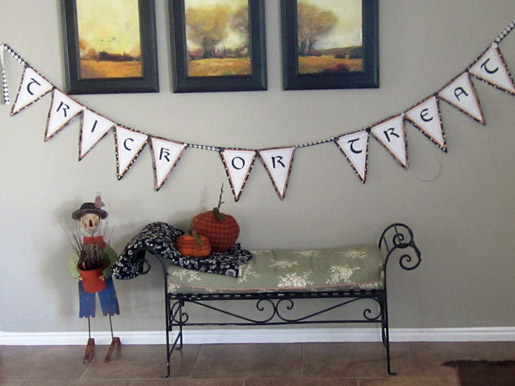
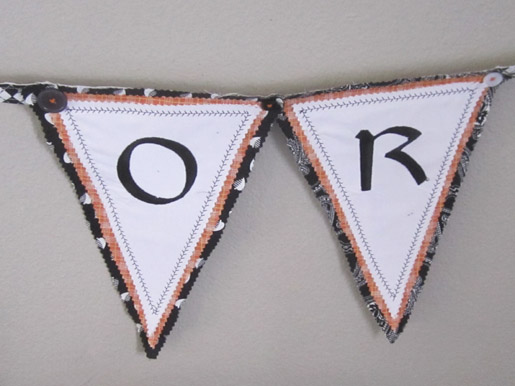
DIY Trick-or-Treat Banner
Created by Miriam Rawson of Miriam Crafts with You and Fabric Folk
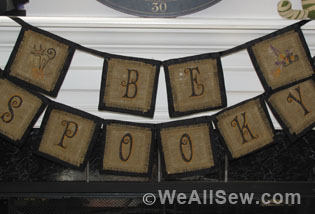
Welcome little ghosts and ghoulies with this happy banner. The embroidered letters spell out Trick-or-Treat, and the layers are held together with a simple feather stitch. Don’t have an embroidery machine? Substitute applique or stencils and fabric paint for the stitching. Boo!
Supplies
- 2/3 yard of white-on-white woven cotton print
- 2/3 yard of orange plaid woven cotton print
- 2/3 yard of black and white cotton print
- Three 1ʺ x 45ʺ lengths of two black and white contrasting prints
- two layers of OESD HeavyWeight Cut-Away stabilizer
- Black Isacord embroidery thread
- Orange embroidery floss
- Heat-activated disappearing pen
- Pinking shears
- Rotary cutter, mat, and ruler
- Quilt basting spray
- Iron and ironing surface
- 24 (or more) buttons, 1/2ʺ-diameter or larger
- Hand sewing needle
- Walking foot (BERNINA Walking Foot #50)
Step 1) Prepare the fabric.
Download the pennant template. Trick-or-Treat_Banner_Template_121814.pdf
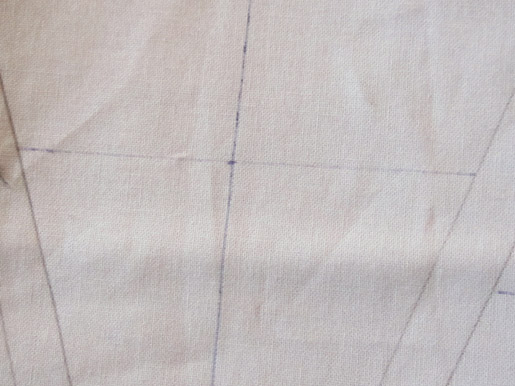
Using the template and a pencil, trace twelve banner pieces on the white fabric. Space them about 1/2ʺ apart, and leave enough fabric around the outside so you can hoop the fabric.
Do NOT cut the pieces apart! That step comes after the embroidery is complete.
Use a heat-activated disappearing pen to draw a line from the apex to the middle of the top line.
Add a perpendicular line halfway down.
You will use these lines a placement guides for the embroidered letters.
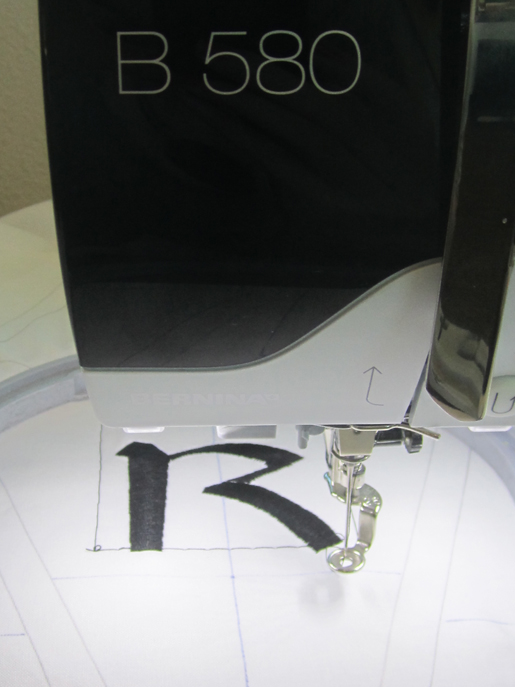
Step 2) Embroider the letters.
Cut two pieces of stabilizer large enough to hoop.
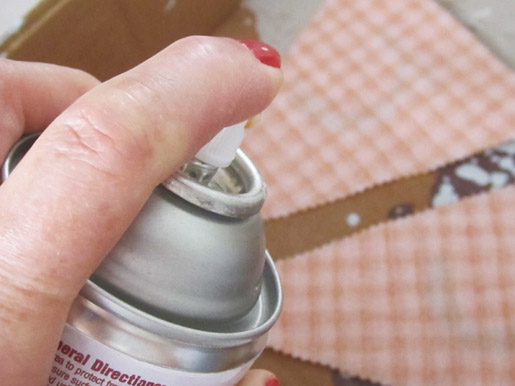
Spray one sheet with temporary adhesive and smooth the second piece into place on top.
Spray the second piece with stabilizer and smooth the fabric into place on top.
Hoop the fabric/stabilizer “sandwich.”
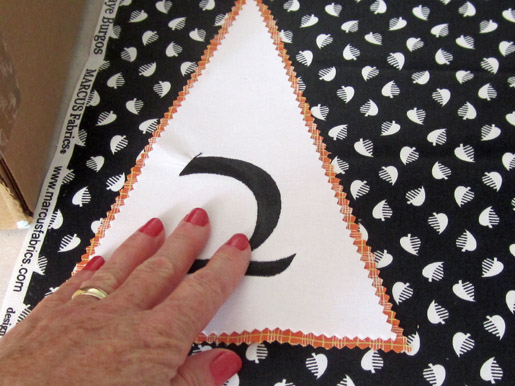
Stitch a letter on each white banner piece. I used the Cyrillic alphabet on the B 580 and adjusted the height to 2-1/2ʺ (63 mm).
Tip: If your embroidery machine has a basting outline feature, use it when stitching your letters. Free basting outline stitch files are available at the BERNINA USA website.
When the embroidery is complete, remove the basting stitches and clip away one layer of stabilizer from the back, close to the stitching.


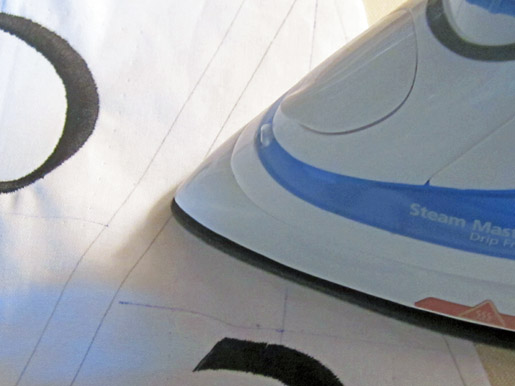
Press the finished embroidery before cutting out the banner pieces.
Step 3) Make the banner flags.
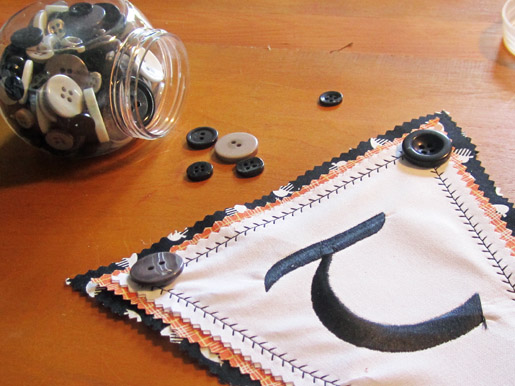
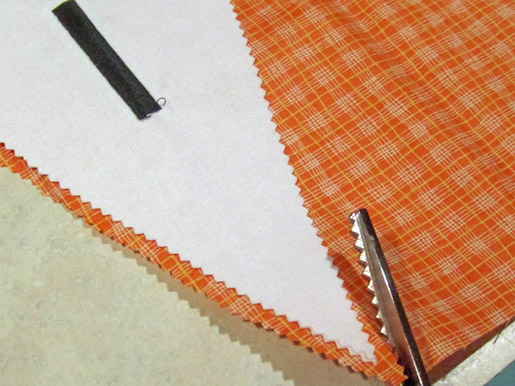
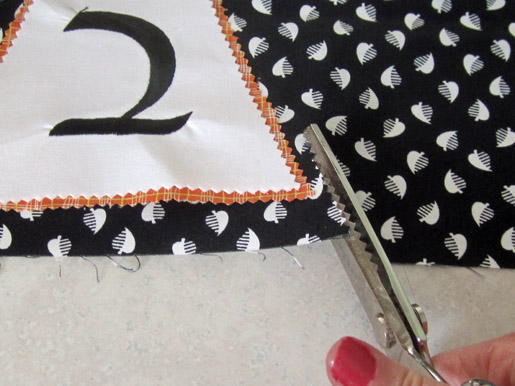
Use the pinking shears to trim the edges of each piece, just inside the penciled lines.

Spray the backs of the embroidered white pieces with adhesive and adhere them to the right side of the orange plaid fabric.

Use the pinking shears to trim away the orange fabric about 3/8ʺ from the white edges.
Spray the backs of the orange plaid pieces.
Place the banner pieces on the right side of the black and white print fabric.
Use the pinking shears to trim away the black and white fabric about 3/8ʺ from the orange edges.
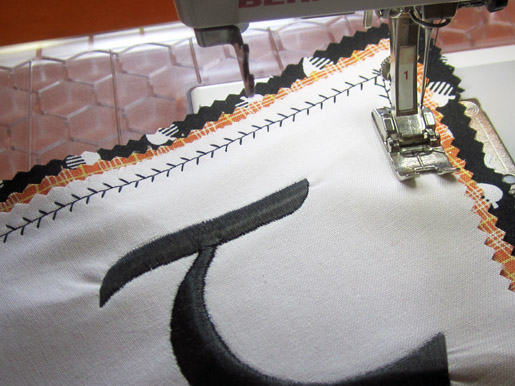
Select a featherstitch (or other decorative stitch) from your machine’s decorative stitch menu.
Using black embroidery thread, sew a featherstitch about 1/4ʺ inside the pinked edge of the white fabric. This will fasten all the layers together.
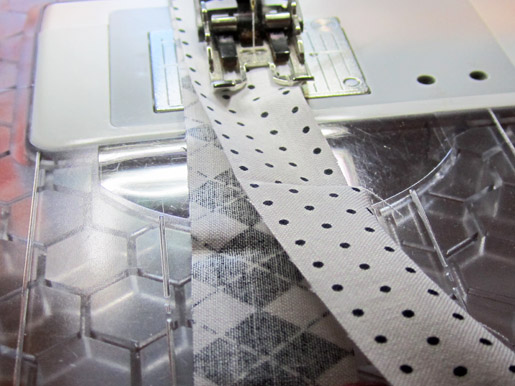
Step 4) “String” the letters.
Create a “ribbon” for your letters by cutting three 1ʺ x 45ʺ pieces of two different black and white contrasting prints. (Don’t worry if your fabric isn’t quite 45ʺ wide; it’s okay if the “ribbon” is a little shorter.)
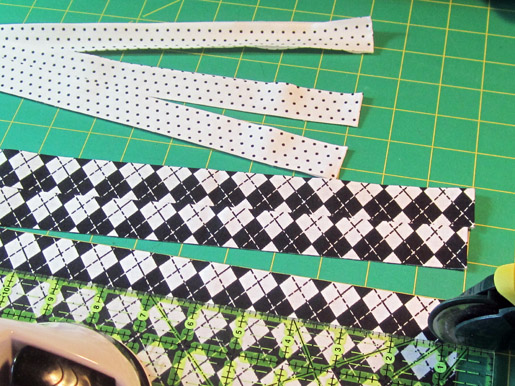
Stitch the three pieces of one print together, end to end.
Repeat for the three pieces of the other print.
Press the seam allowances open.
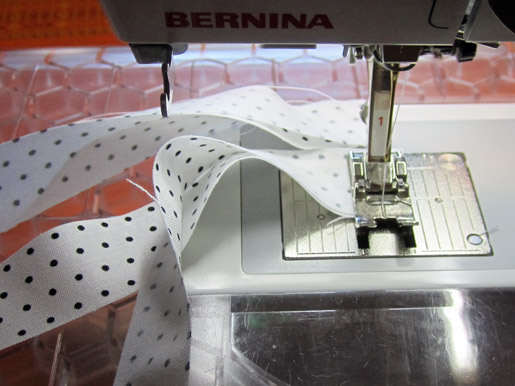
Attach a walking foot to your sewing machine and select a straight stitch.
With wrong sides together, sew the two strips together, 1/4ʺ from the edges. The walking foot helps keep the layers from shifting as you sew.
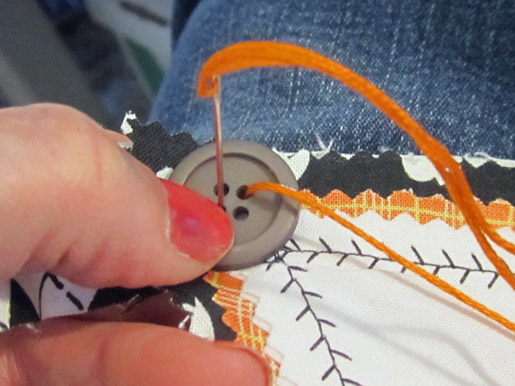
Lap the top of a banner piece over the “ribbon,” then place a button at each upper corner and stitch through all layers.
Method 1: Stitch the buttons in place by hand, using a hand sewing needle and orange embroidery floss.
Method 2: Attach a button sew-on foot to your machine and stitch the buttons in place with your machine.
Visit Miriam Rawson at her blog, Miriam Crafts With You, at www.miriamgourleyrawson.blogspot.com, and at her Fabric Folks website, www.fabricfolks.com.


2 comments on “DIY Trick-or-Treat Banner”
Very cute banner. I can think a many different seasons to make one for