Blanket Carrier Tutorial from Art Gallery Fabrics
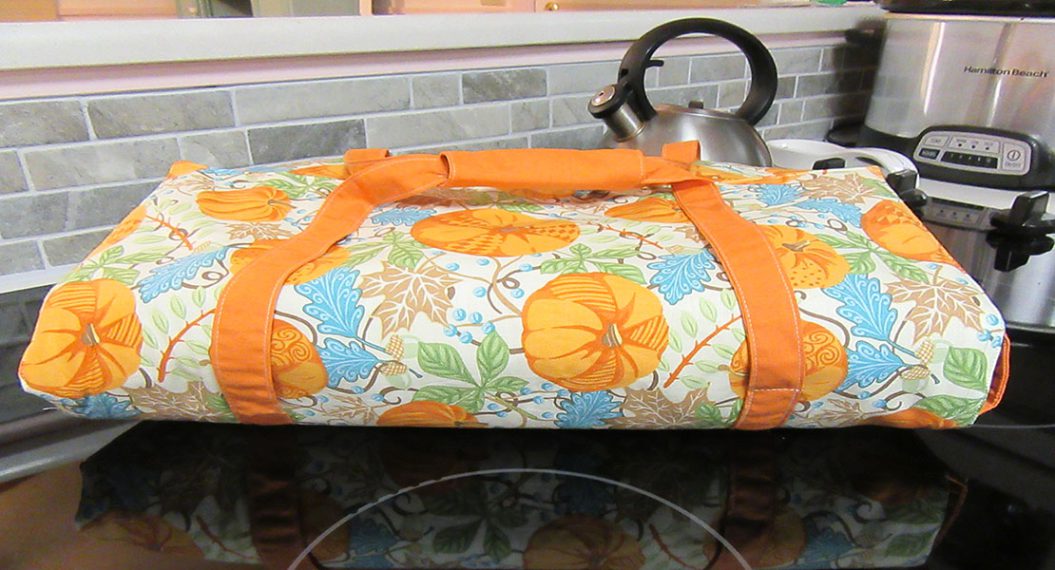
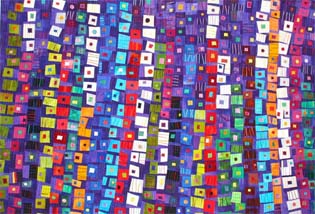
Hello Everyone! Today at the AGF Headquarters we are dreaming of picnics at the park and sitting underneath a tree with our favorite quilt reading a good book. Which made me think up a great tutorial for you all! A picnic blanket carrier made with Tapestry fabric and The Denim Studio Linen mixed with Bernina’s beautiful decorative stitches! You can pick up these fabrics online or in your local store. This was such a fun and easy make that I am thinking of making a few as stocking stuffers! (It’s never to early to start thing about the holiday season!)
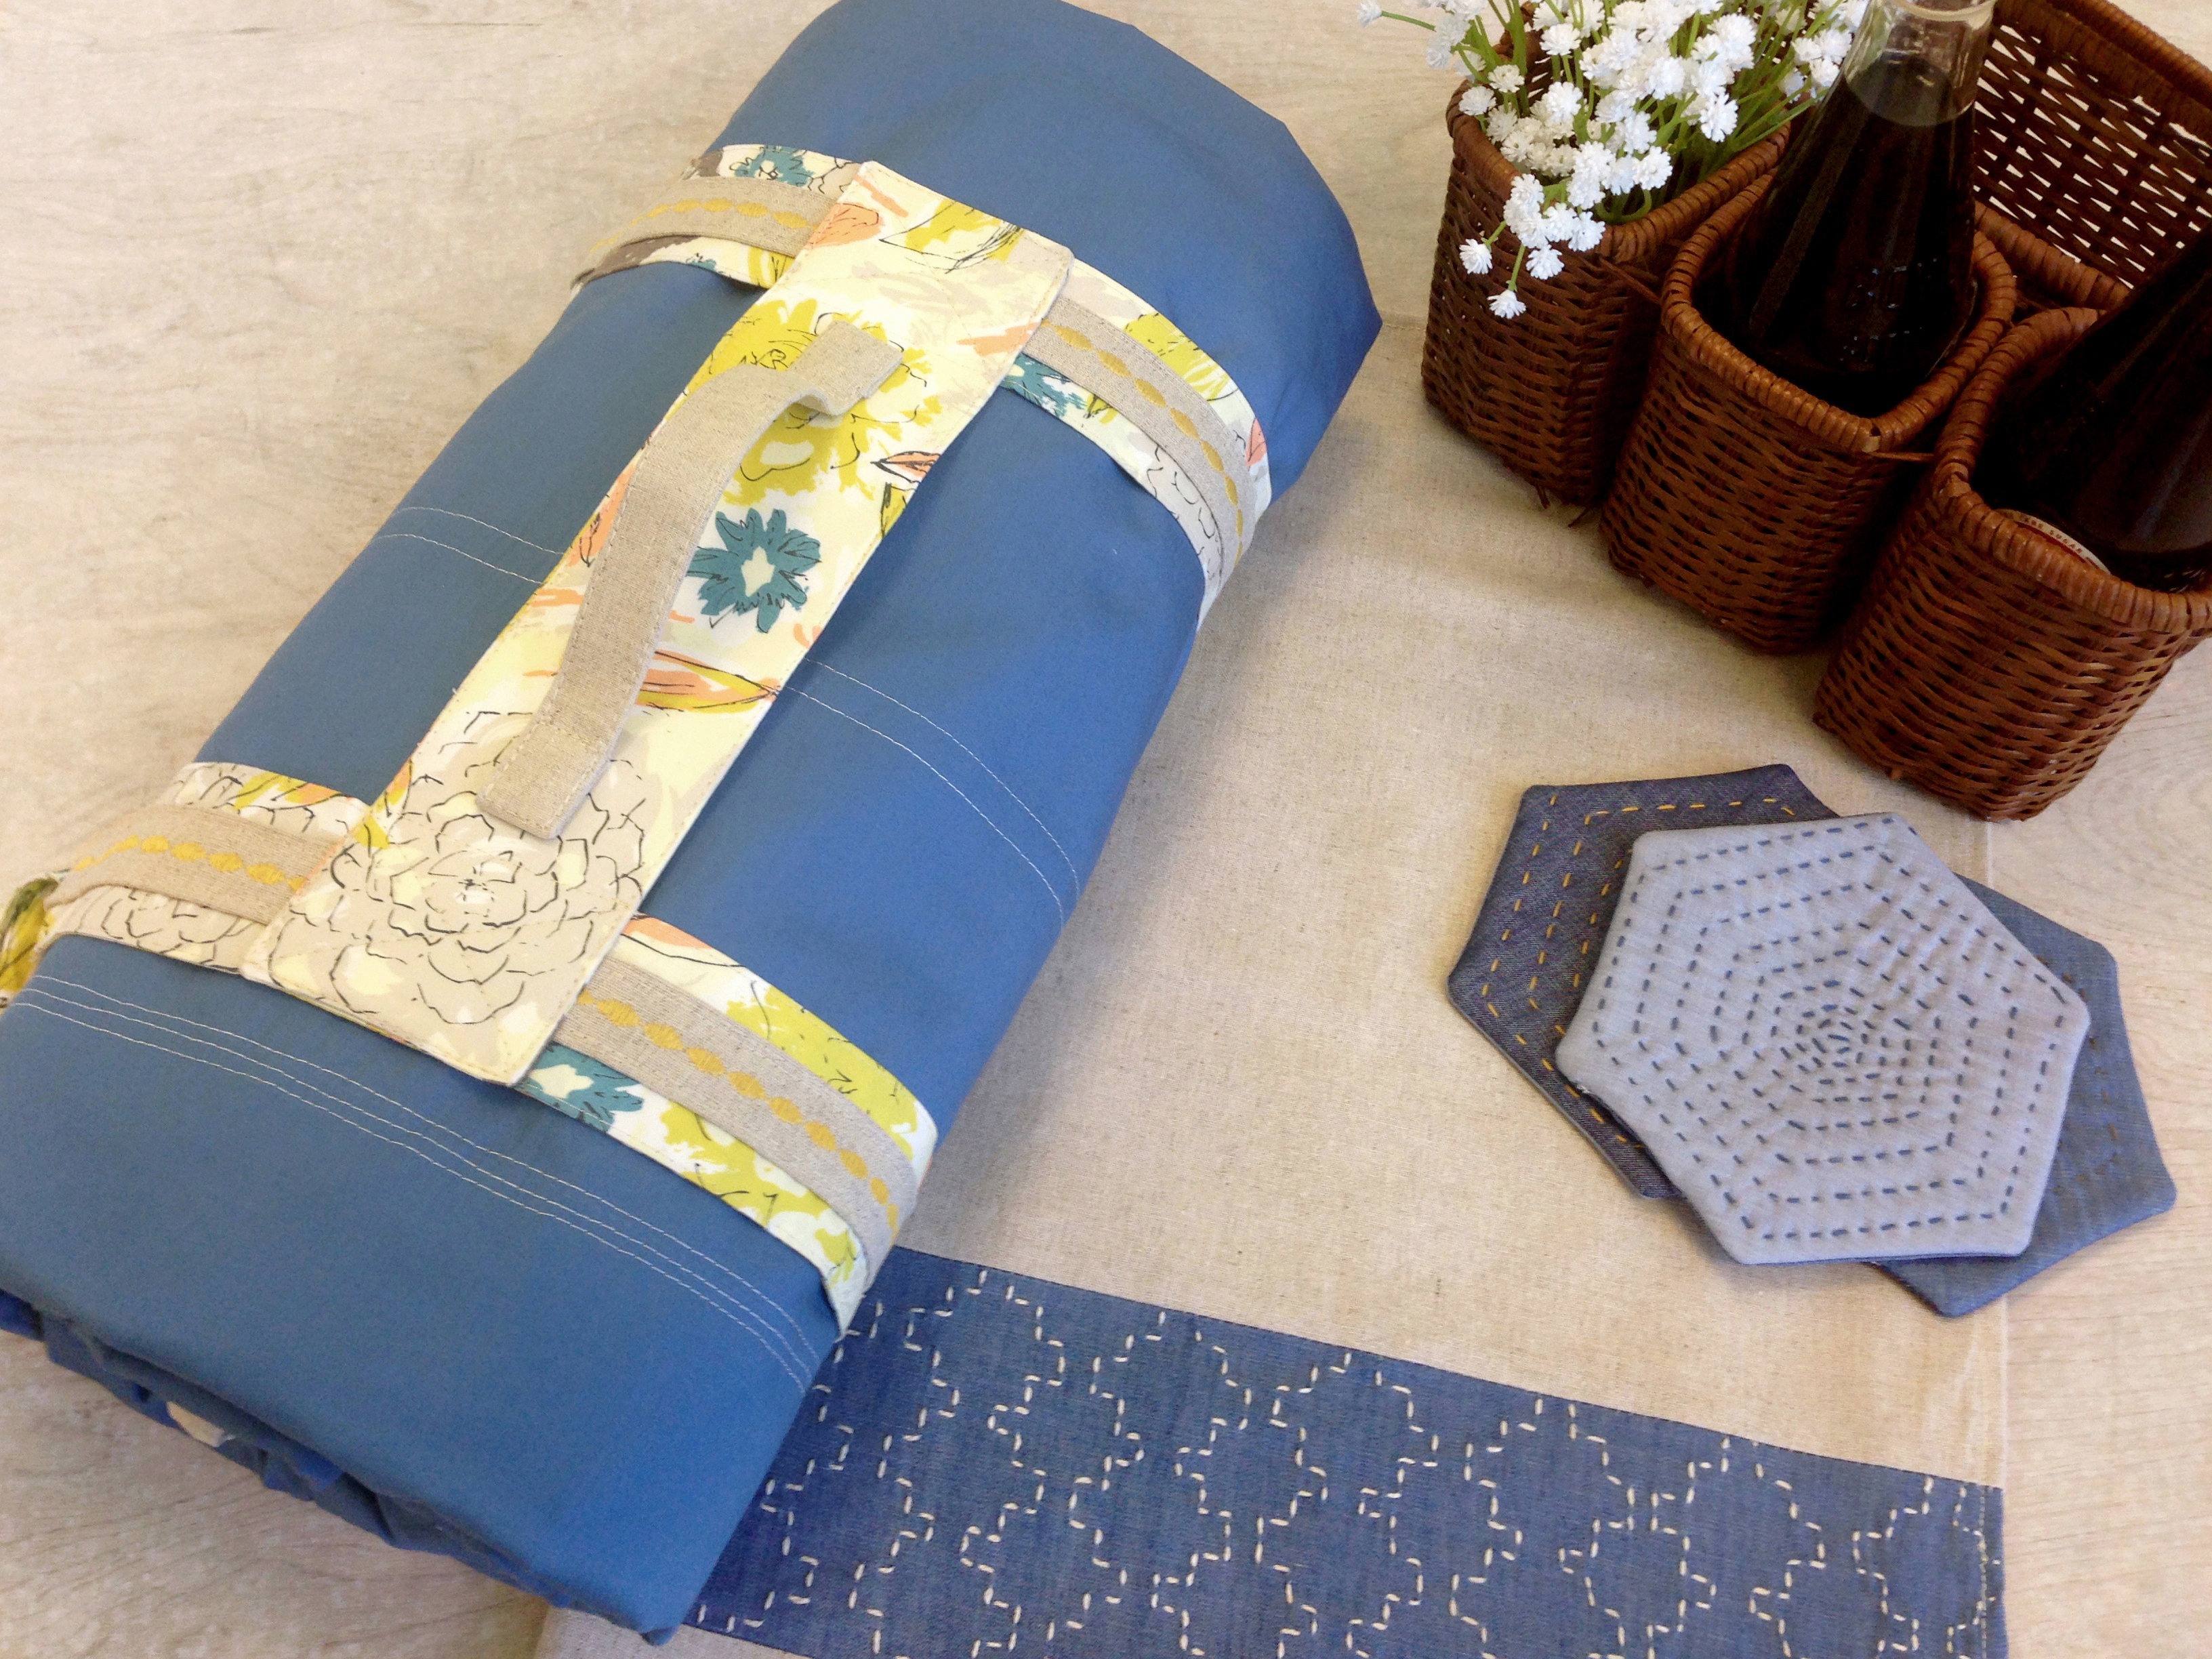
I made my straps on my picnic blanket carrier big enough to fit a 60″ x 60″ quilt so if your blanket is smaller you can adjust your strap length if you would like.
Fabric Requirements
- Fabric A – TAP-72490- 5/8 yd.
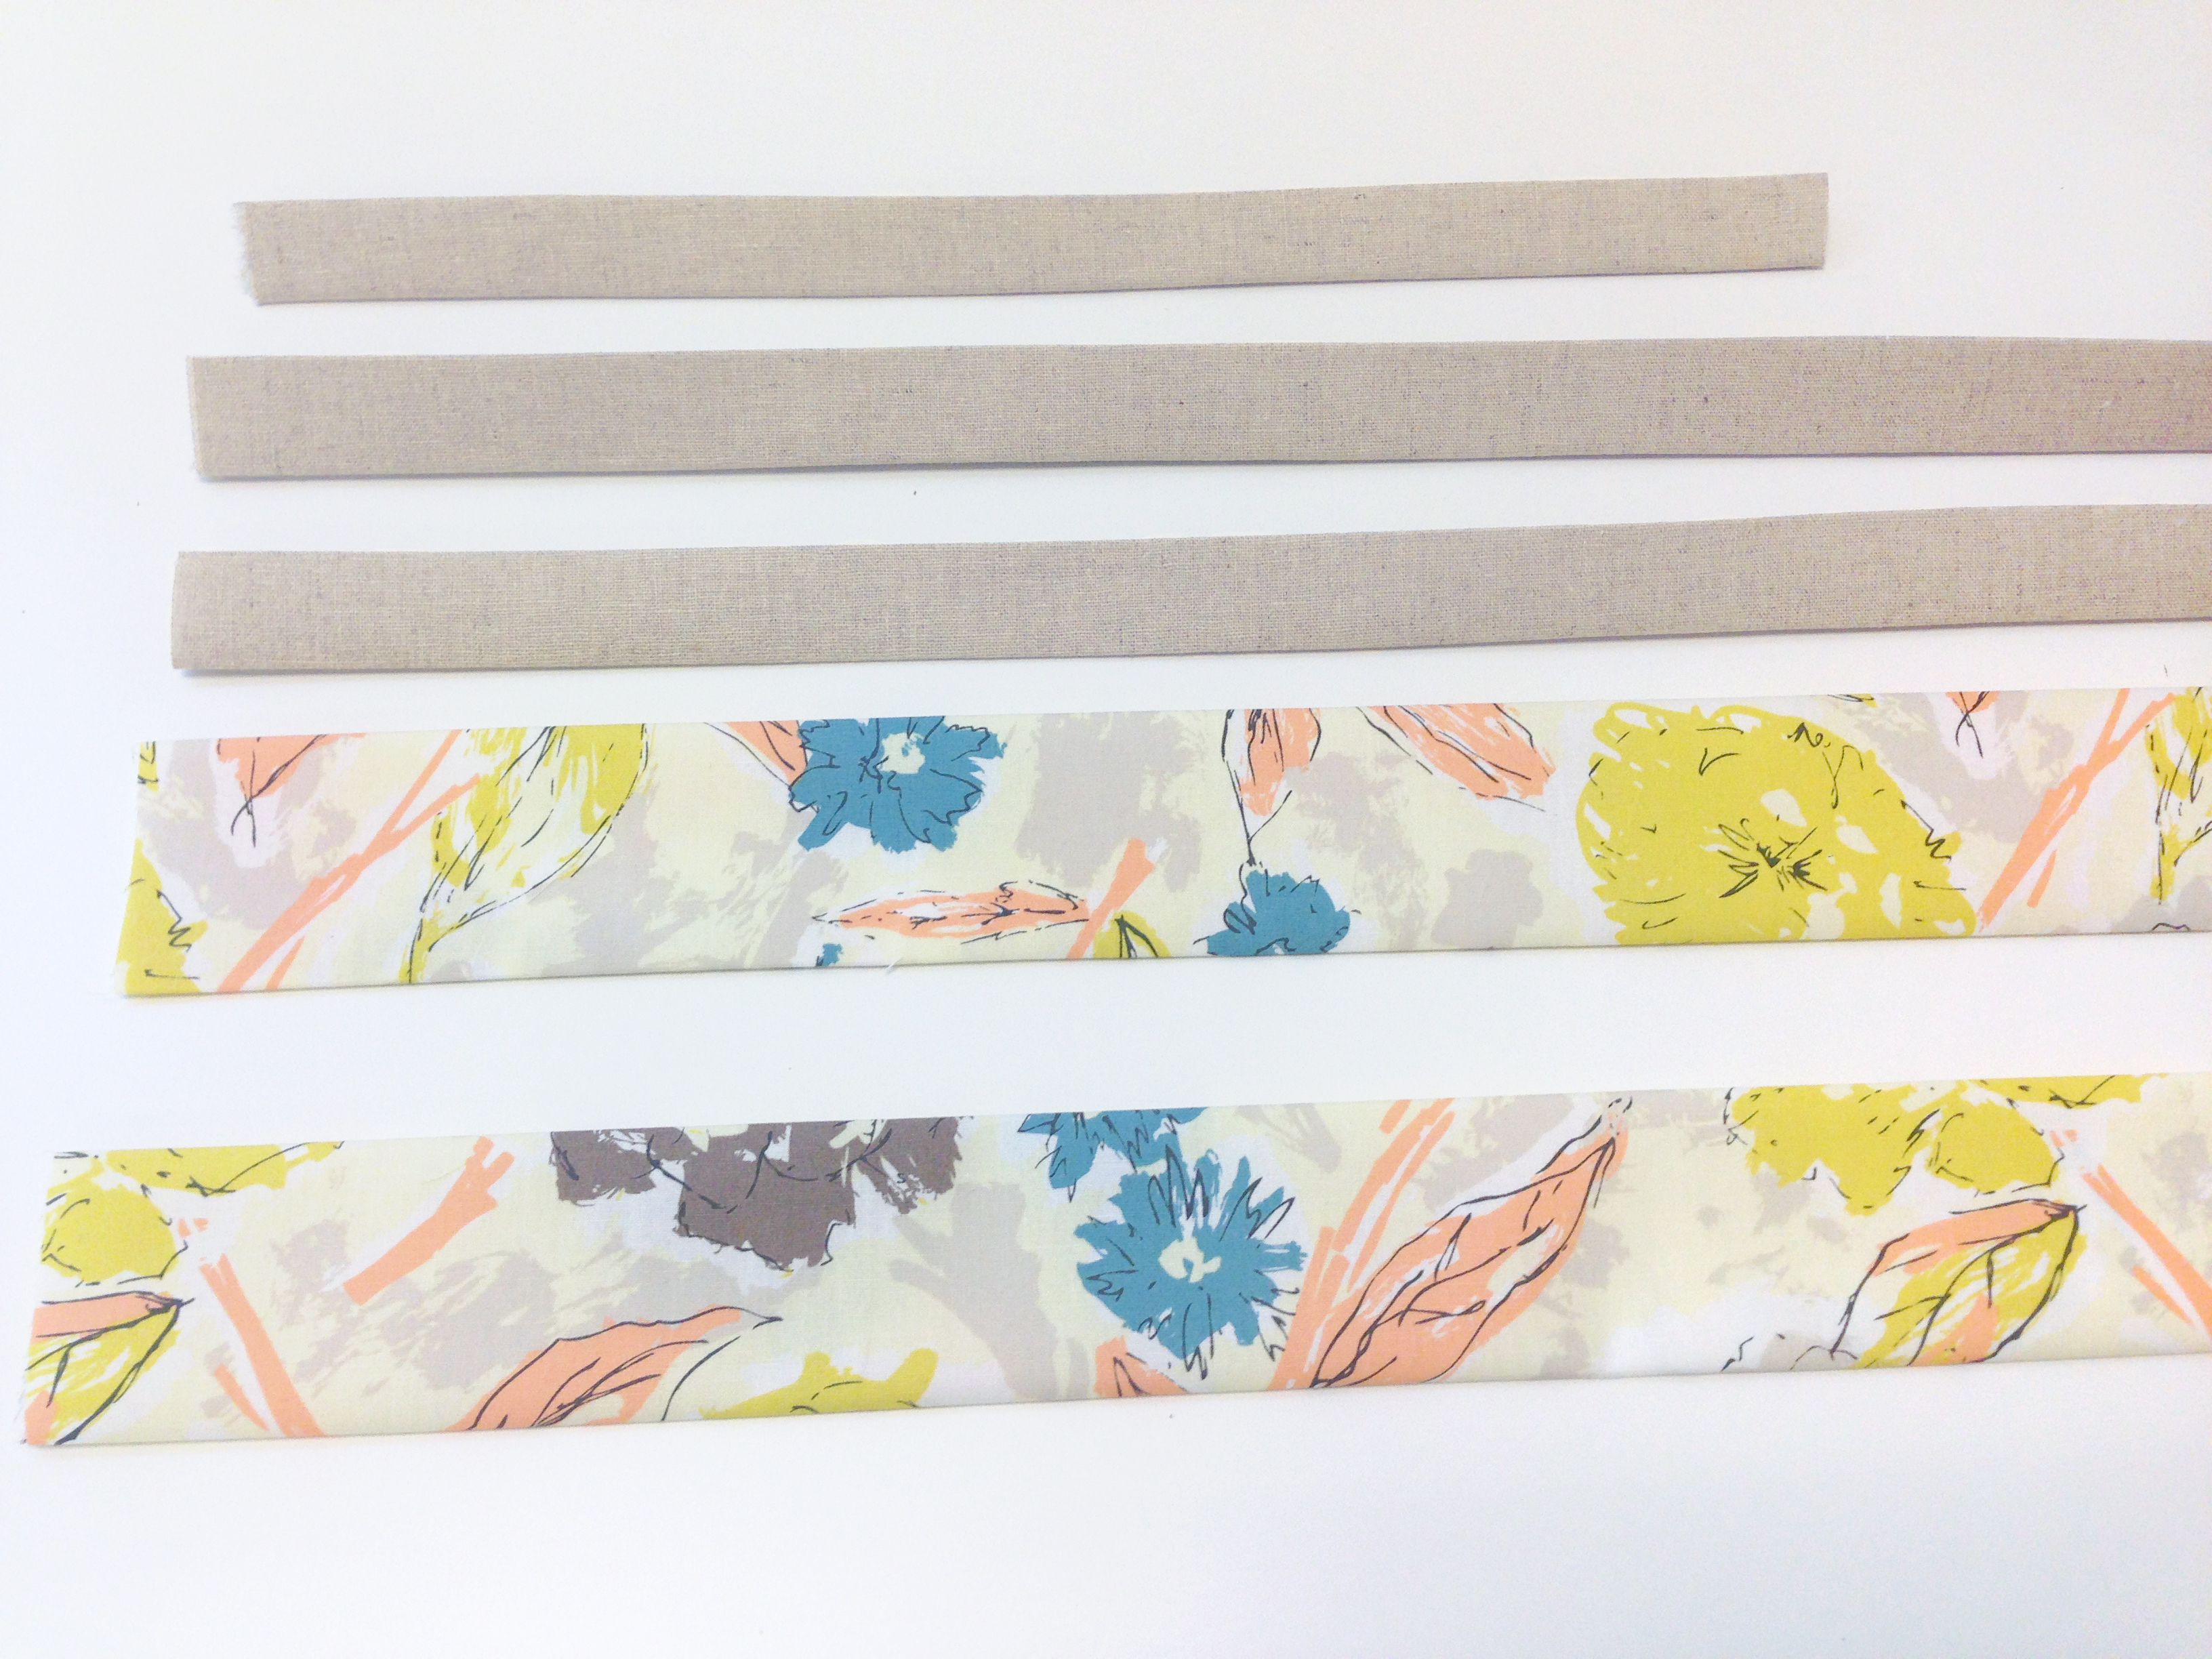
- Fabric B – DEN-L- 4000- 3/8 yd.
Cutting Directions
- Two (2) 7 1/2″ x 33″ strips from Fabric A
- Two (2) 3″ x 9 1/2″ strips from Fabric A
- One (1) 2 1/2″ x 9″ strip from Ultra Firm Fusible
- Two (2) 3 1/2″ x 33″ strips from Fabric B
- One (1) 3″ x 9 1/2″ strip from Fabric B
Other Supplies Used
- Sewing machine (we use a BERNINA 350 PE)
- Reverse pattern foot #1/#1C/#1D
- Blindstitch foot #5
- Open embroidery foot #20/#20C/#20D
- Height compensating tool
- Peltex 71 Ultra Firm Fusible Stabilizer
- Four (4) 2″ Silver Metal Rings
- Thread: Aurifil #2000- Cream and #2134- Spun Gold
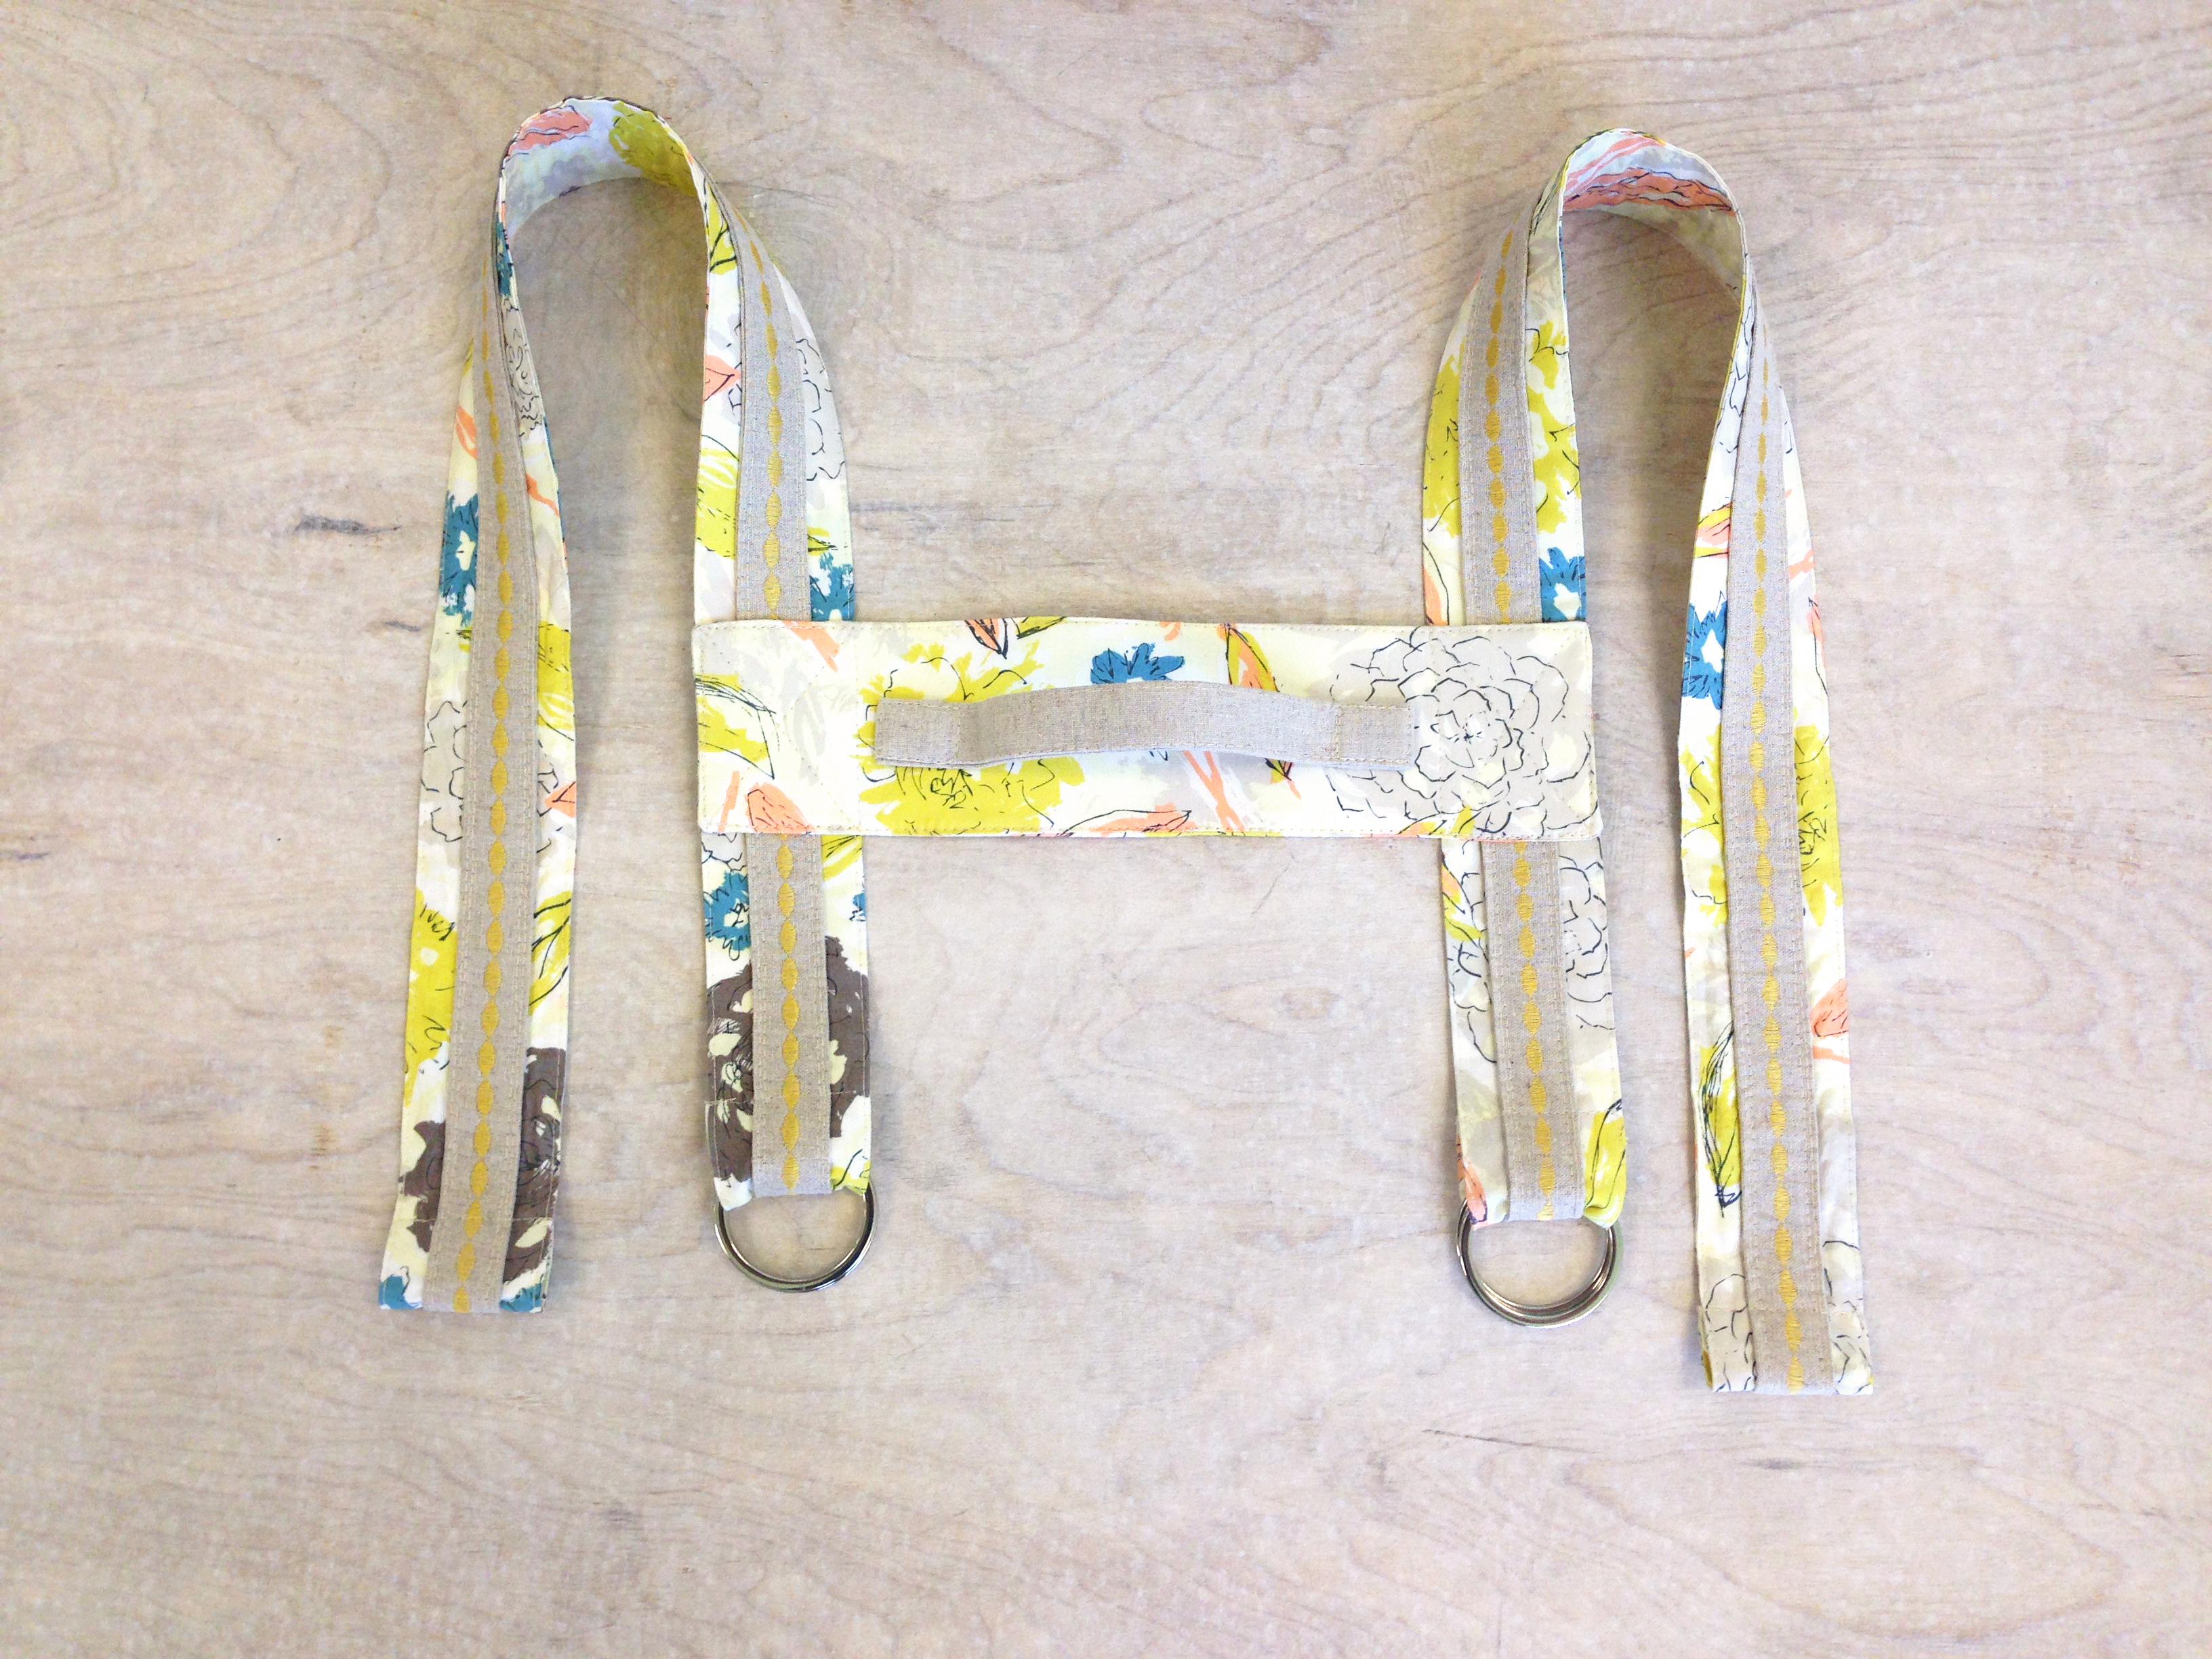
Step #1: Making the Straps
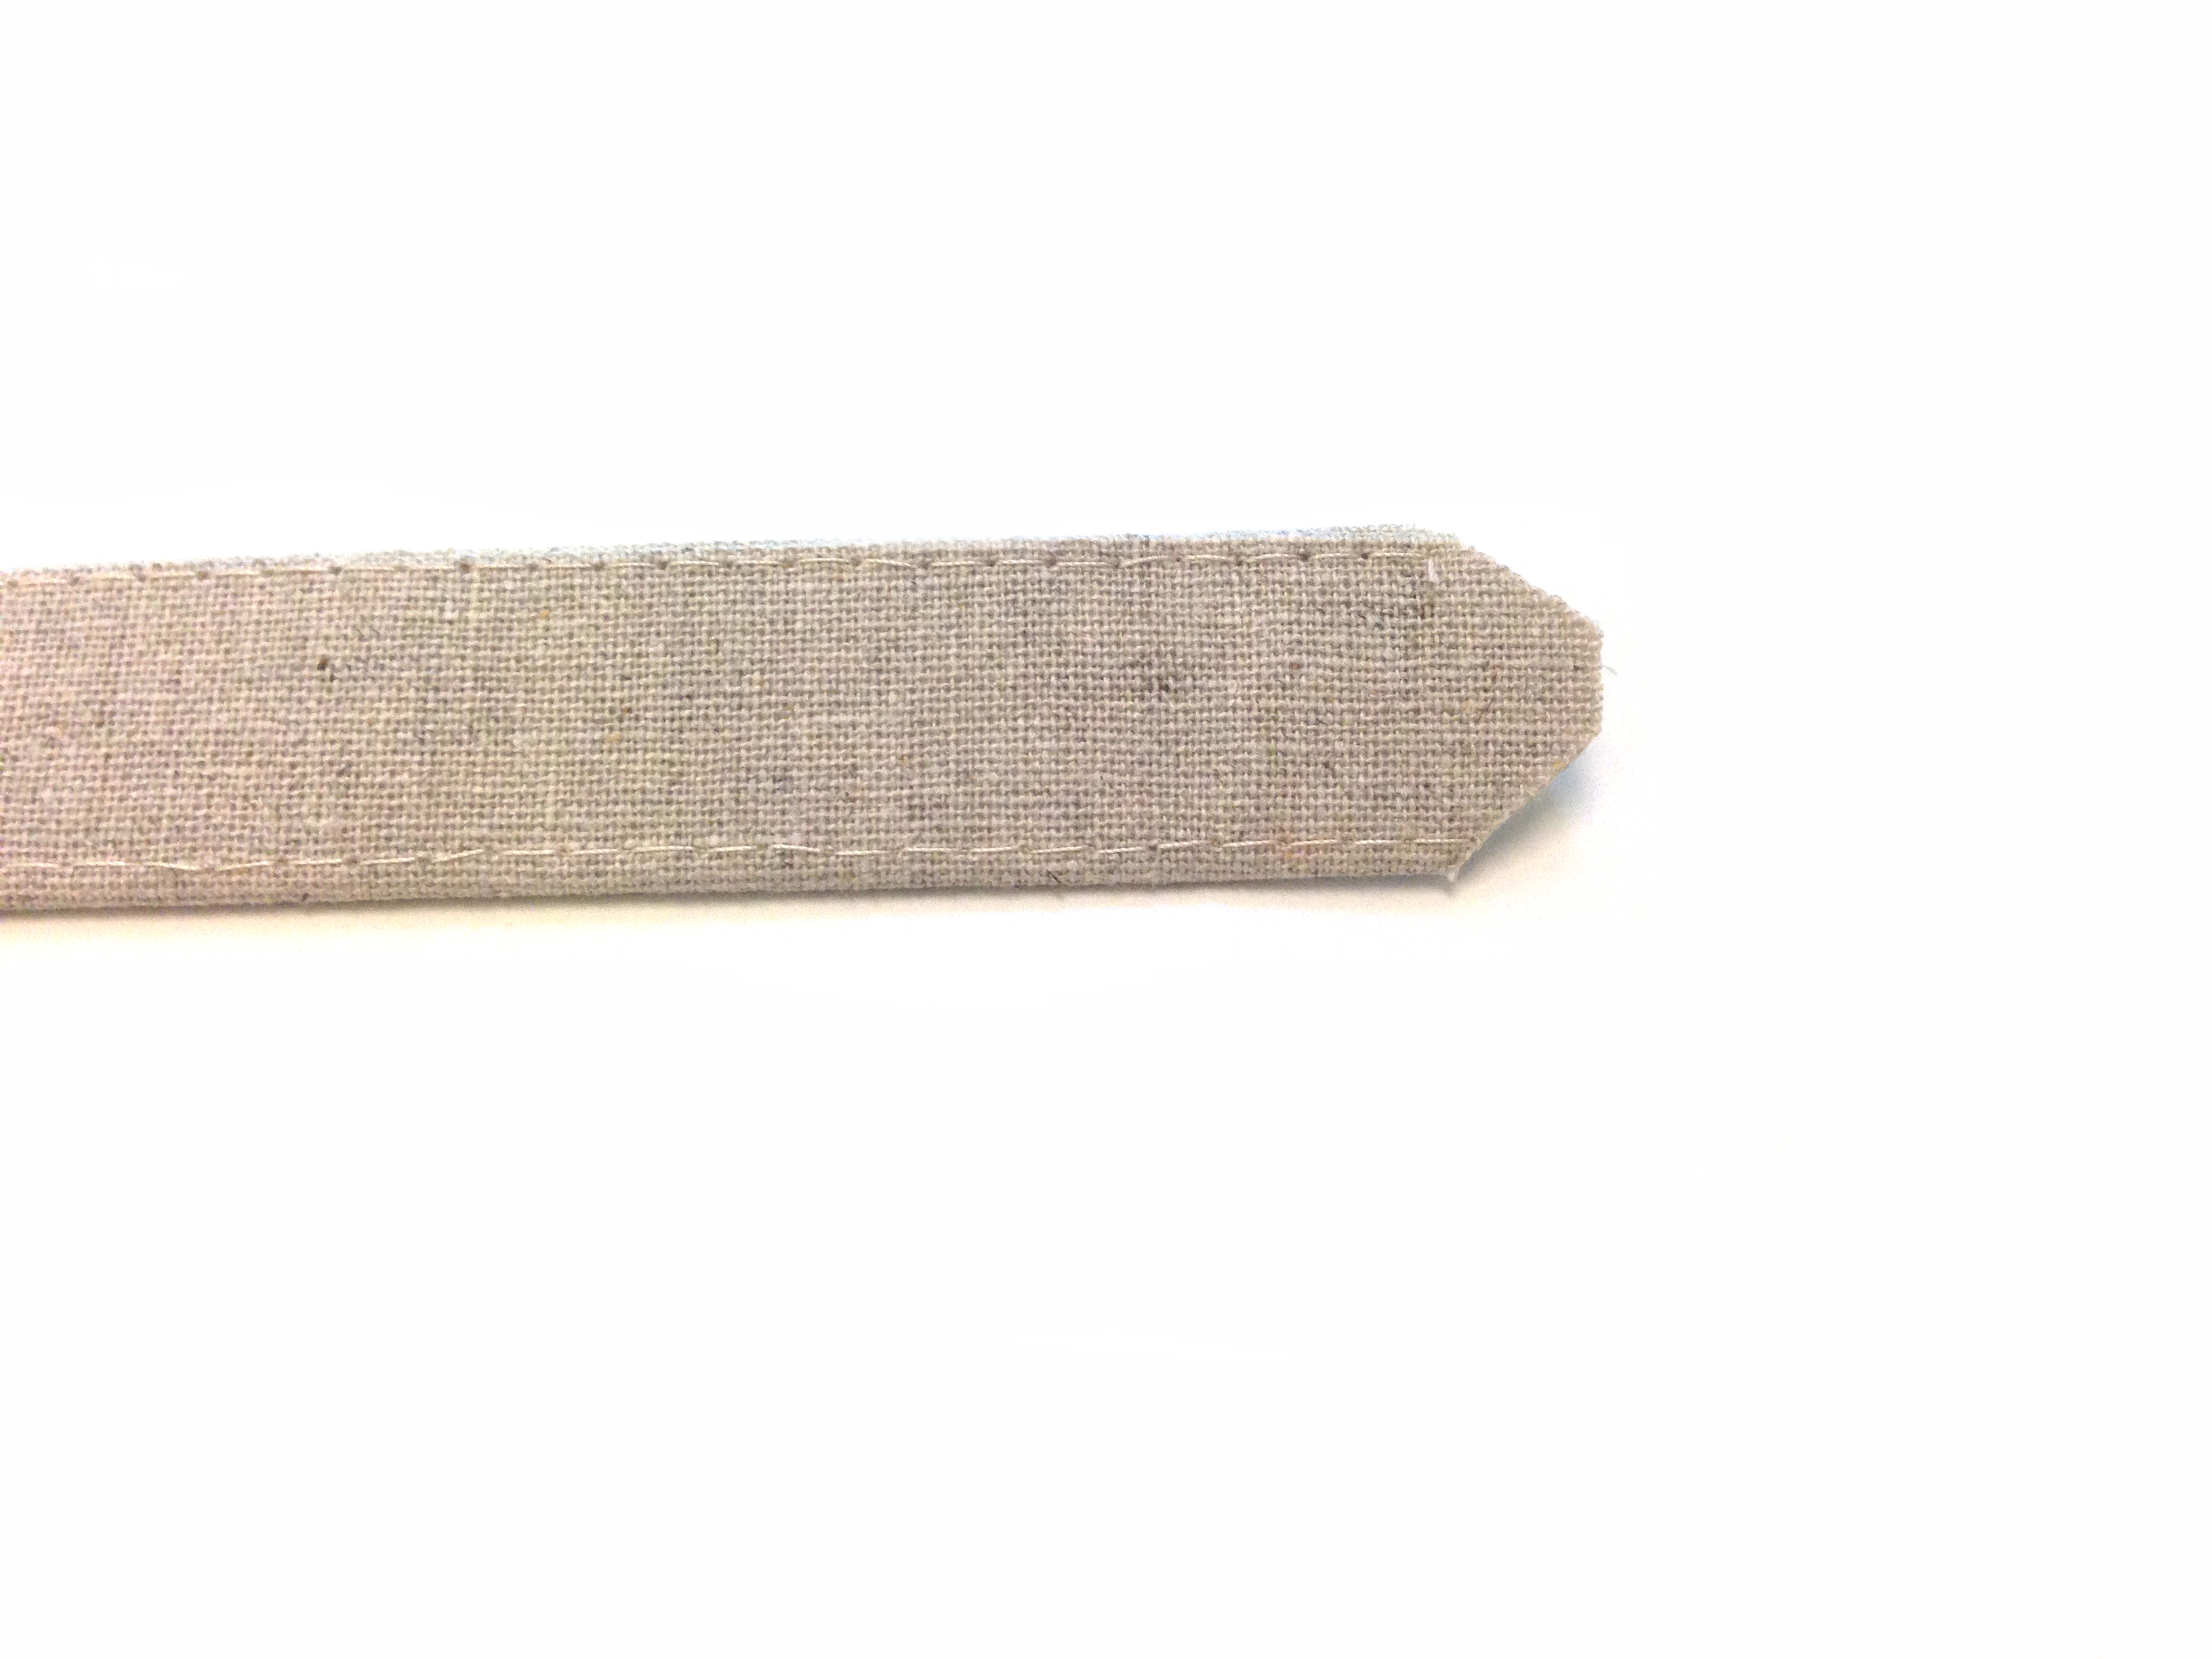
Fold your 7 1/2″ x 33″ strips from Fabric A in half and press. Open up piece and fold raw edges into the center of your strip, lining the raw edges up with the crease you made and press.
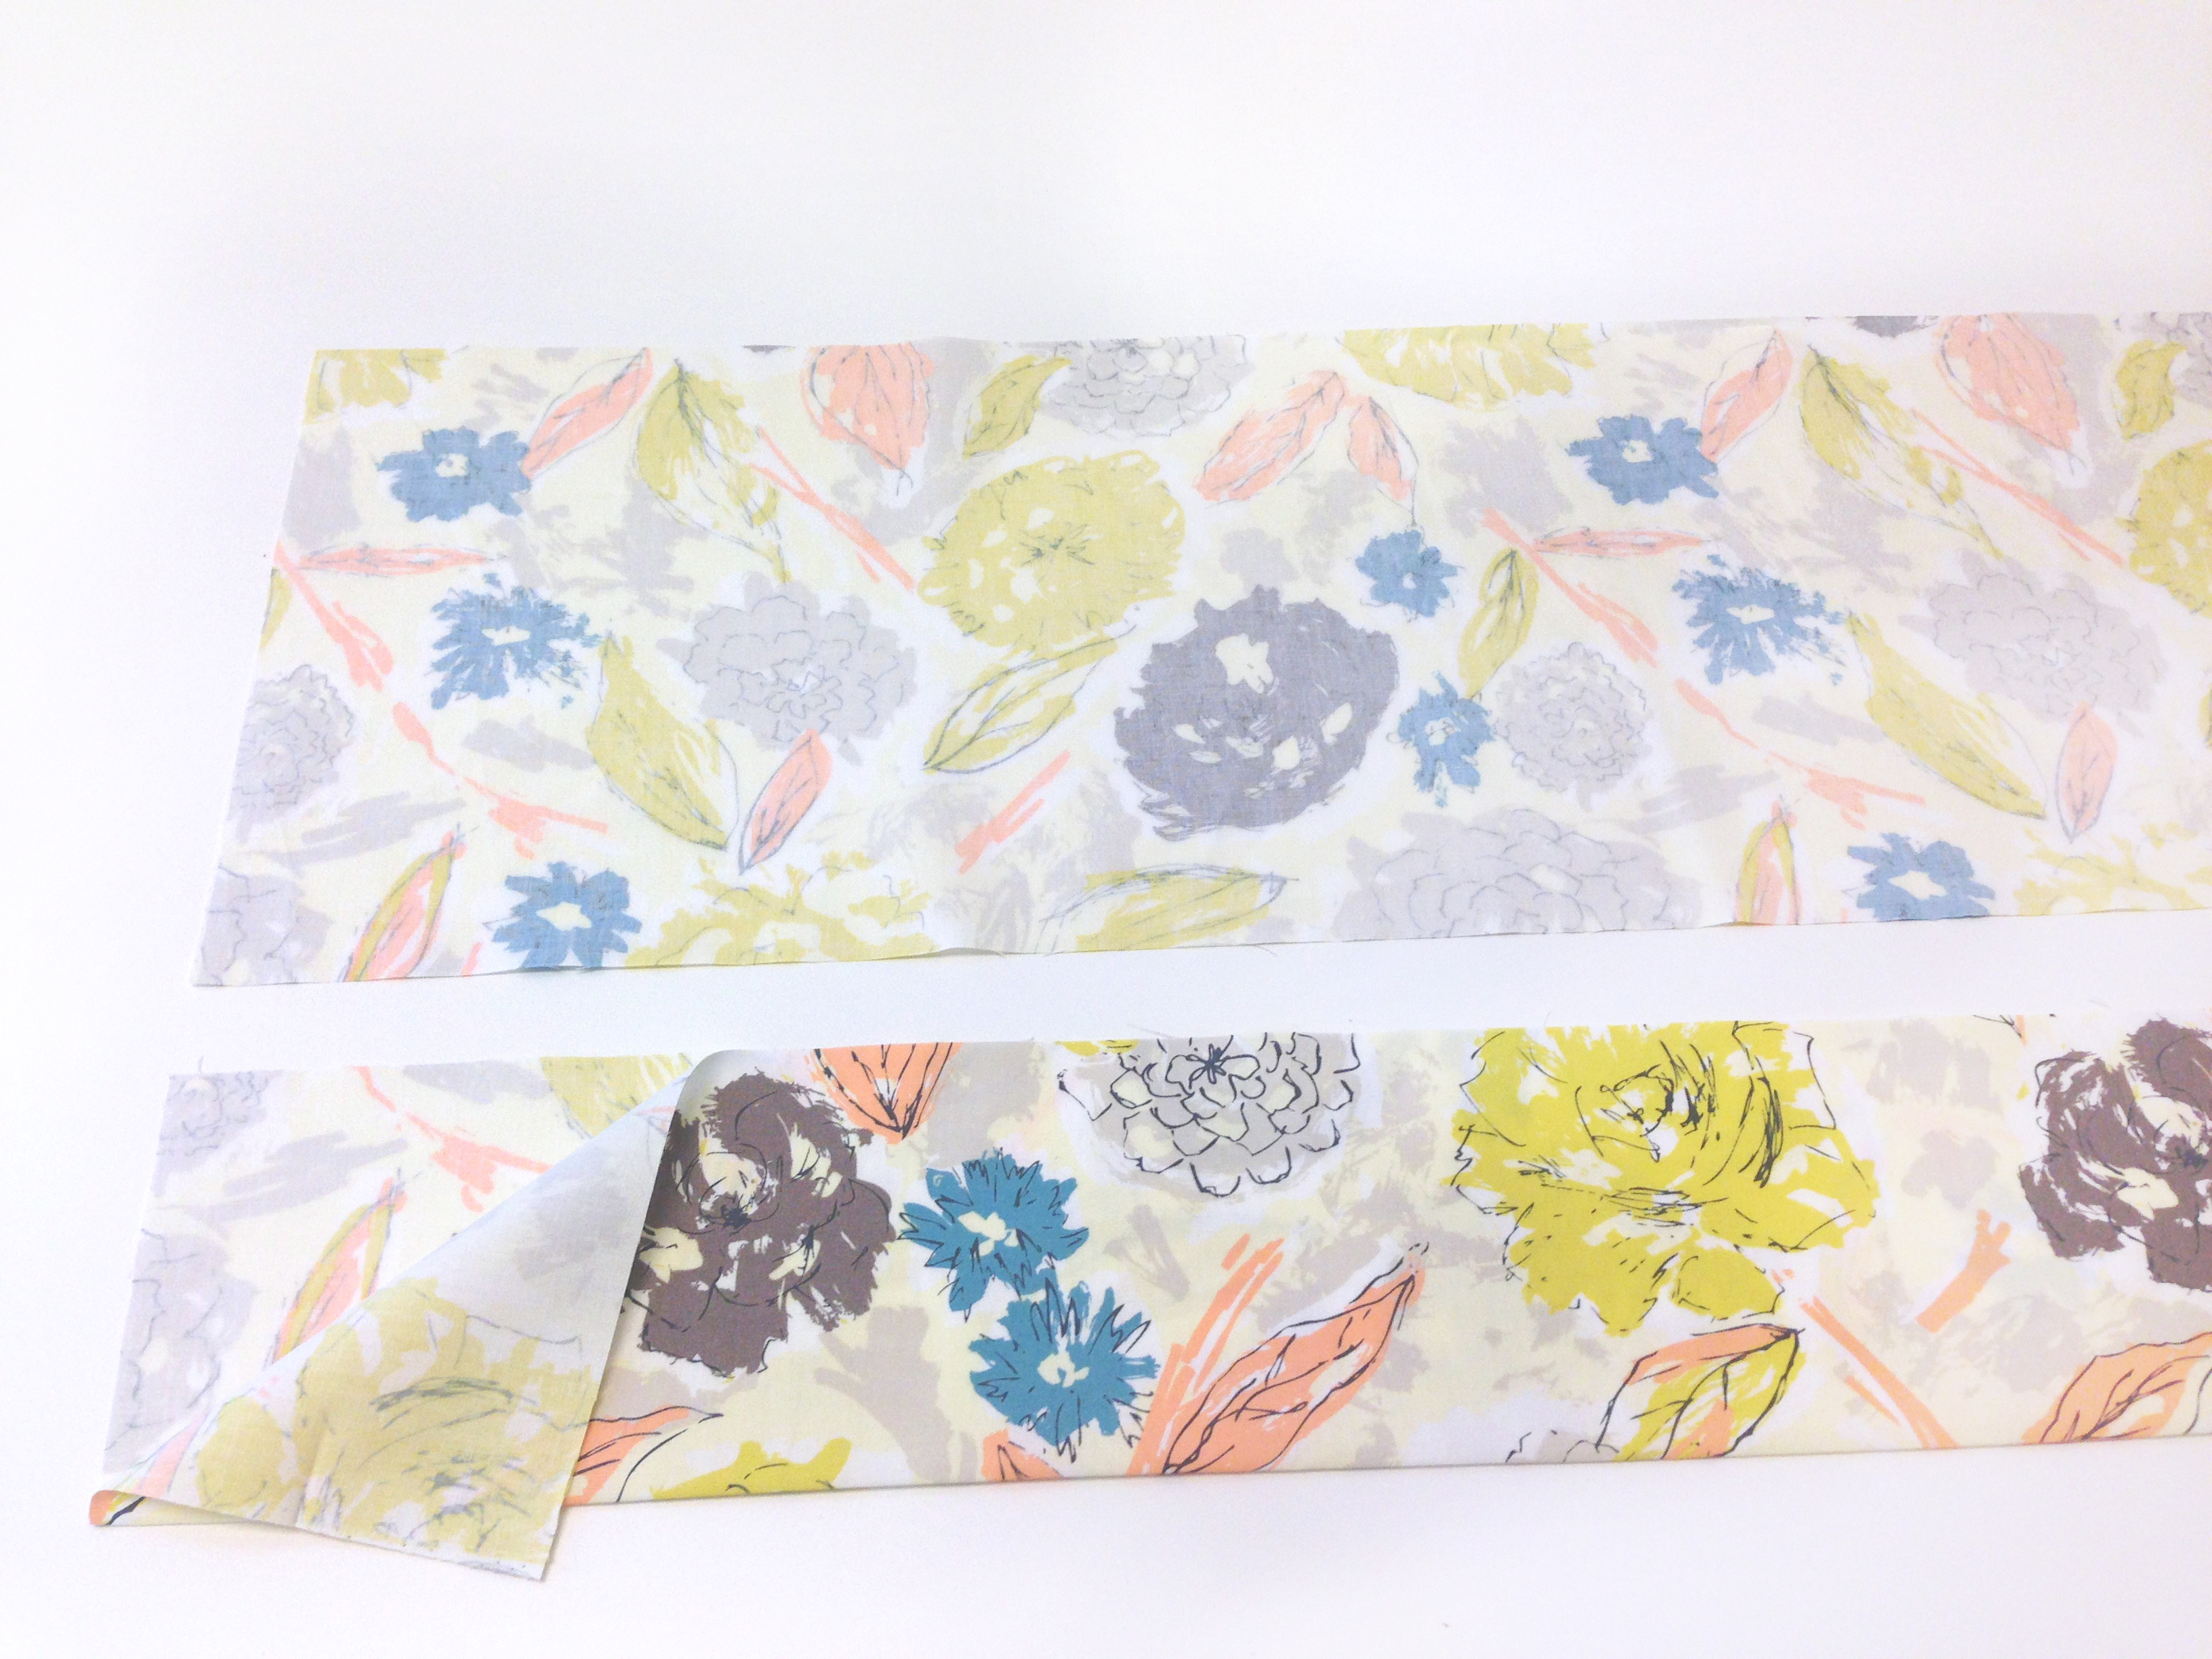

Next fold strip in half and press. Repeat this same process with your strips from Fabric B as well.
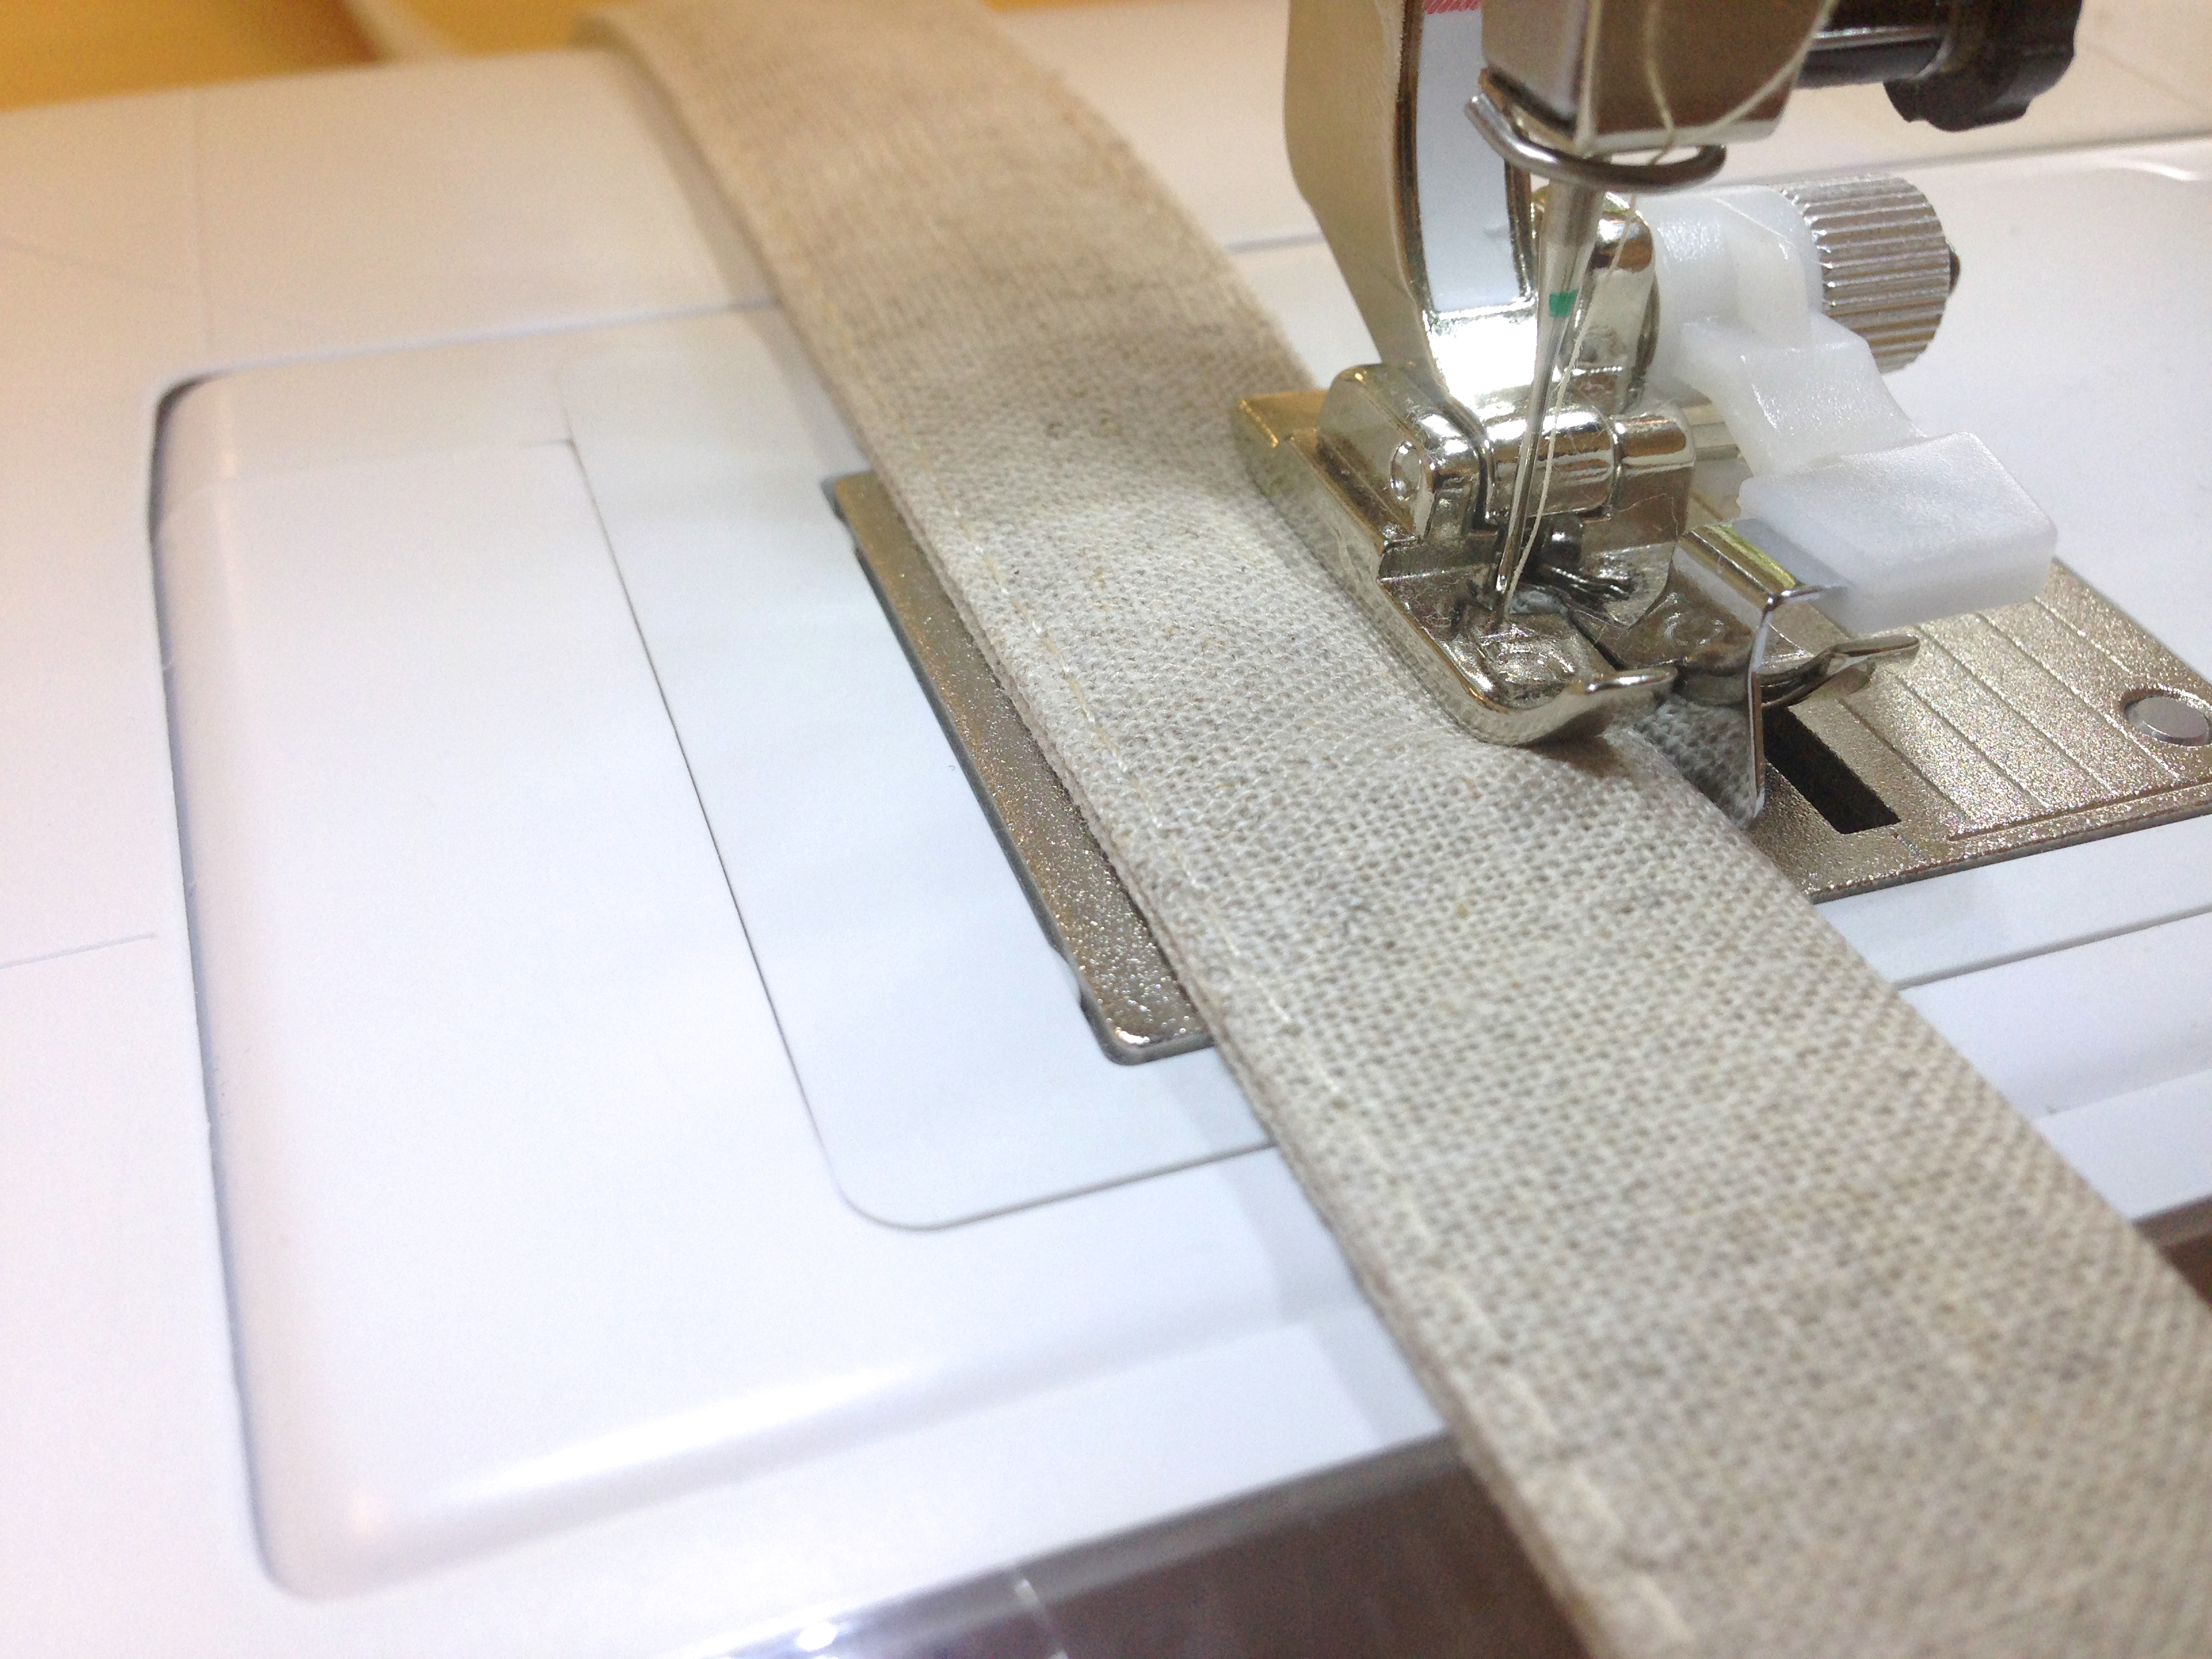
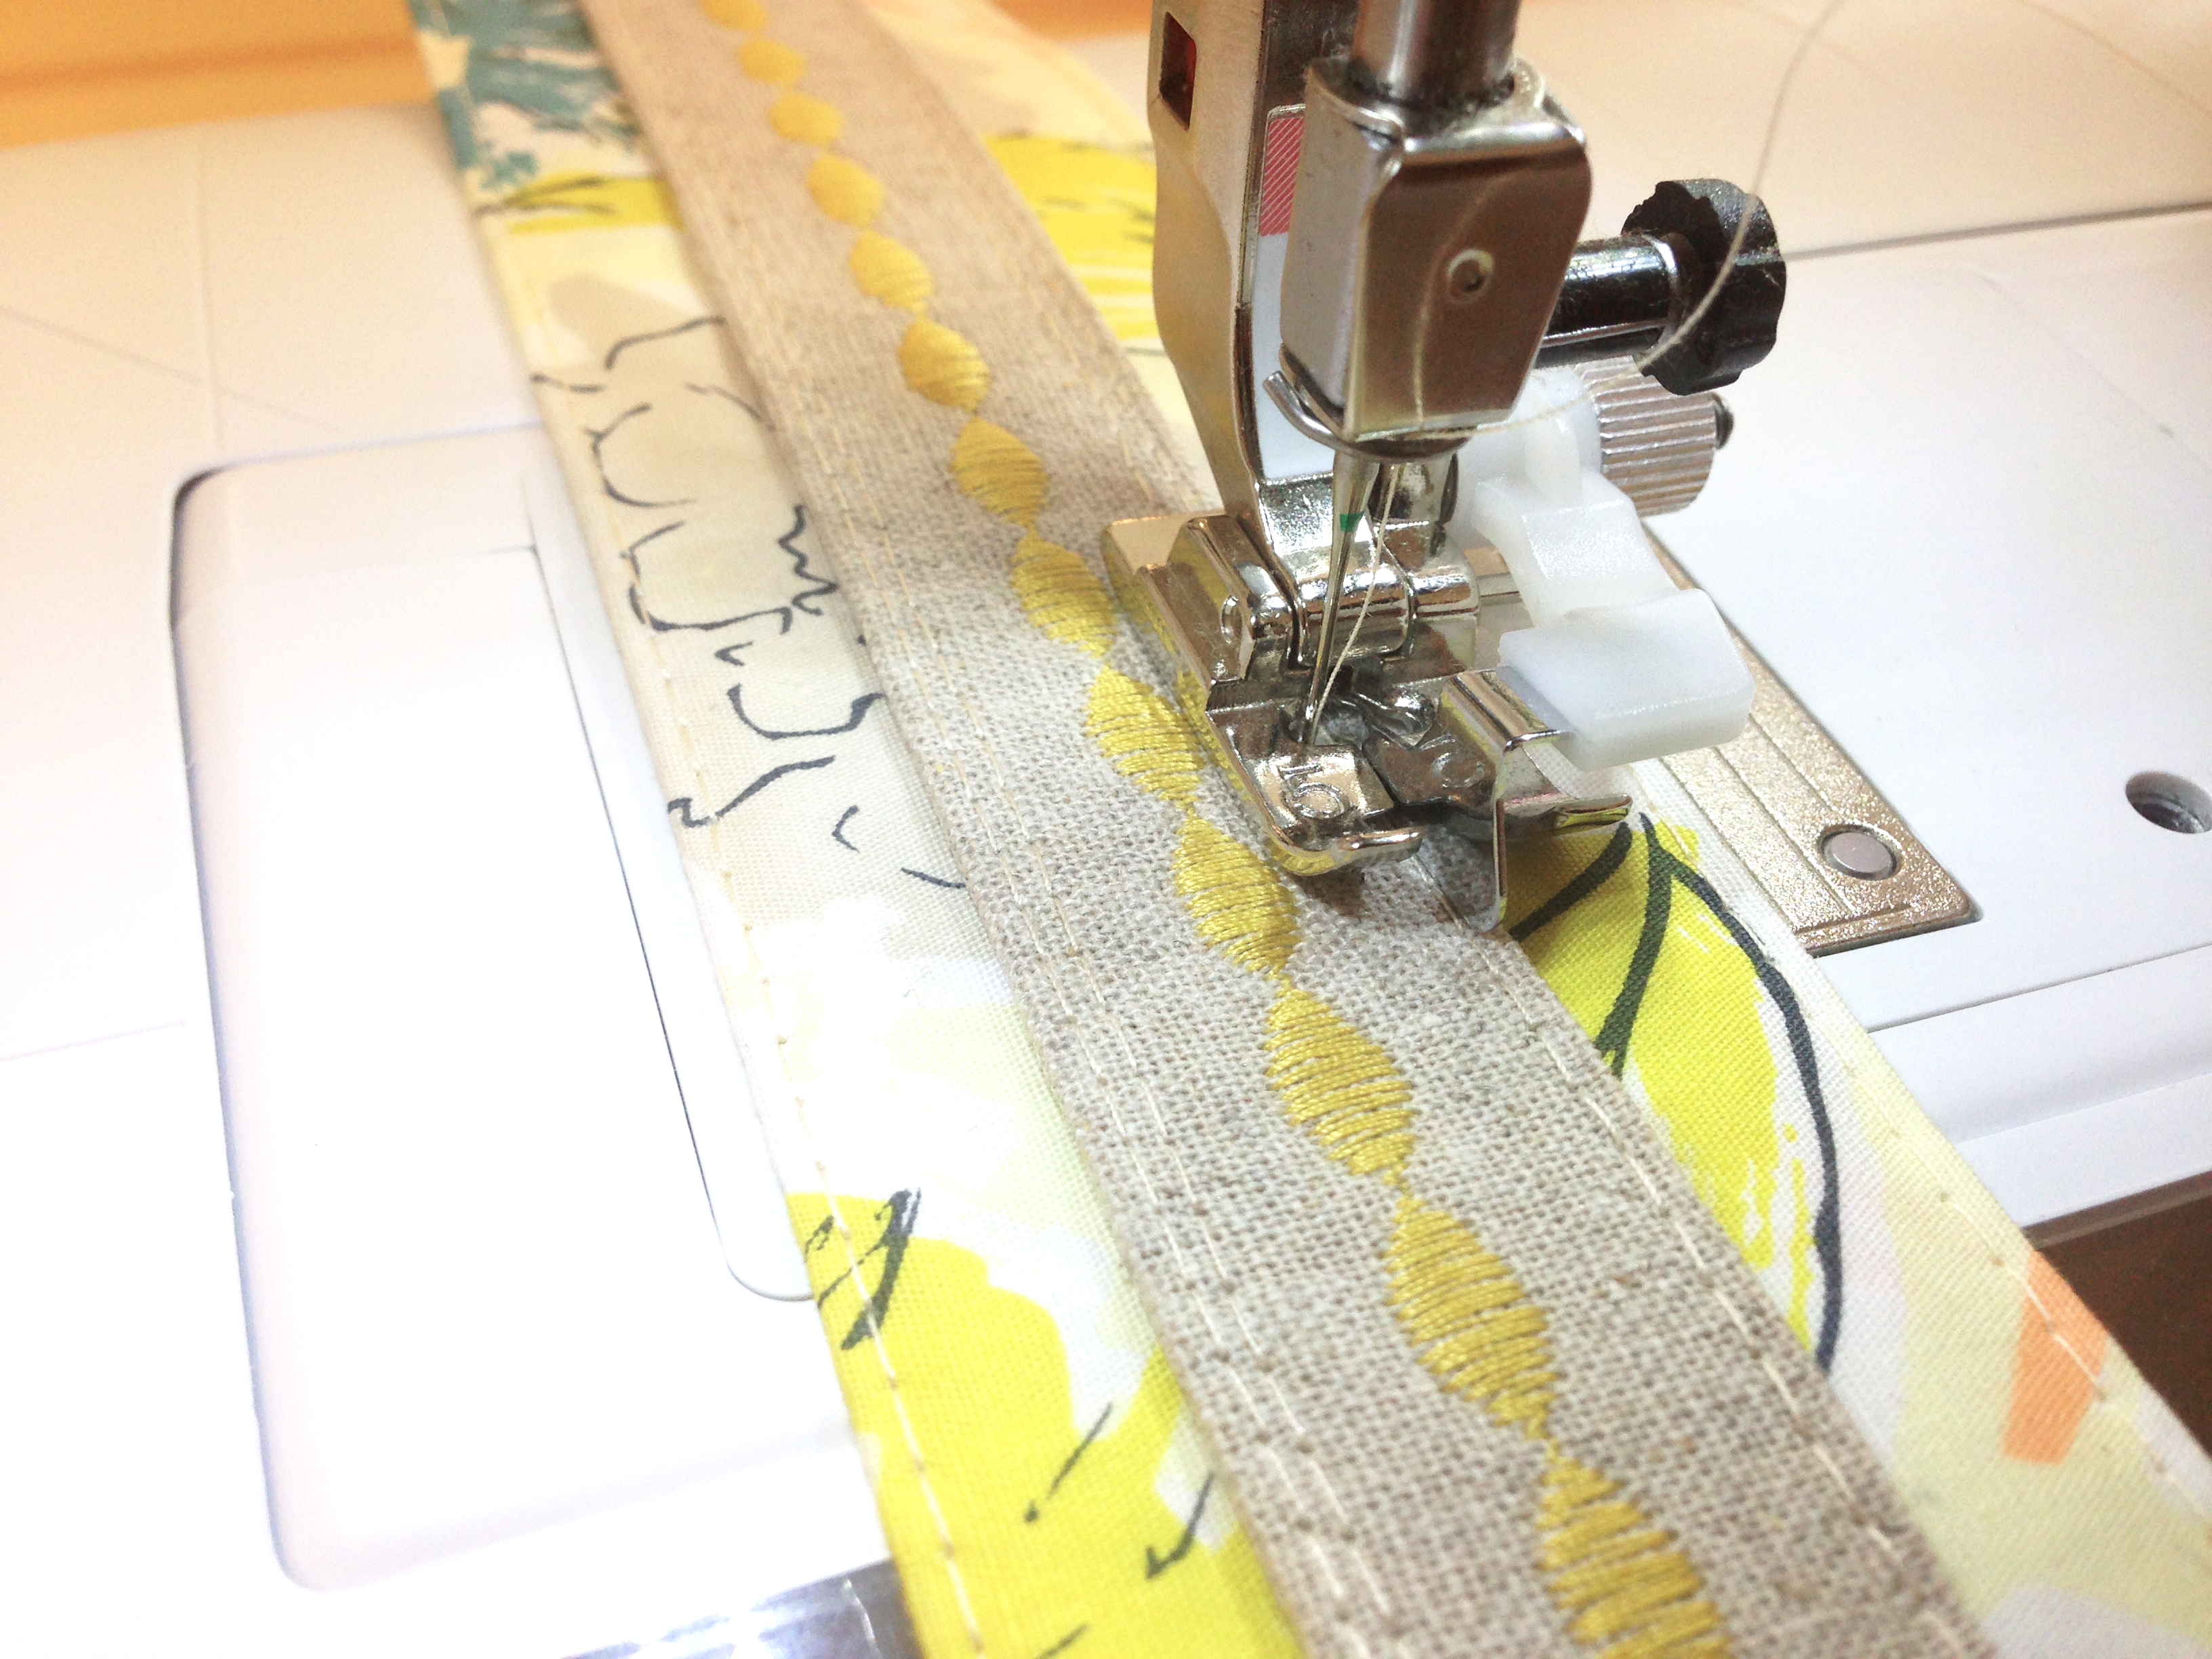
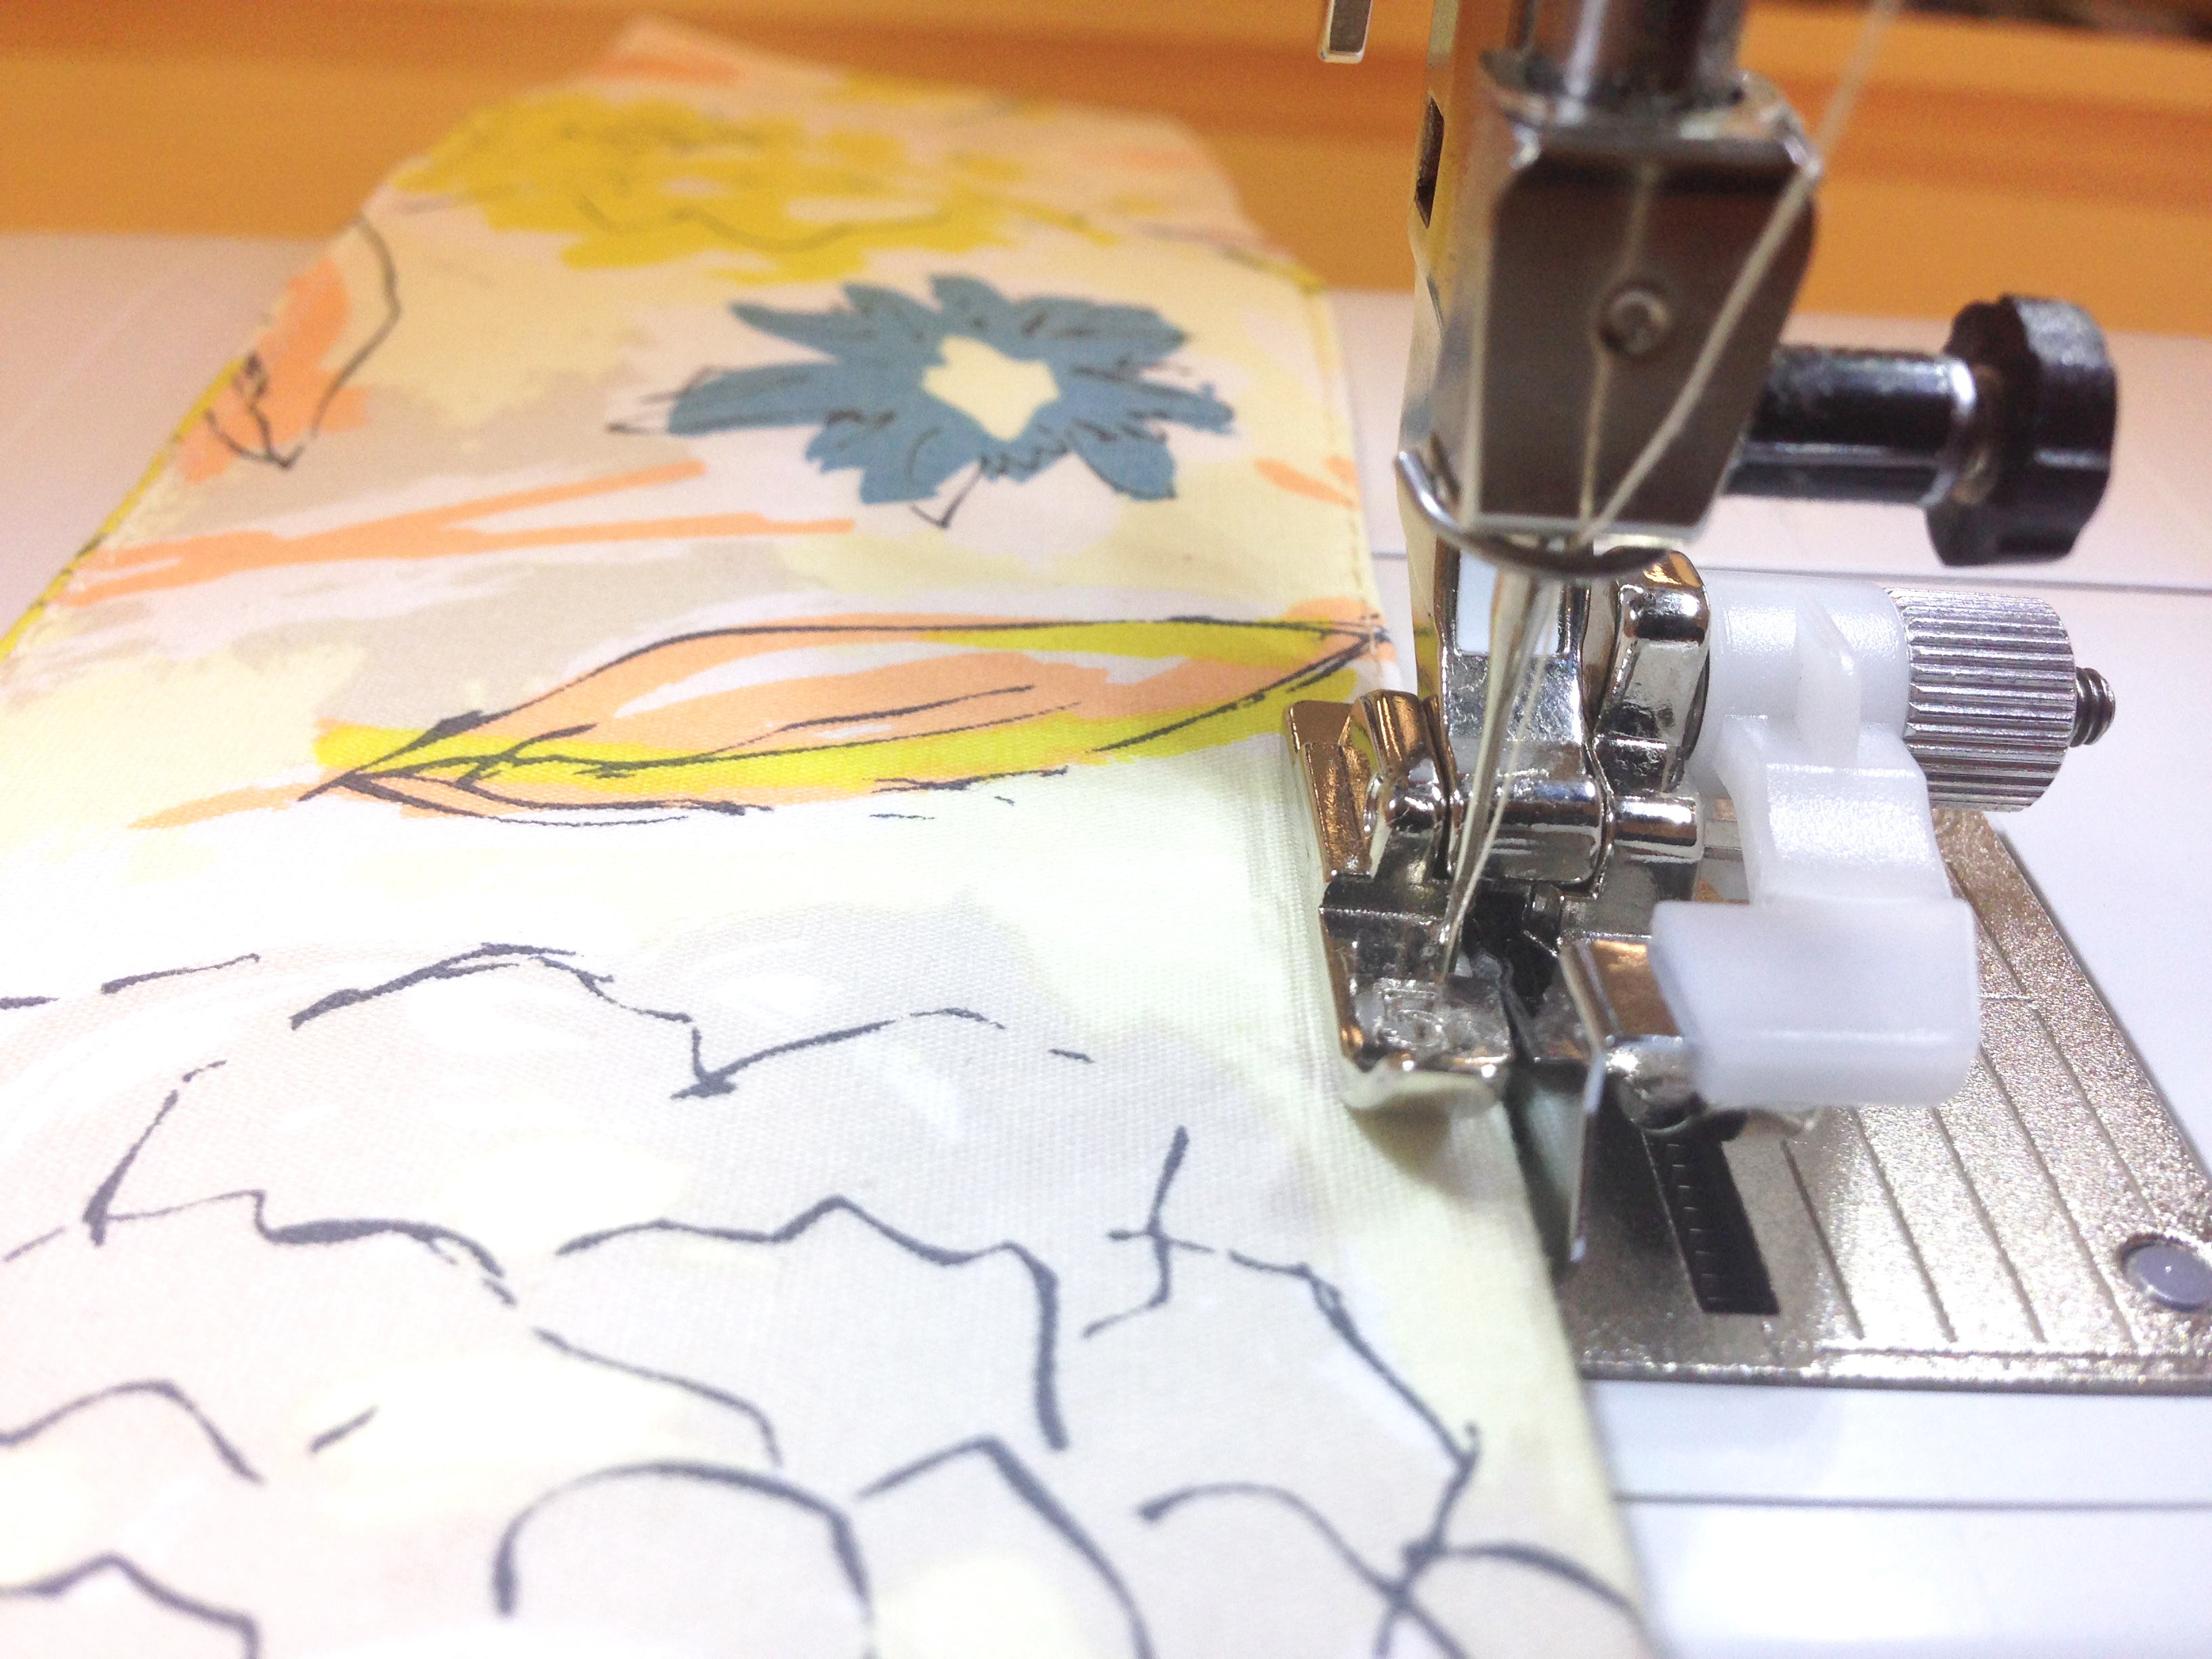
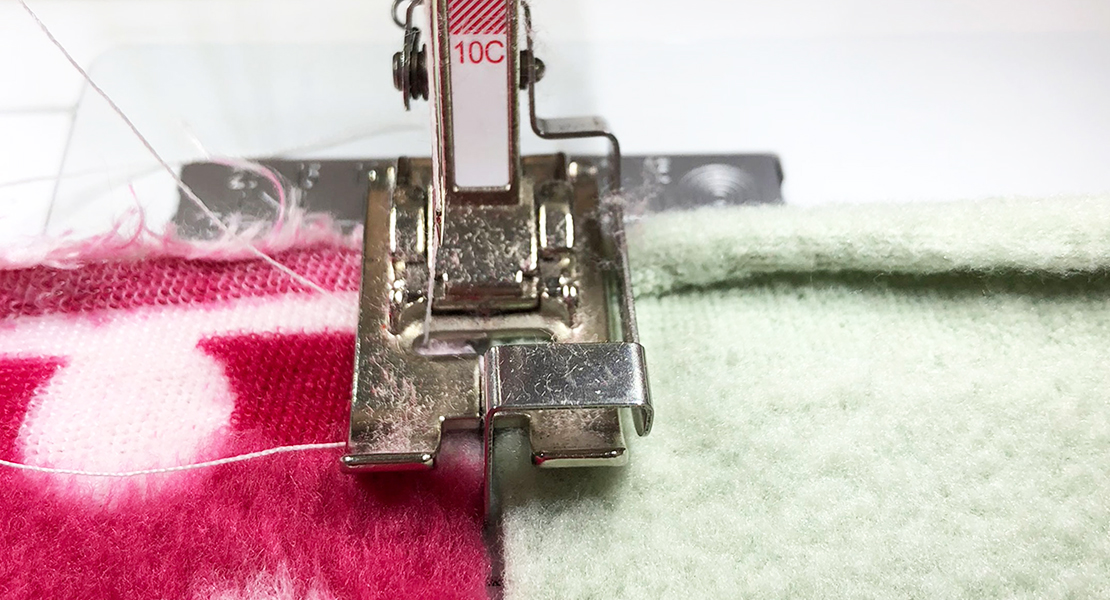
Attach your Blindstitch foot #5 and move the needle position all the way to the left. Topstitch both sides of all of your strips.
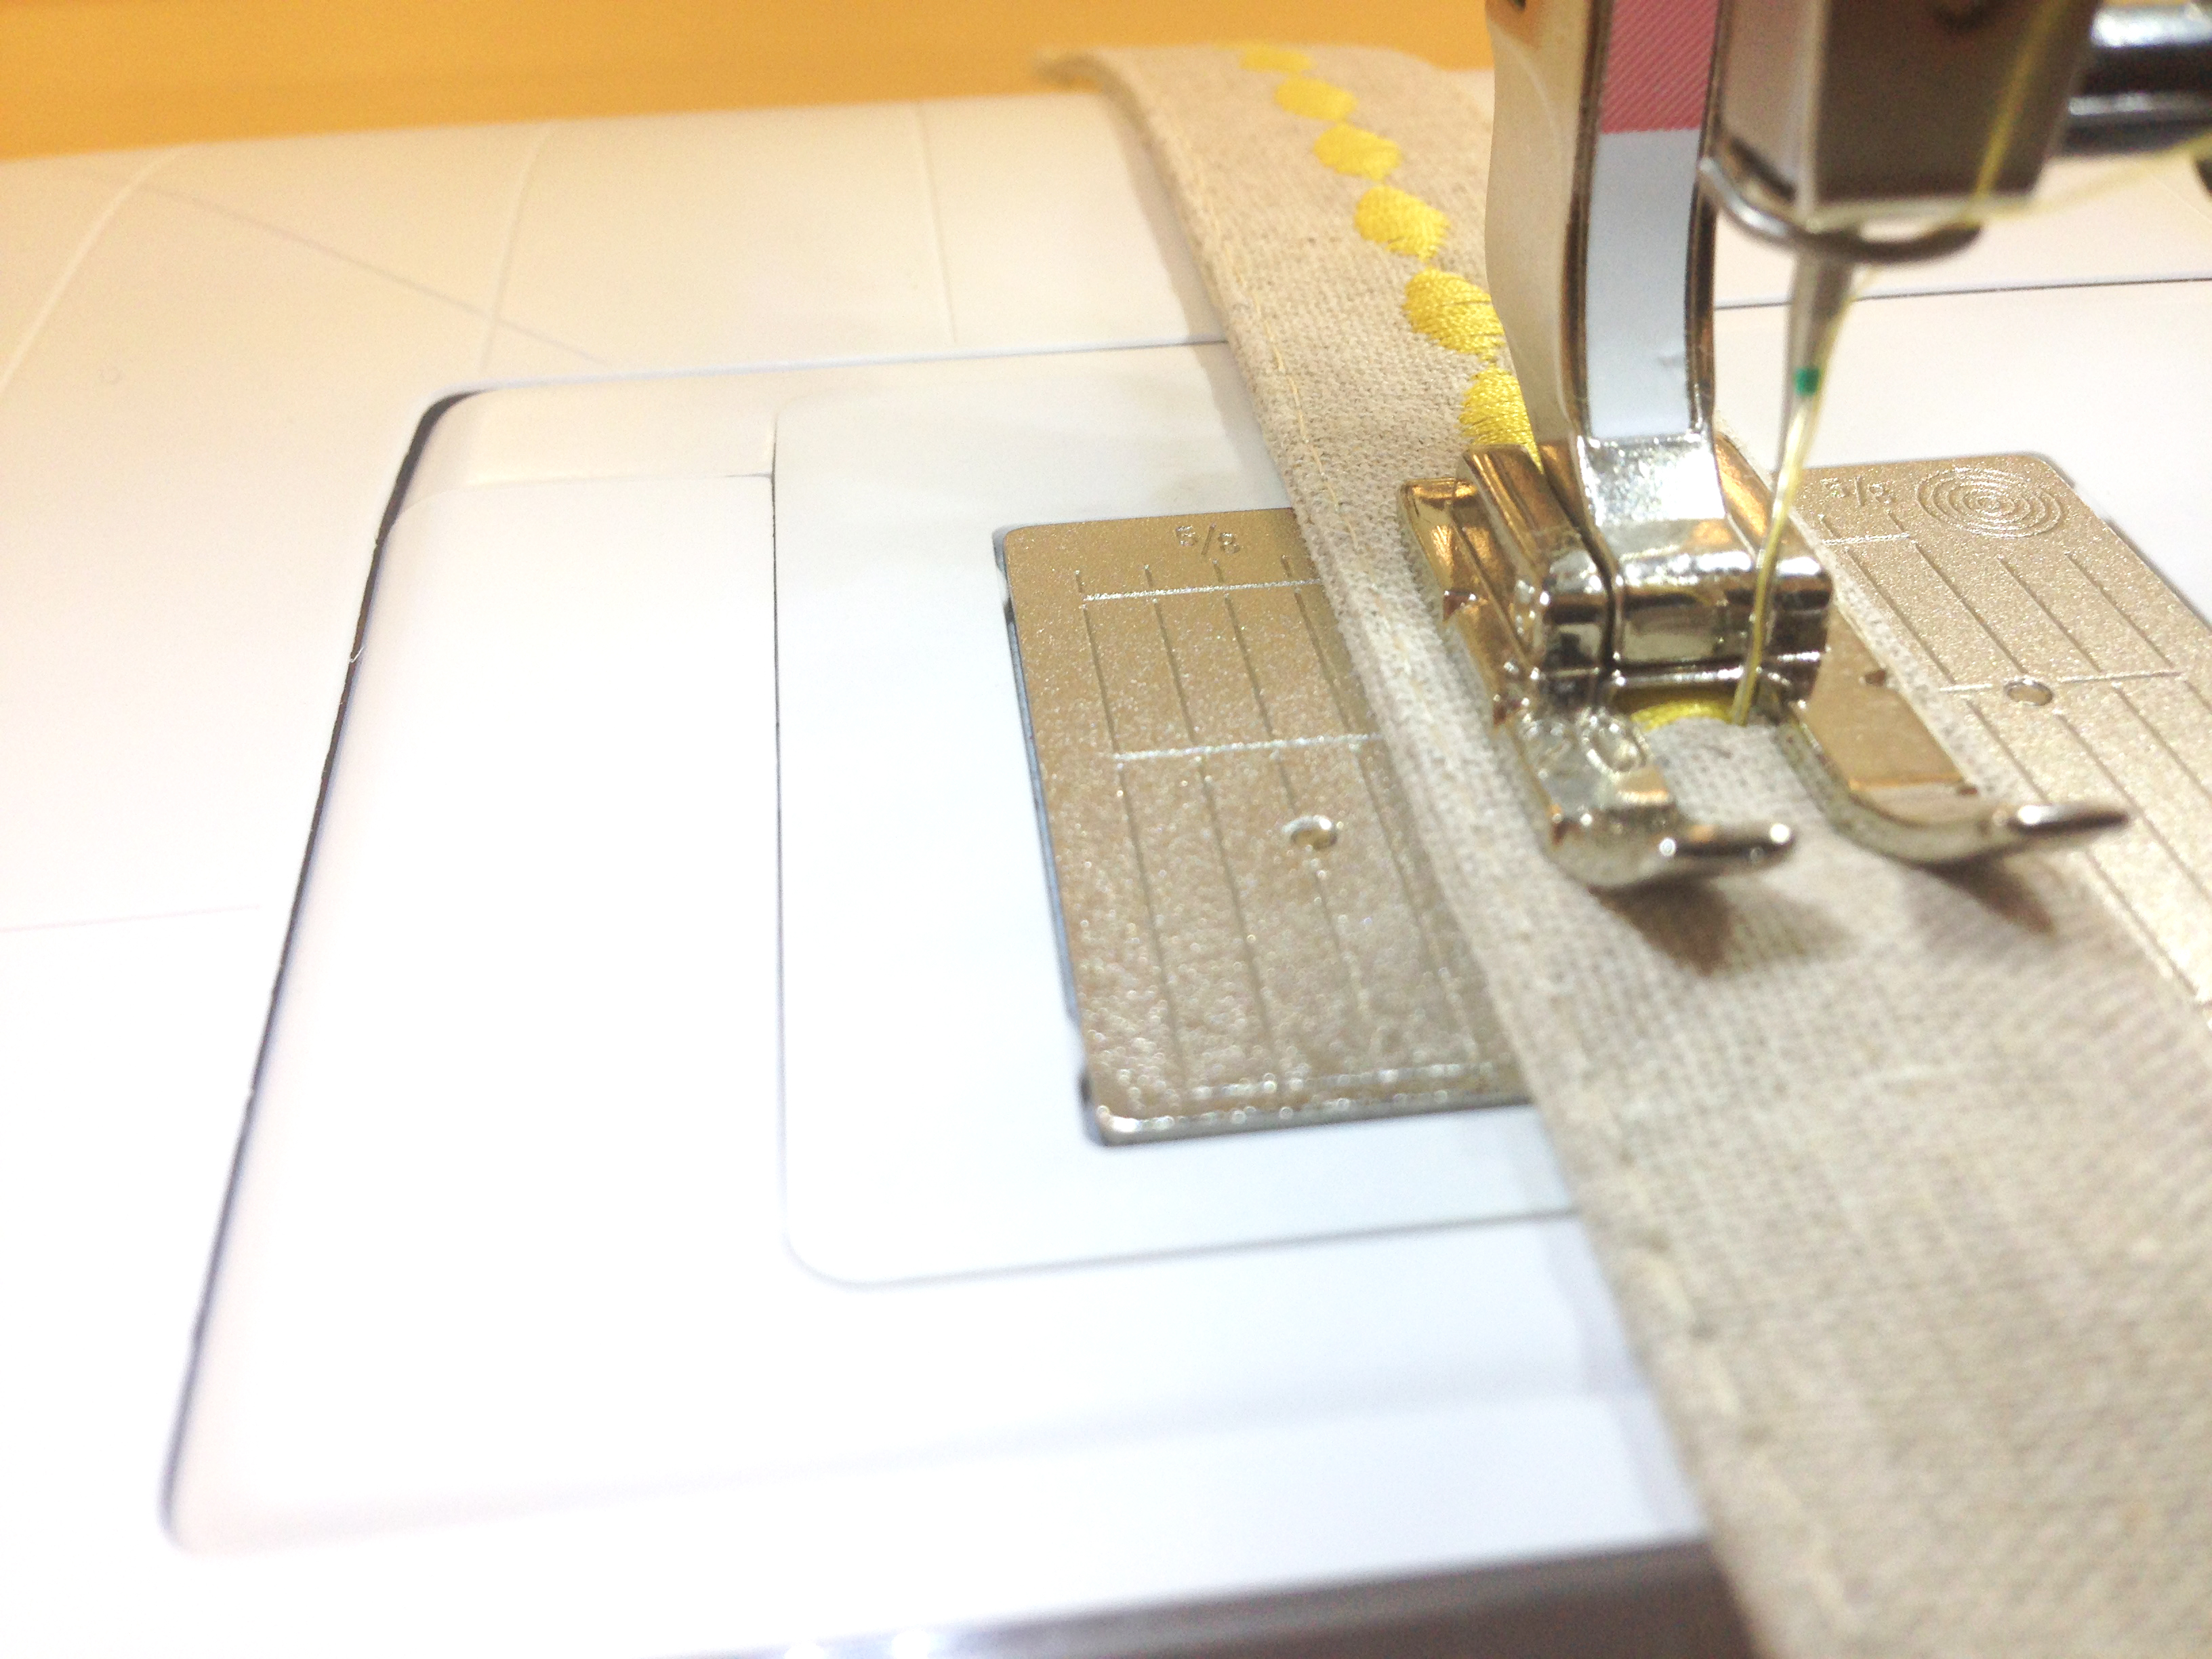
Attach your Open embroidery foot #20/#20C/#20D and center your needle position. Select the desired decorative stitch you would like to be in the center of your straps. I choose stitch #38.
Take straps made with both 3 1/2″ x 33″ strips and sew straight down the middle. I used Aurifil’s Spun Gold thread which looks amazing on AGF’s linen.
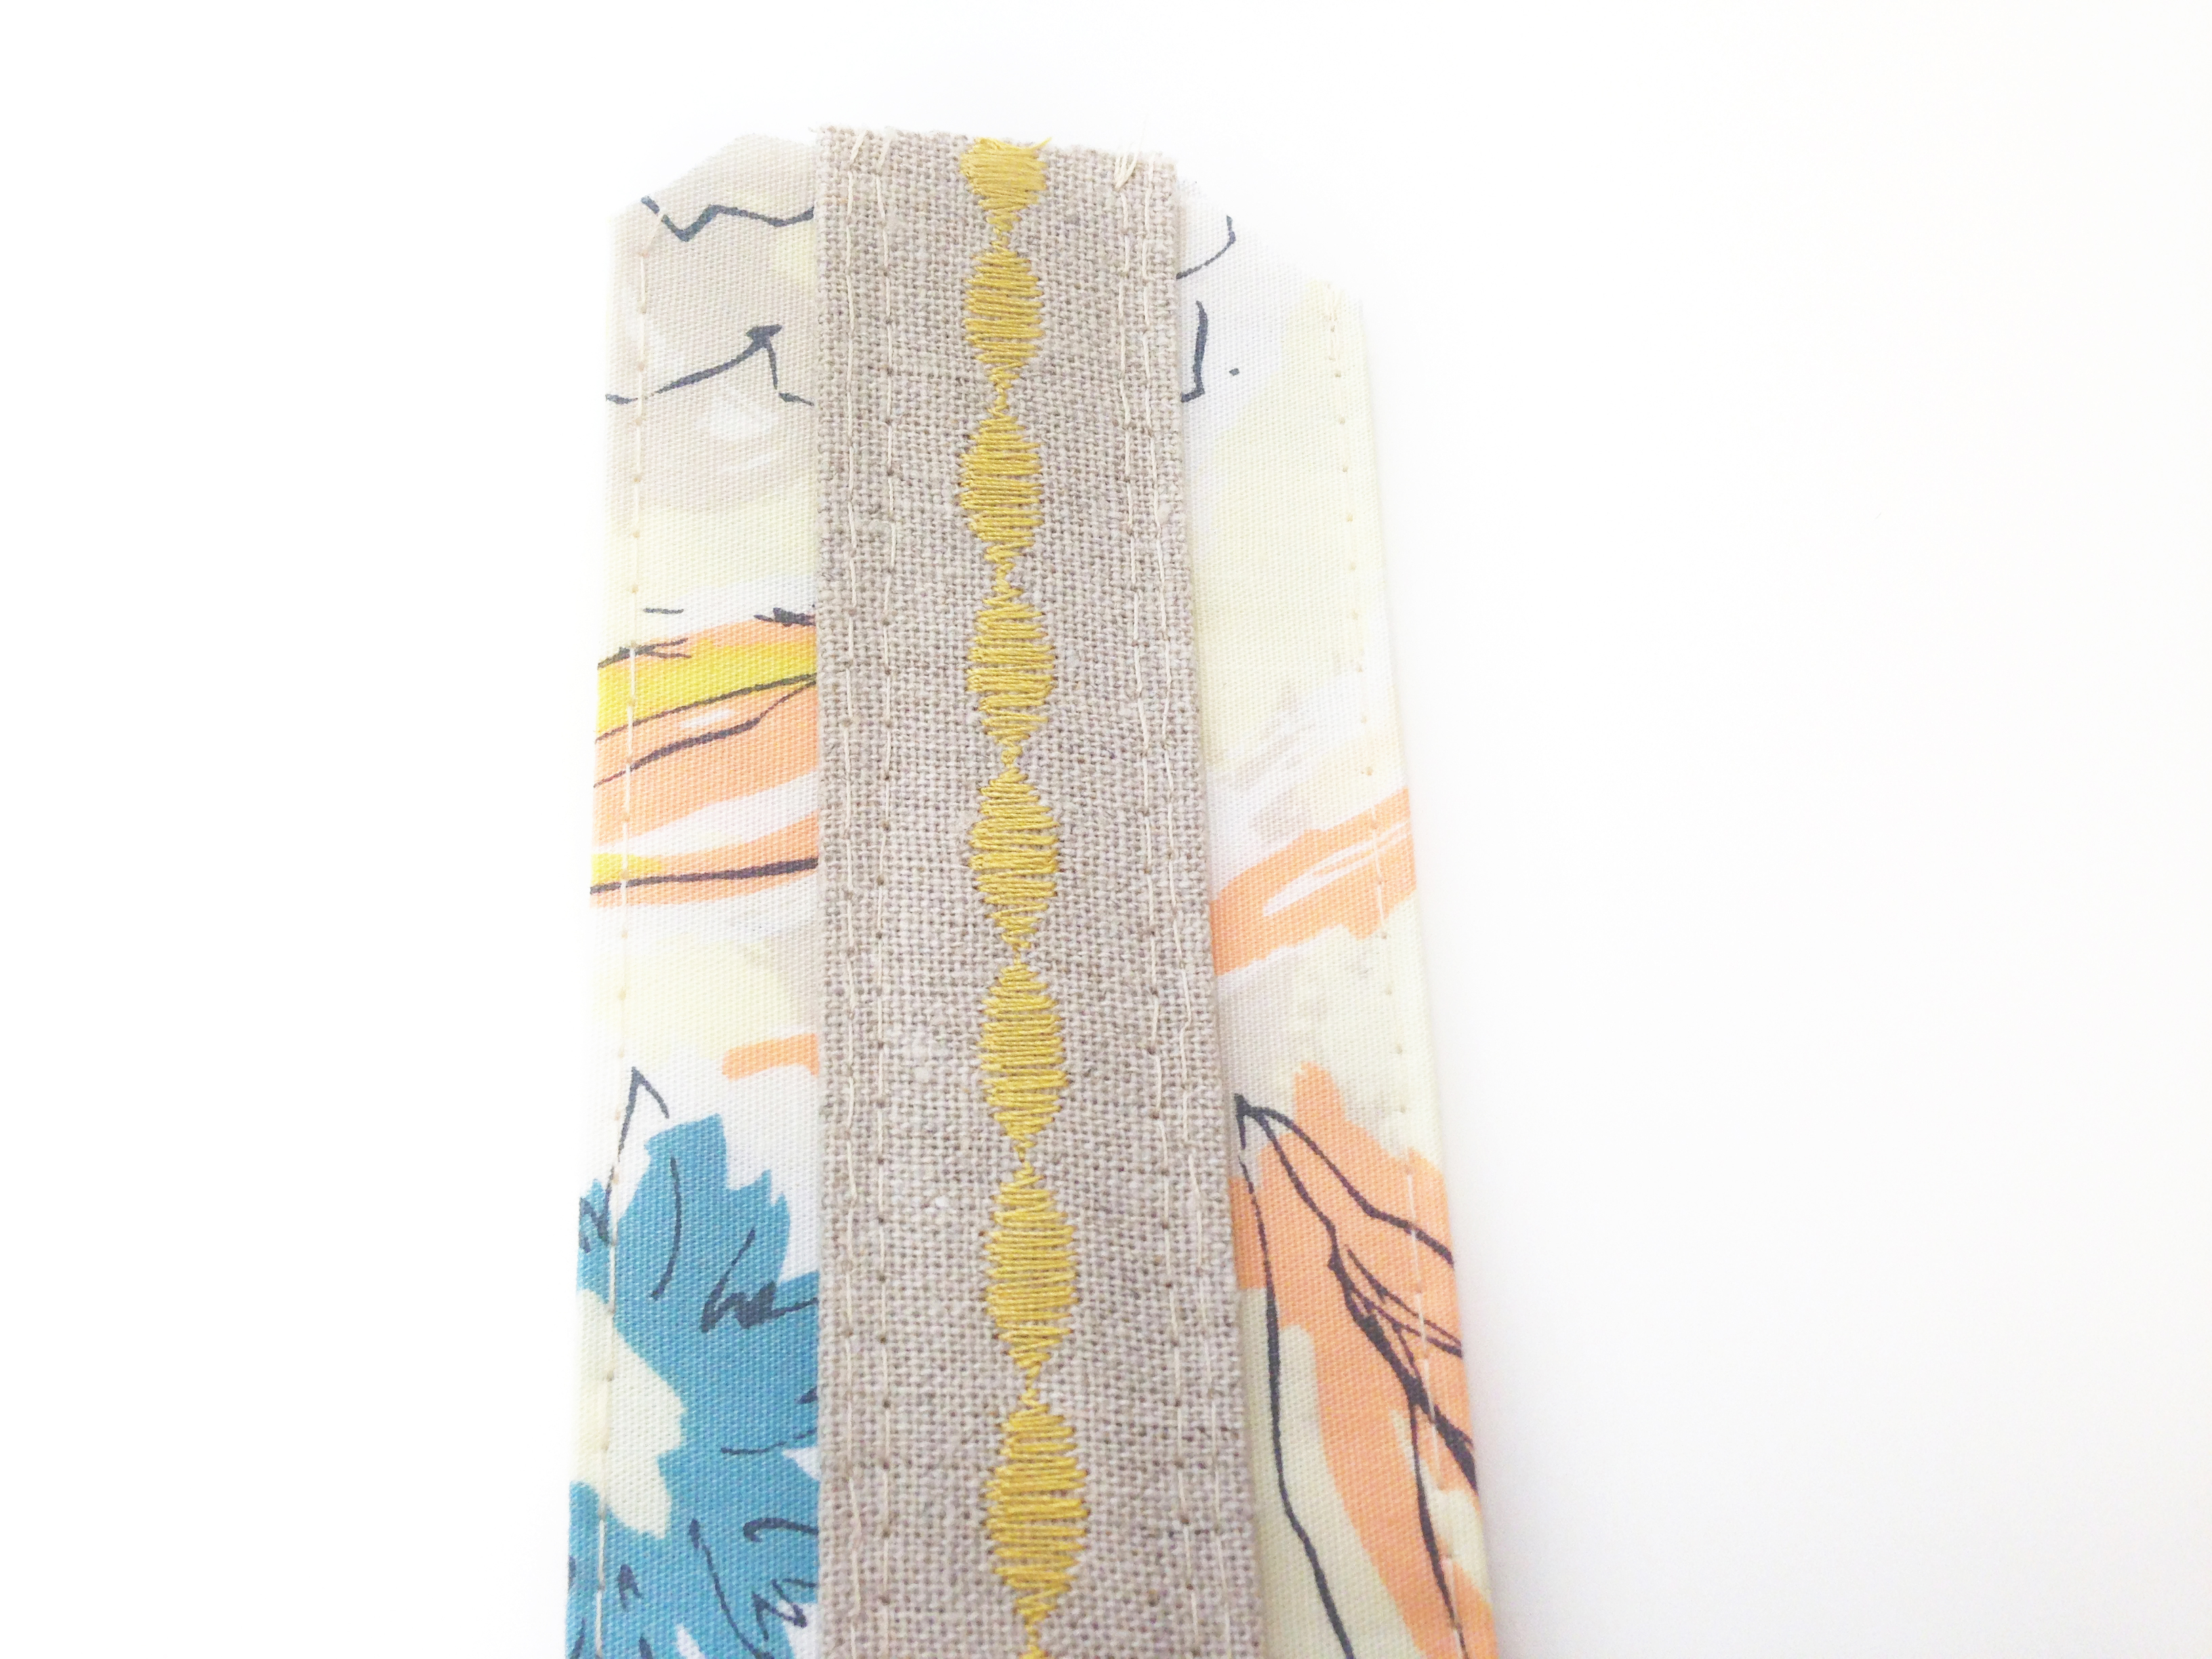
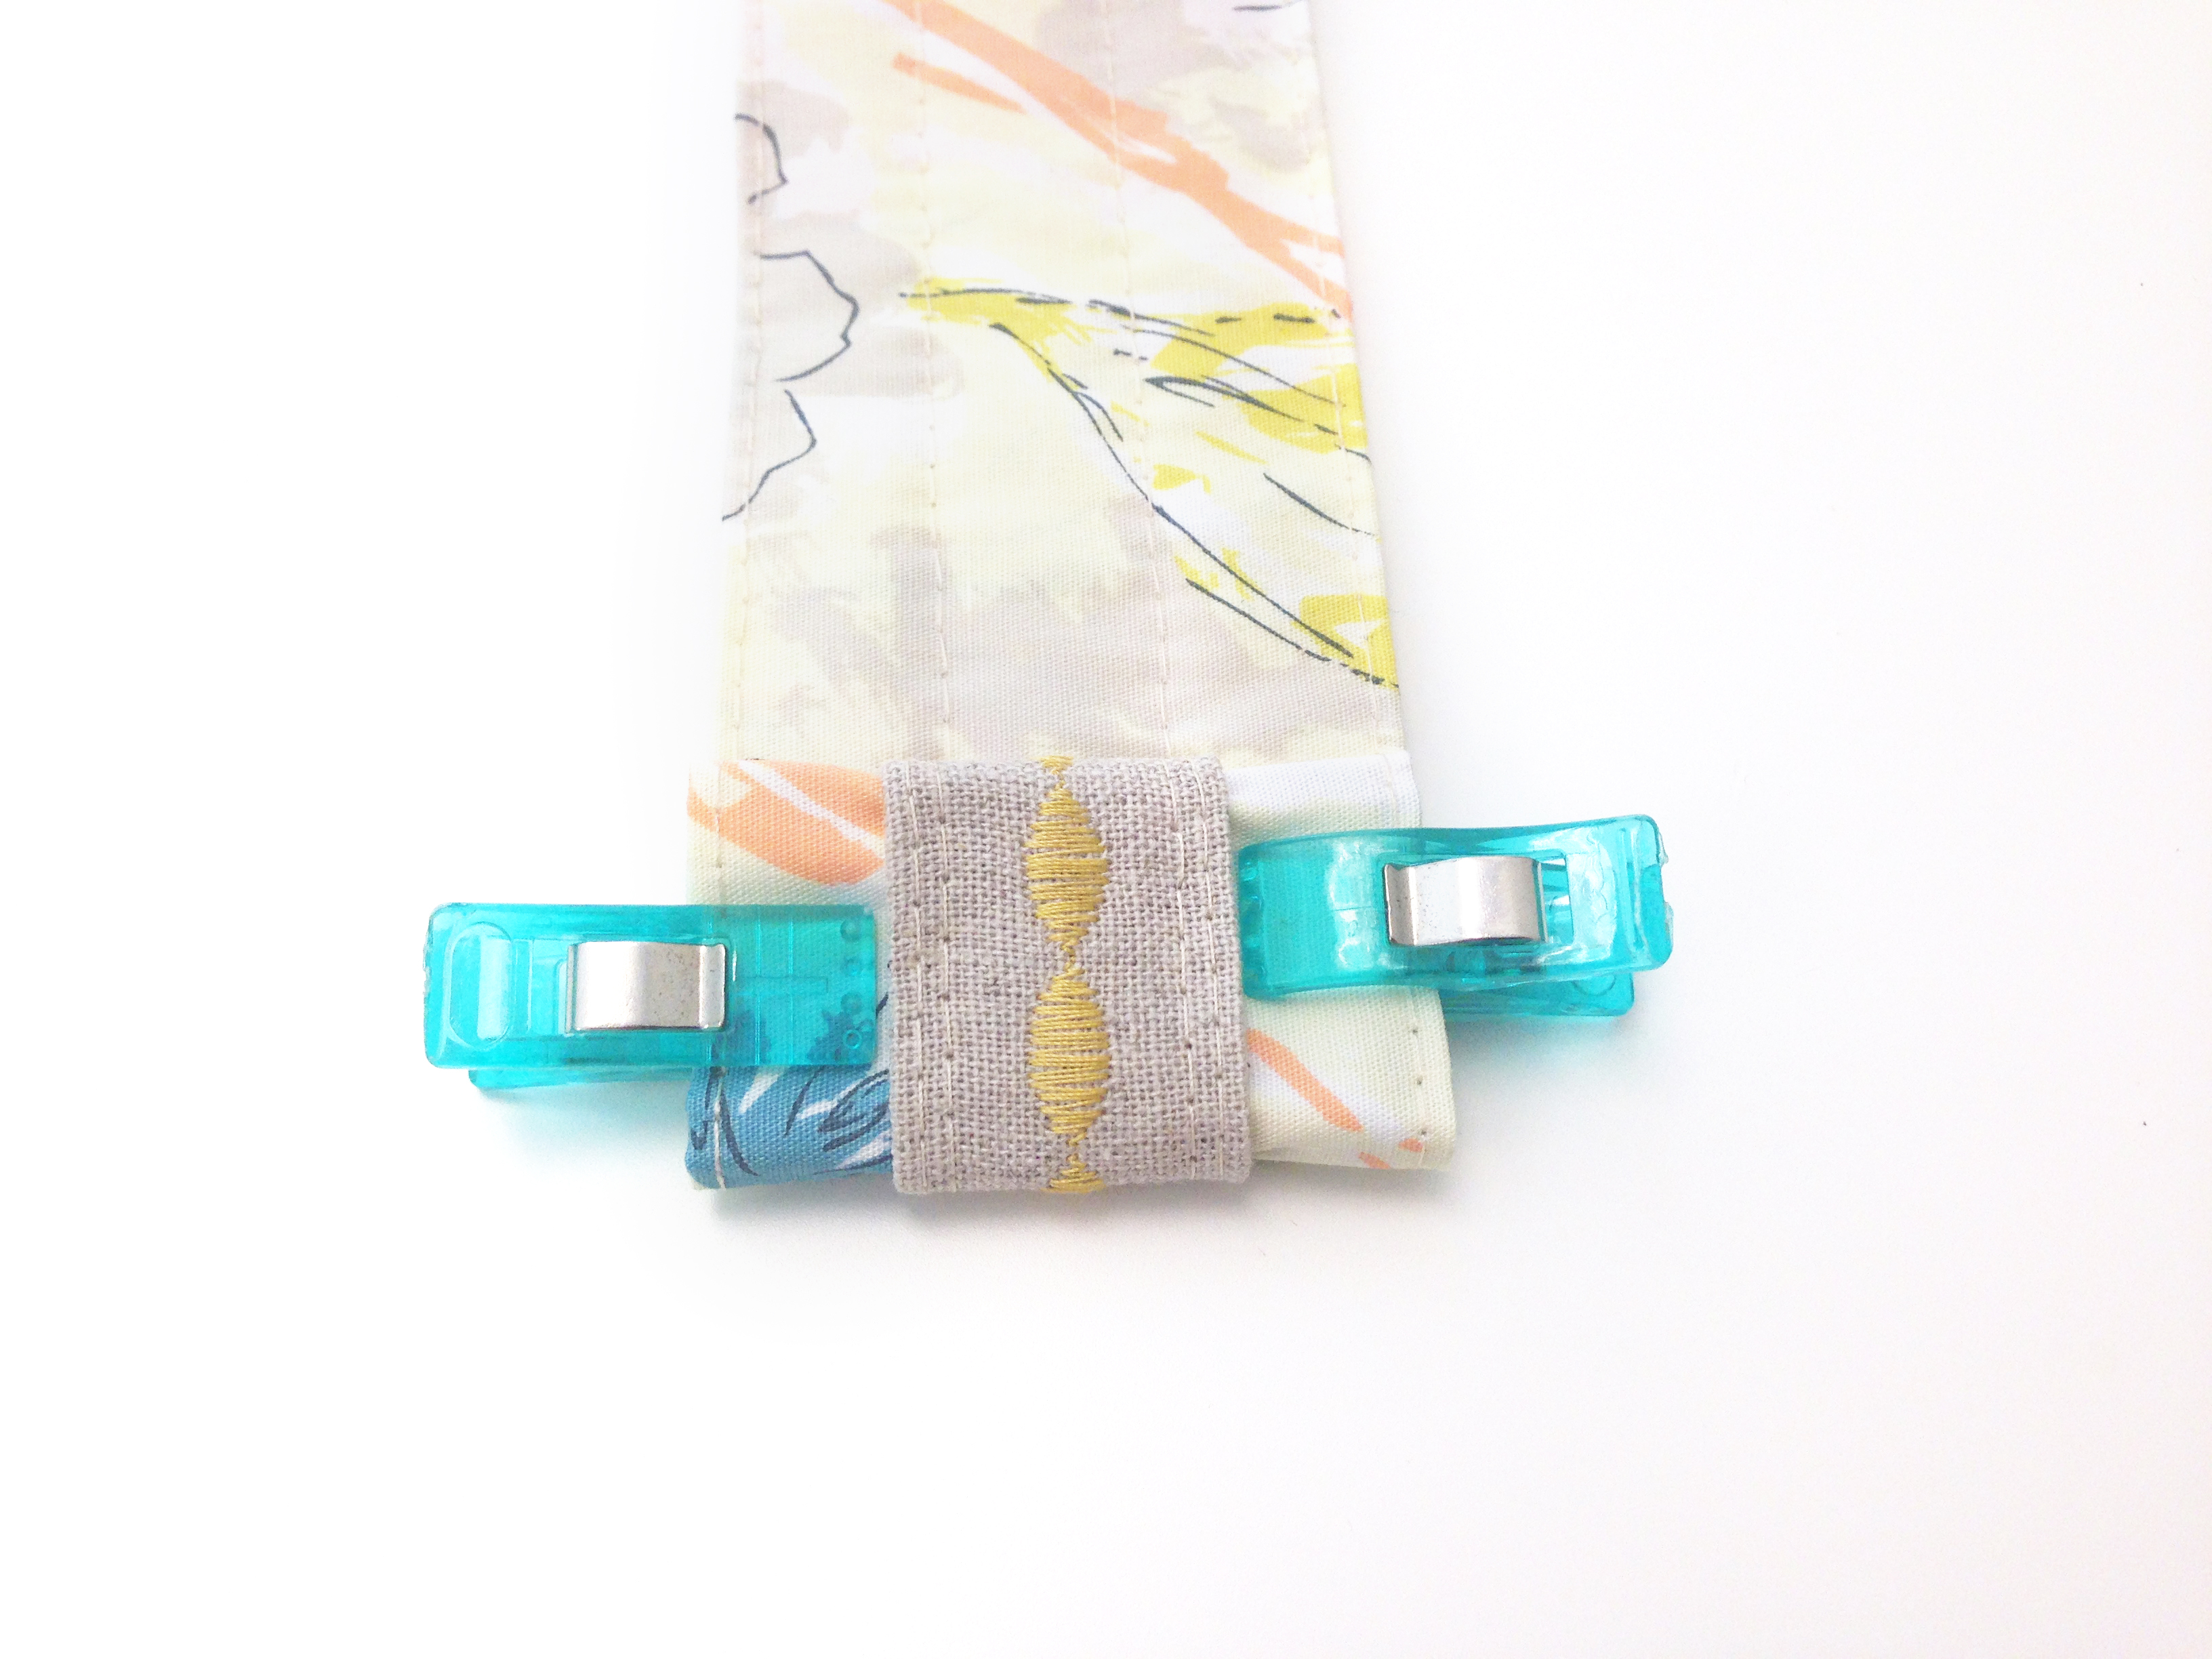
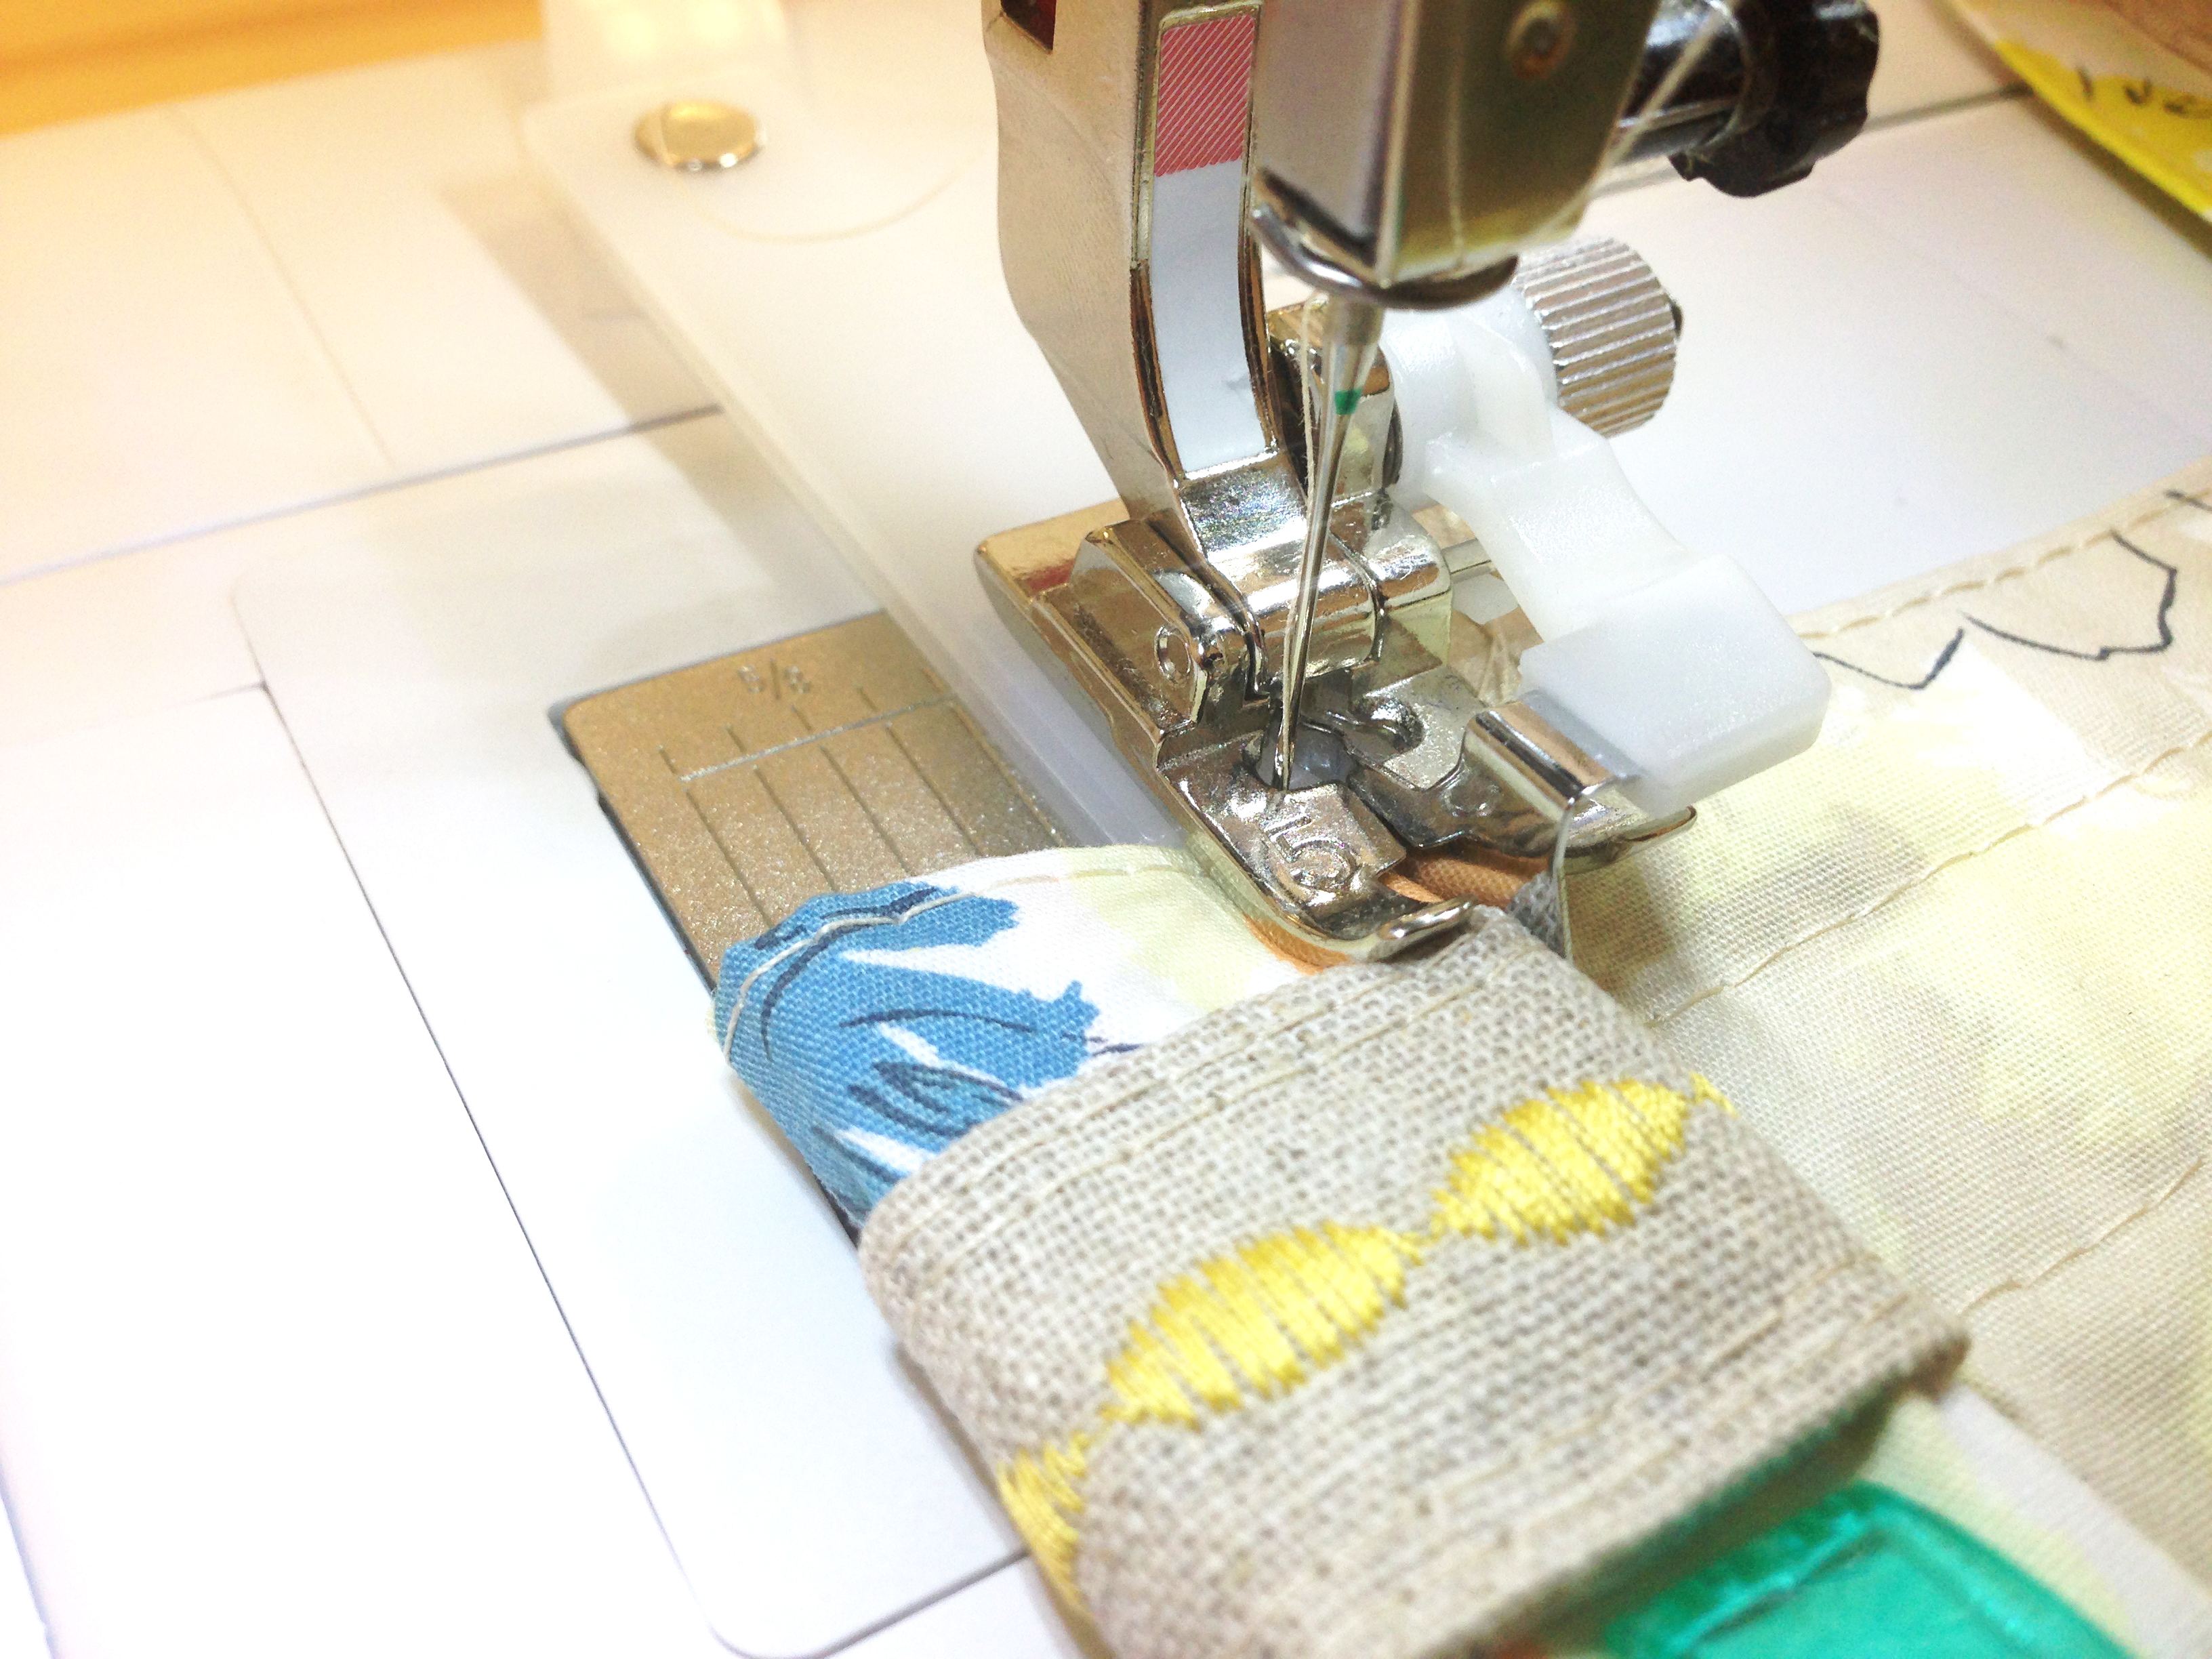
Pin your middle straps to your straps made in Fabric A.
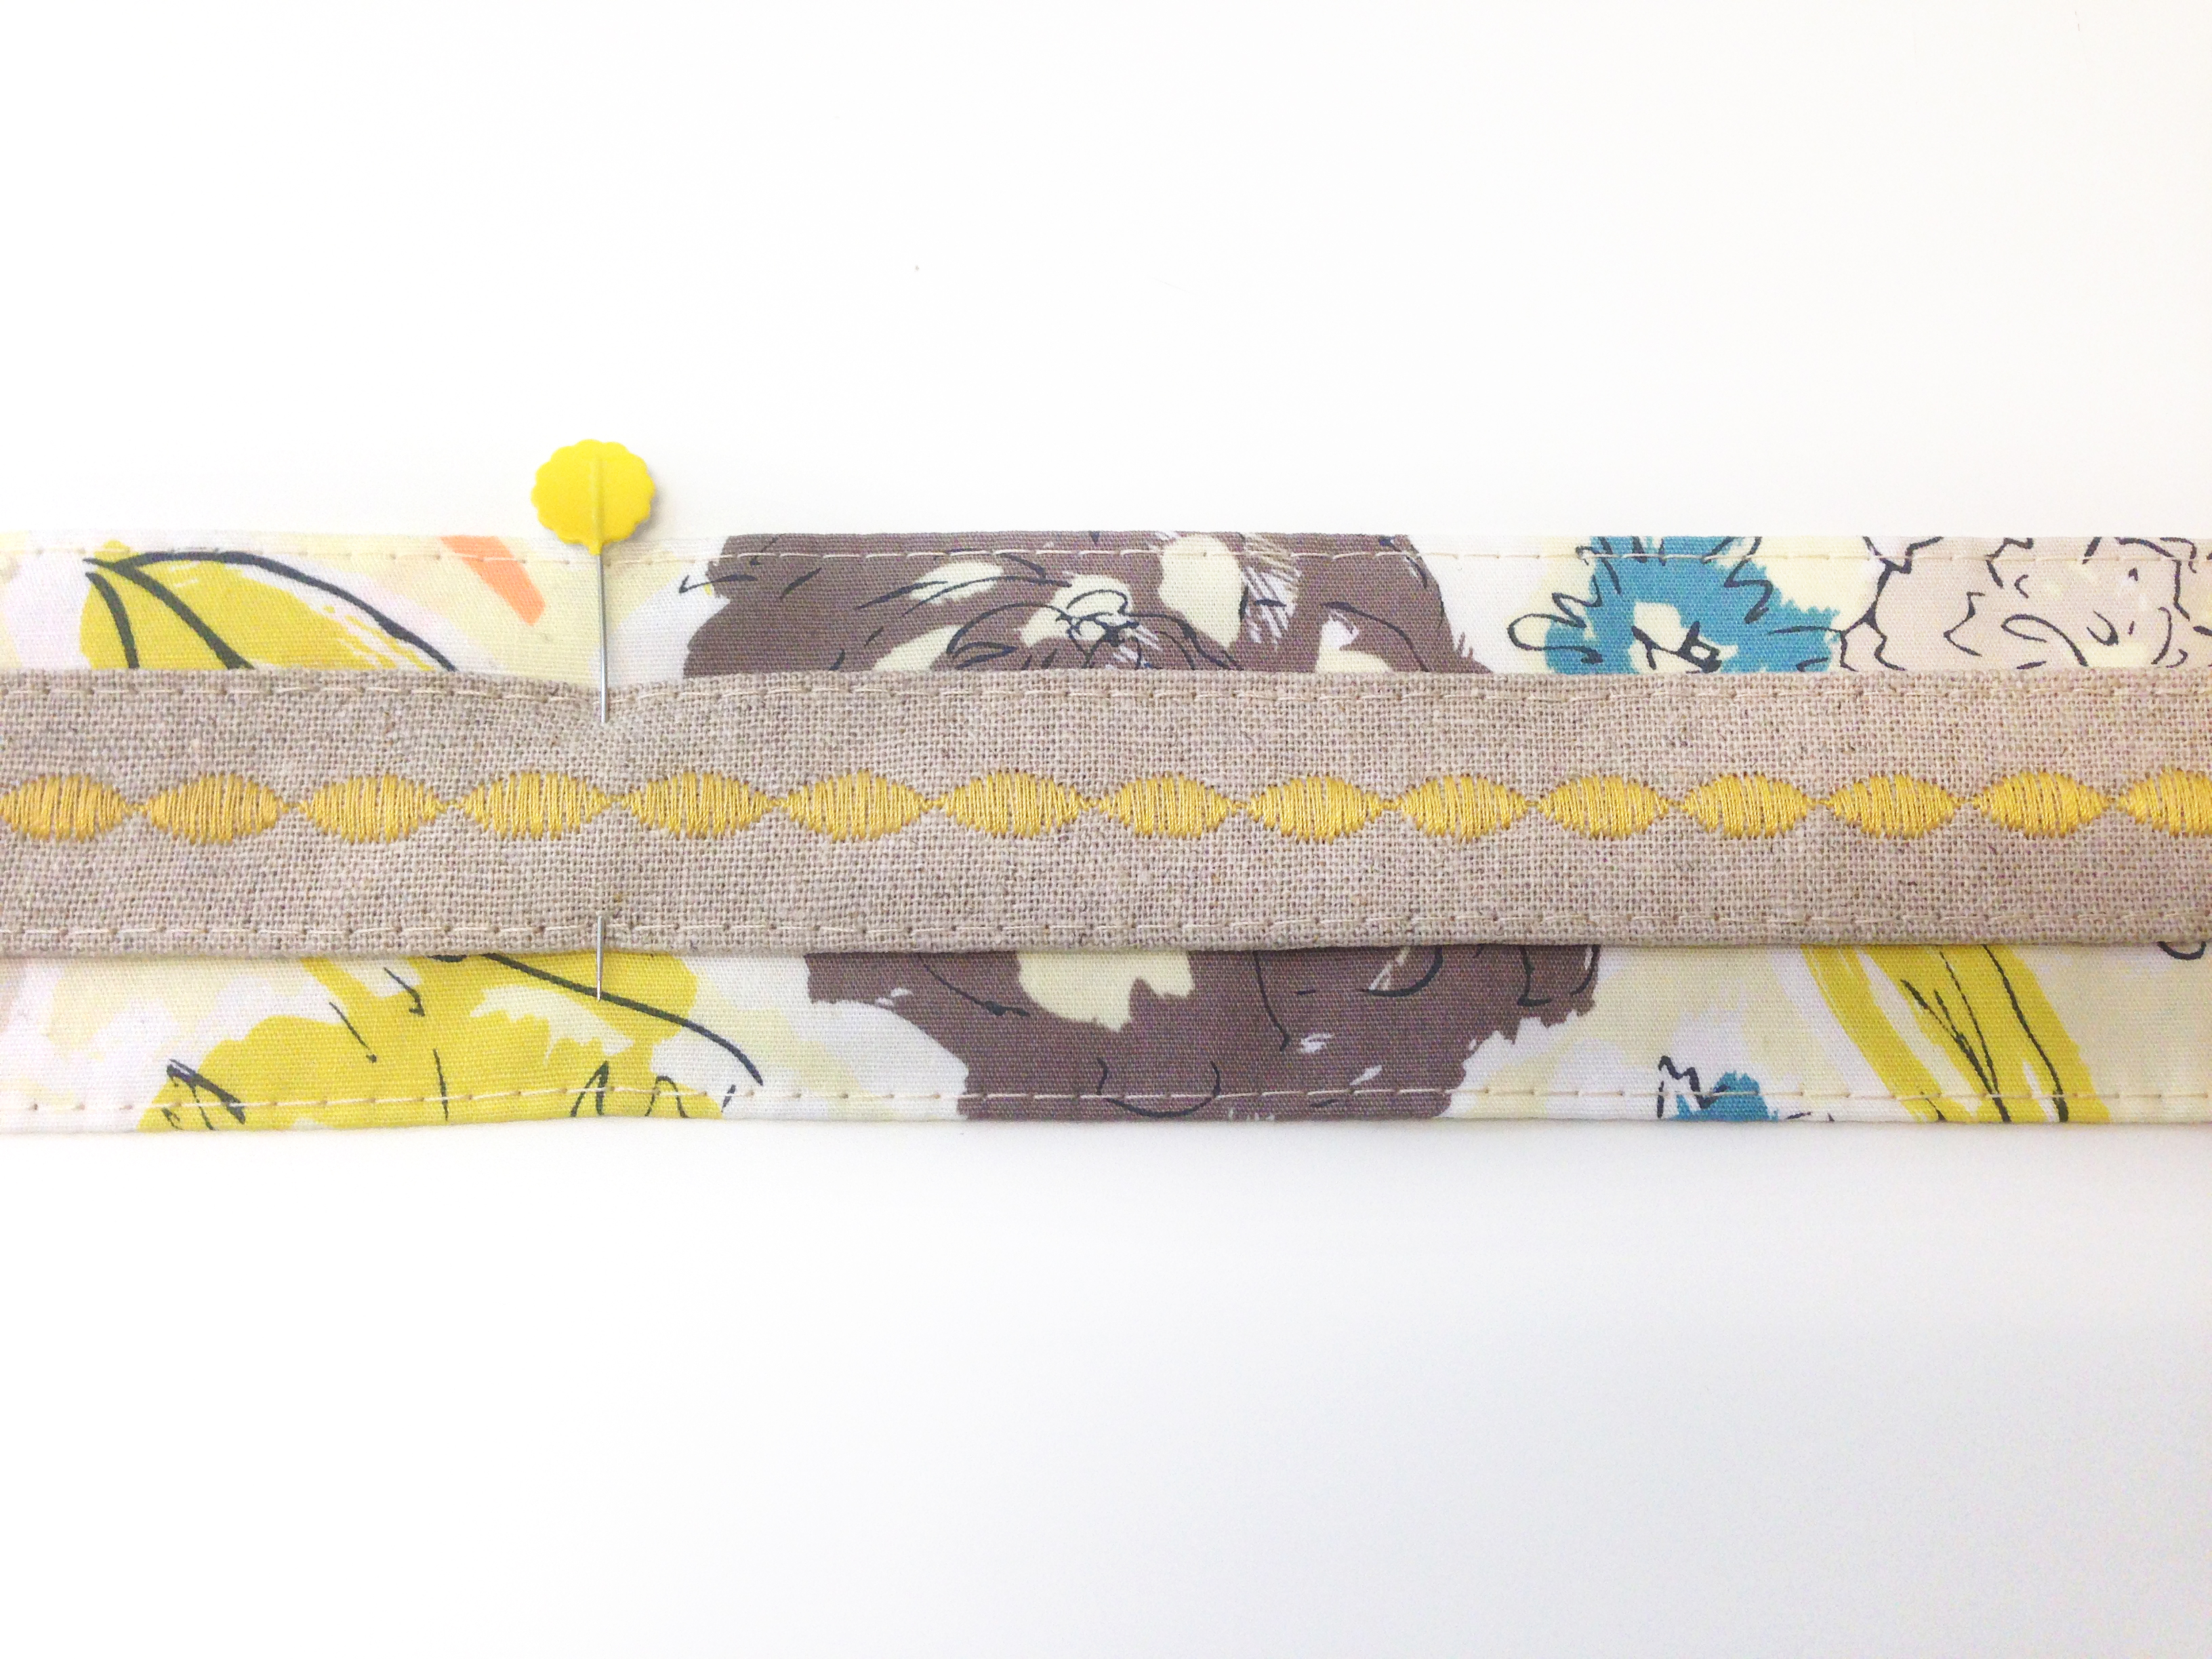
With your Blindstitch foot #5 move your needle position all the way to the left, line up metal guide with the topstitch on your strap and make another row of stitches to secure to other strap.
Trim the corners on each end of strap.
On one end of your strap fold raw edges over 1″ then fold another 1″ and pin in place.
Stitch as close to the folded edge placing your height compensating tool under your presser foot to even out the foot.
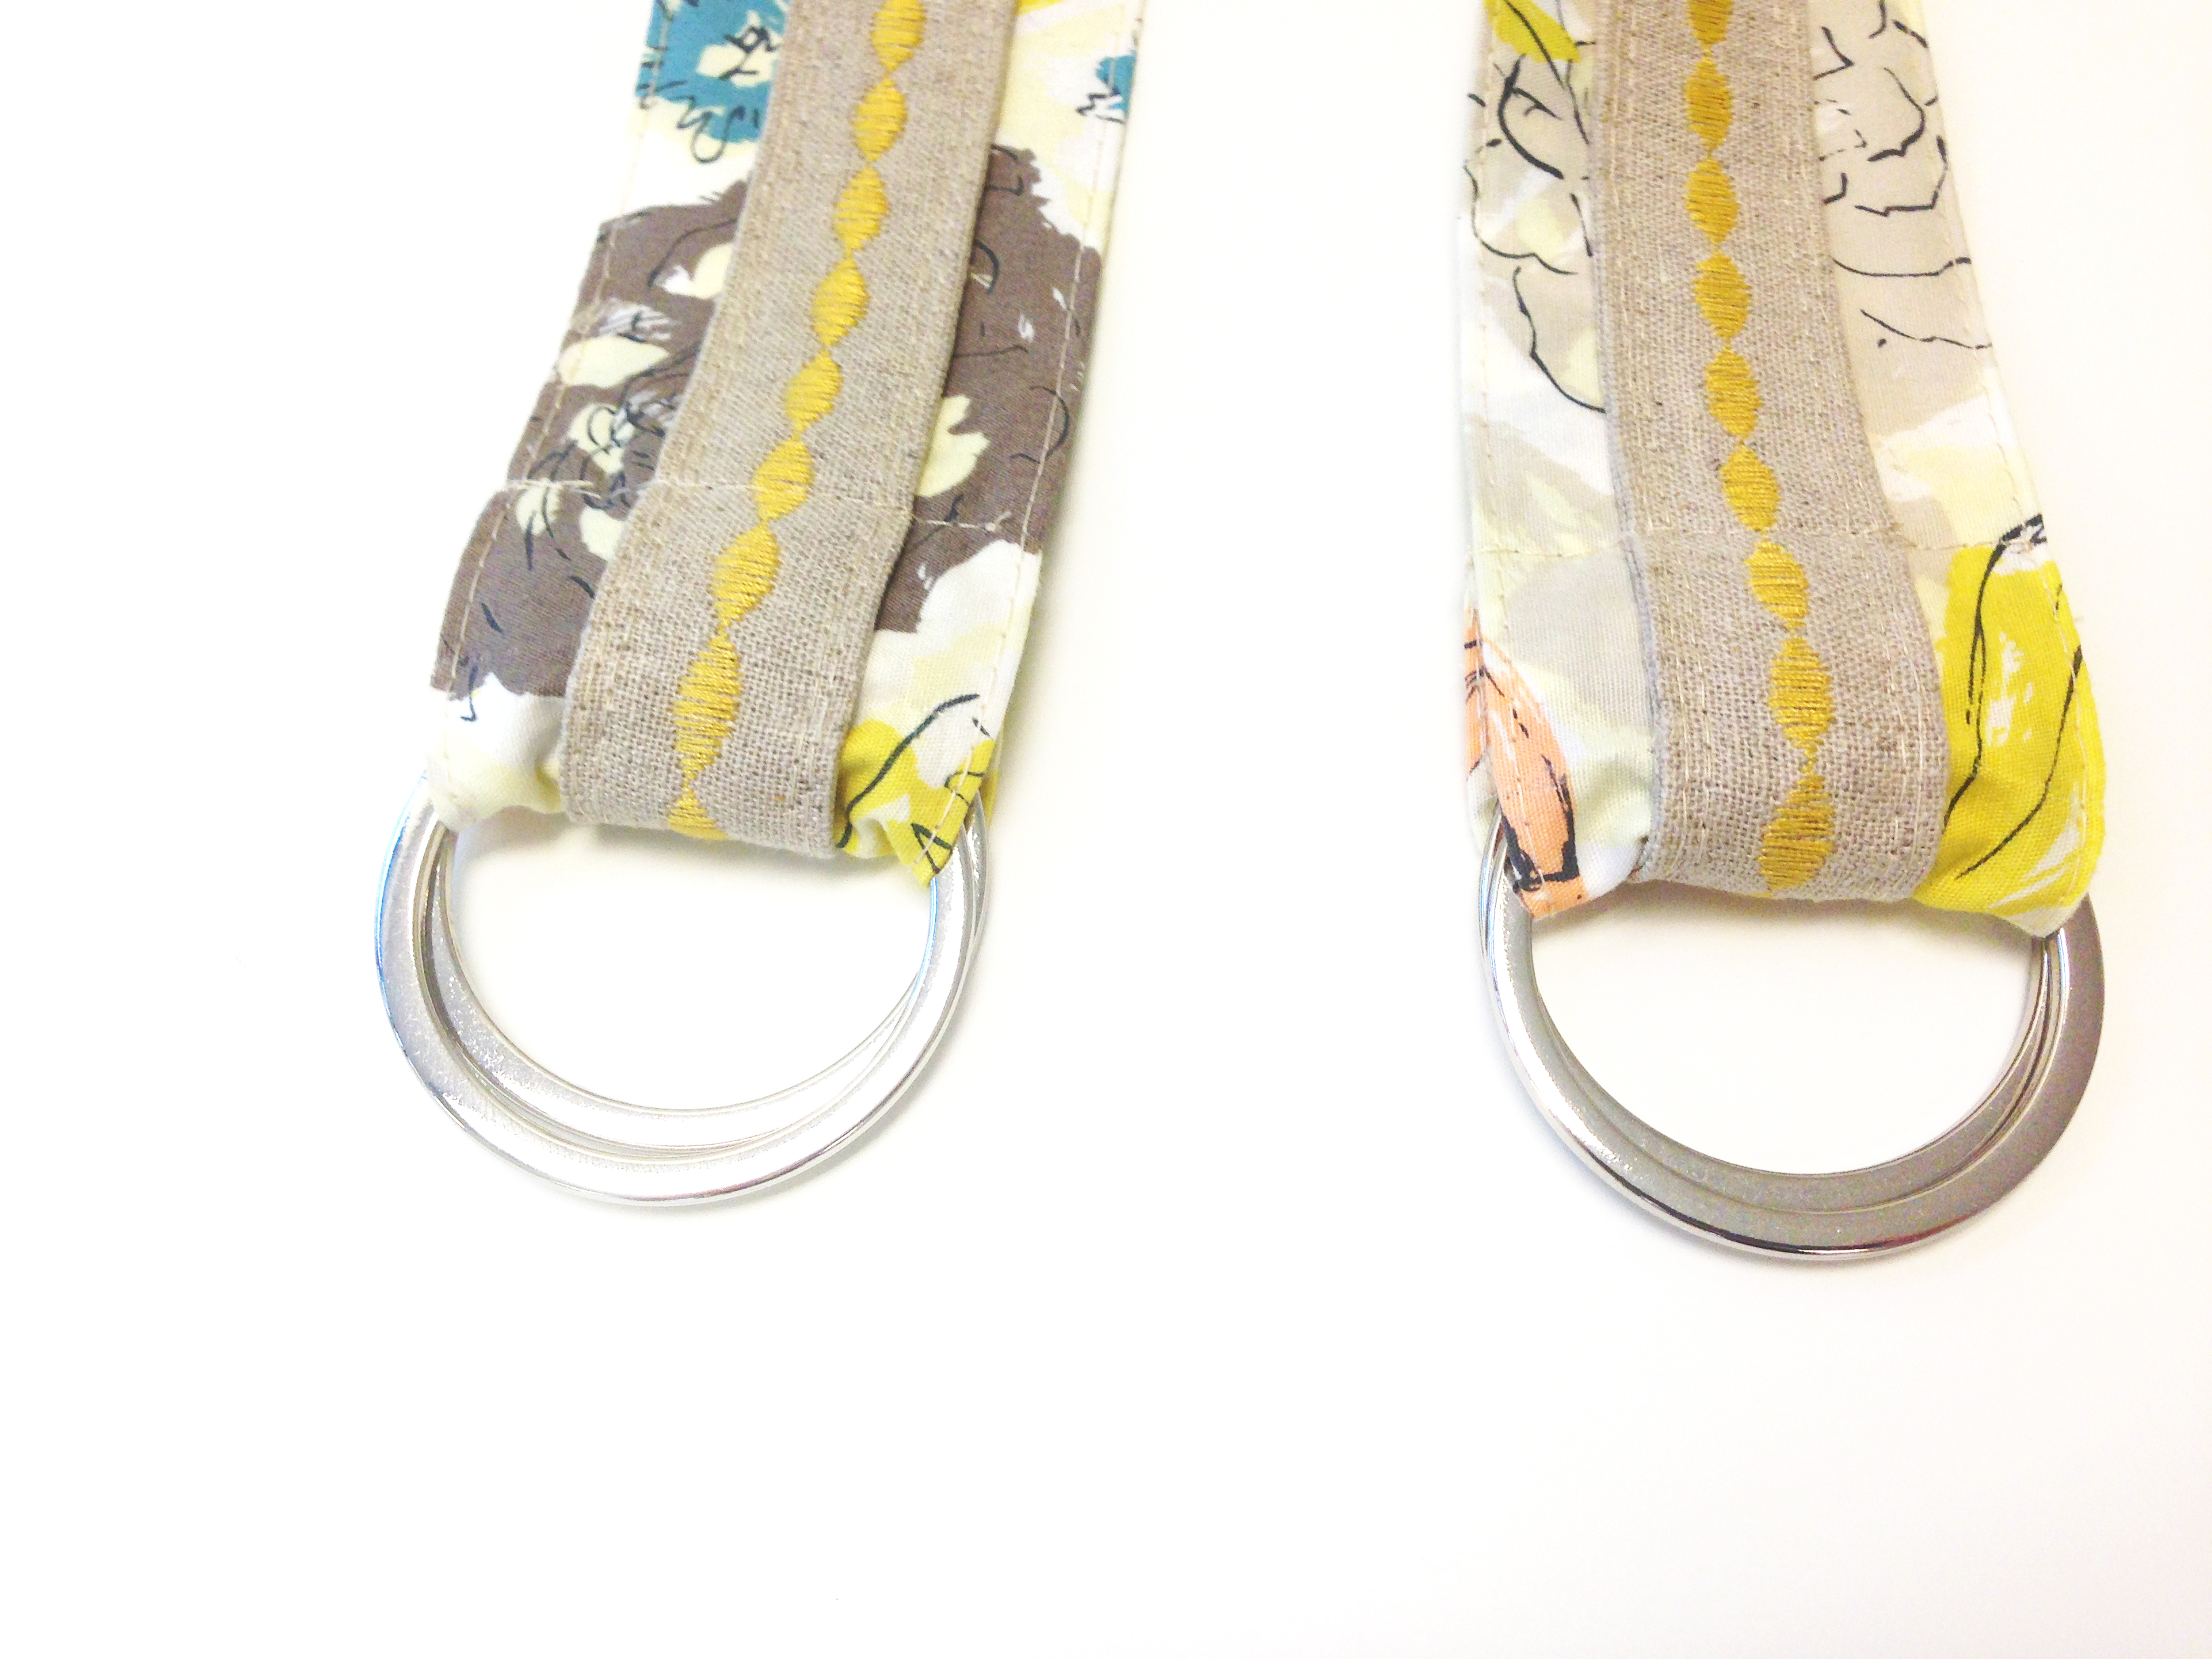
Repeat this same process for the other ends of your straps, but thread two rings through the end of each strap, then fold over 1″ then another 1″ and stitch down folded edge.
Step 2: Making the Handle
Take 3″ x 9 1/2″ strips from Fabric A and sew right sides together all the way around piece, leaving a small hole to flip piece right sides out and to insert your 2 1/2″ x 9″ ultra firm fusible. Sew at 1/4″ seam allowance. Clip corners at seam allowance to reduce bulk.
Flip piece right side out and insert ultra firm fusible. Turn opening in and topstitch all the way around the edges using the Blindstitch foot #5 to sew as close to the edge as possible.
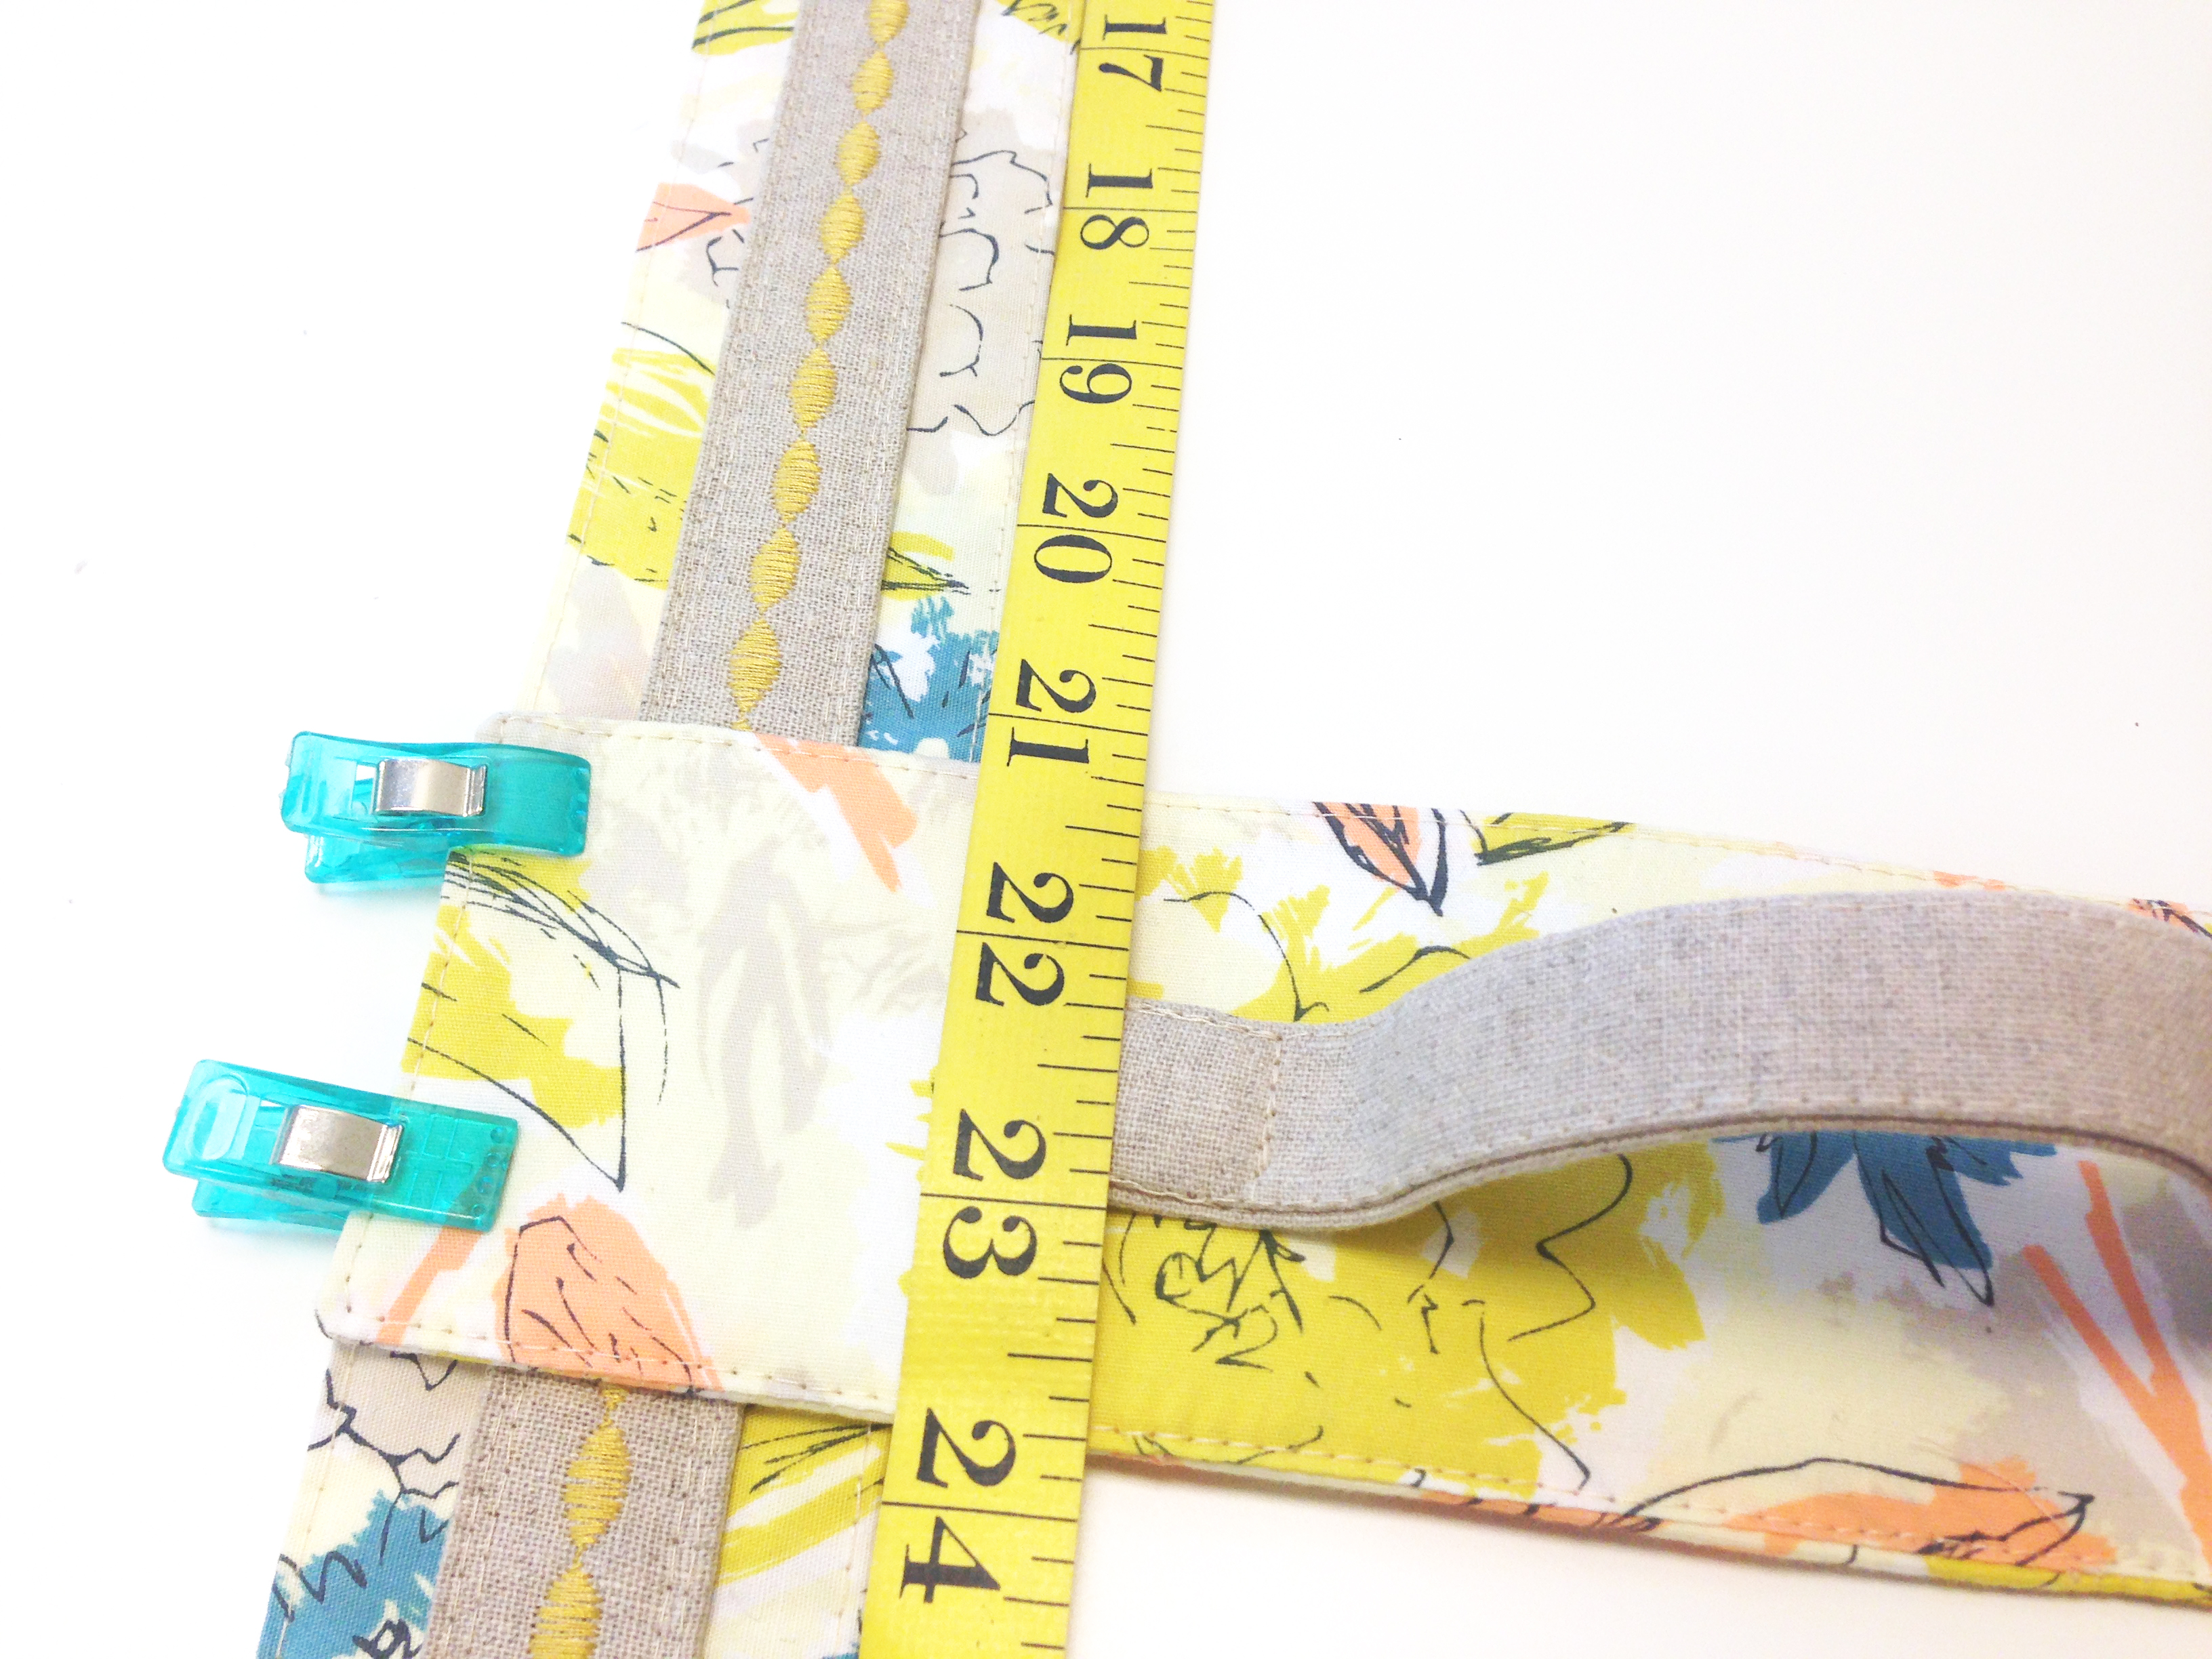
Take your strap made from a 3″ x 9 1/2″ strip from Fabric B and clip corners.
Fold the end 1/2″ under and pin 2″ over from the end of your piece.

Stitch a small rectangle to secure the strap.

Measure 21″ down each strap and place handle on top of straps. Pin and stitch handle with a rectangle shape, and add an “X” with stitches to make the handle extra secure.

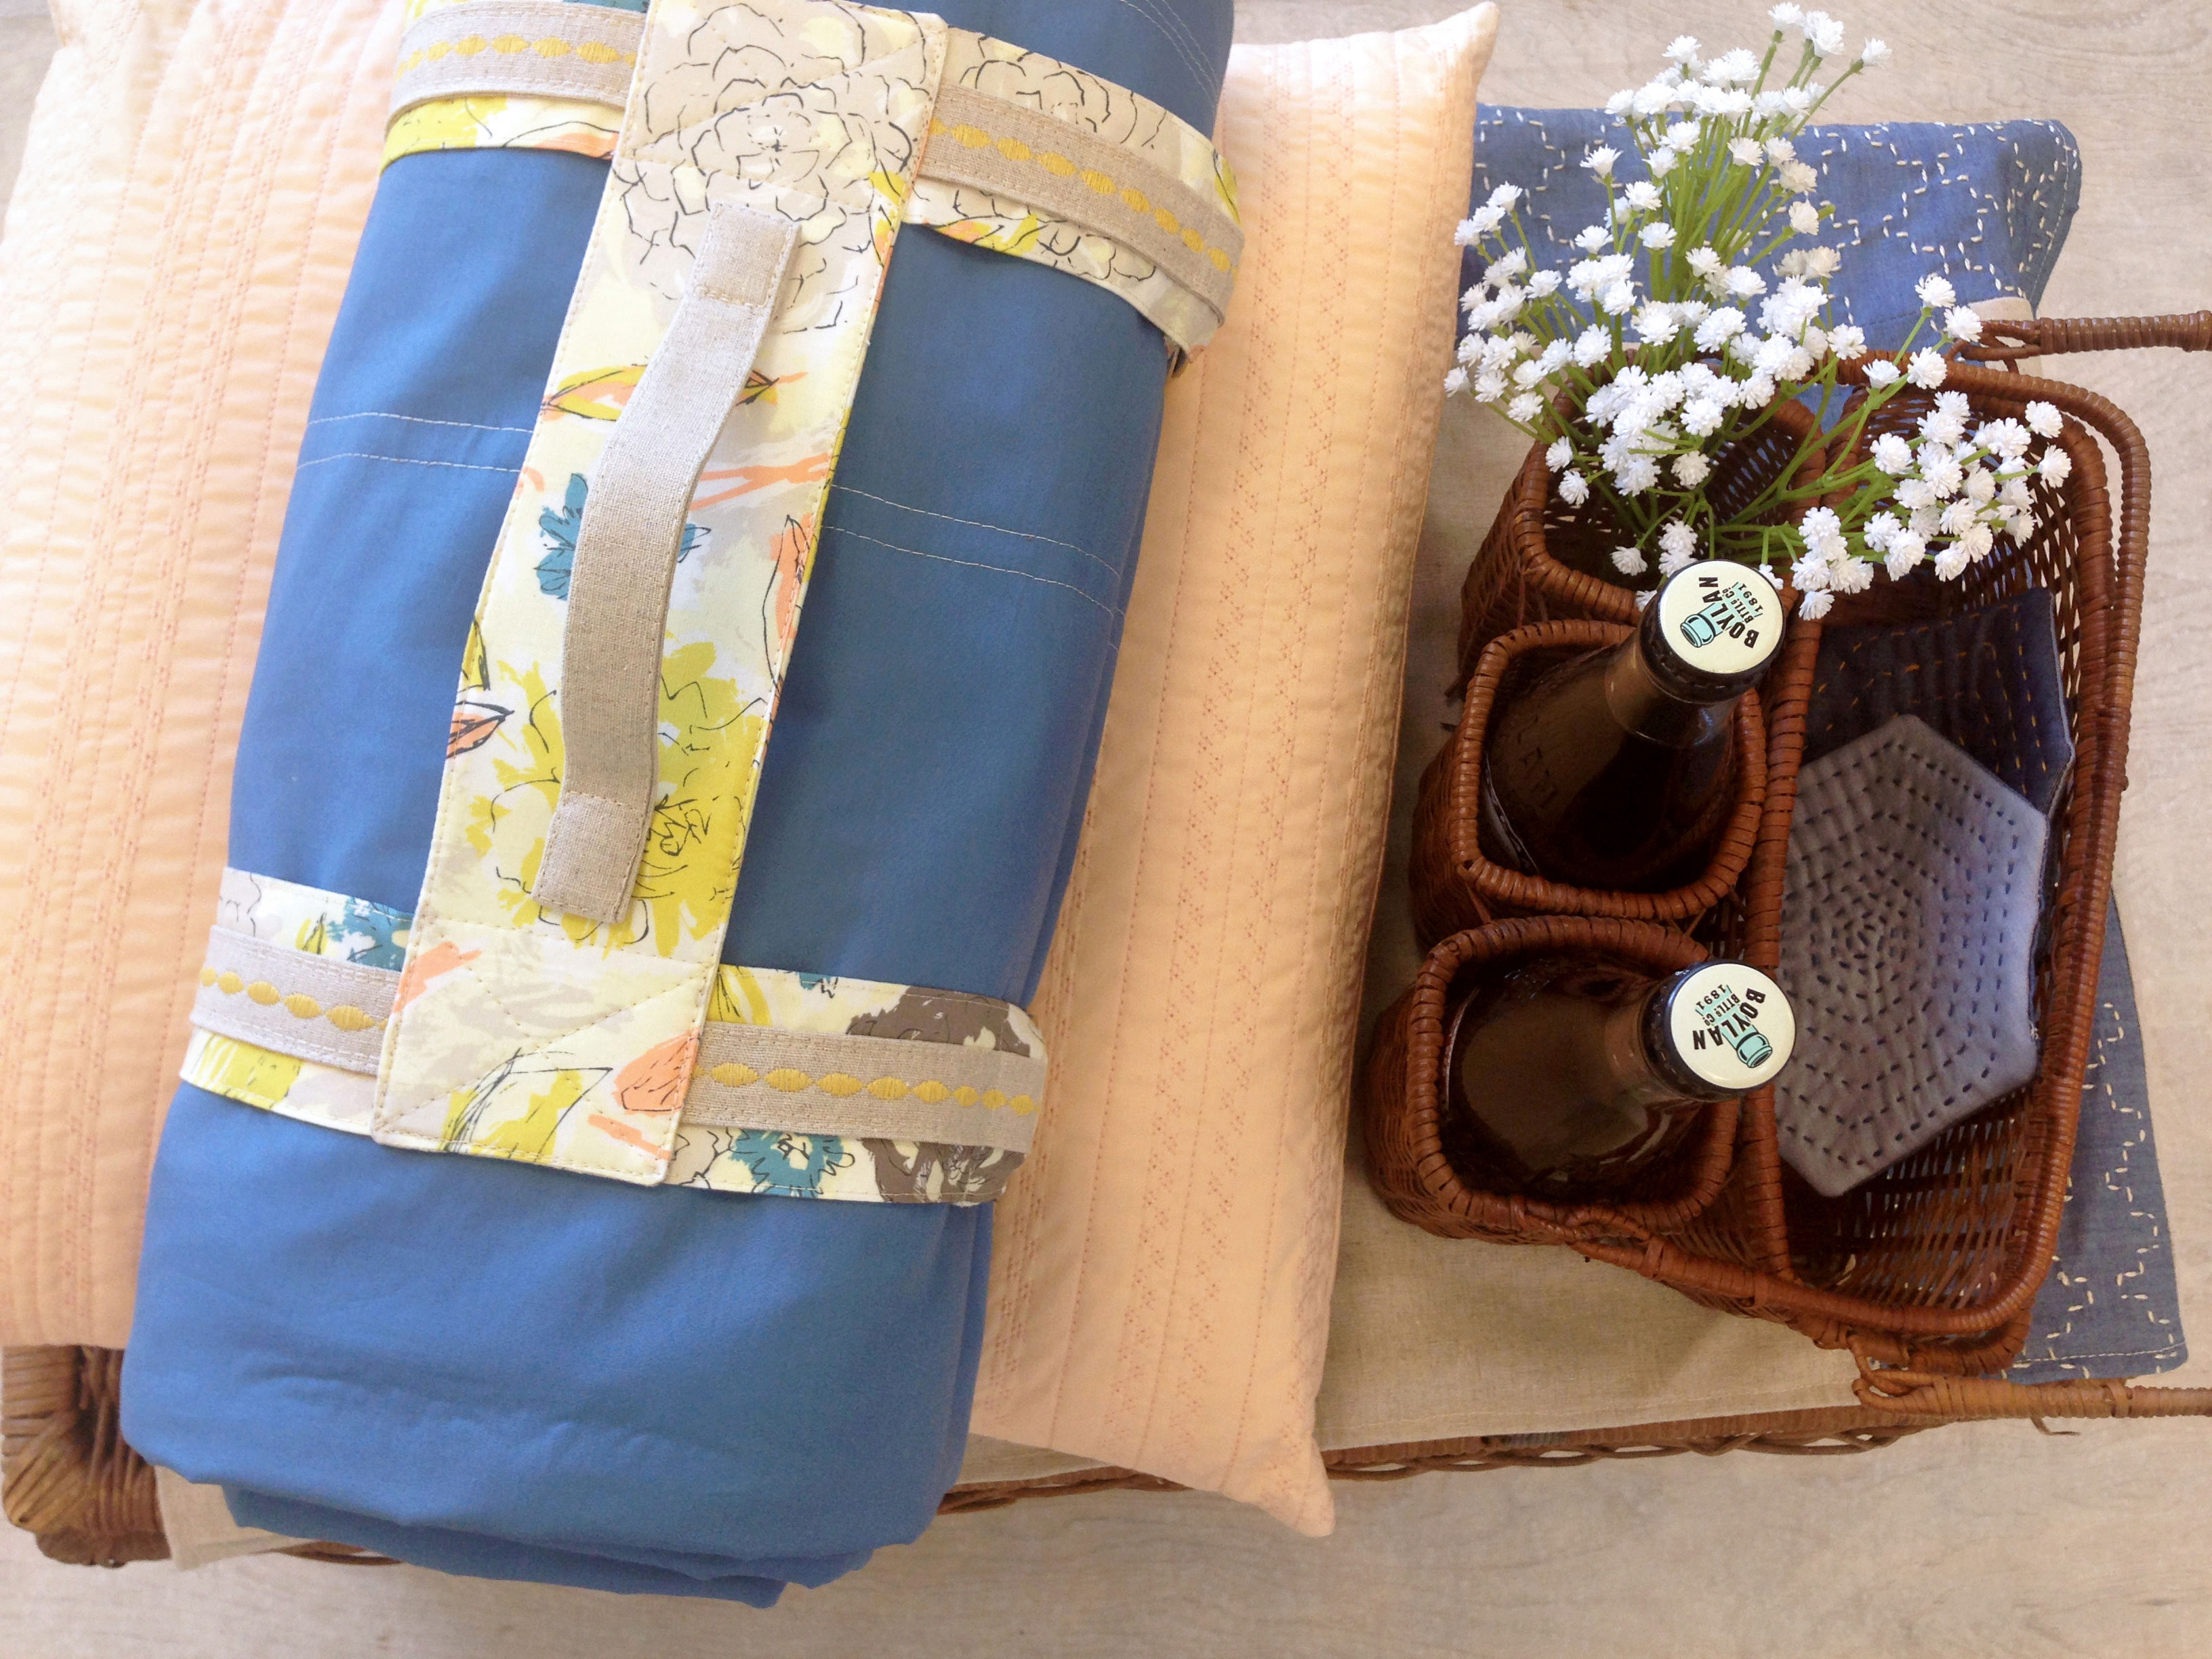
Enjoy making your picnic blanket carrier for you and for friends and family. It’s also nice to have a few spare blankets in your car when the weather gets cold and this carrier will keep
your blankets nice and neatly organized.
Happy Sewing,
AGF


One comment on “Blanket Carrier Tutorial from Art Gallery Fabrics”