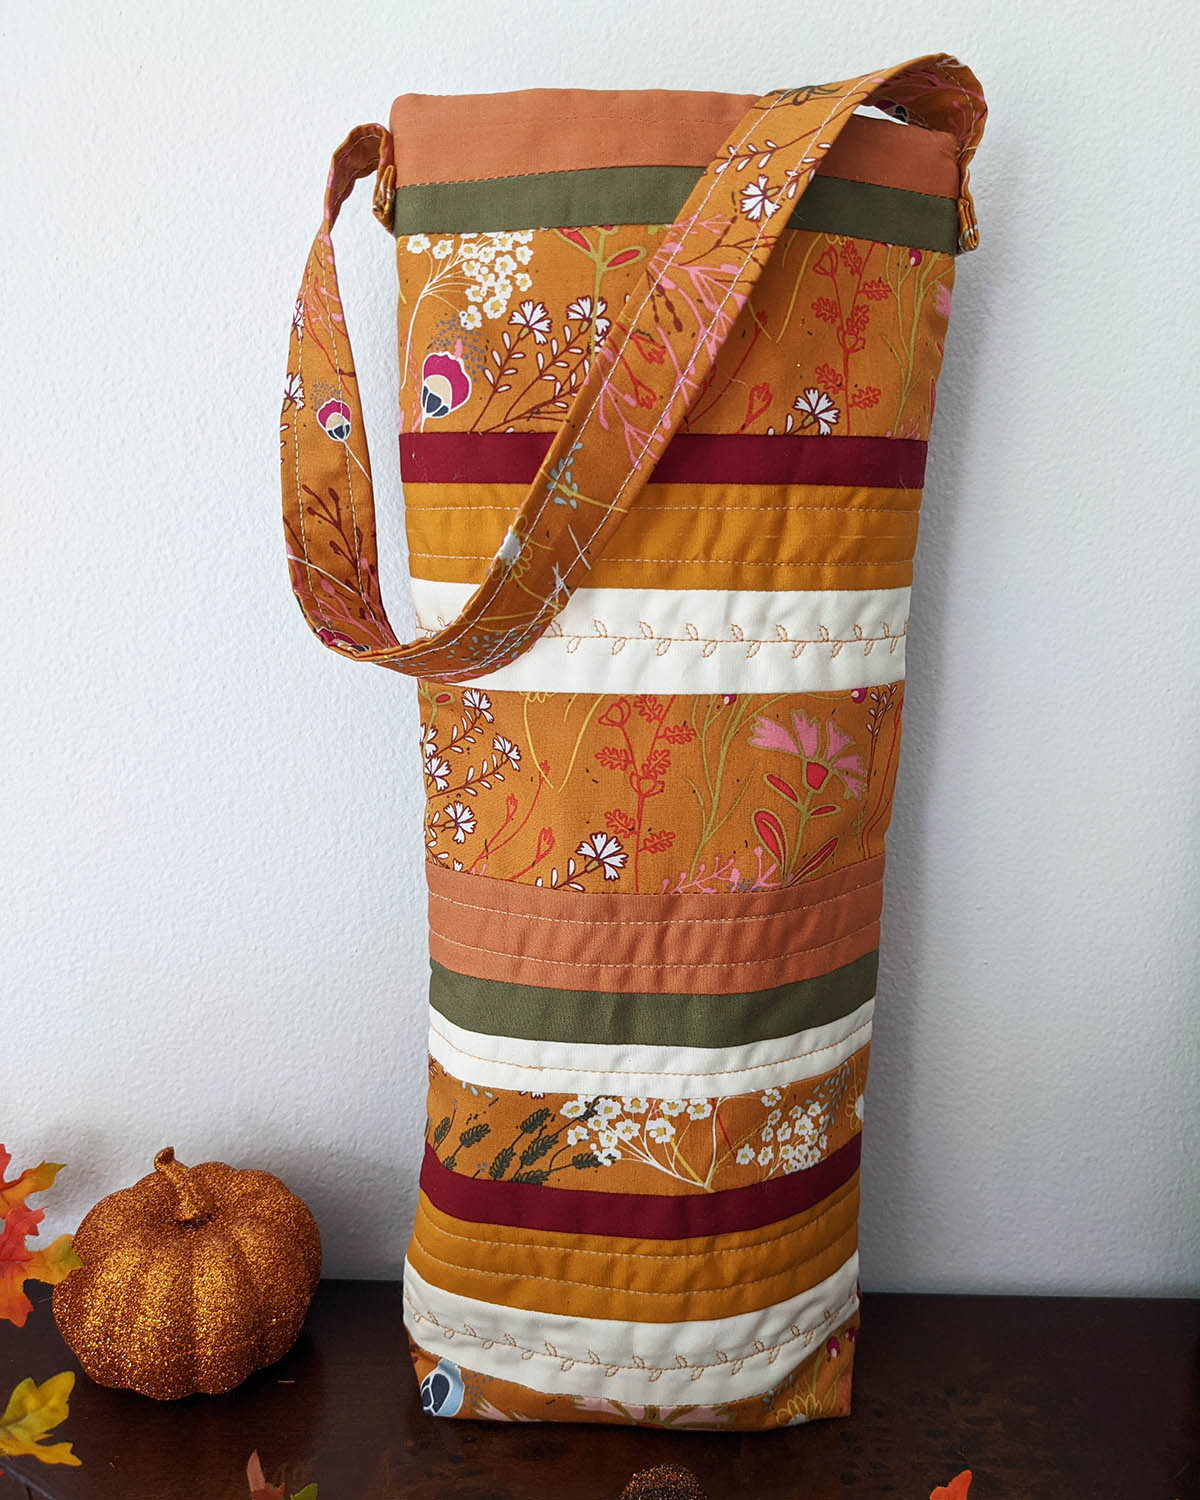
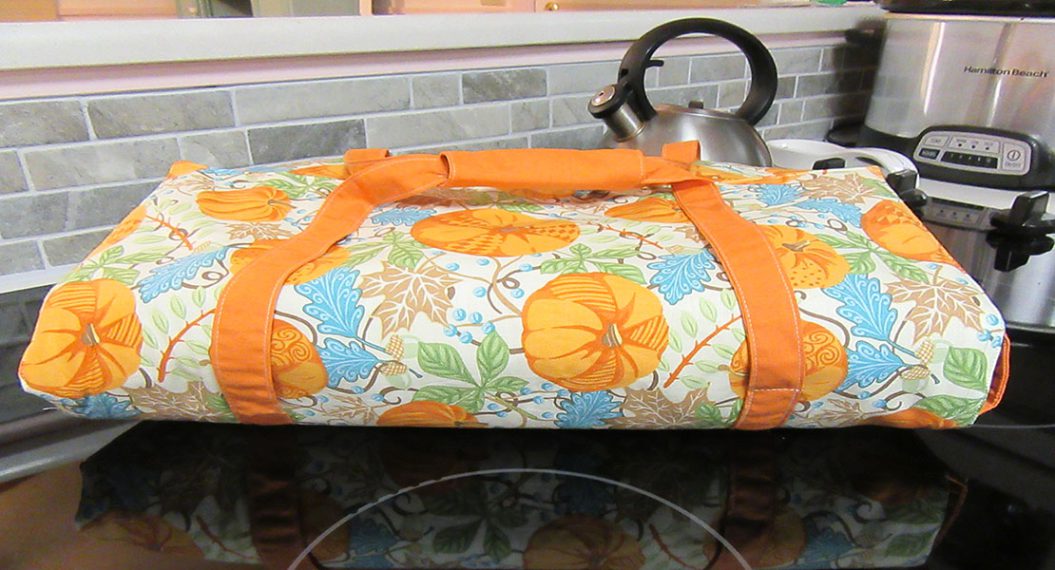
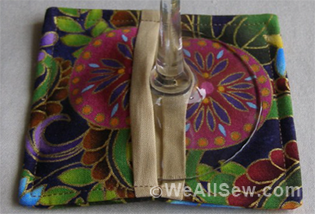
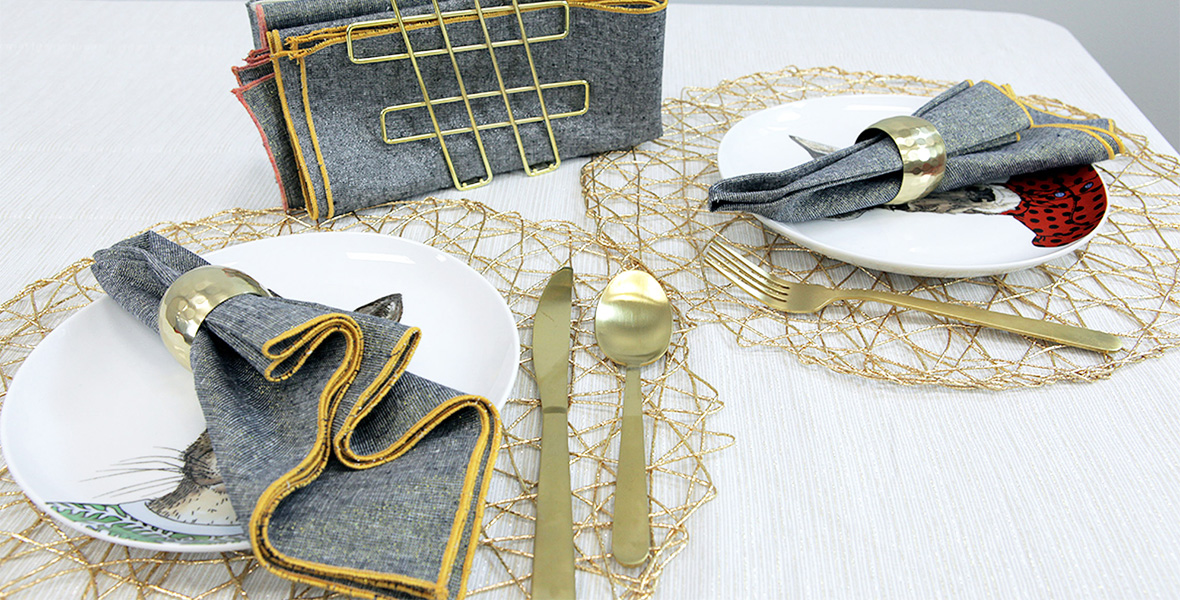
Wine Carrier
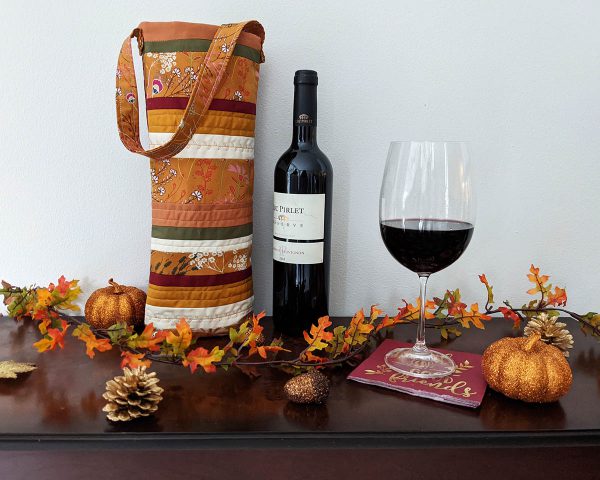
Thanksgiving is a Holiday where people come together to celebrate with delicious food and to be thankful. This year, I wanted to make a wine carrier. It’s a perfect gift to give on this Holiday season or use it if you’re in charge to bring the wine to the Thanksgiving dinner.
I used autumn themed prints for the wine carrier using our Trinkets Fusion, Meadow Trinkets, combined with AGF Pure Solids .
I made this wine carrier a bit taller than what a wine measures, so you can insert any preferred size bottle or if you just want to keep the wine as a surprise gift. Hope you enjoy making this wine carrier!
Materials to make for the wine carrier
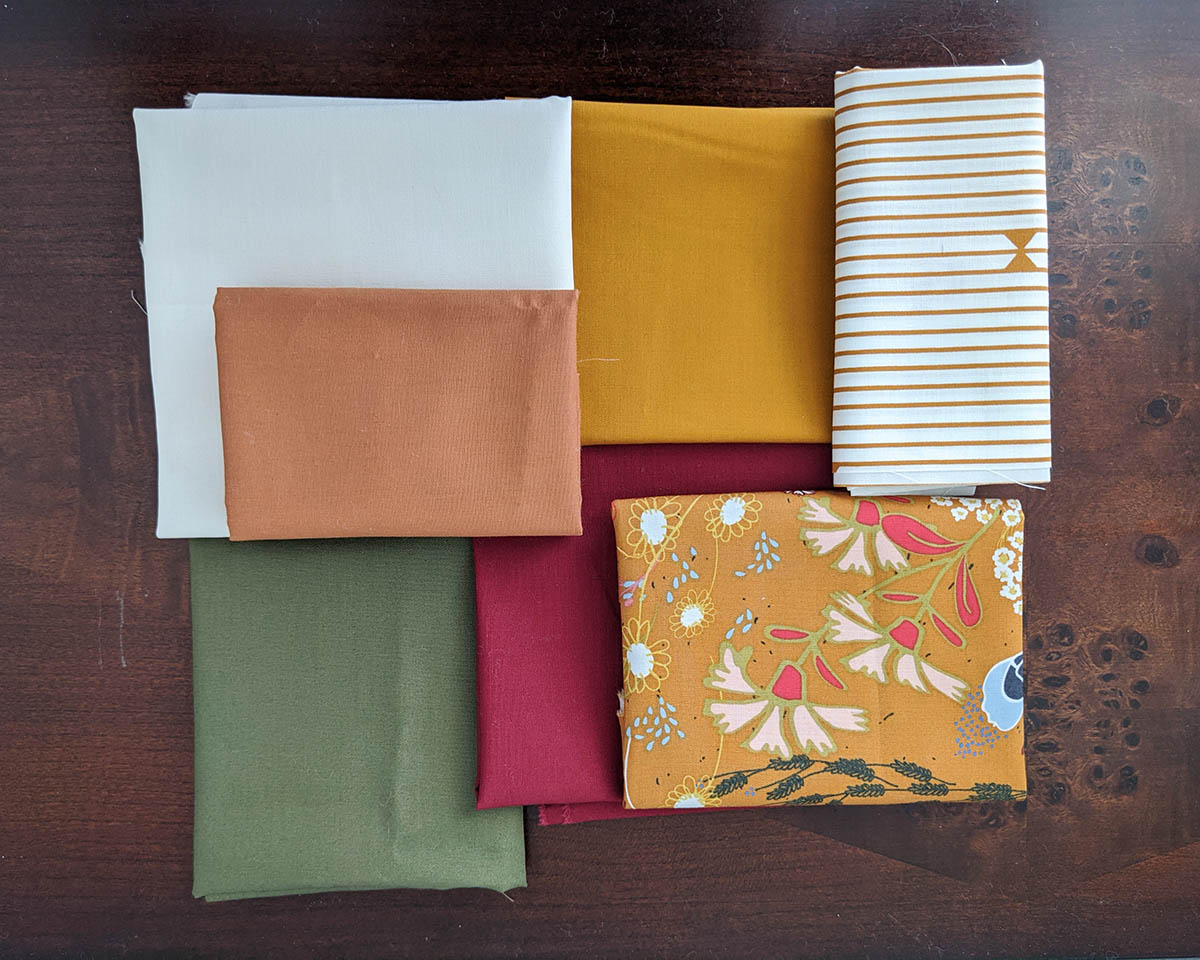
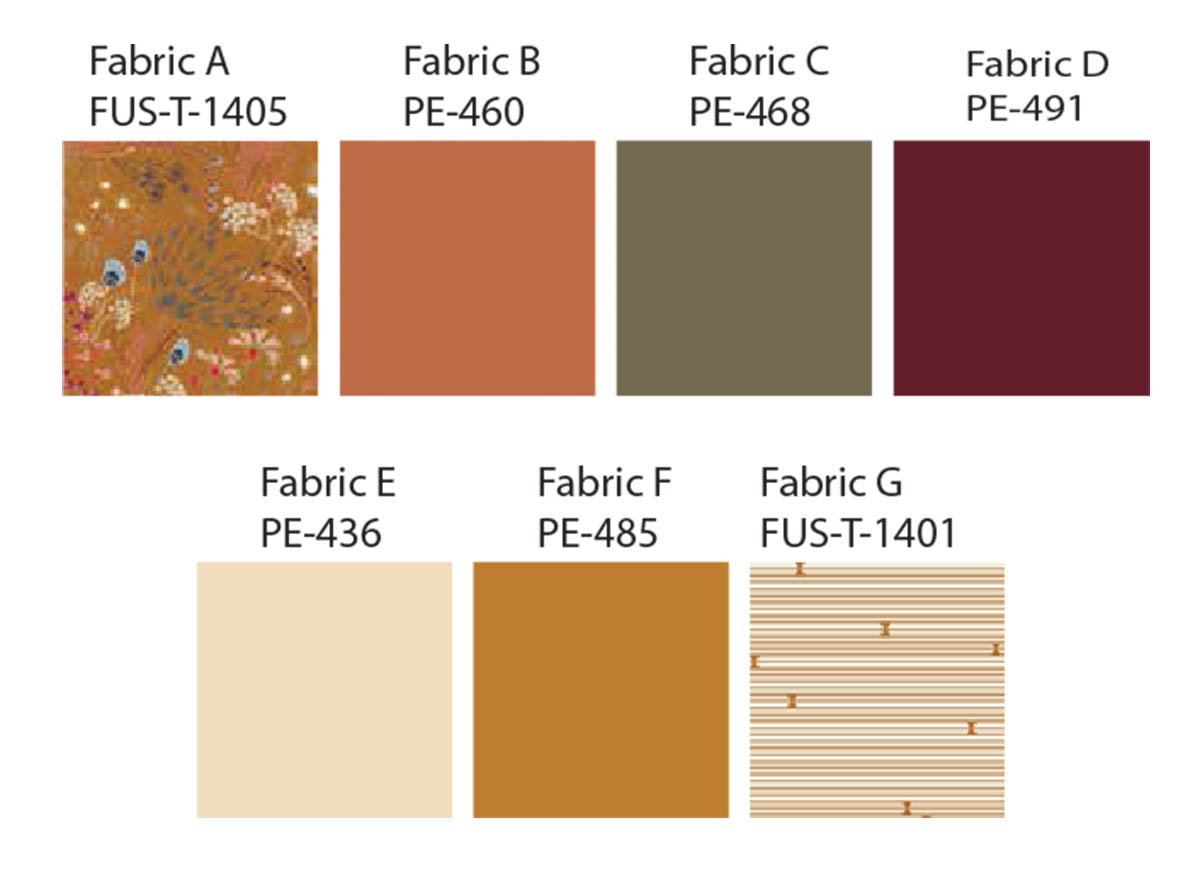
Fabric A FUS-T-1405 Fat Quarter
Fabric B PE-460 Fat Eighth
Fabric C PE-468 Fat Eighth
Fabric D PE-491 Fat Eighth
Fabric E PE-436 Fat Eighth
Fabric F PE-485 Fat Eighth
Fabric G FUS-T-1401 Fat Quarter
Additional material needed
Two (2) 10” x 20” rectangles of Batting.
Quilting and sewing thread.
Cutting Directions
Three (3) 7’’ x 2 1/2’’ rectangles from fabric A.
One (1) 7’’ x 1 1/2’’ rectangle from fabric A.
Two (2) 7’’ x 1 1/2’’ rectangles from fabric B.
Two (2) 7’’ x 1’’ strips from fabric C.
Two (2) 7’’ x 1’’ strips from fabric D.
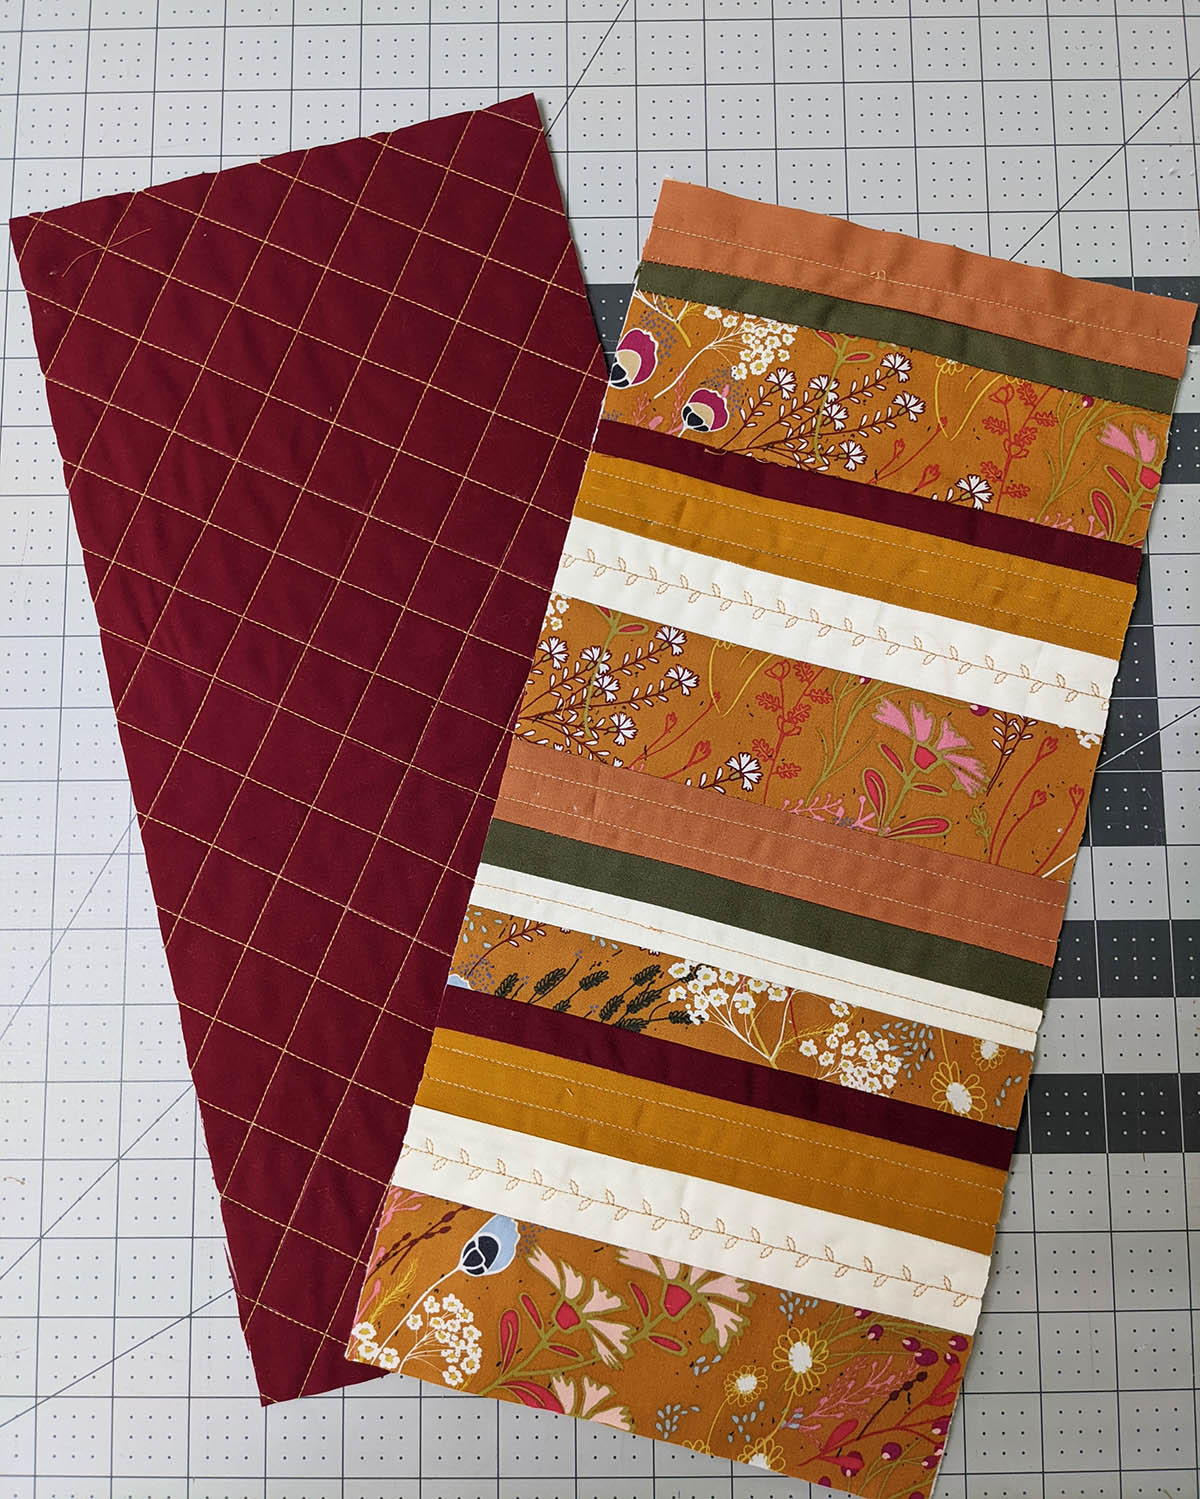
One (1) 7’’ x 15 1/2’’ rectangle from fabric D.
One (1) 7’’ x 1’’ strip from fabric E.
Two (2) 7’’ x 1 1/2’’ rectangles from fabric E.
Two (2) 7’’ x 1 1/2’’ rectangles from fabric F.
One (1) 18‘’ x 4‘’ rectangle from fabric A (strap).
Two (2) 7 1/2’’ x 16’’ rectangles from fabric G (lining).
Instructions to sew a wine carrier
Step one:
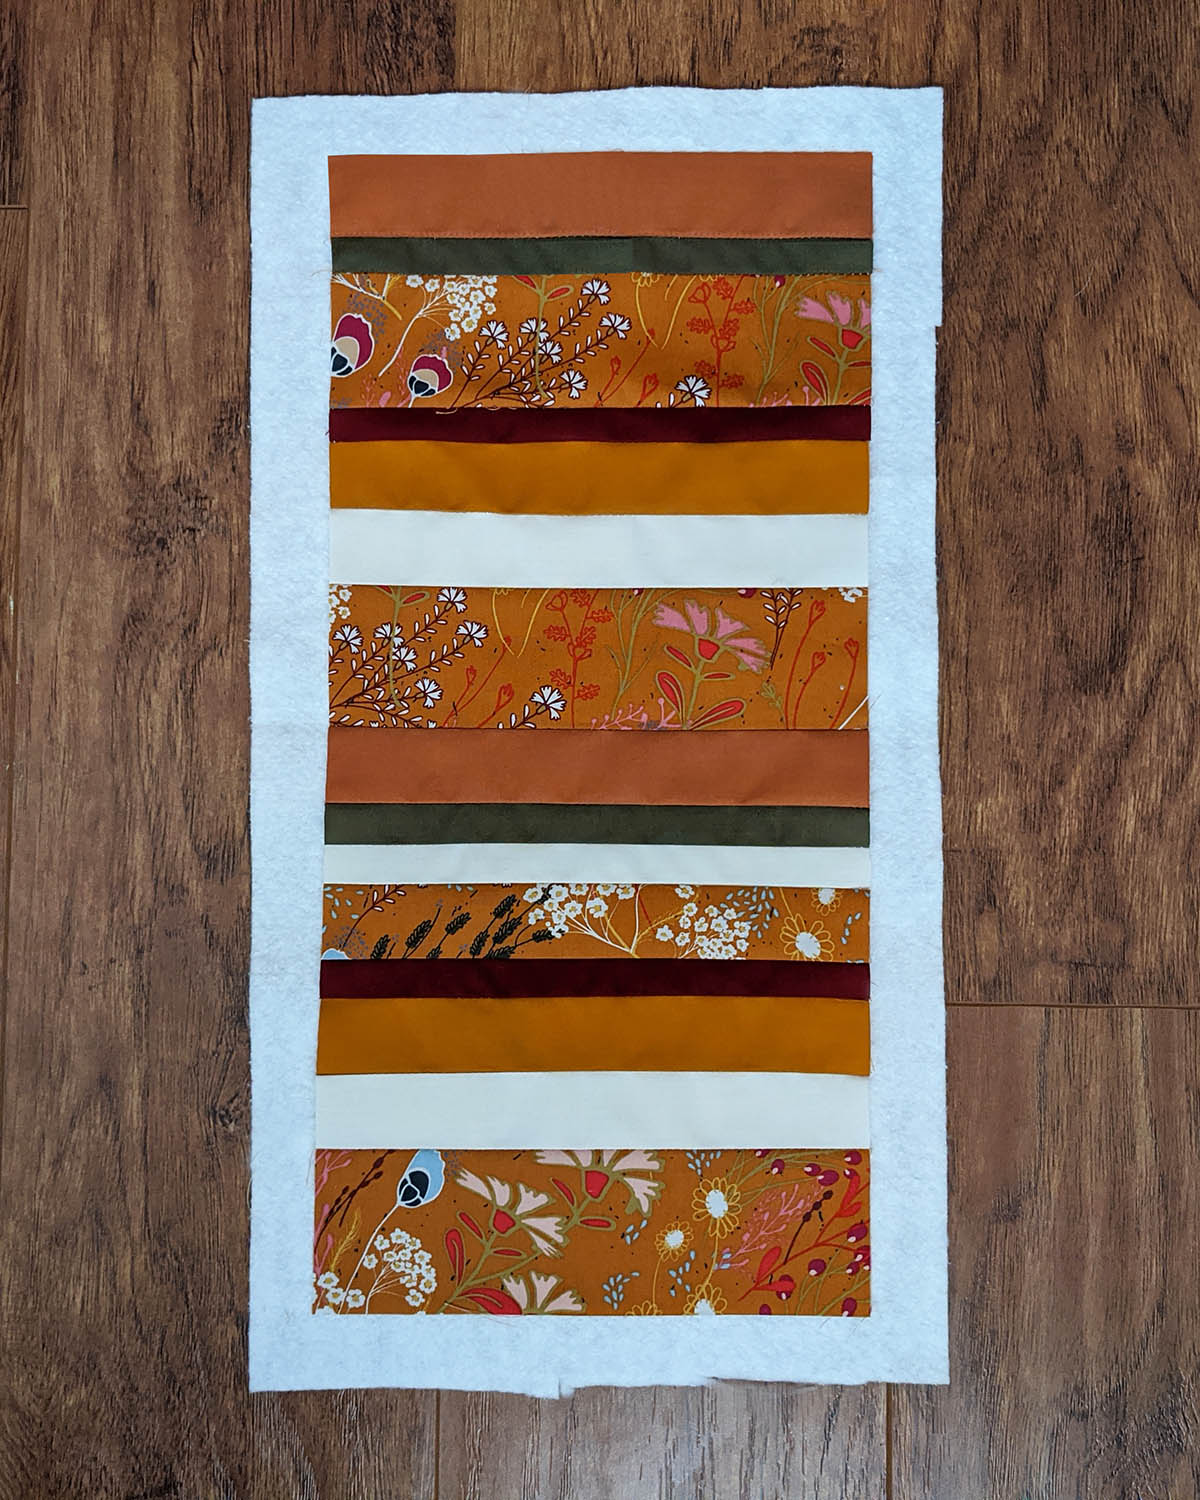
Start joining your strips in the following order:
B-C-A-DF-E-A-B-C-E-A-D-F-E-A
Step Two:
Once you finish sewing all of your strips, take a piece of batting and place it on the wrong side of your assembled piece. Pin all around and on the center so your fabric doesn’t shift when quilting.
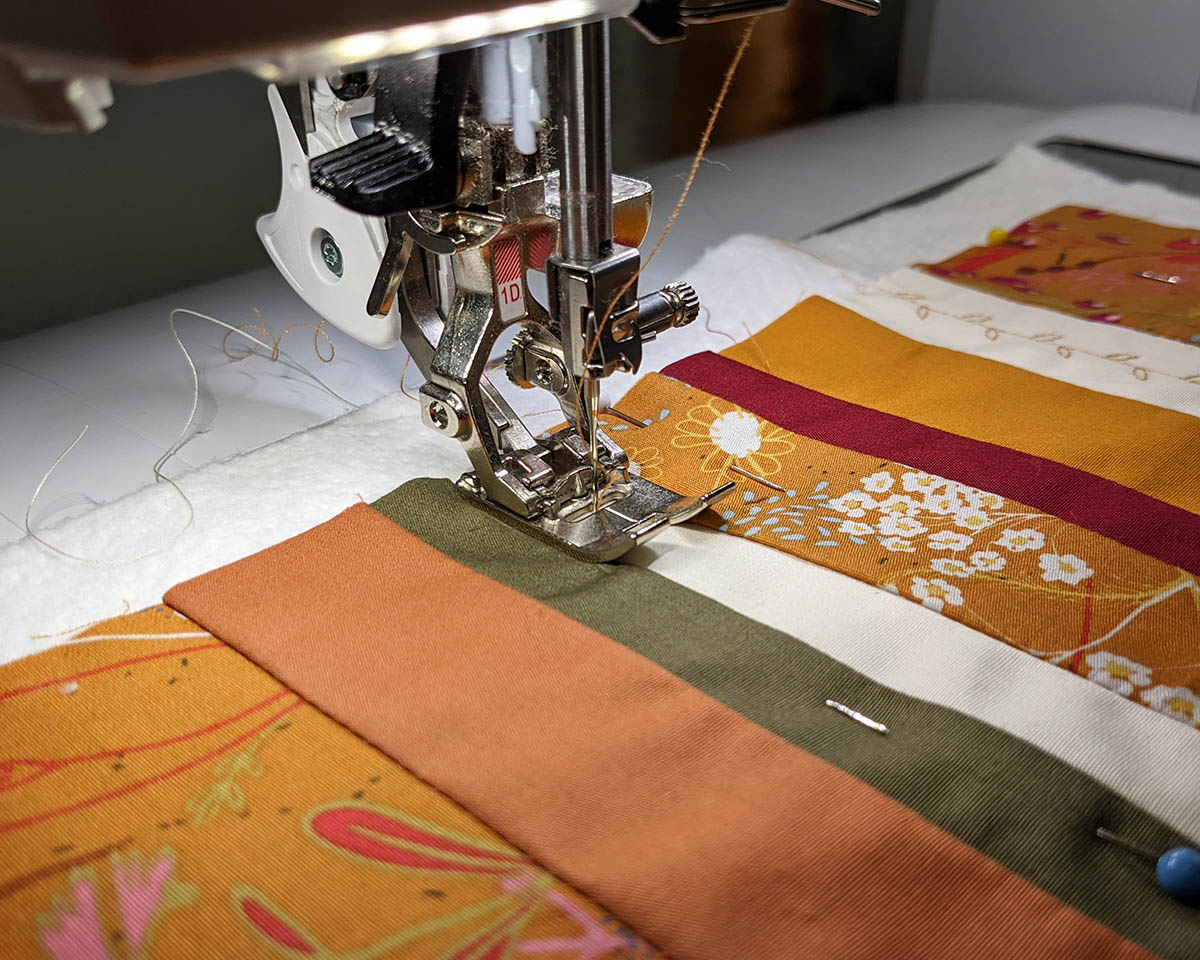
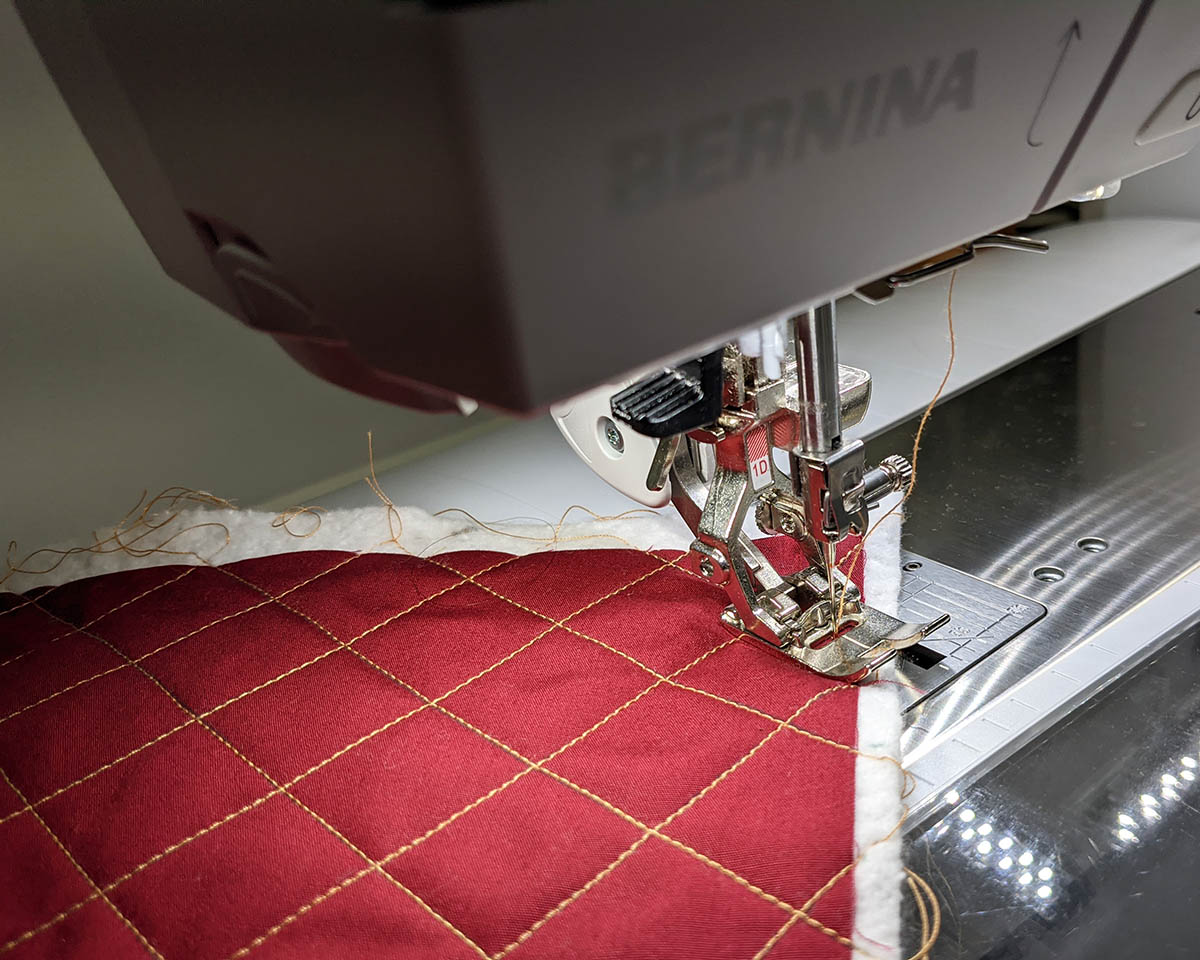
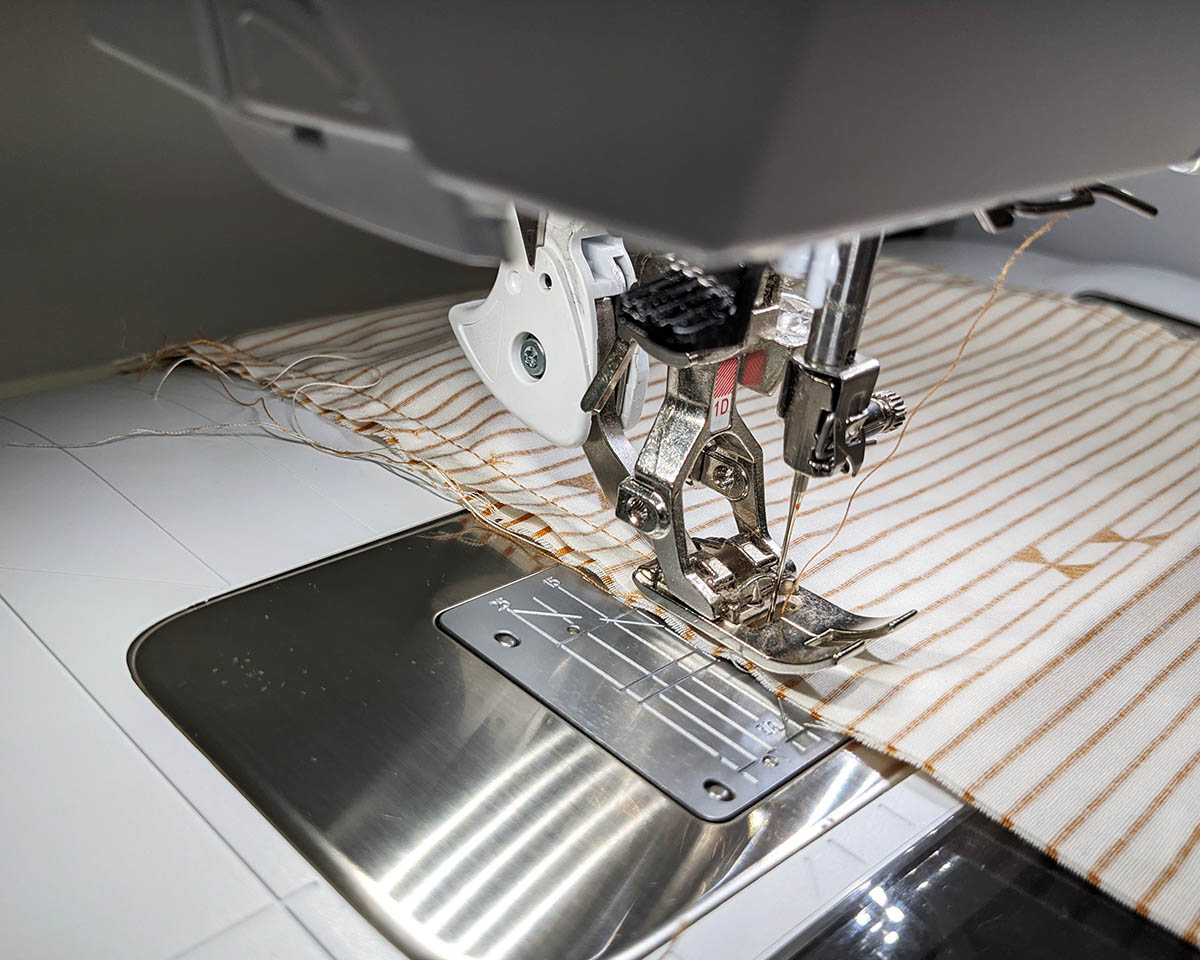
I wanted to use a quilting motive that would match with my Meadow Trinkets fabric, so I chose the decorative stitch #113 which creates a very delicate leaf motif.
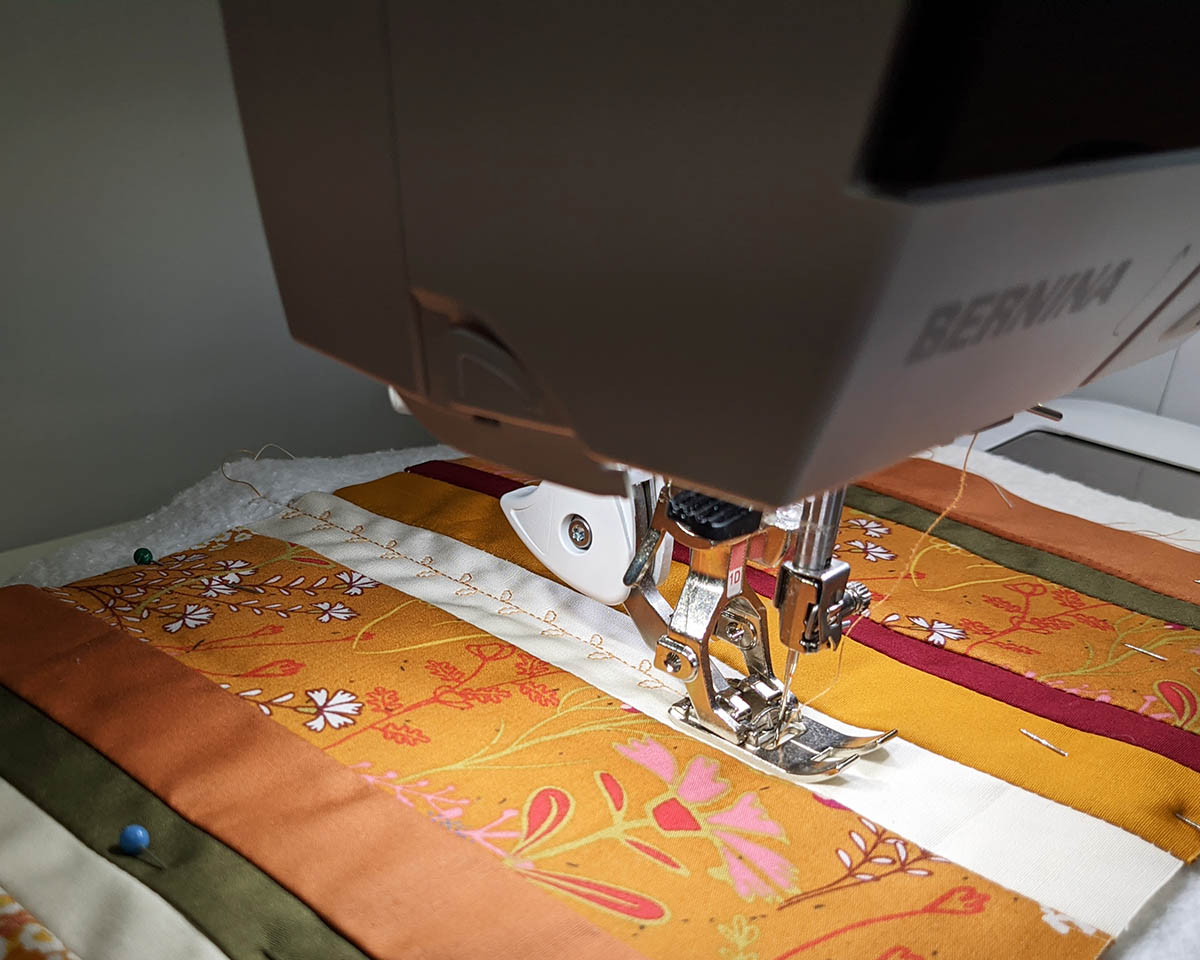
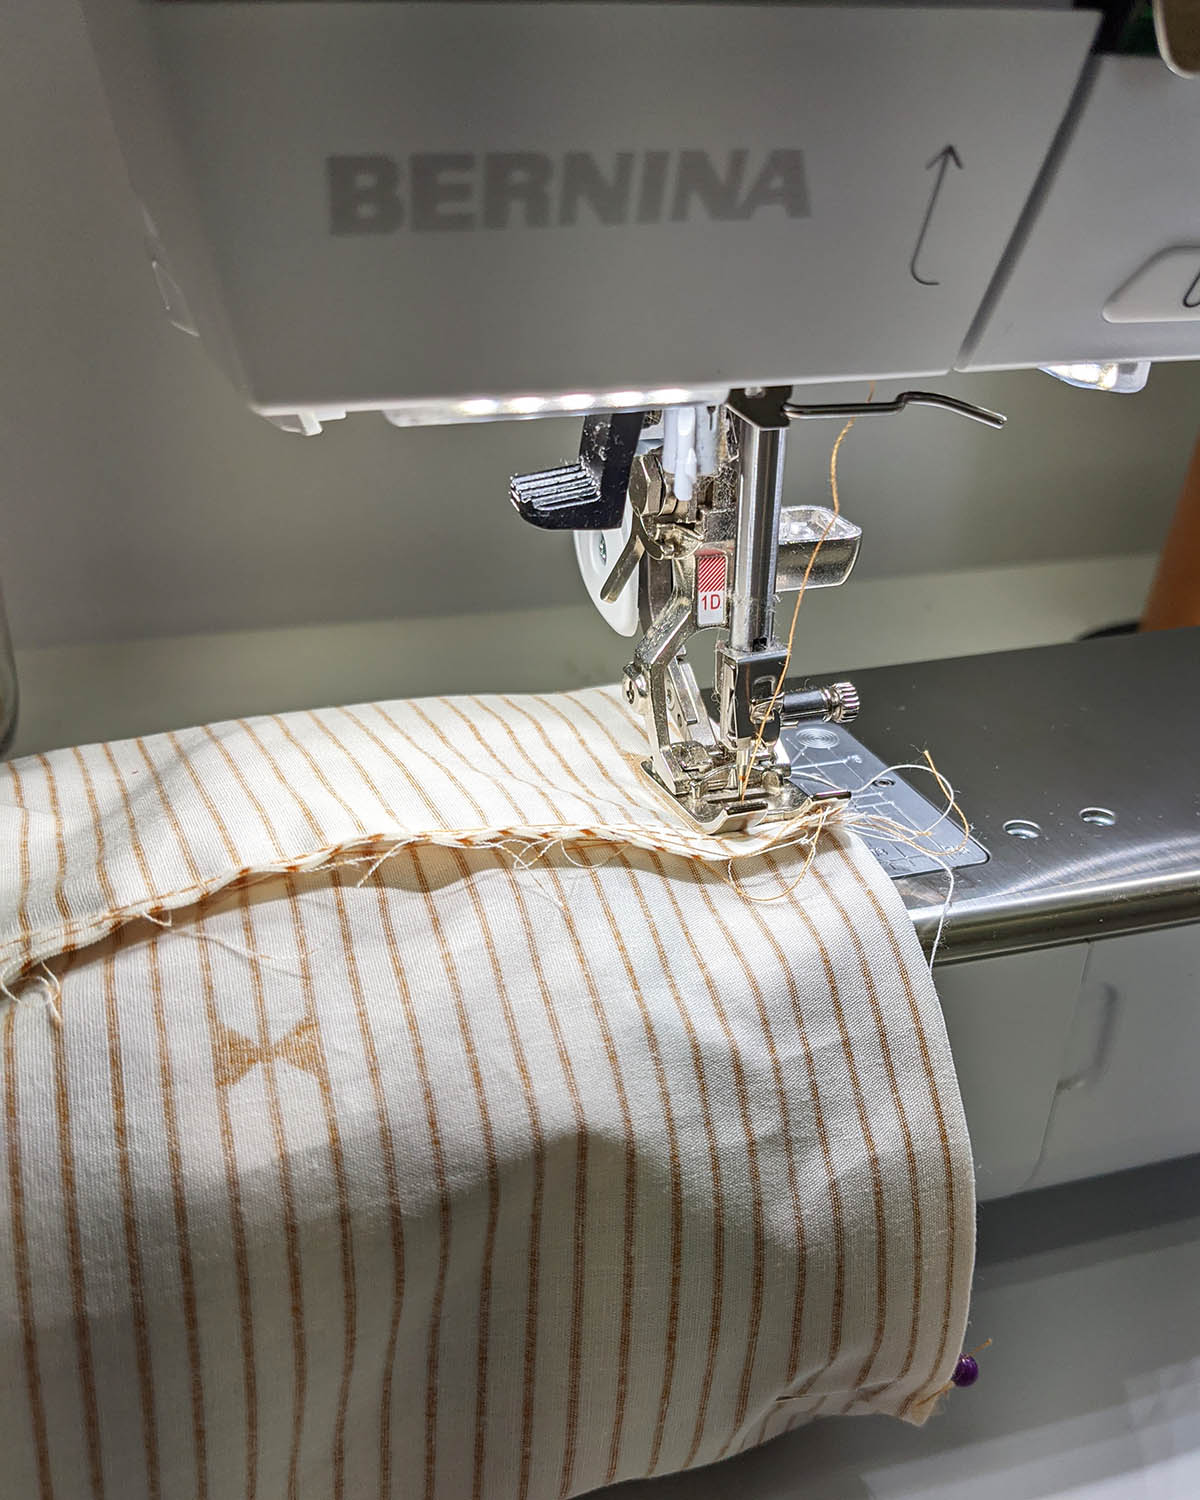
I quilted certain strips with this motif and then did some straight stitching using the Reverse pattern foot #1D to make perfect stitch lines.
Step 3:
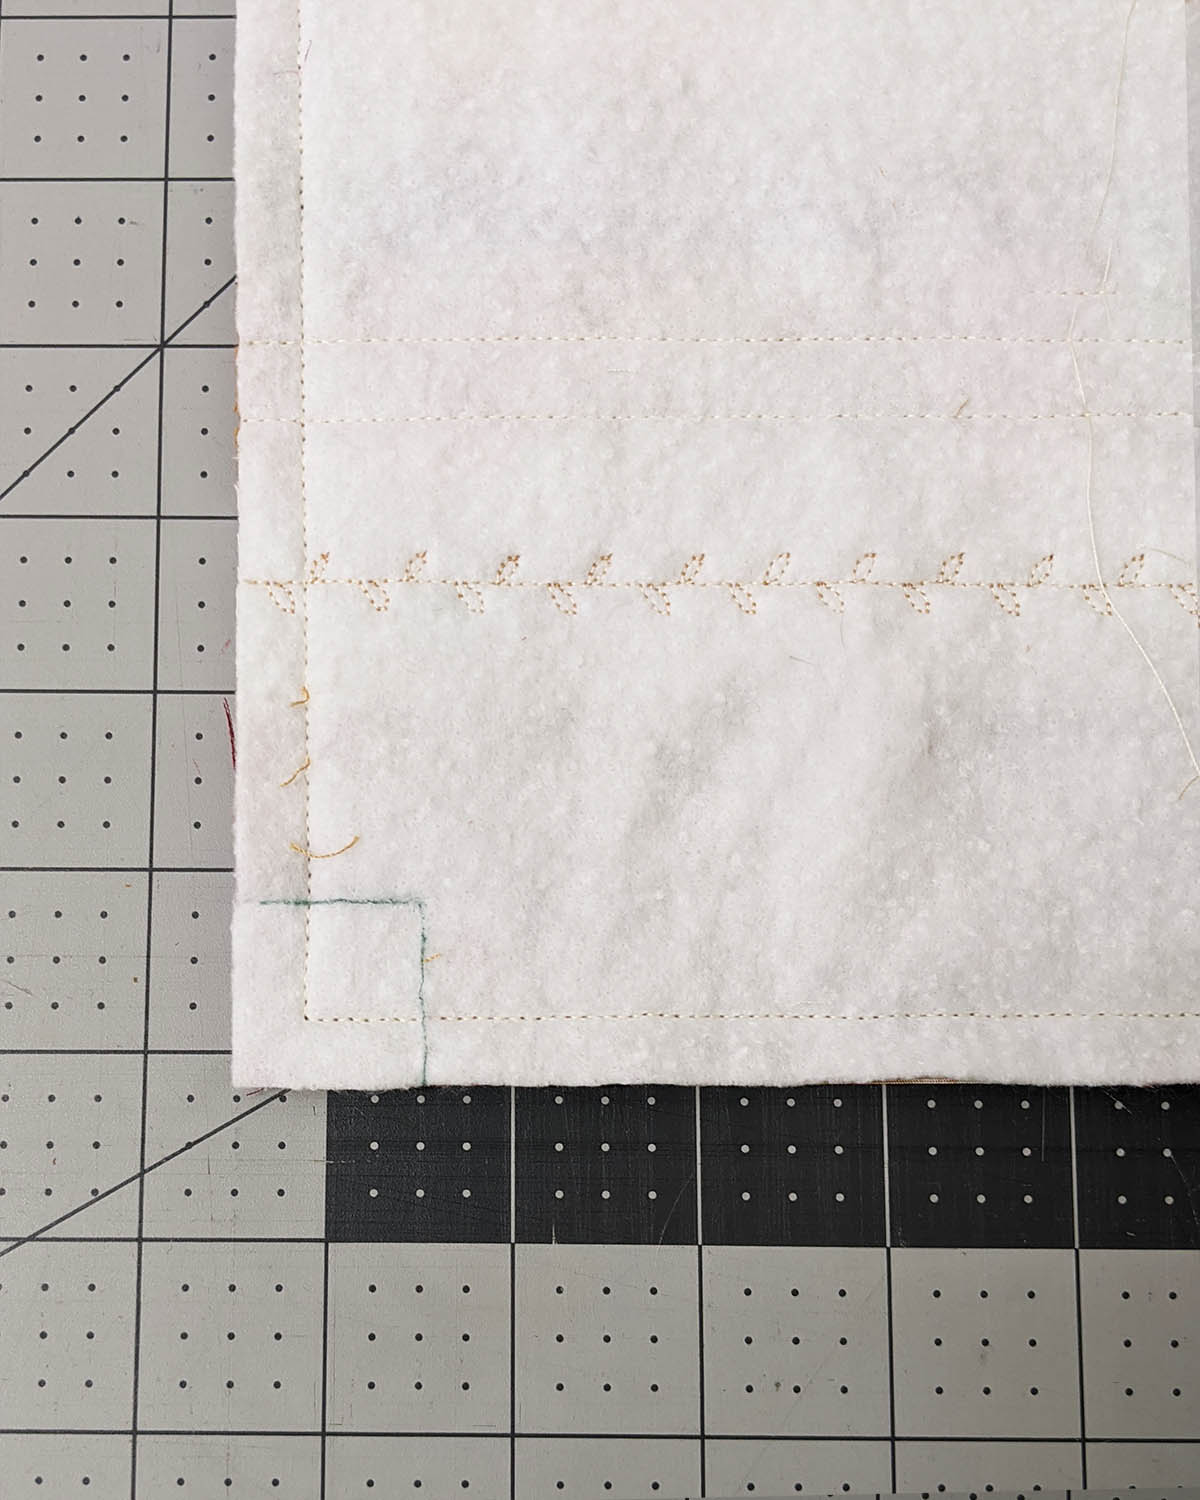
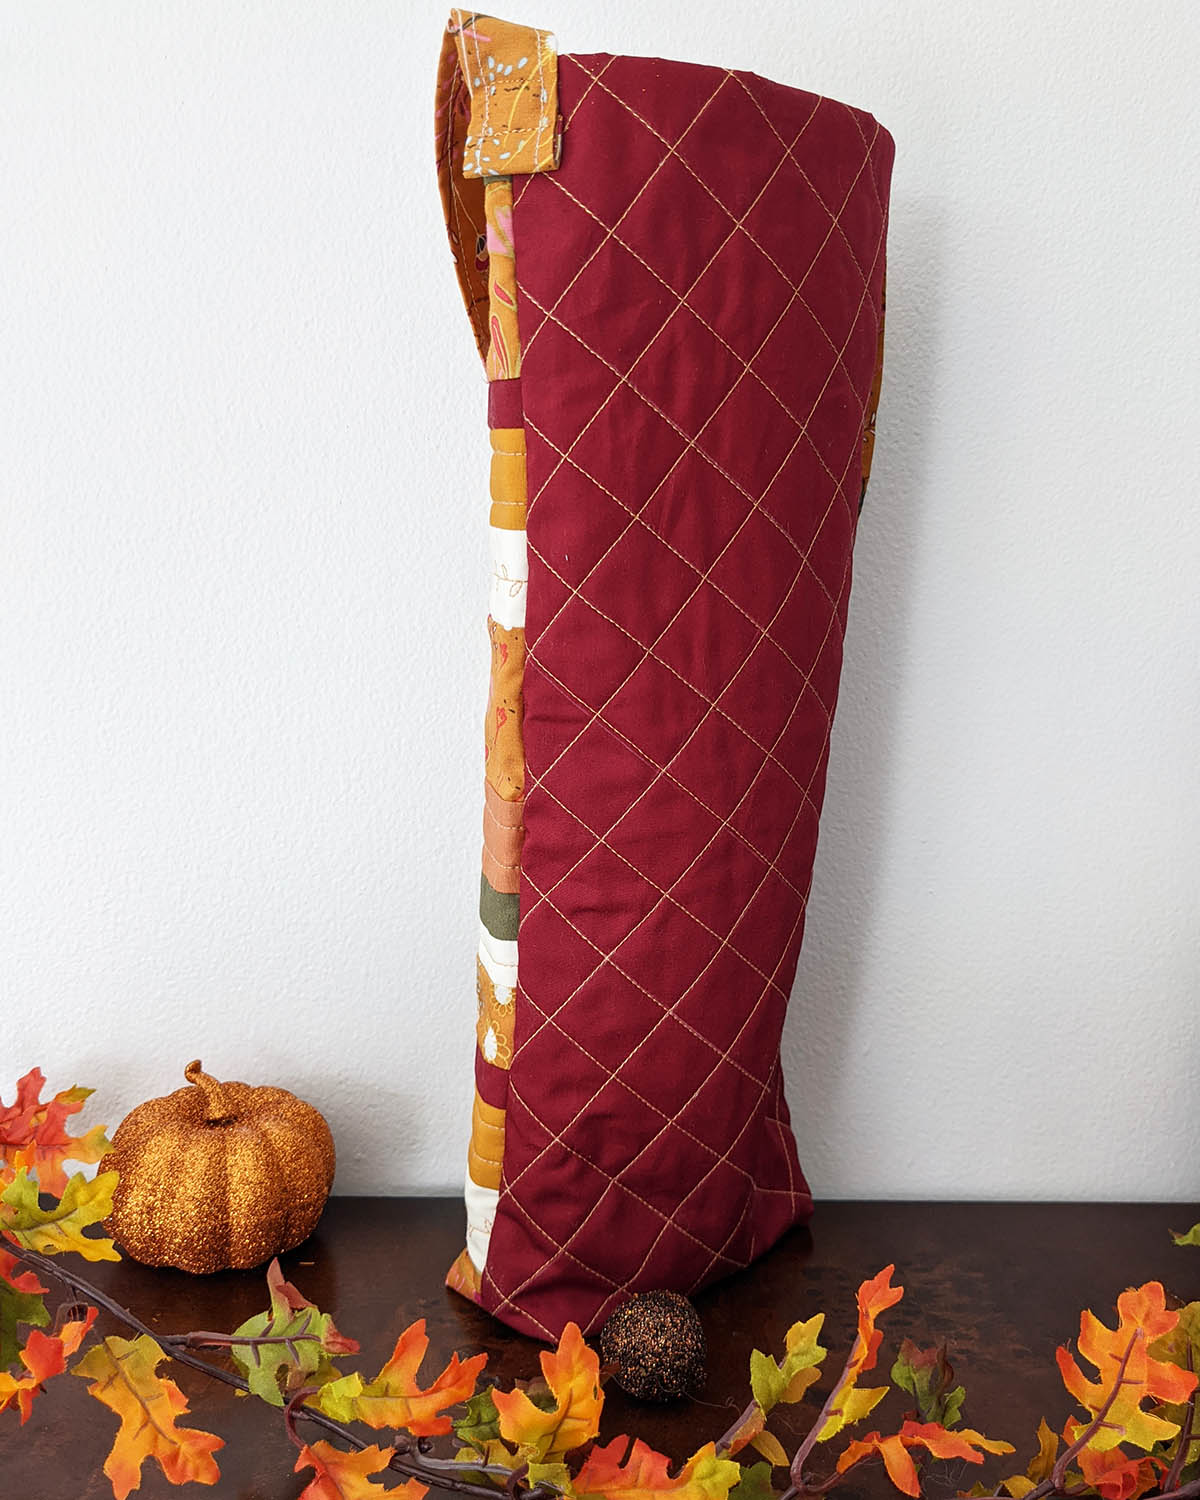
Take your 7’’ x 15 1/2’’ rectangle from fabric D, which is your backing fabric, and place batting on the wrong side of the fabric and pin all around.
Use your preferred quilt motif. In my case, I did a single diamond.
But first, I marked my lines on my fabric with a water soluble pen.
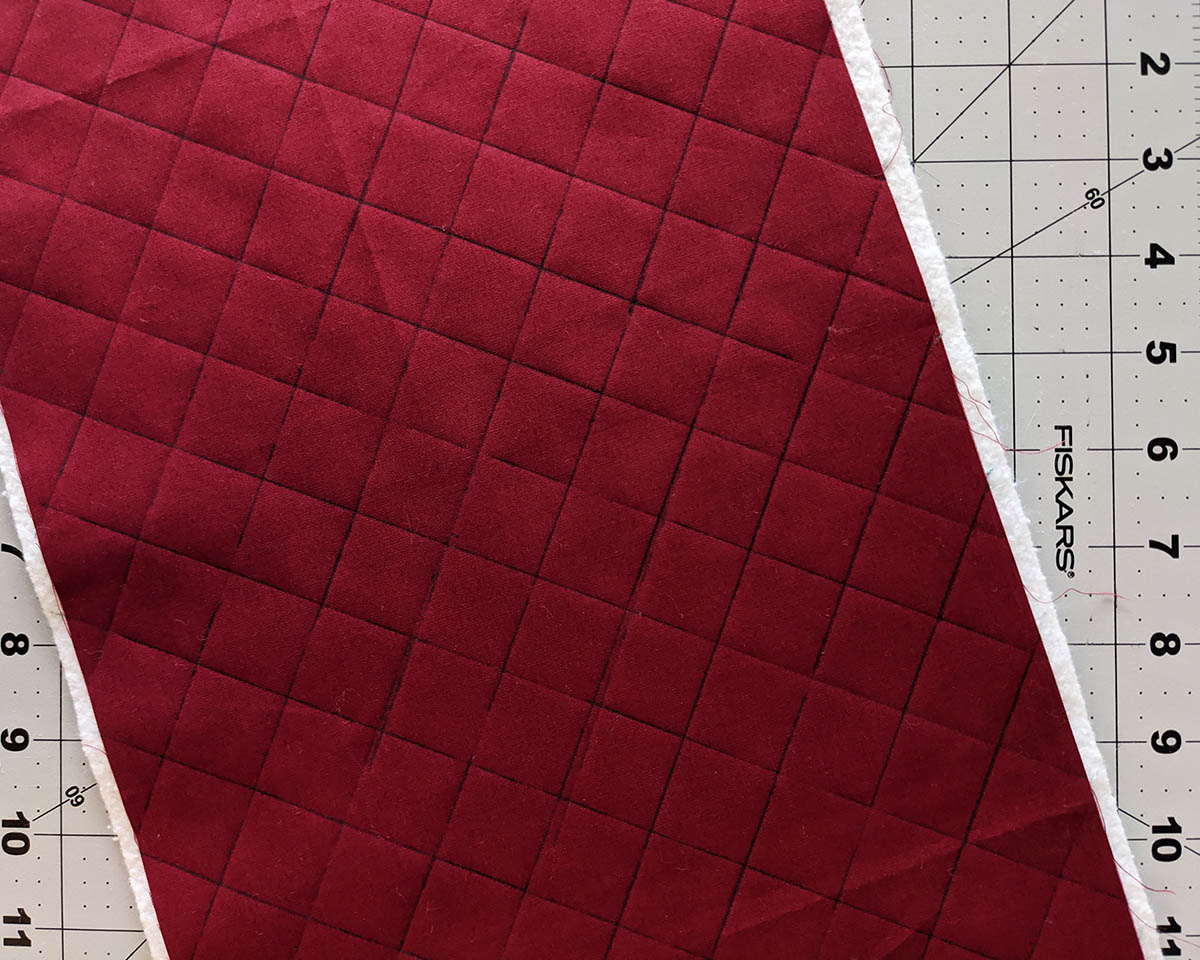
Then, using the Reverse pattern foot #1D I was able to make perfect stitch lines. My lines were about 1” distance from each other and I picked a mustard color thread to make the fabric and quilt motif pop.
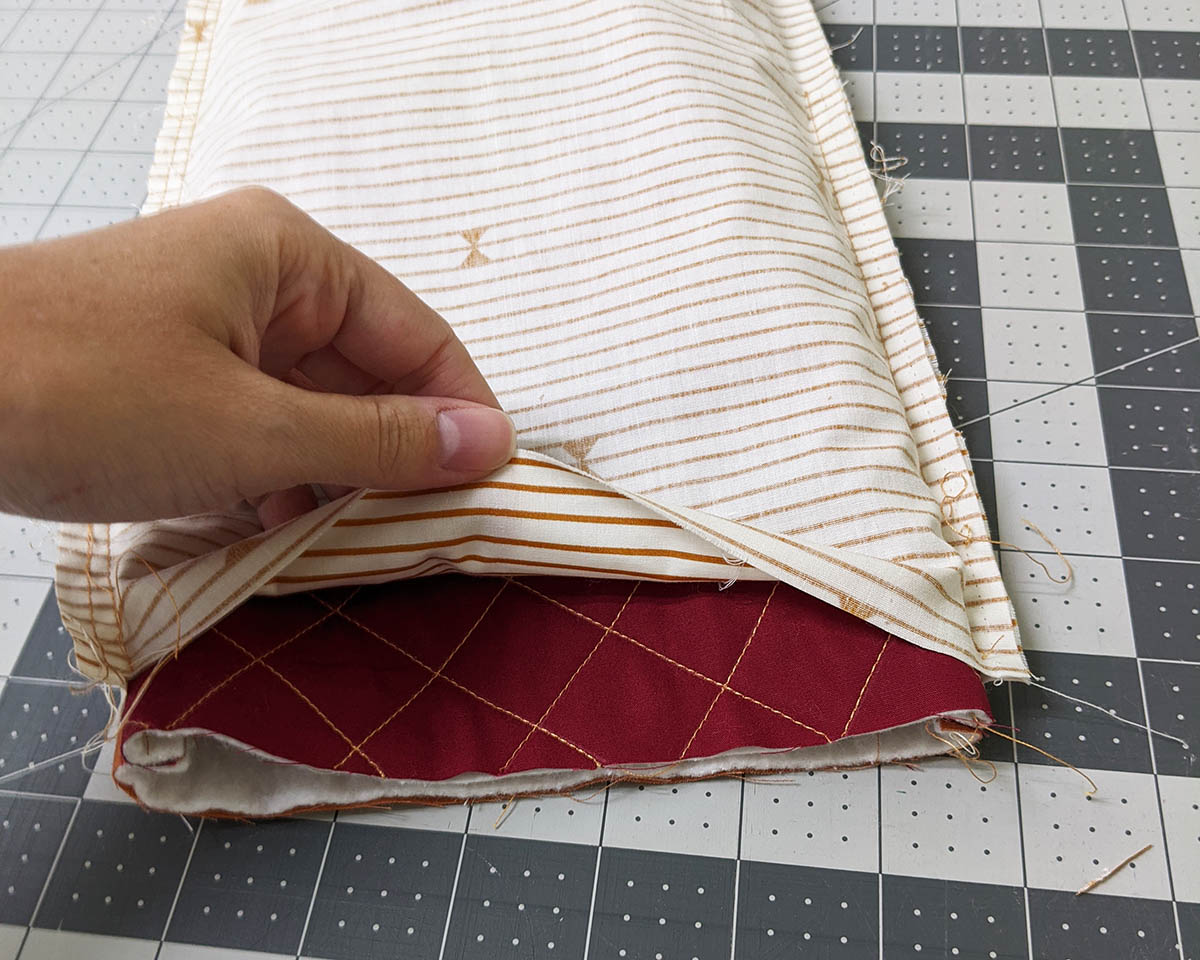
Now, you have both of your pieces quilted and ready to be sewn together.
Step 4:
Place both of your quilted pieces facing right sides together and pin all around.
You will sew the sides and the bottom at a 1/4”.
Step 5:
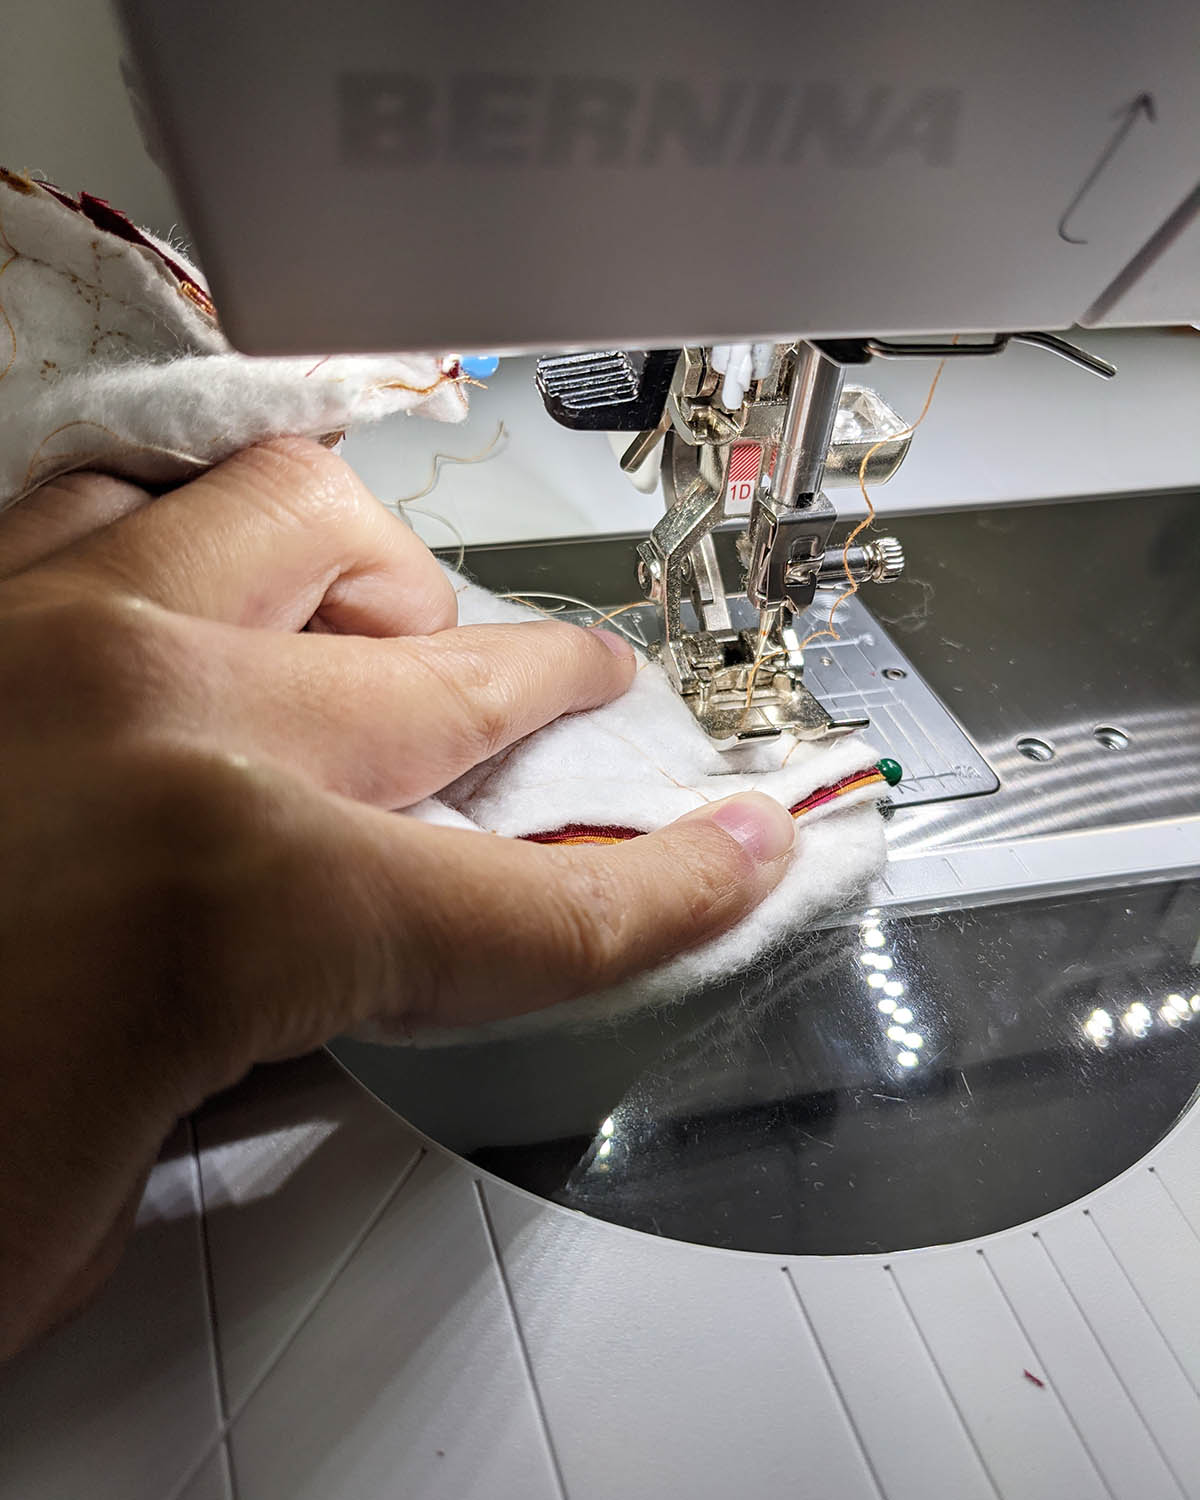
Once you sew all three side, make a 1” square mark on each corner of your piece.
Cut the 1” square carefully. Bring the side and bottom seams together, matching the seams.
Stitch through all layers along the cut edge to close the corner. Backstitch at the beginning, where the seams match, and at the end. If desired, reinforce by stitching again for extra strength.
Set your piece aside.
Step 6:
Take your lining fabric and place them right sides facing each other and pin.
Sew at a 1/4” seam allowance your sides and bottom leaving a about 3”-4” opening so you can turn your piece inside out.
Make your boxed corners on your lining piece as well.
Step 7:
Take the main piece and insert it on the lining piece, making sure they’re right sides facing each other.
Pin your piece making sure your seams are matching. Remove the free-arm table of your machine to sew more comfortably and be able to rotate your wine carrier.
Sew the top of your wine carrier at a 1/4” seam allowance.
Step 8:
Take you wine carrier out of the machine and flip it inside out very carefully. Close the opening of you lining piece.

Insert the lining in the wine carrier. Press and steam.
Step 9:
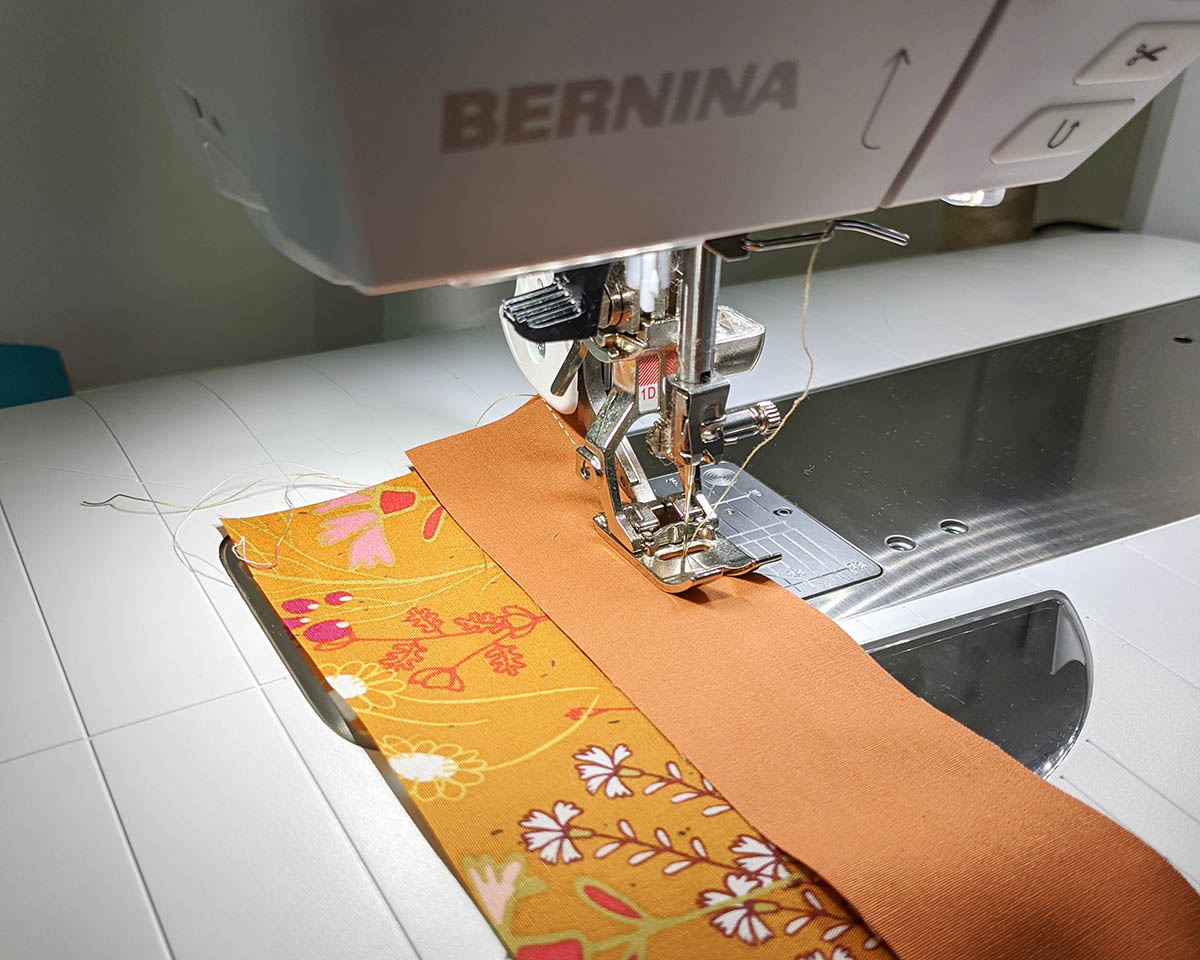
To make your handle, take the 18‘’ x 4‘’ rectangle from fabric A and fold the strip in half lengthwise to create a crease in the center.
Then, open the strip and fold the edges towards the center crease. Fold the folded edges.
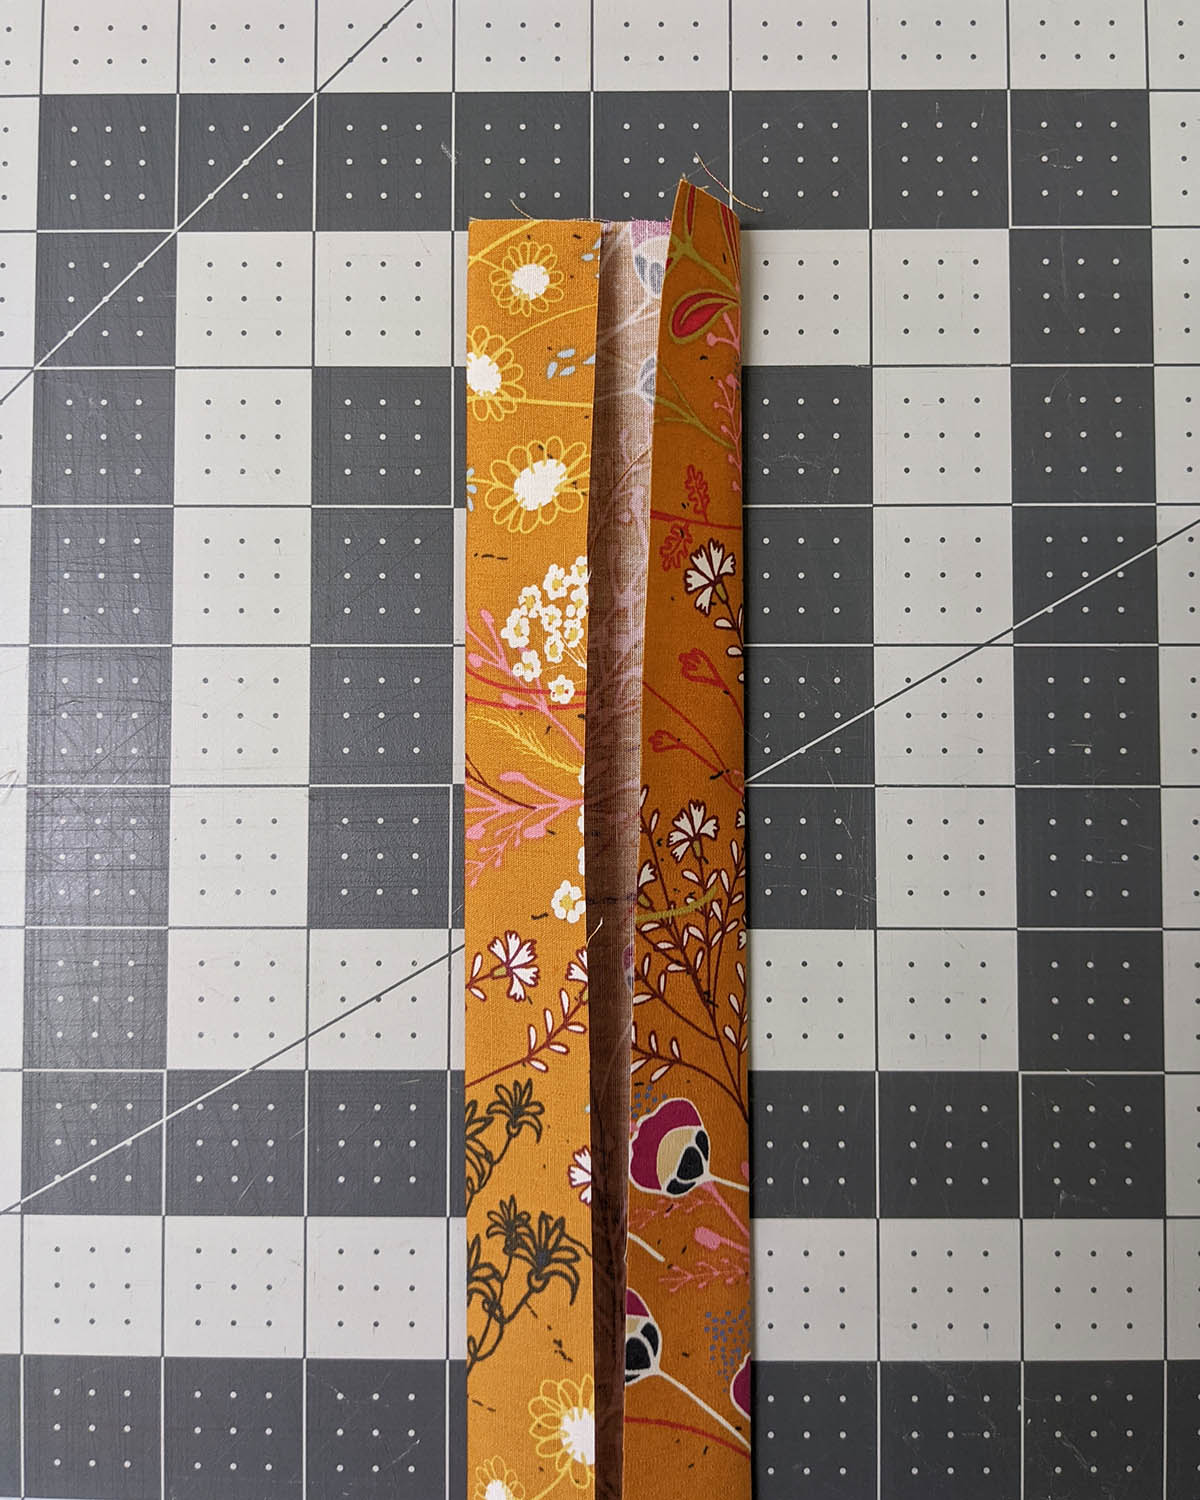
Stitch right on the edge and then sew at the other side of the handle piece. Using the Reverse pattern foot #1D I was able to make perfect stitch line.

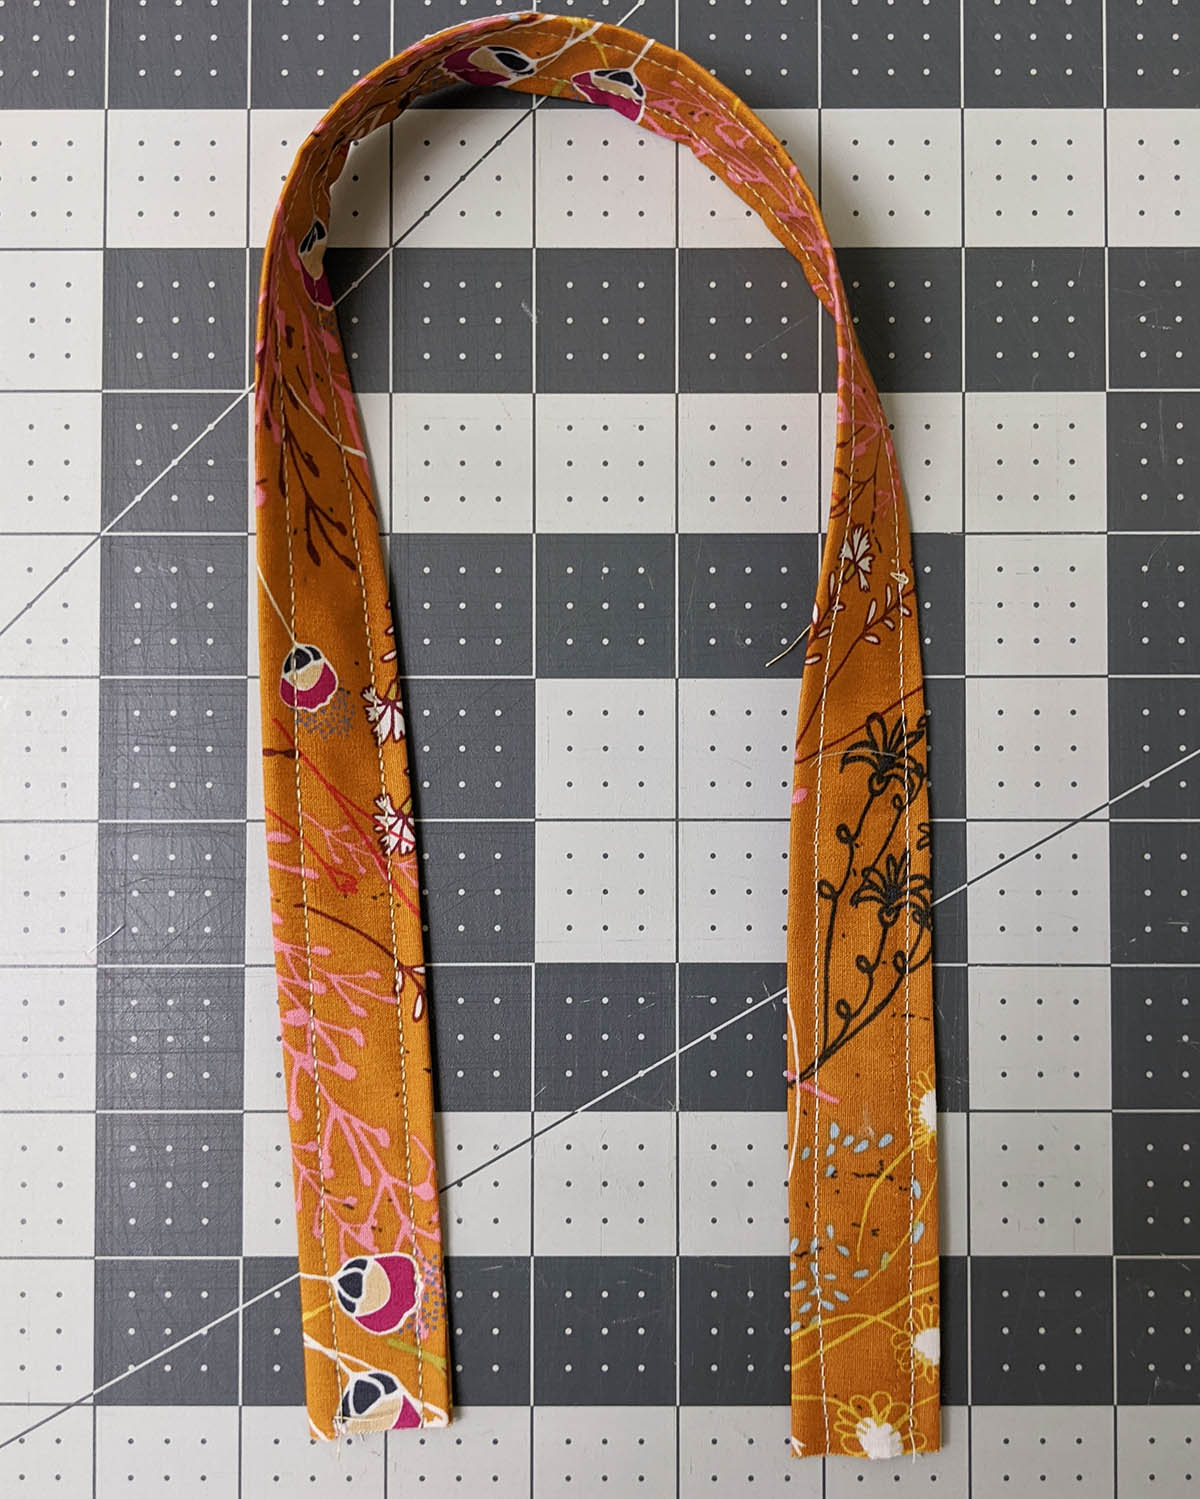
Then, fold your raw edges twice and edge stitch.
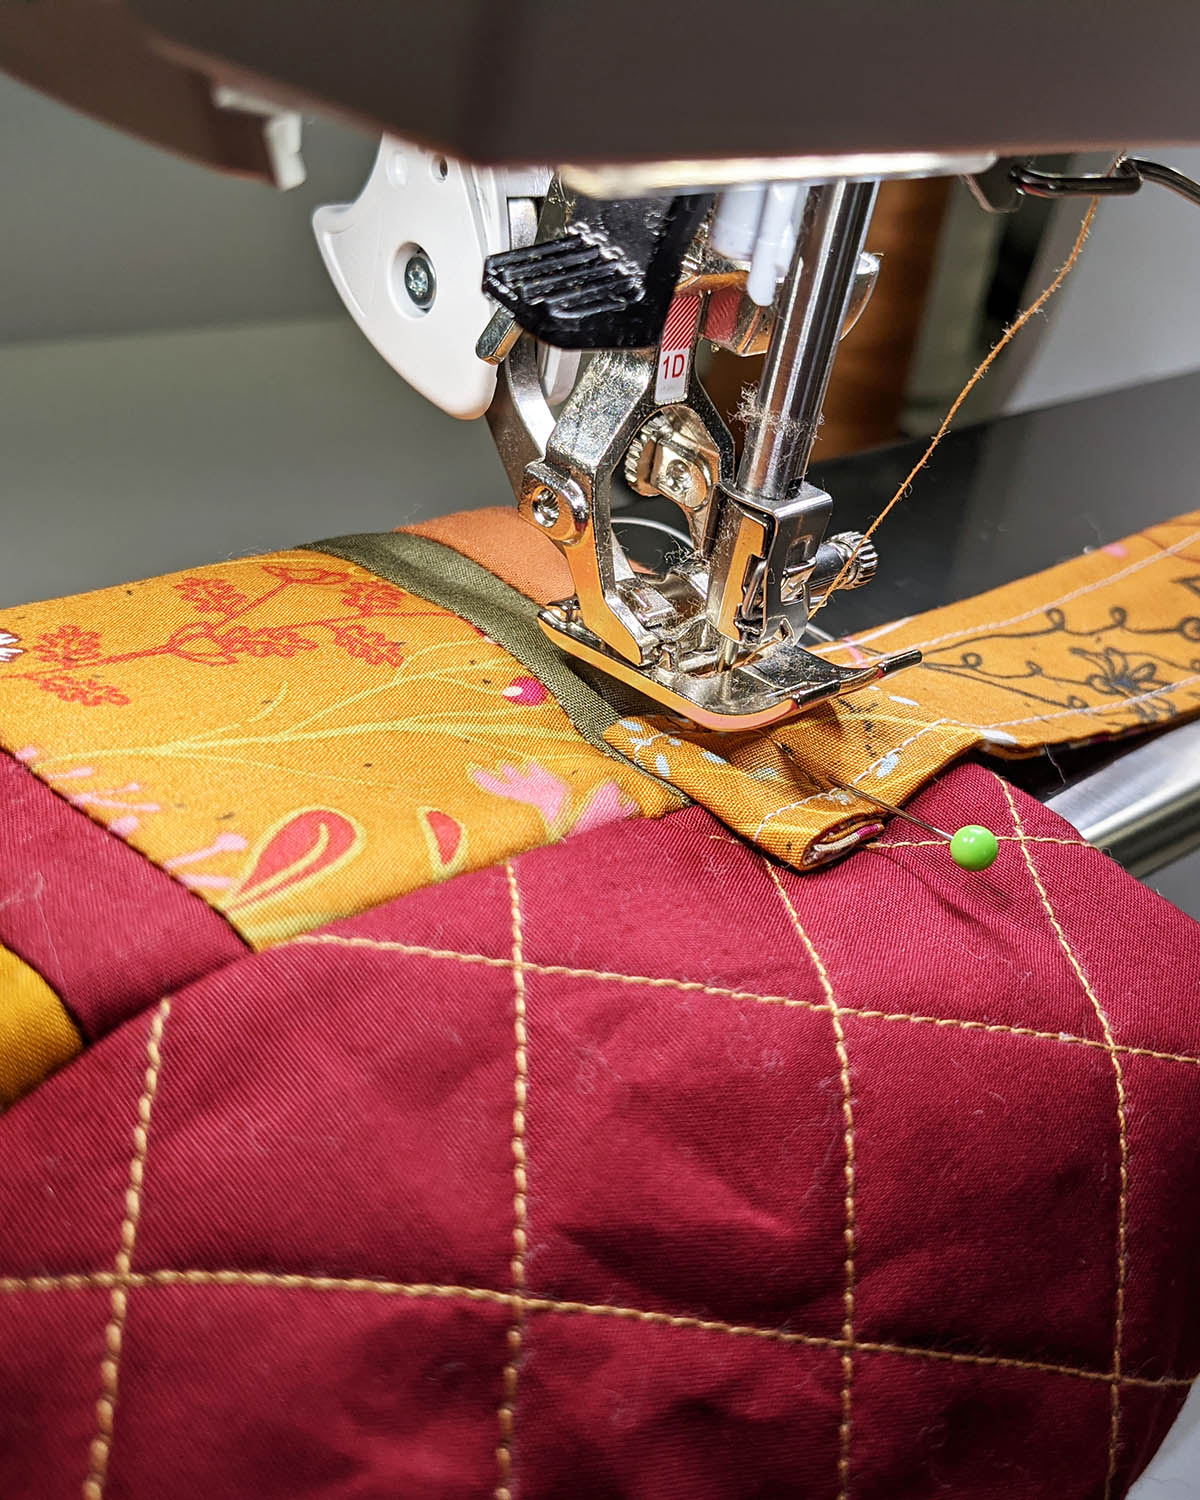
Step 10:
Take the wine carrier and fold it so the side sime is facing you. Place the handle about 1 1/4” from the top, then center it so the handle is pinned right in the middle of the seam.
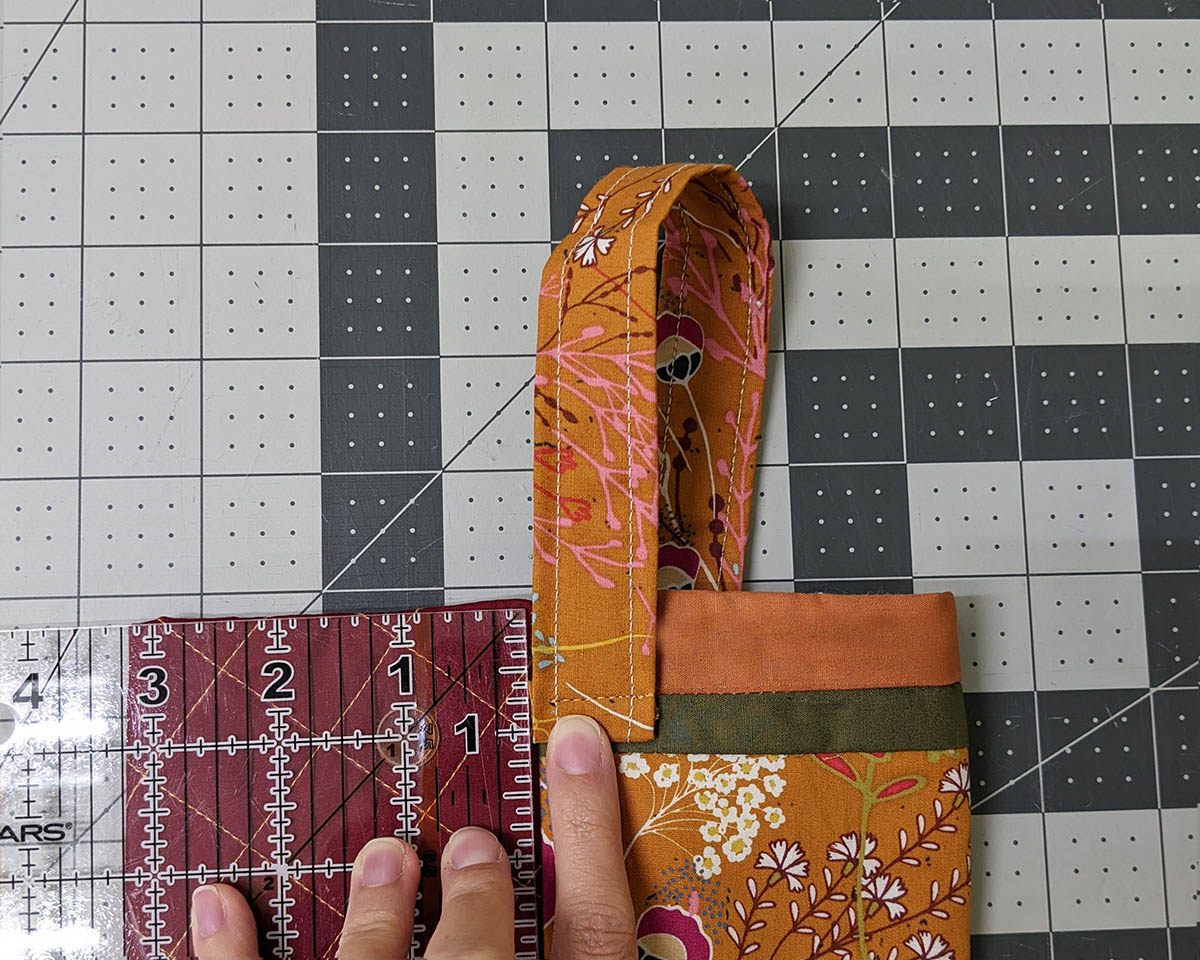
Sew a small square to secure the strap with the wine carrier. Repeat the same on the other side.
Press and steam your wine carrier.
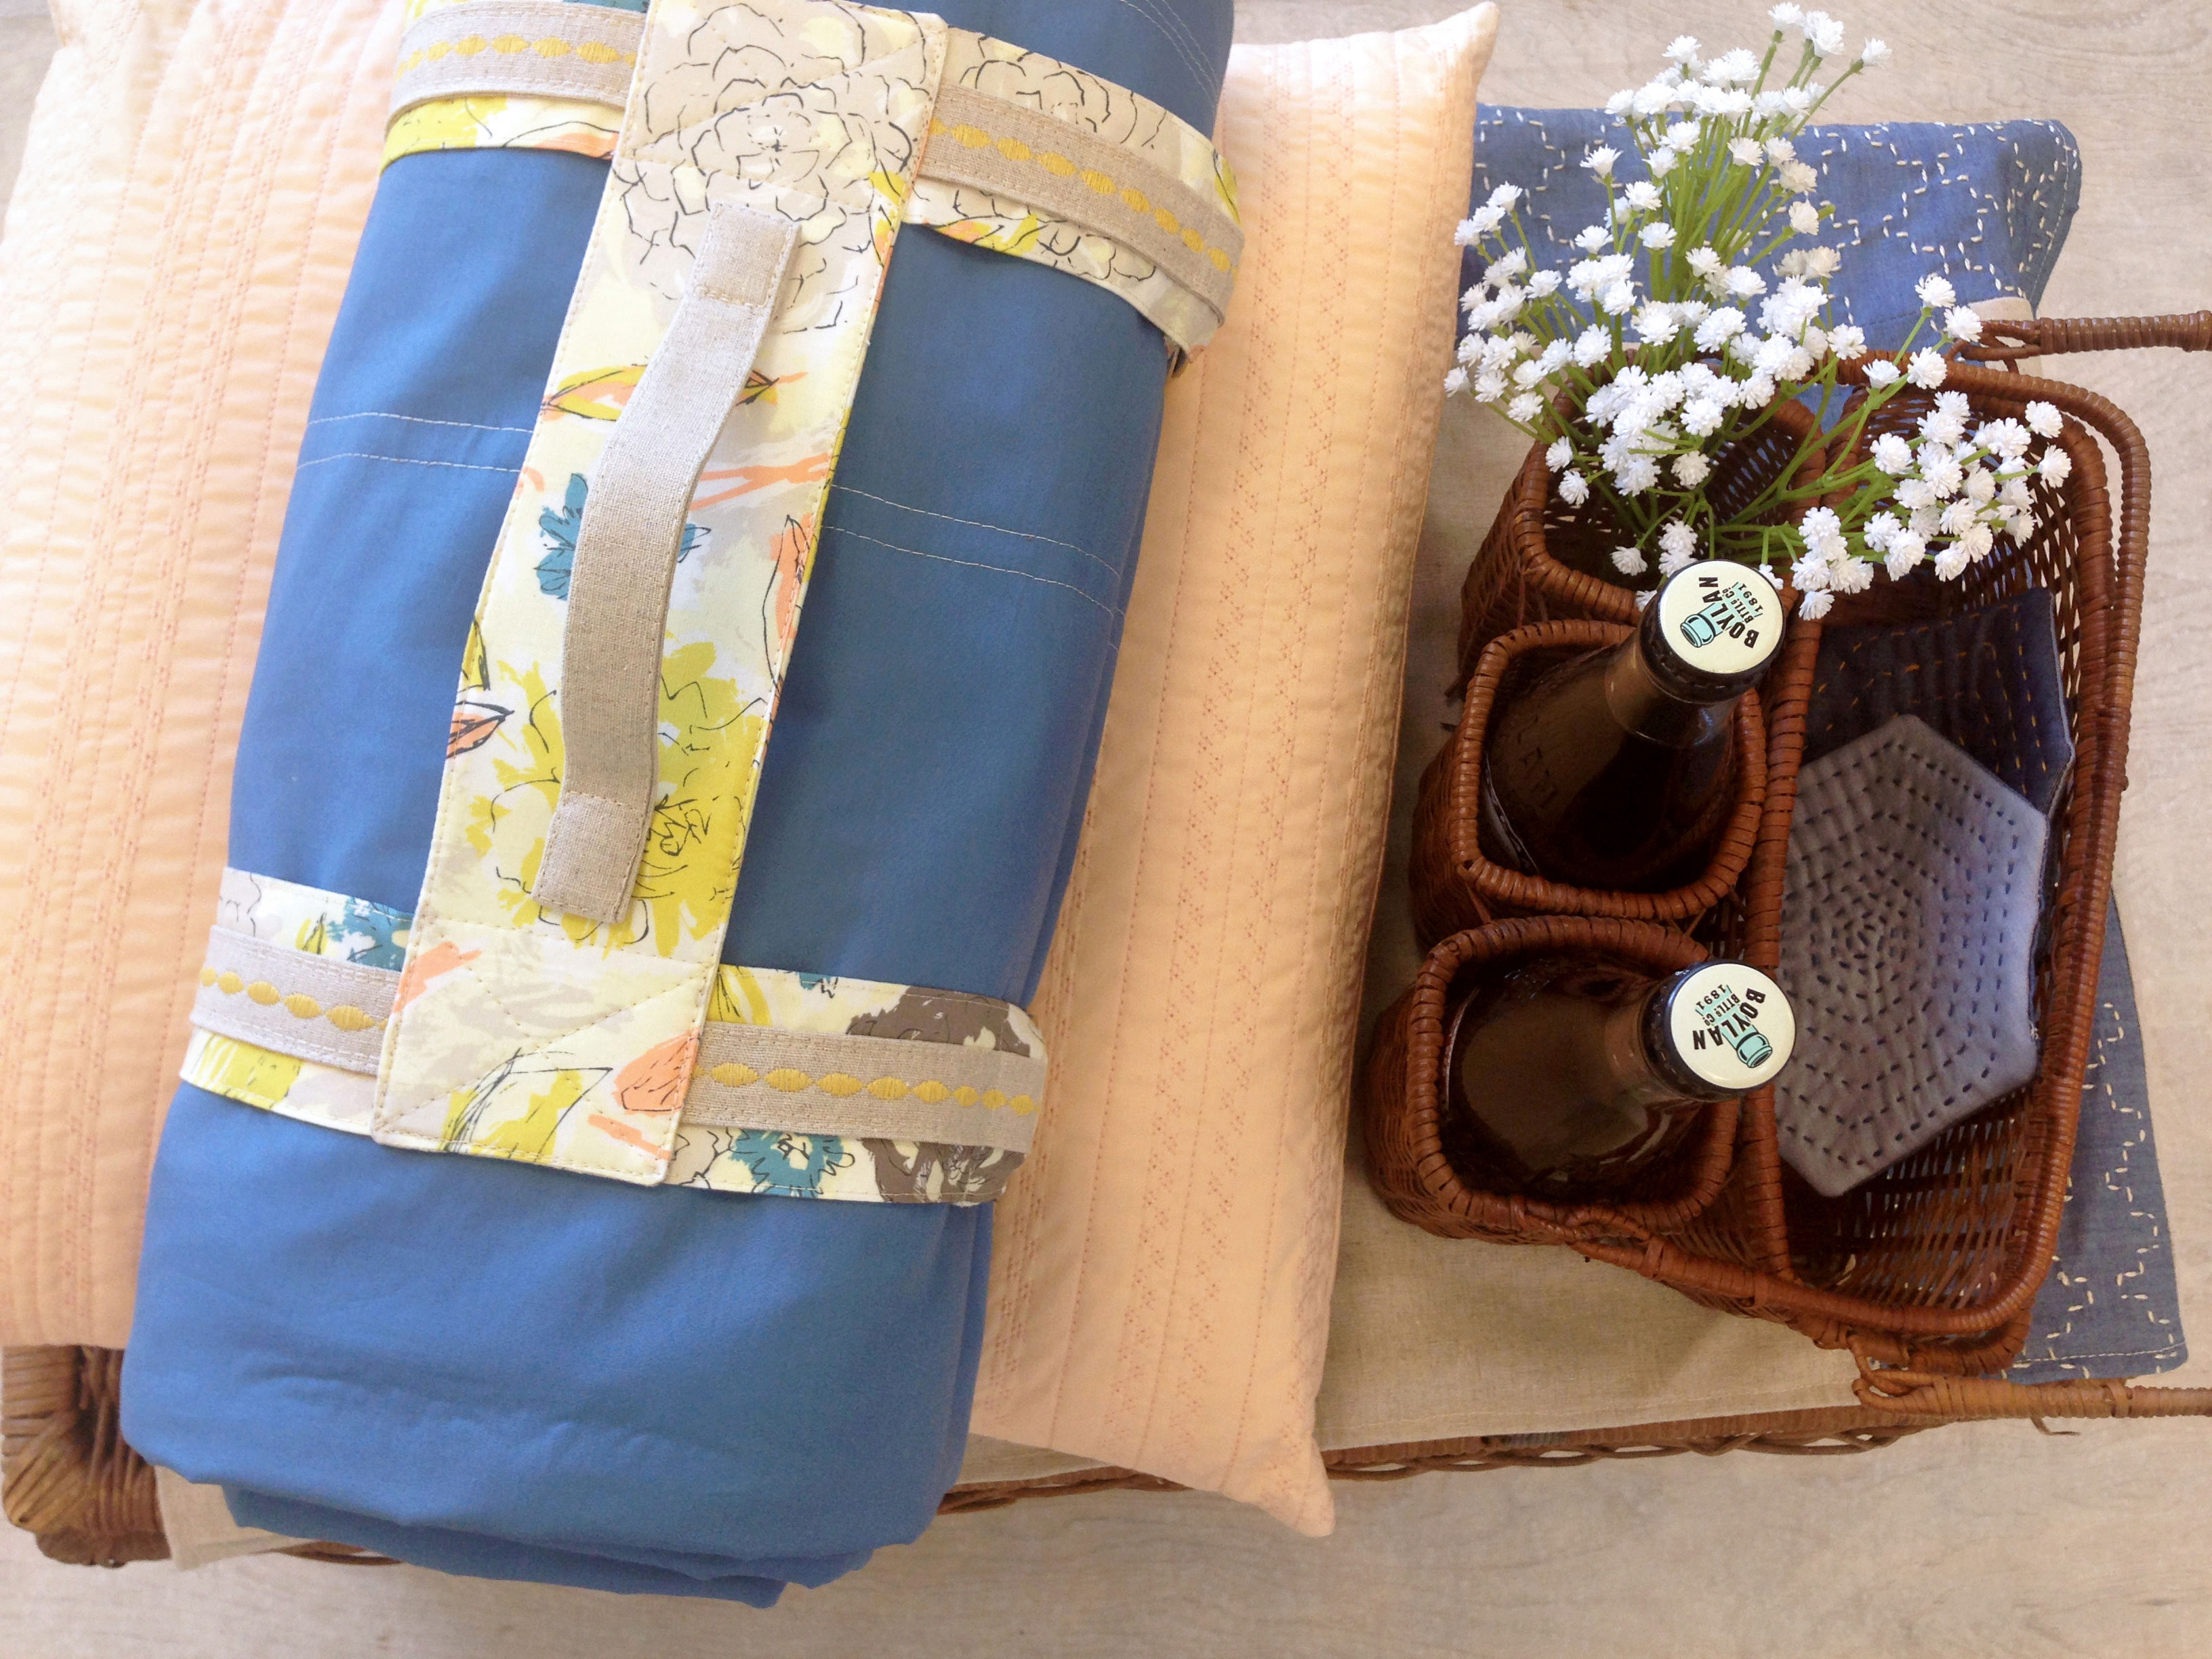
Now you’ve got yourself a cute wine carrier!. Cheers!
Used Products


What you might also like


2 comments on “Wine Carrier”
-
-
Thank you so much for your tips/tricks. This pattern came up in my Weekly Sewing Inspiration email and I thought it might be nice to make one for a hostess whose cookie sharing and wine party I will be attending in about a month. Should have enough time to get ‘er done, even if life gets in the way! Linda from North Dakota
-
Leave a Reply
You must be logged in to post a comment.

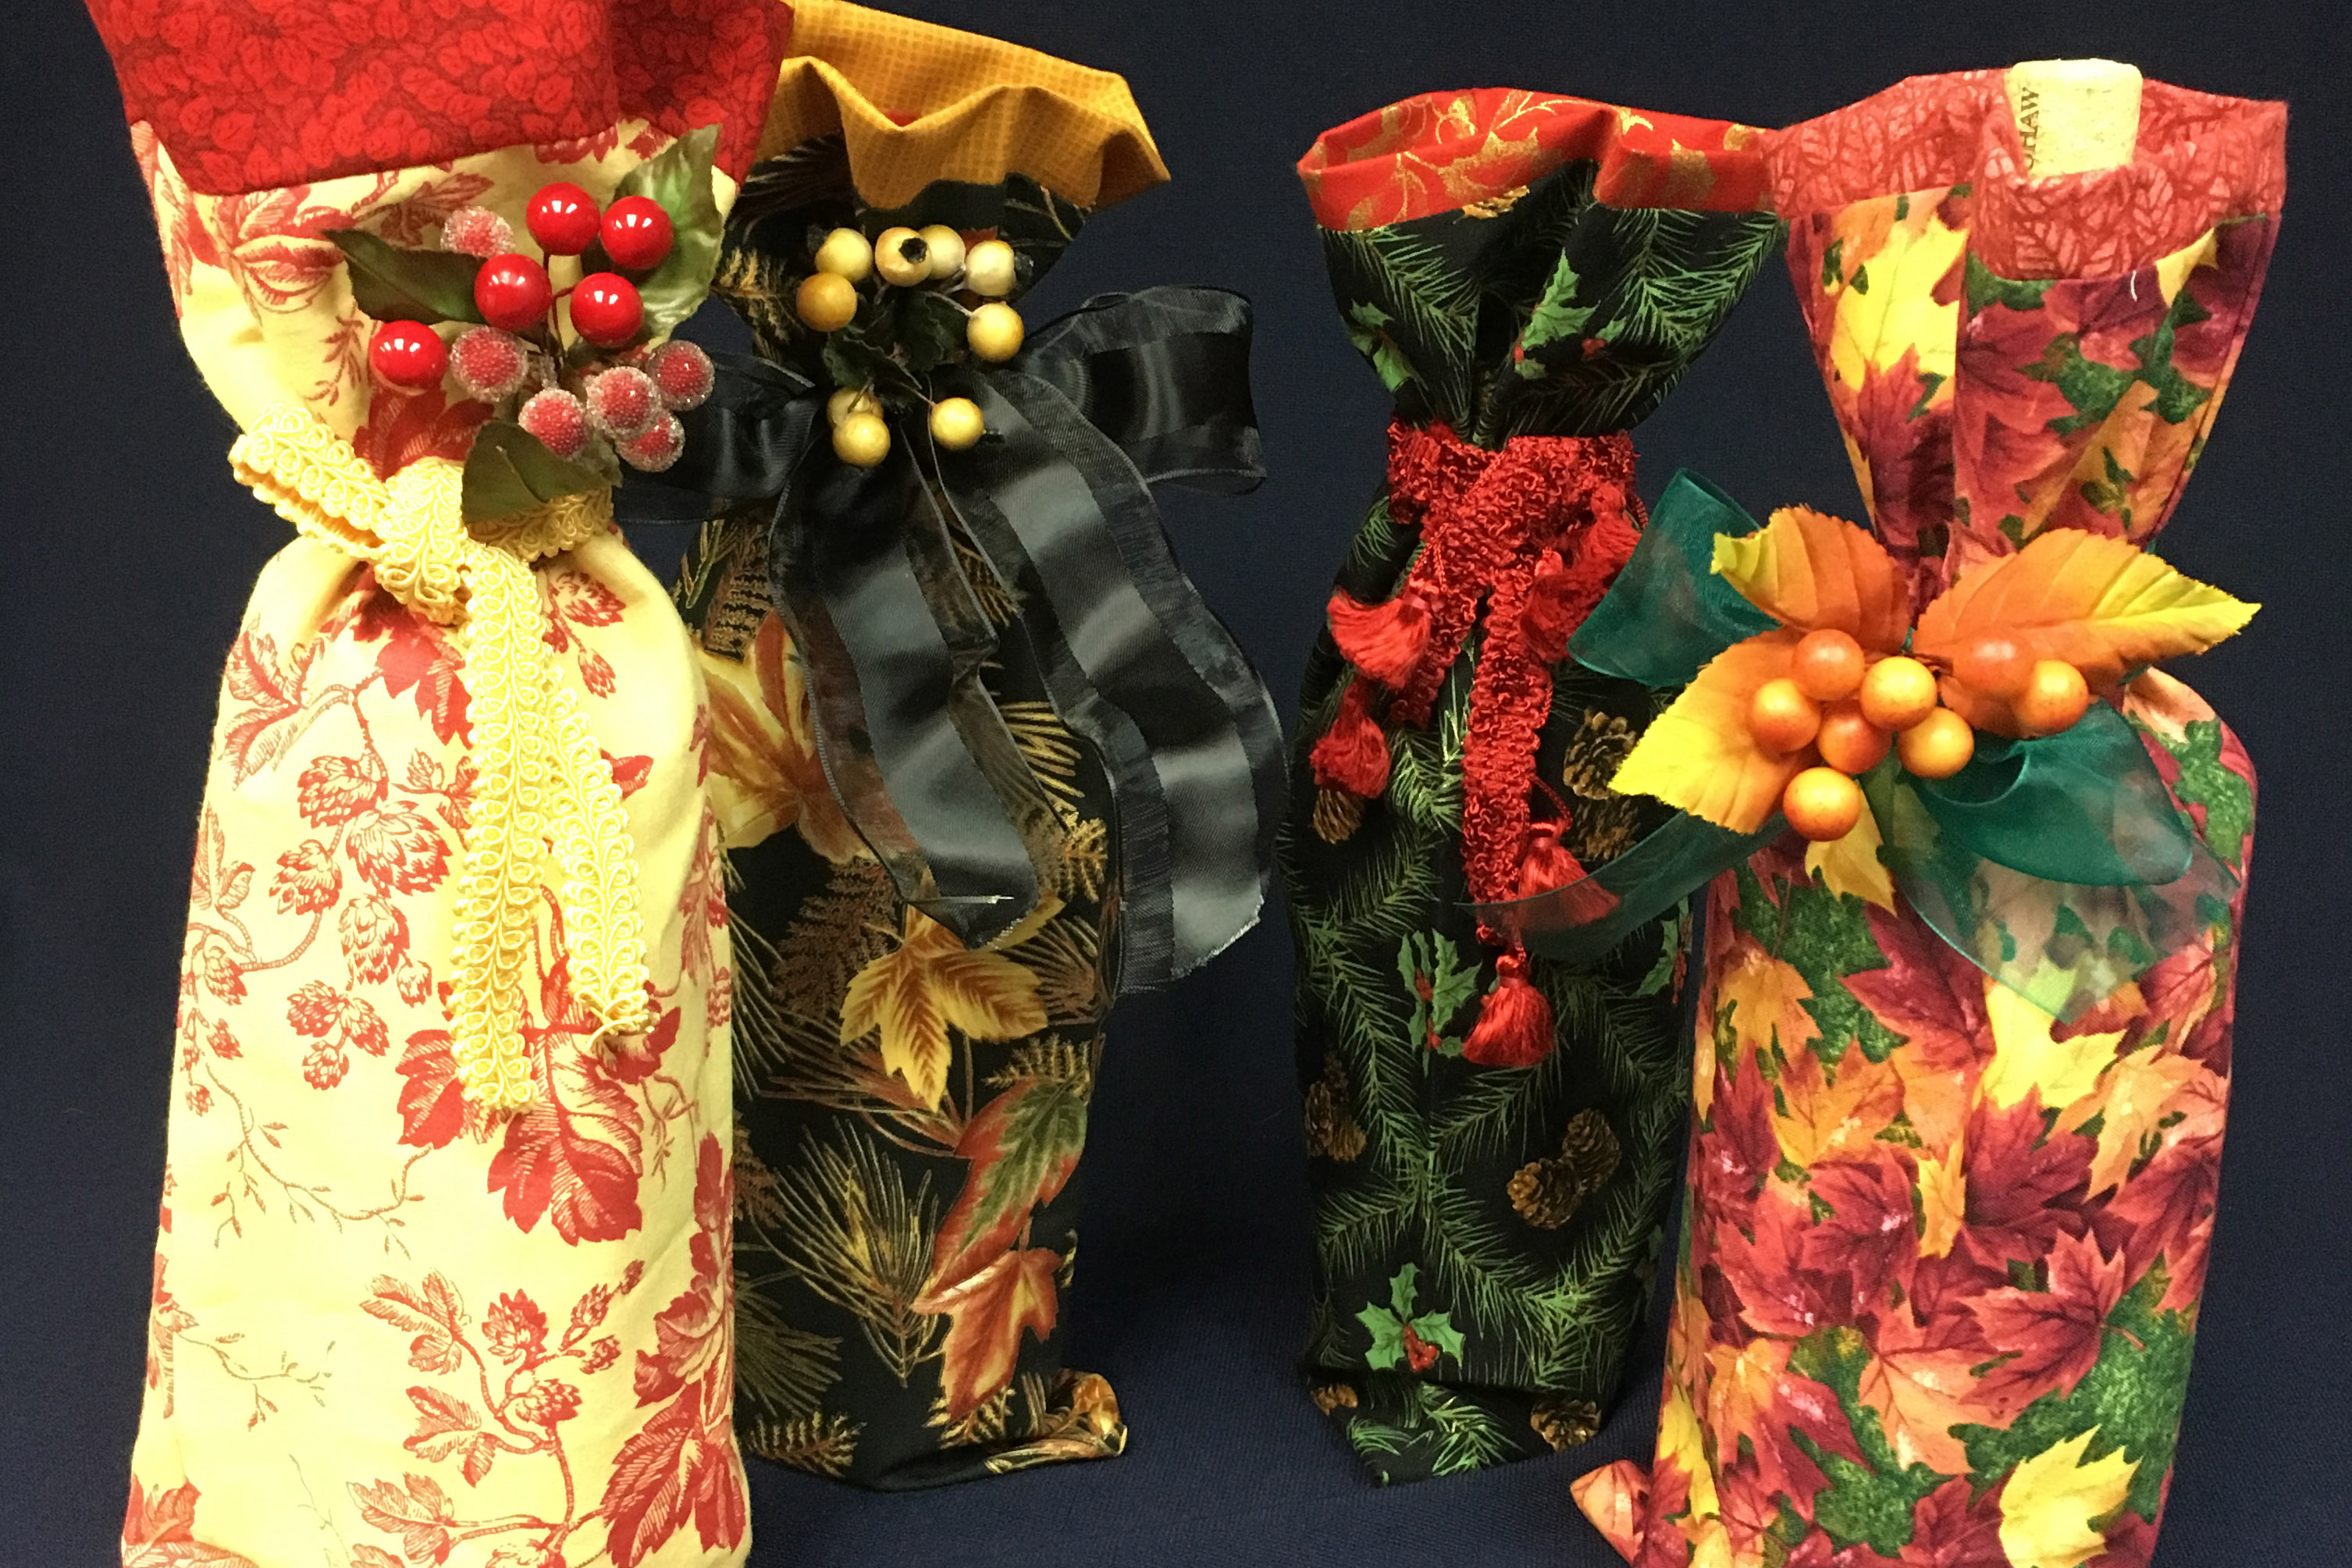
I made several of these for my husband to use for business associates for Christmas 2020. Using left over Christmas fabric from other projects was great and they turned out beautiful. I also used some fabric from a jelly roll of Christmas fabric. I did make some changes to the instructions that I would like to pass on. I used my 880 and found that when I quilted the outside pieces, they seemed to draw up, making them smaller than 71/2″. This caused the lining to be bigger than the outside. So I cut my strips to 8″, then after quilting, I trimmed to 71/2″. The lining fit perfectly. I used metallic thread for the decorative stitches, so I used the thread conditioner, helping the twist of the tread go thru the machine much easier. The next thing I changed was using the walking foot when I sewed the front/back pieces together. I found that the D foot, while good for single layers of batting, didn’t work as well when sewing the front/back together. I also used the 10D foot for the stitch in the ditch. Having the guide helps. When I sewed the front/back together (both outside and lining), I marked the 1″ before I sewed. Then when I got to the 1″ mark, I reinforced the seam right then. That way, when I cut through the seam, I didn’t have to worry about the seam coming apart while I worked to make the gusset. I haven’t figured out a way to sew the handles into the seam yet, I’ll worry about that next Christmas when I make these again.