BERNINA Airthreading Overlocker BERNINA L 850: Cutting Width and Adjustments
The New L 8 Series Overlockers by BERNINA have a lot of comfort built into the design of the machine. Careful consideration was given to the placement of the control dials and how easy it is to hold, access and operate them. I was especially impressed by the ways in which the cutting knife can be used.
Overlockers offer so much variety in the appearance and functionality of the stitches. One of the most versatile and easy ways to change the look of stitch is by adjusting the position of the cutting knife. In this post, we will explore the various widths of stitches, lowering the cutting knife and dive into a special feature called- Micro Thread Control.

Machine Featured: BERNINA L 850
Cutting Width vs. Stitch Width

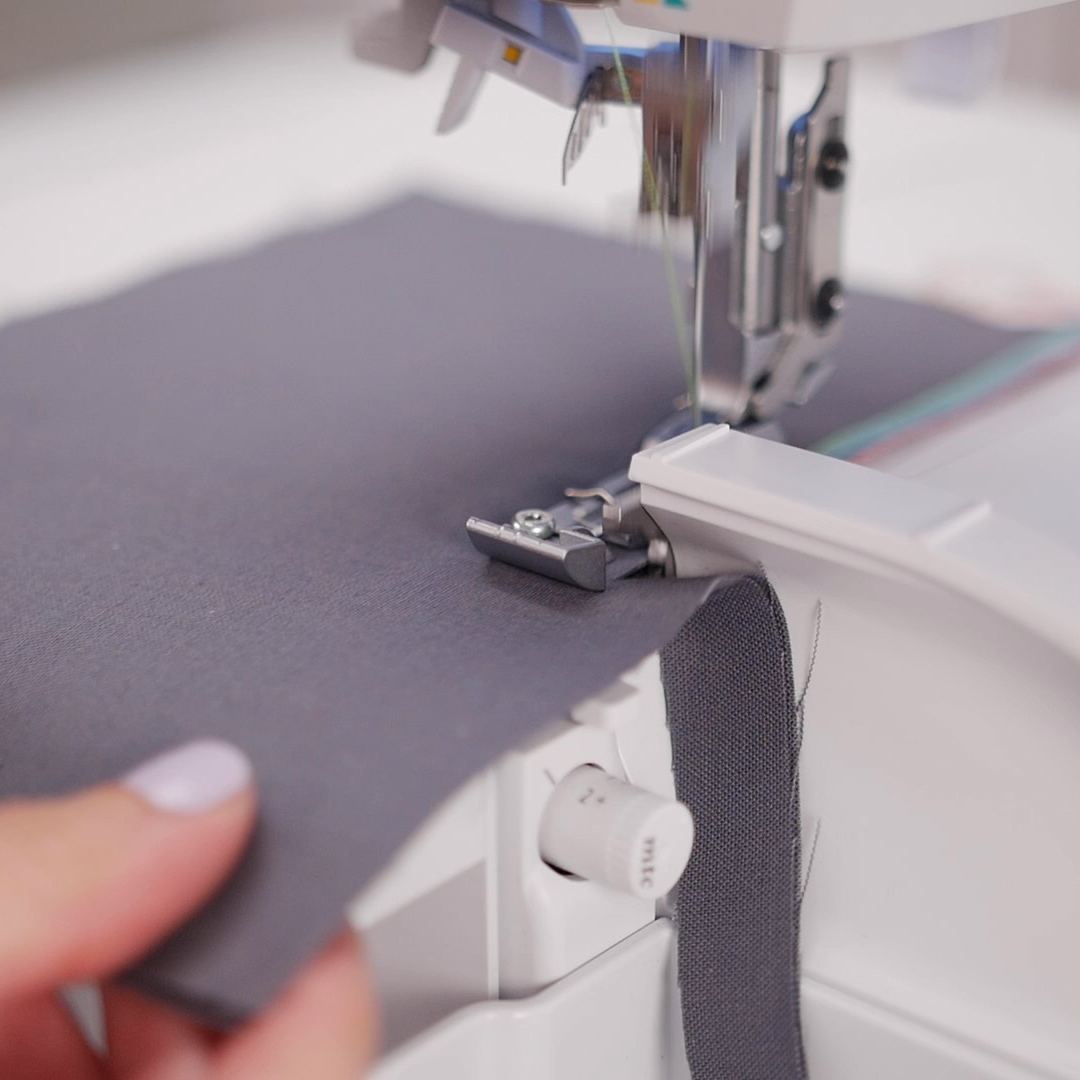
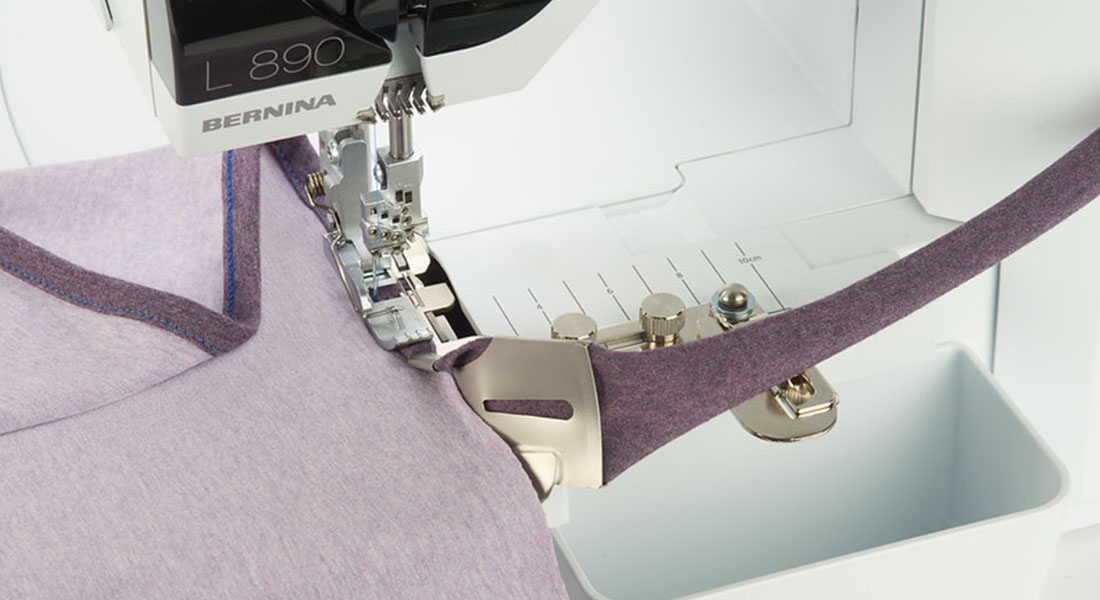
The cutting width dial is easy to identify, clearly marked and located on the front of the machine. On my previous overlocker, BERNINA 700D, I had push the upper knife with one hand and turn a small dial with my other hand to change the cutting width. On the L 8 series, I can easily change the setting with one hand. The operation of the dial is smooth, turning easily with my thumb—nothing to grab and turn. So how does cutting width change the stitch and how is it different than stitch width?
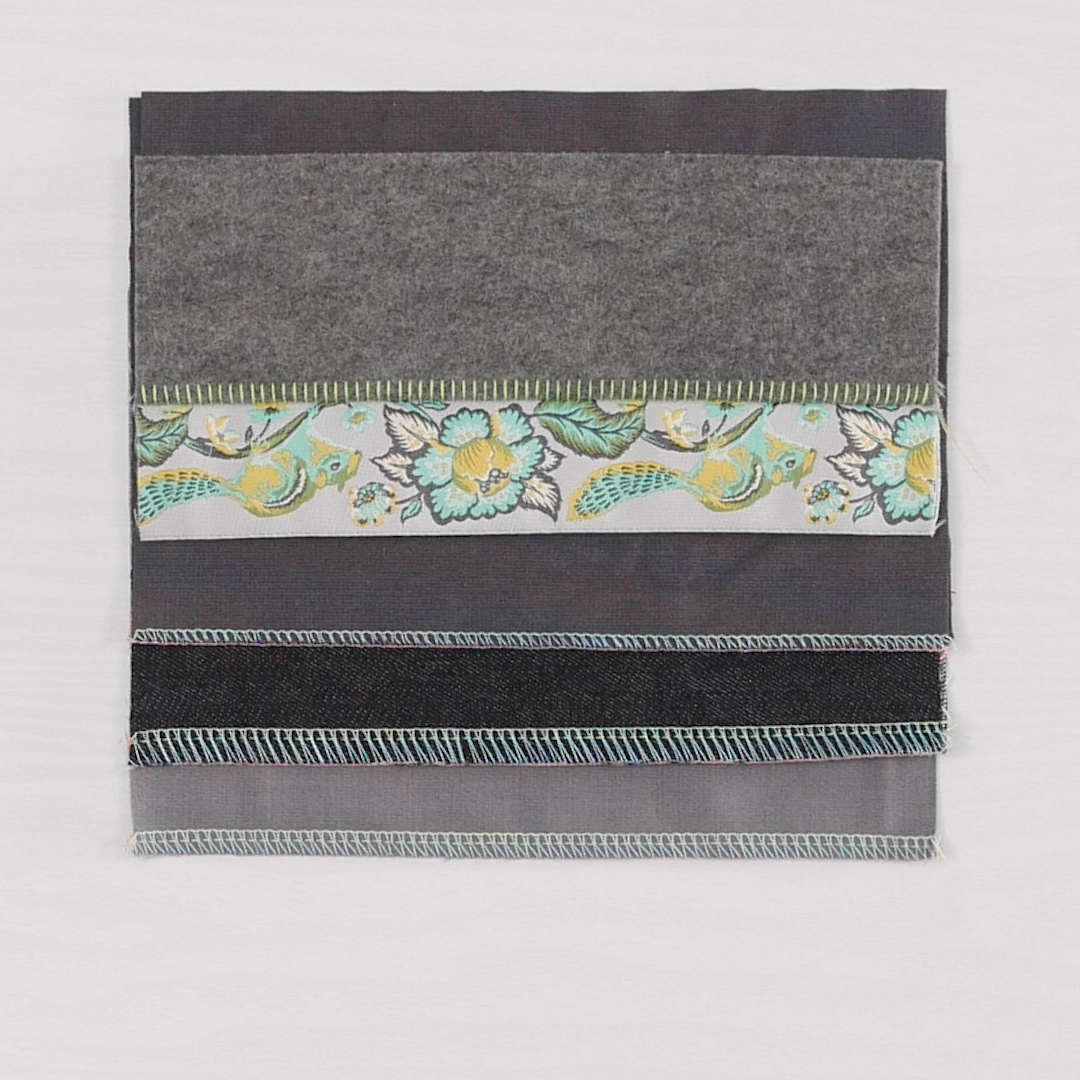
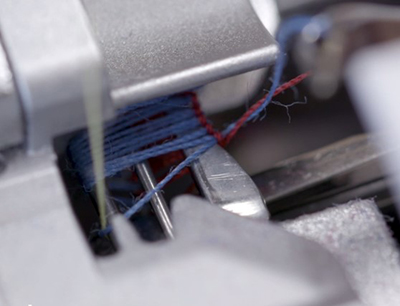
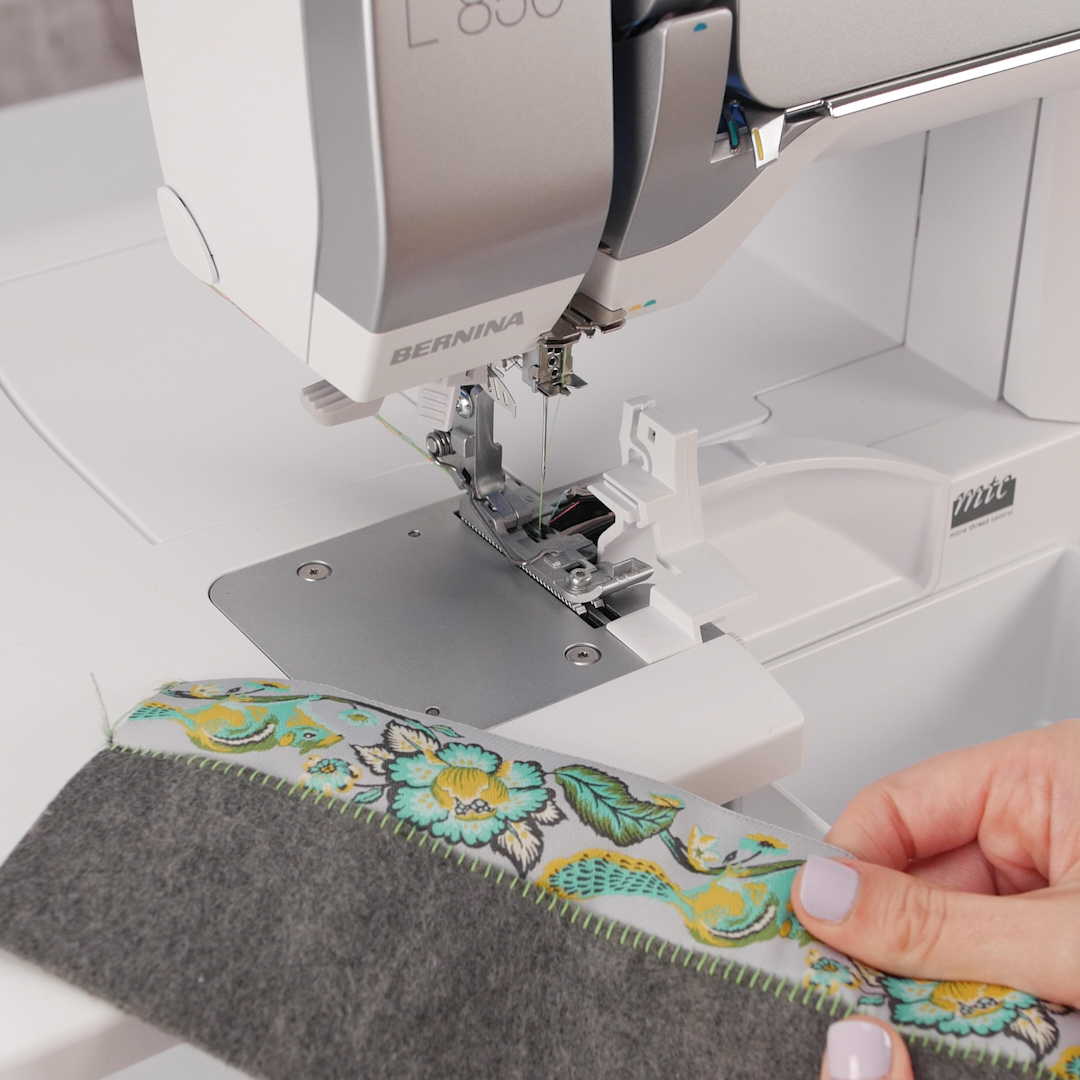
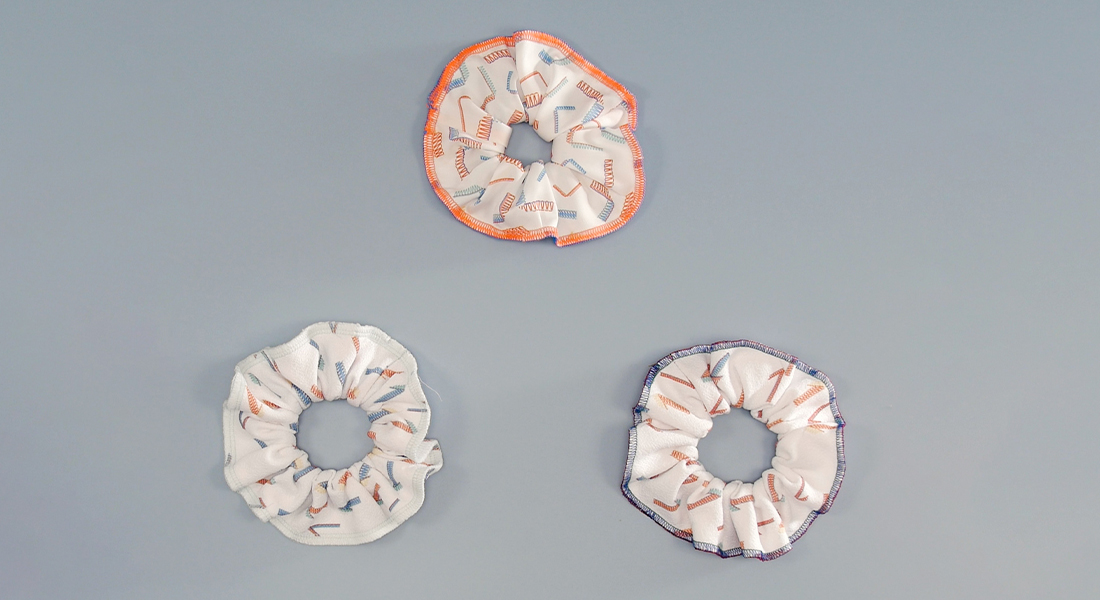
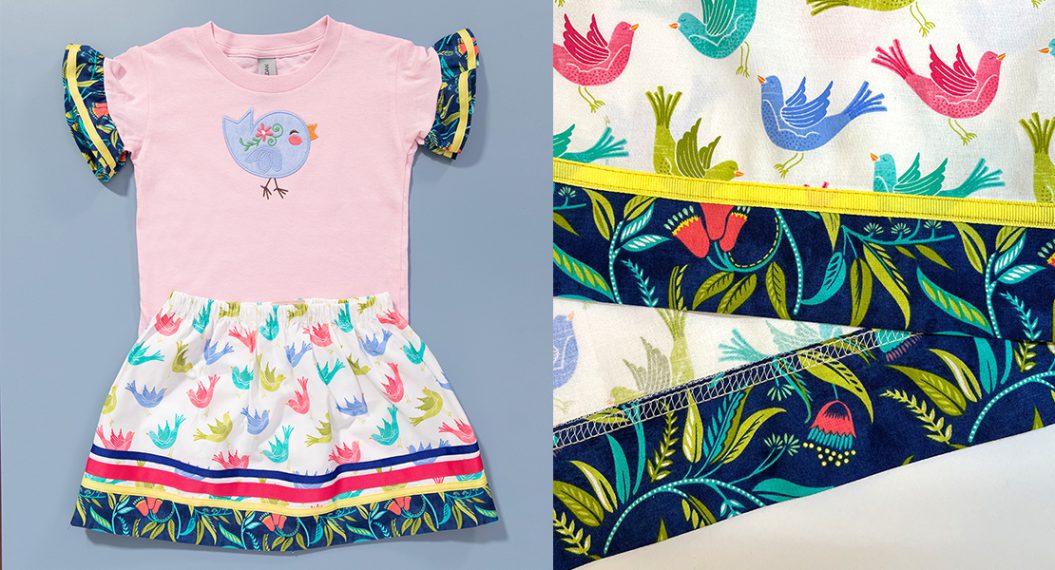
When you change the cutting width, you are doing two things: moving the knife position and also moving the stitch finger position. Try this on your machine and see if both things move—it’s not always the case for all overlockers. The range on the cutting width dial is 5-9 and this corresponds to the resulting stitch width in mm when using the left needle. This means the maximum stitch width of the finished seam can go up to 9mm—a nice wide seam! A stitch this wide allows for practical applications like having a large seam for loosely woven textiles that tend to fray more. It can also be used in many decorative applications and is a great choice when using decorative threads that you really want to show off. Another time that I like to use a stitch this wide is for flatlock ladder weaving. The 9mm width allows for use of two narrow ribbons or thicker ribbons and yarn.

If you are using only the right needle, the resulting stitch width will be 2 mm less than the number shown on the cutting width dial. This means that at the setting of 5—the resulting seam would be 3 mm. Delicate narrow stitch widths have many applications too. They can be functional for narrow seaming or edge finishes and they look lovely in heirloom sewing.
Technically, the stitch width and resulting seam can become even smaller than 3 mm. To achieve a narrower seam, like a rolled hem, you will disengage the stitch finger. This is easy to do with the Rolled Hem Selection Lever, built-in on the stitch plate. Move the lever from “O” to “R” and the stitch finger will move under the stitch plate. Now the thread will curl the fabric edge and the resulting stitch width will be narrower.
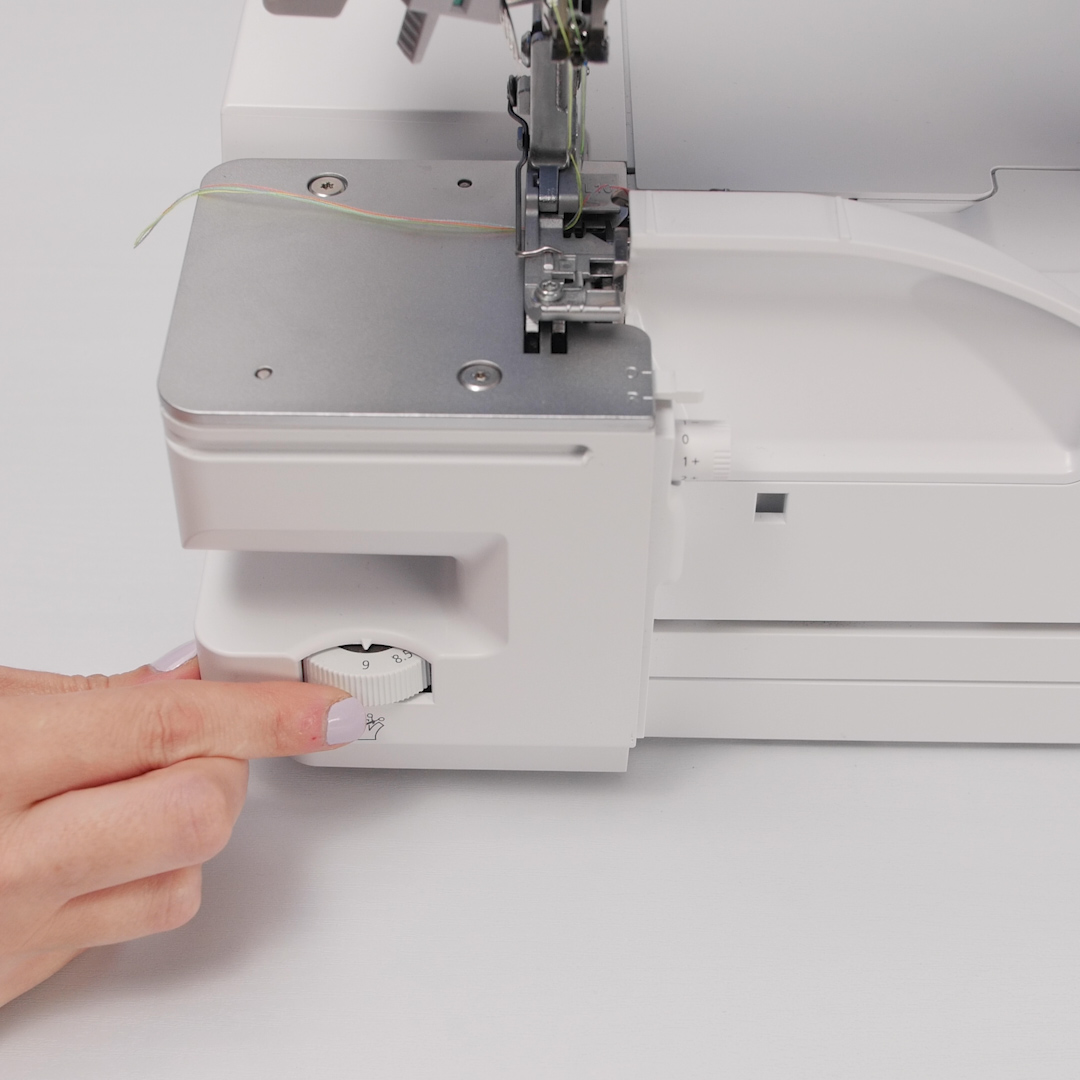
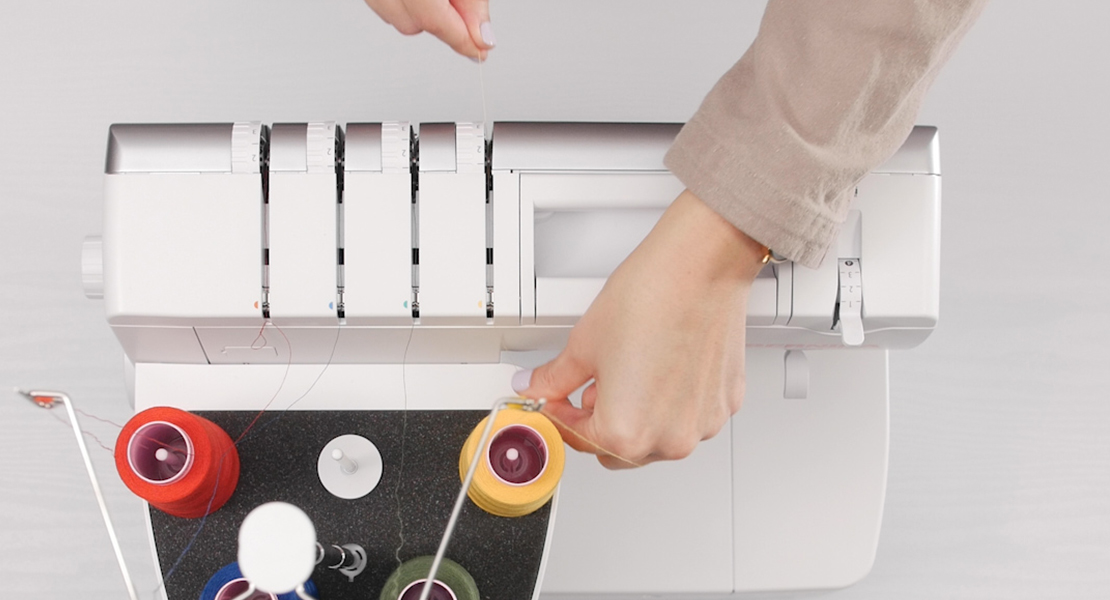
Micro Thread Control (mtc)
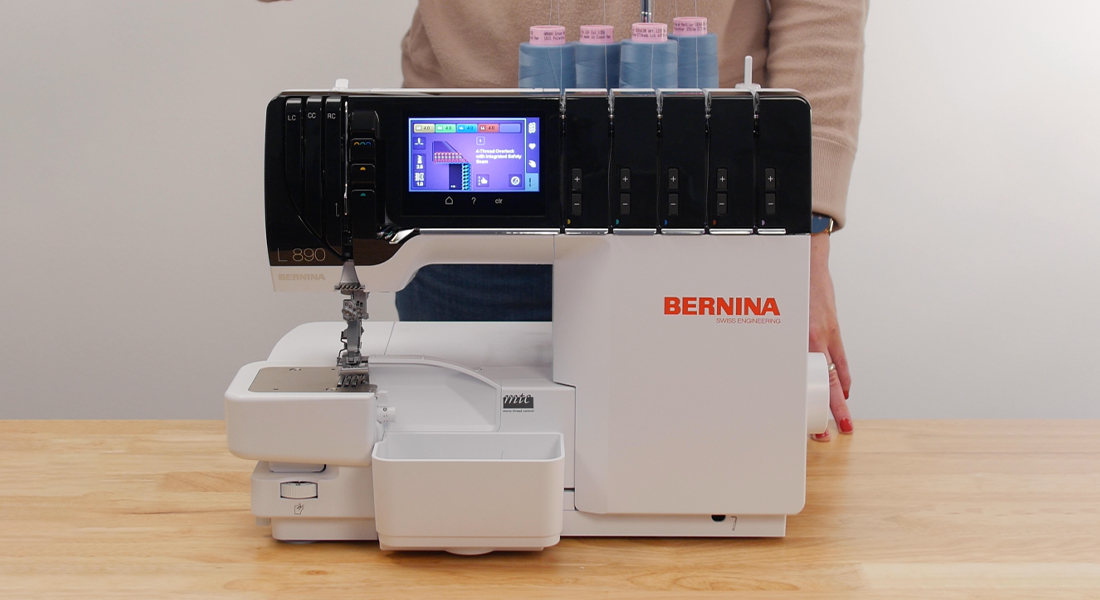
Controlling the placement of the stitch finger can be fine-tuned using a feature called mtc. This is a dial or lever you will find on some BERNINA overlocker models. On the L 8 Series, this dial is easy to turn and is clearly labeled.
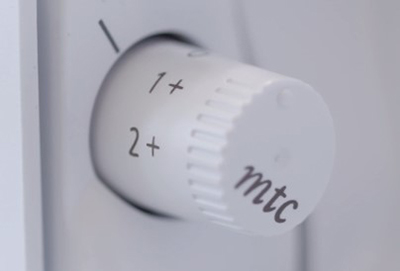
When you move the dial into the <+> positions, the stitch finger will move to the right and increase the space for the loopers to meet at the edge. Use this to reduce tunneling of a seam or to provide more space to pull apart a flatlock stitch. Turn the dial to the <-> position to move the stitch finger to the left. This is perfect to use when you have excess looper thread space at the edge of a seam. Ultimately, this single feature gives you a fine-tune control for the placement of the stitch finger. In summary, the final stitch width is a result of many things; needle position, cutting width and the stitch finger placement (mtc).
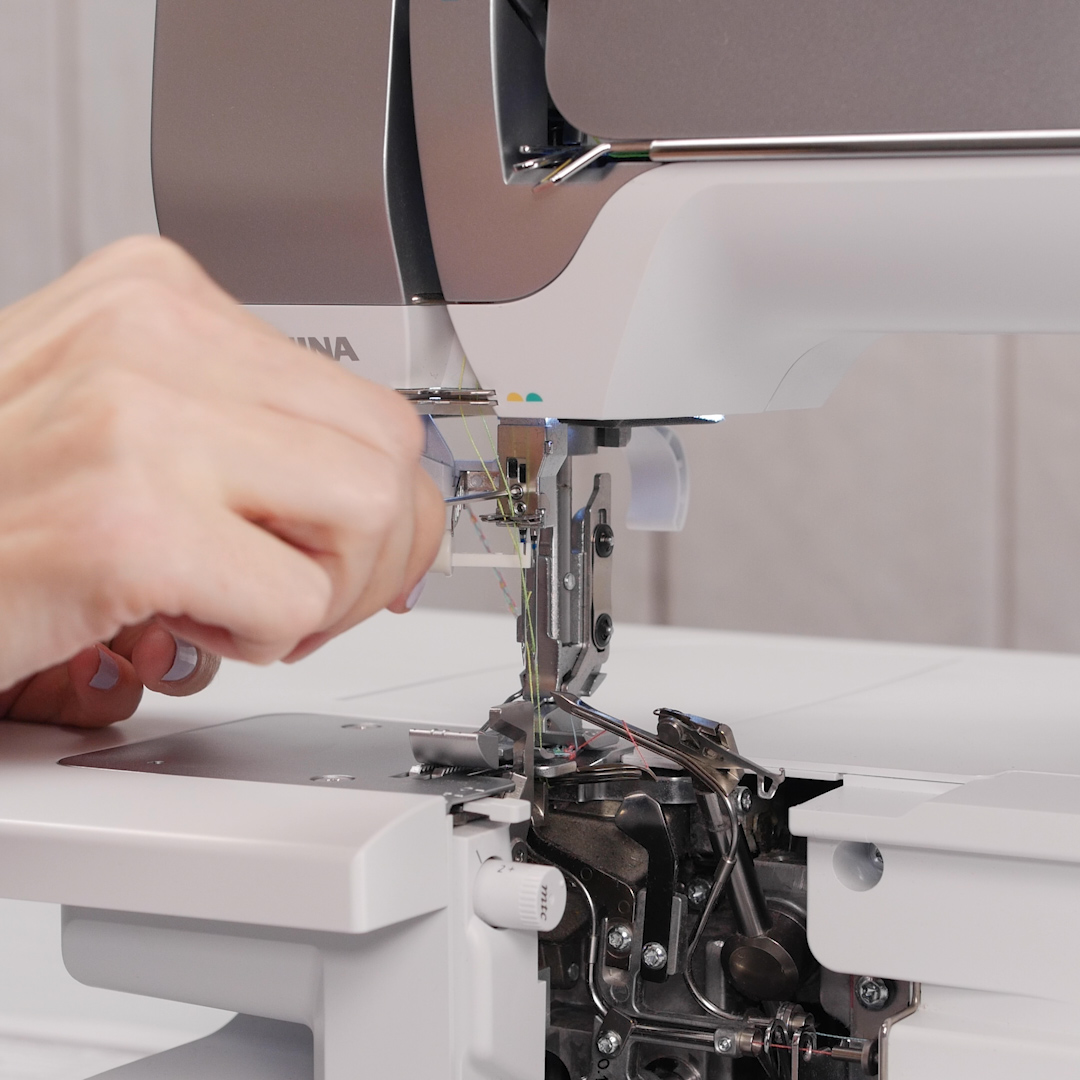
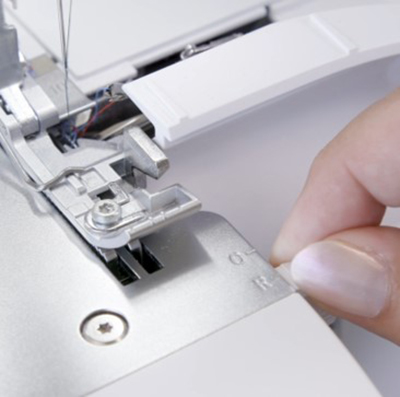
Cutting Knife On/Off
Lowering the cutting knife has never been easier on an overlocker than it is on the L 8 series machines. The switch is located on the outside of the machine at the left side. This allows the knife to be turned on or off at any point in the sewing process. This is great for finishing a seam of any tubular sewing. When you come back to the starting point of the seam, lower the knife and sew over the stitches to secure. With the knife lowered there is no accidental trimming of the fabric or the previous stitching.
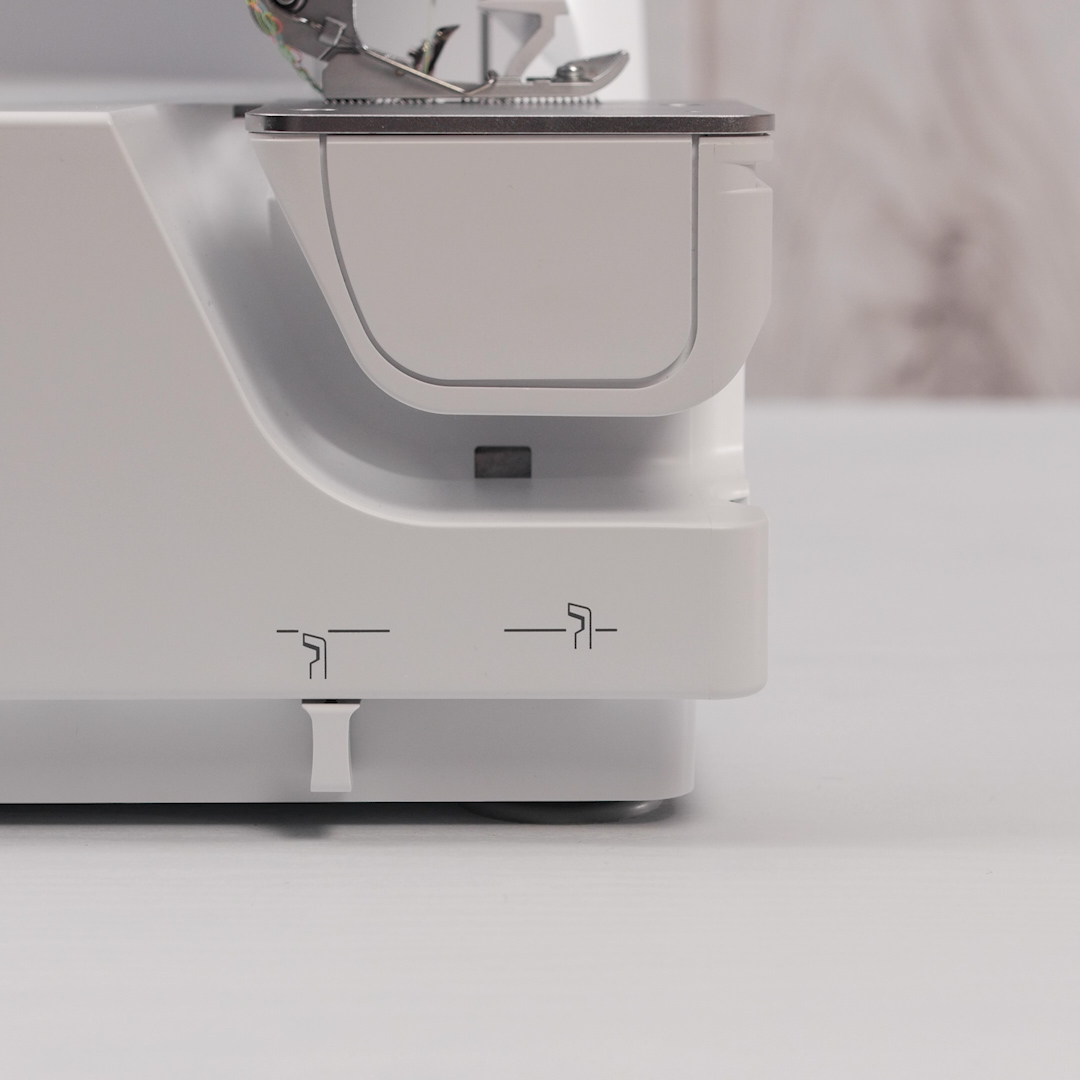
Sewing with the cutting knife off is especially helpful if you are creating a flatlock stitch. A flatlock is created using the right or left needle with a reduced tension—allowing the seam to be pulled apart. This creates a ladder look from the needle thread and the fabric will lay flat or one on top of the other. I use this stitch from time to time to add decorative ribbons into projects.
I prefer to add the seam guide when creating these stitches. The seam guide will do two things: it will help you keep the fabric moving under the presser foot in a straight line, and this will prevent the fabric from jamming into the looper action. This is more important because when the knife is off, it is not trimming the fabric before it reaches the needles.
BERNINA is known for Total Stitch Control and sewing comfort. The ease of adjustments that you can achieve with the cutting knife on these overlockers illustrates why. Try it for yourself and see how creative you can be with the stitches that you make.
Used Products

What you might also like


5 comments on “BERNINA Airthreading Overlocker BERNINA L 850: Cutting Width and Adjustments”
-
-
Wow! Can’t wait to get mine!
-
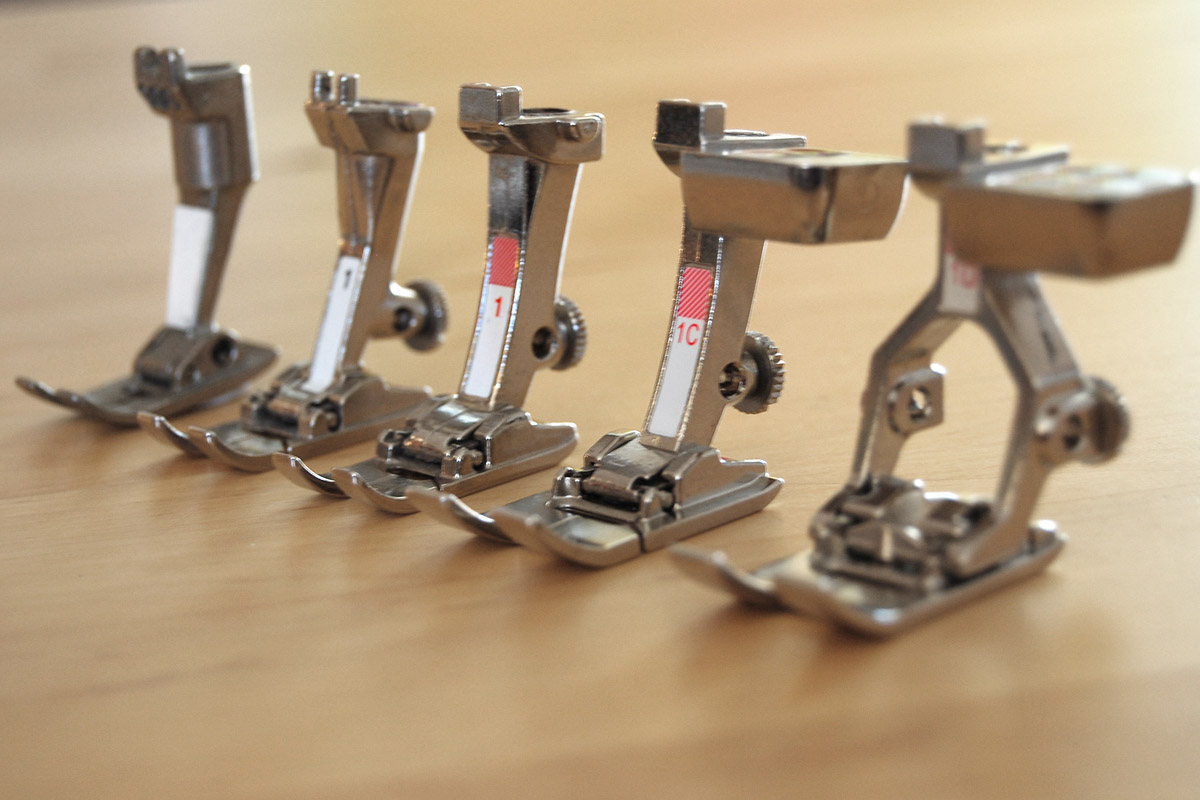
I like the 97 foot, keeps me on 1/4″ seams. It’s hard to pick one, since they are all wonderful.
Since I go to classes and sewing groups, it would really be nice to have a case to carry them in and to keep them organized. -
Jamie
Quick question on the 890, do any of the accessory feet allow for a Belt Loop attachment of sorts? I am going to switch to this machine and it is the one foot I am not sure about. Or if you know how I would accomplish this, that would be great.
-
Great question! We are working to produce additional presser feet and accessories for these machines. The belt loop attachment is currently not one that we have available, but I hope that one will be produced specifically for our machines.
-
Leave a Reply
You must be logged in to post a comment.

I really miss my Bernina!