Rulerwork for Beginners, Part 3: Stitching Circles
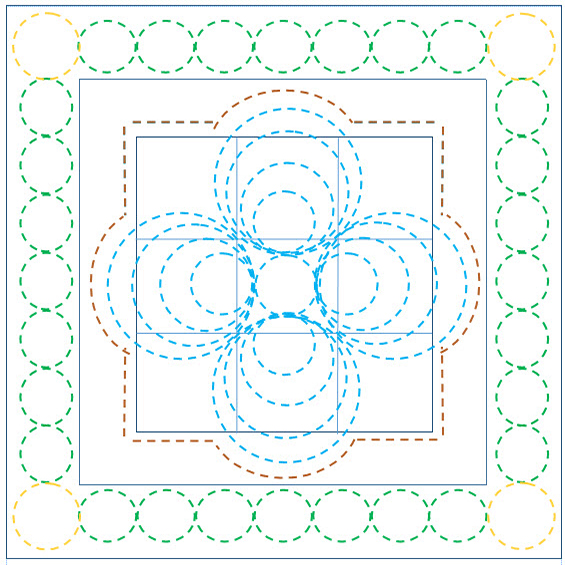
Last month we experienced curves. This month we will be stitching circles, which are nothing more than complete curves. Circles provide so many fun options for quilting. It is almost like having your Spirograph back! But let’s start by taking a look at our Roadmap.
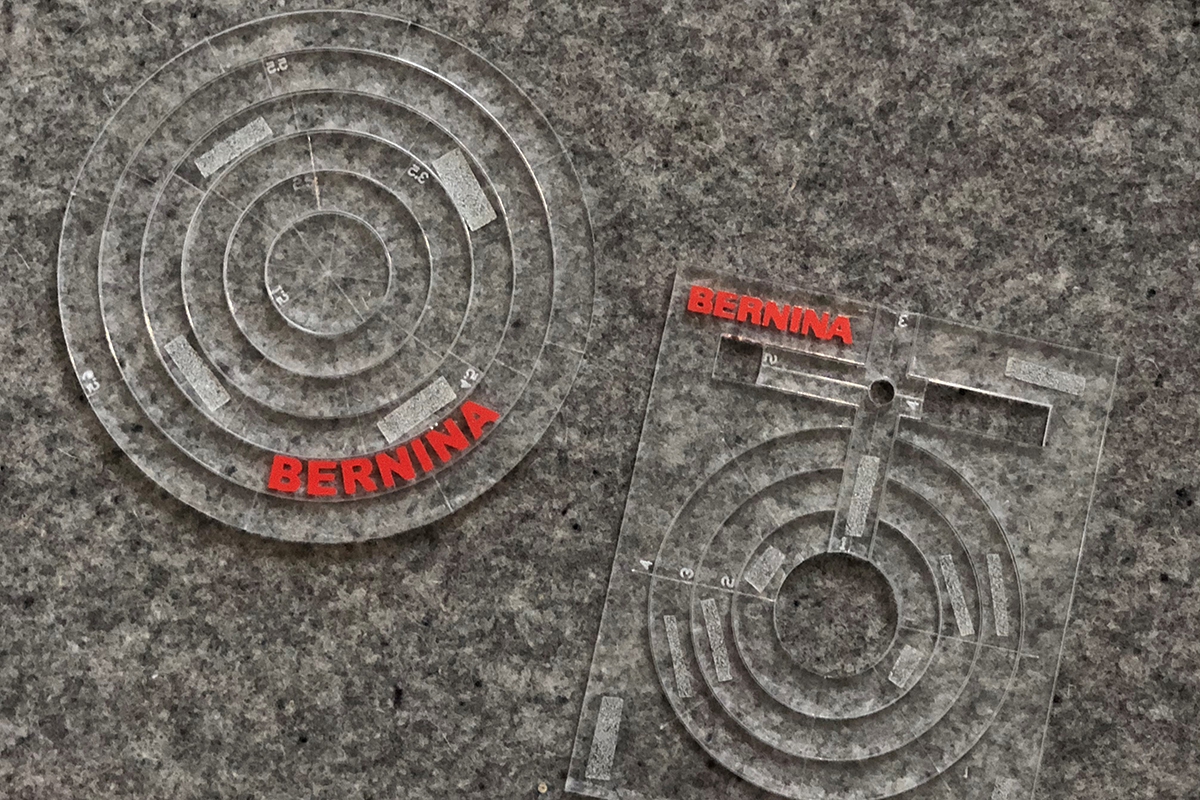
There is a plethora of circle rulers available. There will be rulers where you will stitch inside the circle and those where you will stitch around the outside of the ruler. Both of the BERNINA Ruler Sets include a set of circle rulers.
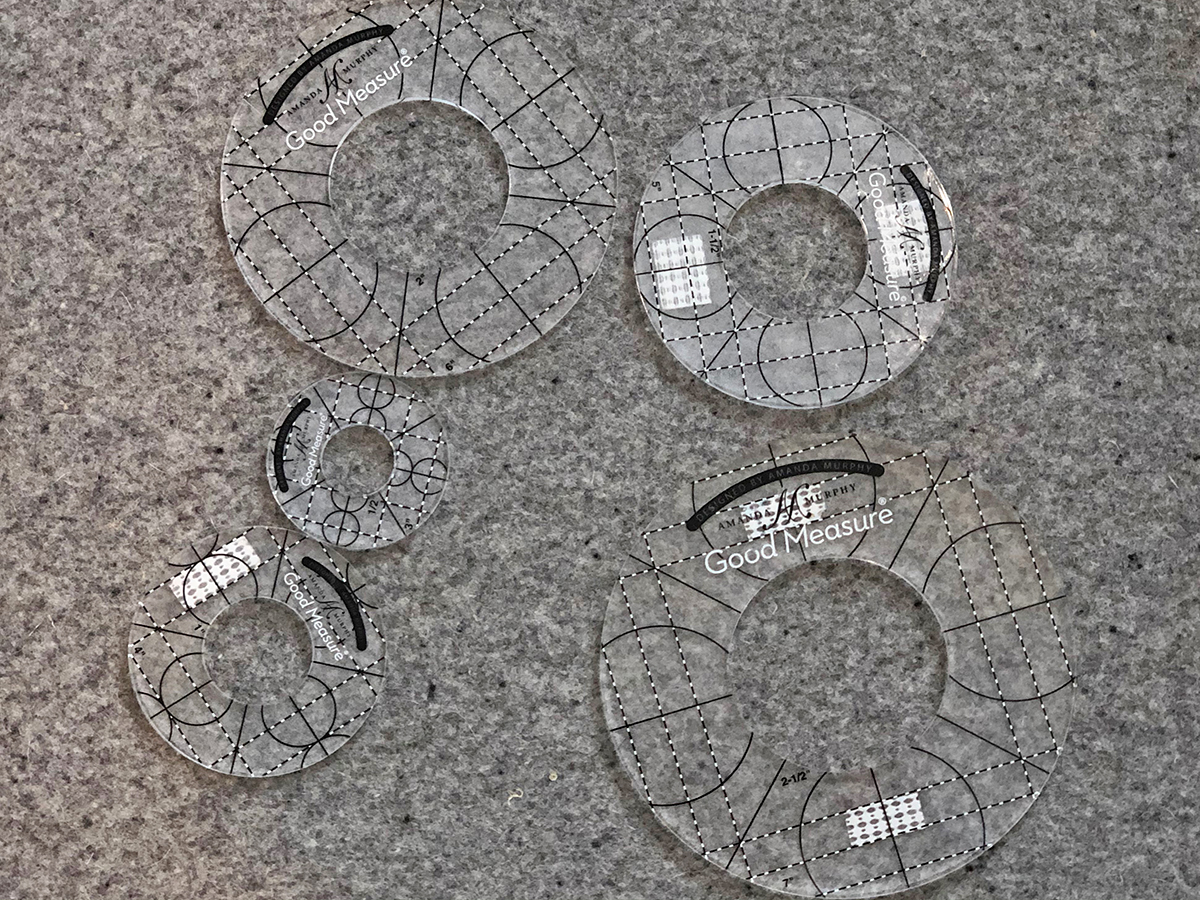
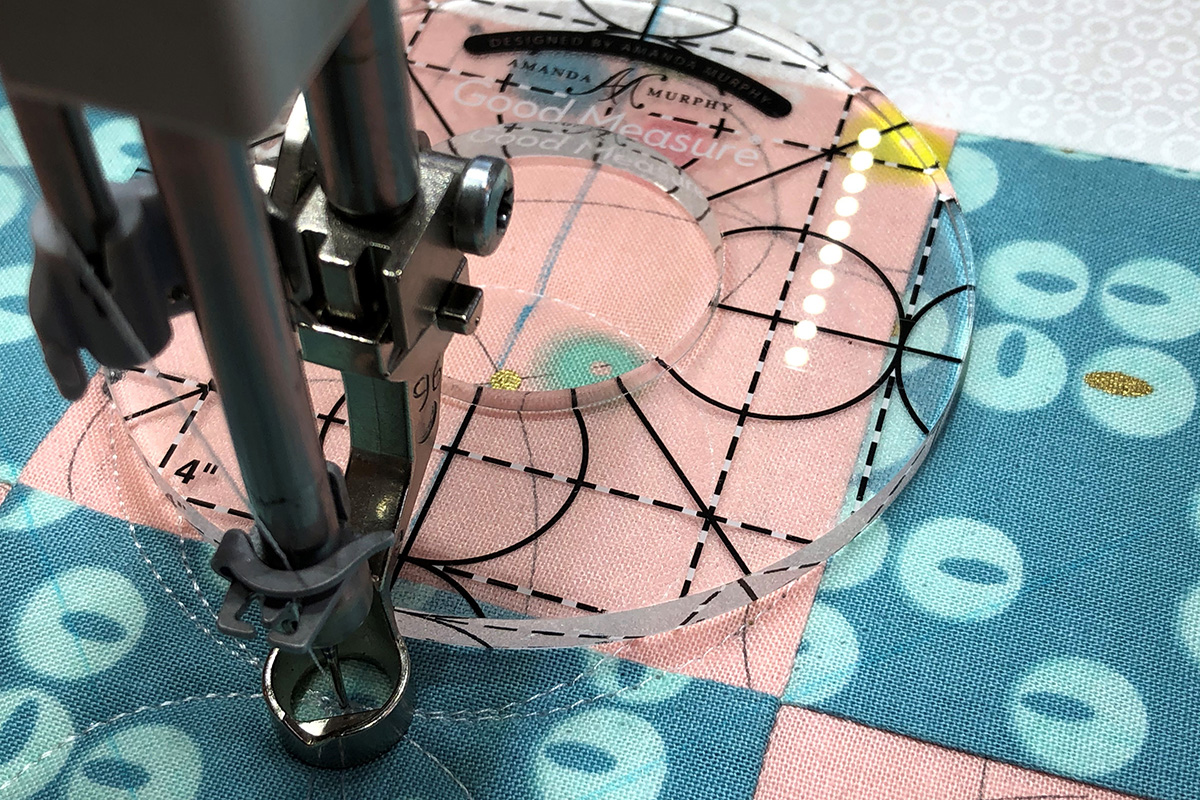
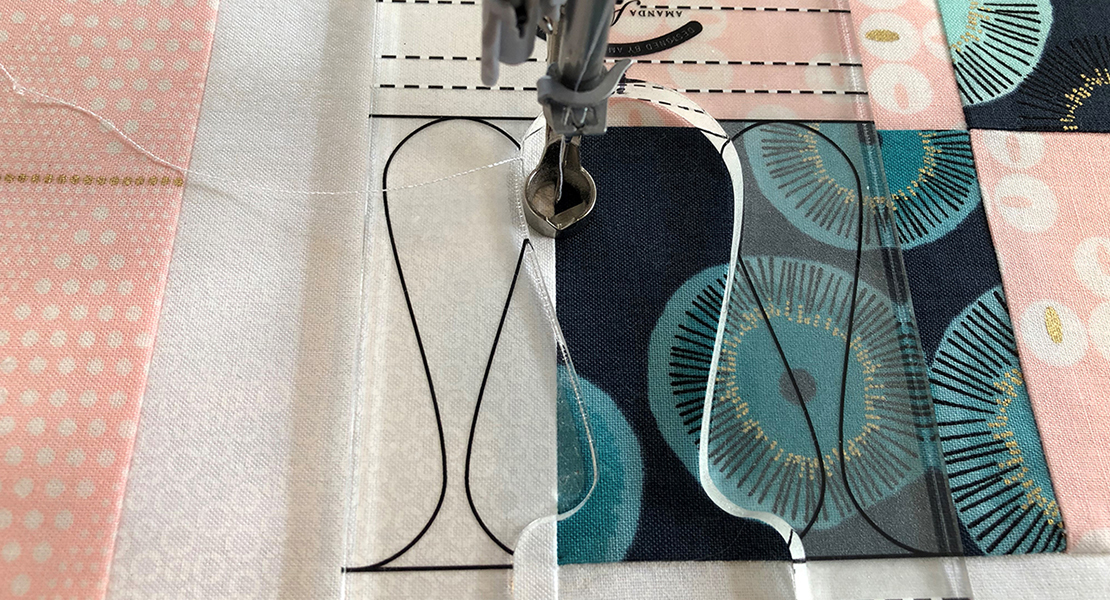
The rulers used on this block are the Good Measure Amanda Murphy Every Circle Set.
Any of these sets may be used, although the circle sizes may be different. If using the BERNINA rulers, consult the ruler instructions in the set.
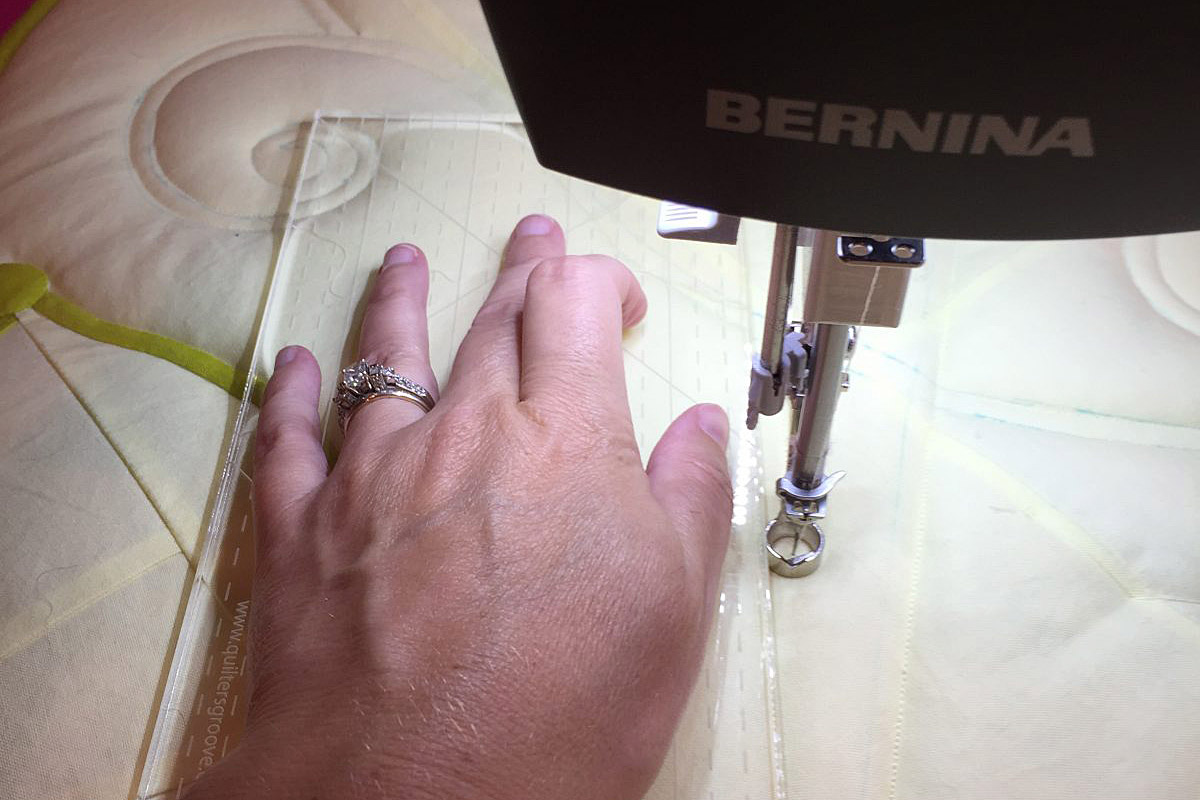
Now may be the time to practice stitching circles on one of those extra quilt sandwiches I suggested you make. To make that perfect circle, you need to stay with the edge of the ruler, whether you are stitching inside the ruler or the outside of the ruler. It takes practice and a concentrated effort to stay with the curve of the ruler. When you look at the photos in the blog, you may even see where I removed stitches when I wandered away from the edge of the ruler. It happens!!
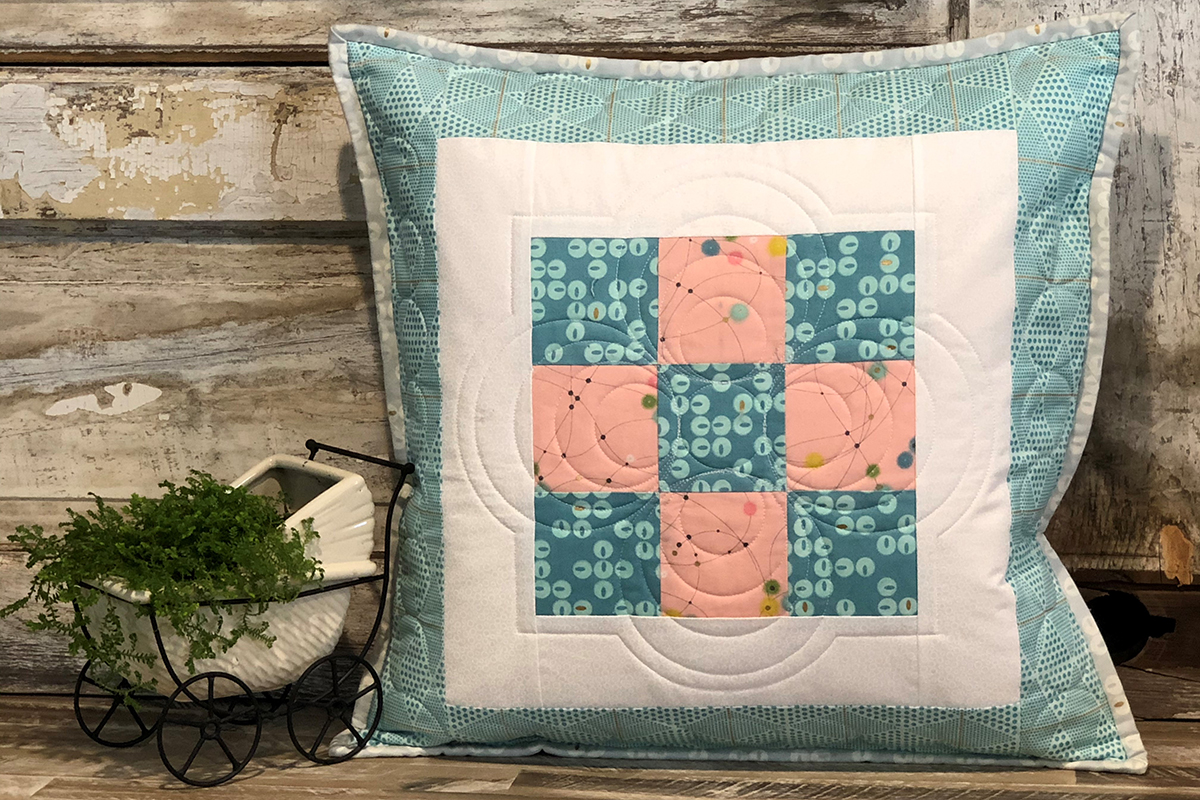
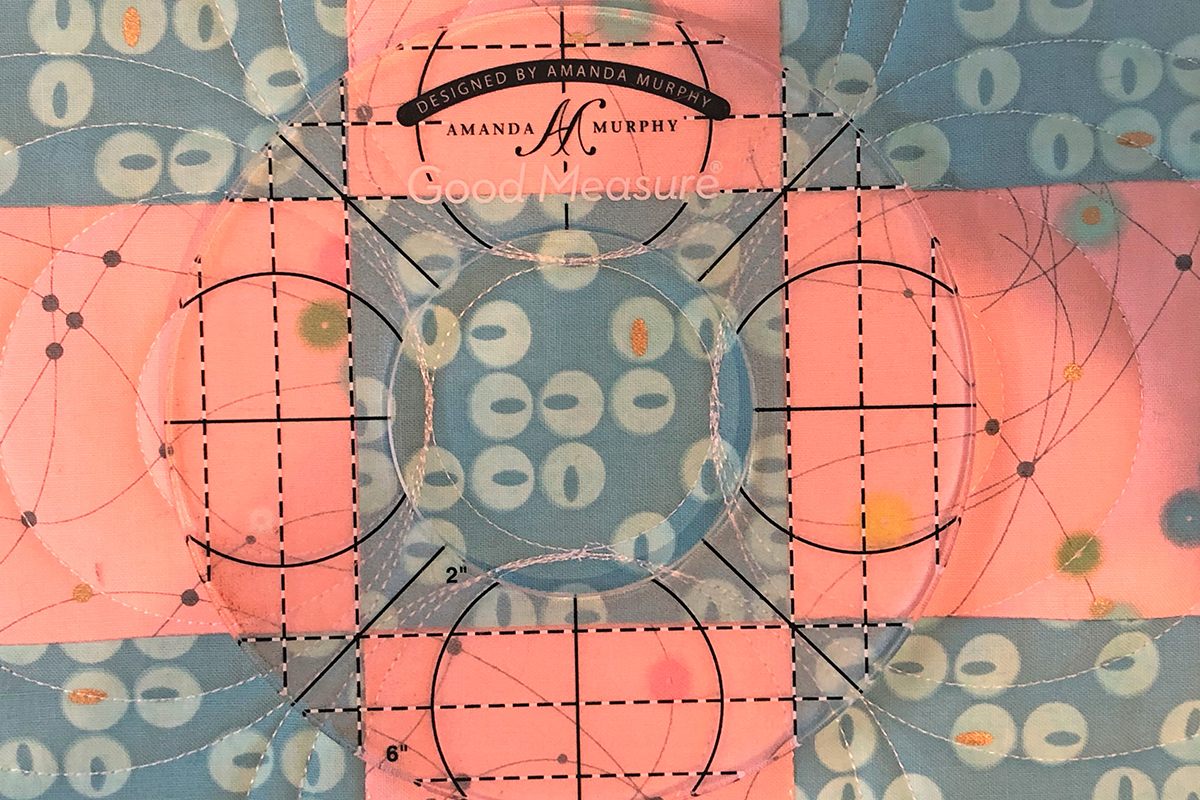
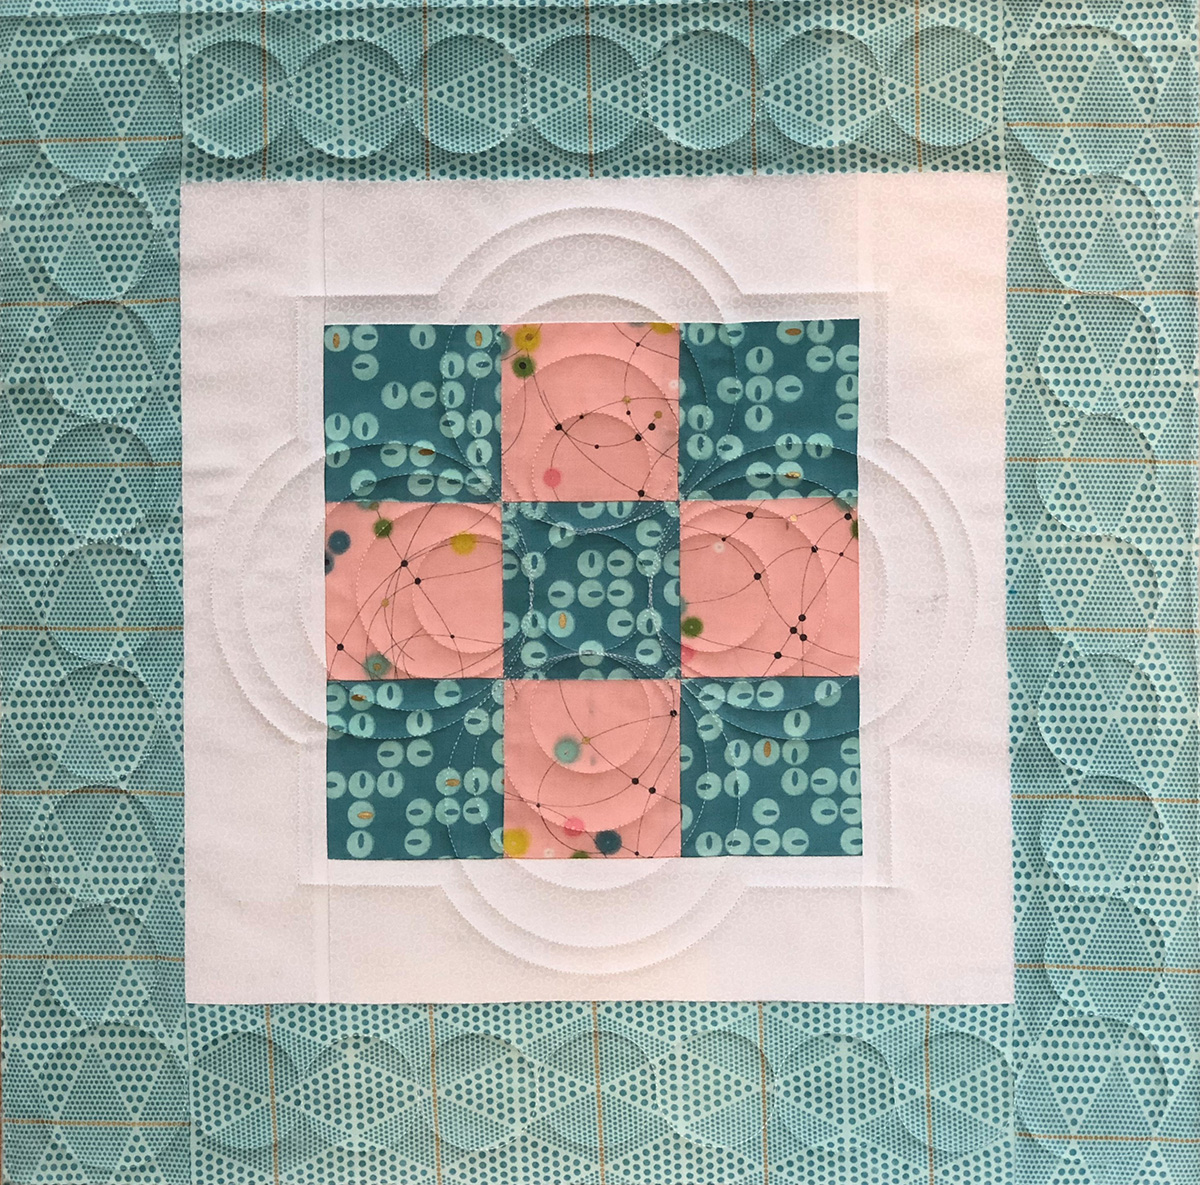
Begin by marking the block. Mark horizontal and vertical centering lines. Mark diagonal centering lines.
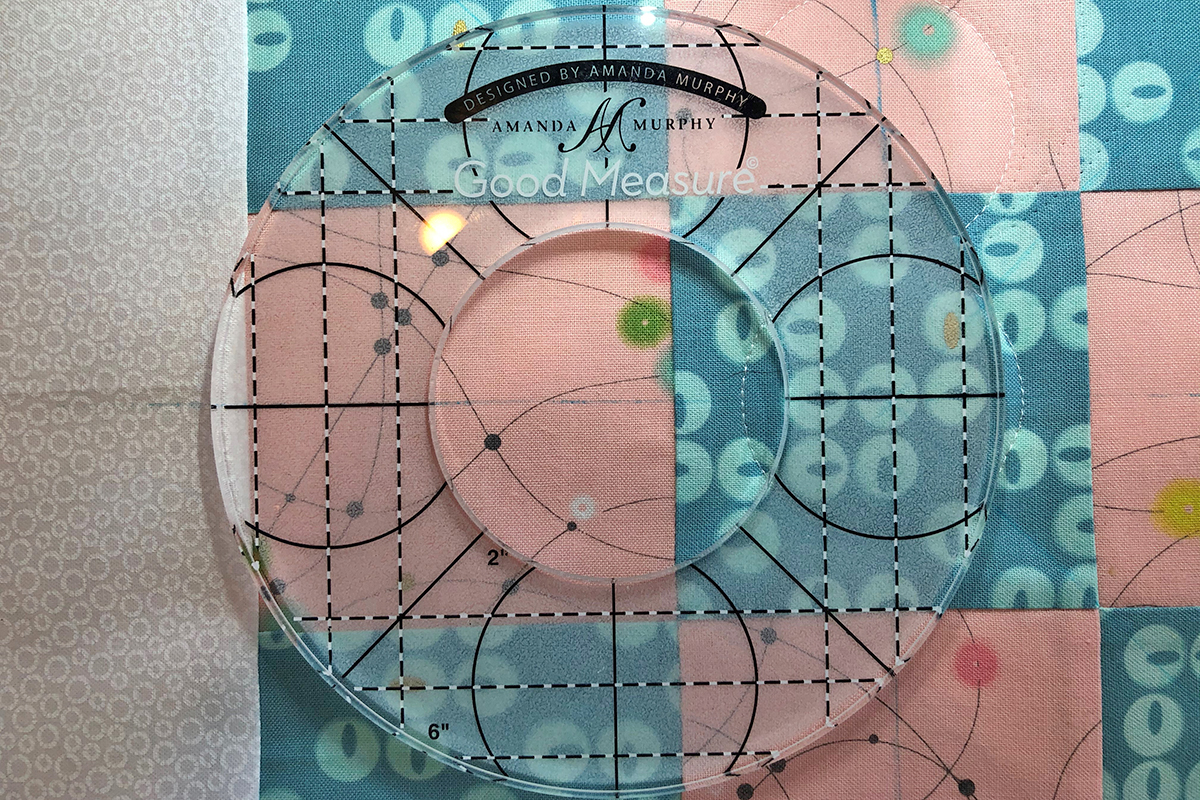
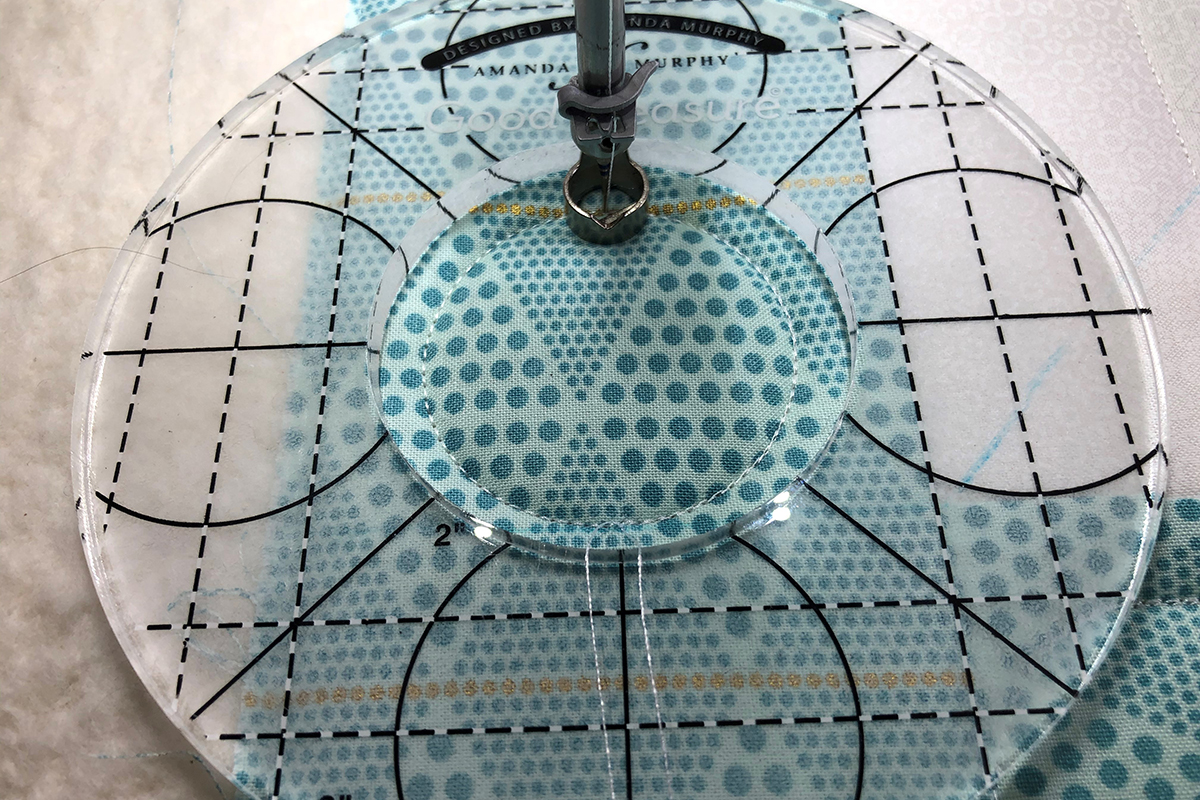
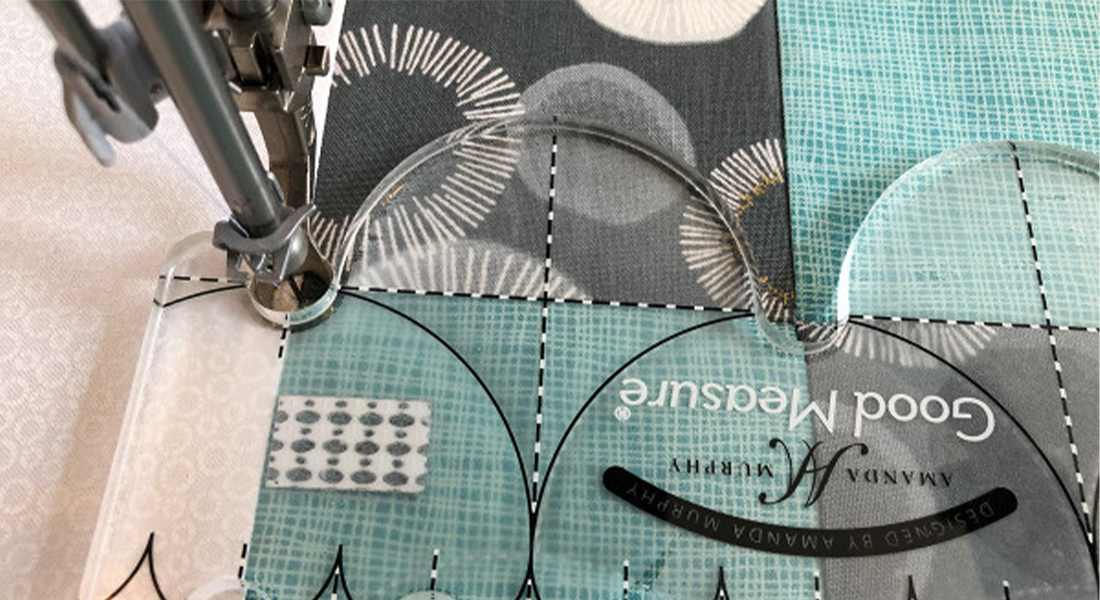
Using the Good Measure rulers, locate the circle with a cutout marked 2”. The stitched circle will be 1 ½”. Place the circle in the center of the block as you see in blue on the roadmap. The marked lines on the ruler will frame the square.
Pull up your bobbin thread and stitch a circle guiding along the inside of the ruler. Cut your threads.
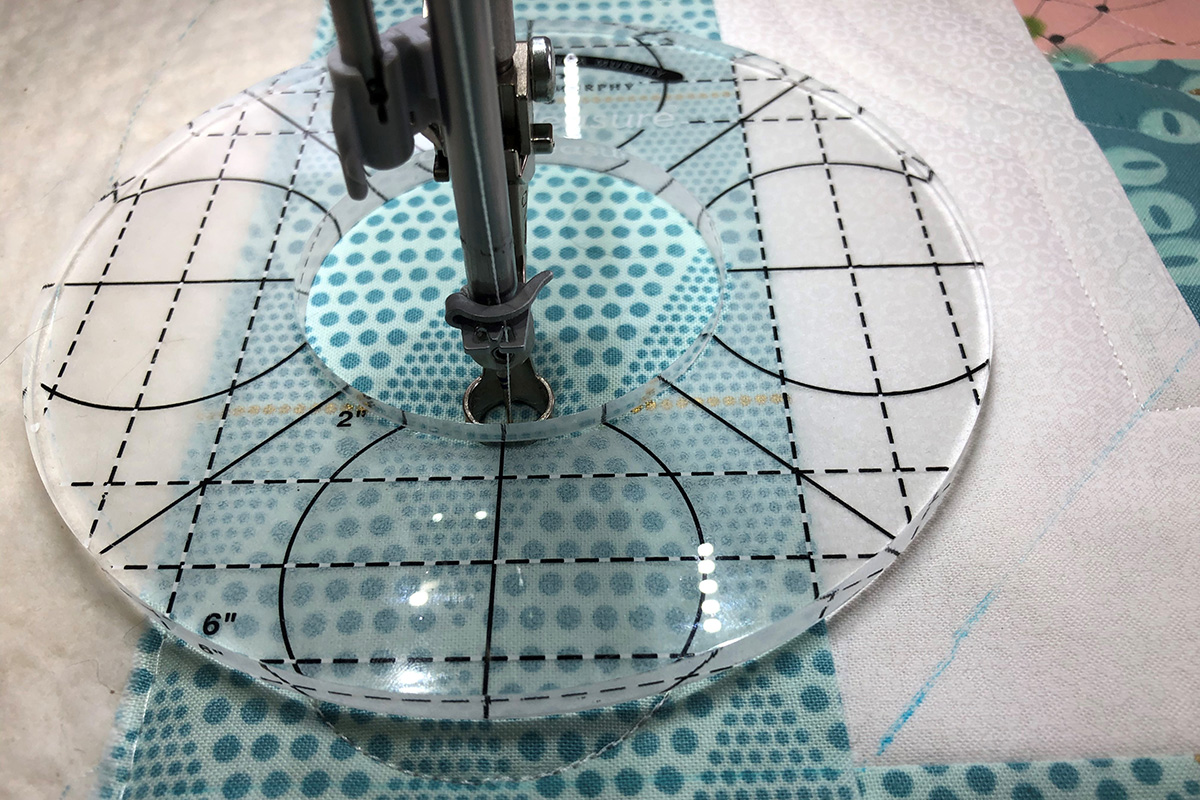
Now stitch circles on all four sides of the center circle, edges touching, cutting the threads between each circle. Use the lines on the Good Measure rulers to line up the connecting circles. Notice the previously stitched circle fits perfectly under the black solid line circle on the ruler.
Our next step will be stitching around the outside edge of the circle rulers.

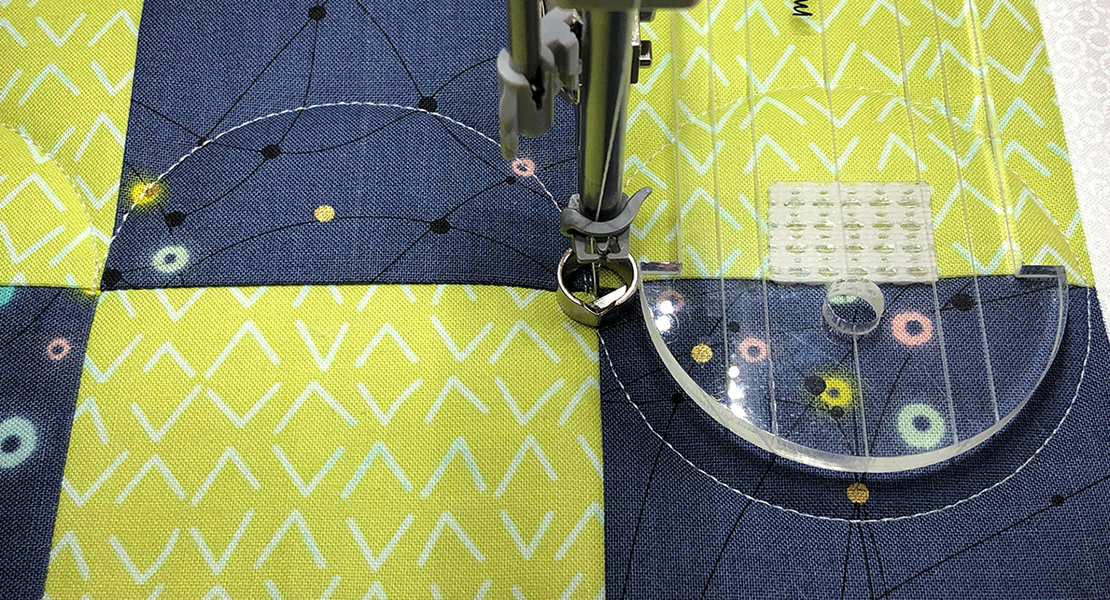
We will use 3 more sizes, 3”, 4” and 5”, and we will stitch all 3 circles without cutting the thread around the circles already stitched. Choose one of the four outside circles you have already stitched and place the needle where the outside circle touches the center circle. Lower the foot and the needle at this intersection. Place the 3” circle against the foot. Using the lines on the ruler, make sure it is centered and straight.
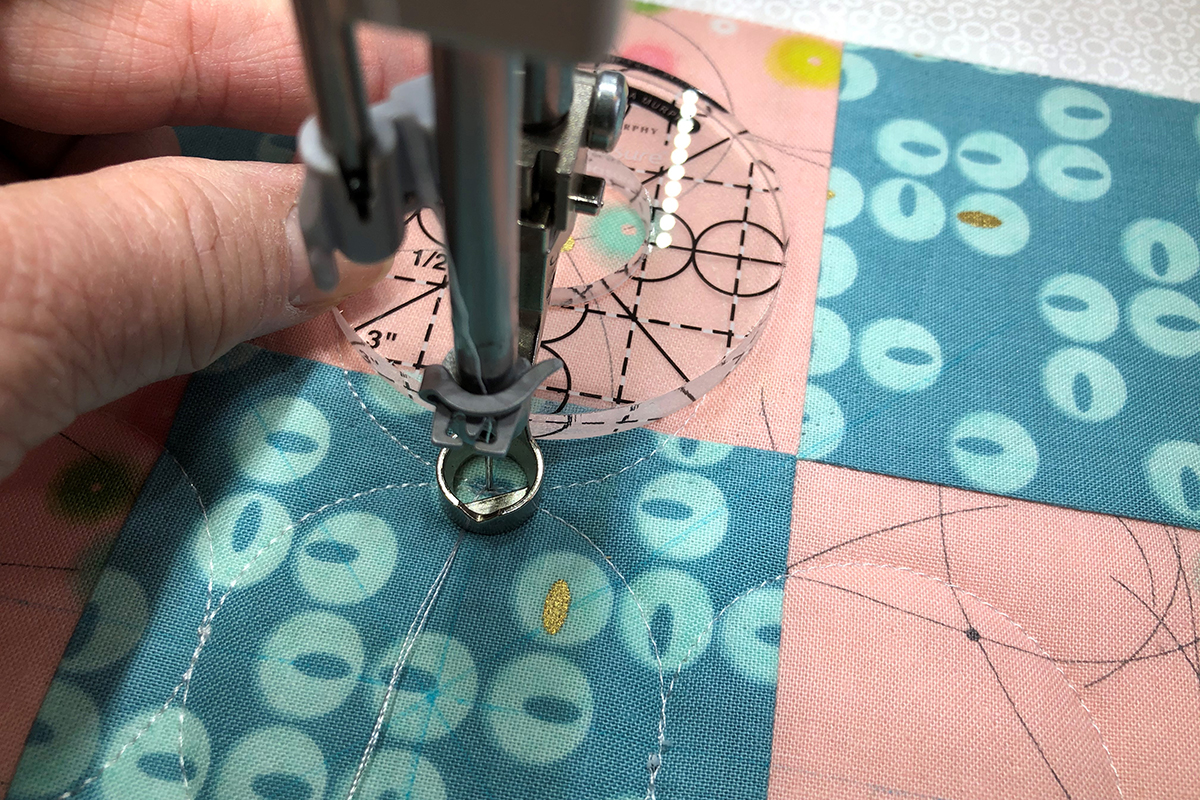
Stitch around the outside of the ruler, stopping where you began with needle and foot down.
Do not cut threads. Remove the circle ruler.
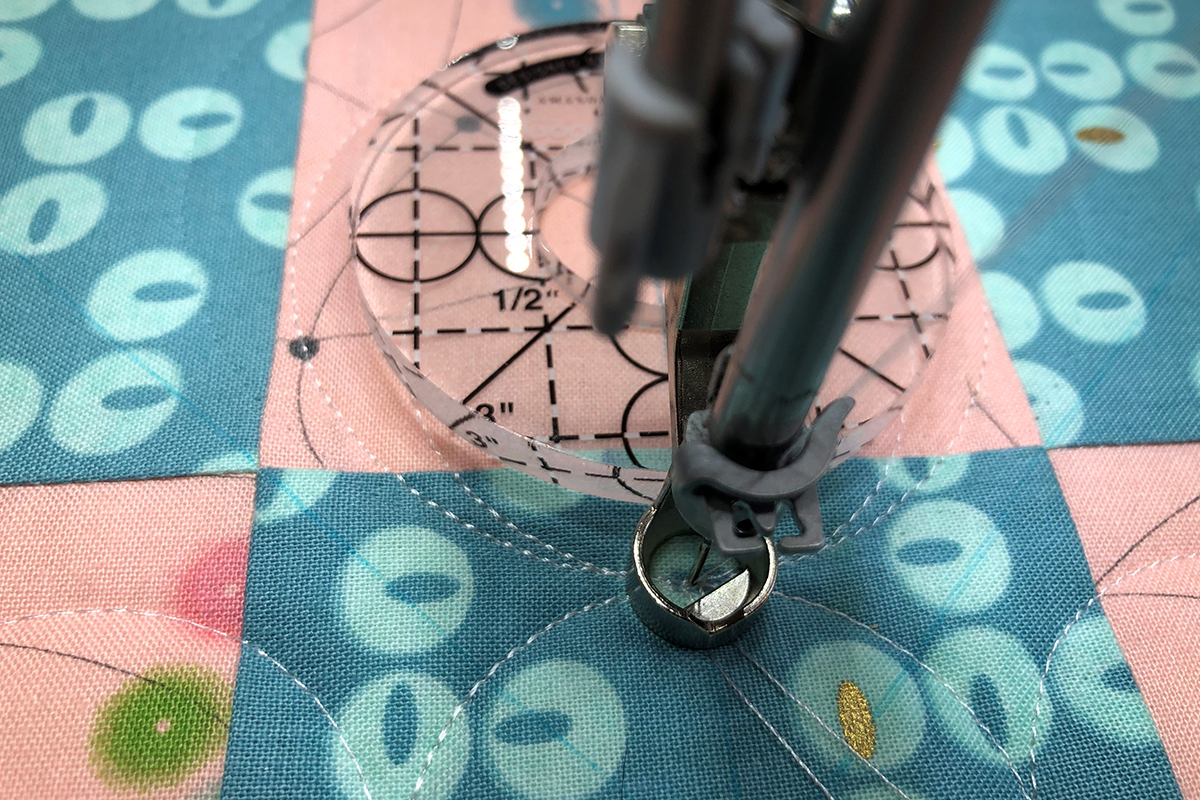
Place the next size ruler (4”) and repeat the process.
Stitch all the way around the circle ruler.

Repeat with the next size ruler (5”). After stitching this circle, the thread will be cut.
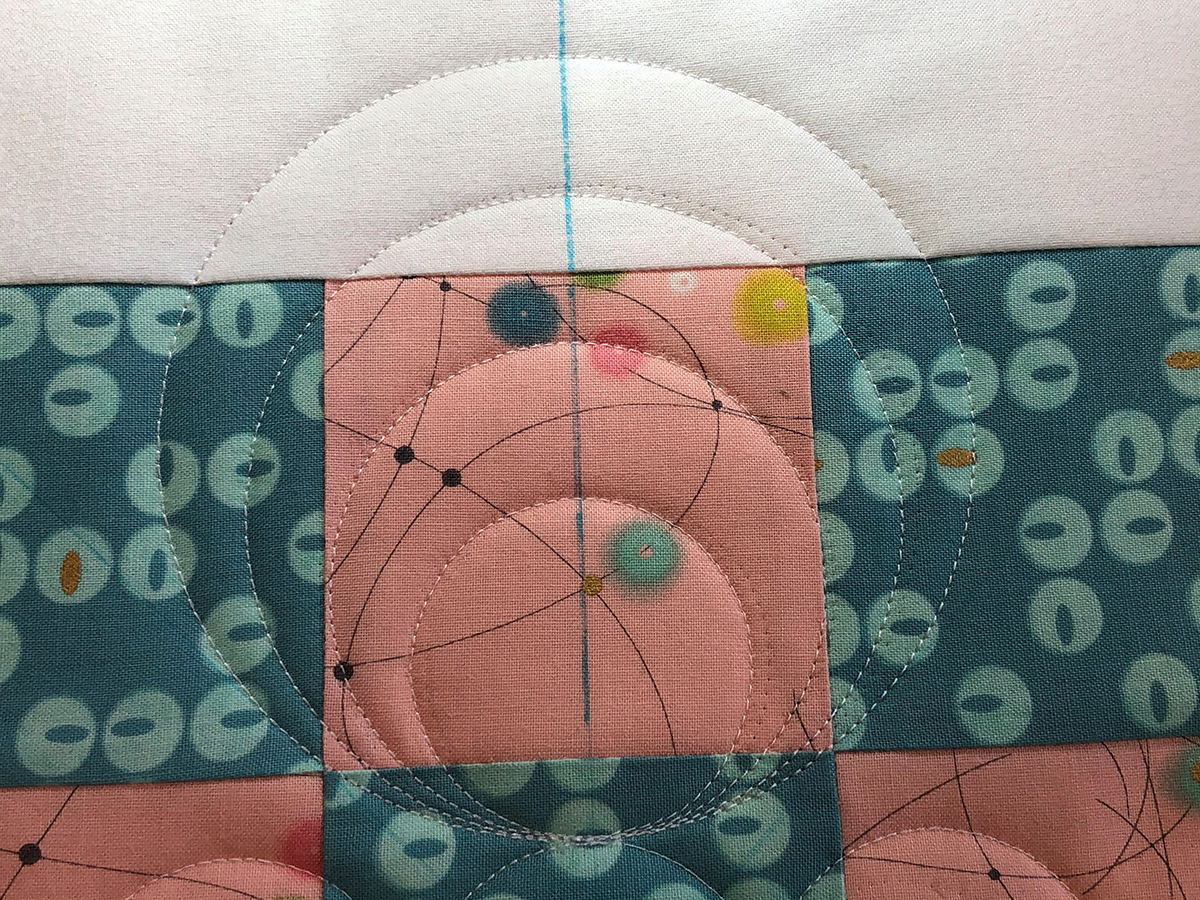
Stitch this motif on all four sides of the center circle. Notice that the outside circle of the motif just touches the neighboring outside circle when using the 5” size.

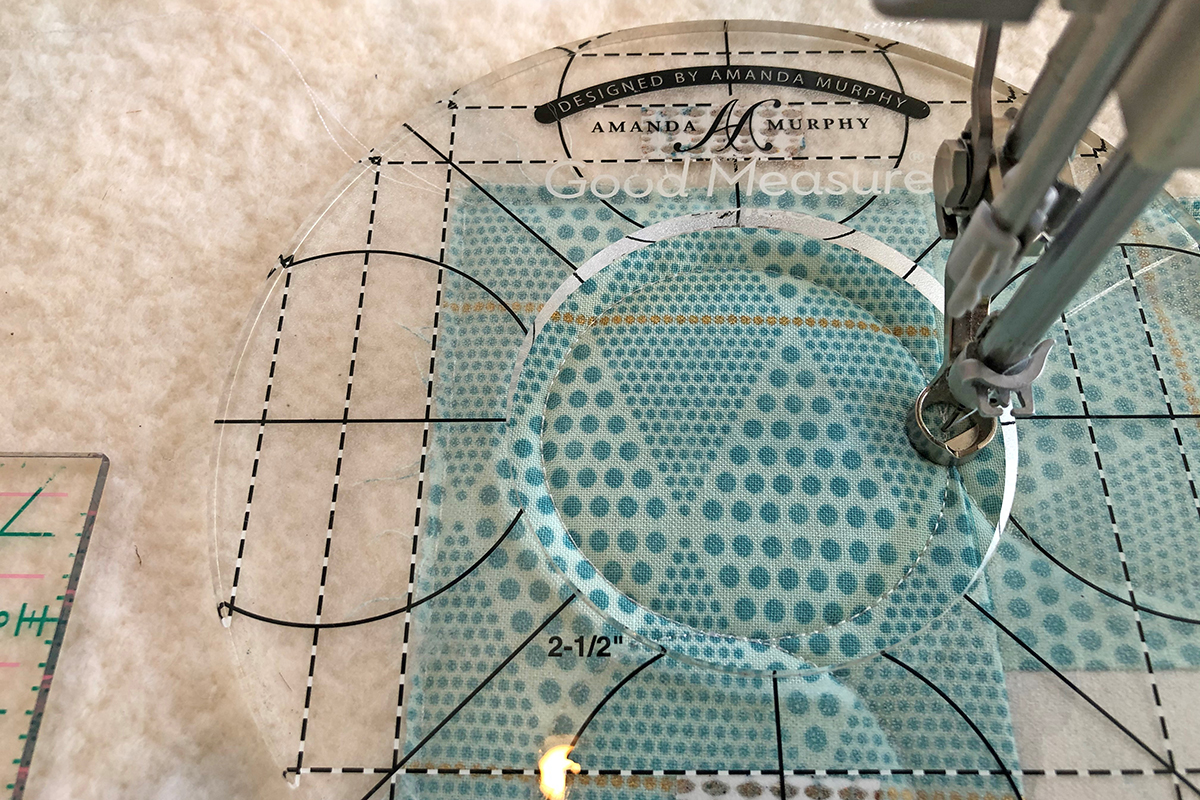
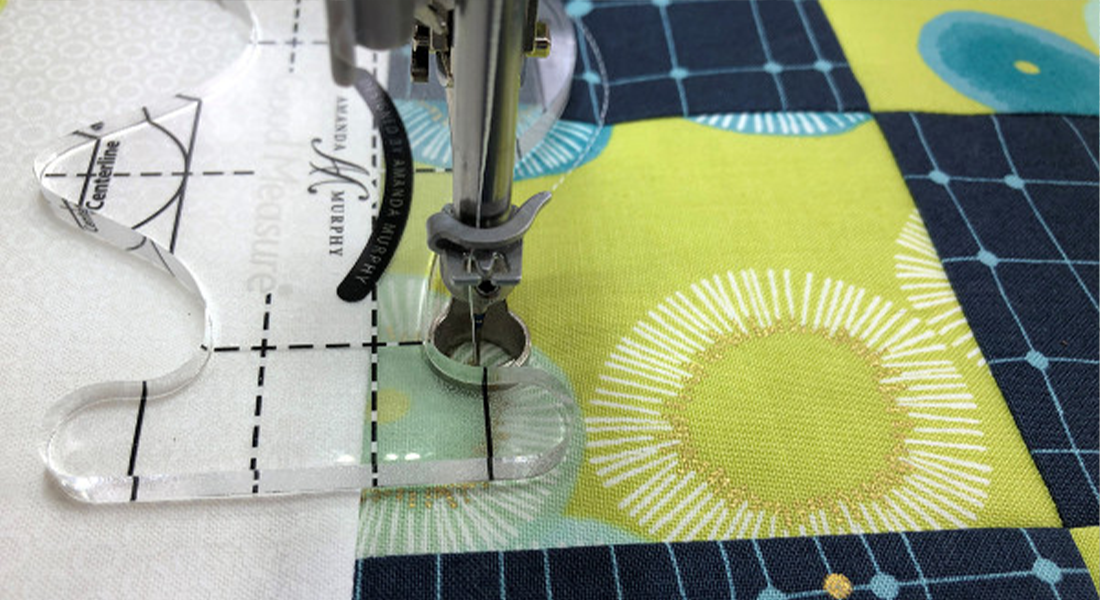
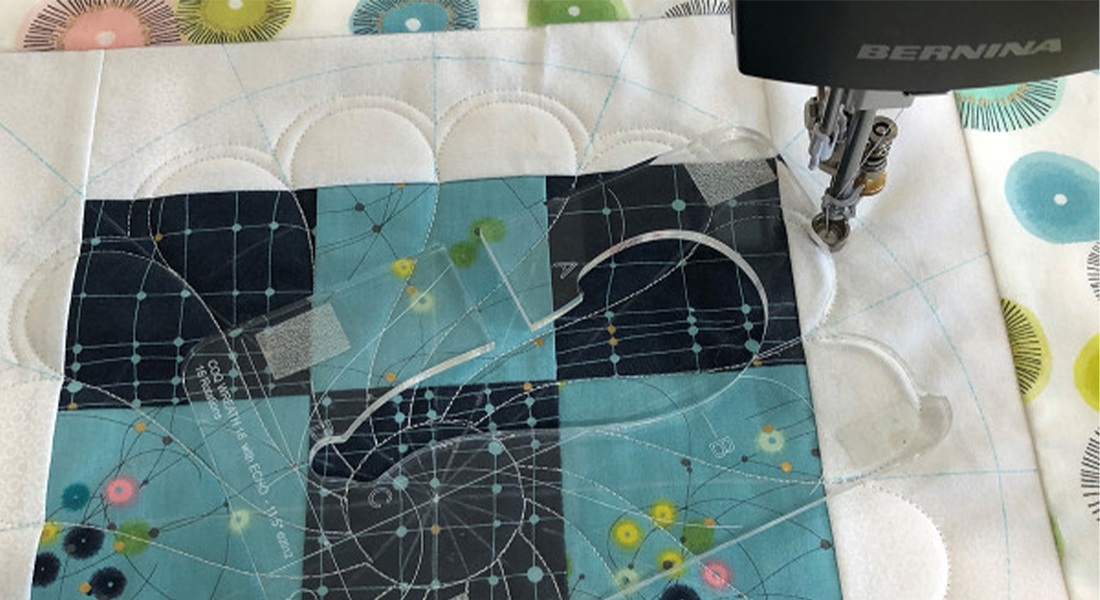
The next step is to echo the entire center motif. Looking at the roadmap (brown stitching), you will see I have added a straight edge ruler to make an interesting design. Attach the BERNNA 3/4″ Echo Clip to the ruler foot. Place the notches of the BERNINA Straight Edge Ruler on the 9-Patch/First Border seam line. (The edge of the ruler will be 1/4″ inside the block.) Place the outside edge of the Echo Clip along the edge of the ruler. Lower the needle into a diagonal line in one corner of the block.

Stitch until the first line on the Echo Clip touches the stitched line of the outside circle. Lay the circle ruler so that the edge of the ruler is on the stitching line.
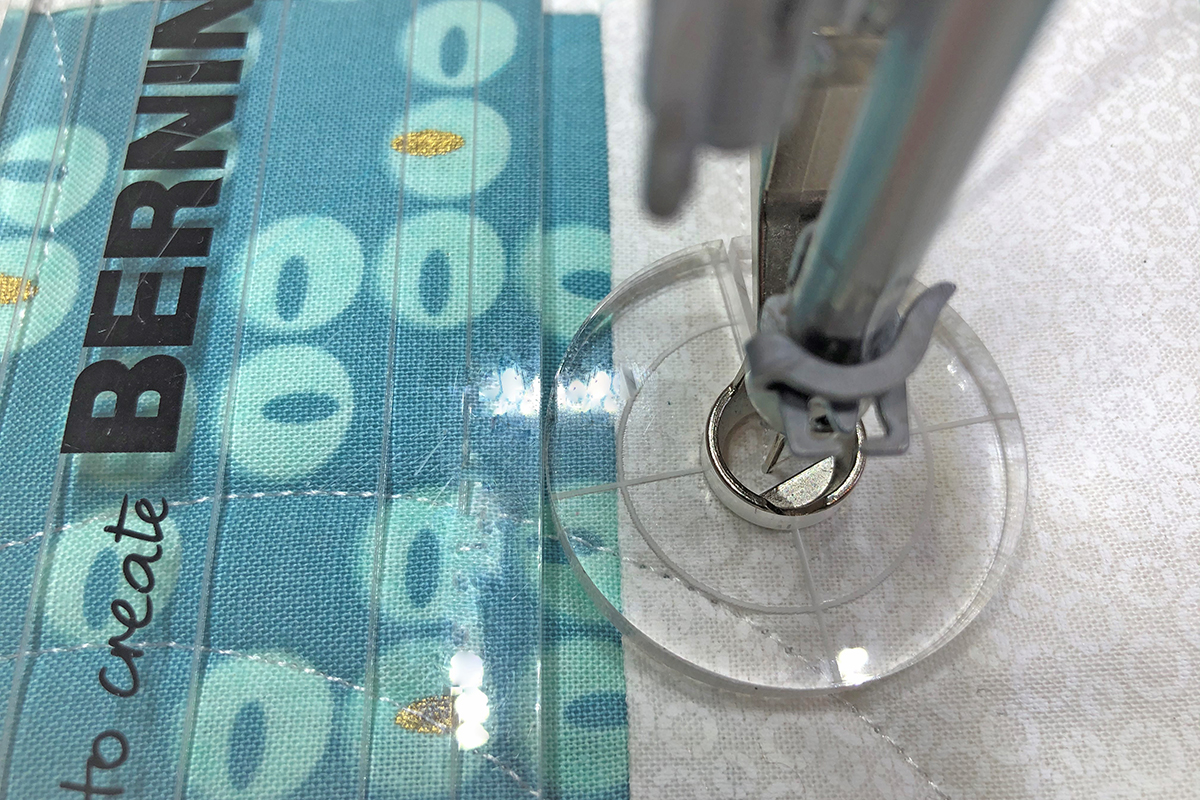
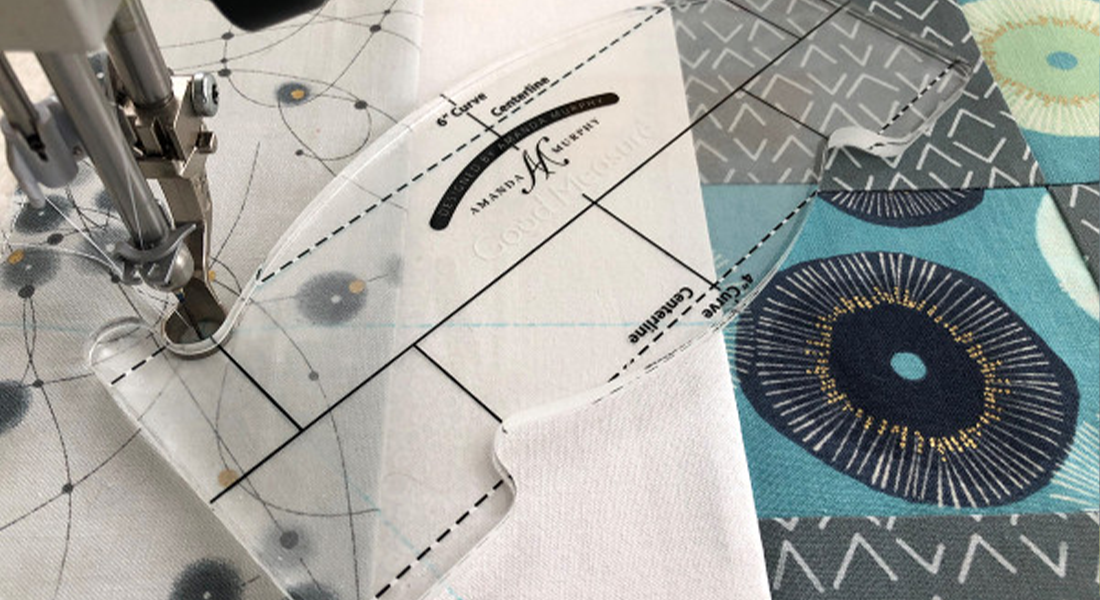
Place the original circle ruler back in its position. There are a lot of markings on the ruler making it possible to align the ruler back in its original position.

Stitch around the top of the ruler until the first line on the Echo Clip touches the seam line. (I removed the ruler for the photo so you could see the stitching line.)
Go back to the Straight Edge Ruler and continue all the way around the motif.
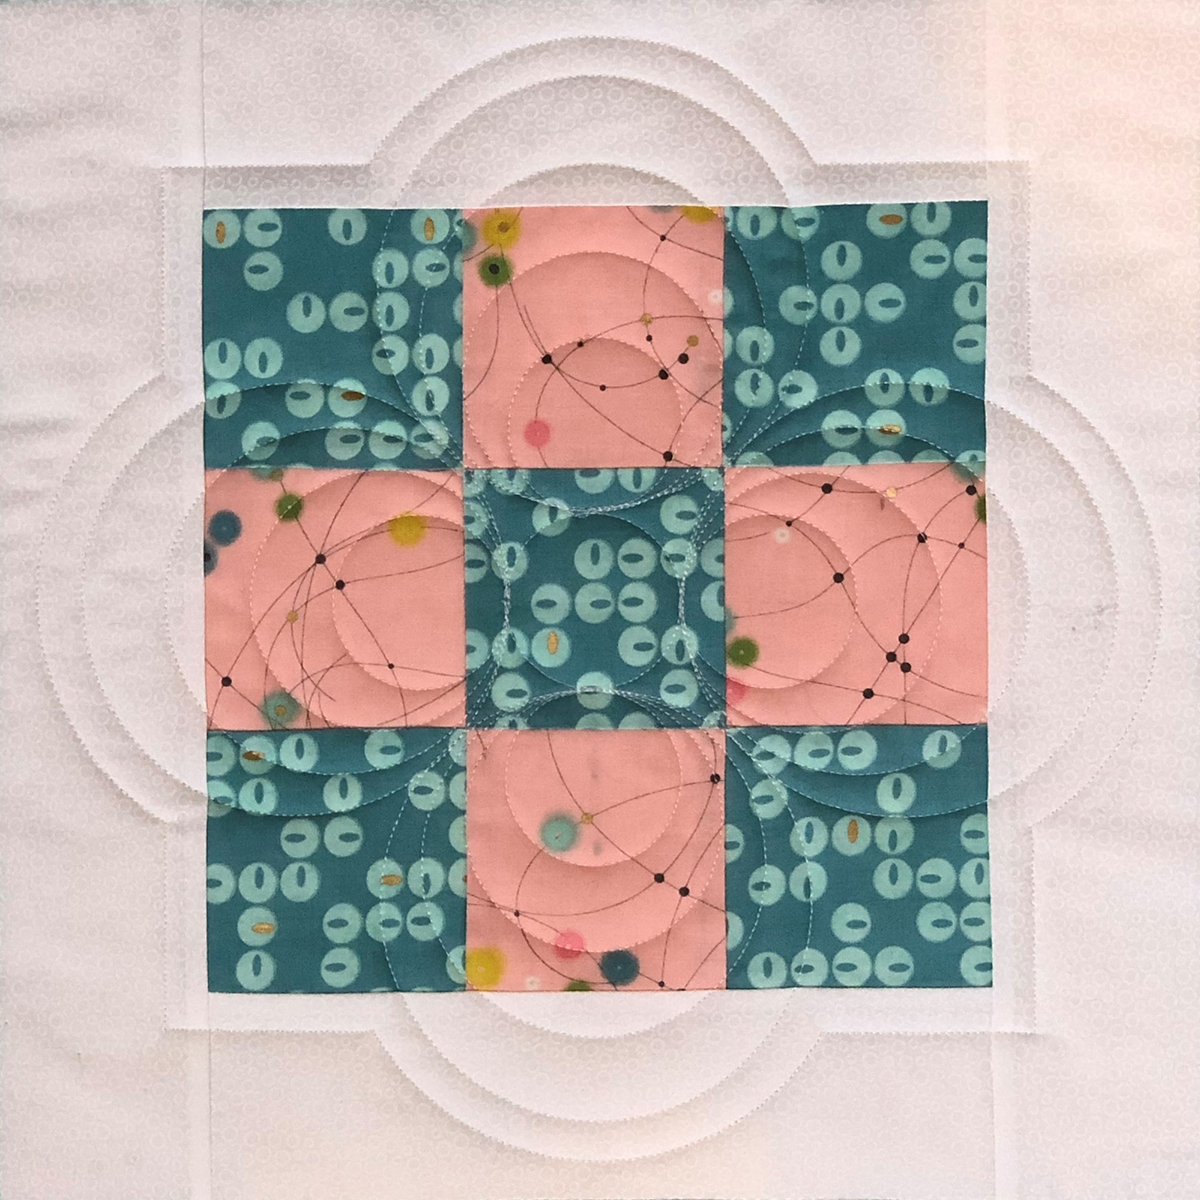
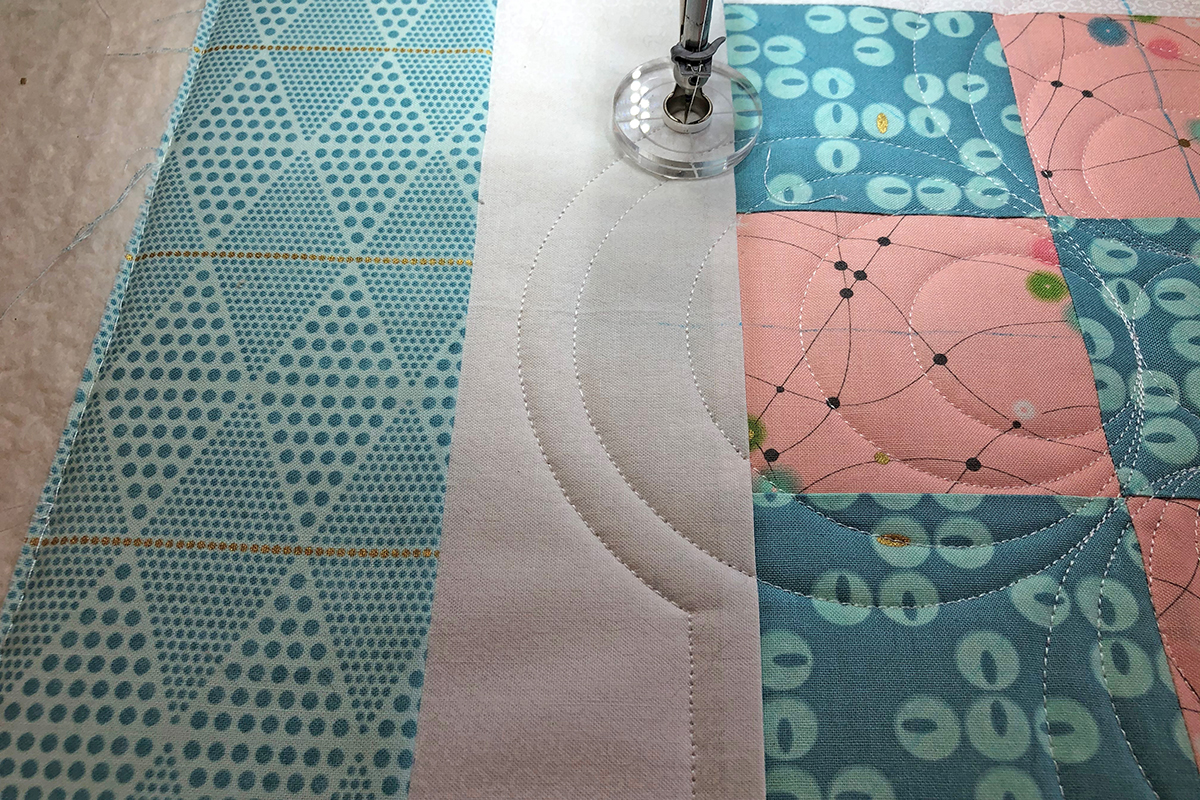
Looking at the roadmap, we can now stitch the green circles in the outside border. The stitched circles are 2”, so mathematically 7 of them should just fit. However, as we have said, nothing is exact. If you measure the side of your block and it is 14” along the edge of the inner border, great! You will begin by marking off each corner so that you can start on a seam line or a marked line. Lay the ruler down so that the edge of the circle to be stitched will be even with this marked line or seam line (a 1/4″ inside the circle).
If you are working with a measurement other than 14”, I would stitch each row of circles in two parts from center out. If this is the case, mark the center of each outside border and begin on the marked center.
Either way, you want the first marked line on the ruler even with the inside seam line as seen in the photo above.
Also, looking at the photo above, notice that a complete circle has been stitched. But because we need to stitch continuous circles, I have stitched another half circle so I can start the next circle. Leave the needle and foot in a down position, slide the ruler and line up keeping the line on the ruler on the seam line and placing the black circle lines on the ruler on top of the previously stitched circle.
You will always be stitching a circle and a half, alternating clockwise and counterclockwise stitching, so the double stitching is never on the same side.
Stitch rows of circles on all four outer borders. To finish the borders, stitch a larger circle in each corner. I used a 2 1/2″ circle. Position the ruler so the circle to be sewn touches the edge of the two sewn circles coming into the corner.

The corner circle will complete the border.
This completes the quilting of the entire block. You could always add free-motion stitching, but it also looks great just the way it is.
Hope you enjoyed stitching circles and that you see the endless possibilities!
Next month we will continue with a curved edge when we will be doing a Clamshell. Clamshells may be done with any circle or half circle ruler but I will be using the Good Measure Amanda Murphy Every Clamshell Set.
Rulerwork for Beginner Series
Rulerwork for Beginners, Part 1: Rulers
Rulerwork for Beginners, Part 2: Roadmap
Rulerwork for Beginners, Part 3: Stitching Circles
Rulerwork for Beginners, Part 4: Clamshells
Used Products


What you might also like


3 comments on “Rulerwork for Beginners, Part 3: Stitching Circles”
-
-
Good information
-
Can you tell me the name and manufacturer of the line of the pink fabric in your block?
Thank you.
Leave a Reply
You must be logged in to post a comment.

Don’t know what foot is being used.