Essential Ruler Quilting Challenge, Part Two: Circles
It’s part two of the Essential Ruler Quilting Challenge.
Welcome! If you are joining the Essential Ruler Quilting Challenge today, please review the introduction for the supply list and part one, where we learn rulerwork with a straight ruler. It’s not too late to join the fun! Today, we learn several rulerwork quilting designs using a circle ruler.
![]()
Join the challenge and download the image above. Share it on social media. Let quilting friends know about the challenge. Use the hashtag #rulerquiltingchallenge
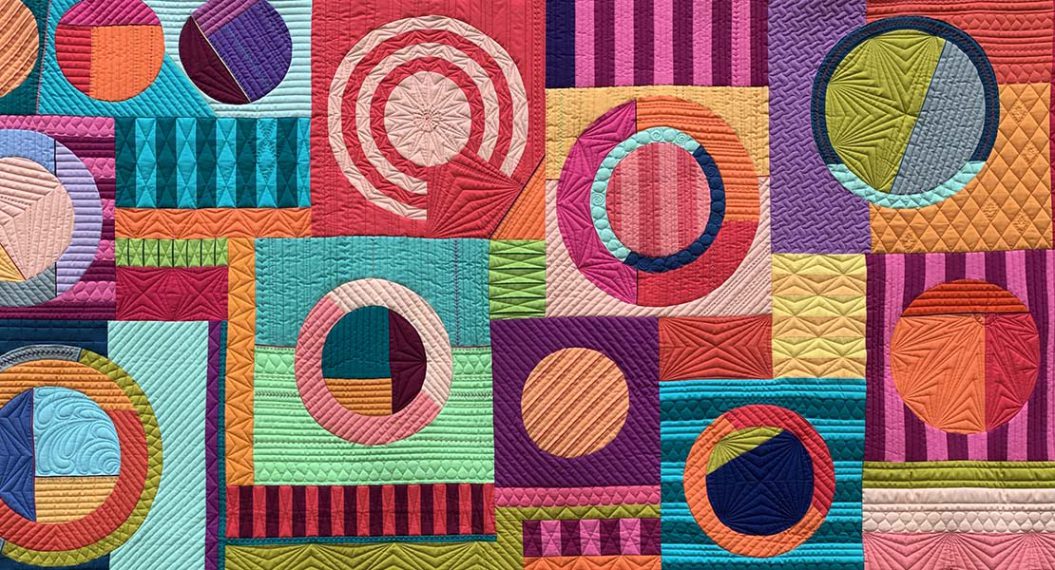
Essential Ruler Quilting Challenge – Circles
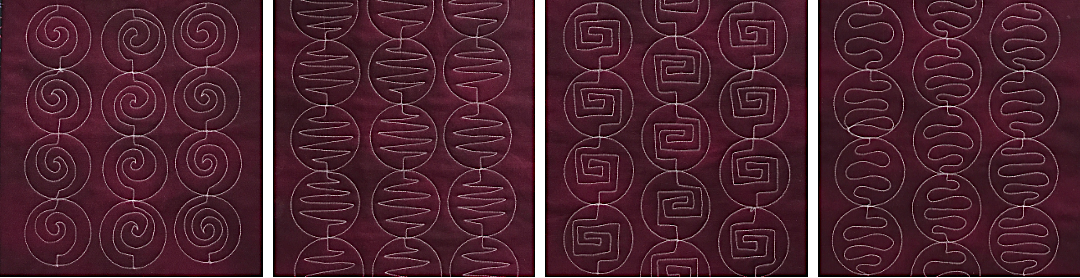
In part two of the Essential Ruler Quilting Challenge learn continuous circle designs. The challenge includes three rulerwork designs and techniques using a circle ruler. One continuous design includes free-motion quilting.
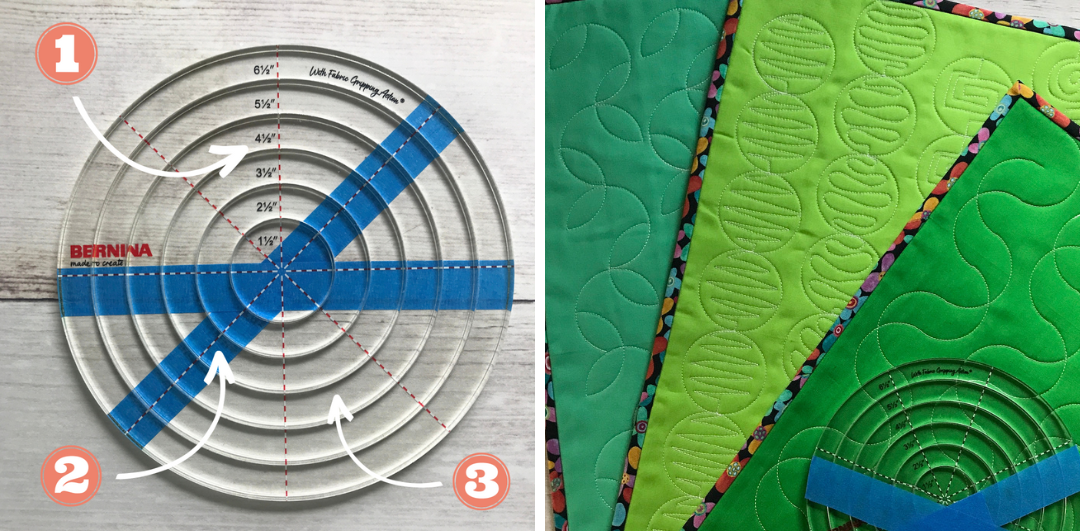
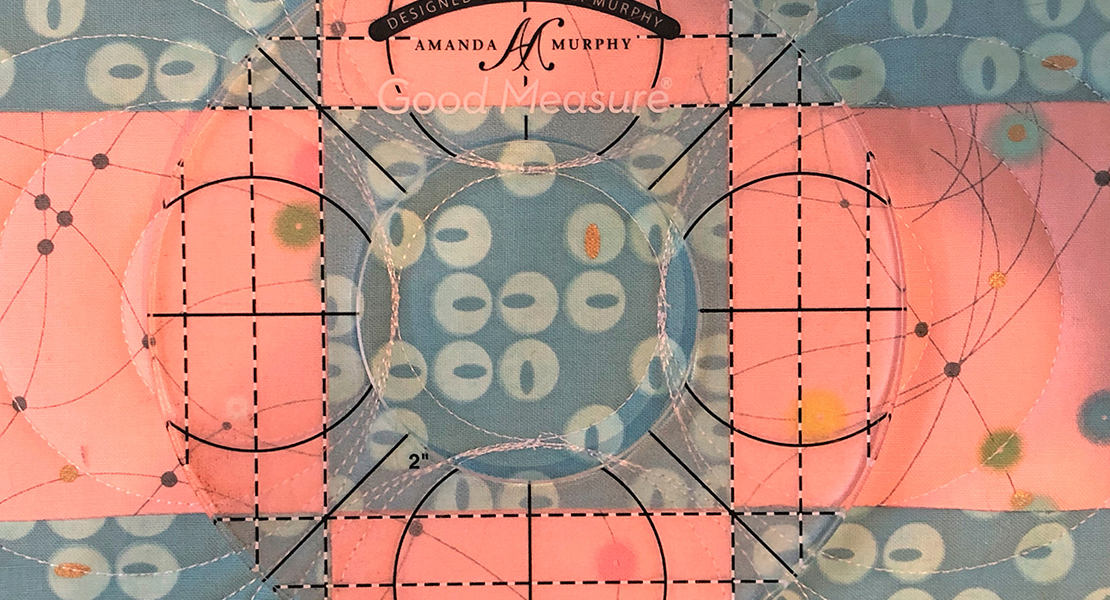
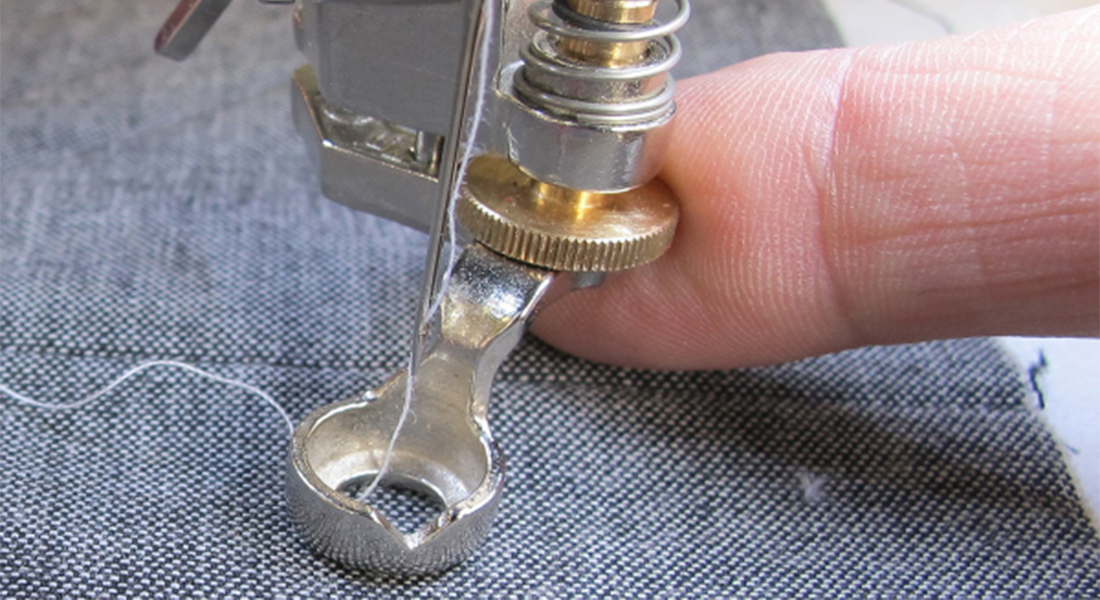
Rulerwork With A Circle Ruler
1- The circle ruler has several sizes from 1-1/2” to 6-1/2”
2 – There are dashed diagonal, vertical and horizontal reference lines on the ruler to help with creating designs.
3 – The nested circles can be used with the ruler foot on the inside or outside of the circle.
Step One
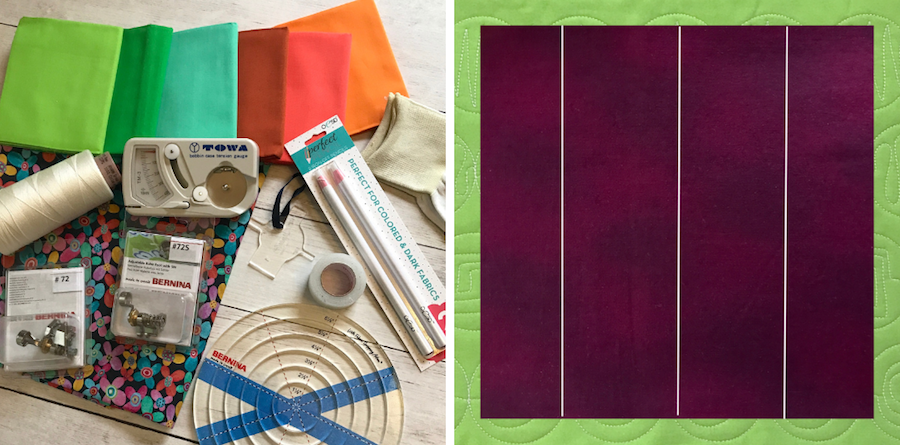
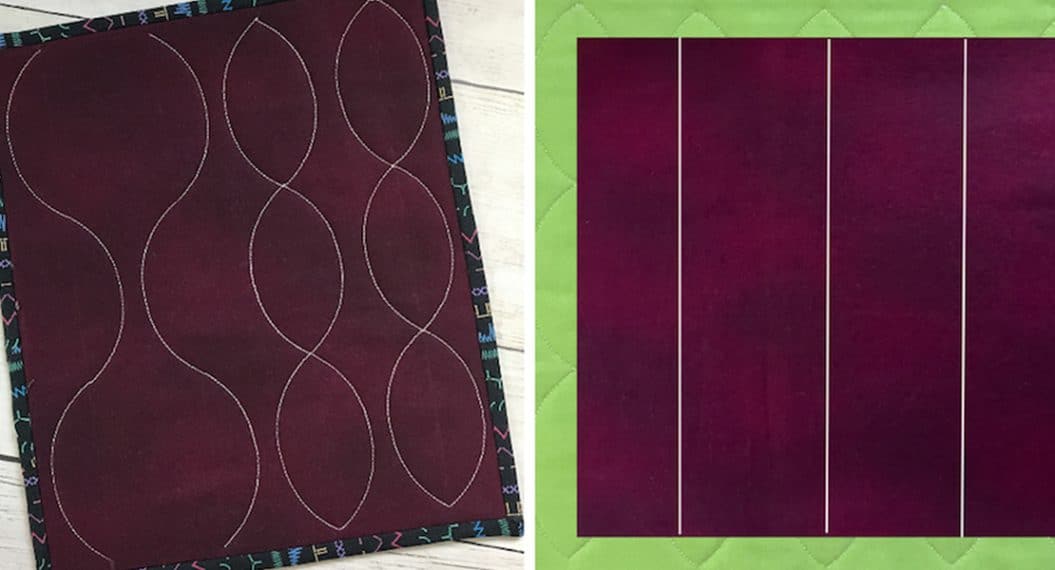
Make the small quilt sandwiches as indicated in the supply list.

Step Two
Mark lines 2-1/2” apart as seen above. The first line(left) should be at least 2” from edge of fabric.
Step Three
Set up a home machine or a longarm for free-motion ruler quilting. I used a BERNINA Q20 sit-down longarm. Learn how to attach and use the foot in video tutorial 1, and video tutorial 2
Step Four
After practicing on the small practice sandwich, apply these techniques to a larger quilt sandwich. Watch tutorial videos for each design below.
Rulerwork Half Circle Design
The serpentine design made with half circles is stitched with two vertical passes over the same location. Watch video for step-by-step instructions.
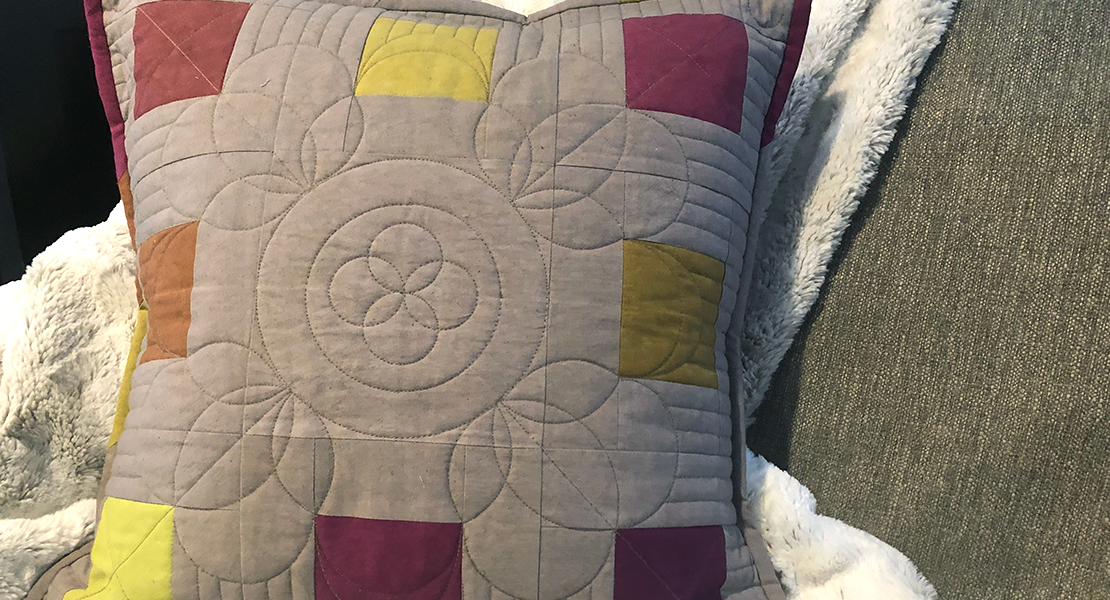
Rulerwork Circle Flower Design
The beautiful flower design is a 7-step process. View the steps below and watch video. Practice on a small piece first, then try the larger quilt sandwich to stitch a beautiful design across the surface of a quilt.
Flower Design Steps
Carefully review and follow the steps to quilt the flower design. Always double-check which step you stitched and which step you are stitching next. Additionally, watch the video tutorial to learn the stitching order of the flower design.
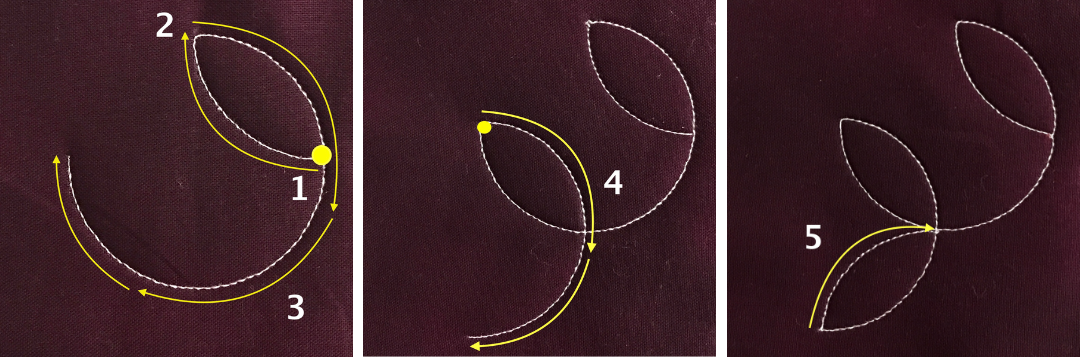
Since stitching the ruler quilting design requires stitching over previous stitches, using a measuring or spacing gauge with a 1/4” arm is key to completing the flower design. Learn more about using the gauges in the video tutorial.
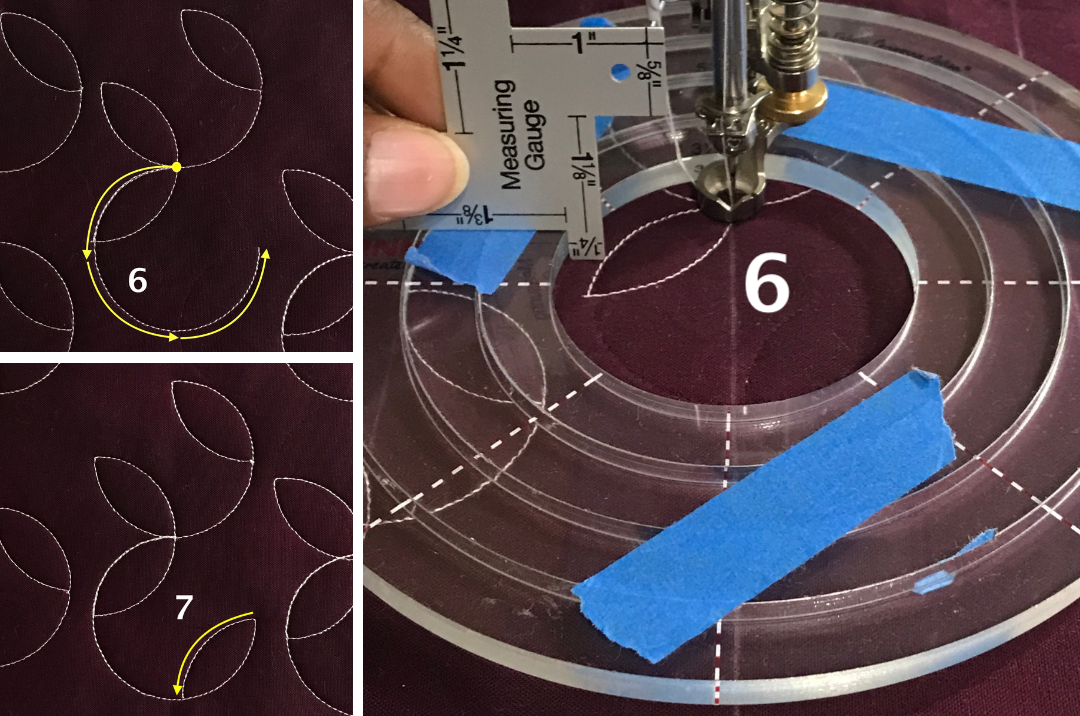
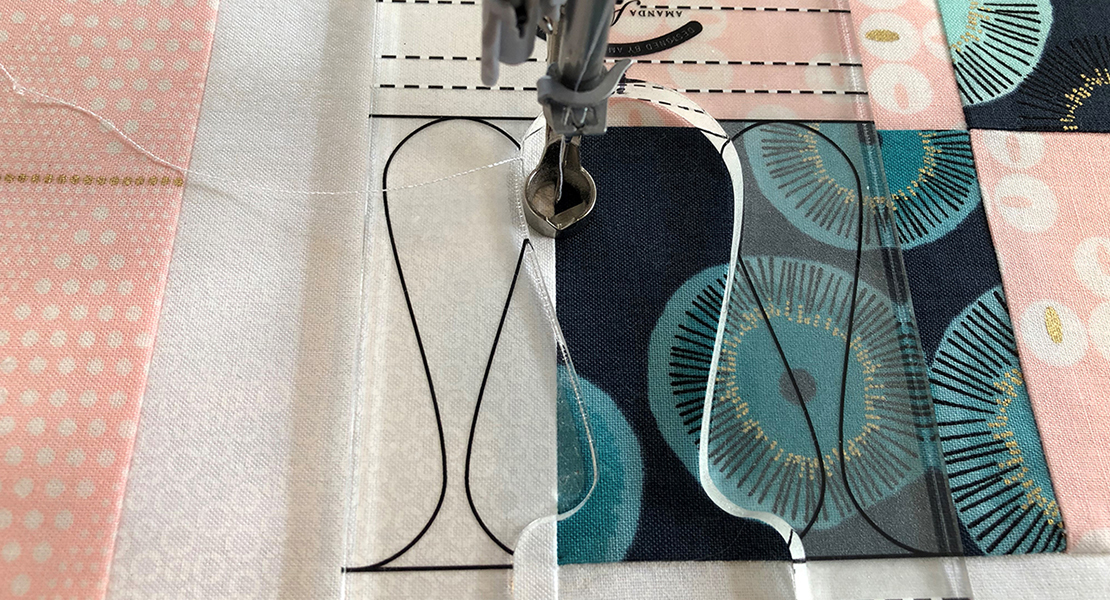
Rulerwork Circle & Free-motion Designs
Now, we learn how to stitch one circle on top of another and include free-motion quilting along the way.
Also, practice the free-motion quilting spiral, zigzag and curvy design on paper before stitching each rulerwork design.
Stitch the four free-motion quilting designs separately or on the same quilt sandwich.
Another option is to stitch a free-motion quilting design we already know and like. The key is starting at the top of the circle and working to bottom of the circle. The video tutorial walks through the stitching order step-by-step.
Next Week
In a week the learning continues with curvy rulerwork designs with a curve ruler. Quilters may use a curve ruler similar to the one in the Essentials Ruler Kit, however, the final design will vary with a different curve shape.


What you might also like


6 comments on “Essential Ruler Quilting Challenge, Part Two: Circles”
-
Thank you for the suggestion to practice each step of the Circle Flower Design. The steps finally clicked as I worked step by step. I appreciate your pace in explaining the stitches too.
-
I am so excited to hear you worked through it step by step and it “clicked”. Also, thanks for letting me know the video tutorials are at a good pace.
-
-
Thank you so much for your time and efforts on the videos! I’m learning so much. Although I need to practice my leaf design, I did figure it out and that is thanks to your amazing instruction! I’m learning so much and am really loving the challenge.
-
Hi Alice,
You are very welcome! I am pleased to hear you are learning and are willing to practice. The leaf/flower design is challenging but so worth it! Please tag me on social media when you share your progress photos. I am excited you are loving the challenge!
-
Leave a Reply
You must be logged in to post a comment.

Wow.. Geraldine is a FANTASTIC teacher. Thank you, Geraldine!