Rulerwork for Beginners, Part 1: Rulers
Rulerwork is a quilting technique using thick acrylic quilting rulers to create exact, repeatable designs. Quilting rulers are used with a foot designed for rulerwork, as a guide for a line, a curve or a specific design. These techniques are not new to the world of quilting, most especially longarm quilting. Longarmers have been using rulerwork techniques for years. Now that we have a ruler foot for BERNINA domestic sewing machines, everyone is able to employ rulerwork techniques.
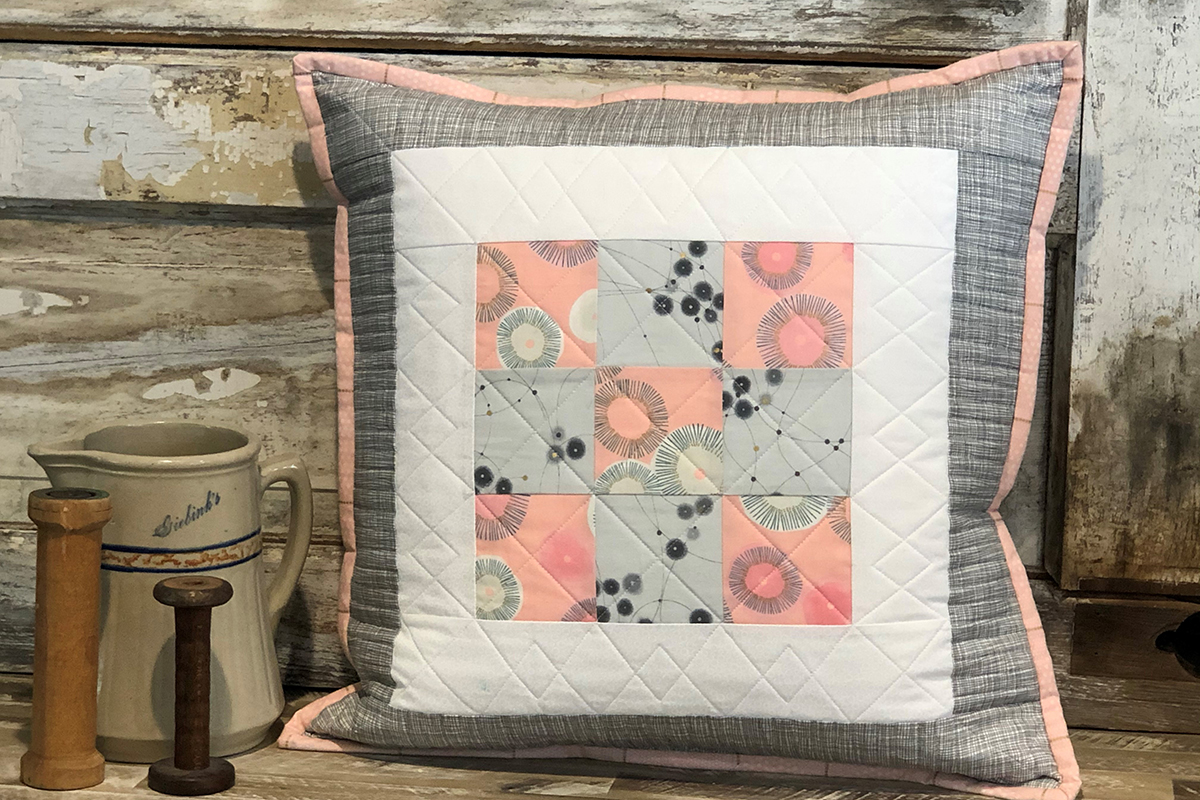
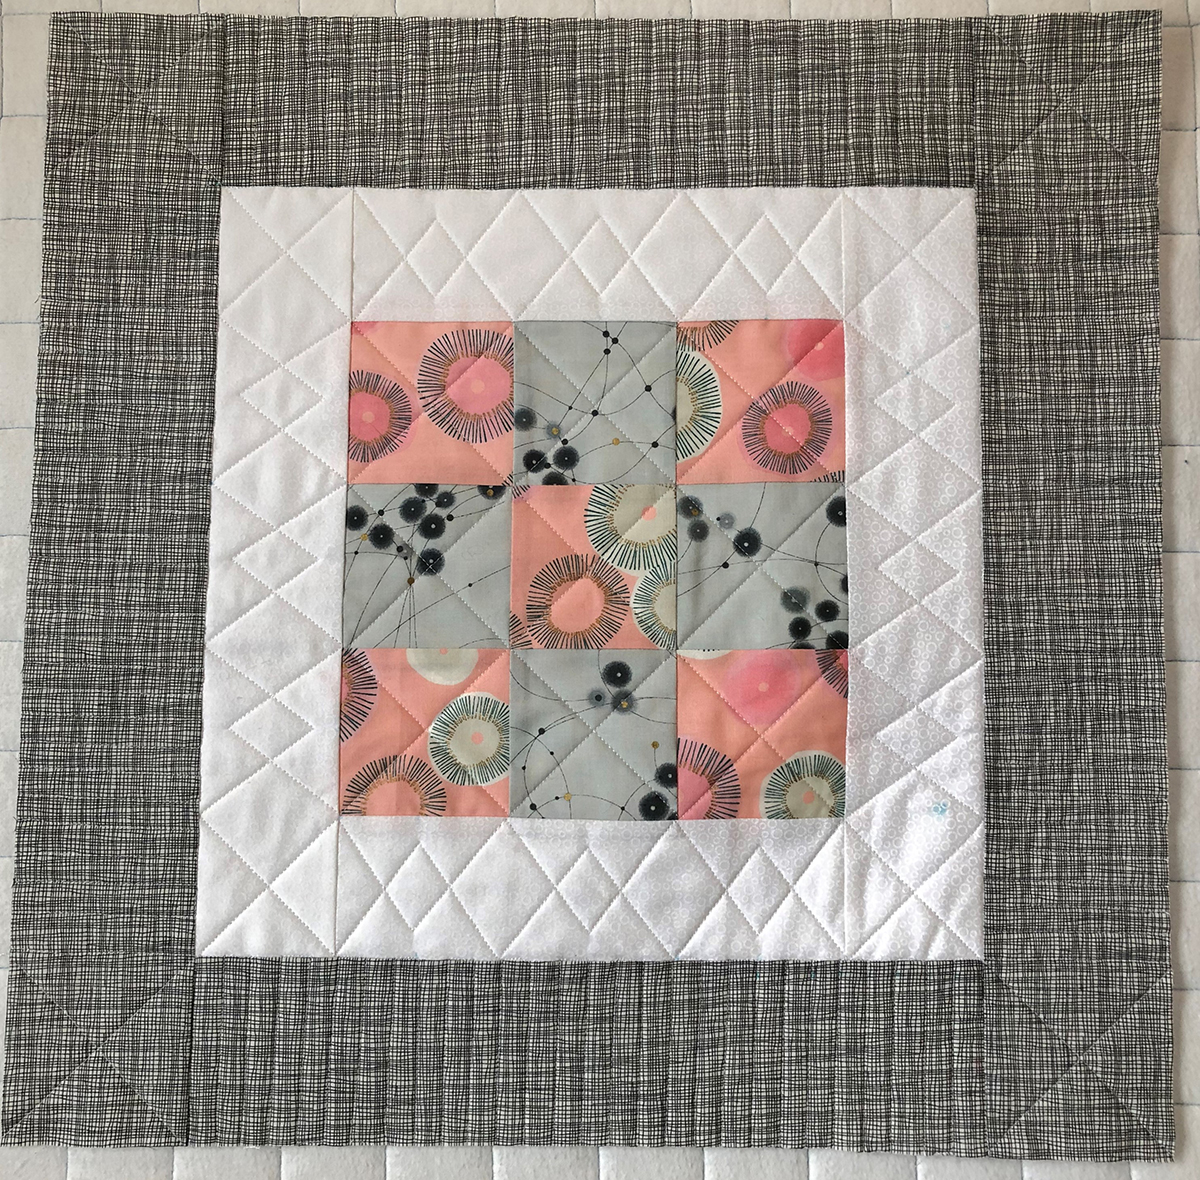
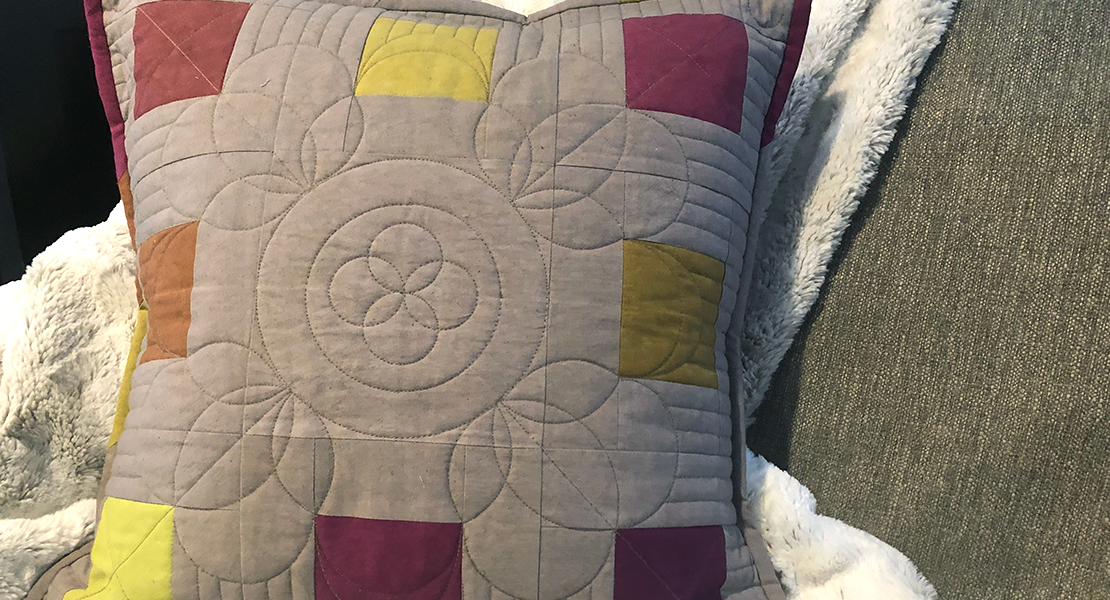
Over the next nine months, we will explore many rulerwork techniques. Each month we will construct a 9 patch block with 2 borders. We will then quilt the block with the ruler technique presented that month. At the end of nine months, you will have the choice of constructing 9 – 20” pillows or putting the quilted blocks together for a 60” x 60” quilt.
Let’s get started.
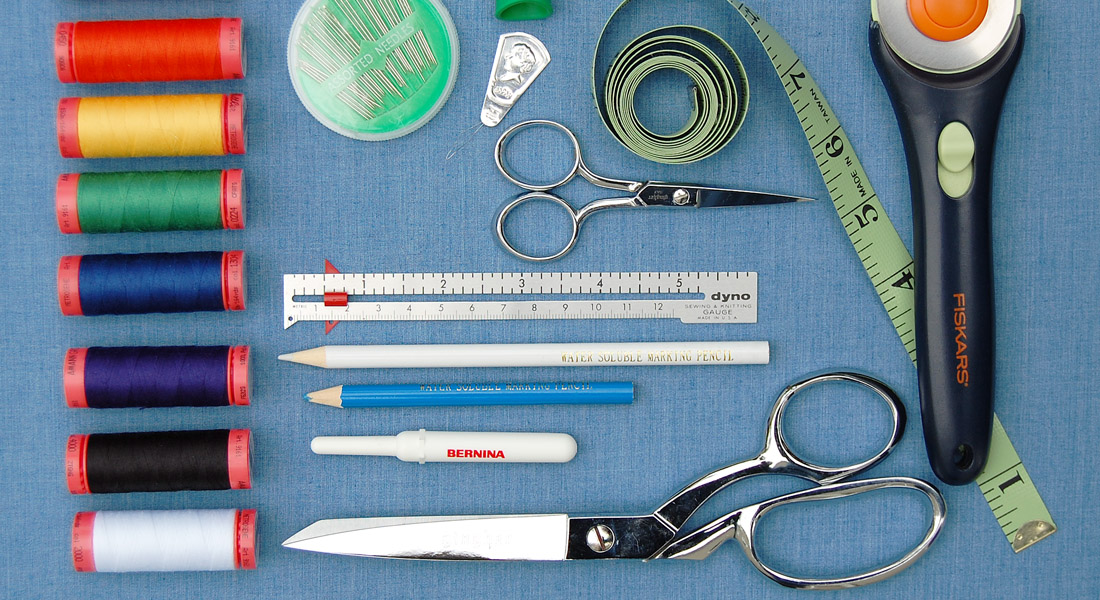
Needed Supplies
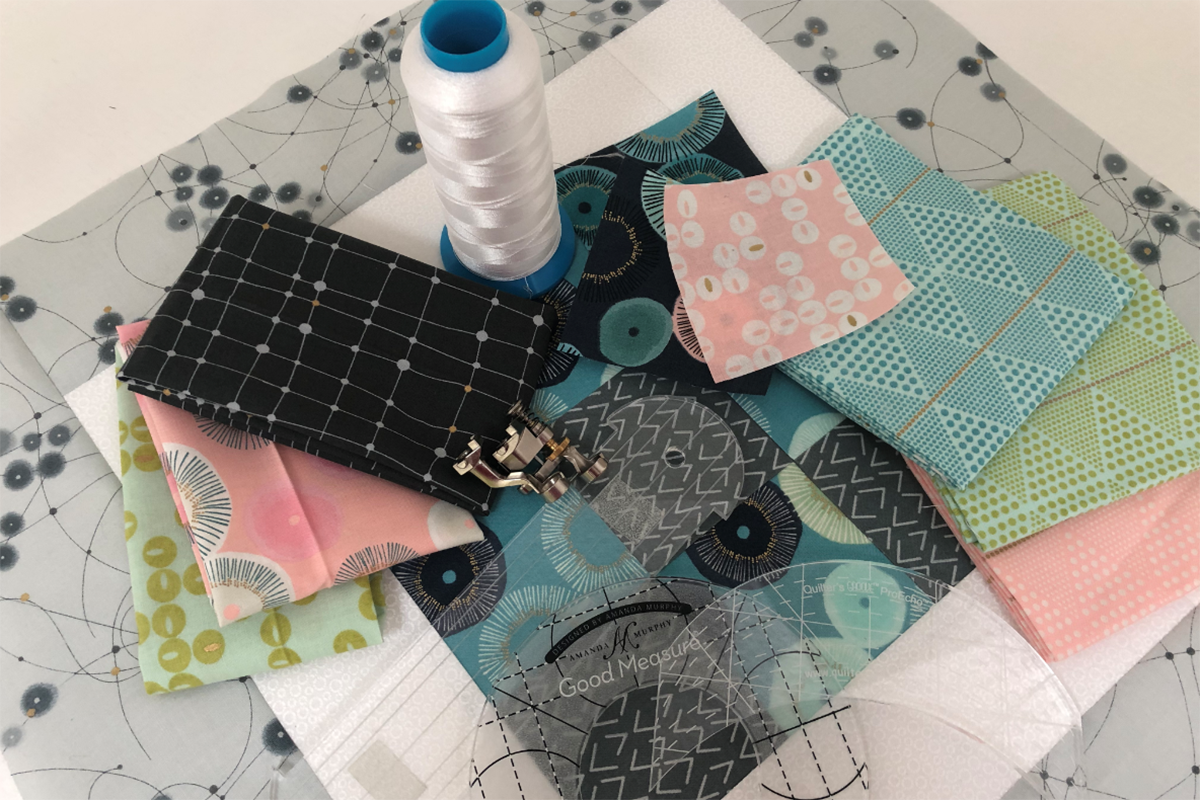
- Fabric-I used a fat quarter bundle of 32 fabrics for the entire project. You will be able to get the 4 and/or 5 squares needed for the 9 Patch as well as the outside border strips
- Inside Border for all 9 Blocks-1 ½ Yards
- Backing- a 22” square of a muslin as the backing for each square. If using a Q Series machine on the frame, you will need 3 ½ yards of fabric. Use 24” at a time on the frame. This will do 2 squares.
- Batting- a 21” square for each month
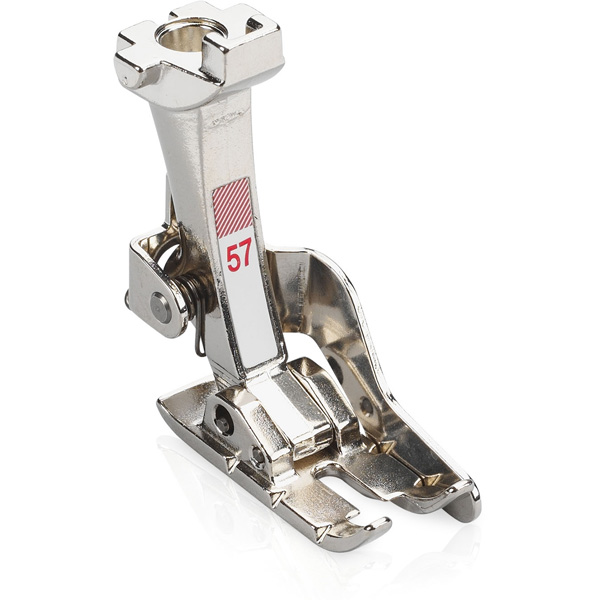
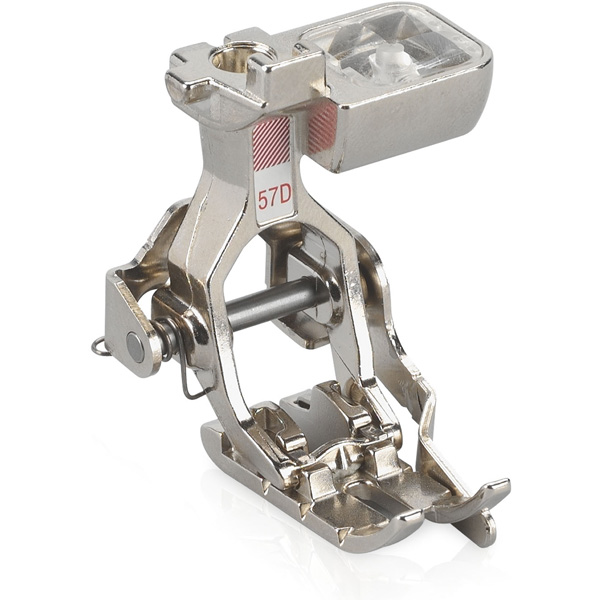
- Patchwork Feet #37, #37D, #57, #57D, #97, or #97D
- Ruler Foot #96 if using a Q Series Machine
- Adjustable Ruler Foot #72 if using a BERNINA domestic machine
- Adjustable Stippling Foot #73 if adding free-motion quilting
- Straight Stitch Throat Plate
- Thread for construction
- Thread for quilting
- Machine Needles #80 for piecing
- Machine Needles #90 Jeans for quilting
- Water Soluble Marker for light fabrics
- Chalk Marker for dark fabrics
- Rotary Cutting Mat and Cutter
- Quilting Rulers listed in Quilting Directions each month (I will list the specific rulers I used. You may use other rulers, you just may not be able to get the exact design created.)
- BERNINA Echo Quilting Clips
Cutting Instructions for the 9-Patch Monthly Block
Nine Patch Center
- Cut squares 3 1/2″. Cut 4 from one fabric and 5 from another. Sometimes this is dictated by light and dark.
First Border
- Cut 2 border strips 3” X 9 1/2″
- Cut 2 border strips 3” X 14 1/2”.
Second Border
- Cut 2 border strips 3 1/2″ X 14 1/2″
- Cut 2 border strips 3 1/2″ X 20 1/2″
Construction of the 9-Patch Block
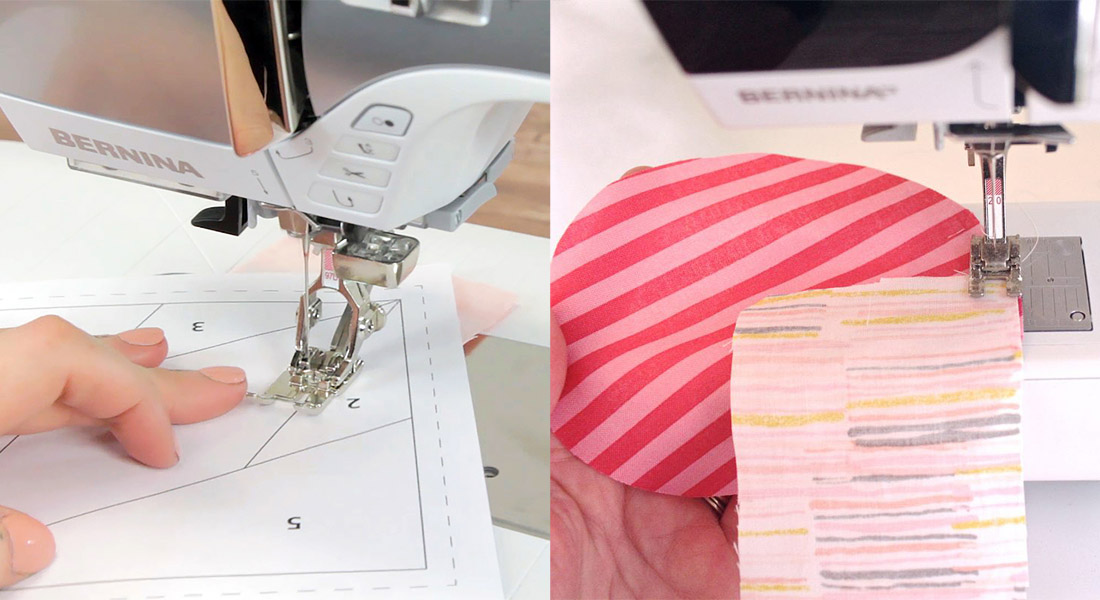
Insert a #80 machine needle and attach the straight stitch throat plate. Locate the 1/4″ marking on the stitch plate. When the squares are stitched together make sure the mark on the stitch plate in front of the foot’s toe is visible.

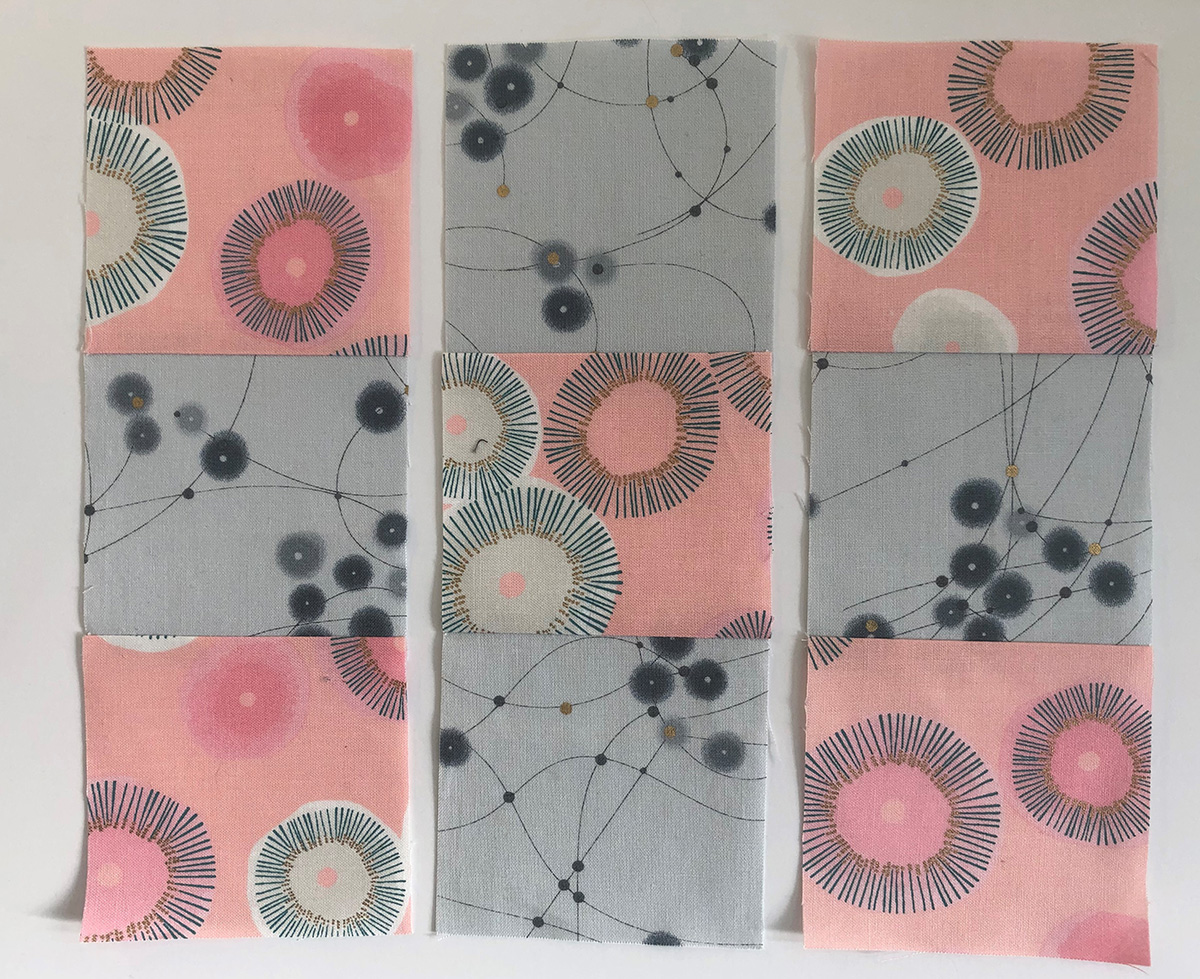
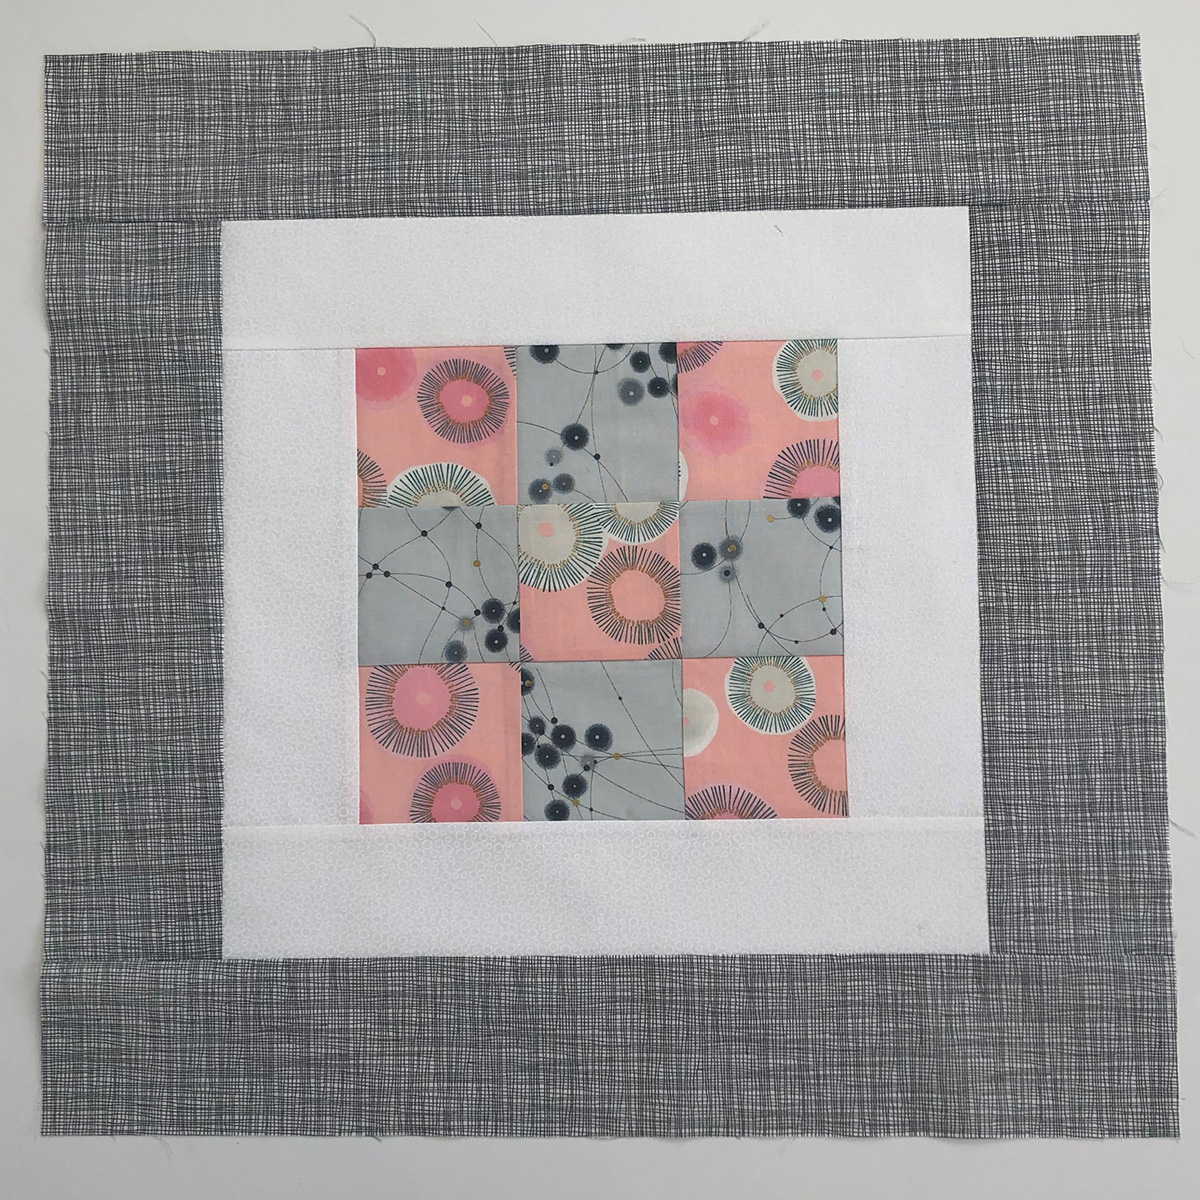
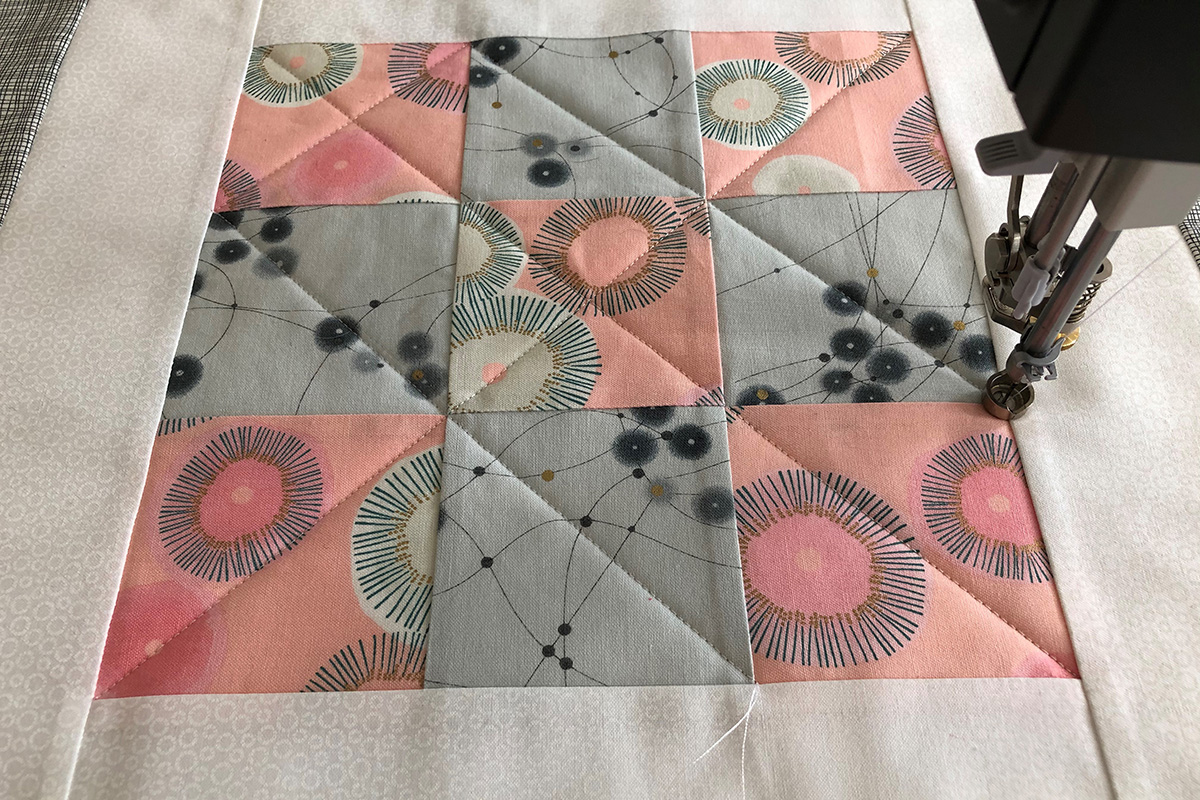
Even though the squares in the pictured block have a similar value, let us consider the pink as the dark and the gray as the light. Locate the 1/4″ mark on the stitch plate. That mark should be visible as you piece.
Stitch a row of dark, light, dark.
Stitch a row of light, dark, light.
Stitch a row of dark, light, dark.
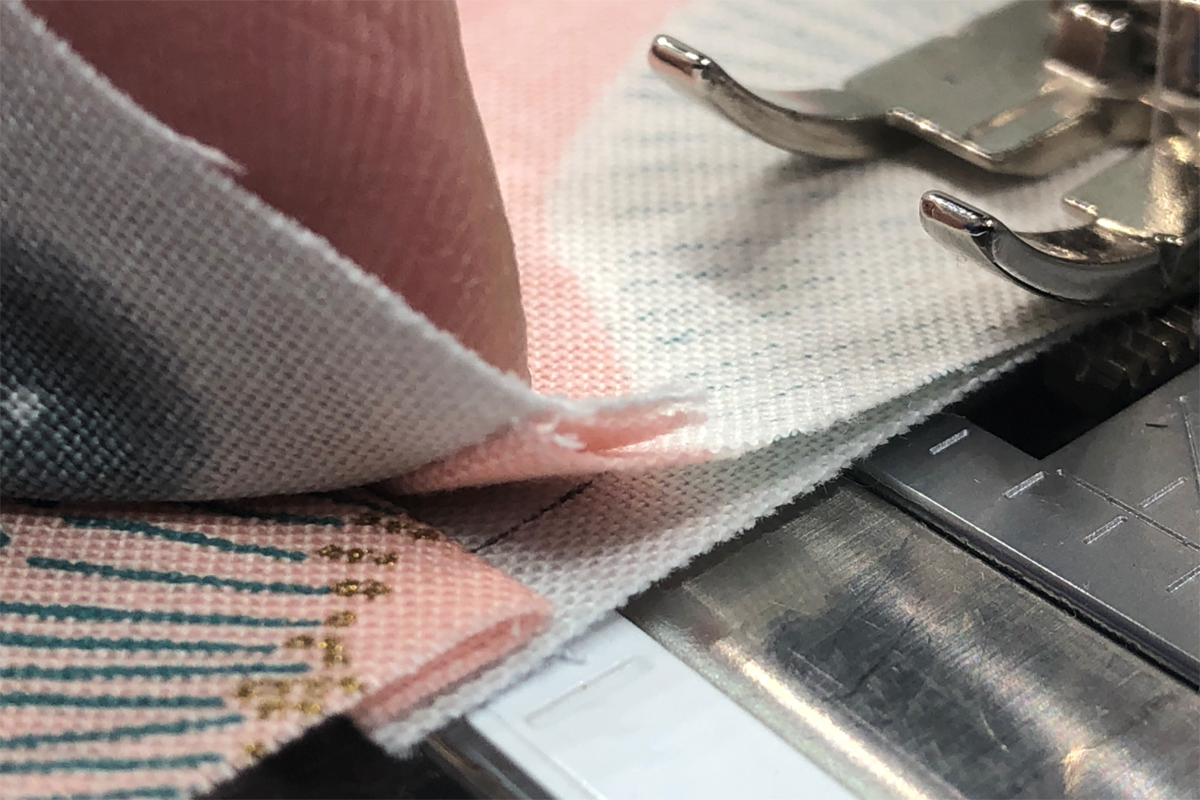
Stitch the rows together nesting the seams in opposite directions.
Add the inner and outer borders.
Layer the backing, batting and constructed square. Pin baste or spray baste if desired.
You may construct a new block each month, or if you like you may construct all nine at one time. 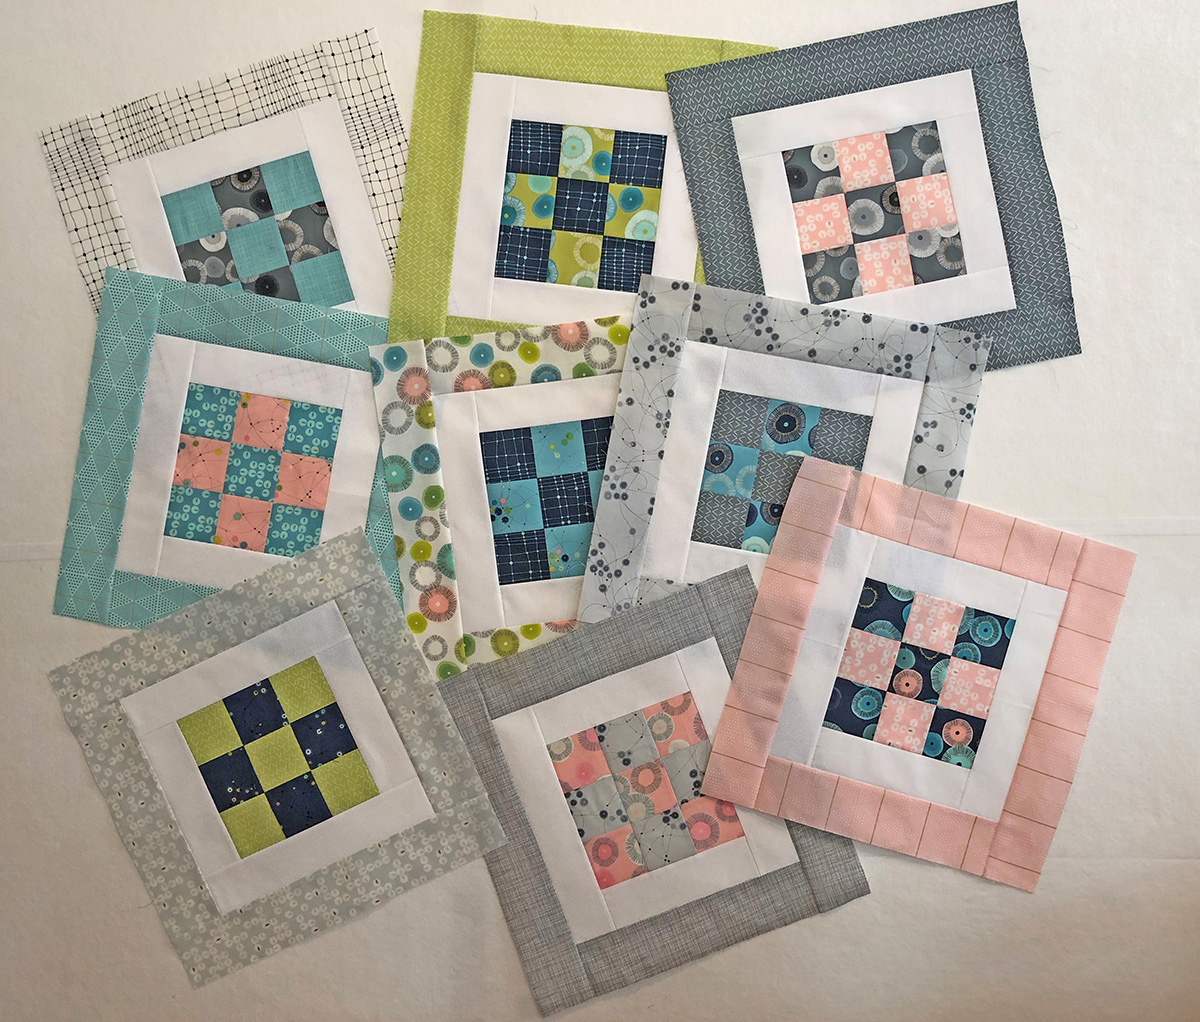
The instructions to make each square into a pillow or to make all the squares into a quilt will be available in Blog Post #9.
Ruler Foot
There are 2 Ruler Feet available from BERNINA.
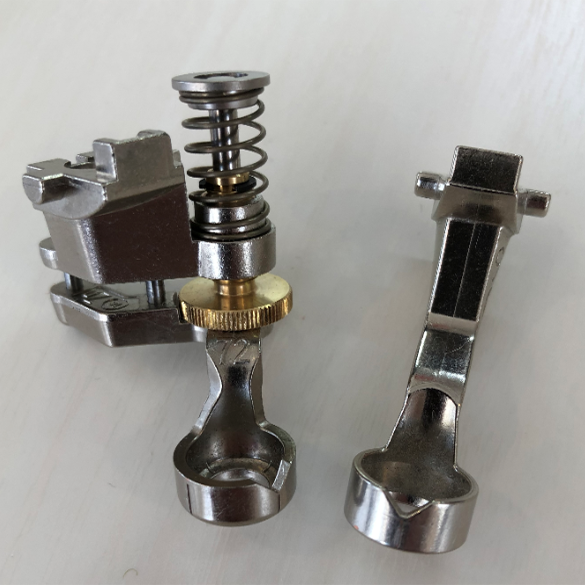
If stitching on a domestic BERNINA machine, you will need the Adjustable Ruler Foot #72. If using a QSeries Longarm machine, you may use Ruler Foot #96 or the Adjustable Ruler Foot #72.
If using a Q Series machine on the frame you will need the Rulerwork Kit which includes foot #96.
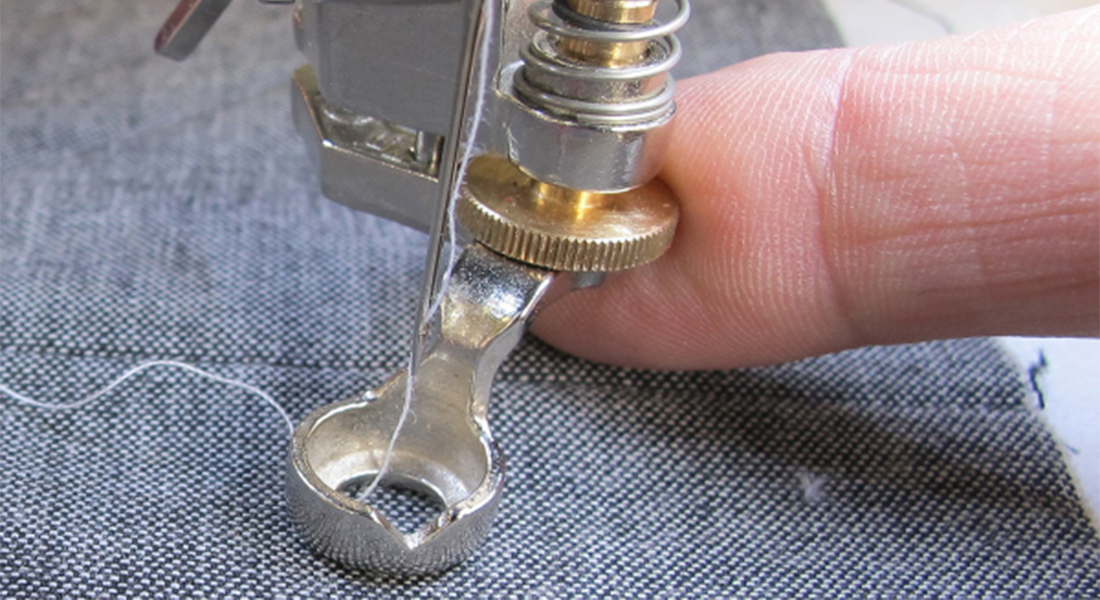
Attach the appropriate foot to your machine. If you have attached Foot #72 you, will need to use the gold dial to adjust the height of the sole. Place the quilt sandwich under the foot and turn the dial so the bottom of the sole just touches the sandwich when the foot is down.
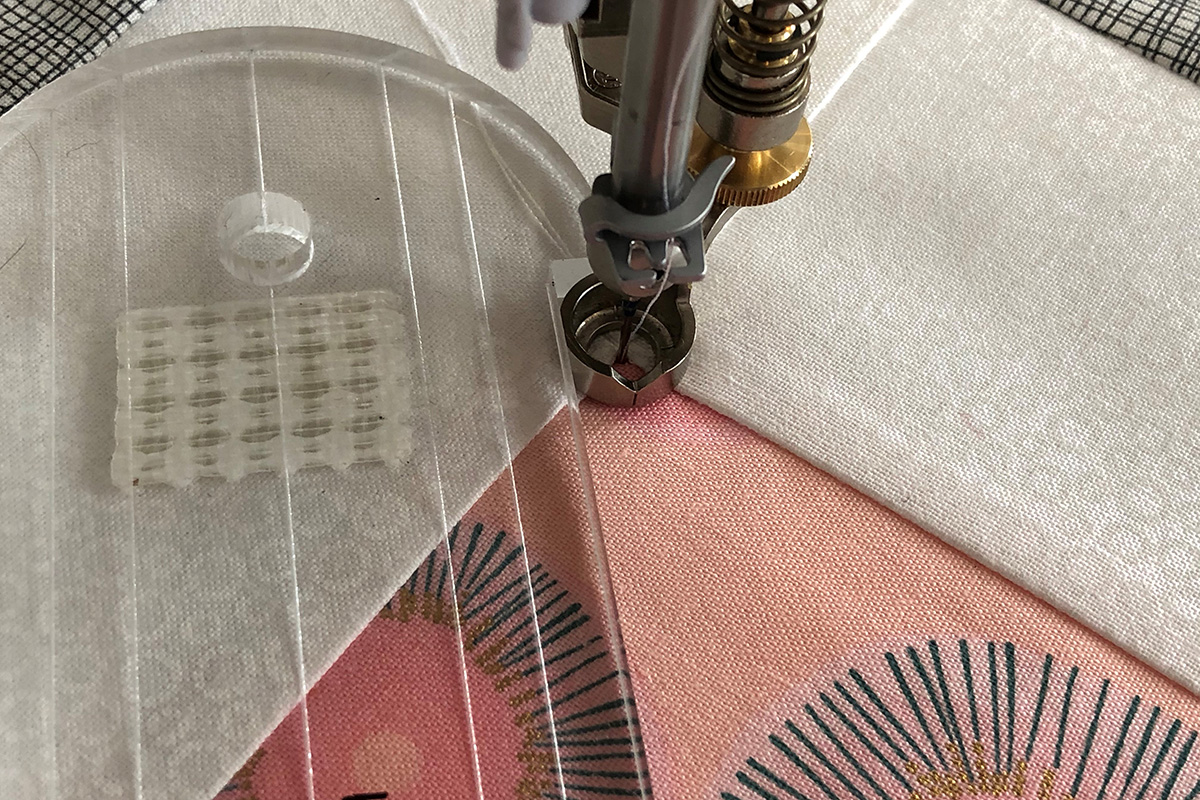
The Ruler Foot is a 1/2” Foot. With the needle in center the edge of the foot (called the Fence) is 1/4″ from the needle in all directions. The Fence keeps the ruler away from the needle of the machine. There is a “v” cut out in the front of both feet that lines up with the needle. There are markings on the inside of Foot #72 that help with precise placement.
Quilting Rulers
A standard quilting ruler is 1/4” (6 mm) thick. This thickness of the ruler works on all BERNINA sewing machines and longarms. As we go through each month, I will be introducing you to different rulers. BERNINA makes two Ruler Sets. Ruler Kit for Table Model Machines
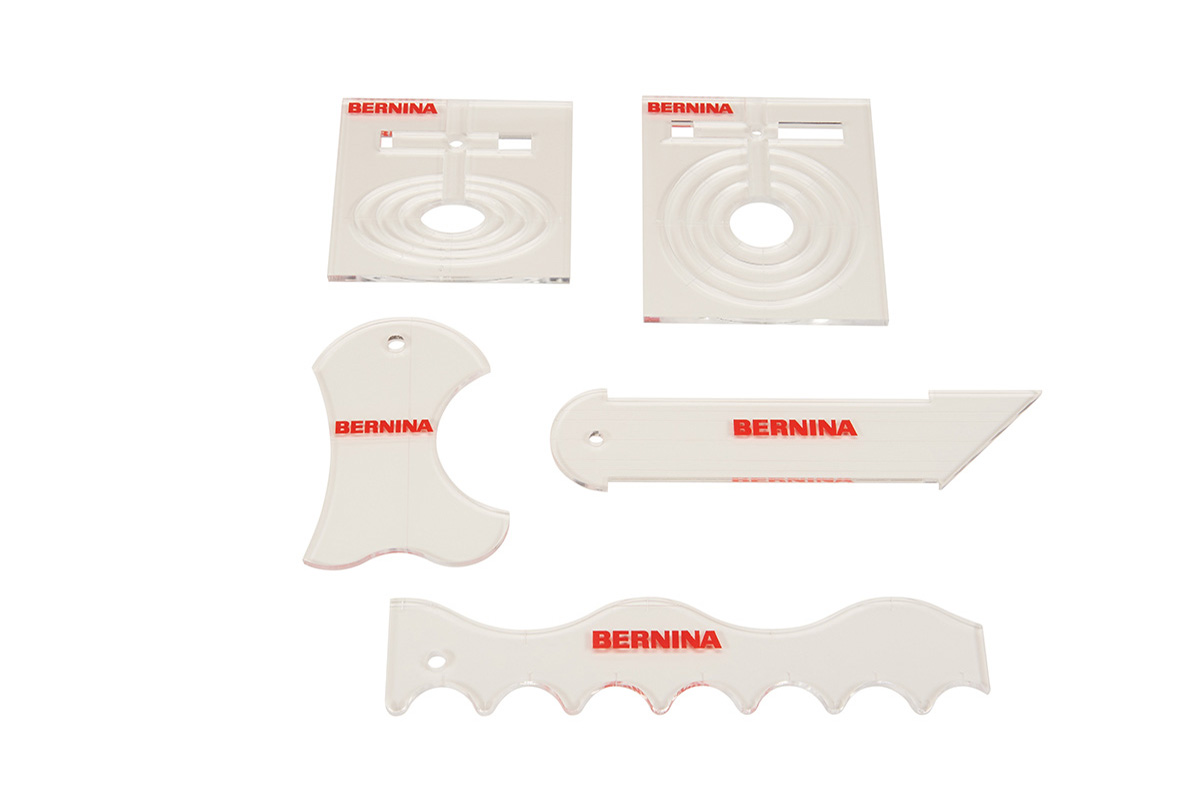
and Ruler Kit for Frame Model Machines.
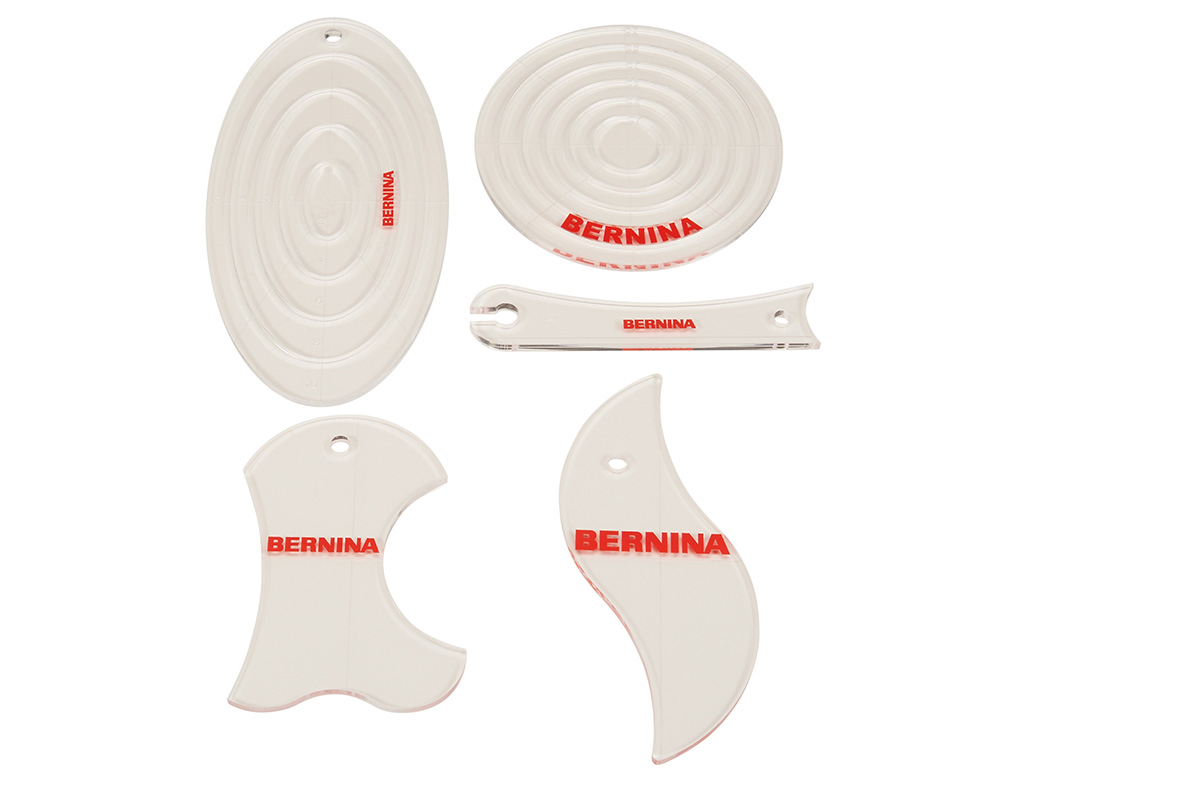
These sets are good starter sets with straight rulers, curves, arcs and more. While these rulers are not necessarily specific to a particular design with detailed marked lines, using painter’s tape across the ruler to create a needed line works very well. When you discover a particular design you like, then you may want to purchase a ruler specific to that design. I will be showing some of those rulers.
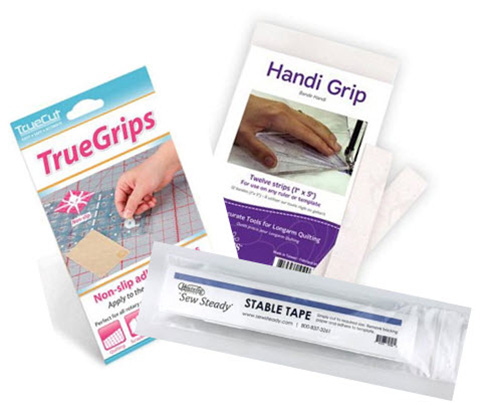
There are many different gripping materials for Quilting Rulers. If you are quilting at a table model machine, you will want something that will grip the fabric, as you will need to move the ruler and fabric at the same time. At the frame, you will want something to keep the ruler from slipping but still let the ruler move when need be.
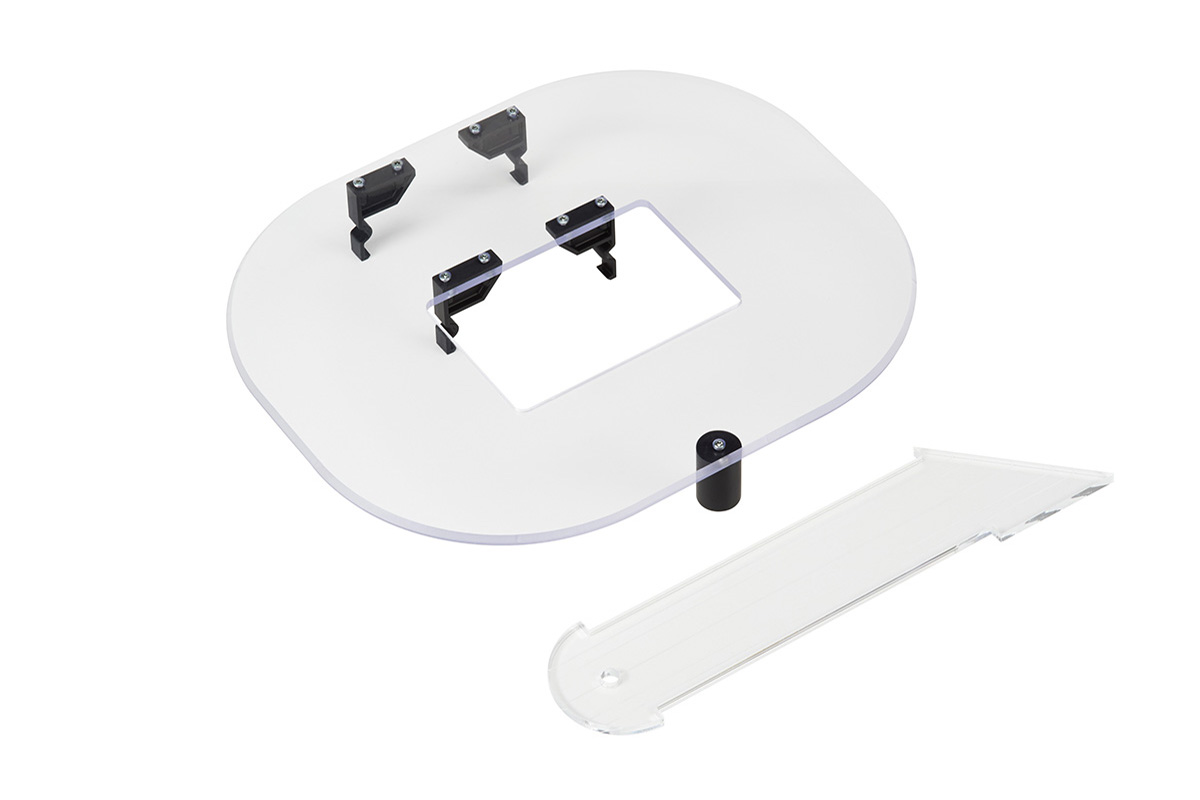
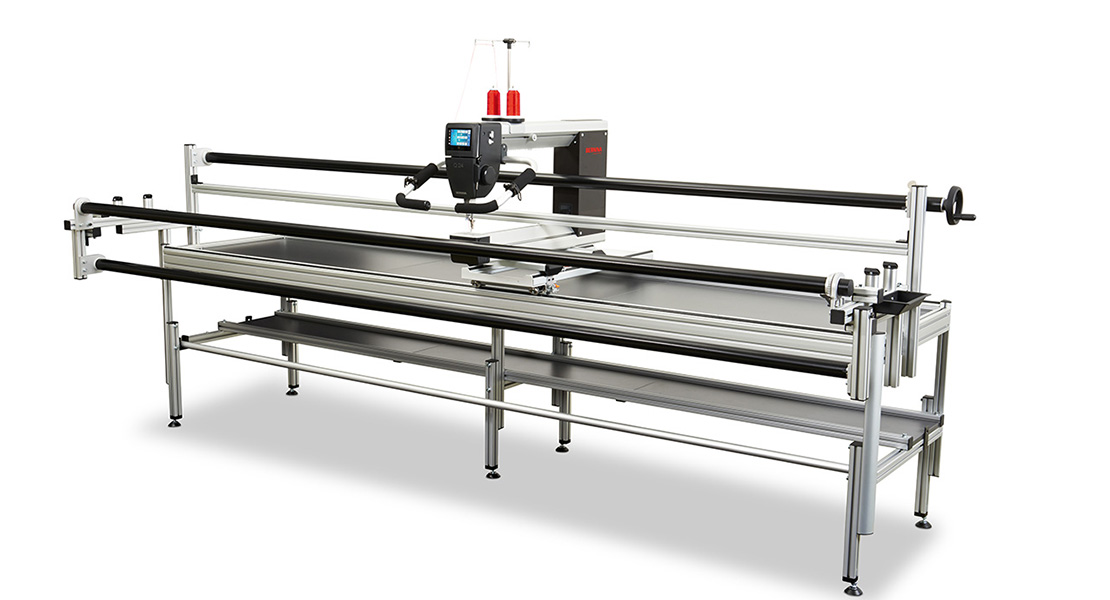
Setting up your machine is another component of success. The best case scenario for doing rulerwork on a domestic machine is to have the machine down in a table so you have a nice flat surface. If this is not possible, then a Plexiglass Extension Table is a good idea. The Slide-on Table that comes with your machine may be a little small, and with the sloping edges the rulers are not properly supported.
![]()
A Q Series Table Model machine comes in a suitable table. And of course a Longarm on a frame has the entire surface laid out!
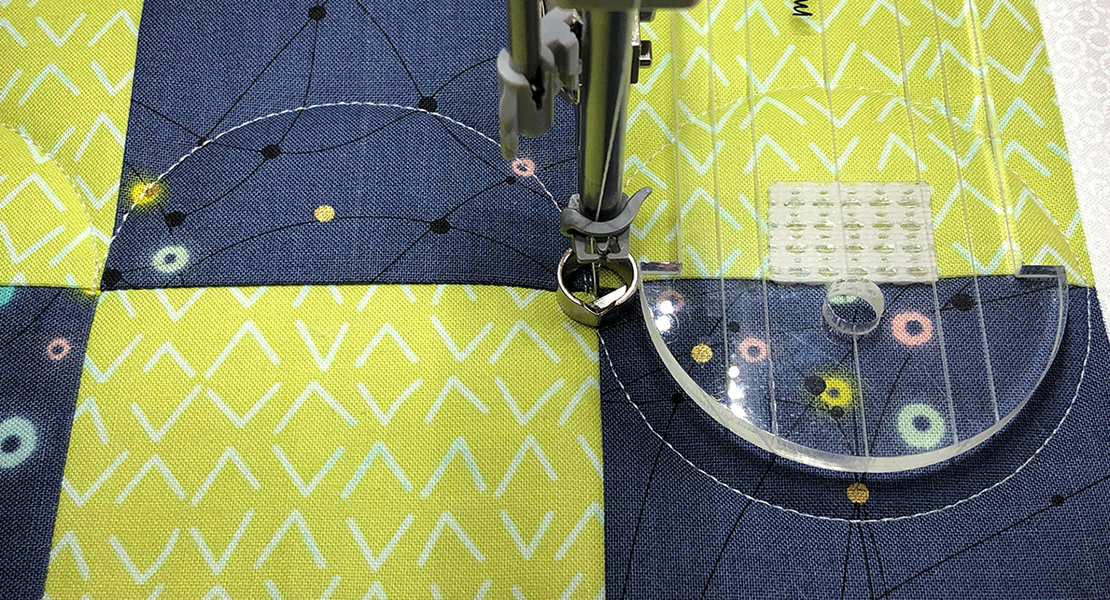
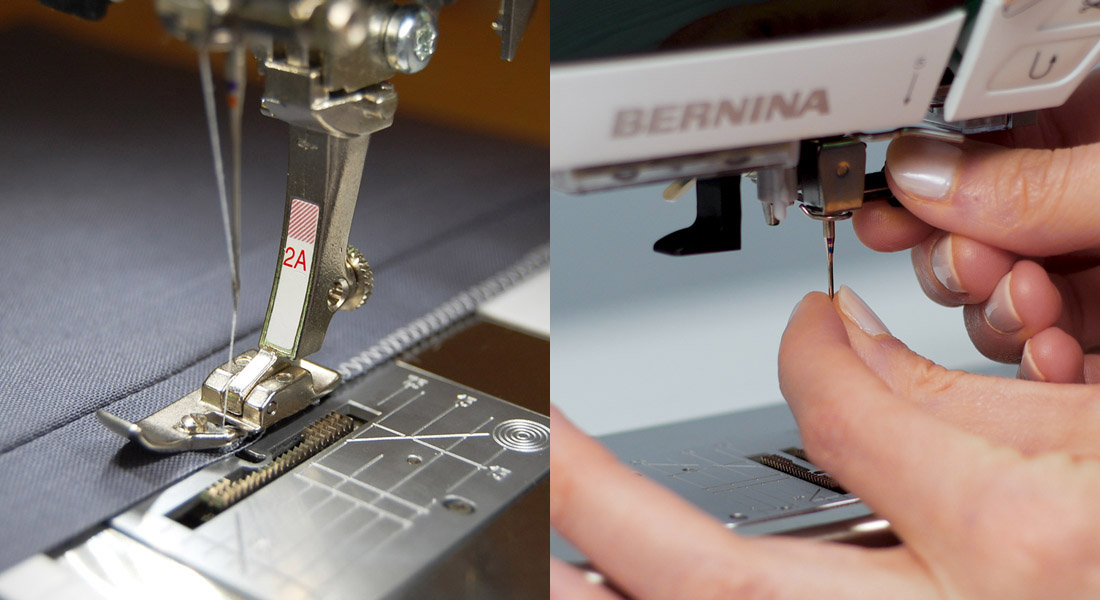
Insert a #90 Jeans needle and attach the Ruler Foot. (If using the Adjustable Ruler Foot #72, make sure it has been adjusted for your quilt block.) Attach the Straight Stitch Plate if you have not already done so. Select Needle Stop Down. On the Q Series machines, select BSR2. On the domestic machine, lower the feed dogs. You may want to have a practice sandwich every month to try out the ruler techniques.
As you work through the ruler exercises, it will be important to support the ruler so that it does not slip. But you also want to be conscious of not pressing down too hard on the ruler or press the ruler against the foot to hard. If you are on a frame, make sure you are not pushing the machine against the ruler too hard. The ruler is a guide that requires a light touch.
Now that we have gone over needed information for participating in this Rulerwork series, let’s get started.
Rulerwork Month #1
Straight Lines
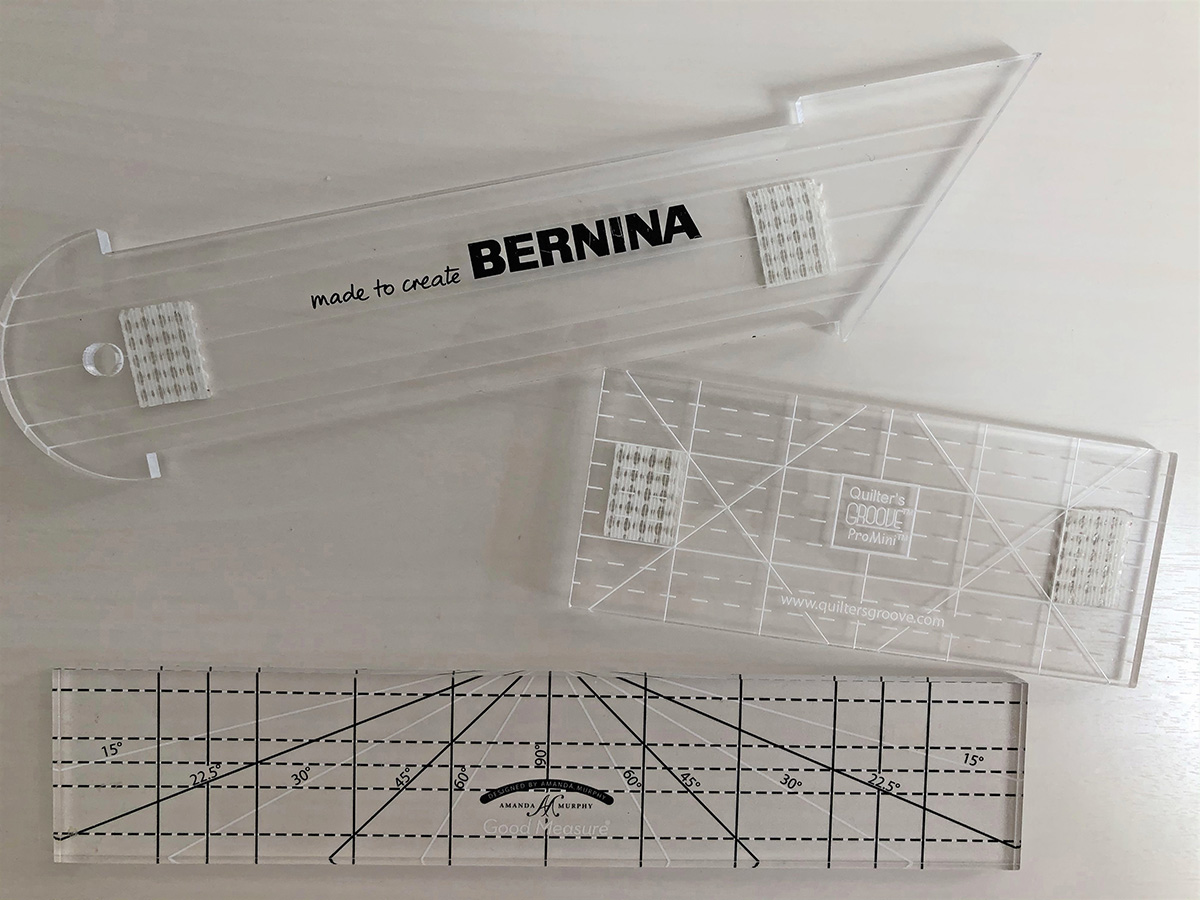
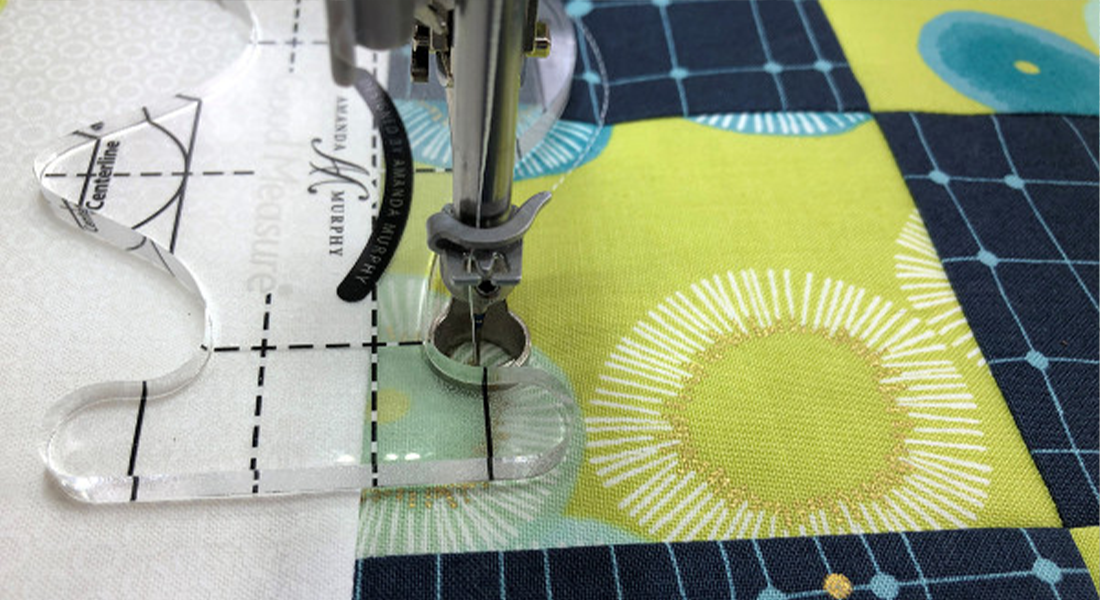
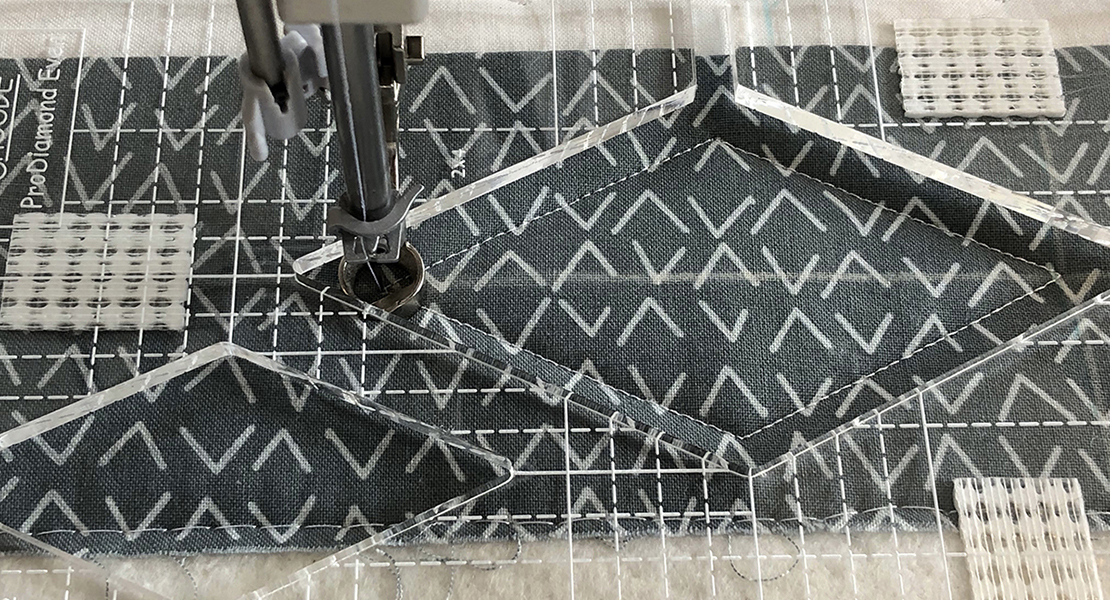
There are many straight line rulers. Here there are three different straight line rulers. You will only need one of them, but each has its advantages. The BERNINA ruler has notches that line up with the stitching line, the Good Measure and the Quilters Groove rulers have more markings on them which can be useful.
We will begin by stitching a large X through the center of the block. Even if you have never done rulerwork before, you can do this! (However, if you are brand new to rulerwork you may want to make an extra block for practice.)
If you are new to rulerwork, let’s concentrate on just the 9-Patch in the center of the block.
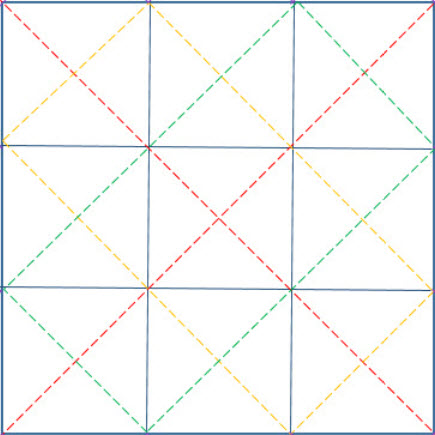
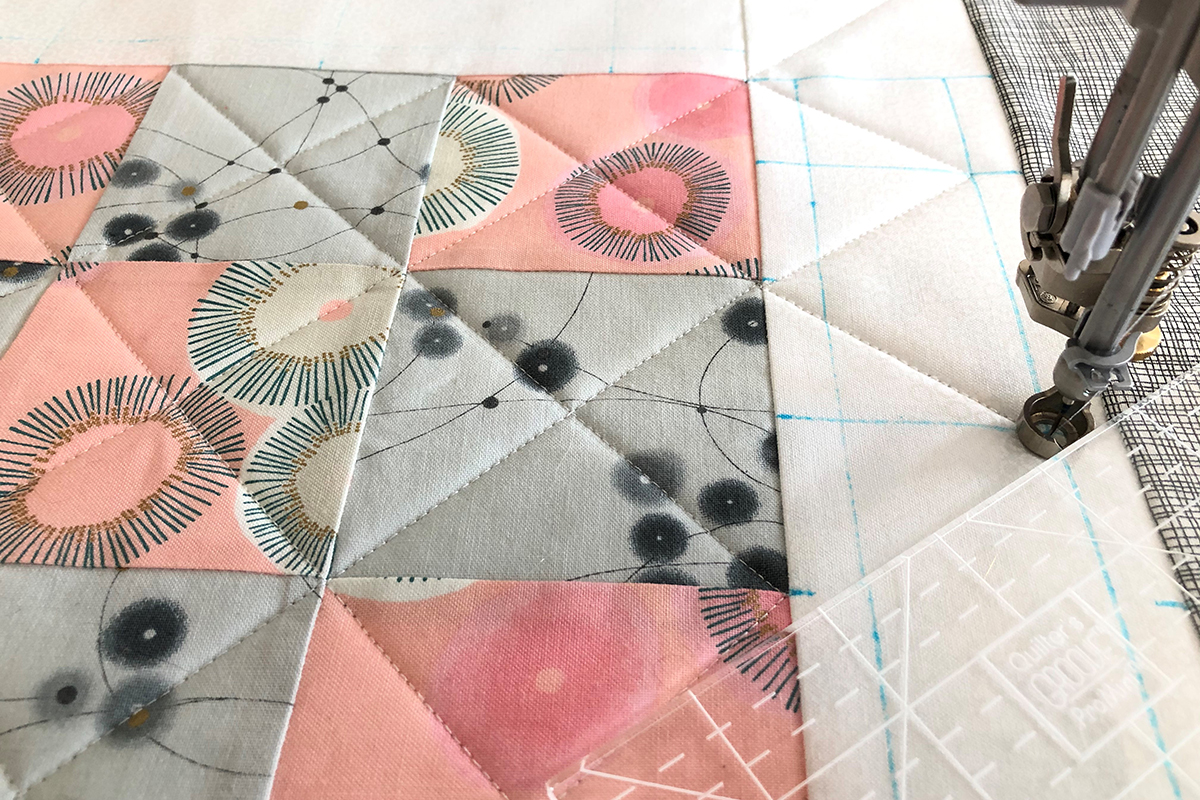
Looking at the red lines in the diagram, start in one corner of the 9-Patch. Pull up the bobbin thread and secure your threads. Lower the needle right in the corner and lower the foot BEFORE you pick up the quilting ruler. (Getting in the habit of always having the needle down in the fabric and the foot down before using the ruler will prevent broken needles and broken rulers!) Position the ruler against the edge of the foot.
The notches on the BERNINA ruler will indicate the stitching line. Position the lower notch on the BERNINA ruler on the intersection of the next seam. The indentation between the notches will be the stitching line. This can help with knowing where you will be sewing. The other two rulers mentioned will need to be positioned 1/4″ away from where you want the stitched line to be, but by using the marked 45 degree lines, this is easy to do. Stitch from one corner diagonally through the center of the 9-Patch to the opposite corner. Secure the threads and cut. Repeat, stitching between the opposite corners.
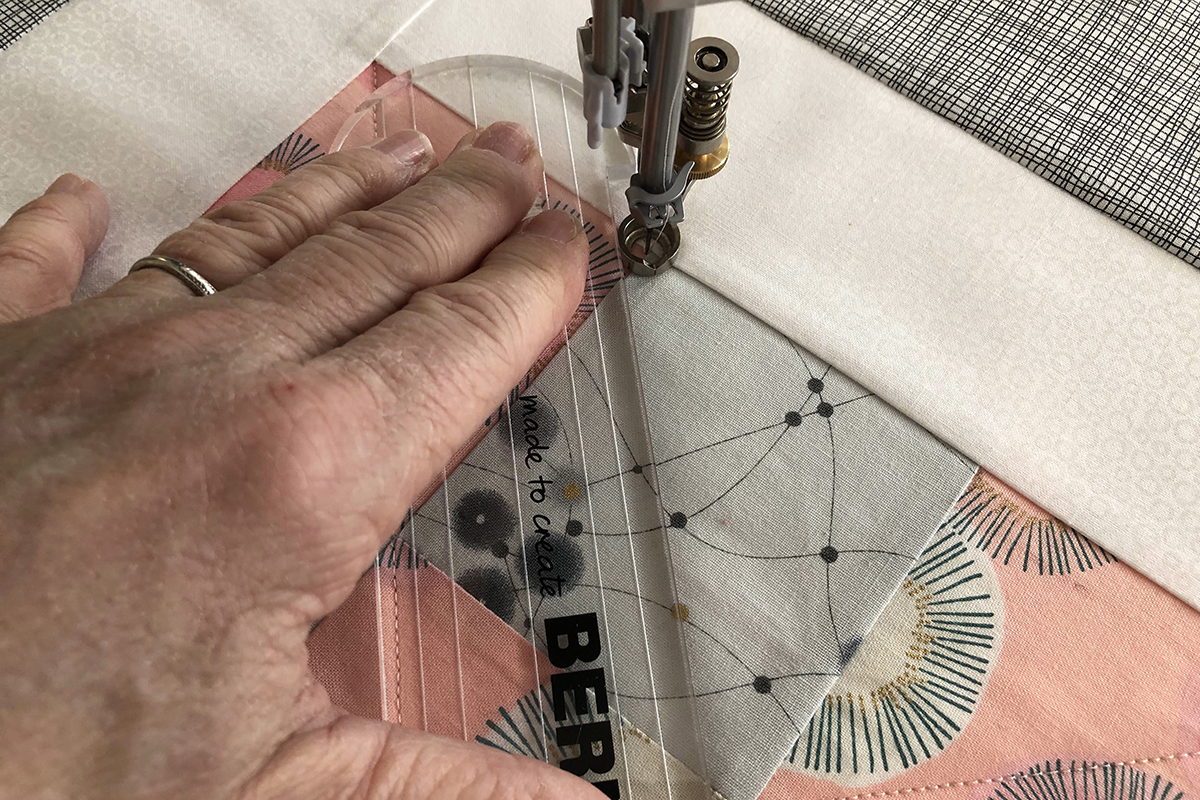
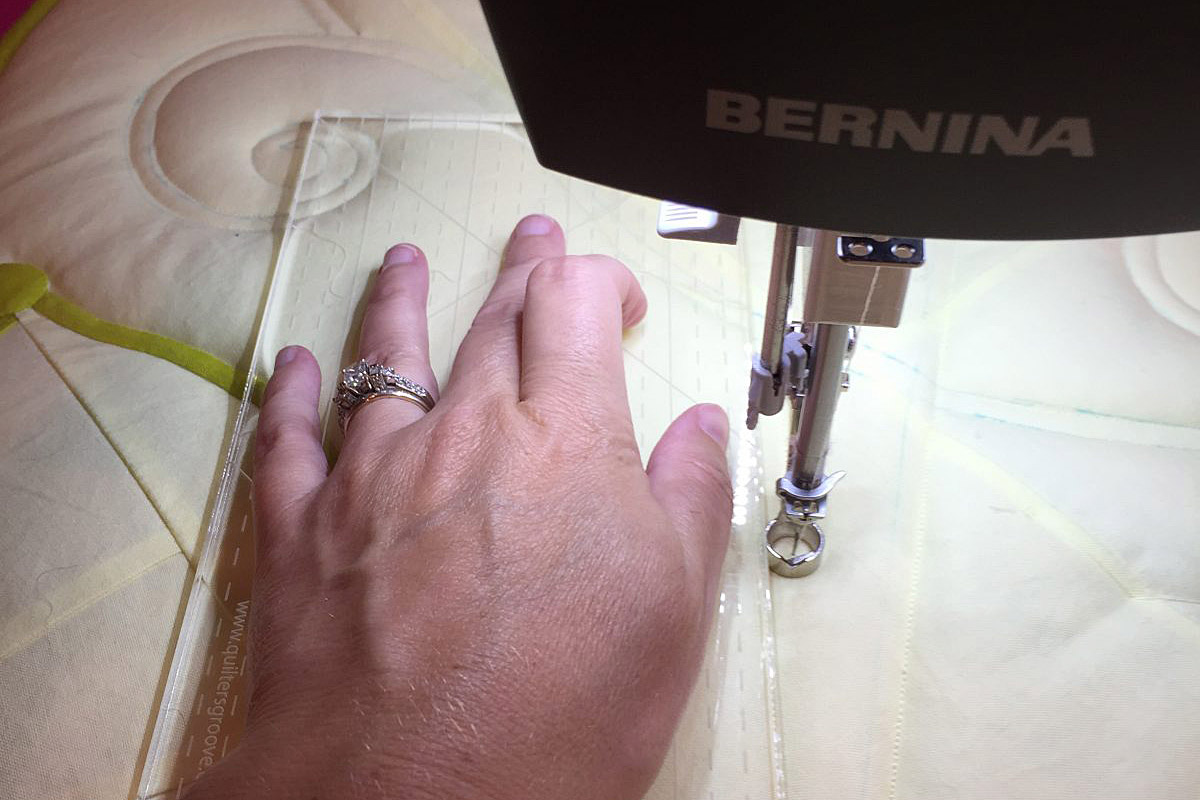
The ruler must be held in place as you guide it against the edge of the foot. Do not push hard against the foot as that can actually make it more difficult and can affect the quality of the stitch.
Make sure the ruler is being held where the stitching is taking place, stopping to move the ruler when needed.
If you have enough hand strength, you can stretch your hand out further, if that is more comfortable.
Looking at the diagram, stitch the yellow rectangle and then the green rectangle. You always want to study your stitch path to allow for the fewest number of starts and stops.
If you have been working only on the center 9-Patch, complete the large X on the entire block by stitching a line from each corner of the 9-Patch to the outside corner of the block. (This could have been done as one line from one corner of the square to other, but if you are a true beginner, I wanted you to just do the center of the block first)
Now let’s look at the entire quilting roadmap.

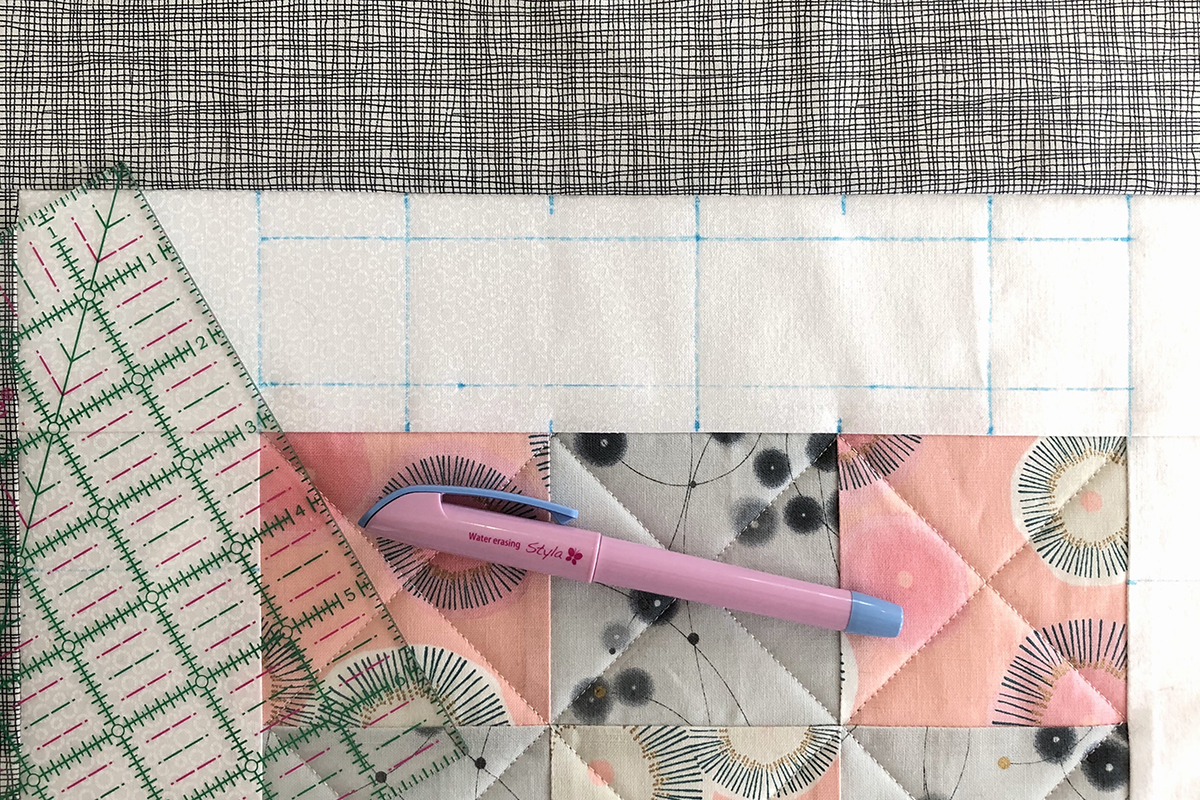
We will now do the inner border. This will require some marking on the fabric. On each side of the 9-Patch, mark the seam and the center of each patch. Place a mark opposite those first marks on the outer edge of the border. Connect the lines in the center of each patch and on the ends. Mark a line 1/2″ from the edge of the 9-Patch and a line 1/2″ from the opposite side of the border.
Begin stitching in one corner of the 9-Patch following the purple on the Roadmap. Turn at each corner and continue around the border.
The second run around the first border will be orientated off the opposite side of the border. Begin in one corner and follow the blue lines on the Roadmap.

When you are finished your border should look like this. You may begin to see that the design options are limitless even with just straight lines!
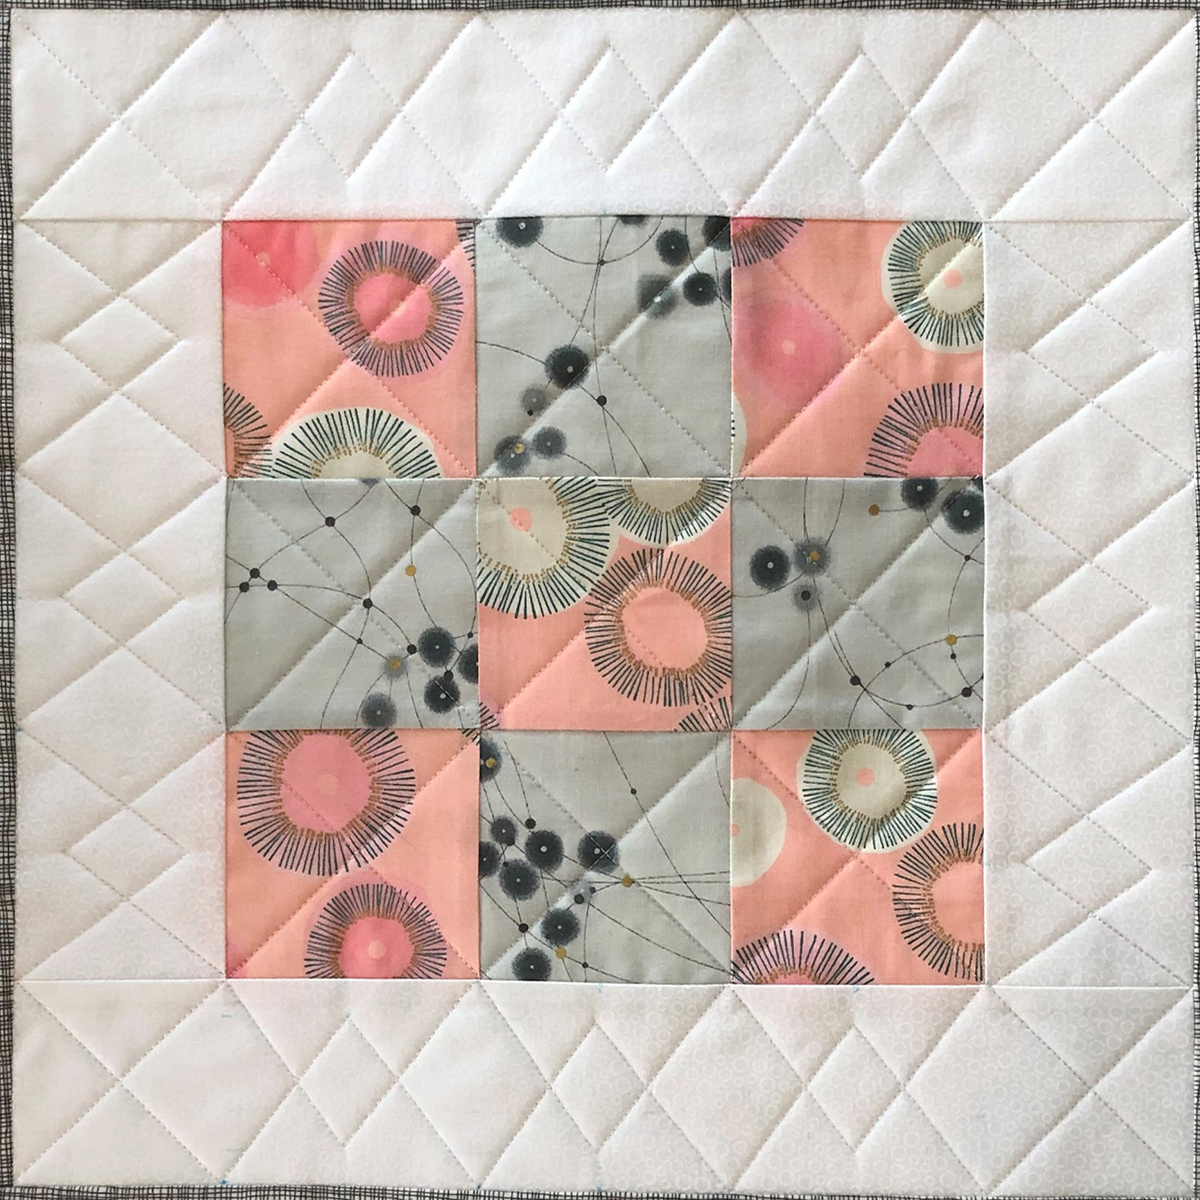
We will finish the square with evenly spaced lines around the outside border. Notice from the Roadmap that I have stitched a diagonal line in each corner of the square forming an “X”. The straight lines on the borders are between the corner “X’s”. Determine the spacing of your lines to make sure you are going to come out even. I determined that spacing the lines 1/2” apart works well because the space I need to fill is 14”. When you are new to this, you may want to mark the border every 1” just to make sure you are spacing correctly. It will be easy to make small adjustments along the way rather than waiting until the end where making any needed adjustment is more noticeable.
Begin on the outside edge of the square, stitching from the outside straight into the corner of the inner border. Stitch in the ditch for 1/2″. This can be done with your ruler or by eyeballing it. Position the ruler so the 1/4″ line rests on top of the stitched line. Stitch the next line in the opposite direction. Stitch over 1/2″ and repeat until you have one side of the square.
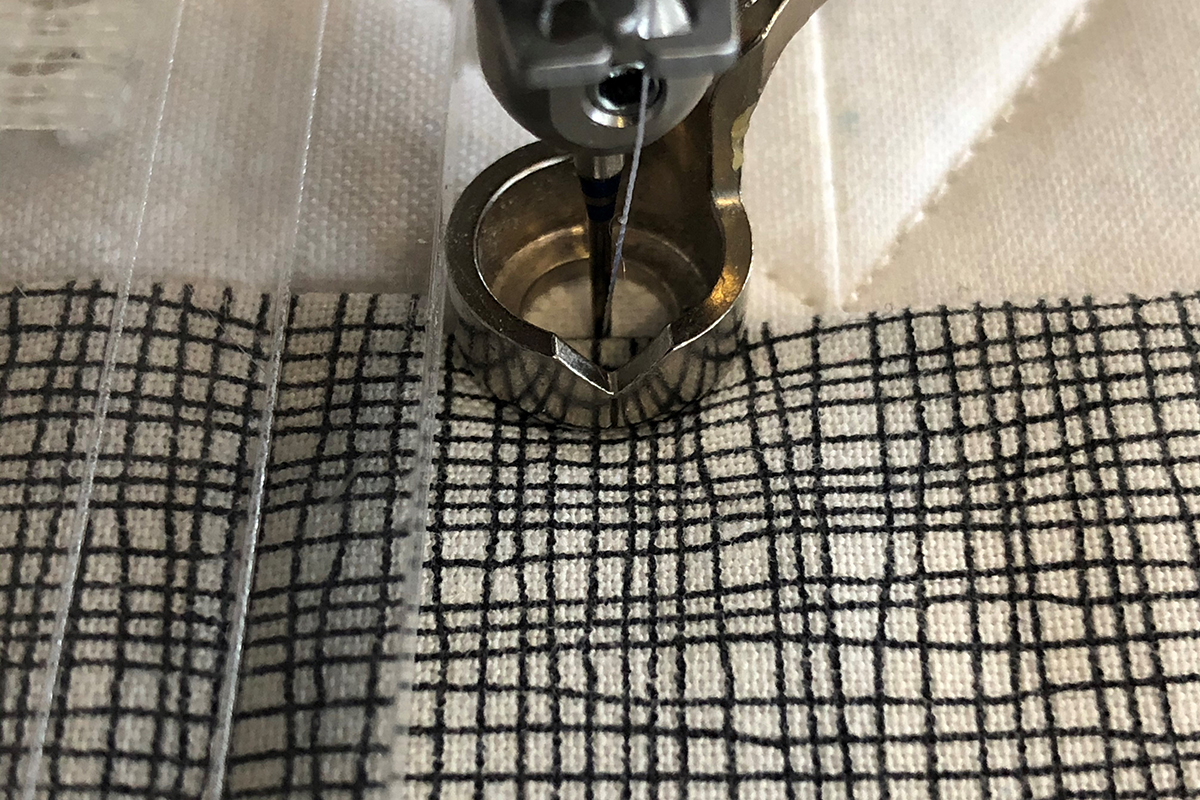
Repeat until all four sides are done.
You did it!! That was a lot of instruction! But I hope you found rulerwork to be a wonderful way to perfect your free motion quilting!
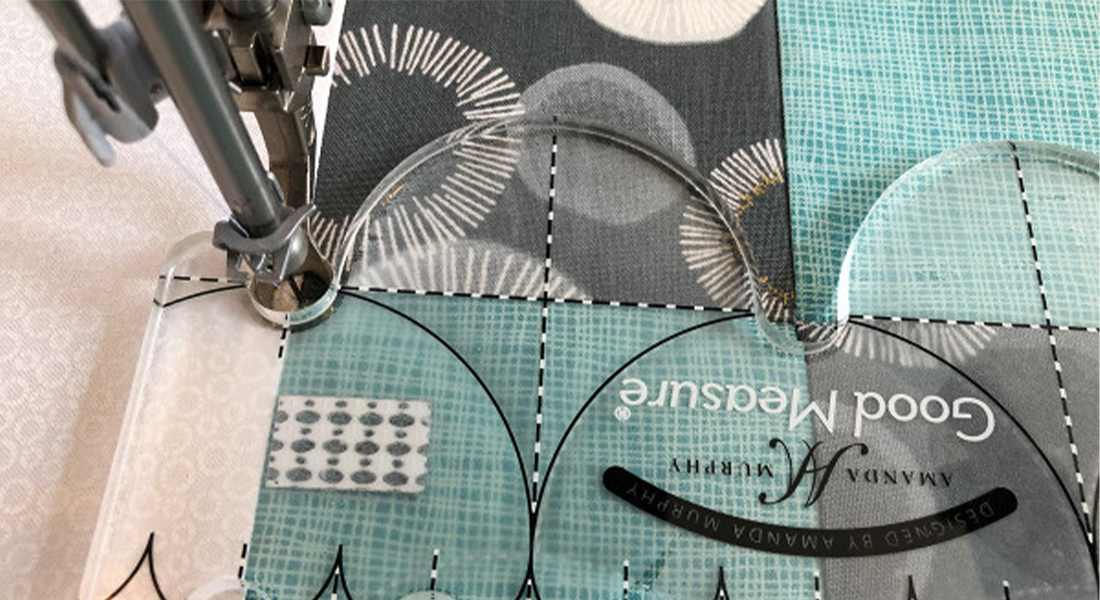
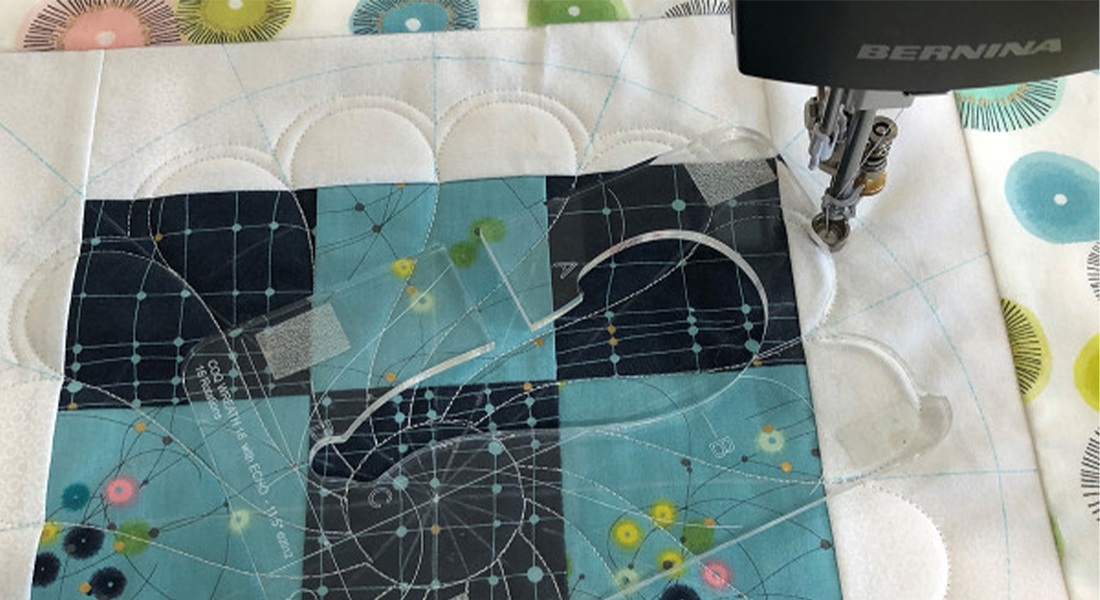
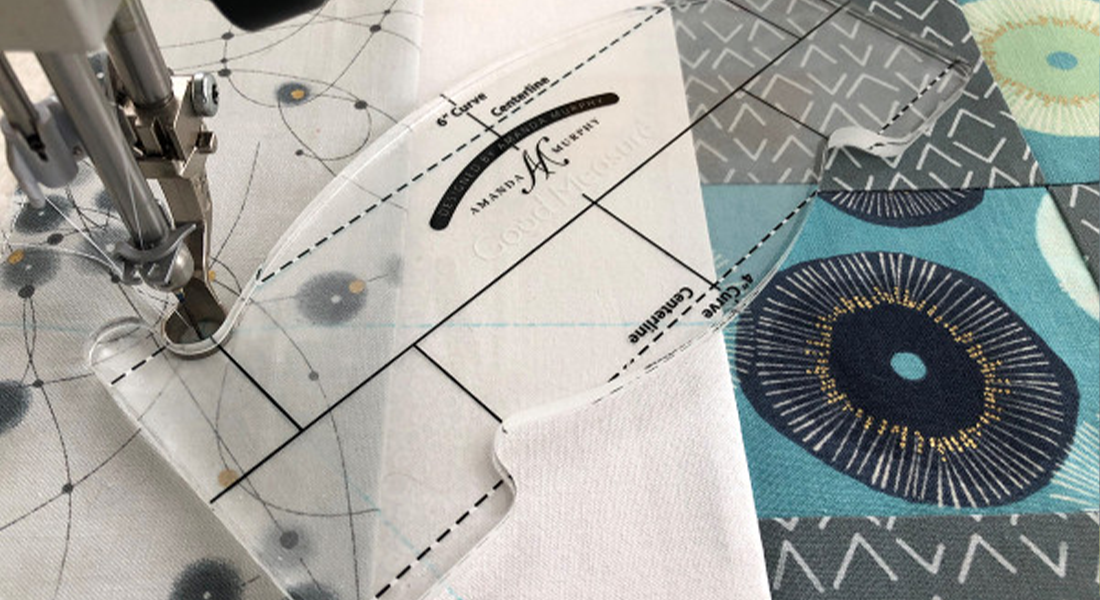
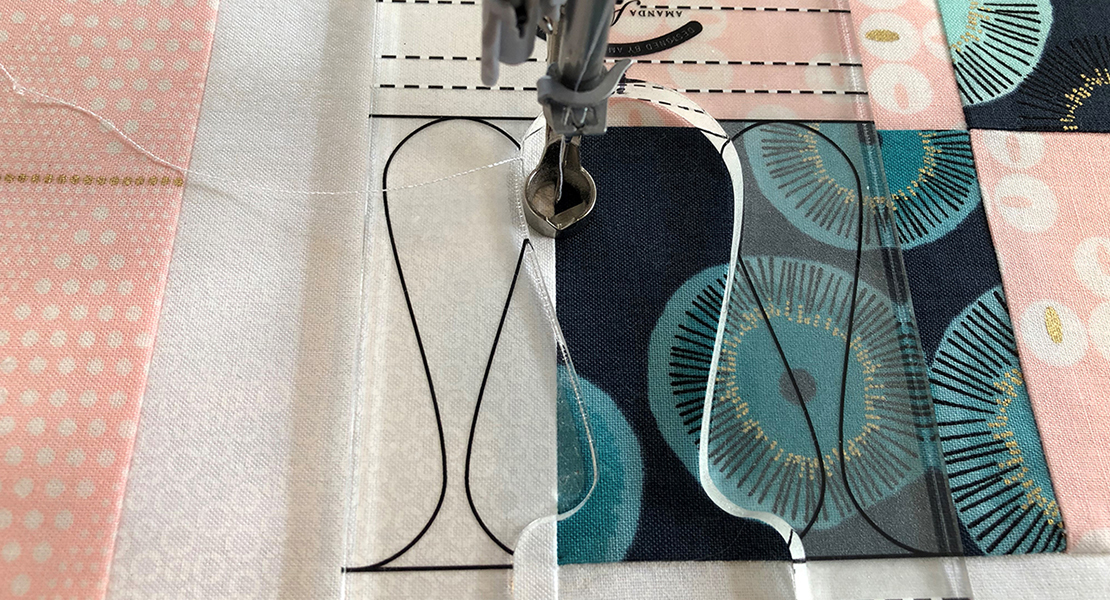
The instructions for making this block into a pillow or making all the blocks we will be doing into a quilt will be given in the last blog. Remember, this is a 9-part series and you will be learning a different technique each month. Next month we will move on to curves! I will be using the BERNINA Straight Edge ruler because it has the perfect rounded end. I will also be using two curved rulers from Quilter’s Groove, the ProEcho 11 And ProEcho 18.
Rulerwork for Beginner Series
Rulerwork for Beginners, Part 1: Rulers
Rulerwork for Beginners, Part 2: Roadmap
Rulerwork for Beginners, Part 3: Stitching Circles
Rulerwork for Beginners, Part 4: Clamshells
Used Products


What you might also like


32 comments on “Rulerwork for Beginners, Part 1: Rulers”
-
-
Wow I needed this. Still need more sew I’ll be watching!
-
This is a wonderful project — and I can pull FQs from my collection and use up those batting pieces! Can’t wait to get my Bernina Rulers!
-
Thank you! I really appreciate the colored lined “roadmap” and the detailed explanations?
-
What are the advantages of using a jeans needle instead of a quilting needle for the actual quilting?
-
I can’t say there is an advantage of one over the other. They are both sharp needles. The point of a quilting needle is a little longer and is designed to go through multiple layers, so is always a good choice. I Jeans needle is more available for many people.
-
-
Nice work! Love the peach & gray fabrics too – are those still available?
-
This is a Moda line called “A Day in Paris”. You would have to search to see if it is still available.
-
-
Appreciated this post & Quilt-along. I plan to follow the entire series. Good information & learning; especially interested in the marking tools used & how to use the correct tools and water erasable markers.
-
So glad you will be joining us. Not real sure I am going to get into much detail about marking tools. When ever I am marking on darker fabrics I like to use white tailor’s chalk and whenever I am on a lighter fabric where the white chalk does not show I use a water soluble marker. My preferred marker is the Styla Water Erasable Roller Pen by Sewline. I like it because it is a fine tip and I don’t think it puts as much ink in the fabric. I use a wet cloth or a misting bottle to remove it.
-
-
Brilliant guidance, as ever. Thank you, Nina.
-
I’m looking forward to following this series. If I plan on using the blocks as a quilt in the end, can I use the backing fabric I have planned to use or should I still use muslin?
-
Most definitely!! Use whatever you would like on the back as a backing. You will then need about about 1/4 yard for the strips that will be used to assemble.
-
-
I a
m delighted with this project. I have taken classes from Nina in the past, but always need more practice. Is there any way we could get the quilt directions prior to 9 months from now. My house does not need any more pillows….learning to multi-hoop on the embroidery machine has taken care of any pillow shortage! But a small quilt would be great. It just seems like an awful chore to stitch finish blocks together and then have to hand stitch the backings together……There must be an easier way! Thanks for listening!-
Here are the finishing instructions for the throw, but it does involve some hand stitching. You could piece all the blocks and piece the blocks together and quilt each block as you manage the rest of the quilt.
To make the throw, arrange the blocks three across and three down. You will be seaming the blocks together making three rows of three and then seaming the rows. Cut 6 strips of fabric 1 1/4″ X 21” Press under ¼” on the long sides of the strips. Place two blocks right sides together laying the raw edge of a strip of fabric on top aligning all the edges and stitch a ¼” seam. Use your Dual Feed or the Walking Foot #50. Press the seam to one side allowing the fabric strip to cover the seam, trim off any excess on the ends. Hint: The seam will lie flatter if you trim some of the batting out of the seam. Hand stitch the folded edge of the fabric strip to the back of the quilt. Repeat the process until you have three blocks joined together, three times. Cut 2 strips of fabric 1 ¼” X 61”. Continue in the same manner until you have the three rows joined. Trim off any excess on the ends of the long seams. Bind your quilt.
-
-
For those of us sewing on a longarm, should we assemble the entire top up front? I do not understand your comment about 24”. Please clarify. Thanks!
-
If you are working on a frame and you would like to make quilt from the blocks, then by all means sew the blocks together for a 60″ X 60″ top. You will need to piece your backing. The original intent was to make individual blocks and if you were to do that, I was saying that 2 blocks would fit across the width of the fabric and you would be using about a length of 24″ of fabric for the two squares.
-
-
Thanks for your blog.your blog are very informative and provide me the best Information.last time I have seen a website that provides me Embroidery digitizing services at a low budget my experience was good.
-
Thank you for this! I just did my first block–I have a ways to go but it was getting more and more comfortable. I had a question about the plexiglass — do people find they still need to use a supreme slider or similar product on top of the plexiglass, or is the plexiglass already smooth enough? Thanks!
-
Hello,
In my opinion it is a matter of personal preference. And for me it depends on the type of fabric I have on the back of my quilt. If I am using flannel, Minky or Cuddle type material, then I also us the Slider to help in moving the fabric easier. However some people find the Slider just makes it easier for them to move the quilt top. Try both and see what works best for you.
Happy Quilting,
Heather
-
-
In the construction of quilt blocks, what is the rule for borders, i.e., on the side first, then across the top and bottom? Or, across the top and bottom first, then down each side? I am always confused about this technique. Please advise.
-
Alberta,
This will partly depend on the pattern for the quilt top. Some patterns have specific instructions for attaching the borders to the quilt. Others just say attach borders. Part of this is a matter of personal preference. If you like the way a finished quilt looks, then look a how the borders where attached. Did they add the side borders first, then the top and bottom. Come up with what is appealing to your eye and then go from there.
Best of luck on your borders,
Heather
-
-
Where can I purchase the Bernina ruler you show in this lesson? I can’t find it. I’m excited to start this since I’ve had the #72 foot for 5 years and have never used it. This COVID-19 has me looking for different things to try since I’m trying hard to stay home.
-
Hello,
The ruler you are referring to is part of the BERNINA Ruler Kit for Table Model Machines. Your local BERNINA dealer should be able to help you with purchasing this ruler kit.
Happy Quilting,
Heather
-
-
I want to learn how to start quilting using the rulers but not sure if I can use my bernette b38. What do I need to get started.
-
Hello,
You would need to purchase a Rulerwork Quilting foot for your b38. Contact your local BERNINA or bernette dealer for more information.
Happy Quilting,
Heather
-
-
I’m just getting started with ruler work . I will be working on a domestic , my question what machine settings? Stitch, tension etc .
Thank youJeri
-
Jeri,
Great question!
Rulerwork quilting is typically done with the straight stitch. As far as tension, on our BERNINA machines I leave the tension at the default setting to start and then test stitch an area. The tension setting will depend on what type and weight of threads you use. I usually have a practice quilt sandwich that I test the ruler as well as the stitch setting on. Then make any adjustments that are needed to have the perfect stitch.
Hope this information helps.
Happy Quilting
Heather~
-
-
I am having trouble getting the pressure foot #72 low enough so that the machine can sew properly. There is about a 1/4 inch gap above the fabric. I have used the dial and lowered the foot as much as possible. Do you have any suggestions? I’m frustrated as I can’t use the rulers so I had to mark the fabric to sew the lines. The piece I’m working on is a quilted tea mat.
-
I find ruler work easy on small projects but difficult even on a lap quilt, how do you move all of the fabric around?
-
I have the ruler foot for the Bernette 70 series, do these rulers work with these machines?
-
How do you secure threads at beginning & end?
Leave a Reply
You must be logged in to post a comment.

Looking forward to learning ways to use all the rulers