Rulerwork For Beginners, Part 2: Roadmap
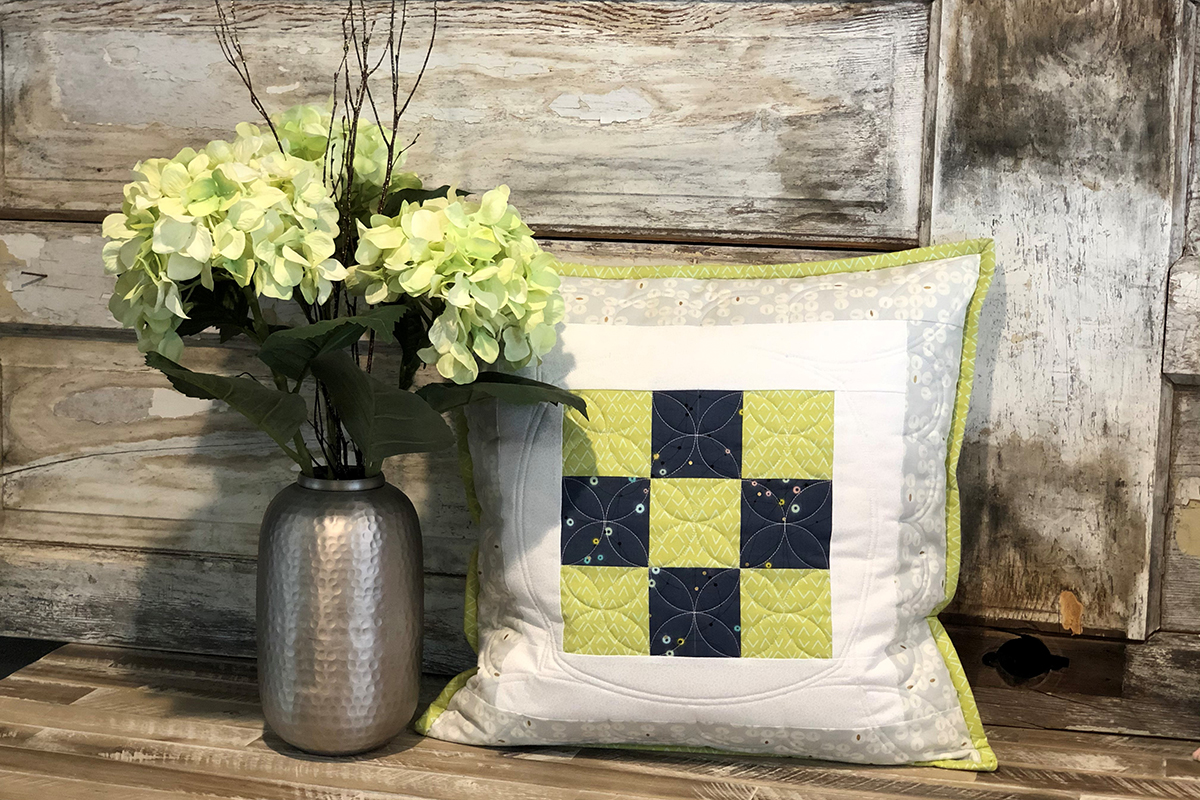
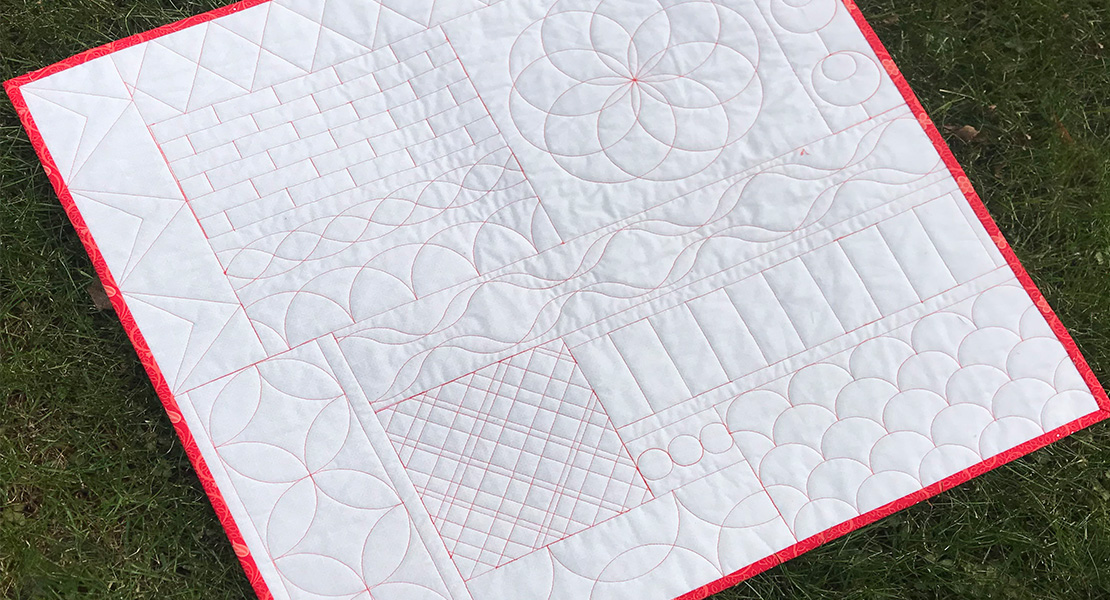
Last month we jumped right into quilting because I wanted to get you started with rulers, and then you saw the direction we were headed when you saw the “Roadmap”. But it is always a good idea to draw a plan before you start. So this month we are going to start out by taking a look at our “Roadmap”.
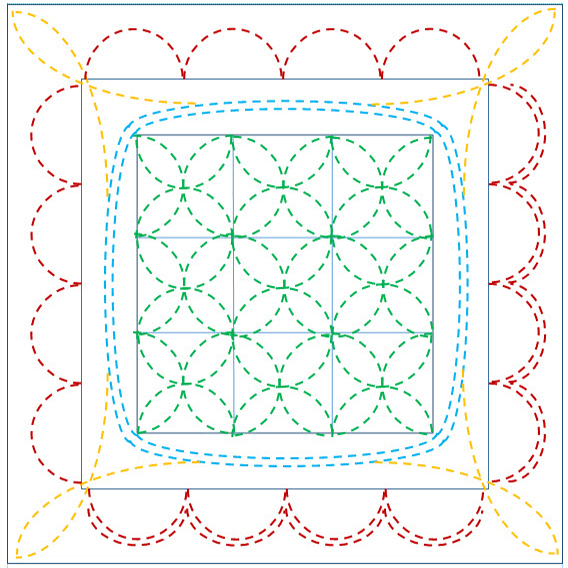
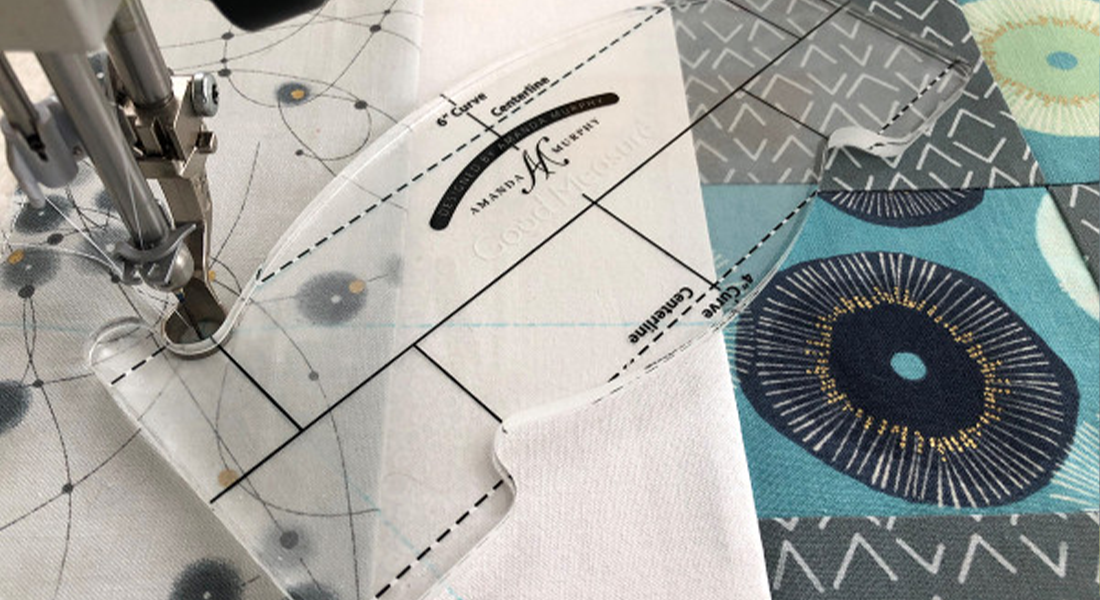
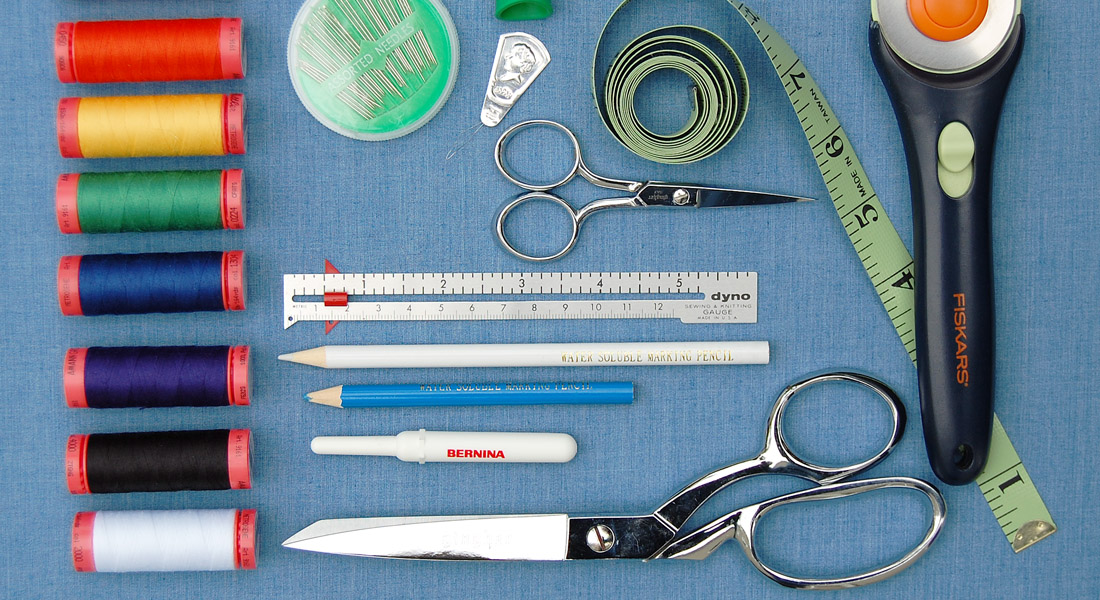
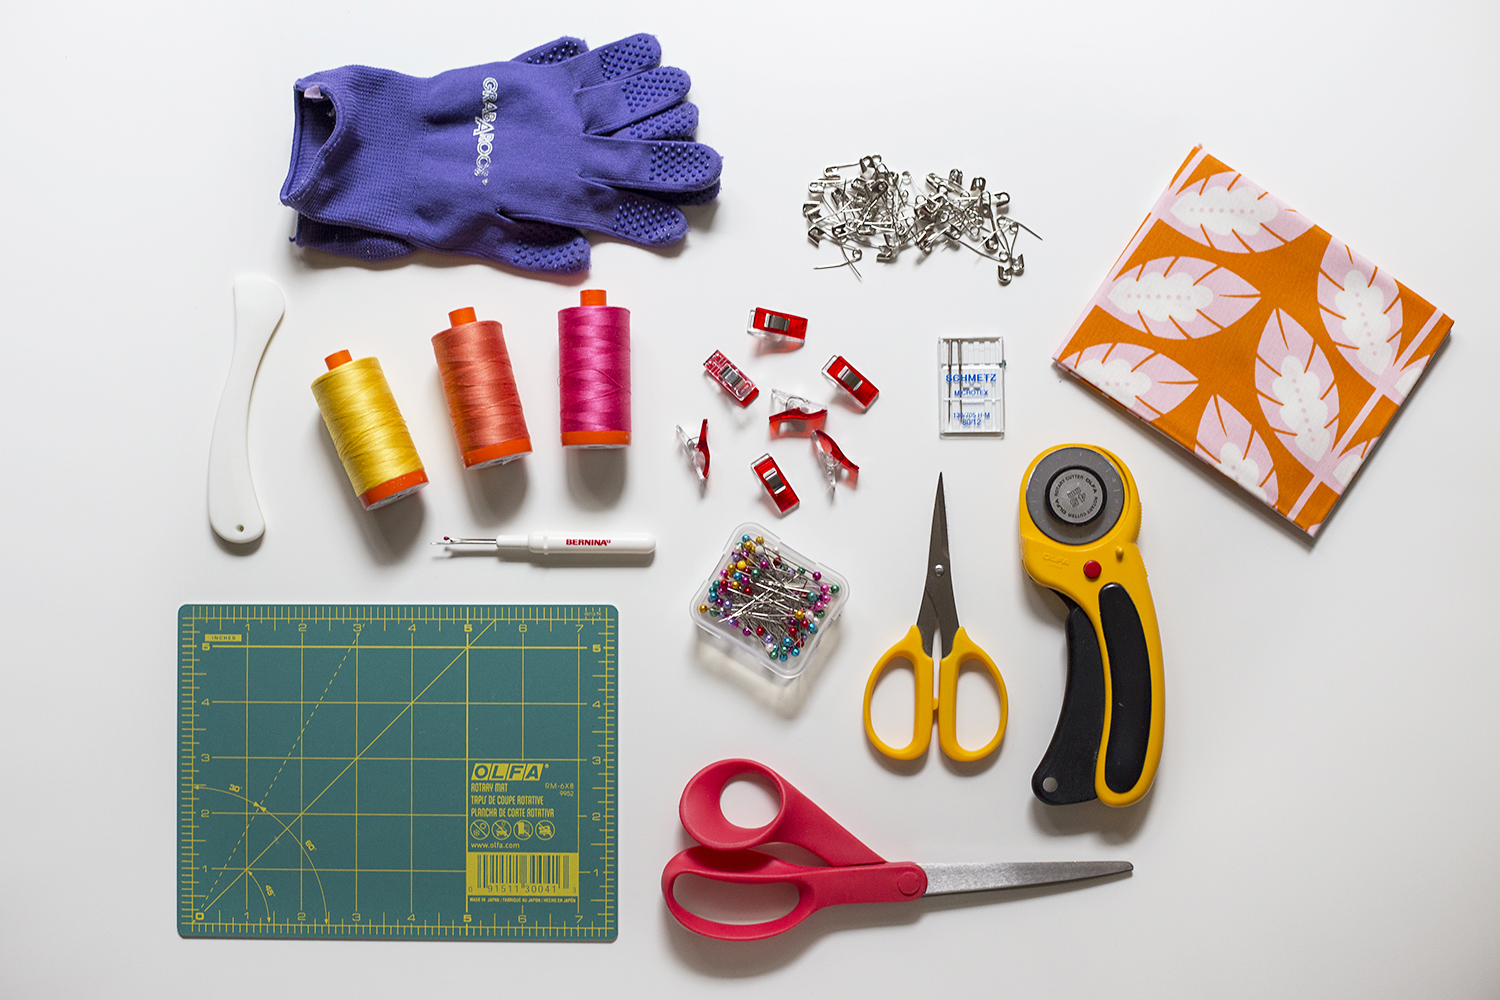
As we look at our roadmap, we see several different curves, so that means we are going to need several different curved edges. We will be using the BERNINA Straight Edge Ruler because it has the perfect rounded end. (The ruler will allow for a 3” half circle.) We will also be using two curved rulers from Quilter’s Groove, the ProEcho 11 and ProEcho 18. (These rulers will allow for the arcs you see on the project. Other curved rulers will work, but the design may change.)
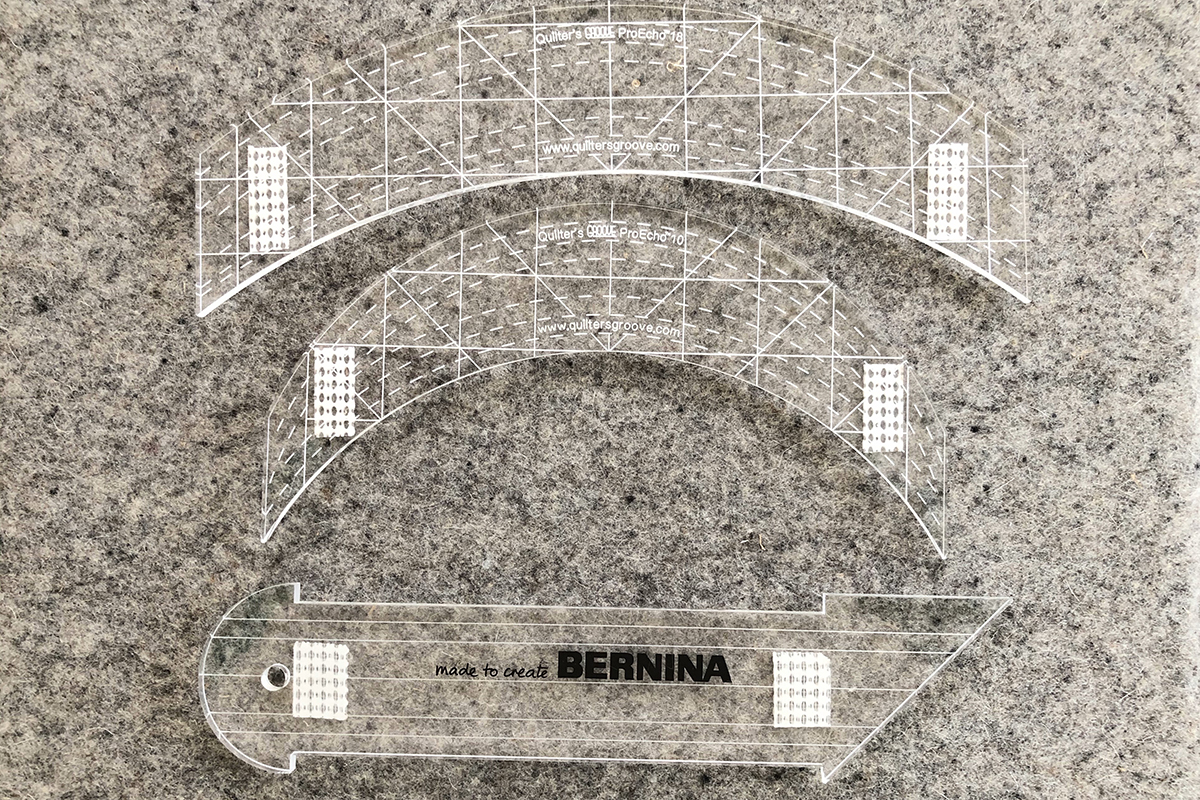
You will notice that there is some echoing of curves on the roadmap, however this is optional. If you are going to be doing any echoing, and you will see more of it from month to month, you will want the BERNINA Echo Quilting Clips.
We will want to do some marking before we get started. Mark diagonal lines from the corner of the 9-Patch to the outside corner of the block. We will use this line later.
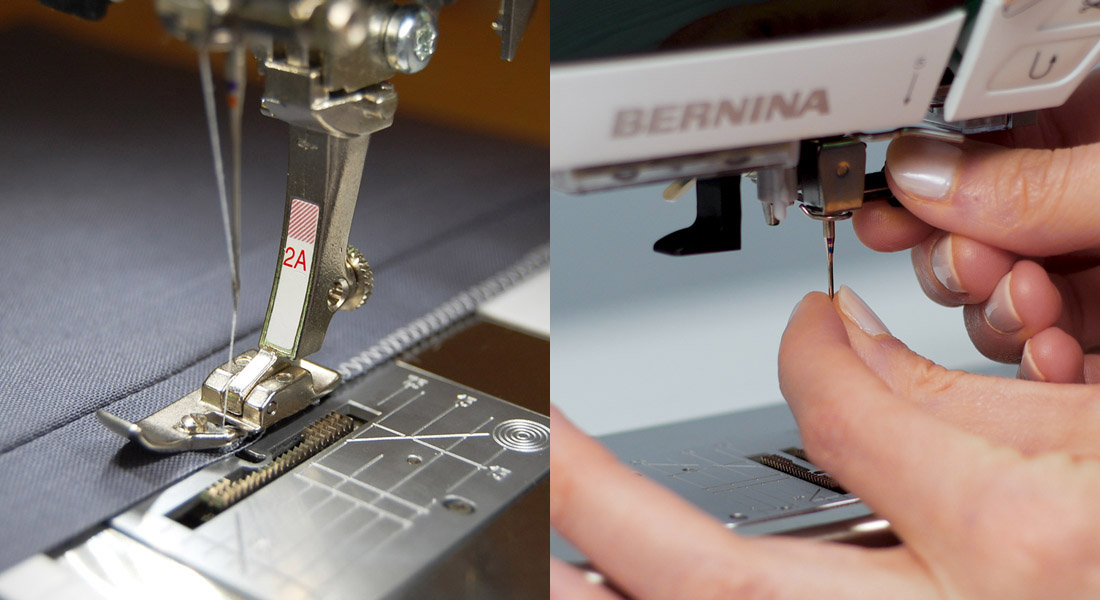
Just to review machine set up, the needle should be programed to stop in the down position. If you have a Hover Function on your home machine, I would turn it off so that when you stop the foot does not raise giving the ruler a chance to slip under the foot. Q Series machines should be in BSR2.
Another reminder when stitching at a table model machine, whether Domestic or Q Series, it that even though it is tempting to turn the block, try not to. Get used to moving in all directions because when you are quilting a larger piece, turning the quilt may be difficult.
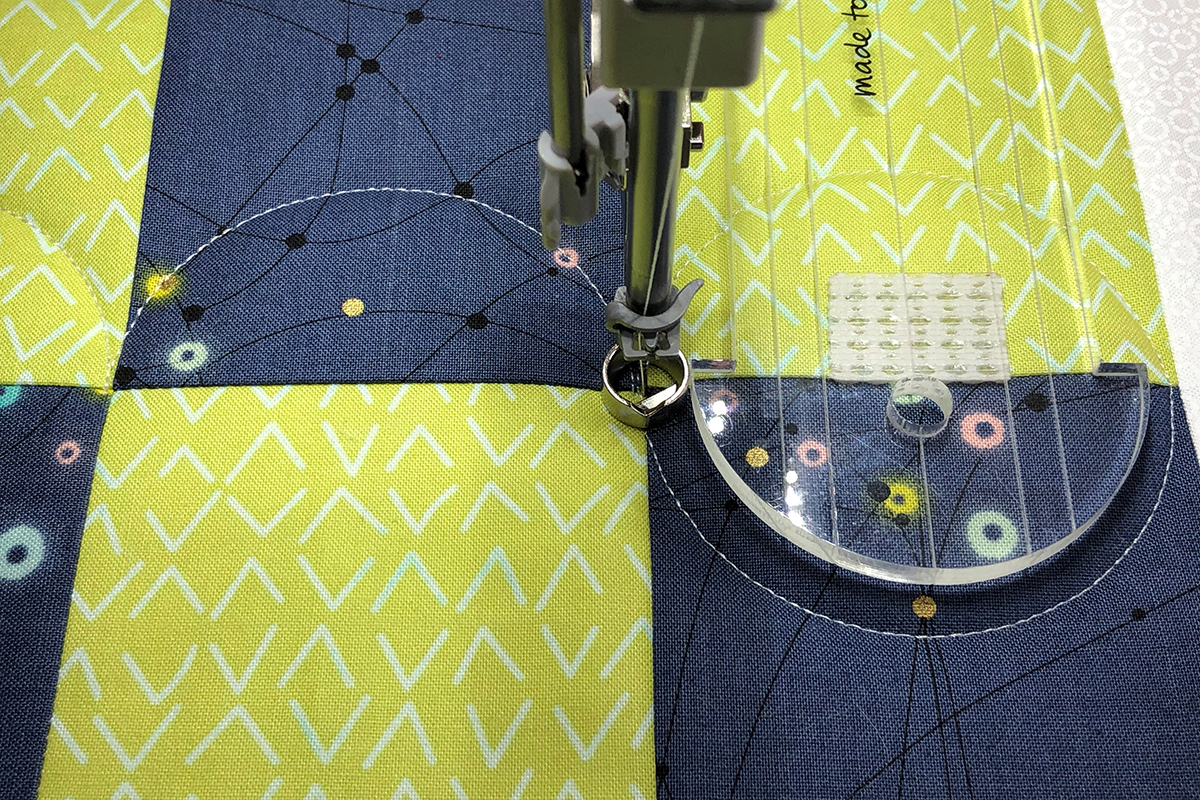
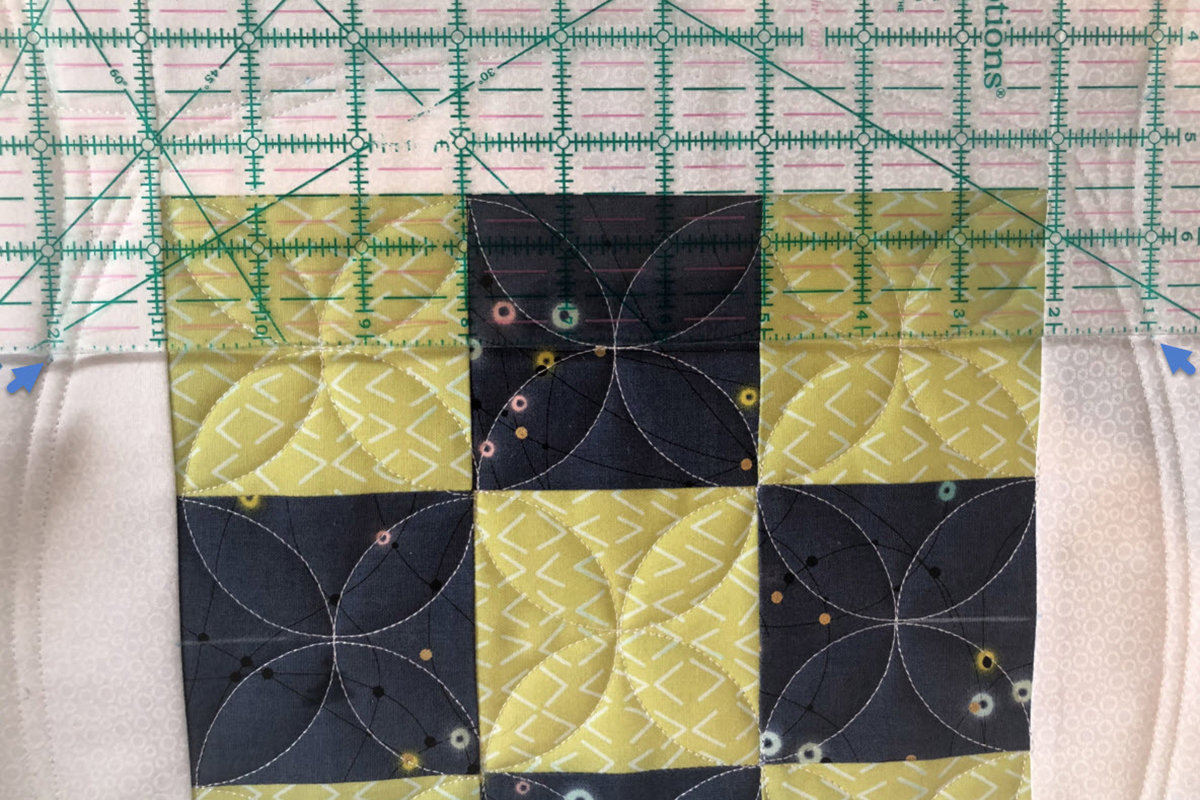
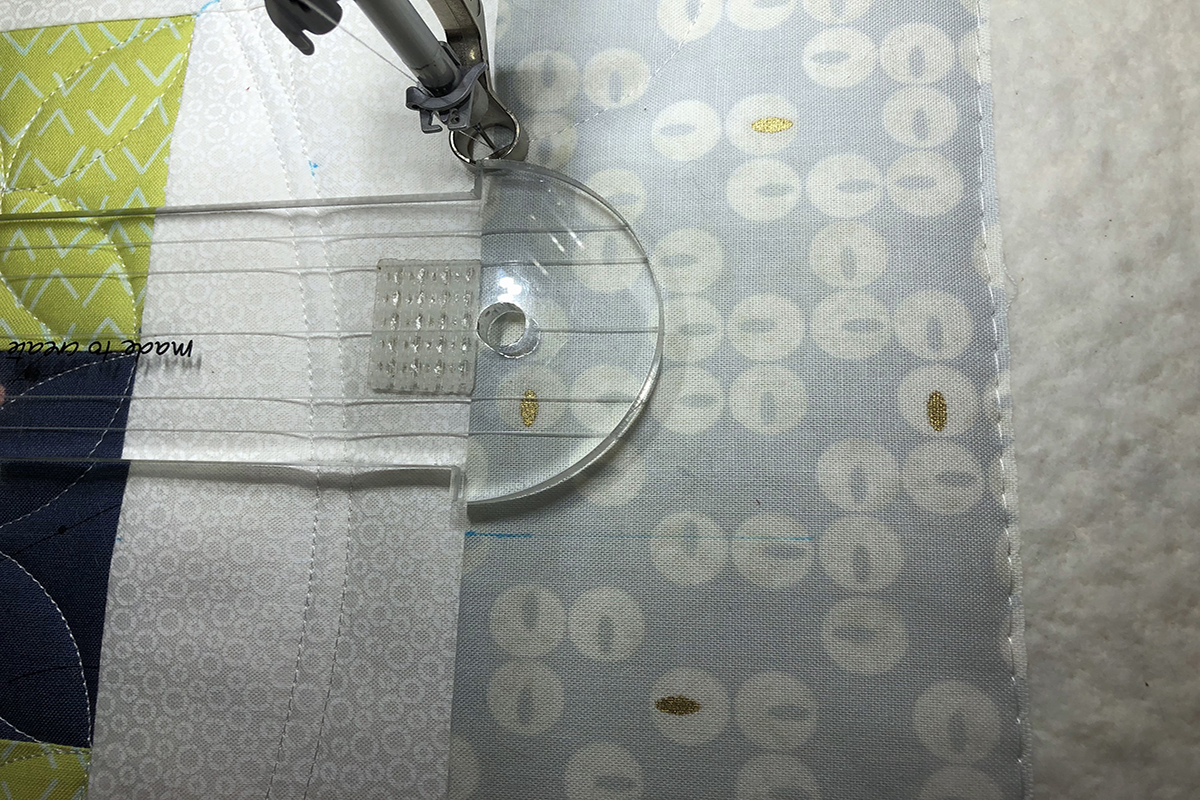
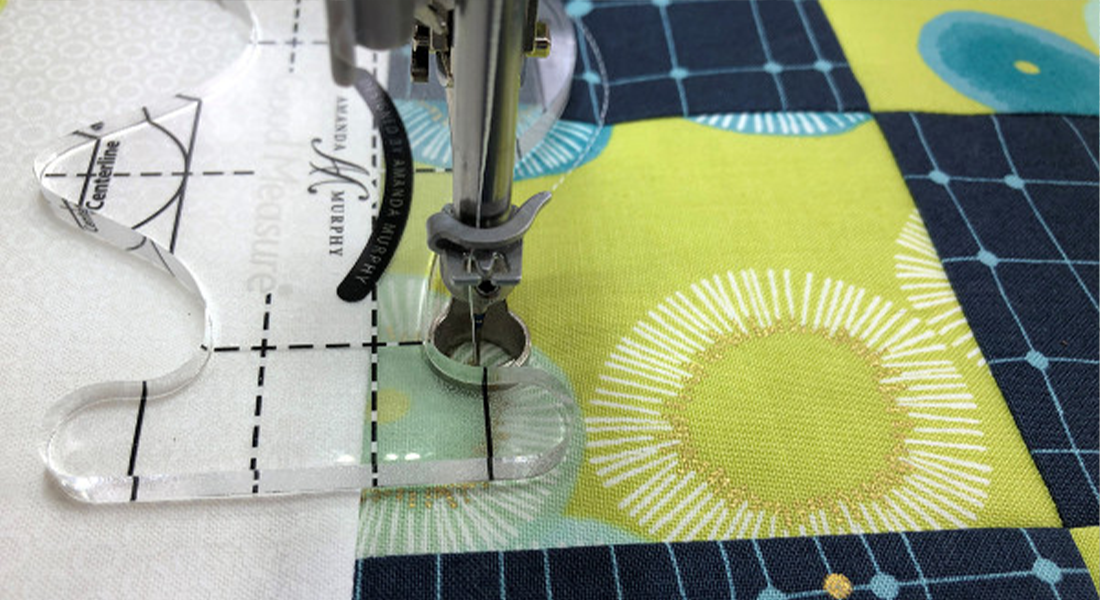
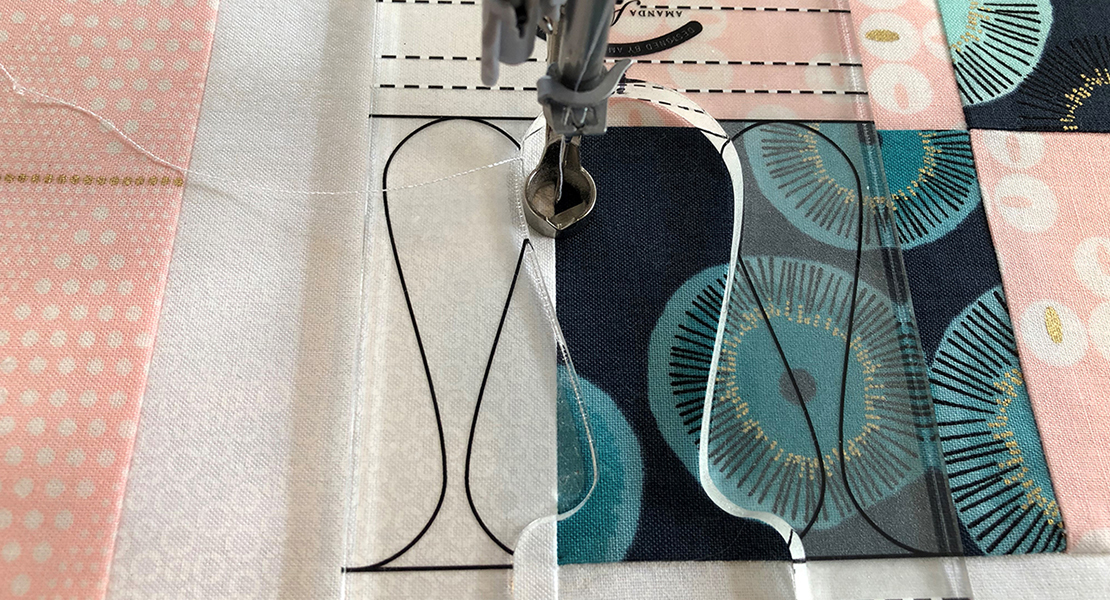
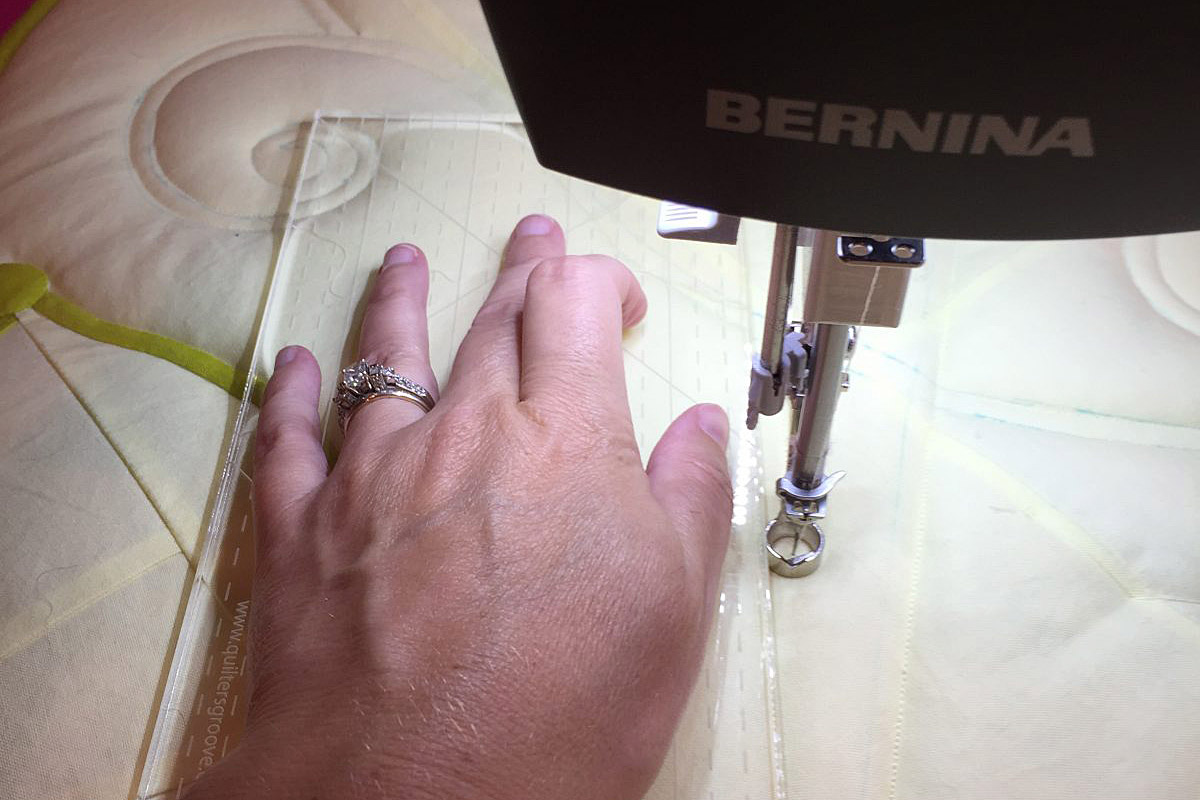
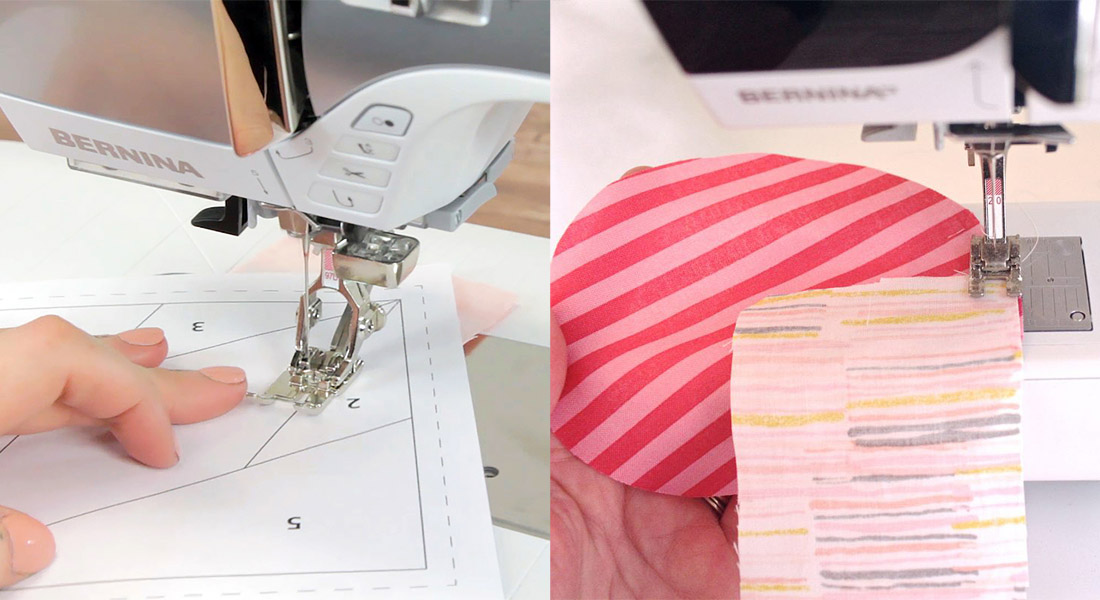
So let’s get started with the 9-Patch center of the block. We are going to be doing a continuous line curve pattern (sometimes referred to as “orange peel”) as indicated by the green lines on our roadmap. This is an extremely versatile pattern and one I use often. Using the curved end of the BERNINA Straight Edge Ruler, begin in the upper left hand corner of the 9-Patch block.
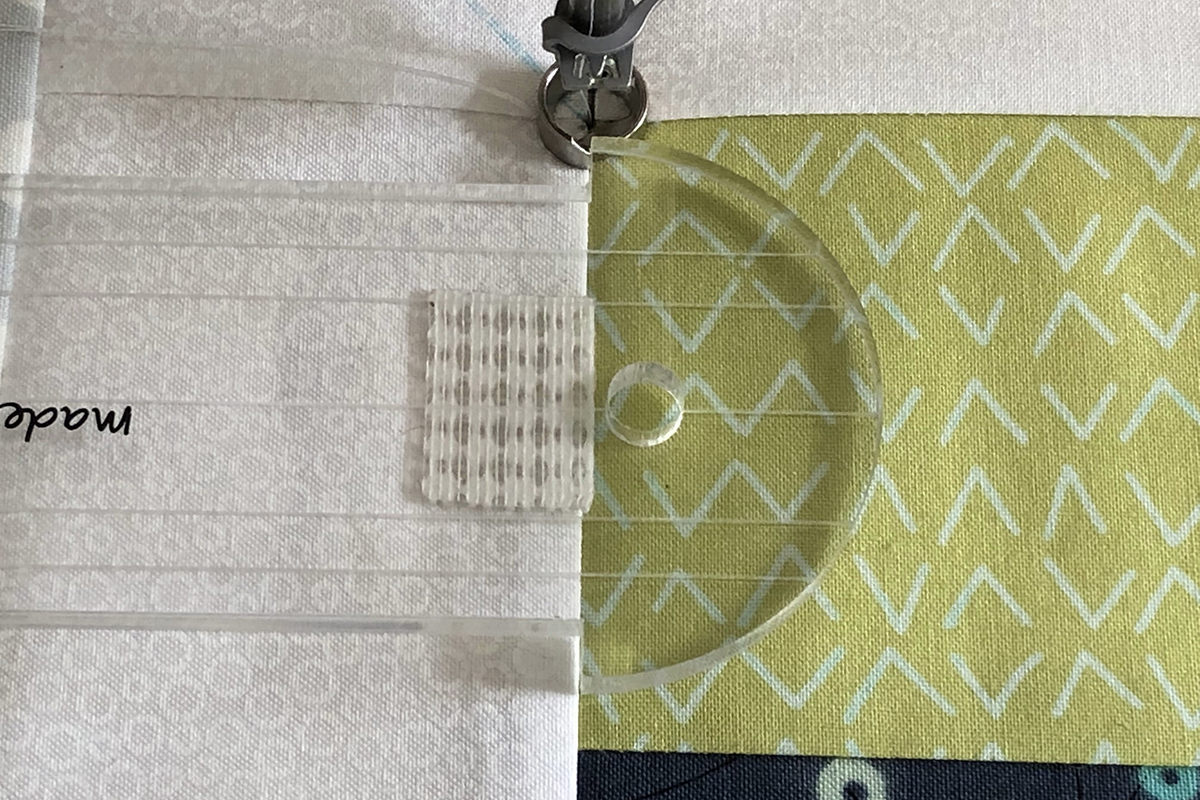
Lay the ruler so that the notches indicating the half circle are on the vertical seam line of the first border and the curve goes into the upper left square. Stitch the half circle stopping at the upper left corner of the second block. Turn the ruler and stitch across the bottom of the upper left square.
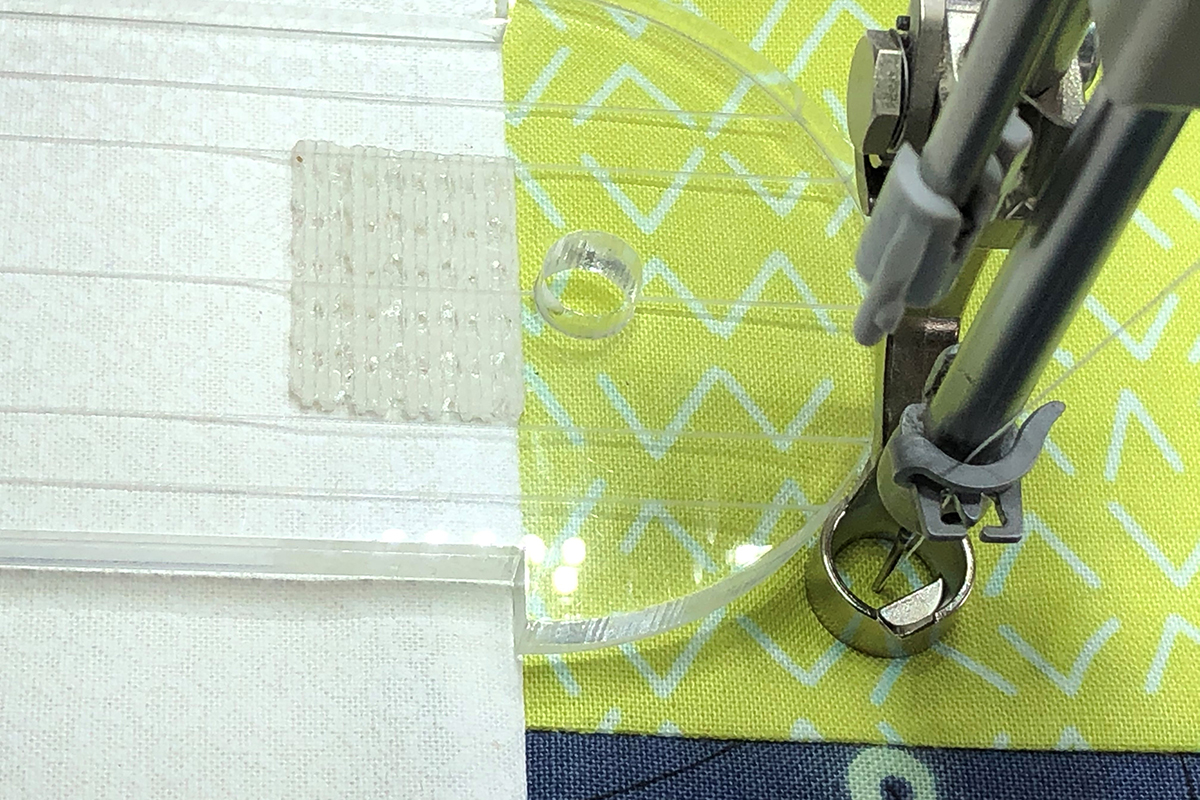
Continue across the bottom of all three squares in the top row.
Turn the ruler and stitch across the bottom edge of all three squares.
Stitch down the side of the first square in the second row.
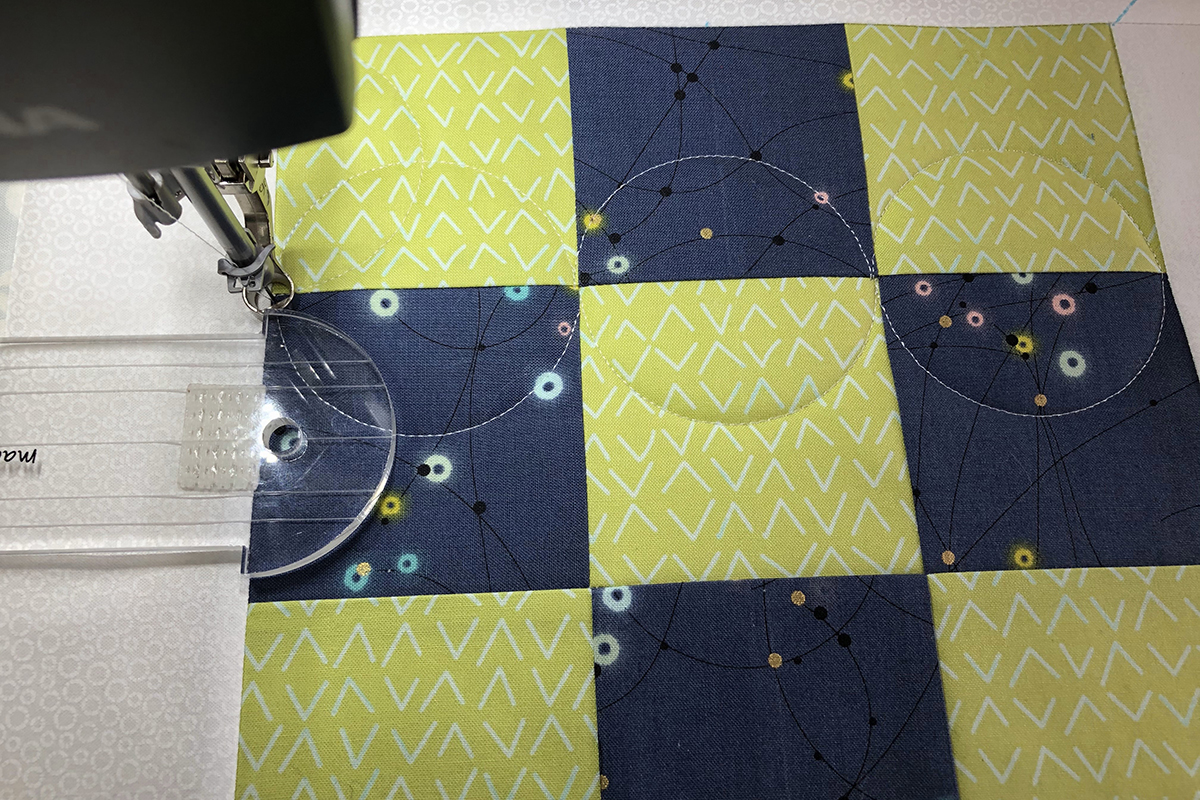
Repeat the same stitching path, stitching across the row and back and down to the bottom left corner of the 9-Patch. Stitch across the bottom left square. Turn the ruler and stitch up one side of the vertical seam.
Stitch down the other side.
Stitch across the bottom center patch, up the seam and down, across to the bottom right corner.

From here, stitch up the side and across the top ending in the same corner you started.
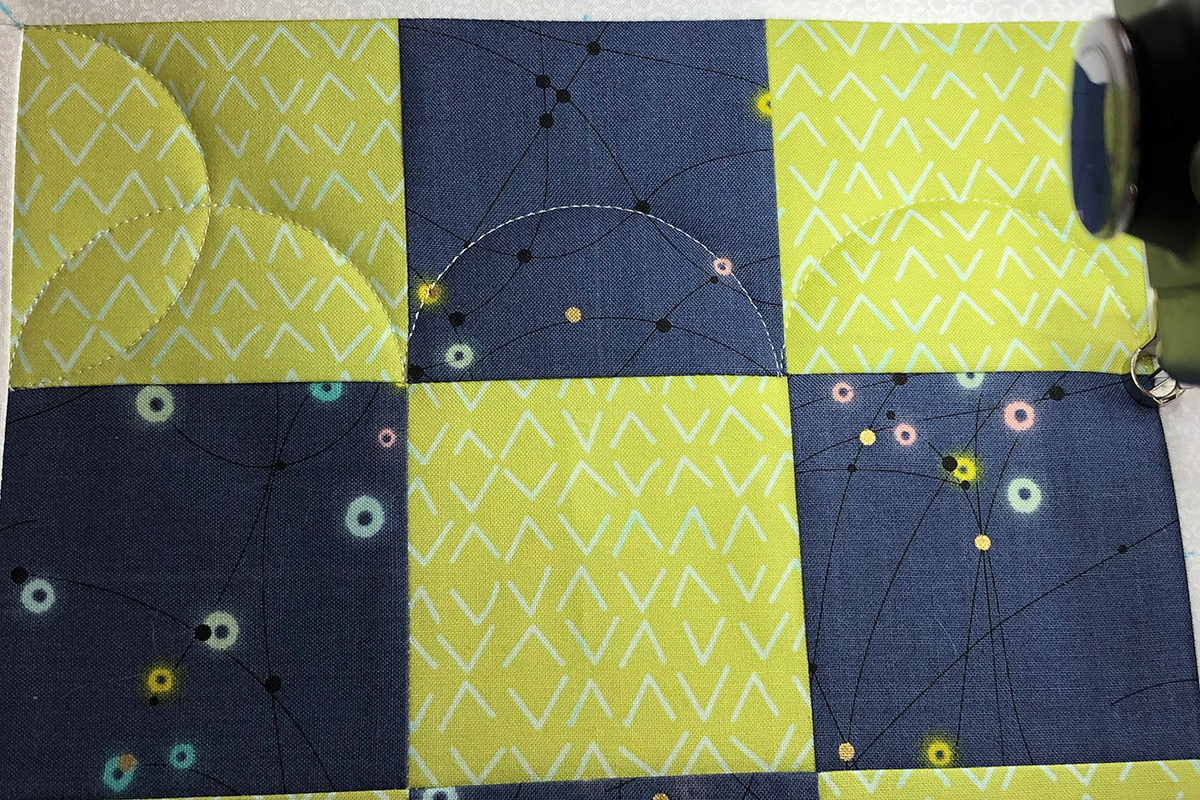
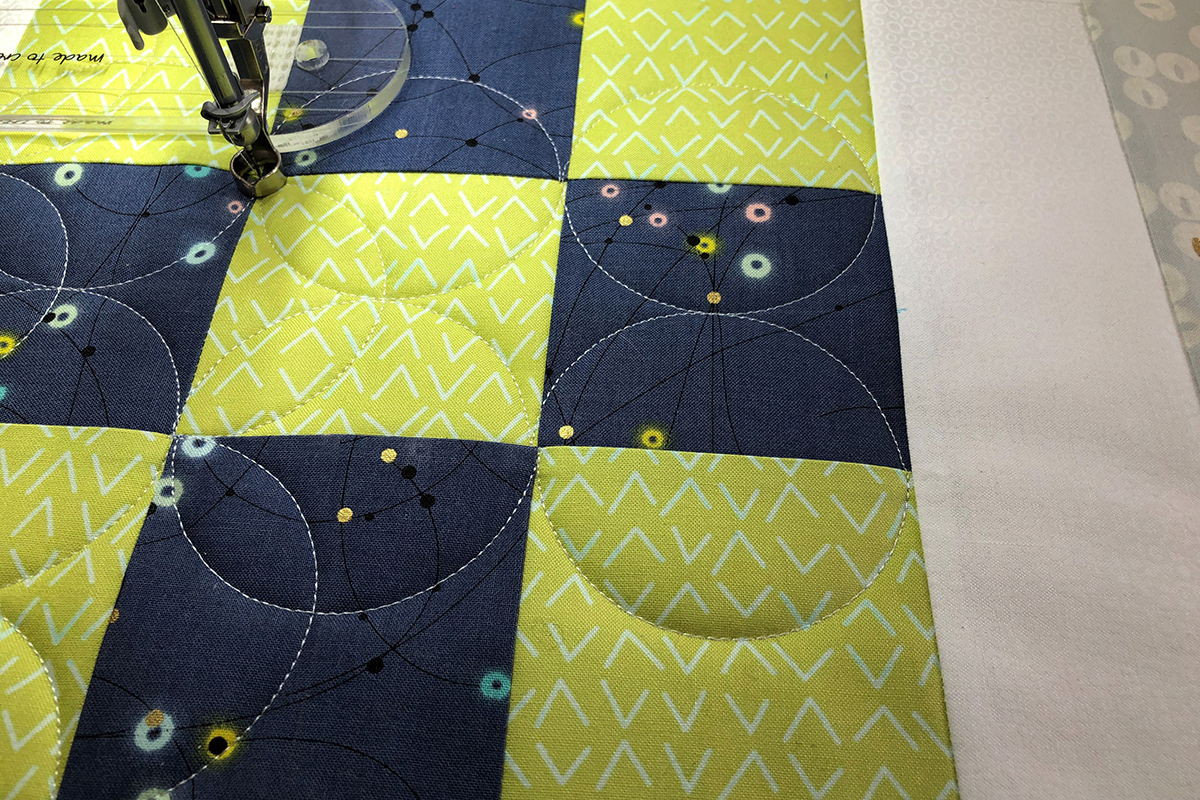
There are many paths you can take to stitch this as a continuous design, this is just one of them. Study the block to determine what path you would like to take, but the objective is to stitch the half circle to the inside of every square without having to cut the thread.
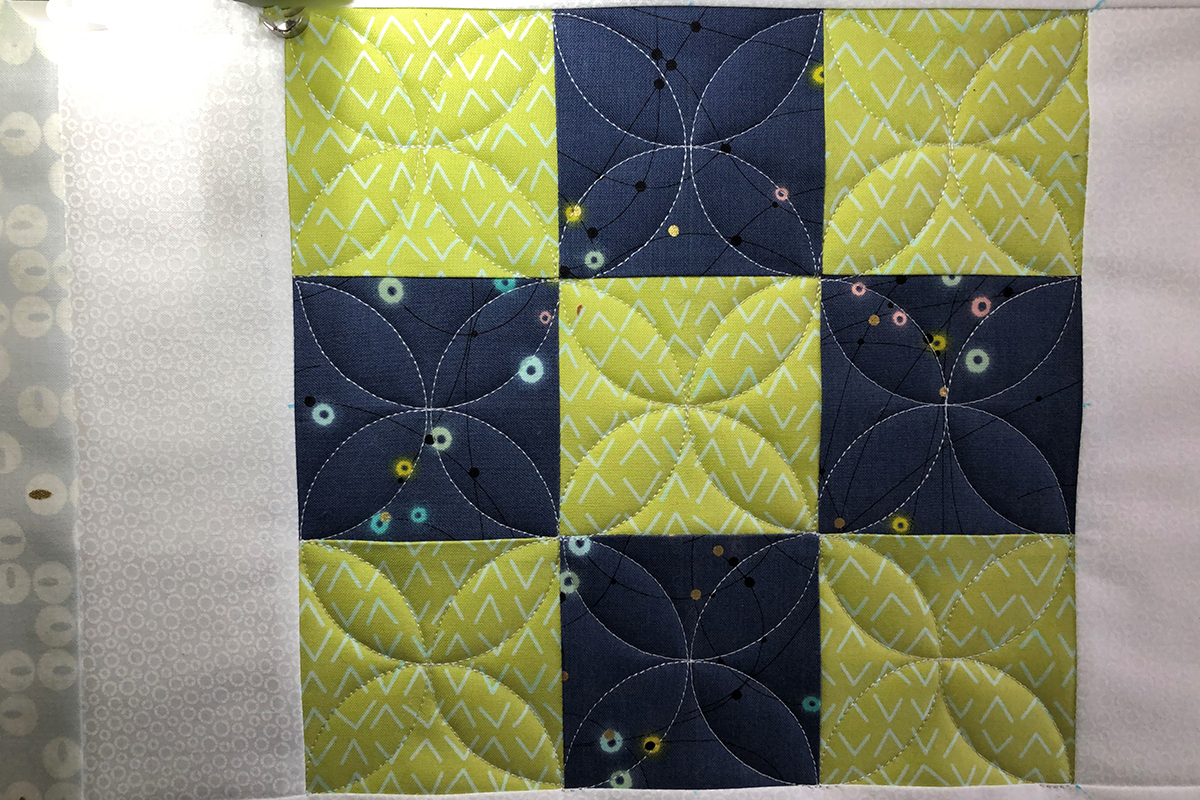
As I said when we started, this is a very versatile design. It can be done in a 4-Patch, 9-Patch, 16-Patch and so on. It can be done in rows, and it can be done with a shallower curve giving a different look.

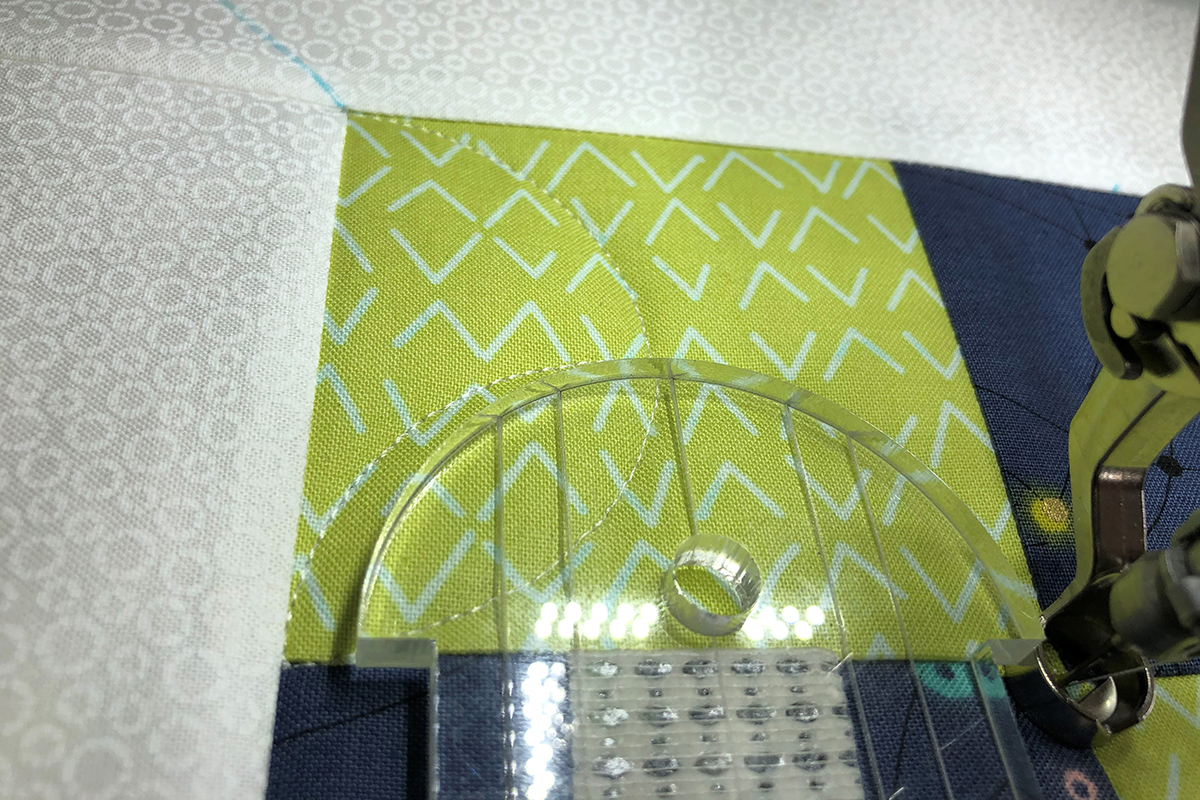
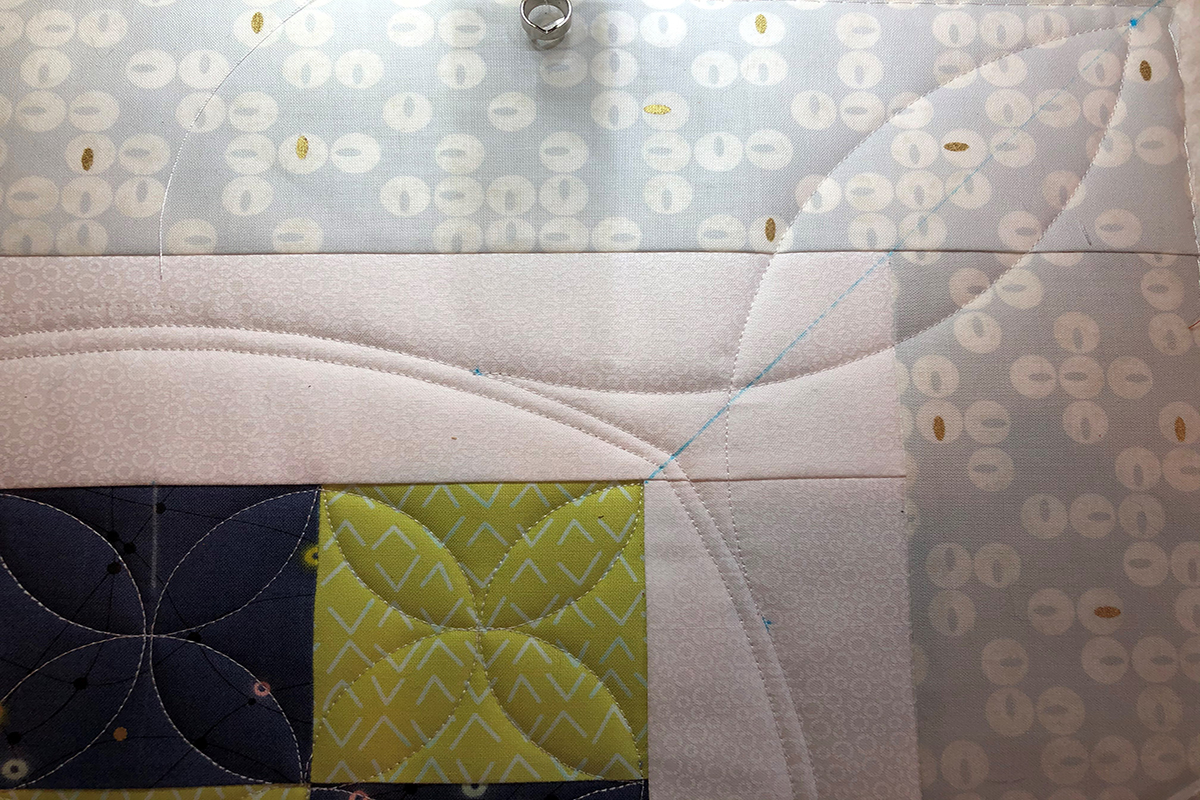
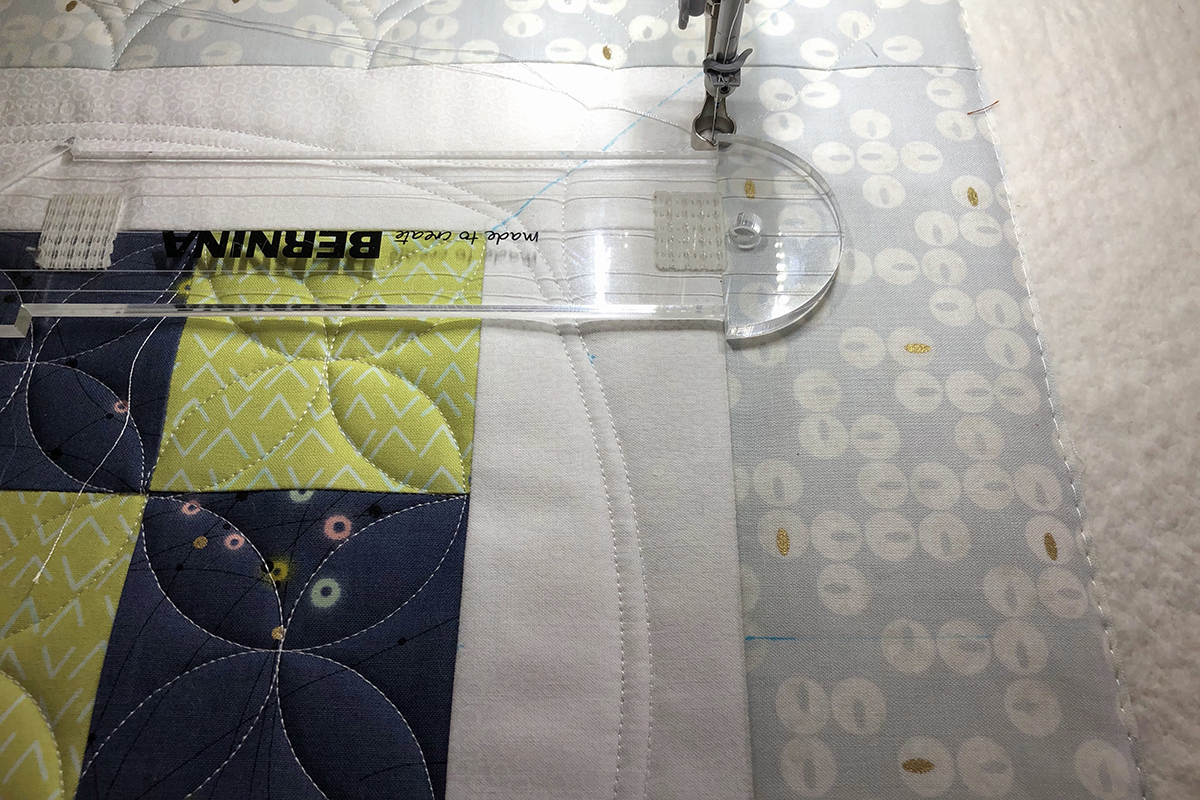
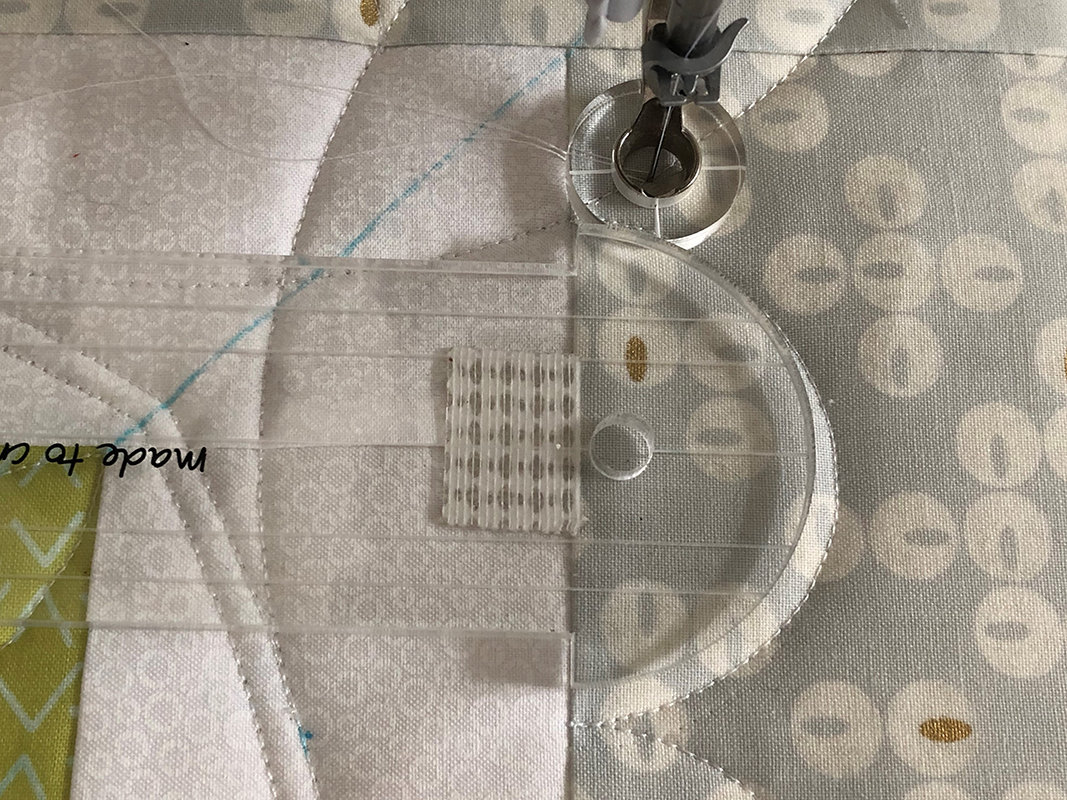
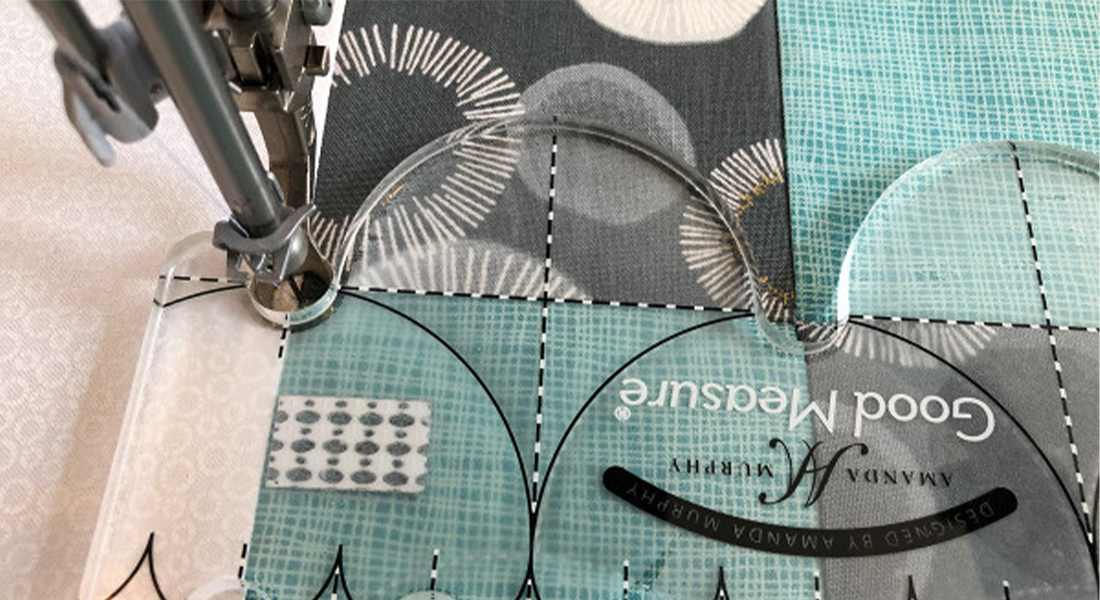
The next step is to add a gentle curve on all four sides of the 9-Patch. You can see that in the blue stitching on the roadmap. Using the Quilter’s Groove ProEcho 18 ruler, lay it on one edge of the 9-Patch. Position the ruler so that it is centered on the side and the long center line of the ruler is lined up with the seam line of the 9-Patch.
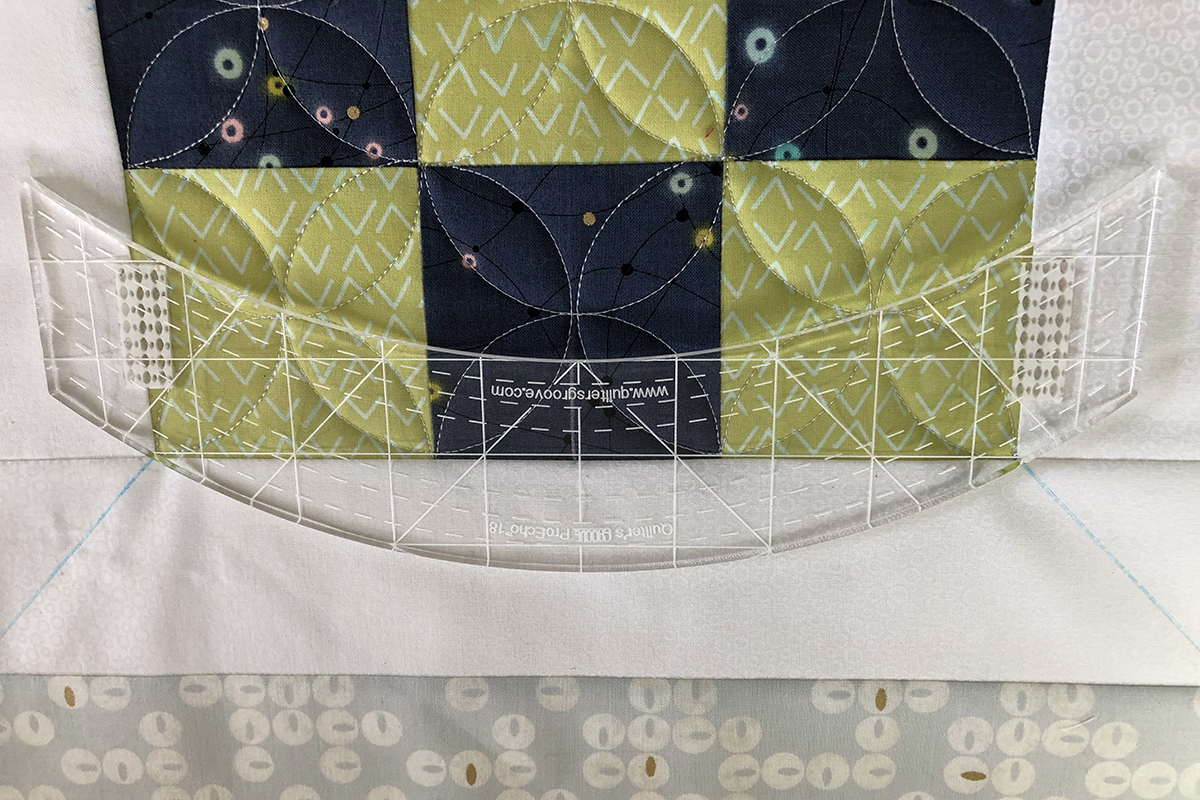
Begin stitching on the diagonal line that was marked on the fabric. Stitch to the diagonal line in the next corner.

Turn the ruler and center it along the next side. Stitch to the next corner. Finish by stitching all the way around the center 9-Patch.
To echo the curved edges, use the same ruler laying the edge of it on the already stitched lines.
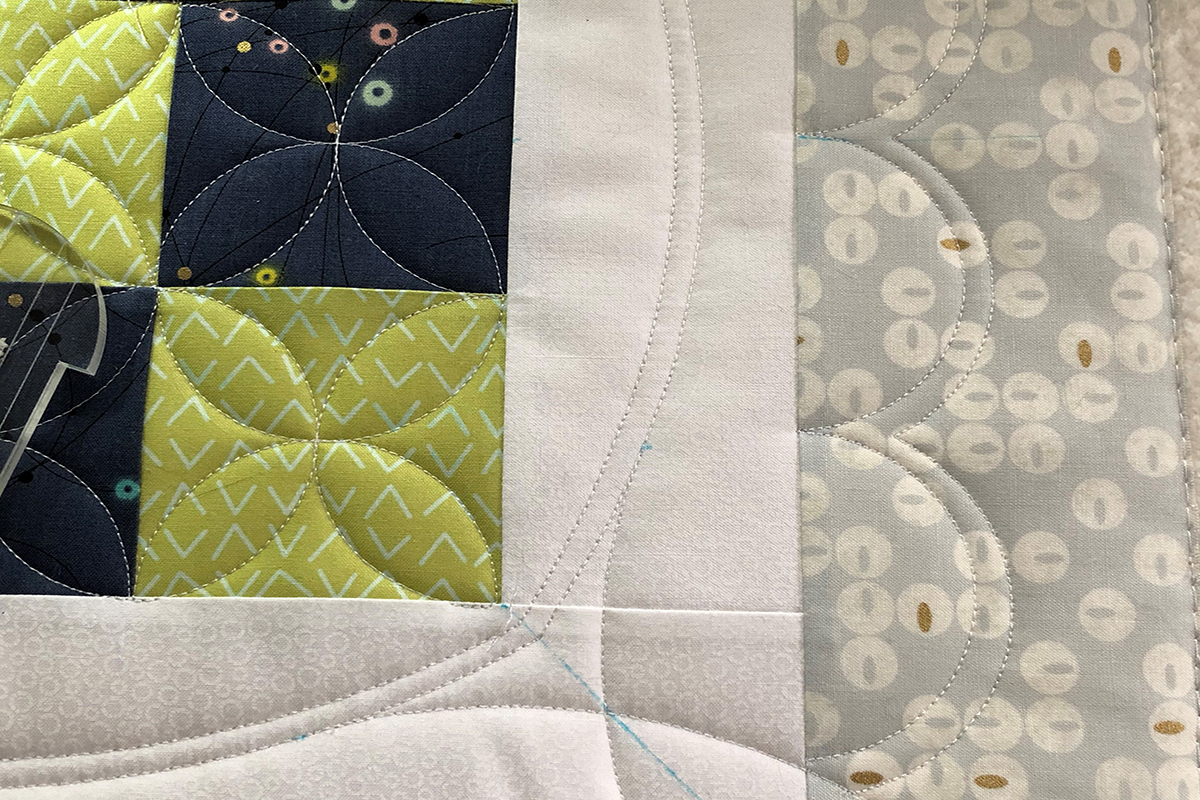
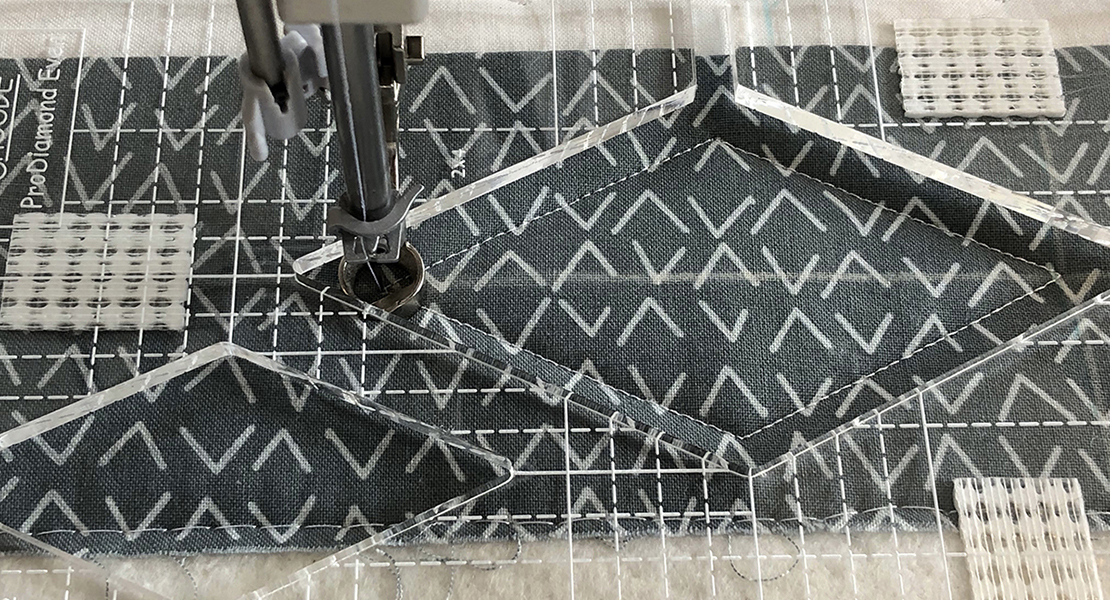
Now to the corners. This would be the yellow stitching on the roadmap.
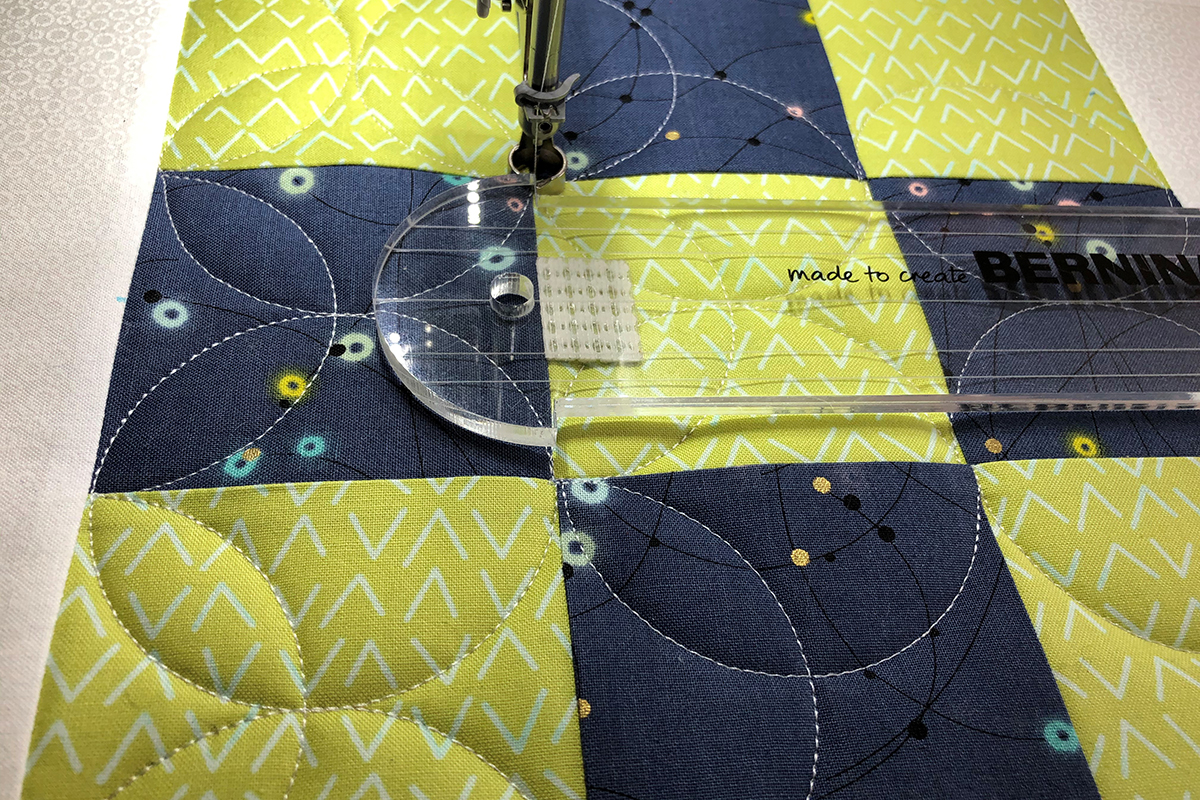
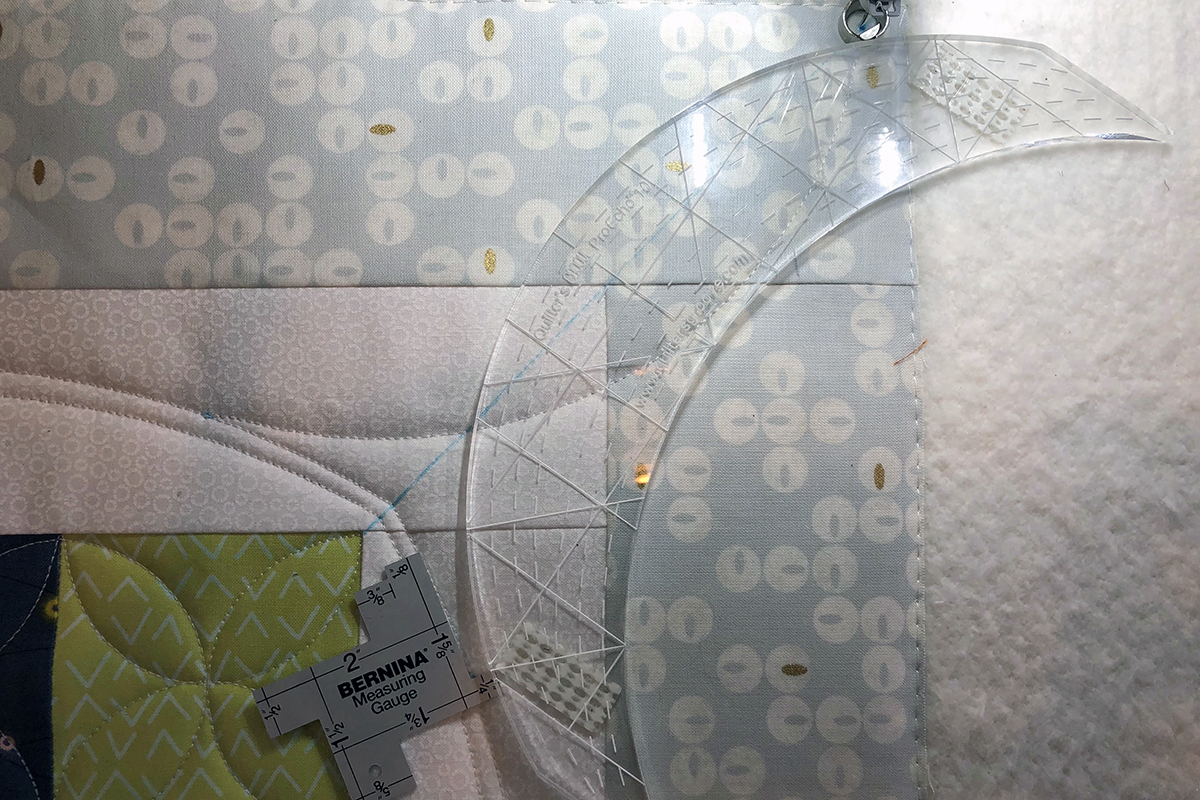
Place a mark 5/8” from each corner of the block on the diagonal line. Lay a cutting ruler so that the 1 1/2″ line is on the outside seam of the 9-Patch. Place a mark where the ruler hits the outside curved line. Do this on all four sides.
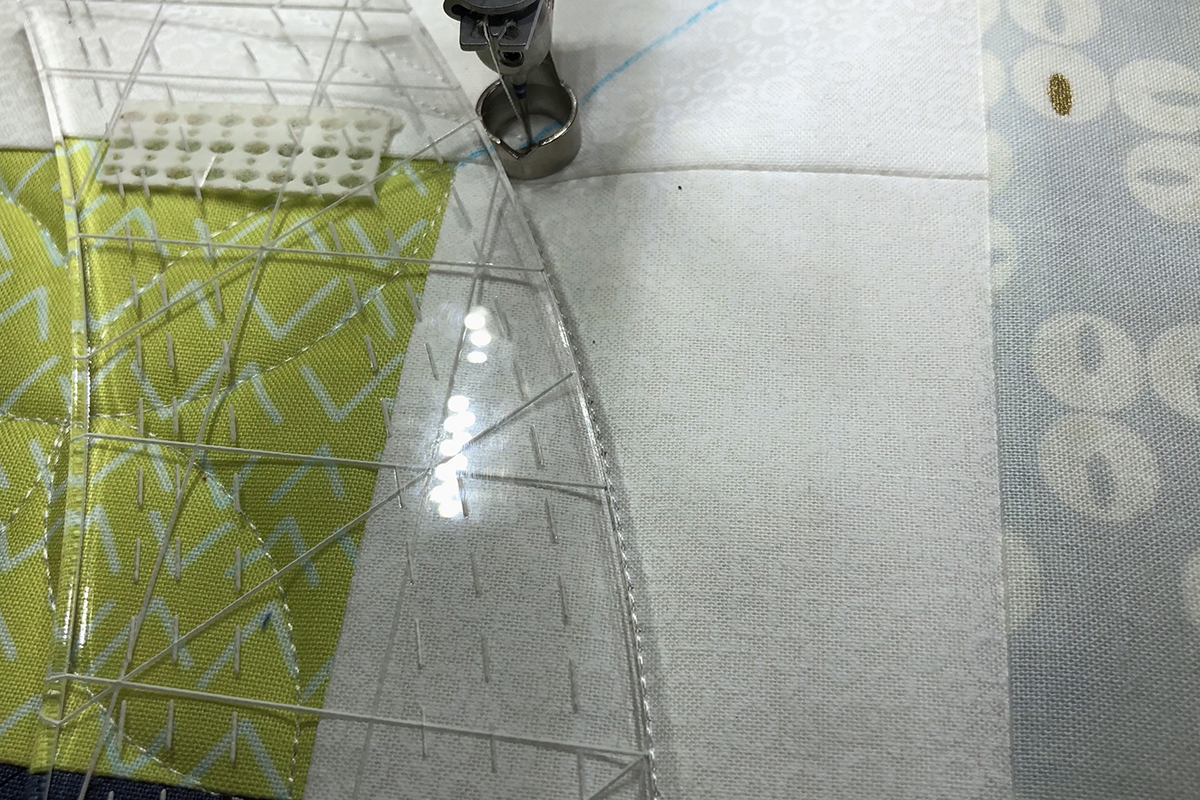
Lower the needle into one of these marked intersections and lower the foot. Lay the last line on the outside curved edge of the ProEcho 11 ruler along the edge of the foot. Angle the ruler so the other end is 1/4″ from the corner mark and stitch.

Leaving the needle in the fabric, flip the ruler so the curve is going in the opposite direction. The other end of the ruler should be 1/4″ from the mark you made earlier. If you do not feel you can eyeball a 1/4″, it is okay to measure.
When you have finished the second line of stitching, you have a competed corner.
Repeat for the other 3 corners.
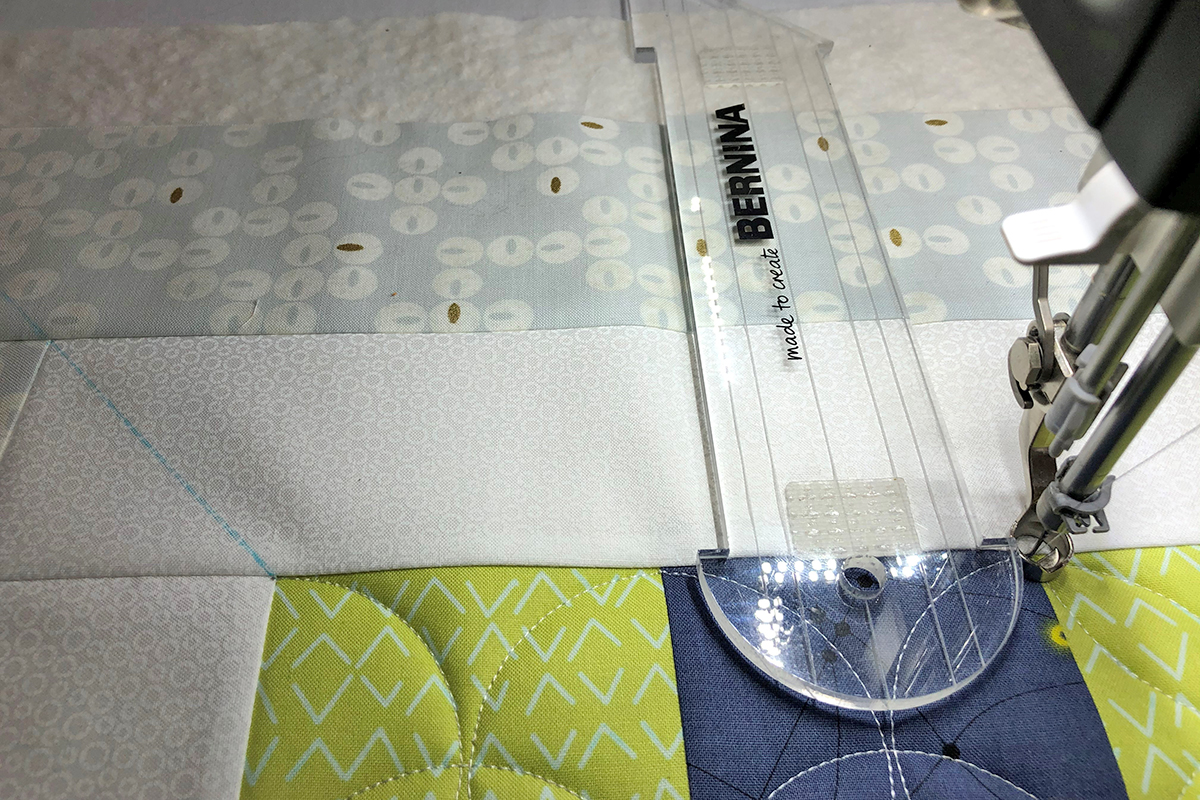
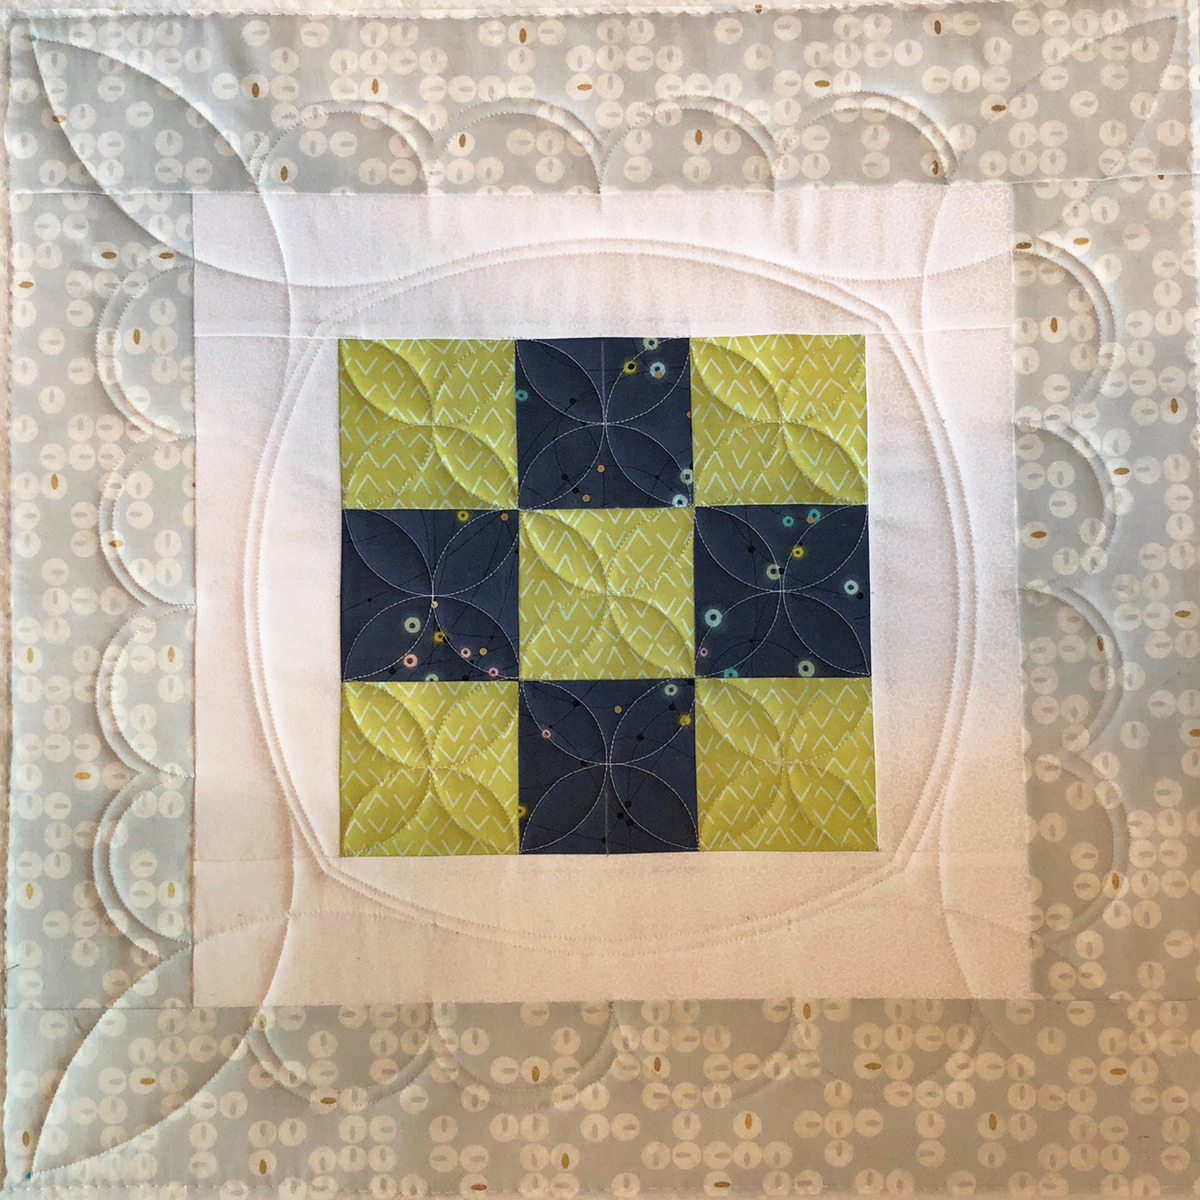
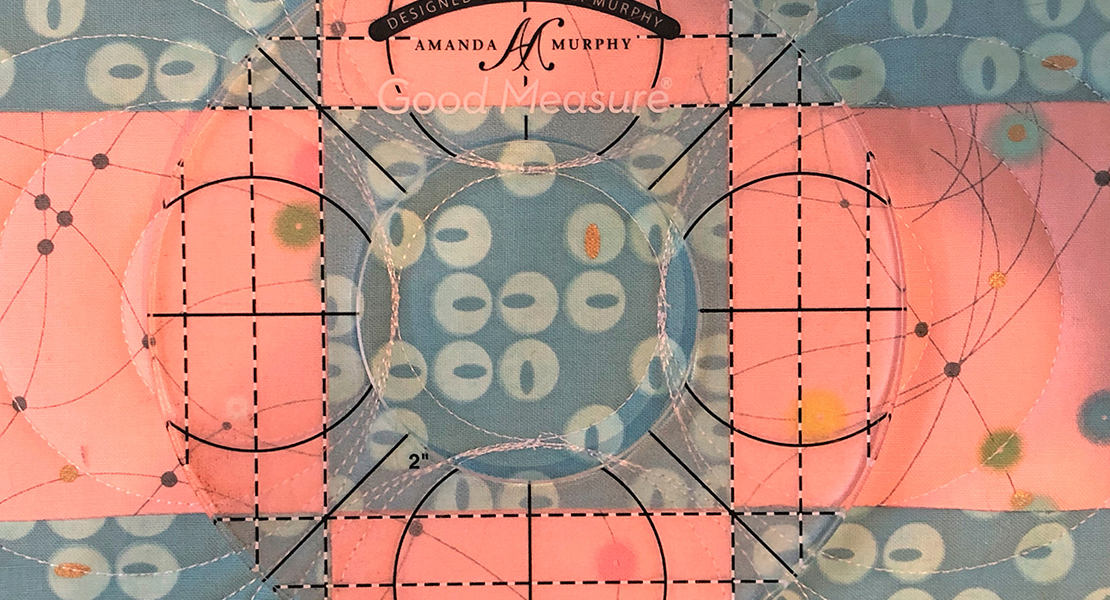
Mark the center of the outside borders. We will be using the BERNINA Straight Edge ruler to stitch 4 half circles along the seam of the outside border (red stitching on the roadmap). Lower the needle into the outside border seam where the seam intersects the stitching from the corner motif.
Four half circles should fit perfectly; however, we know nothing is ever perfect! So before you begin stitching, place the ruler and pretend to sew to see if everything is going to fit. You may have to do a little “fudging” to get four half circles to fit. The second half circle should end at the center mark you placed on the border.
The next steps are optional. I have used the BERNINA Echo Clips for the Ruler Foot, stitching the half circles again to create an echo of the curves. There are three sizes of Echo Clips; 1/2″, 3/4″ and 1”. Use the 1/2″ Echo Clip to obtain a 1/4″ echo of the already stitched design. Attach the clip to the ruler foot with the etched lines facing down, the slit in the back of the foot and the line opposite the slit lined up with the “V” on the front of the foot. Push up until it clips in place.

Place the ruler down in its original position. Now you will repeat the stitching you just did allowing the edge of the echo clip to follow the edge of the ruler.
This will do a perfect echo of the original design. I love the BERNINA Echo Clips!!
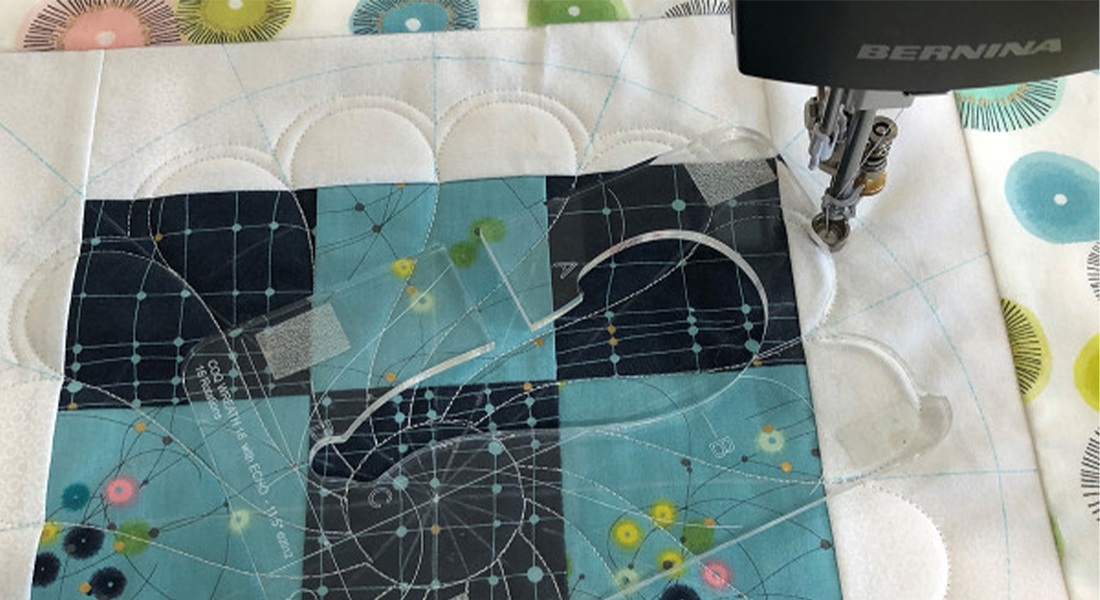
You have now completed quilting a block with curved rulers! You could add more quilting, of course; there are always places to add free motion, or you could do more echoing! I did a little more echoing in the corners.
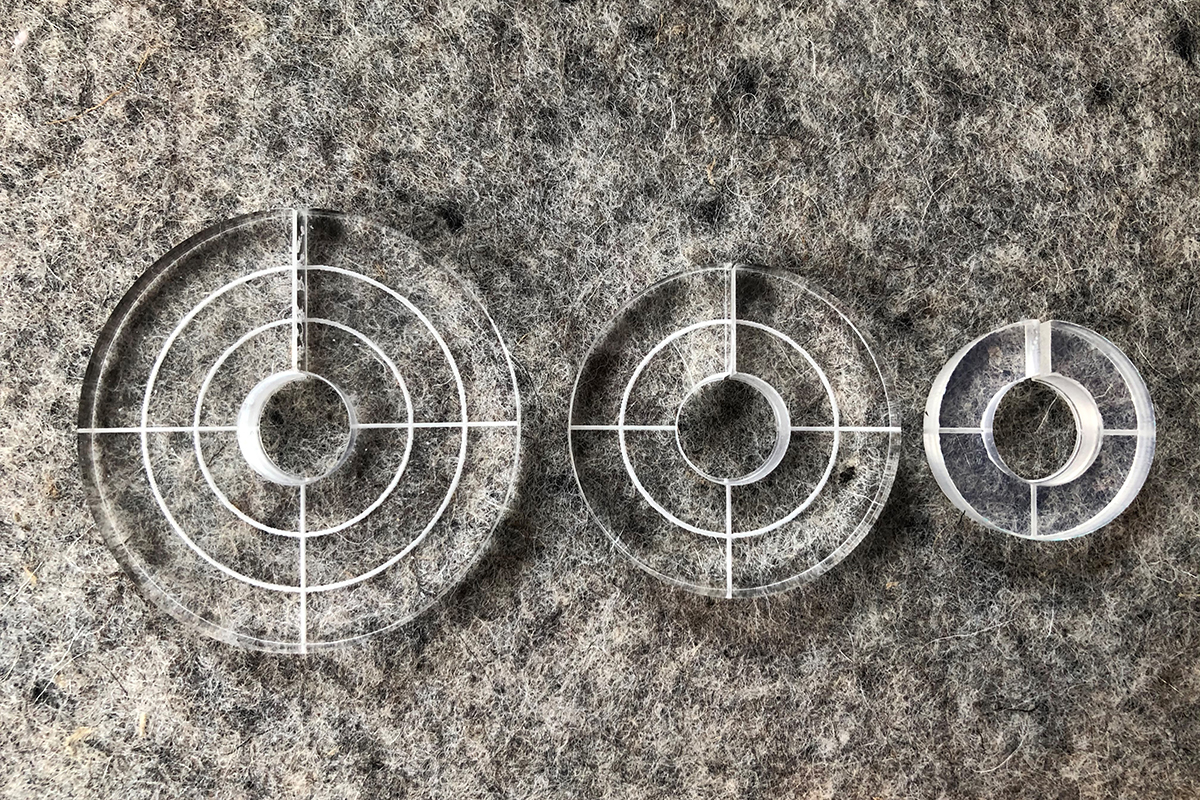
Join us next month when we will be going in circles! The rulers used next month are the Good Measure Amanda Murphy Every Circle Rulers.
Rulerwork for Beginner Series
Rulerwork for Beginners, Part 1: Rulers
Rulerwork for Beginners, Part 2: Roadmap
Rulerwork for Beginners, Part 3: Stitching Circles
Rulerwork for Beginners, Part 4: Clamshells
Used Products


What you might also like


18 comments on “Rulerwork For Beginners, Part 2: Roadmap”
-
-
I’m doing a quilt too and am interested also.
-
Yes, absolutely, use a backing fabric that you like since it will be visible. You will then want an additional 1/4 yard for the joining strips.
-
-
Could you explain more about this paragraph please
Just to review machine set up, the needle should be programed to stop in the down position. If you have a Hover Function on your home machine, I would turn it off so that when you stop the foot does not raise giving the ruler a chance to slip under the foot. Q Series machines should be in BSR2.
I thought we should not use BSR with rulers but use the ruler foot 72.
I have recently bought the 770QE and have been doing some ruler work.-
Because you are sewing on a 770QE you are absolutely correct. When I was referring to the QSeries machine I was referring to our table model longarms, Q20 and Q16, where you have the stitch regulation in the bobbin area so you can use the BSR modes with the ruler foot. On your 770QE you will be using the #72 ruler foot. The hover function I referred to is in the settings of your machine. You want to select the presser foot position to all the way down when the needle stops down. The instructions to do this are in your manual, approximately page 52. (My manual may be slightly different than yours as I have the Gold Edition)
-
-
Appreciate the demo of some additional rulers. Notice the tutorials all seem to show ruler work on smaller projects such as table runners and pillows. Would love to see something on how to do fabric management for ruler work on a full-size quilt.
-
For people new to ruler work, or machine quilting for that matter, handling a larger project can be a little more challenging. But it certainly is done all the time. The biggest thing is to make sure there is no drag on the quilt as you are working on it and moving it on the machine. Make sure your project is not hanging off the edge of the machine which is where the importance of having the machine down in a table comes in. “Puddle” your quilt on the table so that the area you are working on moves easily. It is all part of the learning curve. If you use quilting gloves for free motion quilting you will probably want to use them for ruler work as well.
-
-
If I were to design my own project, how do I determine which size rulers I need for curves, echoes etc.. Prepared projects always get repeats to fit perfectly, but how do we accomplish that once we do something different!
-
I appreciate your comment! I would like to say that it is all mathematical and to some extent it is. Like the ruler used for the nine patch on this block. Because these blocks are 3″, you need a ruler that measures 2 1/2″ across at the start of the curve. If the blocks were 4″ you would need a ruler that measures 3 1/2″ across at the start of the curve and so on .Repeats are always mathematical–divide you space with the number of repeats and then find a ruler for the size of the repeat. For example if you had 10″ and you wanted 4 repeats you would divide the 10″ by 4 for a 2 1/2″ finished design. You would then have to find a ruler that would give you that measurement. You will always get exact echoes if you use the Echo Clips. As far as the arc on the outside of this nine patch, it is one of two things. It is either experimentation or using what you have and making it work even though it may vary from a design you are following. But then that leads to a new design. I have no exact way to figure out what arc you may need for different size situations.
-
-
Nina, I also prefer to make a quilt. I realize that this will be good sized, but putting blocks together after quilting would really be a pain,trying to make the back look good (too much arthritis for hand sewing) I have all my blocks made…..do you have any helpful hints for doing this project as a 9 block quilt? Thank you.
-
Go ahead and make your blocks and put them together in a 9 block quilt top. Baste the quilt top, batting and backing with your preferred method. Your biggest challenge will be managing the quilt as you quilt each block. But as long as you have the quilt pooled on your table to eliminate any drag and concentrate on one block at a time you should be fine.
-
-
I have a Bernina 770QE and recently purchased the #72 ruler foot. I am also planning to purchase the Bernina rulers and was so excited to find this monthly series. However, it appears in order to do the designs, I will need to purchase additional rulers every month. Am I understanding correctly in that the only ruler which will be used from the Bernina package is the one for straight lines and I will need to purchase additional rulers every month to be able to create the featured designs?
-
As a series of ruler work blogs I thought it important to introduce everyone to the “World” of rulers and what is available. However, I understand that you may not want to invest in any more than the set you purchased. I can certainly suggest alternative designs for each design. As we get further along we will be using a feather ruler and a rotating ruler—again to introduce to you what is available. I can offer alternative designs for those blogs as well, but they just will be very different than the original since you will not have anything like those rulers.
Here is what I would suggest for this current design. You will be eliminating the arc around the center square and then the designs in the corners. Since you would be eliminating the arc in the inner border, I would do straight line quilting like you did in the outer border in the first blog.-
When you illuminate the corner designs, you could use the same half circle you used around the sides of the block, rotate it 45 degrees and put it in the corners for the look of a continuous border.
-
-
-
Just completed block One. Thanks Nina- it was the perfect way to begin. Near the completion of the block I had better control of the stitch length .
-
Great! As you do more you will gain better control!
-
-
I have a Bernina 200/730 machine can I use foot 96 on my machine for ruler work thanks
-
Typo in Part 2 instructions for the echoed “gentle curve” blue lines on map. Ruler used is the 18, not 11 as stated in instructions.
Leave a Reply
You must be logged in to post a comment.

Nina, if I know ahead that I will be making a quilt rather than the pillows for this project , would it be best to use a fabric I like on the back instead of the muslin suggested? I am piecing all the blocks at once, so I do have some time. Thank you!