Rulerwork for Beginners Series, Part 5: Diamonds
As we approach this new block, let’s take a look at the Roadmap for this block.

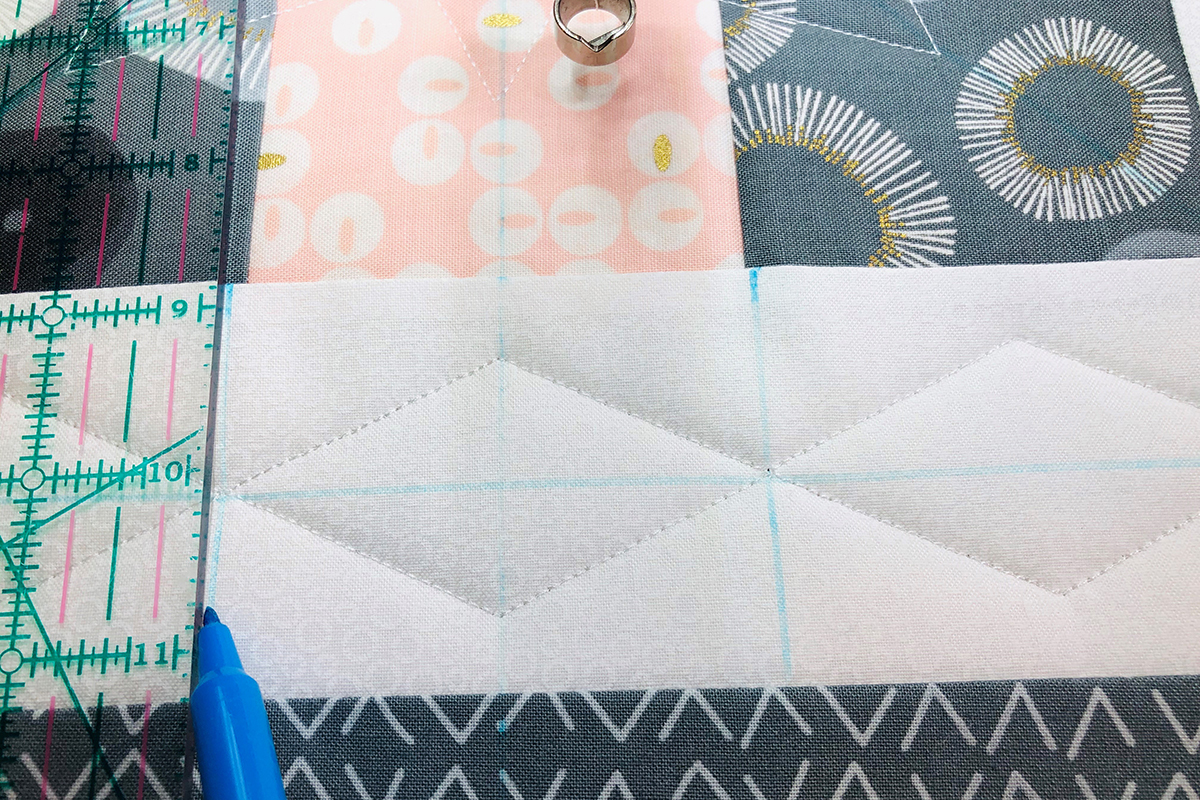
Before you begin stitching, draw horizontal, vertical and diagonal centering lines; corner to corner and edge to edge. Then draw a center line down the length of each border.
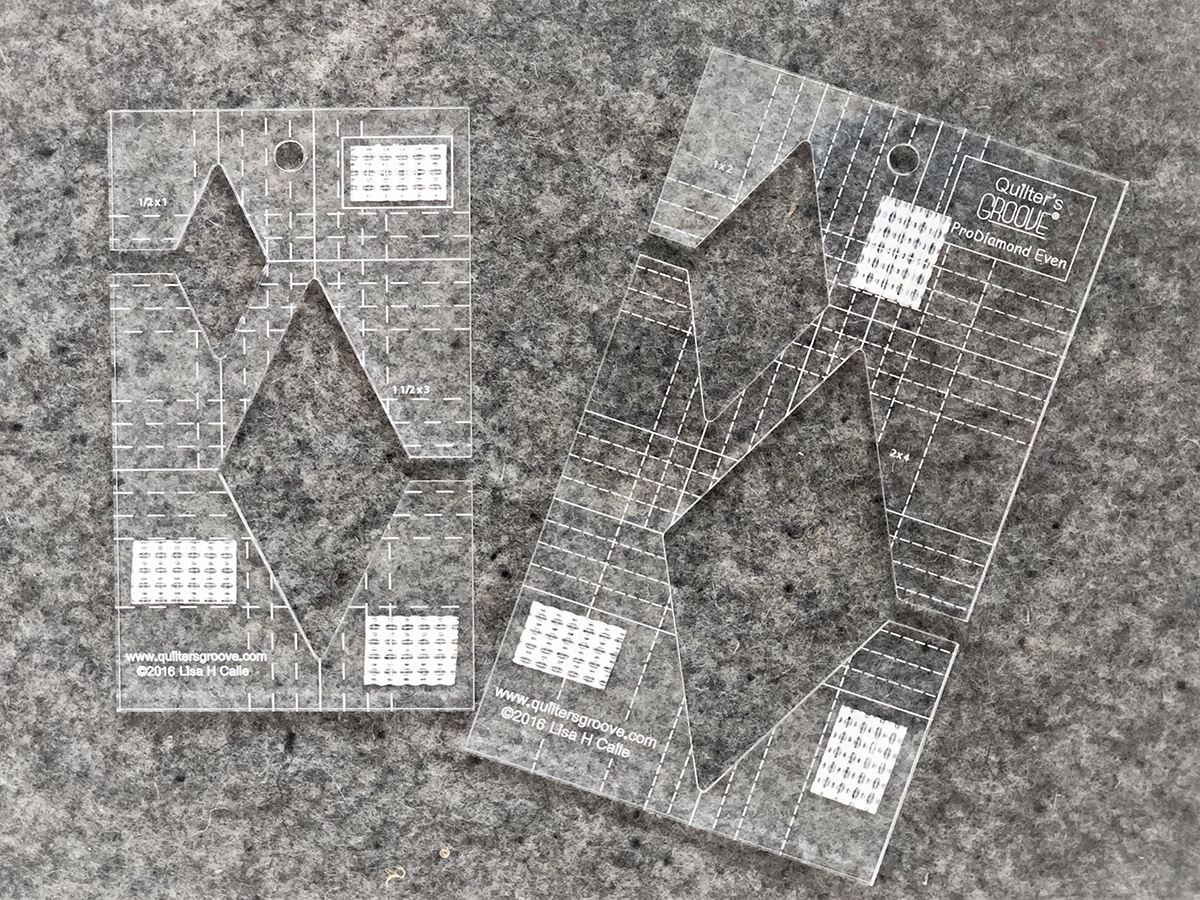
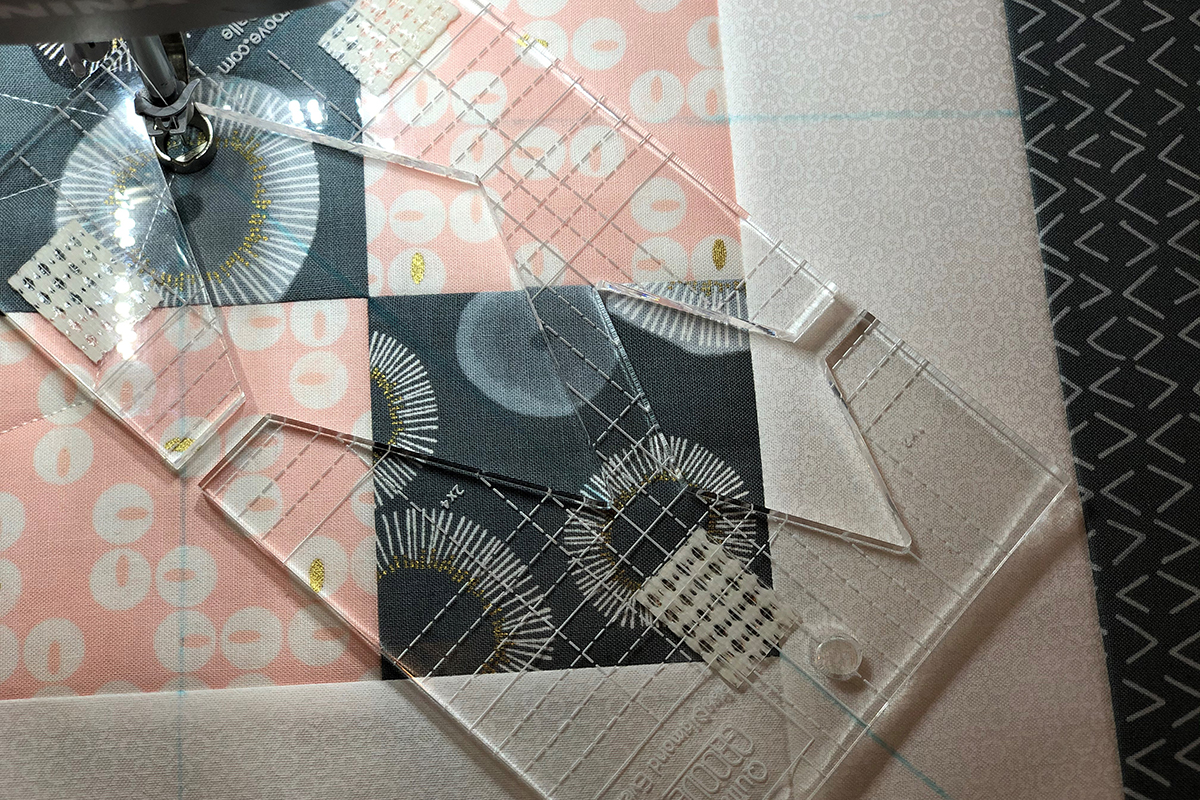
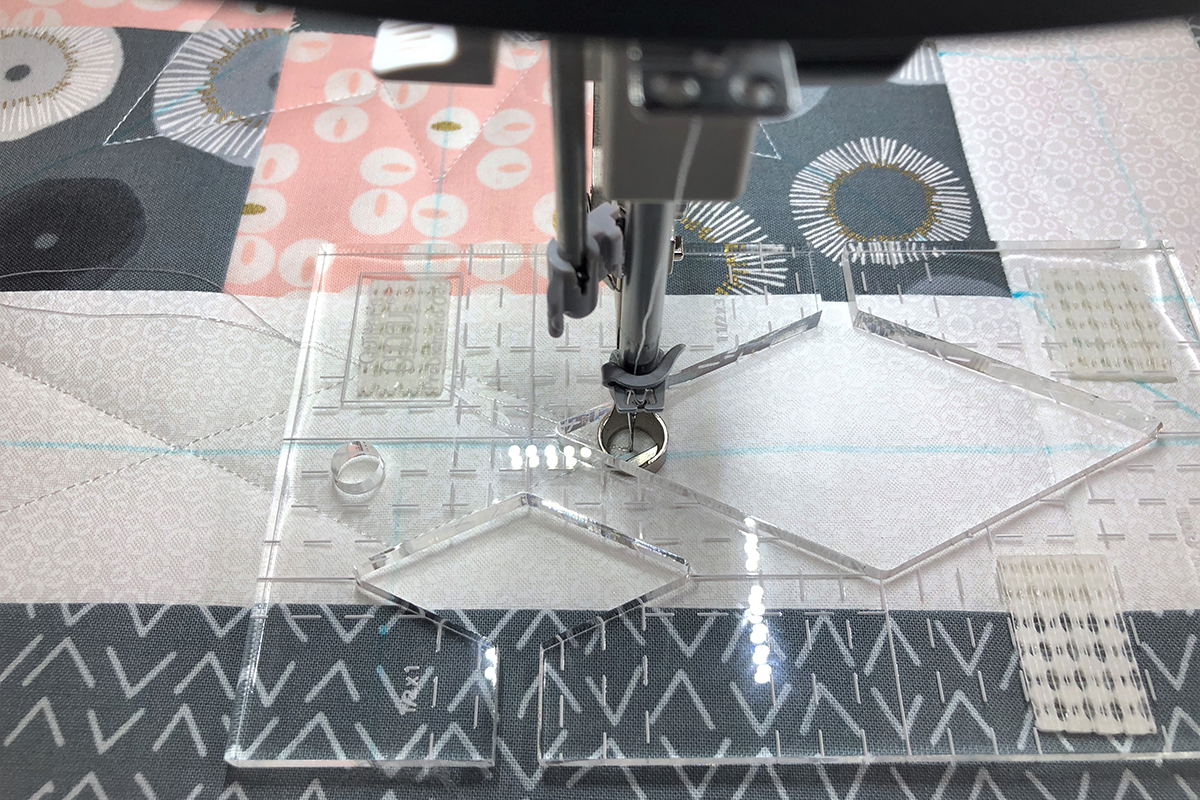
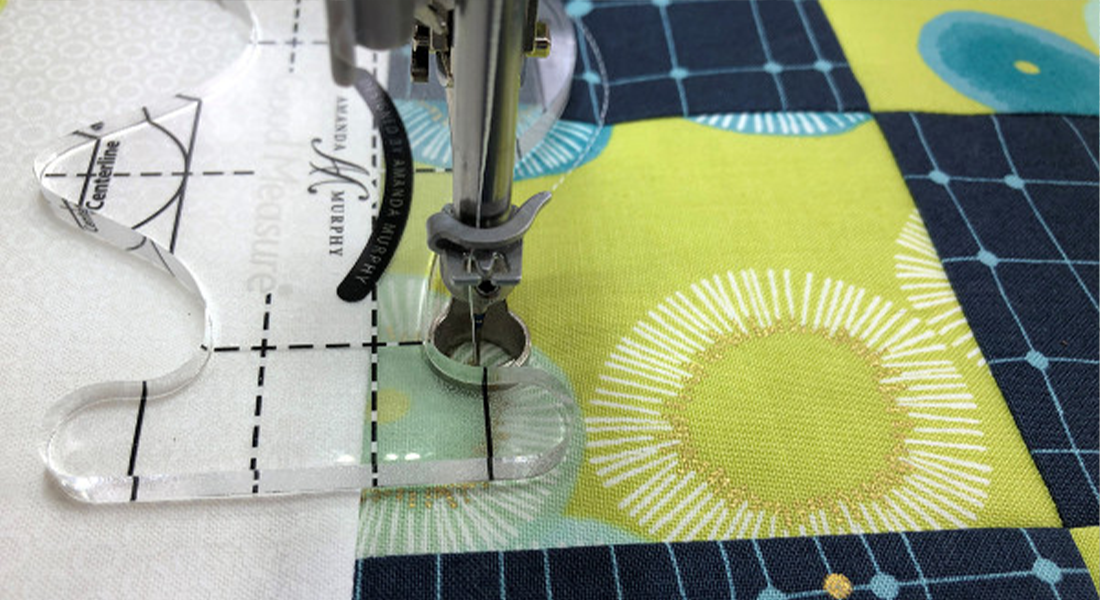
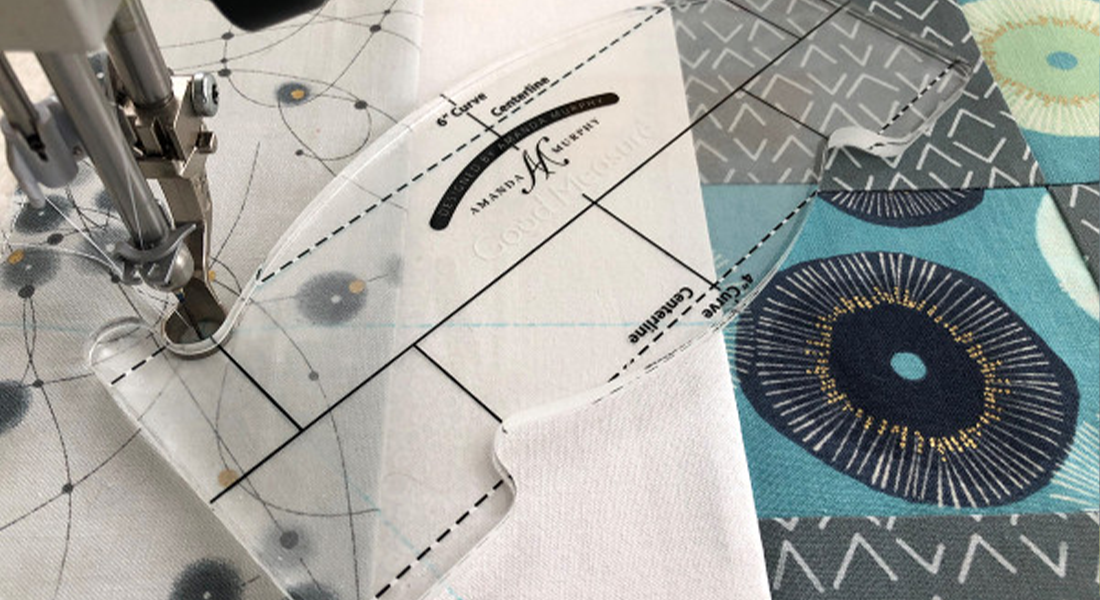
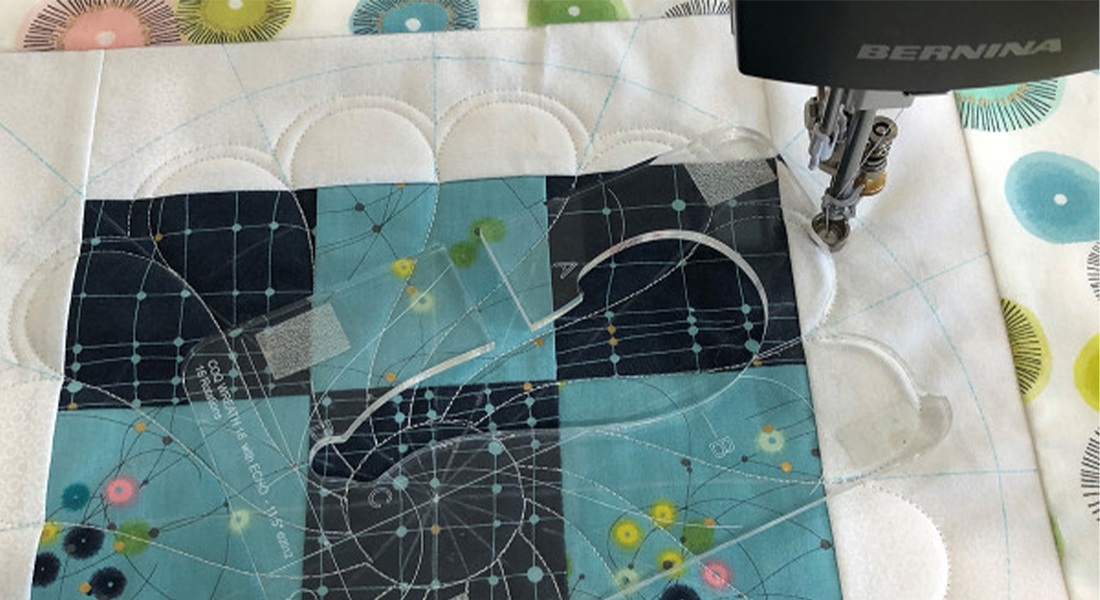
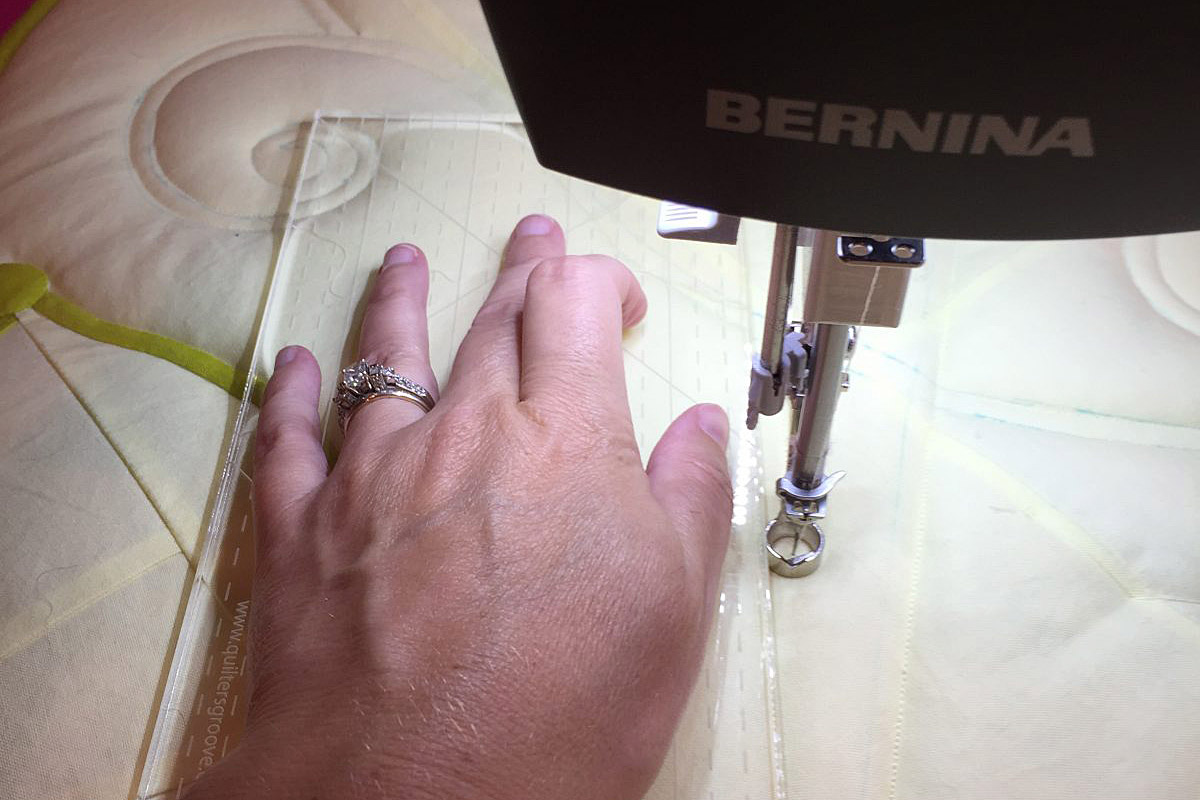
I am going to be using the ProDiamond Rulers from Quilter’s Groove. There are two rulers available, an even ruler to stitch diamonds 2” x 4” and 1” X 2” (ProDiamond Even) and an odd ruler to stitch diamonds 1 ½” X 3” and ½” X 1 (ProDiamond Odd). I love using these diamond shaped rulers as the possibilities for designs are endless. From motifs to borders, these are fun and easy rulers to use. As you can see they are rulers where the stitching is done from the inside. Having both rulers opens up a lot of options.
You are now ready to start the center motif, first stitching what you see in red on the roadmap, and then without cutting the thread, you will stitch what is in medium blue. Begin by lowering the needle into the center of the block pulling up your thread. Lower the foot. Using the 2” x 4” diamond template, slide it over the foot.
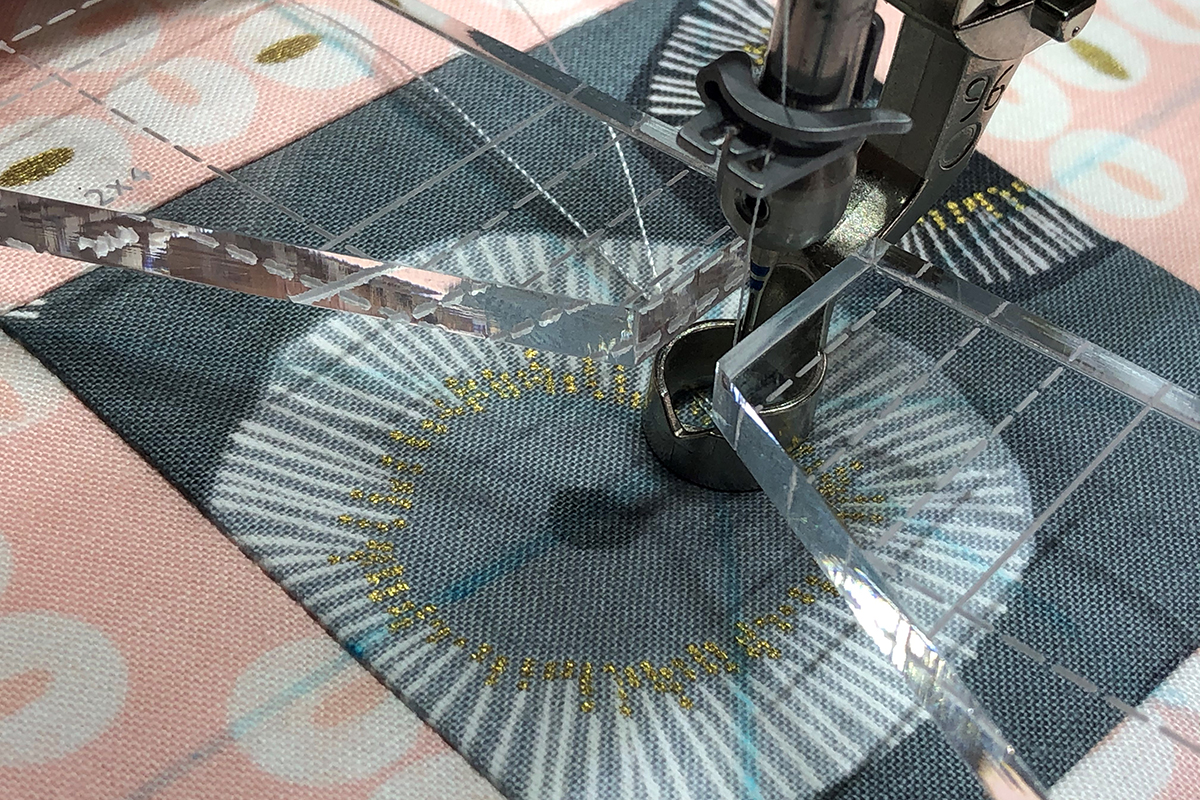
Lay the ruler centered over a diagonal line with one of the corners against the foot.
Stitch around the diamond shape stopping at the beginning with the needle and foot down. Swivel the ruler to another diagonal line and stitch another diamond.
Continue around the center, stitching a diamond on all four diagonal lines. Do not cut the thread.
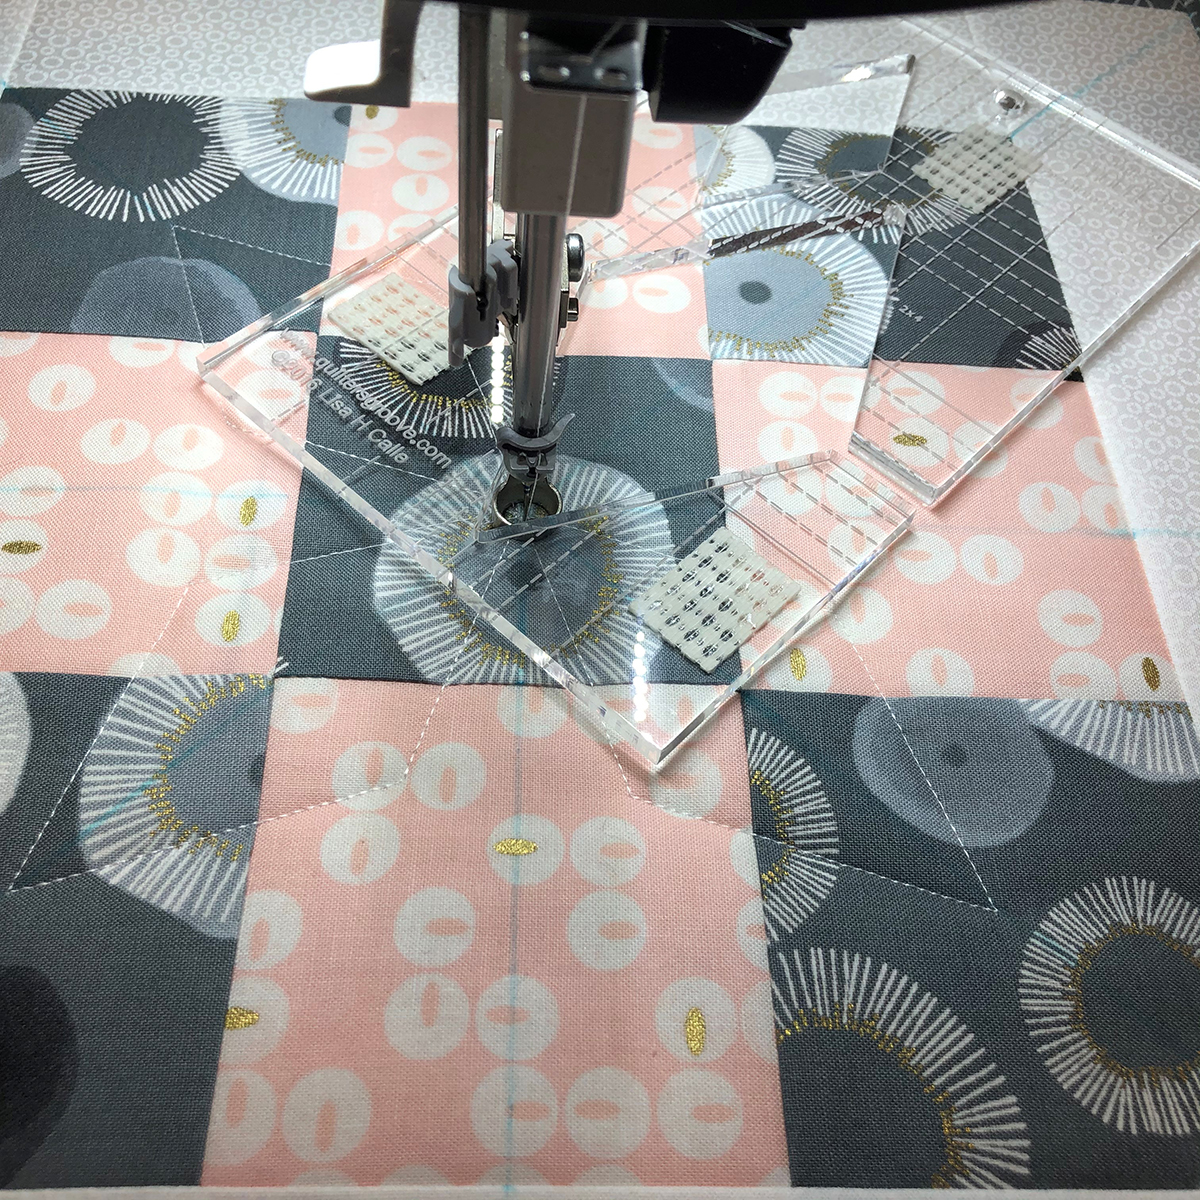
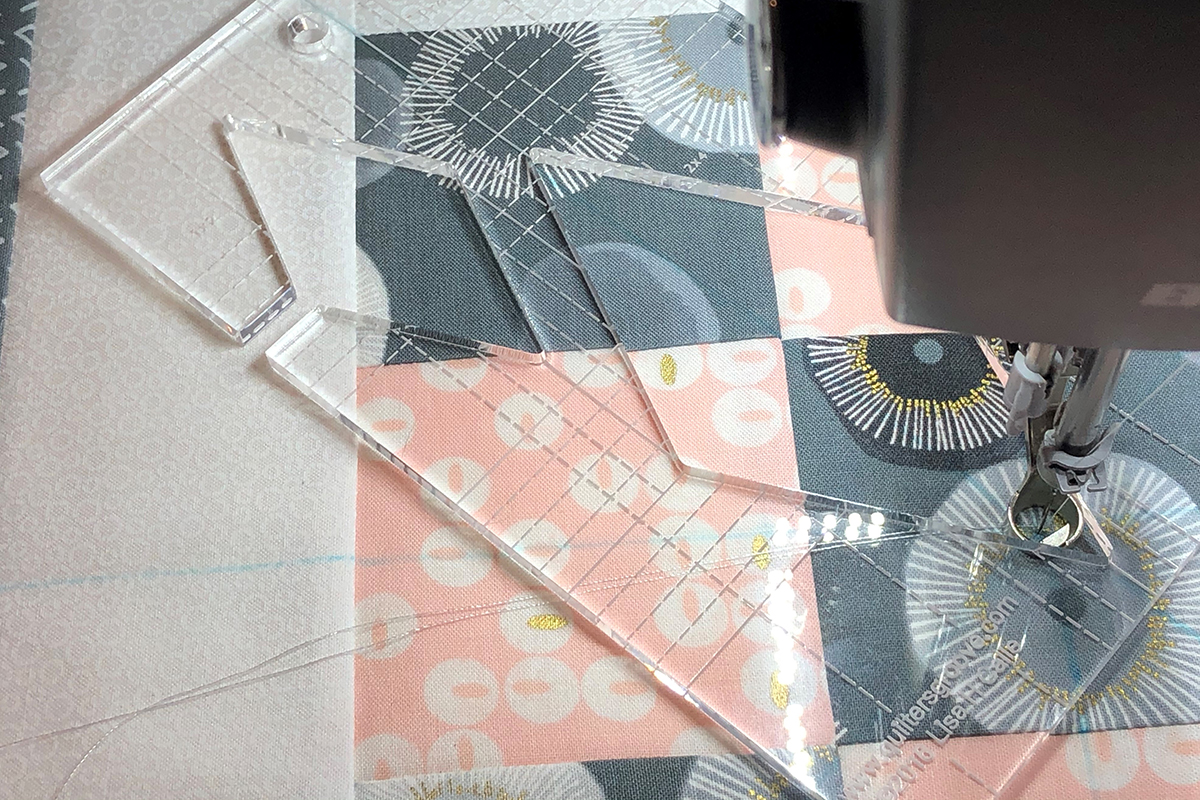
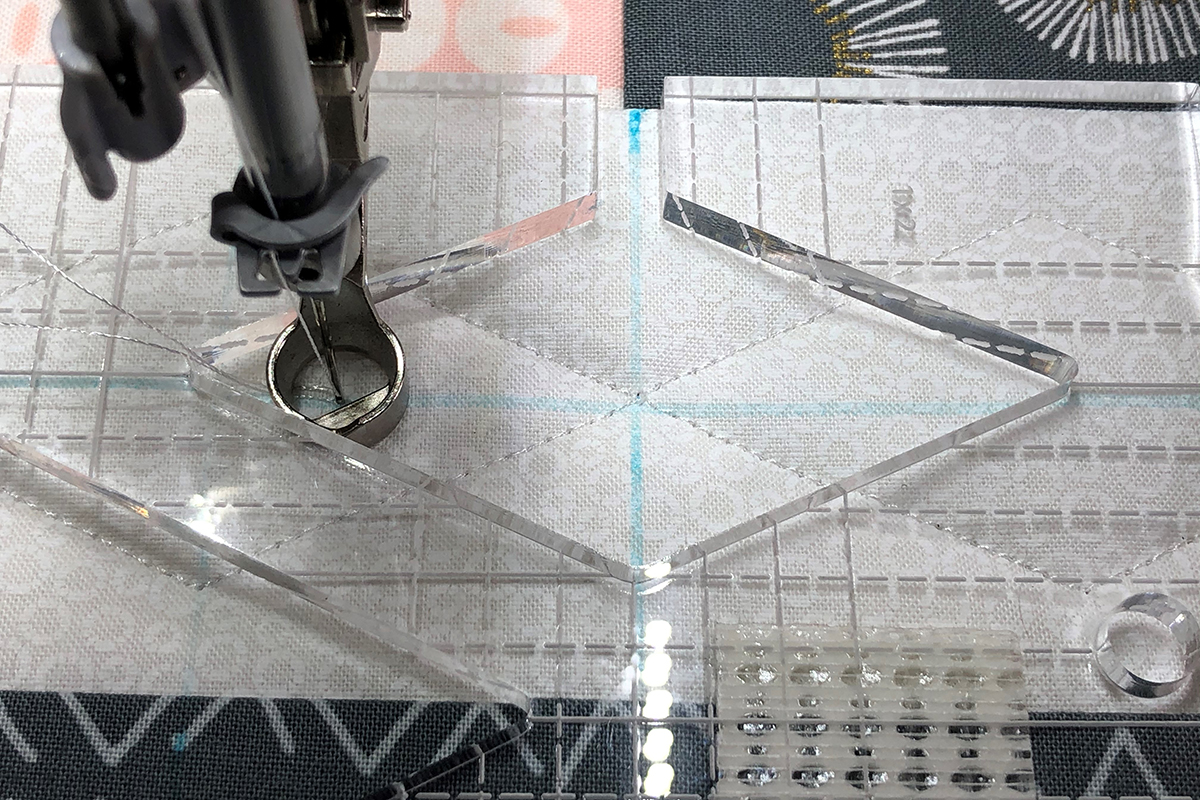
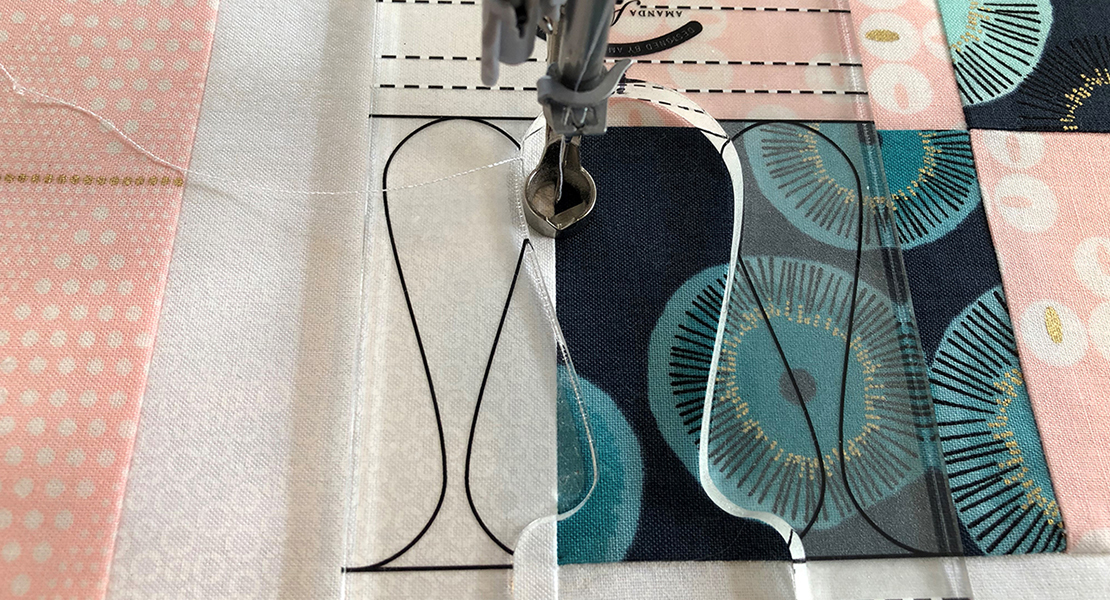
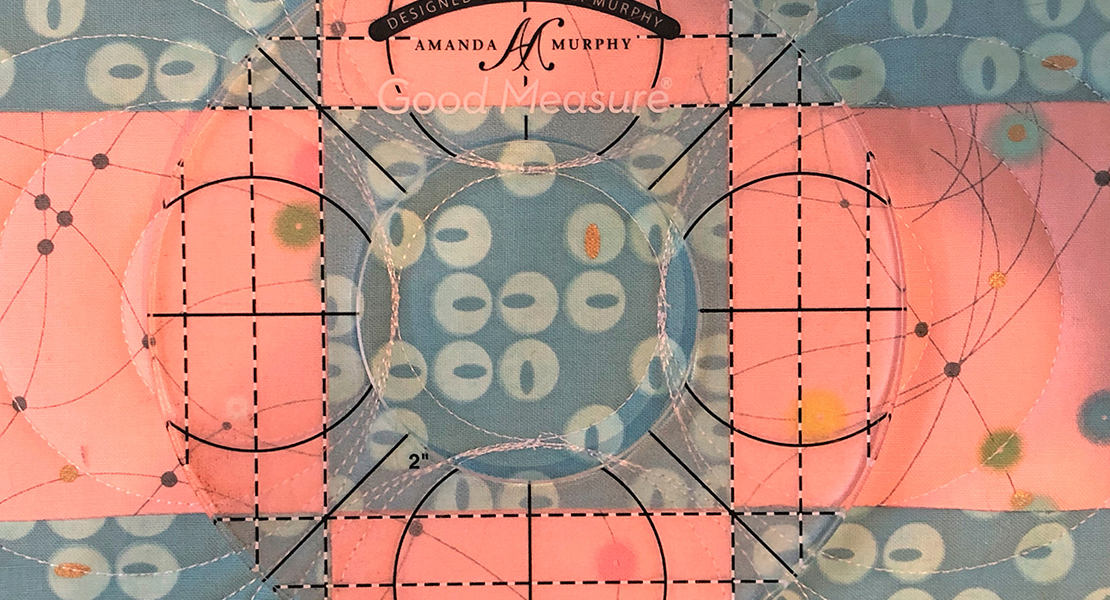
Remove the Even Diamond ruler and replace it with the Odd Diamond ruler using the 1 ½” x 3” diamond. Place the diamond on one of the straight centering lines so that when the smaller diamond is stitched, it lays in between two larger diamonds.

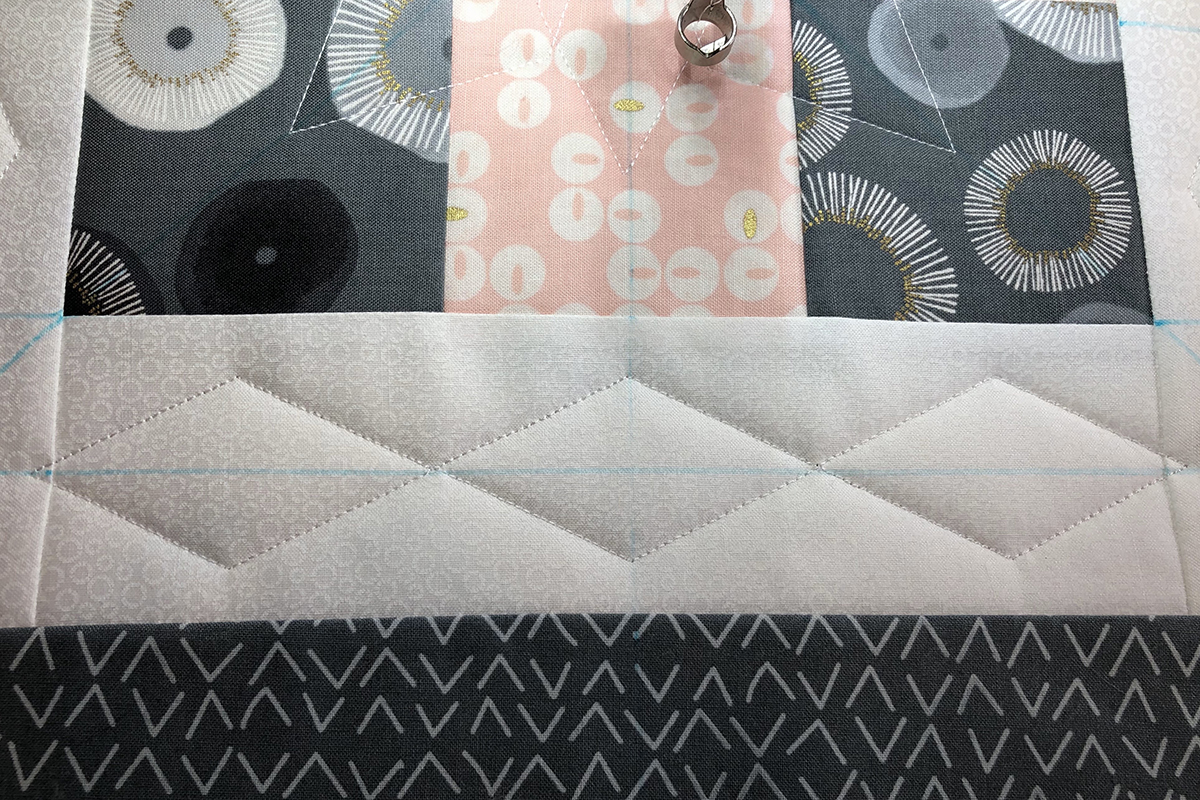
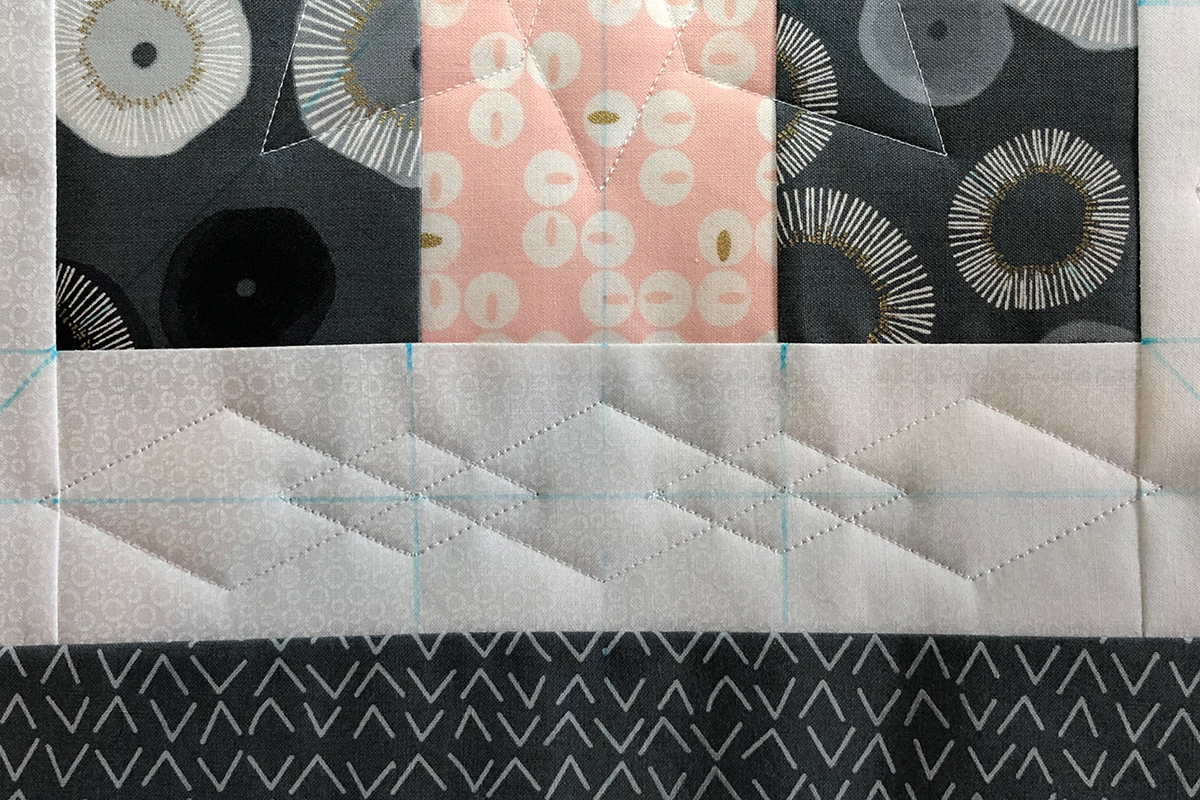
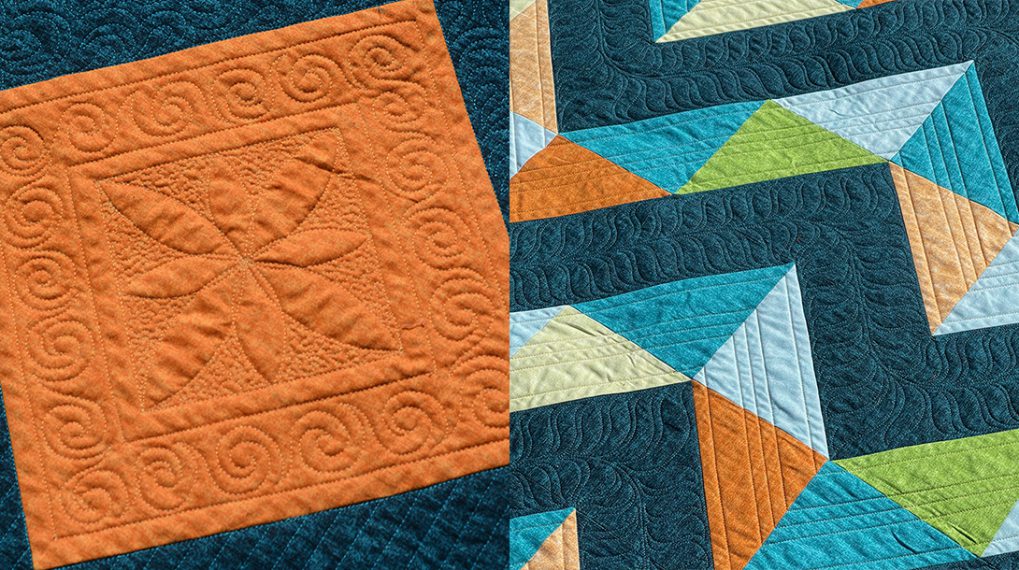
Stitch all 4 smaller diamonds on the horizontal and vertical. Cut the thread. You now have a center motif and it was so fun and easy!
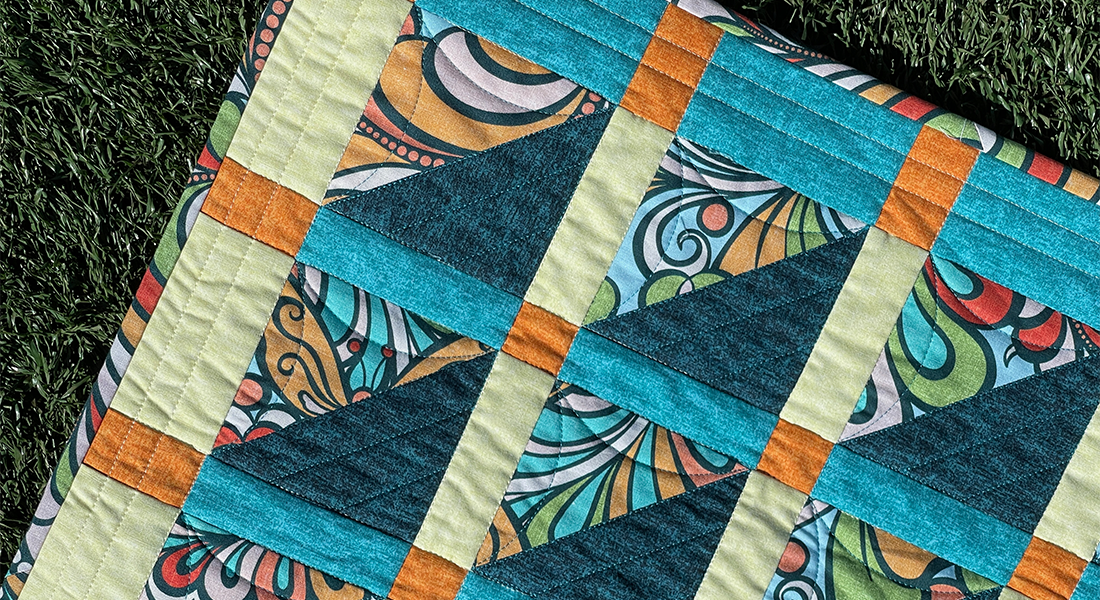
Going back to the roadmap, let’s look at the orange and blue diamonds in the inner border. Lay the 1 ½” x 3” ruler in the middle of the border, centering it on the long lines.
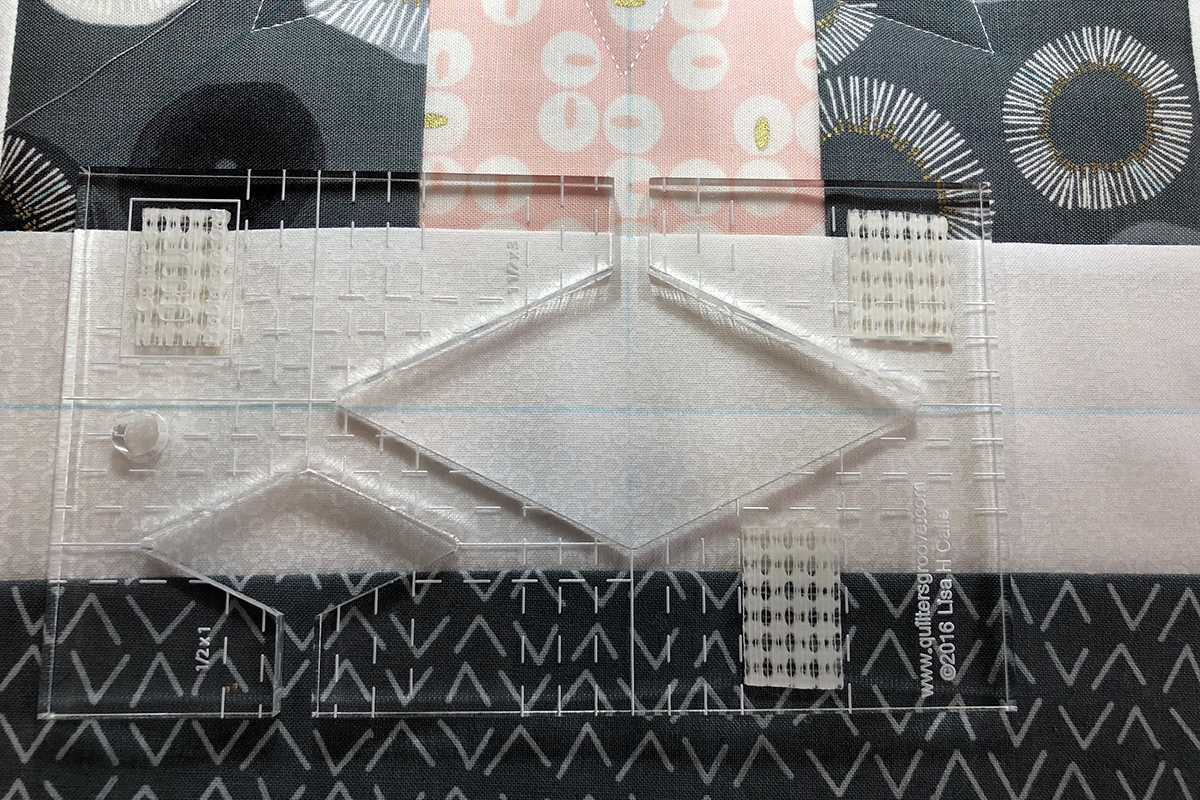
Beginning at one end of the ruler, diamond stitch ending where you began. Do not cut the thread.

Slide the ruler along the centering line and stitch another diamond, cutting the threads when finished.

Lower the needle into the other end of the center diamond and pull up the bobbin thread.
Stitch the third diamond.
Stitch the three diamonds on all 4 sides.
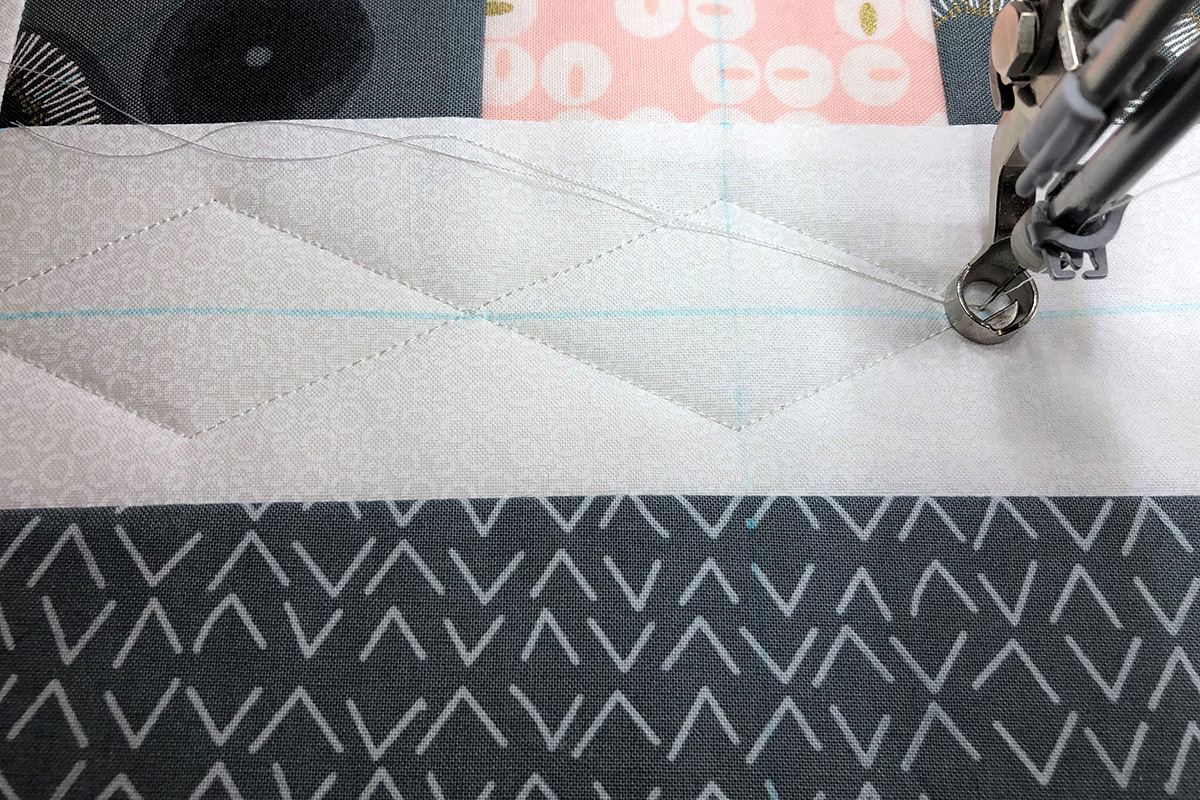
Mark a line in between each of the stitched diamonds.
Stitch a 1” x 2” diamond at each of the marked lines.
The inner borders are finished.
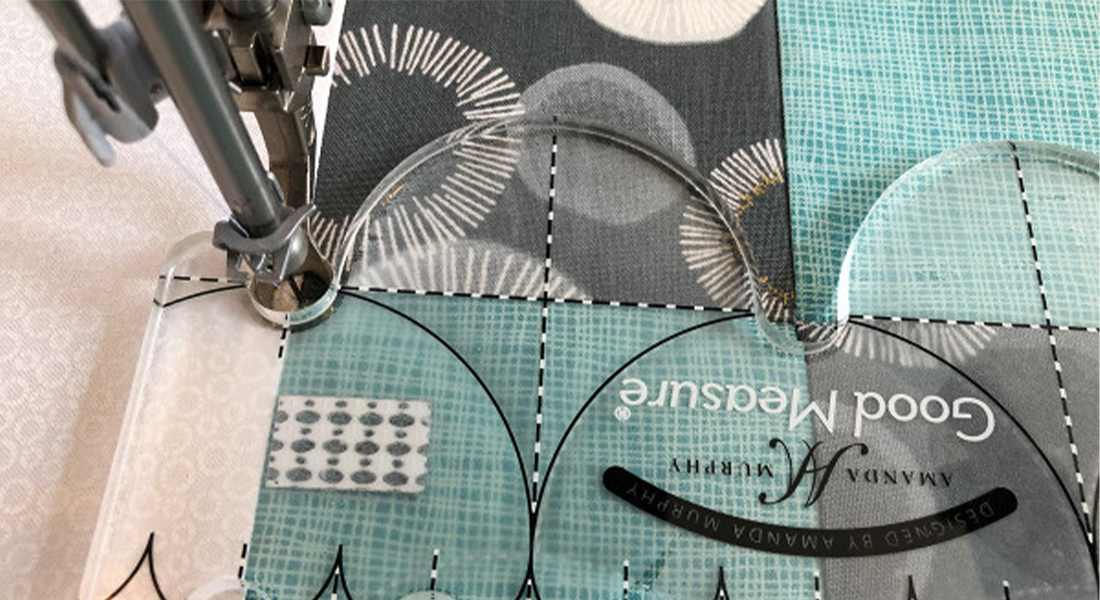
Moving on to the outer border, you will stitch 4 large diamonds on each side. These will be stitched in pairs. Begin by placing the foot over the center of the border and position ruler, but do not stitch.
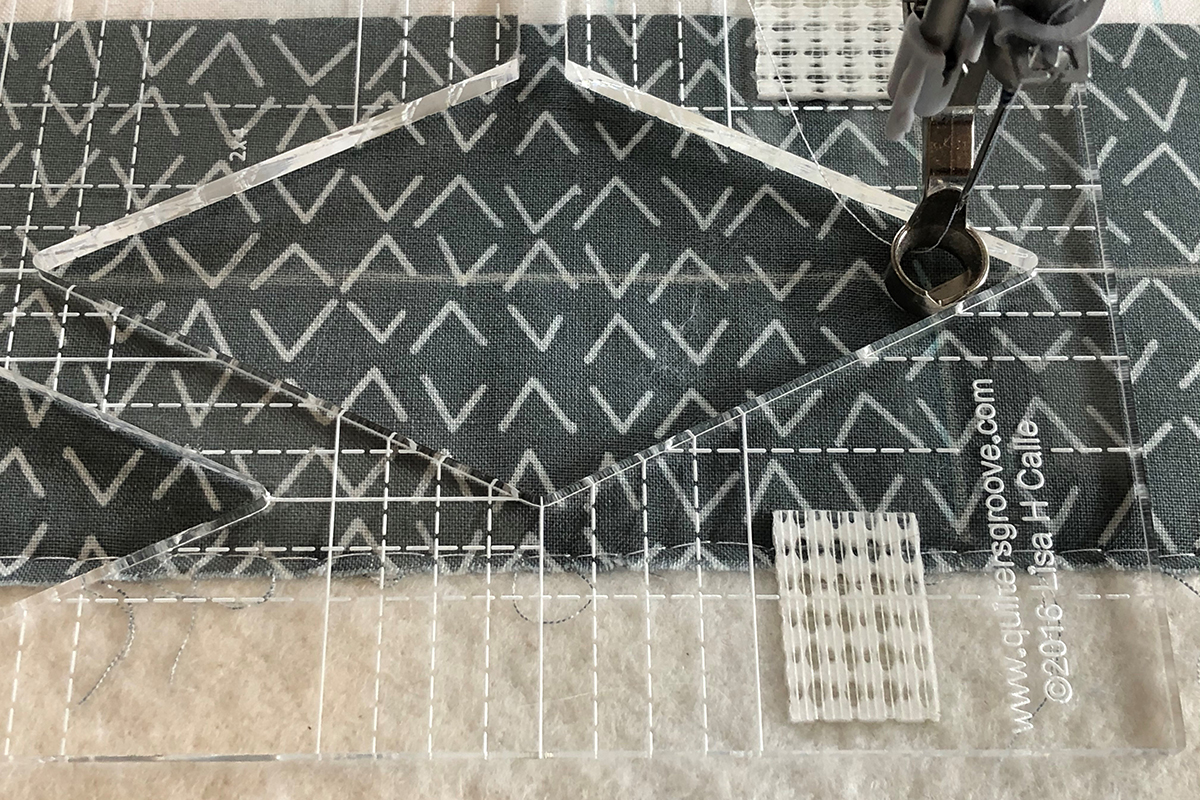
Once the ruler is positioned correctly, move down to the opposite end of the ruler to begin stitching.
Stitch all the way around diamond ending where you started. Don’t cut the thread.

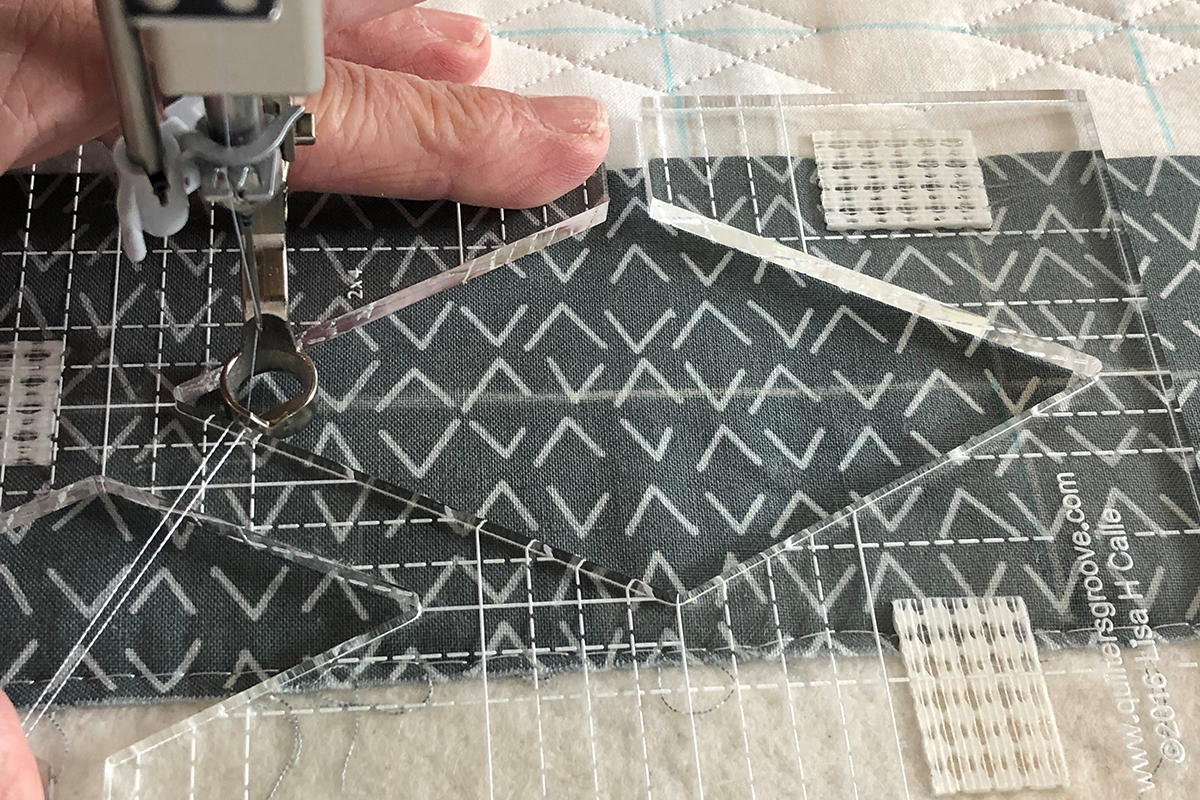
Slide the ruler to the end of the border and stitch another diamond, cutting the thread at the end.
Go back to the center and work in the other direction, sewing 4 diamonds on each outer border.
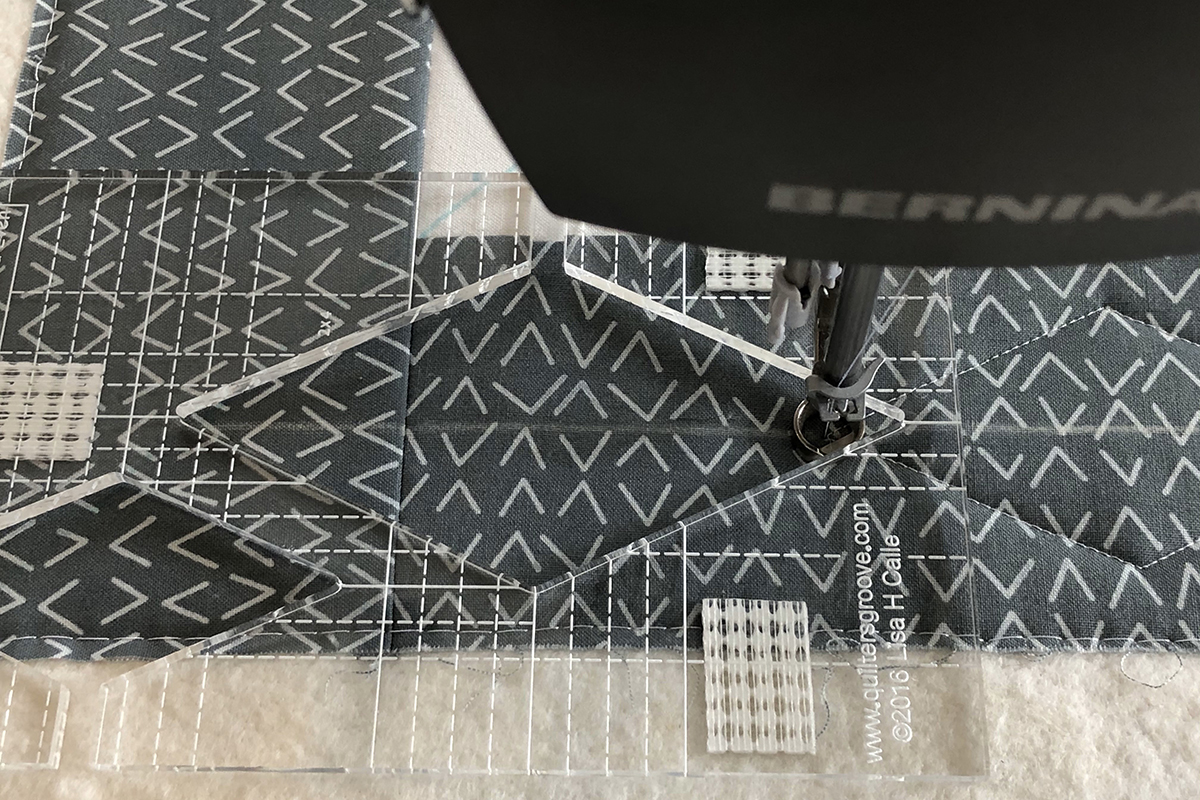
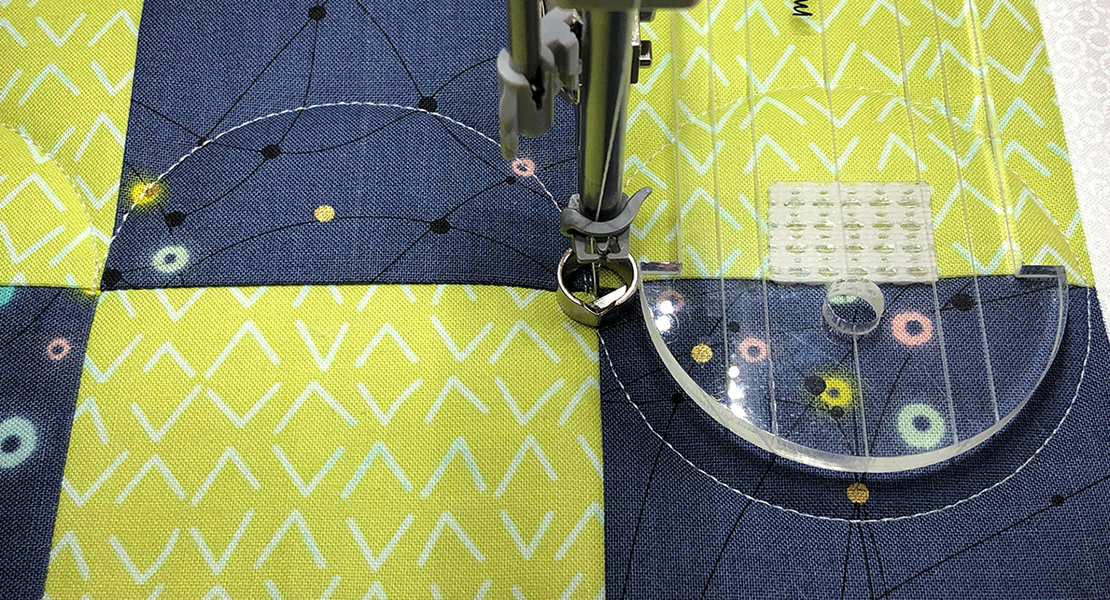
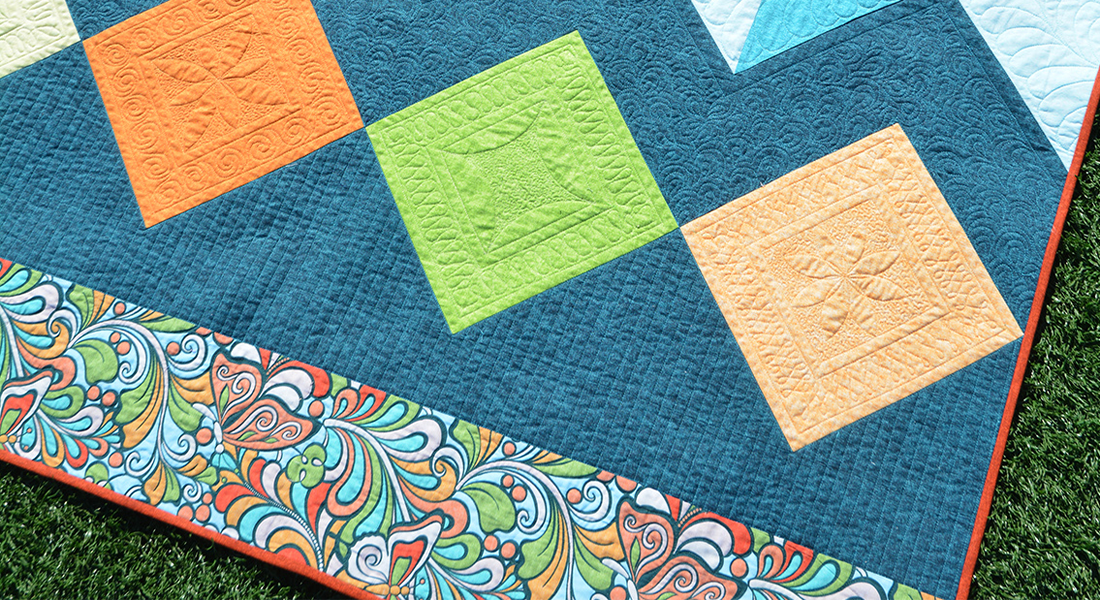
At this point the block is quilted, unless you would like to add some echo quilting around the center motif. I have done this by using a straight edge ruler along the edges of the diamond shapes.

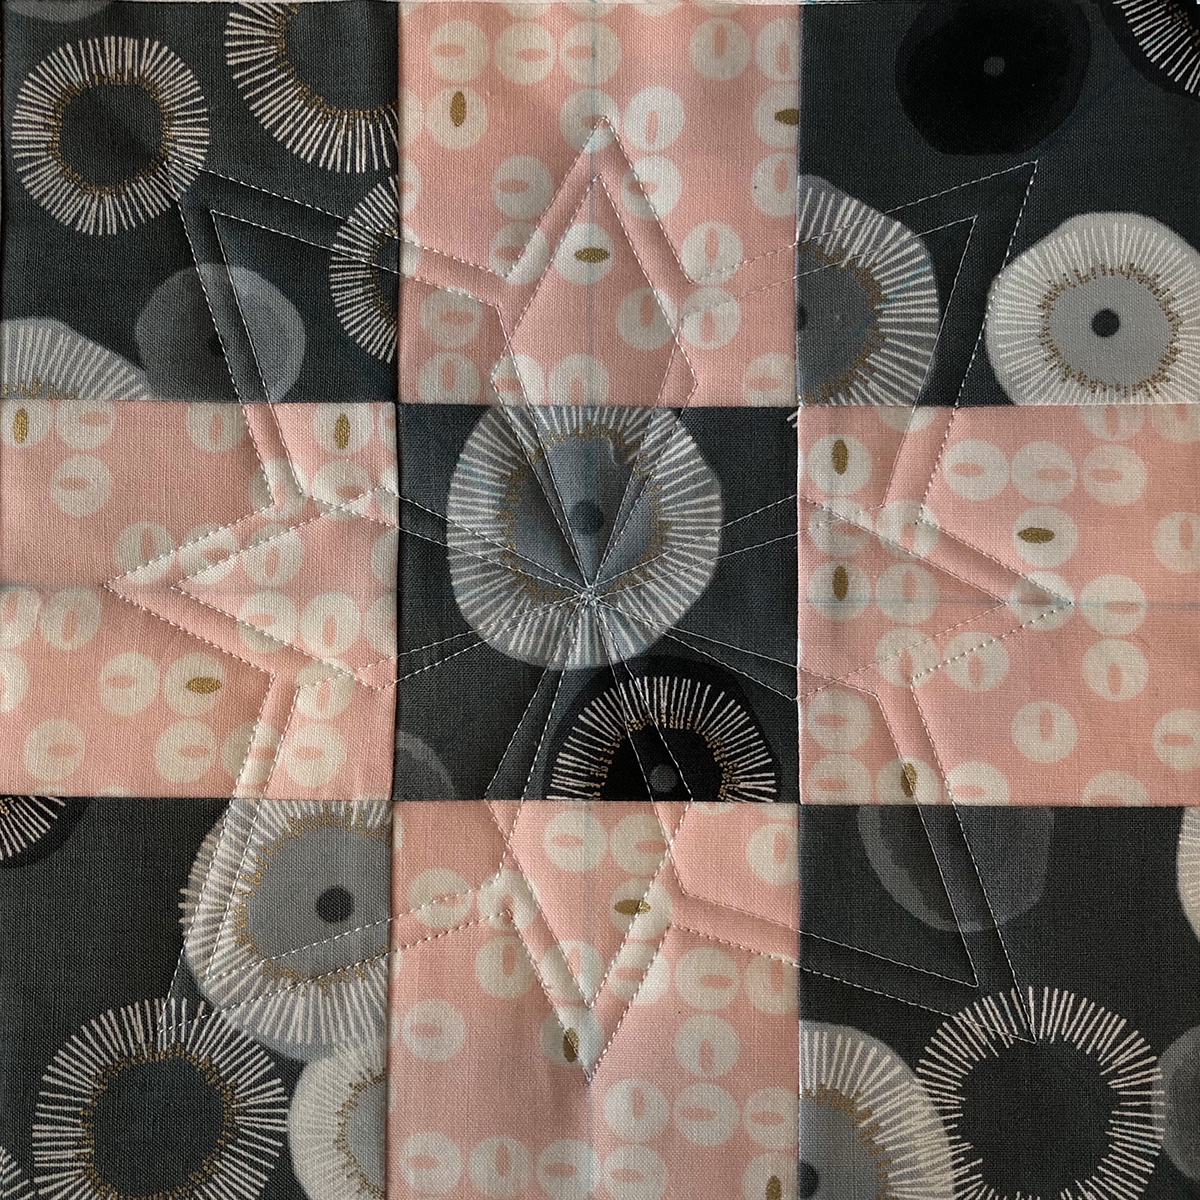
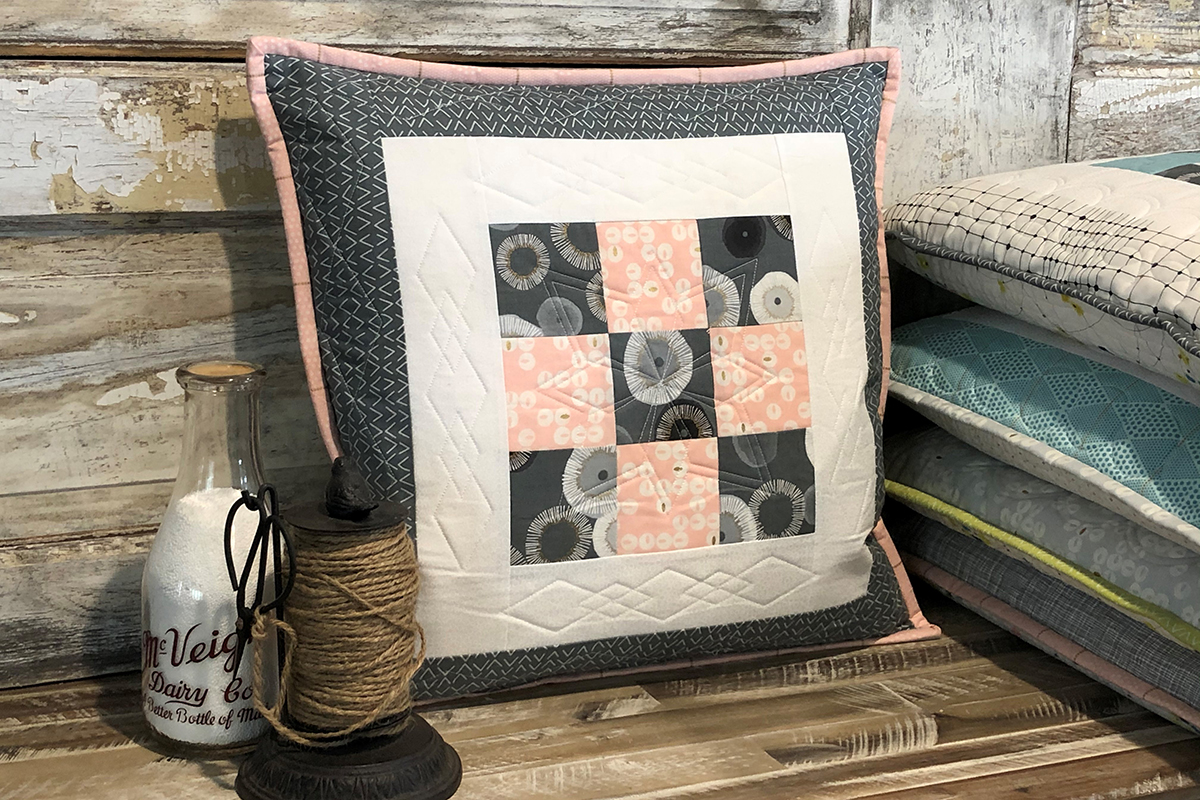
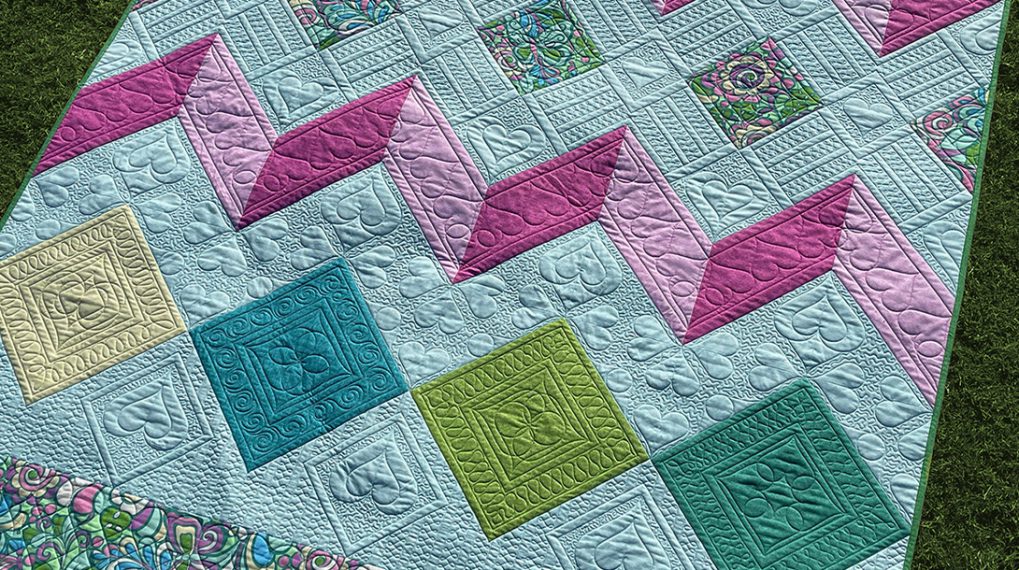
Now we can take a look at the entire quilted block.

There are so many designs that can be created with these diamond rulers. And they are really easy to use!
The “Ribbon Candy” Design is one we would all like to perfect. A Ribbon Candy Ruler will do that for you. I will be using Good Measure Amanda Murphy Every Ribbon Candy template set next month.
Rulerwork for Beginner Series
Rulerwork for Beginners, Part 1: Rulers
Rulerwork for Beginners, Part 2: Roadmap
Rulerwork for Beginners, Part 3: Stitching Circles
Rulerwork for Beginners, Part 4: Clamshells
Rulerwork for Beginners, Part 5: Diamonds
Rulerwork for Beginners, Part 6: Ribbon Candy
Used Products


What you might also like


6 comments on “Rulerwork for Beginners Series, Part 5: Diamonds”
-
-
I’d like to know where or what can be used in it’s place as well.
-
Hello,
The rulers that the above comment is referring to are found on the Quilter’s Groove website. They are rulers by Lisa Calle.
Here is the link for the product,
https://lisahcalle.com/products/prodiamond-rulers-1?_pos=1&_sid=c0a7149fc&_ss=rYou can order direct from Lisa.
Happy Quilting,
Heather
-
-
Hello,
The rulers you are referring to are ProDiamond Rulers from Quilter’s Groove. They can be purchased directly from Lisa Calle of Quilter’s Groove.
Here is the link to the product on her website.
https://lisahcalle.com/products/prodiamond-rulers-1?_pos=1&_sid=c0a7149fc&_ss=rHappy Quilting!
Heather
-
-
Nina McVeigh,
What is the name/number of the foot for the Q series machine that is cupped and keeps the foot on A Q series machine from hanging up on bulky seam allowances?Cathie Hoover
-
Cathie,
The foot you are referring to is the #74 Adjustable Gliding Cup Foot.Happy Quilting~
Heather
-
Leave a Reply
You must be logged in to post a comment.

It looks like those diamond-shaped rulers aren’t produced/sold anymore.
Do you have any recommendations for other similar ones?