Rulerwork for Beginners, Part 9: Wreath with Echo
We are now at Month 9 of the Rulerwork for Beginners Blog Series, which means not only one more ruler design to stitch, but also finishing instructions. Whether you have decided to make pillows out of the quilted squares or whether you have decided to put the squares together for a 60” x 60” throw, the instructions will be given here.
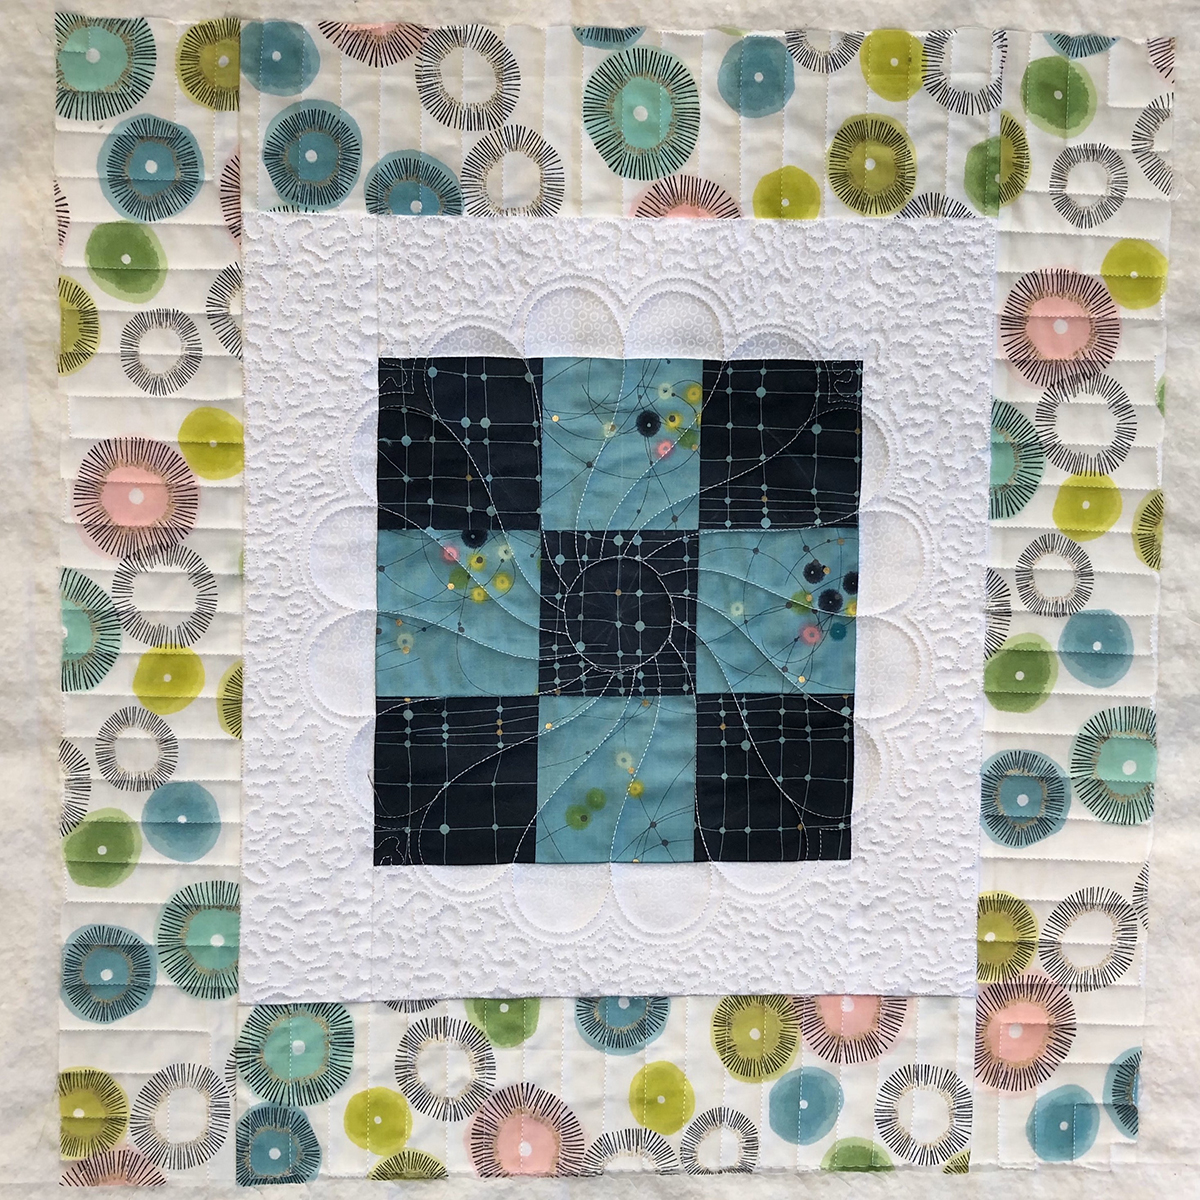
Let’s start with the final ruler work square, taking a look at the Roadmap.
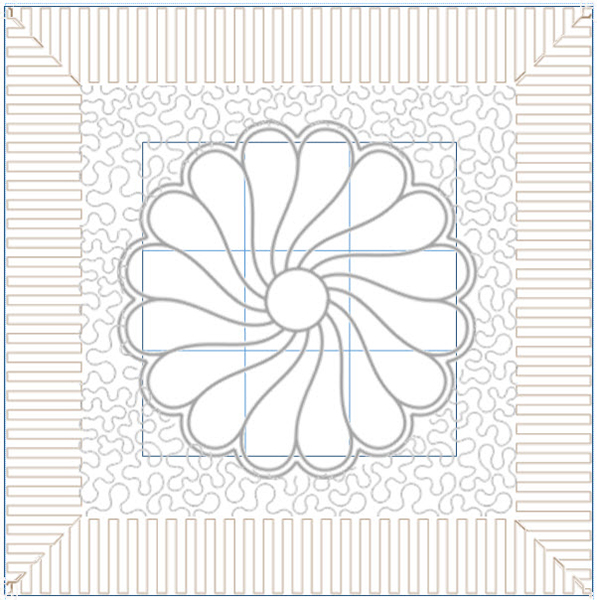
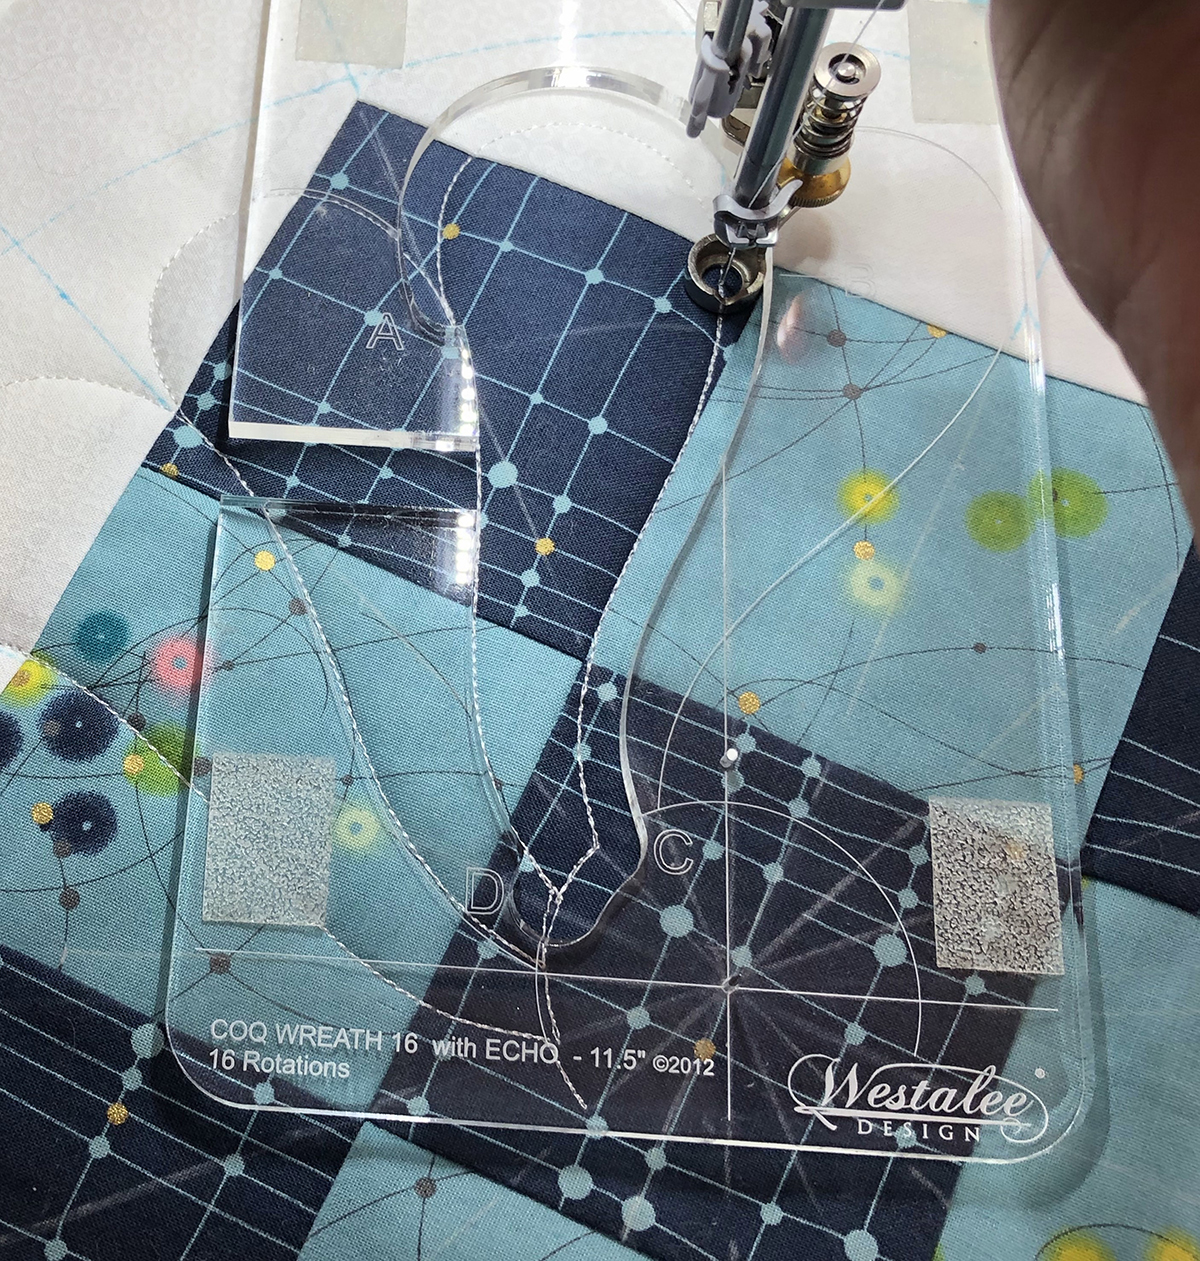
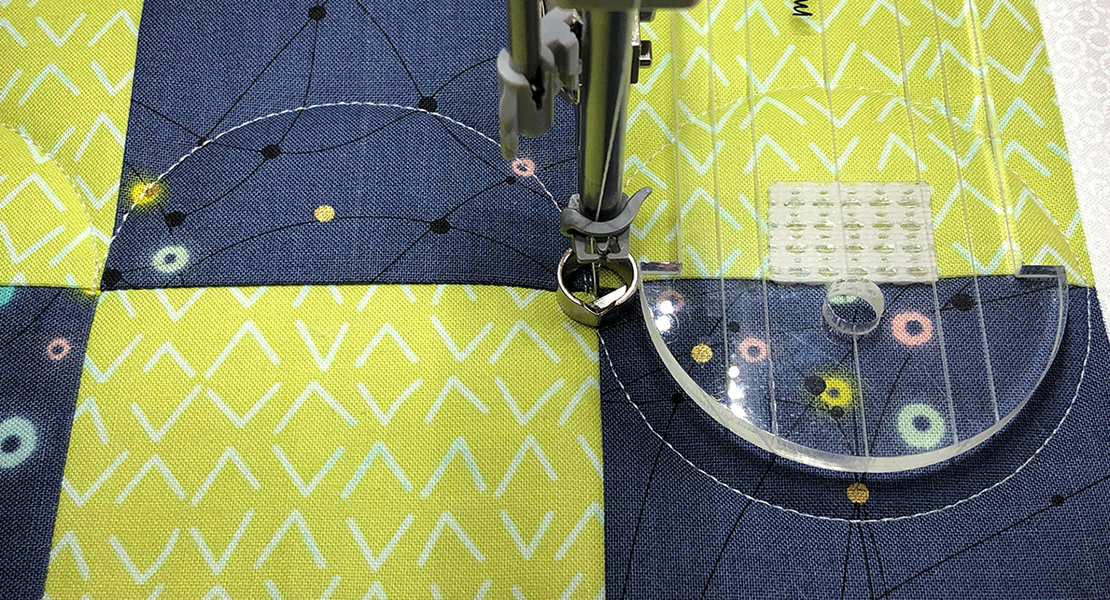
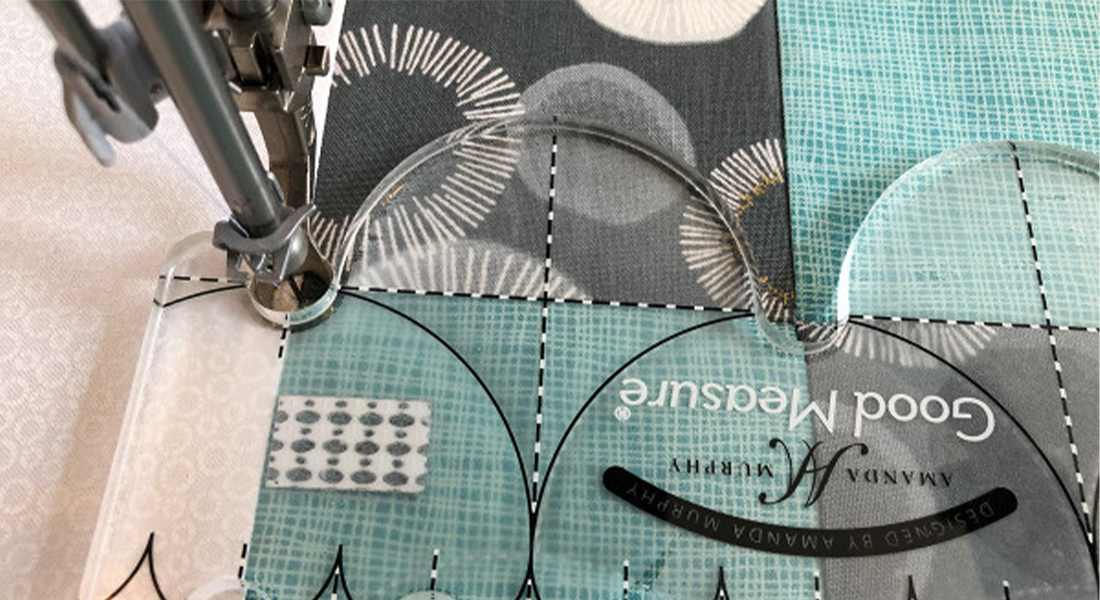
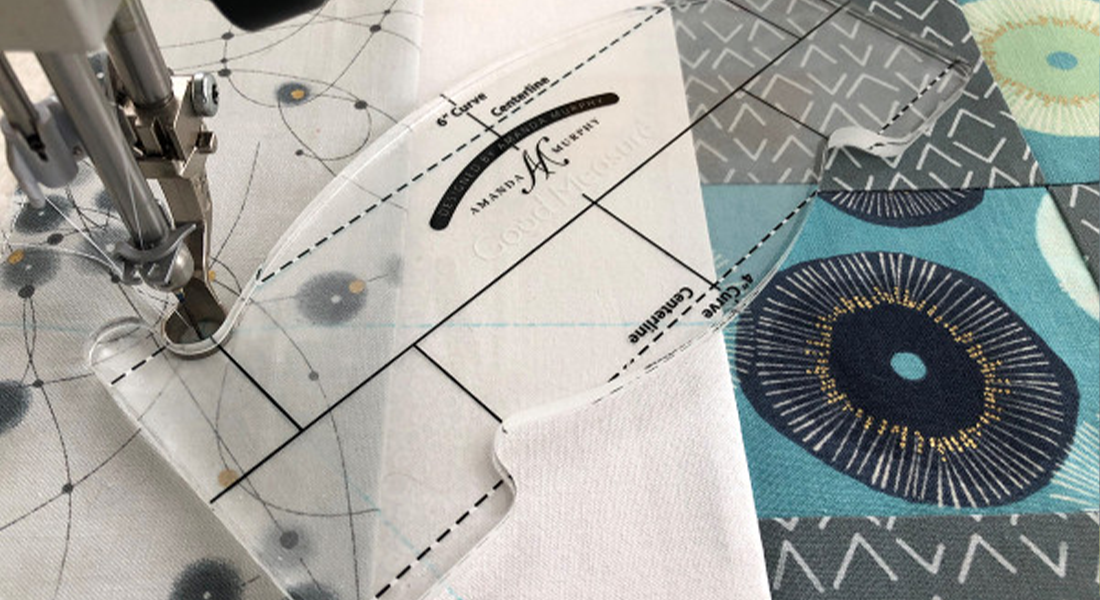
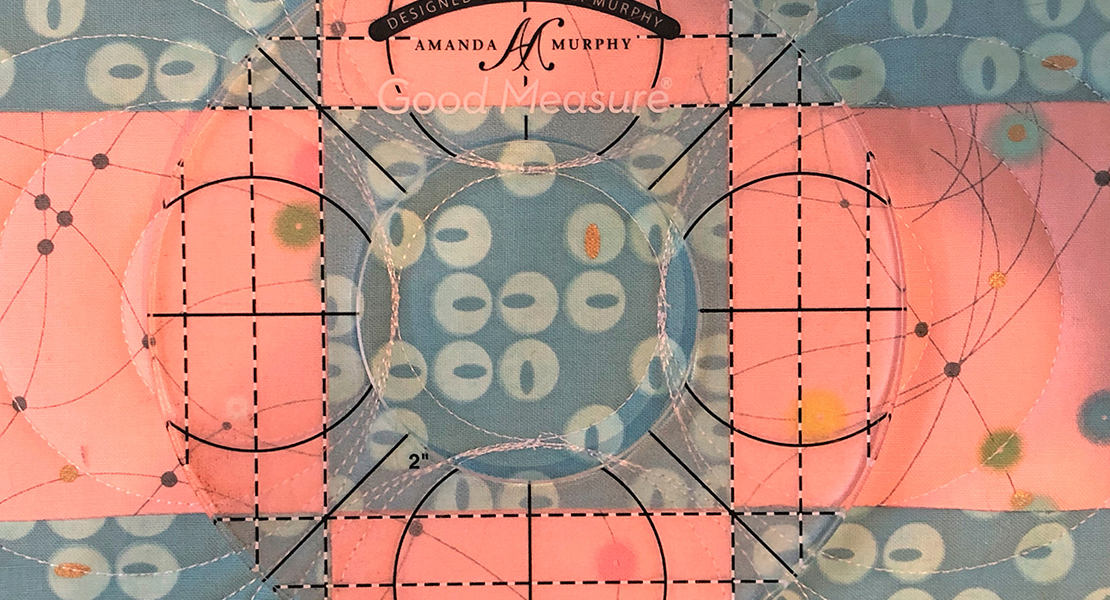
This month’s ruler is different than any we have used thus far. To create this Wreath with an echo, we will be using a rotating ruler from Sew Steady called Westalee Design Wreath #16 With Echo Template in the 11 ½” size.
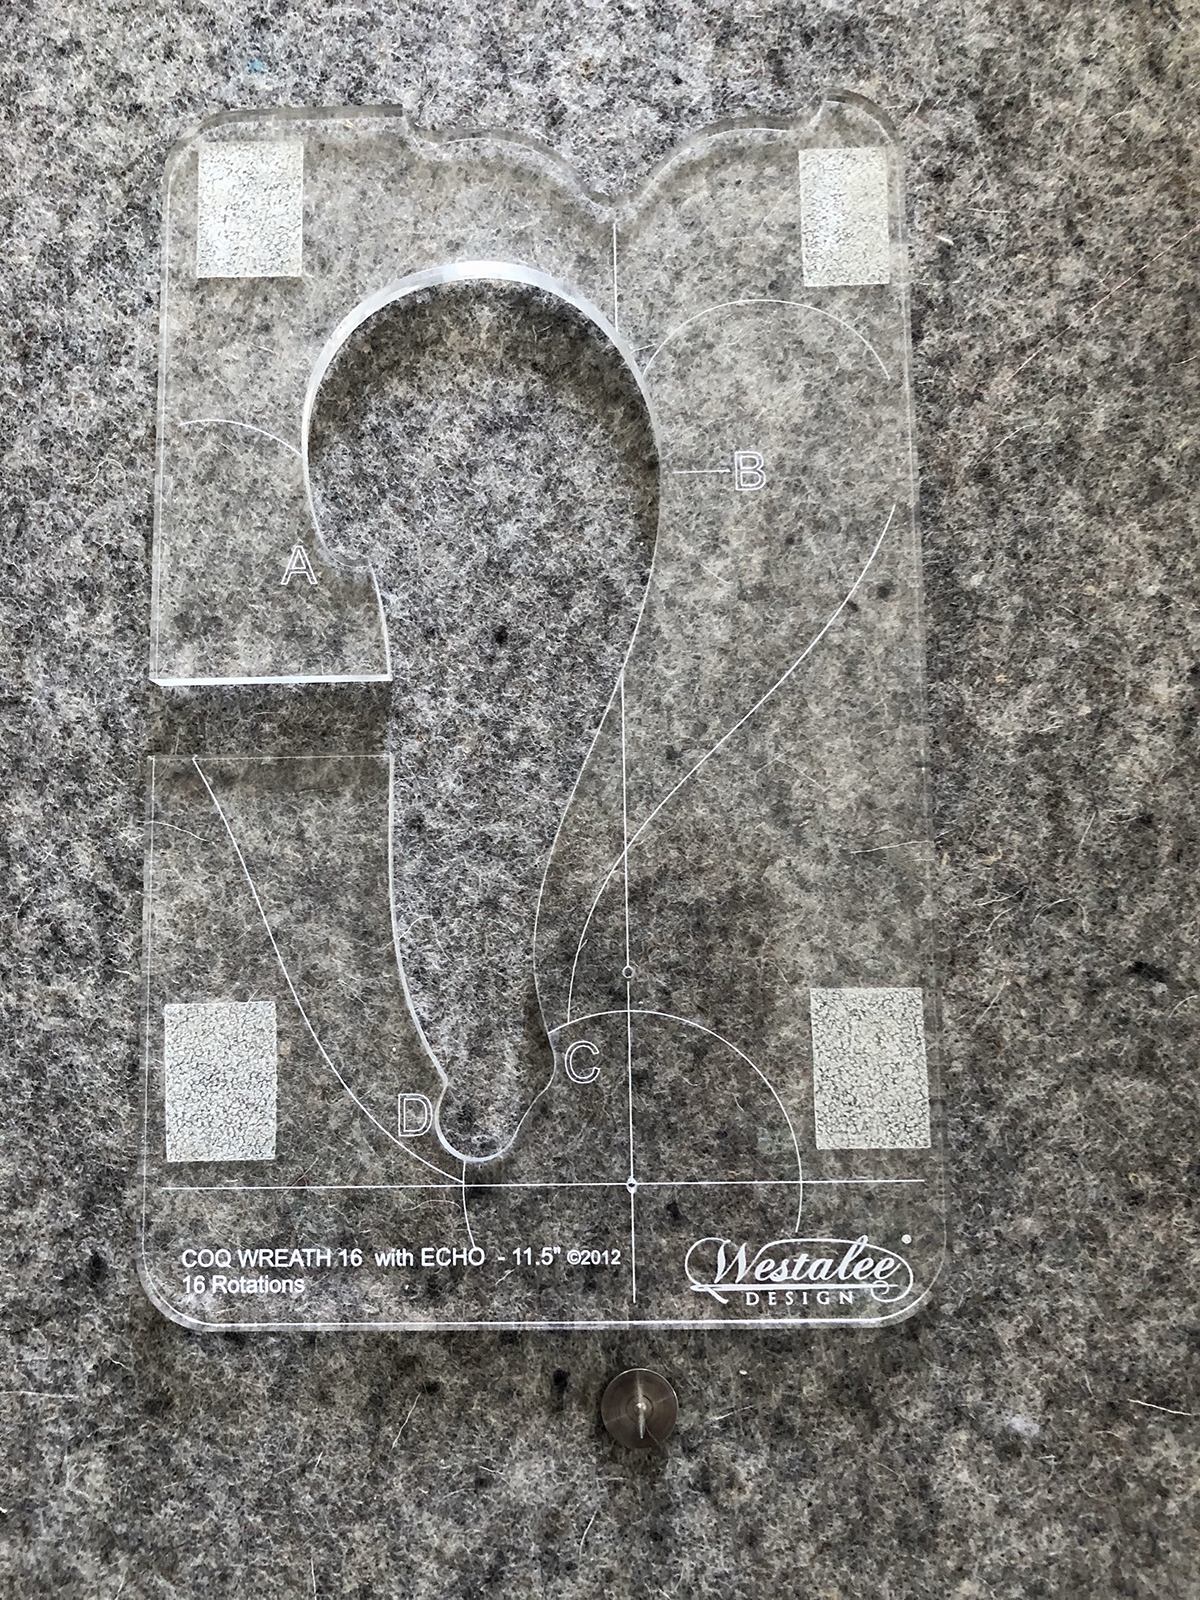
This ruler uses Westalee’s Pin Locator System. In other words, a tack is placed in the center of the design area from the backside of the quilt sandwich and the ruler is placed on this pin. The ruler then rotates on the pin as you stitch each plume on the feather wreath.
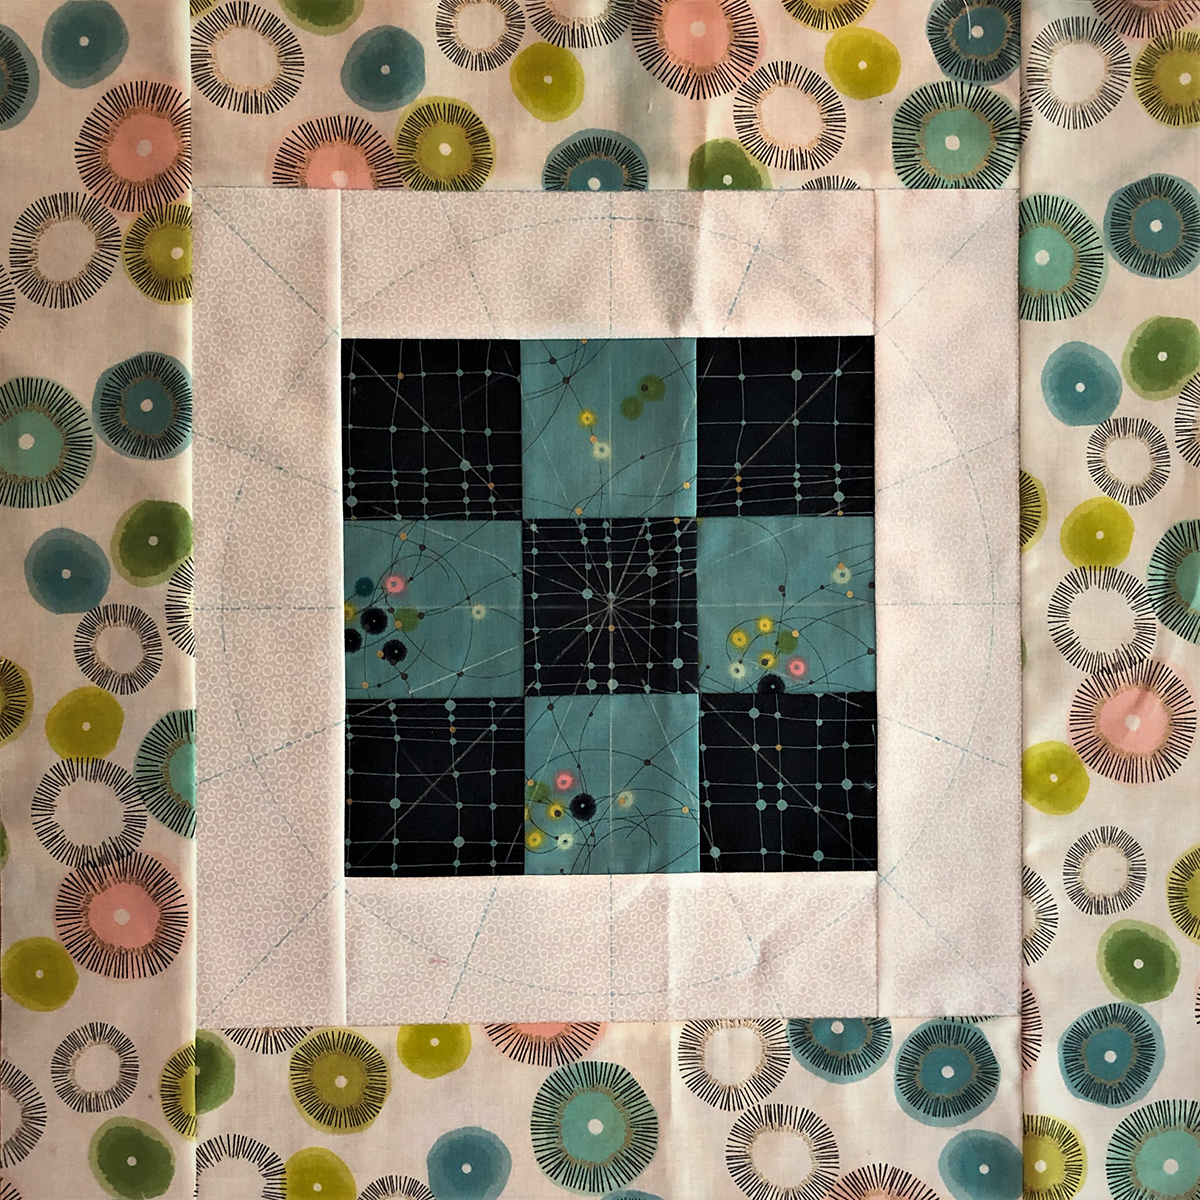
Begin by finding the center of the 9-patch block. Mark horizontal and vertical lines. Divide these in half with 2 diagonal lines so you have 8 evenly spaced lines. Now divide the spaces in half so you have 16 marked evenly spaced lines through the center of the block. The 8 lines are easy to figure out but when it comes to the 16 lines, unless you have a ruler designed to mark 16 lines it can get a little trickier. So I have drawn a 12” circle around my 8 lines. I then measure the distance between two lines where they intersect the circle. Mark the center of this distance. Do this around the entire circle. Now mark the next 8 lines connecting marks opposite of each other.
We are now ready to quilt the wreath. Place the tack in the center of the block from the back side. (If you are working on a frame be sure the ruler work table does not catch on the tack.) There are two holes on the ruler, we will use the lower hole first. Align the etched line on the ruler with one of the drawn lines on the fabric.

Starting at letter A, pull up the bobbin thread. Stitch around the inside of the ruler to B and then stop at C. Stitch from C to D and back to C.

Stitch back up the ruler, on top of previous stitching, stopping at B.
Rotate the ruler so the A position on the ruler is against the foot and the etched line on the ruler aligns with the next line on the fabric.
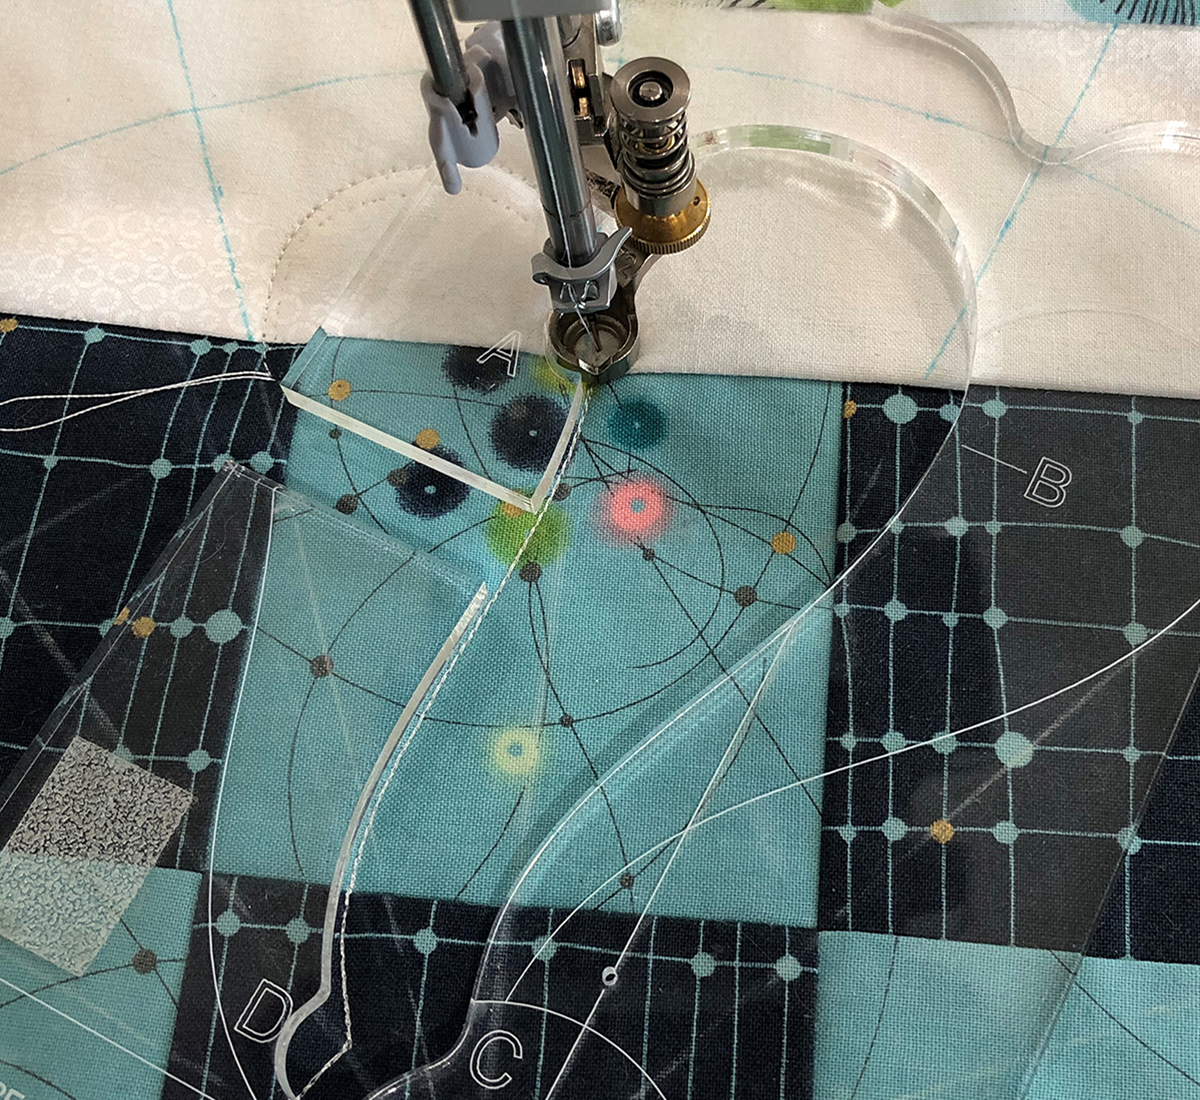
Repeat the sewing sequence. Continue around the block until you are back at the beginning. Pay attention that each time you rotate the ruler that you are aligning to the drawn line. If the end stitch does not exactly match the first stitch you may need to take out a few stitches. Secure the threads.
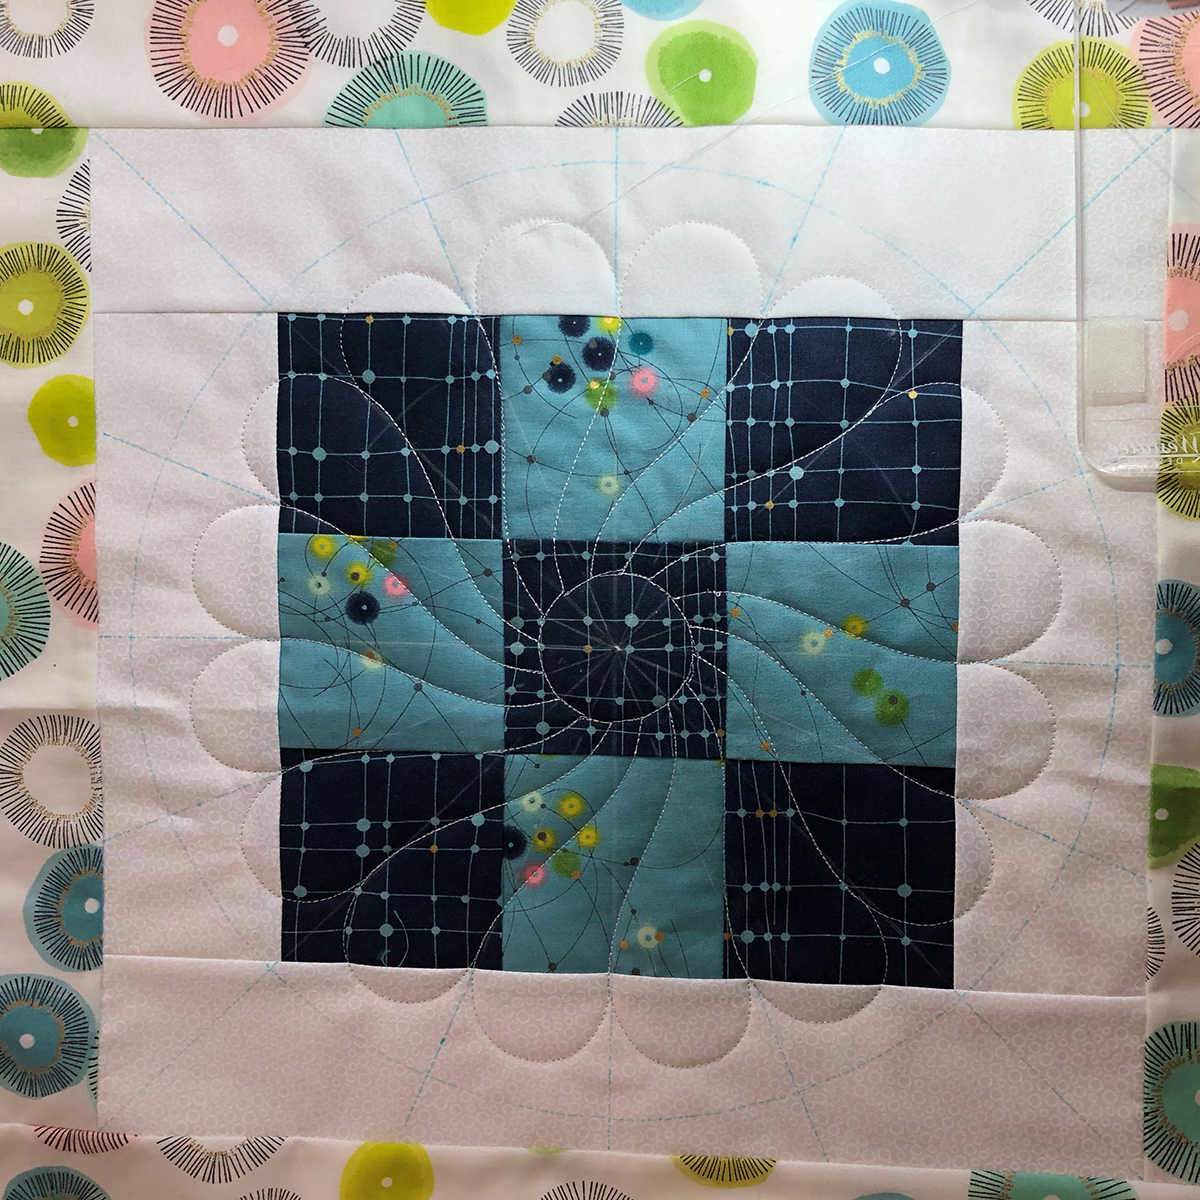
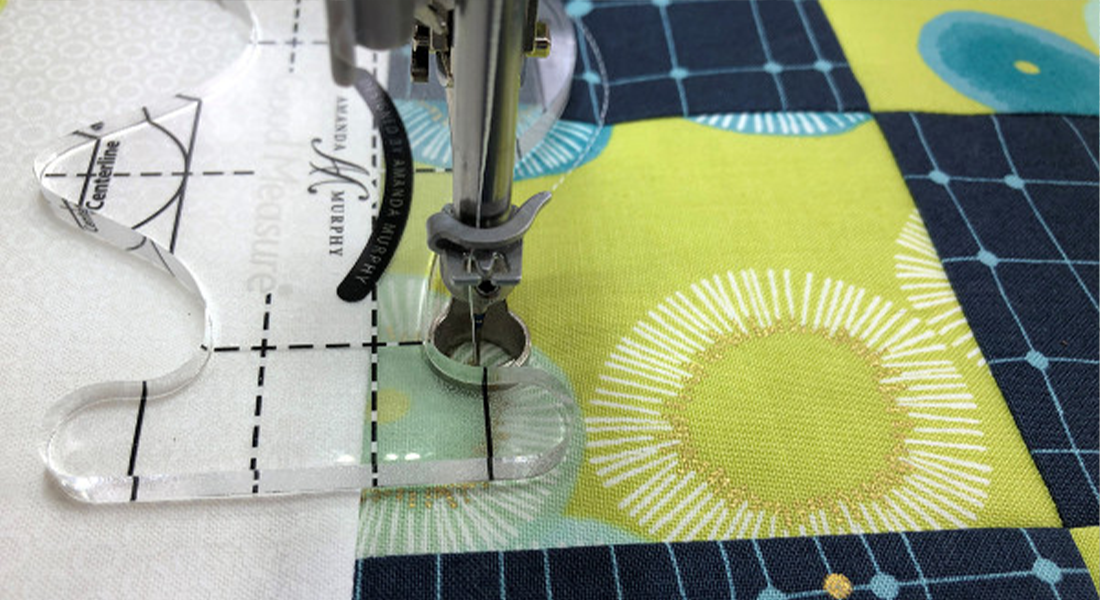
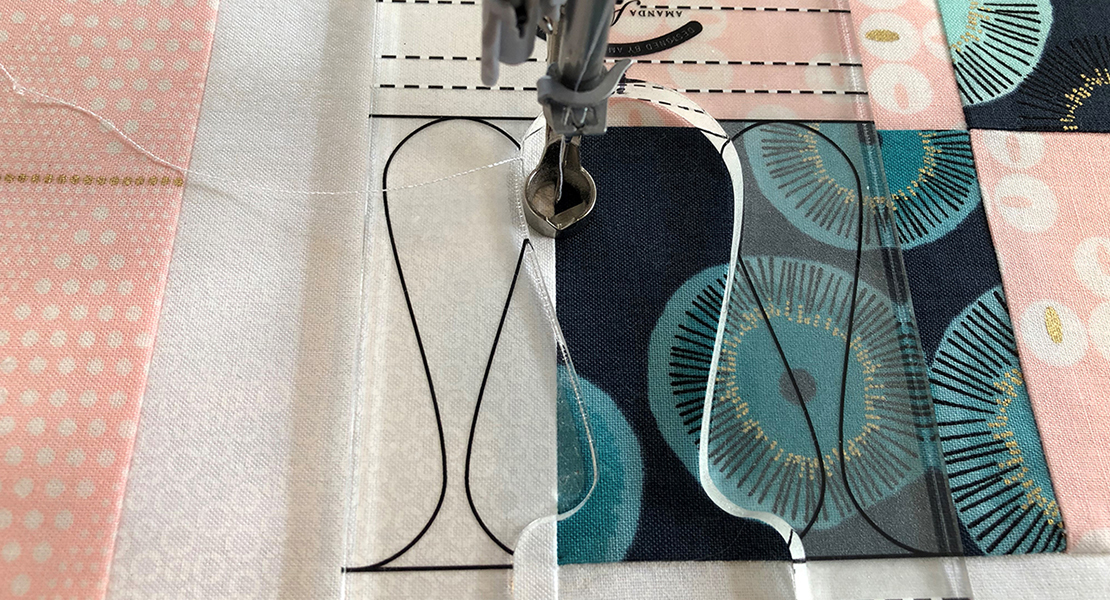
To echo the wreath, move the ruler, placing the upper hole on the tack. Align the etched line on the ruler with the drawn line on the block. The “valley” of the echo should align with the “valley” between the plumes. Stitch from the middle of one plume to the middle of the next, rotating ruler on the pin.

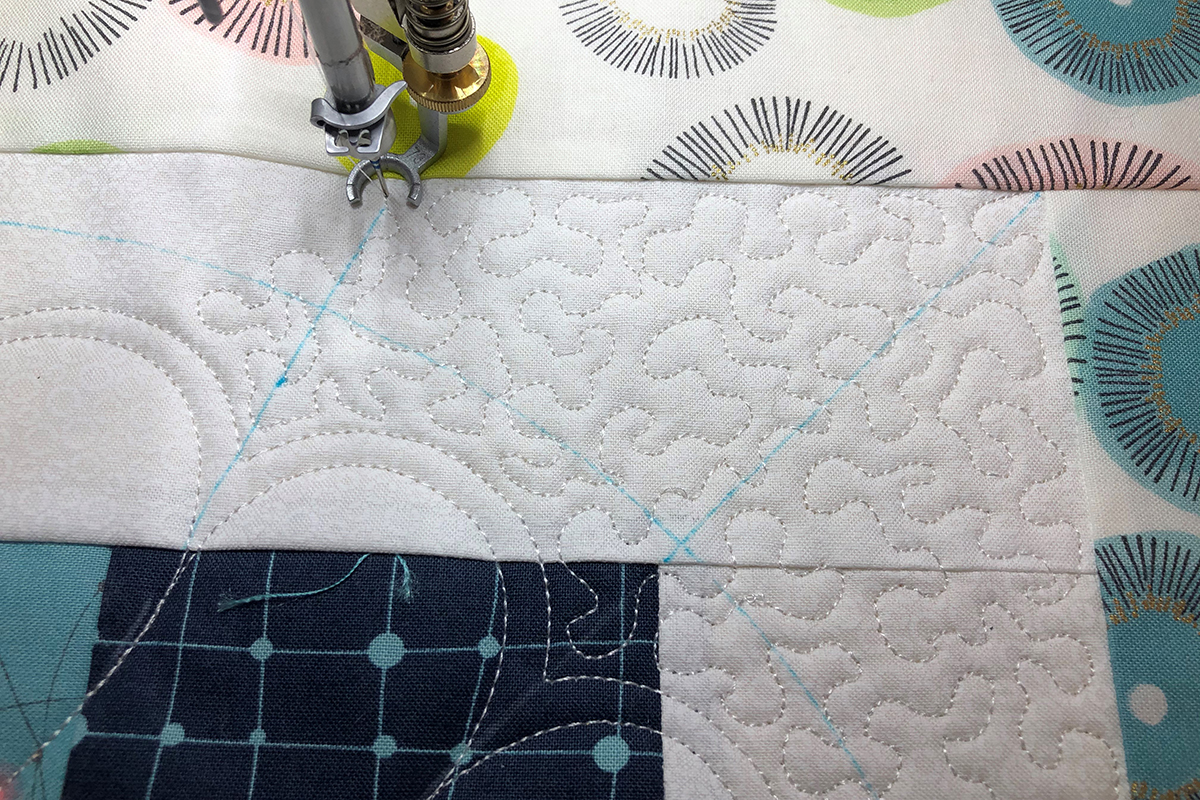
Complete the center of the block by adding a free motion filler, such as stippling, around the wreath. Stitch the fill to the outside border.
The outside border is quilted with evenly spaced straight lines as we did in the first block in this series. I began in the center of one side, spacing the lines 3/4” apart. The last line should be about 1/4” from the corner. Draw a diagonal line in the corner. As you continue stitching lines 3/4” apart, stop when you get to the diagonal lone. Turn 90 degrees and stitch out to the edge. Continue with the stitched lines until each corner is quilted.
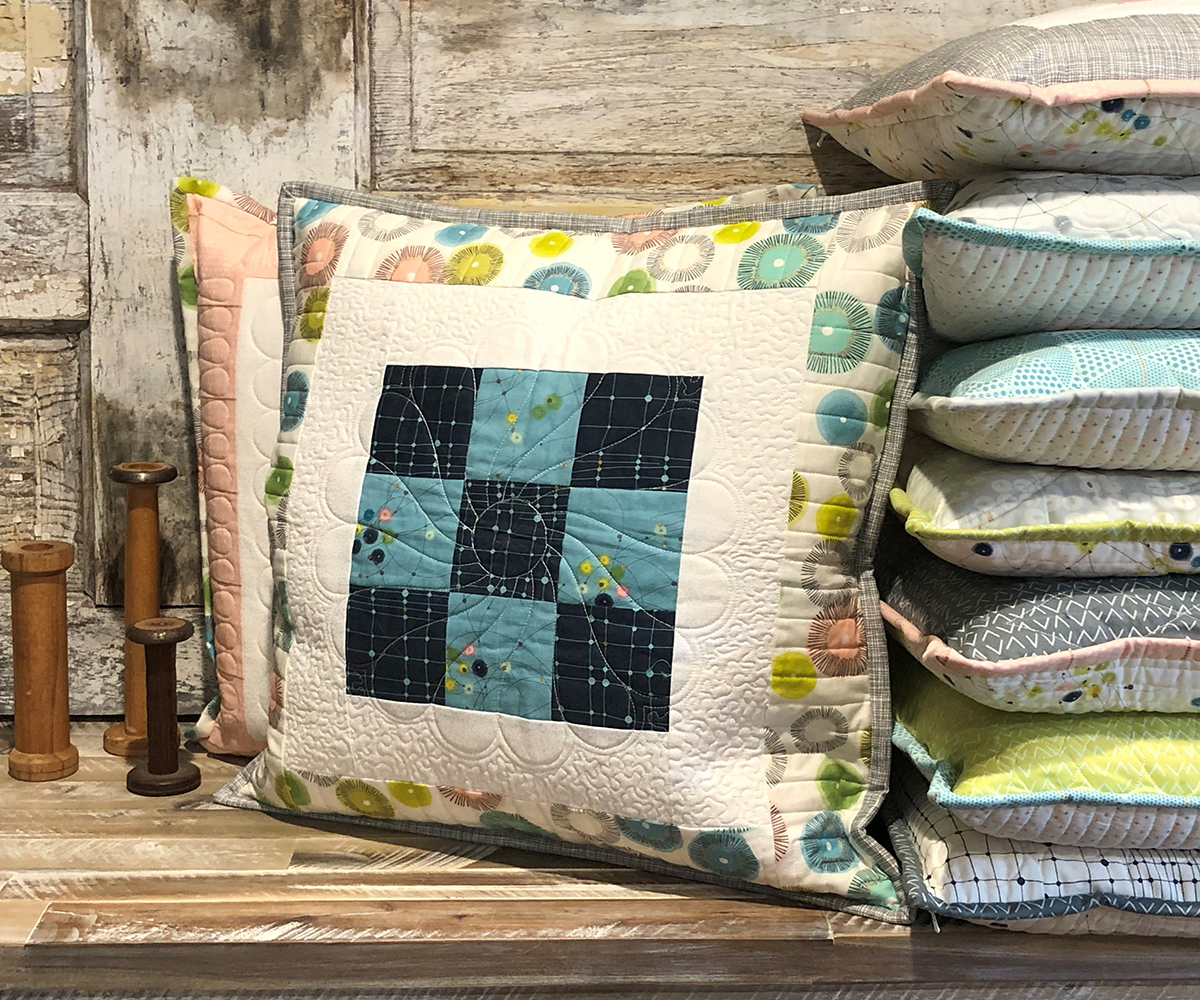
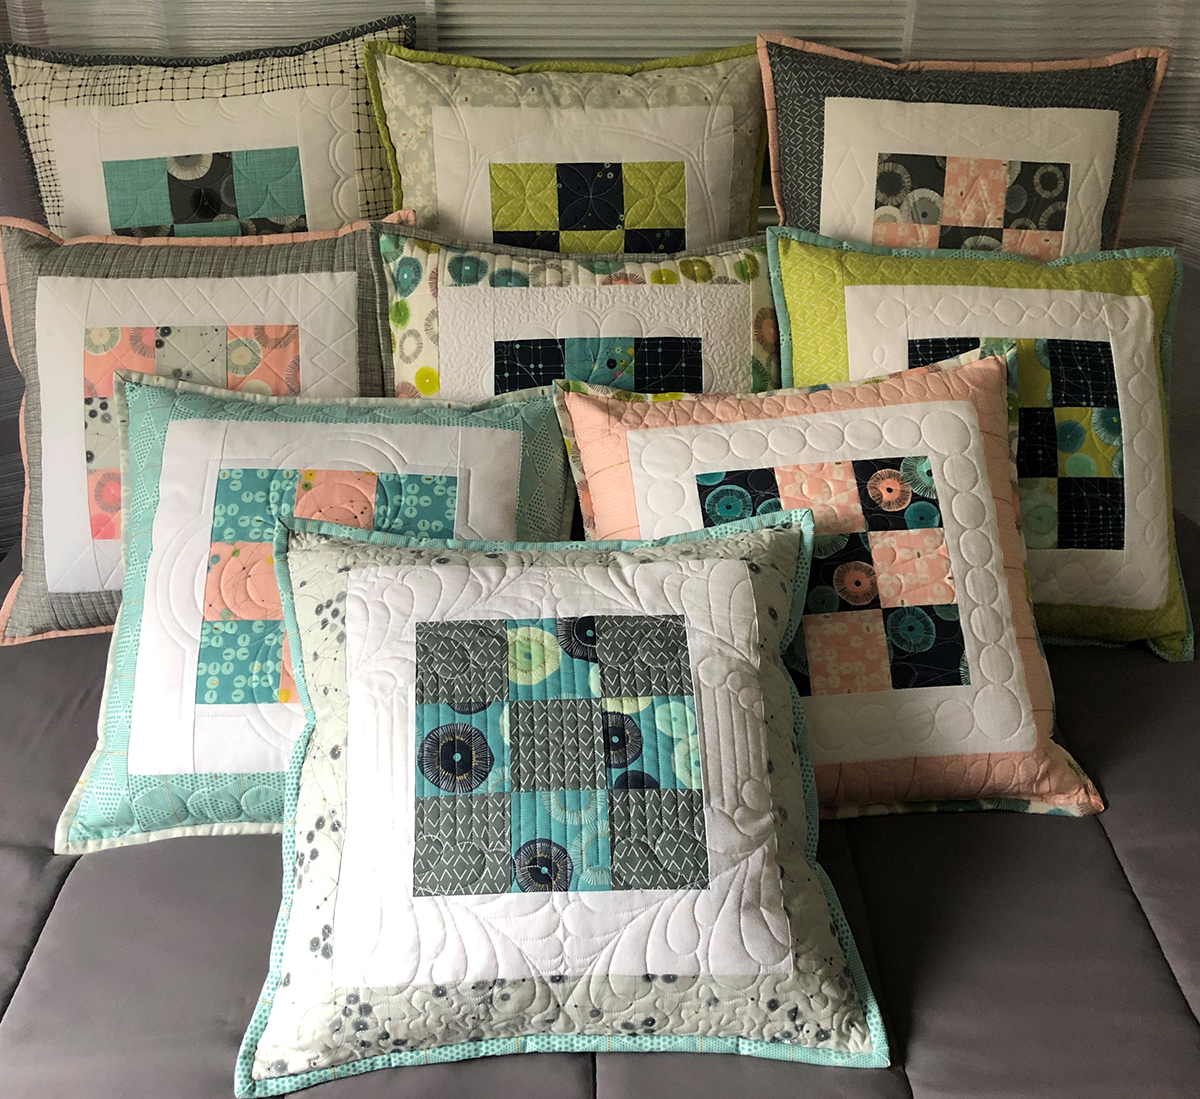
If you have followed along throughout the series, you should now have 9 quilted blocks. You now have the choice of combining the blocks to make a 60” X 60” throw or to make 9 individual pillows.
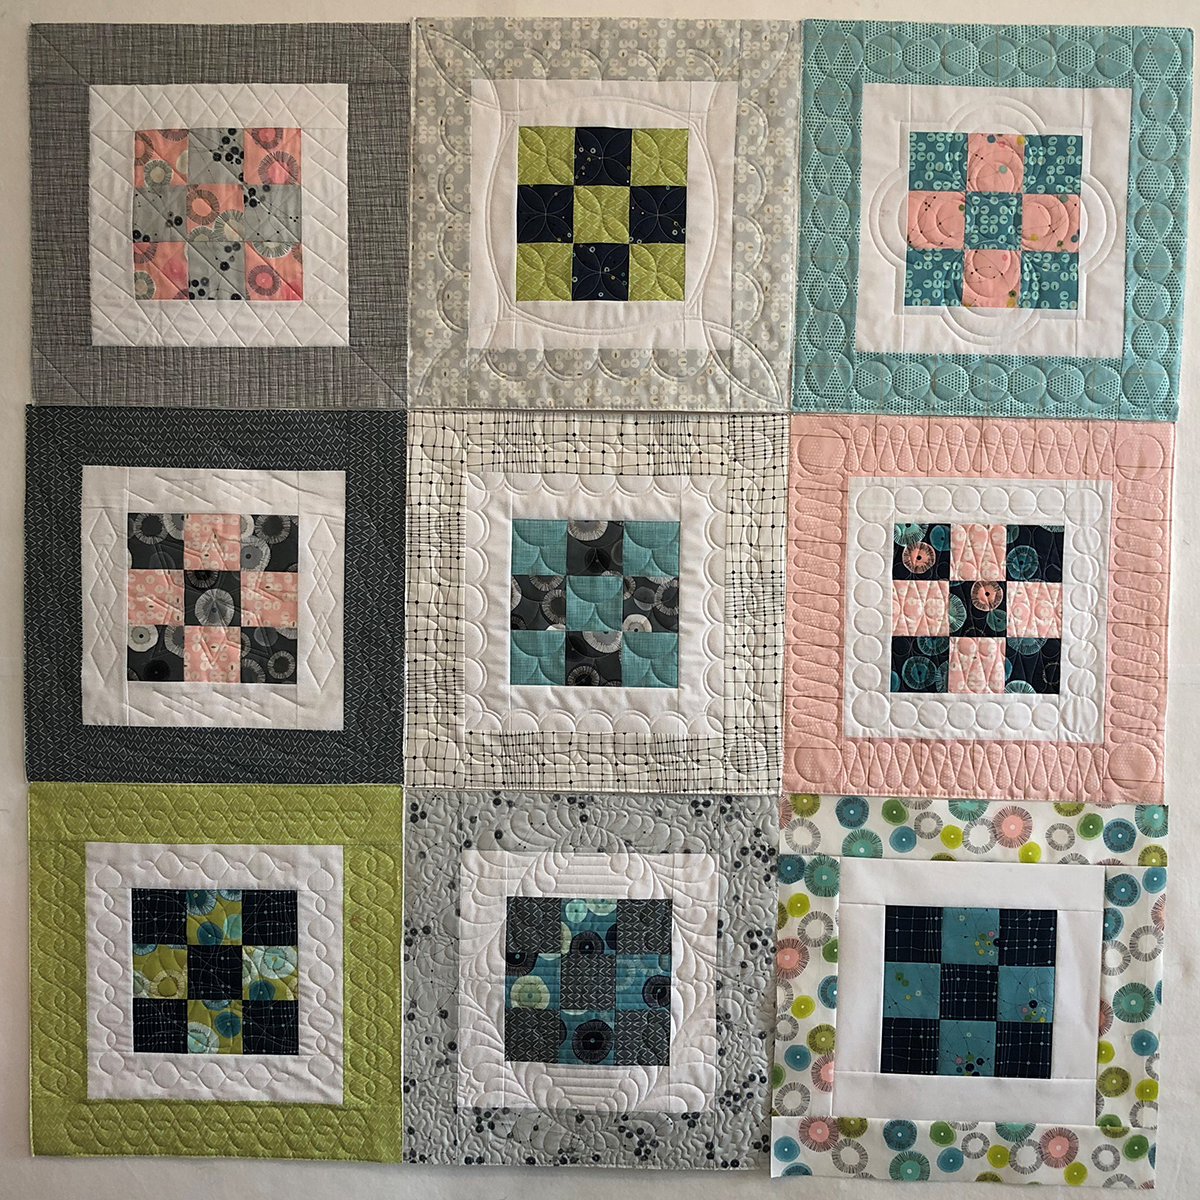
Whether making pillows or the throw, begin by trimming each square to 20 1/2″.
FOR THE THROW YOU WILL NEED:
1/4-yard fabric for joining strips
1/2-yard fabric for binding
BERNINA Walking Foot #50 or Patchwork Foot #97D (used with the BERNINA Dual Feed)

To make the throw, arrange the blocks three across and three down. You will be seaming the blocks together making three rows of three and then seaming the rows.
Cut 6 strips of fabric 1″ x 21”. Press under 1/4” on one long side of each strip. Place two blocks right sides together laying the raw edge of a strip of fabric on top aligning all the edges and stitch a 1/4” seam. Use your Dual Feed or the Walking Foot #50.
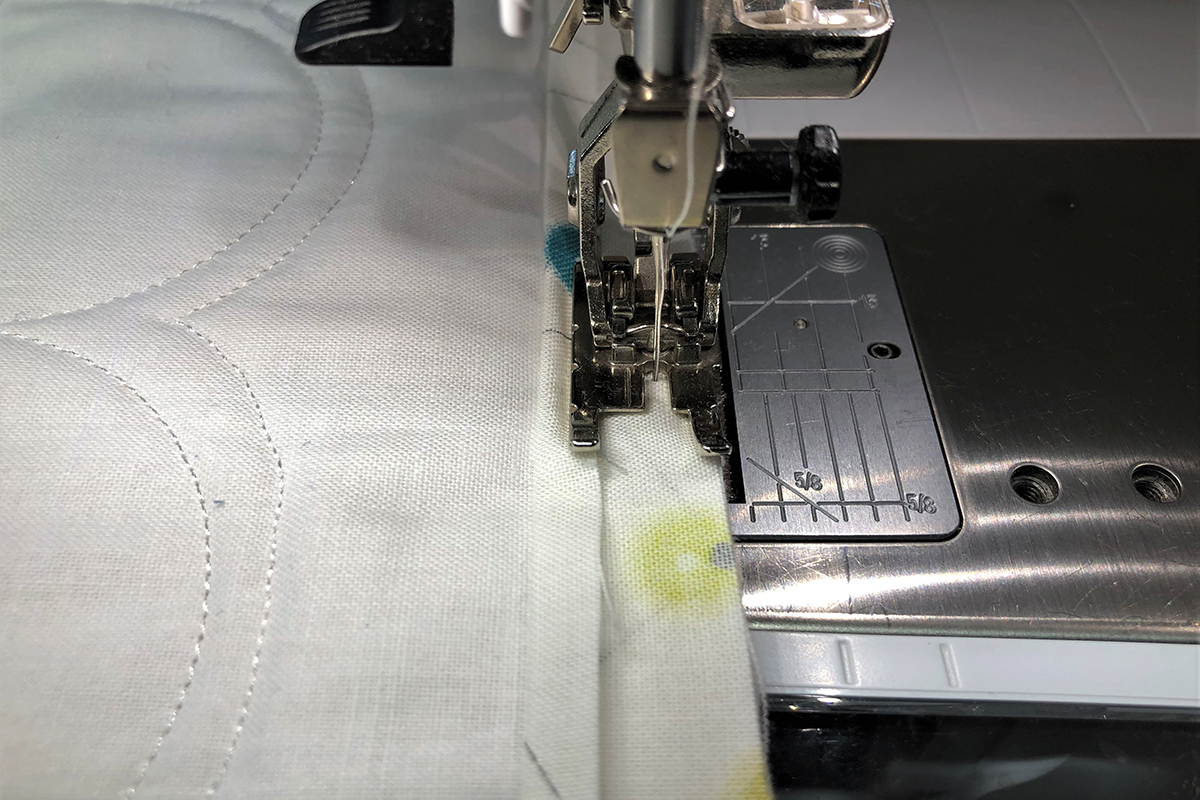
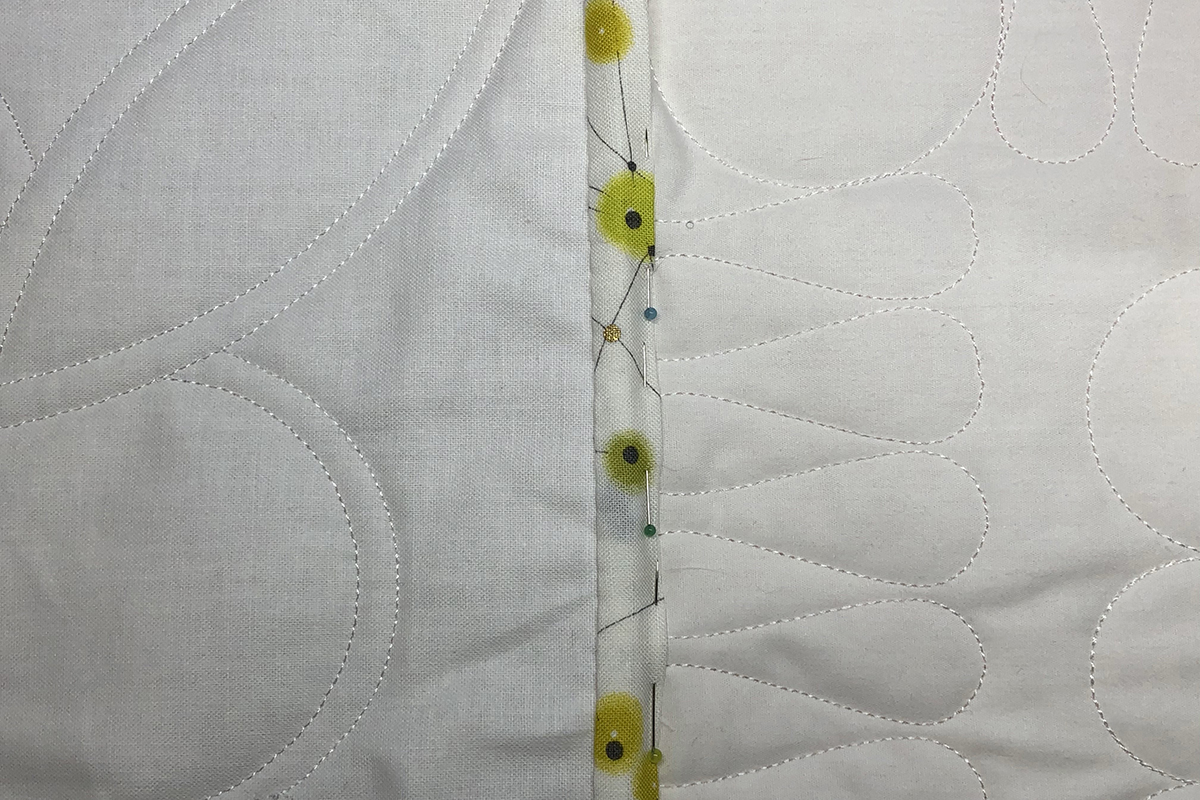
Press the seam to one side allowing the fabric strip to cover the seam, trim off any excess on the ends. Hint: The seam will lie flatter if you trim some of the batting out of the seam allowance. Hand stitch the folded edge of the fabric strip to the back of the quilt.
Repeat the process until you have three blocks joined together, three times. Cut 2 strips of fabric 1” x 61”. Continue joining the rows as you did the blocks. Trim off any excess on the ends of the long seams. Bind your quilt.
For the pillows you will need:
- 3 1/2 yards backing fabric, batting and muslin
- 2 1/2” x 90” fabric strip for binding for each pillow (Two strips of 44” fabric if joined with a straight seam should work for each pillow. If joining binding strips with a mitered seam, you will need 2 ½ strips for each pillow. I purchased 4 coordinating fabrics, 1/2 yard each, for the 9 pillows.)
- 9 Invisible Zippers 22” – 24”
- Invisible Zipper Foot #35
- BERNINA Walking Foot #50 or Patchwork Foot #97D (used with the BERNINA Dual Feed)
To make pillows out of your blocks, you will need to create 9 pillow backs. I like to quilt the pillow back so that it is the same weight as the front. If you are at a domestic machine or at a table model longarm, make a 22” x 24” quilt sandwich to quilt for the back. A simple way to quilt the back would be to do straight line quilting, practicing your rulerwork, or with a walking foot. I am having you make each back a little longer as we will be inserting a zipper.
If quilting on a frame, load 2 3/4 yards of muslin, batting, and pillow backing fabric lengthways on the frame. When done quilting, this will be enough for 8 backings. You may then load the remaining fabric to quilt for the 9th back. I used design Basics_06 and changed the size to 2.0 x 99.
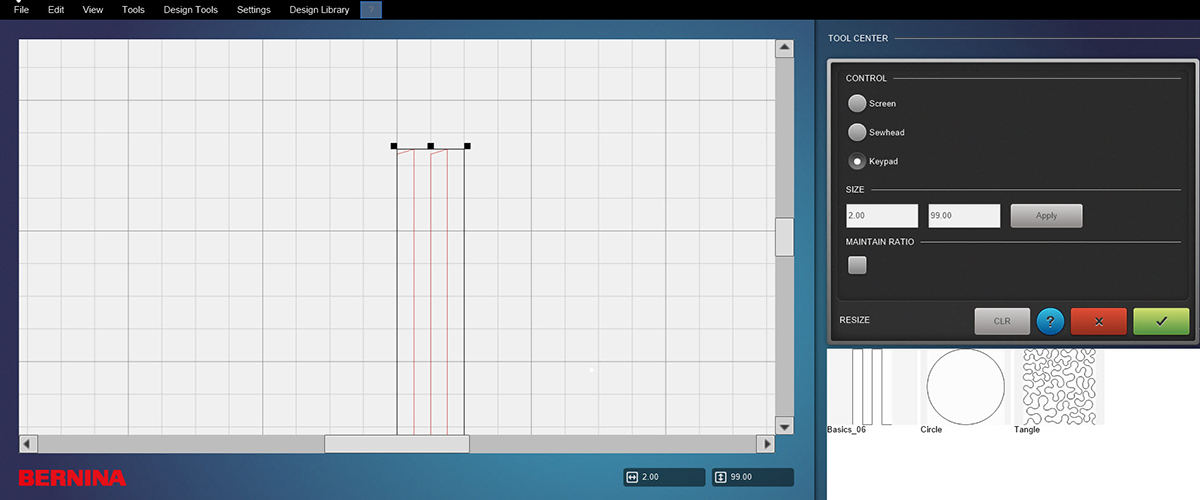
The design was then rotated 90 degrees and multiplied for a total of 22 rows.
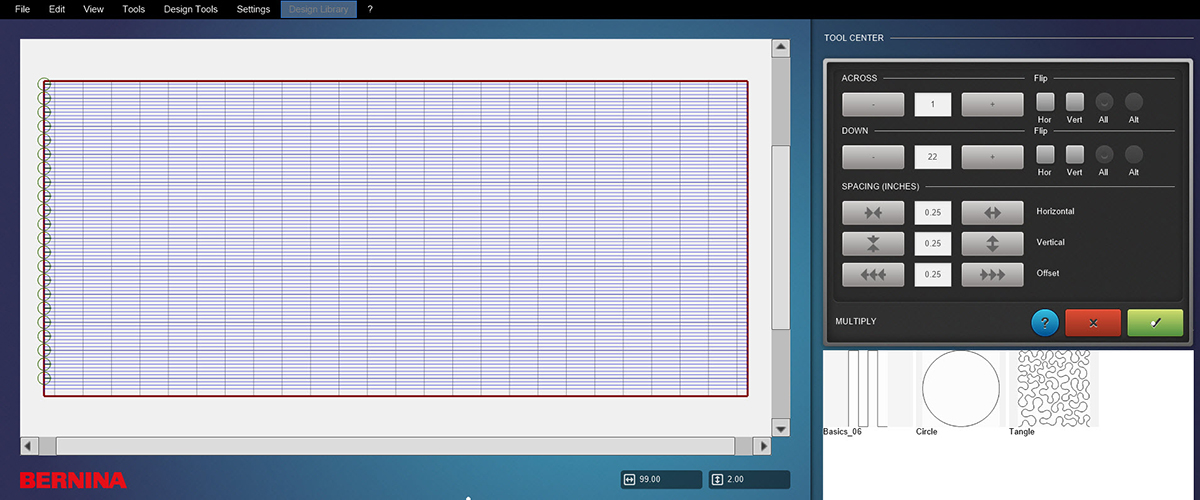
The design was unconnected and every other row reverse sewn. Select the number of rows that will fit in the safe area and quilt the backing. Continue until all the backing fabric is quilted. Cut the quilted fabric into 9 pillow backs, 22” x 24”. The fabric may have shrunk a bit when quilted so as long as the backs are cut approximately to size, a little smaller is OK.
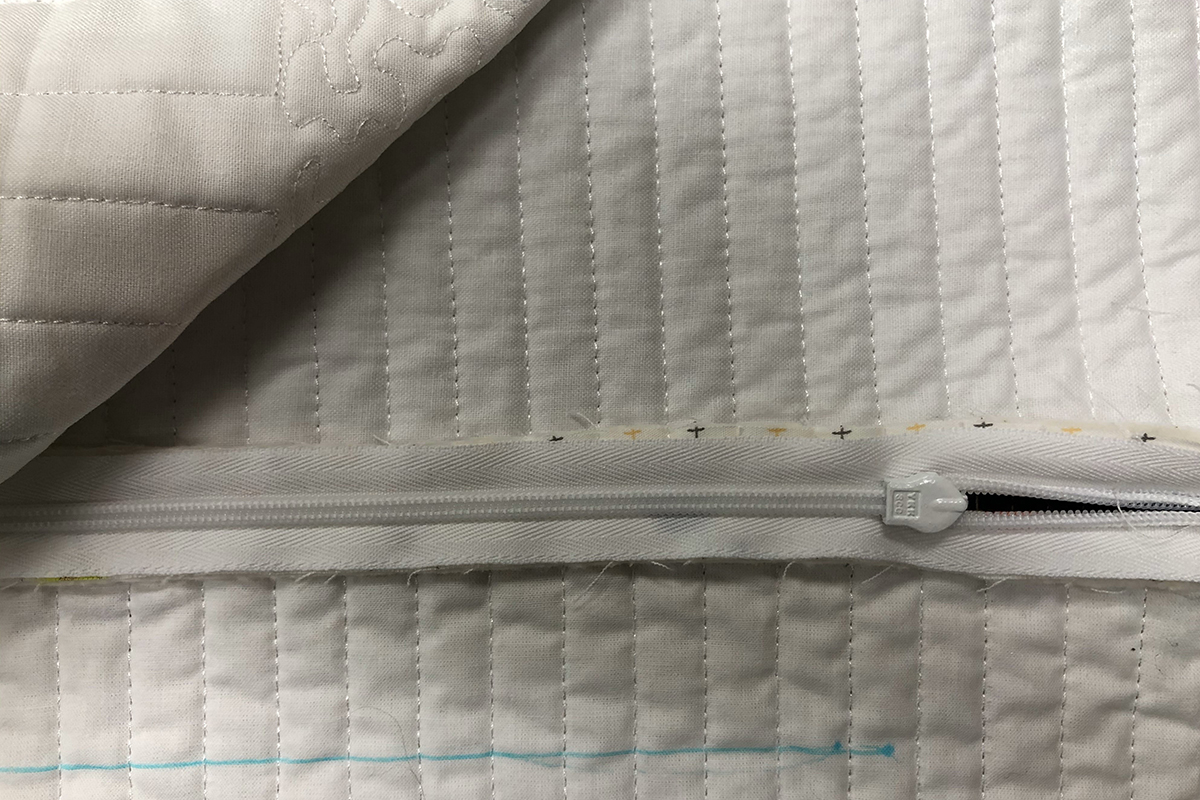
The pillow backs were constructed with a zipper. Cut 1 1/2″ of fabric off one end of the 24” length of backing. Insert an invisible zipper between the main body of the back and this 1/2″ strip. The zipper will be longer than the width of the pillow so there is no need to sew any part of a seam. If you need instruction for an invisible zipper consult BERNINA’s Big Book of Feet or watch the BERNINA video.
Mark a line on the narrow strip on the wrong side of the backing, 1” from the zipper seam. Pull the zipper tab down so that it lies within the 20” width of the pillow. Lay the backing down with the right side down. Lay the pillow top with the right side up and the bottom edge of the pillow top even with the marked line on the backing.
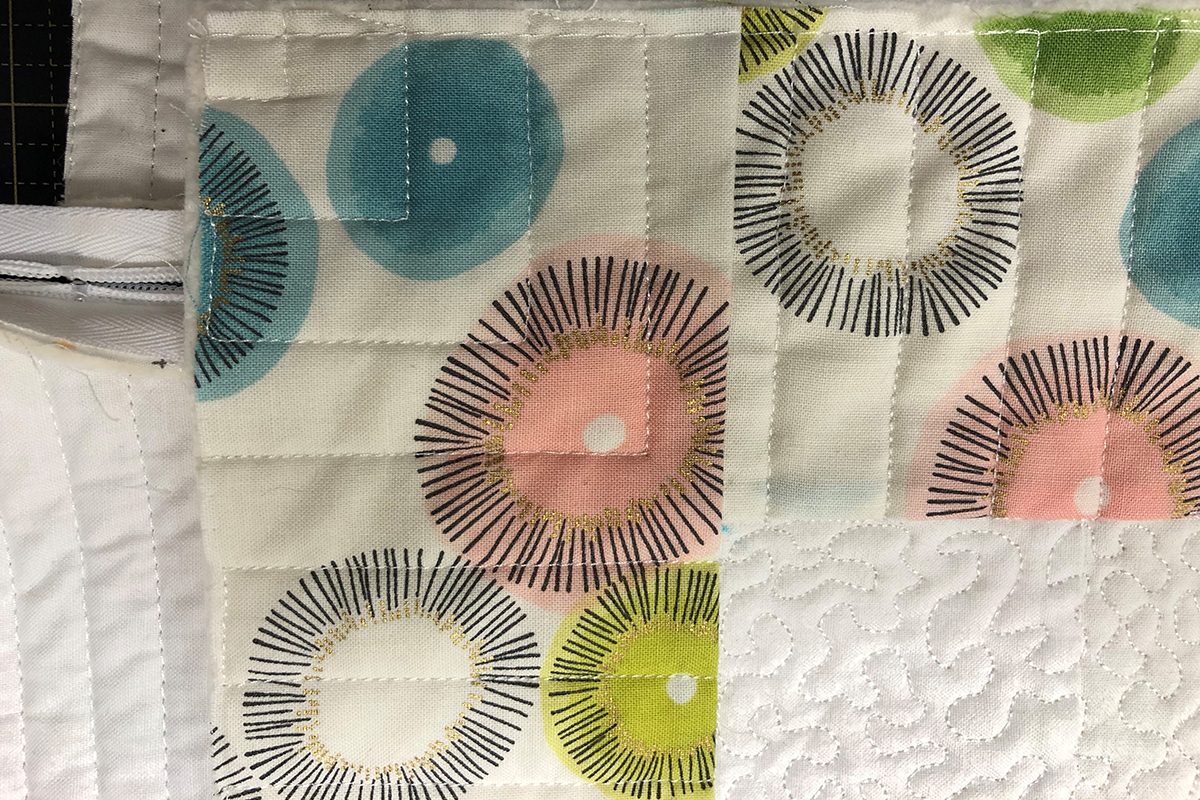
Pin the pillow top to the pillow back, making sure the open end of the zipper is pinned closed. Baste the top and back together. Trim the larger back to the size of the pillow top. Bind the pillow edges together, using your favorite method. Check out this great post to see how easy it is to sew mitered binding corners.
 ether. Trim the larger back to the size of the pillow top.
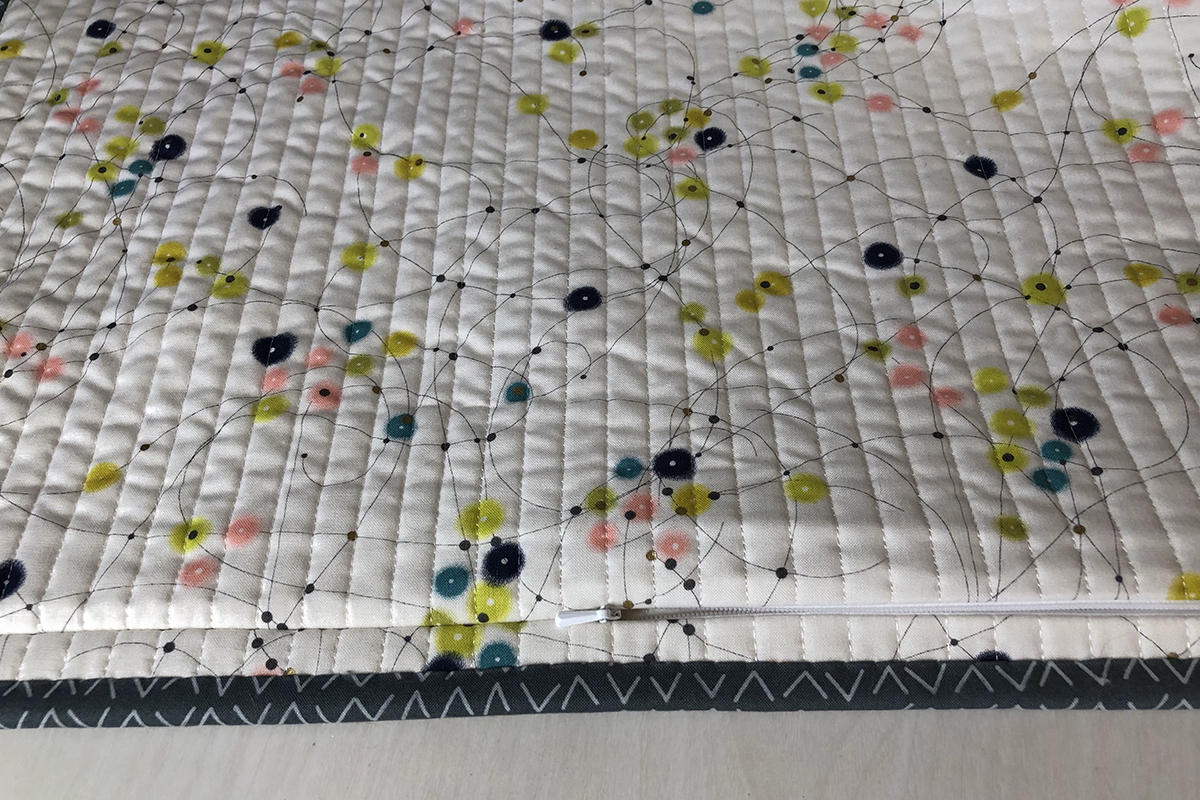
When the pillow form is inserted the seam with the invisible zipper is hardly noticeable.

I hope you had fun stitching out all of these blocks, using different rulers. By now you are a champion at ruler work!
Rulerwork for Beginners Schedule
Rulerwok for Beginners, Part 1: Rulers
Rulerwork for Beginners, Part 2: Roadmap
Rulerwork for Beginners, Part 3: Stitching Circles
Rulerwork for Beginners, Part 4: Clamshells
Rulerwork for Beginners, Part 5: Diamonds
Rulerwork for Beginners, Part 6: Ribbon Candy
Rulerwork for Beginners, Part 7: Waves
Rulerwork for Beginners, Part 8: Feathers
Rulerwork for Beginners, Part 9: Wreath with Echo


What you might also like


One comment on “Rulerwork for Beginners, Part 9: Wreath with Echo”
Leave a Reply
You must be logged in to post a comment.

Thank you Nina!