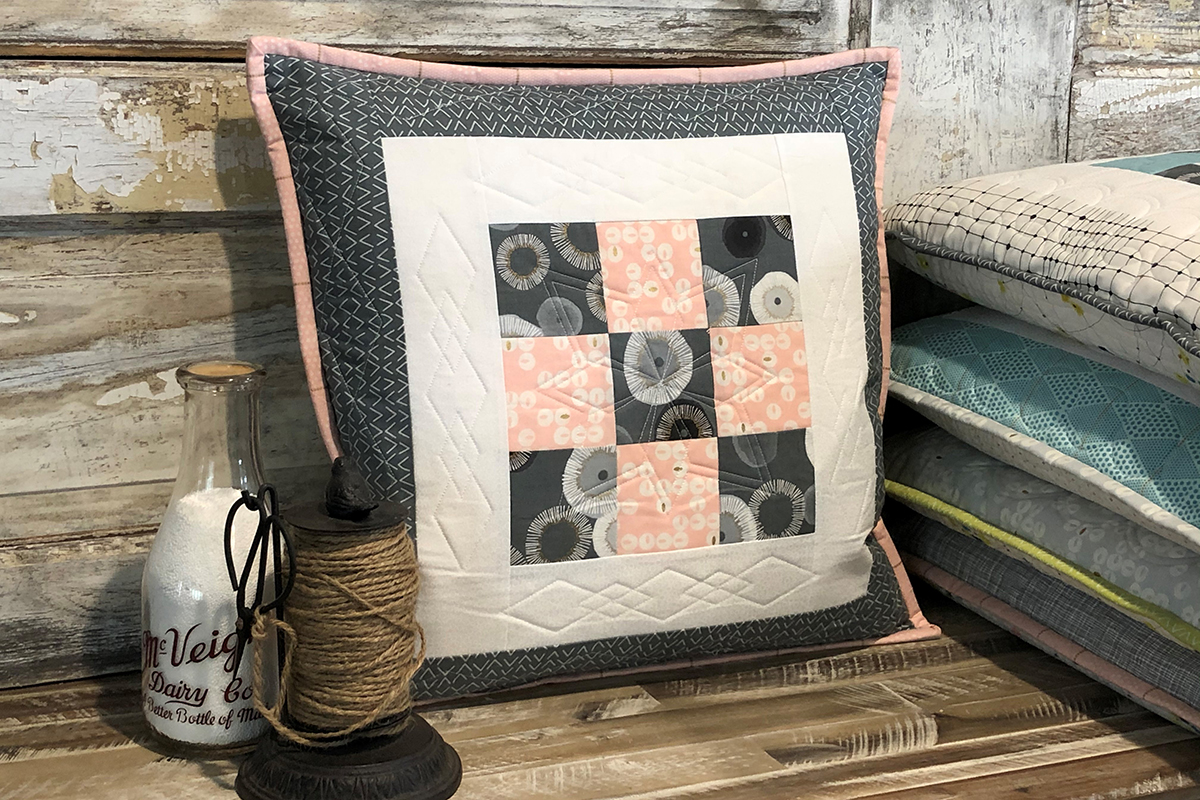
Rulerwork for Beginners Series, Part 6: Ribbon Candy
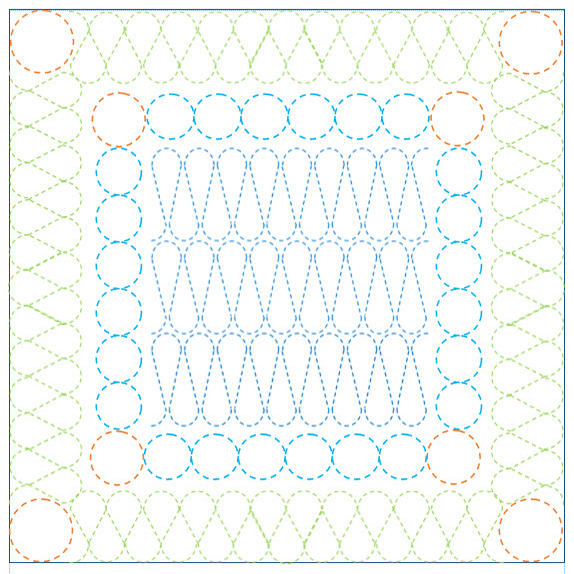
The ribbon candy quilting design is one we strive to do, and not only just to do, but to keep even as we do it! As we do larger and larger Ribbon Candy designs, for example in borders, it is harder and harder to keep them even and regular. So let’s do the design with rulers to perfect the quilting. You can see the Ribbon Candy Quilting on the Roadmap for this month’s block.
I have included an alternative center if you want to be a bit more challenged with the quilting!
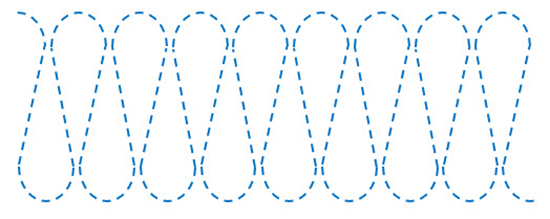
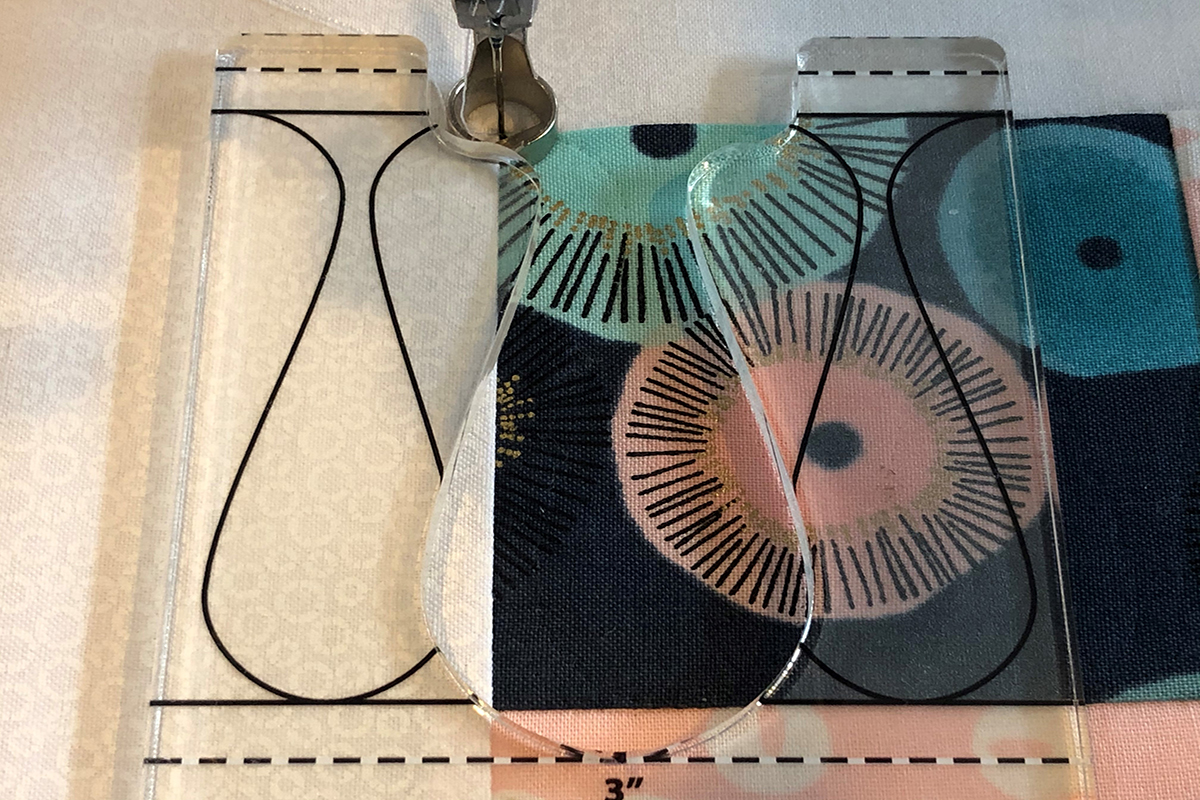
The design is really very simple. It consists of half circles joined by slanted lines.
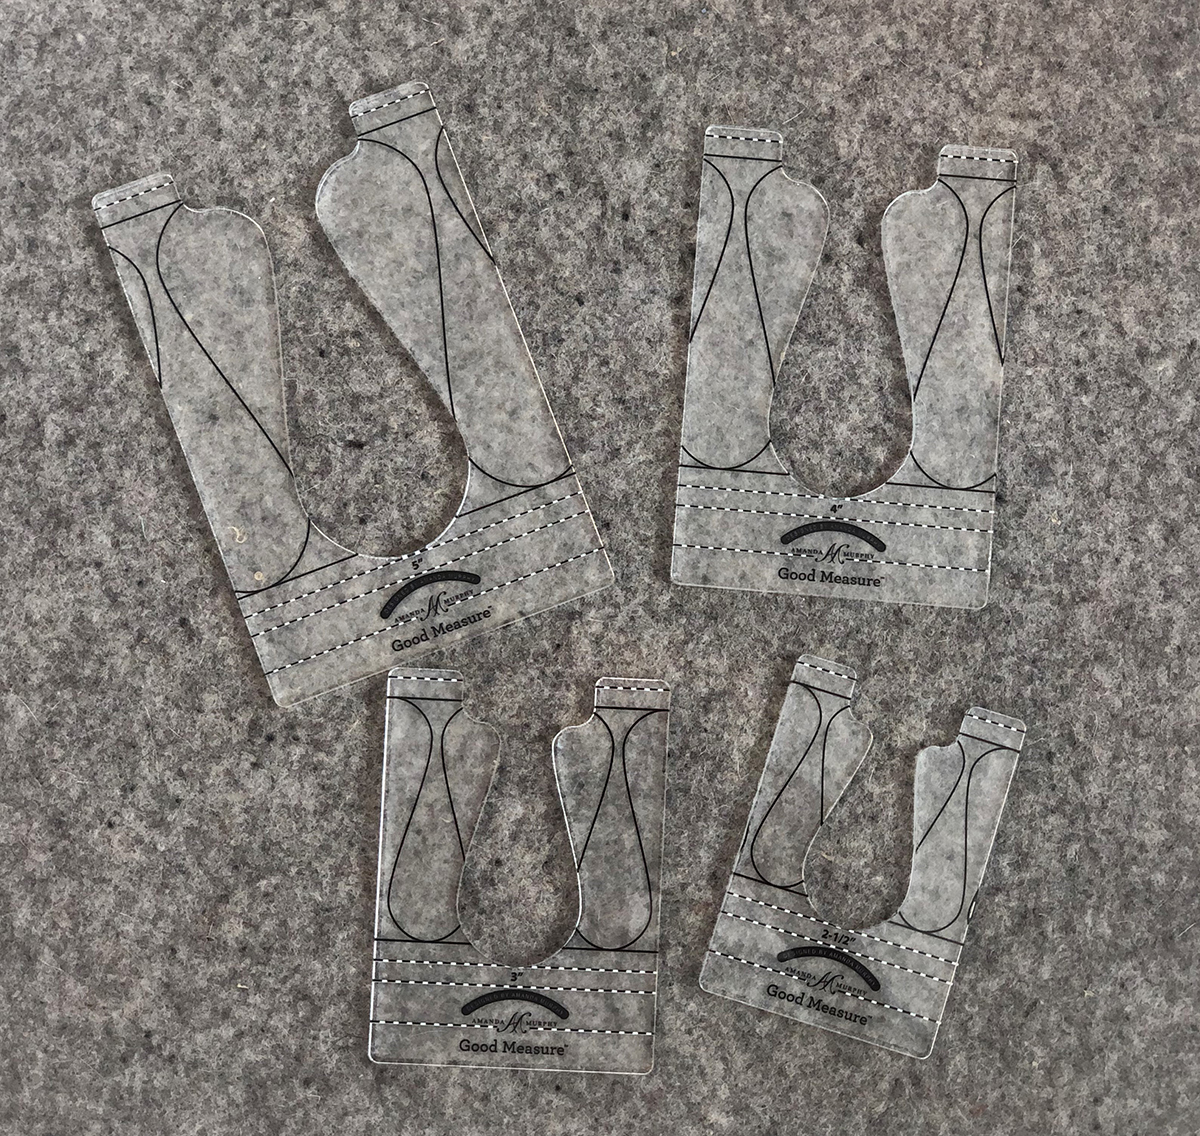
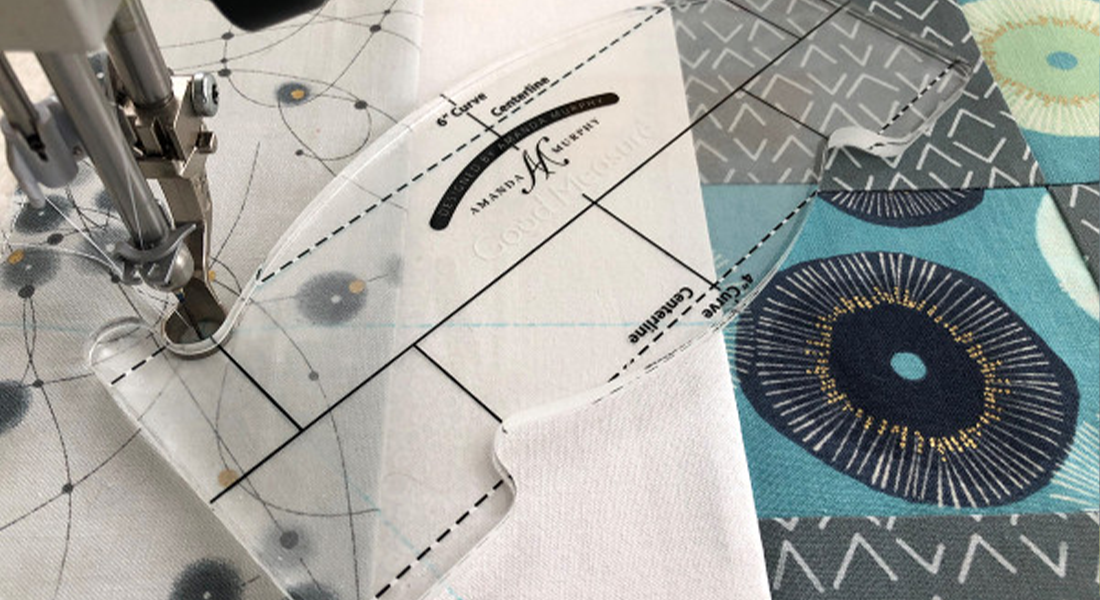
I have used Good Measure Amanda Murphy Every Ribbon Candy template set. This set offers 4 different sizes and have all the right markings making them easy to use.
Although you generally see Ribbon Candy Quilting designs as an all over pattern or in borders, we are going to quilt three rows of this design in the 9-patch for the center of our block. If you are a novice, you will simply quilt three rows of Ribbon Candy in the block as you see on the complete roadmap. If you want a challenge, then consider the alternate design made with the Ribbon Candy Rulers.
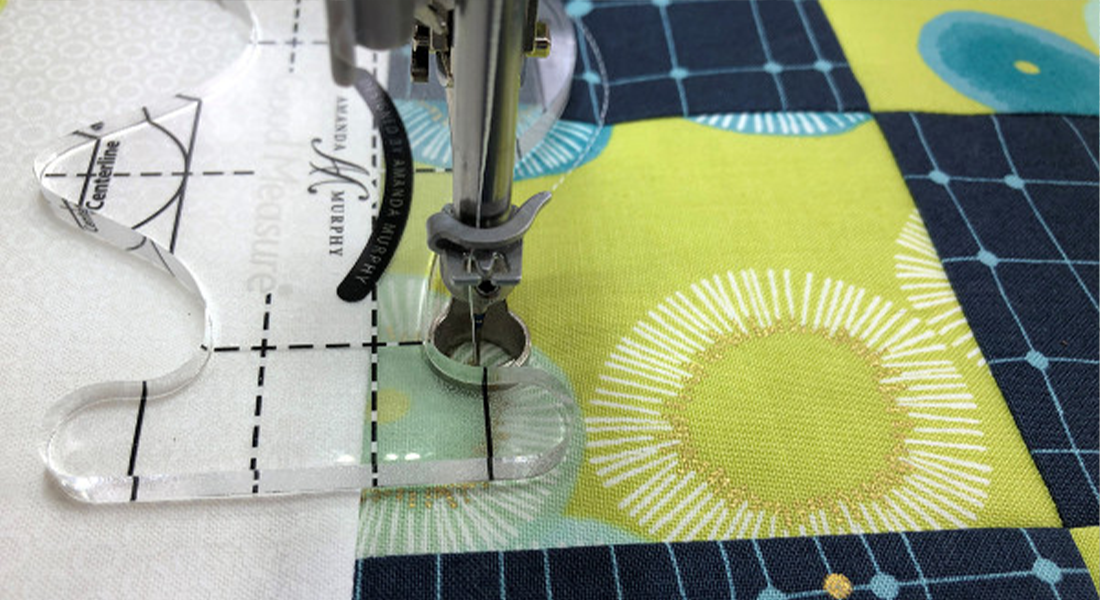
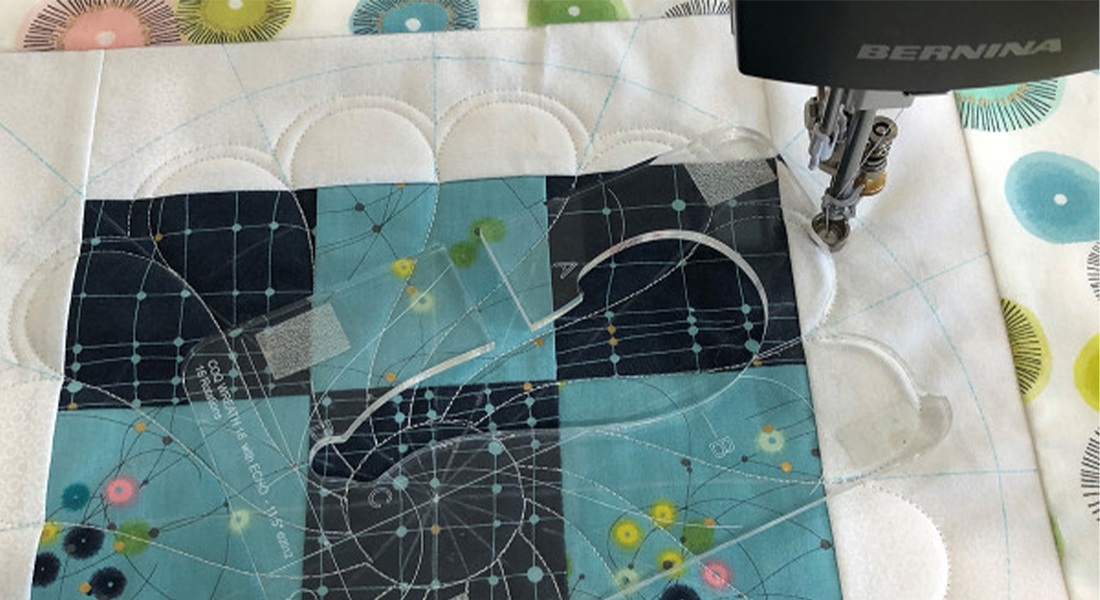
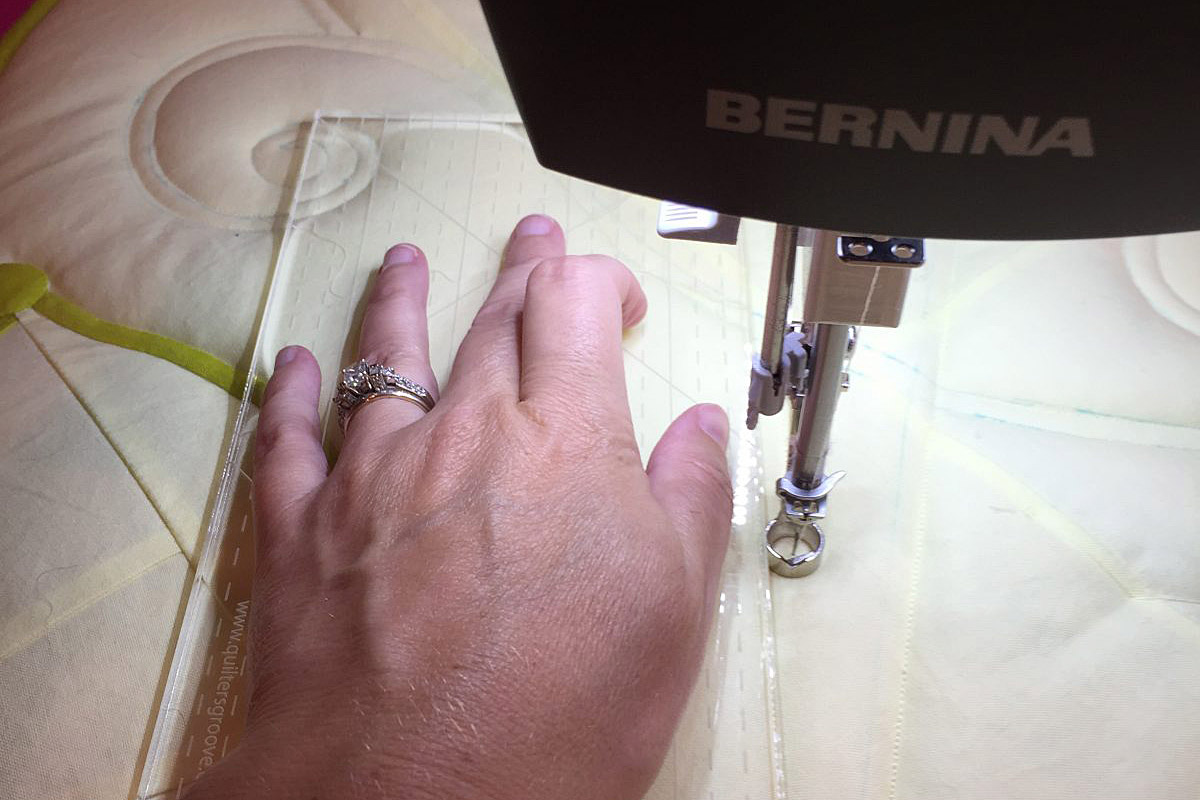
As a novice, begin with the 3” Ribbon Candy Ruler. You may begin at the top or the bottom of the 9-Patch center, but here I have begun at the bottom. While I am starting in the lower left corner, placing the solid black lines on the ruler over the seam lines, I will check to make sure the ruler is in the correct position by seeing where the needle will stitch when in the most outside position and that it will just touch the outside seam.
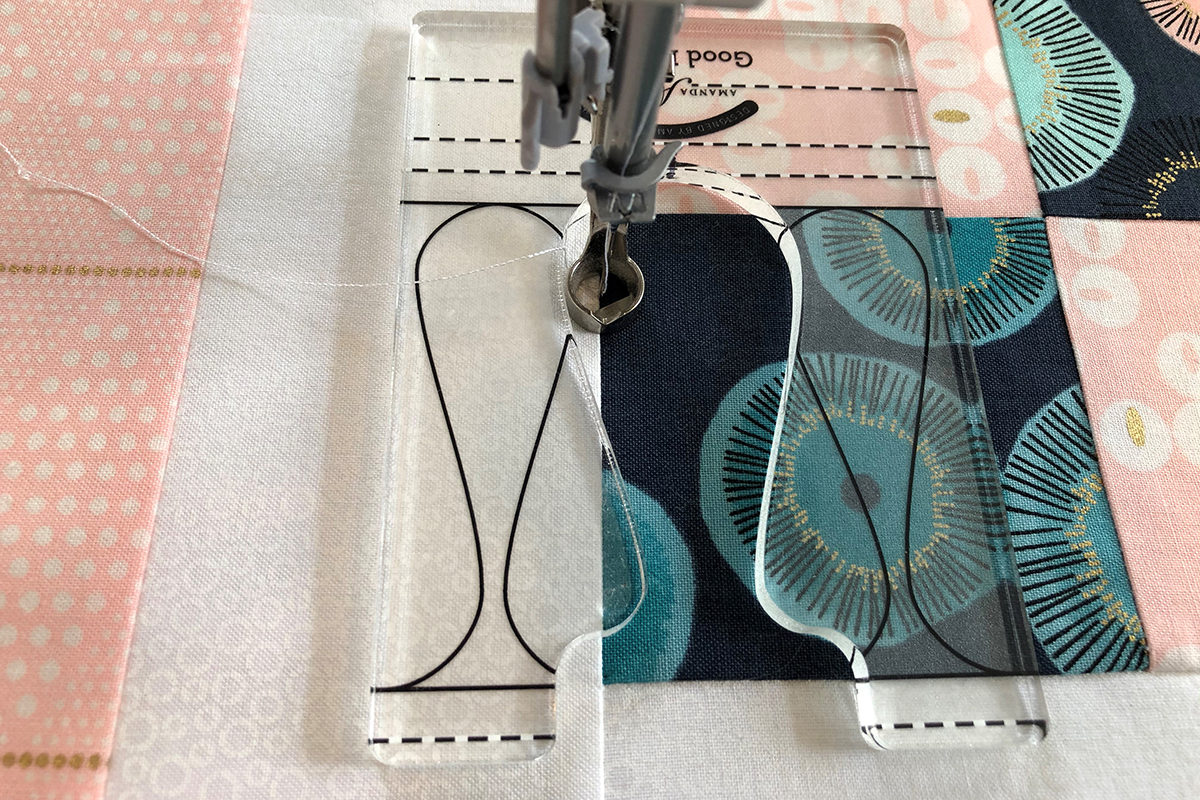
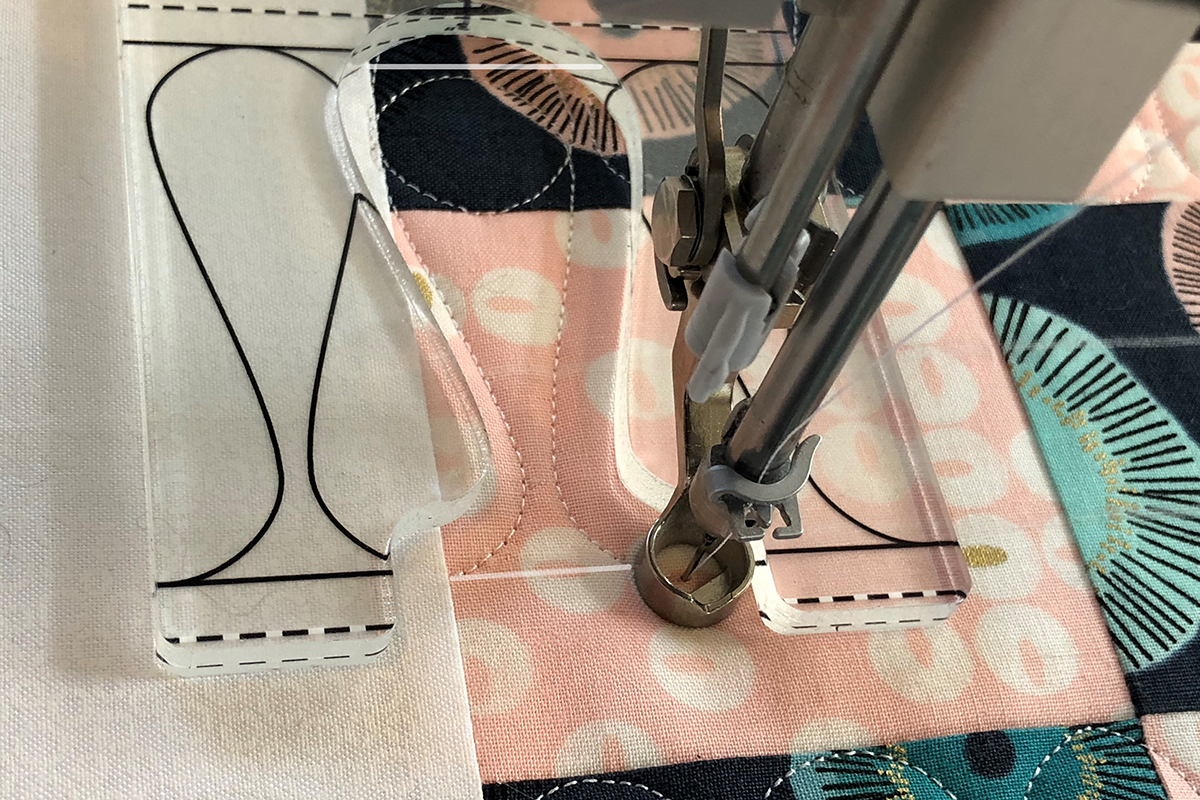
After correctly positioning the ruler, go back to the lower left corner to begin stitching. Stitch around the loop, stopping when you get all the way around the ruler.
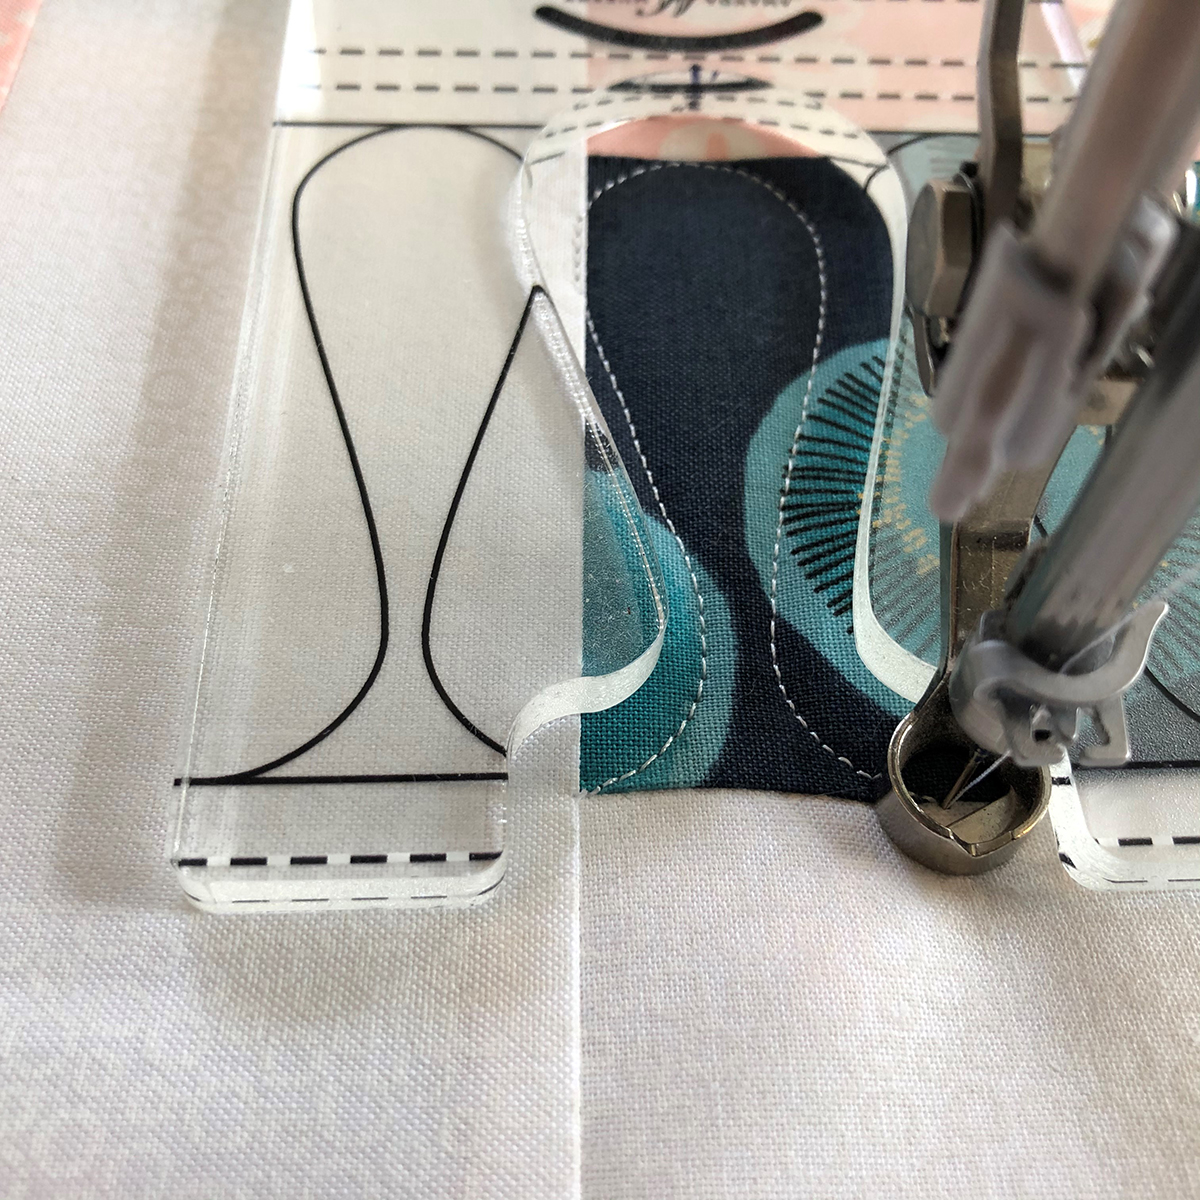
Keeping the needle and the foot down, slide the ruler to the right so that the black lines on the ruler lay over the previously stitched ribbon candy design. Keep the solid black horizontal lines on the seam lines. Stitch the next ribbon candy.
Continue across the row ending at the far seam line of the 9-Patch.

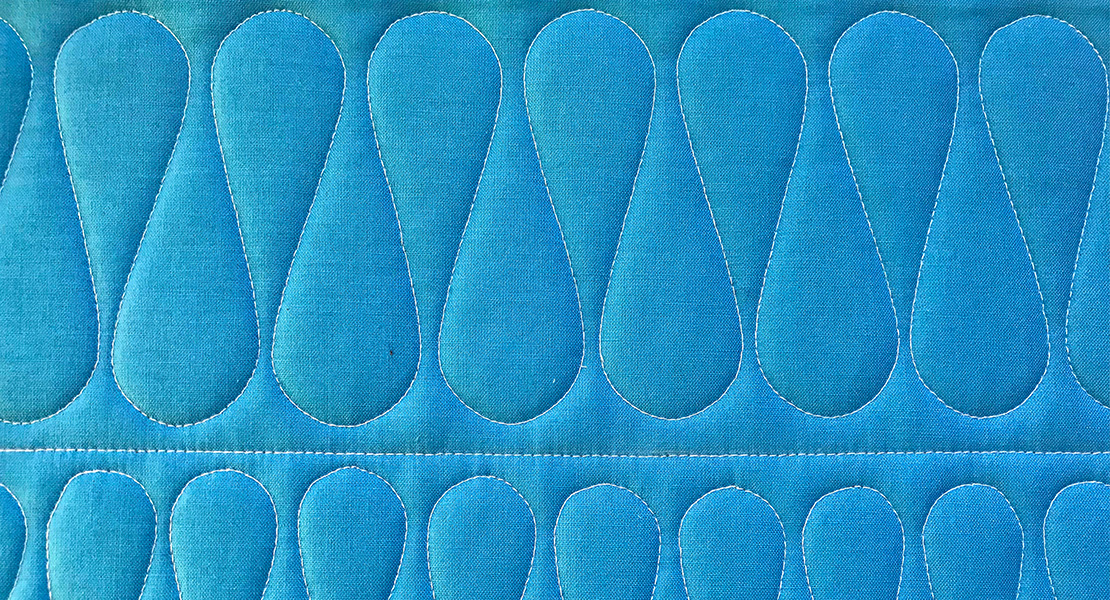
Repeat this row so that you will have 3 rows of 3” ribbon candy across each row of the 9-Patch block. The 3” Ribbon Candy will just fit in the rows.
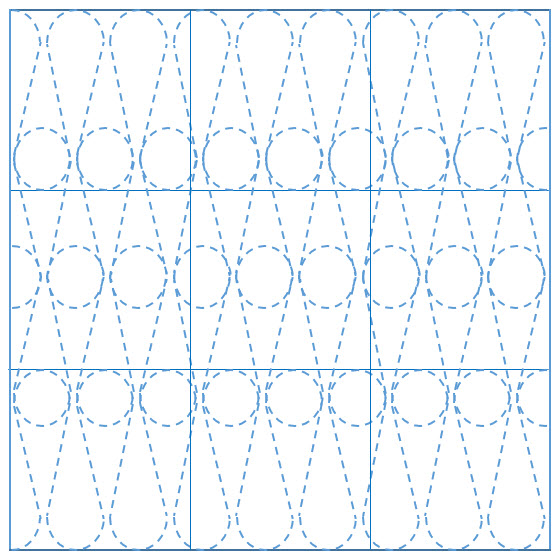
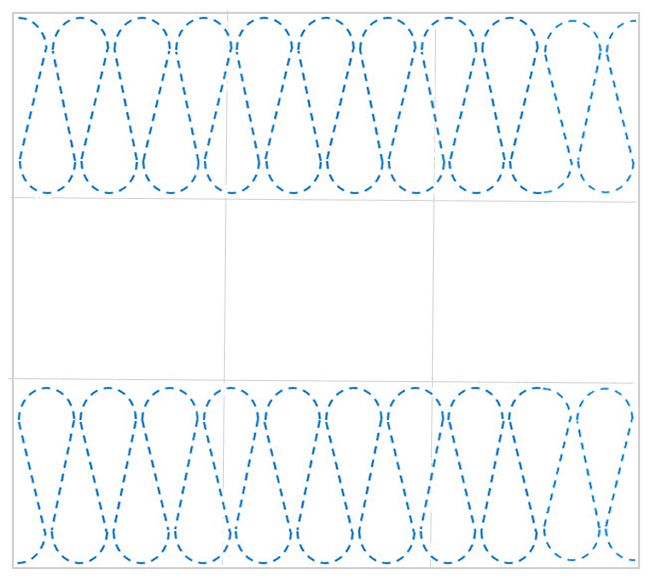
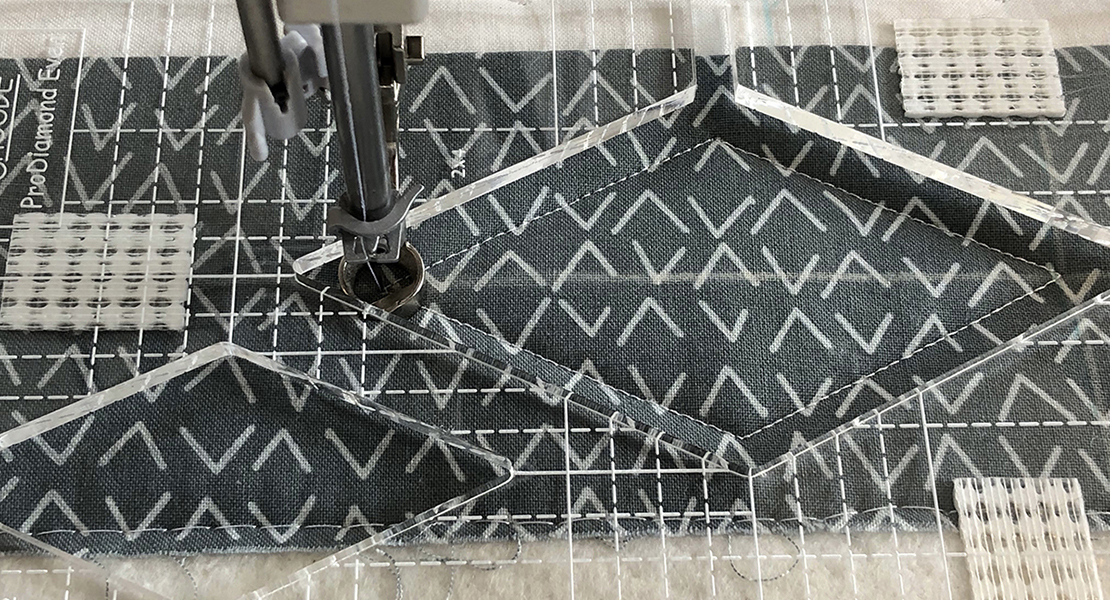
The alternate center is a bit more challenging. While it lays out well on paper, we need to remember that nothing is exact when working with fabric and batting, and I found that I had to do a bit of “fudging” for this to turn out. Basically you will stitch a top row and a bottom row that are mirrored. You will add two mirrored rows in the center that overlap each other and the previously stitched rows forming circles within the rows.
Begin by stitching the first row of ribbon candy across the bottom row of squares per original instructions. Flip the ruler and stitch a mirrored row of ribbon candy across the top row of squares.
You now have two mirrored rows of stitching.
Mark 4 horizontal lines on the 9-Patch, 1” above each horizontal seam line and 1” below each horizontal seam line.

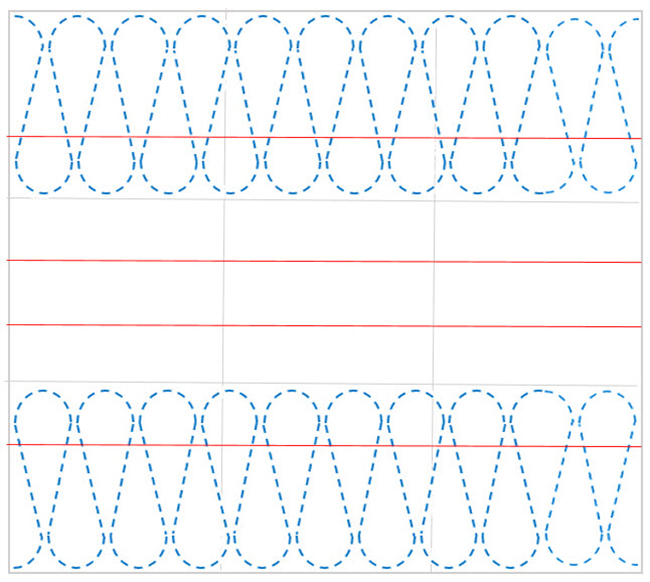
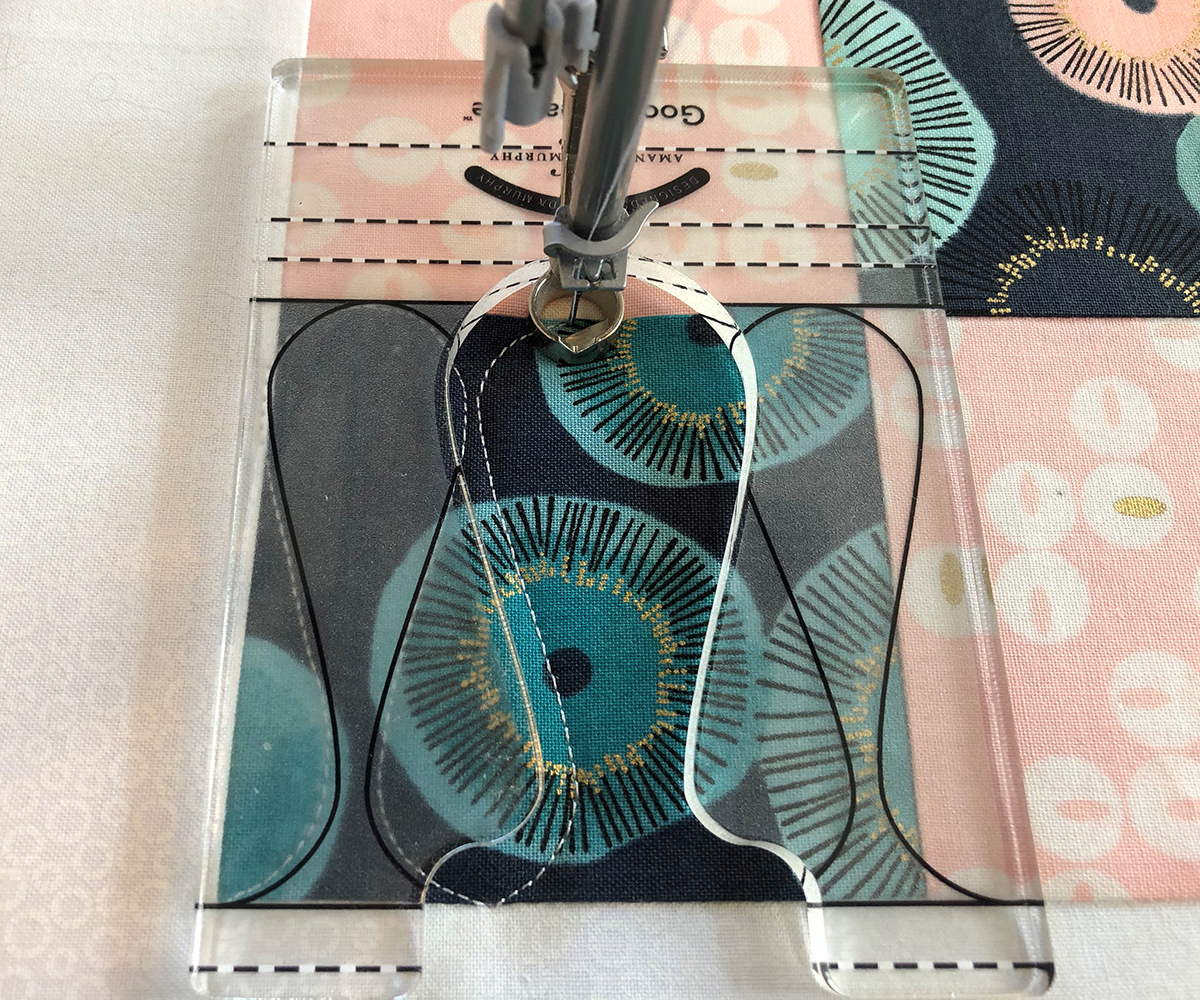
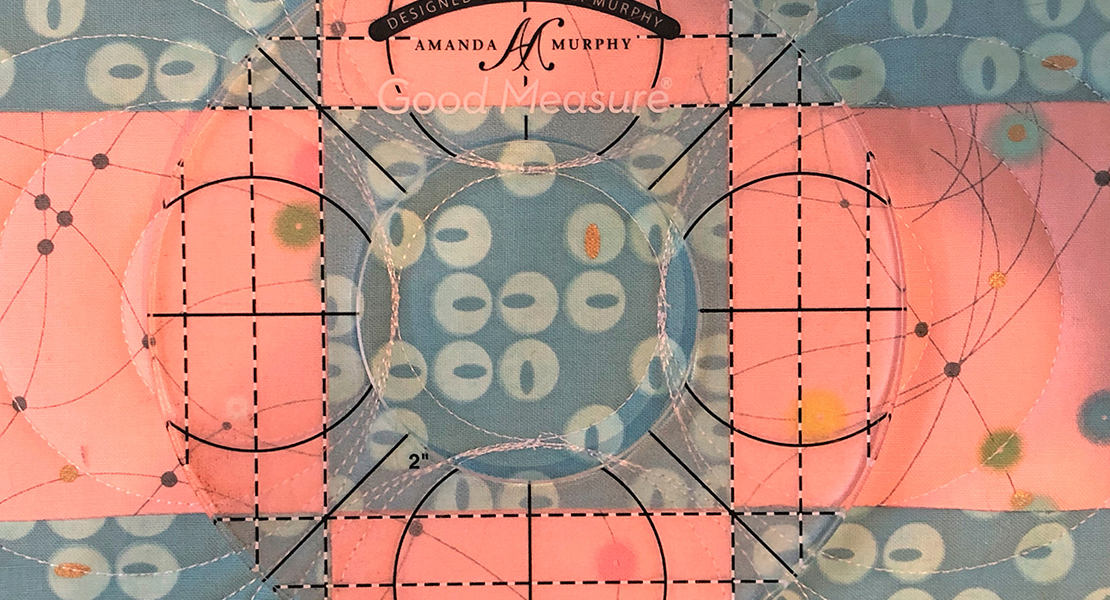
Keeping the ruler in the same direction as the bottom stitched row, place the ruler between the lines indicated. When the designs overlap they should form a circle.
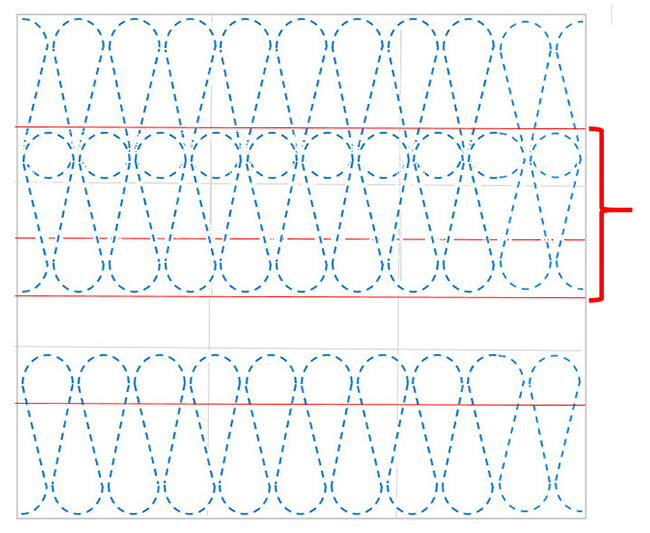

The final row will overlap the row just stitched and the bottom row. The orientation of the ruler is the same as the top row.
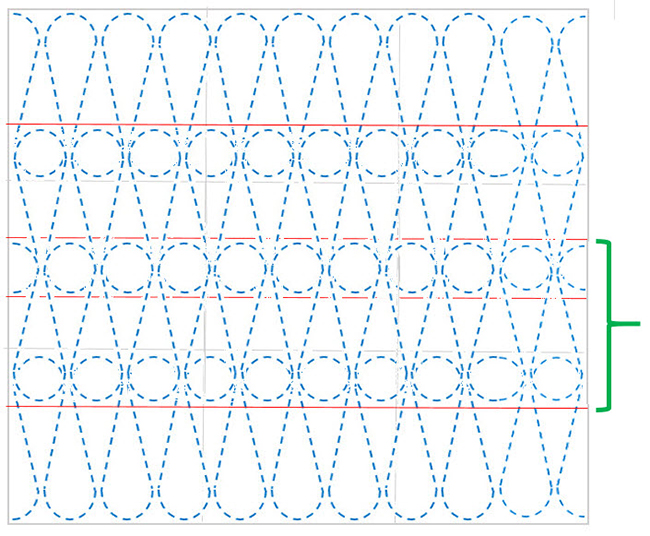
Use the black lines on the rulers to determine if the placement is correct and that you are going to be forming a circle. This may require a bit of “fudging”.

The more advanced center will look like this.
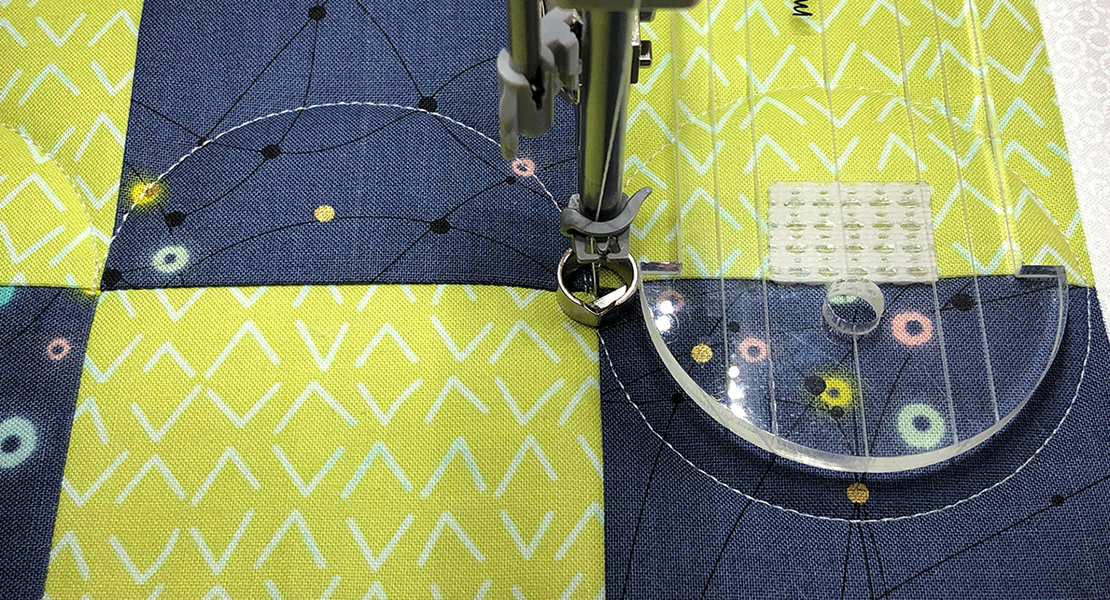
Now it is time to move to the borders. In Month 3, the outside border was stitched with circles. You may want to review Month 3 Alice, can you add a link to Month 3 here? as you will stitch the same type of design in the first border of this block. Refer to the Roadmap. Mark the lengthwise center of each border. Make the line long enough to intersect with the line in the adjacent border forming a square corner. Mark a diagonal line in each corner. Using a 1 1/2″ circle and starting on the horizontal line even with the edge of the 9-Patch, stitch 6 circles. You will always be stitching a circle and a half, alternating clockwise and counterclockwise stitching, so the double stitching is never on the same side.
Stitch rows of circles on all four outer borders.
Place a 2” circle in each corner of the Inner Border. Position the ruler on the diagonal line so that a 1/4″ of each previously stitched circle is visible.
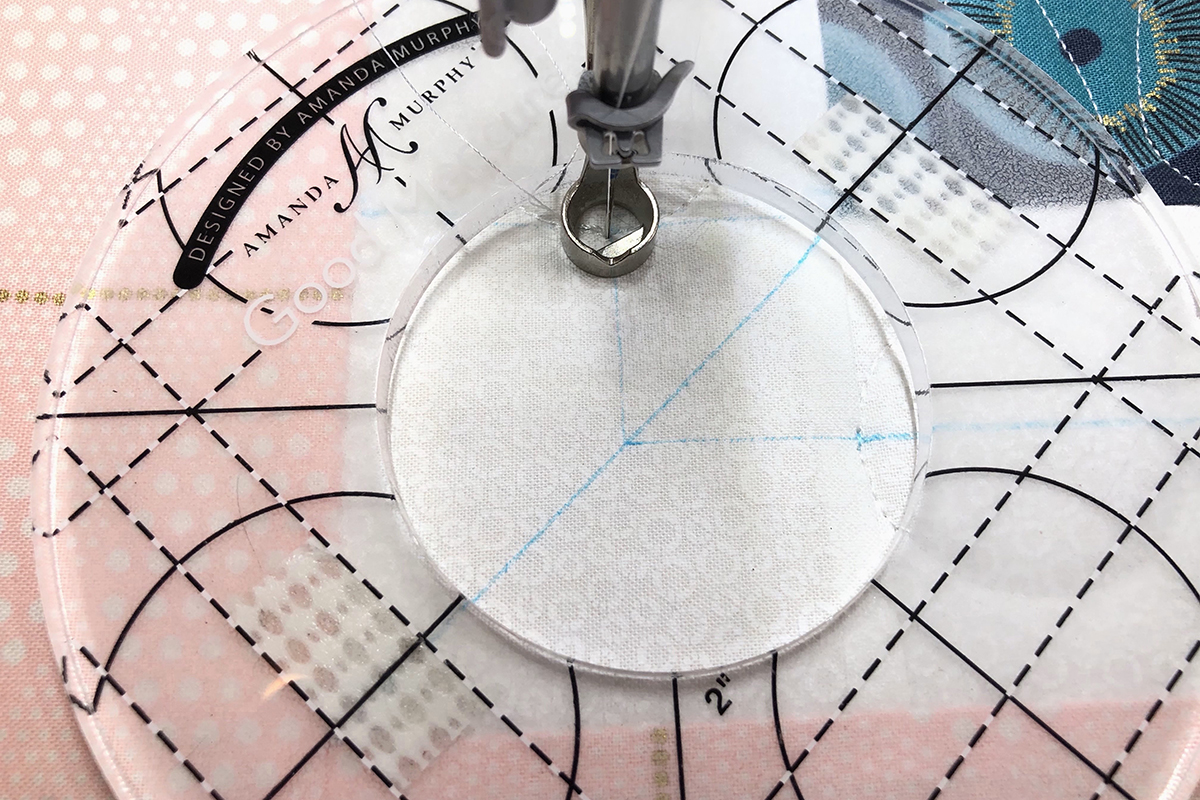
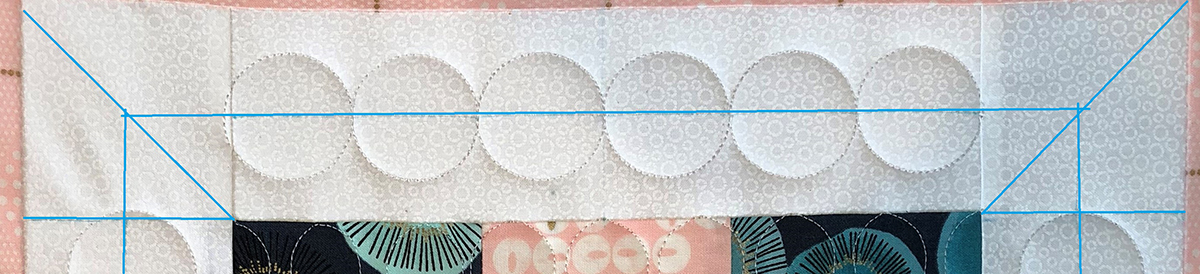
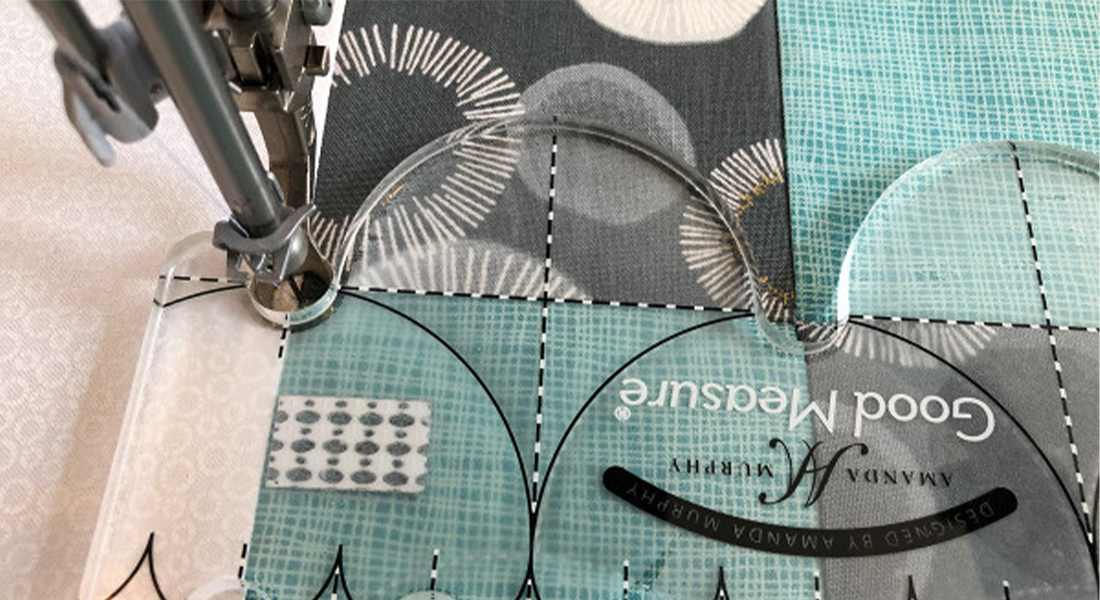
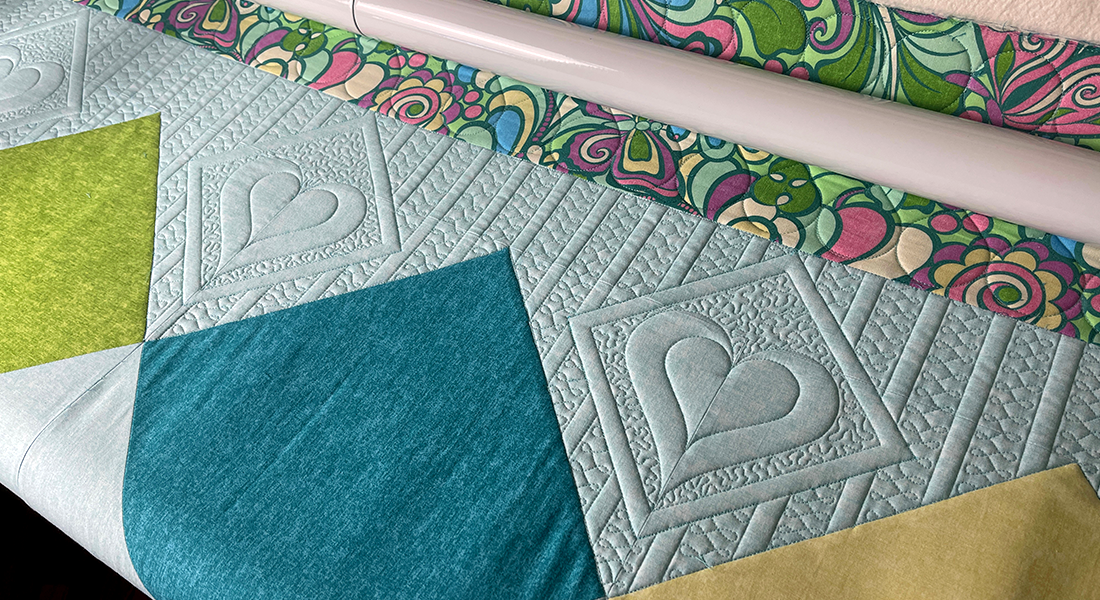
Moving on to the outer border and back to Ribbon Candy…because we are doing a border with a circle in each corner, mark off each corner with the seam line and a drawn line. We will also want to center the Ribbon Candy Row, so mark the vertical center of each border. When I finish the block, I do not want to cut off any stitching, so I used the 2 1/2” Ribbon Candy Ruler. Begin in the center of a border, placing the center of the ruler on the center line. Place the first dotted line on the bottom of the ruler on the seam line. The top dotted line will be 1/4″ from the raw edge of the block.
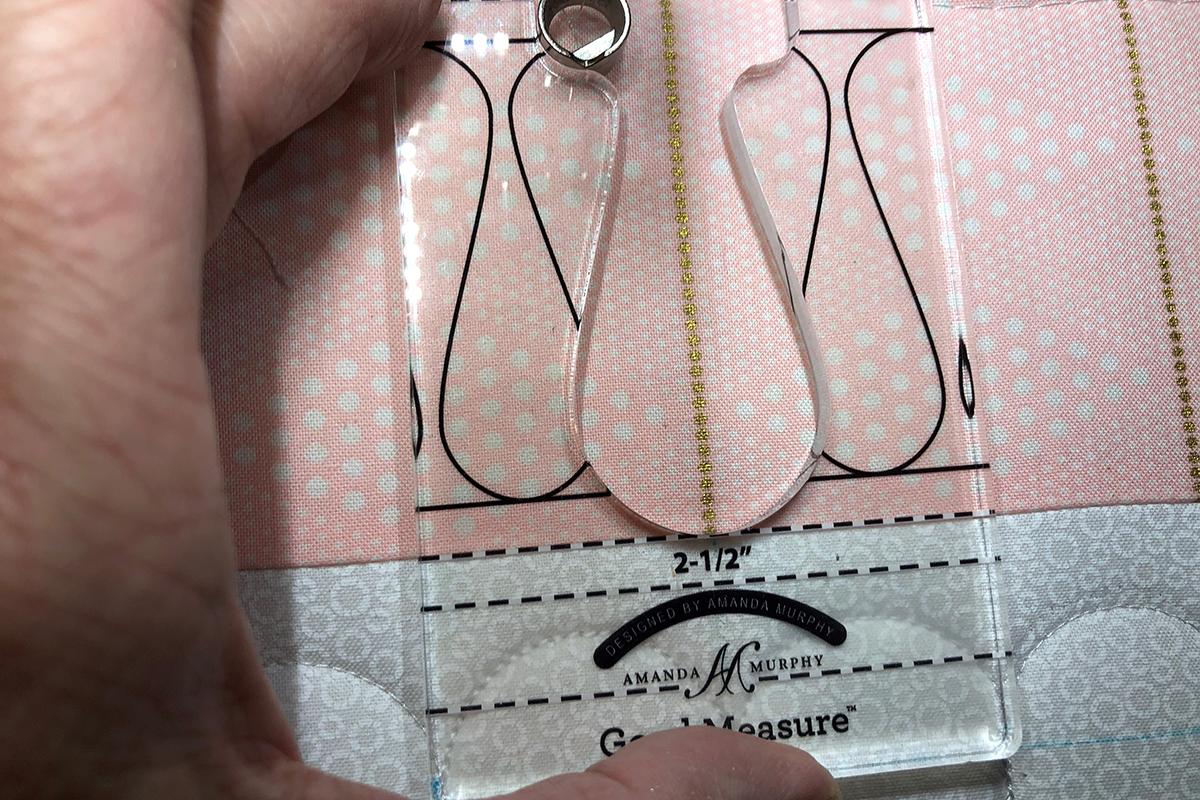
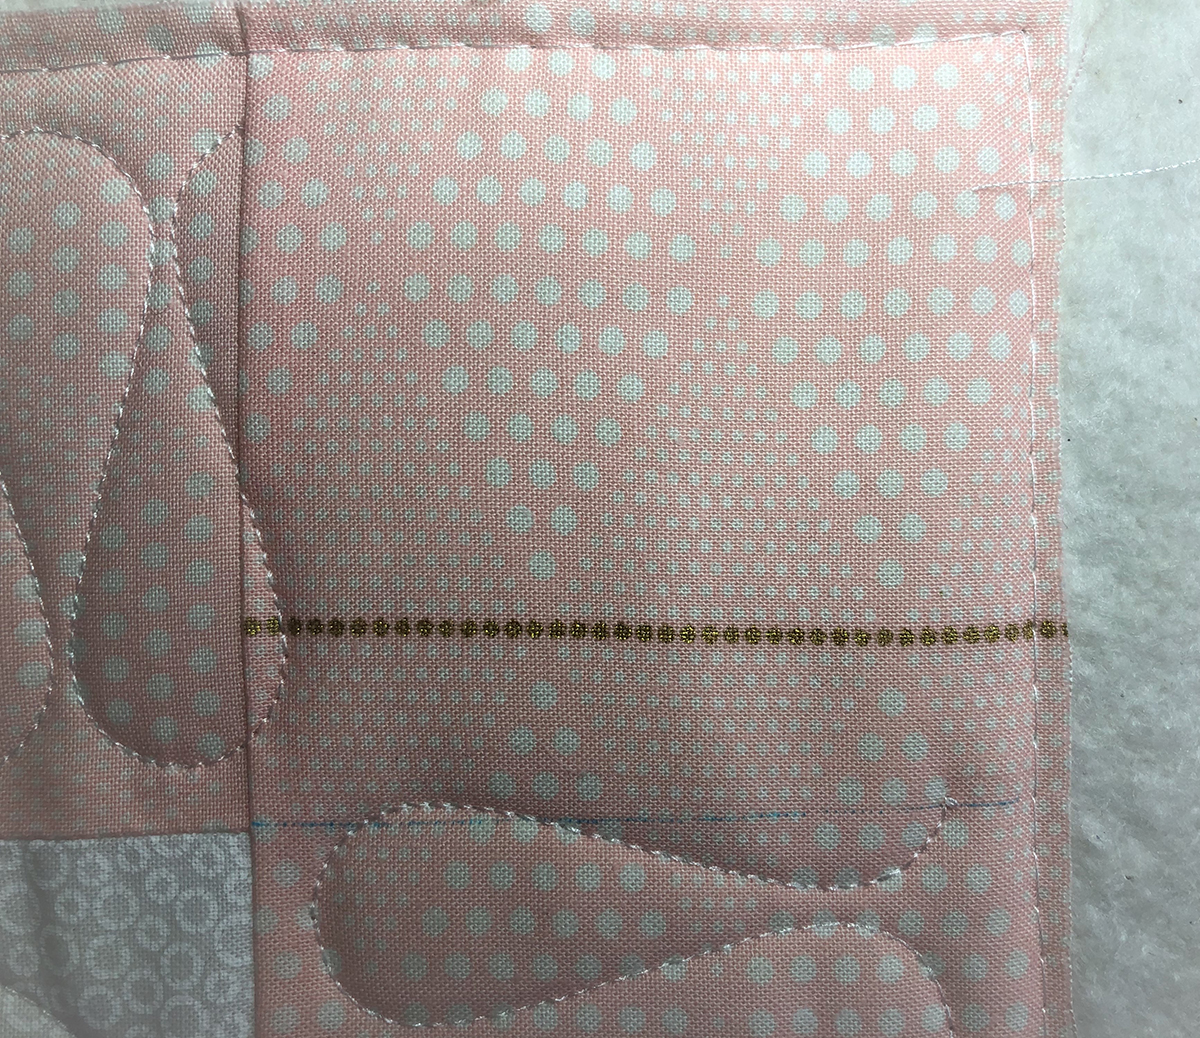
Stitch from the center out in each direction, stopping the design at the seam line or marked line.
When all four borders are stitched add a 2-1/2″ circle in each corner. Make sure that the Ribbon Candy design extends 1/4″ into the circle ruler.
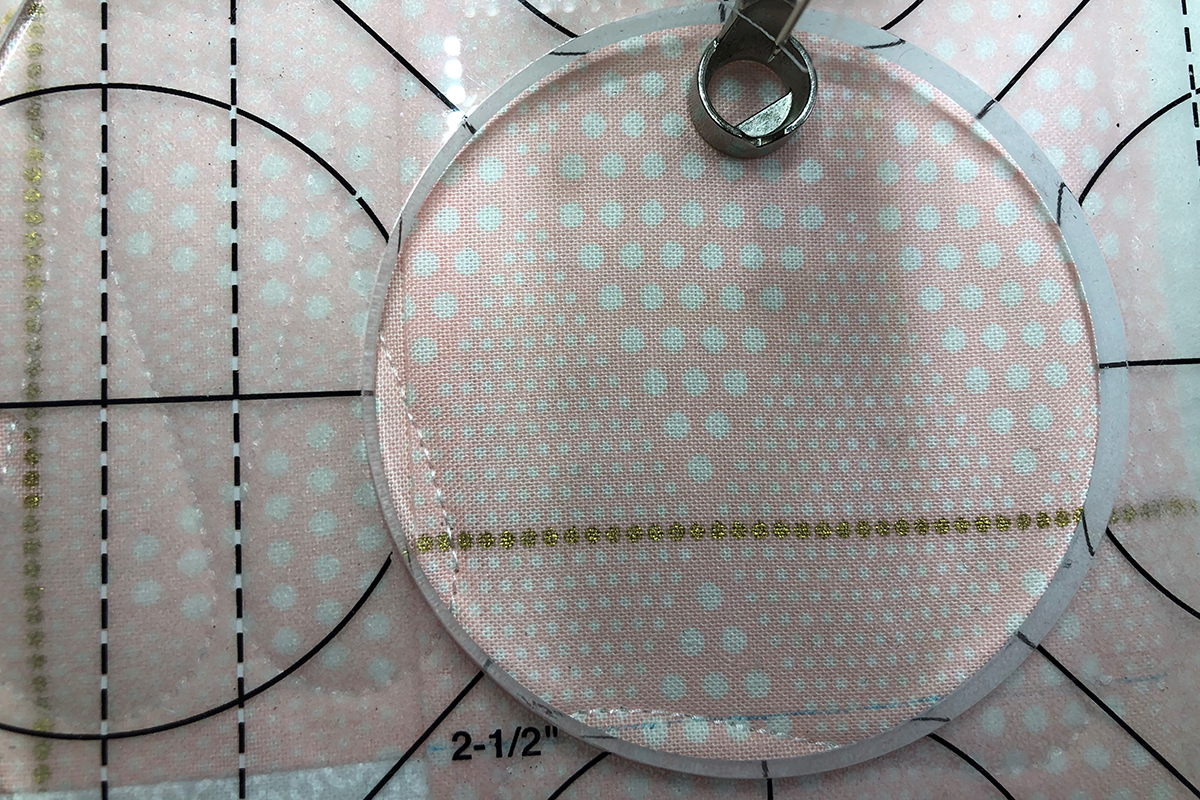
The stitched circle should just touch the Ribbon Candy Design.

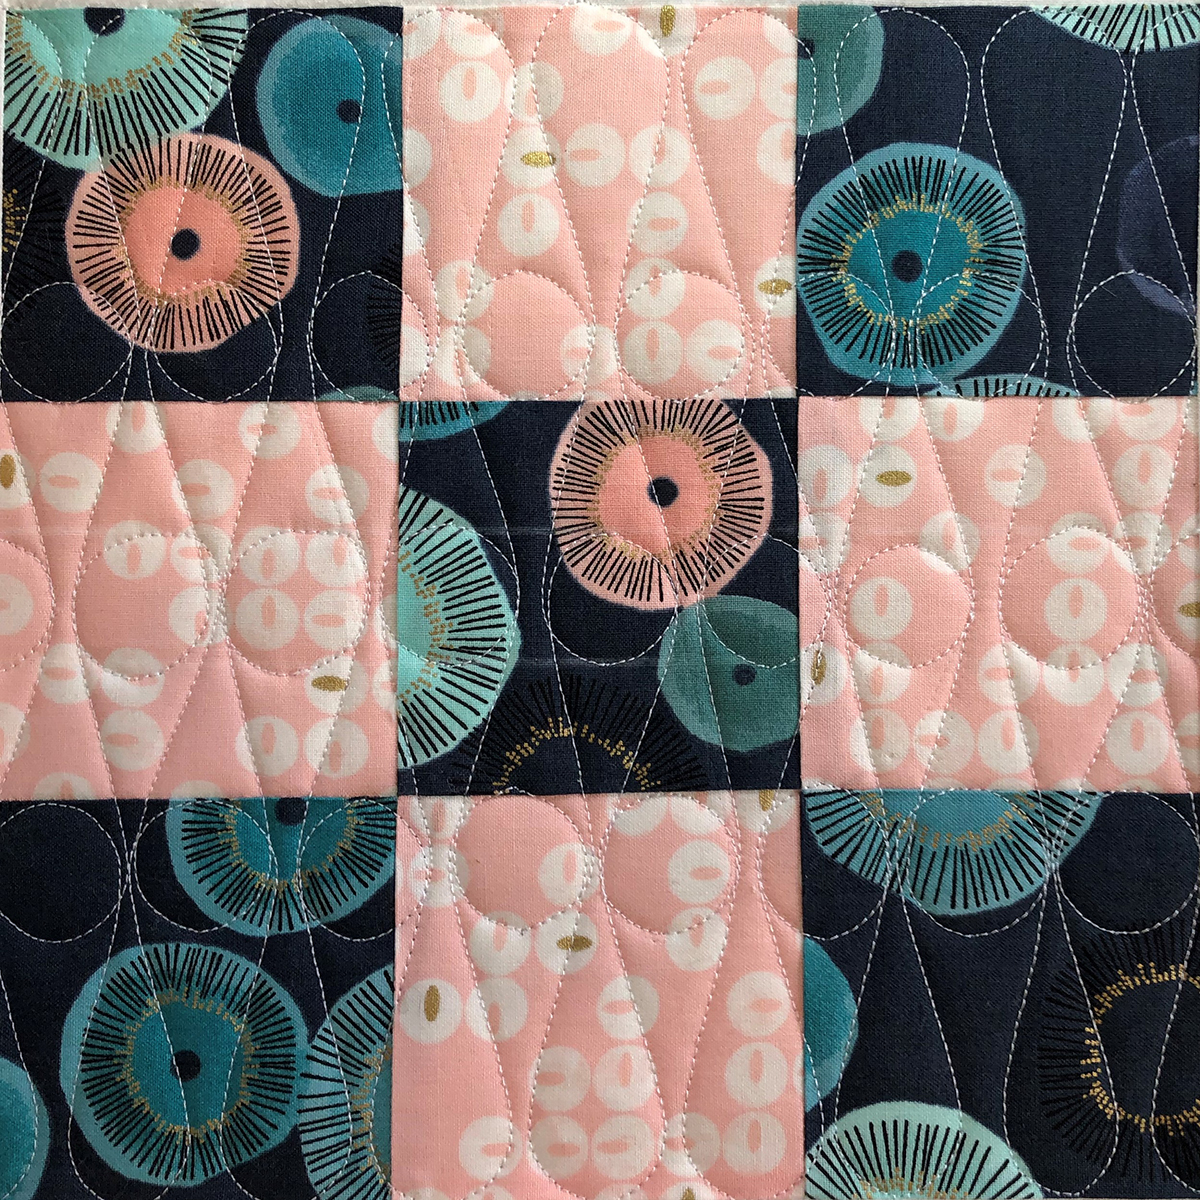
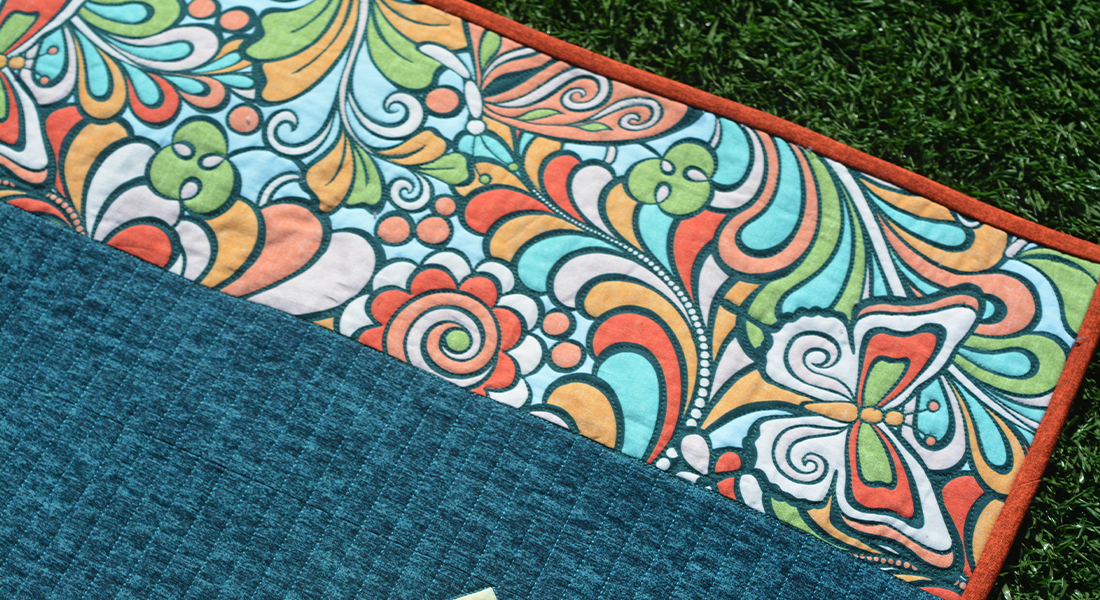
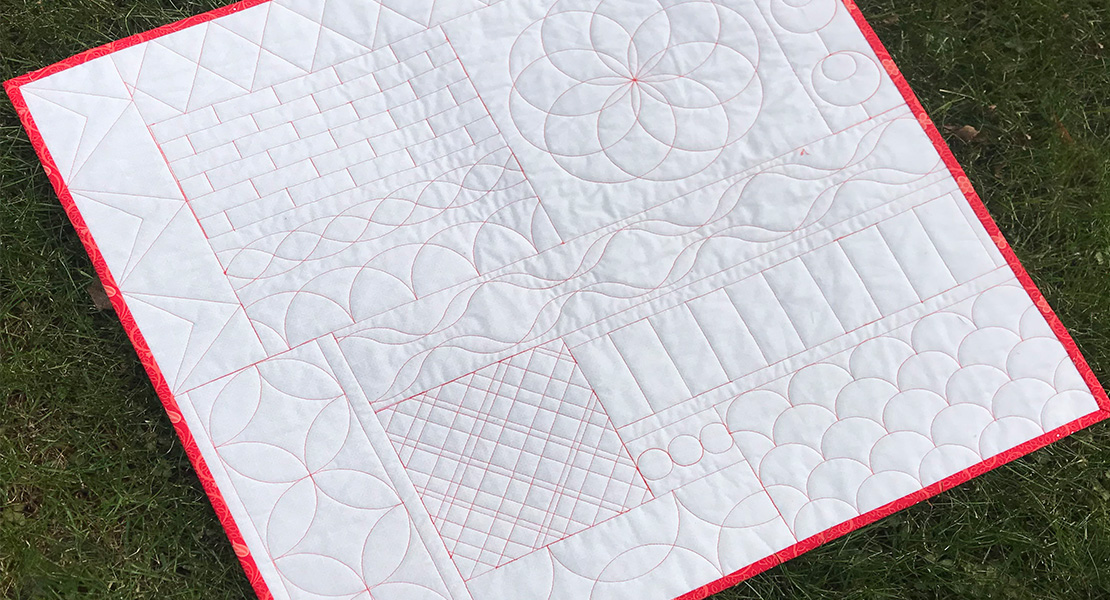
This is our completed Ribbon Candy Block.
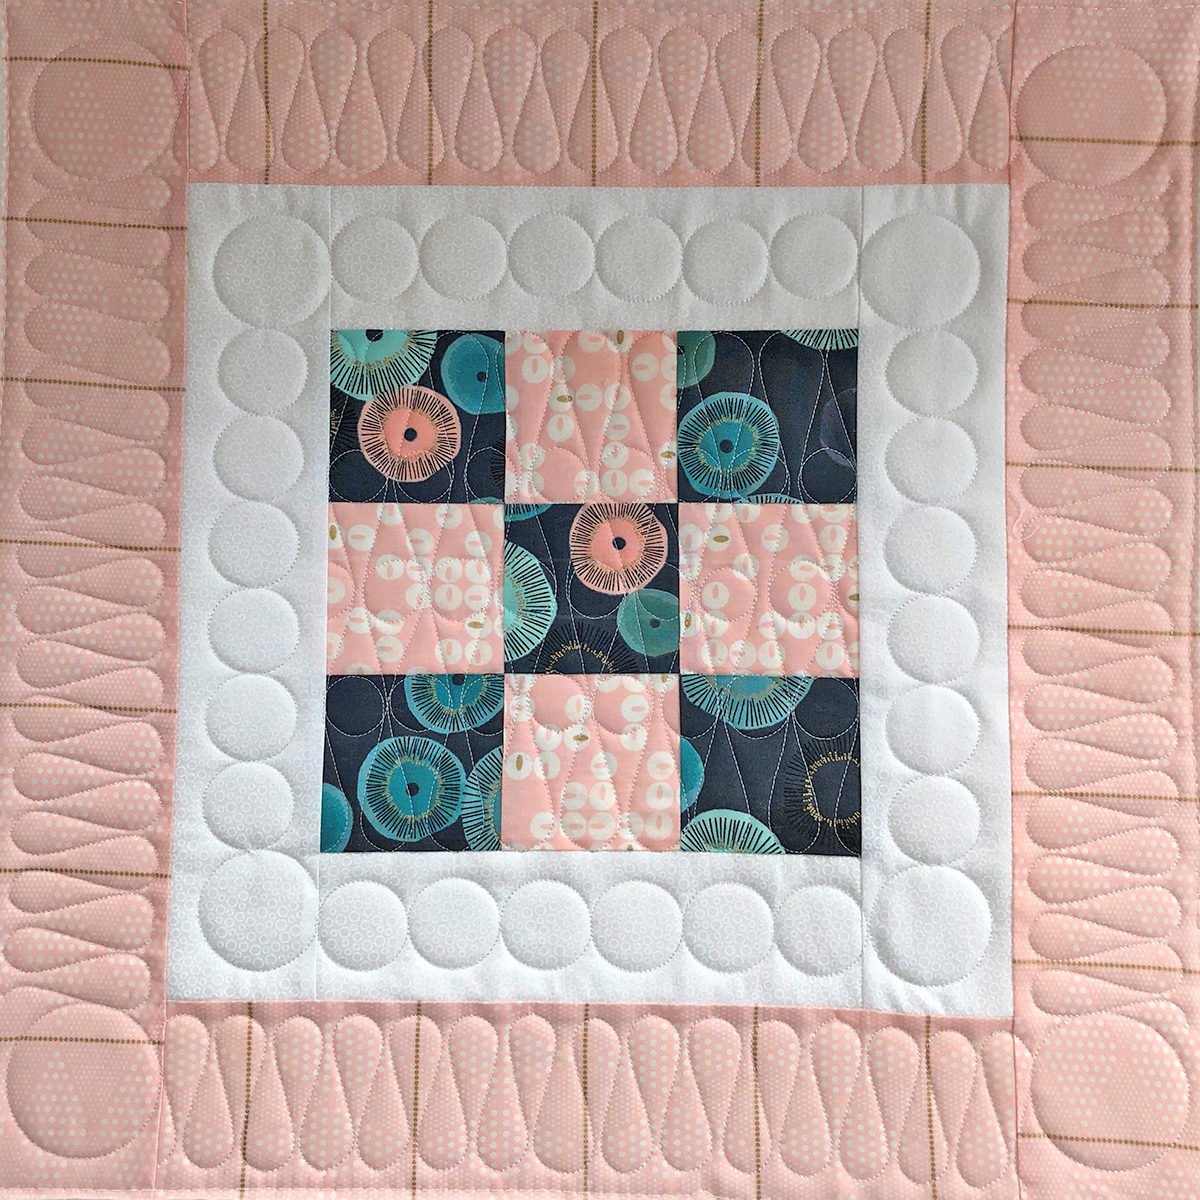
Ribbon Candy is a fun design to stitch and is perfected by using rulers. It is a simple design, but can be used to create more complex design as was done in the center of this block.
Next month we will be taking a look at wave rulers, and oh boy will we have fun with those! I will be using Good Measure Amanda Murphy Every Wave template set.
Rulerwork for Beginner Series
Rulerwork for Beginners, Part 1: Rulers
Rulerwork for Beginners, Part 2: Roadmap
Rulerwork for Beginners, Part 3: Stitching Circles
Rulerwork for Beginners, Part 4: Clamshells
Used Products


What you might also like


One comment on “Rulerwork for Beginners Series, Part 6: Ribbon Candy”
Leave a Reply
You must be logged in to post a comment.

I have been following this series of rulerwork but I must say that I am disappointed that the Bernina rulers that I purchased are not really being fully utilized in the tutorials. I don’t have any of the alternative ones that are being demonstrated and cannot purchase them at this time.