Free-Motion Quilting with Rulers
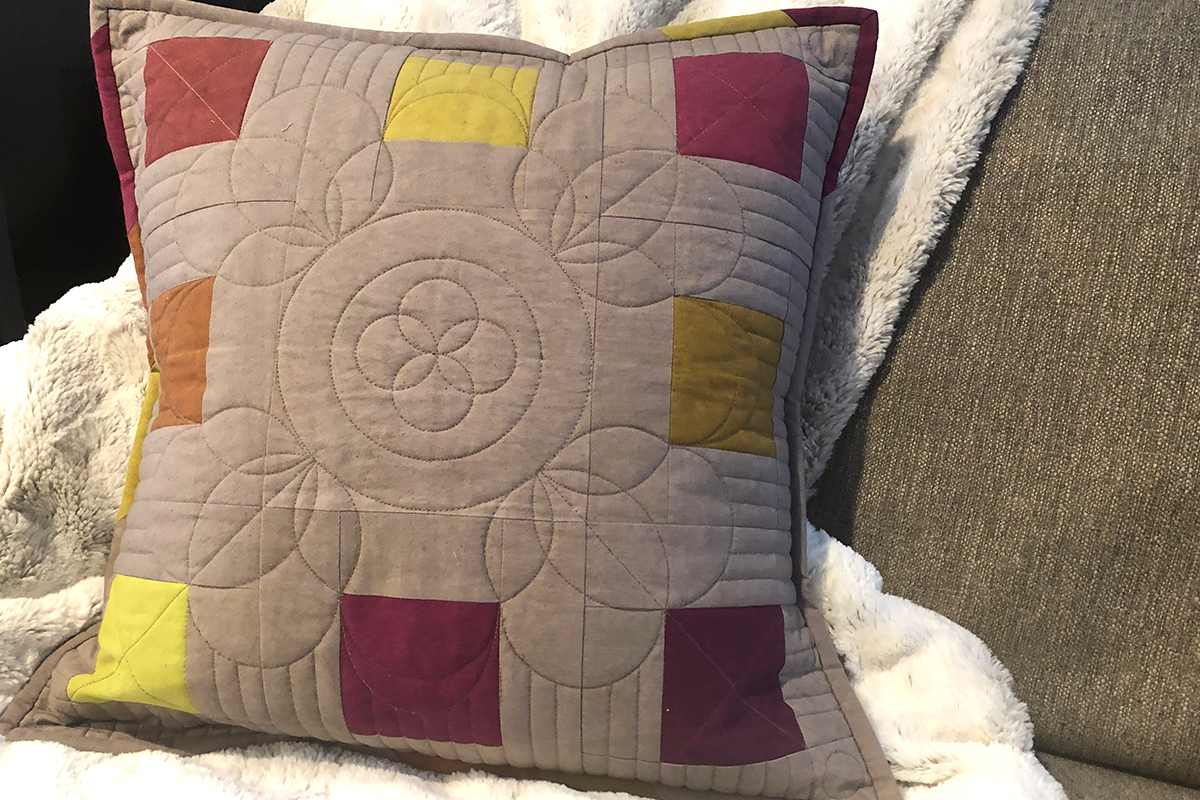
Customize your home décor with new throw pillows, quilted using free-motion quilting methods with rulers.
Materials to Create an 18” x 18” Pillow
- BERNINA 770 QE
- 1/2 yd main background fabric
- 1/8 yd of eight different accent fabrics
- 5/8 yd backing fabric
- 1 1/4 yd muslin
- 1 1/4 yd batting
- 18” pillow form
- Patchwork Foot #97D
- Adjustable Ruler Foot #72
- Straight Stitch Plate
- #80 Jeans Needle
- Cotton thread for piecing and quilting
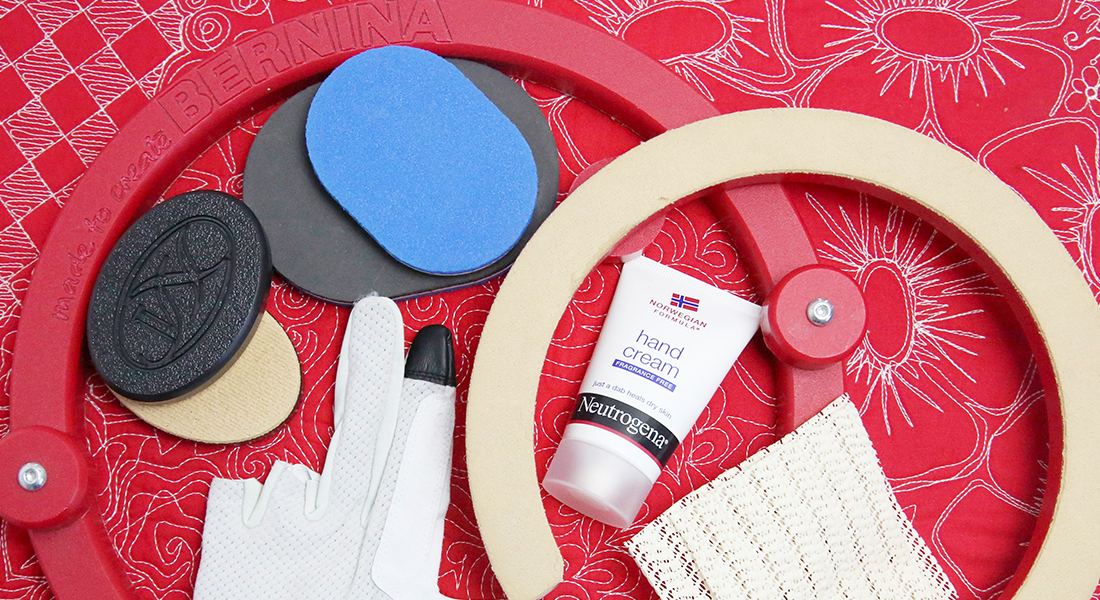
- Rulers
- Straight Edge (From BERNINA Table Model Set)
- Set of Circles (From BERNINA Frame Model
Set or Amanda Murphy’s Circle Set) - 2.5 Oval (From BERNINA Table Model Set
Download the Free-motion Quilting with Rulers Technique Handout.
INSTRUCTIONS
Cutting:
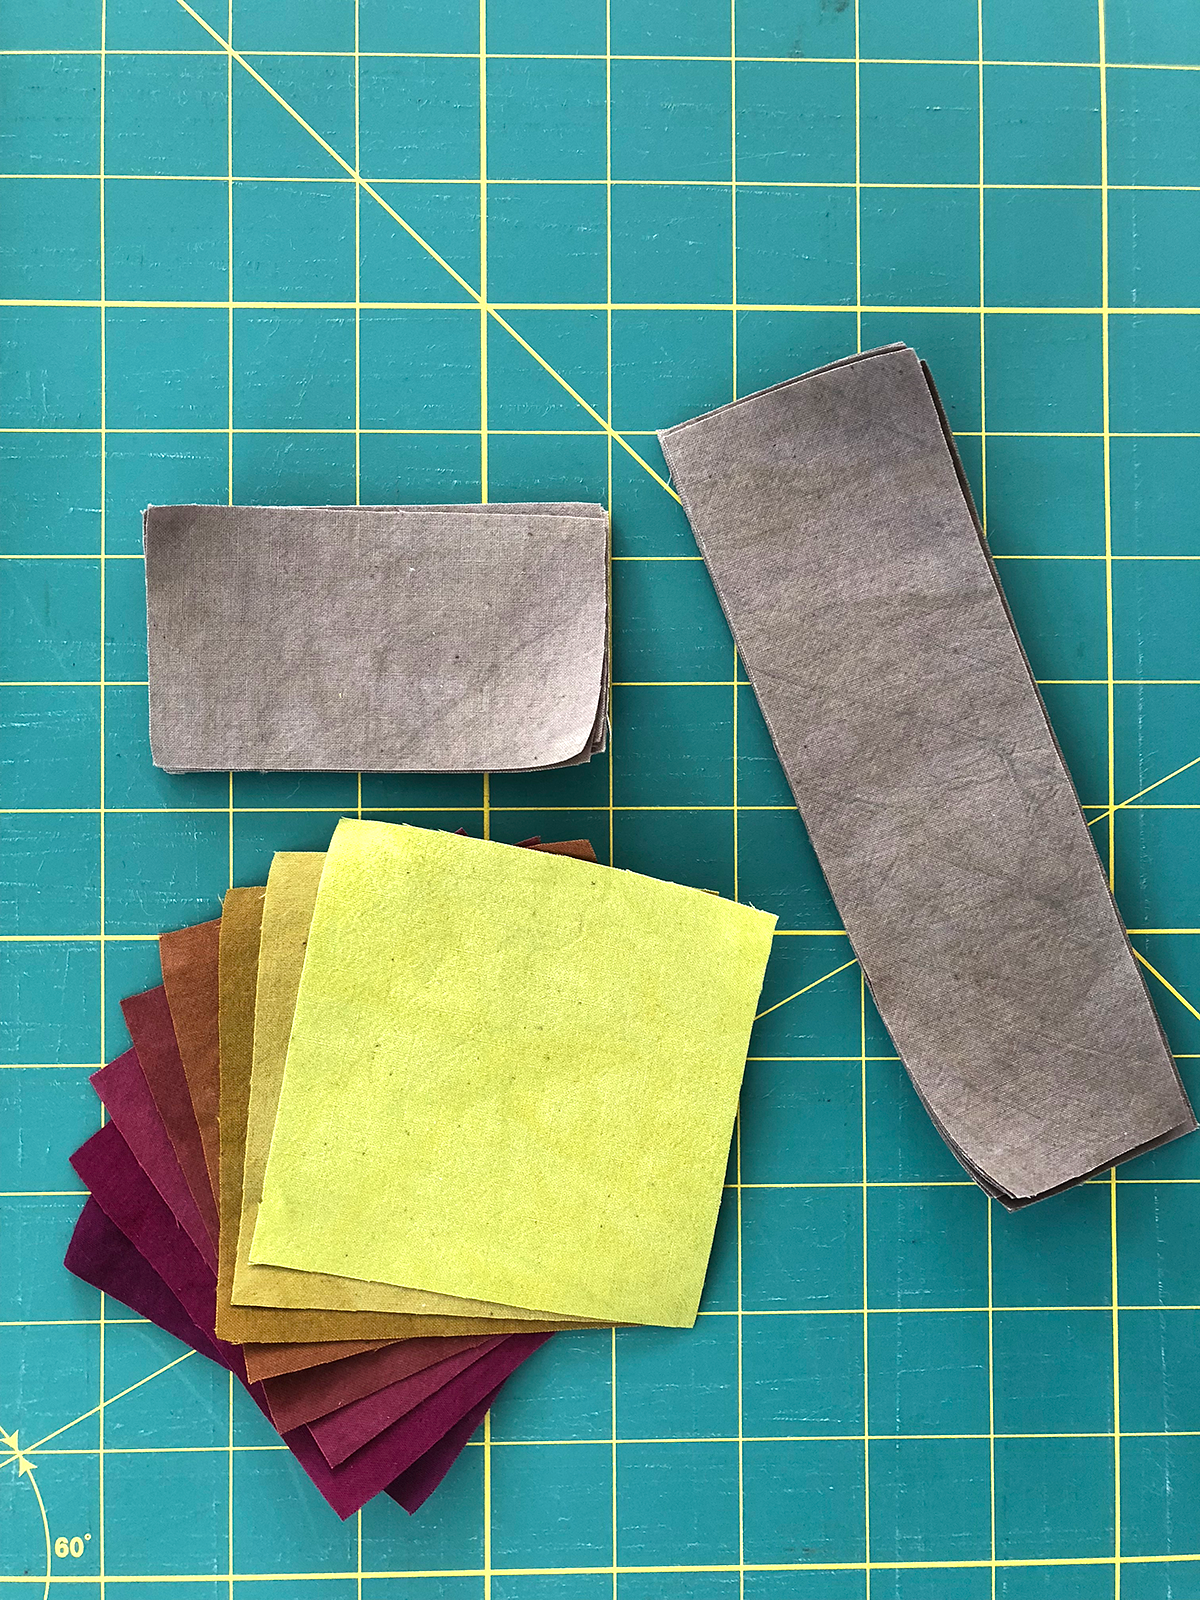
Cut 4 strips 2” wide x width of fabric from main color.
From these strips:
• Cut 16 pieces 3 ½” long
• Cut 16 pieces 6 ½” long
Cut 1 square 6 1/2” from main color.
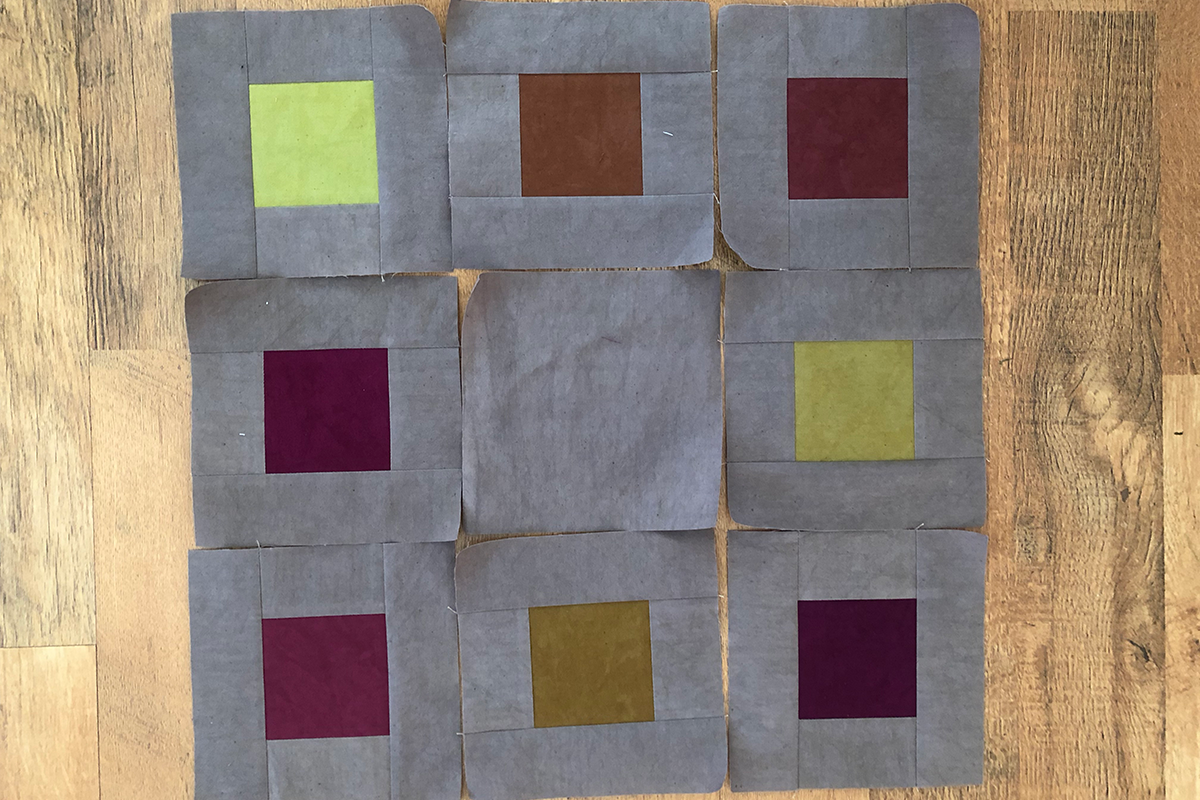
Cut a 3 1/2” square from each of the 8 accent colors.
Sewing:
Set up the sewing machine with the Straight Stitch Plate, Patchwork Foot #97D foot and a #80 Jeans Needle. Thread the machine with cotton thread.
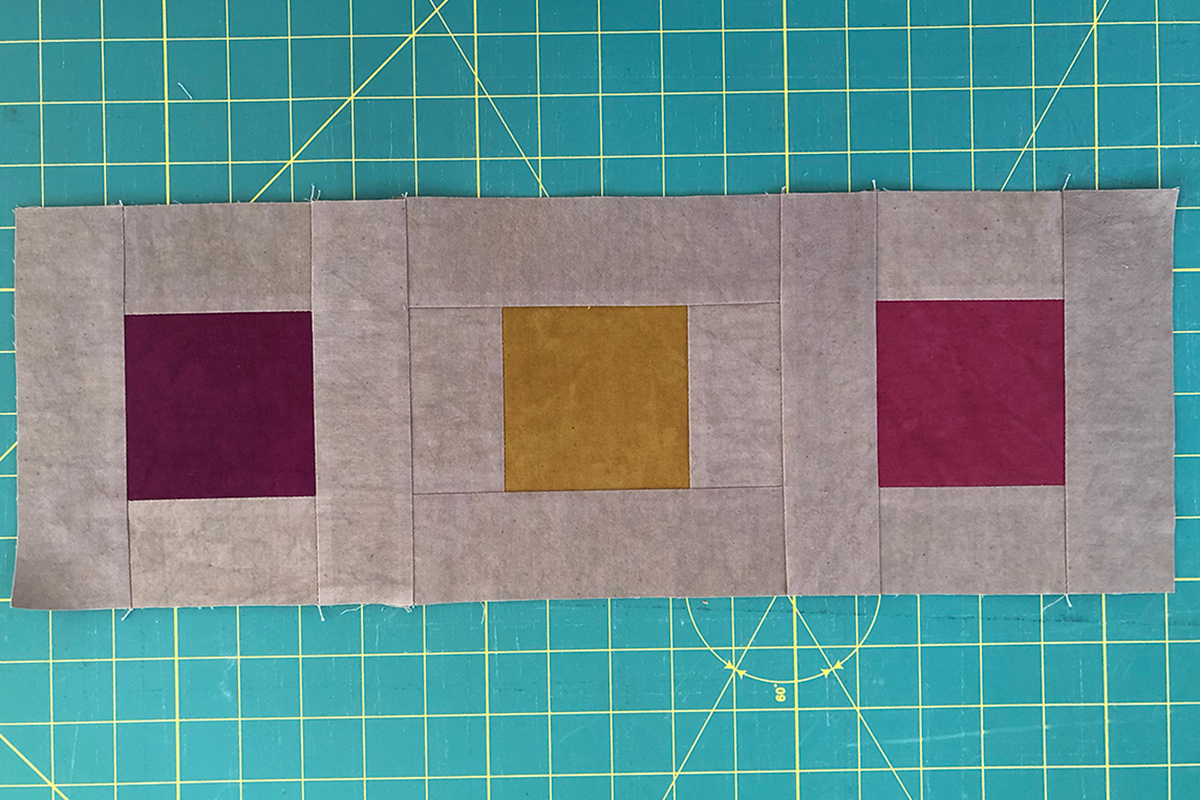
Stitch a 3 1/2” x 2” strip to each side of the eight 3 ½” Squares. Press the seams towards the strips.
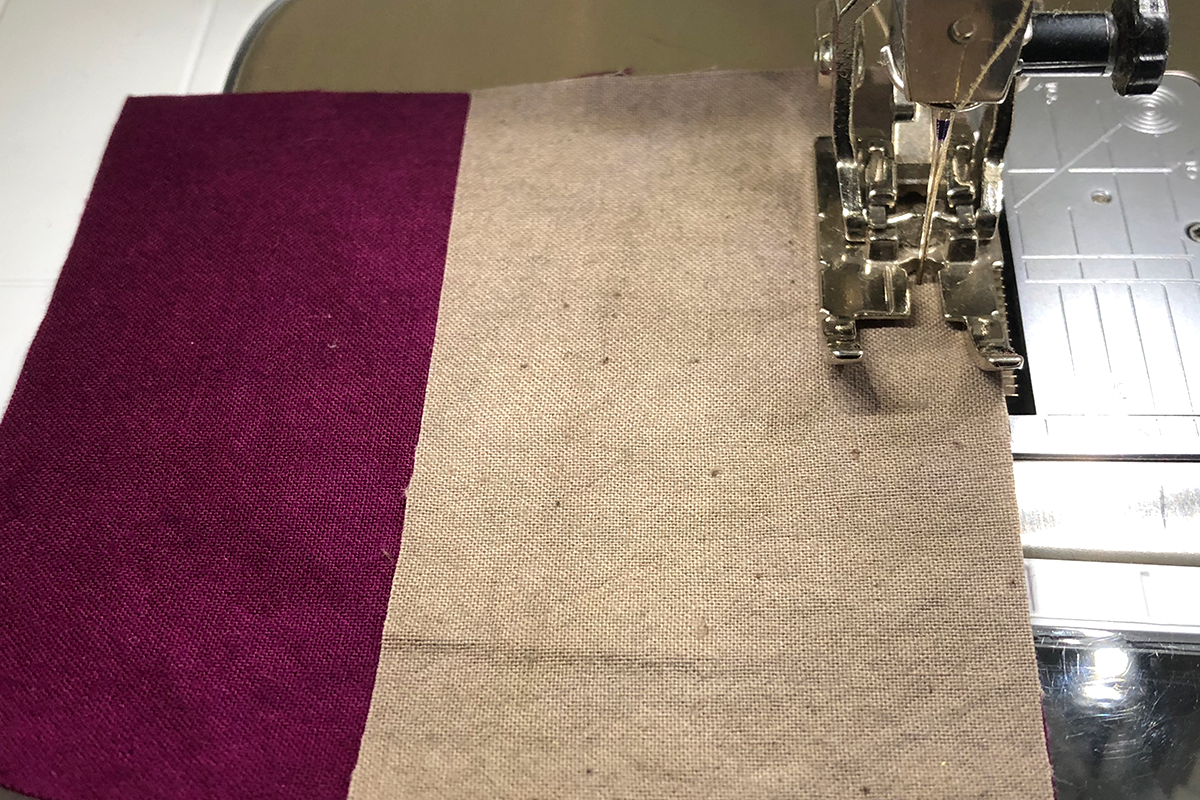
Stitch a 6 ½” x 2” strip to the other two sides of the 3 1/2” squares. Press seams towards the strips.
Lay out the pillow top with the 6 ½” solid square in the center surrounded by the 8 pieced squares.
Sew the blocks together in 3 rows of 3.
Sew the rows together.
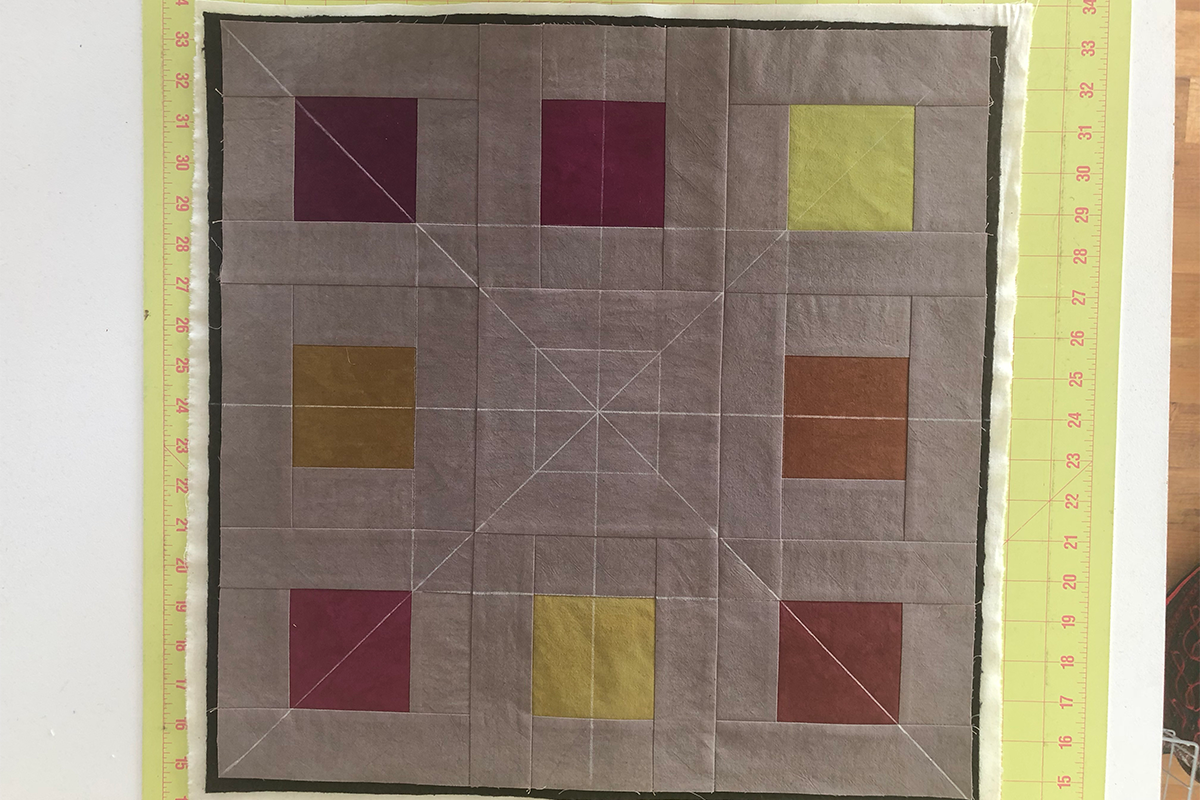
Cut a 20” square of muslin and batting. Layer with the pillow top.
Mark the pillow top with vertical, horizontal and diagonal centering lines.
Quilting
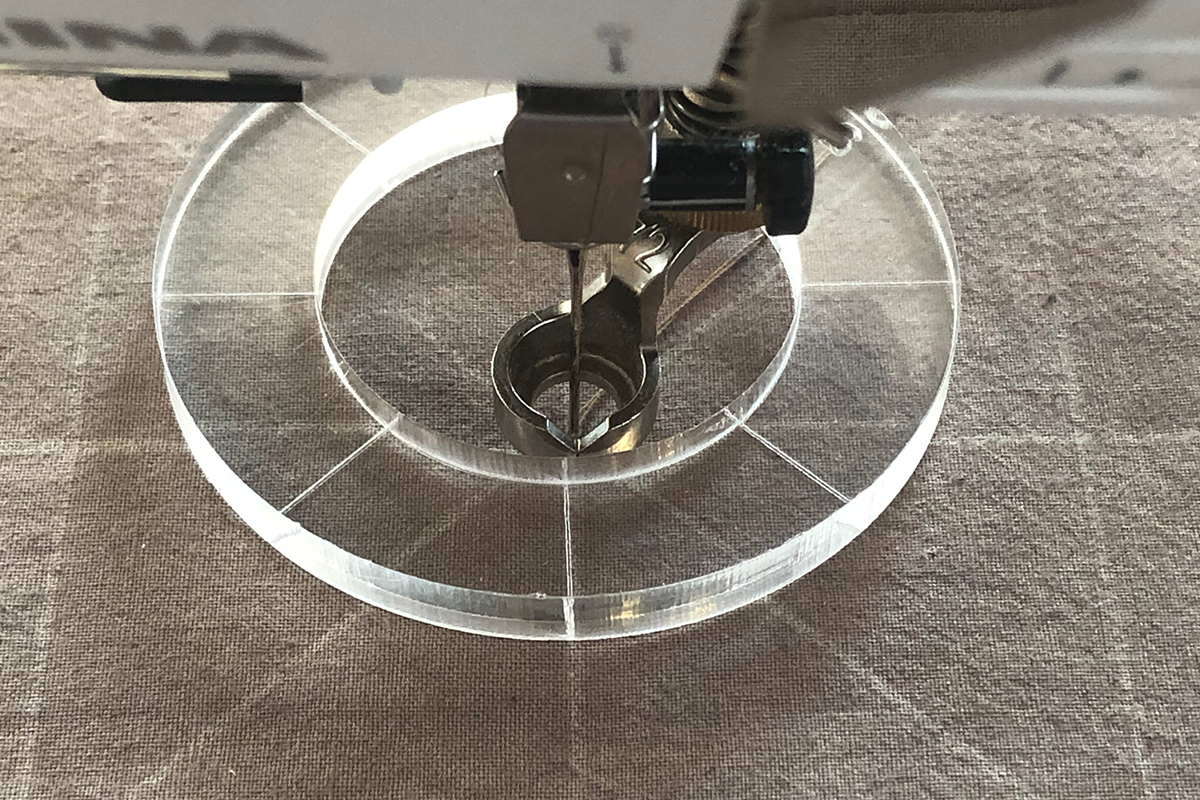
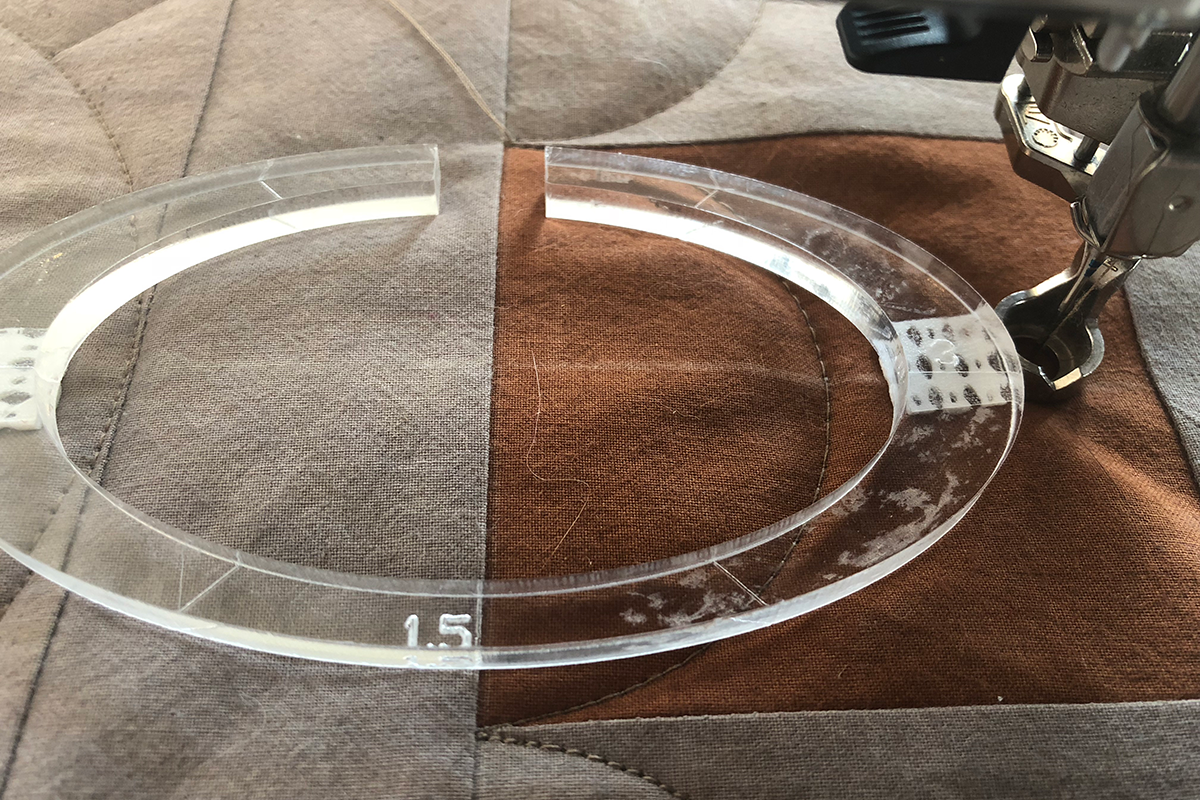
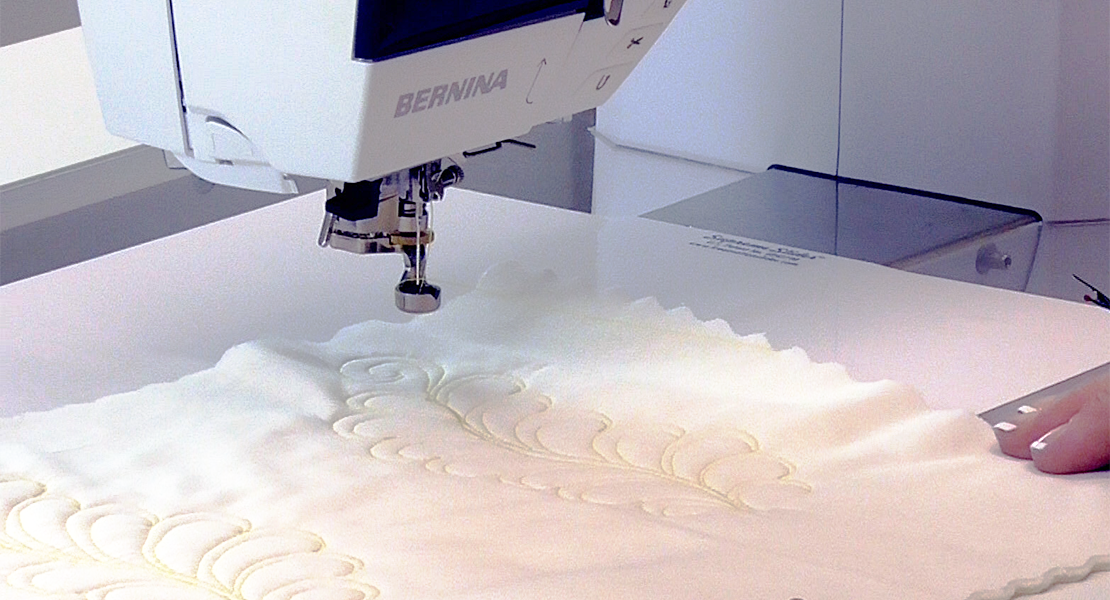
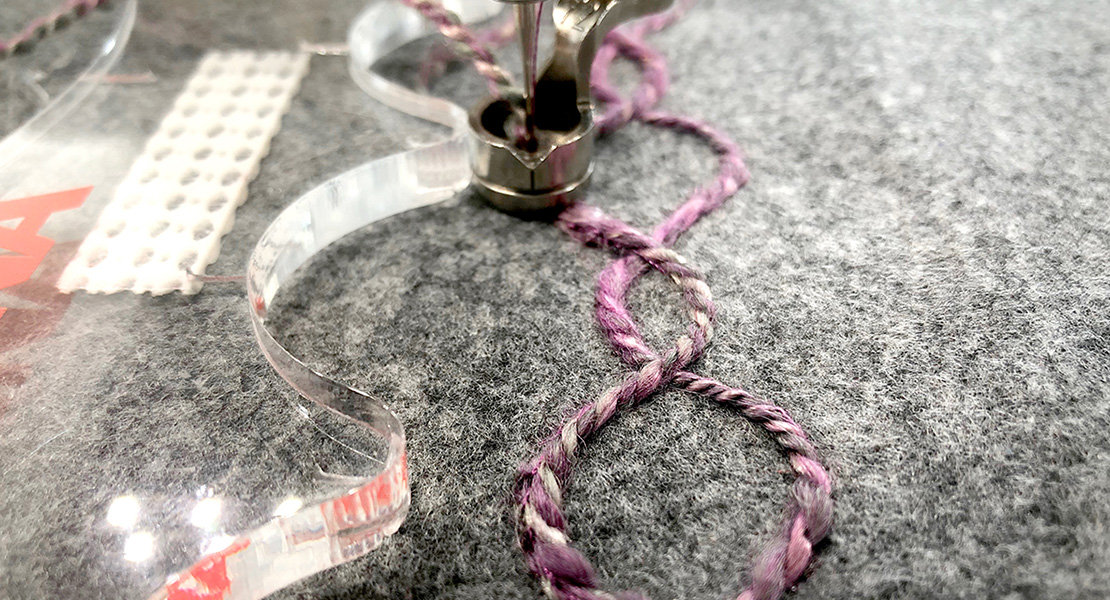
The pillow is quilted using rulers. Rulerwork is done by attaching the Adjustable Ruler Foot #72 to the machine.
Always lower the needle into the fabric where you want to begin stitching and lower the foot before placing a ruler next to the foot. Let the ruler be a guide that the foot gently runs along, whether a straight line or a curve.
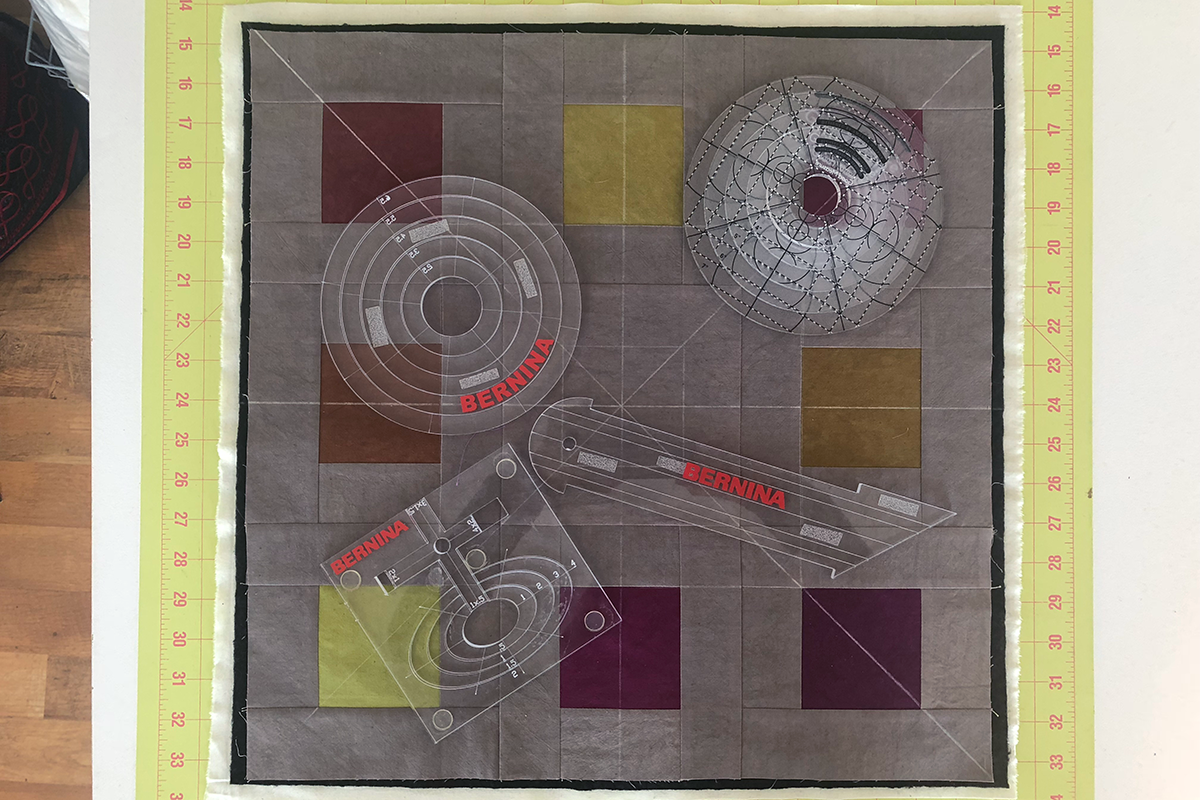
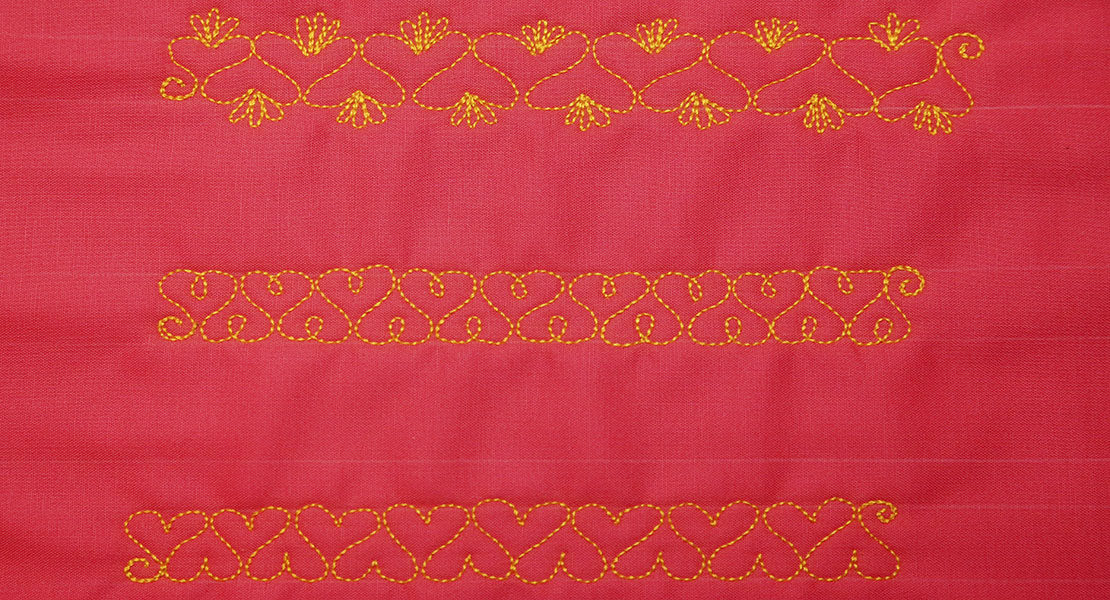
Use circles, half circles, partial circles and curves and straight edge rulers to quilt the pillow top. Use the guide below for quilting.
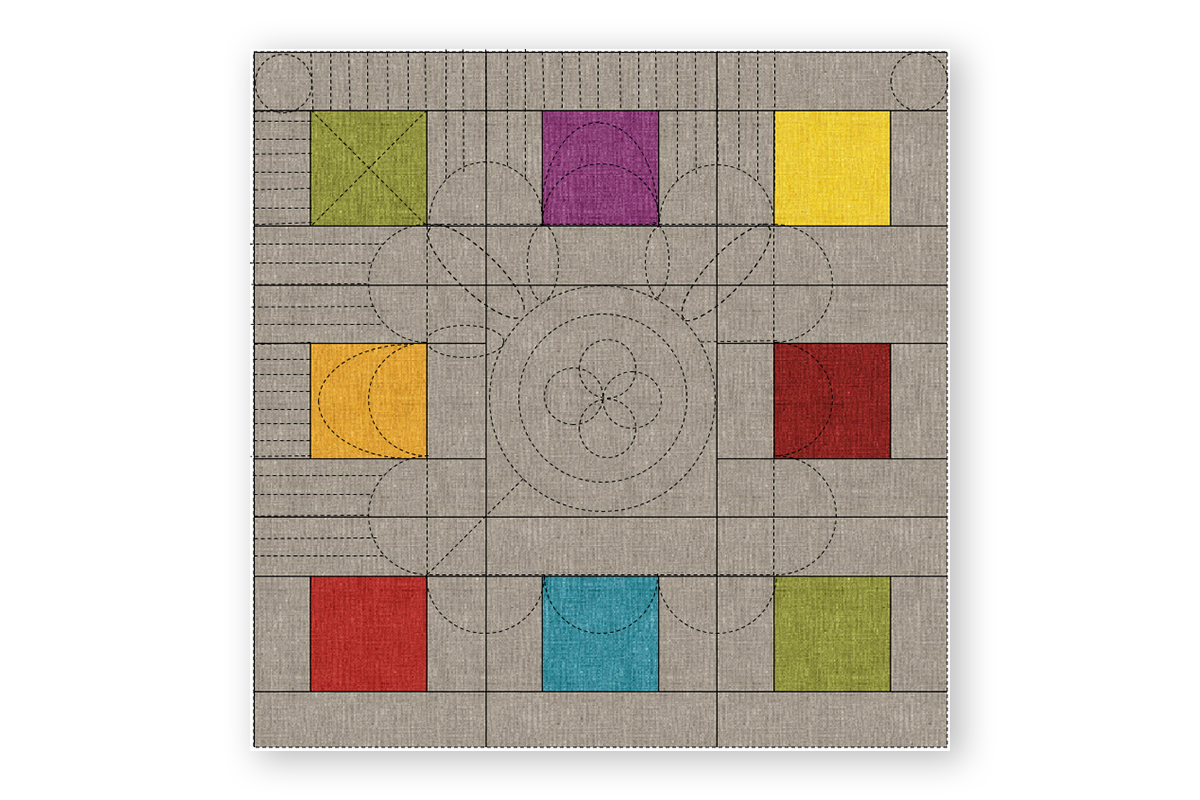
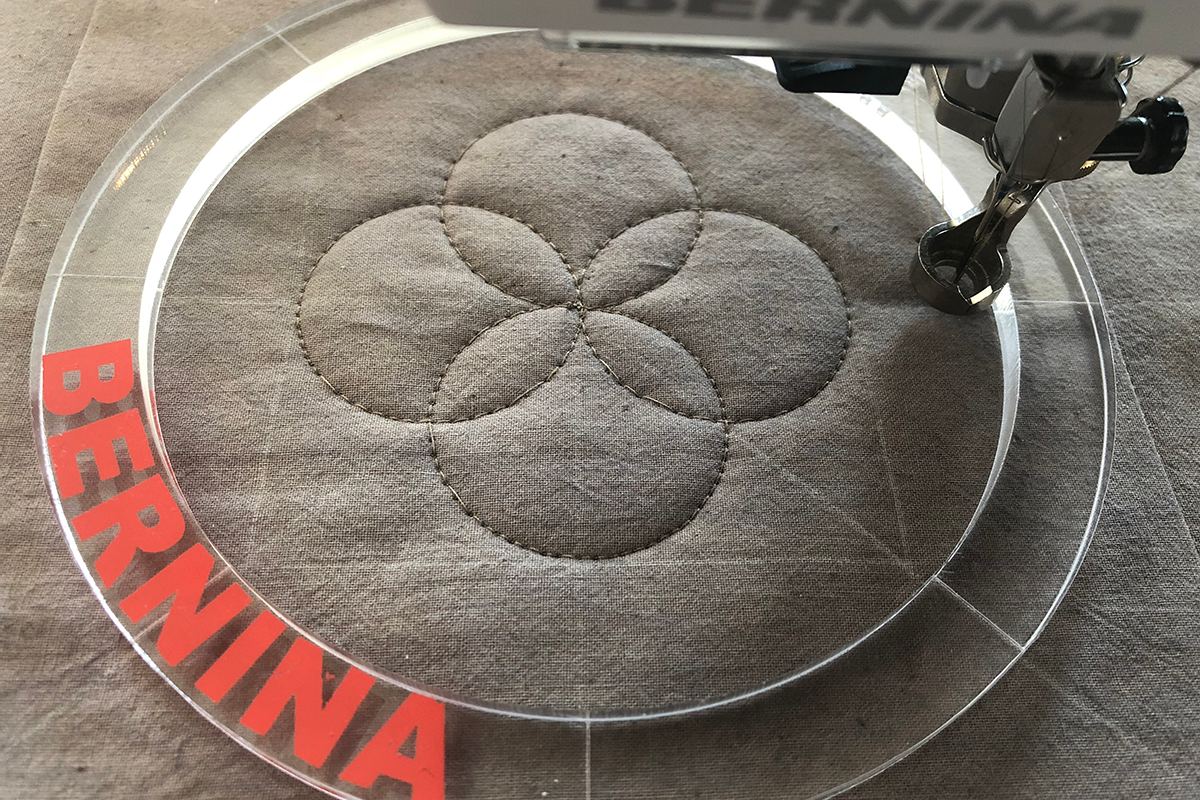
Begin in the center of the pillow. Stitch 4 “Spirograph” circles.
Place whatever circle ruler you are using in the center of the pillow. Lower the needle into the center and pull up the bobbin thread. Lower needle back into center of the pillow, then lower the foot.
Place the circle ruler so that it is centered on the vertical line and the bottom edge of the circle is against the front edge of the foot.
Stitch a circle ending with needle lowered into the start point.
Move the ruler so that the center line of the ruler is on the horizontal line and the left edge of the circle is against the left edge of the foot. Stitch a circle ending with needle lowered into the start point.
Move the ruler so that the center line of the ruler is on the vertical line and the top edge of the circle is against the back edge of the foot. Stitch a circle ending with needle lowered into the start point.
Move the ruler so that the center line of the ruler is on the horizontal line and the right edge of the circle is against the right edge of the foot. Stitch the final circle ending in the center of the pillow. Pull up bobbin thread and secure.
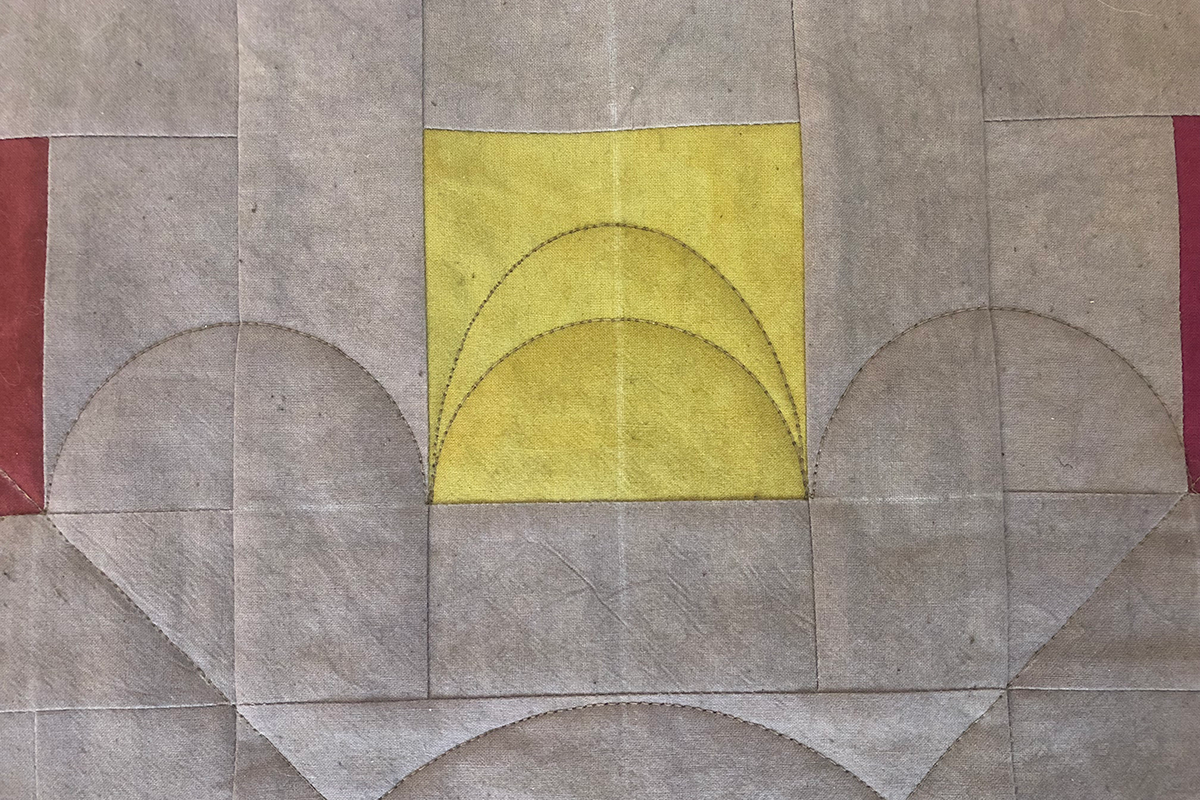
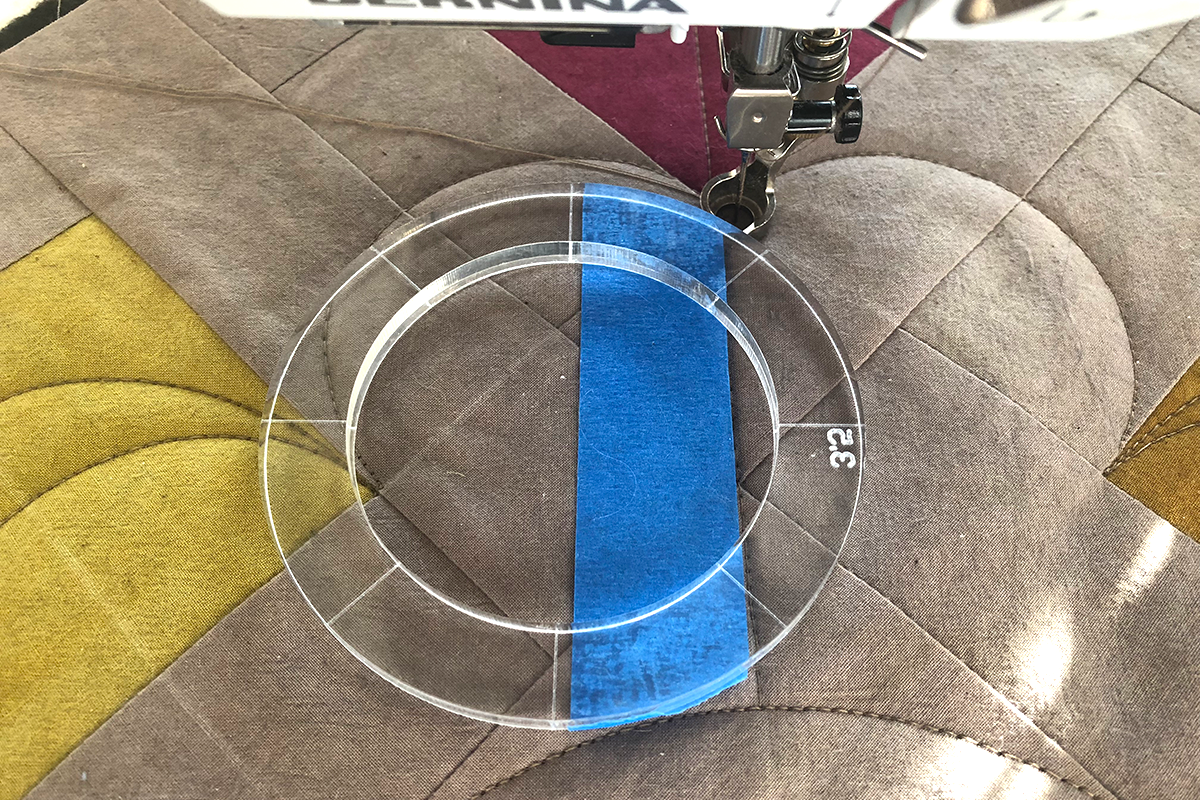
Stitch a 4” circle around the “Spirograph” Circles and then a 6” circle.
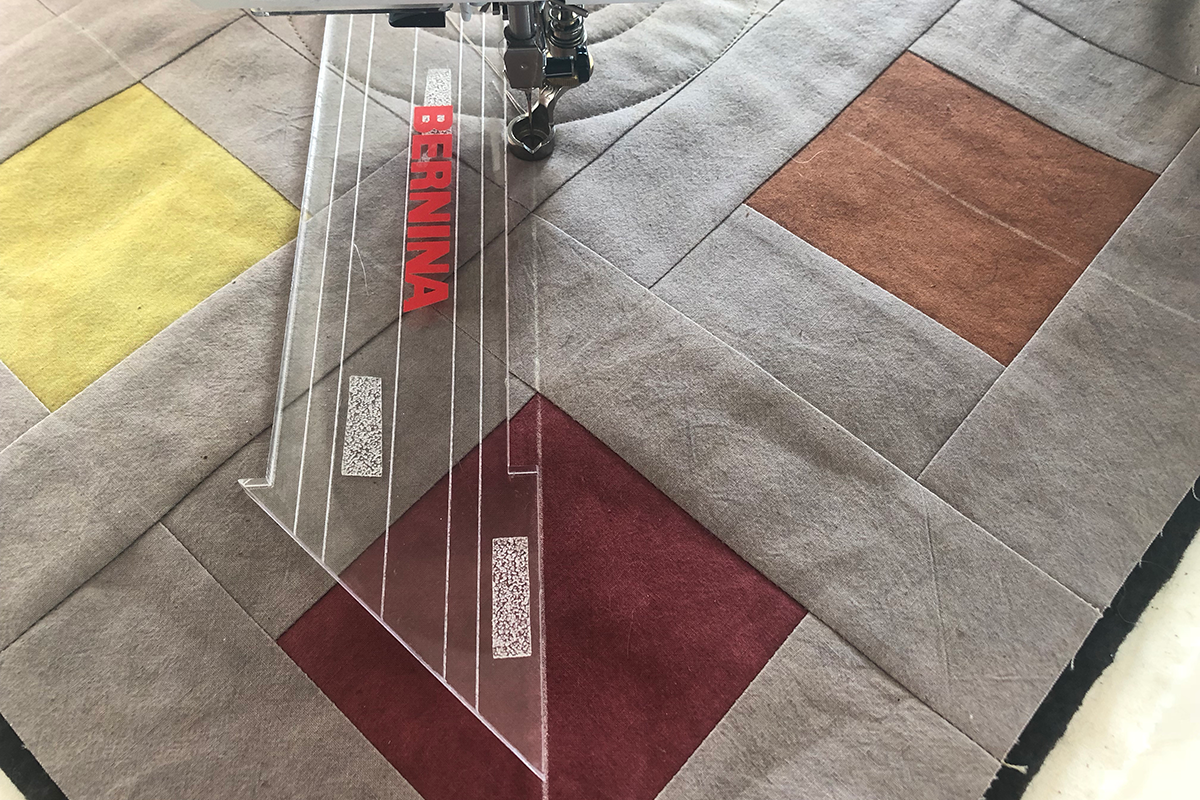
Using a straight ruler, stitch a straight line on the four diagonal lines from the edge of the outside circle to the outside corner of the four corner squares.
Next stitch 3 half circles along each side of the center as shown in the Quilting Guide. Use the curved end of the Bernina Straight Ruler or a 2 ½” circle ruler.
Add a half 2 1/2” Oval to the four colored side center squares.
Each side of the pillow should look as pictured.
Now find a curve – whether using a circle ruler or an oval ruler or simply a curve ruler – that will make a line from the inside corner of the four corner squares to the edge of the circle on both sides of the stitched line. Use painter’s tape to place on the ruler for consistency of the curve.
Optional: Quilt the same type of shape using a smaller curve to each side of the motif you just quilted as shown on the Quilting Guide.
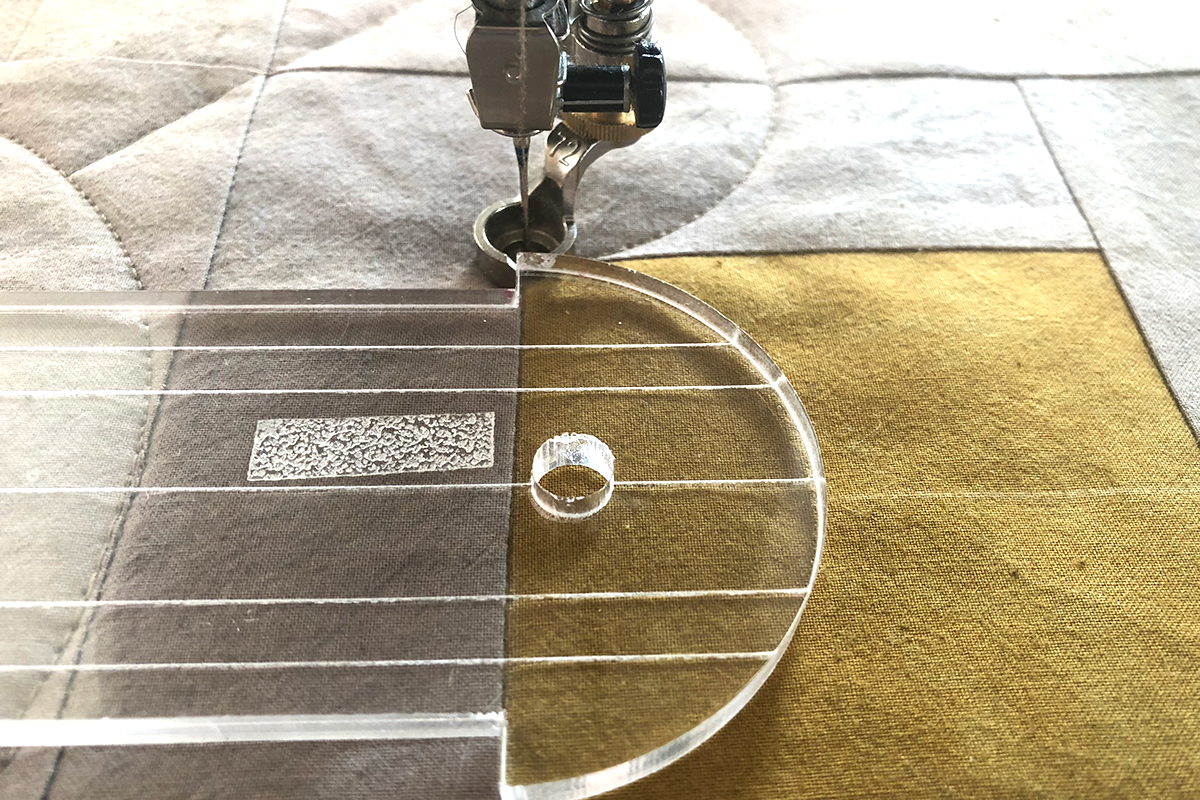
To finish quilting the pillow, use a straight edge ruler and stitch lines ½” apart around the outside edge. Stitch from the outside edge to the already stitched motifs traveling over ½” in the seam, or on the edge of the motif so that you can stitch back and forth continually.
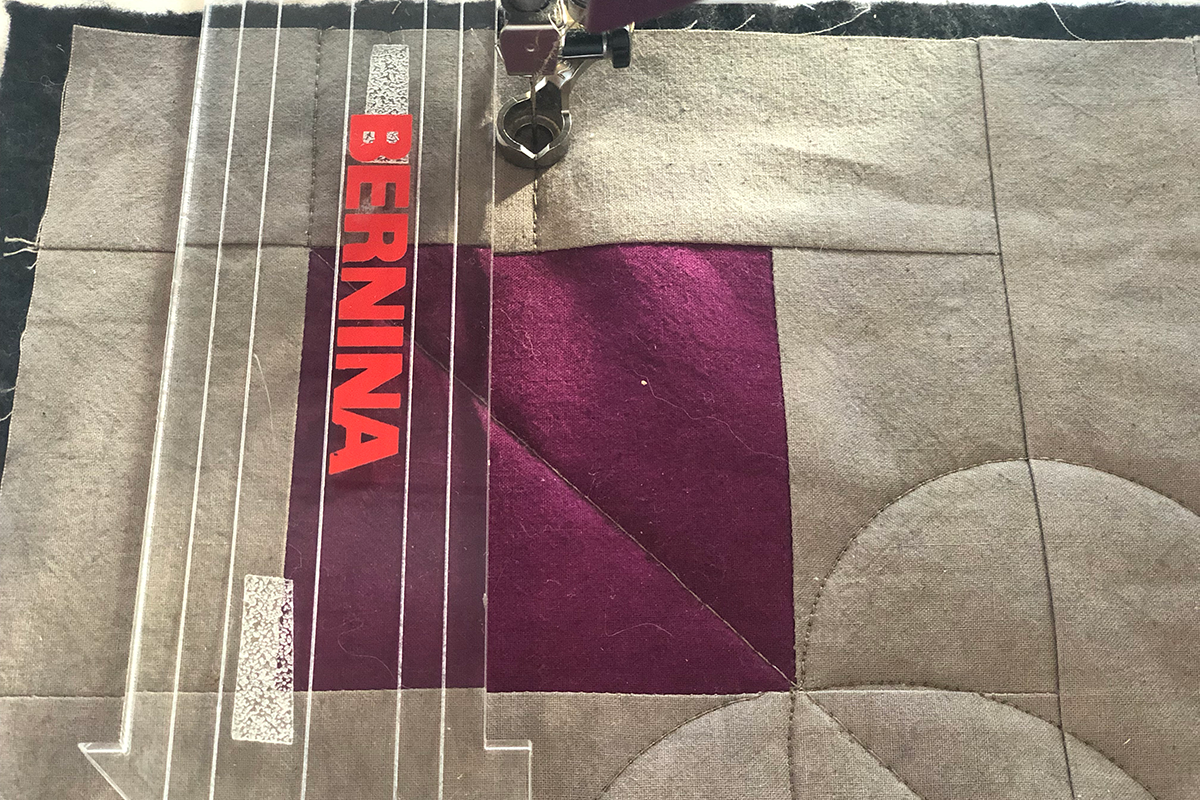
Let the matchstick quilting form a small square in each corner of the pillow. Stitch a small circle in each corner.
To add the last detail, stitch an additional diagonal line in each colored corner square.

Square up the pillow to 18 1/2”x 18 1/2”.
The back of the pillow was channel quilted. The quilted fabric was cut into two pieces 18 1/2” x 13”. Clean finish one of the 18 1/2” edges on each backing piece.
Using one of the quilted pieces, fold 4” on the clean finished side to the inside. Overlap this folded edge over the finished edge of the other quilted piece and pull together until the overlap backed measure 18 1/2”.
Pin the pillow top and the overlapped backing, rights sides together. Pin around the outside edge. Cut enough binding for at least 85” of continuous fabric. I used several different colors in the binding. Attach the binding to the outside edge of the pillow.
Stuff with a pillow form and enjoy!
BERNINA Made to Create Studio Online Lessons
Equilateral Triangle Table Runner
Free-motion Quilting with Rulers
How to Quilt Feathers with Free-motion and Rulers
Used Products


What you might also like


2 comments on “Free-Motion Quilting with Rulers”
-
-
Thank you for your comments Hunny. There is a link for the PDF instructions right below the Materials list. Please let me know if you need more help. Nina
Leave a Reply
You must be logged in to post a comment.

Excellent lesson, Nina! ?? I’ve got Bernina acrylic rulers and the proper quilting foot, but where can I download and save your “Free-Mo Quilting w/Rulers” PDF instructions for repeated reference?