Rulerwork: BERNINA Clamshell Ruler
The BERNINA Clam Shell ruler is the perfect ruler to help fill sashing and borders. Instead of using the clamshell in the traditional fashion, you change it up by switching the ruler orientation. Take a look at the sashing above and I’ll show you how easy it is to use the Clamshell Ruler. Bonus, this ruler has 4 sides in 4 different sizes!
Supplies
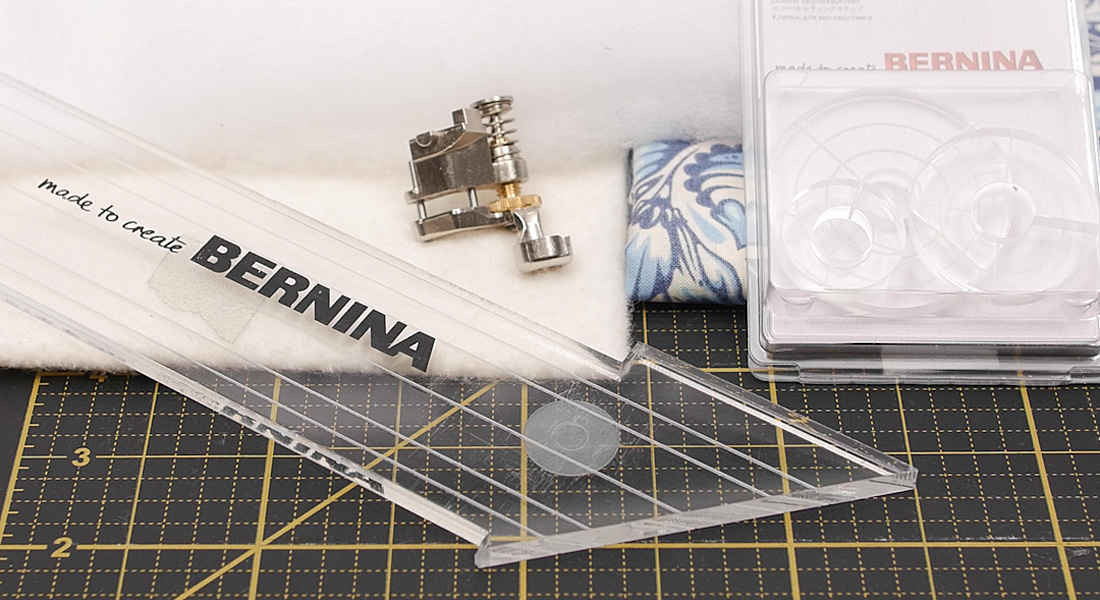
- BERNINA Table Model Q 16, Q 16 Plus, or Q 20
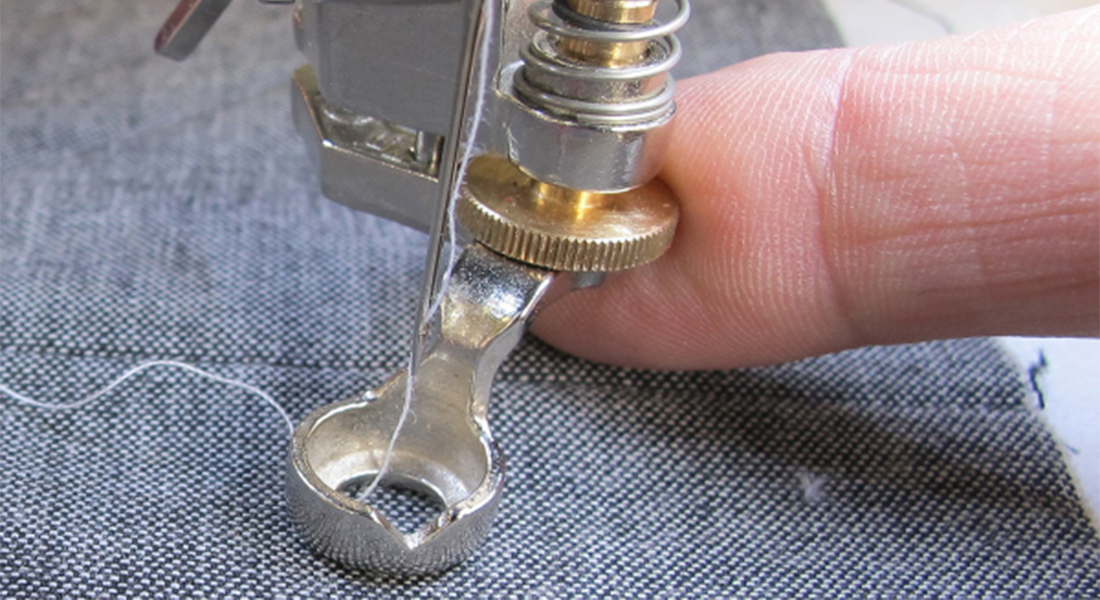
- Ruler Foot – Chose from Ruler Foot #96, Adjustable Ruler Foot #72 or Adjustable Ruler Foot with Slit #72S. The #96 gfot can only be used on the BERNINA Q Series longarms. The #72 and #72S can be used on both the BERNINA longarms and domestic sewing machines.
- BERNINA Curves and Clams Ruler (4 piece set)
- Backing, batting and pieced top (see below for my measurements)
- New 90/14 Quilting Needle and thread of choice (40 or 50 wt)
- Quilting gloves – recommended
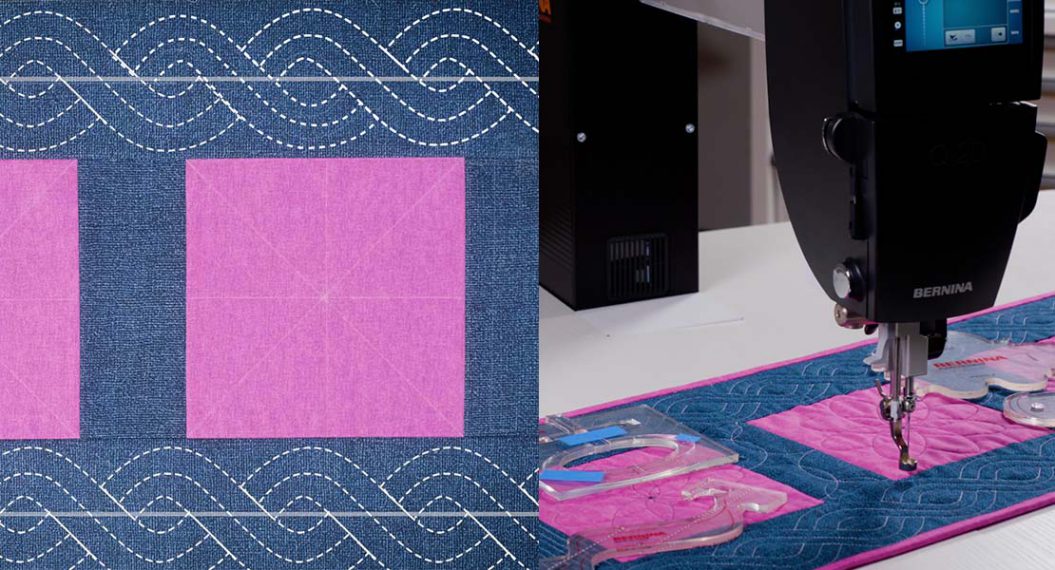
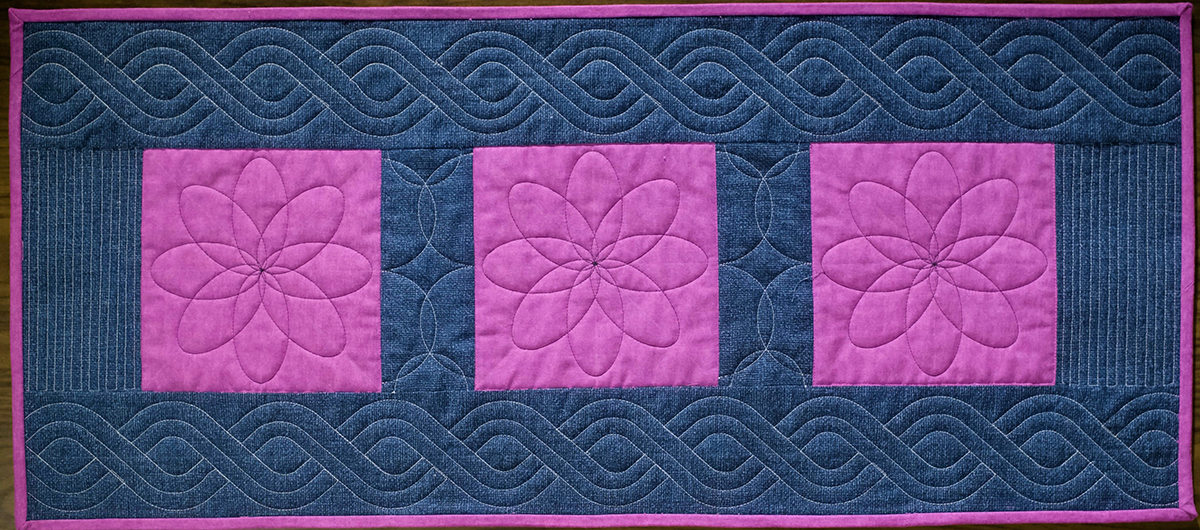
Creating the table runner in this example is super simple. Here are the measurements. I chose fabrics and thread to highlight the quilting but you could use any fabrics you like.
3 – 7″ Squares (pink)
2 – 7″ x 3″ inner sashing
2 – 7″ x 4″ outer border – short side
2 – 31-1/2″ x 4″ – outer border – long side
For smaller projects, I simply spray baste my layers together to prevent shifting and puckering while I quilt.
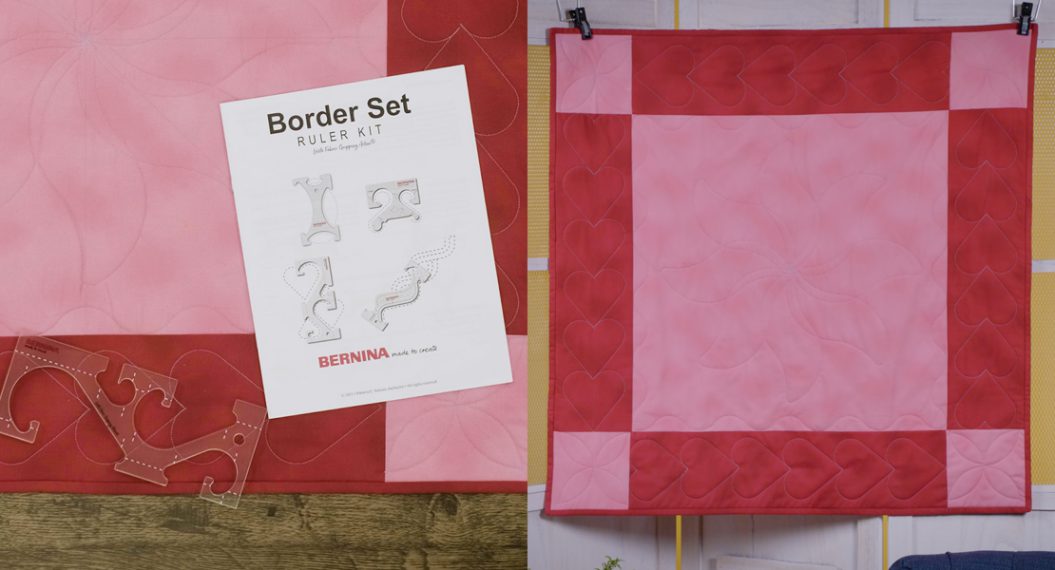
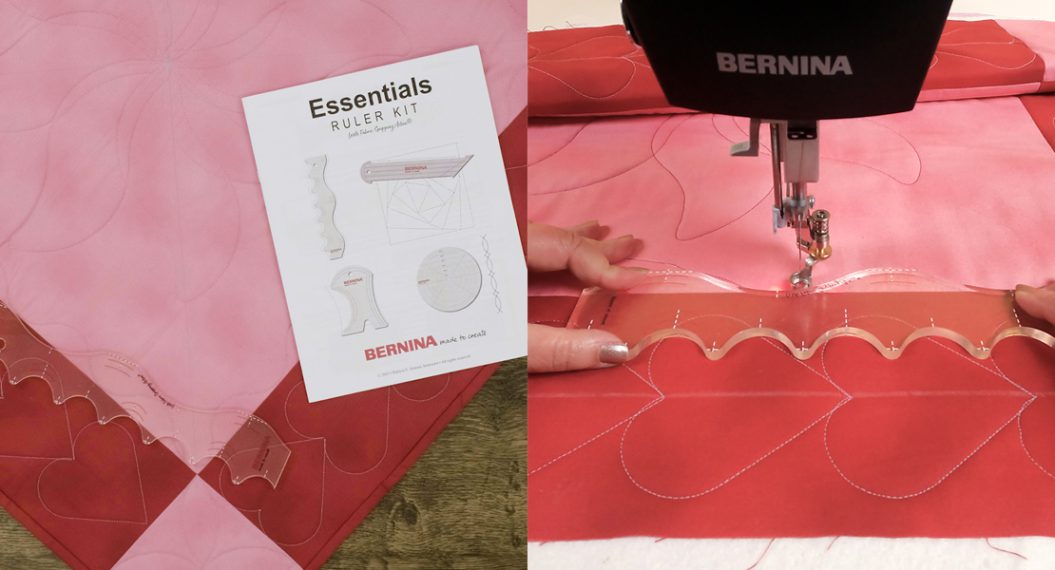
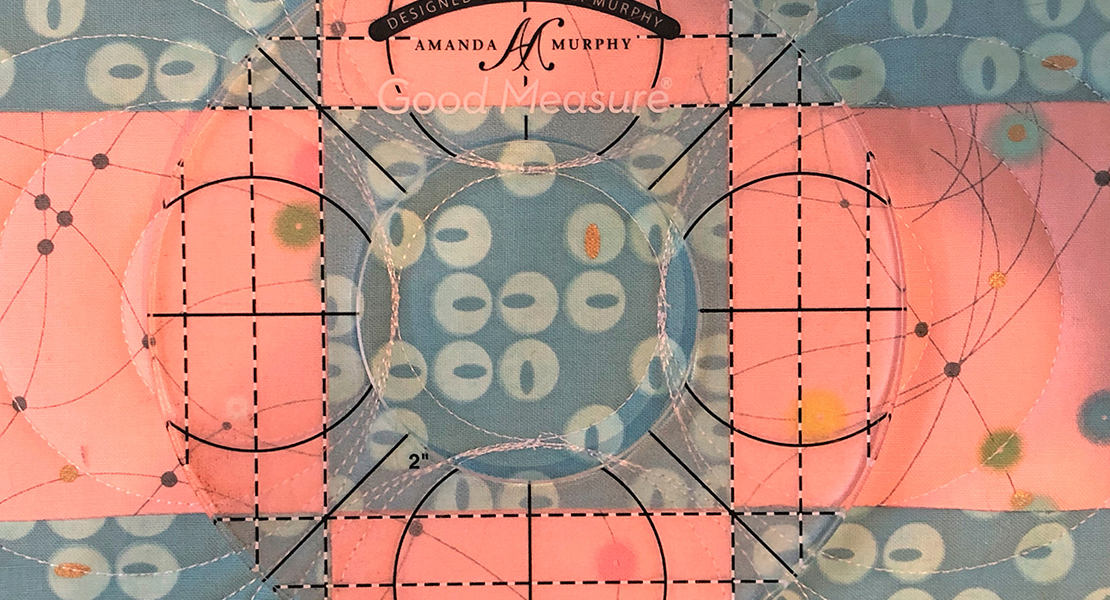
BERNINA’s Curves & Clams Ruler Kit comes with 4 different rulers and a really informative instruction manual giving a variety of ways each ruler can be used.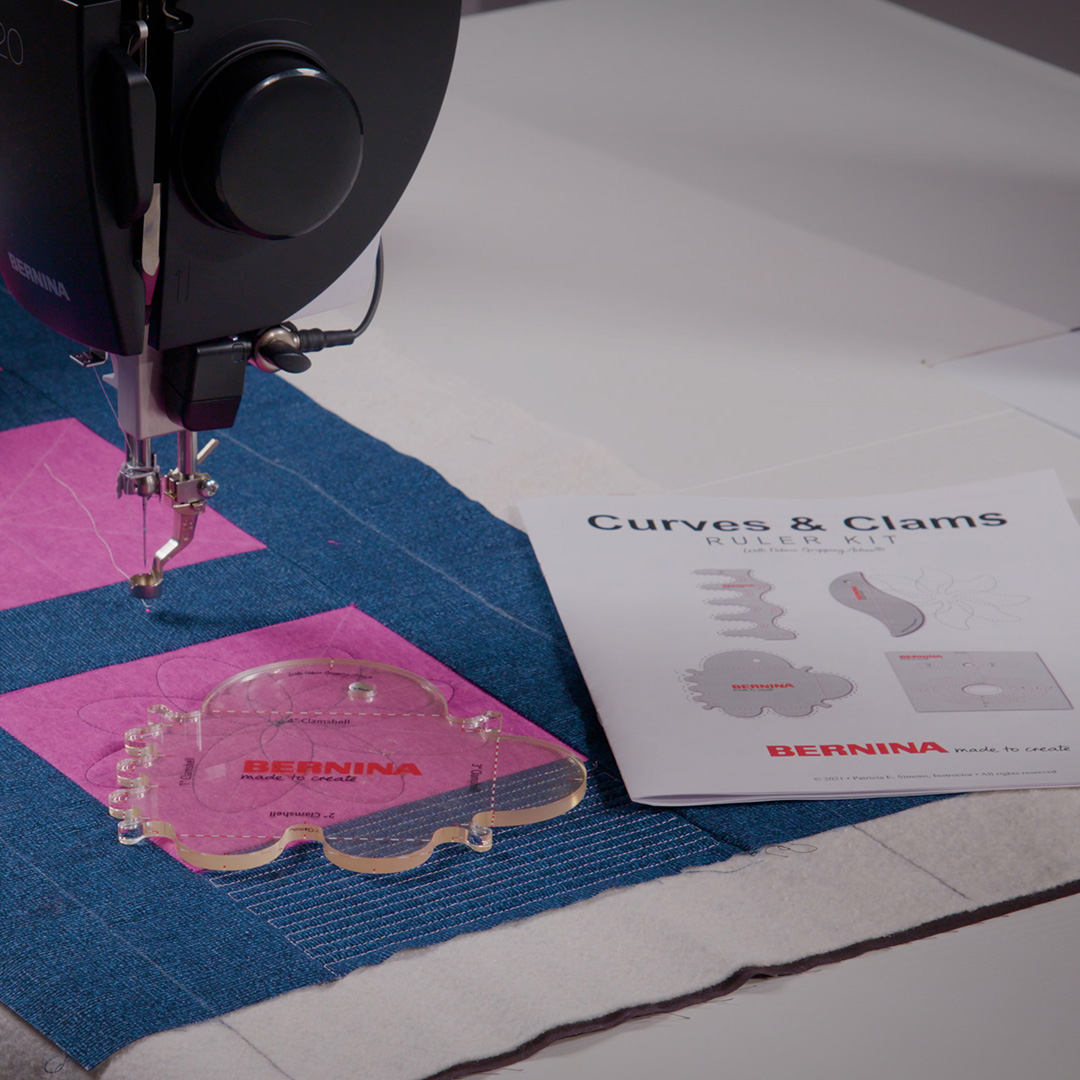
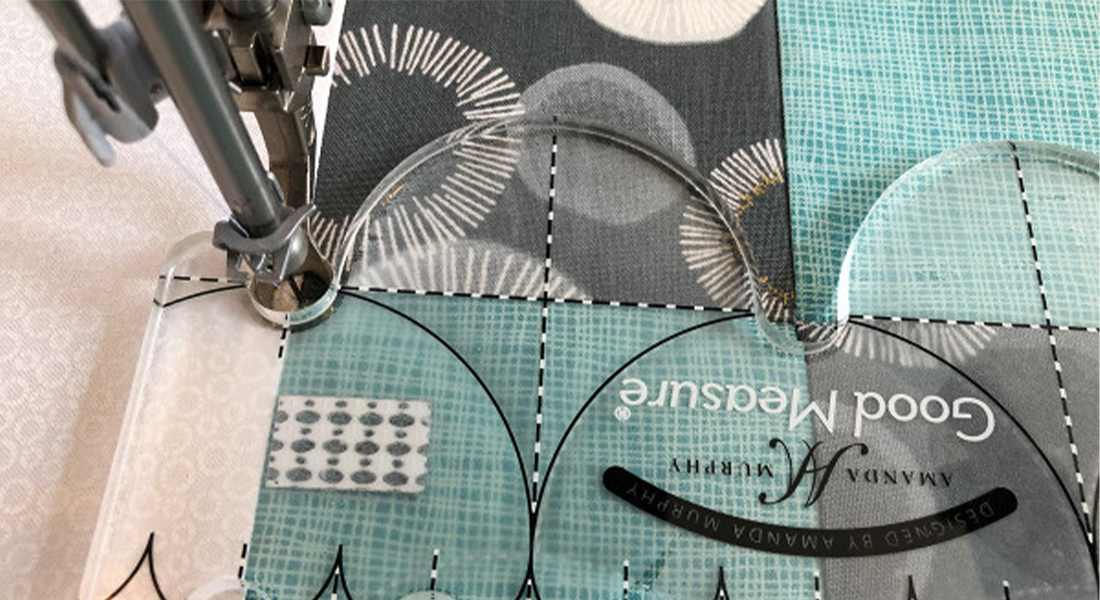
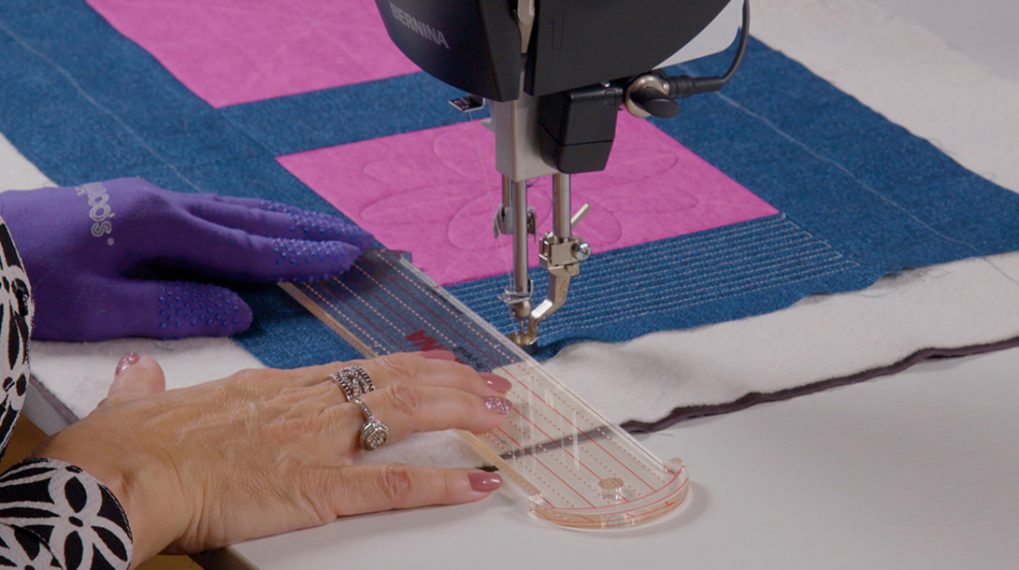
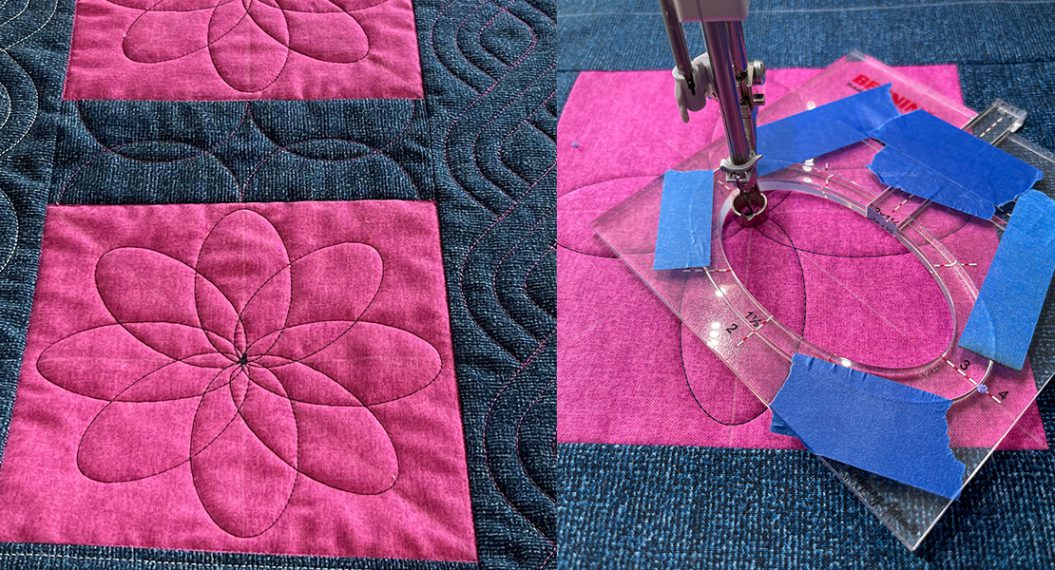
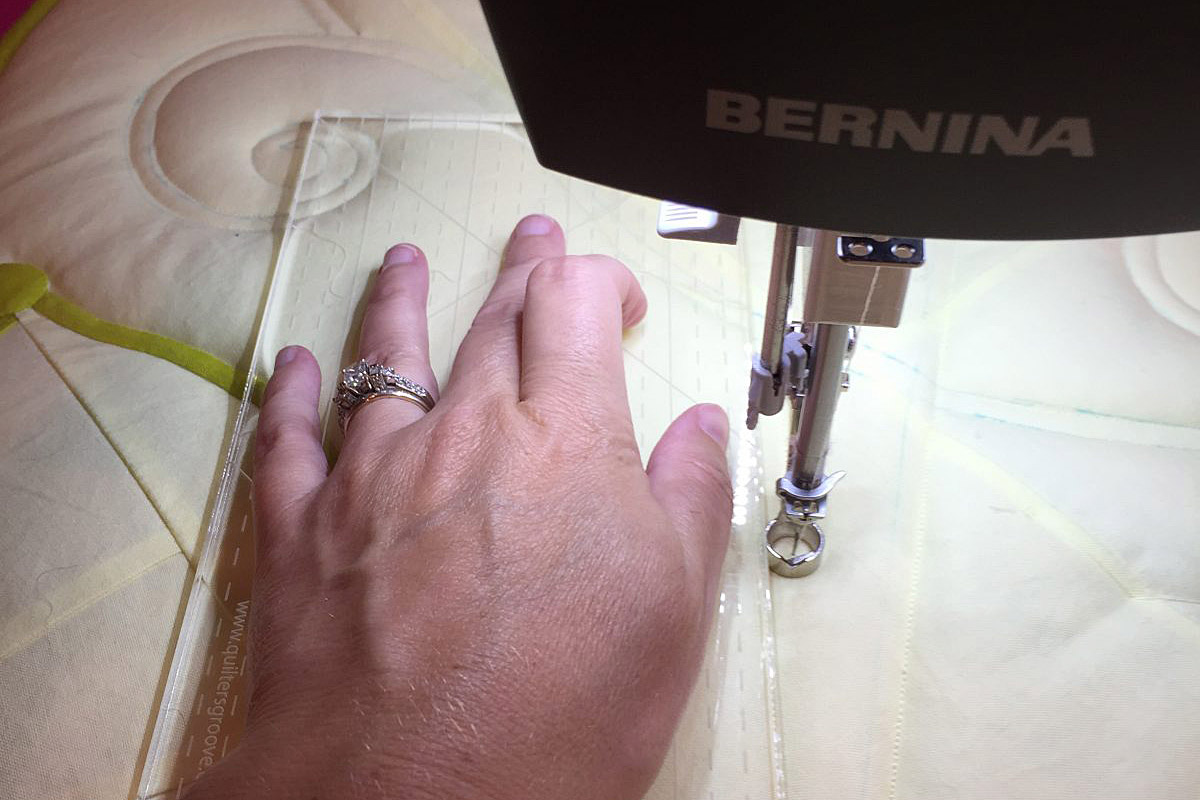
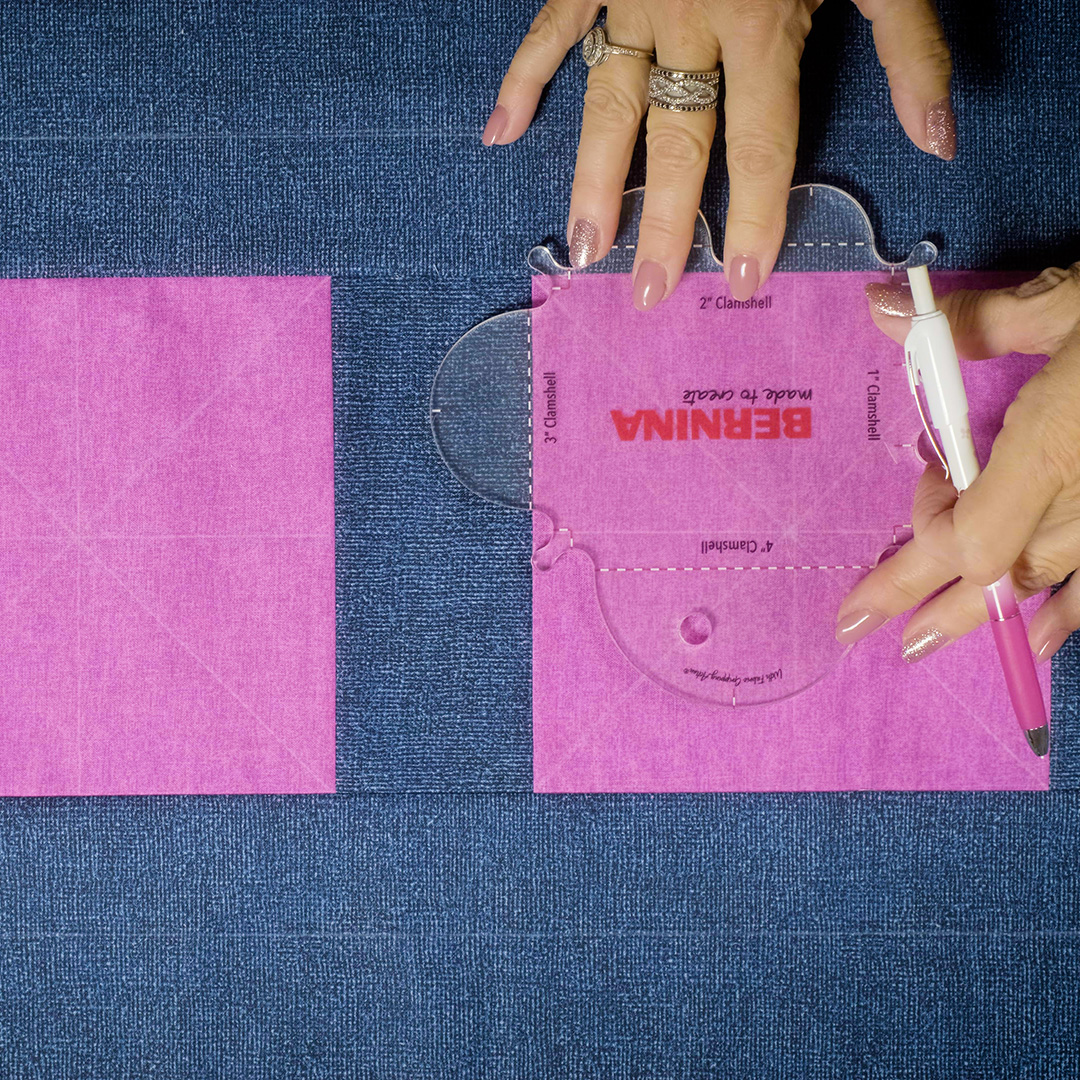
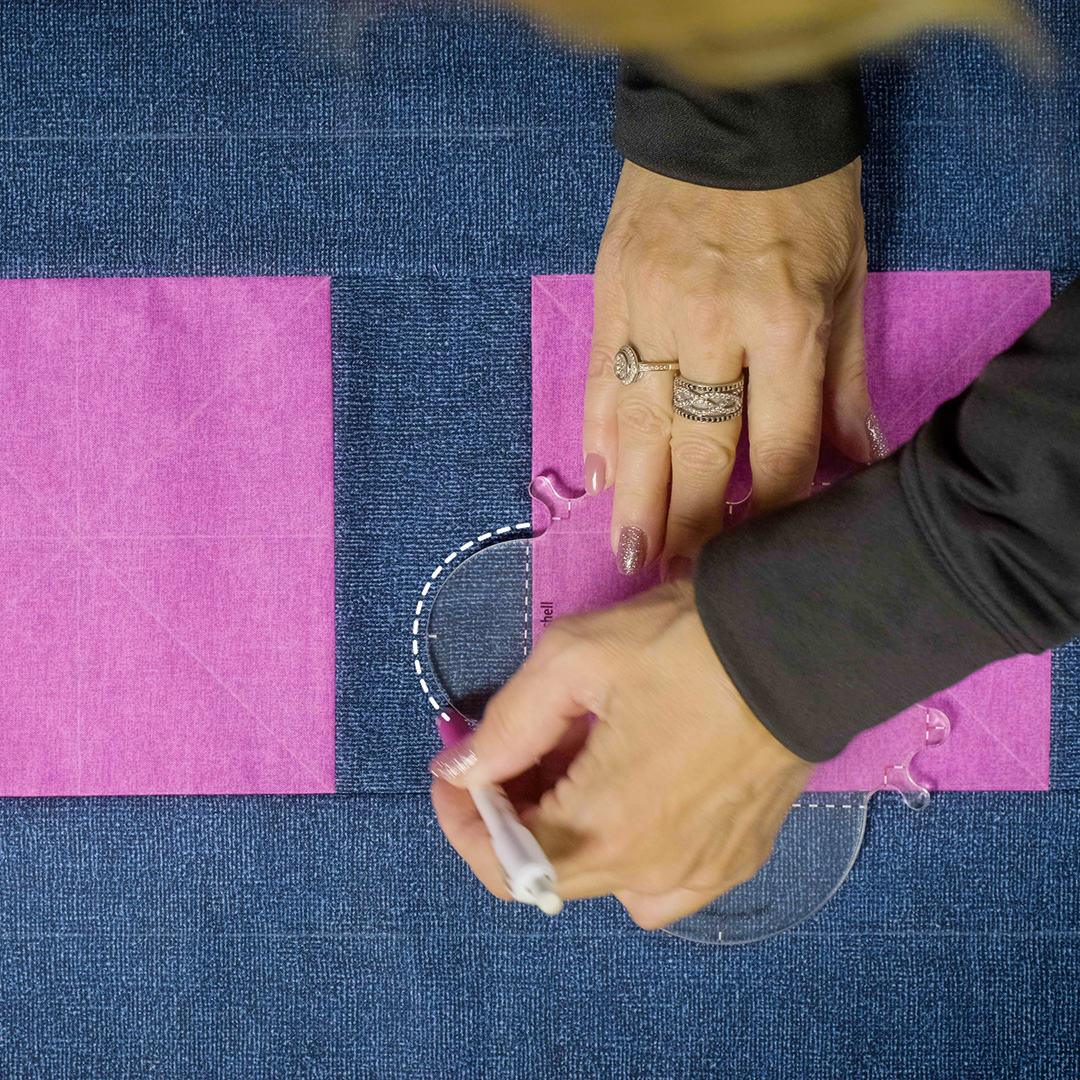
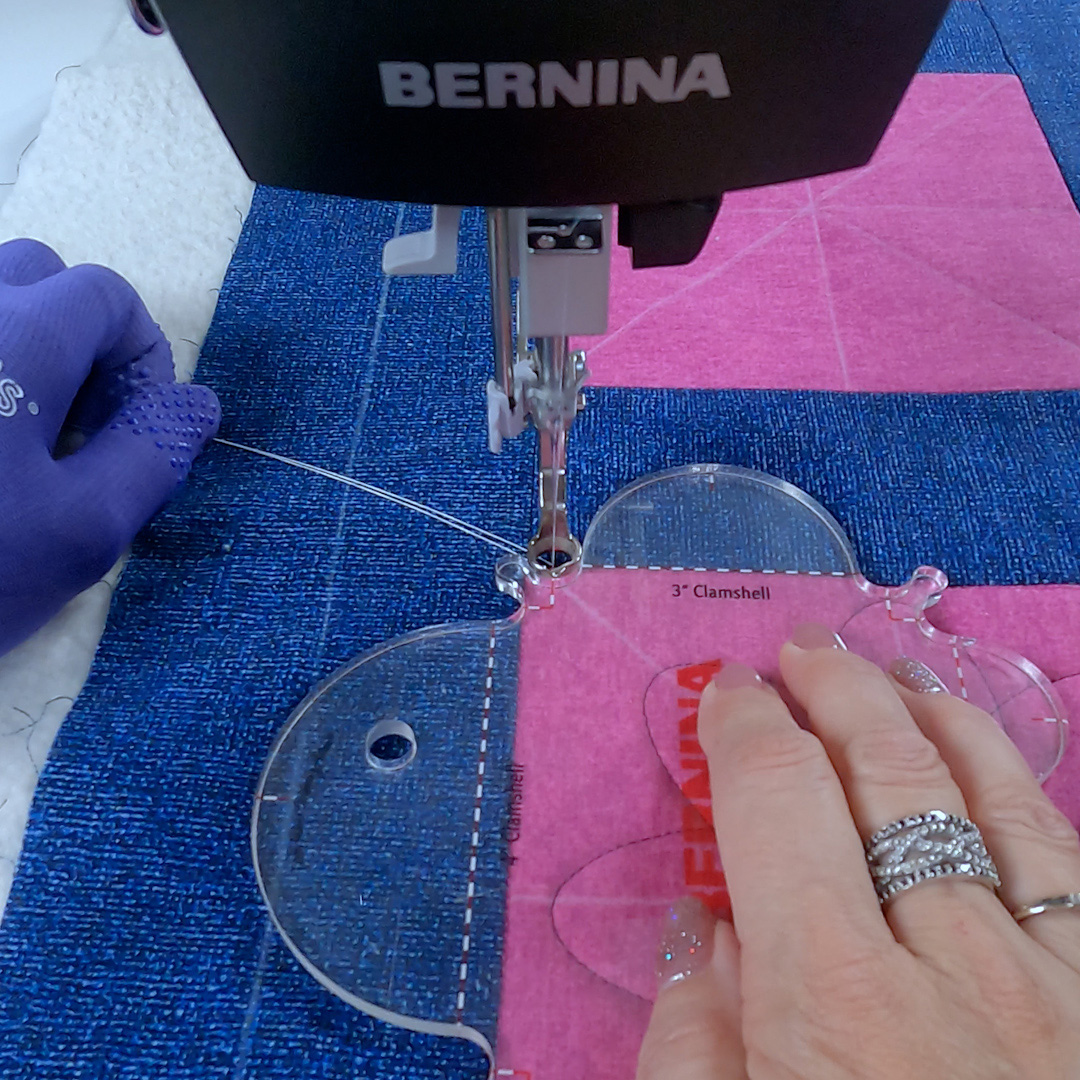
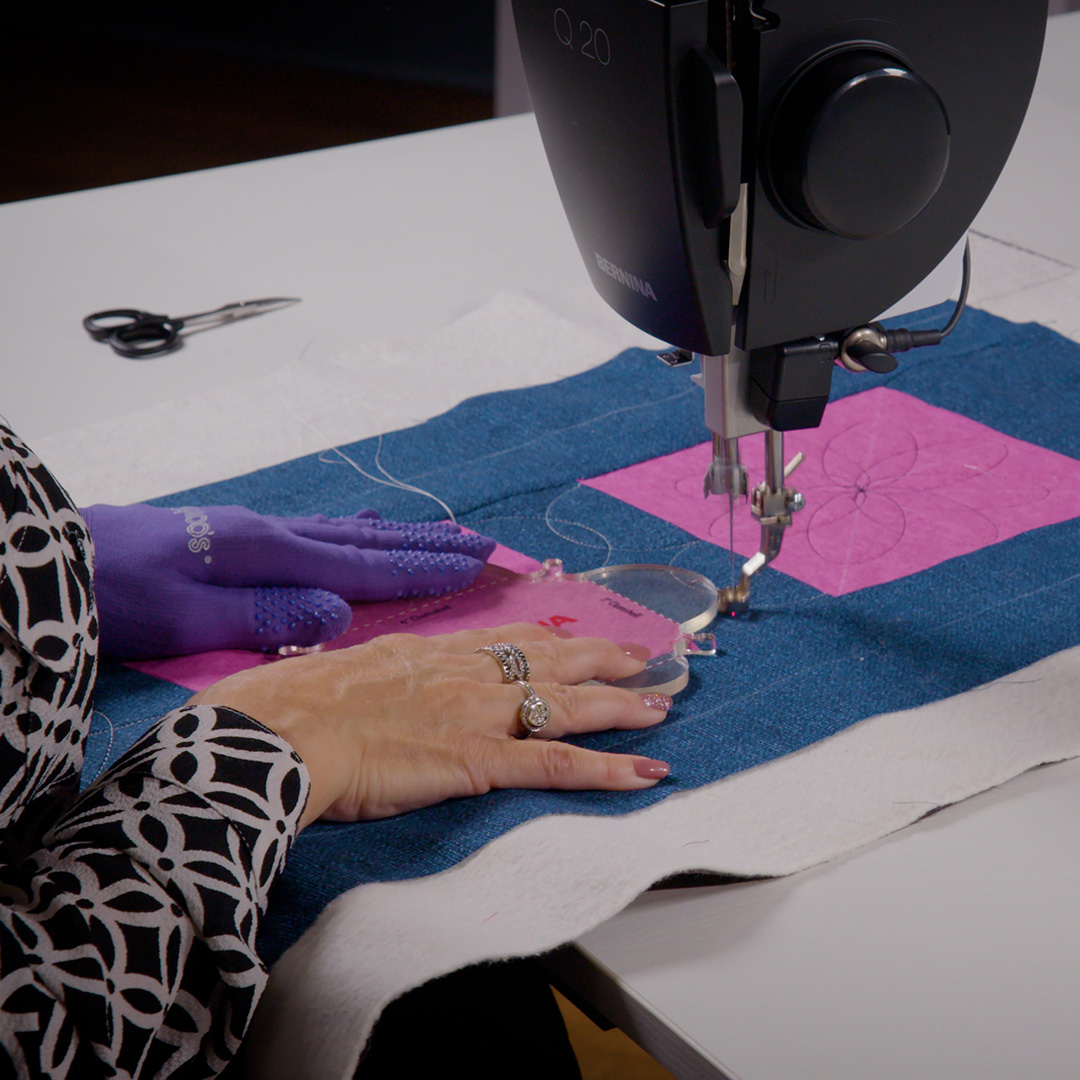
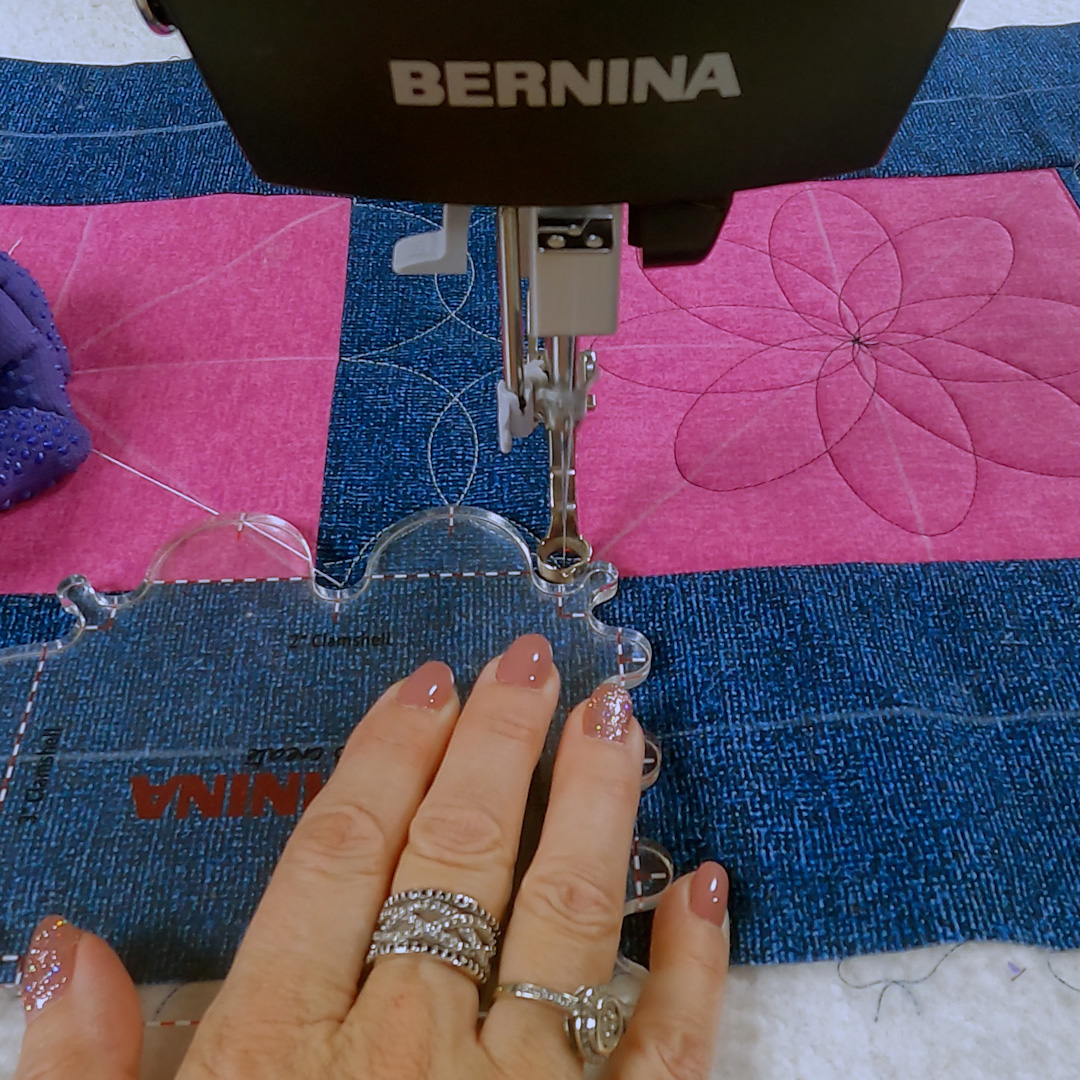
Using the center reference marks I drew on the pink focal squares before I began quilting, I lined up the dashed line of the clam with the edge of the block. I also lined up the dash on the ruler hook with the drawn center mark. I did a quick measure to see that two clams would fit on one side of the sashing.
You can actually draw your lines if you’d like, but since you’re keeping the foot tight to the ruler, they really aren’t necessary and they would be hard to see while you’re stitching.
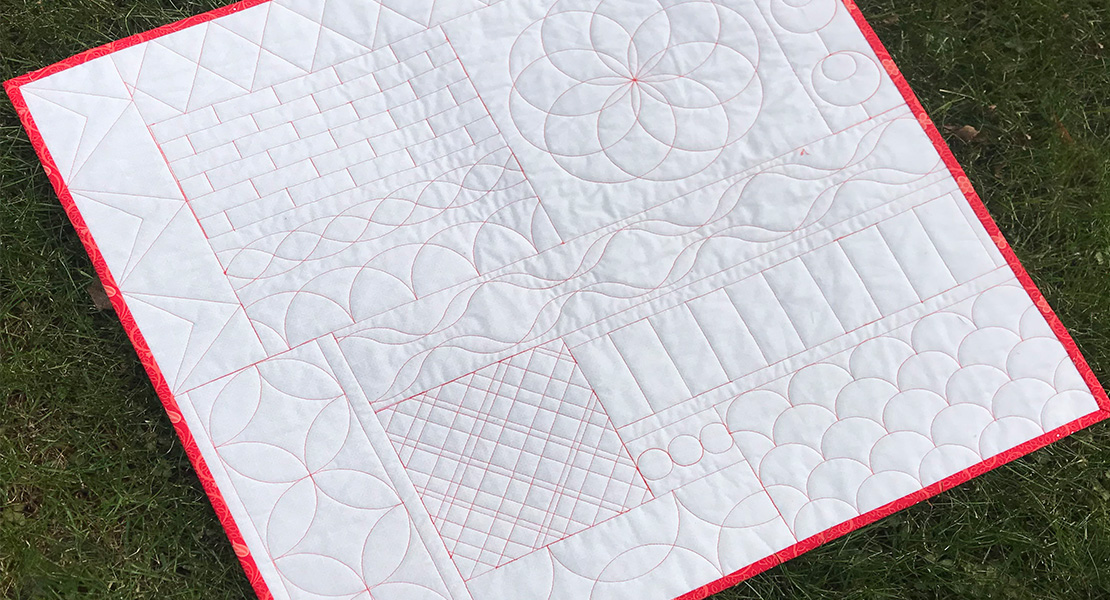
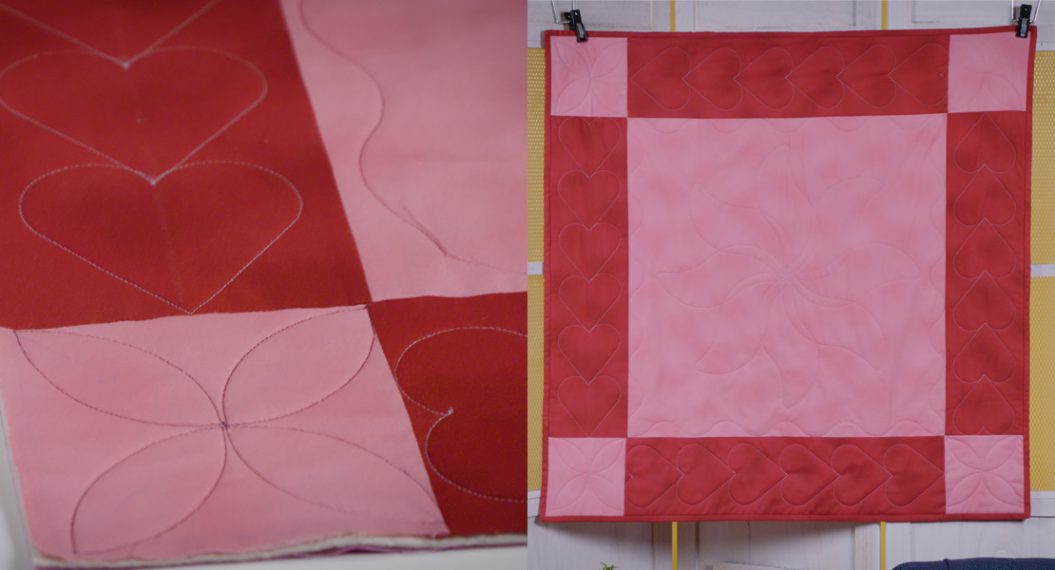
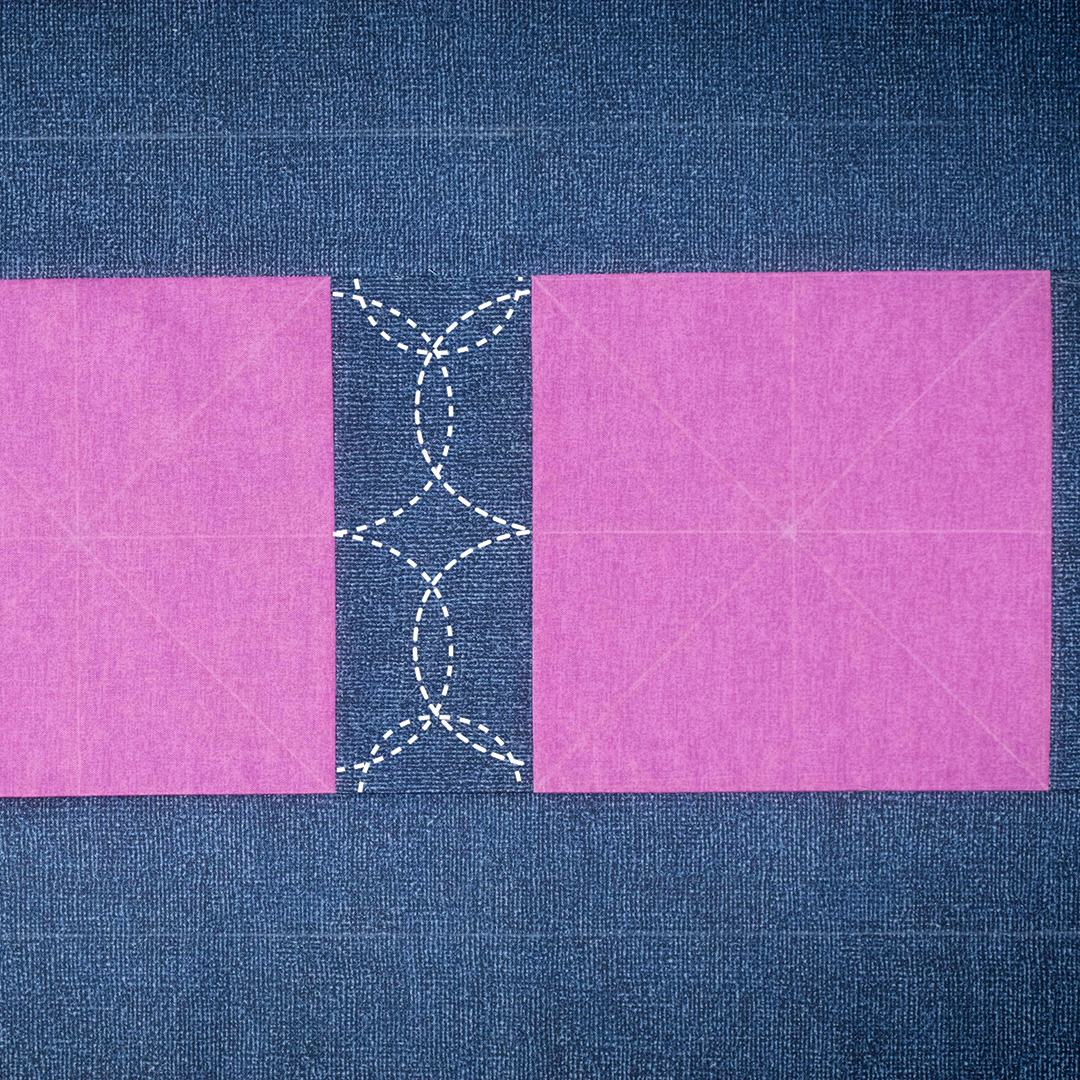
I’ve provided the dashed line images for you to see the path I sewed.
On the long sashing sides I used the 3″ side of the clamshell ruler twice – making sure the first clam ended at the center of the sashing.
On the short sides of the sashing, I centered the 2″ clam – one on each end.

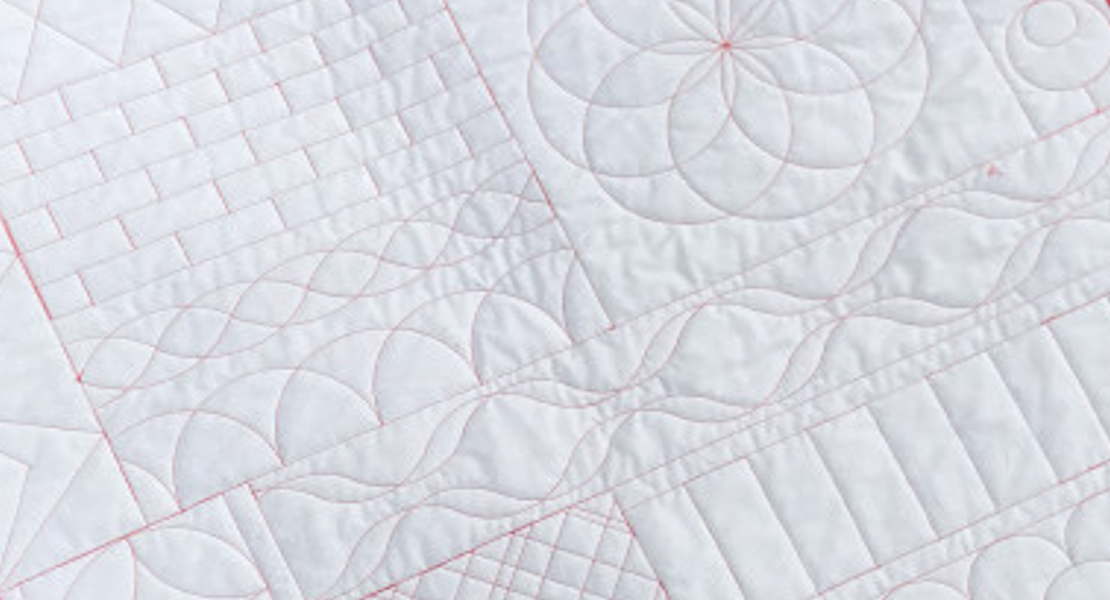
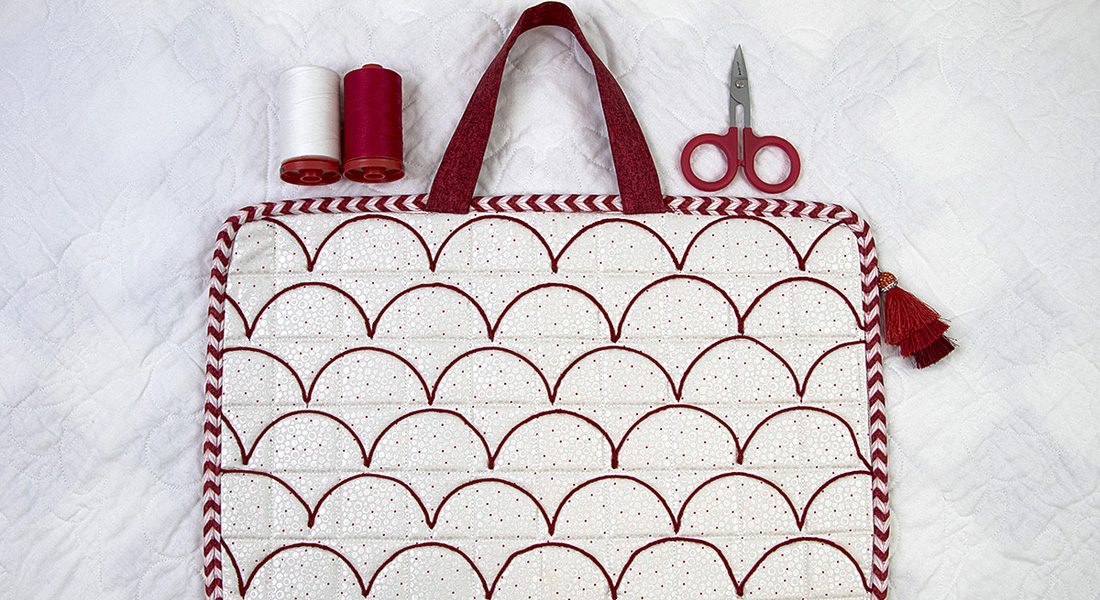
This is what the finished stitching will look like.
To begin sewing, pick a long side of one of the sashing strips. With the mark of the clamshell landing at the center of the sashing and the dashed line of the clam aligned with the pink block, bring your foot into the ruler “hook” start point and orient the table runner to sew in the direction most comfortable to you. Remember the ruler foot allows you to sew 360 degrees around it. Make sure to lower your presser foot BEFORE you snug up the ruler or begin sewing.
Once you’re all situated, bring your bobbin thread to the top and take several securing stitches. Then sew one clamshell and stop to reposition the ruler. Always stop sewing before moving the ruler away from or around the foot.
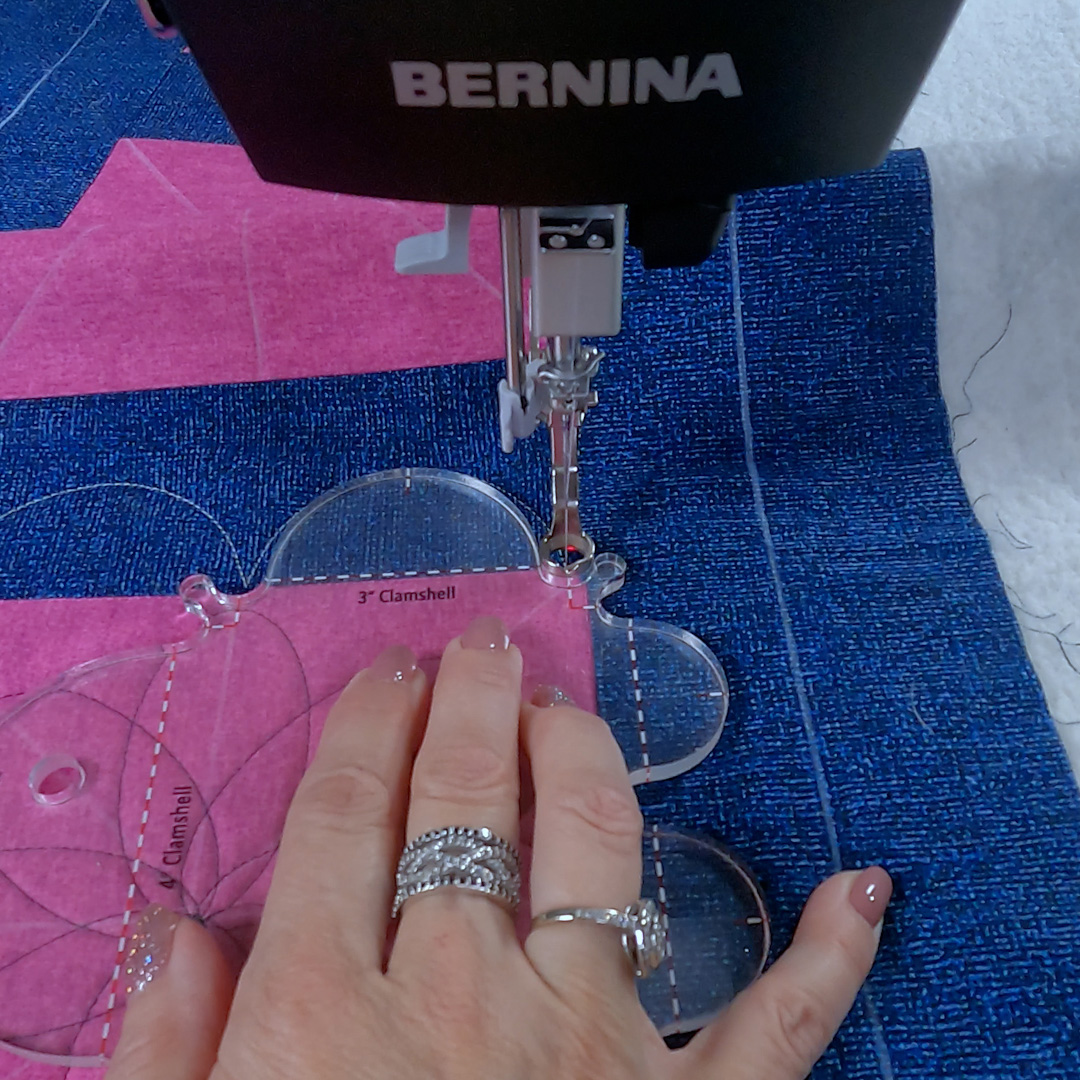
Reposition the ruler hook at the stop point of your first clam and sew the second clam. The hook of the ruler makes it very easy to start and stop exactly at the beginning or end of the design.
After you finish one side of the sashing strip, reposition the table runner so you can sew the opposite side of the sashing.
Here you can see me pointing out the line I am aligning my ruler to.
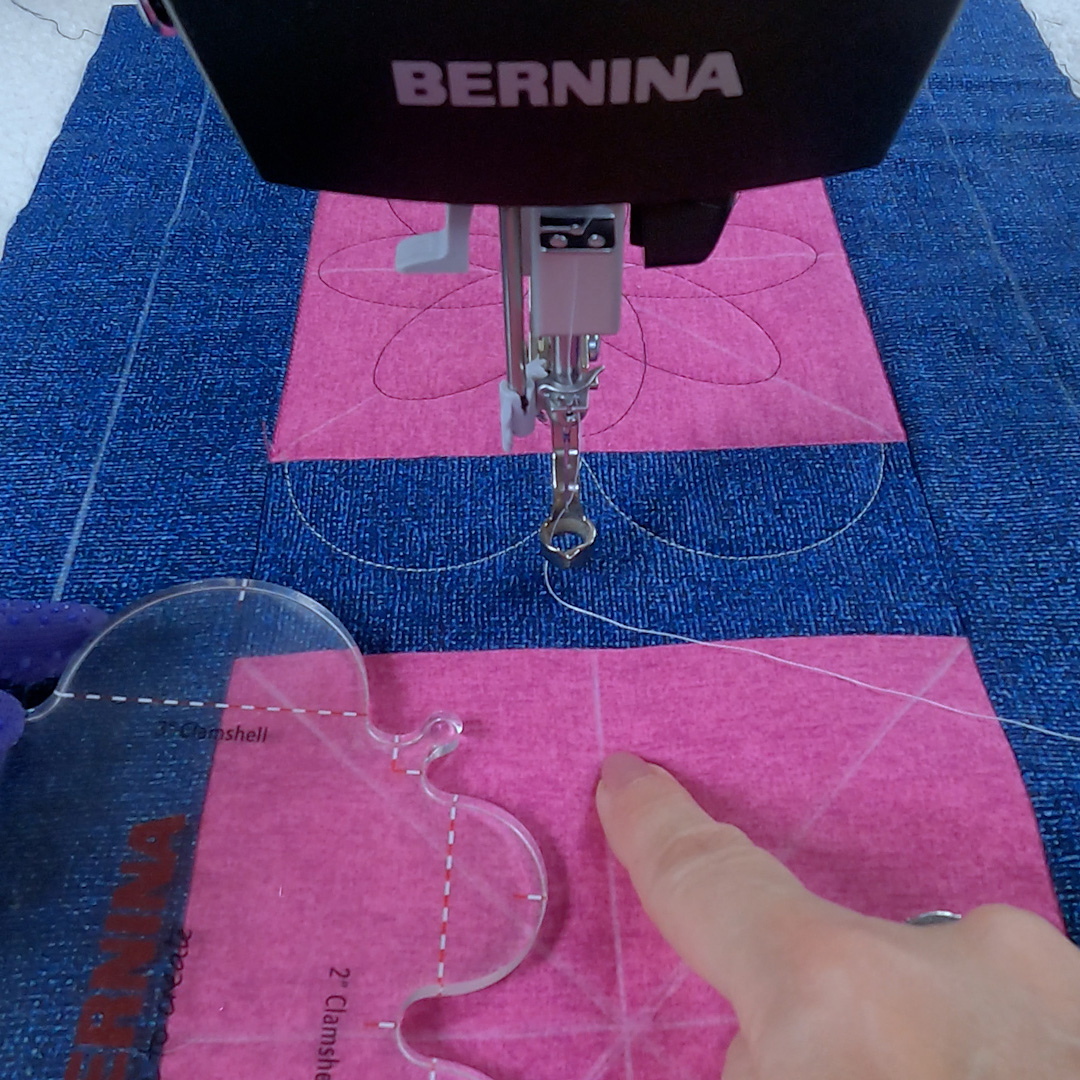
Go ahead and stitch the two clamshells and notice the secondary design that emerges where the 2 rows intersect. I really like it.
Now that we have both of the long sides of our sashing stitched, let’s stitch the short sides.
All I did was center the 2″ clamshell on each end of the sashing to complete the look. Notice how the center mark of my clamshell ruler lines up with the intersection of the clamshells above it. I’m always looking for marks on my ruler to help my designs line up and look pretty.
When doing rulerwork it is important to use the least amount of pressure necessary to move the quilt and ruler while maintaining contact with the foot. You don’t want to “drift” off the foot by using too little pressure, but if you use too much pressure it will be difficult to move the ruler and quilt and you will quickly get sore arms. Stay as relaxed as you can. It gets easier with practice.
One final mention….all BERNINA rulers are 1/4″ thick. If you’re new to rulerwork, remember to use the proper rulers or templates for your machine.
Happy quilting.