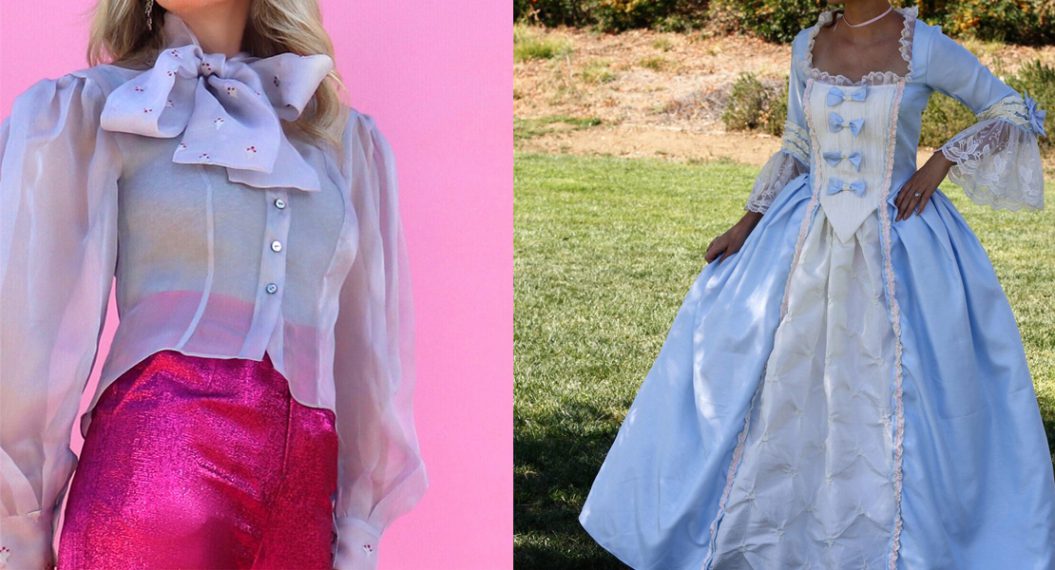
You Can Make a Bralette, Part 2: Tips and Tricks
Bras Featured: Maris Bra by Madalynne Intimates and Jordy Bralette by Emerald Erin
Today I am here to give you a few tips and tricks for sewing bralettes. In the previous post we talked about Materials (fabrics and notions), so check that out to start at the beginning!
First, lets start with what BERNINA parts you can be using. I personally only used parts that came with my machine ( BERNINA 590), and that’s the great thing about them. They are so amazing at the get-go. All the additional feet really are fantastic, and can make certain finishes easier to accomplish, and look more professional, but this project requires just the basics, nothing fancy.
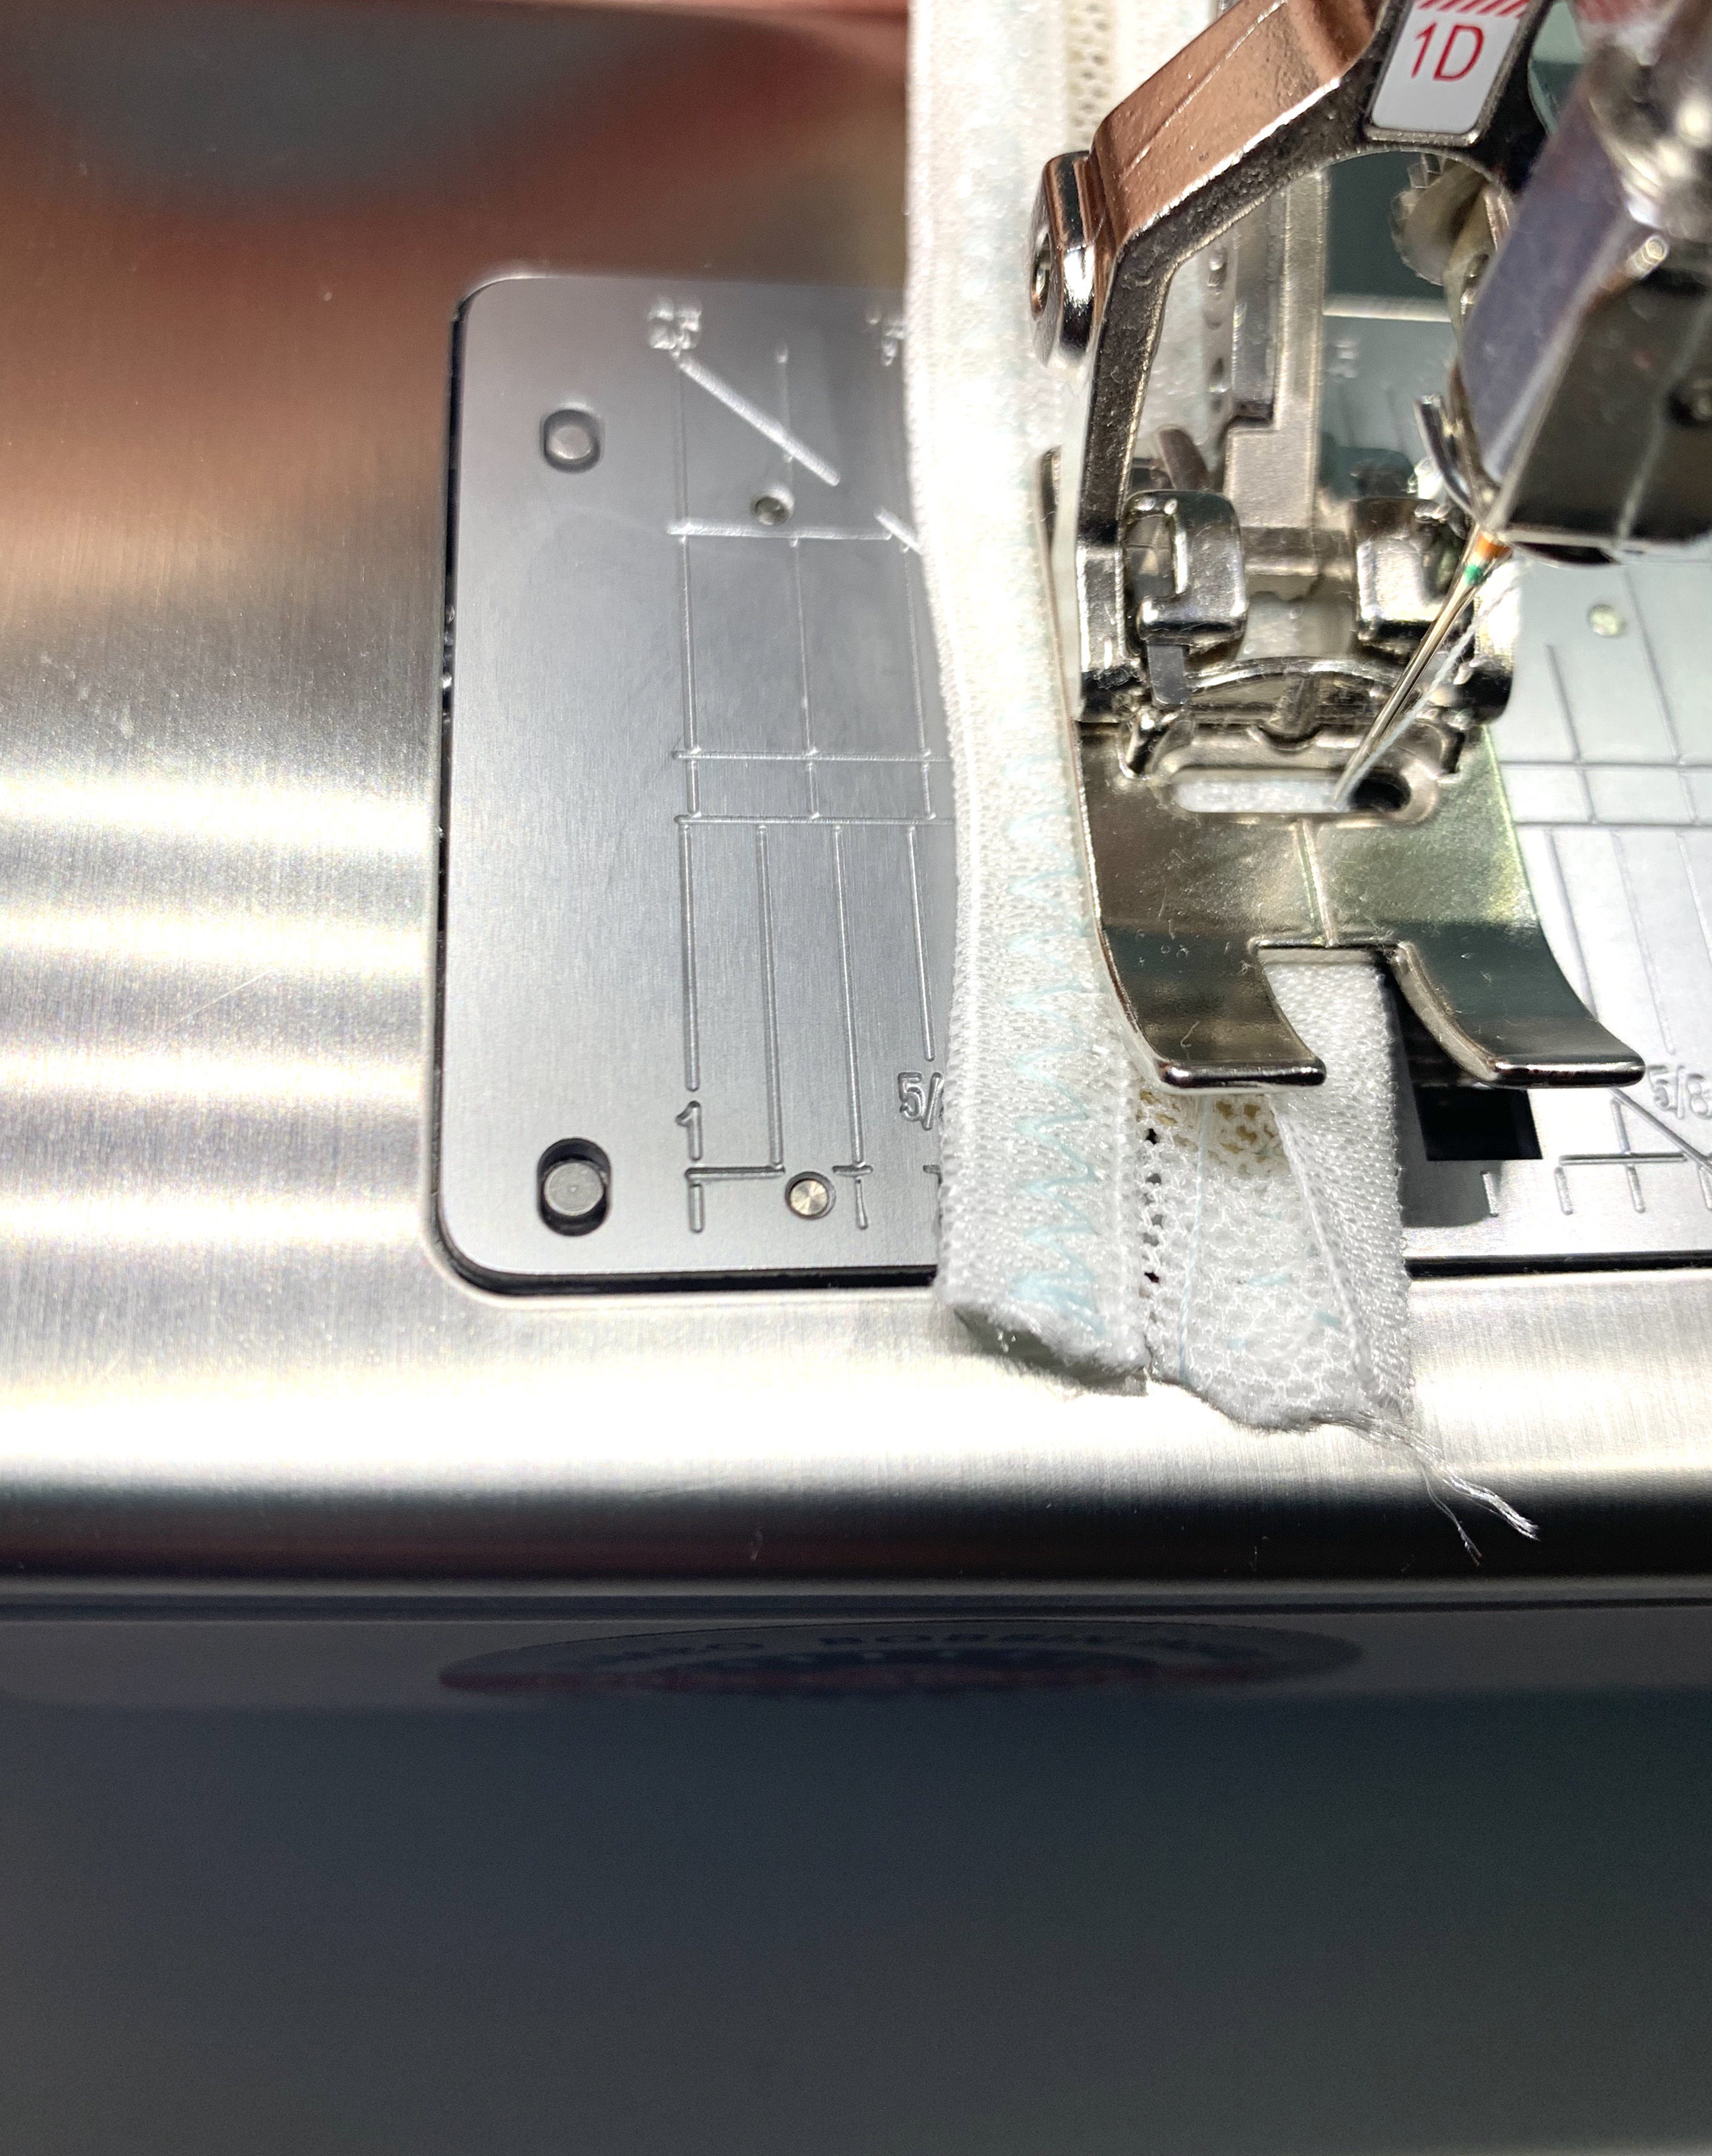
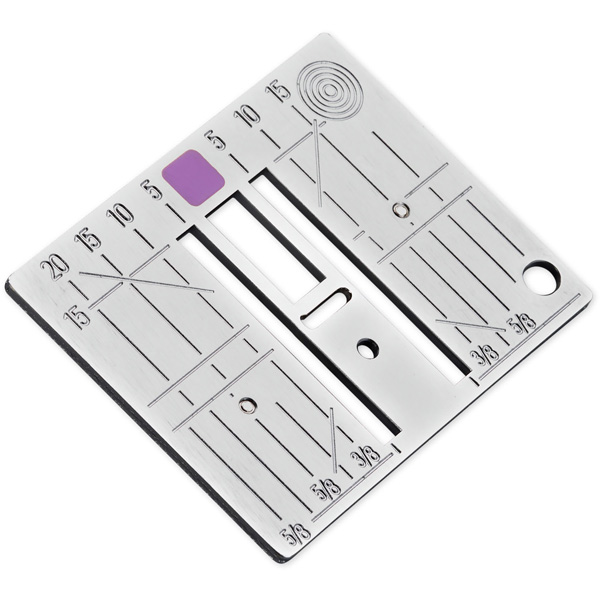
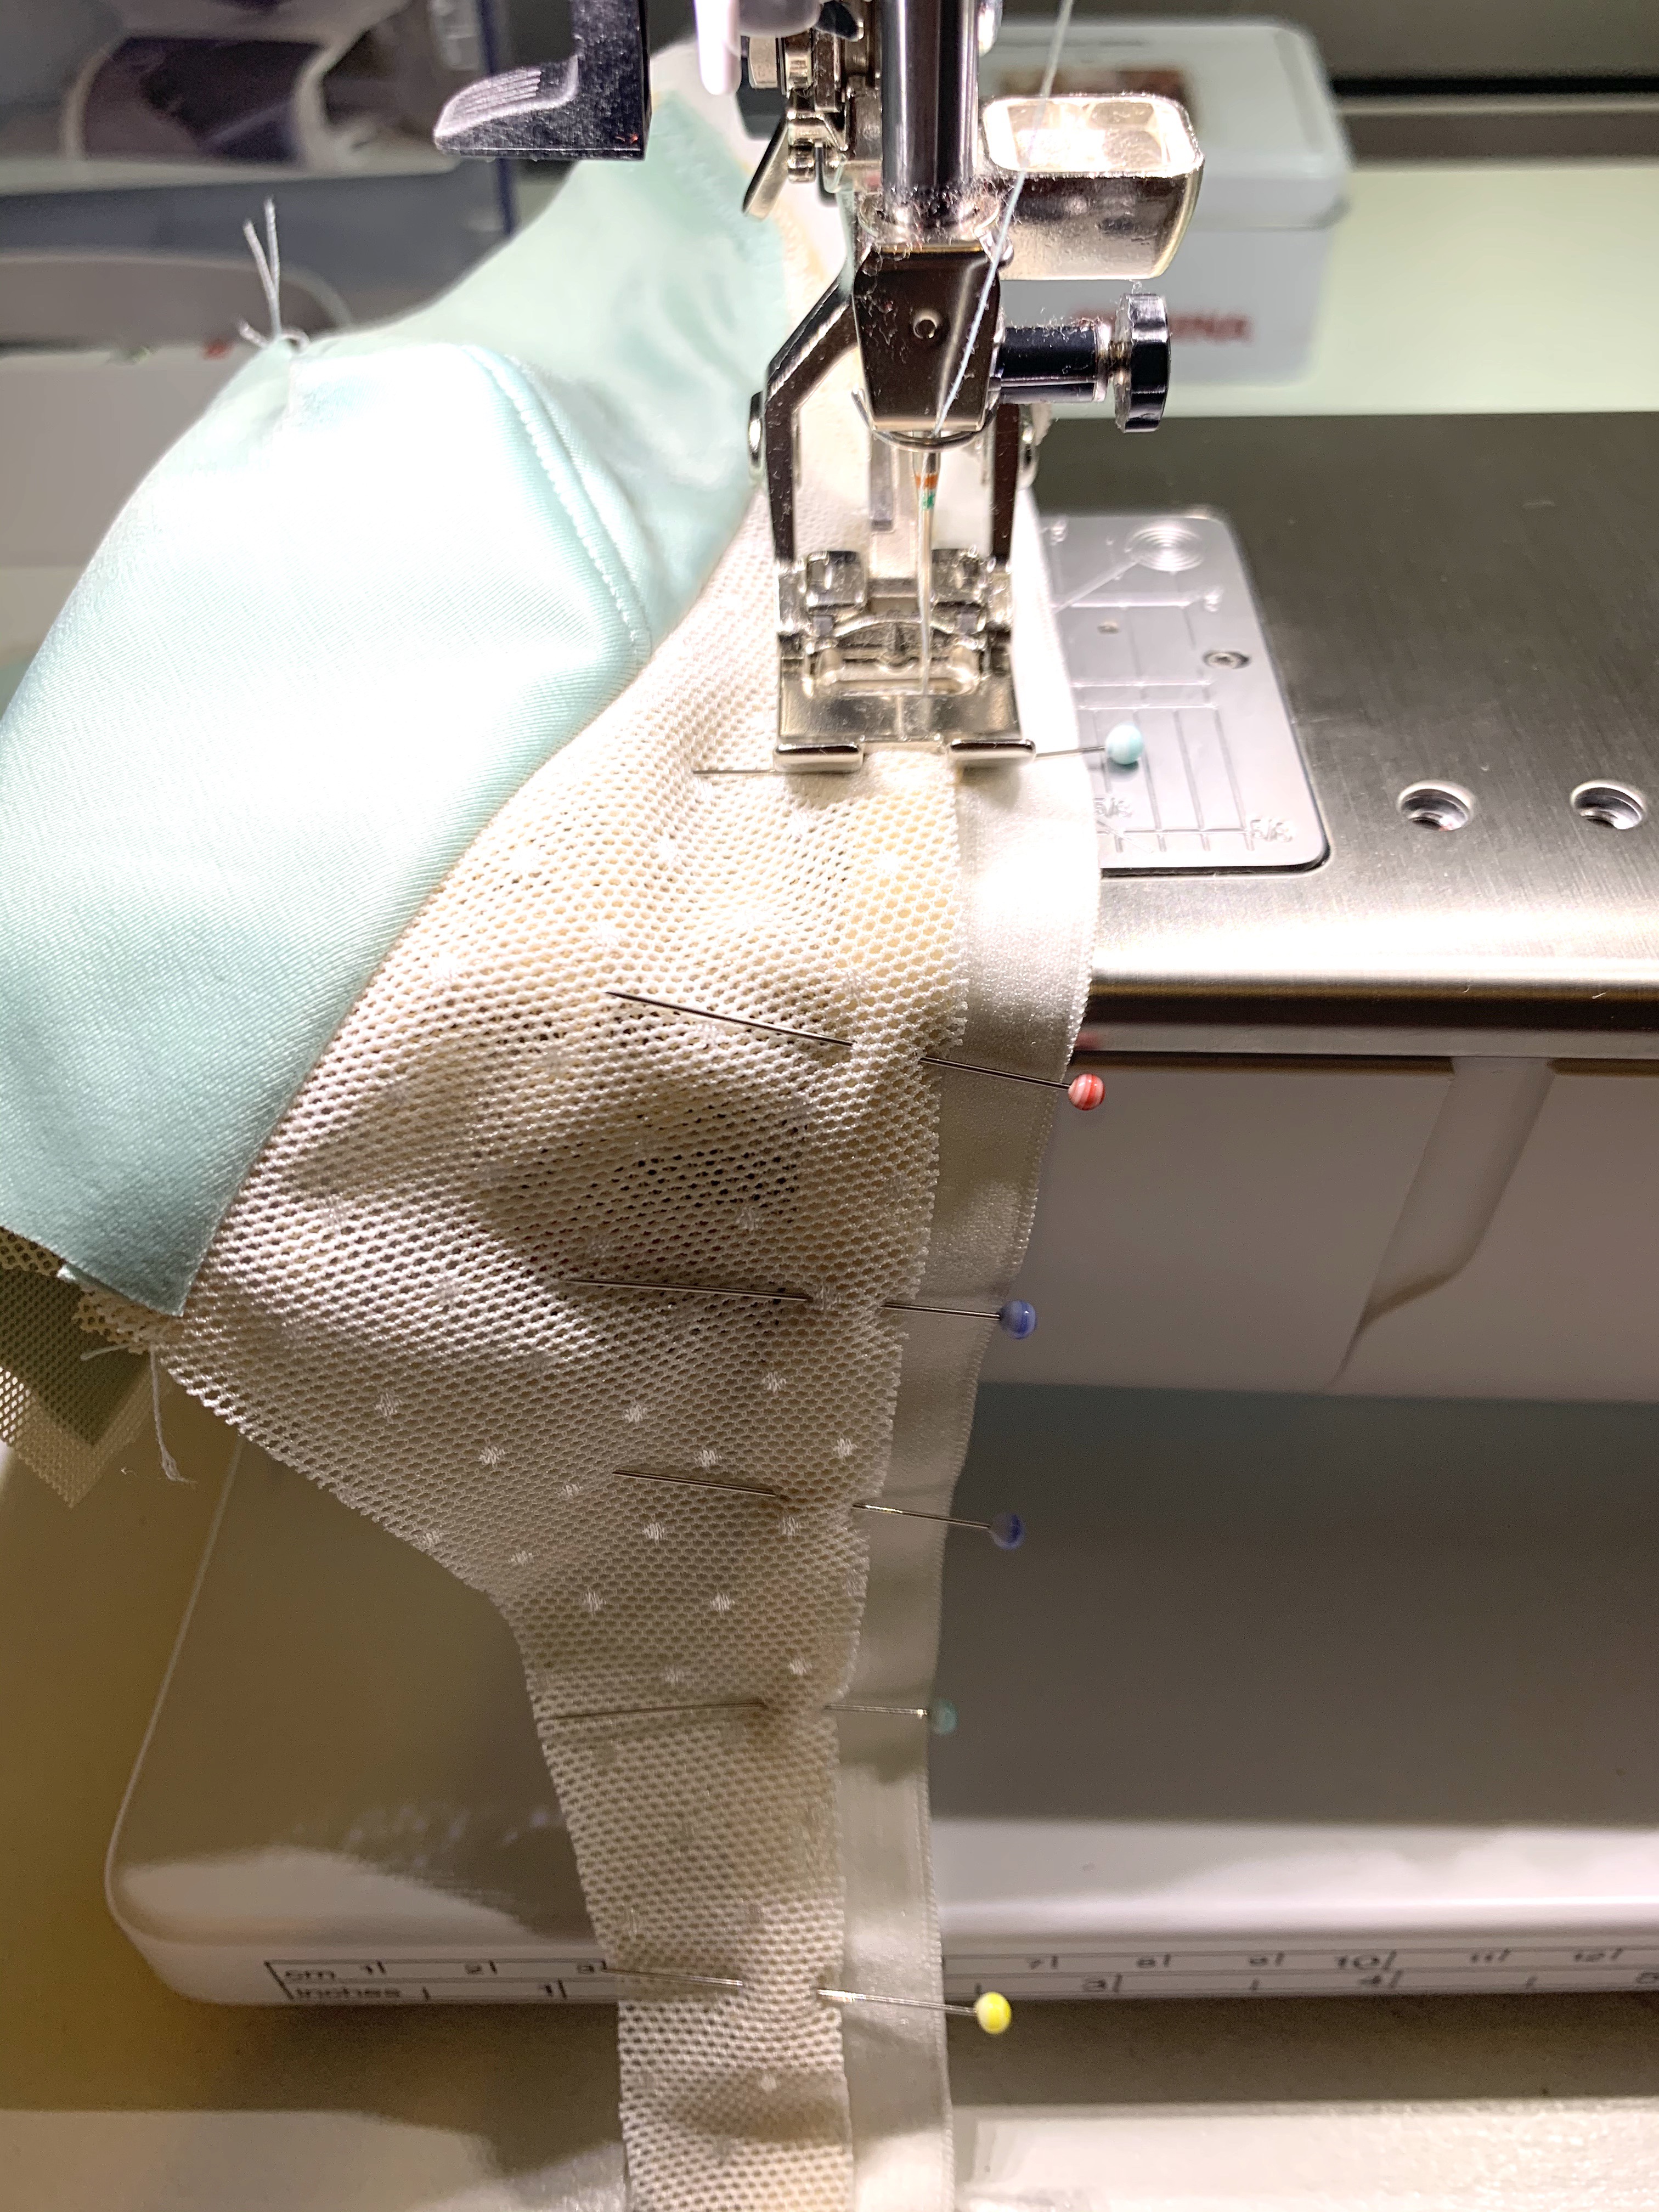
Tip: Here I am using Reverse Pattern Foot #1D and the 9mm plate because I am doing a zig-zag stitch.
Sewing Machine Supplies
I used the #1D foot because the dual feed helps control the stretch of the fabric.
Straight and CutWork Stitch Plate/0mm Plate:
Use for straight stitching to prevent fabric from getting pushed down into the large 9mm stitch plate opening.
Default stitch plate with the machine; can be used for all stitching, but necessary for stitches with any stitch width
TIP #1: Cutting out the Fabric
Depending on your fabric, you might not want to use pins. If this is the case, you could try temporary spray adhesive. or pattern weights to cut the pattern from your fabric. I was able to use pins and no leave holes, but test your fabric first. These fabrics tend to be slippery, and like to move around, so cutting slowly (and maybe using a rotary cutter instead of scissors) helps.
TIP #2: When to Use Straight Stitches and When to use Zig-Zag
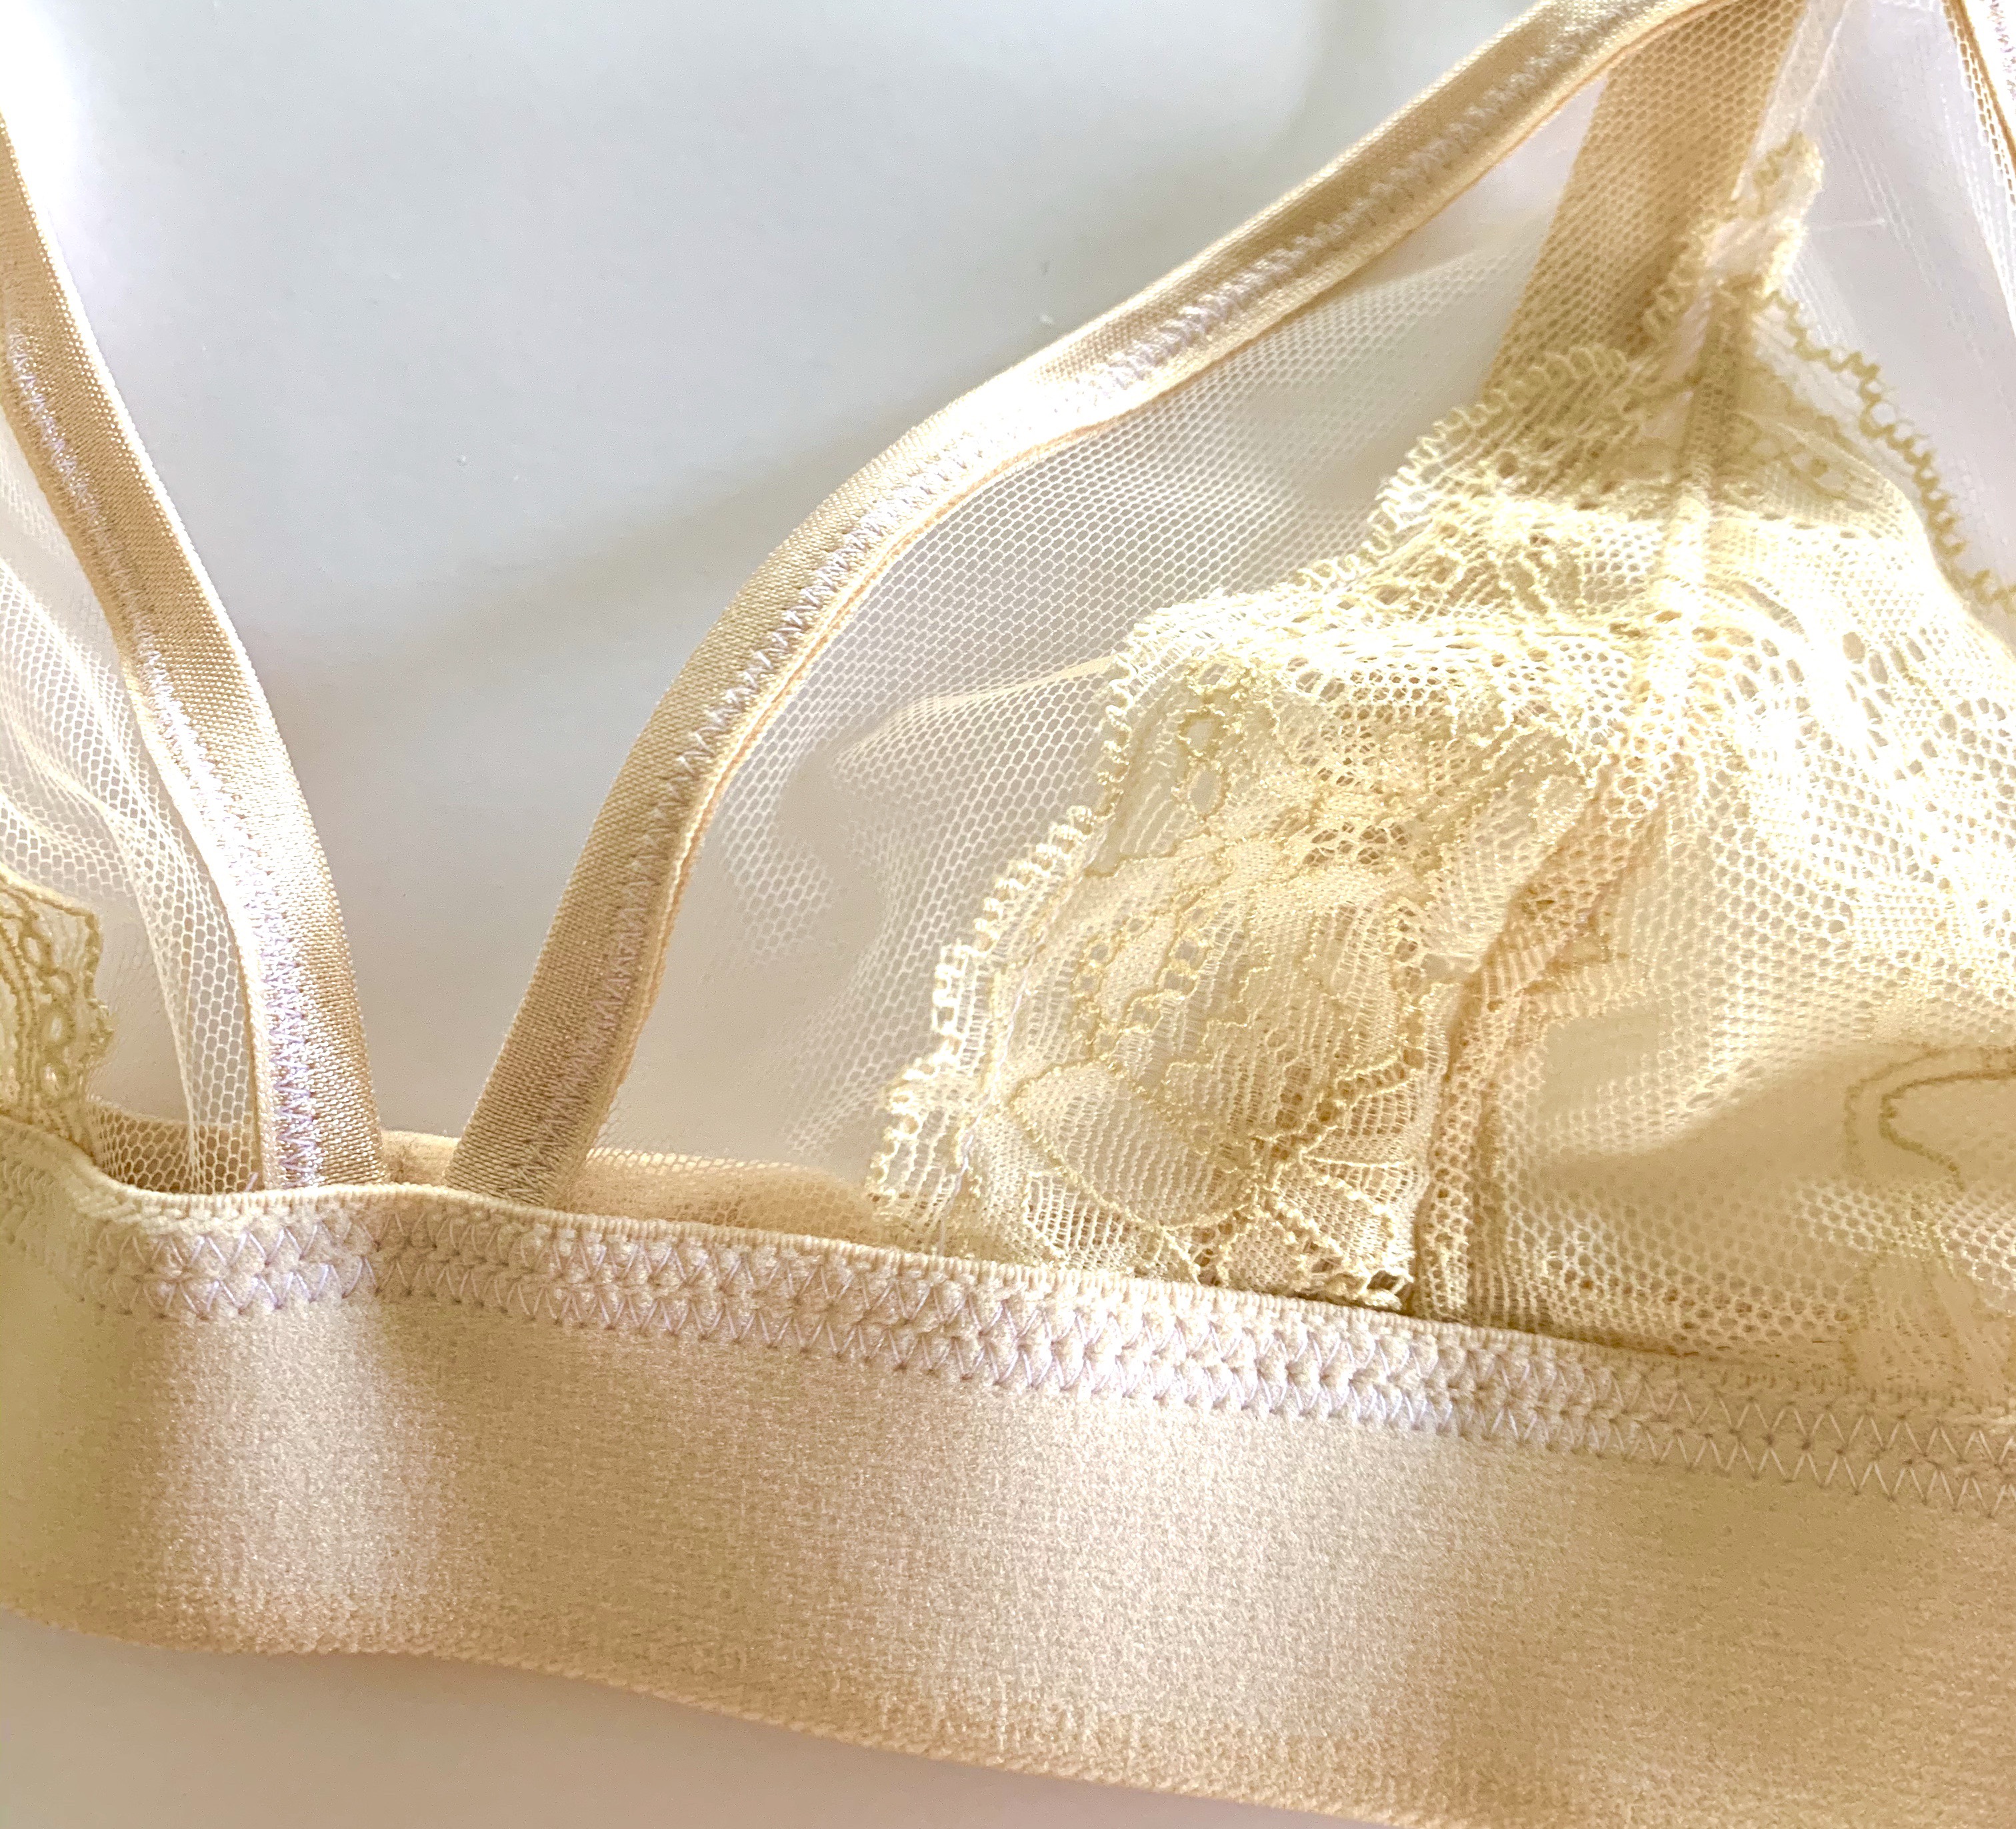
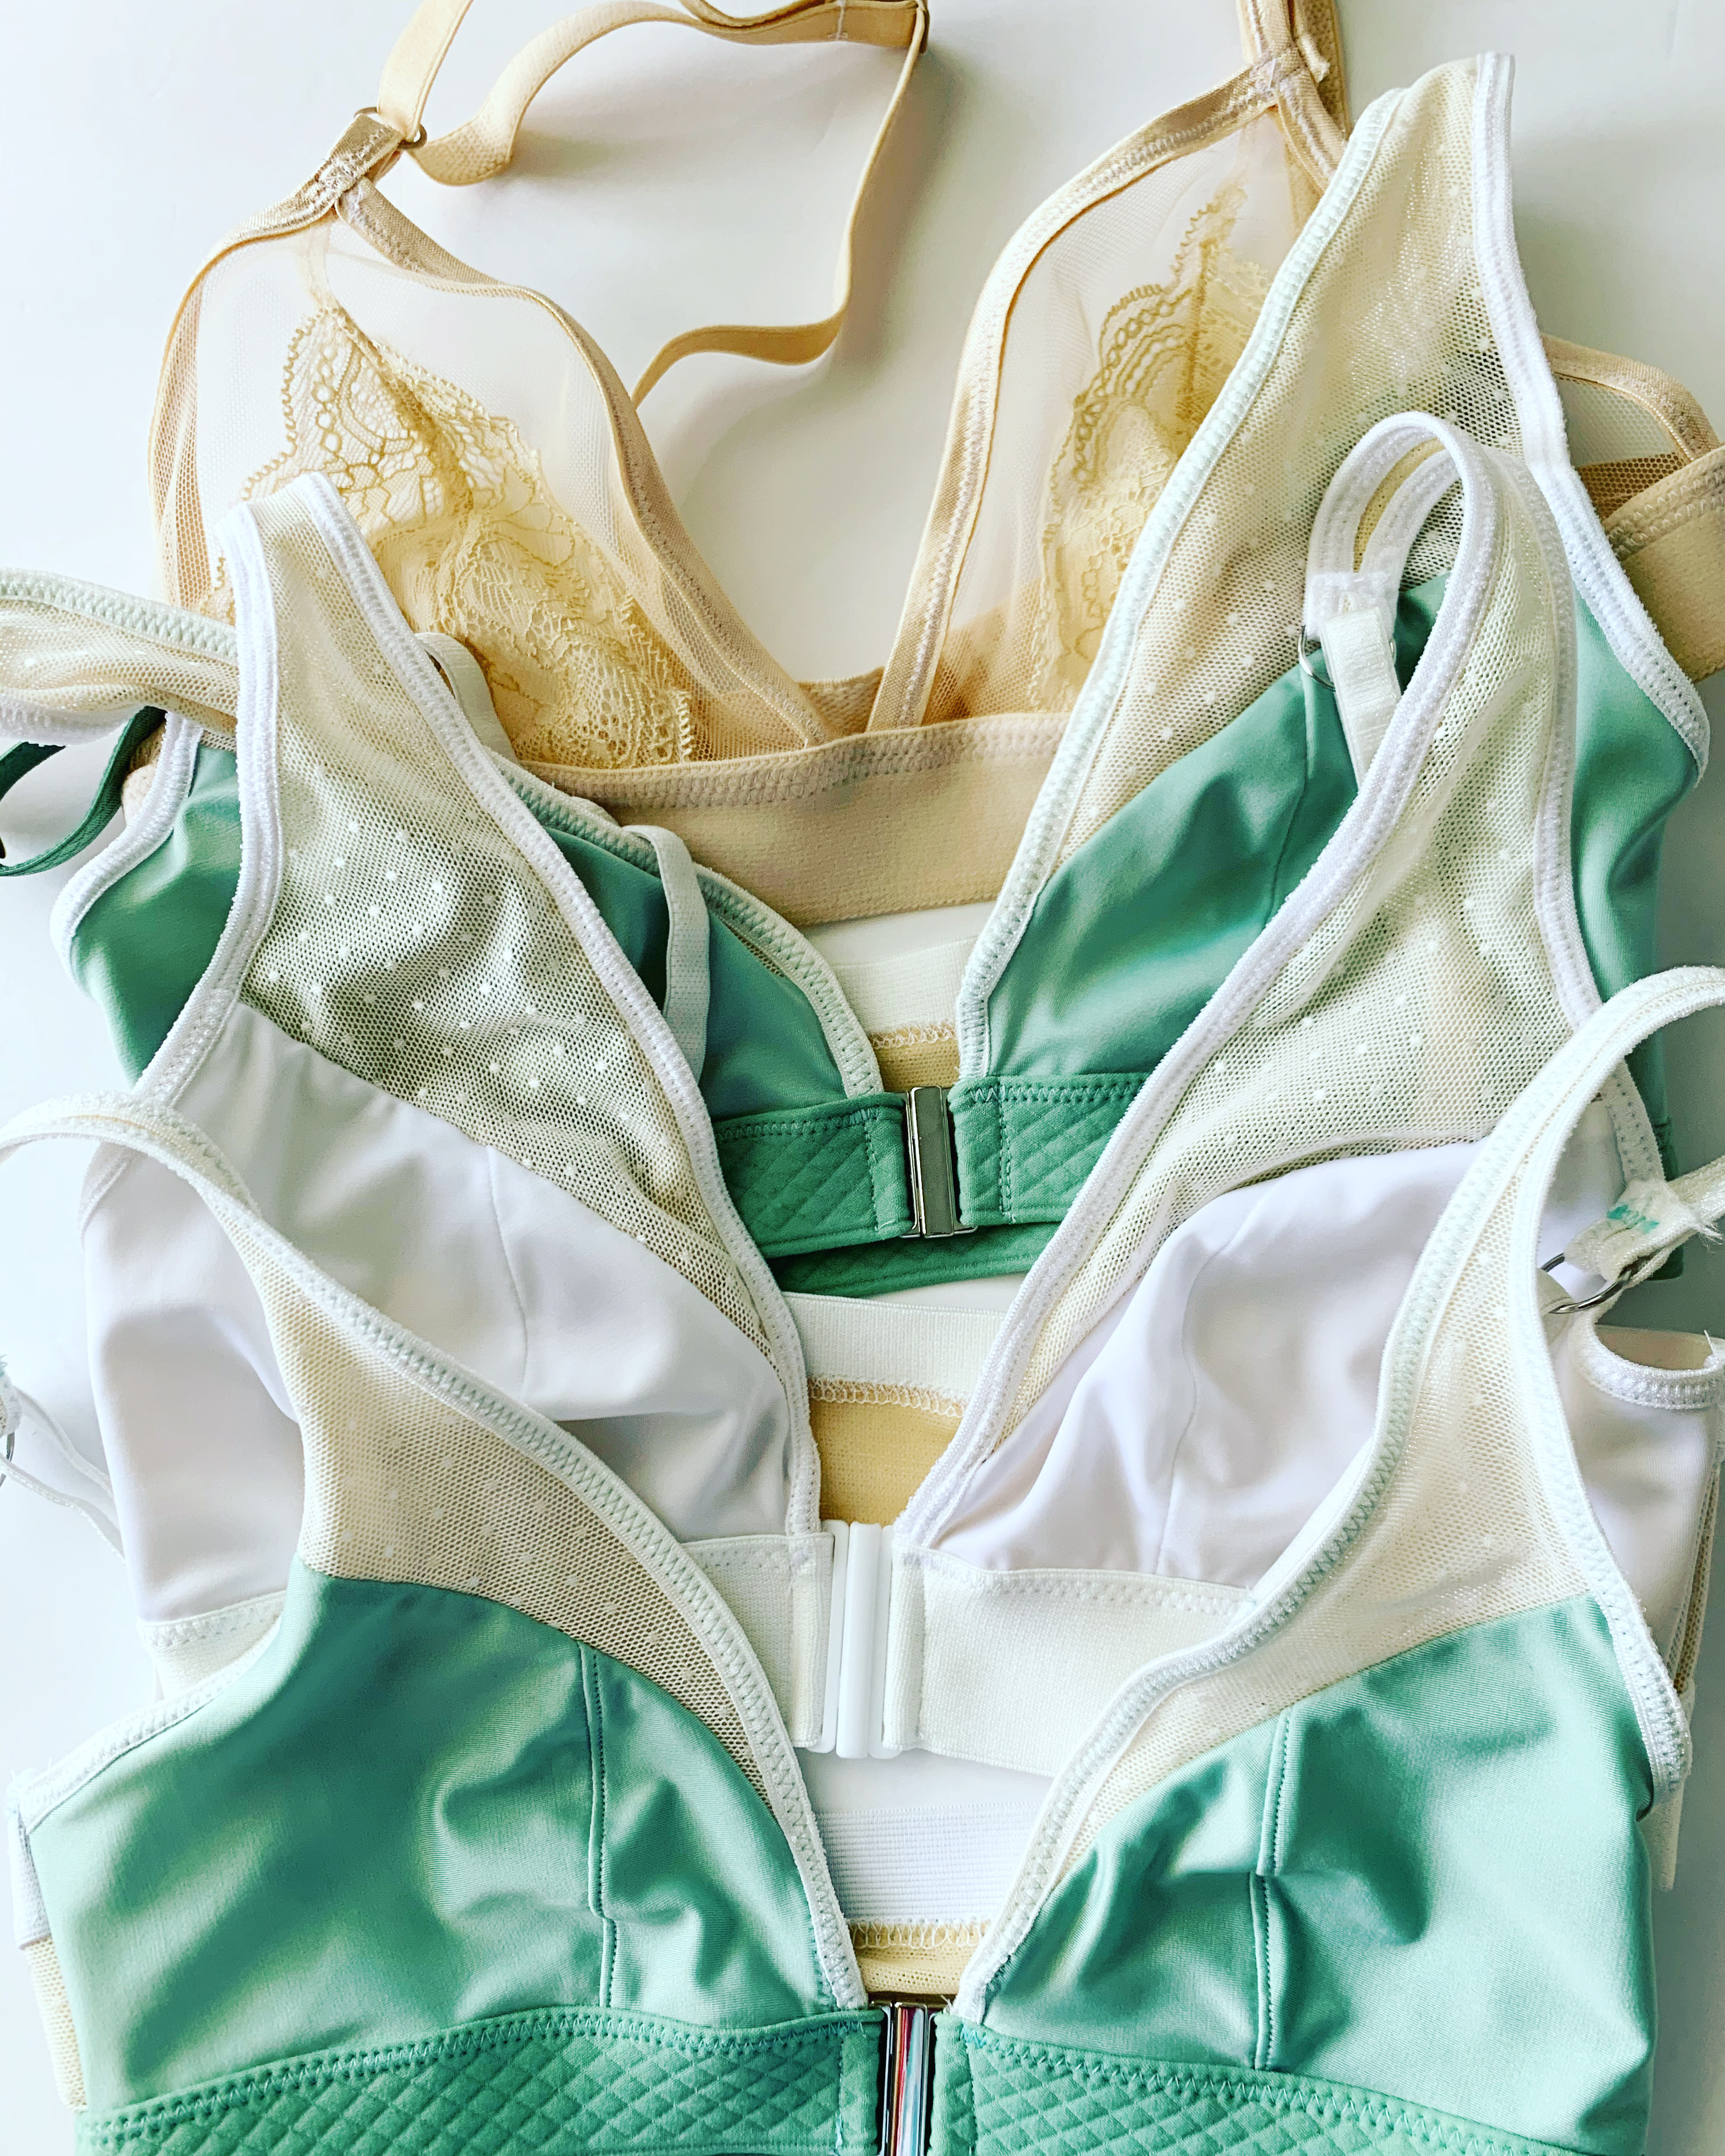
Tip: look at the double row of zig-zag stitches on the band. This secures the cups well, while also adding a decorative detail!
Look at the double row of zigzag stitches on the under-bust band. These secure the cups well, while also adding a decorative detail! Did you think that sewing bras meant having to do some fancy stitching? It doesn’t! Just like sewing clothes, you use a straight and a zigzag. But when do you use straight stitches and when do you use a zigzag while sewing stretchy fabrics?
The answer is simple! If your stitches are going vertically you can use a straight stitch. Why? They don’t need to stretch around something. This isn’t always 100% true (like when doing straps and things), but it applies to most straight stitching in stretchy garments.
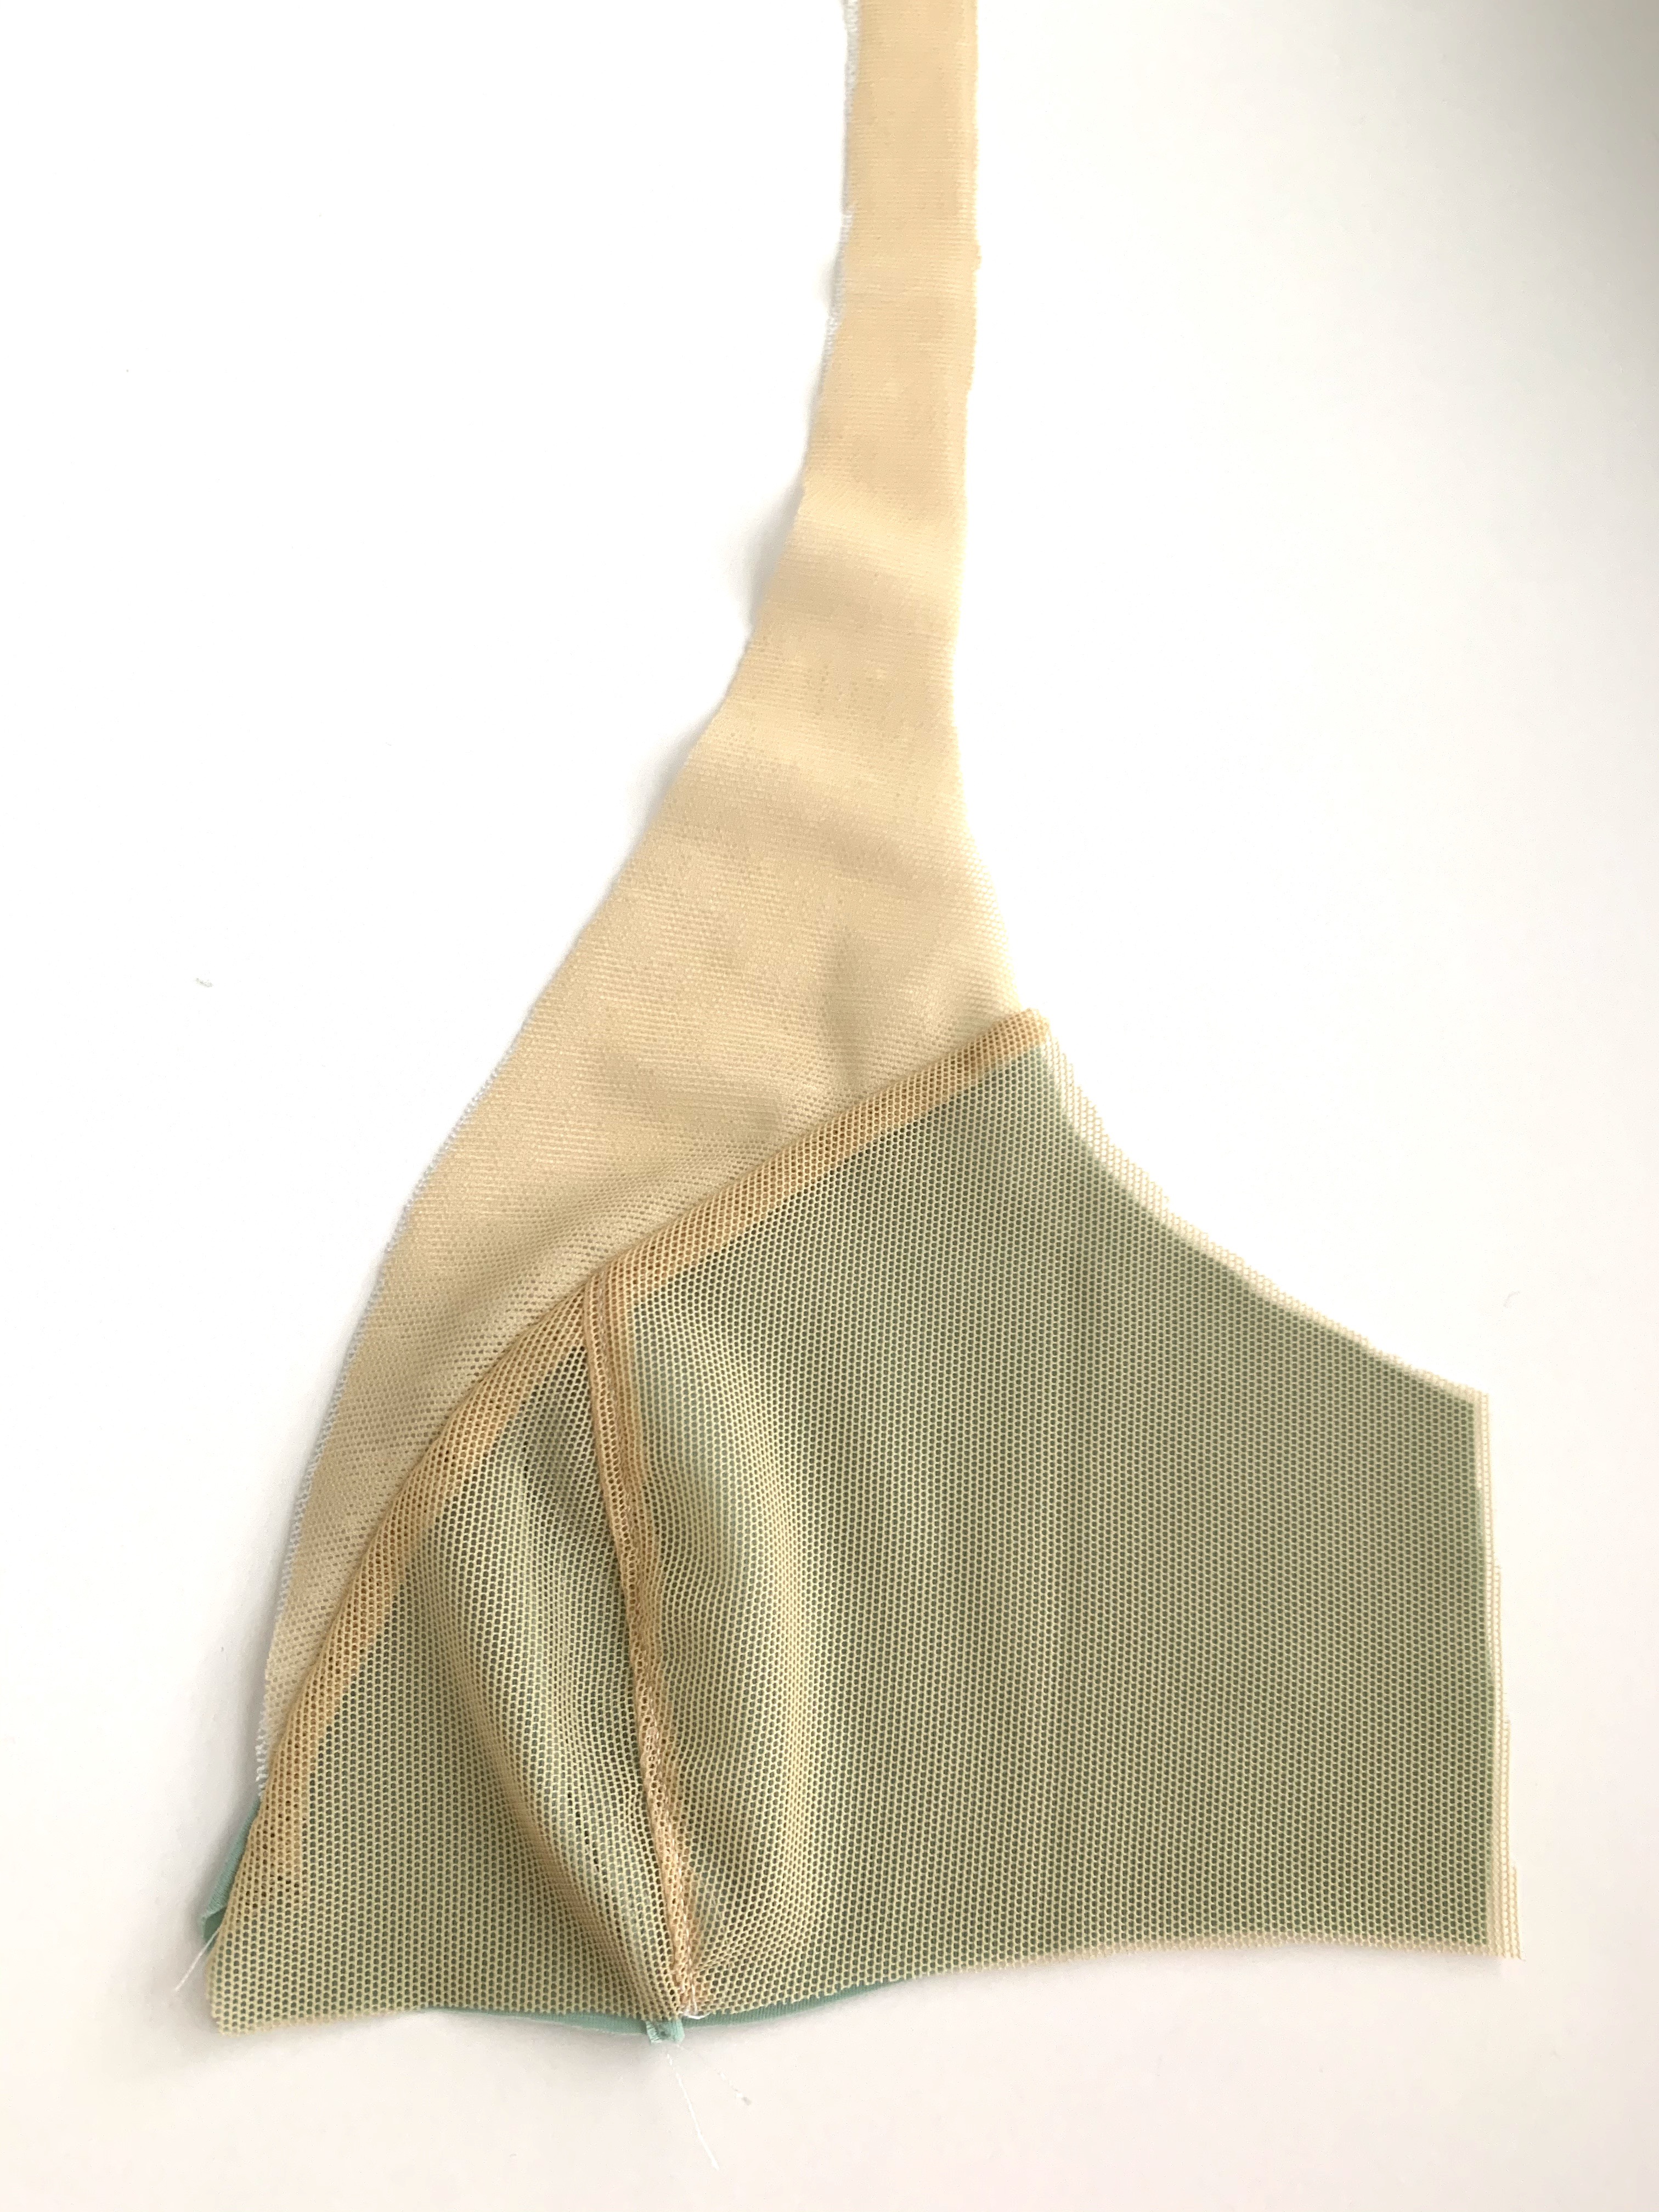
You can see an example of this here on the Jordy Bralette above. The cups need to stretch around the bust, but not over it. The materials in the cup should already be cut to cover it vertically, in the fullness of the bust, and are cut with minimal negative ease. For this reason, you can use a straight stitch.
A zigzag stitch is necessary in areas that need to do a lot of stretching. You can see it on the horizontal under-bust band, and the sides of the cups, which are meant to stretch because they need to stay closer to the chest without gaping. You can vary the size of the zigzag for the elastic width and durability needed (a tighter zigzag would be more durable).
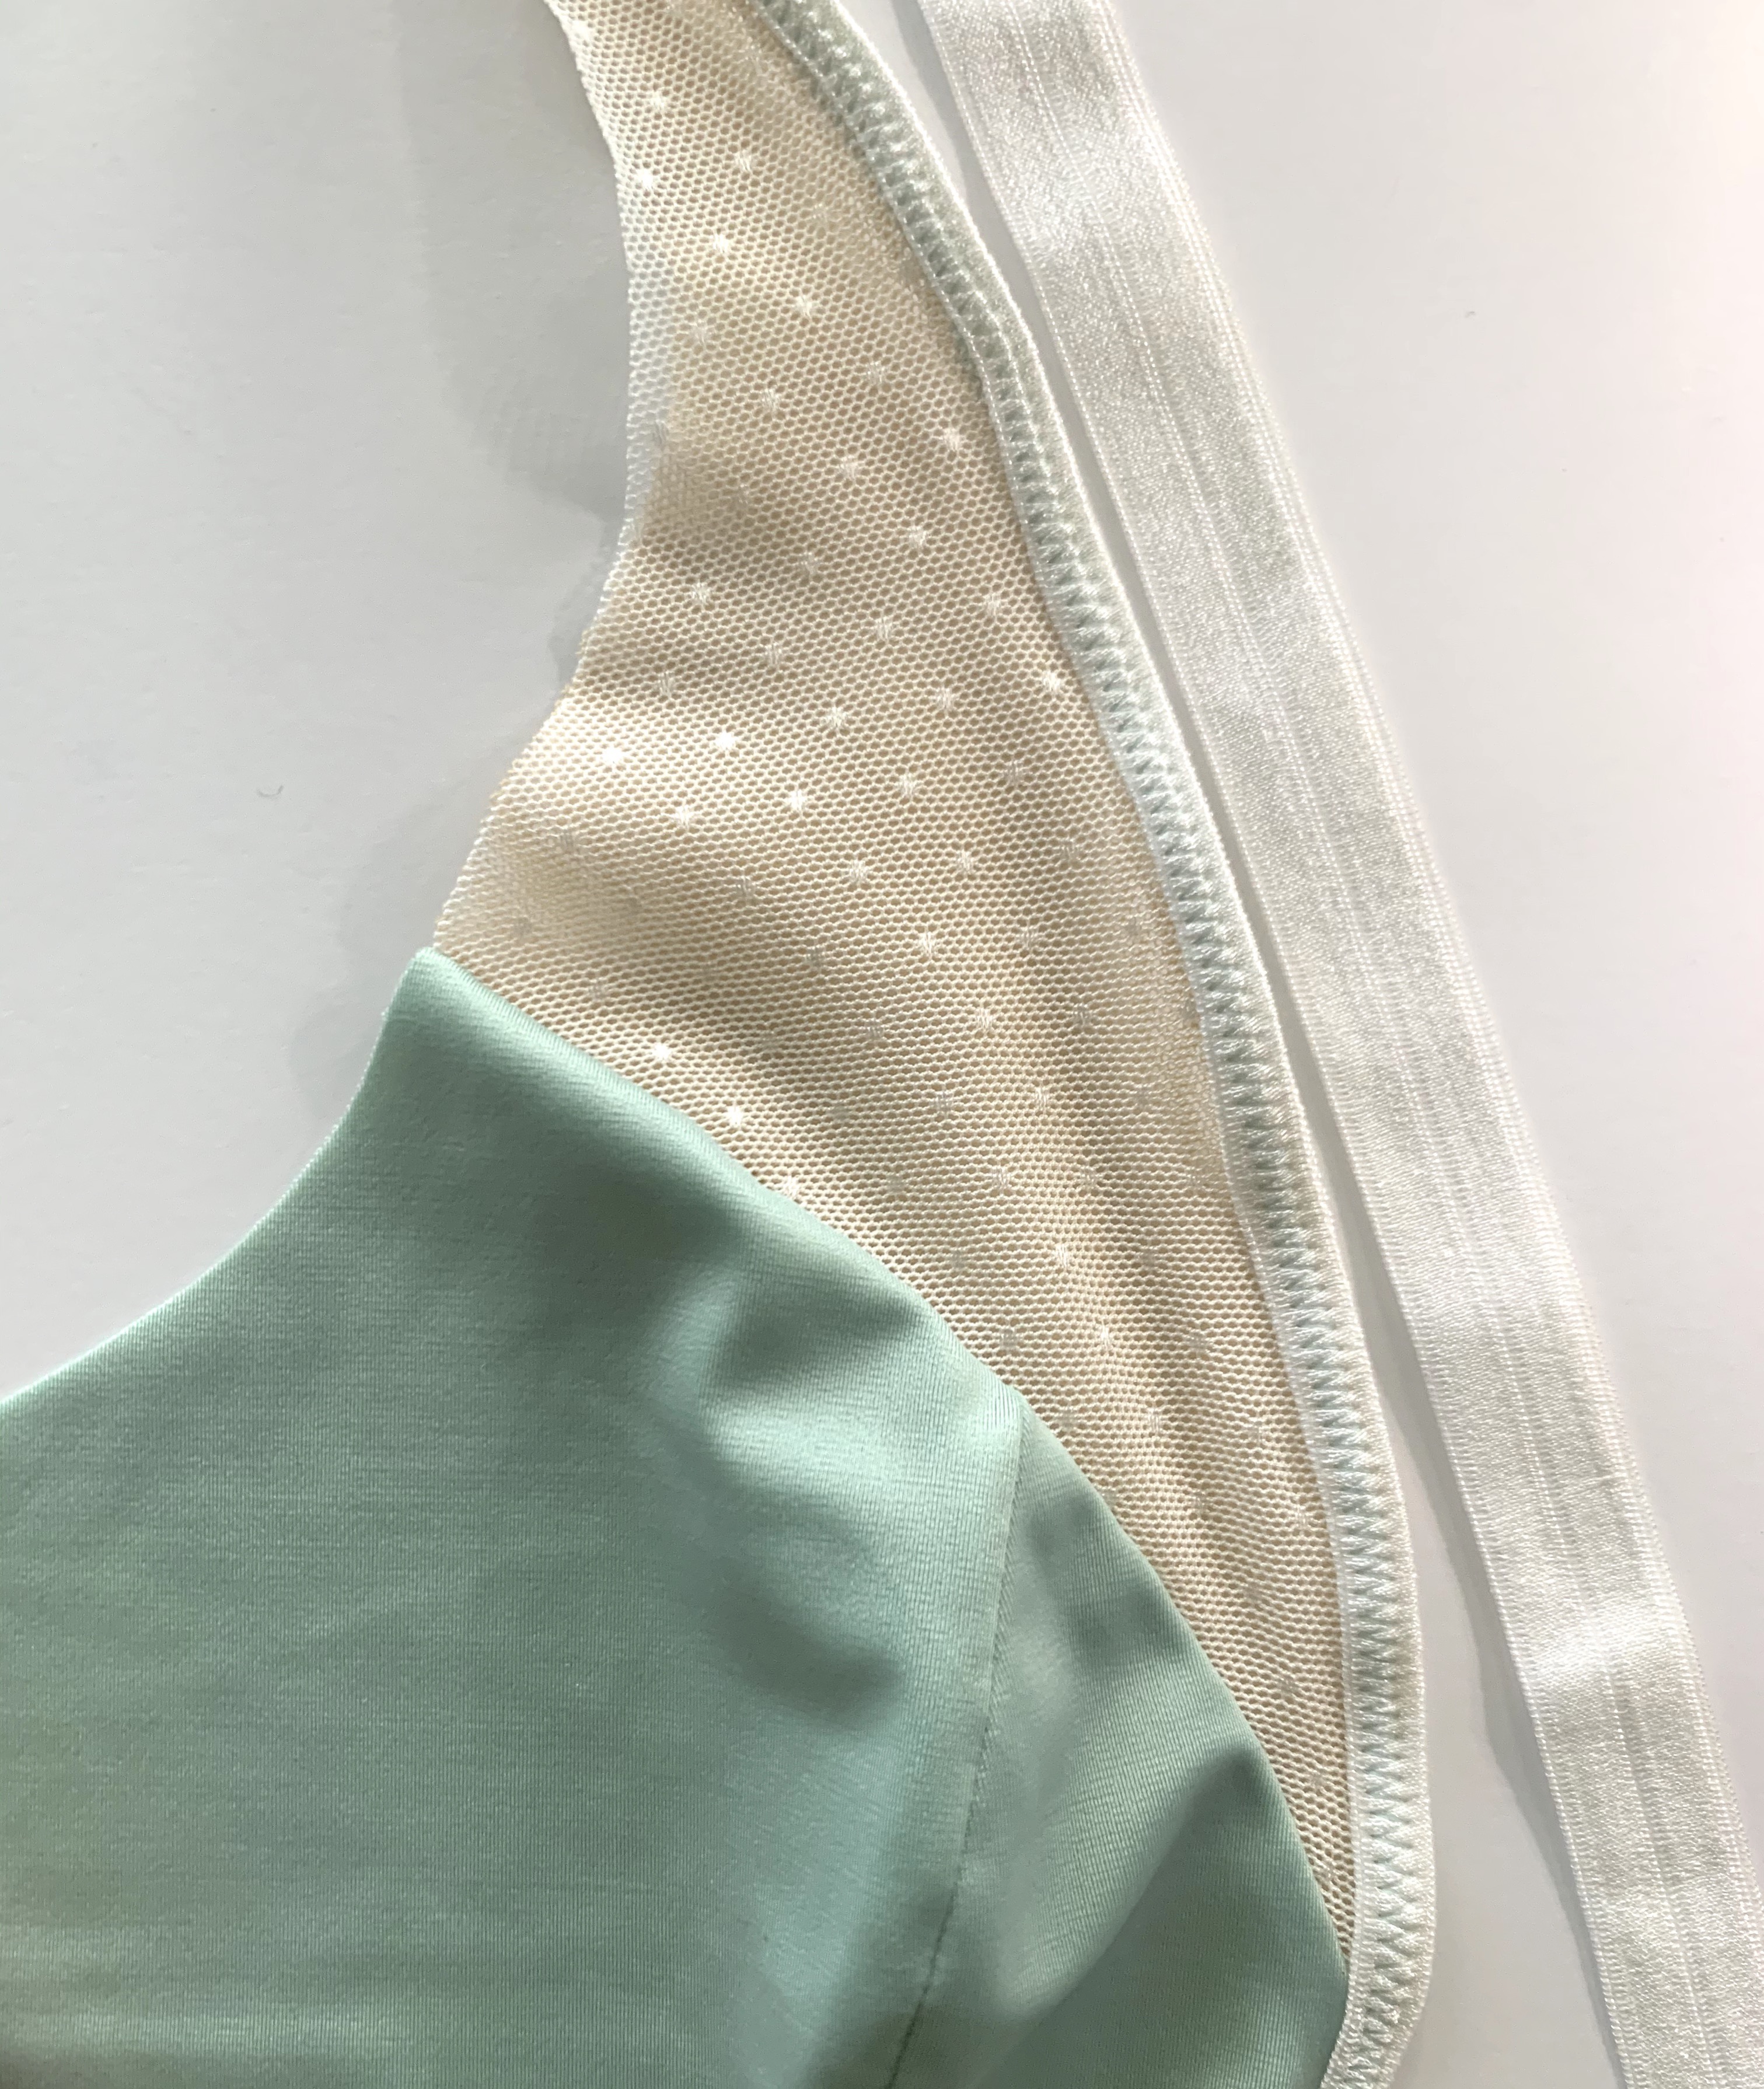
In the photo above of the Maris Bralette, you can see the the seams were encased. There was no need to serge any seam allowances! And this way it feels so much nicer against the skin.
TIP #3: Working with Fold over Elastic (FOE)
This is FOE: Fold-over-elastic. It’s a commonly used material in lingerie sewing.
FOE—as you will see it called most places—is simply a thin elastic with a crease down the center making it easy to fold-over and encase raw edges. It is used often in underwear patterns.
The tips I have for you are these:
1. Cut the length of the FOE a little bit shorter (about 1/2”) than the area it is enclosing (even if the pattern doesn’t say to!) By doing this, it doesn’t stretch out too much, causing the area to be wavy, and instead looks nice and flat. If the material it is encasing doesn’t have a lot of stretch you might not need to do this, but for materials with lots of stretch, it really helps! The bra on the left below is wavy-er because the FOE wasn’t cut shorter! It got a bit stretched out.

2. Even though it is tempting to fold the elastic over the edge, pin and sew it all at once… don’t. You will have a much nicer finish if you do this: Pin and sew (zigzag) the elastic to the back/underside first. Then, fold it over, pin and zigzag it down the front.
And a couple notes on…
Boning
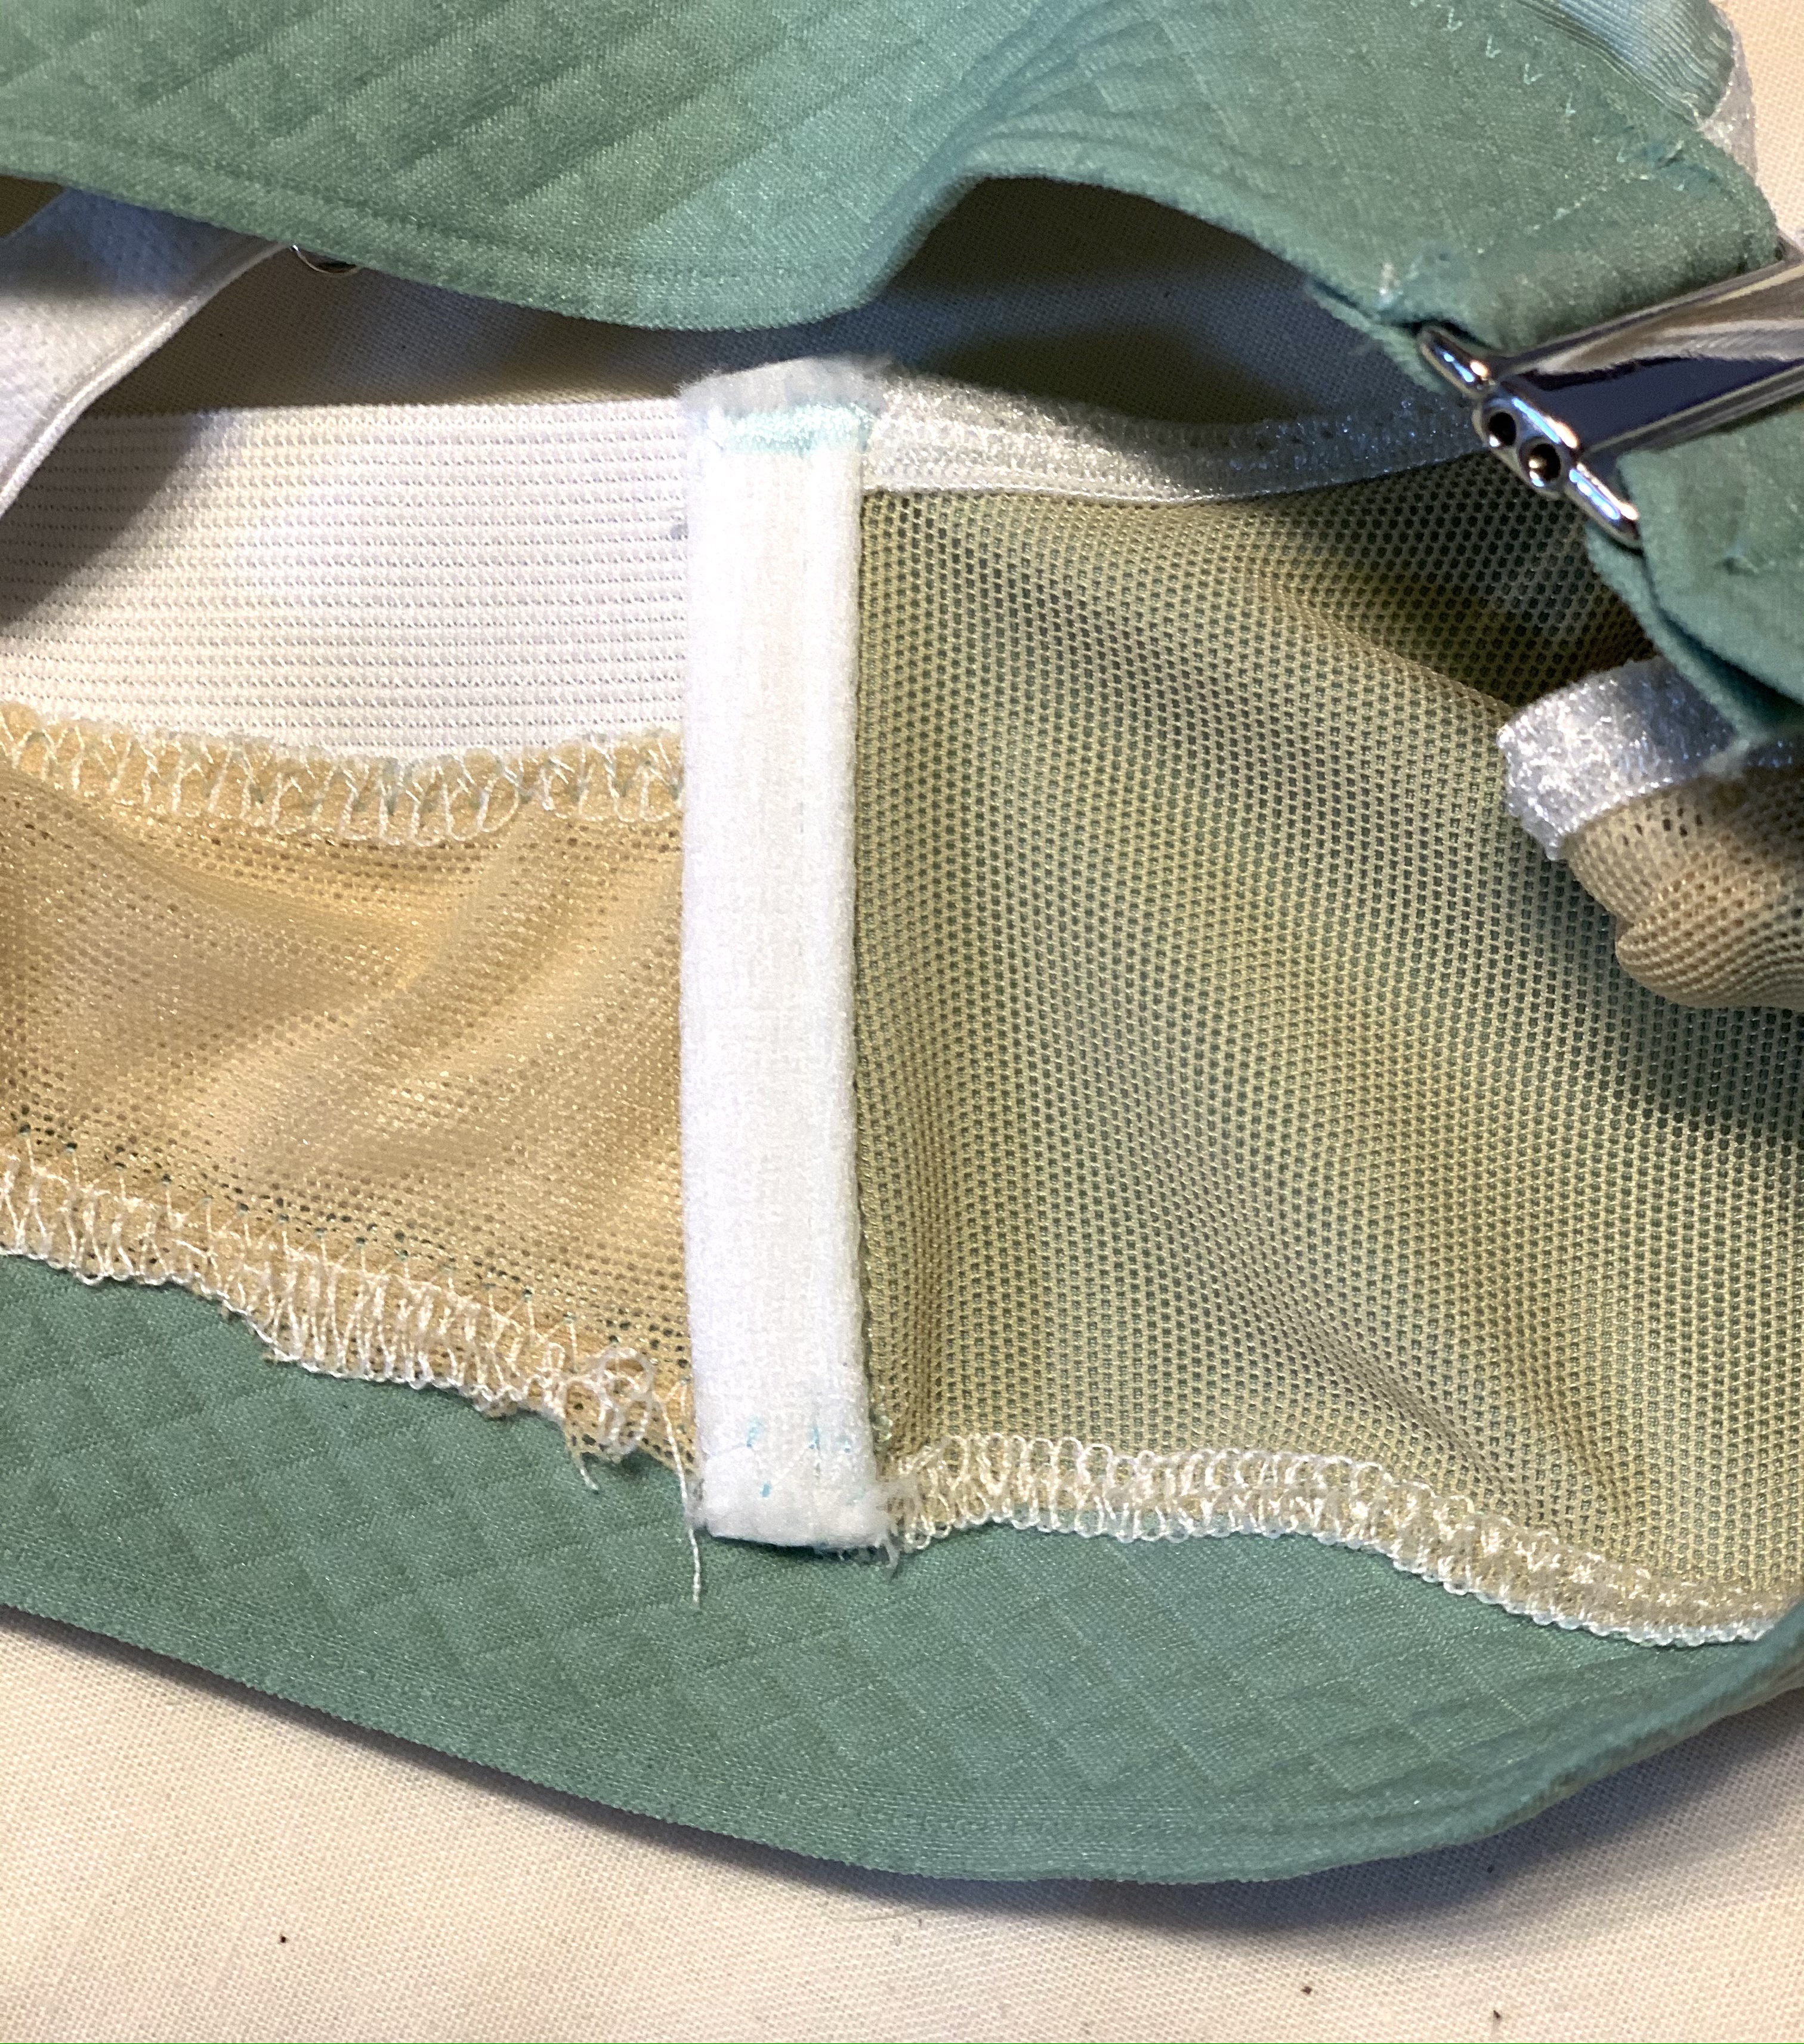
Boning provides structure, but this is not to be confused with underwire. Bralettes don’t have underwire! Bralettes are nice because they don’t have underwire and don’t dig into your body because of it. Boning is used on the Maris pattern though, to provide structure and stability at the sides of the bust. I appreciated this detail. You will need both channeling (the casing for the boning), and boning to insert down the center. This is different than buying the all-in-one stuff, but it’s much softer than the covered boning I’ve bought by the yard from stores in the past.
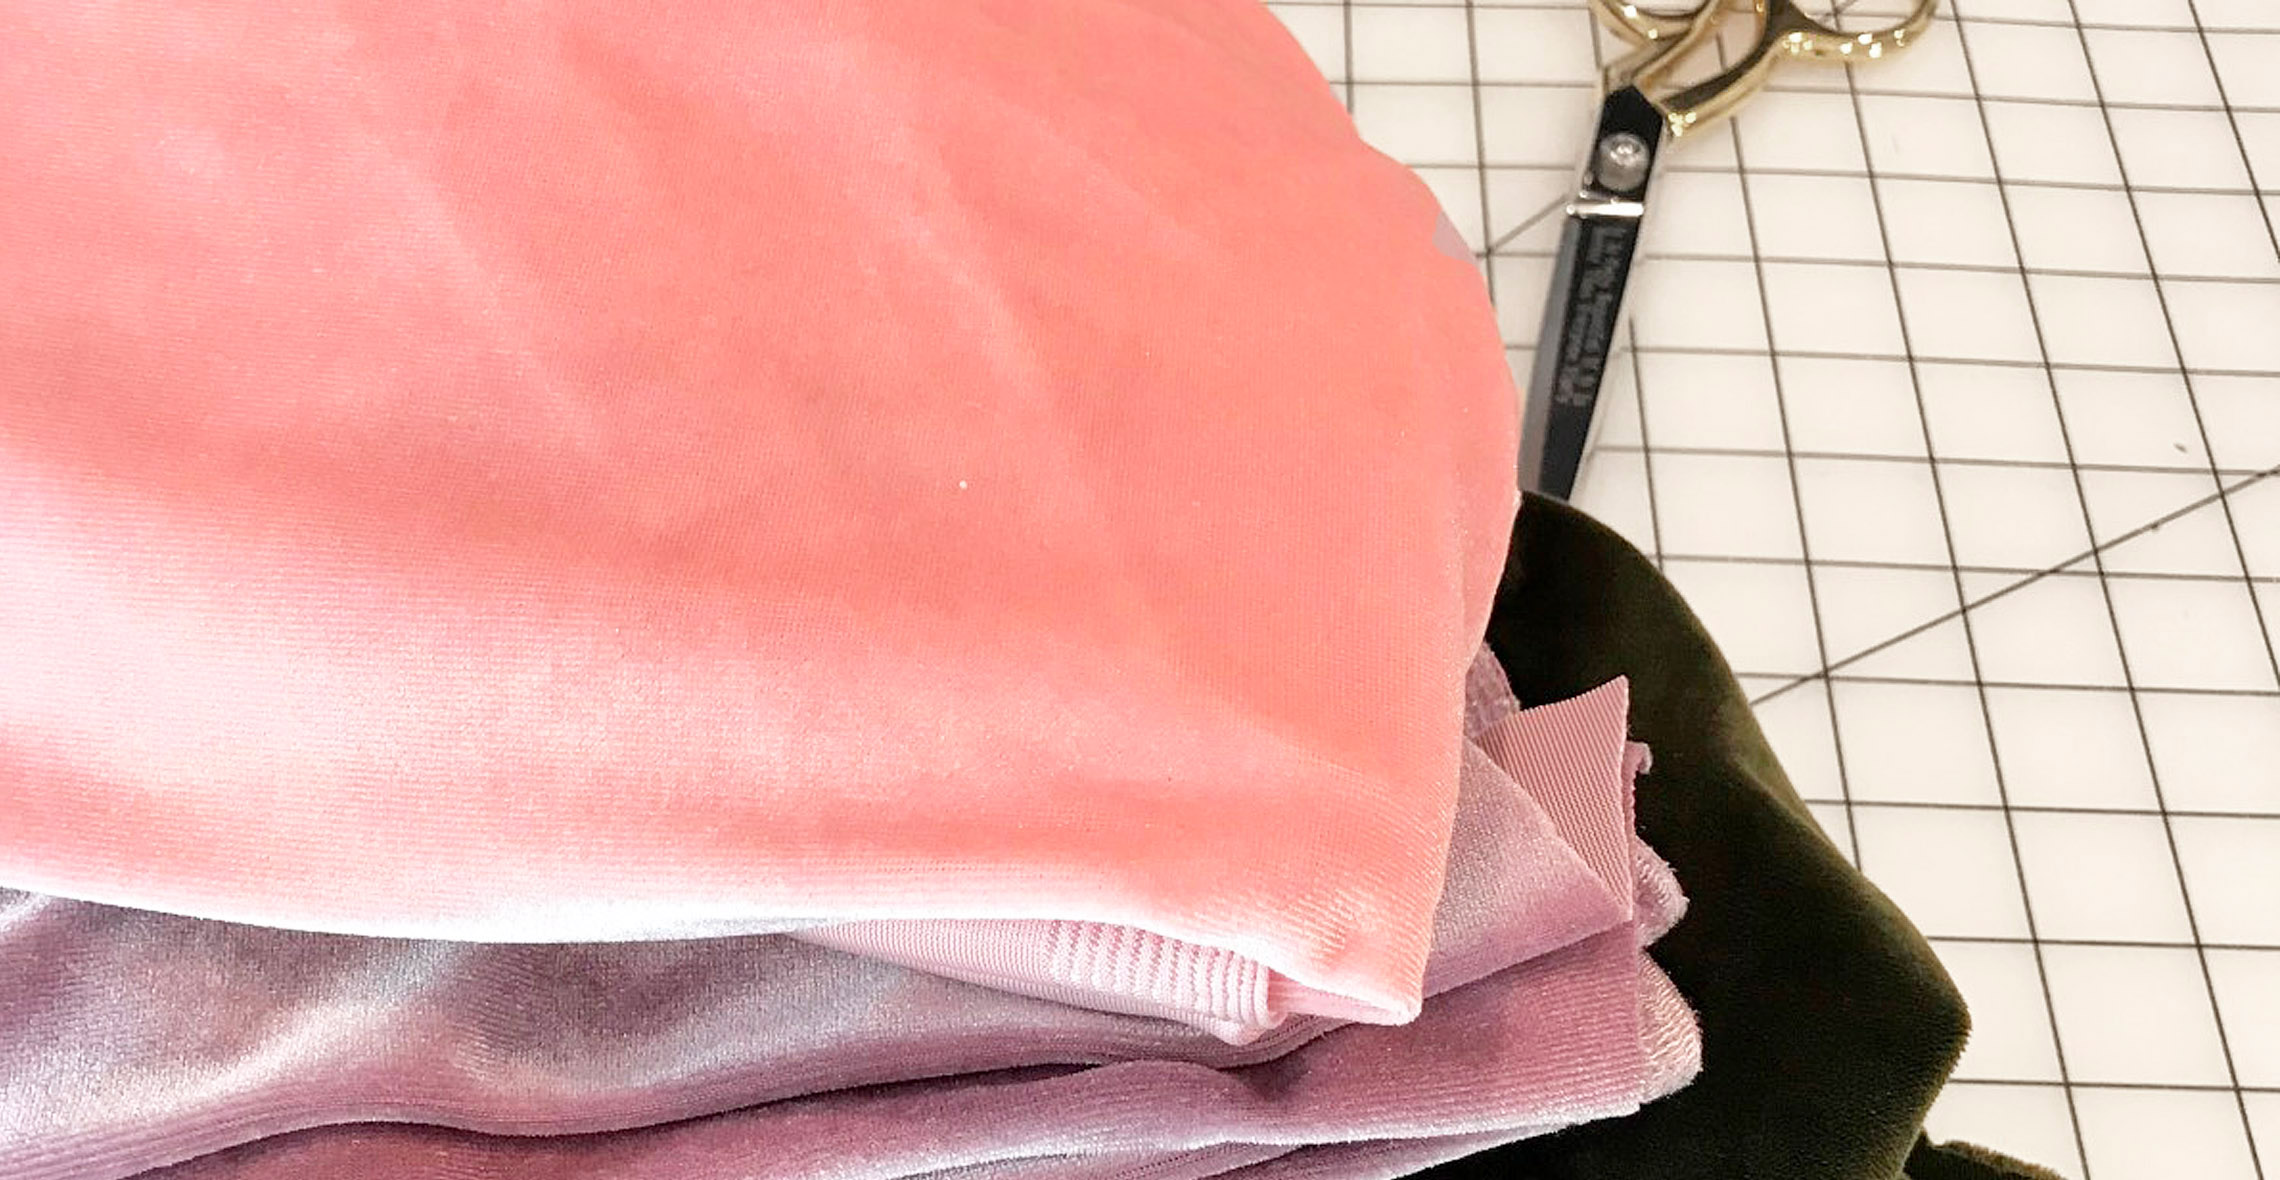
Layering delicate fabrics

Layering laces, mesh, and satiny, stretchy lycras looks beautiful! Just remember to make sure the stretch is going in the same direction when you cut them/layer them. You also should use a walking foot or dual feed foot so that they lie flat and the under layer doesn’t move/stretch differently than the top! You can use a special spray adhesive for delicate fabrics (like this), so that you don’t have to use pins.
I hope these tips help you! I sewed my very first bras (bralettes) and found out they were just so much easier to make than I’d assumed! Now I’m on a mission to get everyone sewing them, and these are the notes I wanted to share with my sewing friends.
Here is another post on the WeAllSew blog that might help with sewing knit fabrics as well!