Bobbinwork
Have you ever wanted to embellish a project with thread that is too thick to go through the needle? There are a couple ways to achieve this. One is through couching, where the thread is laid on top of the fabric and tacked down with a stitch. You can read more about couching in the “Couching Three Different Ways” post on WeAllSew.com.
But, there’s another way–bobbinwork. Bobbinwork is exactly what it sounds like–the decorative thread is placed on the bobbin, and the fabric is placed upside down under the presser foot. The needle is threaded with a regular-weight thread.
Bobbinwork is a relatively simple process, but there are a few steps that are necessary to get a good stitch.
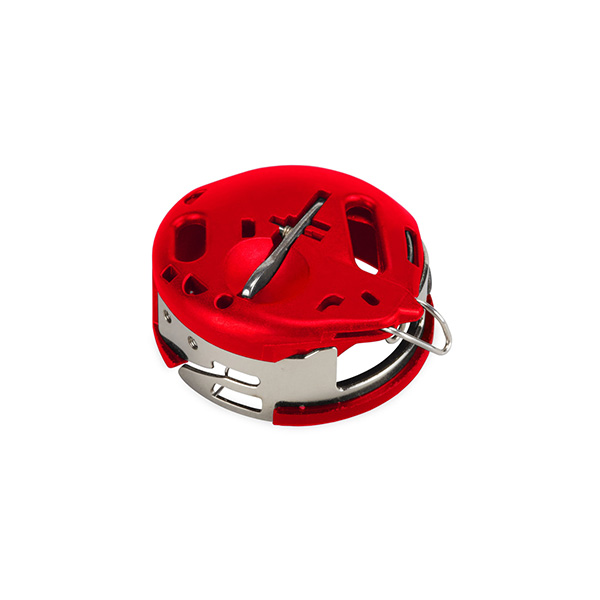
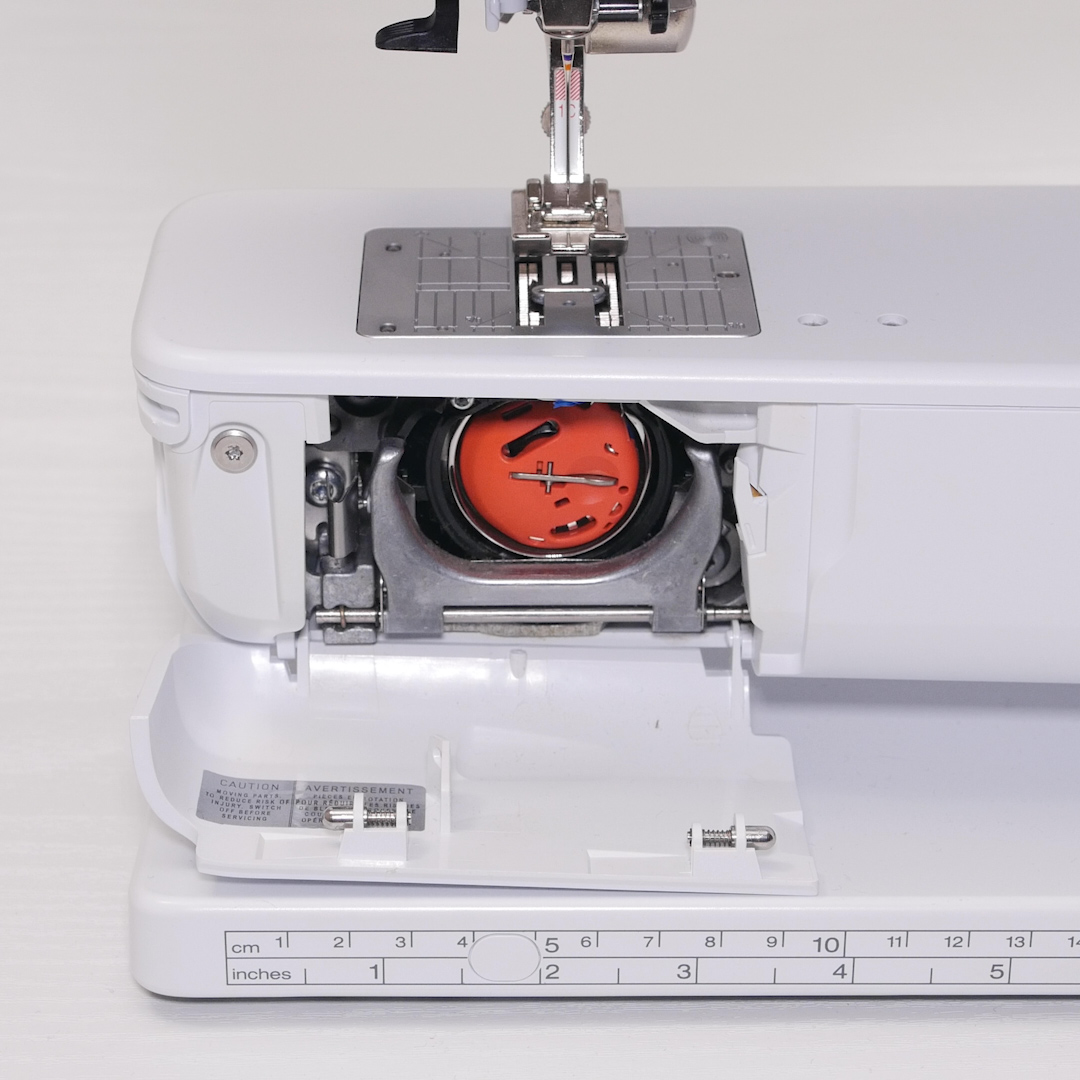
First, you’ll need a bobbin case that allows for a looser tension to accommodate a heavier thread. For BERNINA machines with the BERNINA hook system, use the red bobbin case for bobbinwork. It is specially designed for heavy threads. (Note: For BERNINA 8 Series machines, the bobbin tension can be reduced using the Multi-function Tool that comes with the machine).
For other machines, you can purchase a separate bobbin case and reduce the tension by loosening the tension spring. It is not recommended to adjust the bobbin tension of your “everyday” bobbin case – getting that set perfectly is something a technician uses a special tool to do.
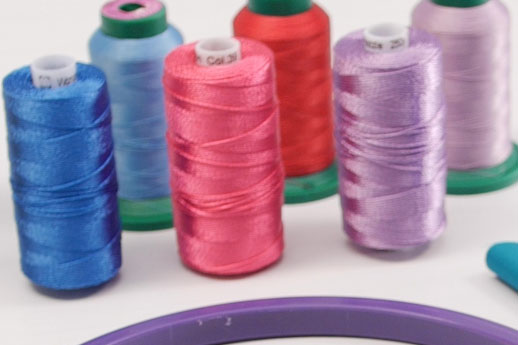
Next, choose the decorative thread. While you can use a much heavier thread than will go through the needle, there is still a limit to how thick a thread you can use. If you cannot wind a bobbin smoothly using the bobbin winder, the thread may be too thick to use. You’ll also need to be sure that you can get the thread into your bobbin case. Remember that we are using a special bobbin case, so a much thicker thread than you might be imagining can be used. Also, you’ll want to be sure the thread can glide smoothly out of the bobbin case. Test this by pulling gently on the thread after you’ve threaded the bobbin case and make sure that it doesn’t catch or snag.
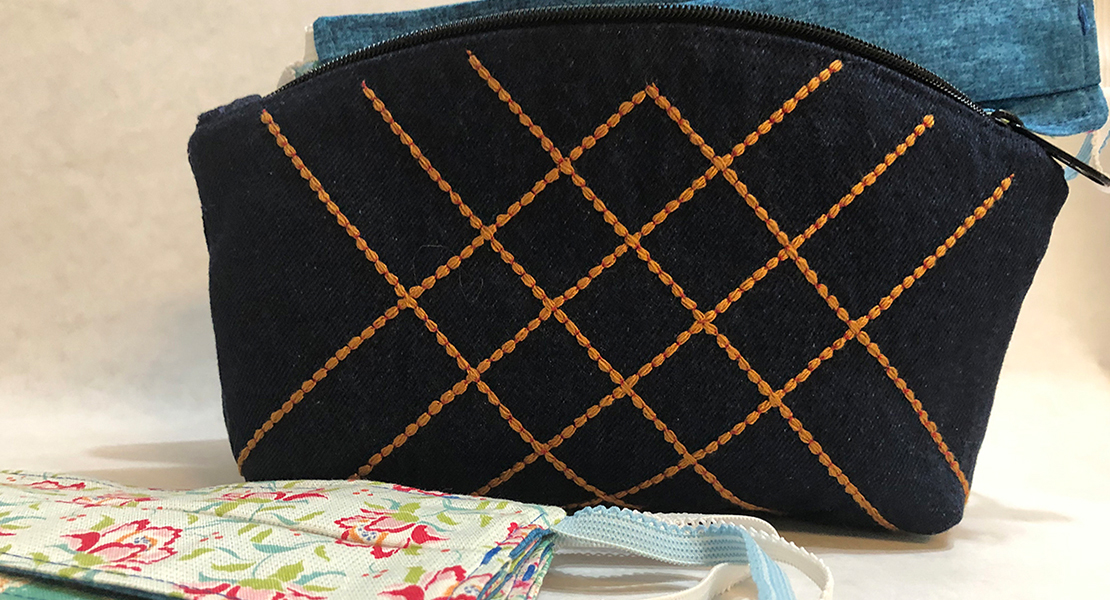
I’ve successfully done bobbinwork with thread up to 8 weight, but you’ll always want to do a test before stitching on your actual project. For these examples, I’ve used Razzle from Wonderfil, a 6-ply rayon that is similar in weight to an 8 weight perle cotton. I love it for its shine and the many colors available.
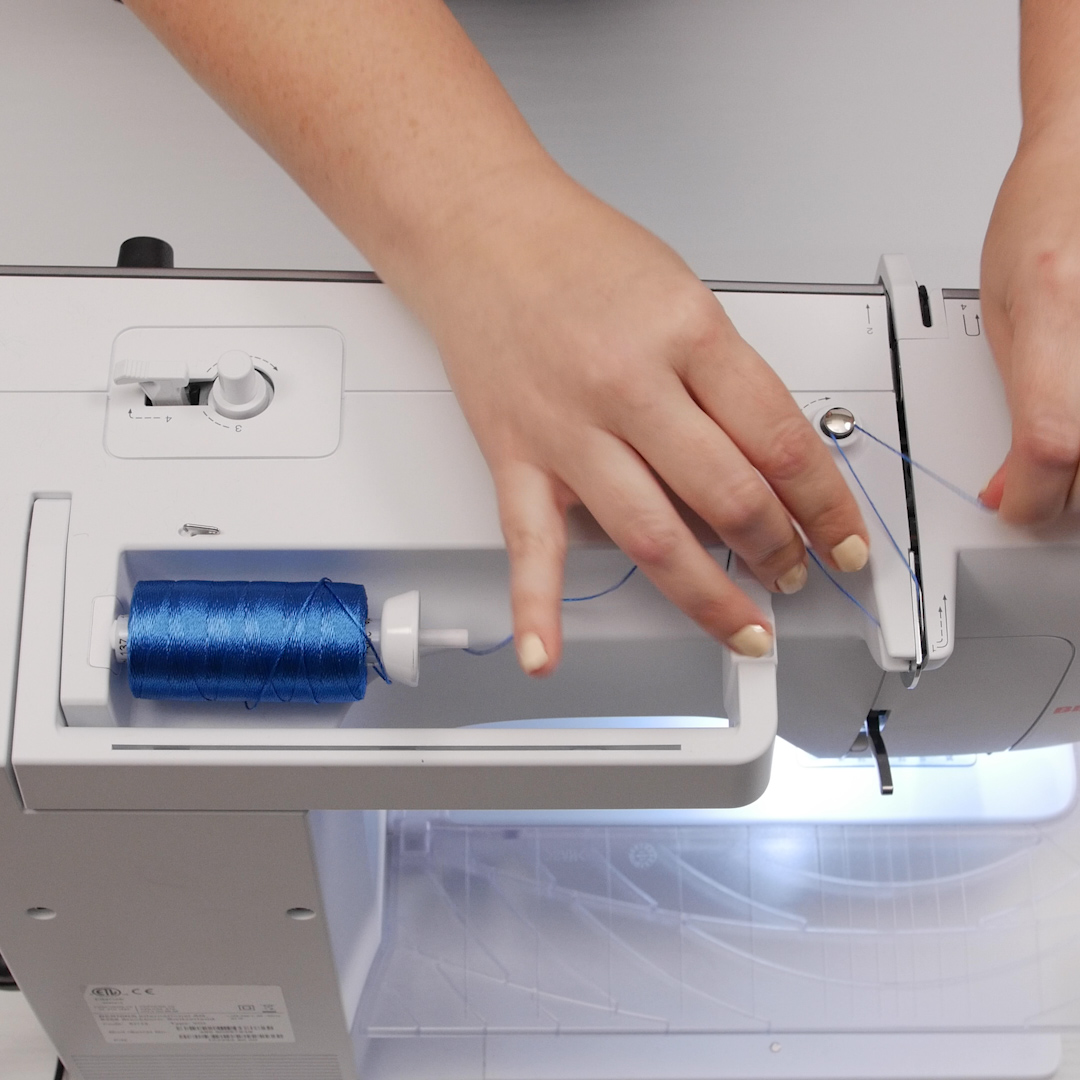
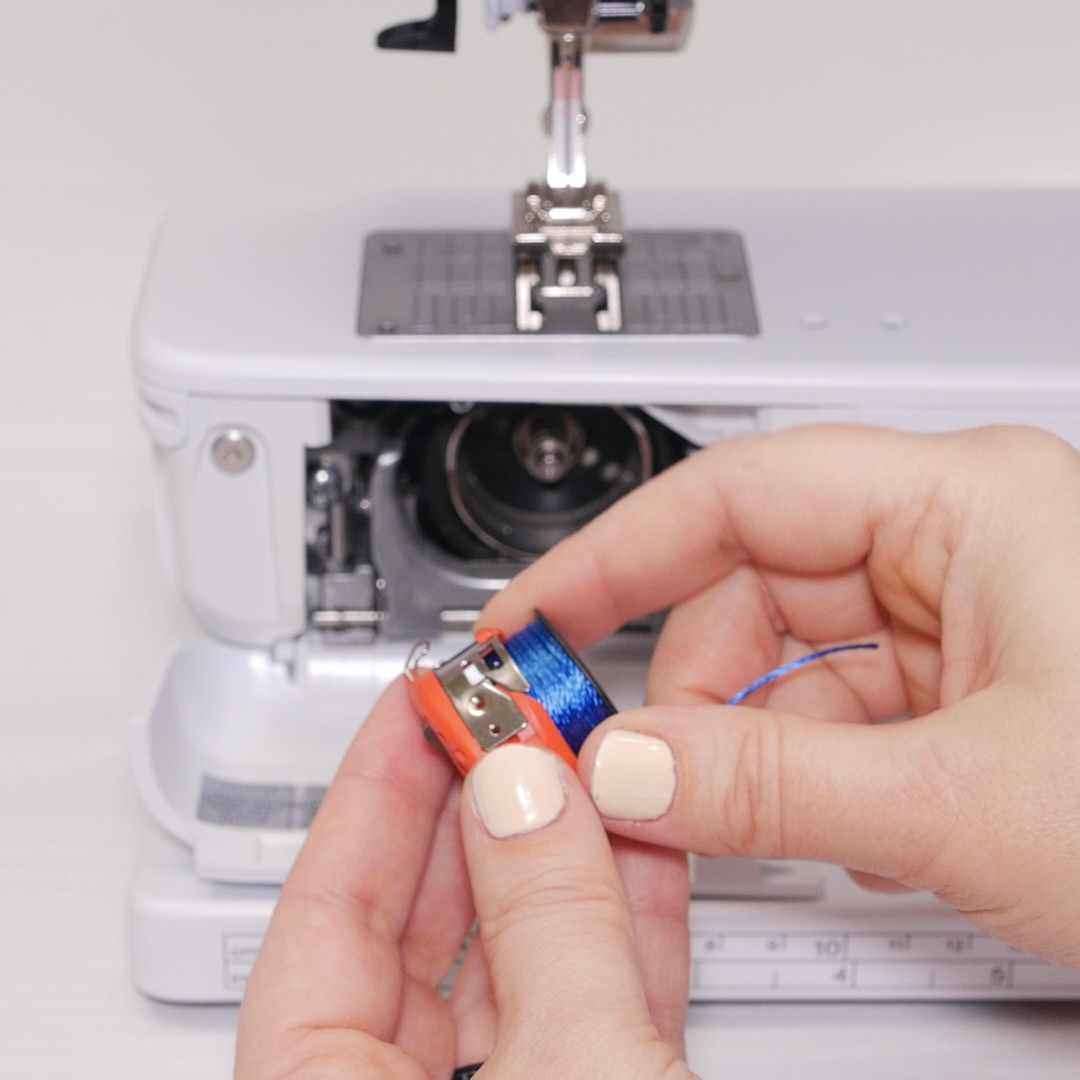
Wind your bobbin as usual. Depending on your thread, you may need to use a thread stand behind the machine to wind smoothly. The razzle thread wound fine on the regular horizontal spool pin.
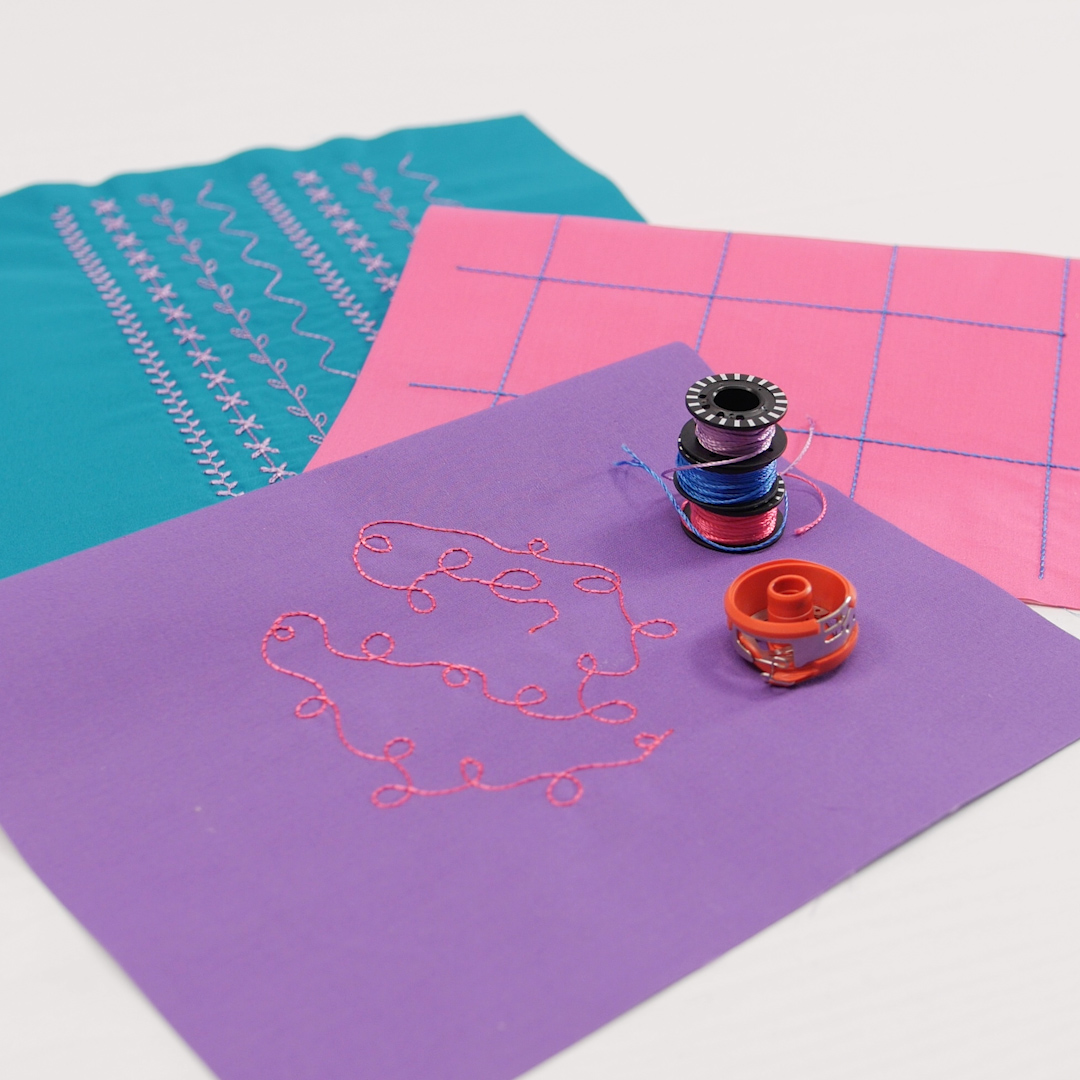
Now that you’ve wound a bobbin, insert it into the bobbin case. Thread the needle with a matching but lighter weight thread. A 40 or 50 weight thread could be used. I’ve used Isacord – a 40 weight polyester embroidery thread. I was able to get a near-exact match to my bobbin thread, and it’s light enough to form a stitch without showing too much.
A note about bobbinwork – with a normal stitch, the “knot” of each stitch is sandwiched right in the middle of the fabric – you have a balanced stitch. With bobbinwork, the stitch will be unbalanced. The top thread will show a little bit on the bobbinwork side of the fabric. This is because the heavy thread will be too heavy to pull into the middle of the fabric.
Bobbinwork can be done on most types of fabric that don’t have a nap. Remember when preparing your fabric that you will be stitching on the wrong side of the fabric – so any markings you make to guide you will need to be marked on the backside. Also keep in mind that your pattern will be reversed since you will be working from the wrong side.
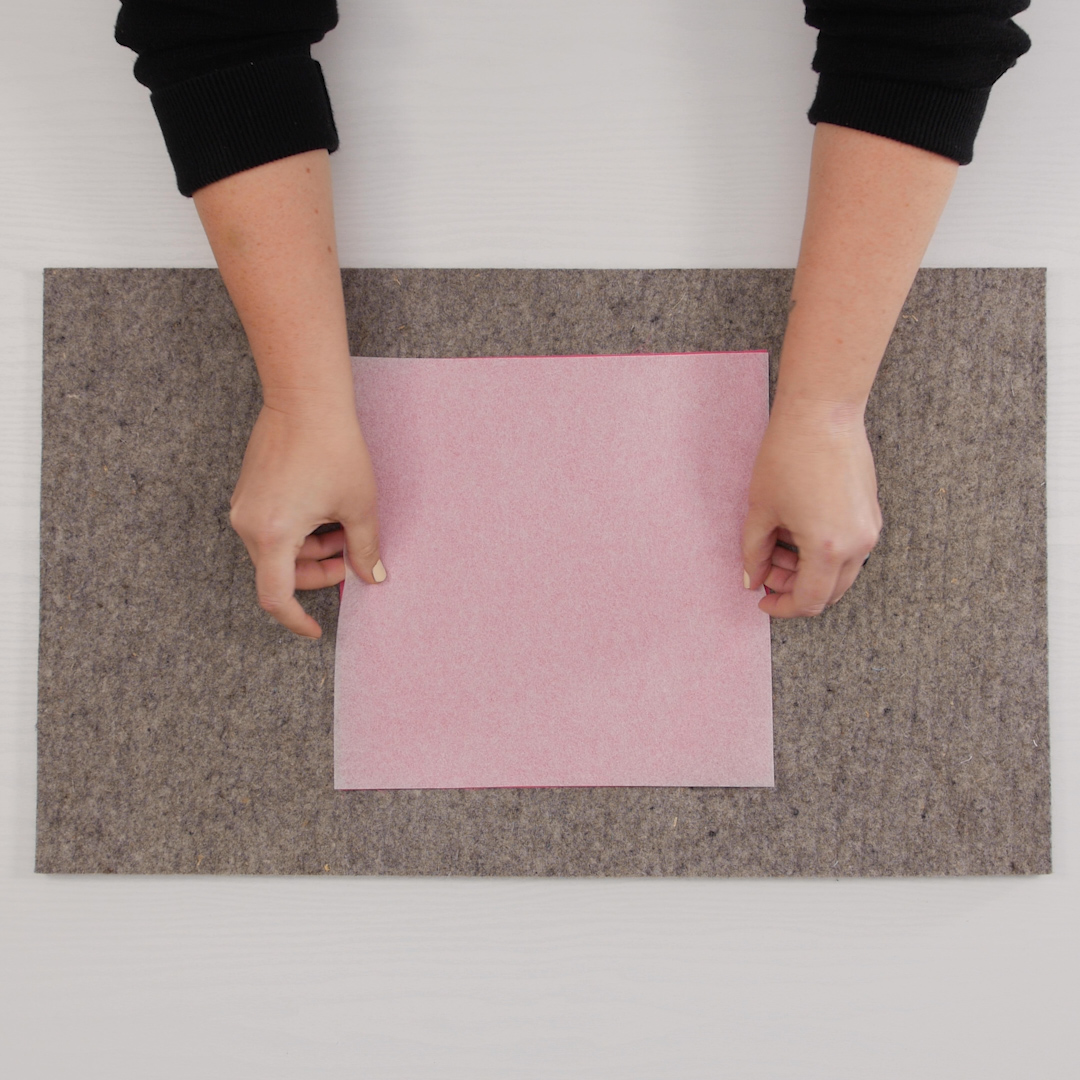
With bobbinwork, as with most decorative work, you will want to stabilize your fabric. I am working with a quilt cotton, and my stitching will not be too dense, so I used OESD Light Weight TearAway stabilizer. A single layer was plenty for my project, and I lightly sprayed it with 505 Temporary Adhesive Spray to keep it in place while I am working.
Now that you’ve threaded the machine and prepared the fabric, it’s time to set up the machine. Insert the bobbin into the bobbin case and then insert the bobbin case into the machine.
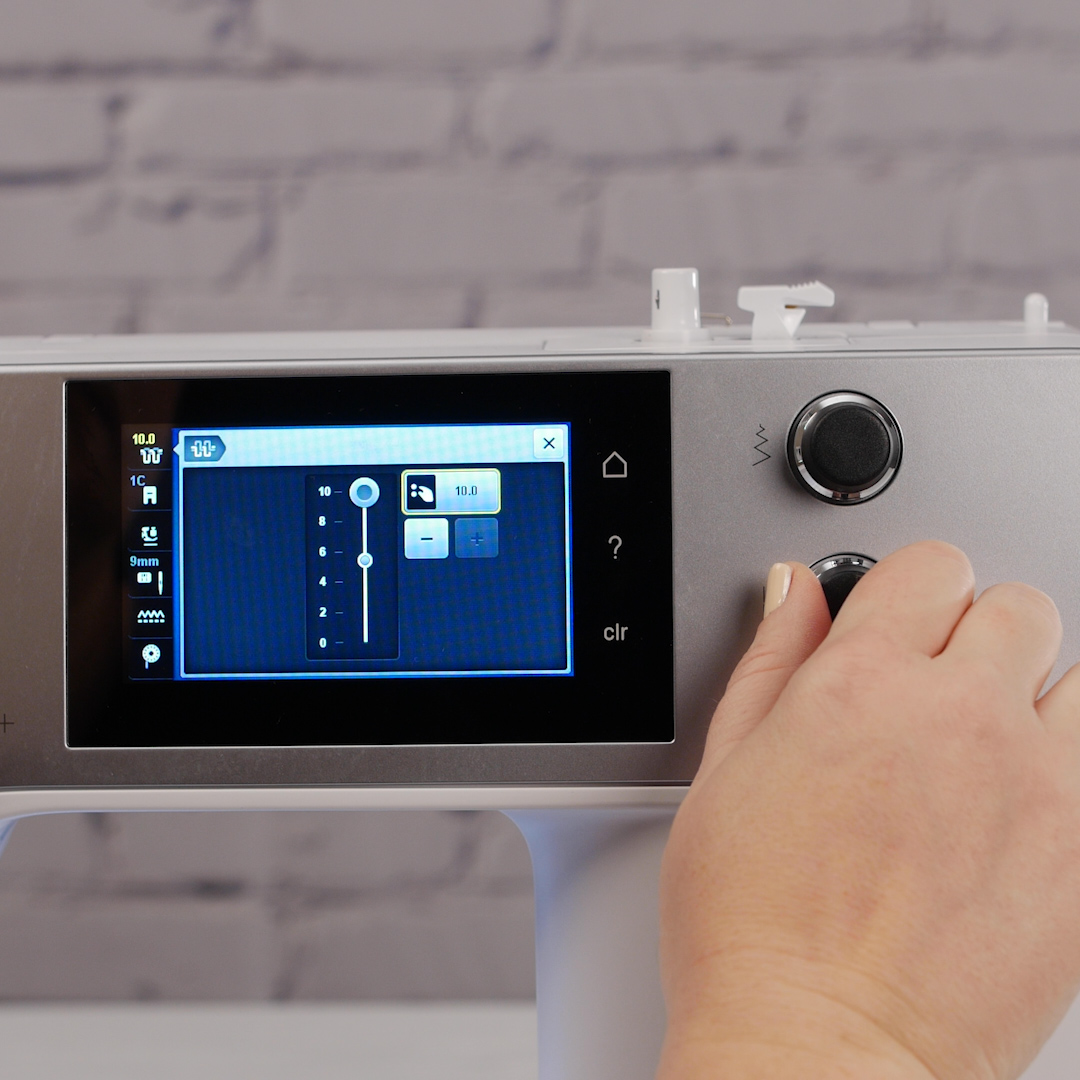
Choose the stitch you want to work with. Next, increase the top tension. You’ll want to do a test sew to determine exactly how much you need to adjust the tension, which will vary based on how heavy your bobbin thread is. For my project, using Razzle in the bobbin and Isacord in the top, I turned the tension all the way up to 10 to get the best stitch.
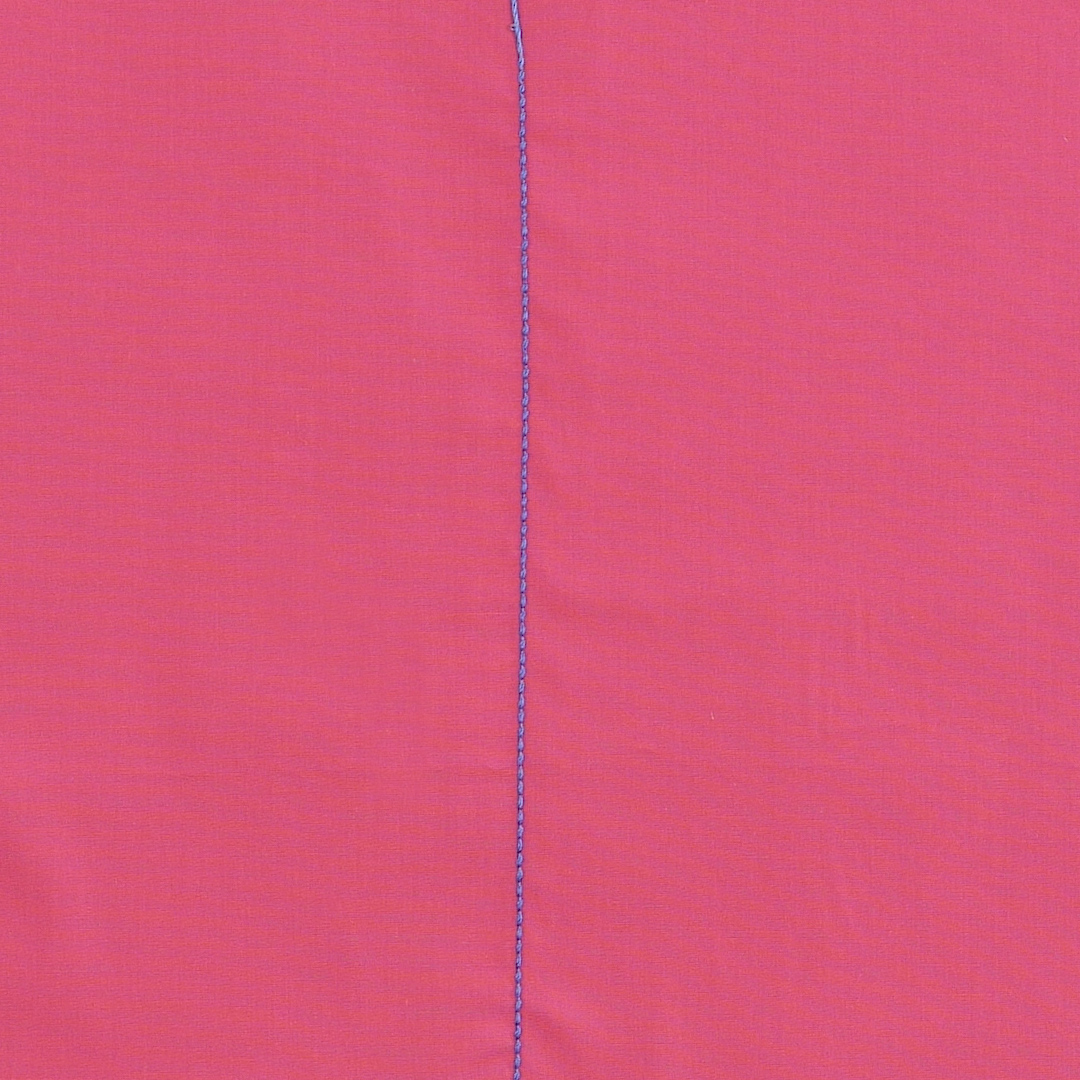
To keep things simple, you could do a simple straight stitch. For a straight stitch, you can use your Reverse Pattern Foot #1/1C/1D. Place the fabric right side down under the presser foot and stitch.
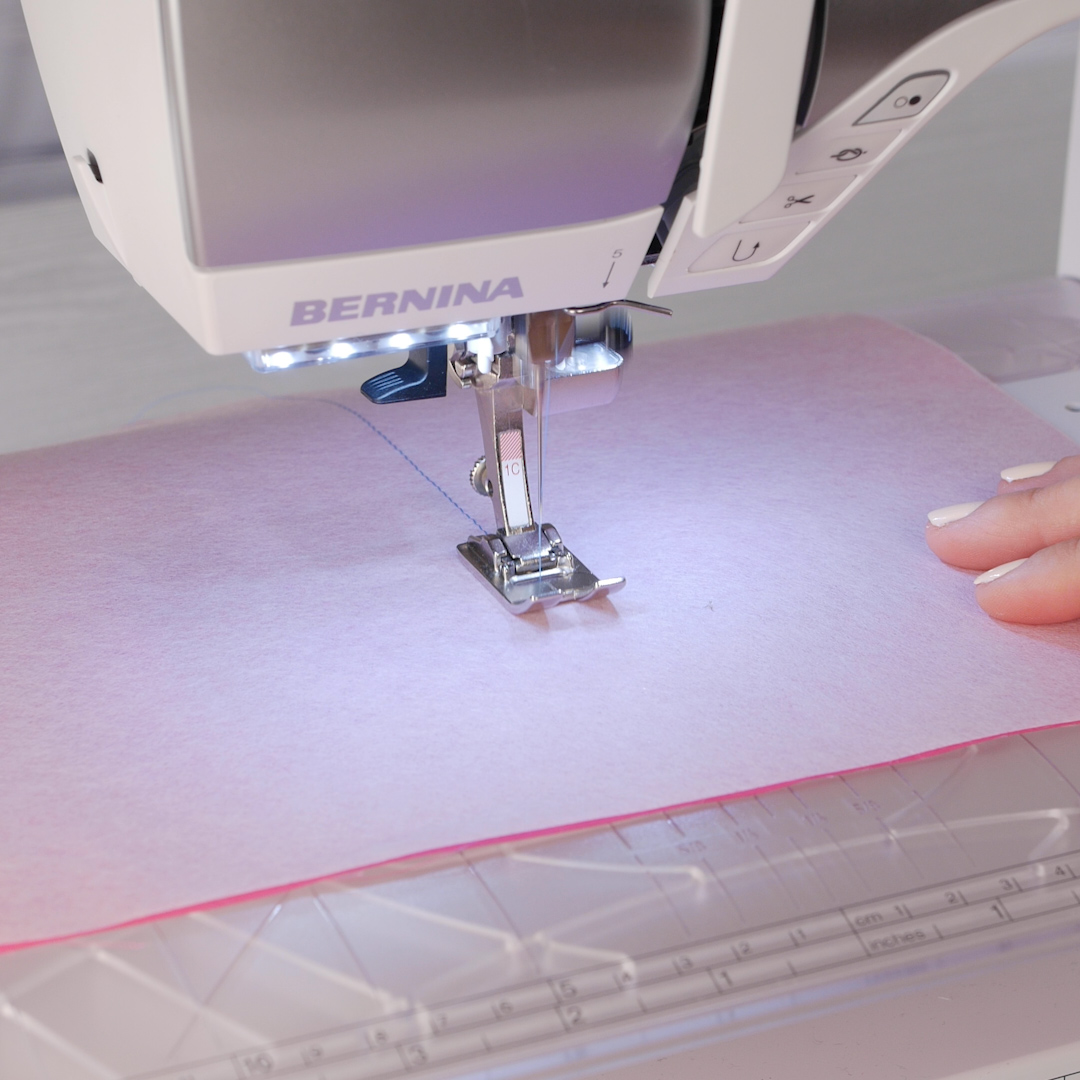
With bobbinwork, you will not want to use the automatic thread cutter. Leave a long tail so you can pull the bobbin thread to the wrong side of the work when you are done.
Even a simple straight stitch can give you a beautiful “beaded” look.
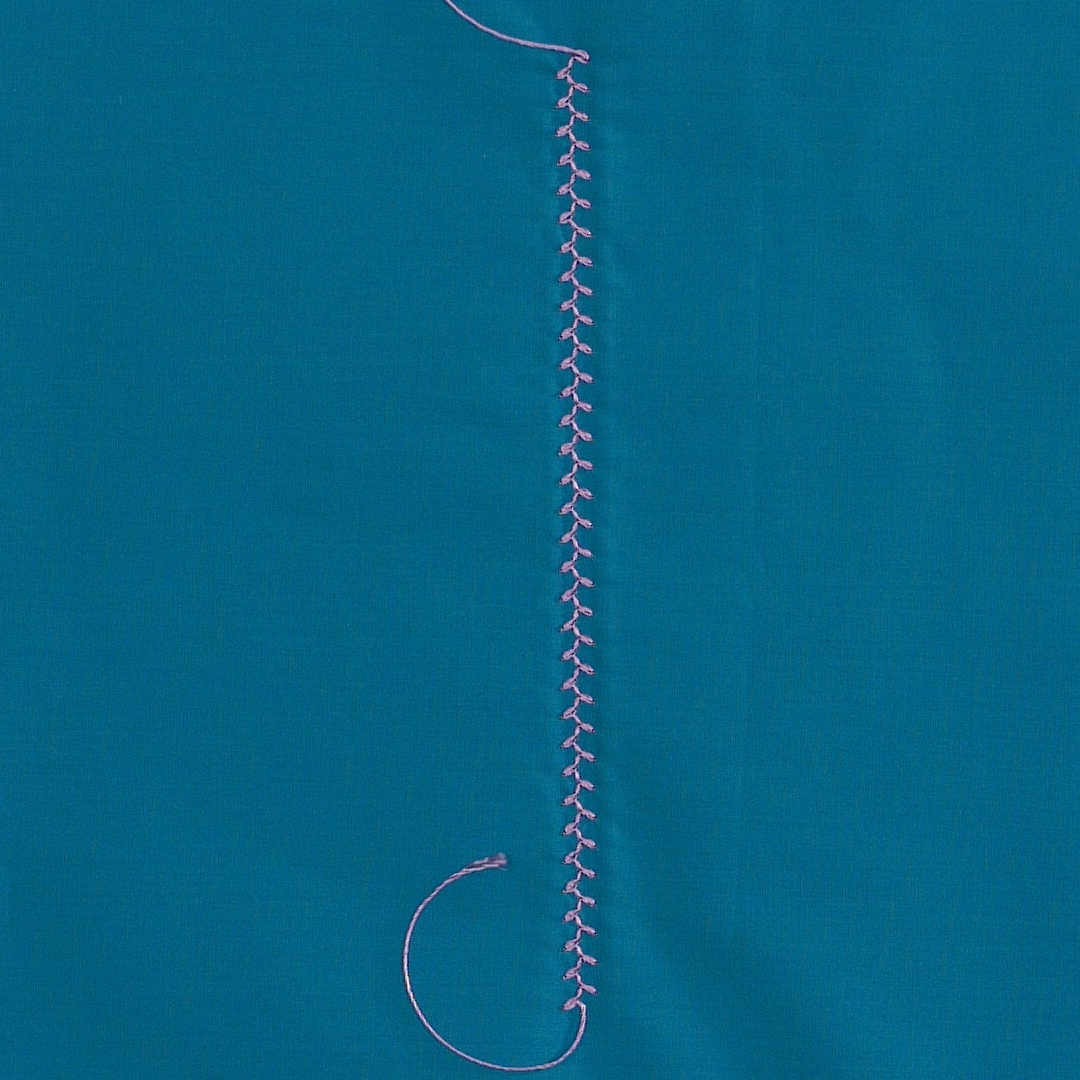
A decorative stitch can also be used. Some decorative stitches are going to work better than others. Choose a stitch that doesn’t backtrack on itself too much – the thicker thread may be too heavy if the stitch lands in the same spot too many times. Avoid satin stitch patterns as these will be too dense for your heavy thread. Here I’ve used a feather stitch, which works beautifully with the Razzle thread. For decorative stitches, use an embroidery foot, such as the Open Embroidery Foot #20/20C/20D. The embroidery foot has a cutout in the bottom of the foot that allows the thicker stitch to pass through smoothly.
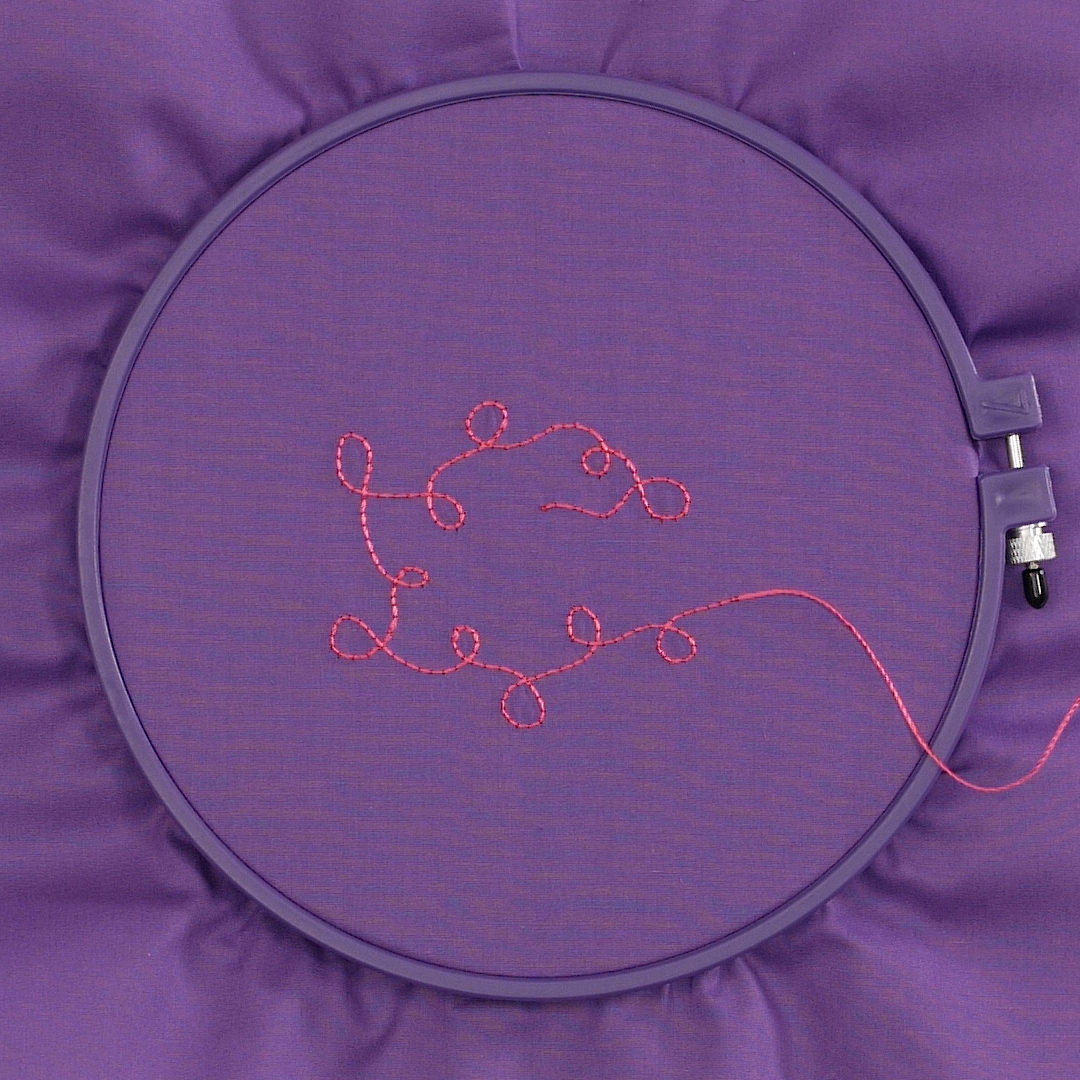
You can even do free-motion stitching with bobbinwork – this is one of my favorite ways to do it! Use any free-motion foot you are comfortable with, or if it is available to you, try using your BERNINA Stitch Regulator (BSR).
To do free-motion work with bobbinwork, use an embroidery hoop to hold your work in place. Hoop the fabric upside down, with the stabilizer side up. The right side of the fabric should lay flat against the bed of the machine.
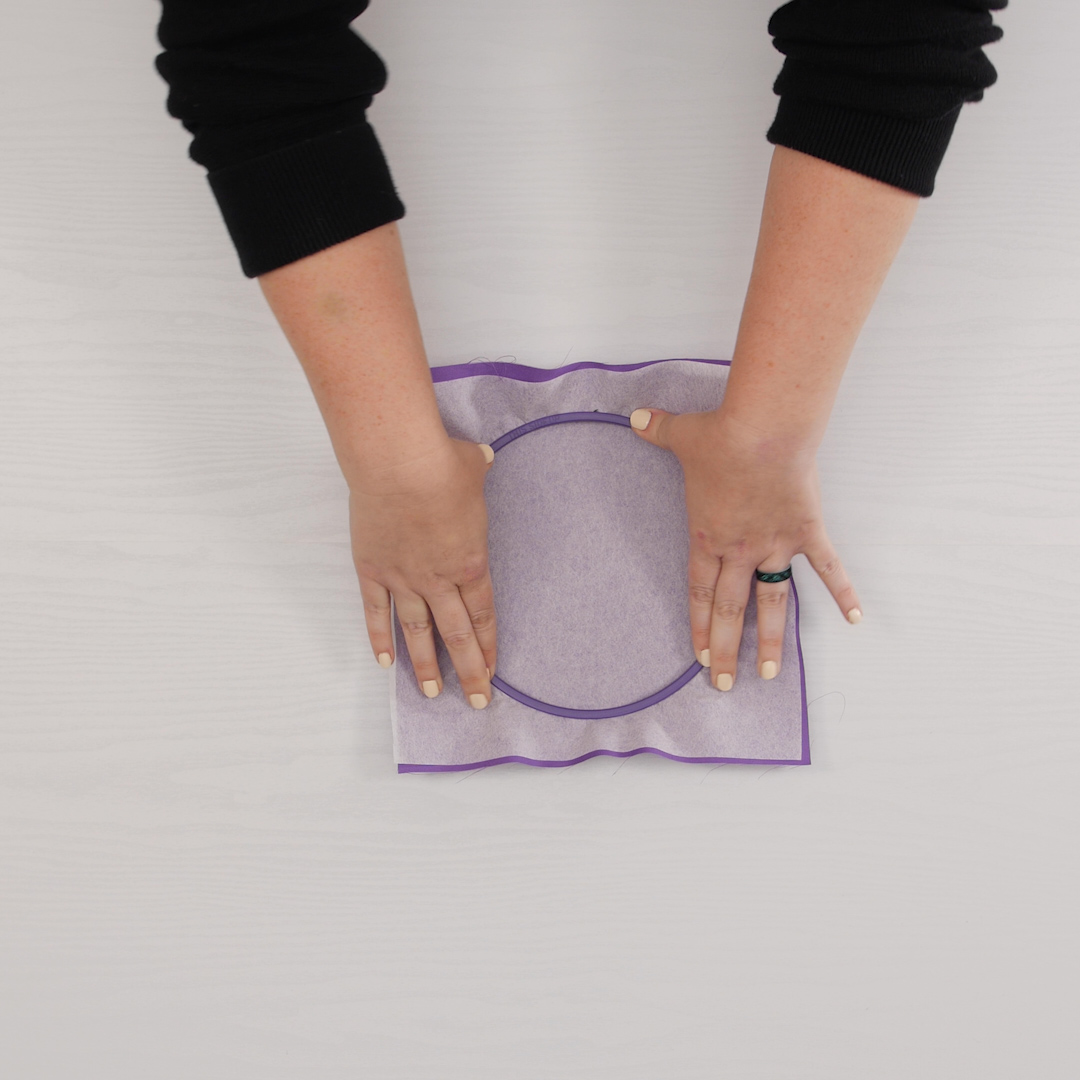
When doing free-motion work with bobbinwork, be sure to pull up the bobbin thread at the beginning of the stitch. Then take a couple of short stitches to secure before you cut the tail short. Guide the fabric by moving the hoop to create the design you would like. You may want to trace a pattern onto your stabilizer to follow. (Don’t forget to reverse the pattern!) Also, be aware if you are using the BSR that it has a low profile, so it may bump into your embroidery hoop – so you choose a hoop that is large enough to give you a margin around your design.

Whichever method of stitching you choose, when you complete your stitching, leave a long tail of the top and bobbin thread.
Then use a large-eyed tapestry needle to pull the bobbin thread to the wrong side of the fabric. Hand-tie a knot with the bobbin thread and top thread to secure.
Enjoy experimenting with different threads using bobbinwork—we’d love to see what you create!