Embroider-Along Part 3: Needles and Threads
Embroider-Along Part 3: Needles and Threads. My name is Sue O’Very, BERNINA Ambassador and machine embroidery expert. Up until now we have discussed the top four basics of machine embroidery and dived deeper into Stabilizers. Today we will jump into one of my favorite topics; Needles and Threads (and as a bonus, get a free embroidery design to stitch my Enchanted Flamingo design!).

Needles and Threads
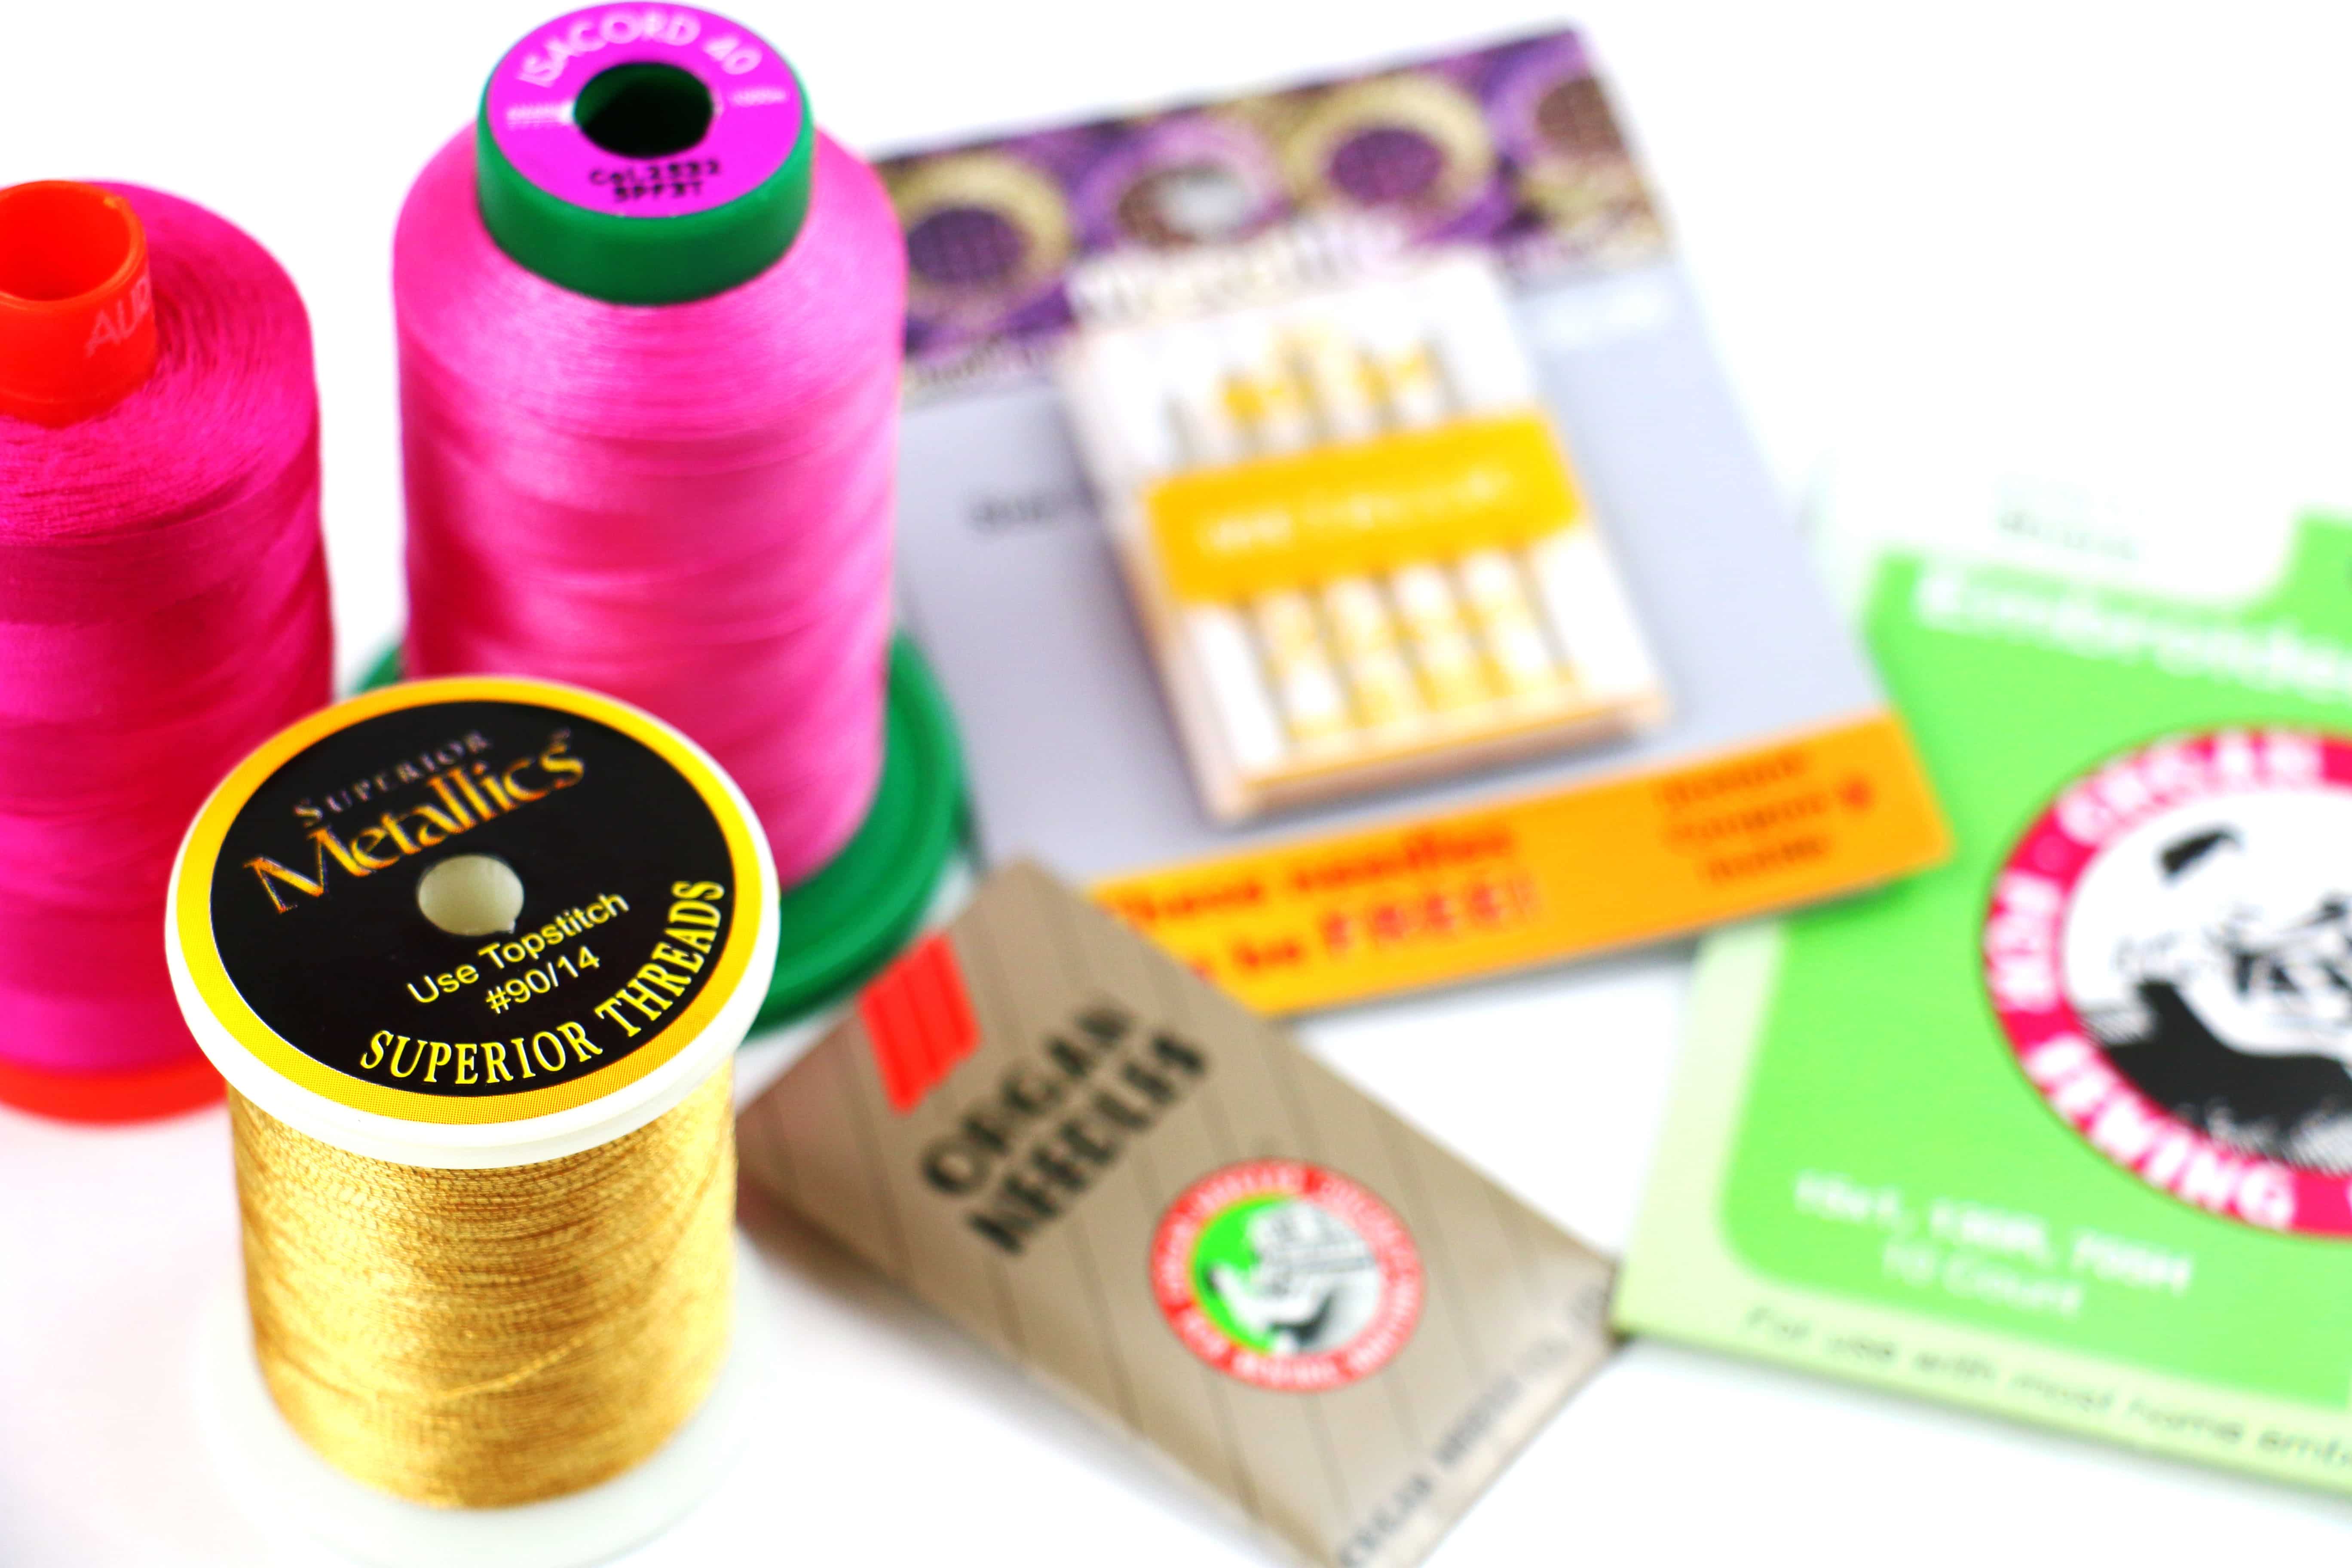
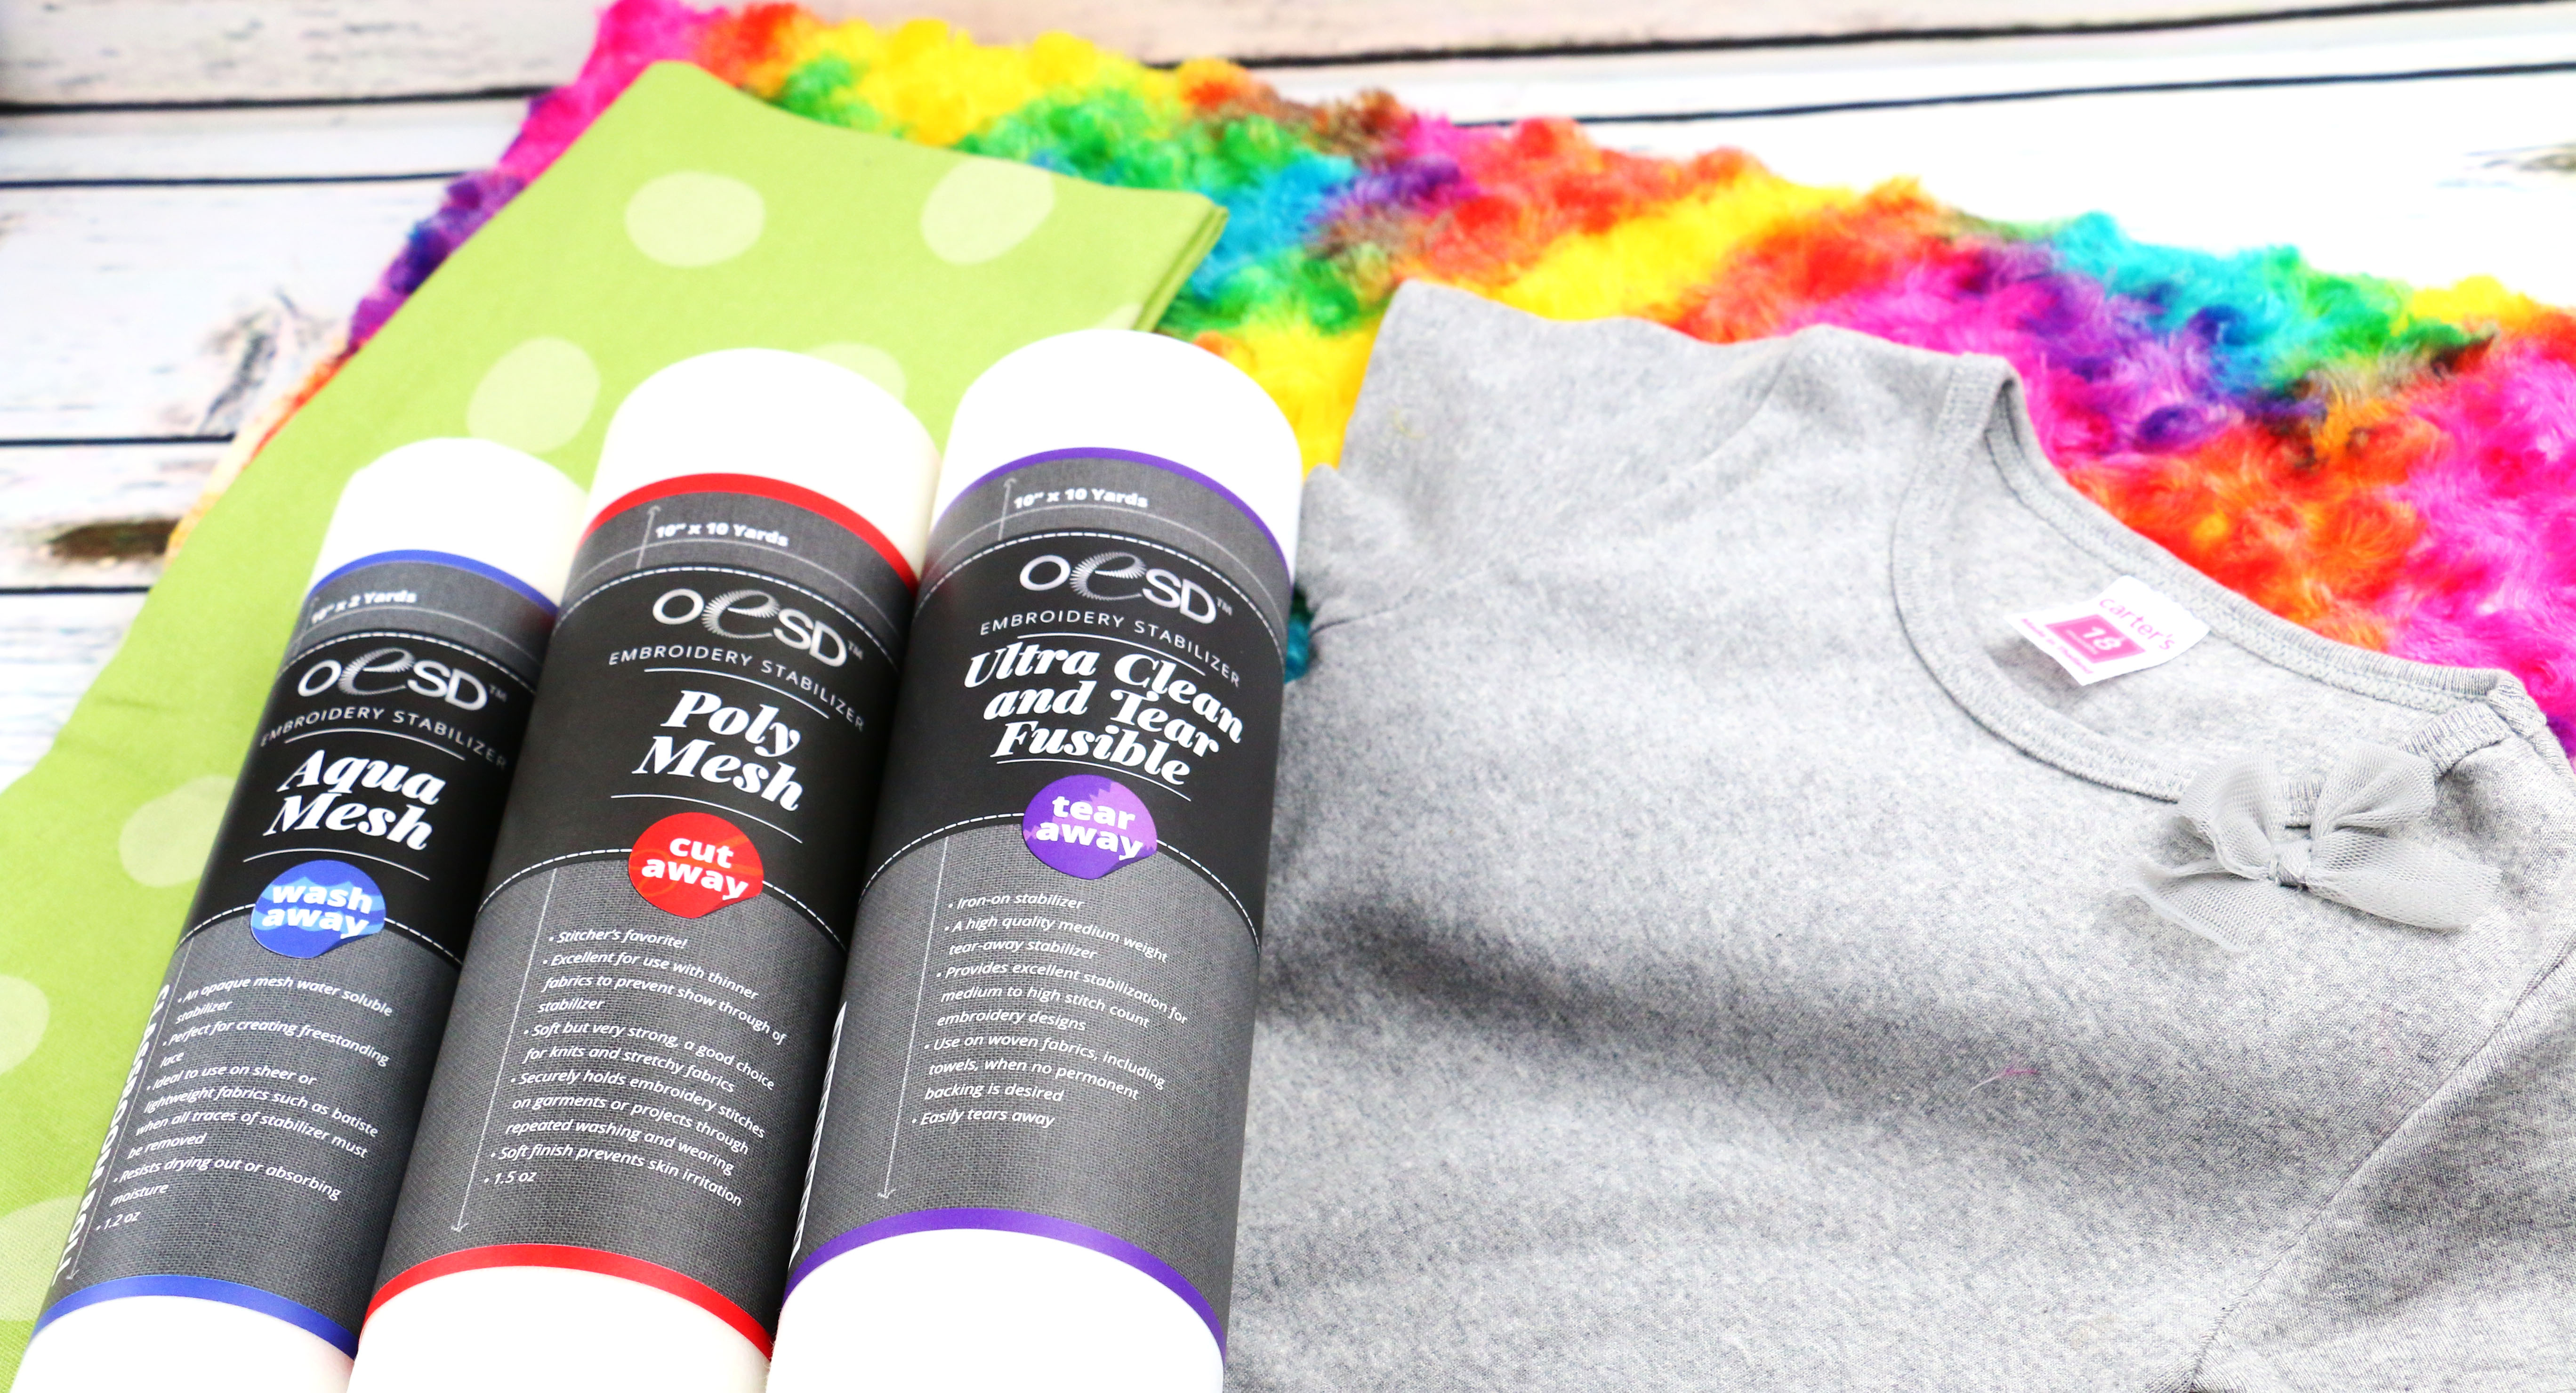
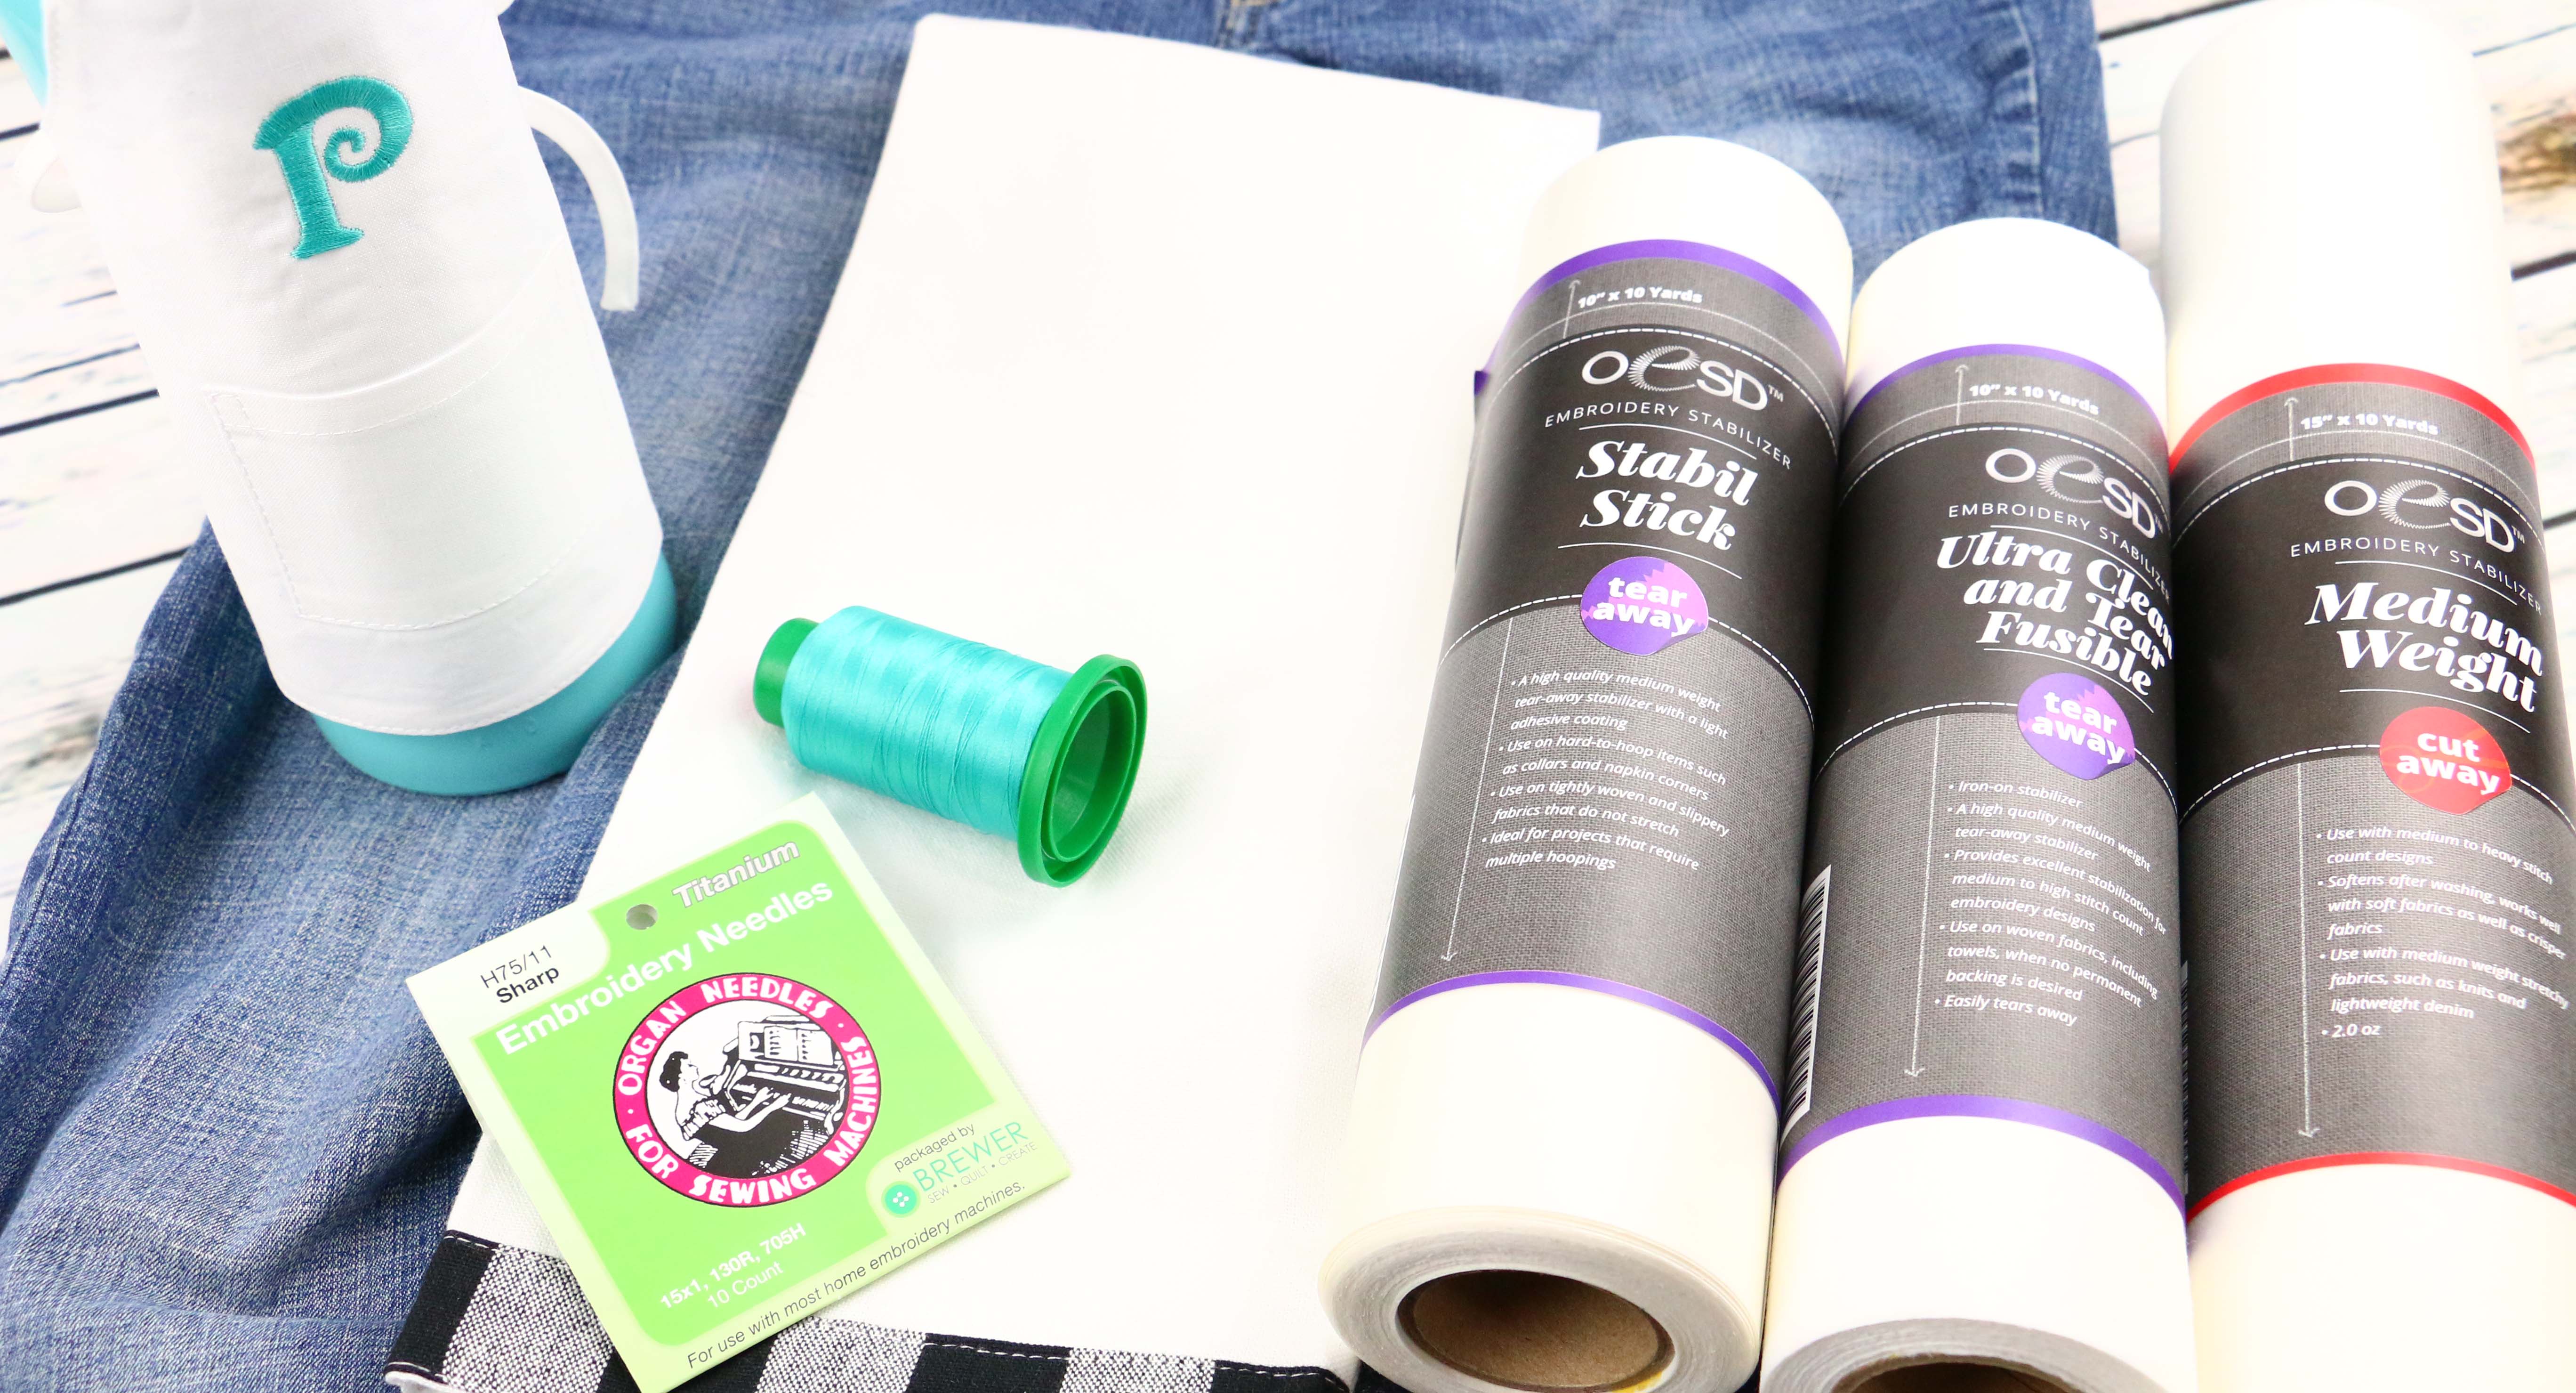
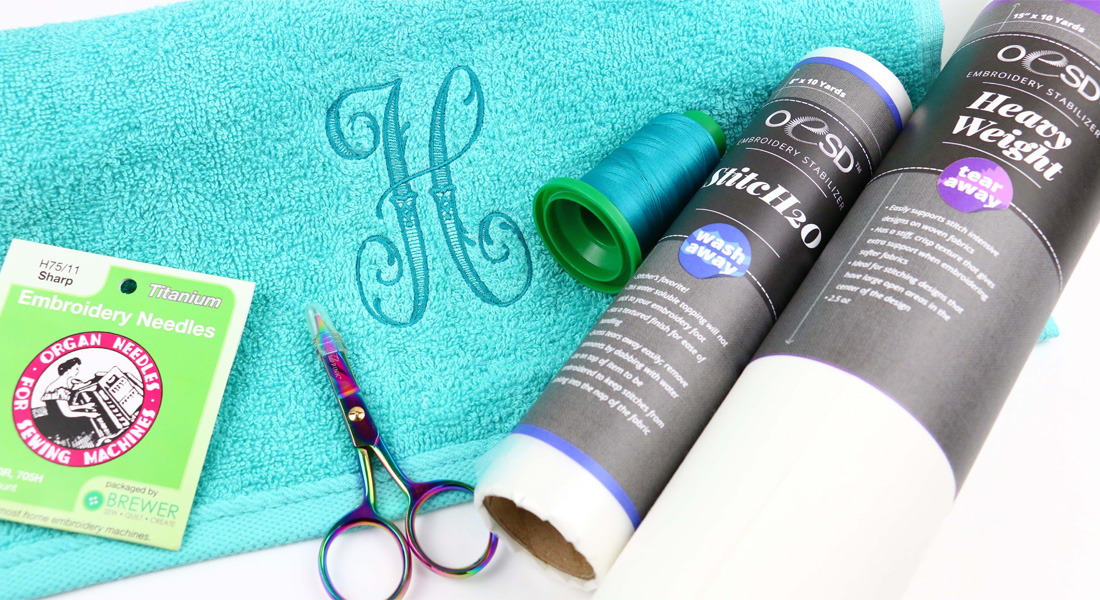
When first starting the hobby of machine embroidery you’ll be adding lots of new goodies to your sewing basket. All of the four basics for machine embroidery work together to give you the best results but none more than needles and threads. The two work hand in hand. Today we will discuss the top three needles and top three threads for machine embroidery.
Needles
When stitching 600-1000 stitches per minute it’s incredibly important to choose the right needle. What sets needles apart from one another is size and type.
Needle Size
The size is determined by the width of the needle (ex. 75/11, 80/12 and 90/14). Selecting the size is determined by the size of thread and thickness of materials. The thinner the material, the smaller the needle size. The thicker the material, the larger the needle size. For example:
- Ladies T-Shirt would be 75/11 or 80/12
- Bathroom Towel would be 80/12 or 90/14
Needle Type
The type is based on the material/application: woven/sewing vs. woven/embroidery. When looking closely at needles you can see the difference by the shape of the eye. Shown in order below to accompanying photo:
- Basic universal = short small eye
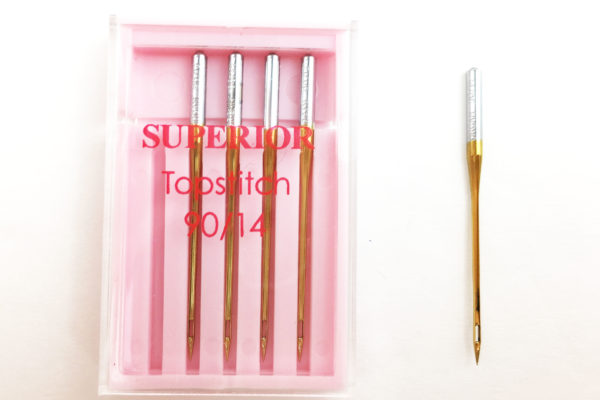
- Top Stitch = extra long eye
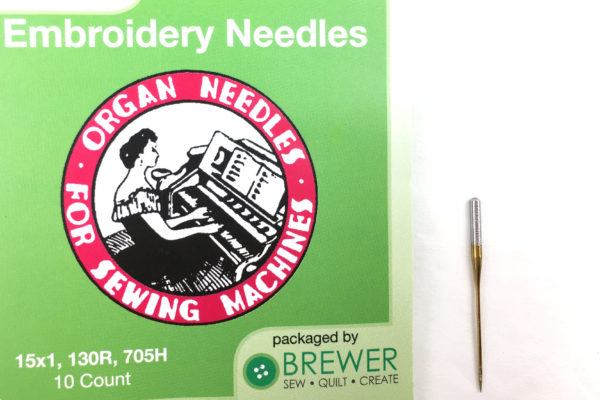
- Embroidery = short wide eye
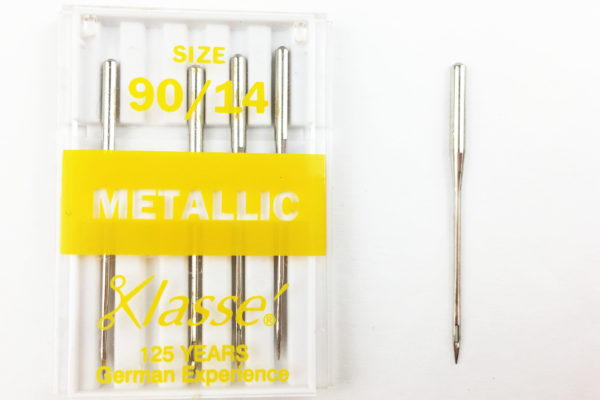
- Metallic = longer narrow eye

Pro tip: The bigger the needle size, larger the needle.
How do you choose a needle for embroidery?
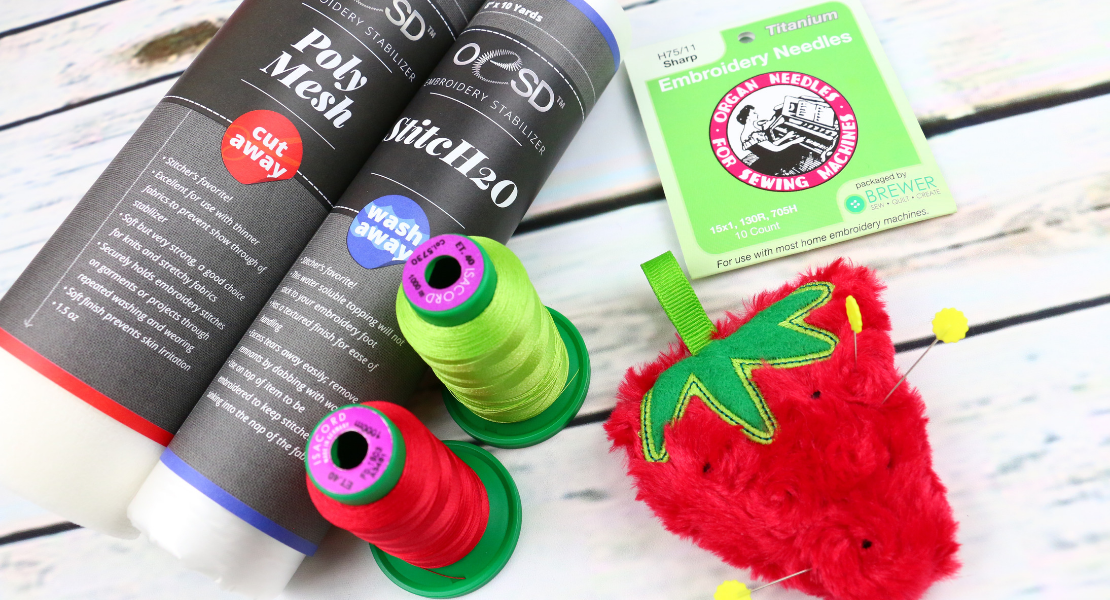
When embroidering, your machine will sew fast, really fast! Depending on the design the machine can quickly change from a running stitch to fill stitch without hesitation. Because of this, we want to choose the correct needle for the project. Below are a list of the most popular needles used for machine embroidery:
- Top Stitch
- Embroidery
- Metallic needle
Top Stitch needles have the larger eye which accommodates thick running stitches. The extra sharp point allows the needle to penetrate all thicknesses of fabric. Most popular sizes are 80/12 and 90/14.
Embroidery needles have a wider eye allowing the thread to go through smoothly for the higher speeds. Most popular sizes are 75/11 and 90/14.
Metallic needles are designed to use when stitching with Metallic threads. They have a large eye to help thread flow and prevent thread breakage. Most popular sizes are 80/12 and 90/14.
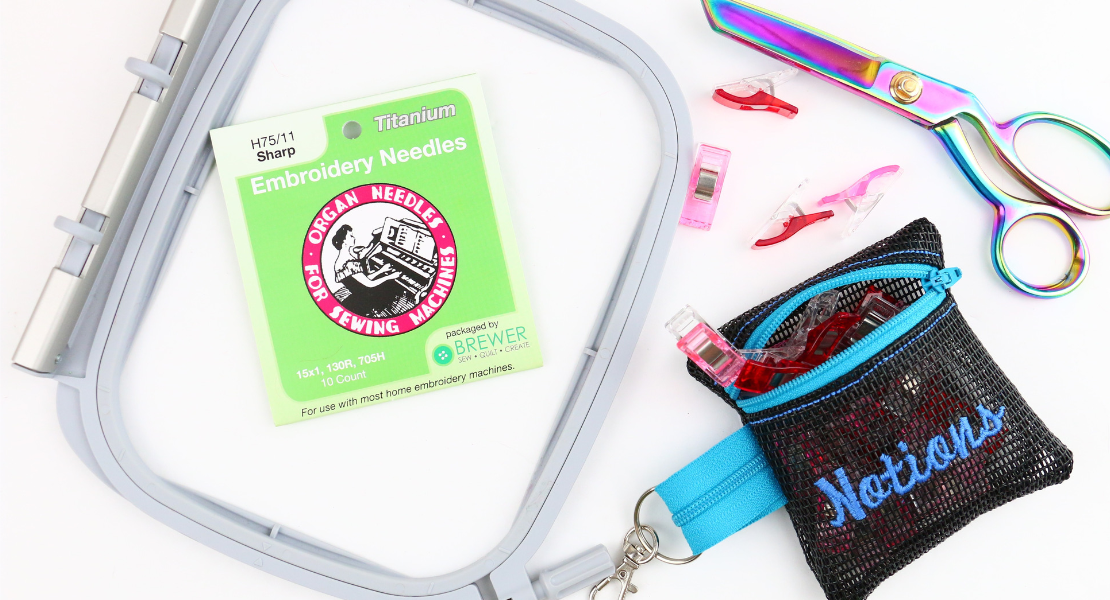
Needle Life and Storage
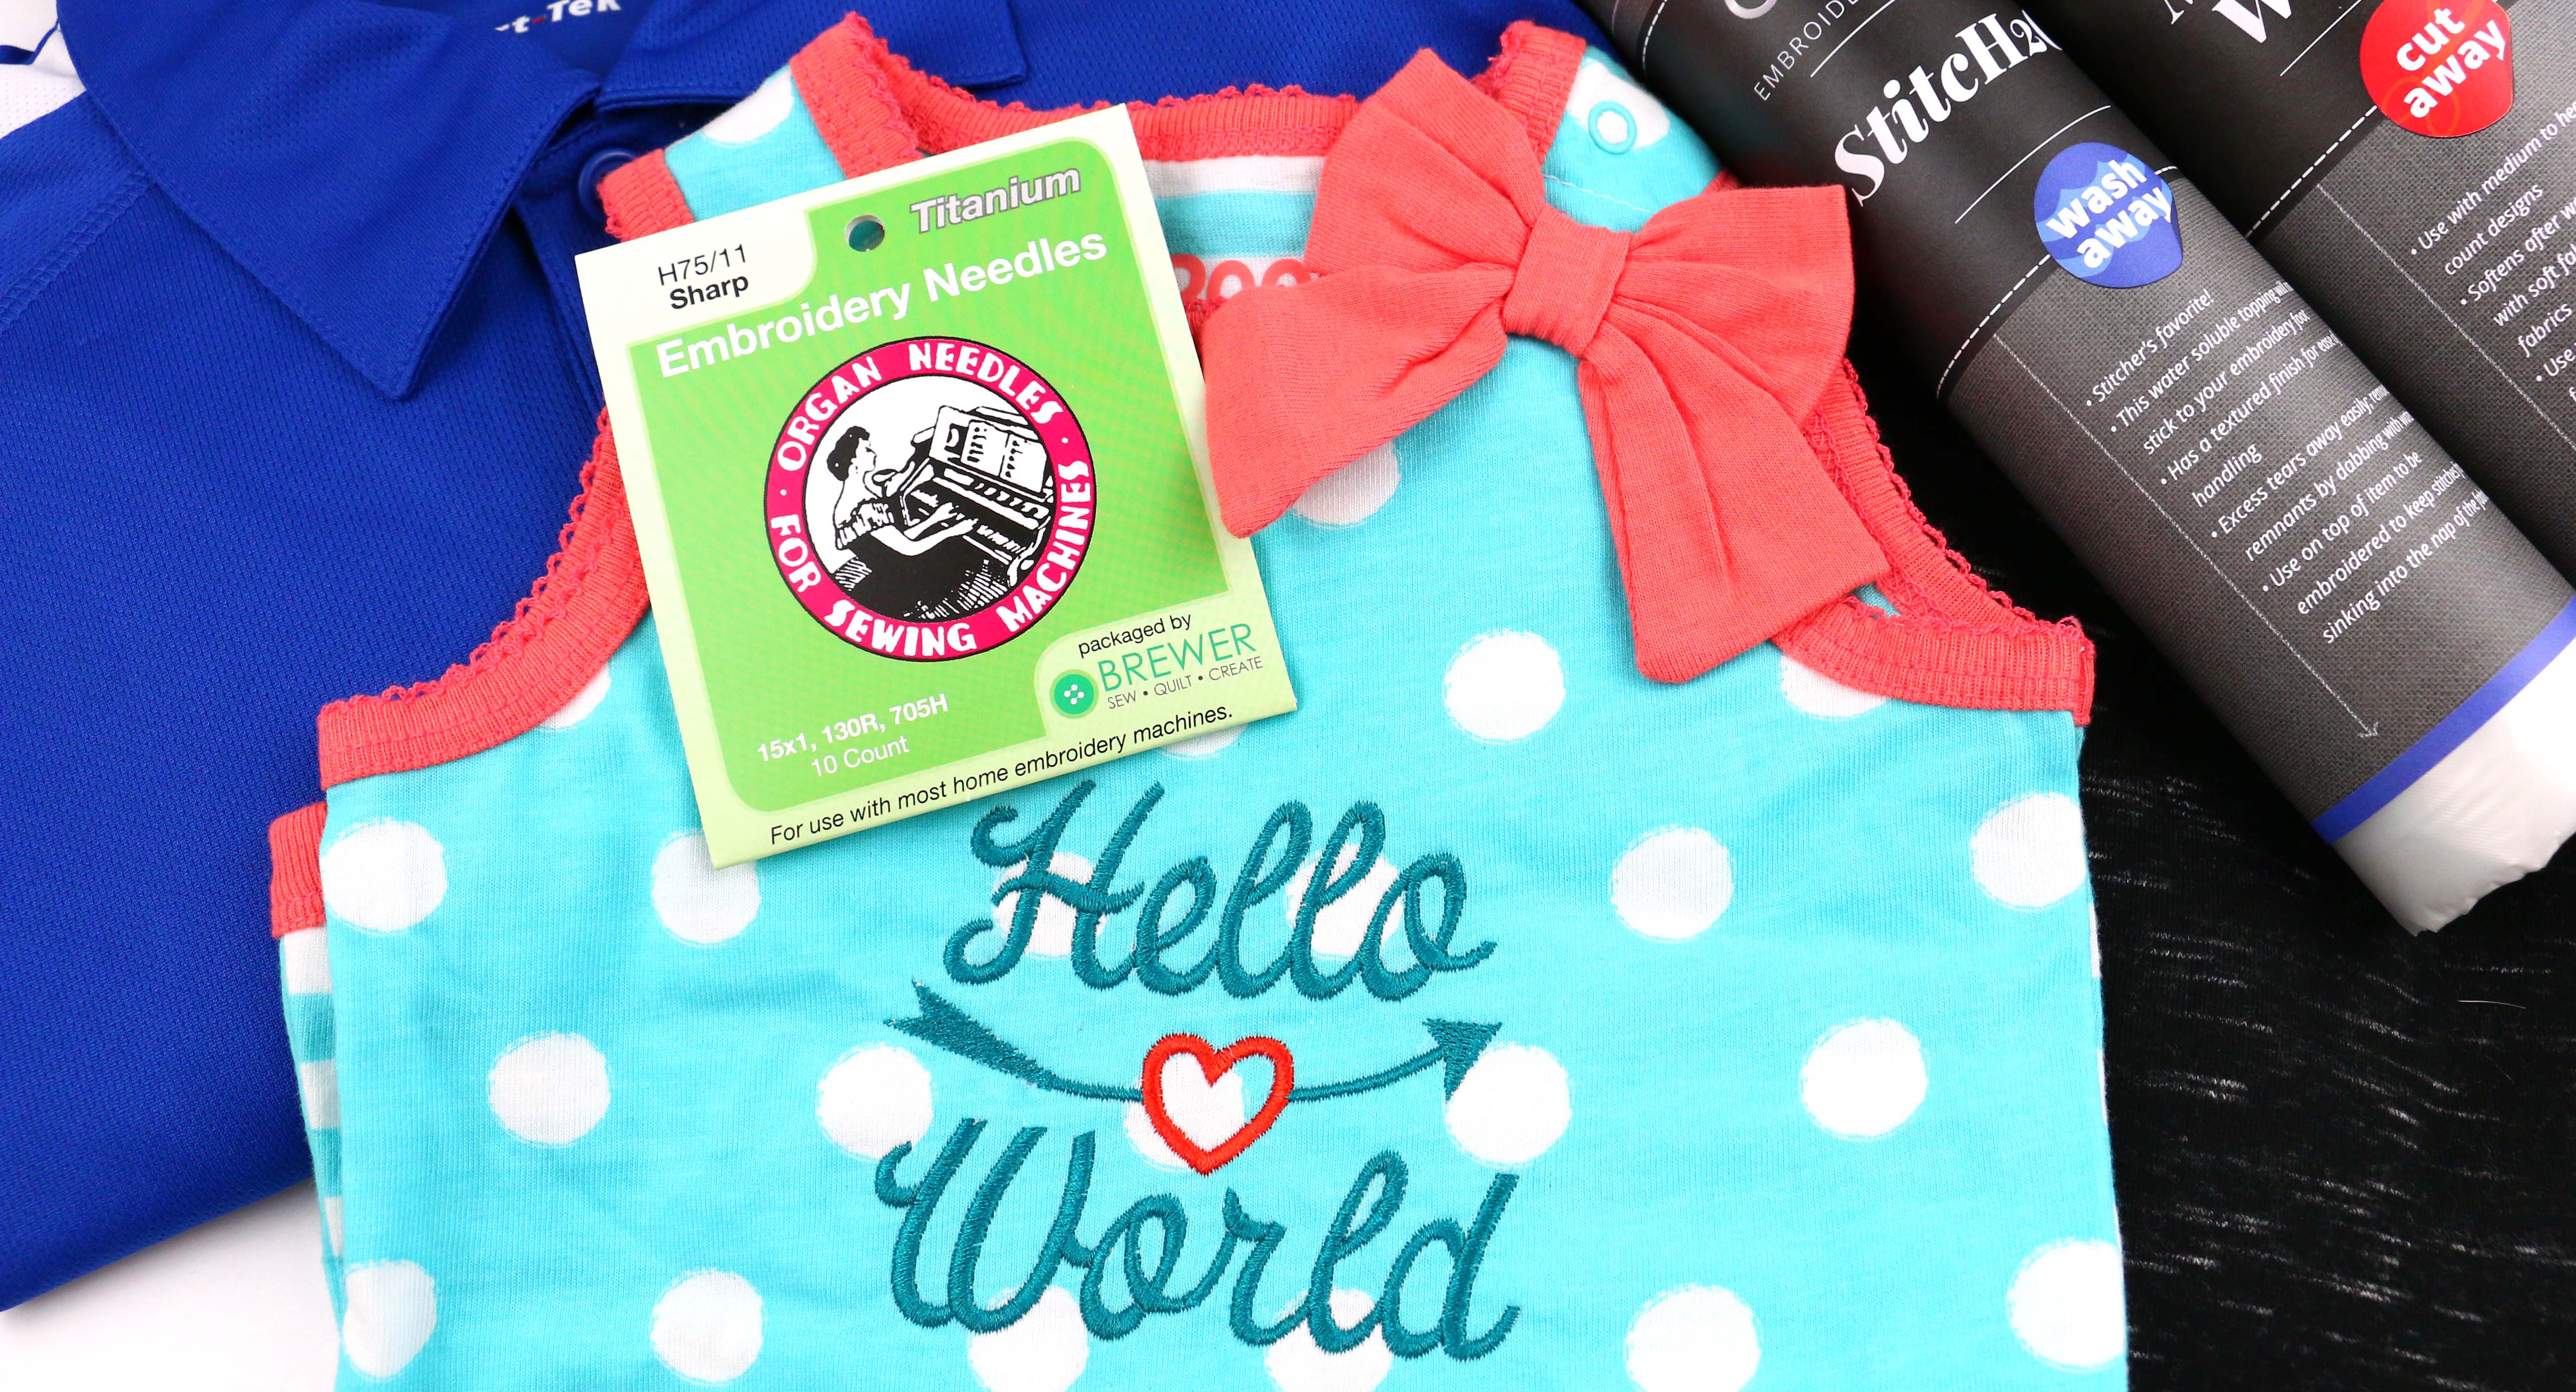
Needles were not designed to be used forever. They usually are at their sharpest and strongest for 6-8 hours. After that time it’s a good idea to safely dispose of the needle. I usually toss them in an empty medicine bottle. Using a needle past the 6-8 hour mark can cause the needle to become bent or broken. Bent and broken needles can damage your machine. The throat plate can get nicked and the bobbin case can be pierced. Replacing a bobbin case is far more expensive then replacing a needle!
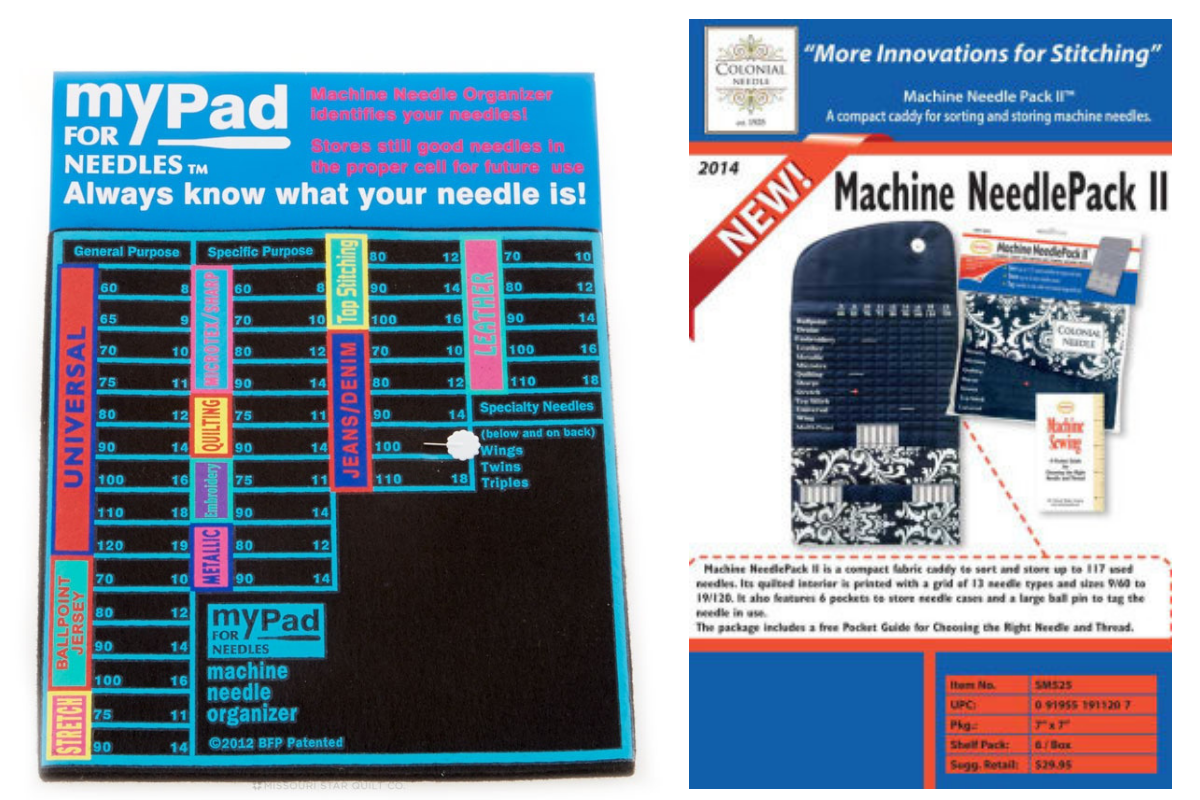
Let’s say you’ve used a needle for one small project and it still has good life ahead of it. What do you do with your needles? There are several excellent needle storage options on the market. The MyPad is an option for being able to see which needle is in your machine at a quick glance and storing your most often used needles. I like keeping my needle packages all in one convenient spot like the Machine Needle Pack.
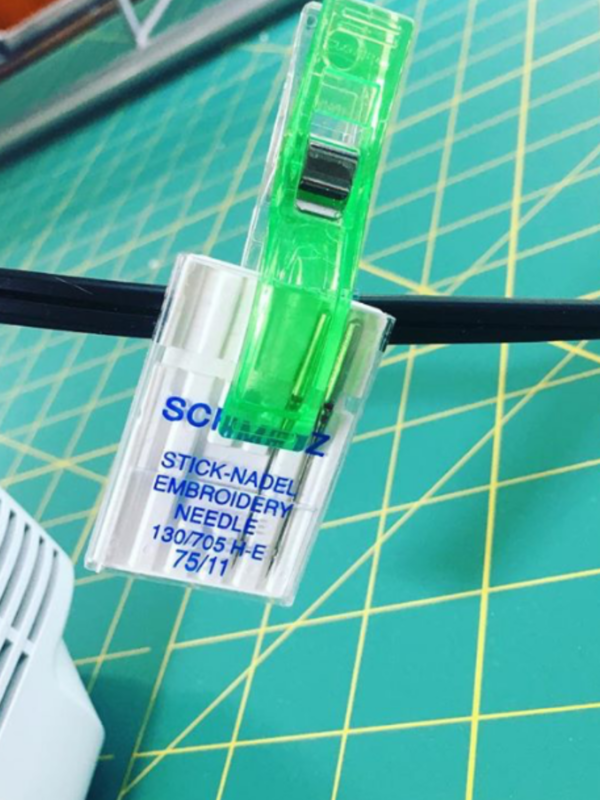
If I am in a hurry and need to switch my needle quickly I will simply clip the needle package (of the needle in my machine) to the power cord.
Threads
Now it’s time to take what you’ve just learned about needles and add some thread to the mix. With traditional sewing you wind and insert a matching bobbin. This way the stitches balance out and look the same on the front and back. However, with machine embroidery you will want to insert a thinner weight thread in the bobbin which will ultimately cause the bobbin thread to pull towards the back. This way the top of the design, the pretty part, will lay nice and flat.
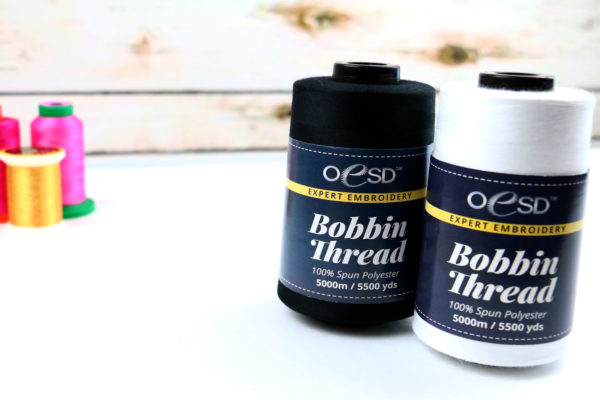
There are many occasions where your project or design will call for matching thread in top and bobbin. This means the designer has altered the design to accommodate the stitch balance and it would be advised to follow their direction. An example of this would be In the Hoop projects. These are projects where all or most of the construction is completed using only the embroidery machine. They are fast and fun to make. The bobbin thread is usually 100% spun polyester and is 60 weight.
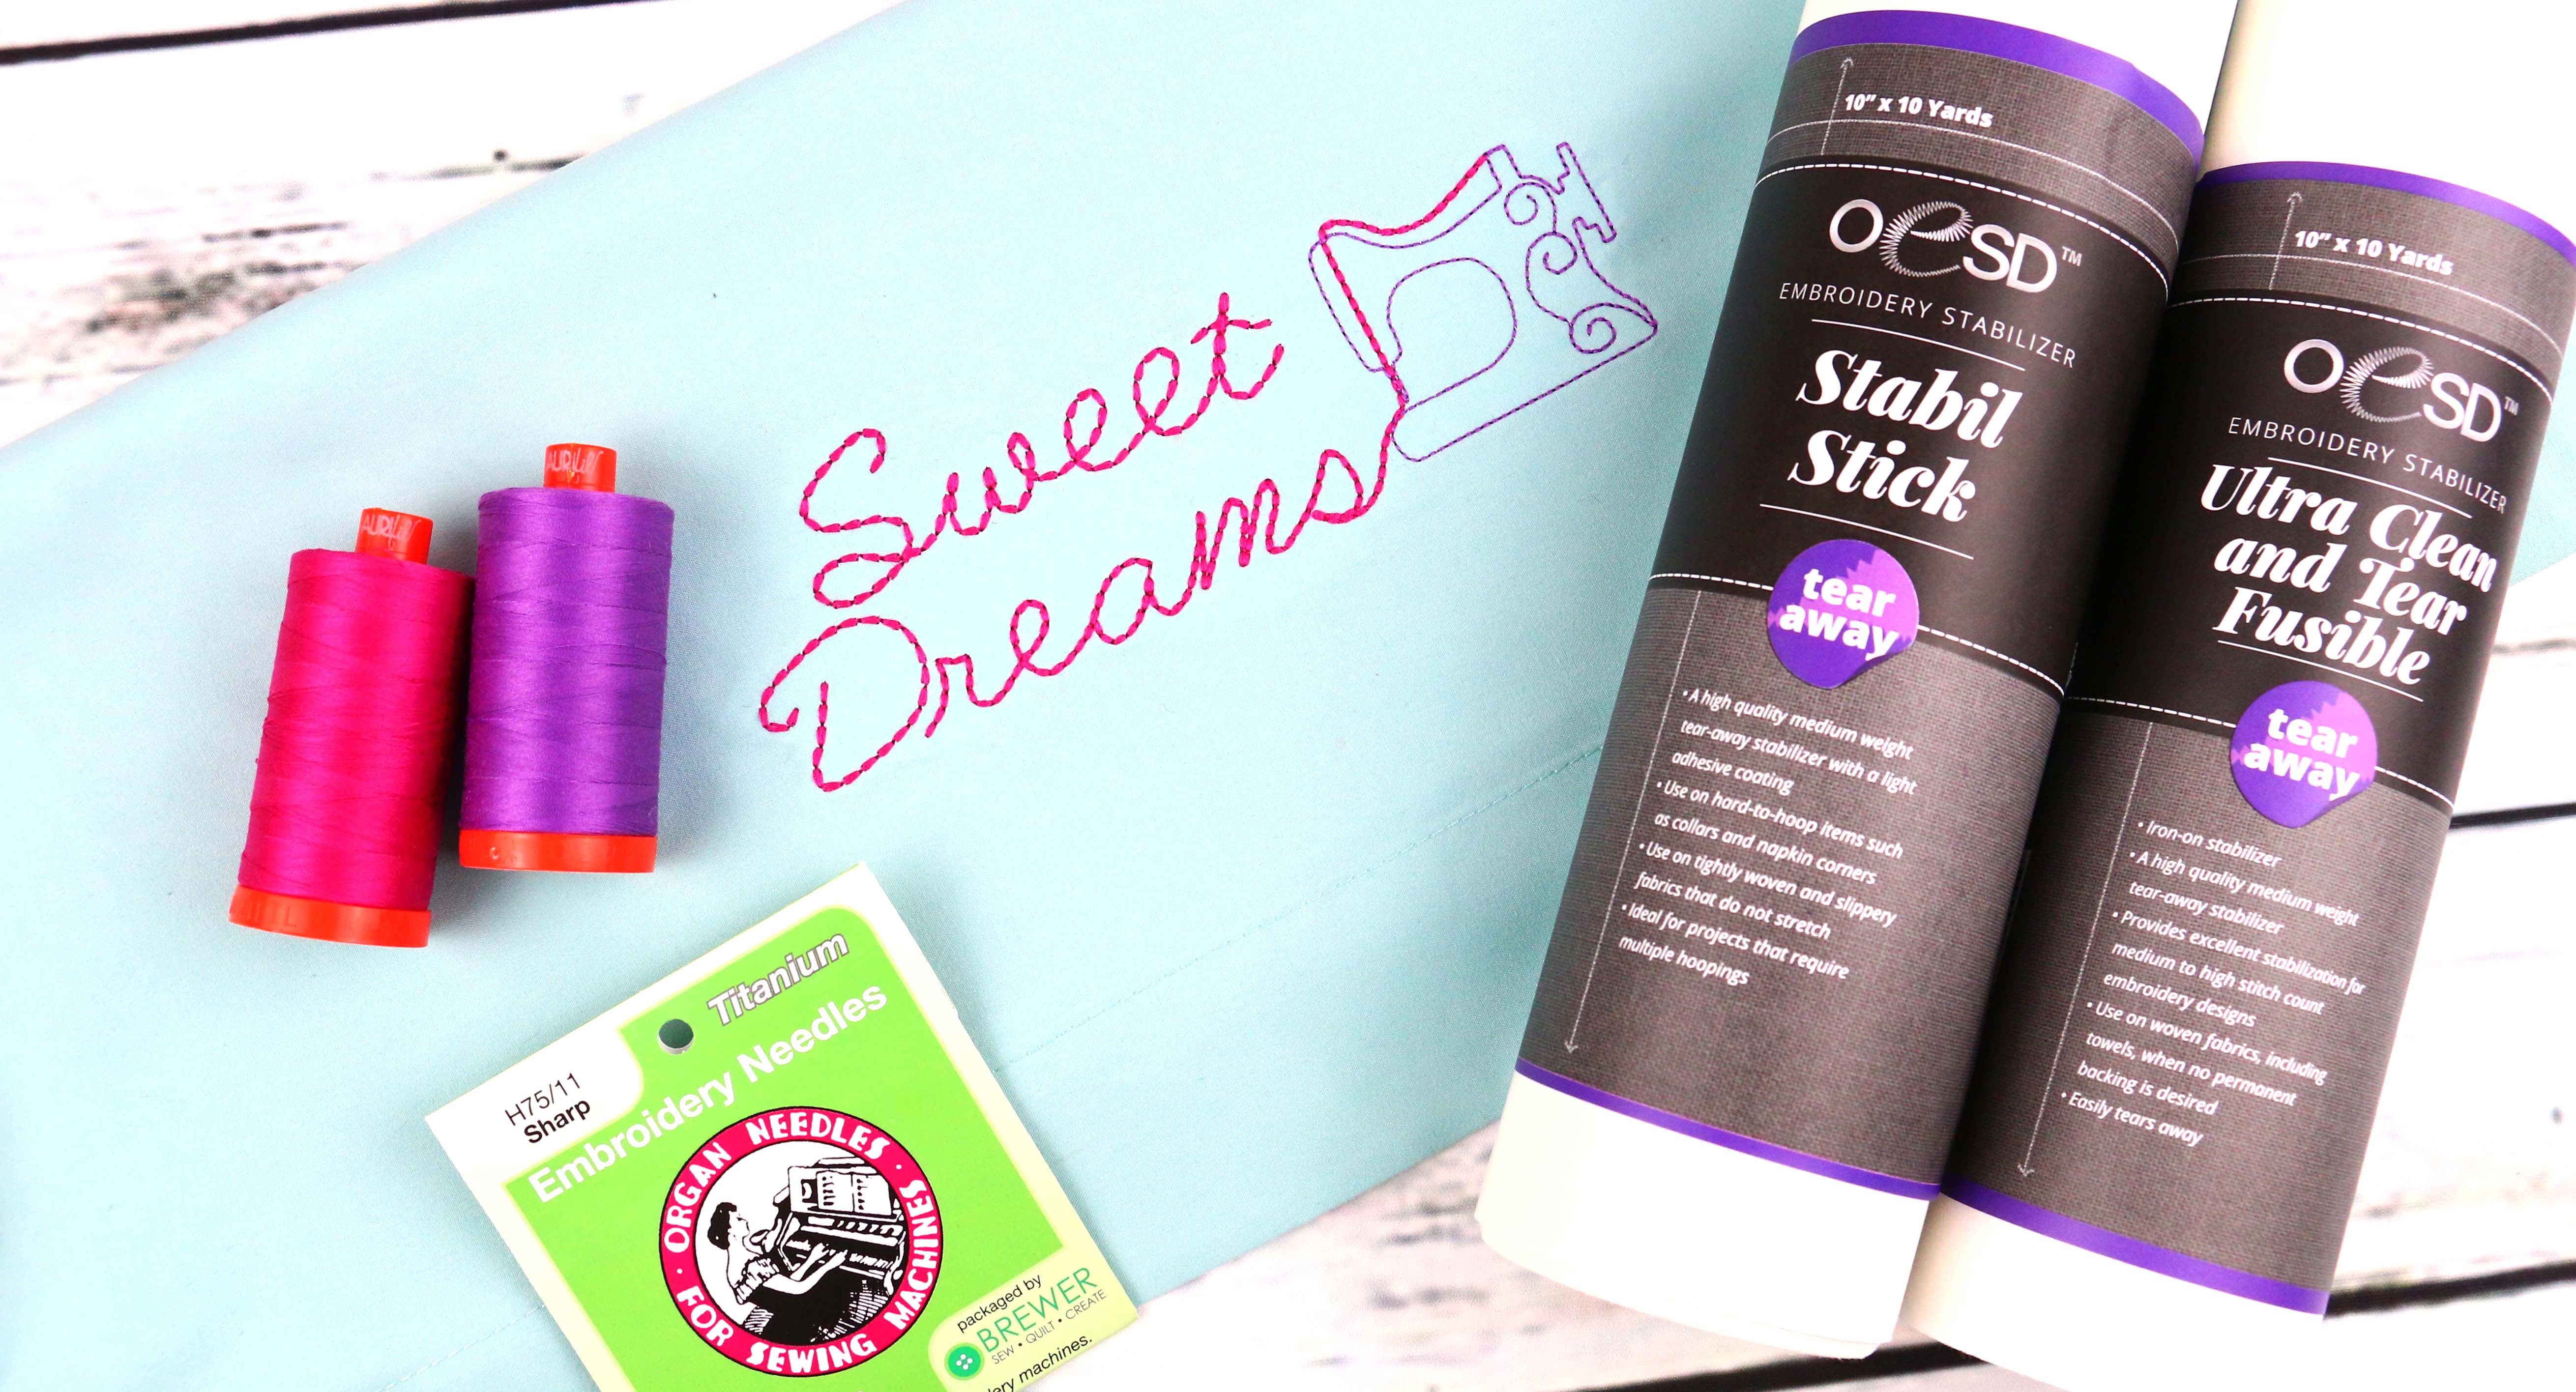
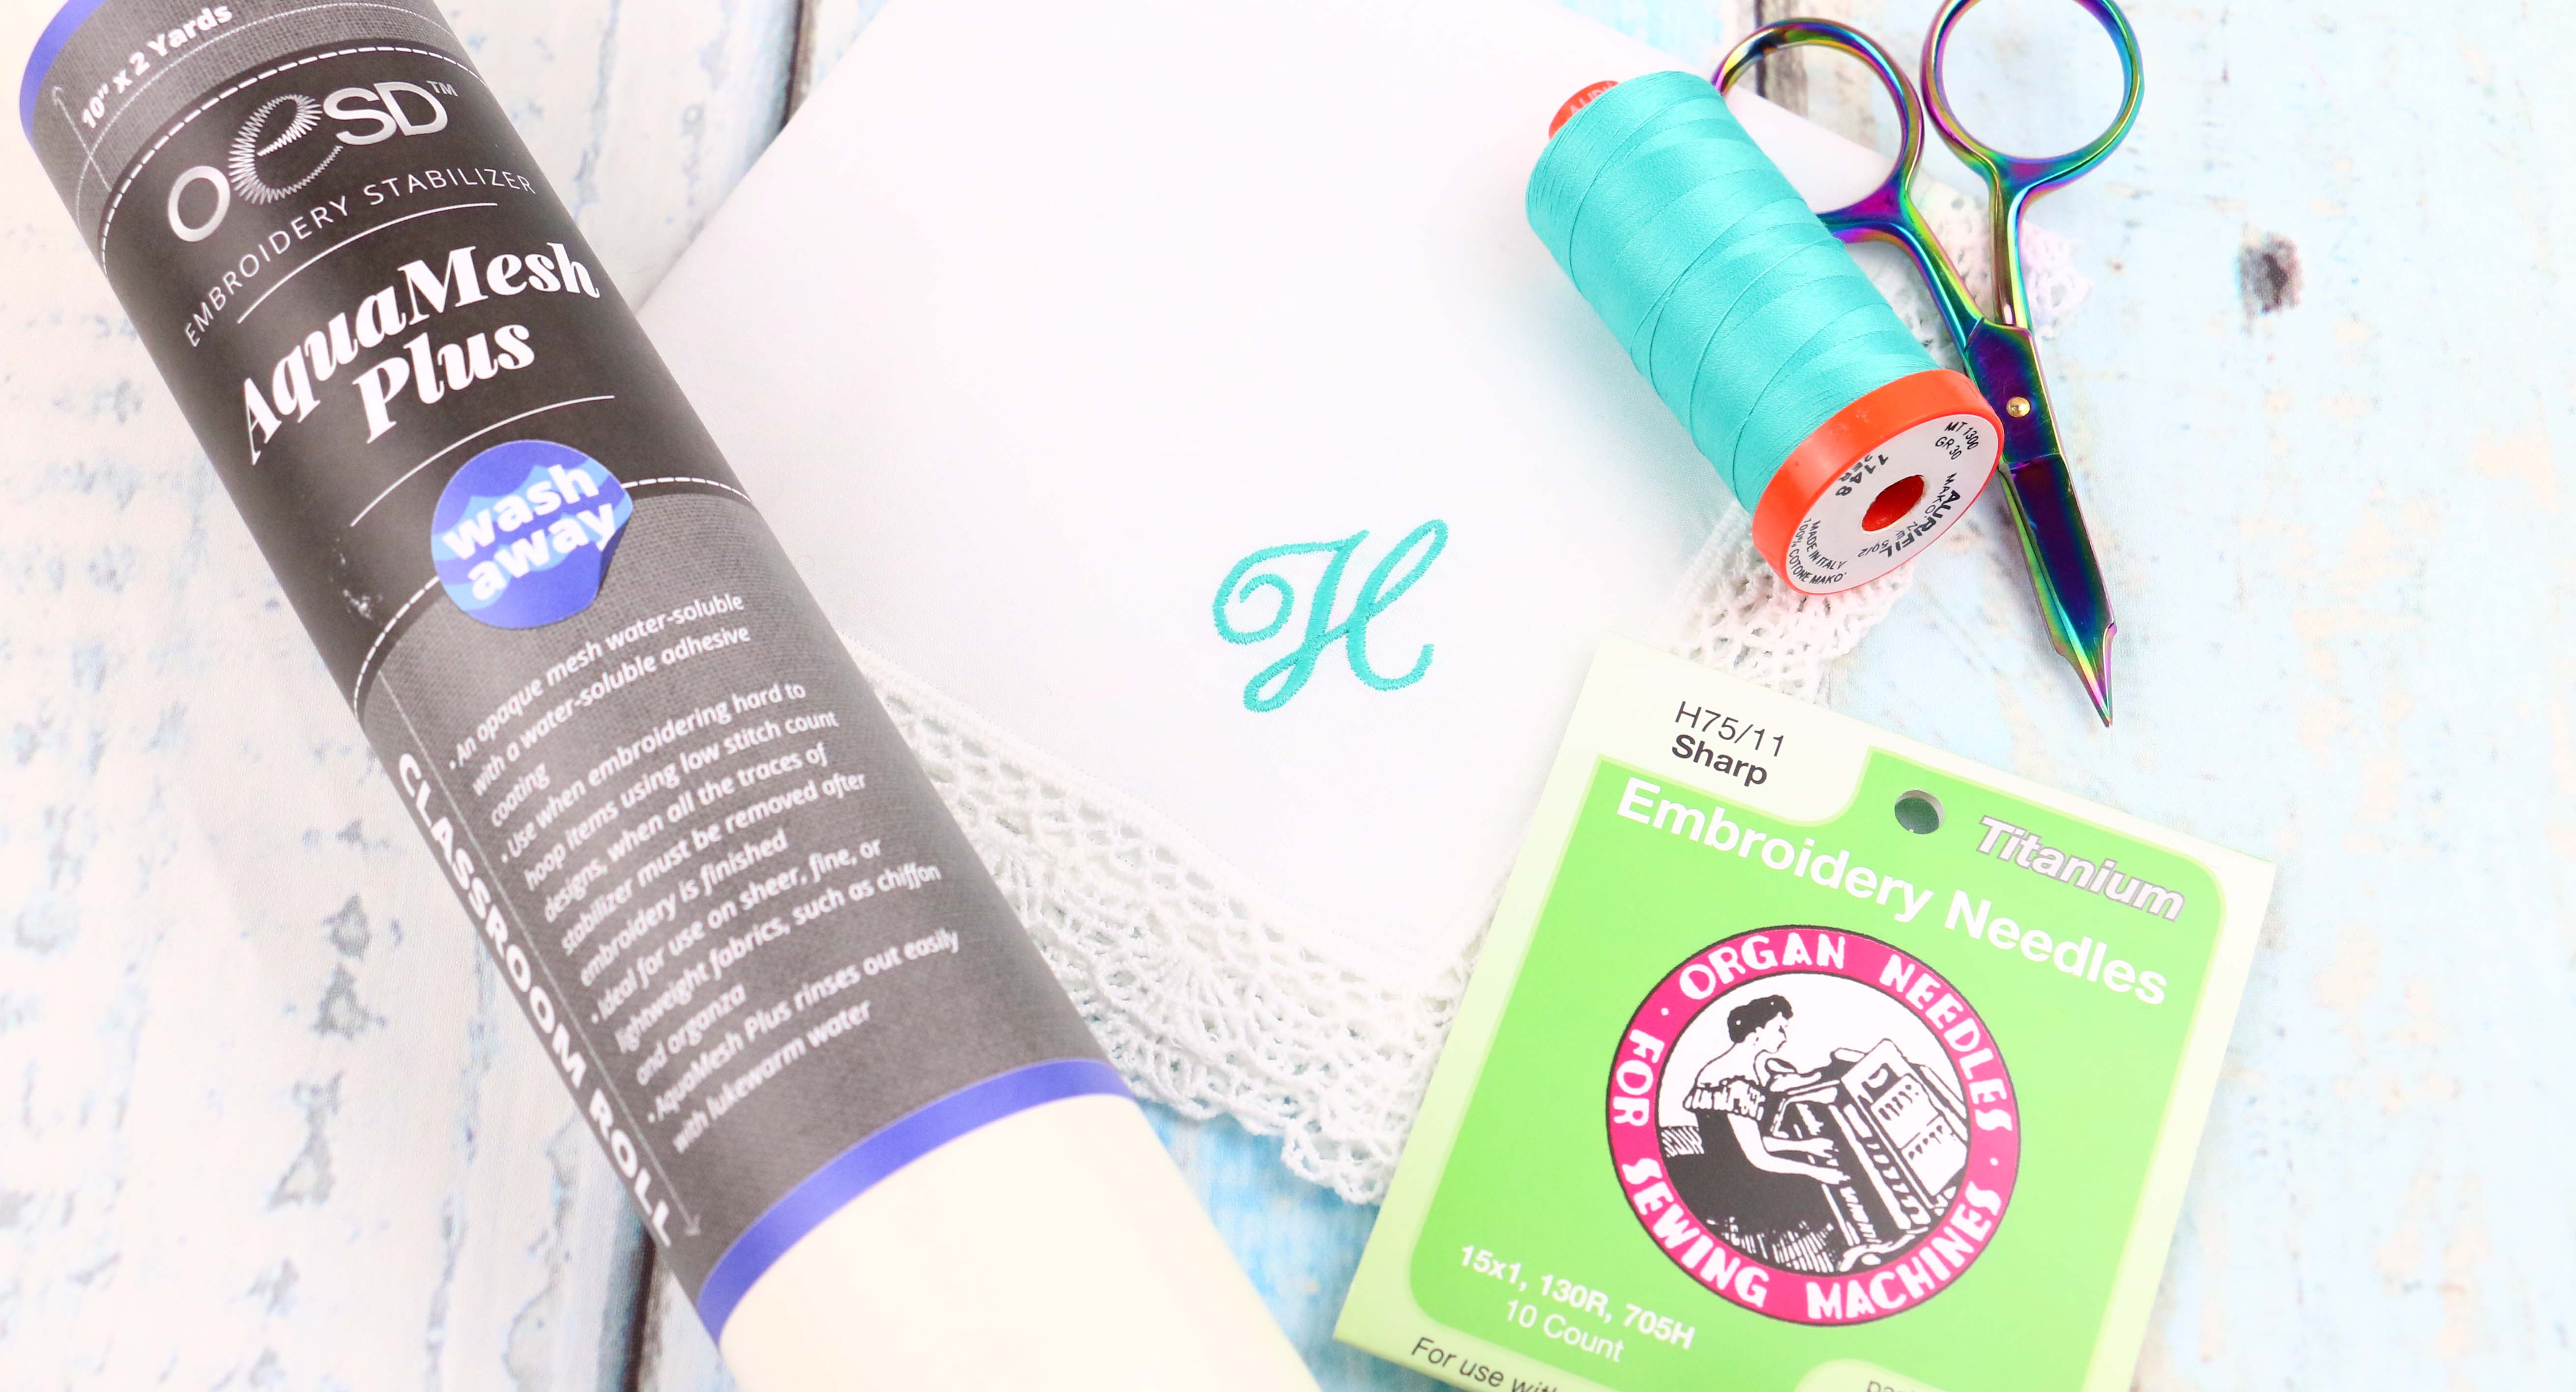
Thread content and weight
Thread is identified by content and weight. Content will be polyester, rayon, acrylic, metallic and cotton. The weight is basically the thickness. The thinner the thread the larger the number. For example: 40 weight, 50 weight and 60 weight. 60 weight will be the thinnest and would be for the bobbin as mentioned above. Here are the most popular contents and weights of thread used for the top of your machine embroidery project:
- Embroidery thread: Polyester, Rayon and Acrylic – 40 weight
- Metallic thread – 40 weight
- Cotton – 50 weight
Each thread will provide different effects. The Embroidery thread tends to be shiny, Cotton thread offers a matte appearance and the Metallic is like metal. The fun part is you get to choose what you like for the effect you want. You should also take into consideration the project. If you want to sew on a T-Shirt which will be laundered often you might want to go with Polyester as it is color fast and will not loose its shine where as Rayon threads have been known to bleed, just test a sample in the wash to be sure.
Also consider the durability of the project. Will you be embroidering on a table linen used for Christmas once a year or pillow case slept on nightly. Metallic threads might be a lovely choice for your table linen but could be scratchy against someones face each night.
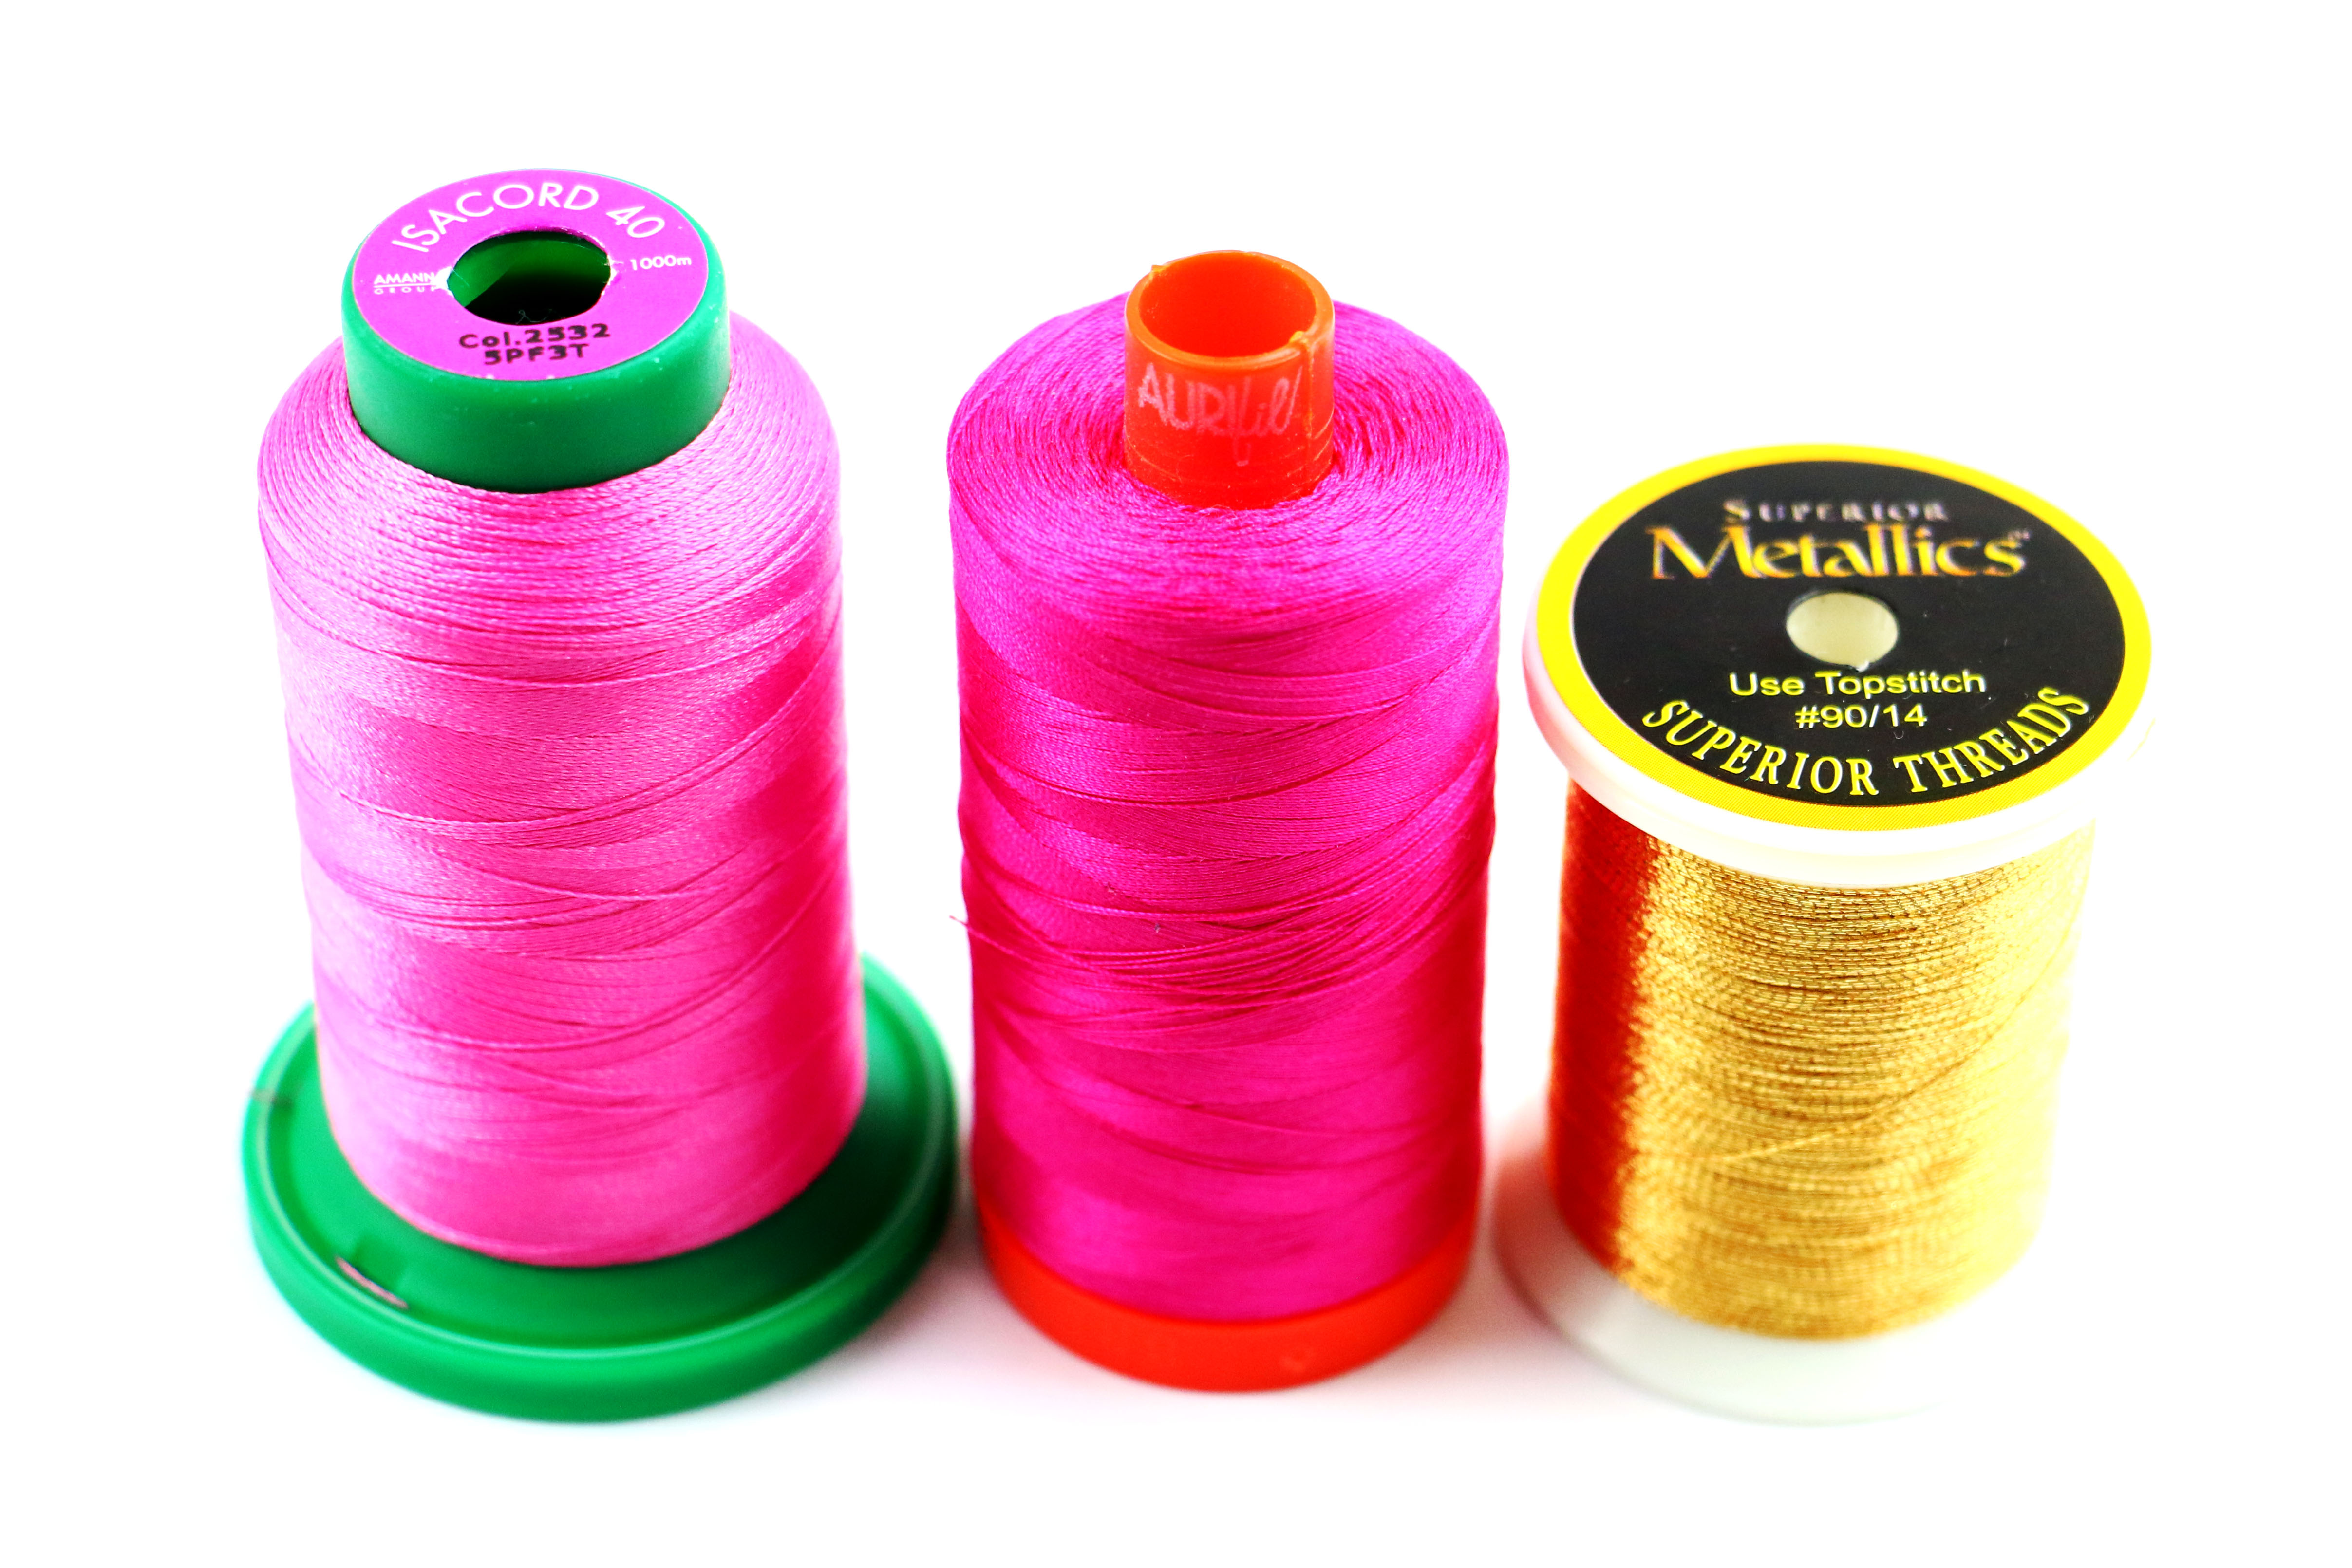
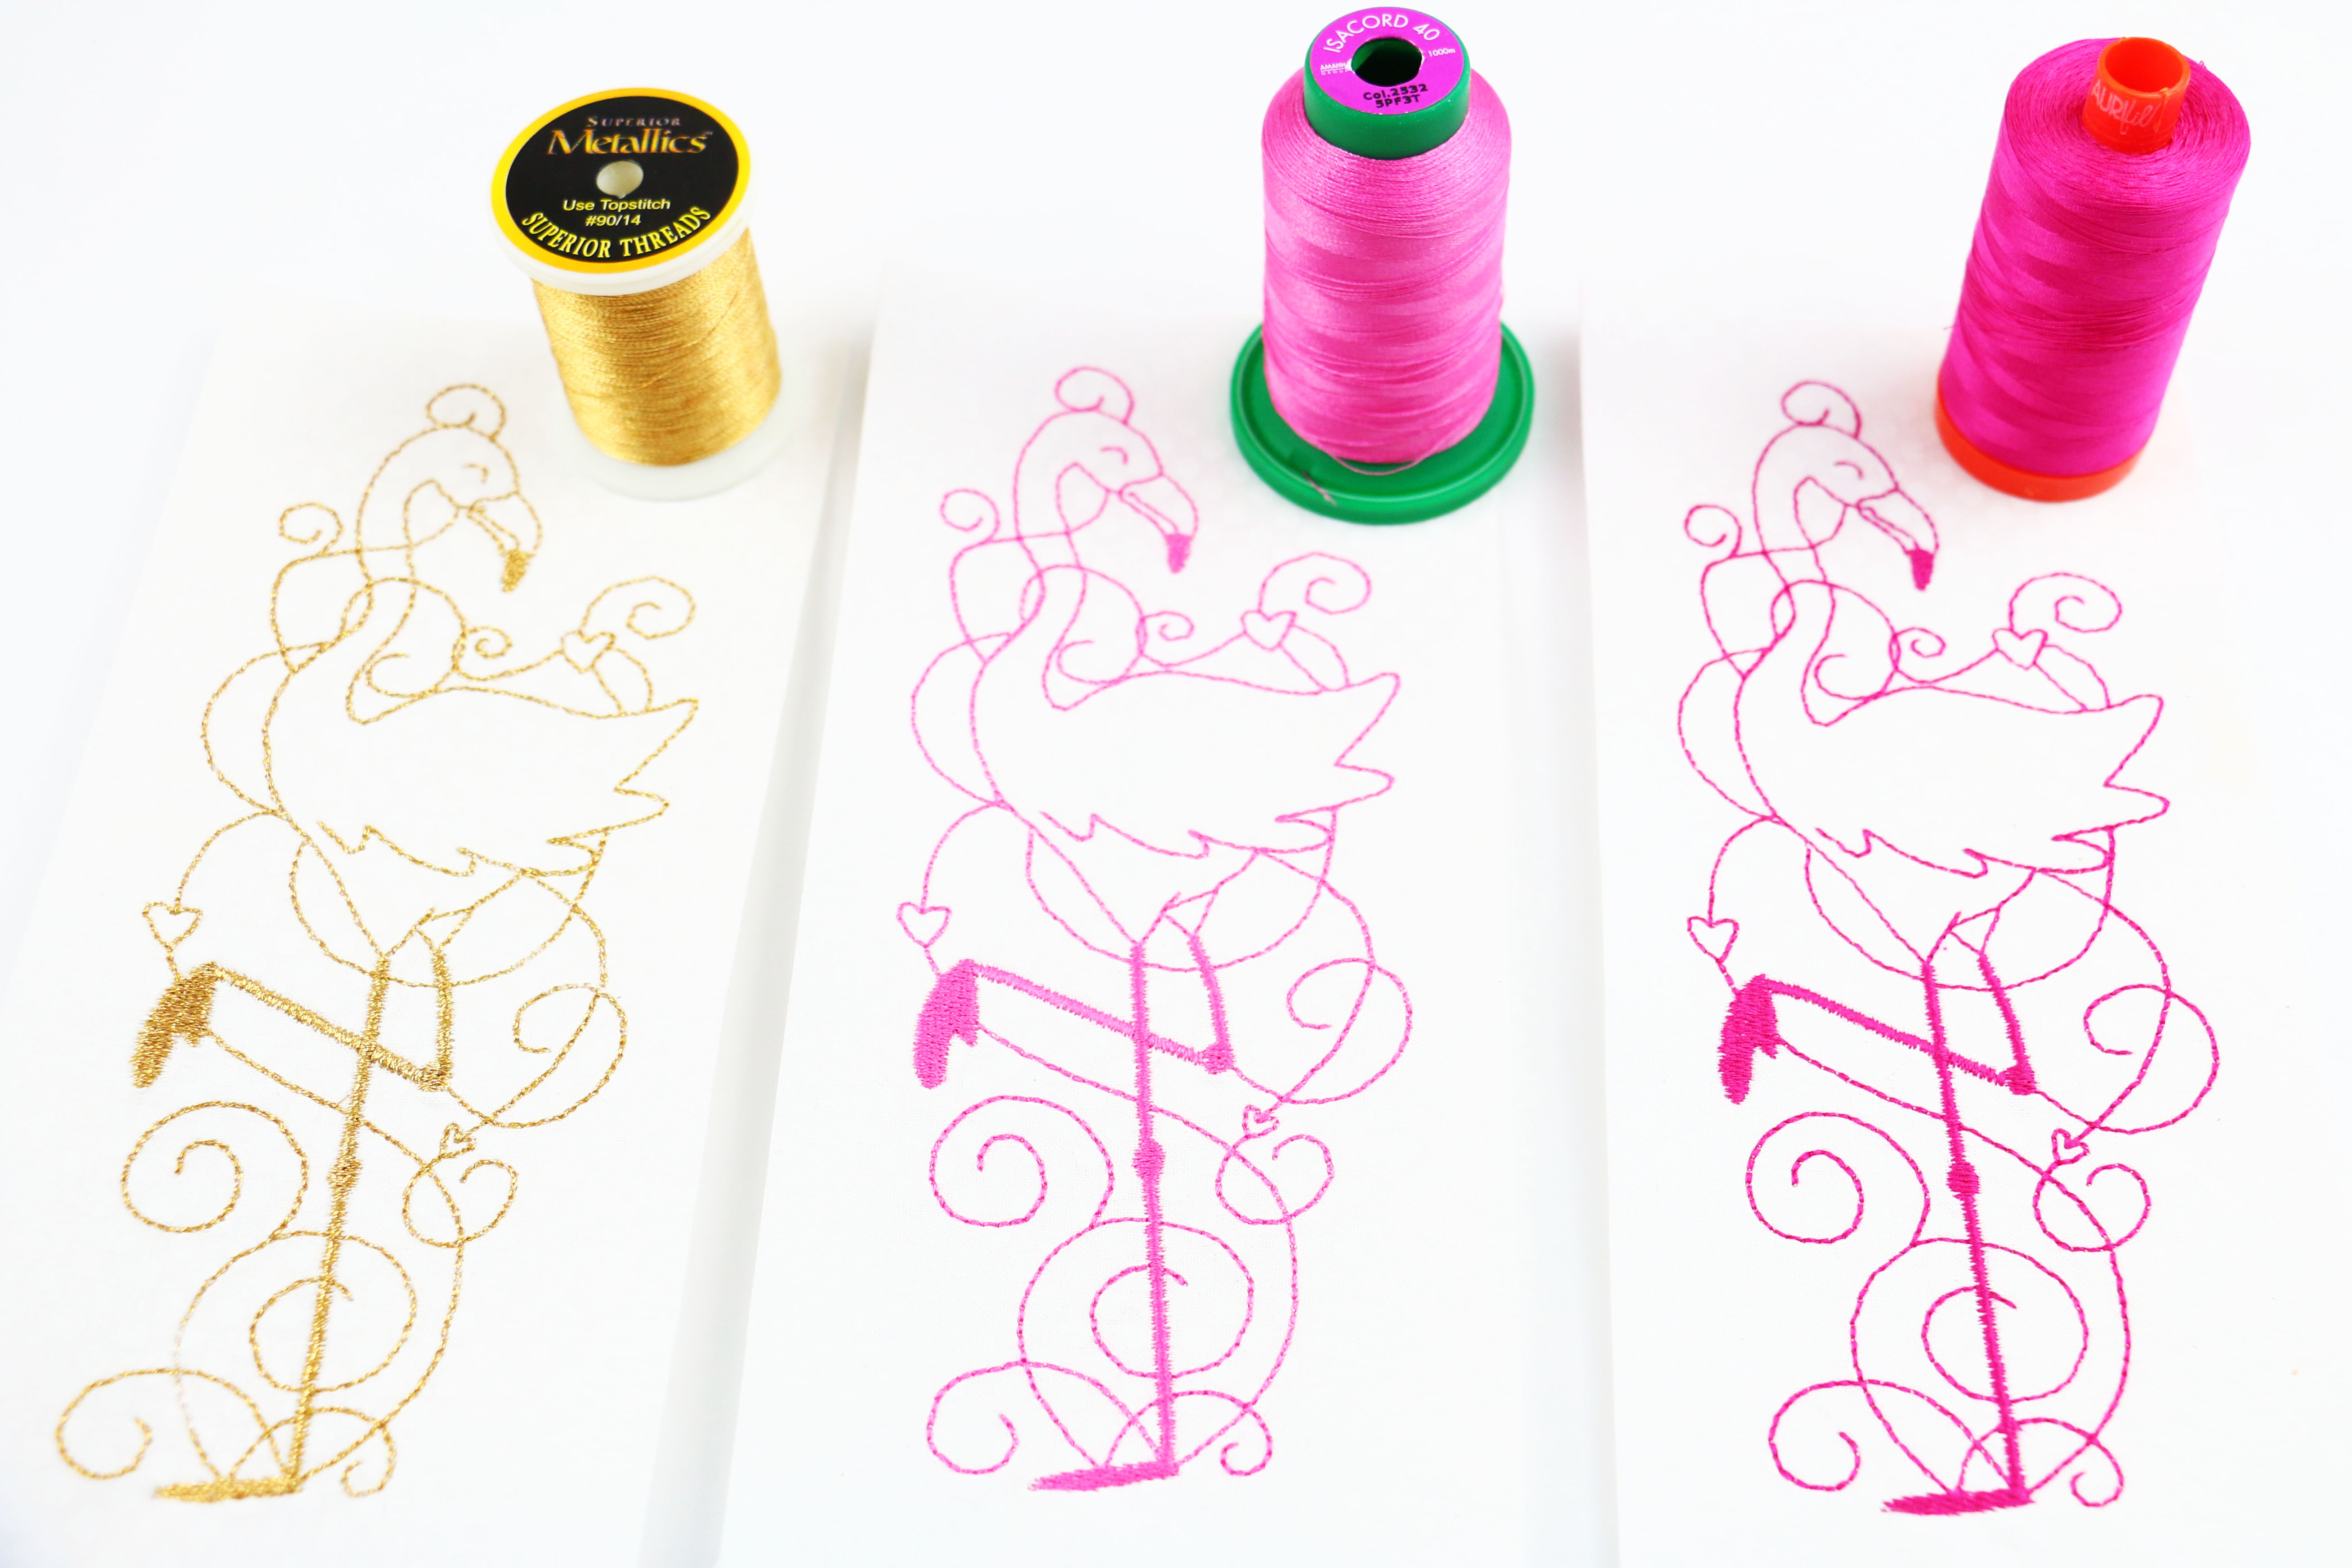
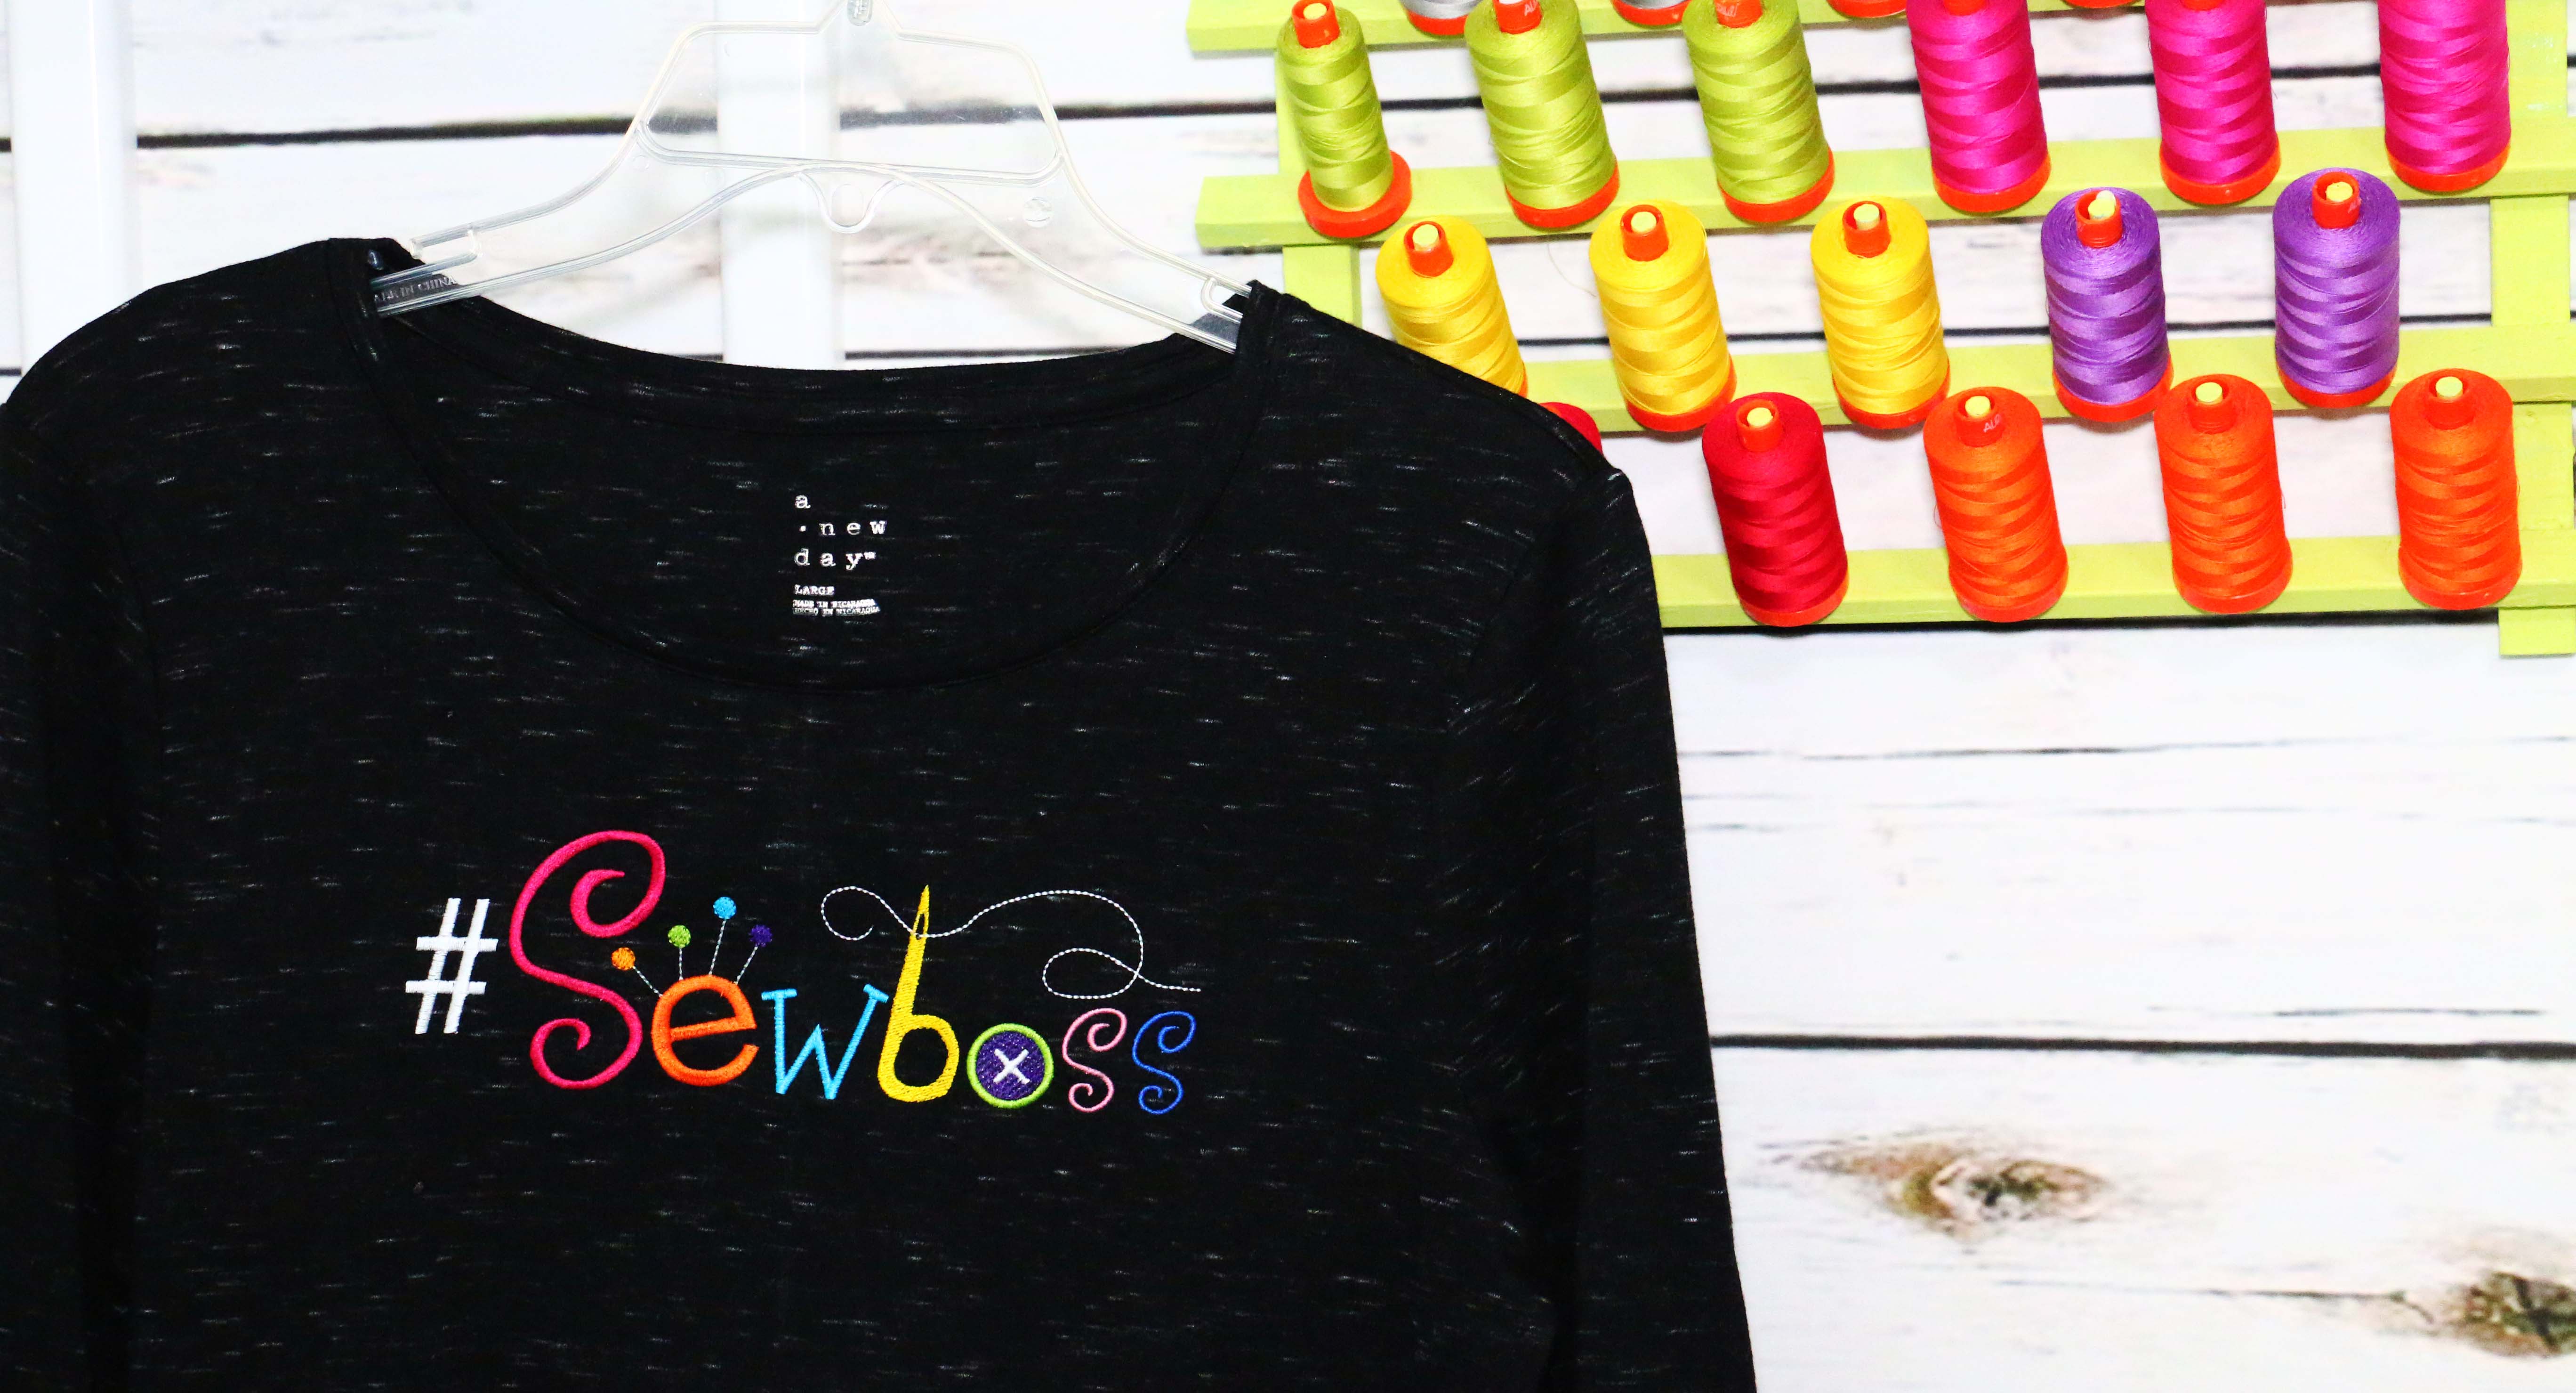
Here is an example of my Enchanted Flamingo stitched using three different threads. Enjoy this complimentary embroidery design (click here to download the zip file including multiple embroidery file formats), if you want more Enchanted Flamingos, check out the complete set here.
Pro tip: The thinner the thread the larger the weight number.
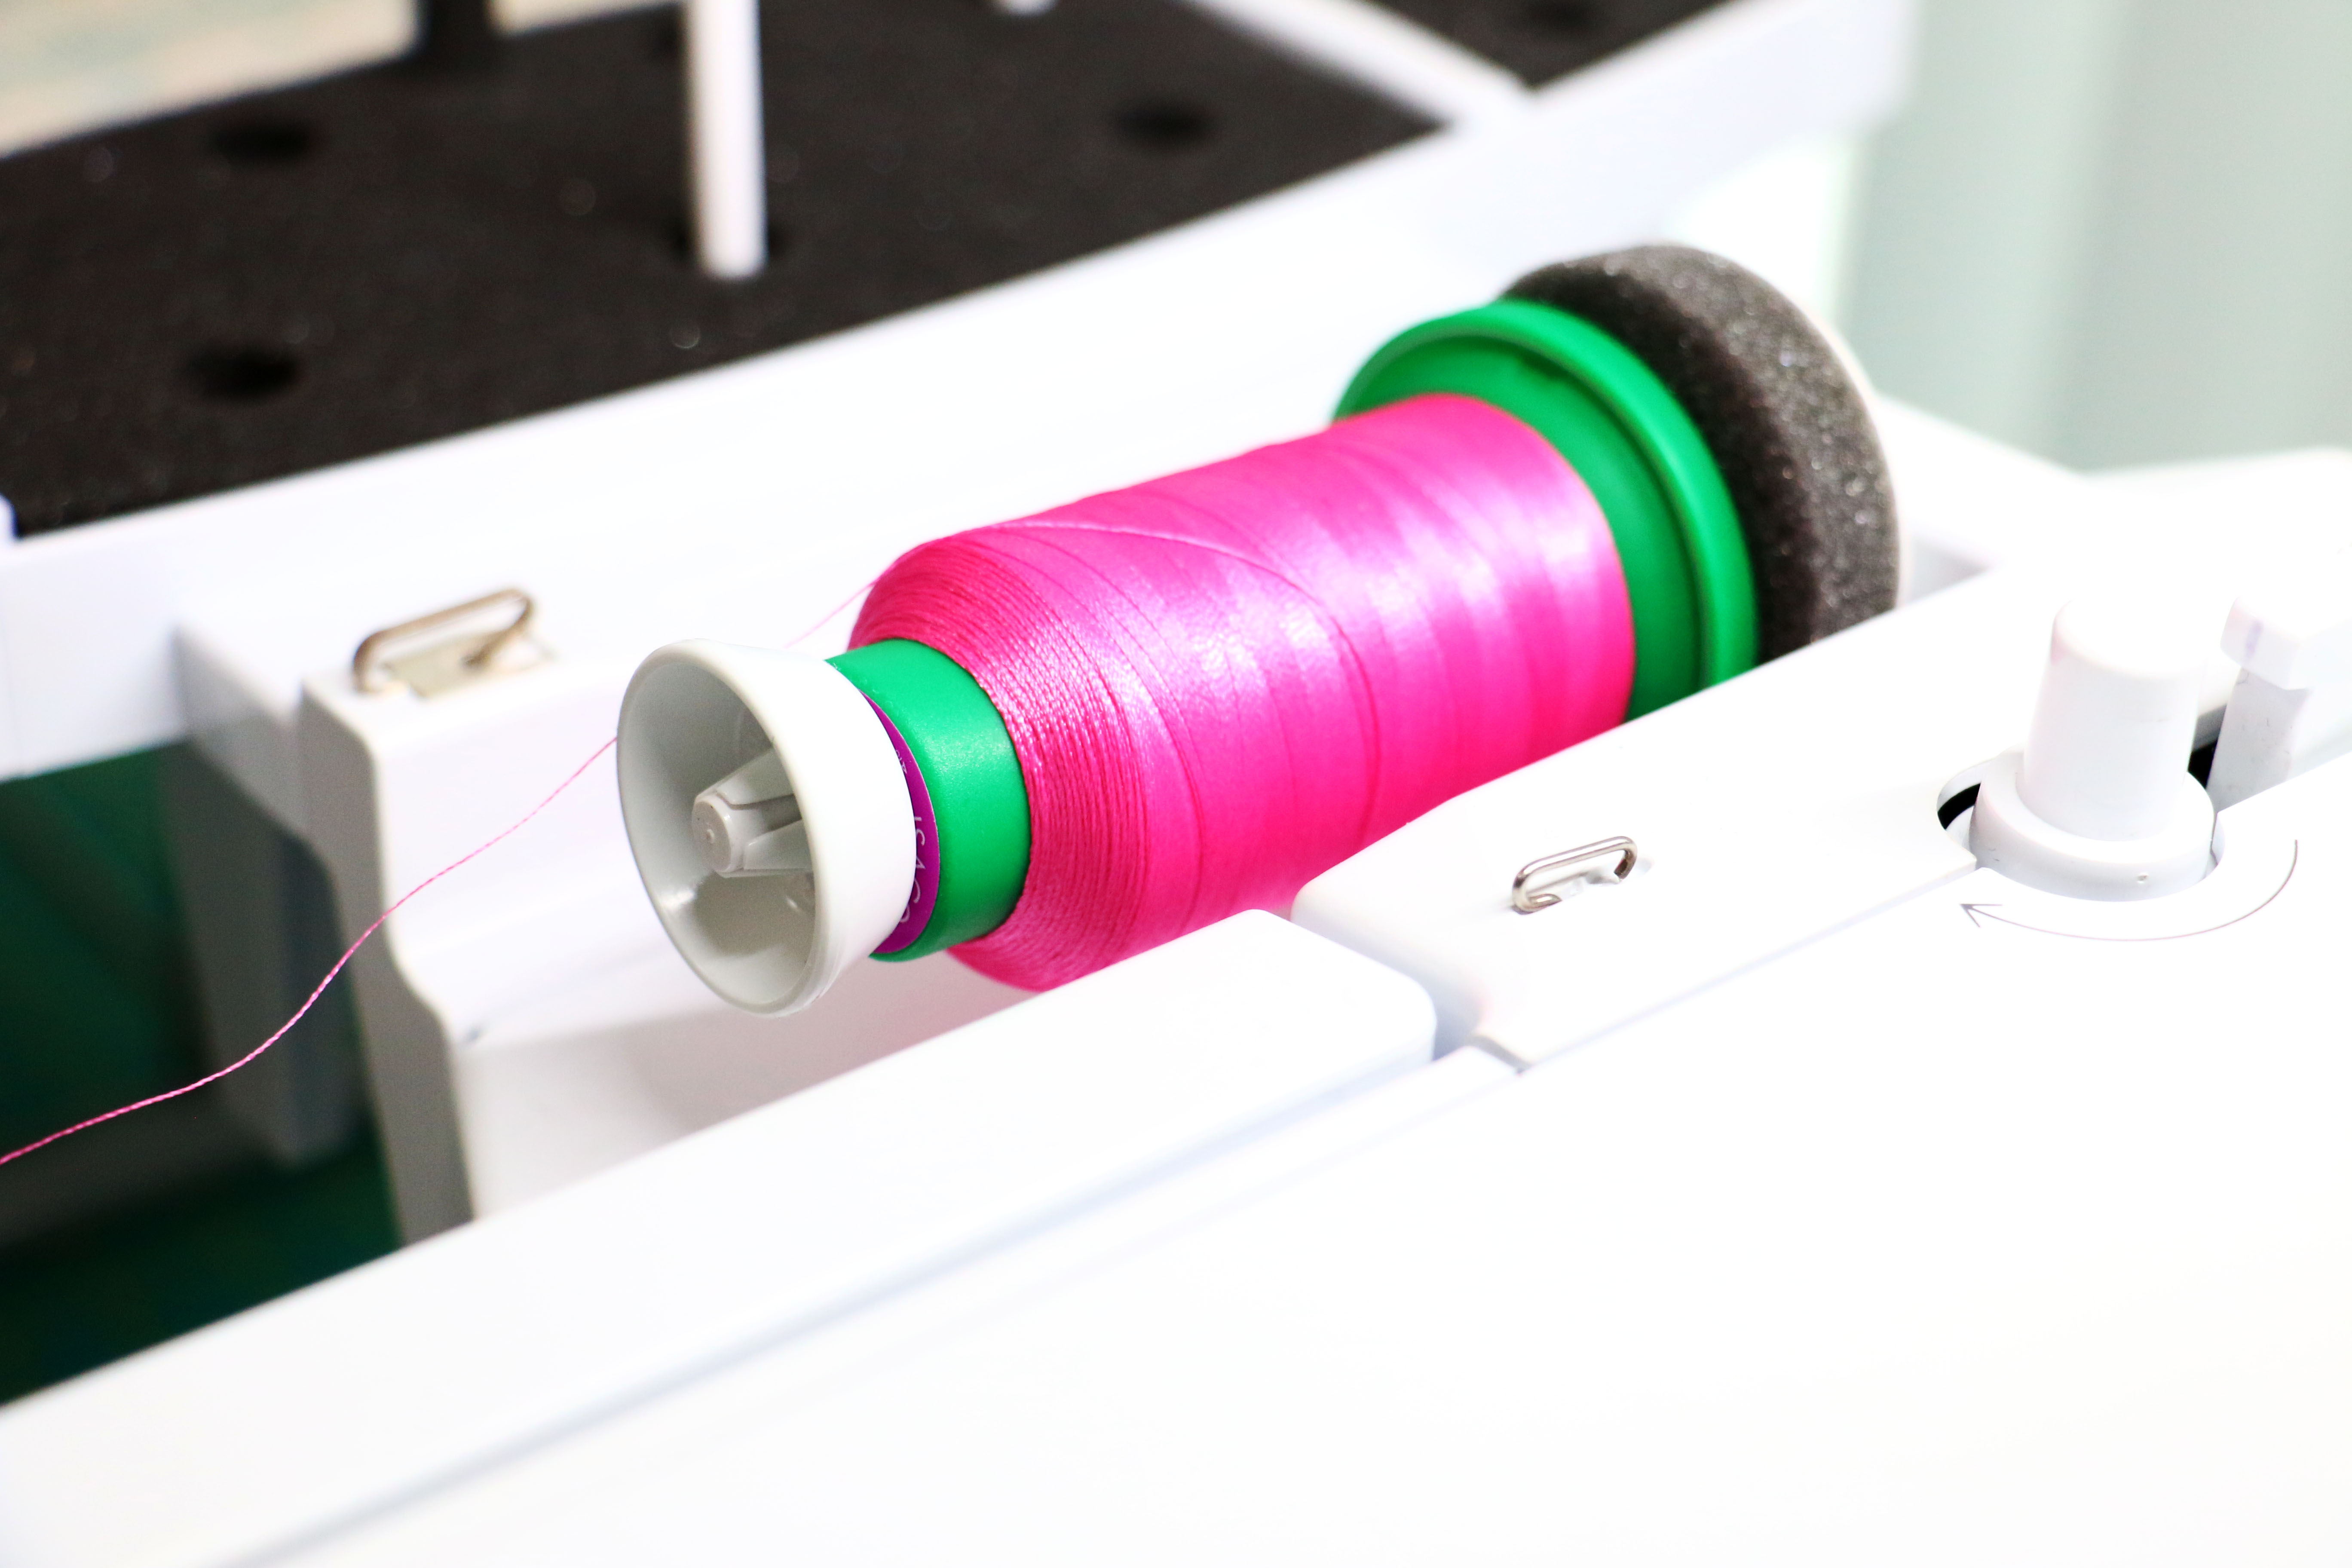
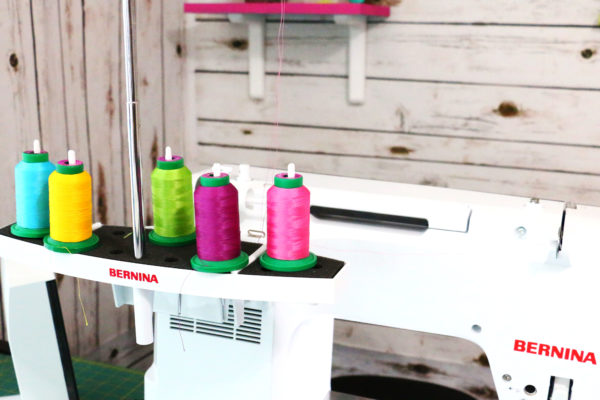
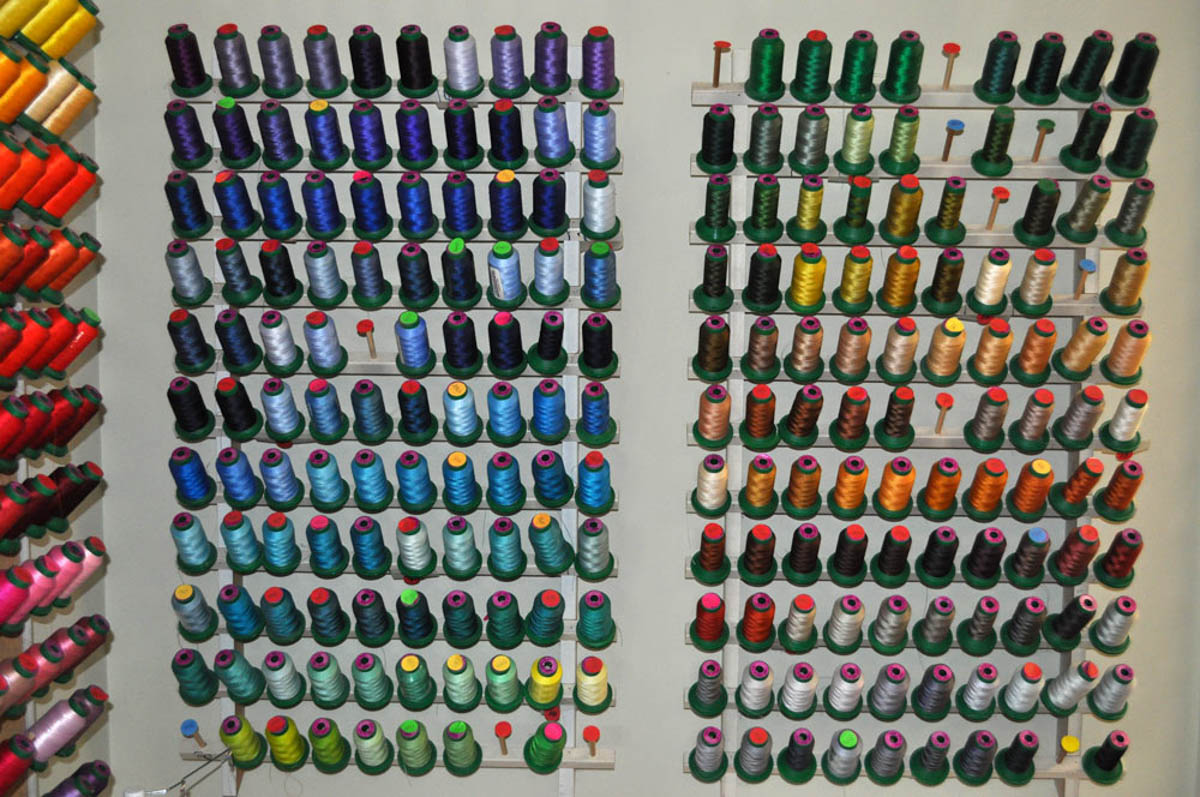
Thread Stand
Every machine has a built in thread stand. Most are vertical whereas others are horizontal. Many machines will guide you to place the thread coming over the top (like toilet paper) and other machines will show the thread coming from underneath.
Some machines, like multi-needle will show thread standing vertical. Not sure, follow the user manual or ask your local dealer.
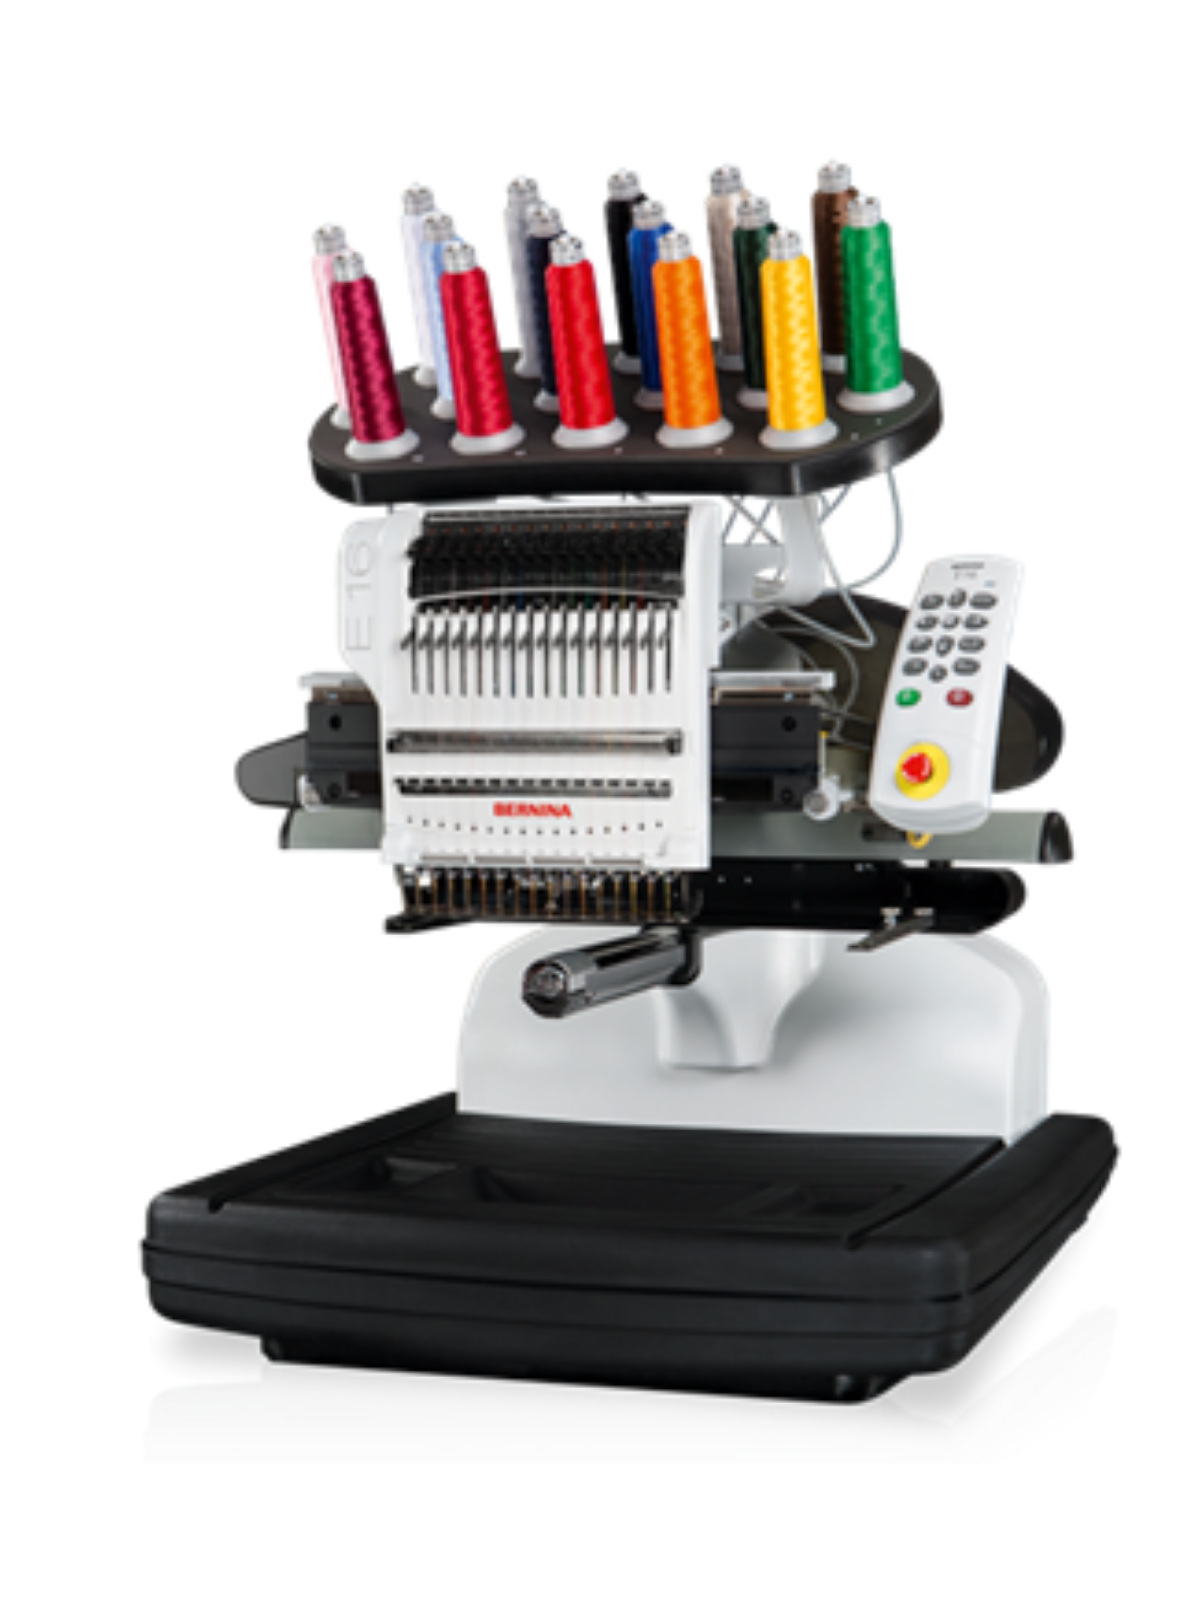
In addition to built in thread stands, some manufacturers offer add-on thread stands designed to attach to the machine. These stands usually will hold 2-10 extra spools of thread on the back or side of your machine. Shortly after I got my BERNINA 790 Plus, I decided to purchase the Multi-Thread stand for my machine. What a difference it has made for me, for most embroidery designs require more than one thread color per design, even dozens! It’s a luxury to line up your threads on the stand in order of the stitching chart. If you have not yet looked into one, it might be a nice thing to add to your wish list.
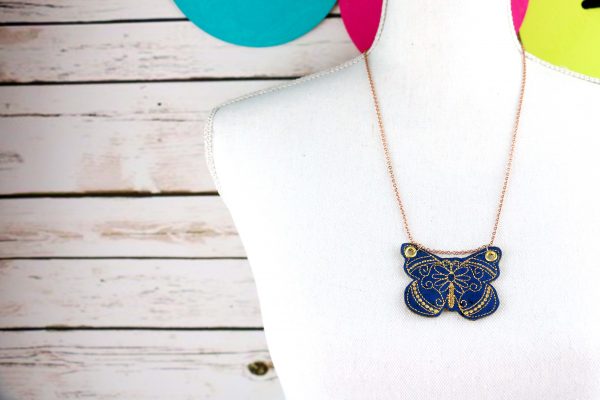
Recently I discovered a thread stand which is designed to help metallic threads glide off smoothly. Not always, but sometimes metallic threads will kink up, break or snag during stitching. Besides a the thread stand, there are a few tricks you can do to try and prevent this from happening:
- Slow down the stitching speed, check with your user manual on how to do this
- Insert a metallic needle, remember the size of the needle will depend on the thickness of the material
- Use a thread stand where the thread can flow off from the side, i.e. the Superior Thread Holder show below

The Superior Thread Holder really improved the stitch quality while I was using metallic thread on my cork butterfly necklace, feel free to download it here.
Thread Storage
Thread is like the gasoline we put into our cars. It’s best to use the correct quality and most importantly buy it brand new. Filling up your car with gas left over from 40 years ago wouldn’t be a good idea. This same principle also applies to thread. Try to make sure you’re putting the best, newest and freshest thread in your machine. Thread does have a shelf life. How long you might ask? Some companies will say that it depends on how you store it. Most say a few years. An easy test to see if your thread is still in good working order is to wrap a long strand around each index finger, like dental floss. Give the thread a tug to break it. If it snaps off and looks as if you cut it, then the thread is still is fresh. If it looks like the cat played with the end, that means it’s time to dispose of it.
Back to thread storage. As much as I love my threads hanging all pretty on the wall, it really isn’t the best for the thread. Thread can get dusty and the sunlight will break down the strength. The best way to store thread is hiding them away from sunlight and dust. There are lots of different containers to store thread in.
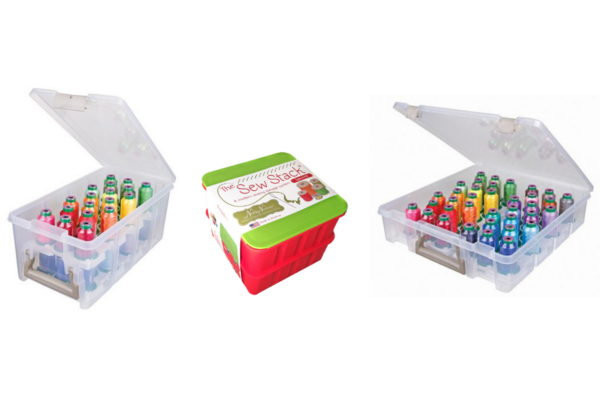
Even grab some plastic tubs and designate a color for each box. I do find it’s best to keep my sewing thread separate from my embroidery thread. I’m also big into color coordinating. At the end of the day we want our thread to be fresh and happy to come out of it’s box and thrilled to play with our beautiful embroidery machine.
What is next?
Check back here each week to see the next lesson and prepare to learn something new. As a part of the Embroider-Along there will be 12 weeks of lessons and (of course) some adorable final projects. Each blog post will bring you closer to mastering the basics of machine embroidery. Consider spending some time organizing your threads and needles. In the comments below you can share with me how you did.
Here is the blog schedule:
- Embroider-Along Part 1: Intro four most popular materials for machine embroidery
- Embroider-Along Part 2: Stabilizer and Materials
- Embroider-Along Part 3: Needles and Thread
- Embroider-Along Part 4: Placement and Hooping for Machine Embroidery
- Embroider-Along Part 5: How to Embroider on Knits
- Embroider-Along Part 6: How to Embroider on Woven Materials
- Embroider-Along Part 7: How to Embroider on Napped Fabrics
- Embroider-Along Part 8: How to Embroider on Sheer Materials
- Embroider-Along Part 9: How to Embroider on a Ladies T-shirt
- Embroider-Along Part 10: How to Embroider on a Pillow Case
- Embroider-Along Part 11: How to Embroider on Luxe Cuddle® Rose
- Embroider-Along Part 12: How to Embroider on a Pet Screen
I’d love to hear what your favorite embroidery thread is, and why!
Until next time, I hope you have a creative day, bye-bye.
Sue
Used Products


What you might also like


26 comments on “Embroider-Along Part 3: Needles and Threads”
-
-
My pleasure!! If you stitch out my Enchanted Flamingo be sure to post on social media and tag BERNINA and me!!
Enjoy the Embroider-Along ~ Sue
-
-
thank you Sue for the info. I always get mixed up about the threads and I have been sewing for some time.
-
Welcome and thanks for the encouraging words!! Enjoy the Embroider-Along ~ Sue
-
-
Sue, Thank you for sharing your knowledge with us. I am just getting back into machine embroidery after 30 plus years so it was nice to read your articles to bring me up to speed. Looking forward to reading more.
-
Thanks so much for the encouraging words. We all need refreshers. Especially when things change so quickly. Enjoy the Embroider-Along ~ Sue
-
-
Sue, Love your blog and will print out each section to use for reference. You are right that you always learn something new and also love the conformation that I was doing something right. I have been sewing for 50 years with different machines. Am now the proud owner of a Bernina 830LE that I bought when it came out. I have a lot of trouble with the tension when I embroider. I have a Viking Designer 1 that I never touch the tension adjustment. But the 830 Embroidery tension is a constant problem. I have learned to use ONLY Isacord thread as other brands break or shred. Loops on the top of the embroidery are another problem. Would love some advice. Thanks. omalo
-
Thanks so much for your encouraging words. Congrats on your new beautiful machines!! I’ve found that isacord work best too. Tensions can be tricky but I usually ask those questions to my local BERNINA dealer. Have you had them check it out? Enjoy the Embroider-Along ~ Sue
-
-
Yikes, I loved the clarification on needles and thread. I really like using Isocord thread since I seem to have less trouble. Great information
-
Awesome. Thanks for following along. I’m with you. Isacord just works like a dream in my machine. Why mess with something when it works. Enjoy the Embroider-Along ~ Sue
-
-
Just recently took the plunge and purchased a Bernina that would accept an embroidery unit so your series could not have come at a better time for me. So delighted to have so much detailed information to help guide my efforts. Can’t wait for the next installments! Thank you so much for sharing your expertise. I live hours away from any classes so this is a godsend.
-
I wish my dealer was closer too. I travel over an hour but when I go I let them know I’m coming and make an appointment. I’m so glad you’re benefiting from my series. Please ask questions. I’m here to help. Enjoy the Embroider-Along ~ Sue
-
-
I have a 780 and now love it. I sold my multi thread holder and just line up my colors on my sewing table. I used Isacord thread only and mount it on the horizontal spool holder. I use only top stitch or embroidery needles. Keeping things simple and consistent have improved my stitch out success. I haven’t experimented with metallic threads yet. I also work slowly and methodically when I’m embroidering. I made tons of beautiful pillows this Christmas. One thing I strongly recommend is to be on top of maintenance of your machine. My dealer is a two hour drive away, but a necessary one! I’ve also gotten good advice on the phone, and take classes regularly. I’m surprised how much I learn every ti Even!!
-
I’m so thrilled you’re enjoying this series. You’re right, classes and having online friends is great. I’m a long ways from my BERNINA dealer too so I am glad there is an online community. Enjoy the Embroider-Along ~ Sue
-
-
Thank you for clarification on needle types & sizes. I’ll make notes in “Bernie’s” manual. I’ve had my B790 2 years now; she & I are fast friends!
I’ll be doing large dense symbols on brocade altar paraments. I’m thinking of making “patches” that can be sewn on. That way not chancing problems embroidering directly on $80/yard brocade. What do you suggest as the “sandwich” for making the symbols? Stabilizer, fabric types. Thank you!-
Oh I really love the idea of treating the designs as patches. Ok, so here is what I would suggest. Not entirely sticking to the rules of this blog but going into stabilizers, etc deeper. Here goes:
1. Press a piece of Woven fusible interfacing to the wrong side of the material (like what you would press in a shirt collar or waistband) Shapeflex is a good one. Reason why is sometimes Brocade can shift and you need to give the material consistent body.
2. Hoop the brocade with a heavy tear away.
3. Use a 80/12 top stitch needle (the eye is longer and I think going through a heavier material might just help out).
4. Love the idea of you stitching it as a patch after it is complete. Once stitching is complete, cut around leaving 1/2″ seam. Turn down the seam toward the back and either hand stitch or use a tiny zig-zag or stretch stitch with clear thread.Let me know how it turned out.
Sue
-
-
embroidery thread
such a nice blog , I am really impress your writing skills , we are also work in StitchMax software , it can use to embroidery design and punching use, The Stitchmax Provide best embroidery digitizing service, Stitchmax is a great way to start creating and editing professional embroidery designs on a VERY low budget. Every device support of Windows OS with all versions that is work fast speed and smooth work, website: stitchmax [dot] in -
I’m 83 years old and have a problem with inserting a needle in my machine. I see in your tutorial the person demonstrates inserting the needle with a plastic needle holder. Can we purchase one? I’ve looked in the Bernina accessories but do not find one offered. Does Bernina sell them?
-
Hello patakers, yes, you can buy the needle inserter through your local BERNINA store. Just get in touch with the store directly to ask about purchasing the needle inserter!
-
-
Hi Sue, I am grew up with my sewing machine until our kids were older and my attention was on other aspects of life. Grandchildren have brought me back to my sewing. I purchased a new Bernina with embroidery module. I am very intimidated by it. Your sew along has given me encouragement. I am ready to start accumulating my supplies and start a project. Thank you for breaking the task into small sections and a place I can refer back to as I learn. As I get older, I need more time to learn!
-
I love hearing stories like these. When I first got into machine embroidery I was fresh out of college and then found a true love for it again when my daughter was born. So interesting how in life we go through these re-found interest. Enjoy and know we are here to help! Sue
-
-
Hi! I have been seeing since I was a teenager, but am new to Bernina. I am so excited to have a new machine,which came with the embroidery module. I’ve never done it before, and I’m a bit intimidated. I just got the email about this, and I see you’re on #4. I will try to catch up! Thank you for putting this series together for us newbies!
-
Hi Suzie! Welcome 🙂 This series is already complete (it’s a couple years old) but the information will always be good and always be here! Start back on #1 and follow to #12. Follow it lesson by lesson so you can see how it all flows together. Enjoy!
-
LOL, I didn’t know that! It’s new and relevant to me, though, so thank you!! I will enjoy it very much.
-
-
-
Love all your tips and info. It’s also great to refer back to or refresh the brain.
I prefer Isacord thread, and my favorite store sells it.Thank you
Leave a Reply
You must be logged in to post a comment.
Thank you so much for sharing your knowledge with us. I love embroidering on my machine. I store my threads in plastic containers and have shades over window where I sew that limits sunlight. I usually use Sulky threads.
Thank you for the flamingo embroidery. Look forward to further lessons