Embroidery for Beginners: Hoops and Hooping
Take a deep and detailed look at the quality hoops from BERNINA, learn all the features and how to use them to hoop your projects properly.
BERNINA Embroidery Hoops

Let’s start by taking a look at the parts of BERNINA embroidery hoops.
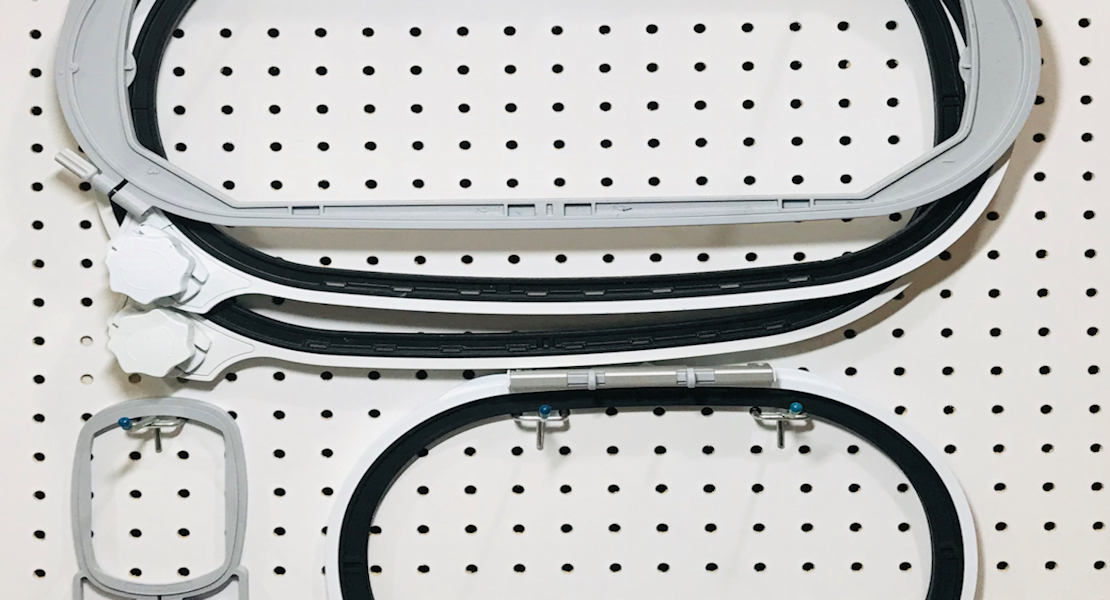
Generally, BERNINA hoops are oval in shape to evenly and securely hold the stabilizer and project around the entire hoop. There are no areas or corners in the embroidery field that can shift while stitching. They have two parts: an inner hoop and an outer hoop.
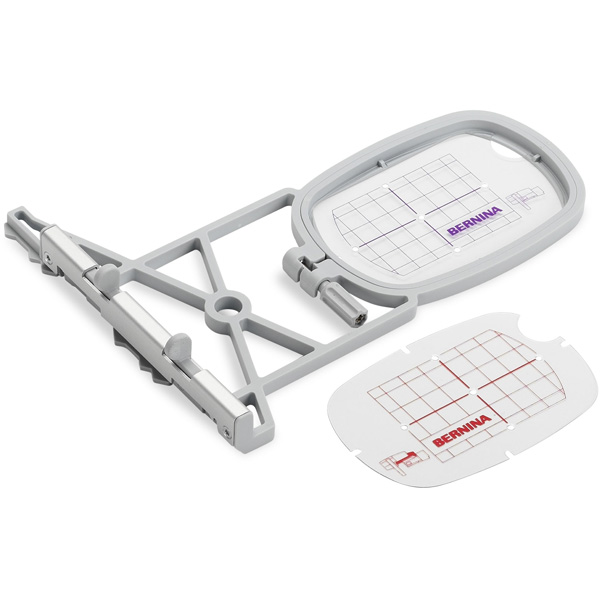
In the above image, the outer hoop has the twist-lock mechanism which has the rotary lock and releases buttons to easily release the inner hoop. At the bottom of the inner and outer hoop are two arrows markings to indicate the bottom of the hoop. On the left side of the outer hoop is the mechanism that attaches to the arm of the module. In addition, there are template clips and a plastic template with markings for positioning the hoop on the project.
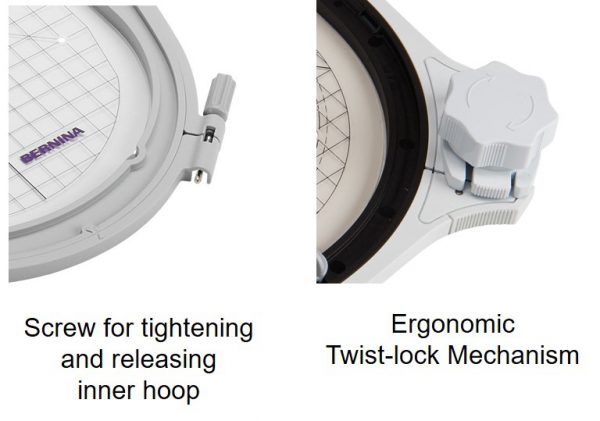
As mentioned, the hoop in the previous image has the Twist-lock mechanism for releasing the inner hoop. BERNINA also has hoops that release the inner hoop with a screw. On the Standard BERNINA Embroidery Hoops with the screw, the screw on the outer hoop is rotated clockwise to tighten or counterclockwise to loosen.
The below video shows how to release the inner hoop of the Ergonomic Twist-lock hoops. See how it works and the advantages of the ergonomic twist lock.
The other part of the outer hoop is the attaching mechanism which is what we used to attach the hoop to the module.
Attaching the Embroidery Hoop to the Embroidery Module
The attaching mechanism makes it easy to attach the hoop and once attached, it securely holds the hoop in place and will not come loose while embroidering.
To attach the hoop to the module arm, hold the hoop at the attaching mechanism, squeeze both ends, then position the hoop over the brackets on the module arm and push down until the attaching mechanism engages. To remove the hoop, squeeze both ends of the attaching mechanism and pull the hoop up and off the module arm.
Templates for Hooping
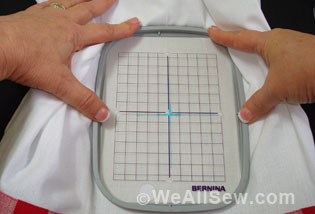
Included with the hoops is a plastic template which is a very useful hooping tool. There are plastic clips with the template to clip into the template. And, once attached to the templates, the clips fit into the notches of the inner hoop to position the template perfectly and allow little room for movement. The clips also allow for easy removal of the template.
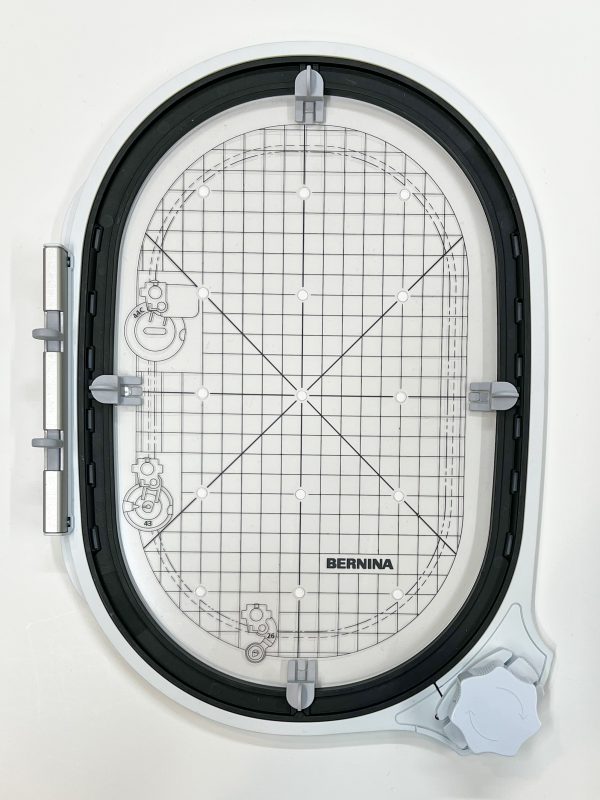
In looking at the plastic template you will see a grid marked in 1 cm squares. There are center and endpoint holes for transferring marks to the material. The outer line of the grid shows the embroidery field when using the Drop-shaped Embroidery Foot #26. The embroidery field is the area that can be embroidered.
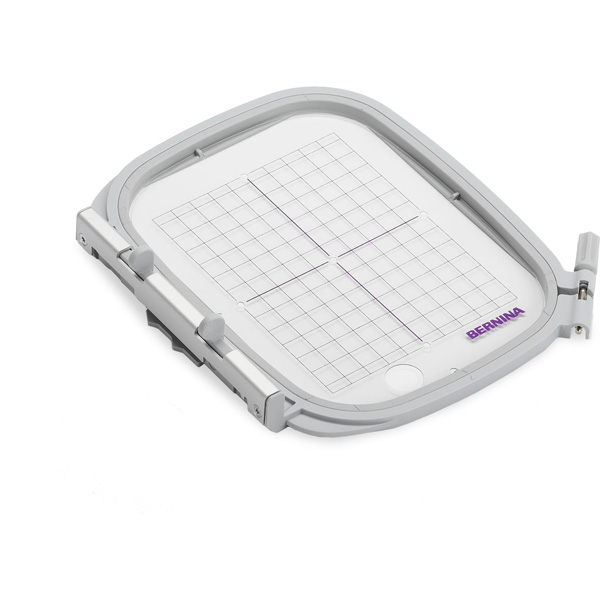
When you see a hoop size, such as in the Midi Hoop (pictured above)—which we say is 10 ½” x 6 ½”—this measurement means the area that can be embroidered, not the actual size of the hoop.
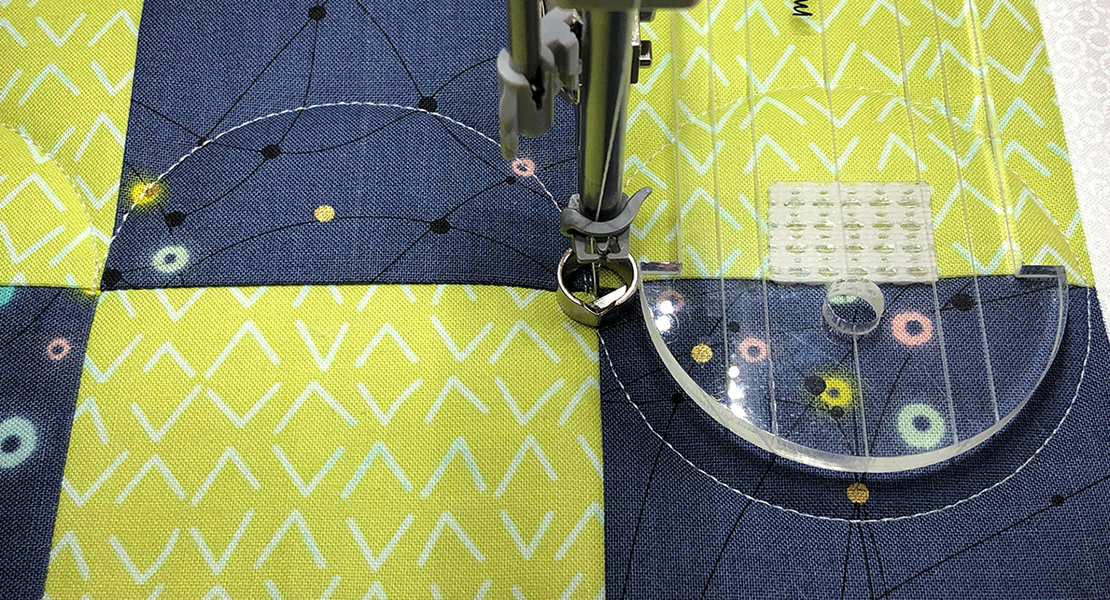
The embroidery field on any hoop depends on the presser foot you have on your machine. On the template, you can see a line drawing of the Free-motion Couching Foot #43 and a dotted line. If you are embroidering with foot #43 which has a wide base, this reduces the embroidery field so if using this foot with the Midi Hoop the embroidery area is reduced to 9 5/8” x 5 7/8”. Likewise, the Echo Quilting and Cutwork Foot #44C and the inner dashed line indicate the embroidery field if using this foot.
Ergonomic Twist-lock Hoops vs. Standard BERNINA Hoops
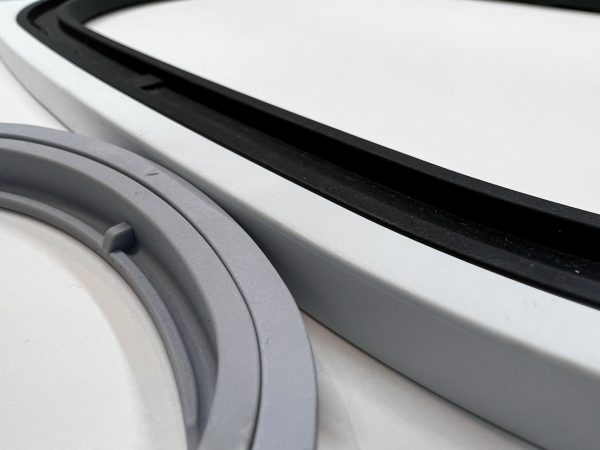
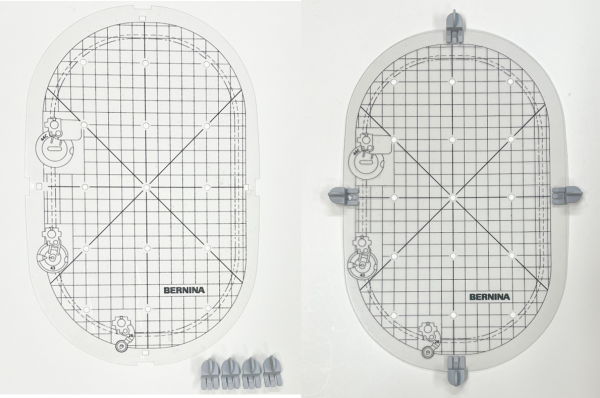
One more difference in the Ergonomic Twist-lock Hoops vs the Standard BERNINA Hoops is in the height. The height of the Ergonomic Twist-lock Hoops is 10 mm and the Screw Hoops is 8mm. Hoops with more height provide greater support and stabilization of stiff and heavy fabrics or layers of a quilt.
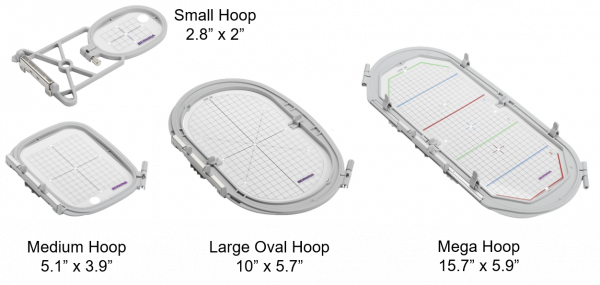
There are four standard BERNINA embroidery hoops. The Small, Medium, Large Oval and Mega Hoop will embroider designs from 2.8” x 2” to 15.7” x 5.9”.
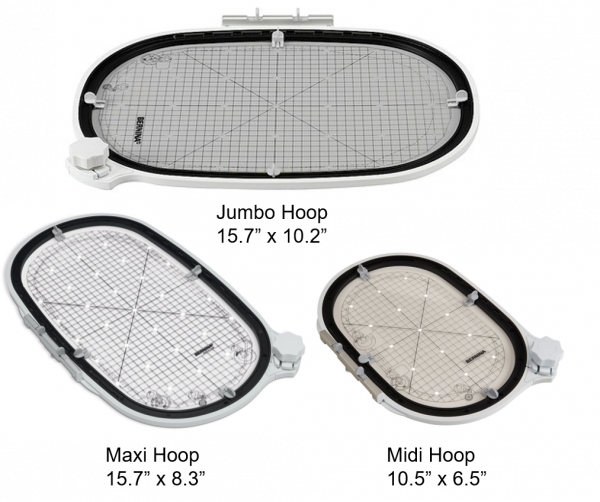
And, currently, we have 3 specialty hoops with the Ergonomic Twist-lock System. They are the Midi Hoop, Maxi Hoop and Jumbo Hoop with an embroidery field of 10.5” x 6.5” to 15.7” x 10.2”. These specialty hoops are available at your local BERNINA Dealer and online.
This chart shows which hoops come standard with BERNINA machines and which hoops are optional.
Hooping
Now that we know all about the hoops, let’s hoop a project. Properly hooping the fabric will yield the best results in terms of stitch quality and matching outlines of the design. The first step is to prepare the project.
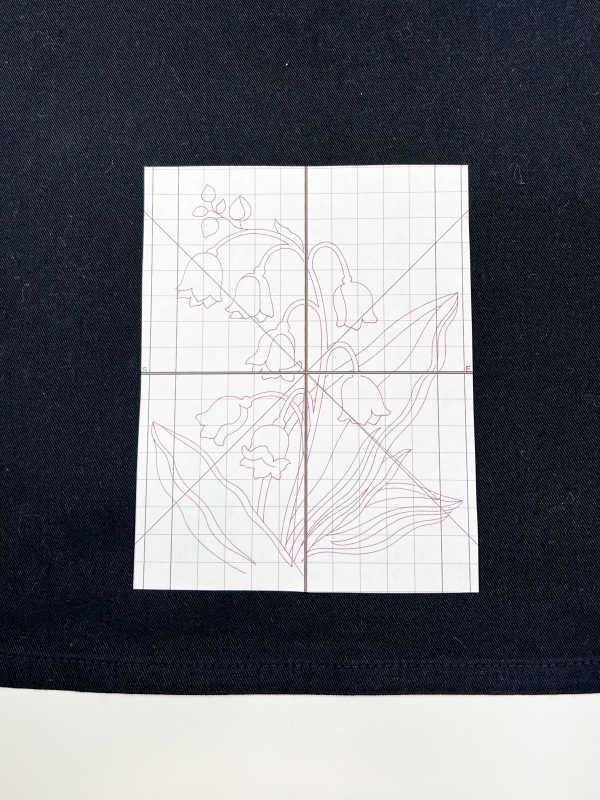
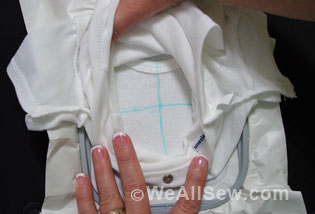
Determine Design Placement
Determine the center of the project to be embroidered. To help determine where you want the design to be and to visualize it on your project you can print a template of the design. This will print the actual size of the design so you can place it on your project and determine where to stitch the design. The printed template also gives you thread and stitch count information. To print a template you will need ARTLink Embroidery software which is available to you as a free download from our website. Or, if you have BERNINA Embroidery Software V7, 8 or 9 you can also print the template through this software.
After determining where you want the design, mark the center of the design on the project with a “t”.

After the fabric is marked, position the stabilizer on the back of the fabric. It is helpful to adhere stabilizer with temporary adhesive spray, OESD Tear Away Tape or ironing it if it is fusible.
To show you how to easily and precisely hoop a tea towel, check out the below video.
How to “Float” Your Project
There are times when an item cannot be hooped because of the shape of the project, the location of design or fabric type. Therefore, on bags, baby items, collars, heavy towels and other difficult to hoop items, you can “float” the project on top of the stabilizer rather than hooping it.
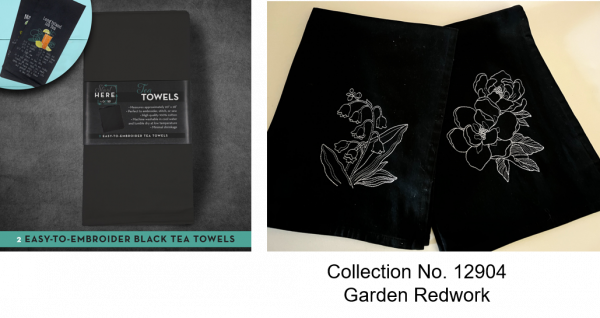
This is the hooping method I used on a set of embroidered tea towels as I wanted the design in the corner rather than the middle of the towel and the corner could not be hooped. The towel that I used is a high-quality blank towel from OESD which is pictured above. For the design, I used a new embroidery collection from OESD #12904 Garden Redwork.
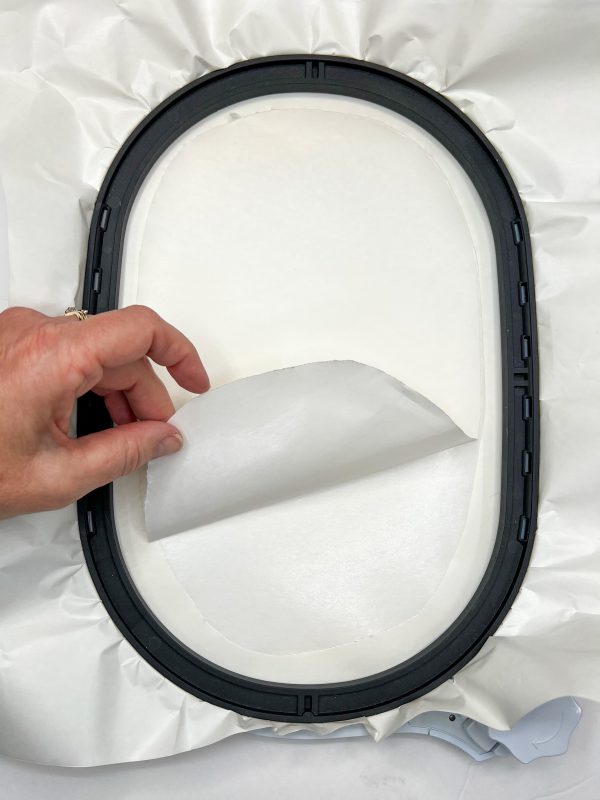
The stabilizer I used to float the project was Ultra Clean and Tear Plus. This Peel and Stick Stabilizer is quick and easy for floating the towel plus it washes out easily which is important since we will see the back of the tea towel.
To float the project, I hooped the Ultra Clean and Tear Plus Stabilizer with the paper backing side up. Then I scored the paper backing and peeled it away so the adhesive is exposed as shown above.
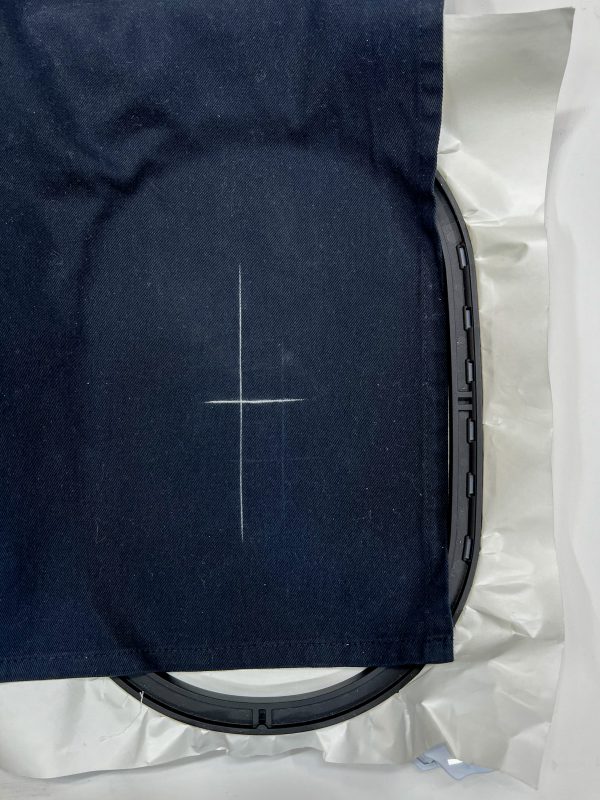
All that is left to do is adhere the project to the adhesive. The adhesive on this stabilizer is very strong and will hold this tea towel in place while stitching. However, there are times when you float a project that you may want to secure it to the stabilizer even more.
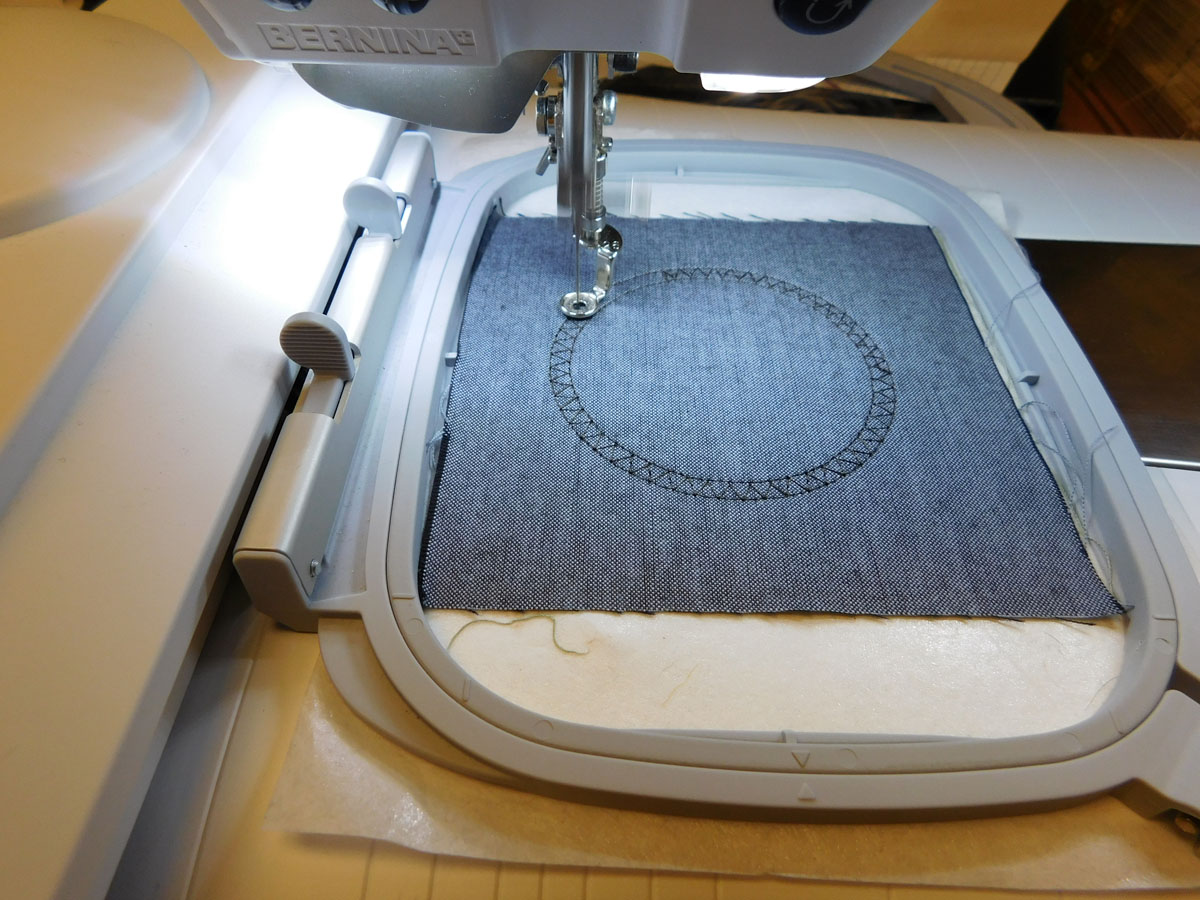
Built-in Basting Box
This is where the built-in basting box on BERNINA machines comes in handy.
When you have the design ready to stitch you have the option of having a basting box stitched around your design to temporarily secure the project to the stabilizer. To do this, after you have the design open and are ready to stitch you select the basting box icon which is shown here.
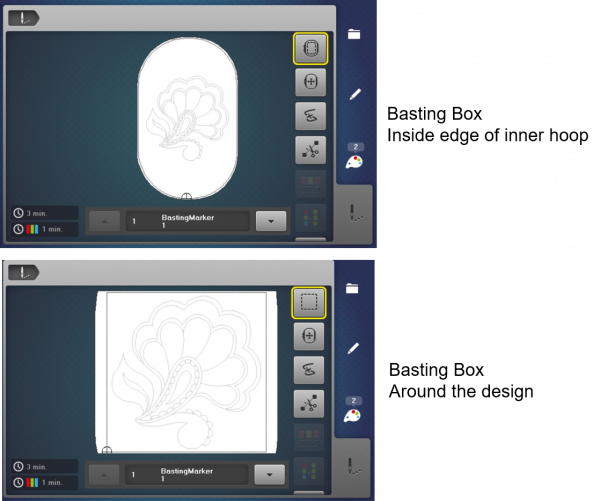
You can choose to have a basting box stitch around the inside edge of the inner hoop or you can choose to have the basting box around the design.
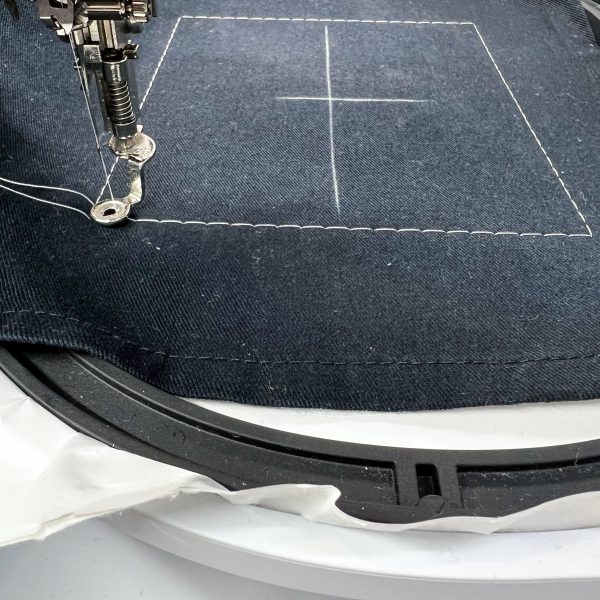
Here you see the corner of my tea towel floating on the stabilizer with the basting box around the design:
The last couple of things to mention are:
- When choosing the best hoop for your project is to select one that is closest in size to the design. This will give you the best stitch quality and outlines.
- When you purchase a new hoop it is recommended to calibrate your machine to the hoop. This is a very easy process and it ensures the center point is precisely in the center.
Calibrating a New Hoop
To calibrate your machine to the hoop, place the hoop with fabric and stabilizer and plastic template on the module. Select the Set Up Program Icon then the Embroidery Settings Icon.
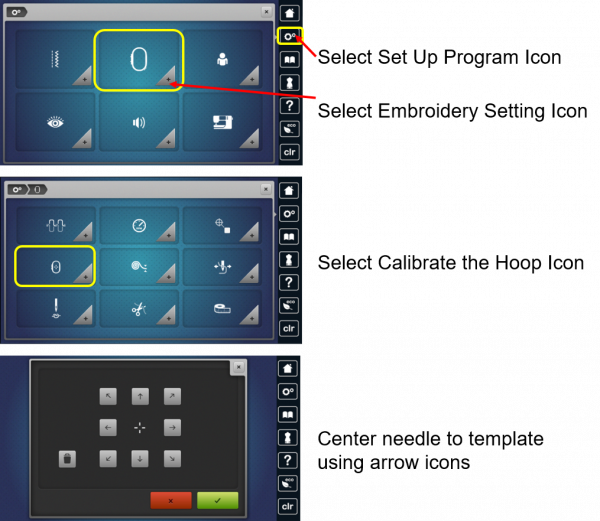
Select Calibrate Hoop Icon. The machine will automatically recognize the hoop that is attached. Look at the location of the needle in relation to the center dot of the plastic template. If the needle is not positioned exactly in the center of the template, it must be centered using the arrow icons. Select the arrow icons to move the hoop in the direction of the arrow. Move the hoop until the needle is centered in the template. Confirm with the green check box; the adjustment is saved.