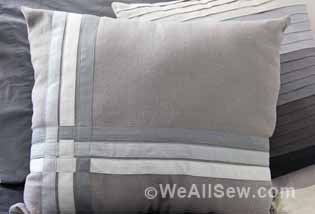
How to Make a Modern Piped Pillow
Give your pillows a polished appearance with the piping foot on your BERNINA L 890.
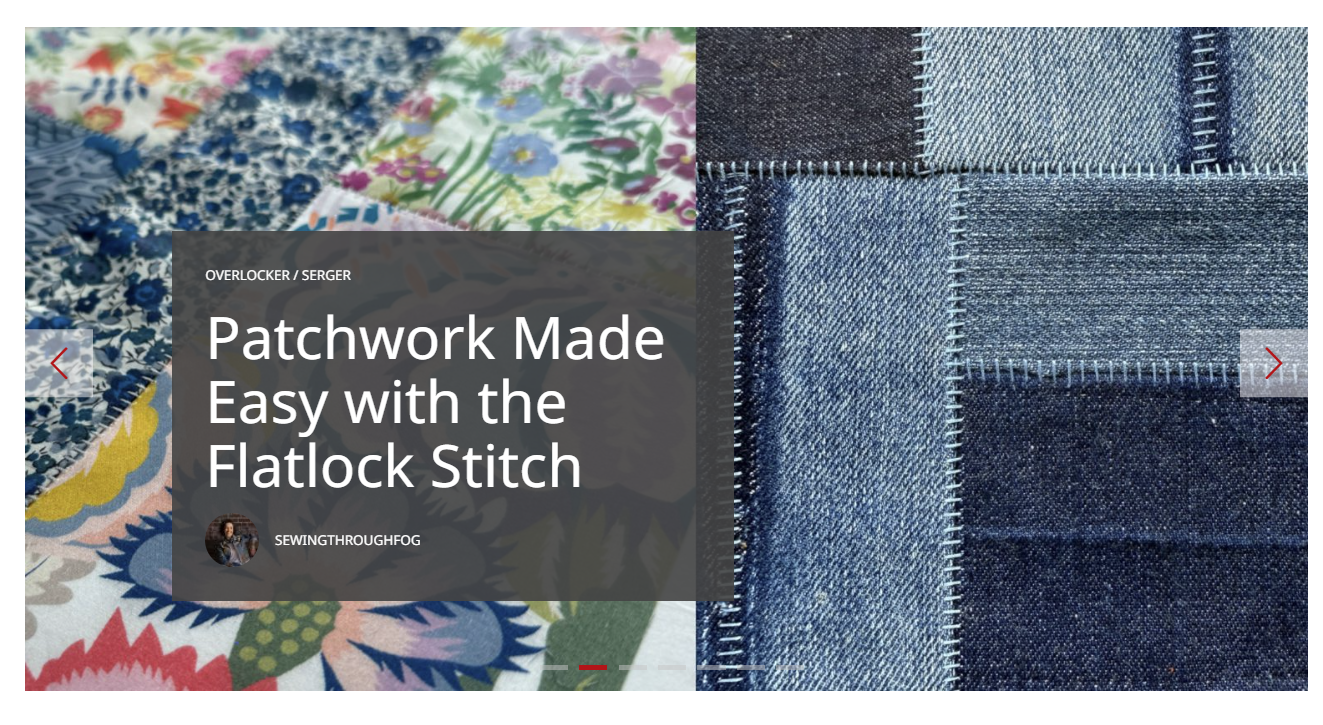 Hi there, I’m Radha (also known as @sewingthroughfog), and I give new life to discarded textiles and upcycle a whole lot of jeans! In a previous post, Patchwork Made Easy with the Flatlock Stitch, I showed you how to turn scraps of any kind into a patchwork using this versatile stitch on the BERNINA L 890.
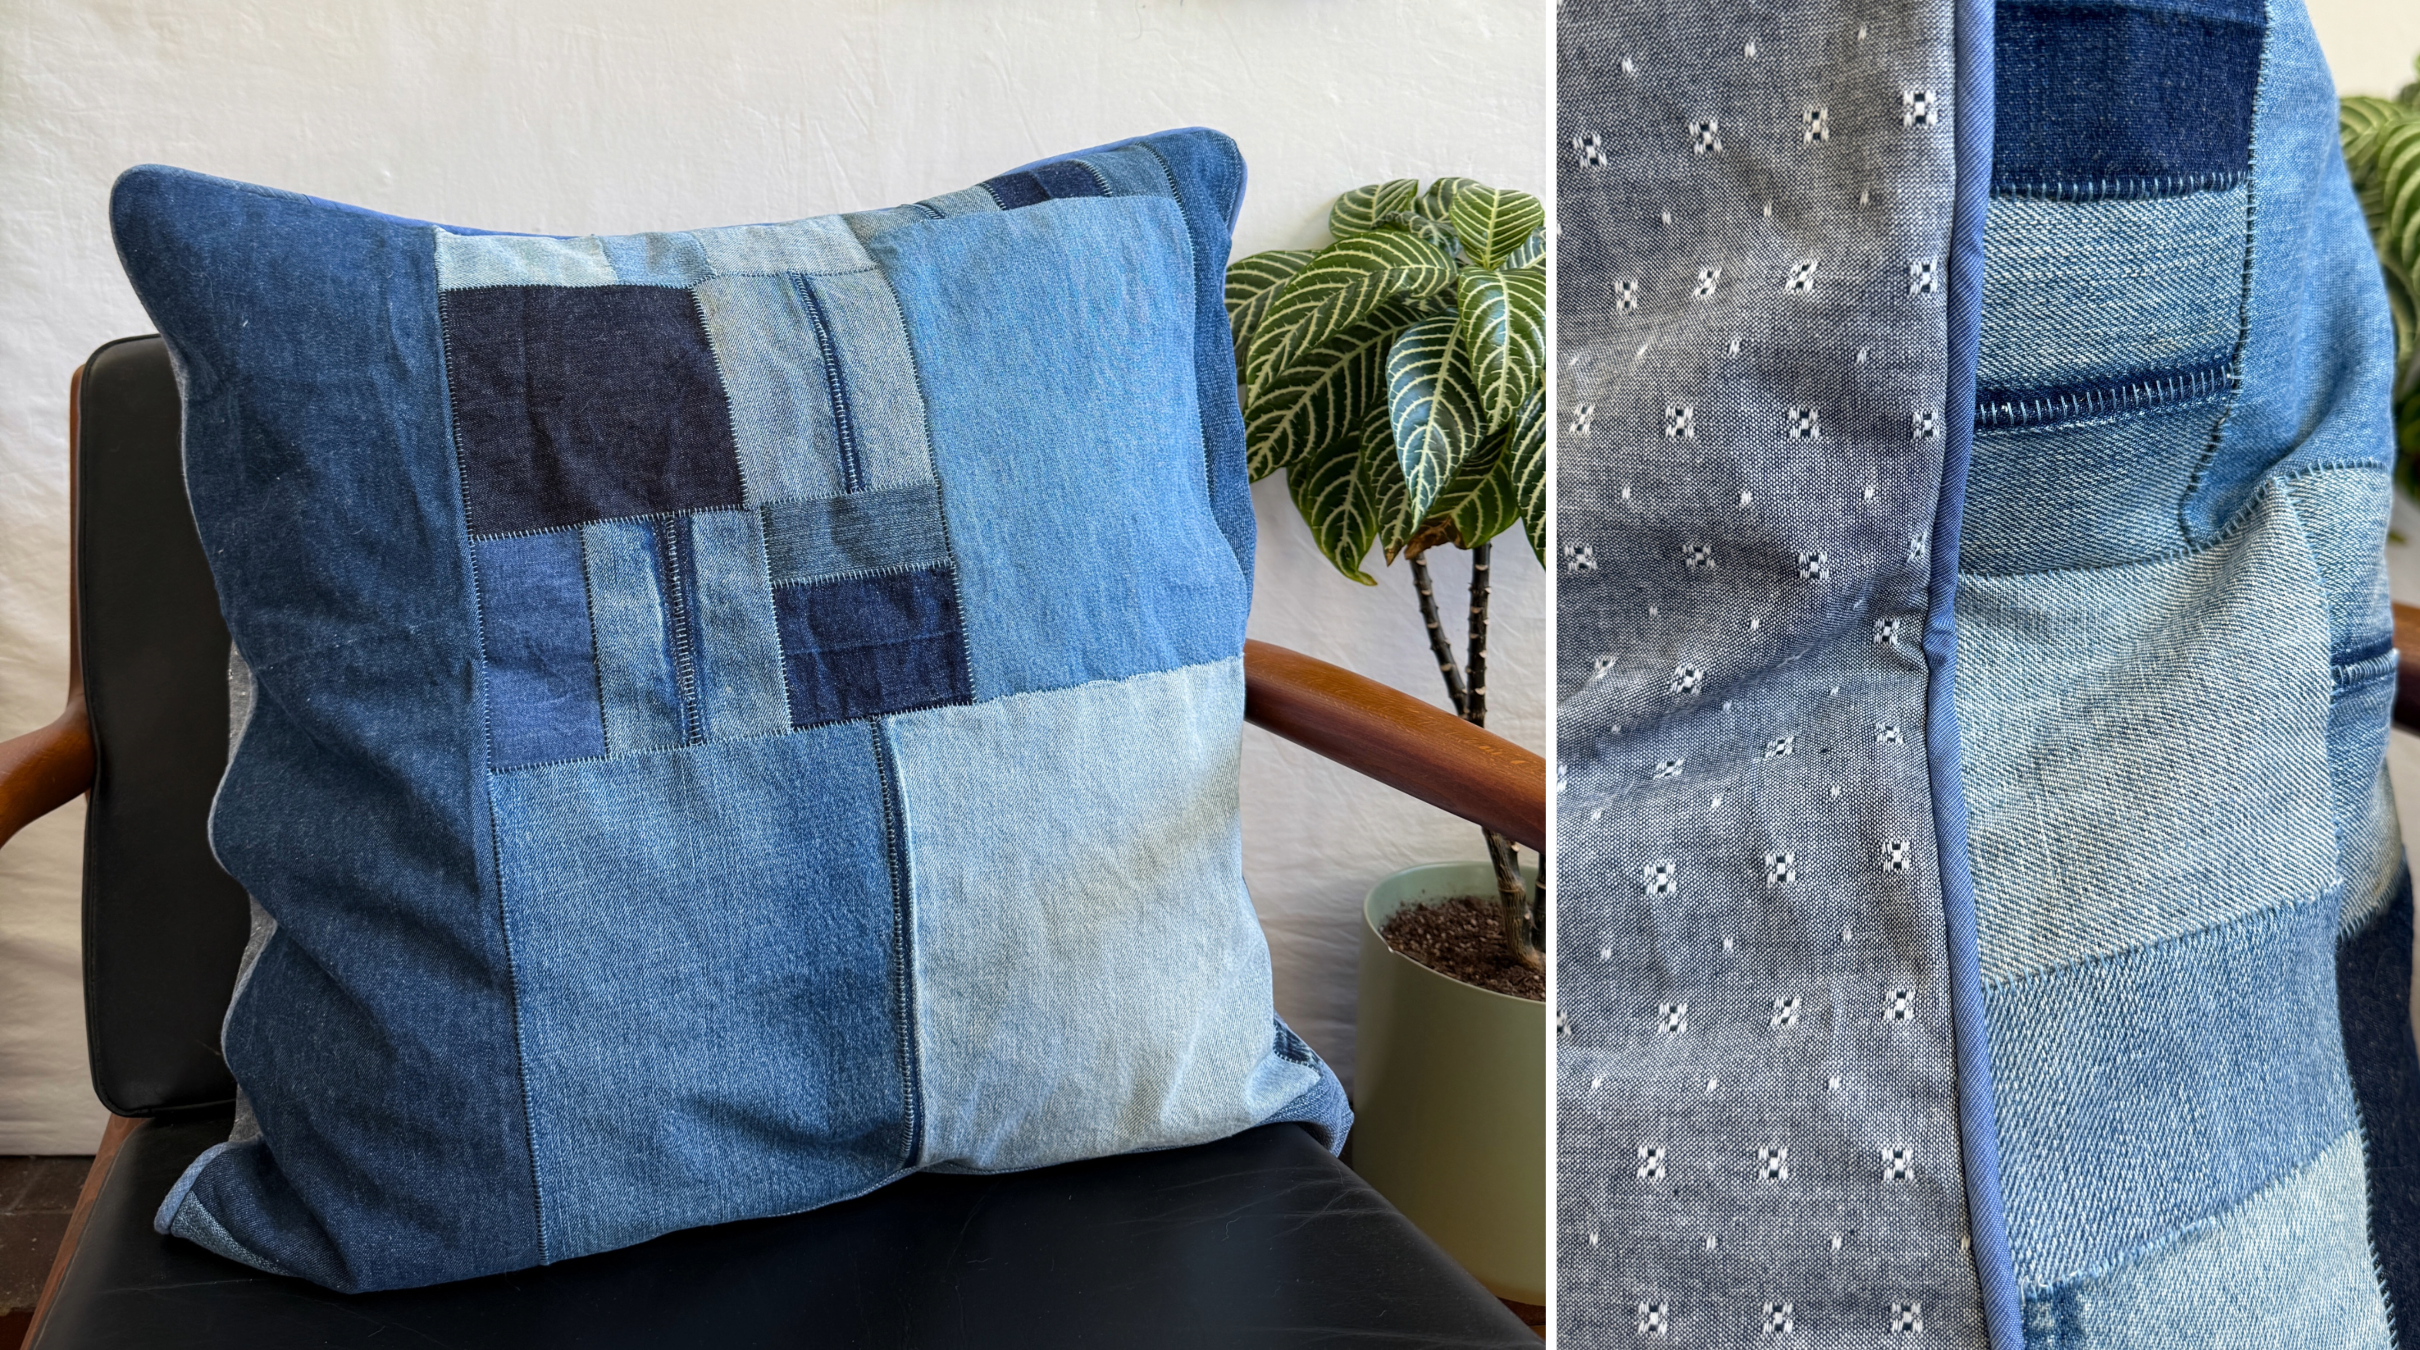
In today’s project, we’re taking that idea a step further, and I’m going to show you how to turn your patchwork (or any fabric you love) into a modern upcycled pillow with piping using the Piping Foot #C16L.
You might think of piping as a traditional detail, but I love using it on modern upcycled projects. It gives your project a clean, professional finish and an opportunity to add an extra pop of color or texture. And it’s easier than you might think. Whether you go for a subtle tone-on-tone look like I did or use something bright and bold, piping adds that little something special.
Why Use a Piping Foot?
You can make piping without special tools, but having a piping foot makes the process so much smoother and more precise. It keeps the cord perfectly in place while you stitch, helping you get an even finish. BERNINA has a range of different size piping feet for their overlockers, and for this project, I used the Piping Foot #C16L, which fits piping up to 5mm.
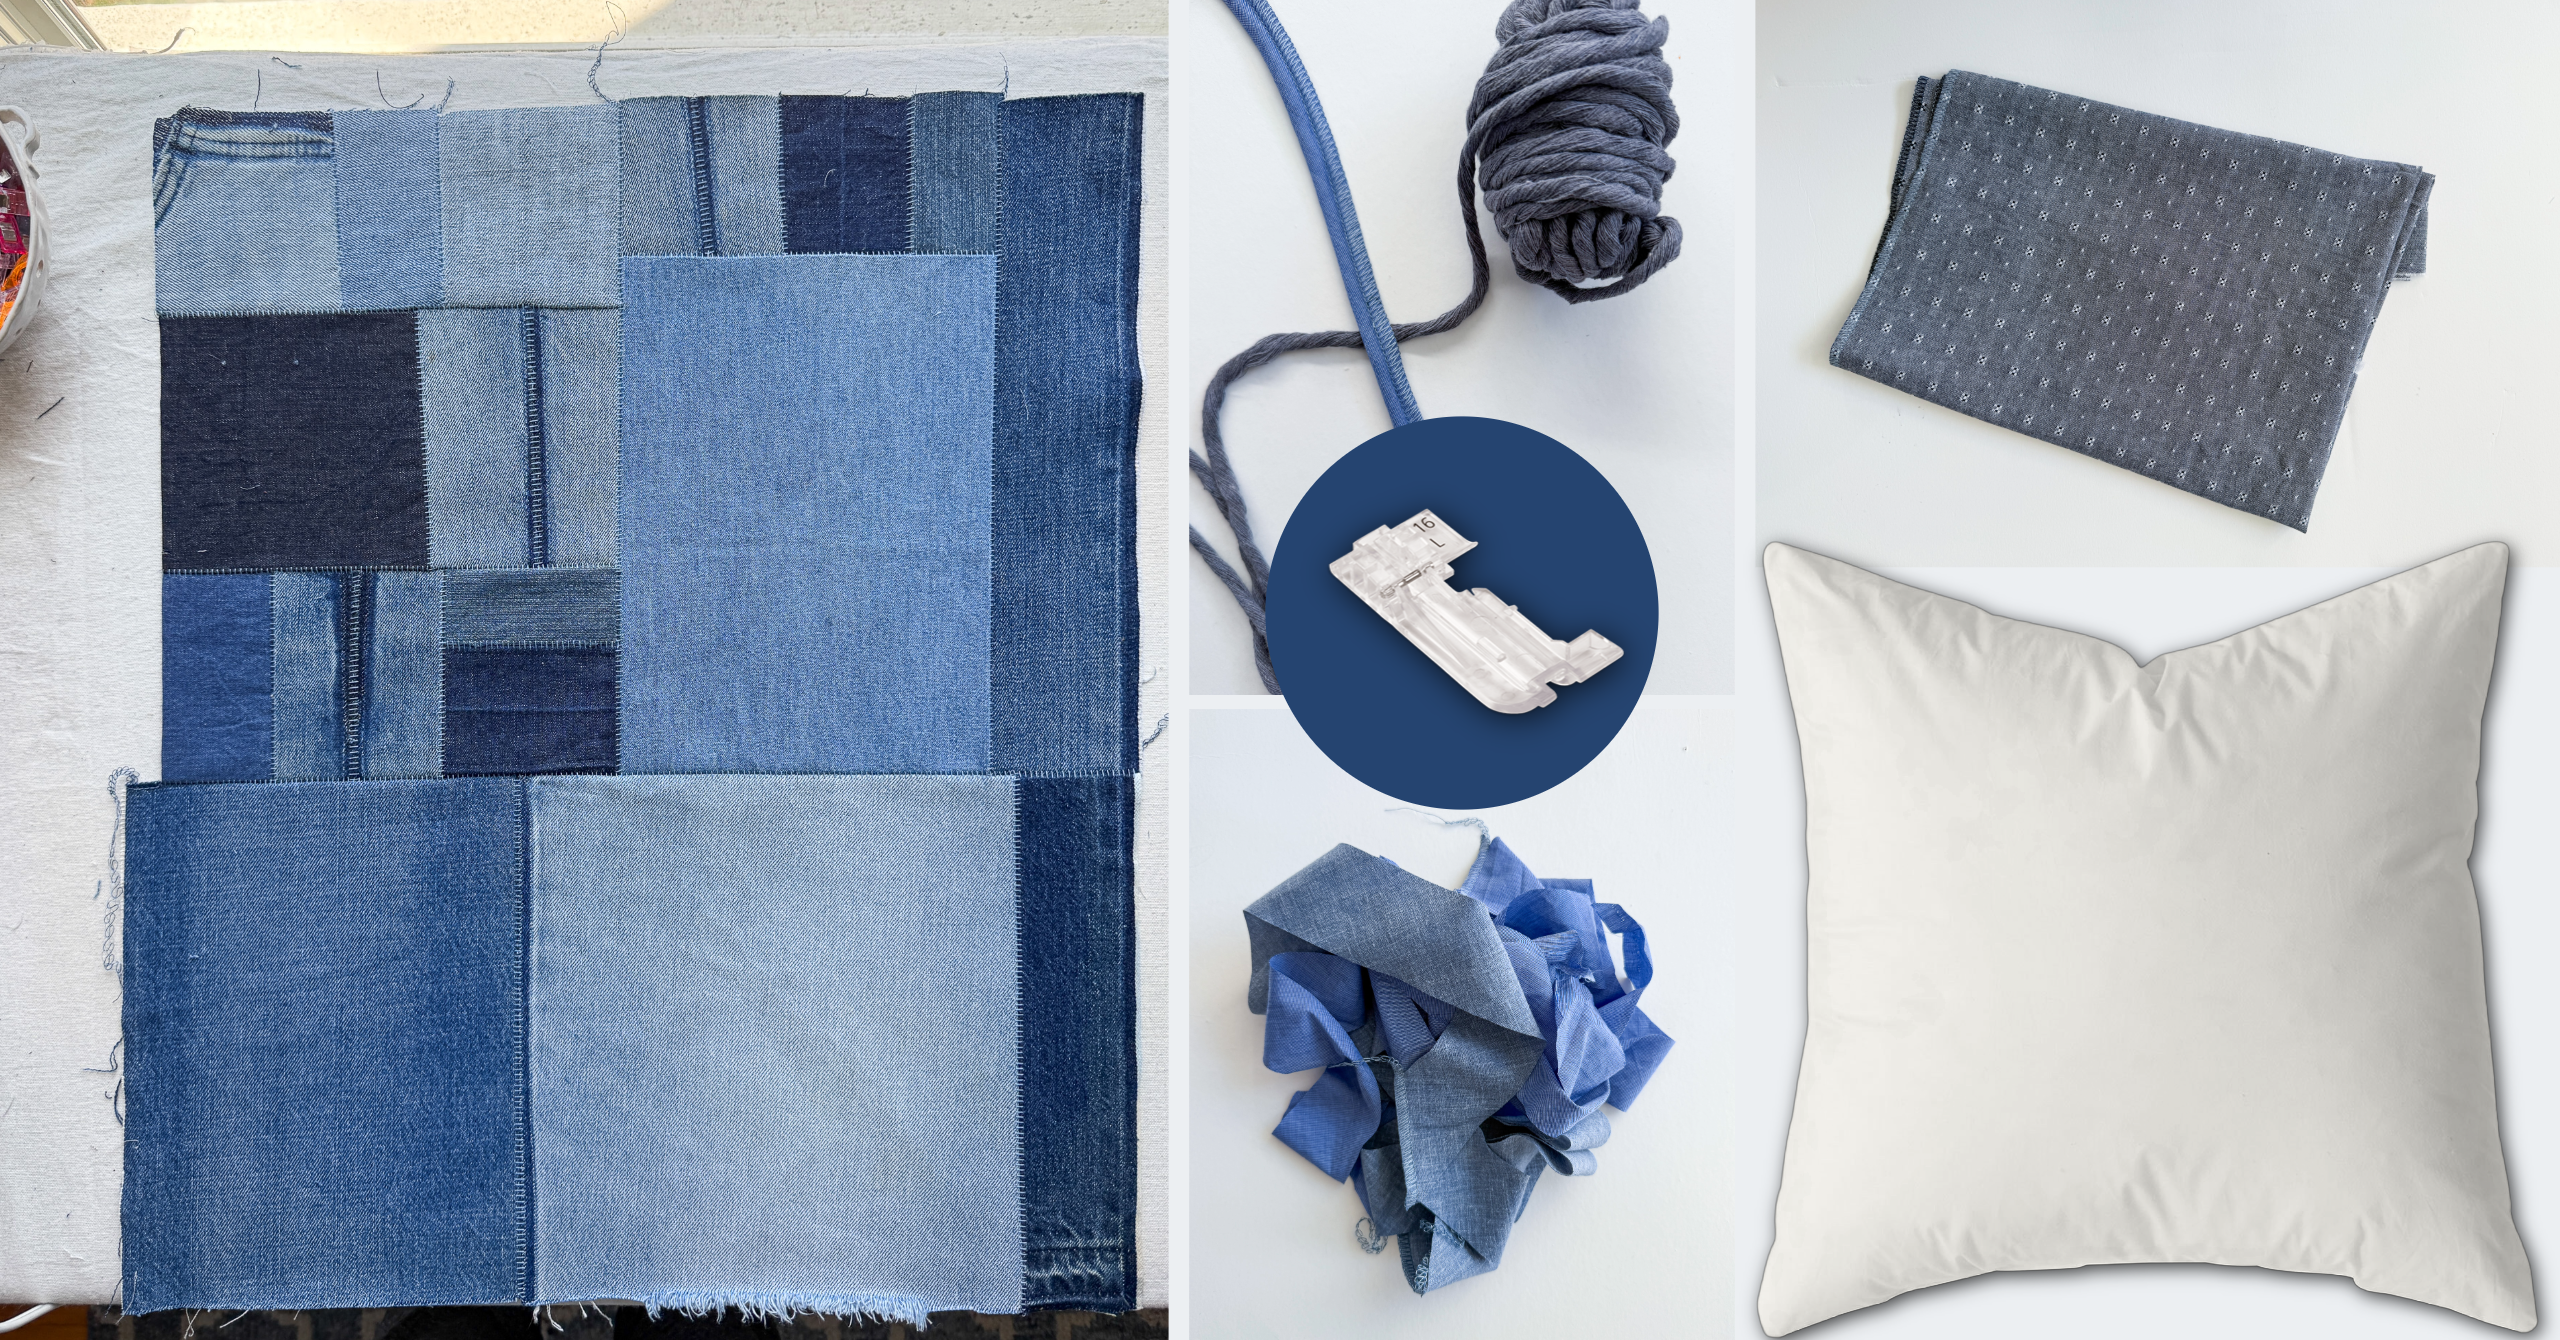
Materials Needed to Make a Piped Pillow
- Pillow insert
- Pillow front: patchwork, denim scraps, or any fabric you’d like
- Pillow back: any midweight fabric (I used a thrifted cotton with a dobby weave)
- Cord for piping: almost any type of cord works, even thick yarn or macramé cord (just be prepared to test it with your piping foot before you start!)
- Approx. 2” wide bias binding (mid or lightweight) for covering the cord
- Overlock thread (color doesn’t matter, it won’t show)
- BERNINA L 890 or another BERNINA overlocker
- Piping foot (I used the #C16L)
*Please note: the pillow I’m showing has an envelope closure on the back (an overlapping flap). You can use a zipper closure if you are comfortable with that, but it does make the construction with the piping a bit more challenging.
Zero-waste tip: I used the selvedge (the tightly woven edge) of my backing fabric for the overlap, so I didn’t have to finish it. It added a decorative detail and saved fabric. If you’re using quilting cotton with a fun printed selvedge, this is a great place to show it off. Just prewash your fabric first because selvedge tends to shrink differently than the rest of the fabric.

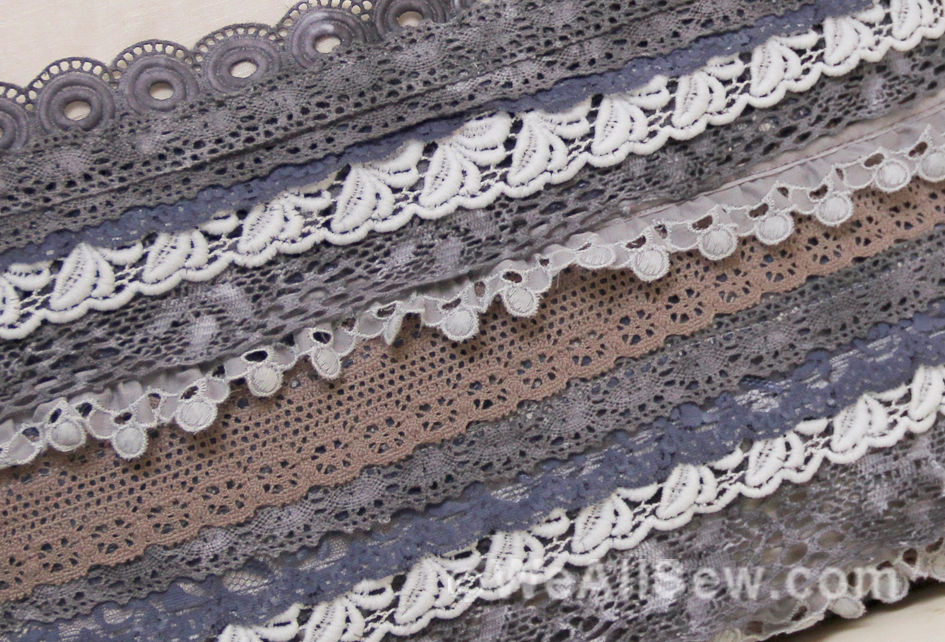
Choosing Your Cord & Bias Binding Fabric
Here are some questions to ask that will help you choose the right size cord and bias binding for your project.
- What size pillow are you covering? A bigger pillow can use thicker piping.
- How much focus do you want on the piping? Is it the key design feature? The larger the piping, and the more color contrast it has, the more it will stand out.
- What size cord fits in your piping foot? To execute your piping, the cord and fabric need to fit comfortably inside your piping foot groove.
For my pillow, I went with a medium-sized piping in a complementary fabric. It was a large pillow and could have taken a larger piping, but because my design focus was the patchwork, I didn’t want to do anything that would pull the focus.
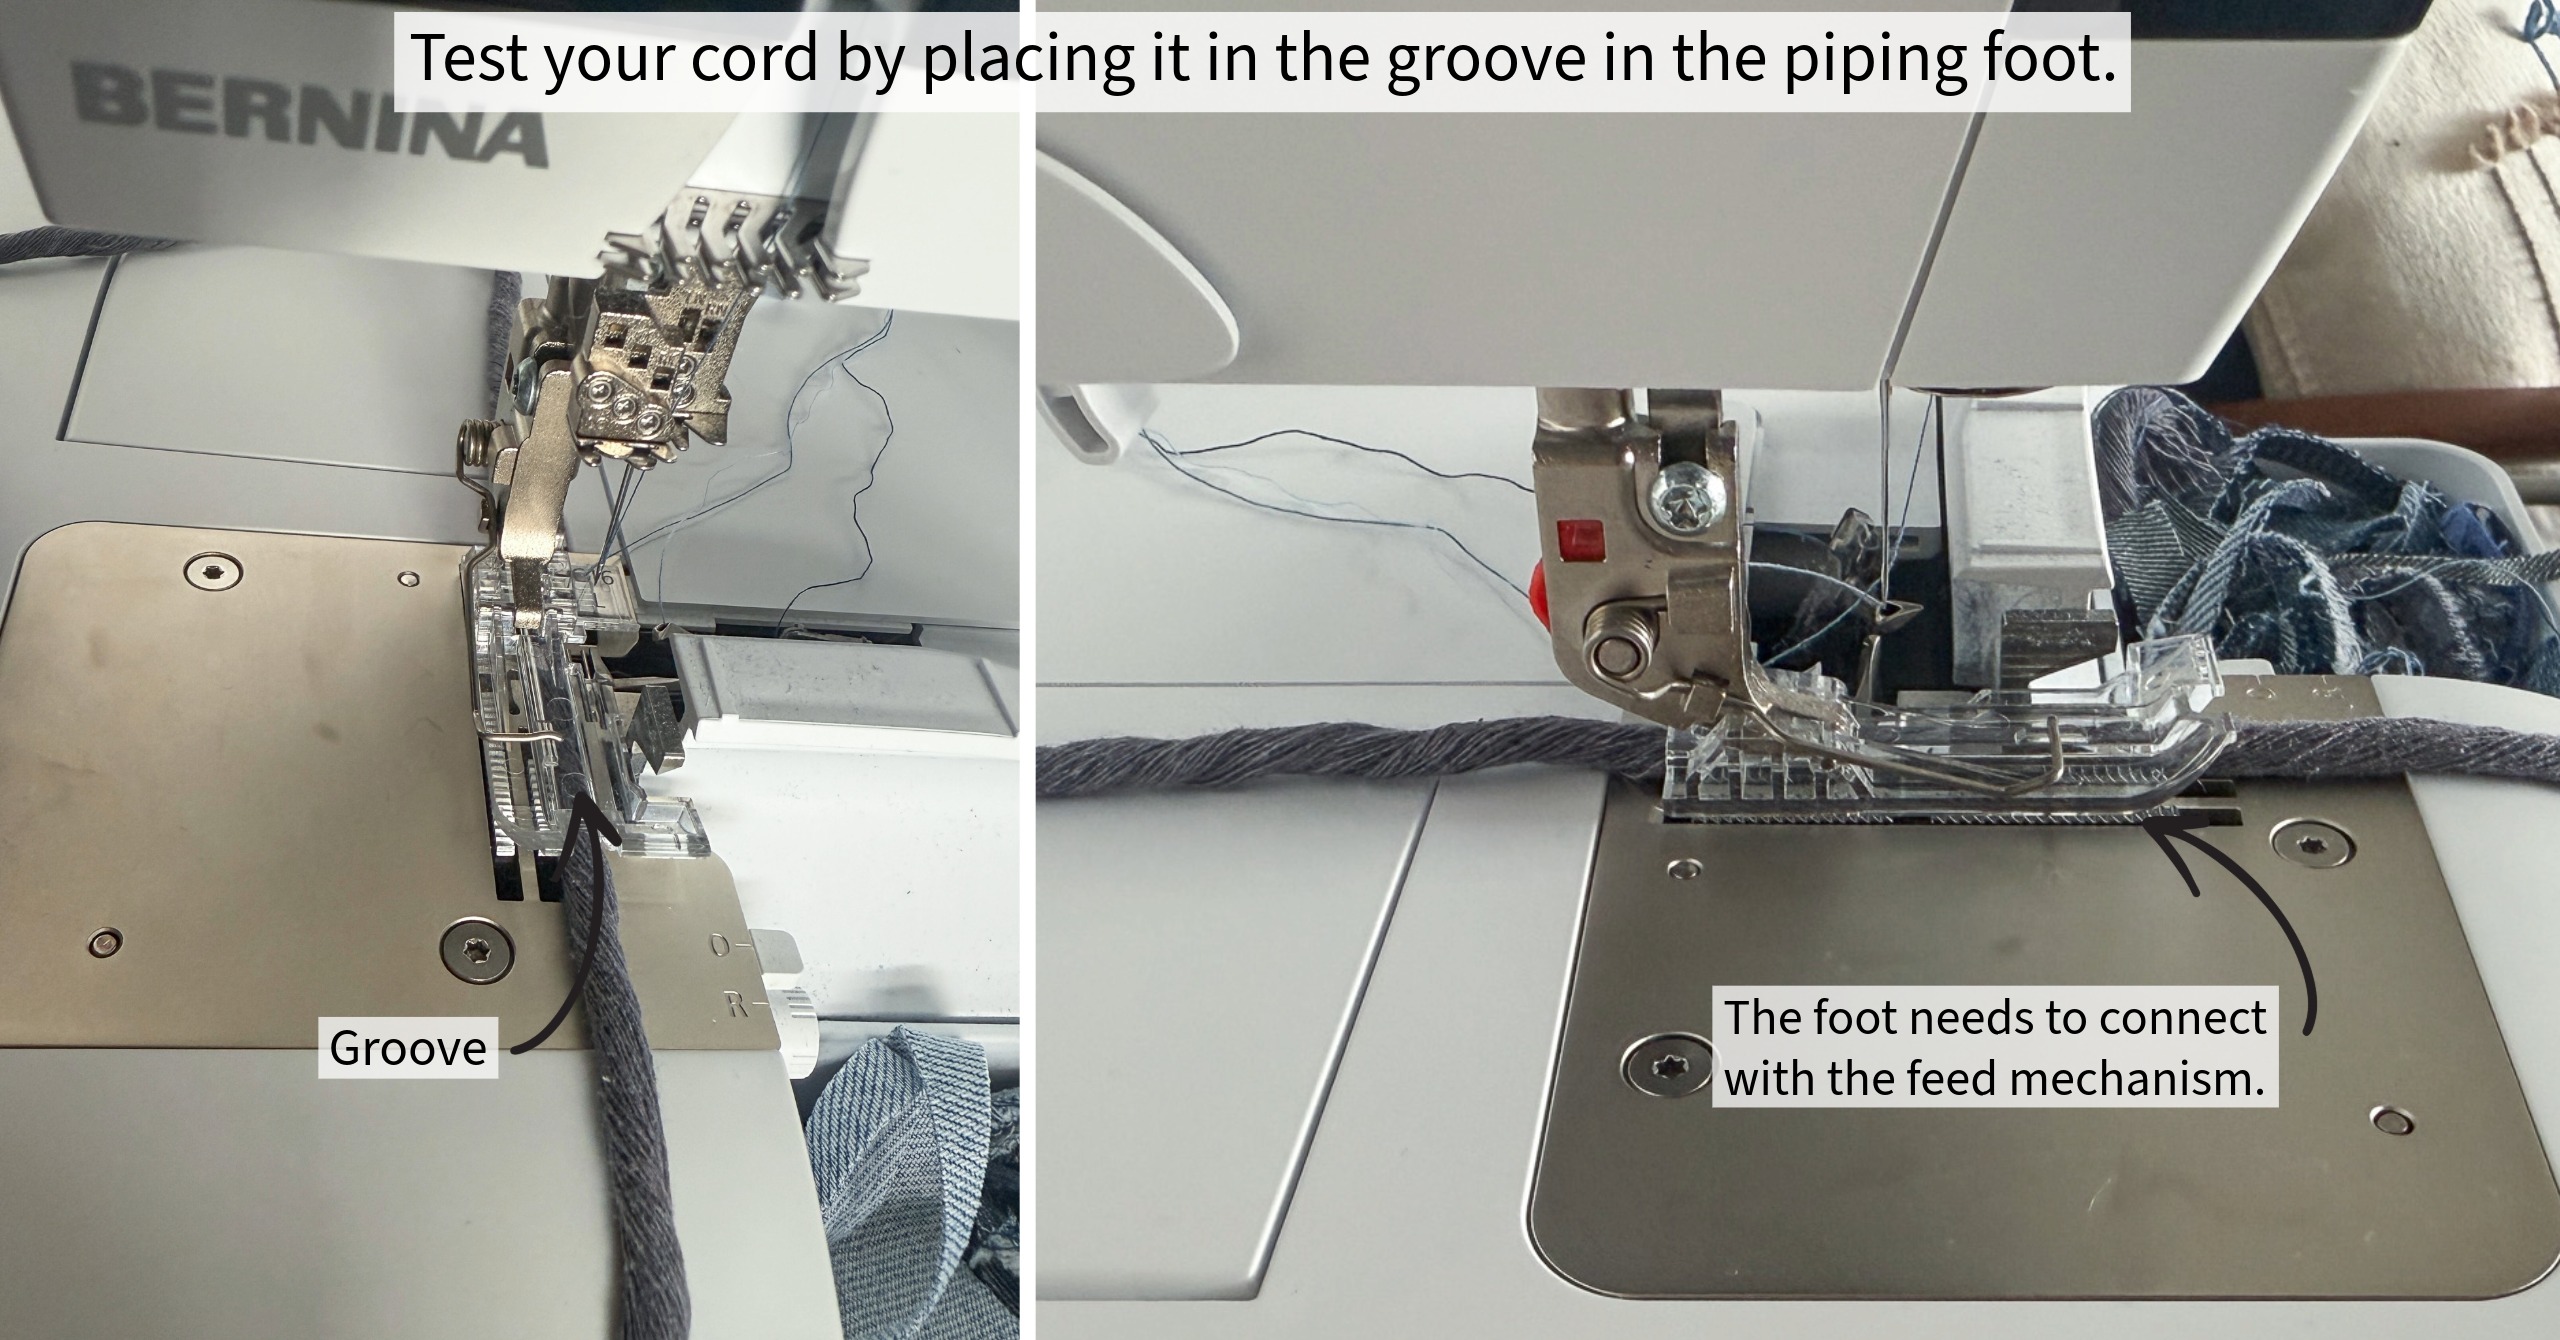
Before you start, test your cord with the foot to make sure it fits properly. If the cord is too thick, the presser foot won’t connect with the feed mechanism, and your piping will be wonky.
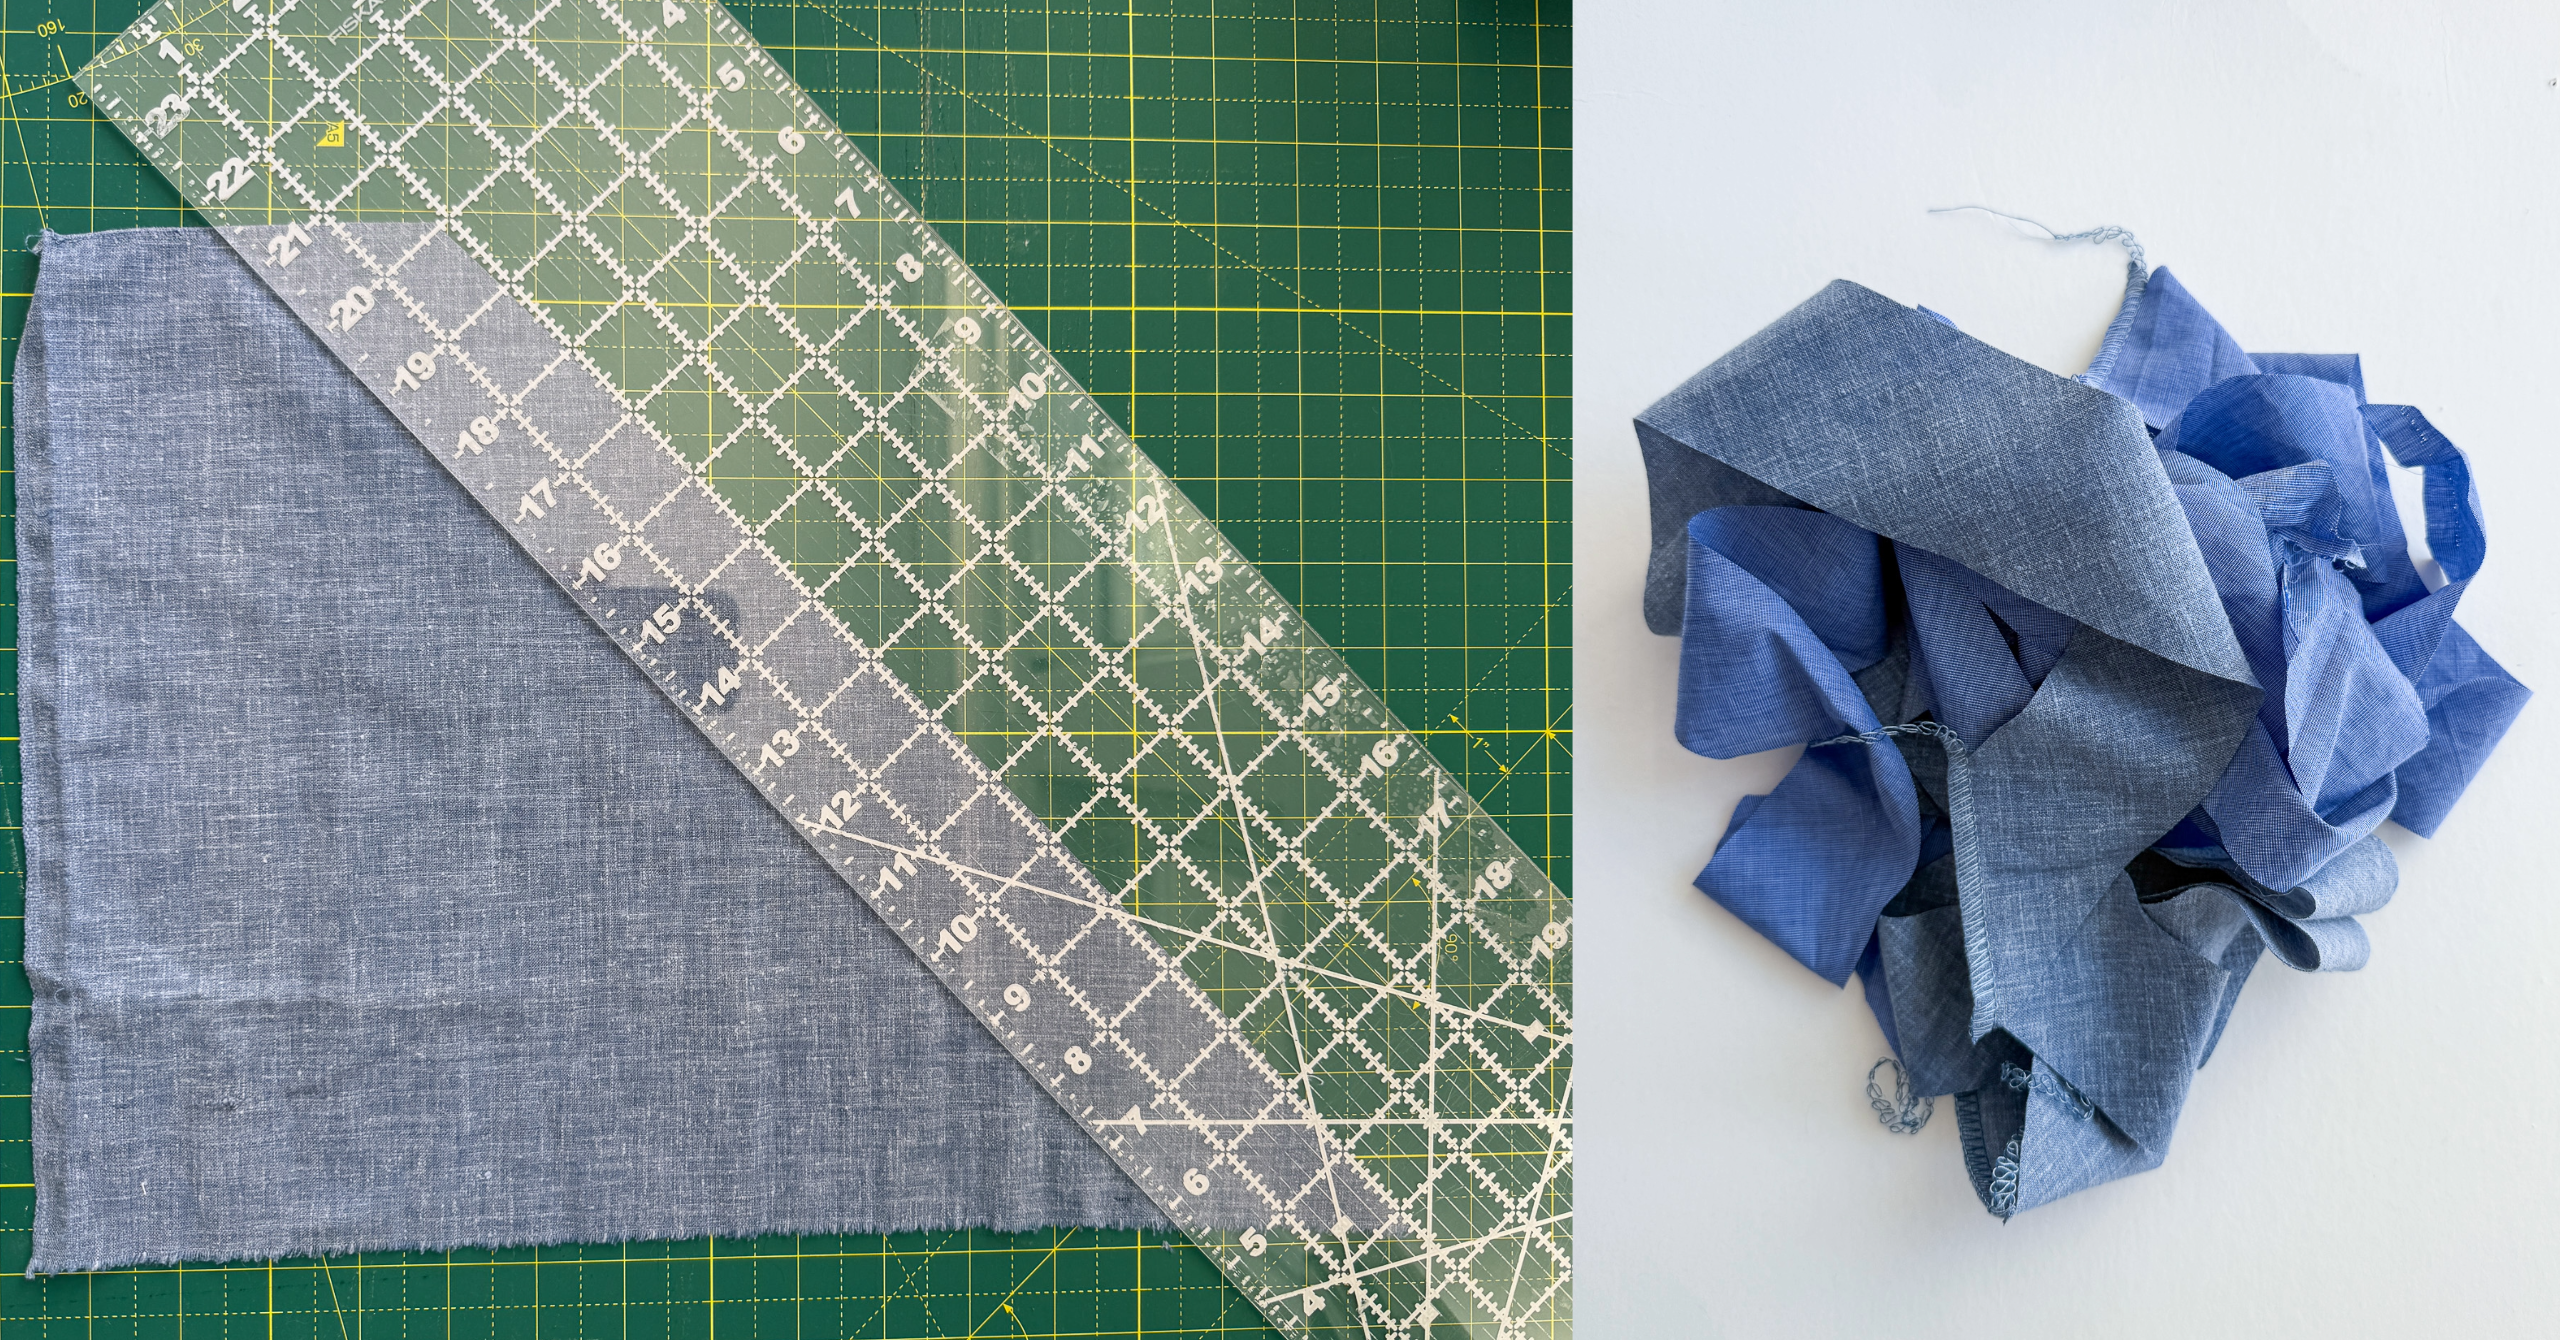
Zero-waste tip: Who says your piping needs to be all one fabric? I mixed scraps from a men’s chambray shirt and one large scrap of a denim-looking weave to create my piping. I cut the longest 2″ strips I could (on the diagonal/bias) and then used the overlock to attach them all together to make one long piece of bias binding.
Step 1: Measure & Cut
I used a 24″ by 24″ pillow insert, and the below dimensions are based on that, but I’ve included some easy math so you can figure out what size materials you need from whatever pillow you chose to use!
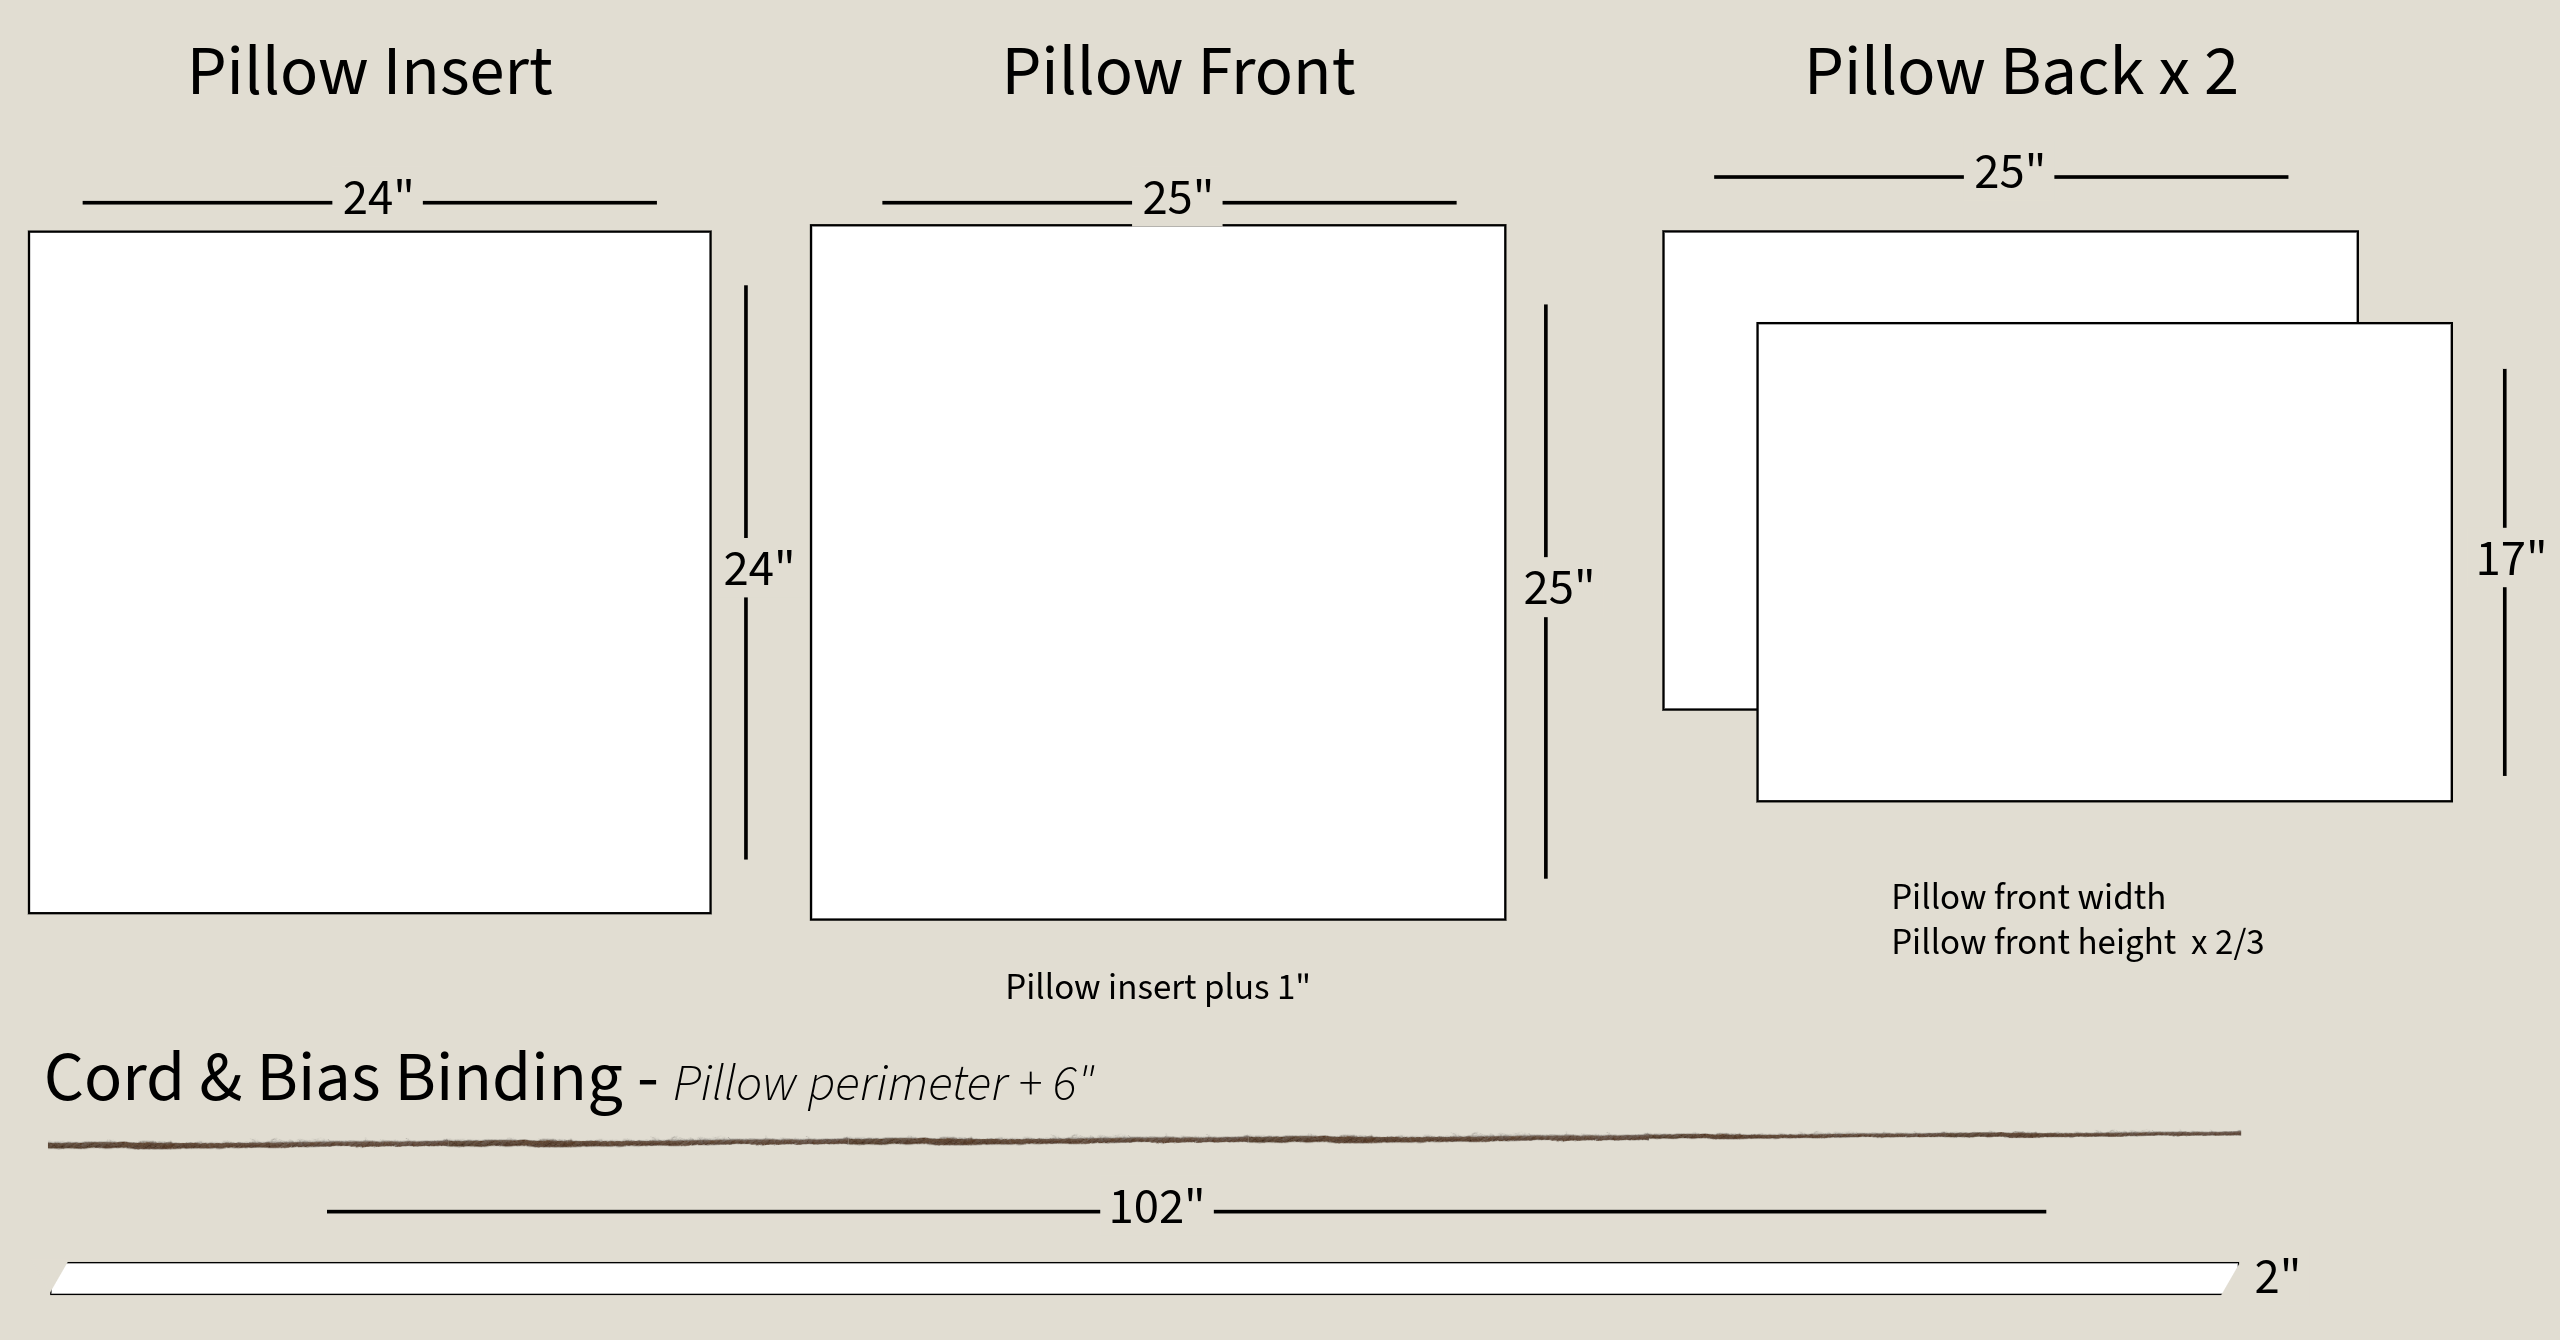
- Measure your pillow insert.
- Add one inch to both the width and height for your pillow front. This gives you a little extra room, so the pillow doesn’t feel too smooshed.
- For the back, cut two pieces the same width as the pillow front, but about two-thirds the length, so they overlap for an envelope closure.
- Cut your cord and bias binding long enough to wrap all the way around the pillow, plus six extra inches.
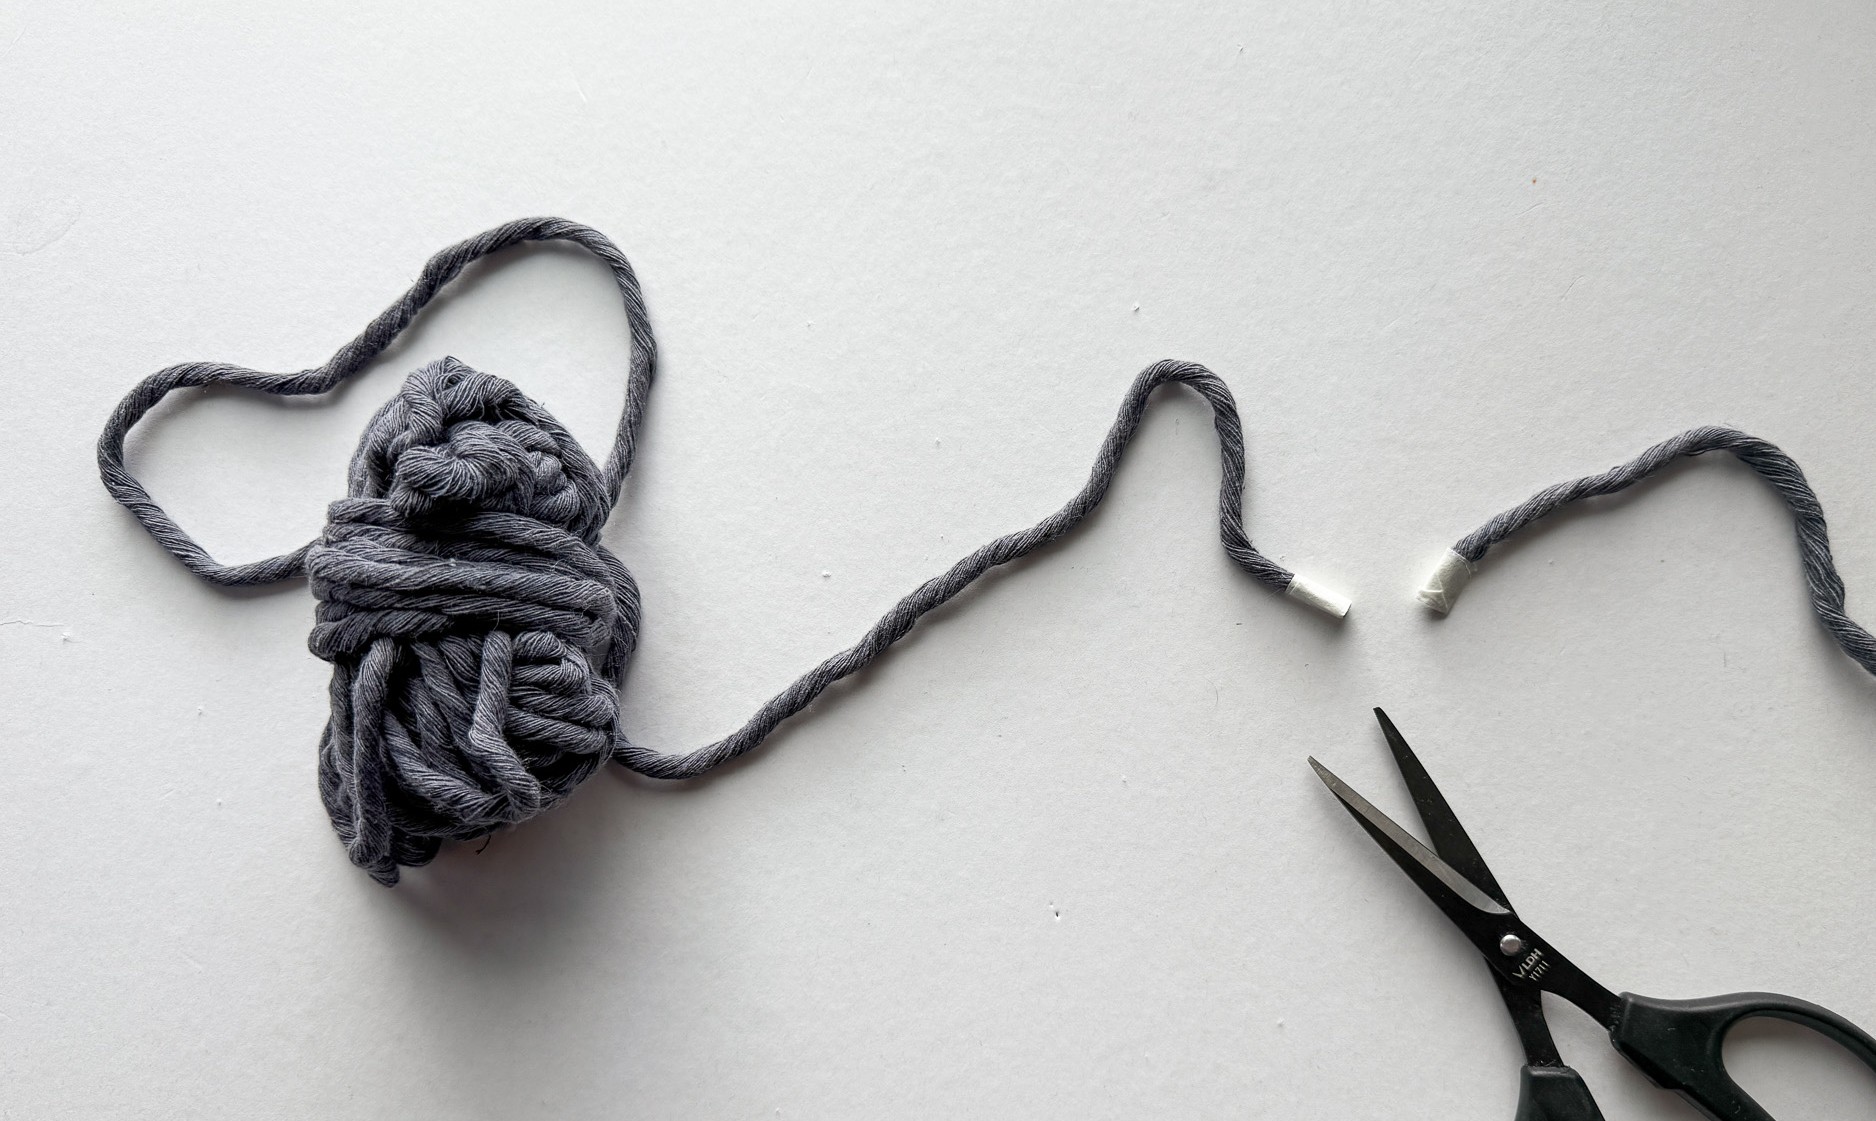
Tip: Secure the ends of your cord with masking tape before cutting to prevent fraying. Place tape where you plan to cut, slice through the middle of the tape, and both ends will stay neat.
Step 2: Prep the Back Pieces
I like to sew the overlapping back pieces together before attaching them to the front and the piping. This will prevent them from shifting when you overlock everything together.
- If you are not using the fabric selvedge as the edge of your back pieces, you will need to finish the edges that are making the envelope closure. I recommend overlocking them and then turning the overlocked edge under and stitching them down on your sewing machine. Alternatively, you could use the coverstich function on your L 890.
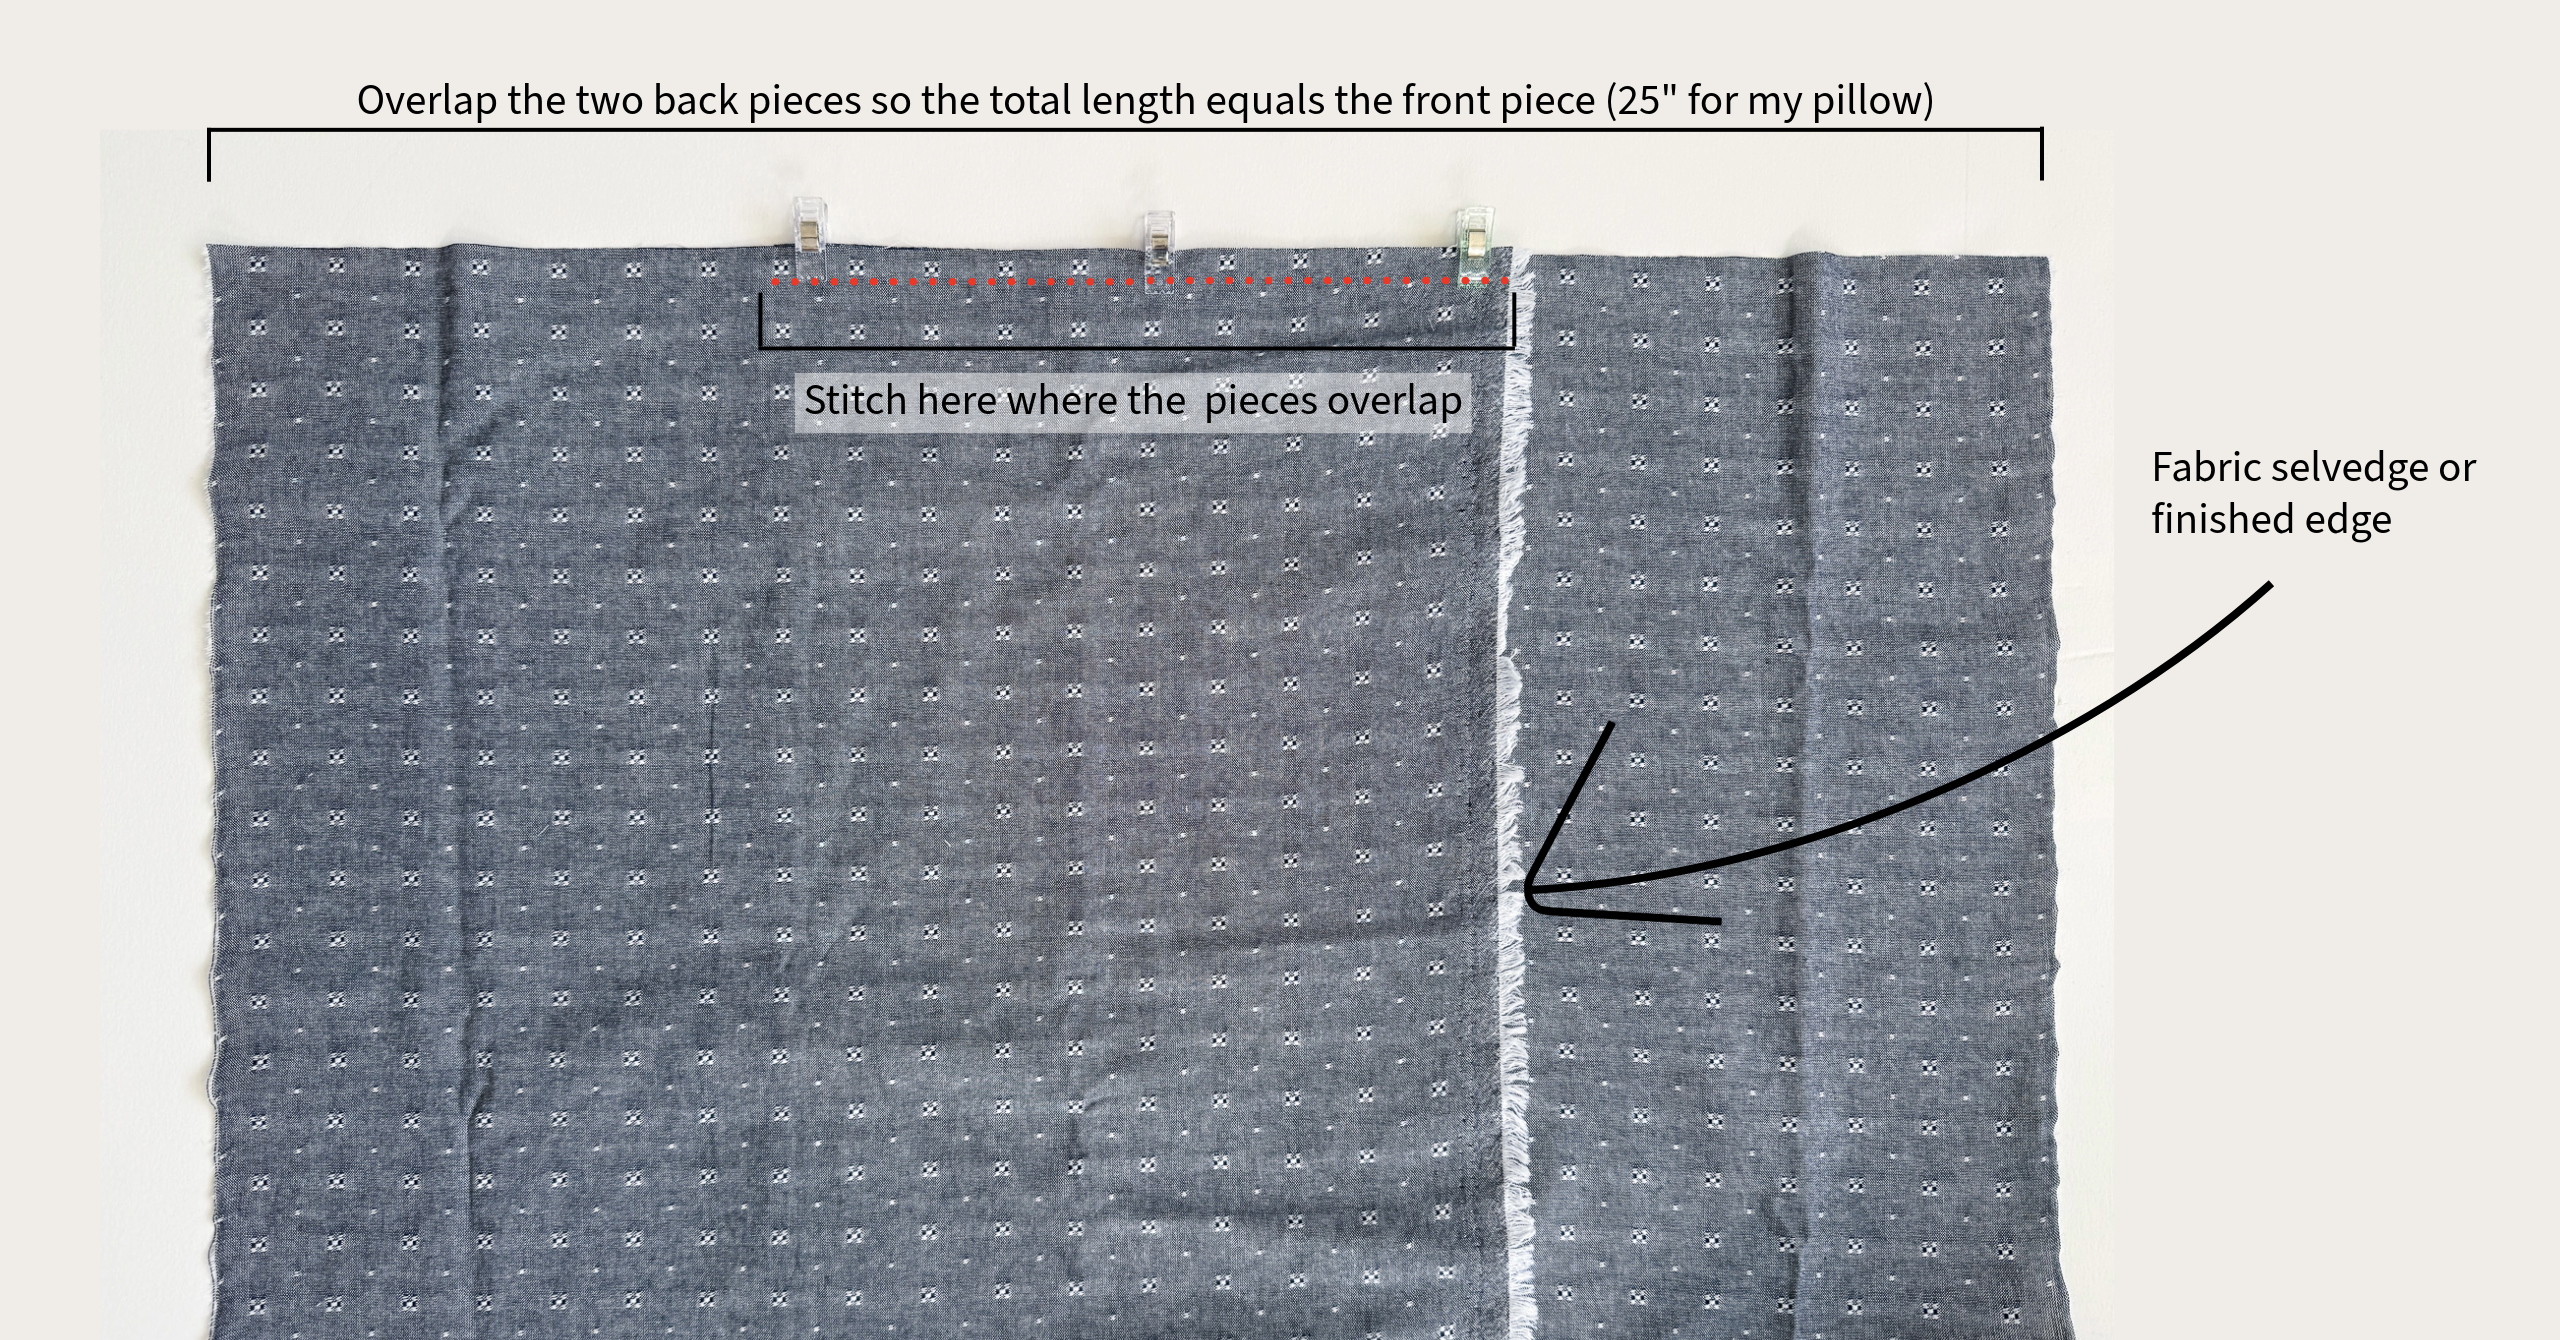
- Overlap the two back pieces so that the total length equals the length of the front piece (for me that was 25″) and clip or pin.
- Stitch the pieces together where they overlap about 1/4″ from the edge.
Step 3: Make the Piping
You can use almost any overlock stitch to secure the piping. I used stitch #3 on my L 890, the 3-Thread Overlock Wide (LN).
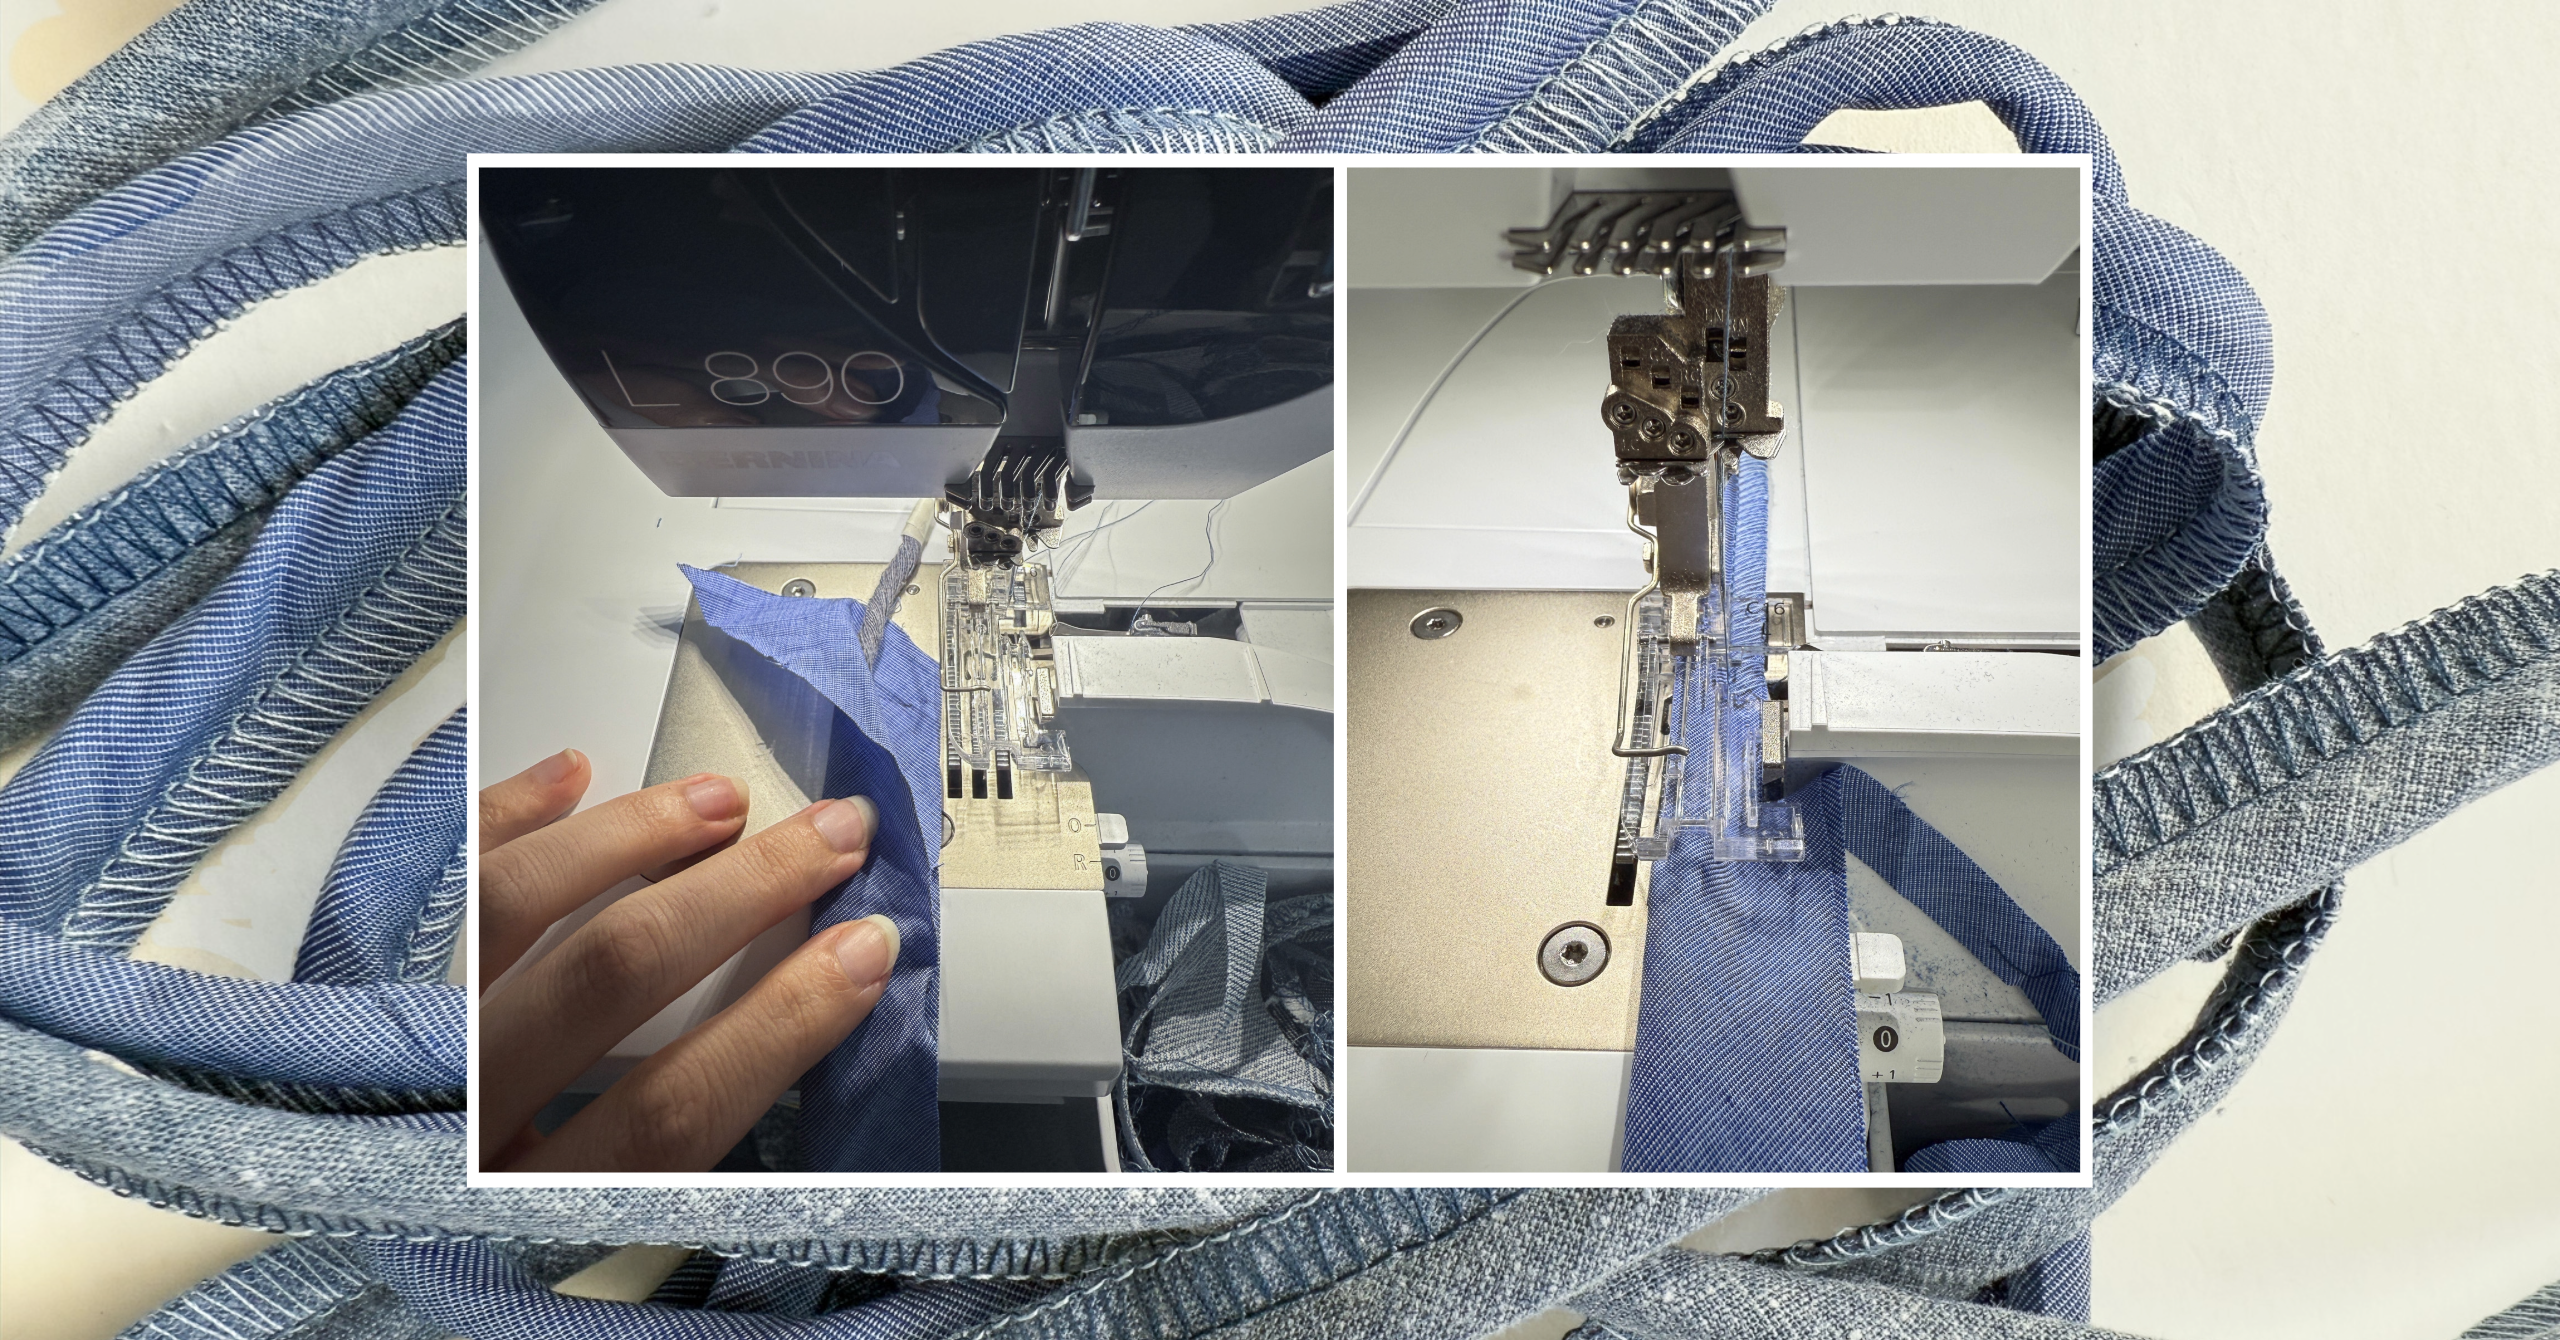
- Fold the bias strip around the cord with wrong sides together.
- Position it under the piping foot so the cord sits neatly inside the groove. Start with a few inches of cord extending behind the foot to help it feed smoothly.
- Sew along the length of the cord, enclosing it inside the bias strip.
Step 4: Attach the Piping to the Pillow Front & Back
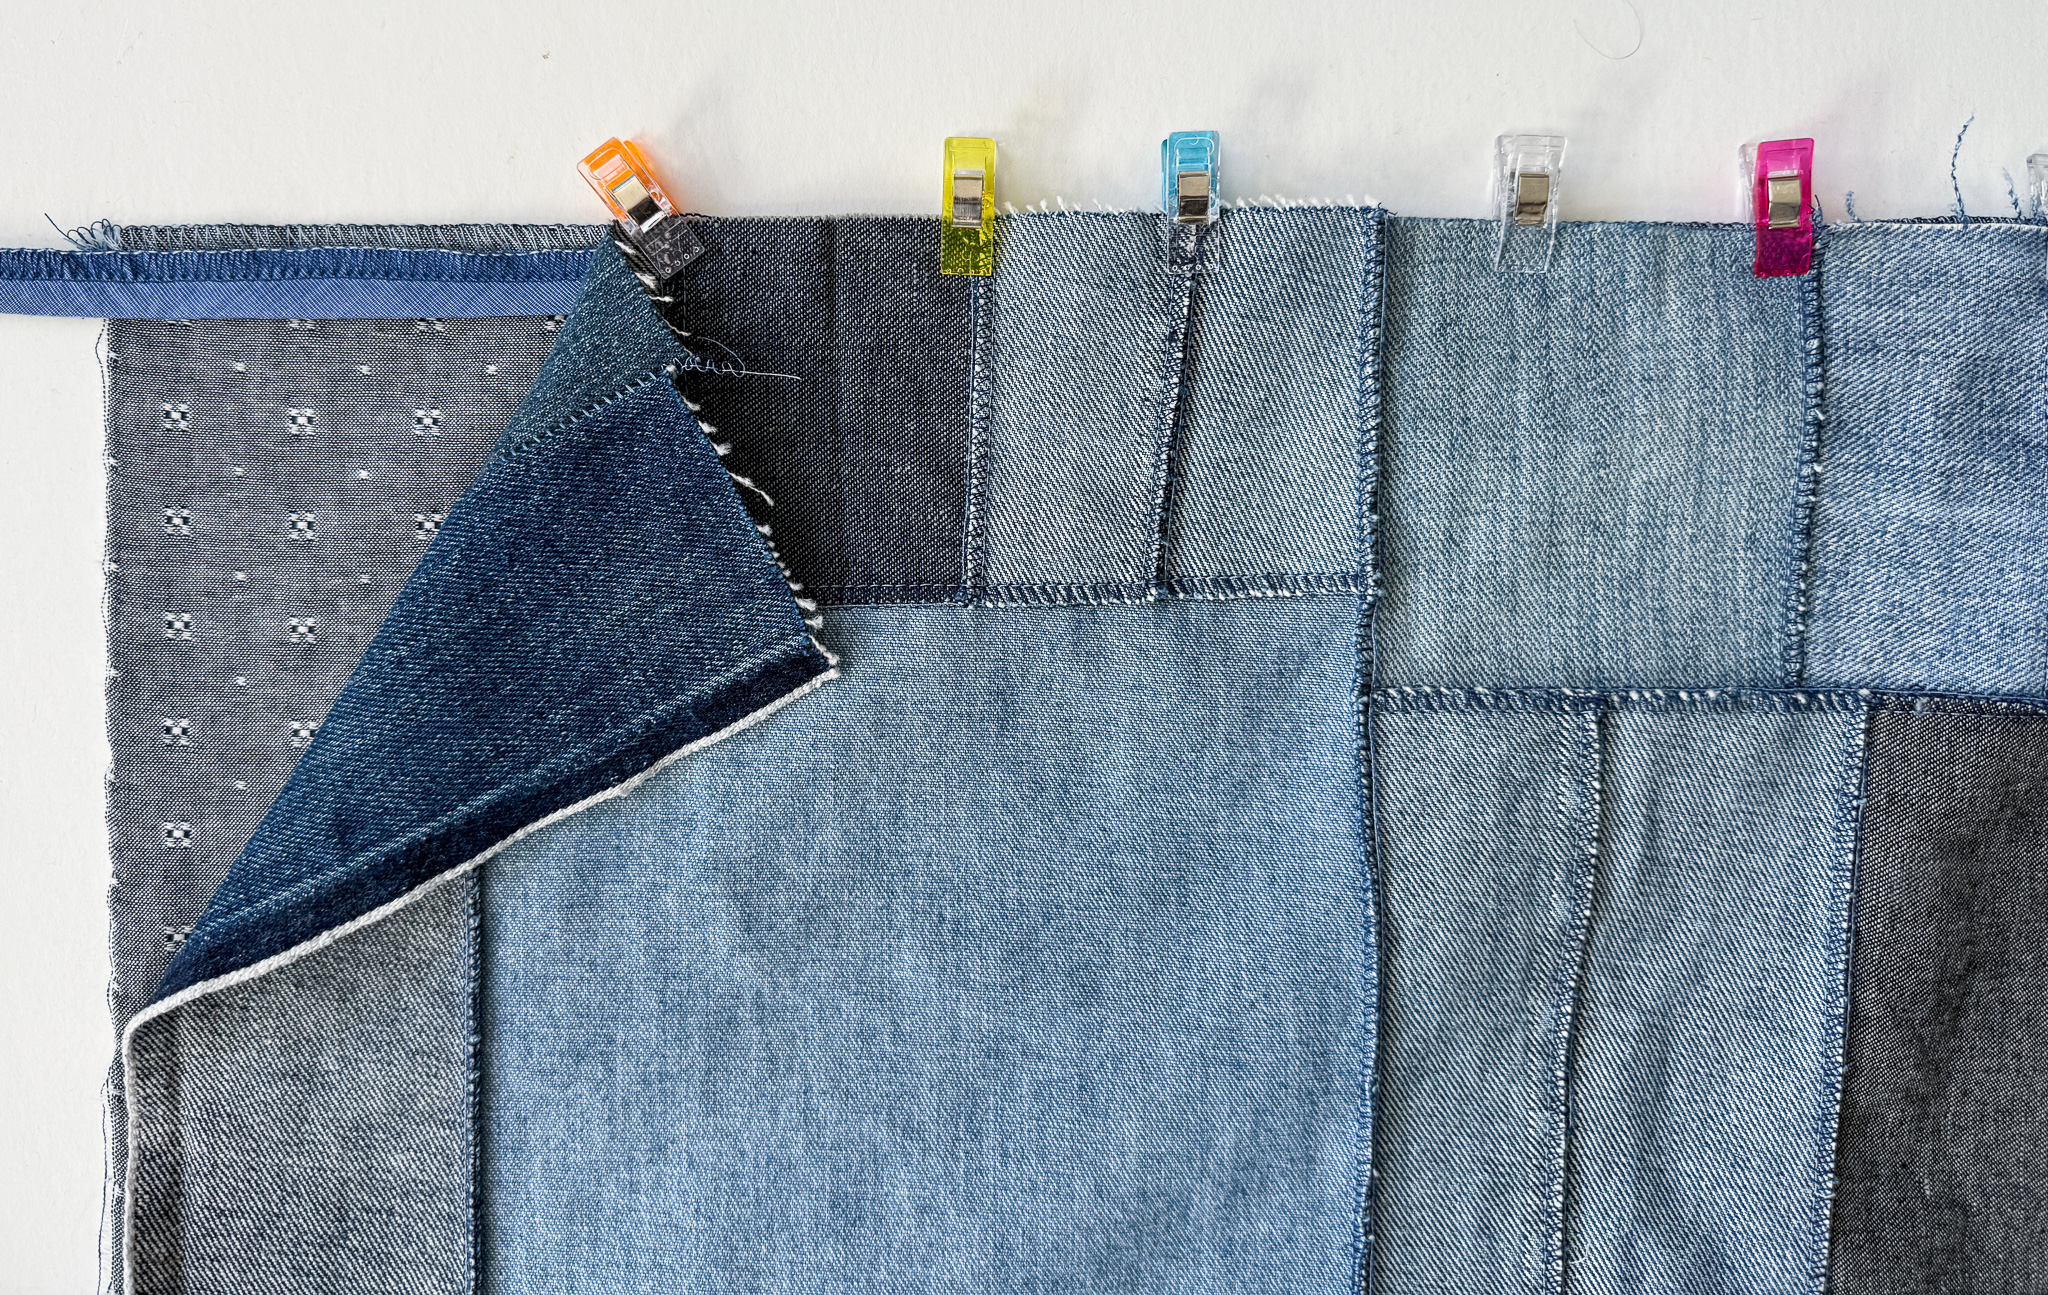
- With right sides together and raw edges aligned, layer the pillow front, piping and pillow back with the piping cord facing inward.
- Use clips, pins or hand baste to secure the front and back layers together but only attach the piping along the first side. This is because you are going to clip and turn the piping as you go (explained in pesky corners section below). Important: if you use pins you need to be extra careful to remove them, so they don’t go through the machine!!
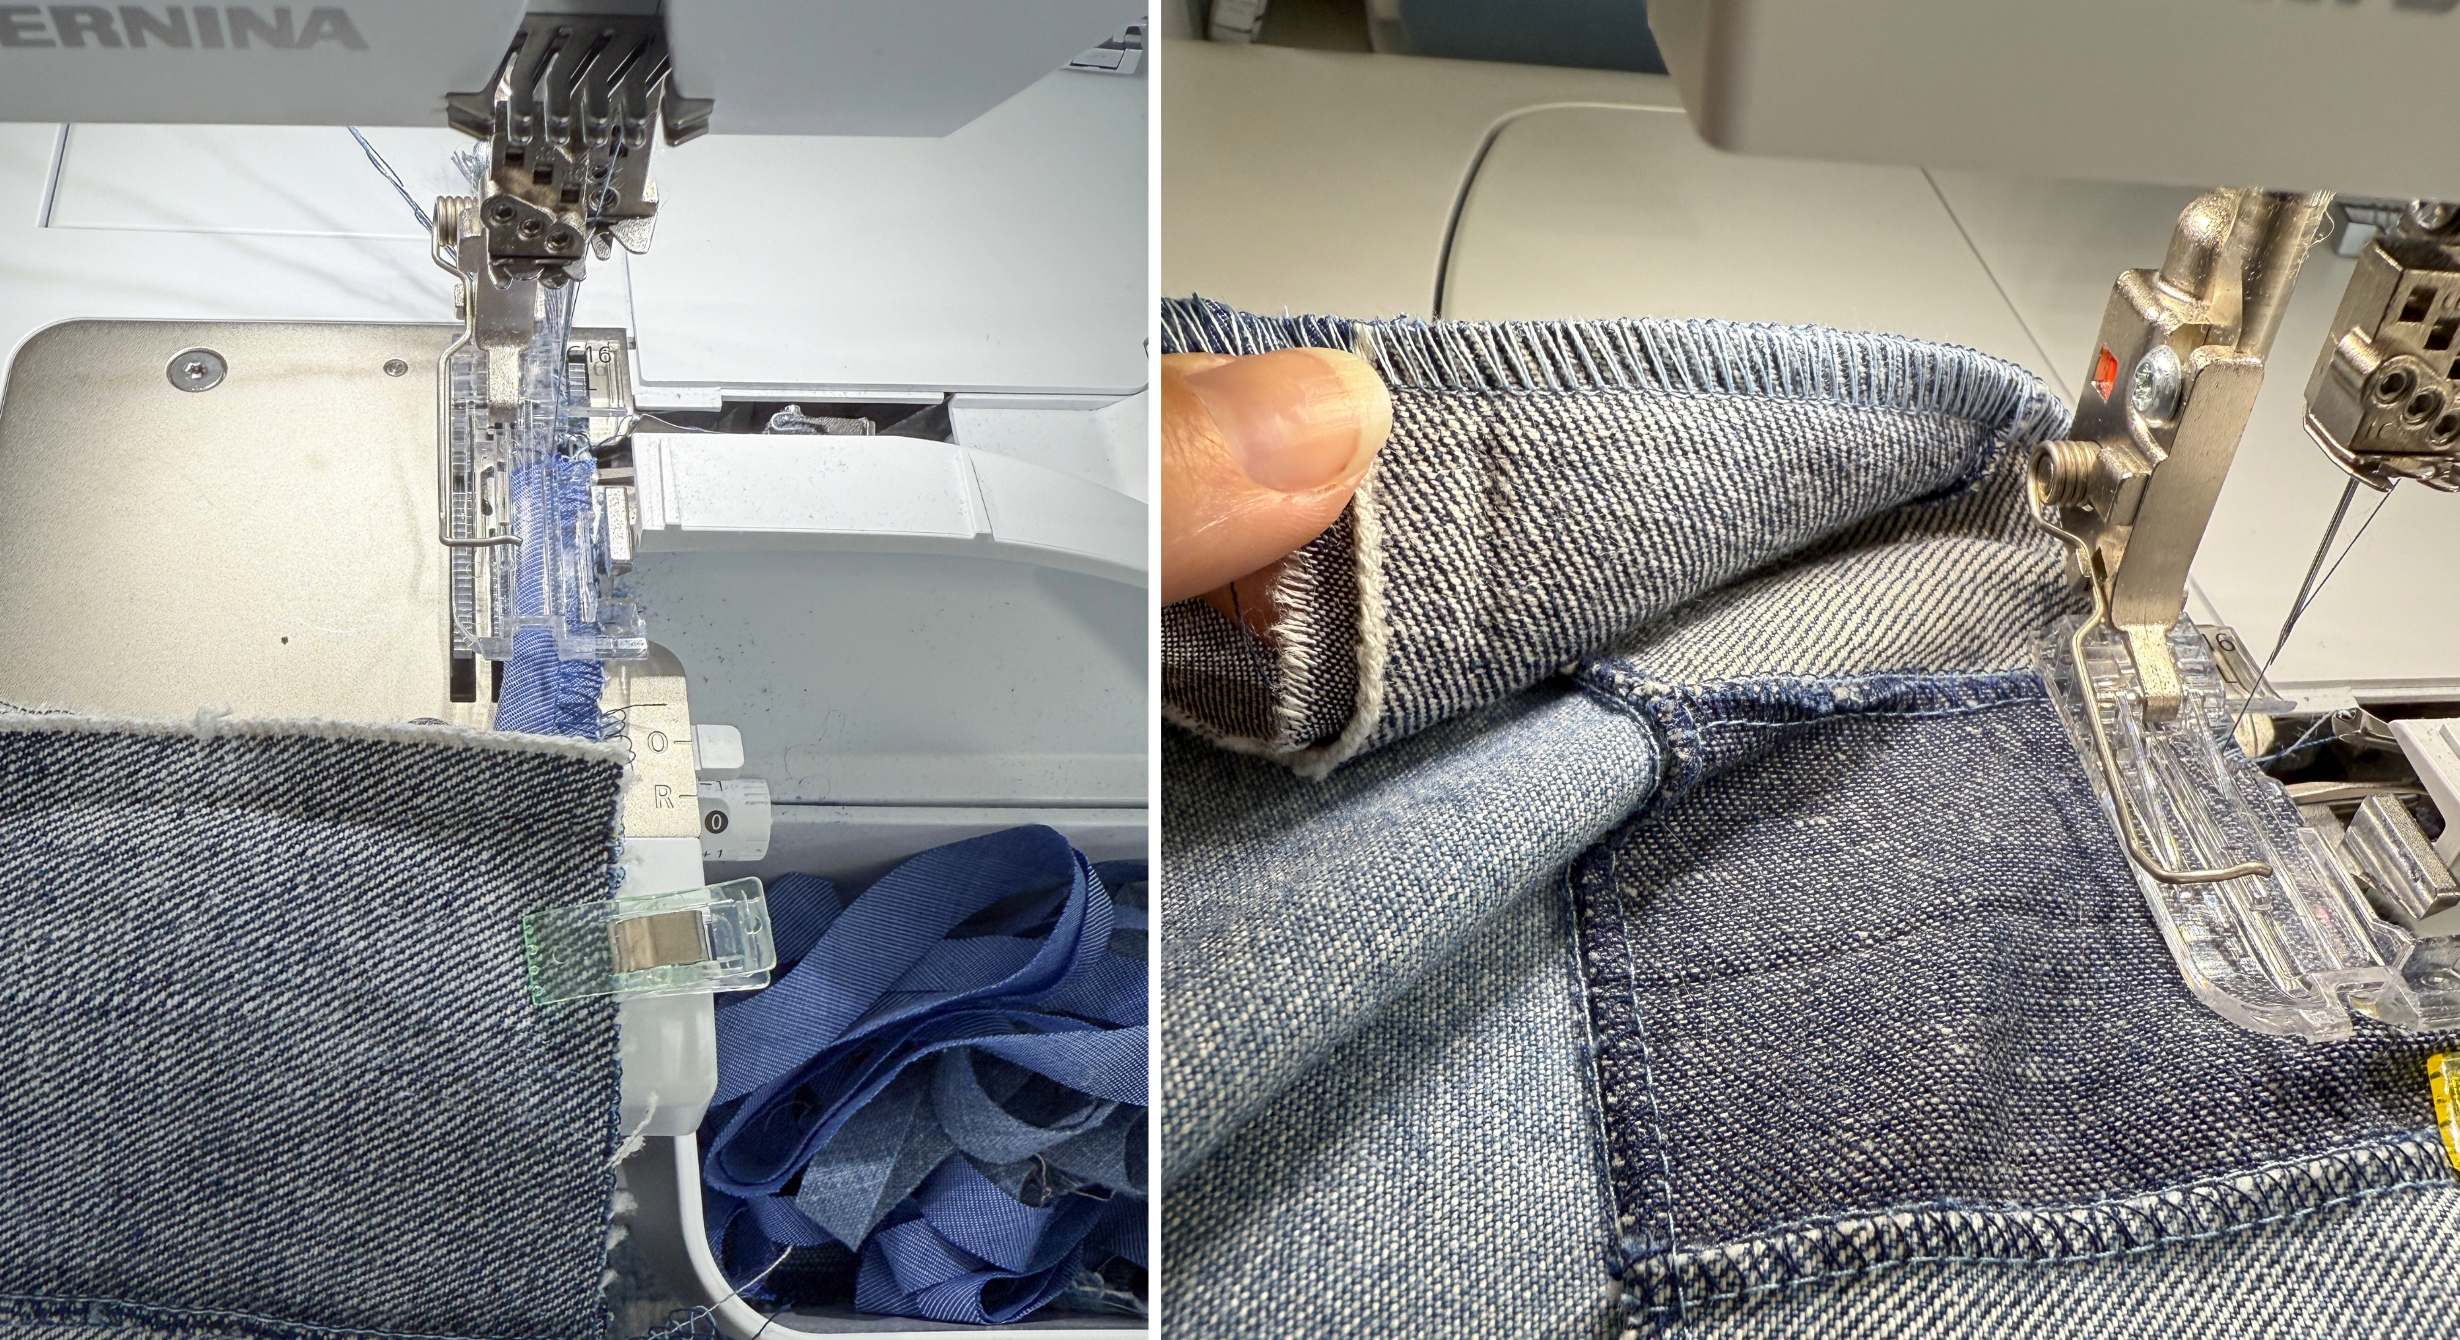
- Using your chosen overlock stitch, start stitching at one corner, leaving an inch or two of piping sticking out the back. The cord should naturally stay in the groove as you stitch.
- After you have sewn a couple inches, check where you have sewn to make sure all the layers are catching in the overlock.
Those Pesky Corners…
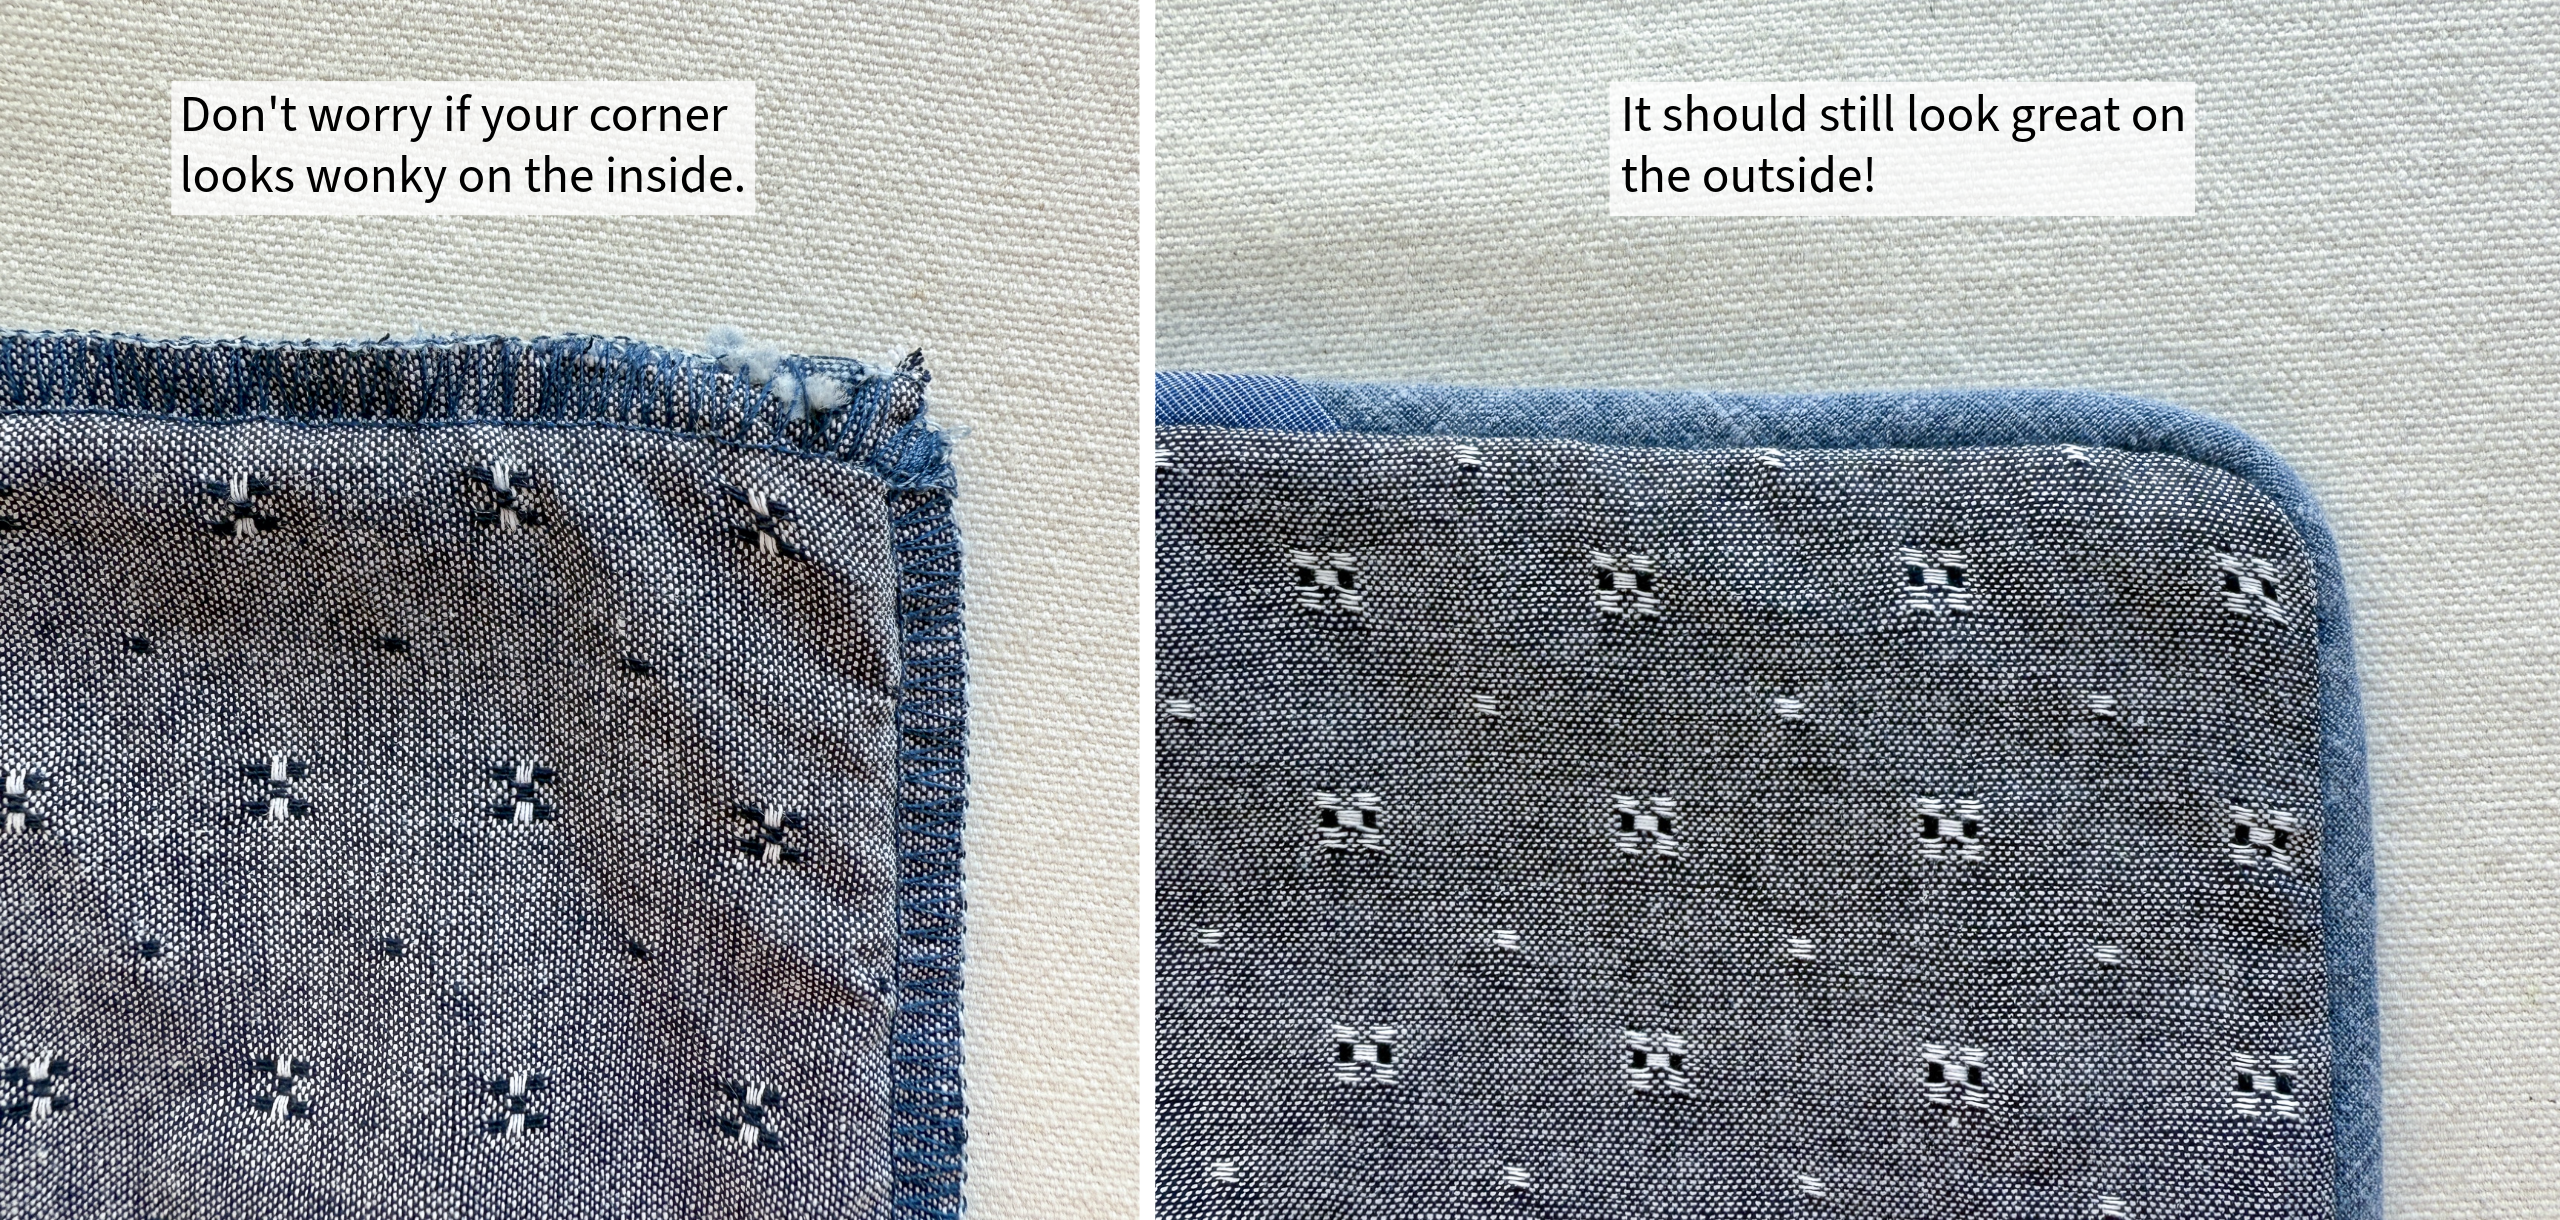
Overlocking around the corners is the trickiest part of this project, and I’m going to be honest, my corners were a hot mess on the inside. But you know what? They looked great when I turned the pillowcase right-side out, and this is a piping-police free zone, so I’m giving you permission to do the best you can and not worry so much about perfection.
Just know: a perfect corner won’t make your pillow any less comfy!
There are a couple of different ways to attack the corners; this way worked best for me.
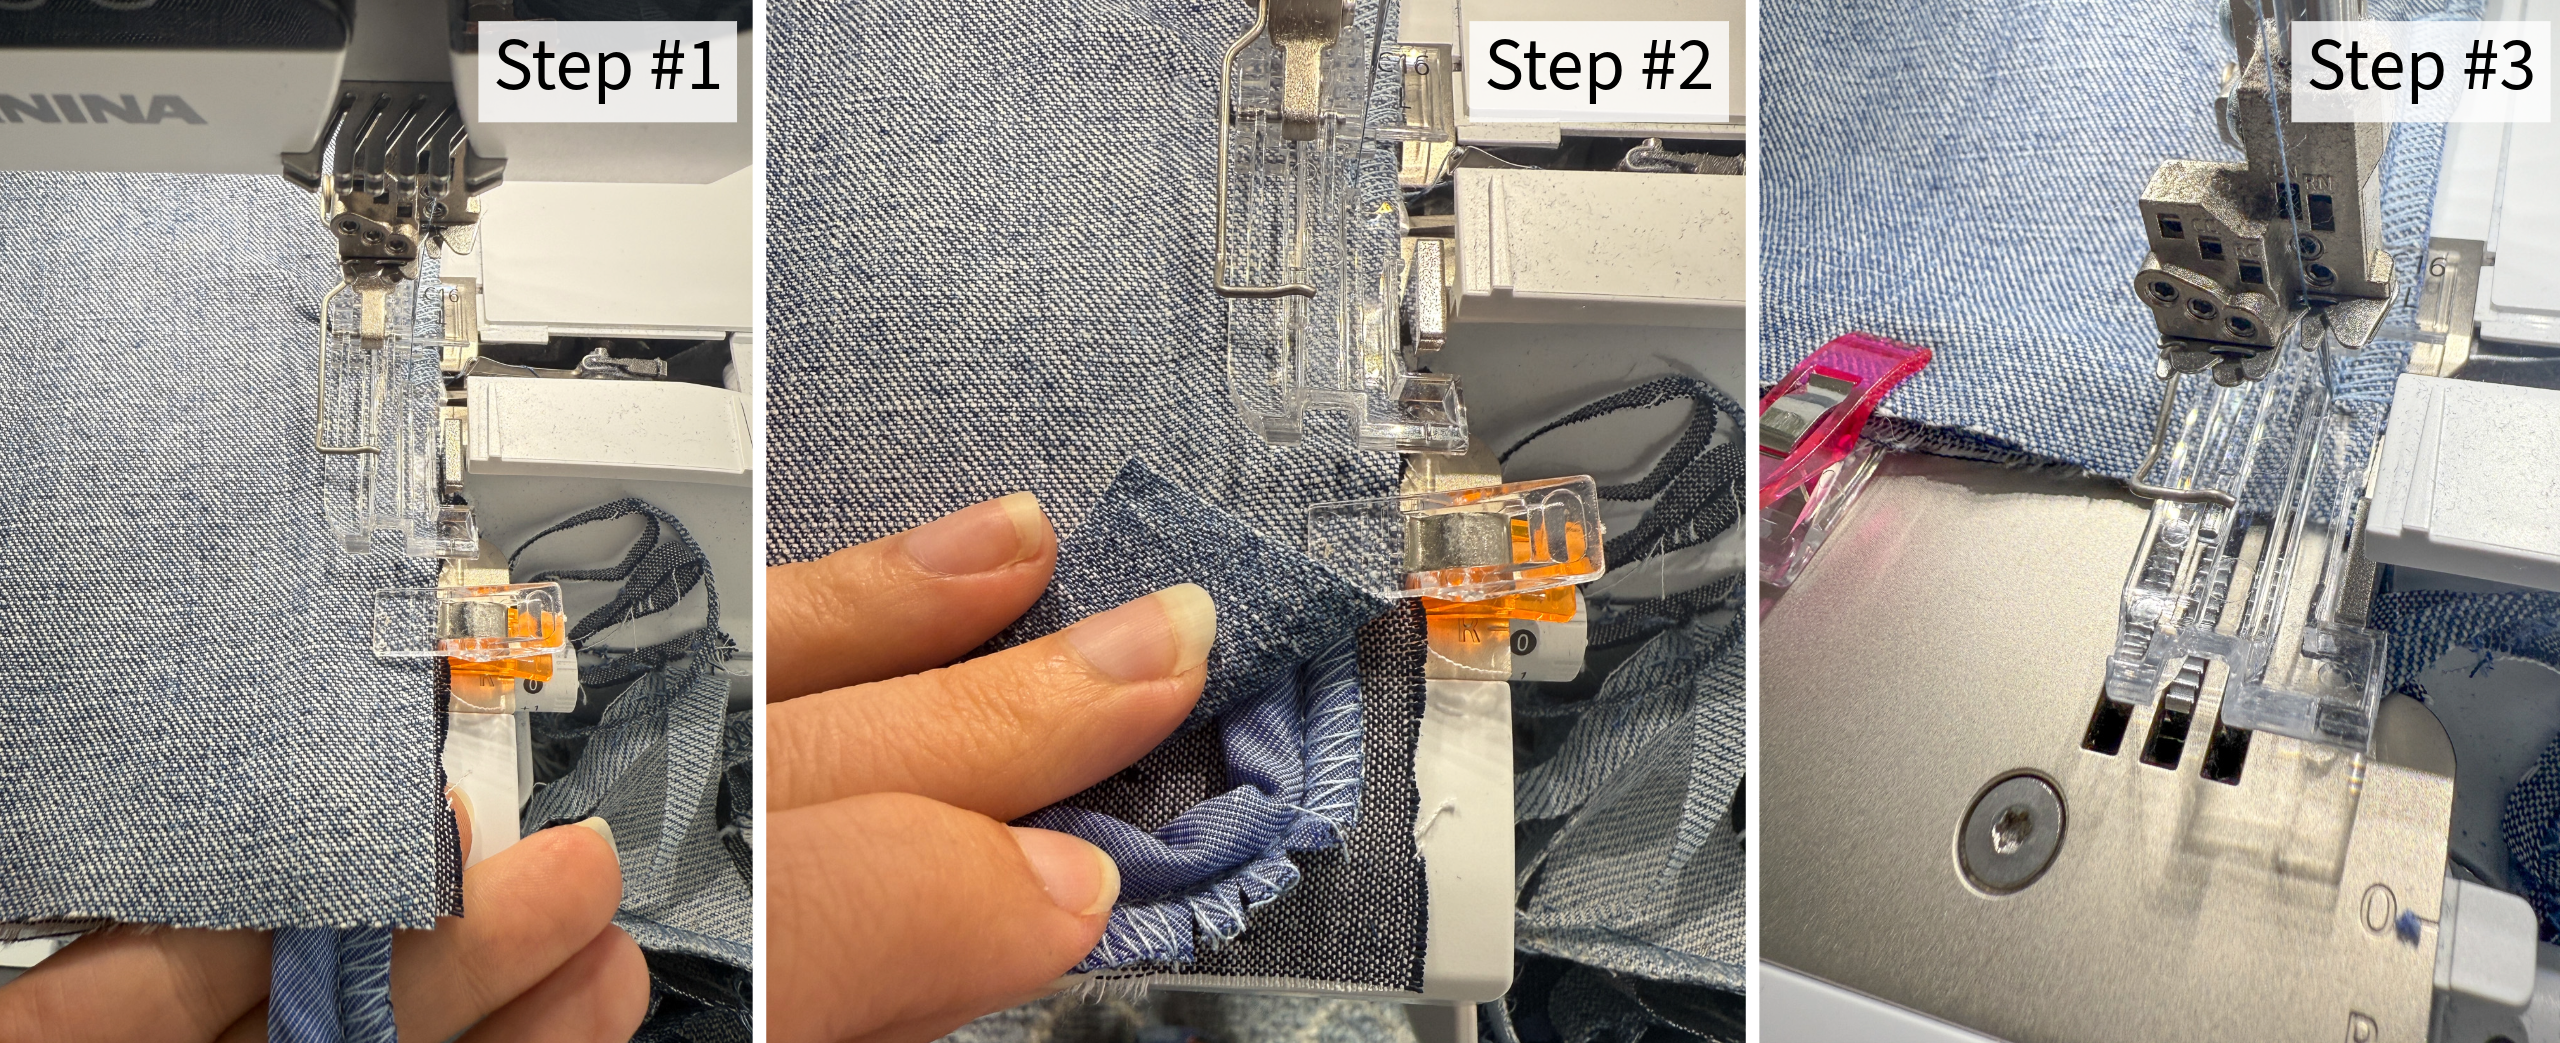
- Stop sewing about two inches before the corner.
- Flip up the top layer of the pillow cover and clip into the piping’s seam allowance right at the corner. The piping can now curve around the corner.
- Stitch almost all the way up to the corner.
- Start to turn the fabric as you stitch (slowly) until you have gone all the way around the corner. This is the funky part because your piping won’t stay in the groove.
- Keep sewing until you get to the next corner and then follow steps #1-#5 again.
- When you get back to the corner where you started, cross the end of the piping over the piping tail that you started with. Overlock straight off the corner, catching both ends of the piping.

So, why did I wait to clip the corners and turn the piping until it was in the machine? Working with denim and other upcycled materials, I’ve learned the hard way how much these textiles like to shift while you are sewing them. Waiting until the fabric and piping are in the machine and you are at the corner ensures that where you clipped the piping is going to be in the right place.
I try to give myself some grace when working with these materials, and you should also. And speaking of grace, if your corners end up looking as wonky as my corners, don’t worry! They might look messy on the inside, but once you turn them right side out, they almost always look great.
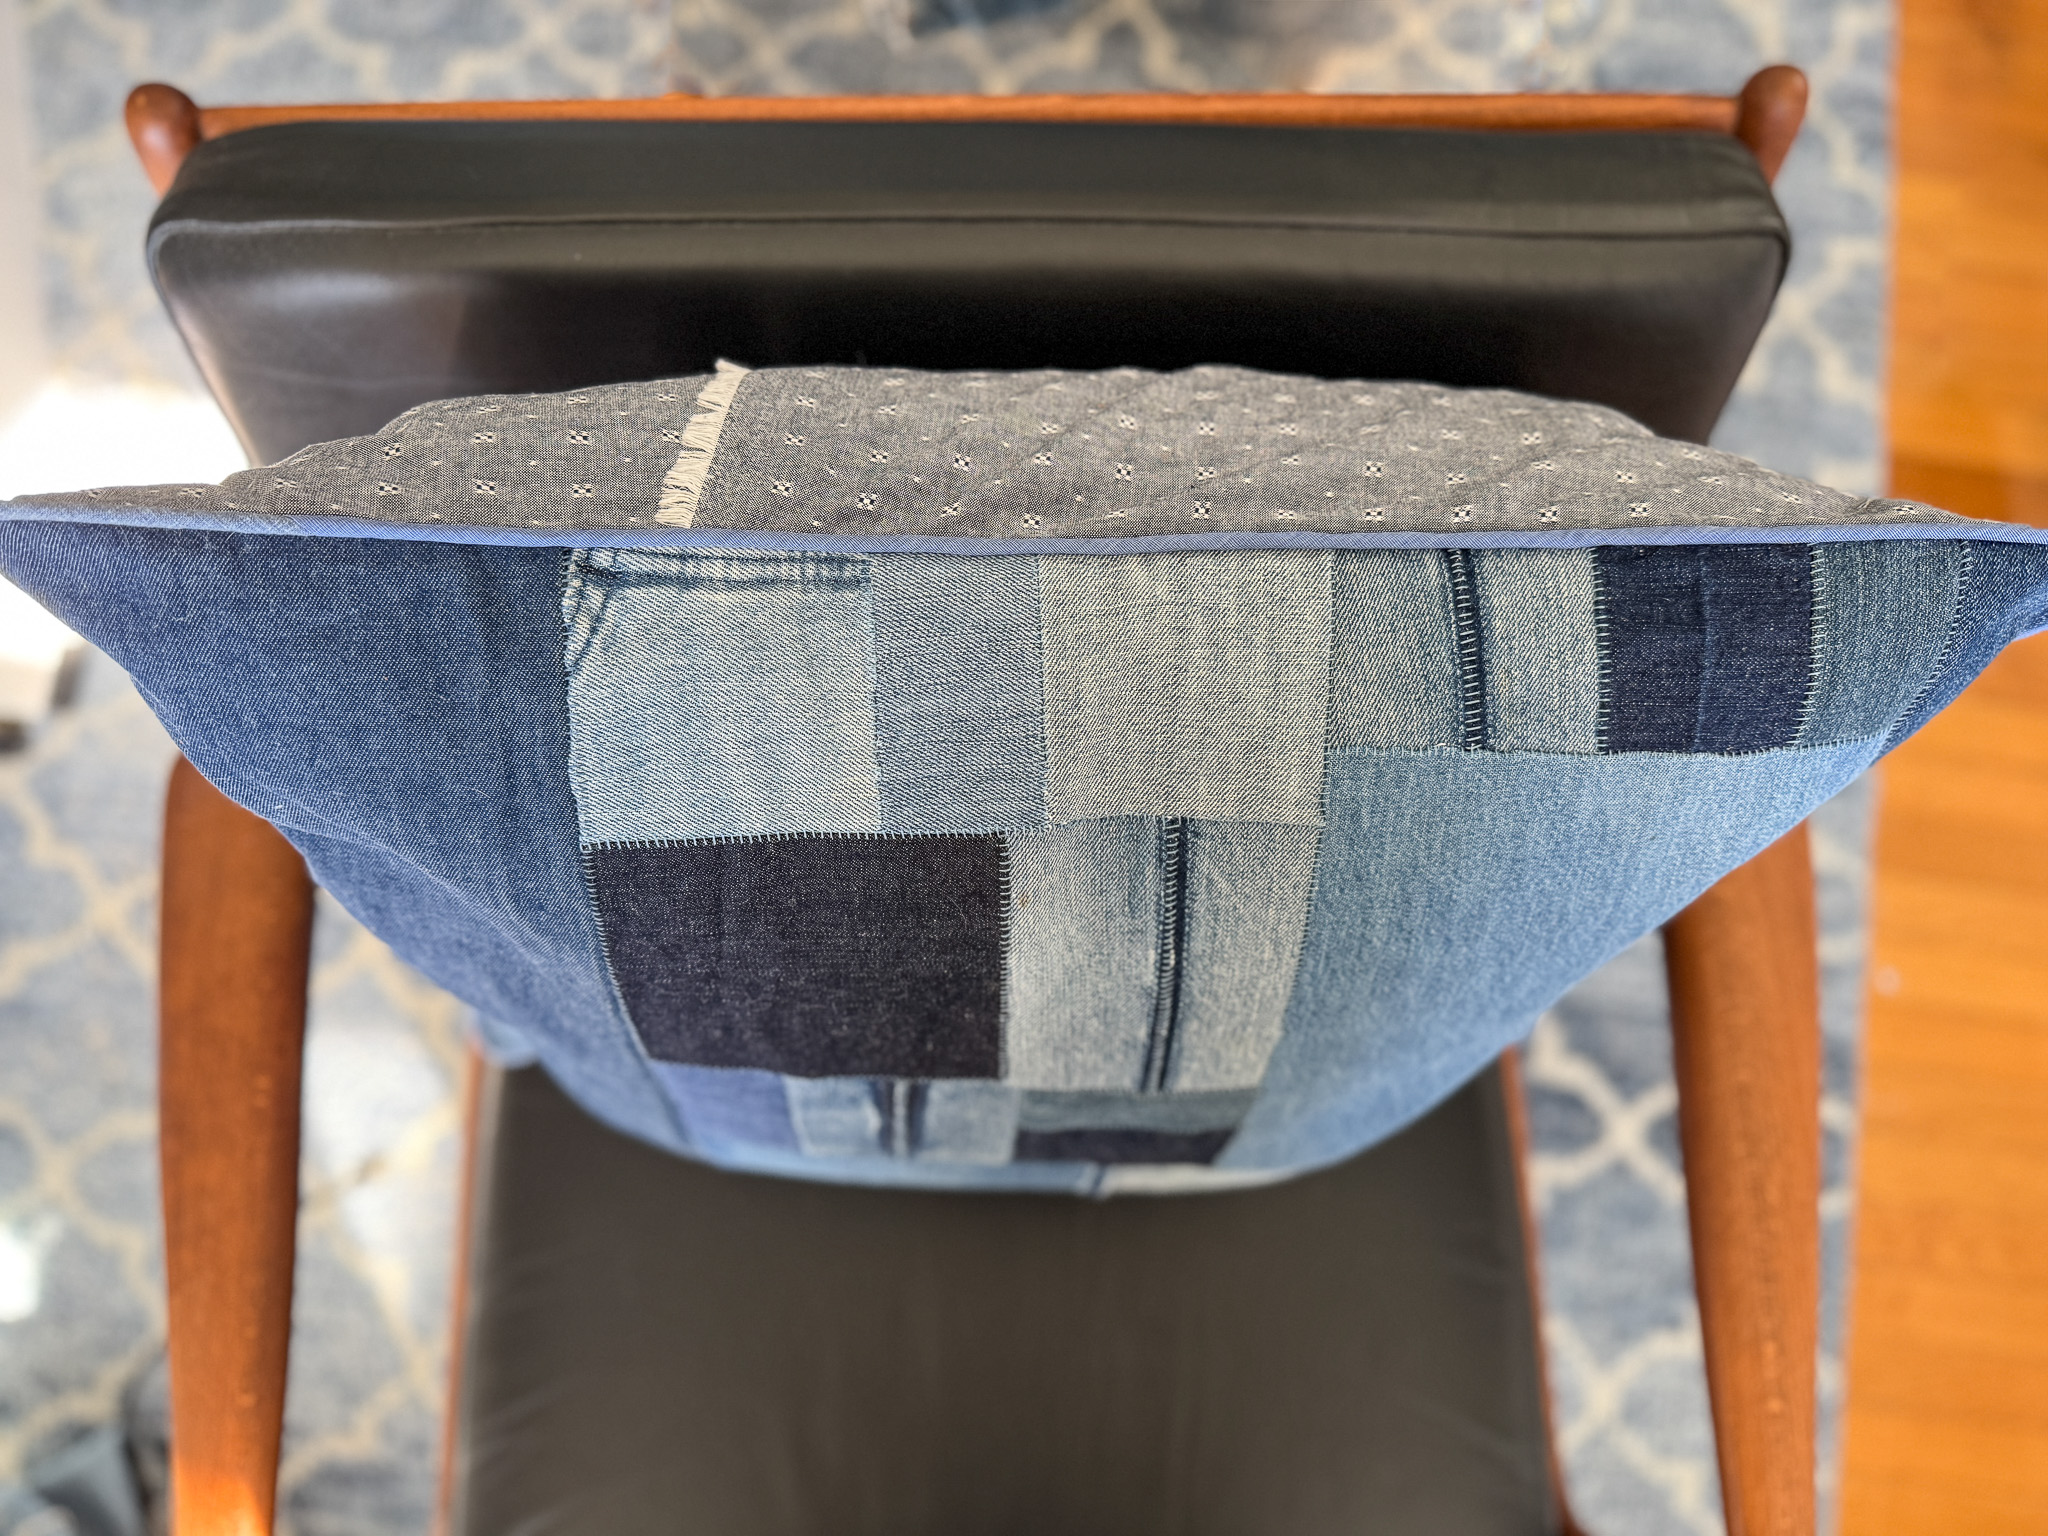
Step 5: Turn & Finish
- Turn the pillow right side out and give it a good press along the edges to make the piping pop.
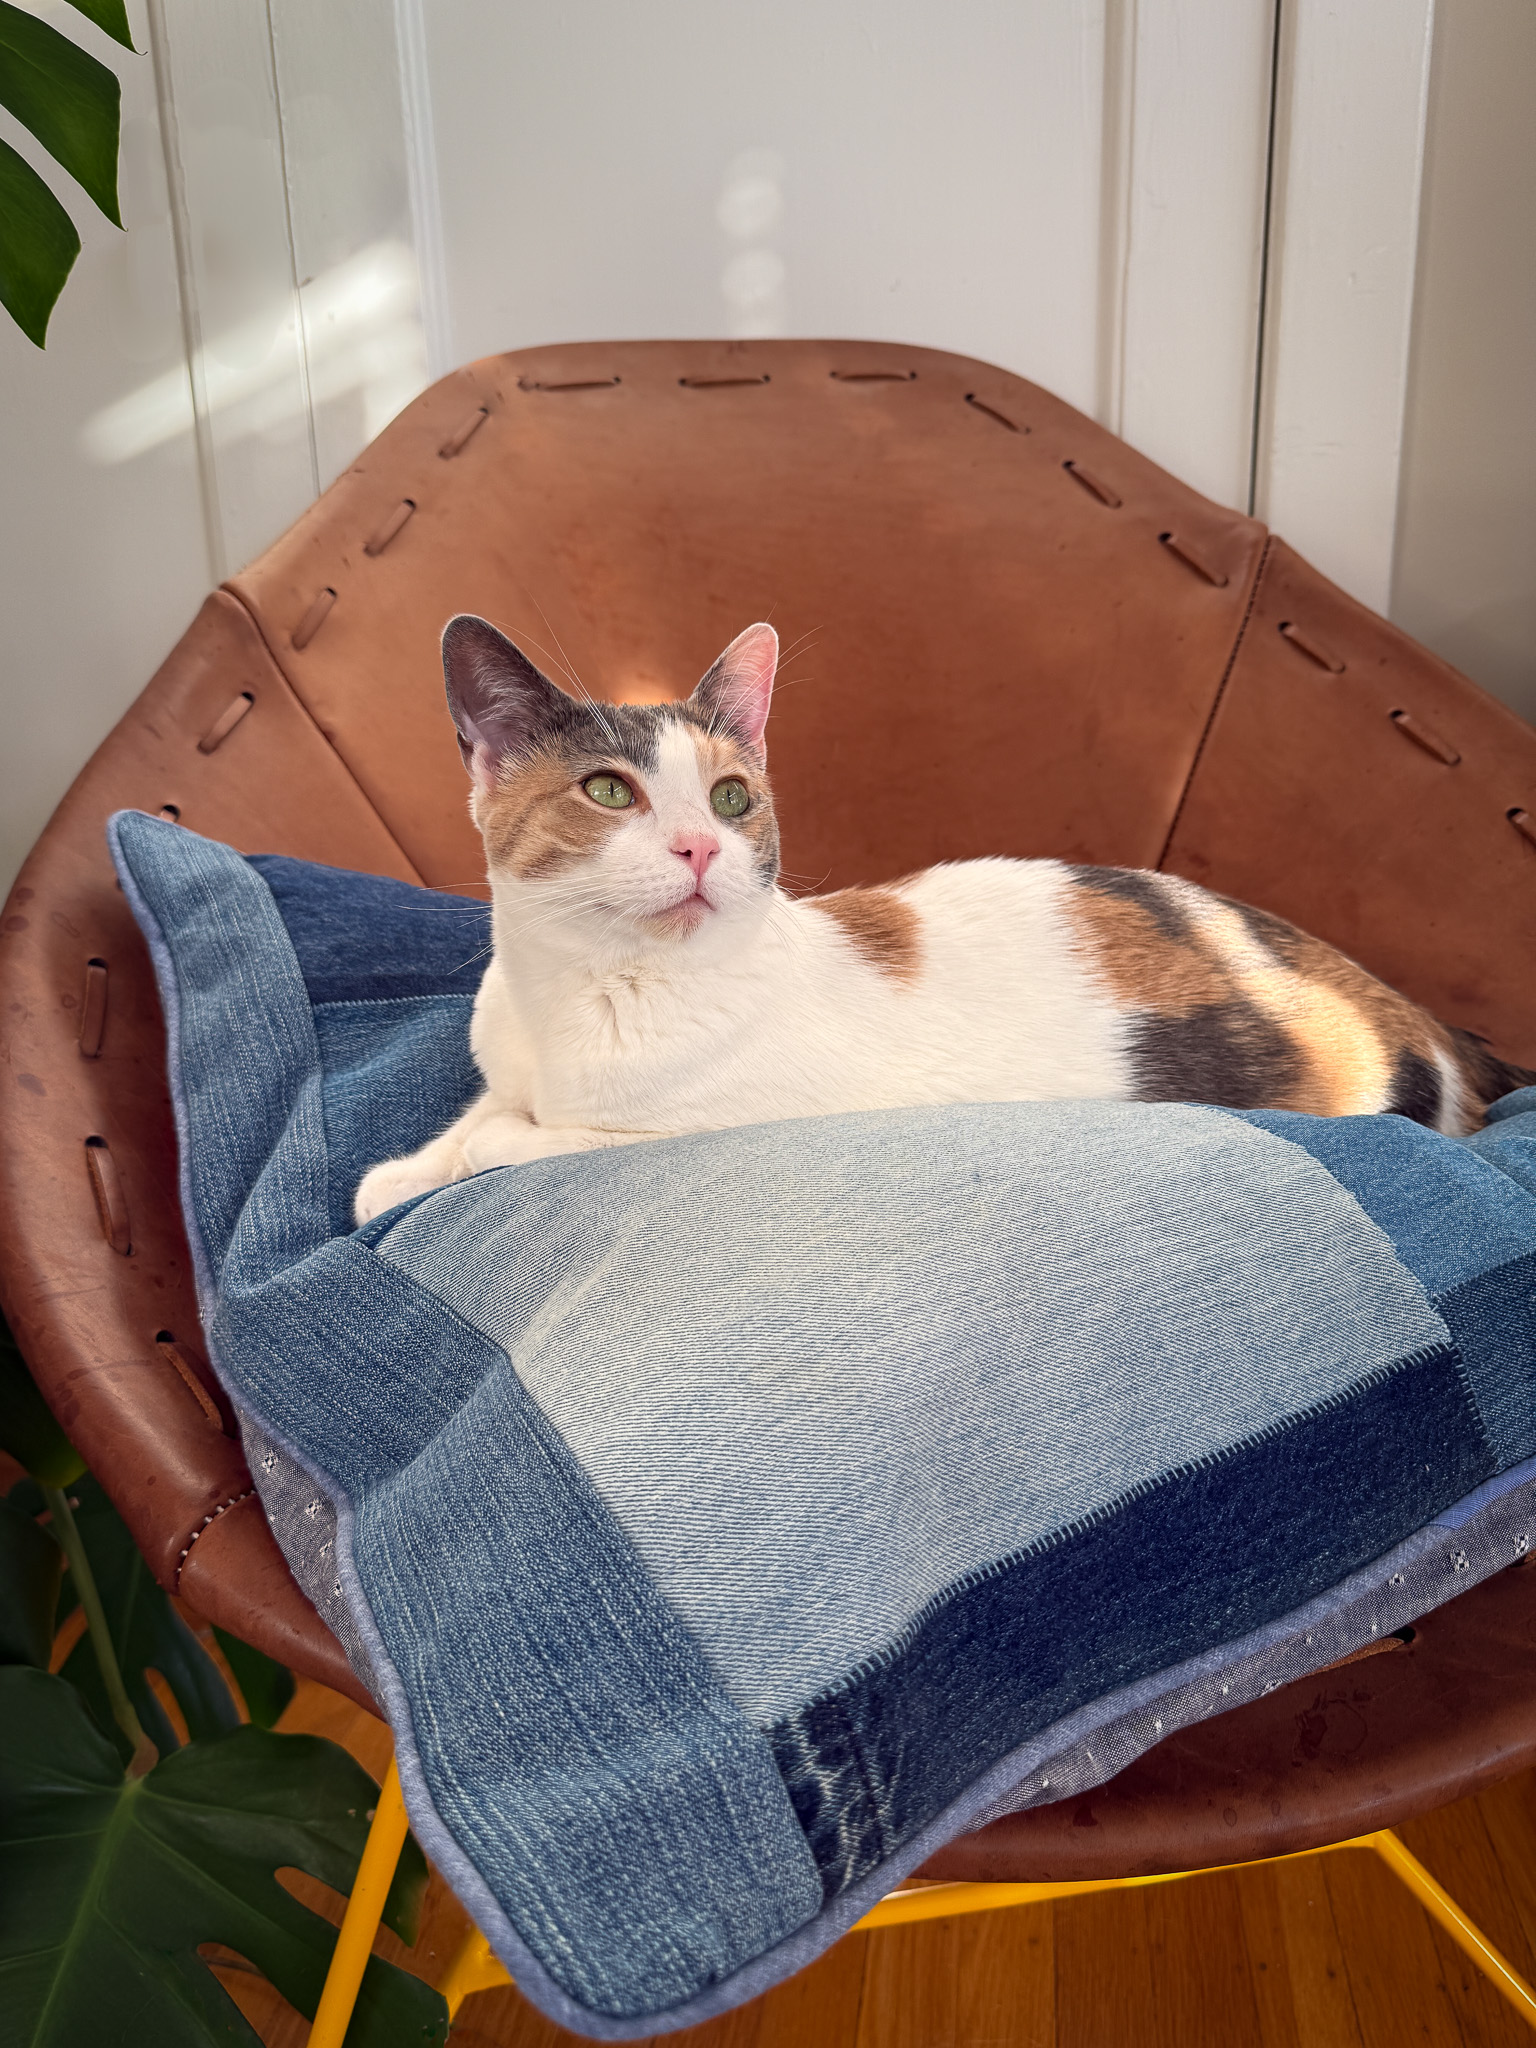
- Insert your pillow form and admire your work.
- [Optional Step] Test the pillow for comfiness (if you have a furry friend, they might like to test the pillow as well).