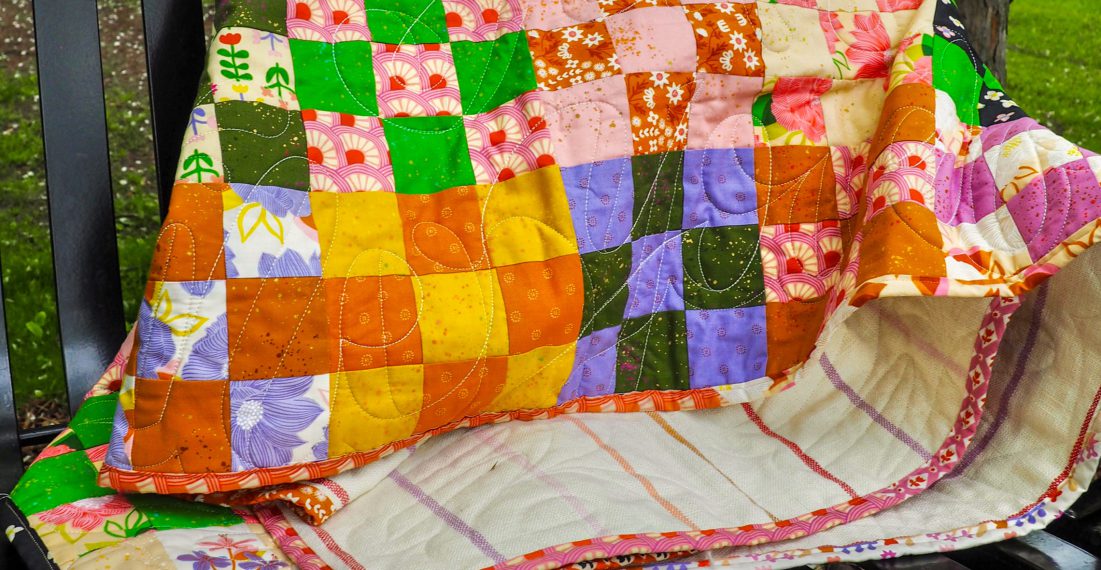
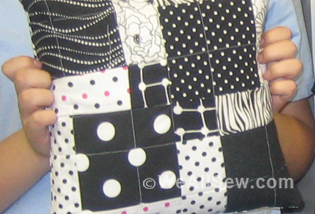
Nine-Patch Picnic Quilt, Part Three
Hello friends! This is Candice from A+CO with a follow-up to the Nine-Patch Picnic Quilt series. In this third post, I’ll show you a couple of fun extras I made for my picnic quilt.
I live in Northern Wisconsin and it gets really really cold here in the winter. Because of that, I keep a pile of at least four blankets in my car at all times. I realized a few summers ago that these blankets also served a purpose in the summer when my family and I wanted to stop for an impromptu picnic!
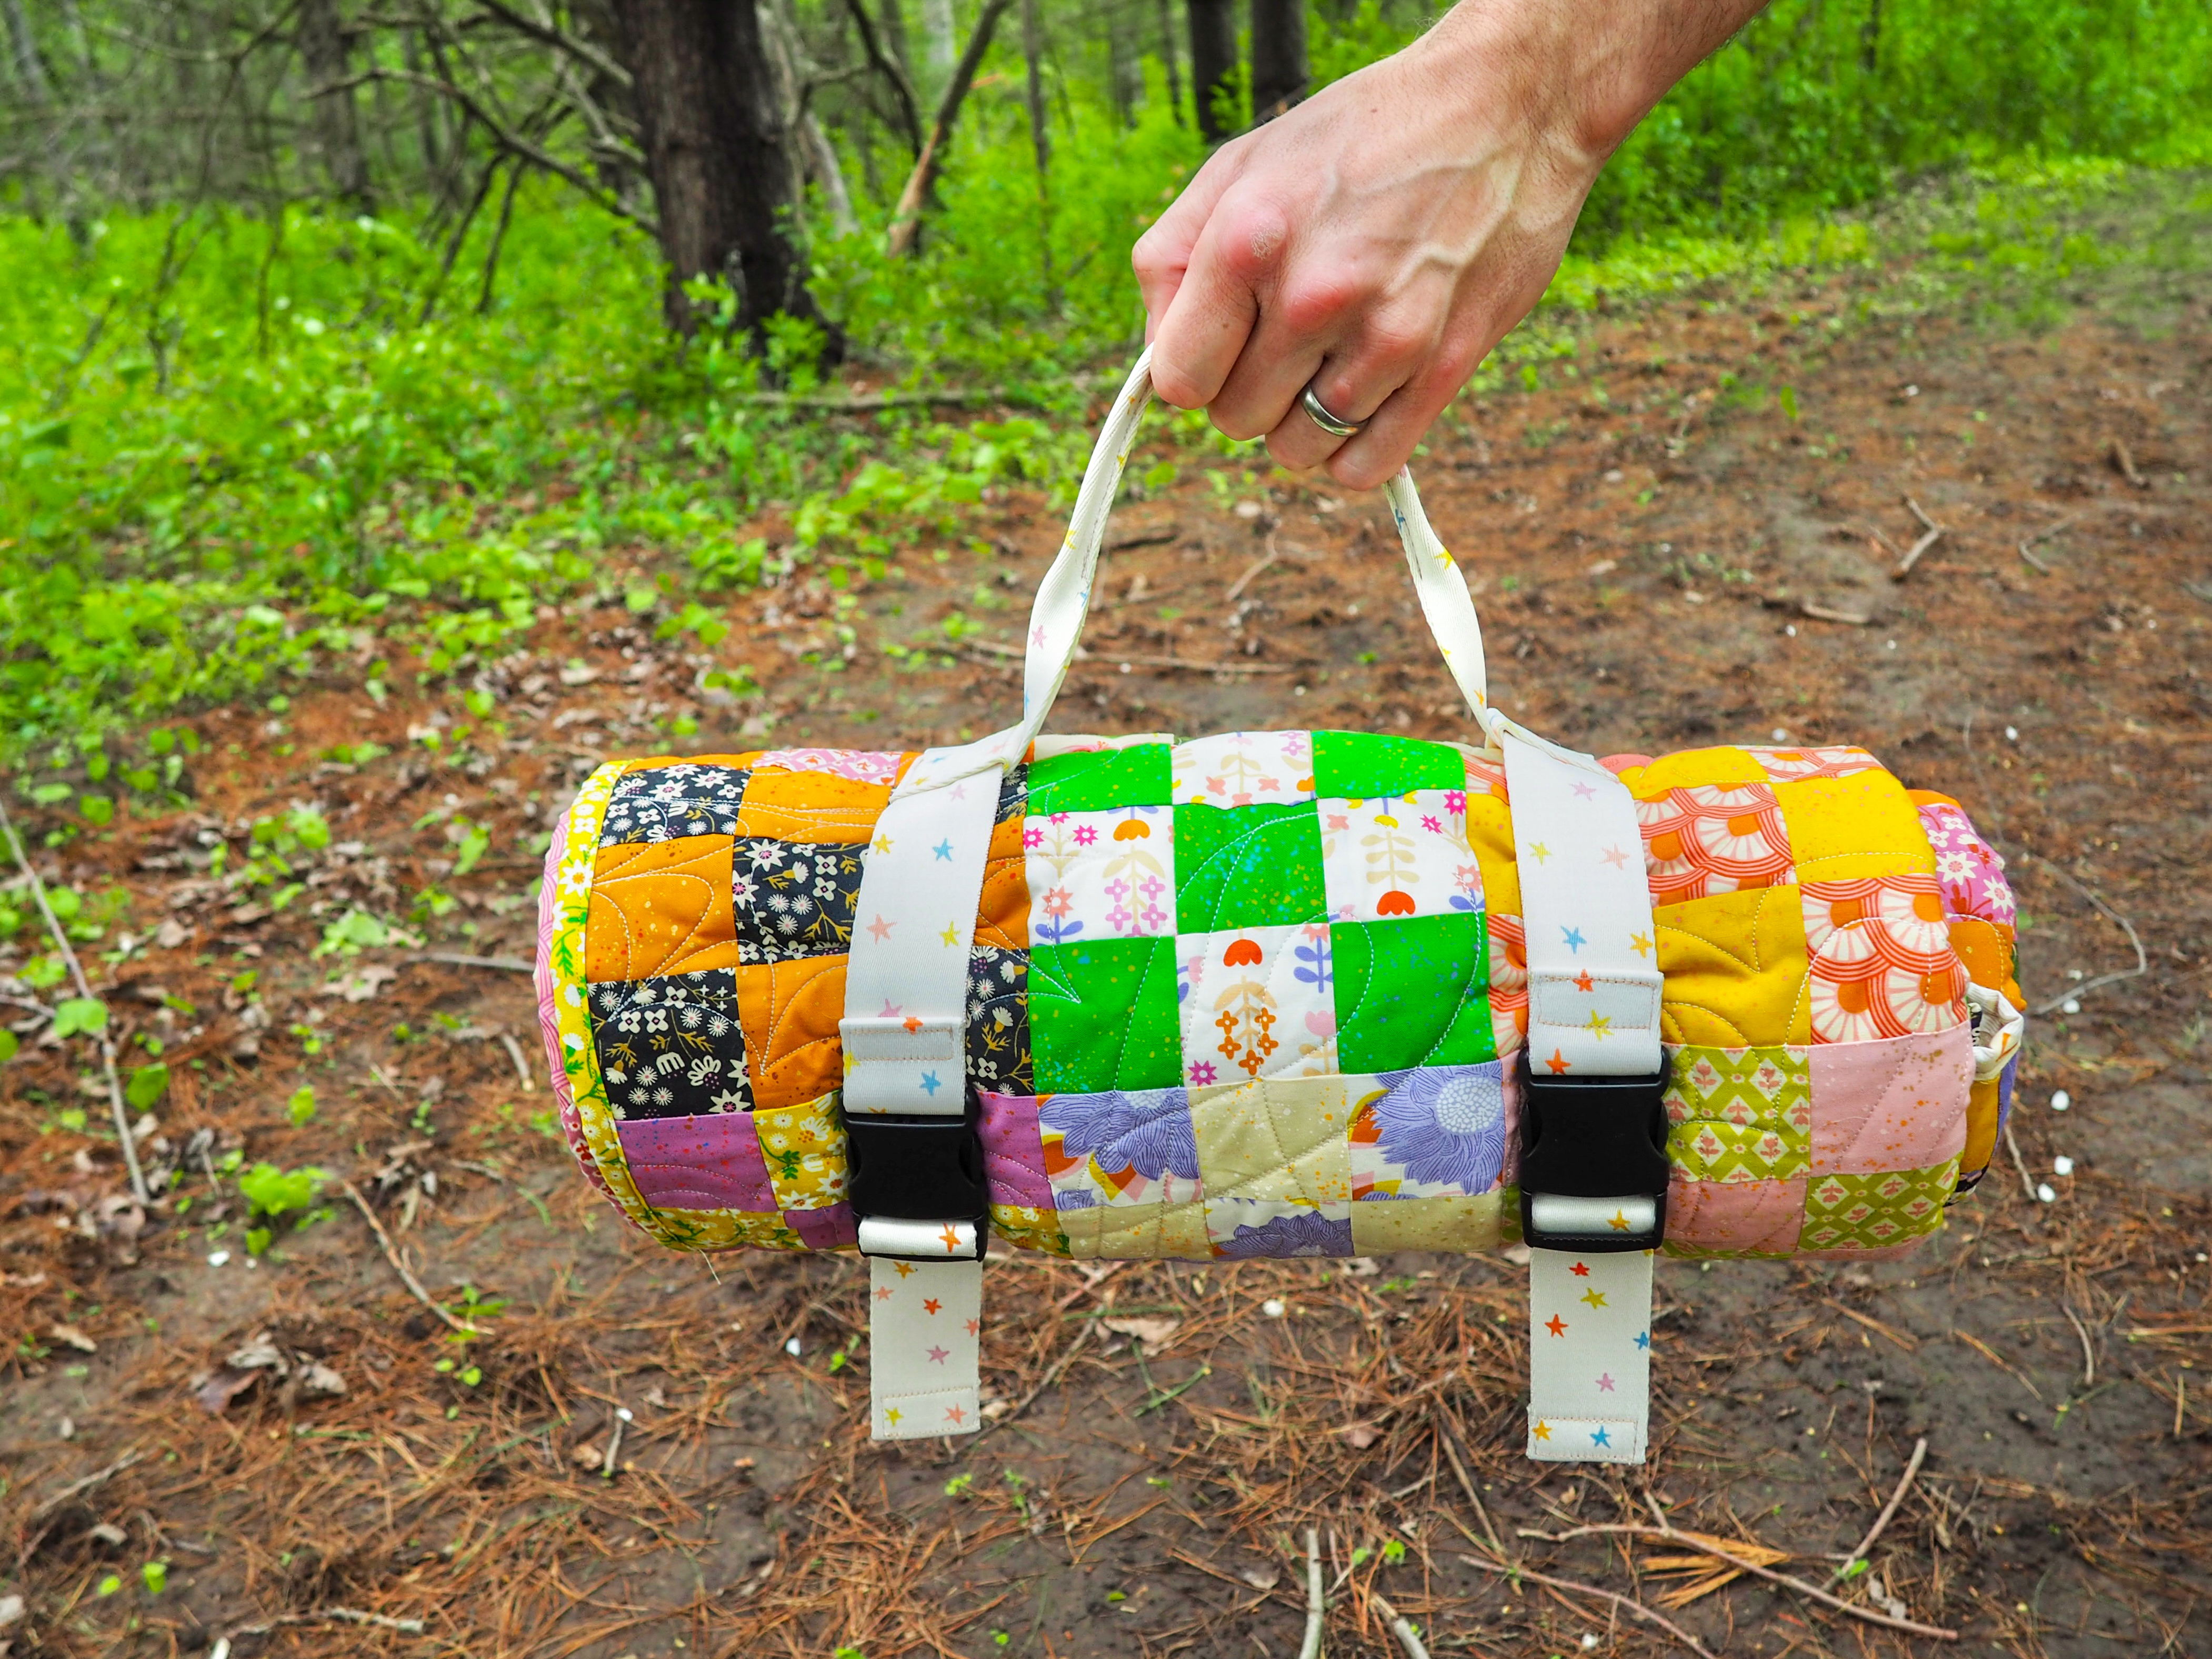
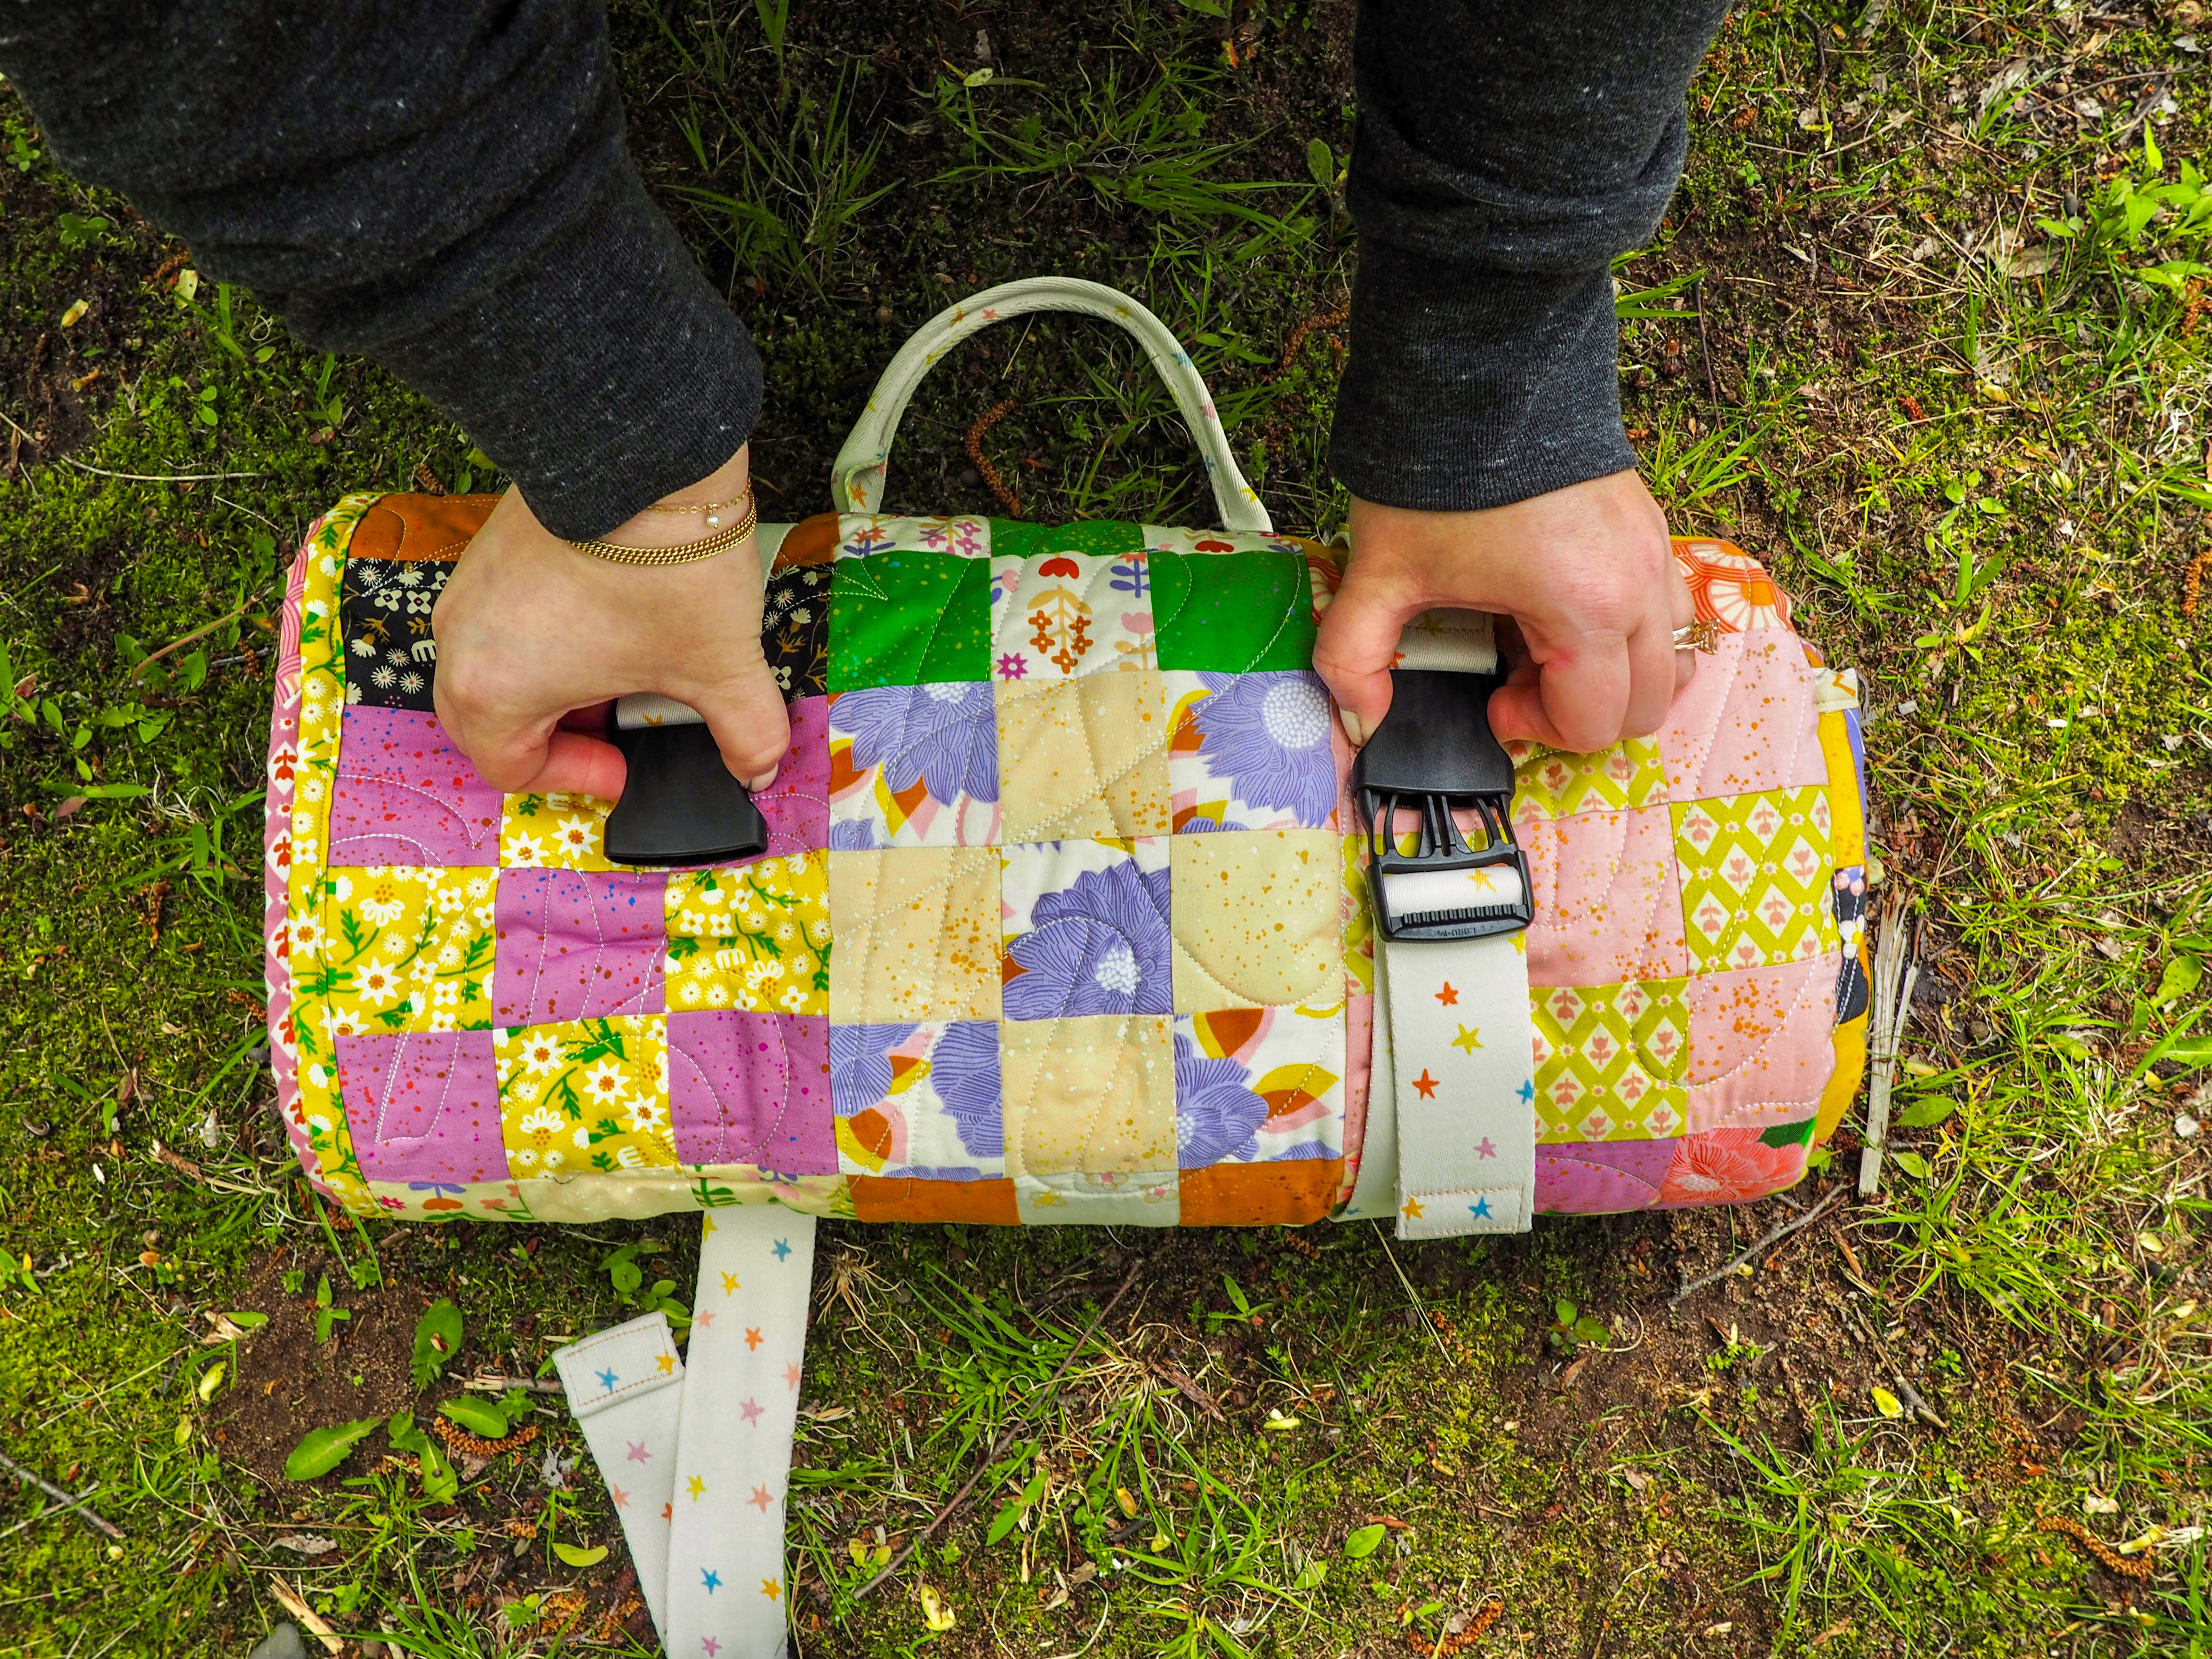
After a night of music in the park, I realized that schlepping all of our things back and forth would be so much easier if I had a better way to carry my blankets and from there, my picnic quilt carrying strap was born.
The great thing about the carrying strap is that you don’t need to be super exact with your measurements. The strap is adjustable, allowing you to cinch it tighter around your quilt or loosen it up if there’s more bulk. Feel free to use this as a base for your carrying strap and make adjustments as you see fit.
Materials
- 2.5 Yards of 1 1/2″ webbing
- (2) 1 1/2″ Side release buckles
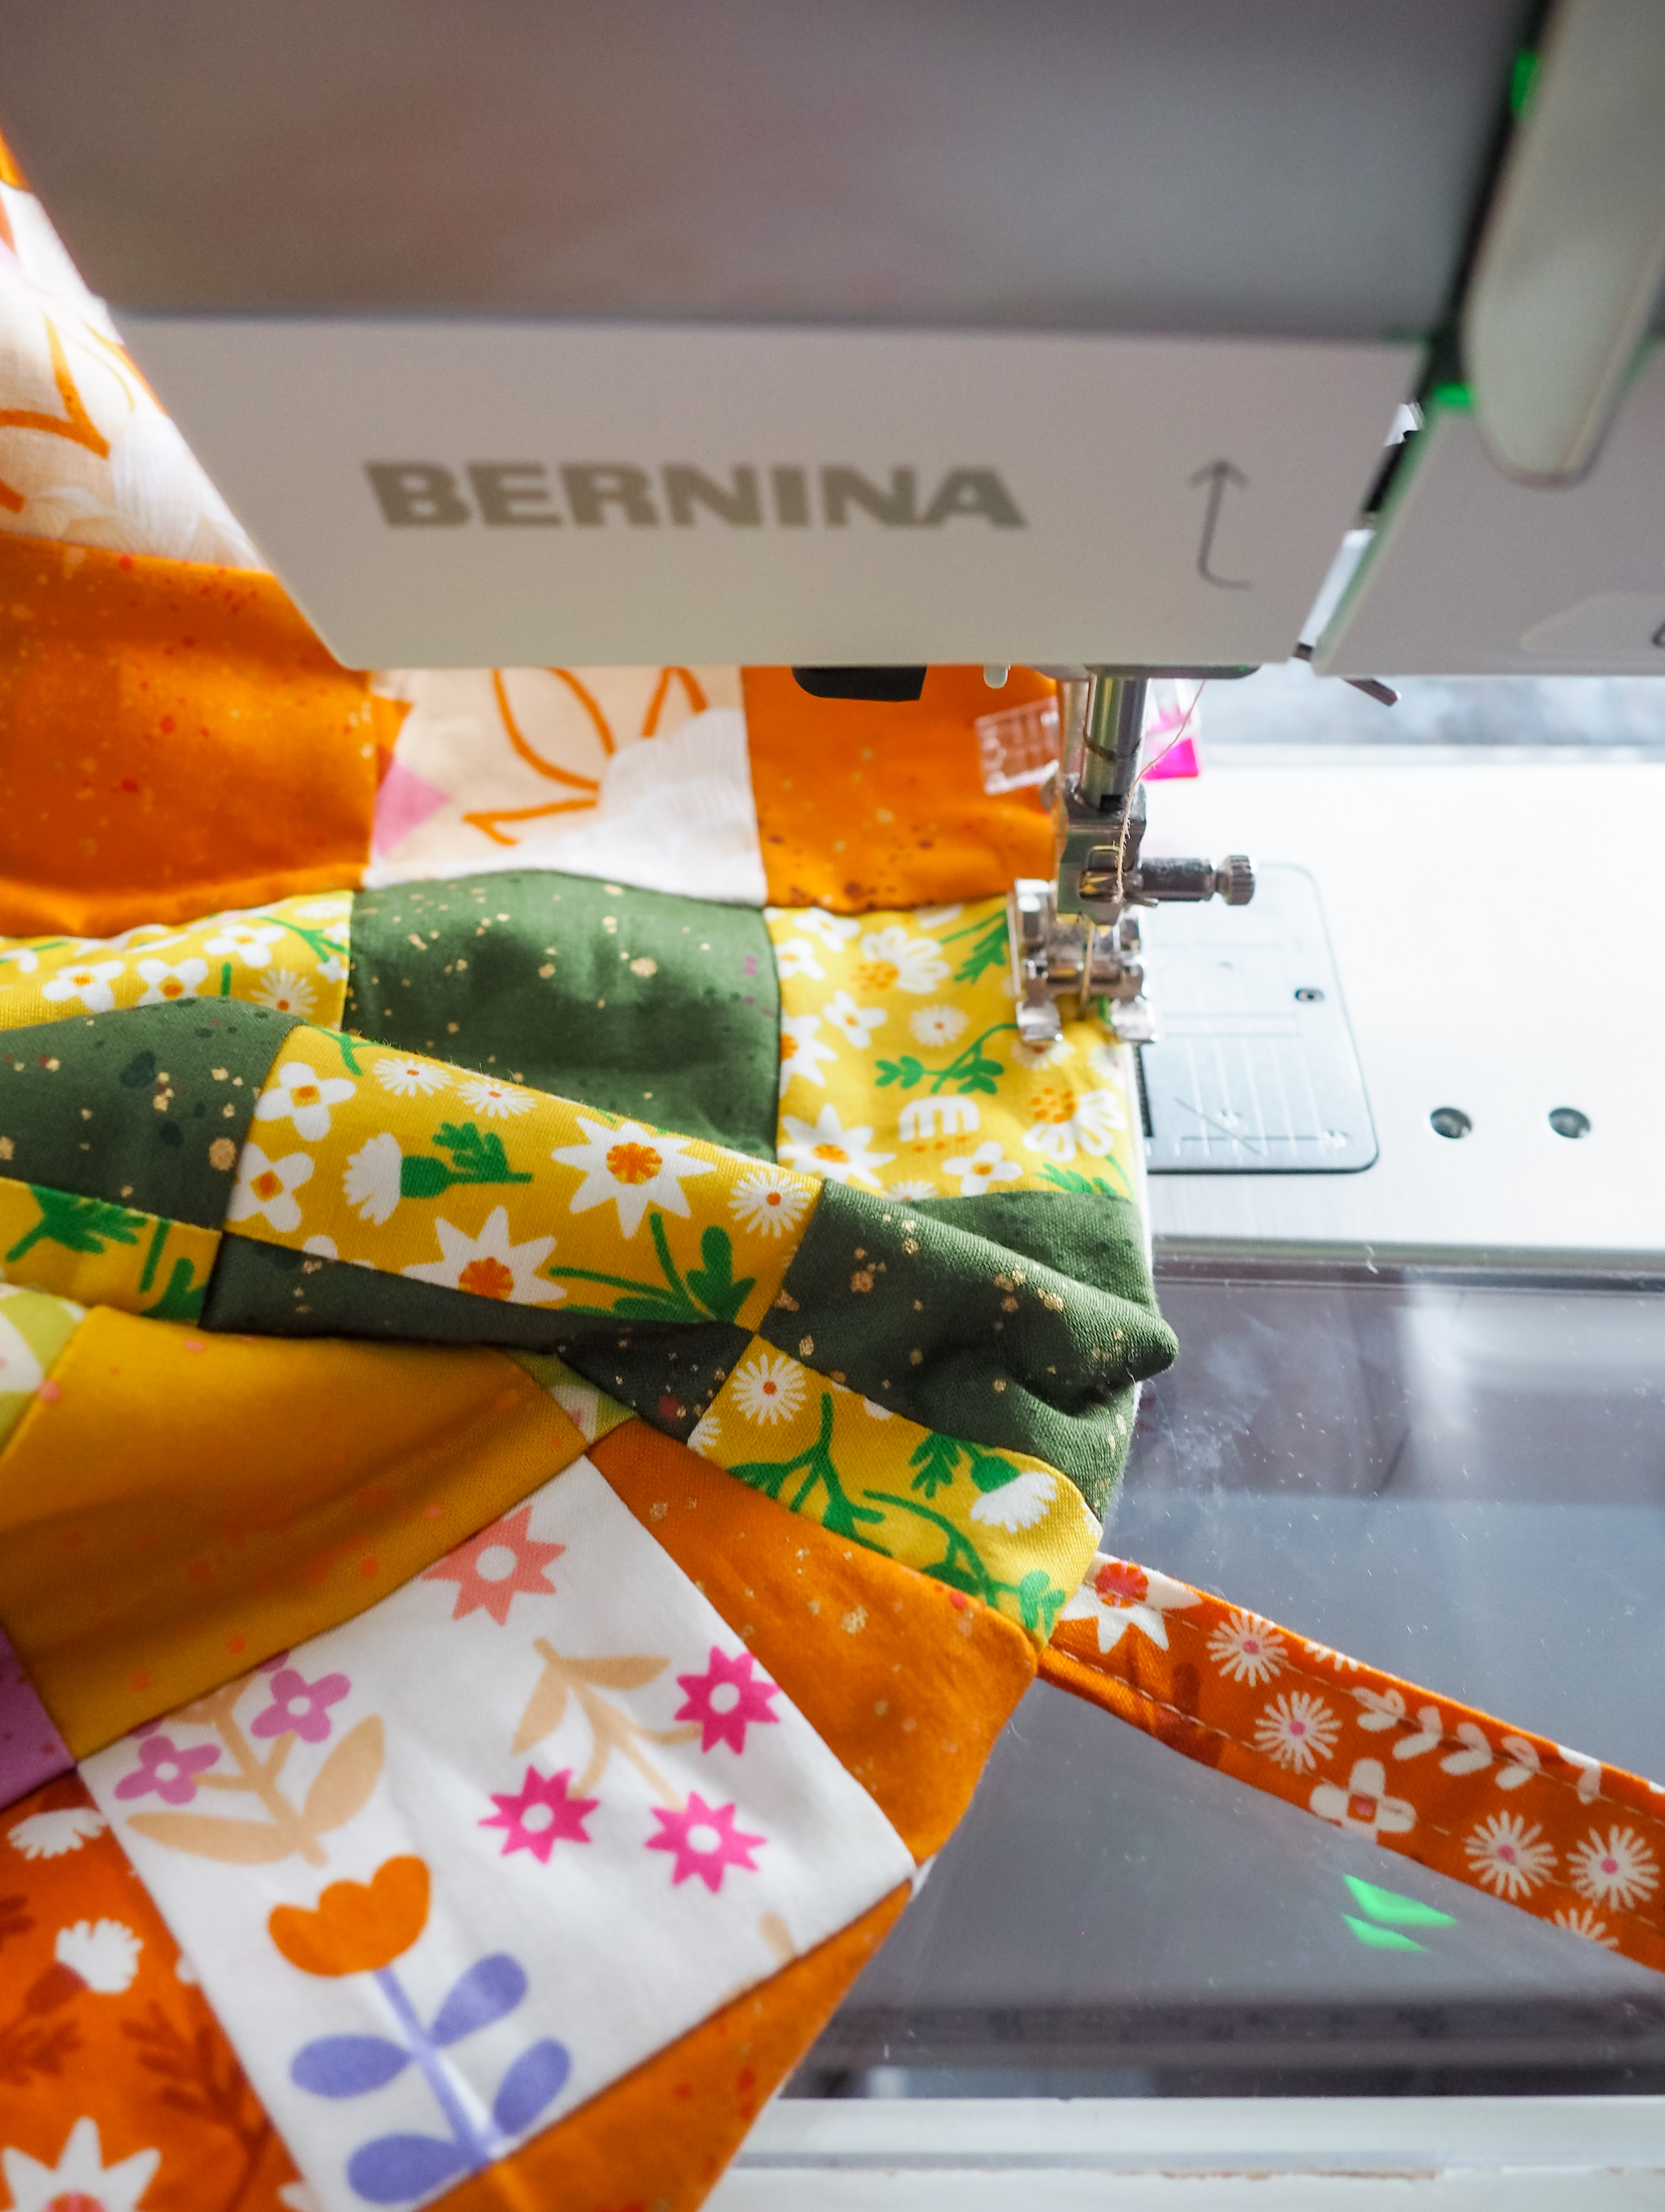
- BERNINA 735
Instructions to Make a Picnic Quilt Carrying Strap
- From your webbing, cut:
- (2) 28″ strips for the adjustable straps
- (1) 22″ strip for the handle
- Lay your first strap piece in front of you horizontally, right side up.
- Take apart the two parts of the buckle. Set aside the outer piece for use in a later step.
- Take the inner piece of the buckle and place it with the top facing down, and the teeth to the left.
- Feed the inner buckle onto the right end of one of the inner strap pieces.
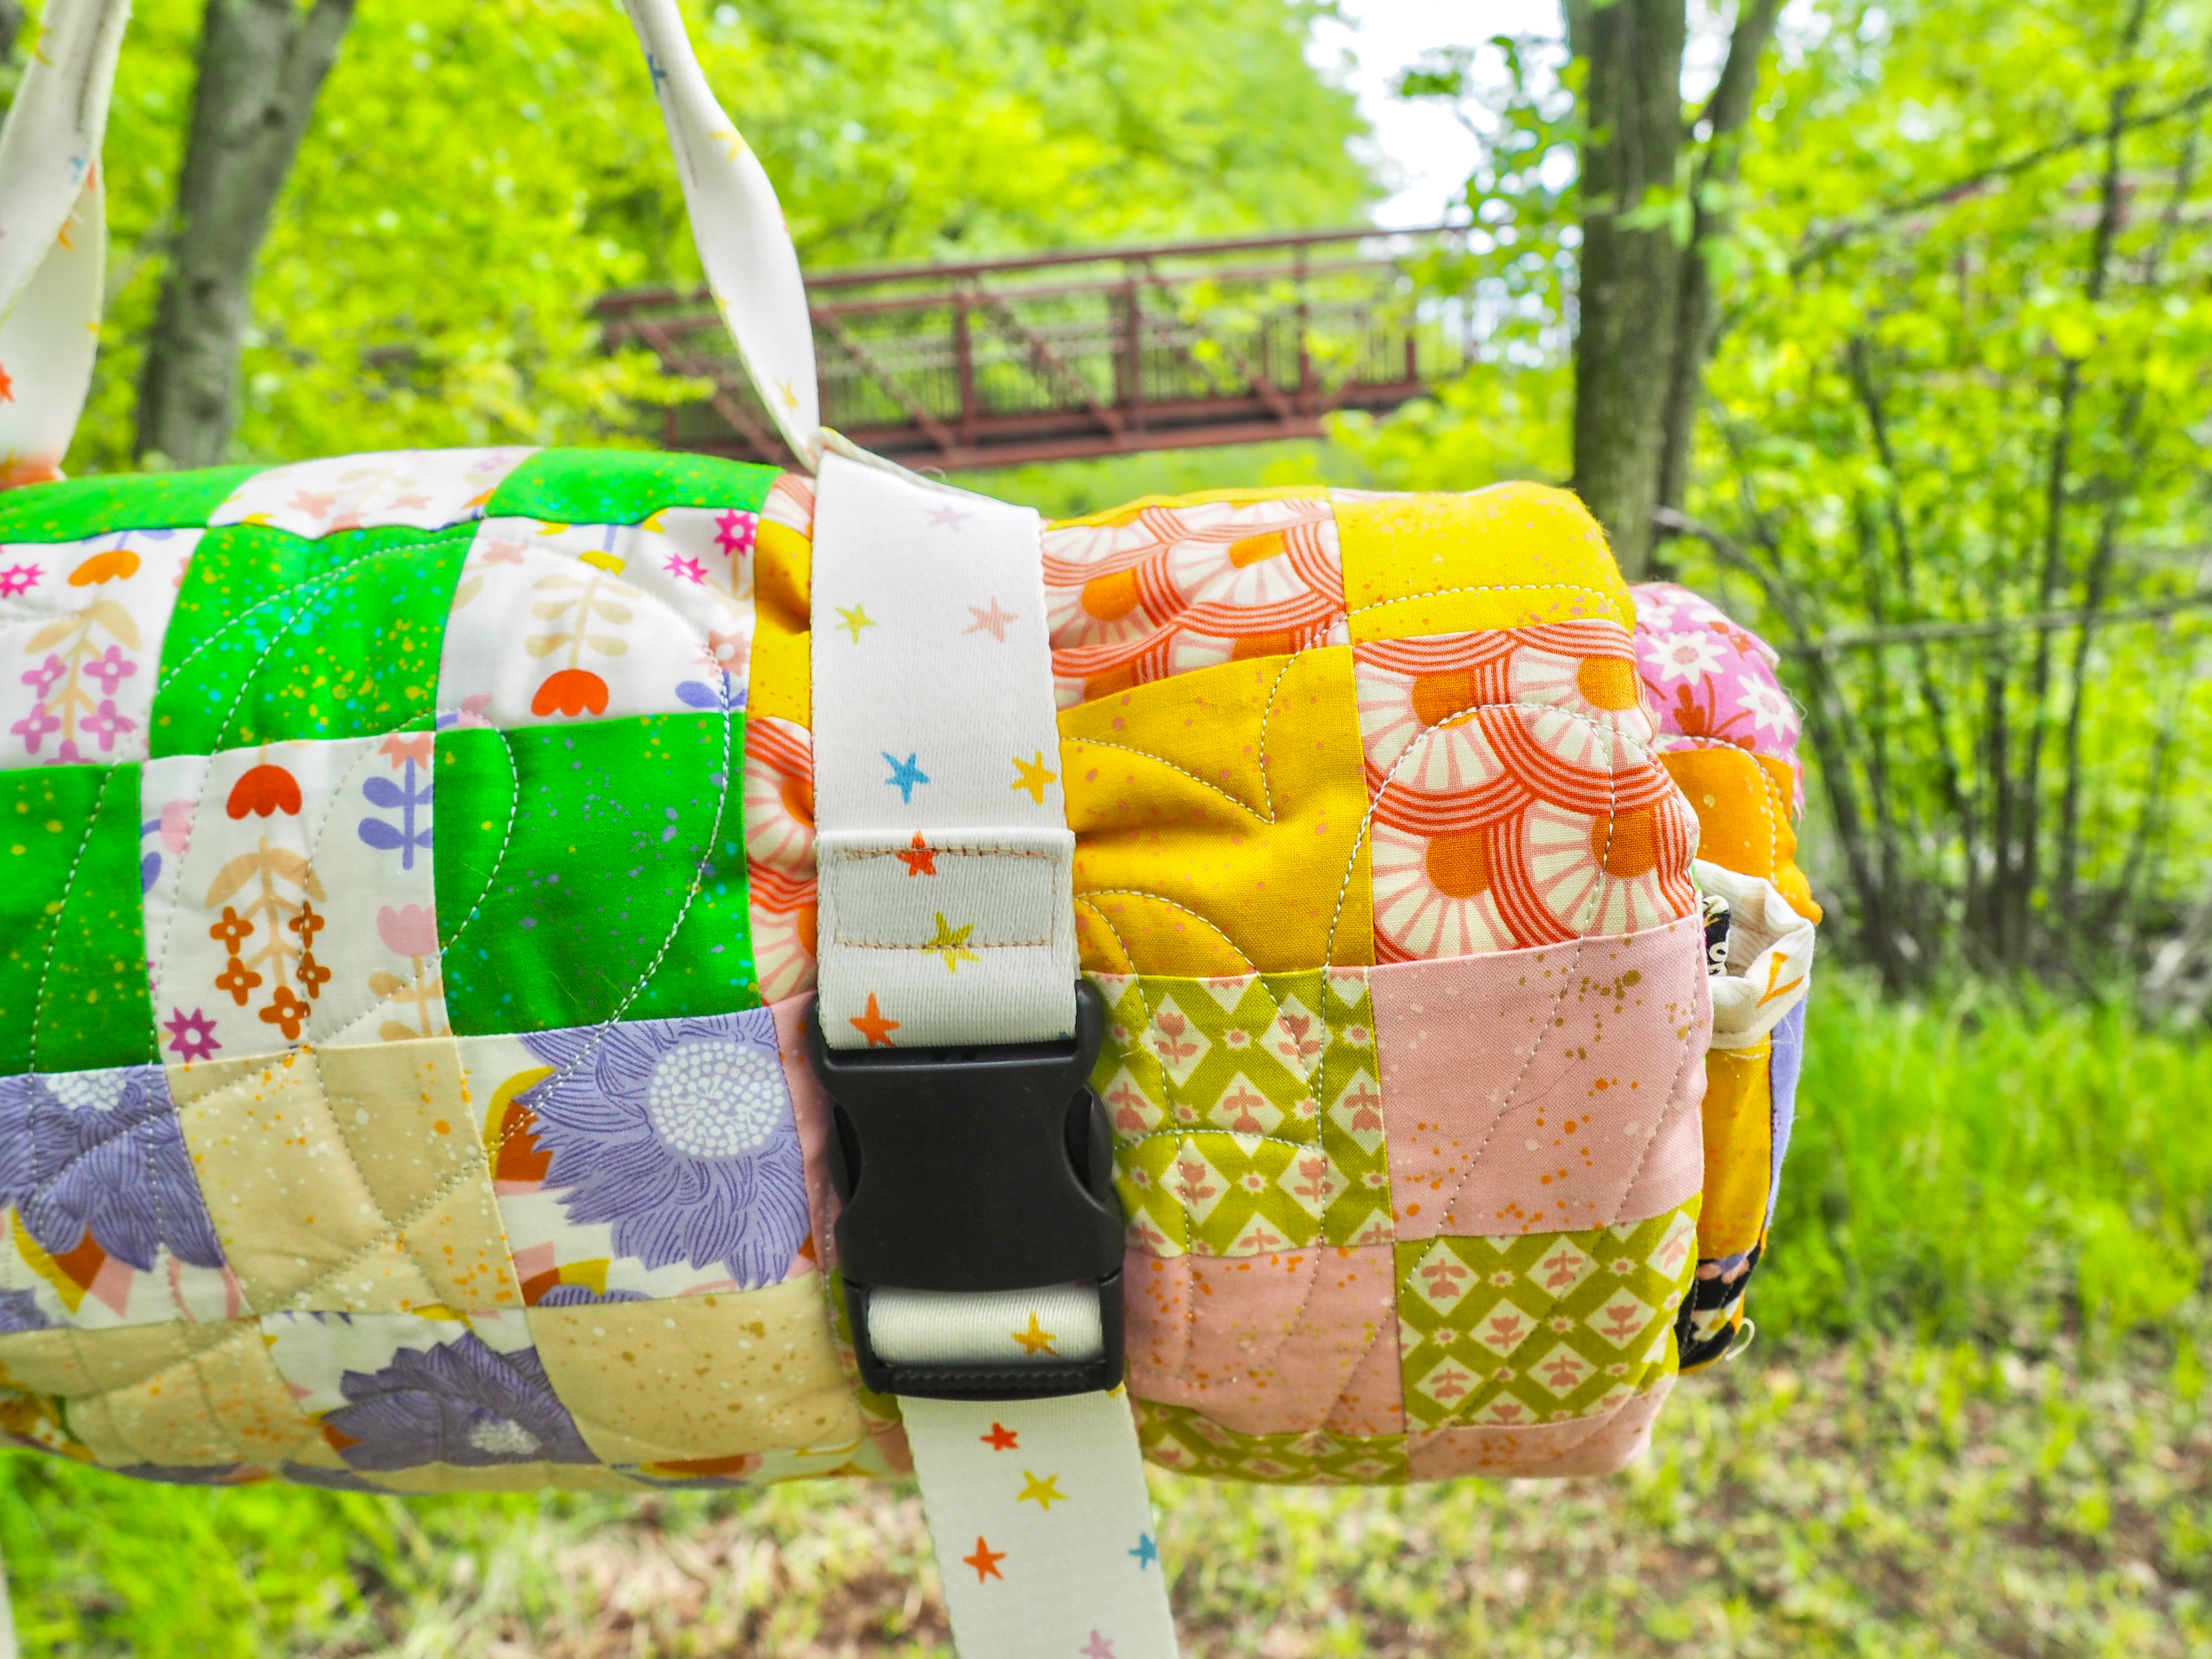
- On the right raw edge of the strap webbing (that you just fed through the buckle), fold the raw edge in approx. 1/2″, then fold again, clip to secure. The raw edge should be encased.
- Sew carefully along all four sides of the folded piece, backstitching at the beginning and end to secure your thread.
- Take the outer buckle piece and attach it to the left end of your strap webbing. Fold the raw edge under approx. 1/2″ and fold again, clip to secure.
- Sew along all four sides, ensuring the webbing is secure against the outer buckle piece.
- Repeat for the second strap piece. Set both aside.
- Fold your handle webbing piece in half, matching up the two raw edges. Make a crease or use a removable marking tool to mark the center of the piece, unfold.
- From the center, measure 4″ to the left and right and make a small mark
- Fold the webbing in half lengthwise wrong sides together, starting at one mark and continuing to the other. Clip to secure in place.
- Using 1/8″ stitch, sew a seam from one mark to the other.
- Grab your two prepped strap pieces and lay them in front of you horizontally, right side up, with the outer clip piece to the right, on strip above the other.
- Measure 4.5″ from the right short edge of the webbing on the strap pieces and make a small mark.
- Take your handle piece, right side up, and place it vertically, crossing over the strap pieces.
- Align the right edge of your handle piece with the mark made on the strap pieces.
- Put the handle piece under the strap piece, then fold it back over the top, and tuck approx. 1/2″ back under. The end of the handle piece should be looped around the strap piece with the raw edge encased. Clip to secure.
- Sew along all four sides, backstitching at the beginning and end to secure your stitches.
- Repeat for the other side.
That’s it! I like to fold my quilt in half, then half again on one side. From there I roll the quilt like a sleeping back and it fits in it’s carrier snug as a bug in a rug.
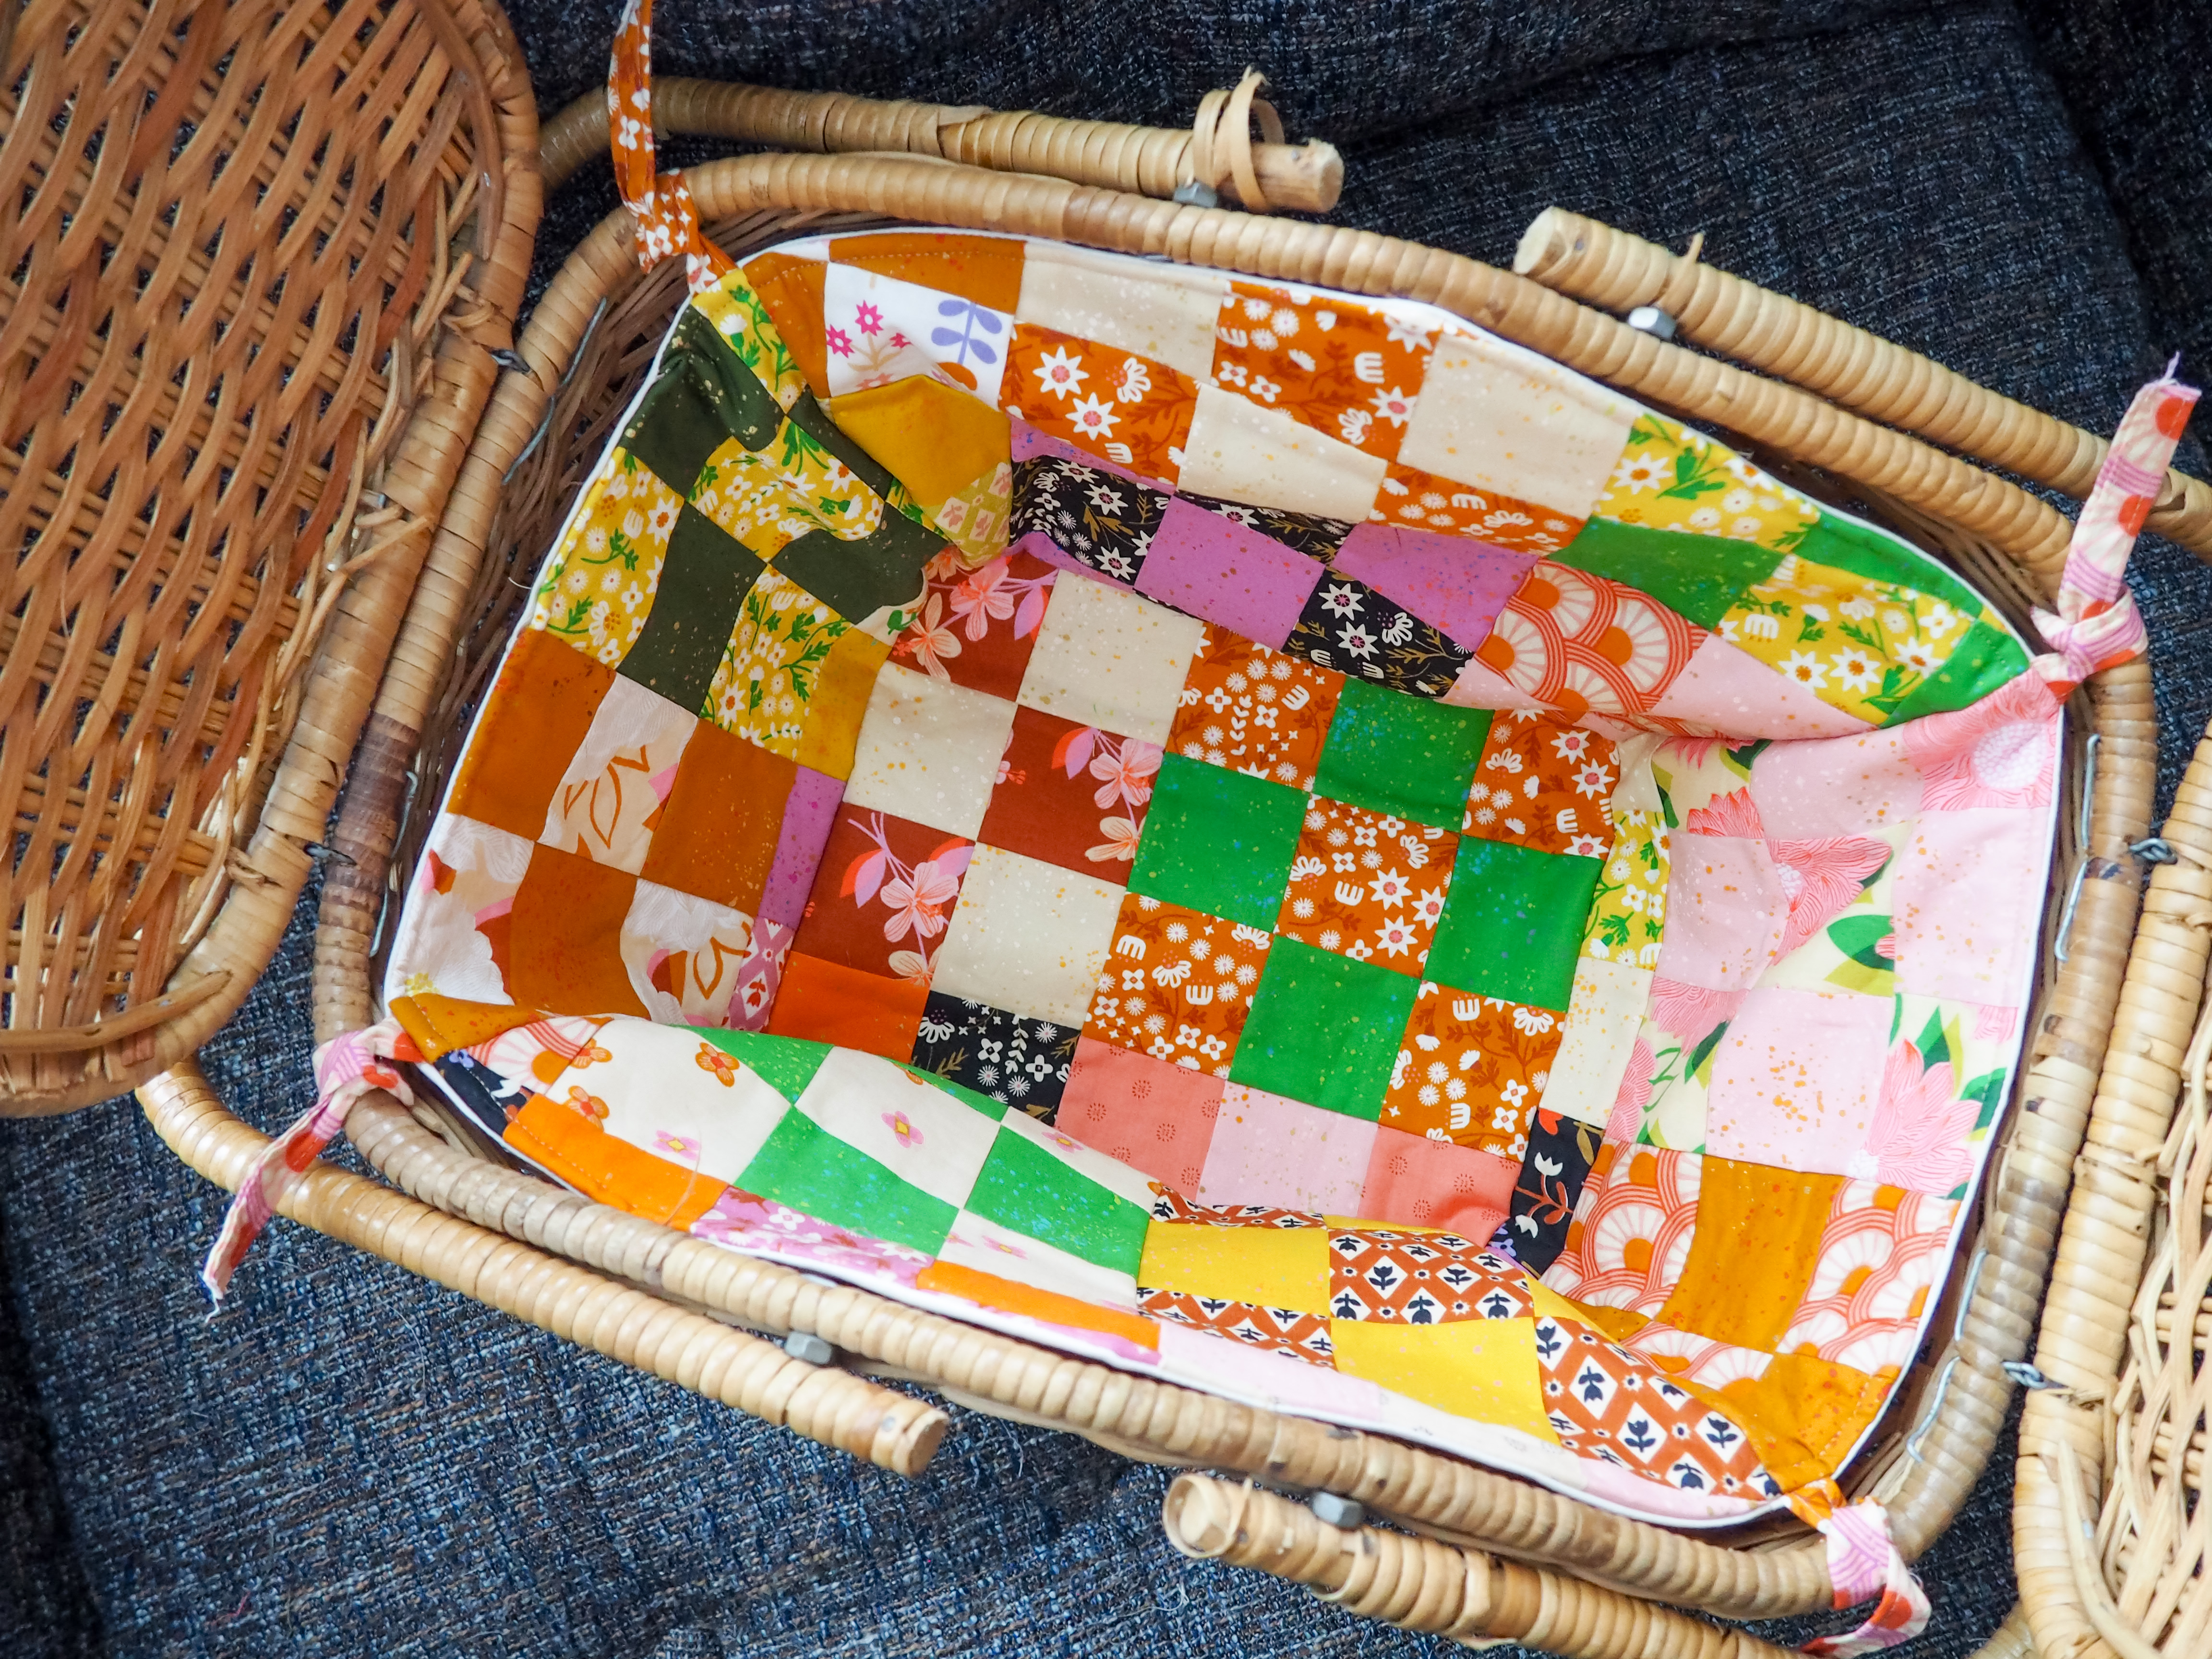
Picnic Basket Liner
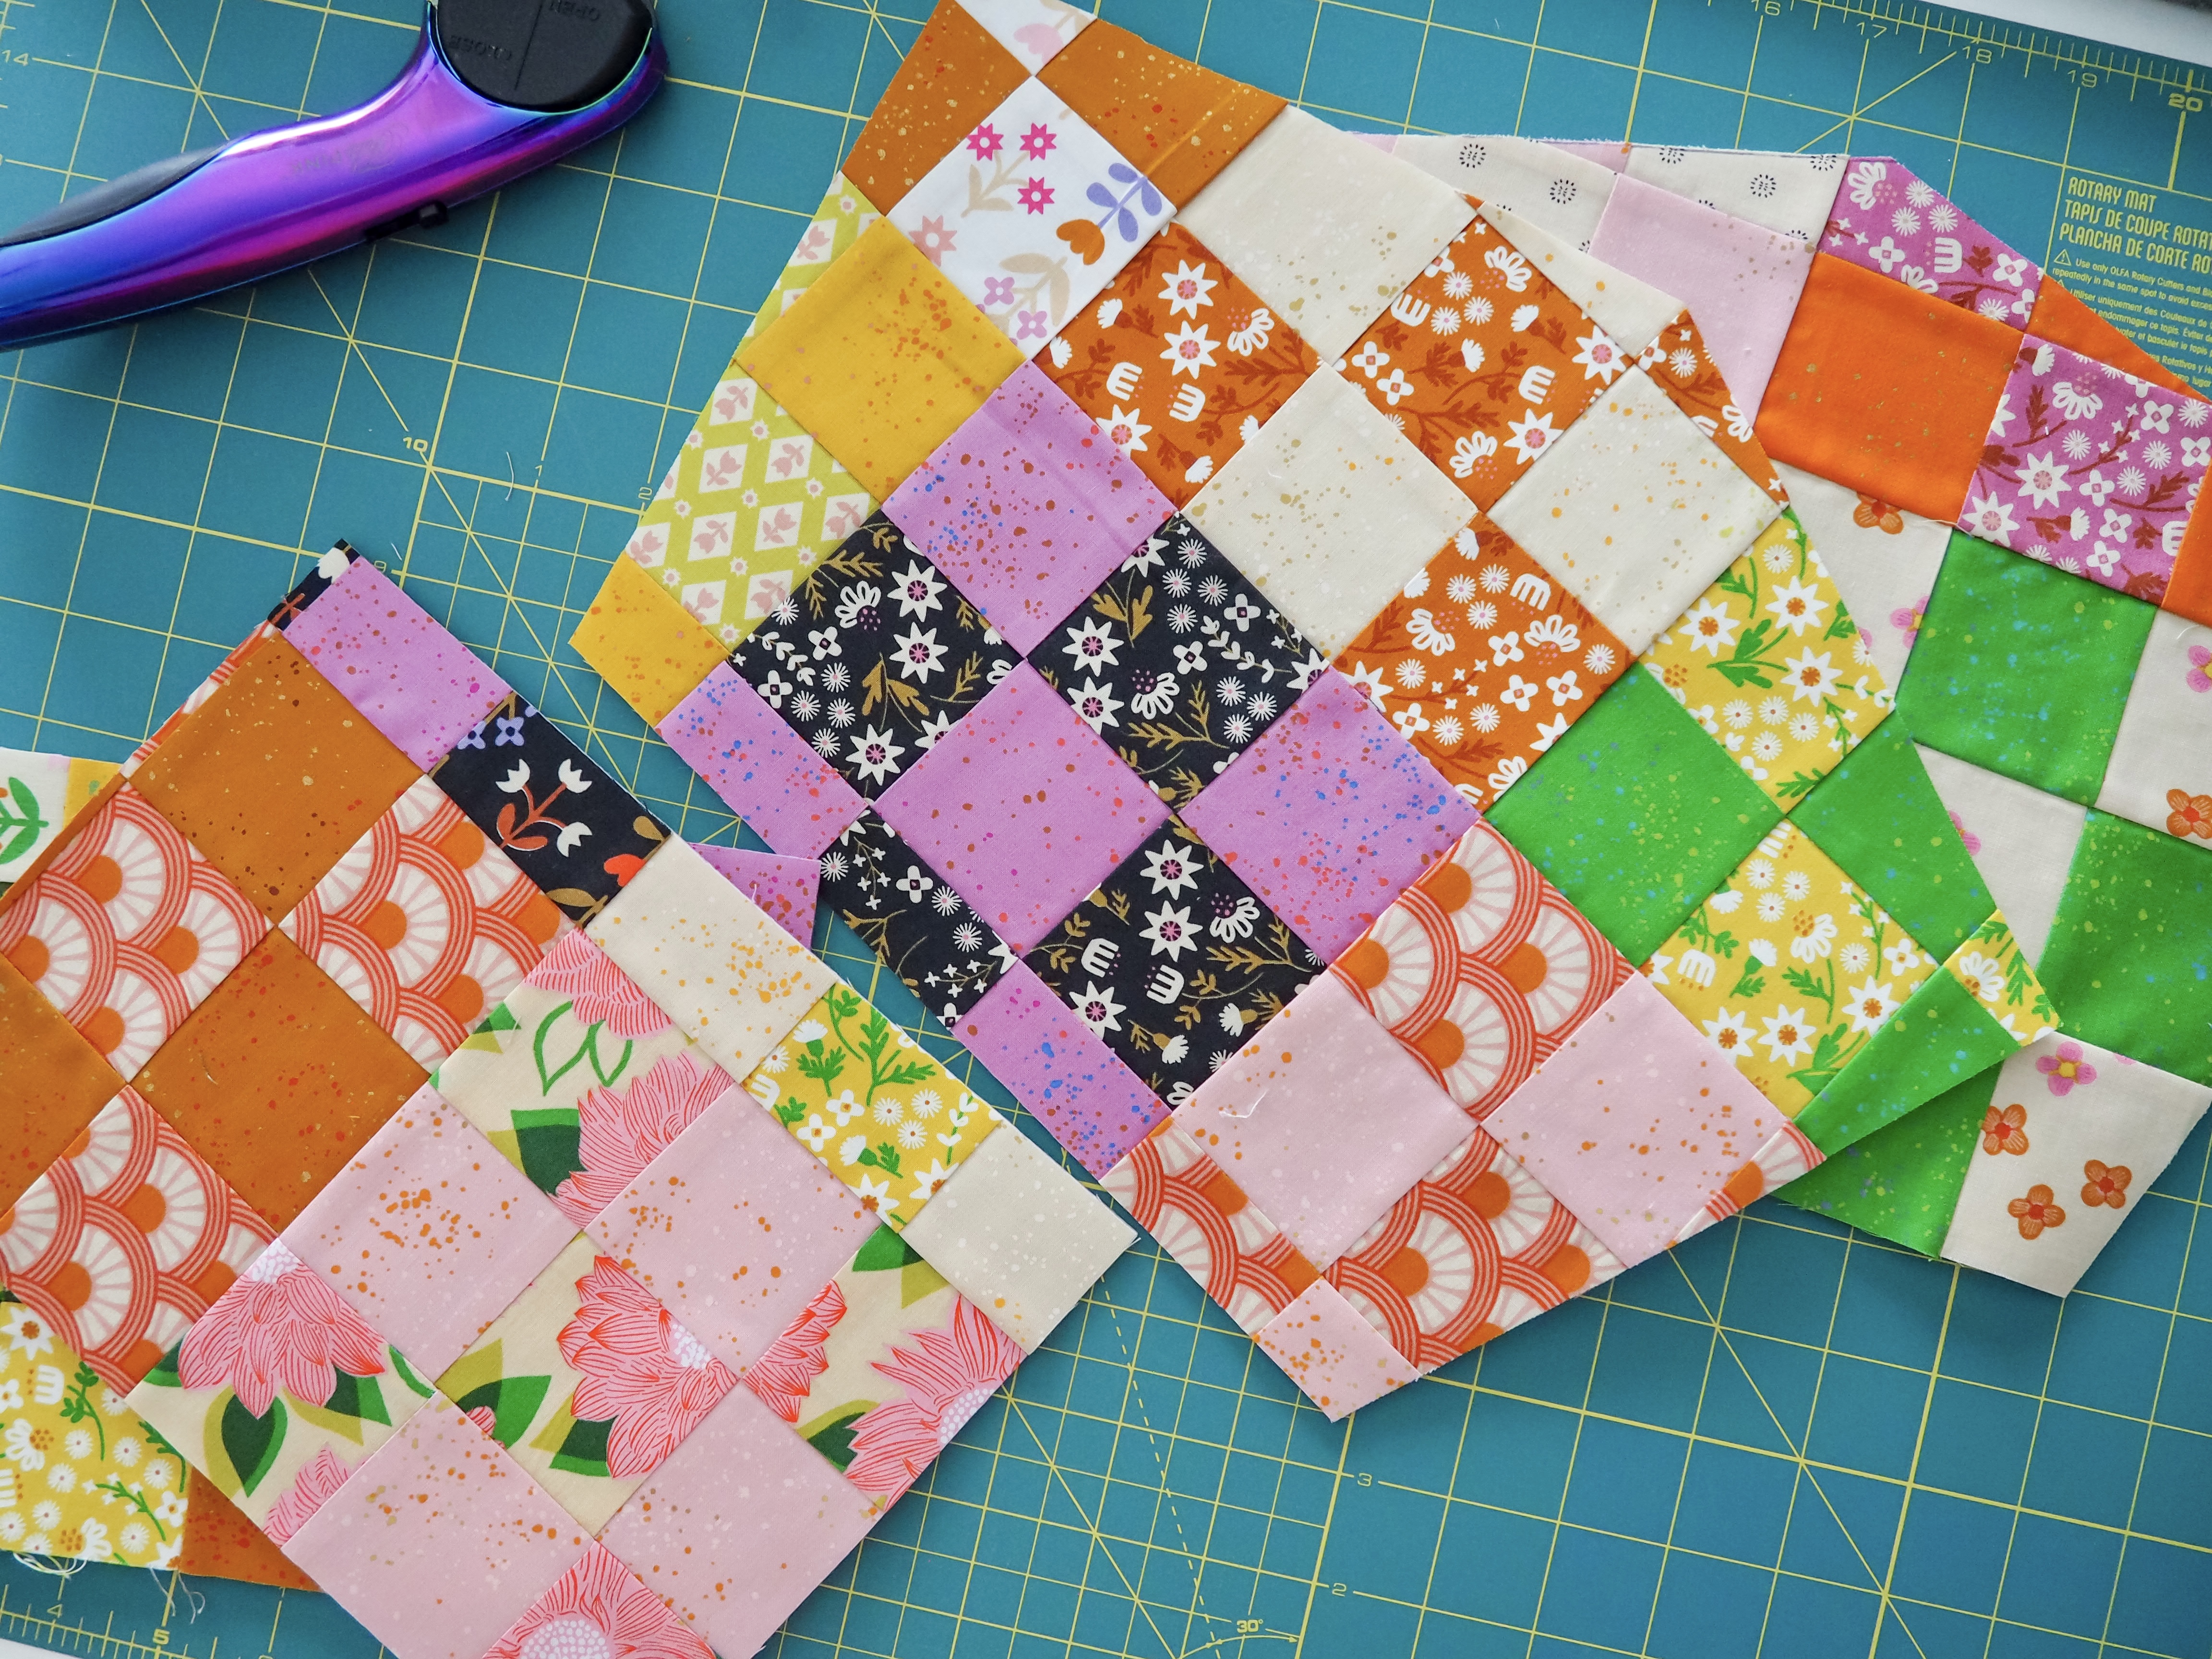
One of the other fun things I did with my scraps was make a matching liner for a vintage picnic basket I picked up. I had a fair amount of small squares left over from my quilt but knew they’d be an adorable pop of color inside the wicker basket.
There’s not a specific pattern for this because each basket is going to be unique. I self-drafted this in a very unofficial, not profesh way and will show you each of those steps!
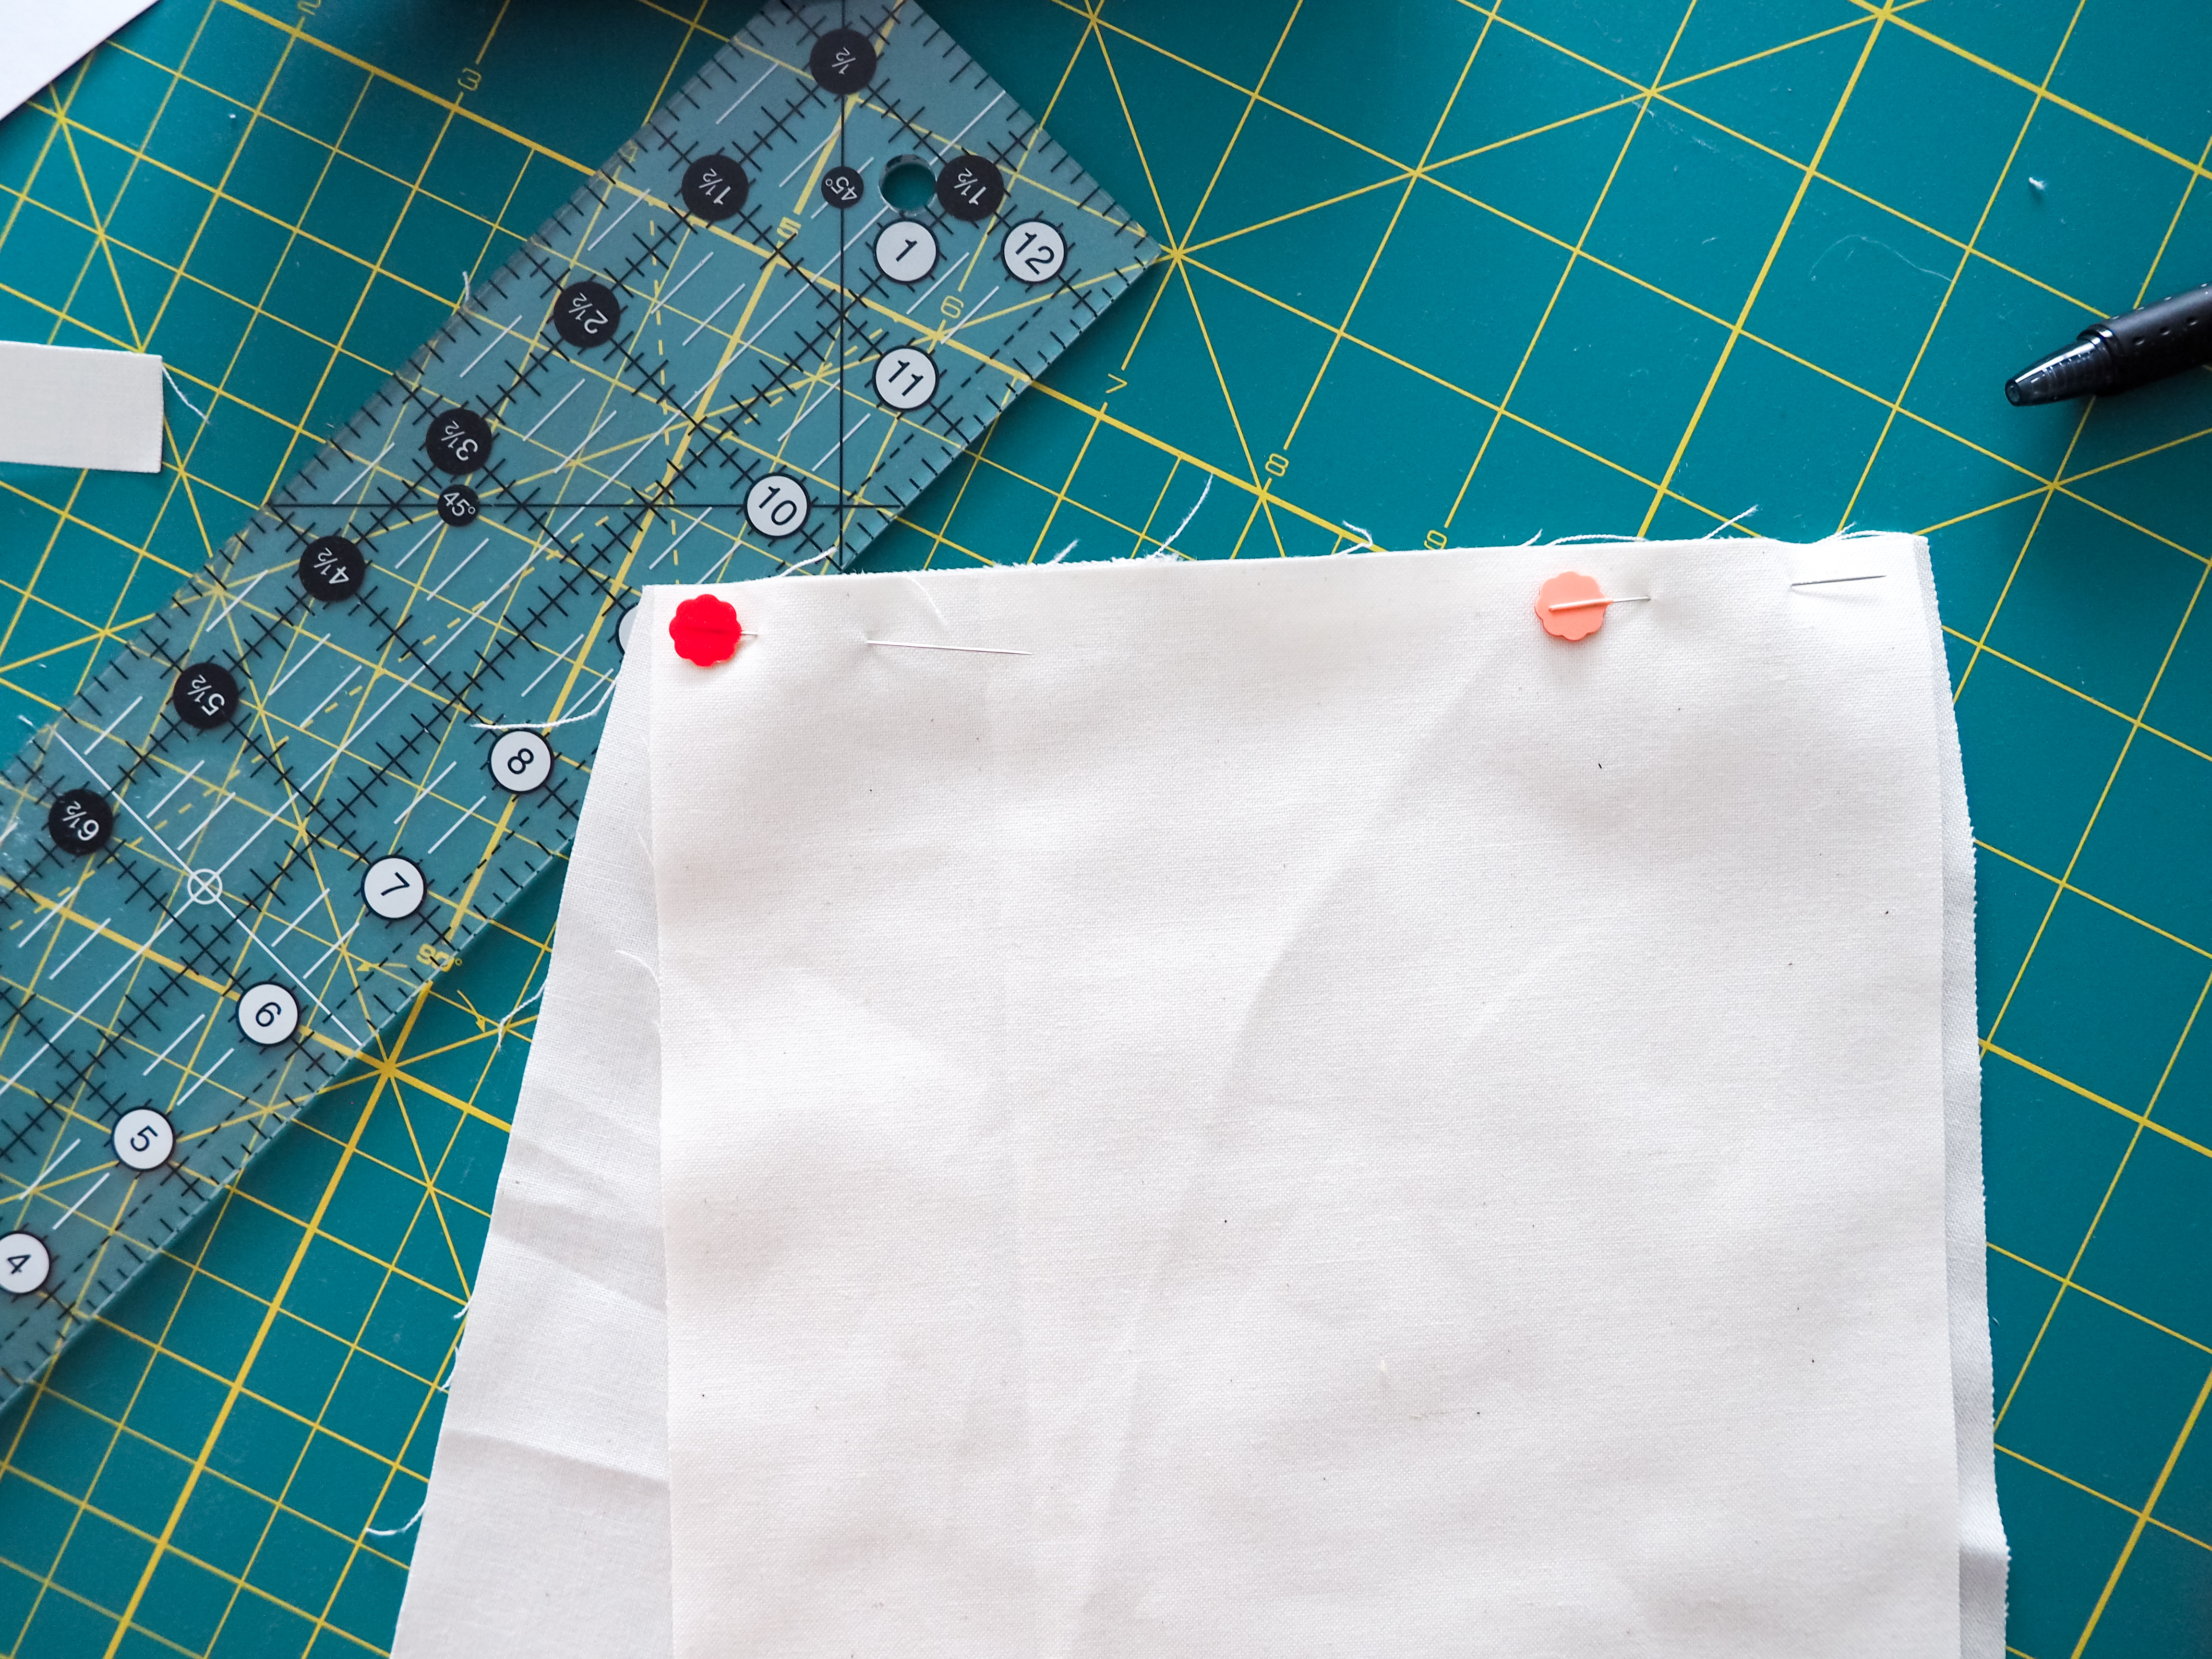
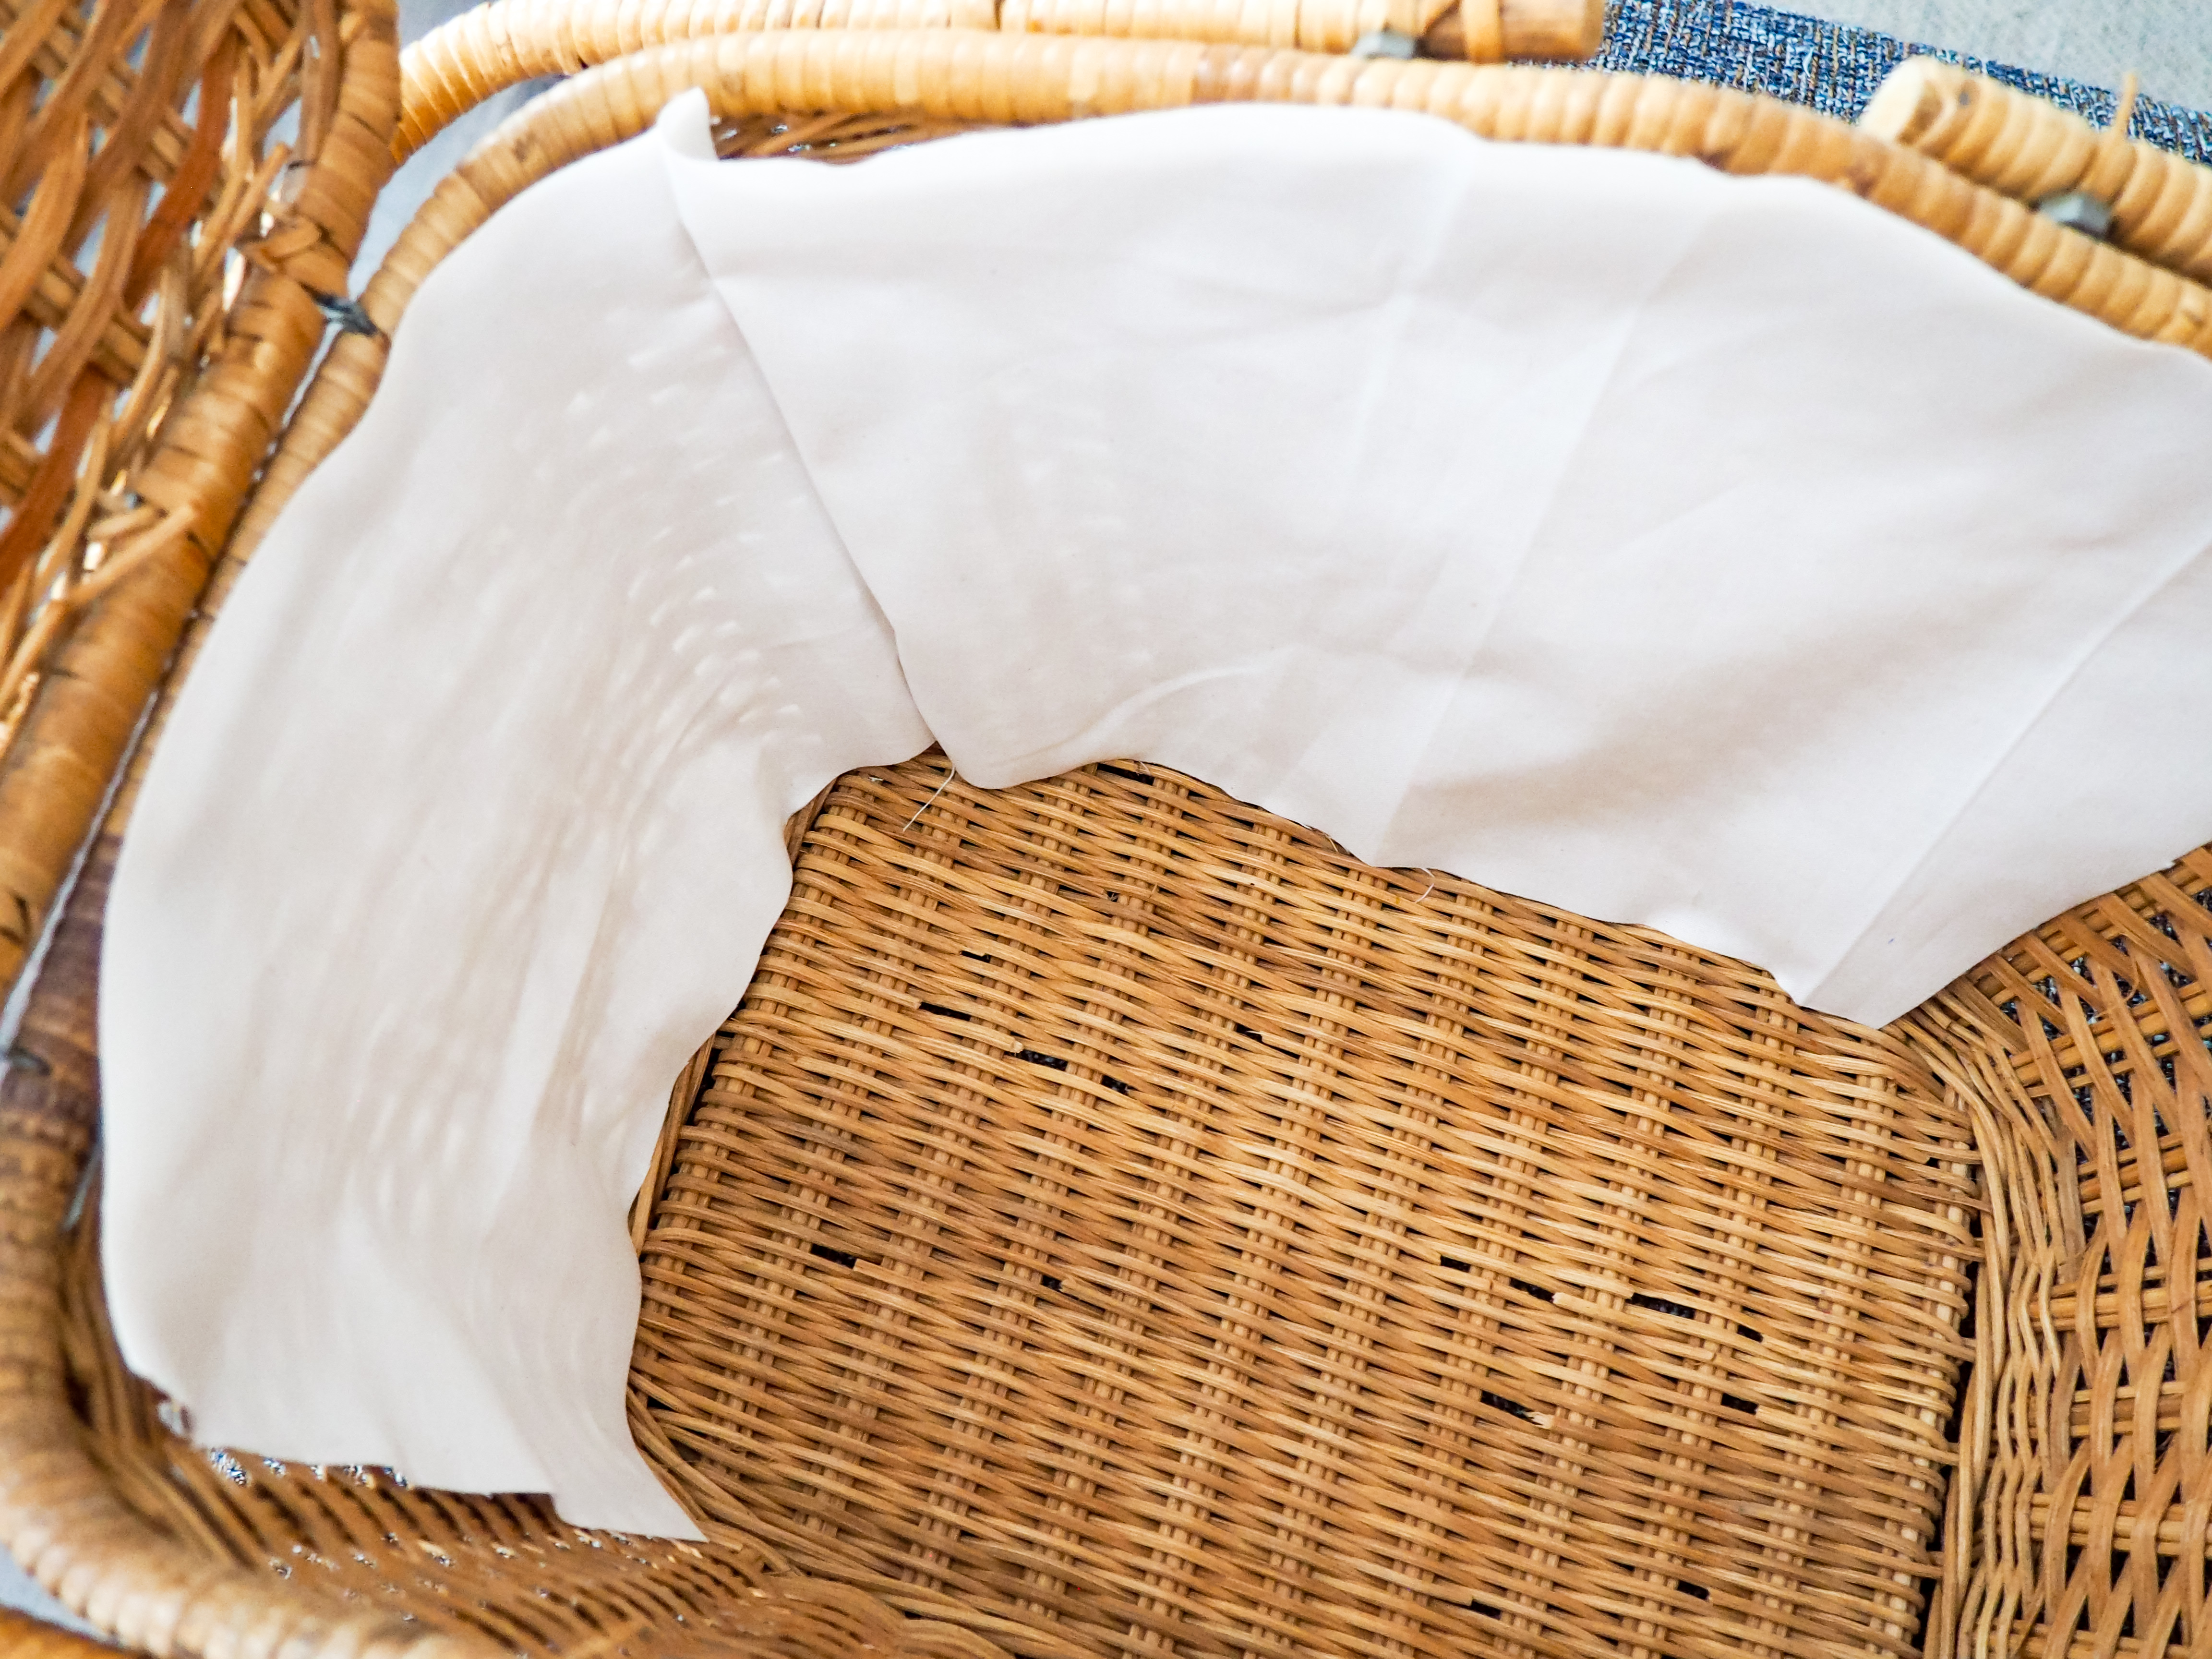
First, I used plain paper to trace a rough outline of each of the four sides of the basket and the bottom. This outline was larger than what I would need for the inside but gave me the general shape for the two long sides, two short sides, and bottom. The extra space helped with the seam allowance and to allow for adjustments.

Next, I traced these shapes onto a basic, neutral-colored cotton and cut the pieces out. The neutral fabric will be on the outside of the basket liner, generally not visible. I then placed the five pieces roughly in their place inside the basket and used pins to start creating the shape. I trimmed the excess off and set the pieces aside.
Next, I attached the pieced blocks to fusible fleece pieces, slightly larger than the five pattern pieces from above. The pieced blocks will be the lining of the basket liner and what you see when you open your picnic basket. Using the neutral cotton as templates, I cut matching shapes from the patterned fabric.
Working with the neutral fabric first, I first pieced the four sides together, then attached the bottom. I did the same with the patterned pieces, ensuring the seams were sewn on the wrong sides of the fabric.
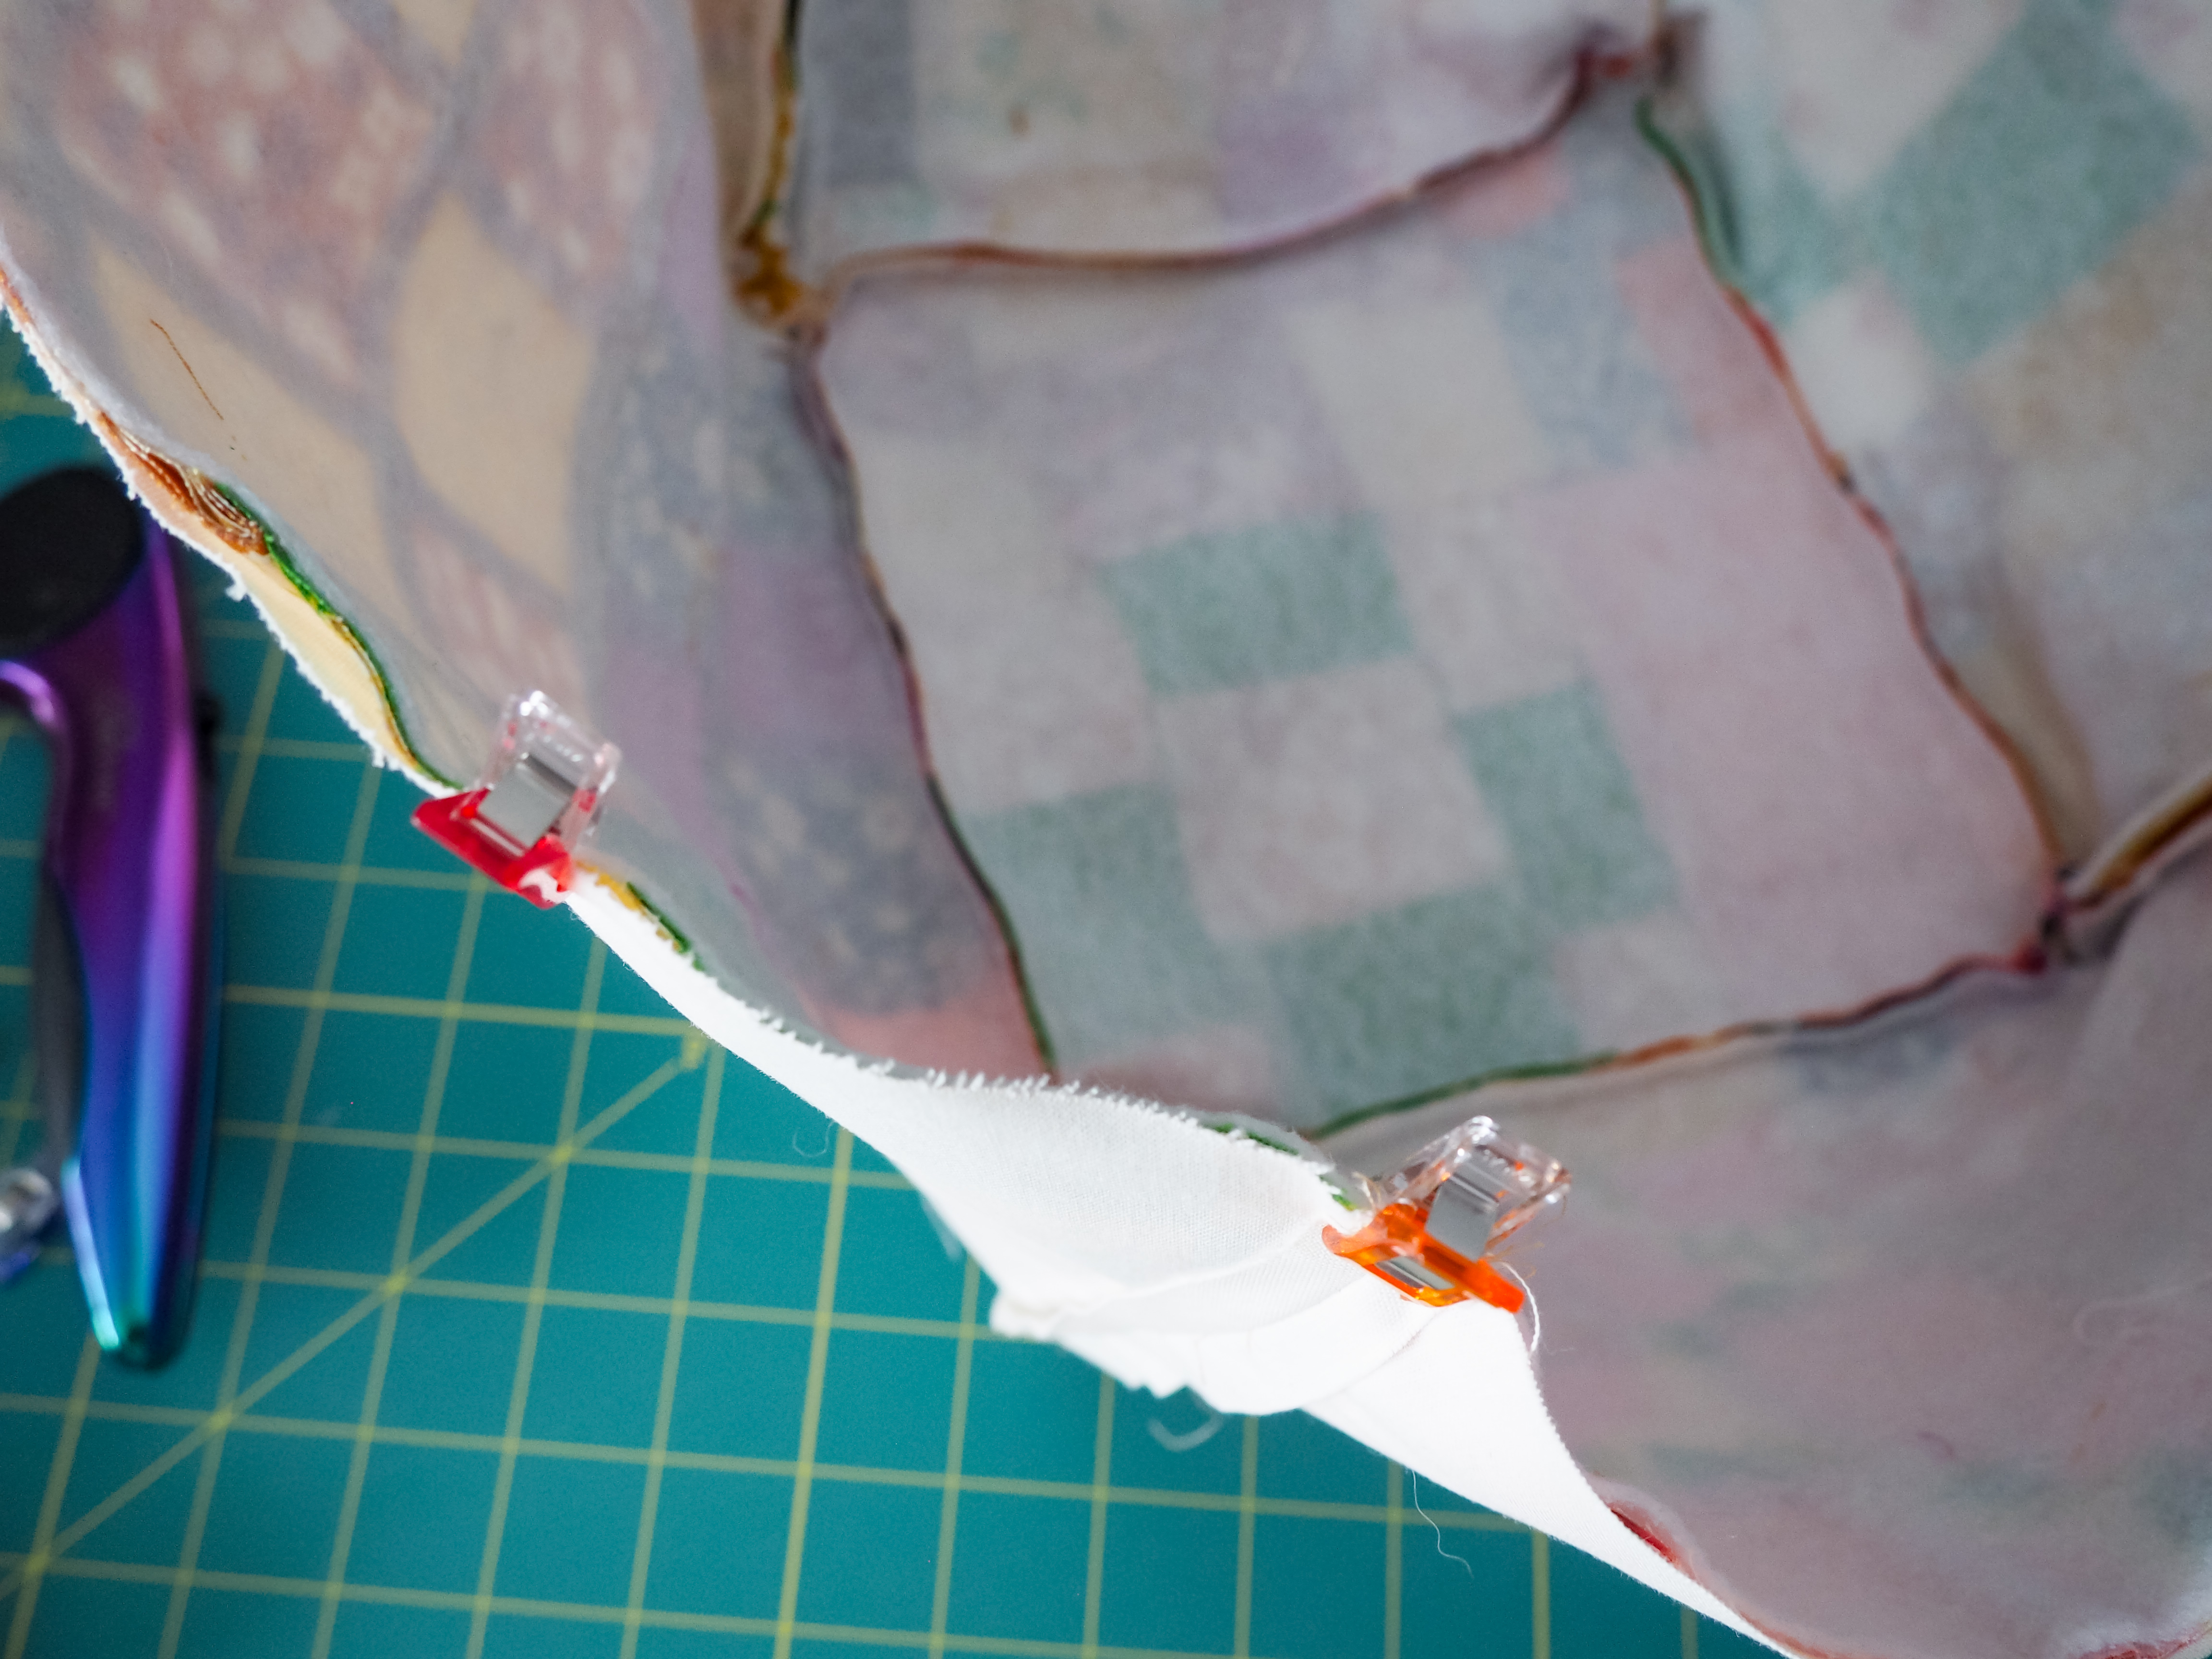
I had some extra binding pieces from my quilt that I sewed into strips and sub cut into (8) 5″ lengths. To attach the, I placed the patterned lining piece in front of me, with the seams on the outside. I pinned two of the 5″ long strips to each corner, aligning one short raw edge of the strips with the raw edge of the lining. The length of each strip was hanging down into the lining piece.
To put it all together, I placed the neutral exterior piece inside of the patterned lining piece so that the right sides were facing together and each of the corner seams were aligned. I sewed along the top edge, leaving a gap to turn right side out.
The last step was to turn right side out, press, and then top-stitch along the edge! I used the two ties on each corner to tie the lining in place around the wicker of the basket.
I hope you enjoyed making your own picnic quilt as much as I have! There is so much you can do to use up fabric scraps in addition to the ideas above. I can picture cute matching napkins, silverware sleeves, a drawstring bag, and more!
As always, I’d love to see what you make. Please tag me on social media at @aandcowi.