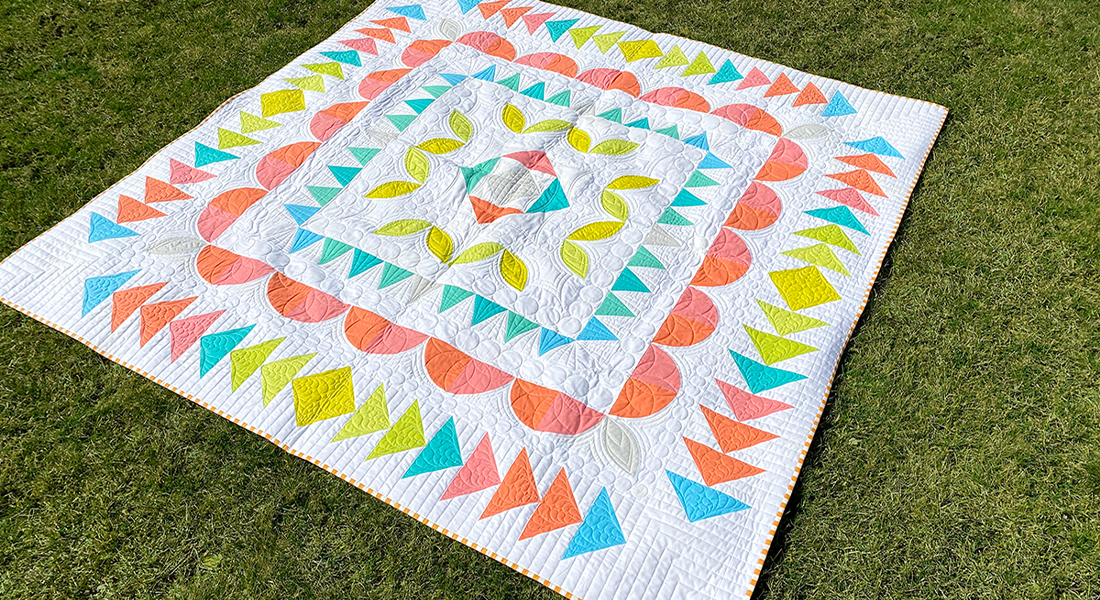
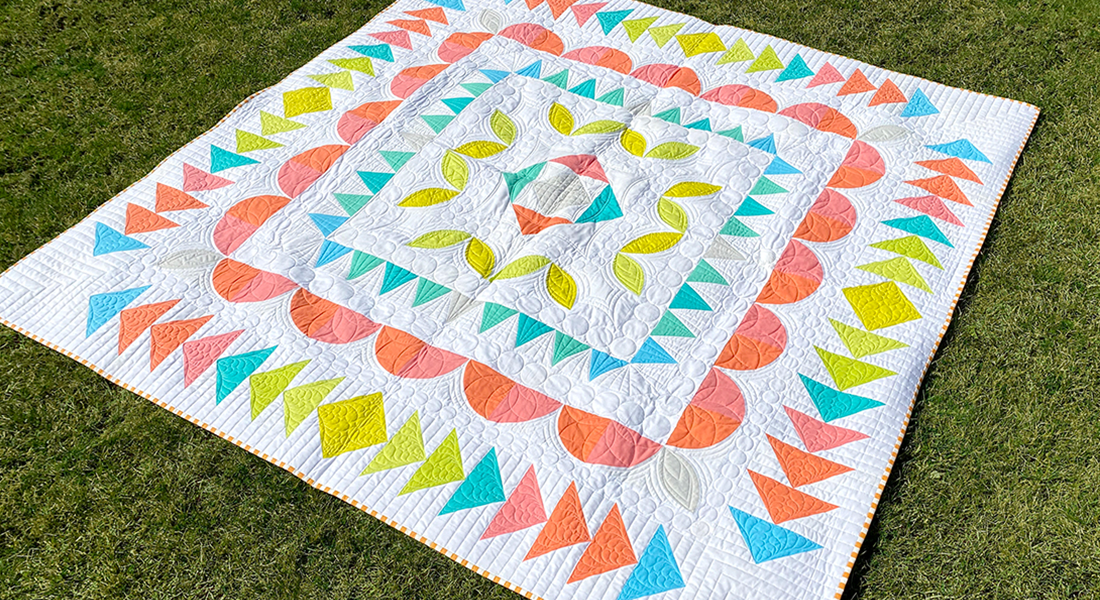
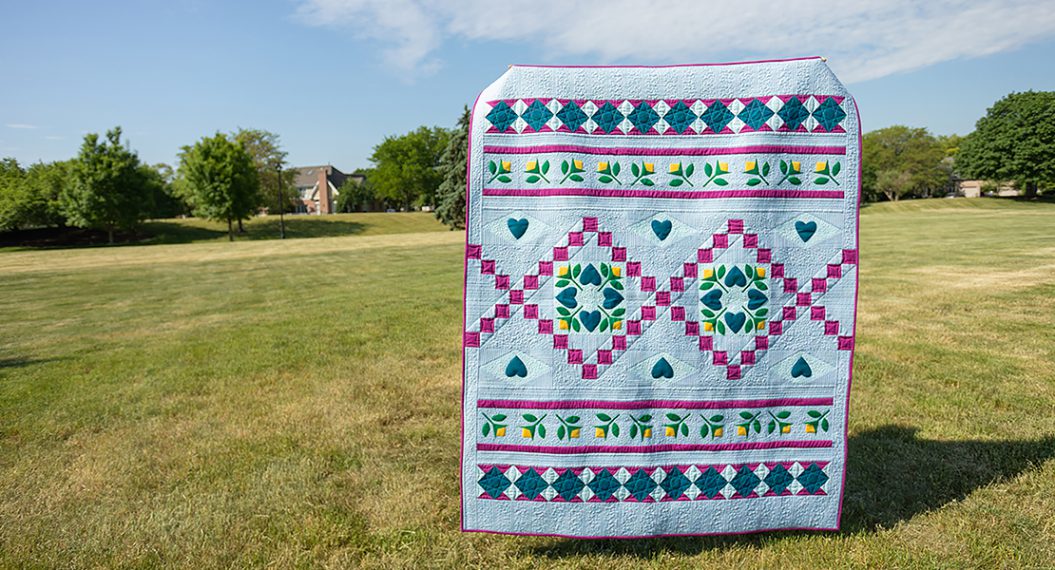
Passiflora Quilt Along, Part 3: Round One Medallion
Welcome back to the Passiflora Quilt Along! If you’re just joining in, you’ll want to visit the previous posts in this series to catch up:

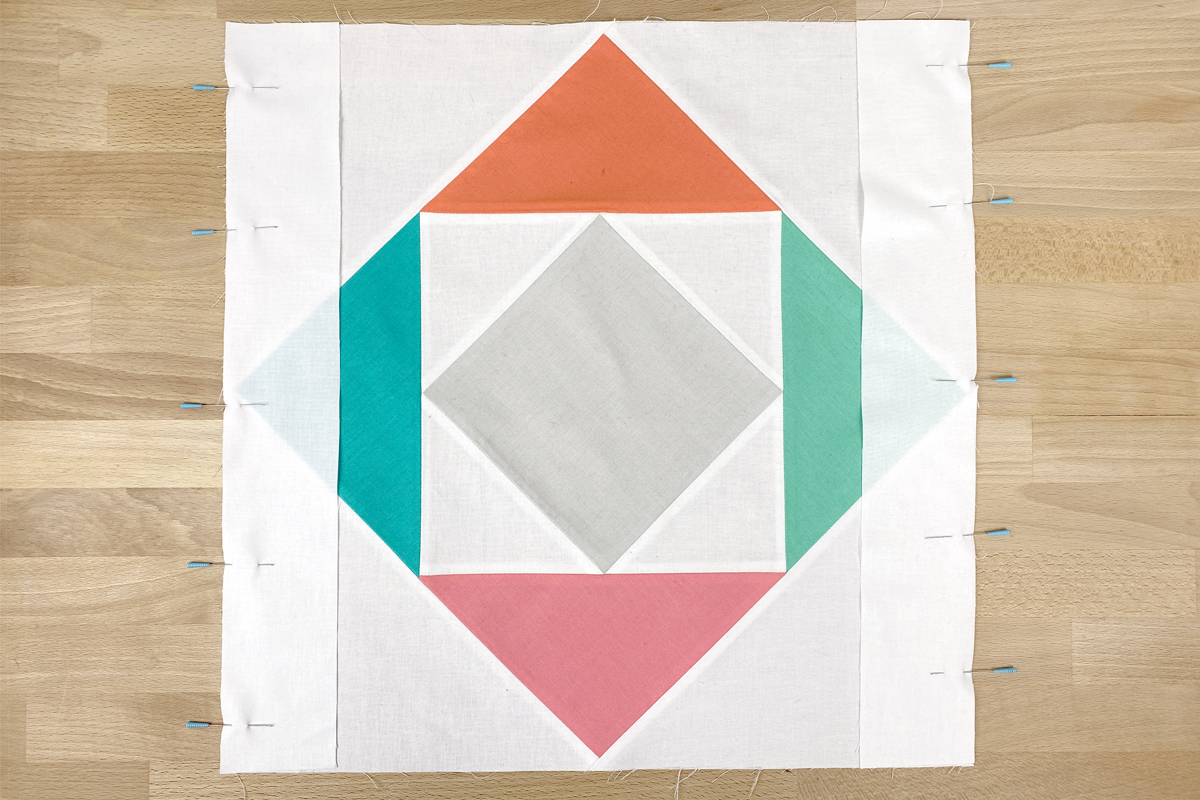
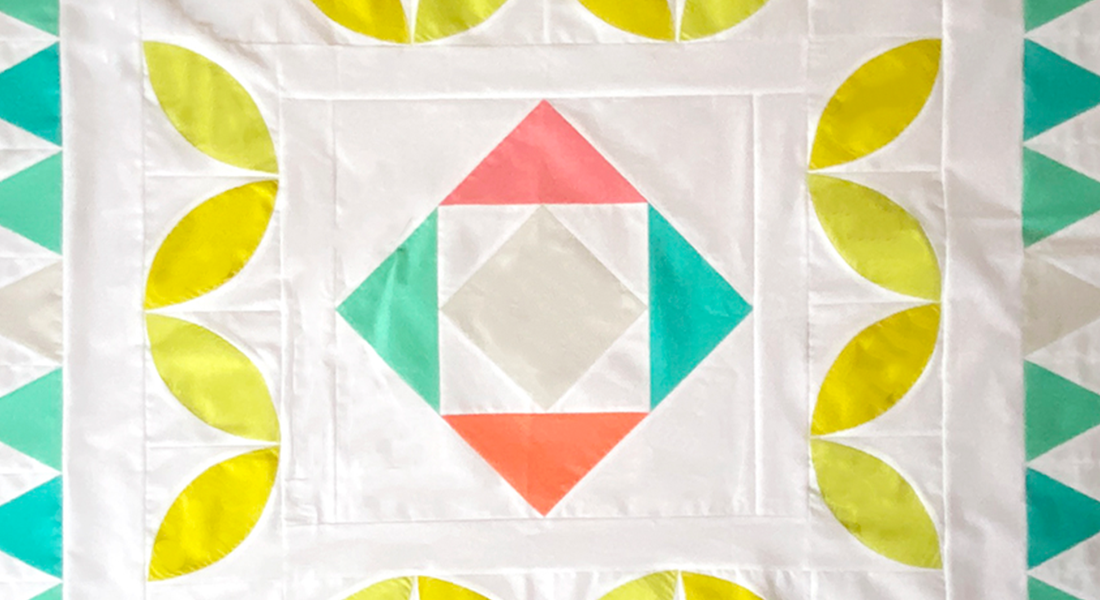
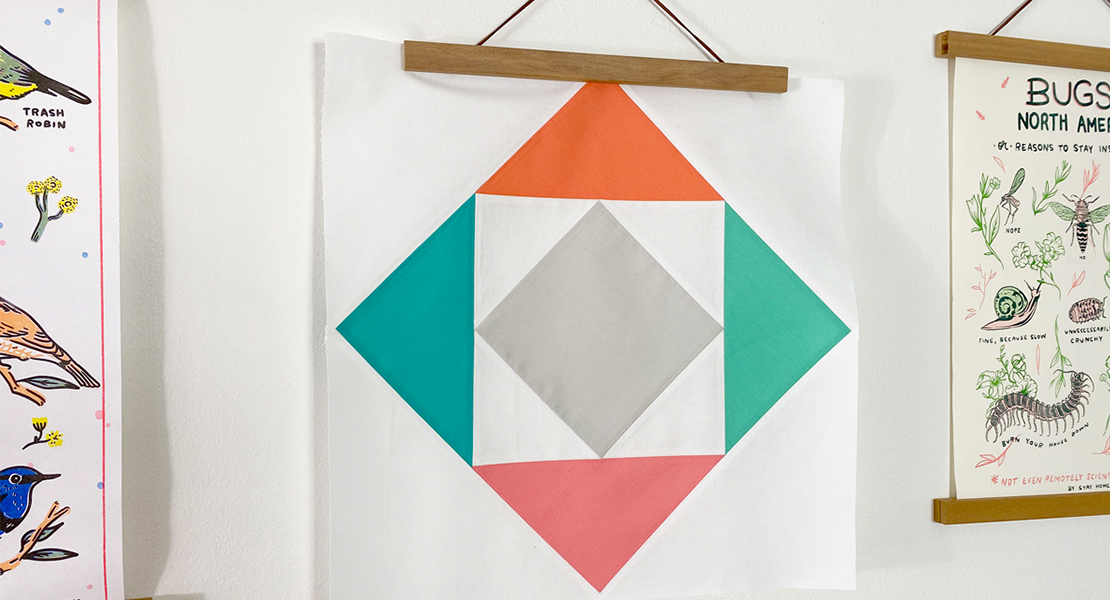
This month we’ll be creating the first “round” of our medallion and building on from the center block we created last month.
Last month I also noted some general supplies/tools you’ll want on hand for patchwork. From that list (plus a couple extras), there are a couple I want to really highlight this month:
- Stiletto – This is, by far, the most valuable tool in my kit when it comes to piecing curves. A fine-point stiletto can be used to hold your curves in line right up to your needle. Using your hands is not only risky (we’re not trying to end up in urgent care here), but realistically, you just can’t hold things as precisely as this tool can. If you don’t have a stiletto on hand, you could use some sharp pointed tweezers, but I highly recommend investing in one of these tools.
- Starch-alternative pressing spray – Piecing curves can be tricky. There is so much opportunity for stretching and warping along raw curved edges. Pressing your fabric prior to cutting with a starch-alternative spray will help your pieces retain their shape. Pressing your blocks after piecing with this spray will help them smooth out flatter.
- Template plastic or cardboard – I recommend tracing our templates onto a sturdier material. I personally prefer a thin cardboard for this because it is a material I already always have around at home, it doesn’t slip as easily against the fabric, and is a bit thicker which means you could more safely use your rotary cutter against it. Personally, I printed the template out, glued it to cardboard, and then cut out my shapes.
- 28 mm rotary cutter – The standard 45 mm rotary cutter is great for cutting straight lines but cutting curves can be a bit trickier. Try using a small 28 mm rotary cutter for cutting out our shapes for these blocks! The smaller diameter blade makes maneuvering curves a bit smoother.
- An acrylic ruler with a 45 degree angle line – Lots of quilting rulers have a 45 degree angle marked out. I recommend a square ruler for this, simply because they’re easier to turn and work with. Be sure your ruler is at least 6” x 6”.
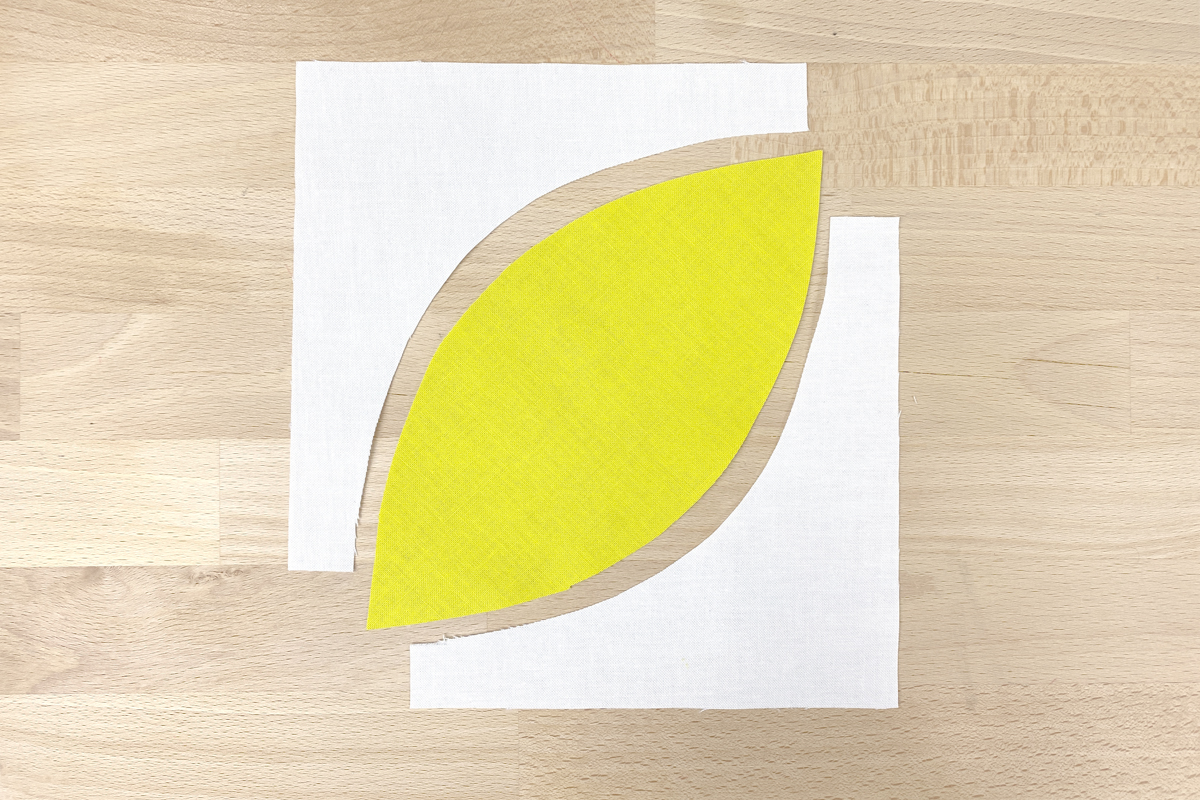
To create these orange peel blocks, you will trace and cut templates for the “peel” shape and the background. I have intentionally built in a larger seam allowance around the outside of the background pieces. This way, no matter how perfect or imperfect your curved piecing ends up, you will have plenty of wiggle room to square up and trim down to the appropriate finished size.
Download the PDF pattern template HERE.
- Cut all fabrics

Three fabrics/colors are used to construct this row. Cut your fabrics to the following:
- Color #3 (Pear)
- Eight of Template A (peel)
- Color #4 (Mojito)
- Eight of Template A (peel)
- Background (white) –
- 16 of Template B
- 16 of Template C
- Five 5 1/2″ squares
- Two strips 2 1/2″ x WOF
Cutting templates/curves can be a bit tedious compared to swiftly cutting strips and squares for more angular blocks. But cutting precisely is worth the extra time! You may be tempted to layer up your fabric and cut many at the same time but I recommend not cutting more than four layers of your fabric at a time, especially if you’re using a smaller rotary blade. When your layers get too thick, they start to shift, potentially resulting in the top layers being a different size/shape than the bottom ones. We don’t have a ton of pieces to cut here, just take your time!
- Stitching your first curve
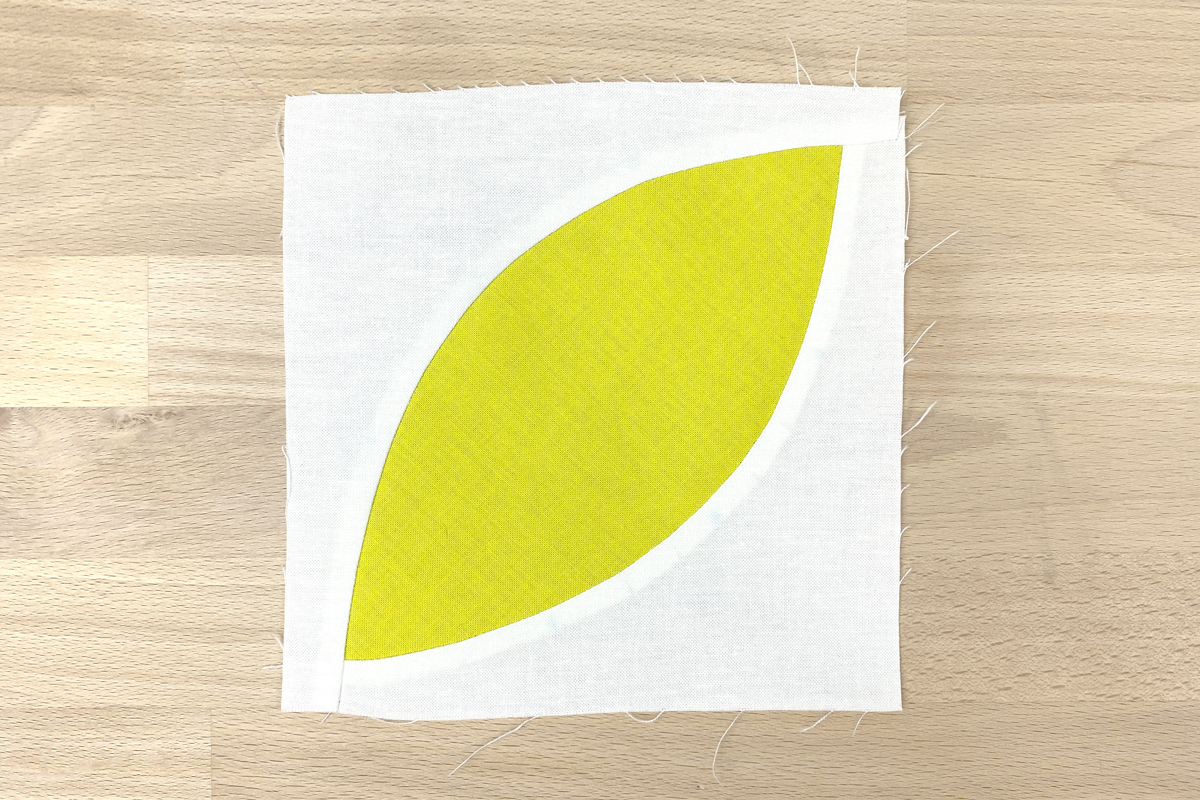
These blocks are pretty simple—there are only three pieces per block. Let’s start with making just one of these orange peel blocks.
On each template, there are three markings along the curved edges. Transfer these markings to your fabric pieces with a temporary fabric marking tool (like chalk or an erasable marker).
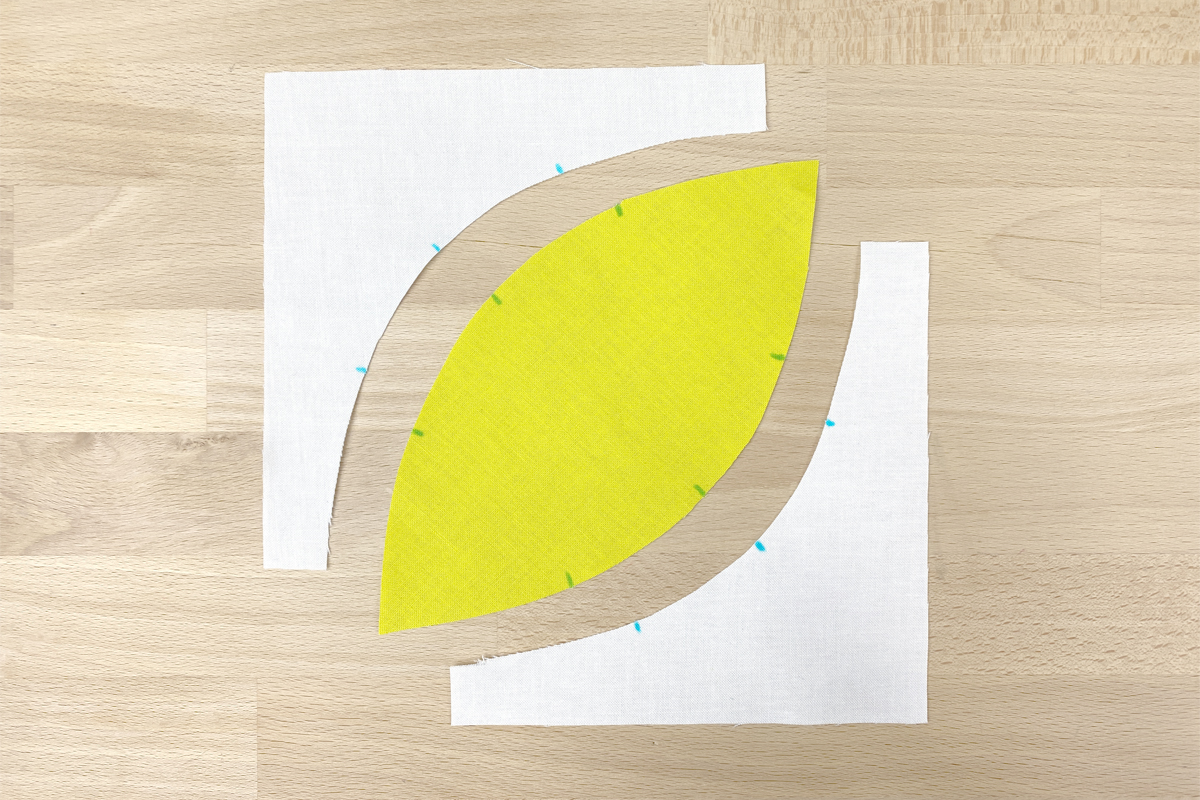
Set your Template A (peel) shape right side up on your cutting table. Lay the Template B (background) piece on top, with right sides together. Align the corner of the background to the point of the peel and add a pin. The background piece will lay in an L-shape on top of the peel.
Now align the other end of the curve on the Template B piece with the opposite point on the peel and pin.
Align the center markings on the two pieces and pin. Repeat for the other two midpoint markings.

Pinning this curved edge will ensure that your fabric doesn’t get stretched as you sew it down which reduces the change for waves or puckers. You can add more pins to this if it makes you more comfortable, but these five should do the trick.
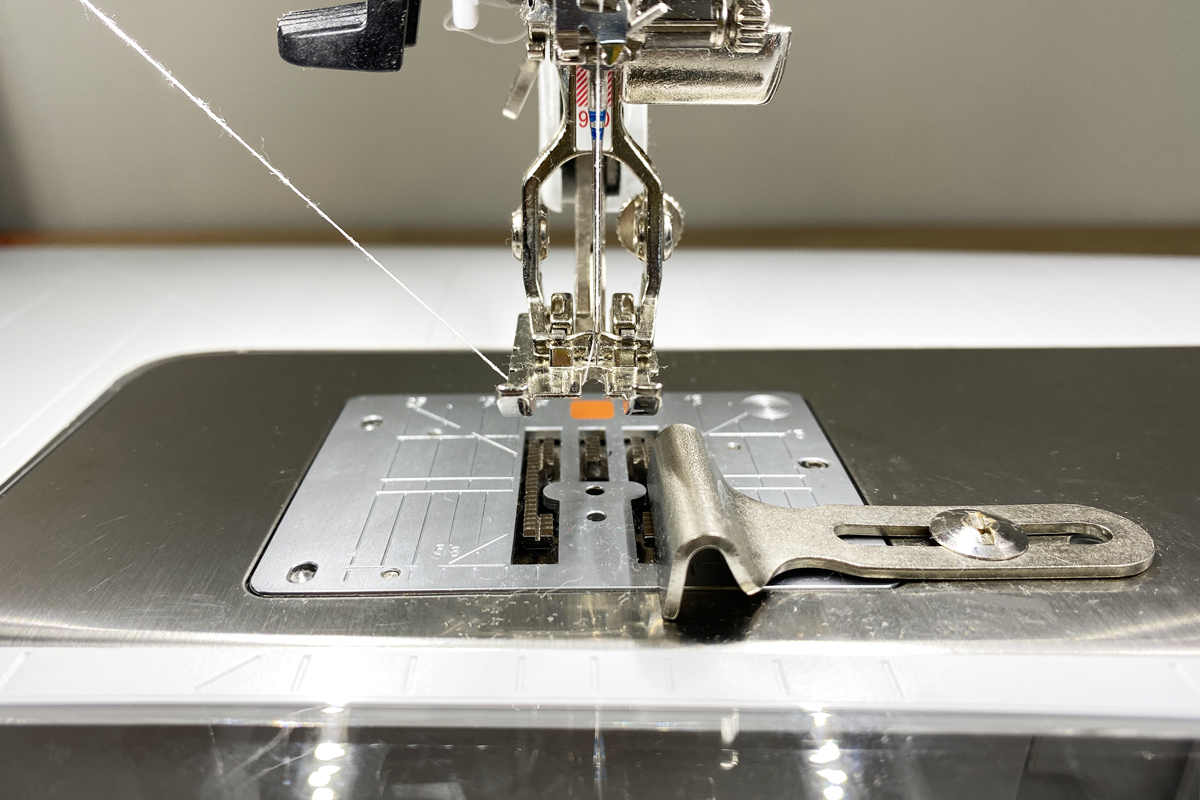
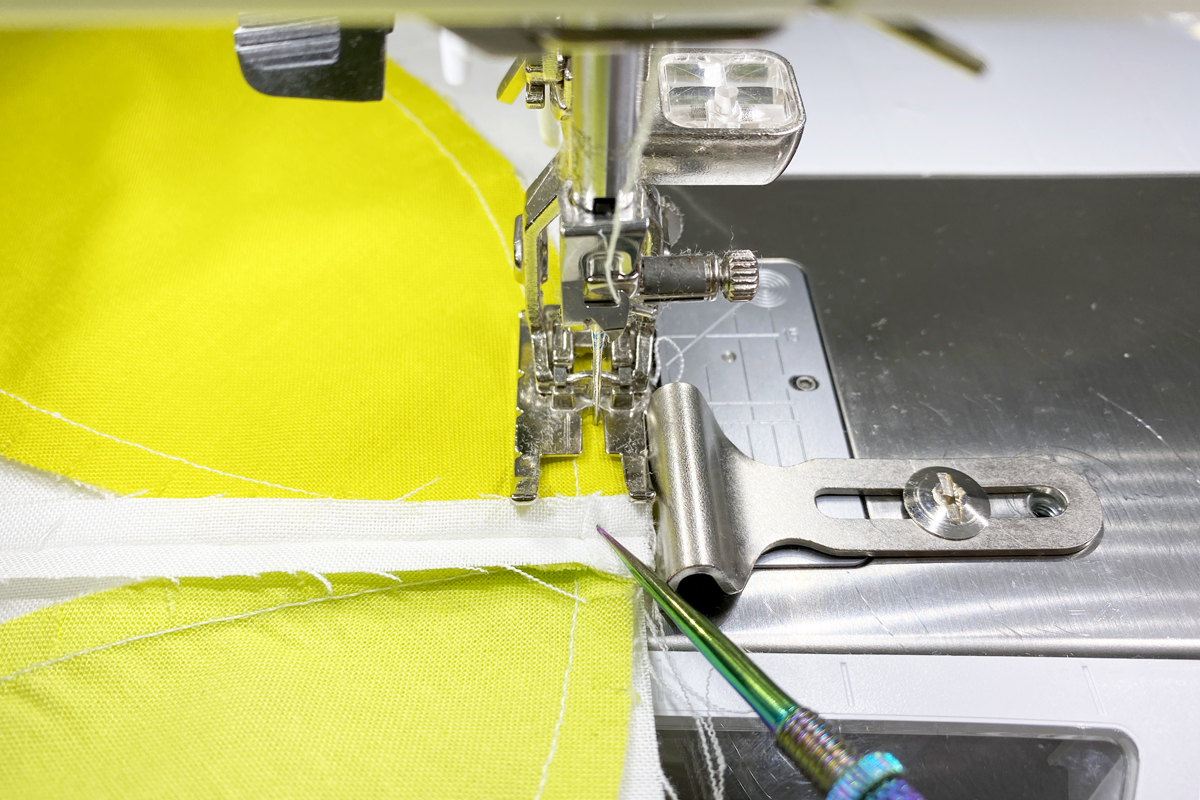
Attach the adjustable seam guide to the freearm of the machine. This guide will make it so much easier to keep the seam allowances on your curves precise!
I always recommend stitching these curves with the concave piece up. This piece is under a lot more stress, being stretched along this curve, and you’ll have much more control of the process with this on the top side.
Place the top point of the curve under the presser foot. Because of the seam guide, you’ll probably need to remove the first pin to get the fabric in place. Cue the stiletto! Get your fabric generally under the presser foot area then use your stiletto and your other hand to bring the edges together again. Then lower your presser foot using the Free Hand System.
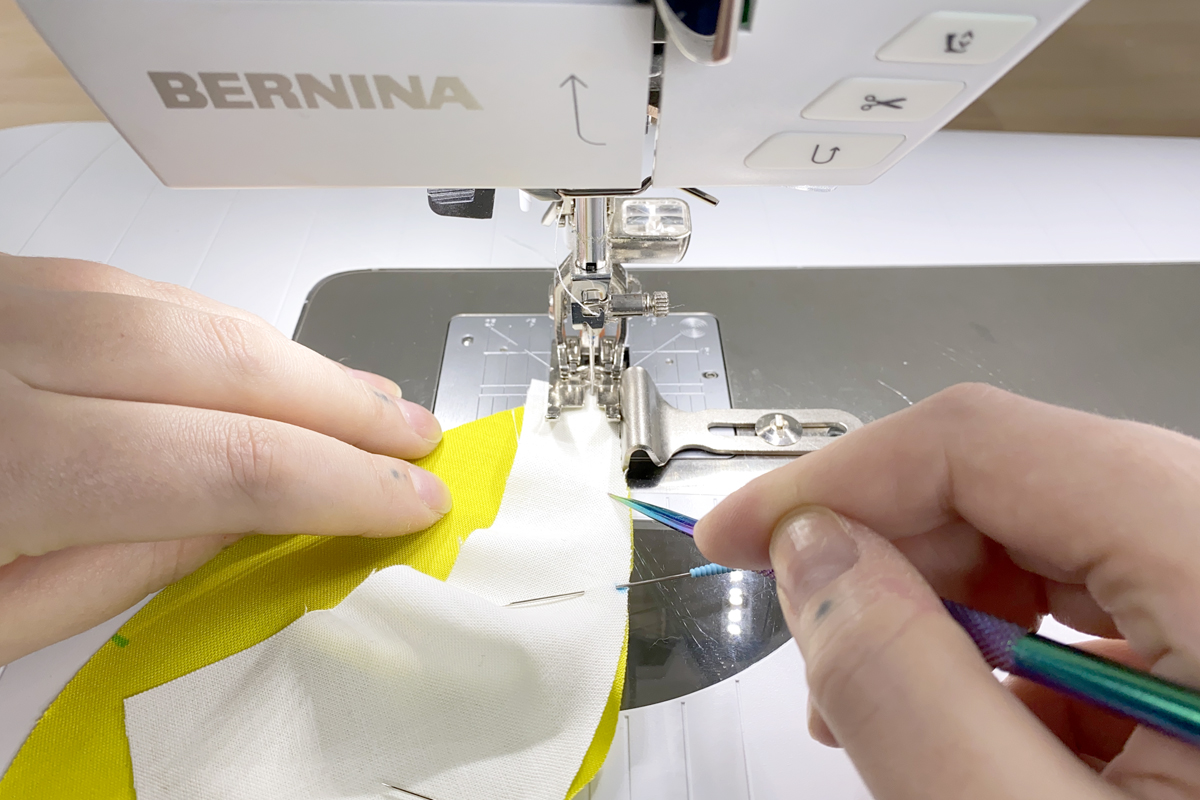
Begin sewing. I recommend reducing your sewing speed for this process. You will be able to maintain control a bit better if you slow things down. Take a few stitches at a time then use your stiletto to keep your raw edges in line.
Work your way down the curve, removing pins as you go. When you reach the end, cut your threads.
- Pressing curves
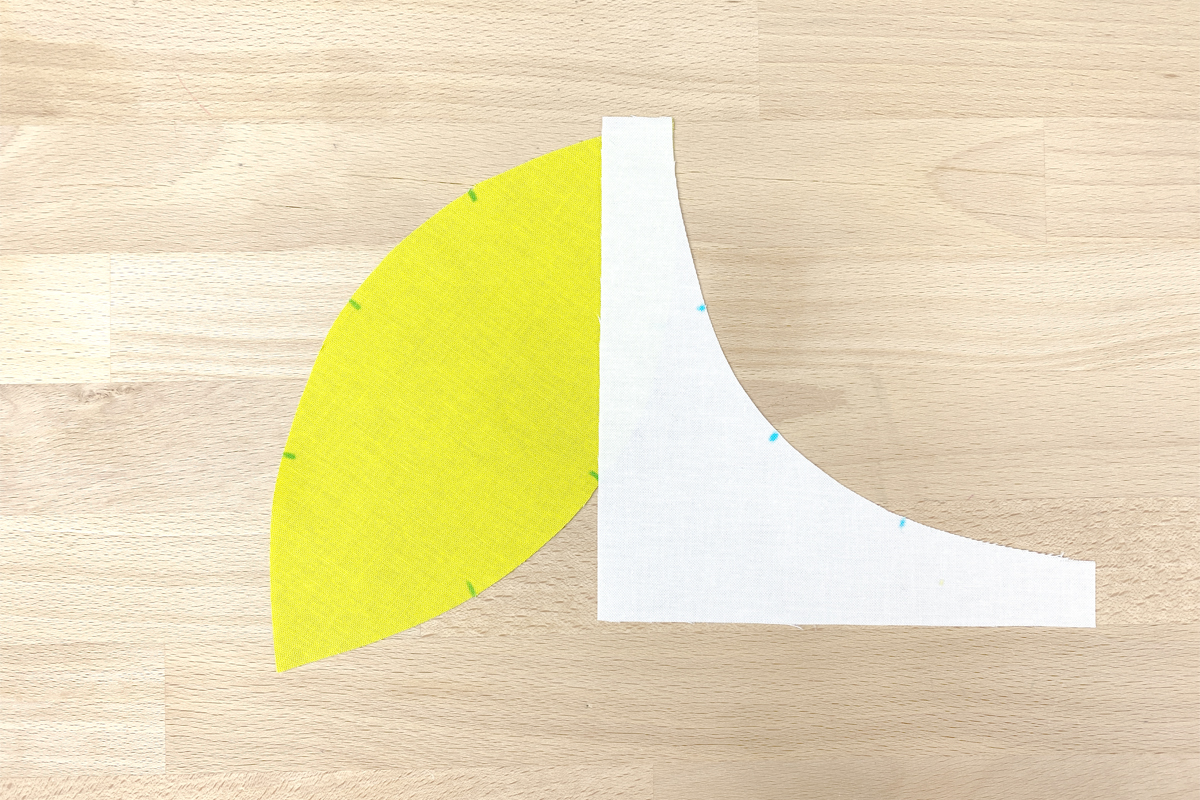
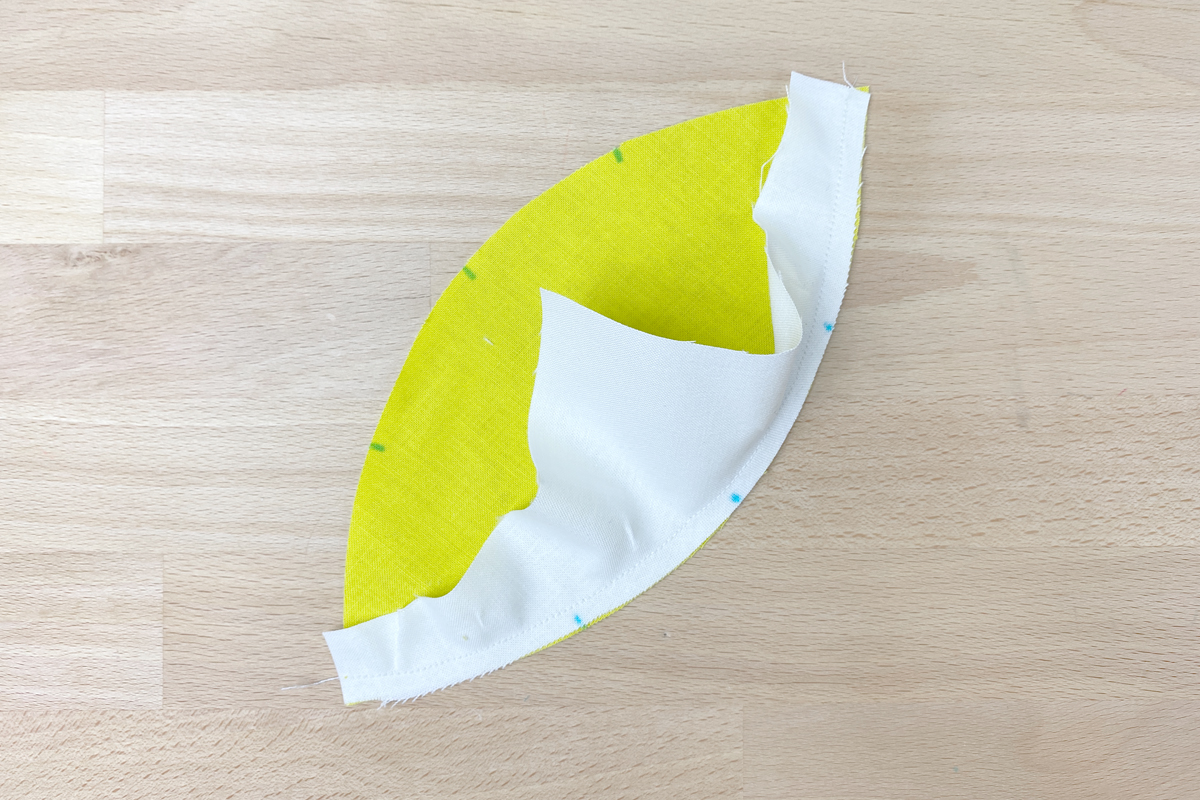
If you have ever sewn garments, you know the importance of clipping or notching curves. In order to help our patchwork lay flat, we’ll want to clip into these curves under the same logic.
Use small scissors to make a series of clips into the seam allowance of the background fabric, each about 1 cm apart. Be careful not to cut through your stitches!

Finger press the background fabric away from the peel. Your seam allowances will lay toward the background fabric. Press along the curve, then iron out to the edge, with a dry iron. Then, if you have one on hand, set the seam with a tailor’s clapper.
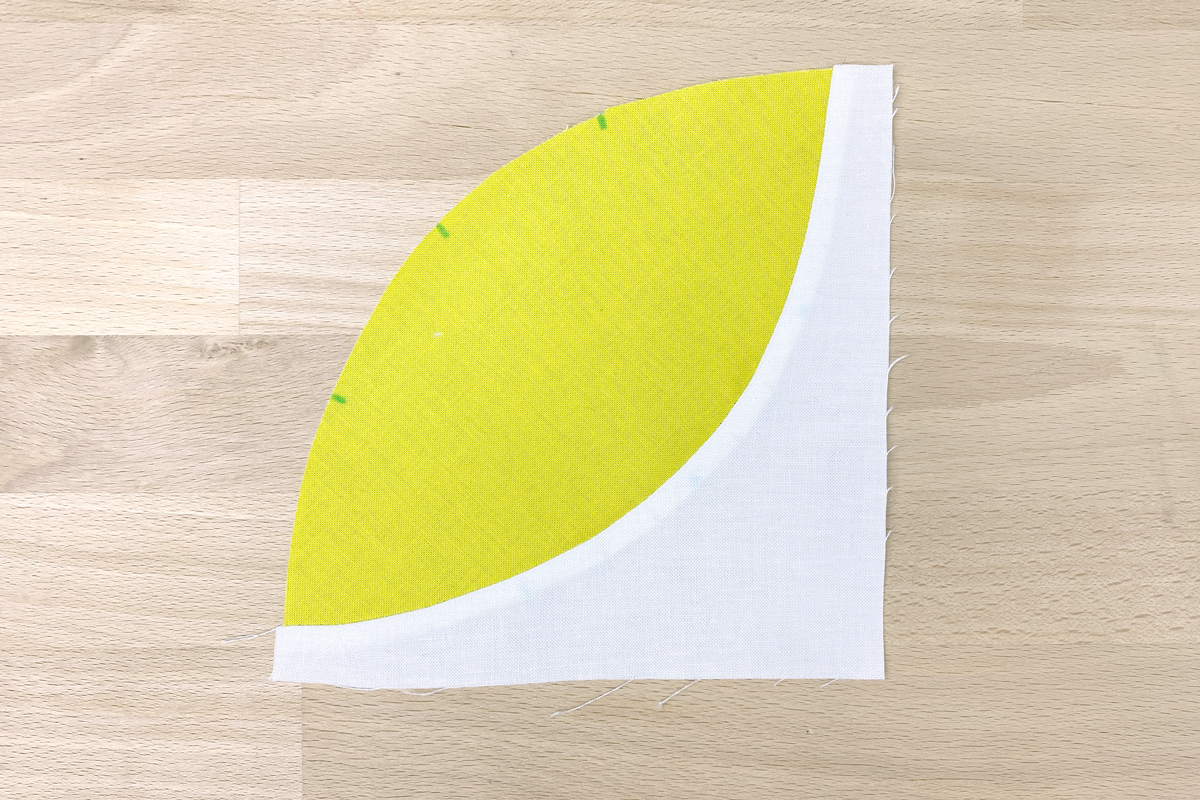
- Sewing the second curve
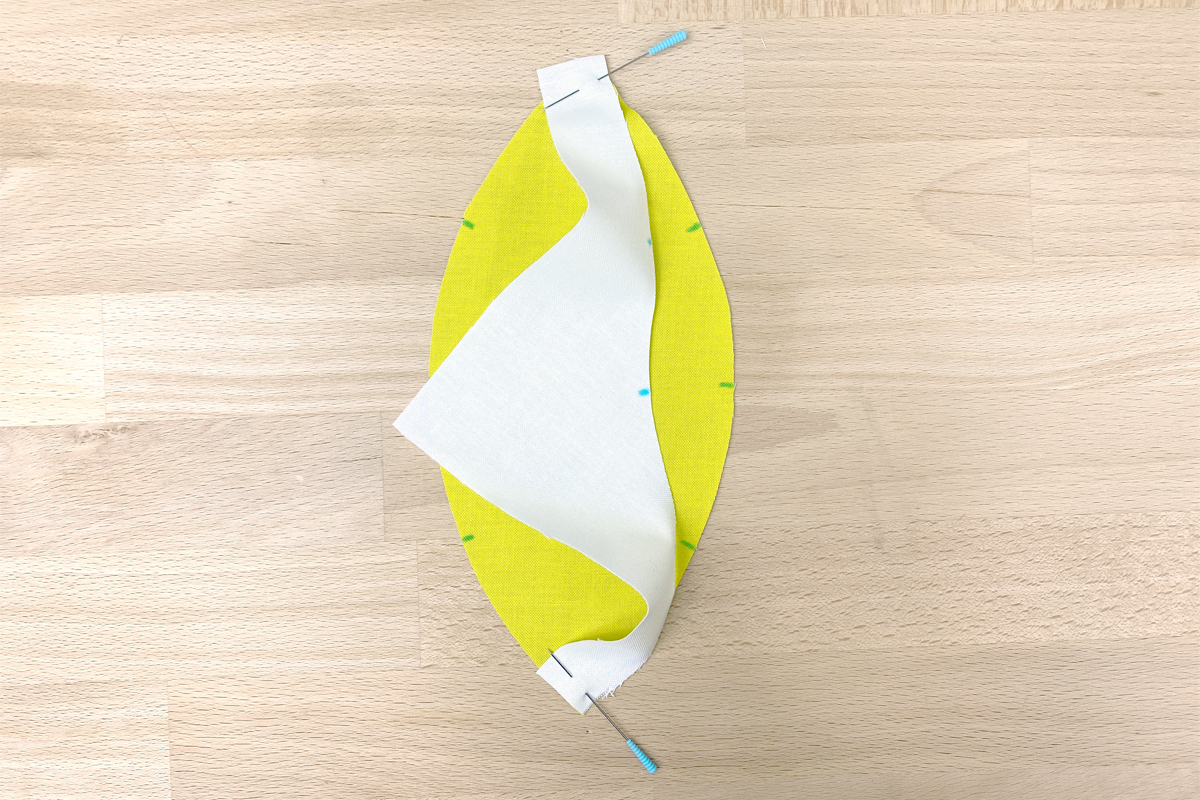
The other side of our block, the second curve, is sewn in essentially the same process as the first but now adding the Template C background piece to the other side of the curve.

Again, transfer the markings from the templates to both fabric pieces, then align and pin. Stitch down this curve, using your stiletto to keep things aligned in the process.
Once again clip your curves and press the background fabric out.
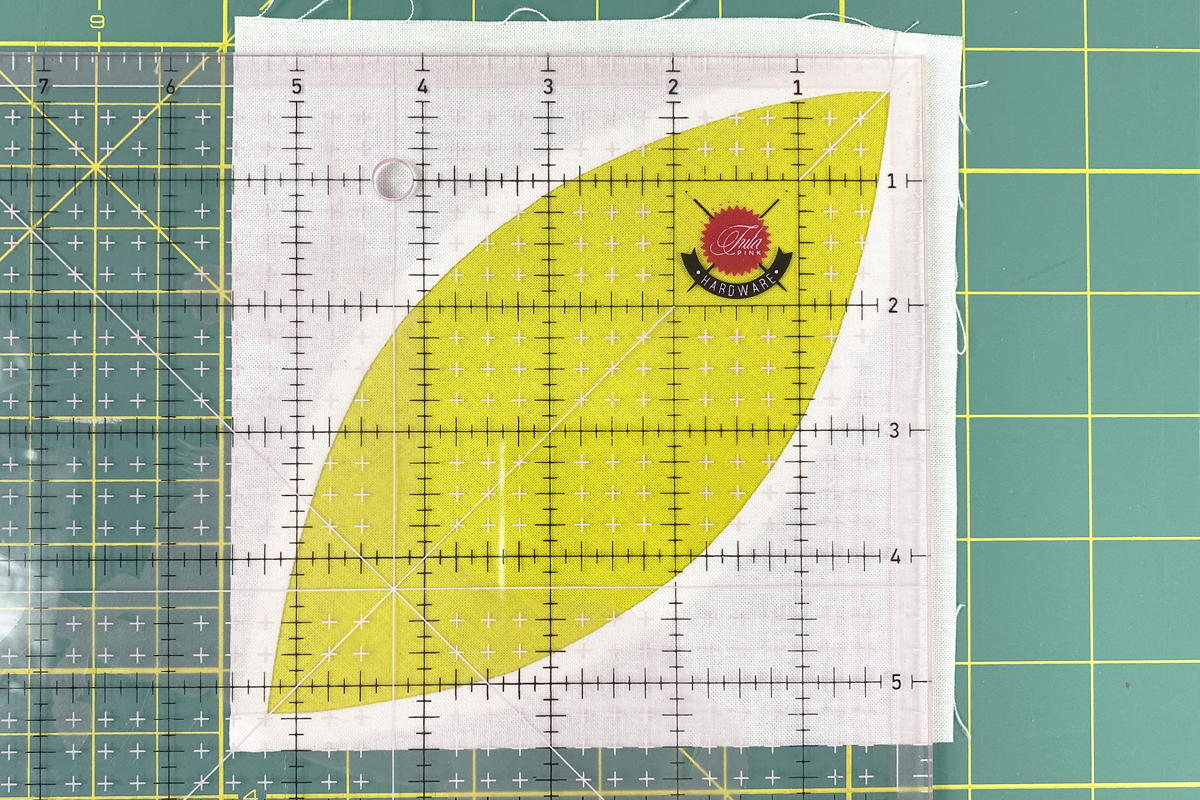
- Squaring up
At this point, your block might look a little wonky around the edges. This is okay! Remember at the beginning, I mentioned that some wiggle room has been built into these templates? Now is when we really take advantage of that!
Place your block underneath your ruler. Align the upper right point of the peel 1/4″ in and 1/4″ down from the edges of the ruler. This is to accommodate your seam allowance around the block.
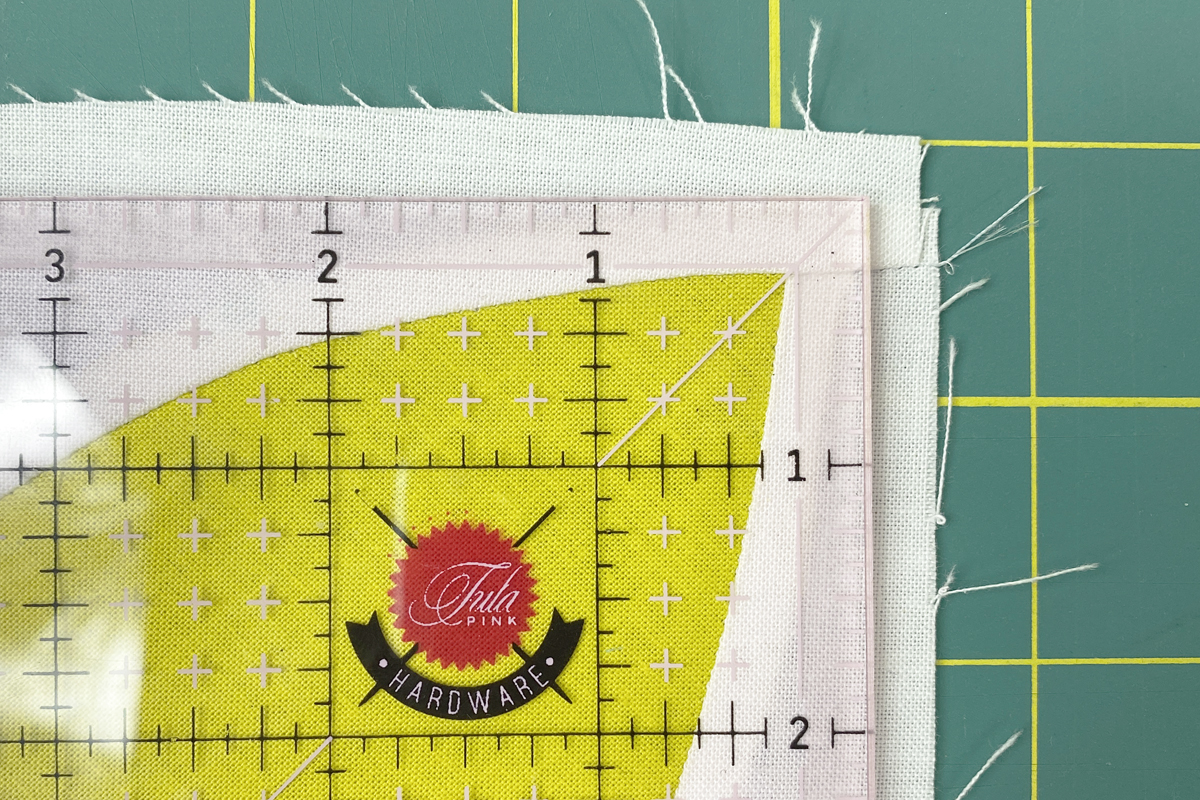
Now align the opposite point of your peel along the 45 degree line marked on your ruler. It should land at about 5 1/4″ in and 5 1/4″ down.
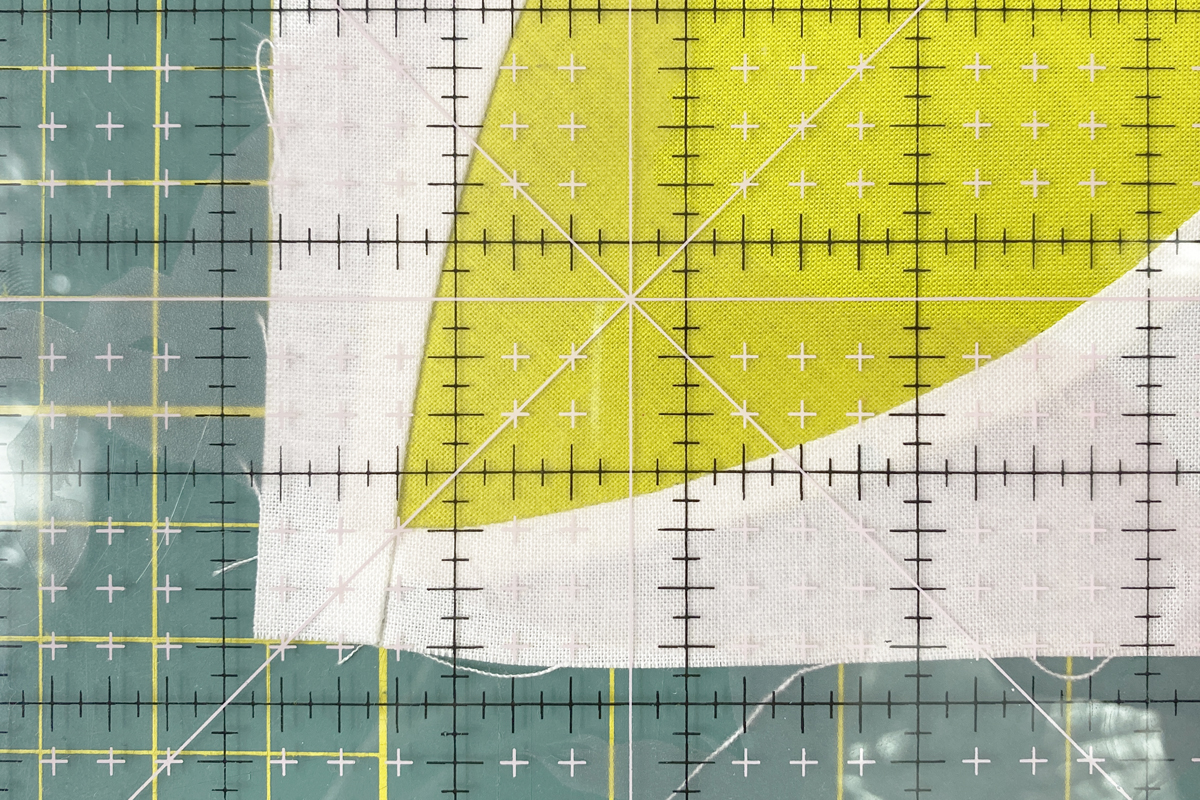
Trim the right side and top edges of your block.
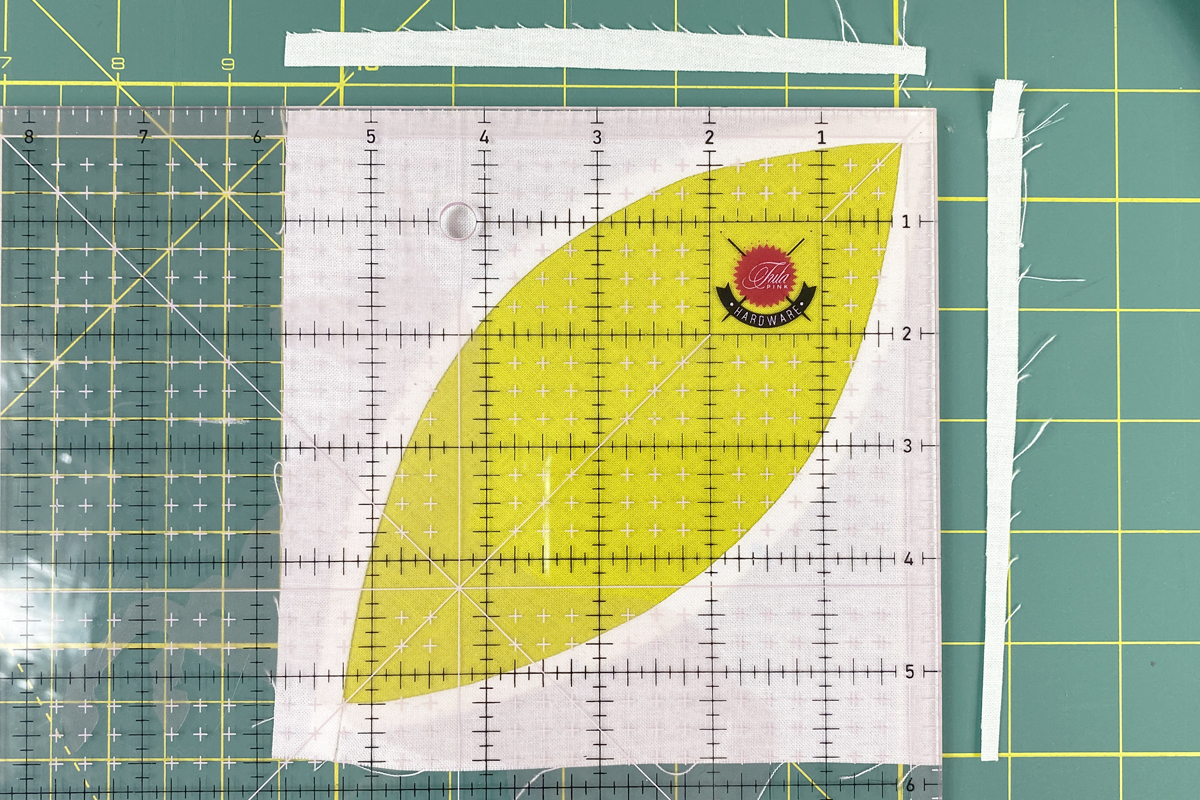
Now rotate the block 180 degrees so you can trim the remaining two sides. Again, line up the upper right point of the peel 1/4″ in and 1/4″ down from the edges of the ruler. Align the opposite point along the 45 degree line. The two sides we just trimmed should measure at 5 1/2″ square. Trim the right side and top edge.
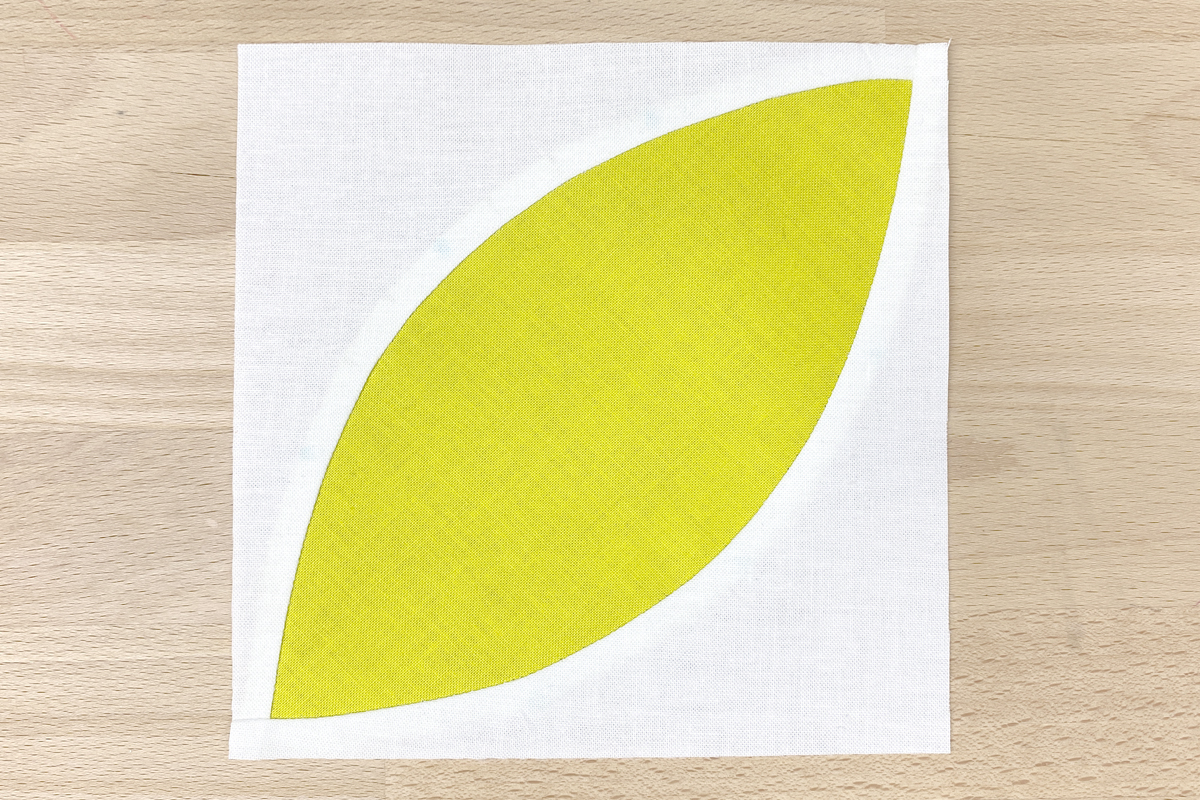
Now you have a beautiful, precise orange peel block! All that’s left is…15 more of them! I highly recommend chain piecing these blocks. As you continue stitching these curves, you’ll find a good rhythm in the process and it’s best to keep rolling with that without breaking to press too often.
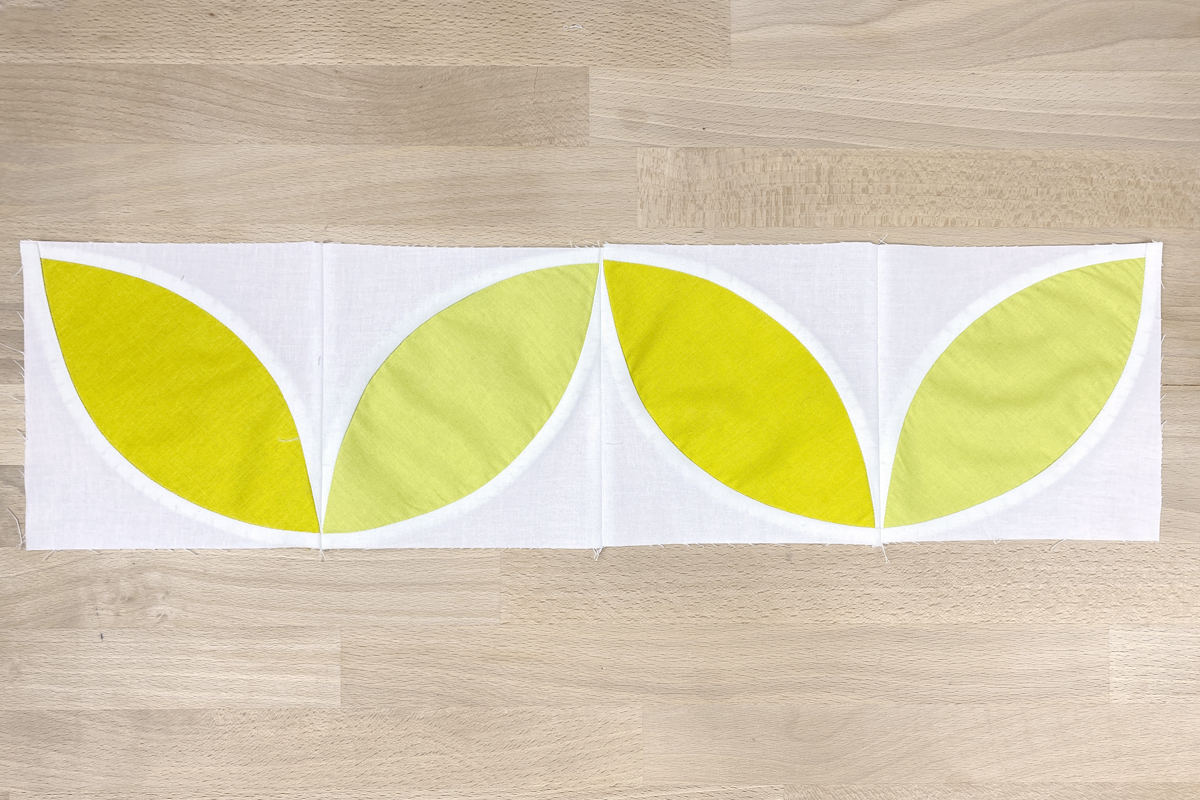
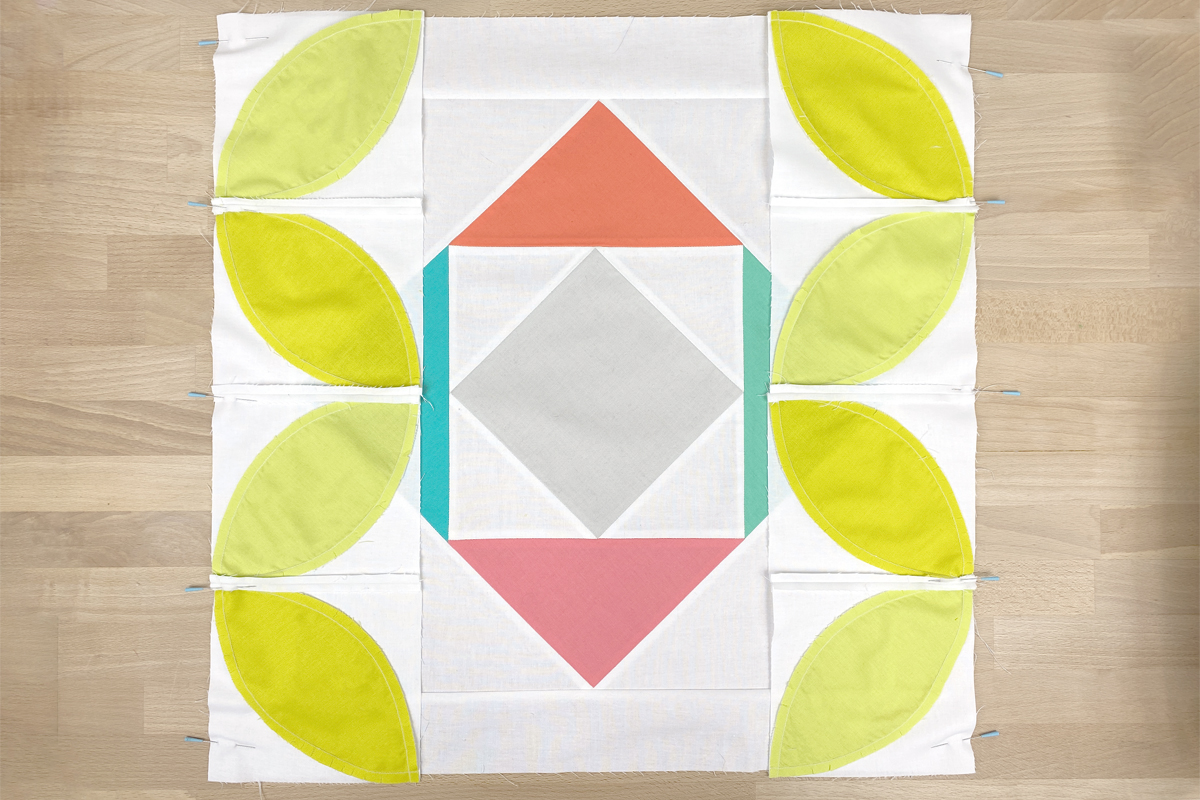
- Assembling rows
With all the orange peel blocks assembled, we now need to put them into rows for our medallion. Again, I recommend chain piecing as much of this as possible!
The peels in our rows alternate colors (color #3, color #4, color #3, color #4) and also alternate angles. Begin by pairing up your blocks—color #3 angled up and to the left and color #4 angled up and to the right.
Sew all the peels in pairs with a 1/4″ seam allowance. Then press these seam allowances open.
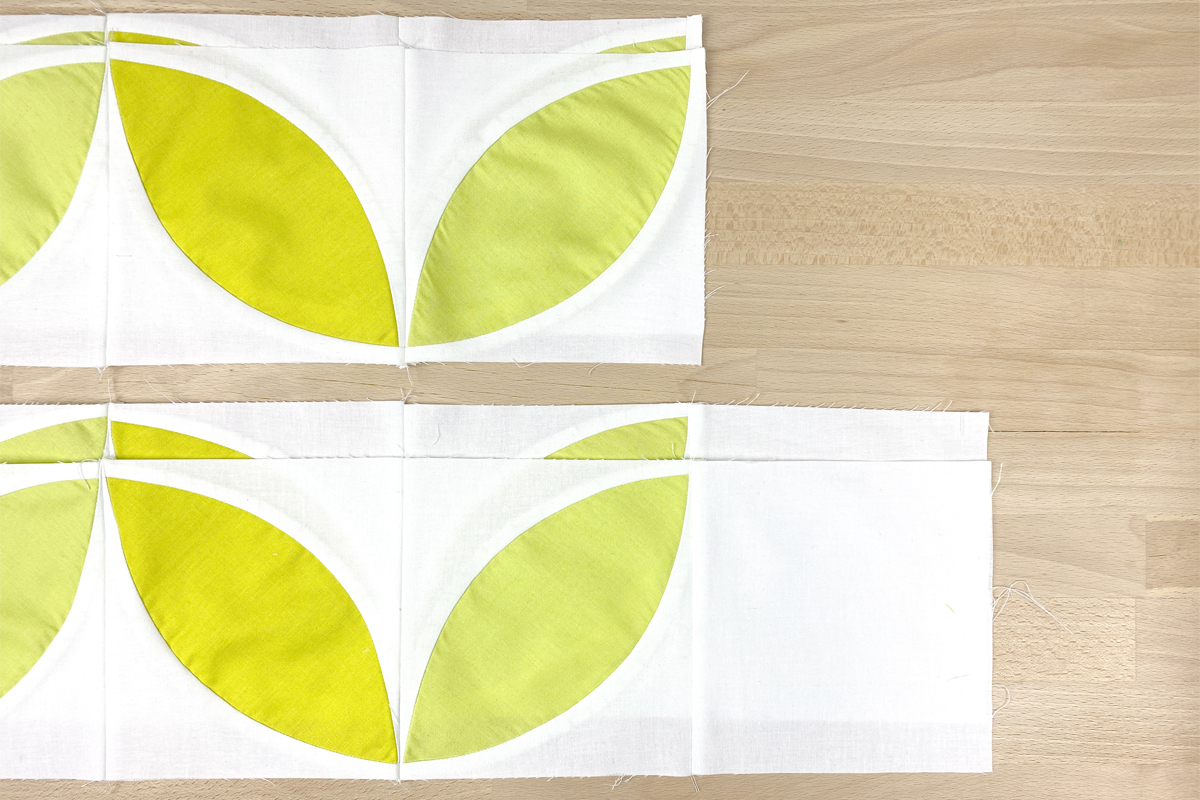
Now we will stitch two pairs together, again with a 1/4″ seam allowance and pressing open.
Finally, take two of those rows and add solid background squares to each end, as corner stones for our round.
- Building on from the center
Now we can build on to the center of our medallion. Between our center block and our orange peel round, we have a round of sashing.
From each of the two 2 1/2″ wide strips, subcut a 16 1/2″ strip and a 20 1/2″ strip. Place the two shorter strips right sides together with the center block, on the left and right sides of the block.
Sew the sashing with a 1/4″ seam allowance. Press the seam allowance toward the sashing. Repeat the process with the longer strips along the top and bottom edges of the block.

Now we will add our orange peel round in the same method, adding the two strips without cornerstones to the left and right of the block. Again, press the seam allowance toward the sashing.
Then add the longer strips, with the cornerstones, to the top and bottom edges. Remember to reach for your stiletto when piecing these rows with all these seam allowances!
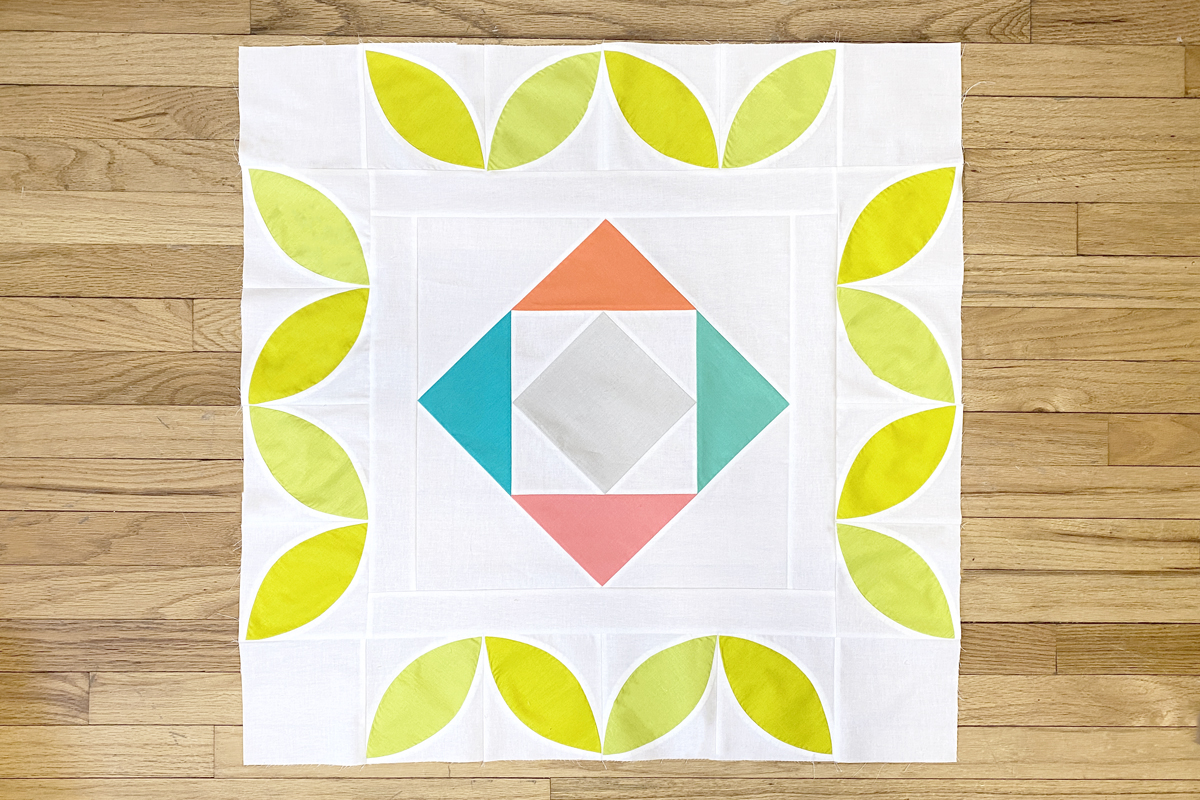
Our first round of the medallion is all done! Join me back here next month for round #2 as we return to simple, straight-line piecing!
Passiflora Quilt Along
Used Products


What you might also like


6 comments on “Passiflora Quilt Along, Part 3: Round One Medallion”
-
-
When this round is attached, your piece should measure 30.5″ square 🙂
-
Oh thank you! Would it be possible to give this measurement with each round? I’m enjoying this project very much!
-
-
-
If possible, it would be nice to have a PDF of the instructions as well as the template. I prefer printing the instructions rather than looking at it on the web and it just takes a lot of paper to print it from the web. I think I PDF might consolidate it some. Thanks for this wonderful pattern and all the work you have done to put it together!
-
I am a novice sewer, and enjoying this very much. .I am having a problem with squaring the orange peel blocks to 5 1/2 “. Using the quarter inch marks at the peel ends, I only get 5 1/4″ squares. (I’ve checked my seam allowances.) I can only think that I printed my templates too small. To get to 30.5”, I will have to correct the inner sash dimensions. Is it possible to have measurements of the templates added?
-
I am so happy I found this blog! I have been quilting for years but have a new Bernina 570QE and this info. has been so helpful!!
Leave a Reply
You must be logged in to post a comment.

What is the size of the project when round 3 is completed? Need to verify my piece is correct.