Transforming Fabric with Zero Waste Quilting
What is Zero Waste Quilting?
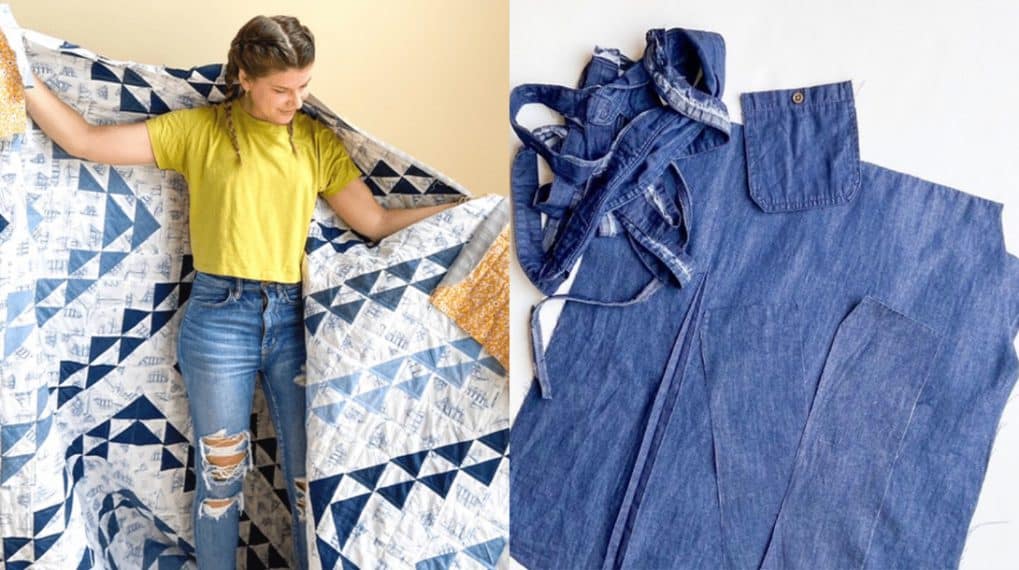
My third book, Zero Waste Quilting, was released in November 2024. The concept behind Zero Waste Quilting is that every scrap of fabric from a quilt is used to make a quilt and subsequent projects. Thinking even bigger: it’s a redesign of how we use scraps. Traditionally we make quilts and scraps land in the garbage, a destash, endless piles in our sewing spaces, or elsewhere. With Zero Waste Quilting all the leftover fabric from quilts is transformed into useful secondary projects.
Why is Zero Waste Quilting Important?
When we think in larger terms about our environmental footprint specifically with regard to textiles, we need to acknowledge that textiles are a huge pollutant and contributor to global warming. And when we think about what resources we have as quilters, our options have traditionally been up-cycled materials, a limited (but growing!) selection of GOTS, OEKO-Tex, etc., or digitally printed materials.
All three of those options are fabulous and we should fully utilize and take advantage of them when we can. I recognize that availability and cost factor into the conversation when those options aren’t actually an option. Or if you are like me and up-cycled materials aren’t really my medium of choice, then what happens? How can I continue to create while being a better steward to the planet? Enter Zero Waste Quilting. The concept introduces a middle ground so we can stretch the life of the materials we use. Better for our wallets and better for the planet. Plus who doesn’t need a cute gift from time to time? This way you can grab and go. There’s a bonus in that, as well!
How Does Zero Waste Quilting Work?
The reason Zero Waste Quilting is important is because we can take steps to minimize our environmental impact through craft. We all have scraps. We all have piles in overflowing bins and often we don’t know what to do with them. At a certain point, scraps can become overwhelming. What to do with all those mis-cut pieces, random cuts or fabric that has otherwise been cast aside.
Zero Waste Quilting takes the hassle out of how to handle your scraps. In my book, and now this pattern, you are given supplemental projects to make, meaning the frustration and overwhelm of figuring out how to use your scraps is eliminated. Additionally, you gain some freedom in that each project is fluid so you can make an item slightly larger or smaller to allow for mis-cuts or extra yardage you may have. For example: does it matter if your scrunchie begins with a 3” vs a 4” strip? Nope! You can make it with either size AND you still get a cute scrunchie.
Now, I know what you’re saying: I know how to use the scraps or I love having scraps around but not everyone does. In fact, at a guild meeting a few months ago a member offered that she threw the scraps away after a quilt was made because she didn’t want to hassle with them. And I am not here to throw shade on anyone but the simple fact is that many people toss material if they can’t figure out how to use it. In addition to being wasteful, it’s not good for the planet (or our wallets) so this concept helps us minimize our footprint just a little by using all the fabric. Beginning to end use of goods.
Progression of Projects
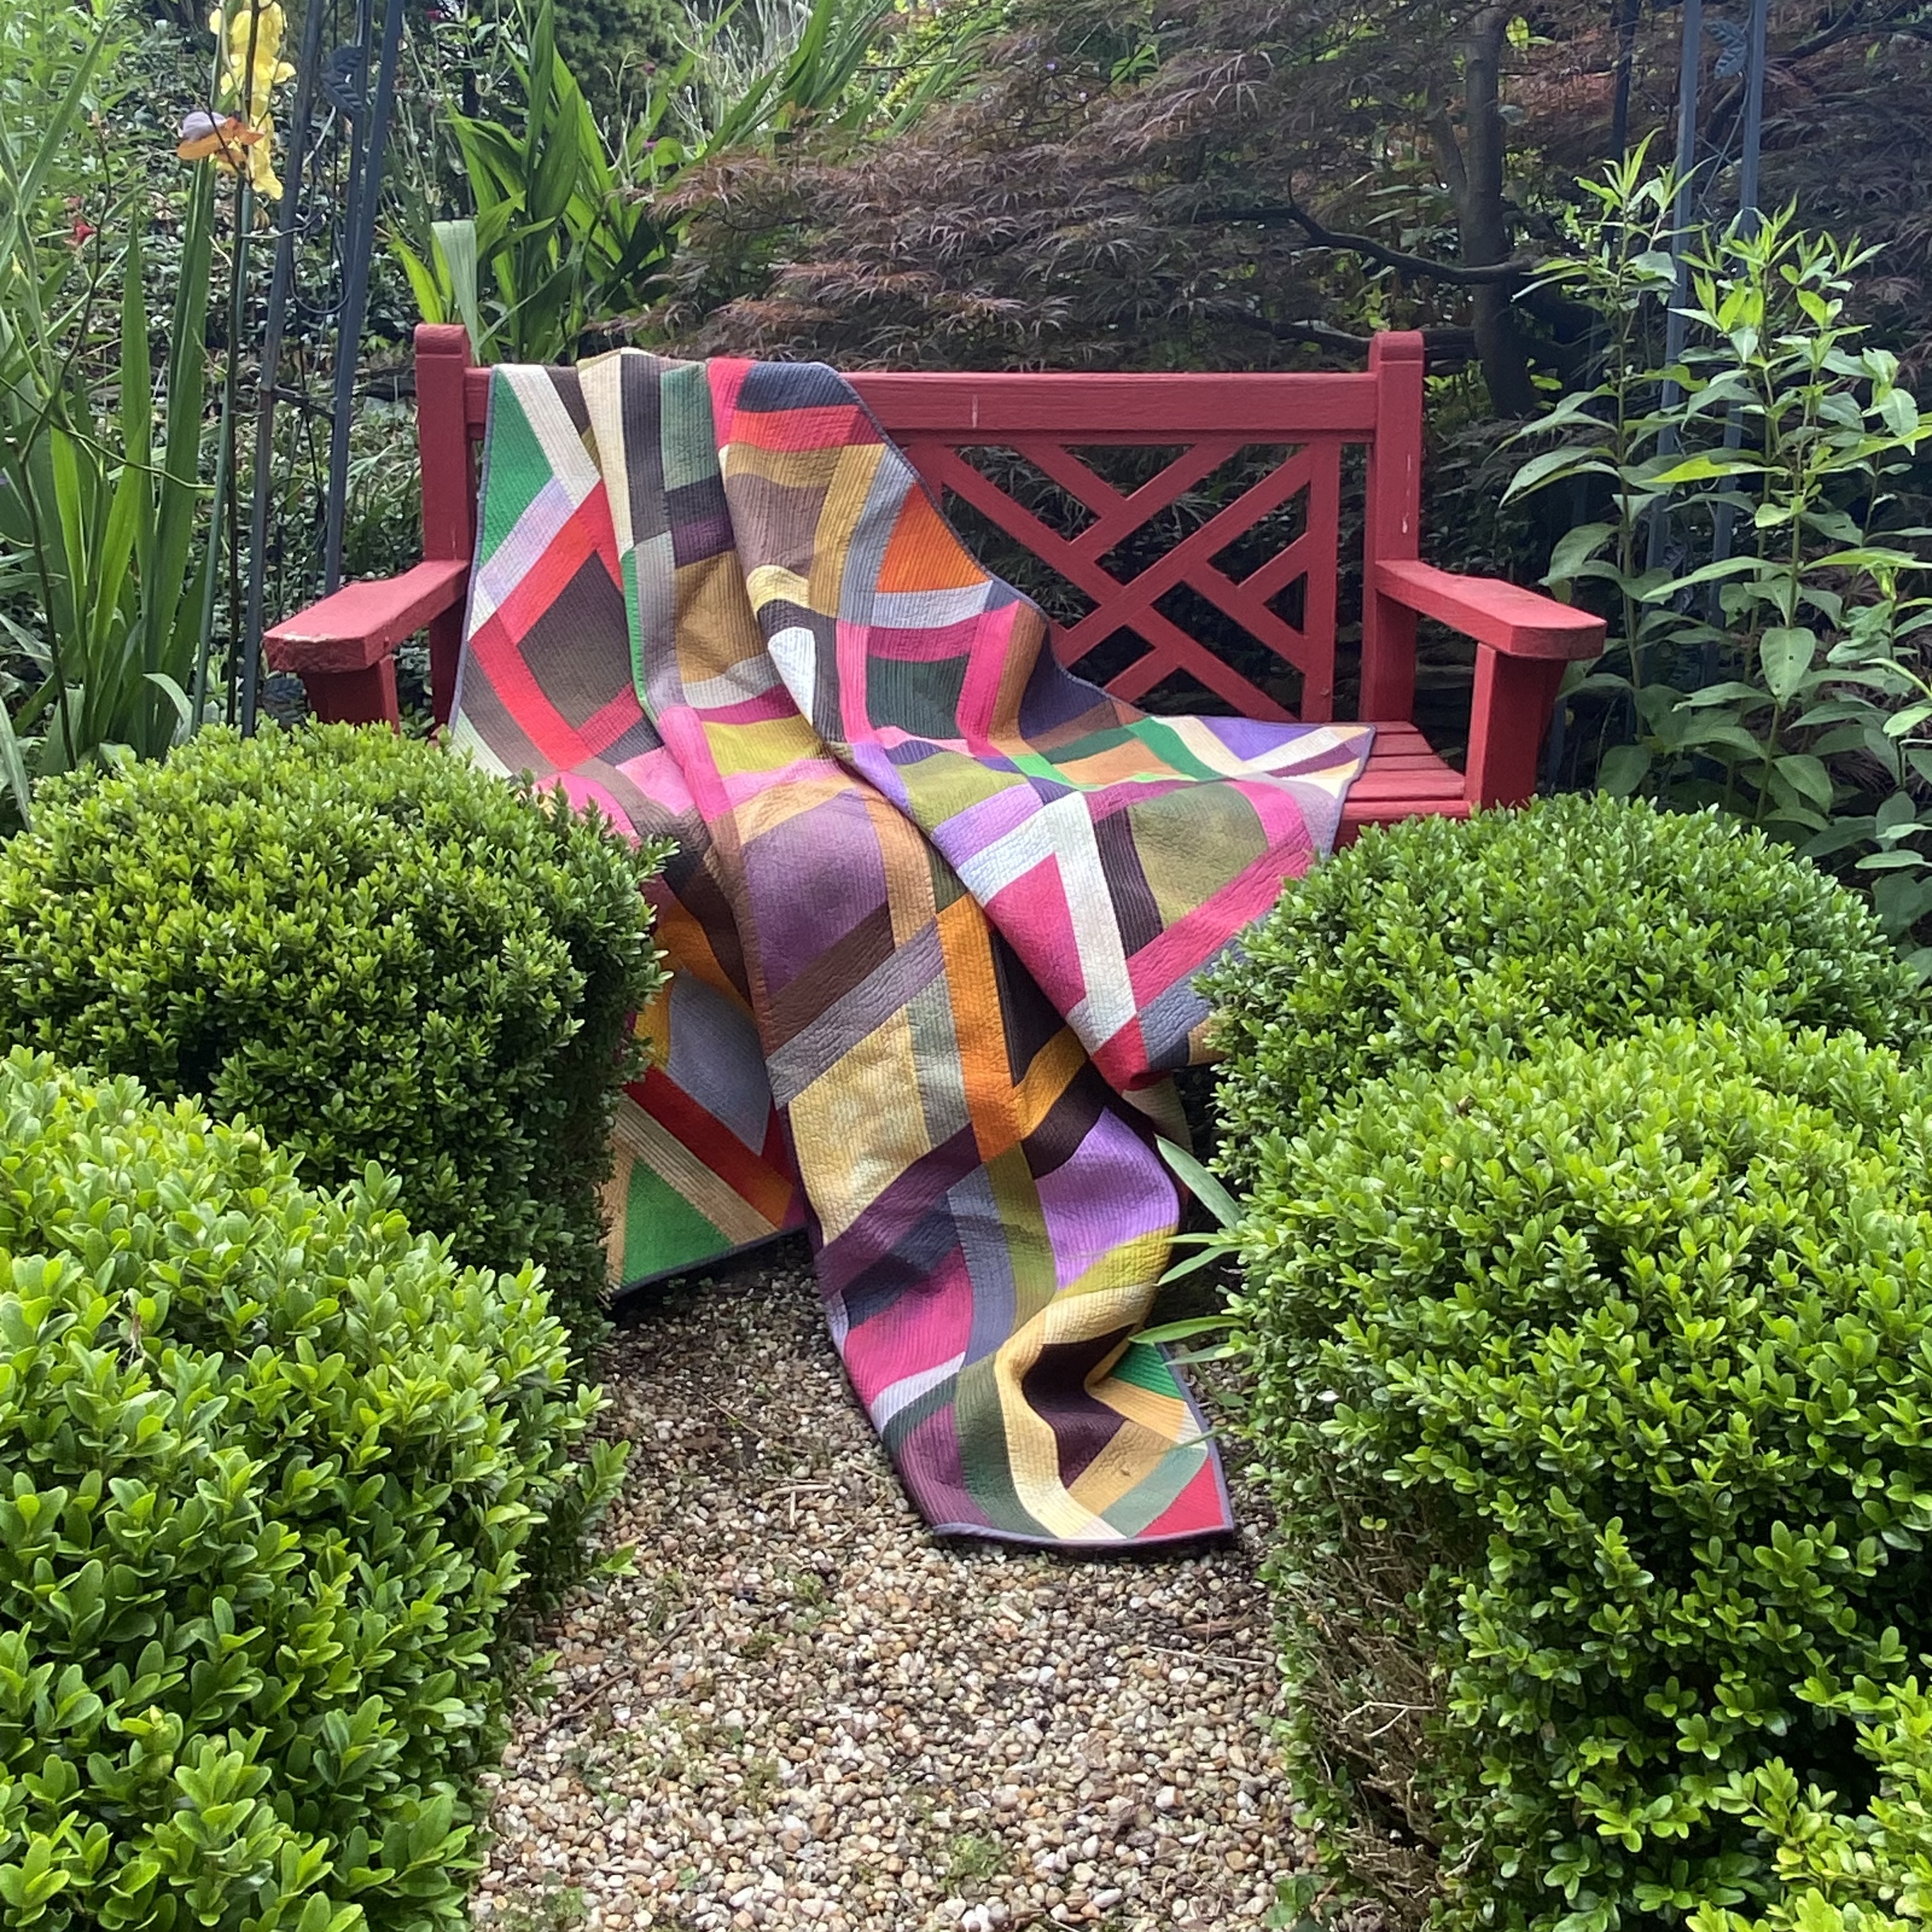
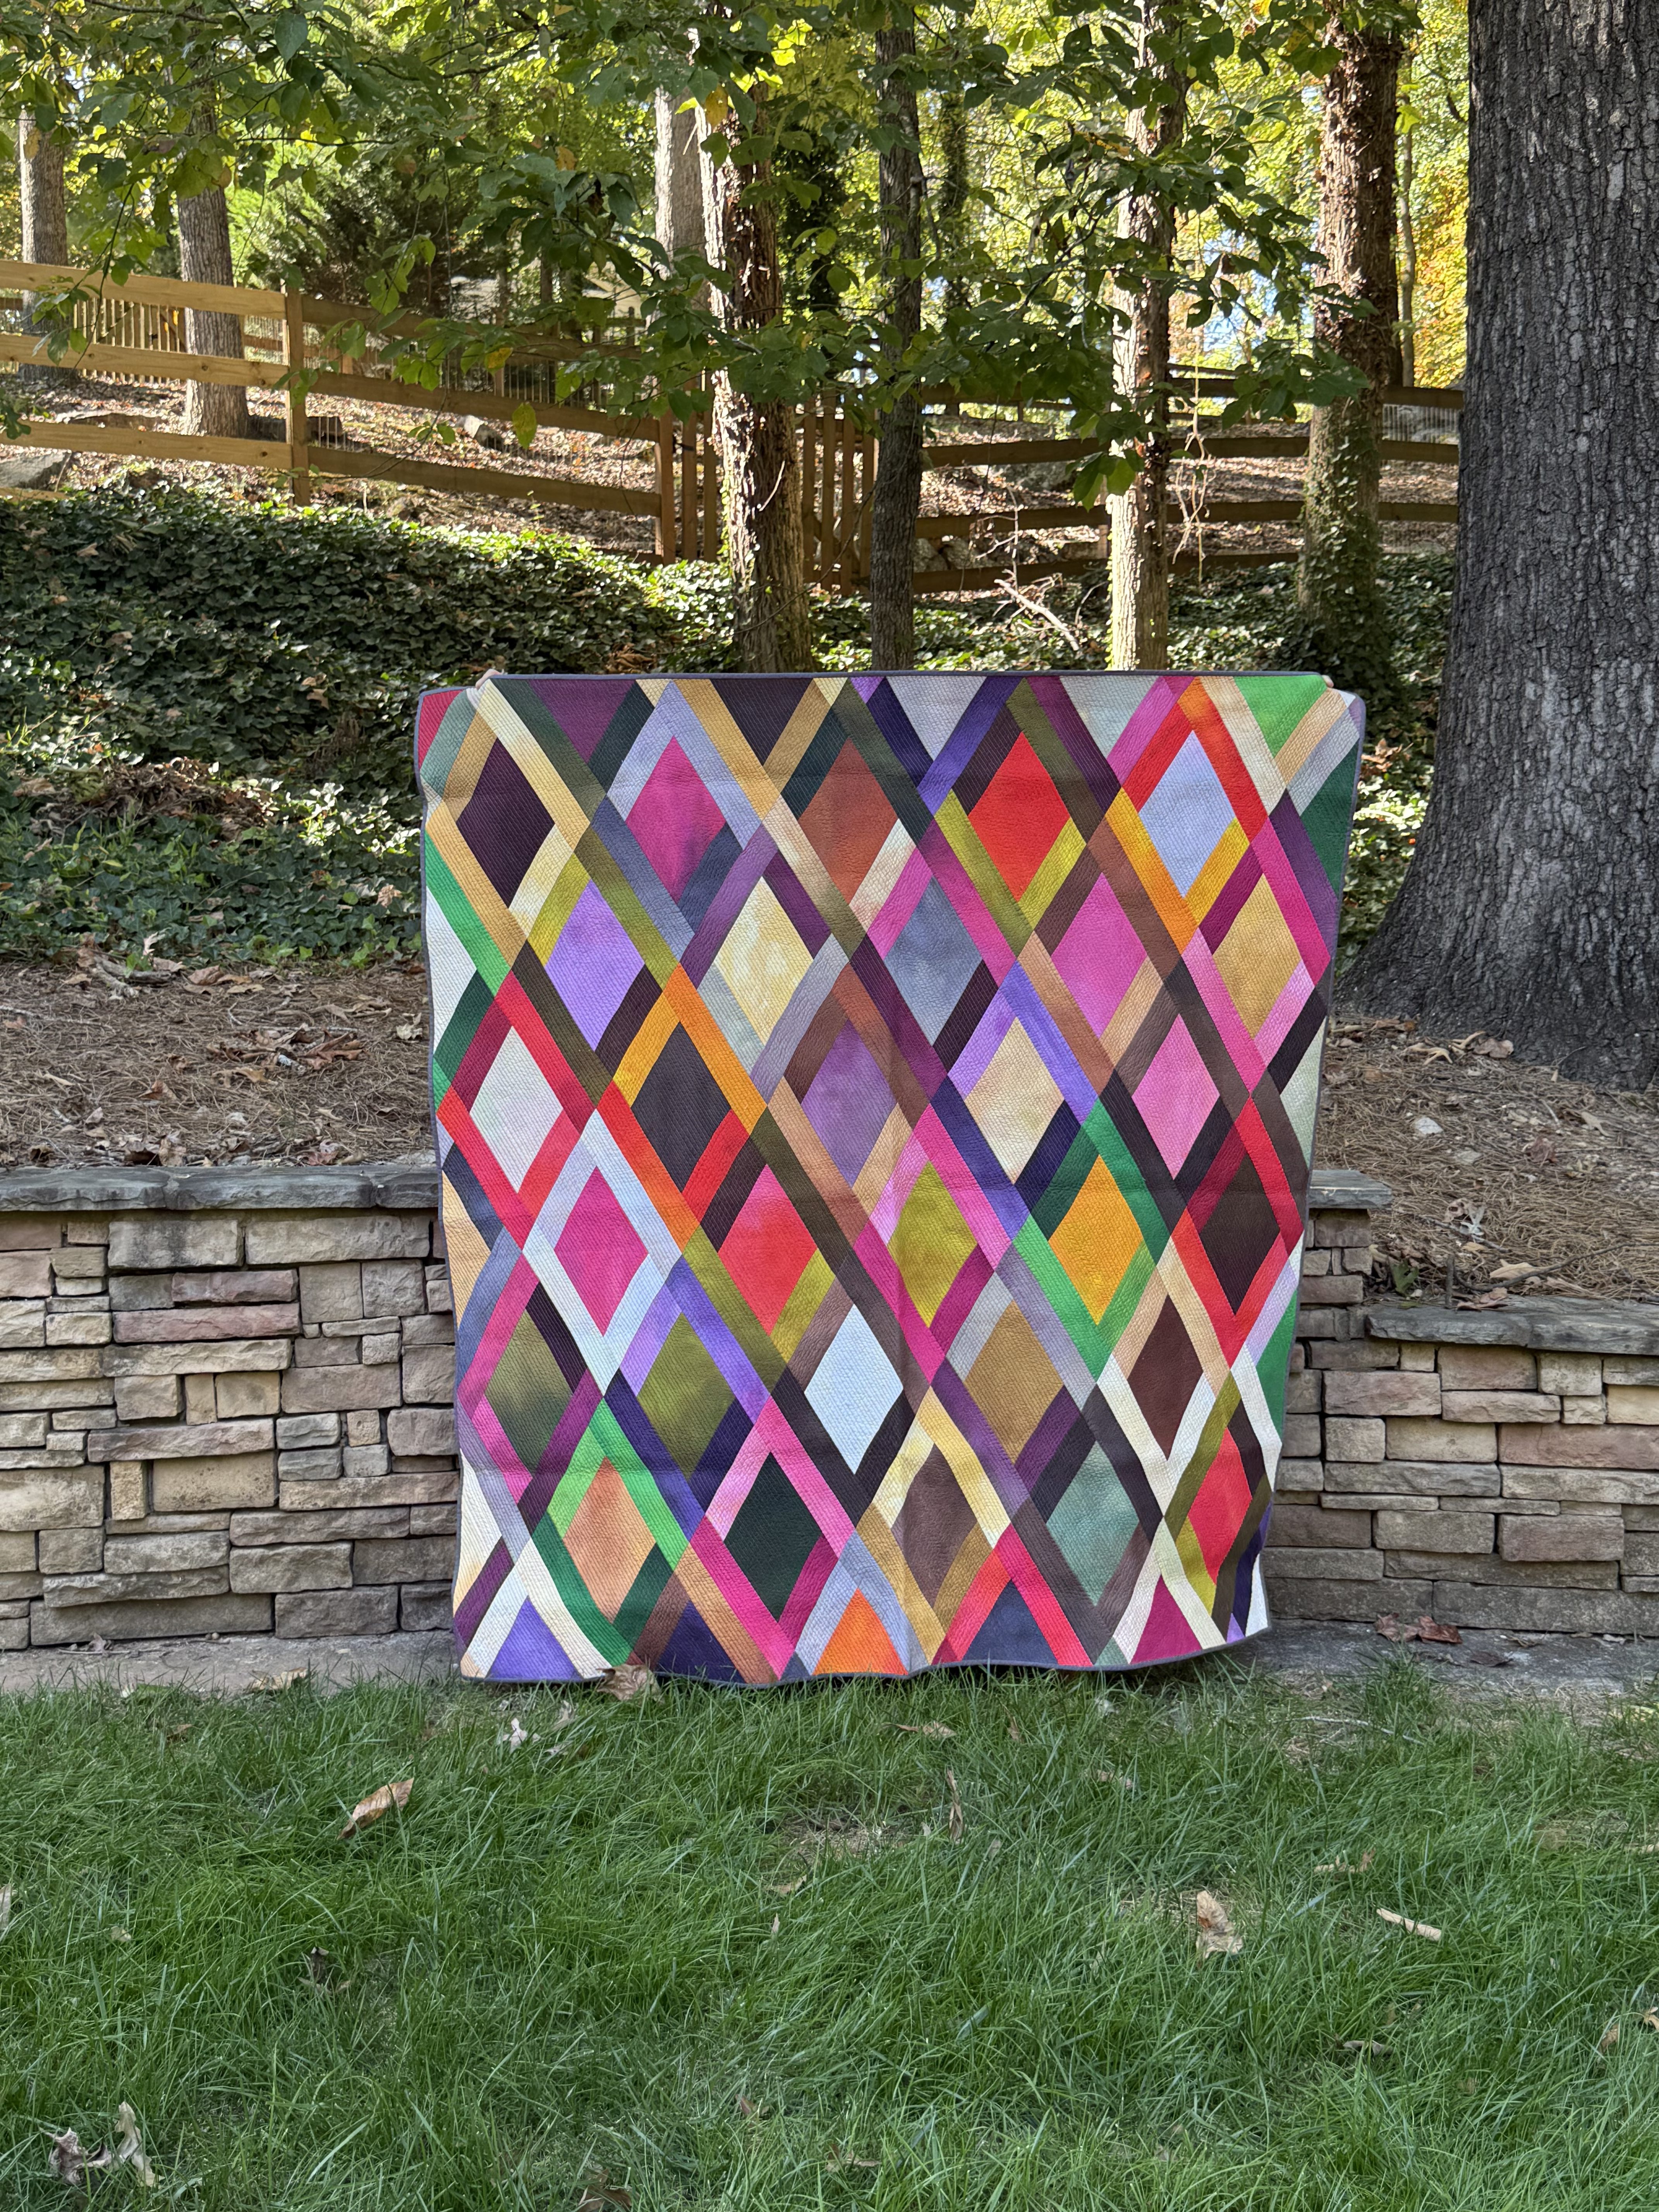
Persephone Awaits
This is the first quilt in this series. I began with half-yard cuts of 15 different fabrics to make Persephone Awaits.
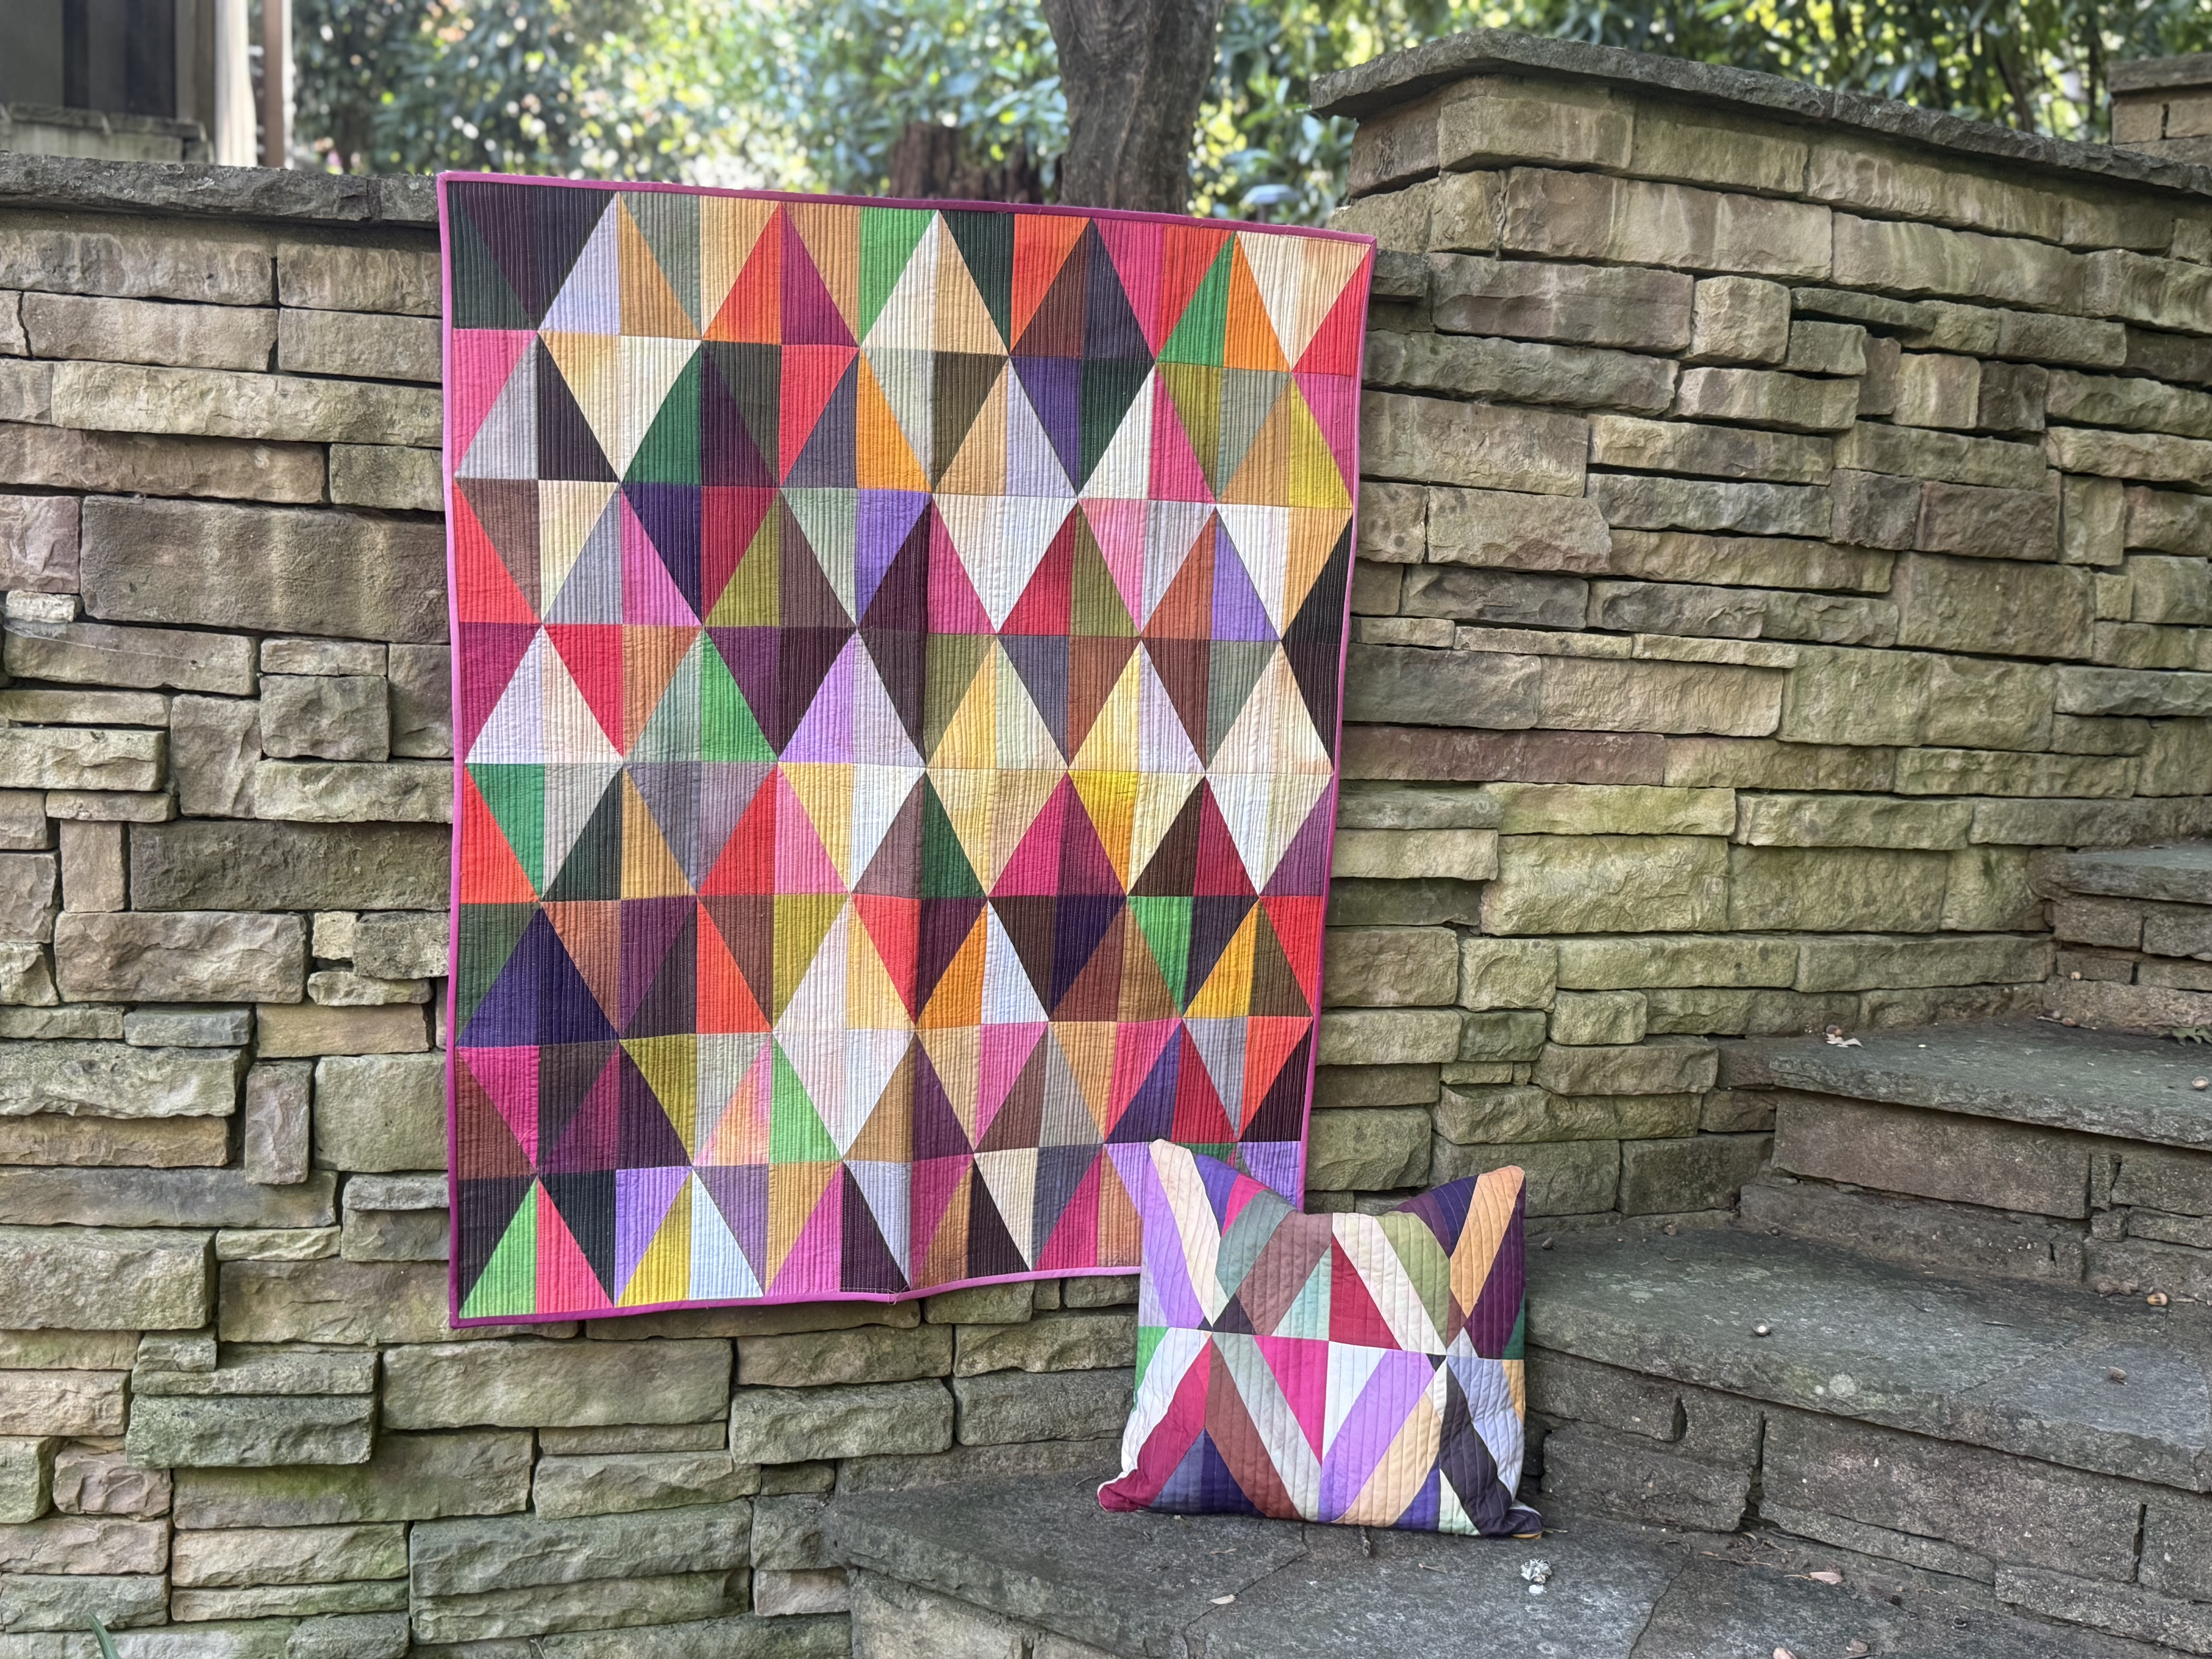
Small Yet-to-be-Named Quilt and Pillow
The second quilt used leftover half-rectangle triangles to create this darling wall hanging. The pillow was created from the off-cuts from the diamonds. I created a pillow insert with the smallest scraps (less than 1”), thread and batting for the pillow. The pillow has an invisible zipper closure.
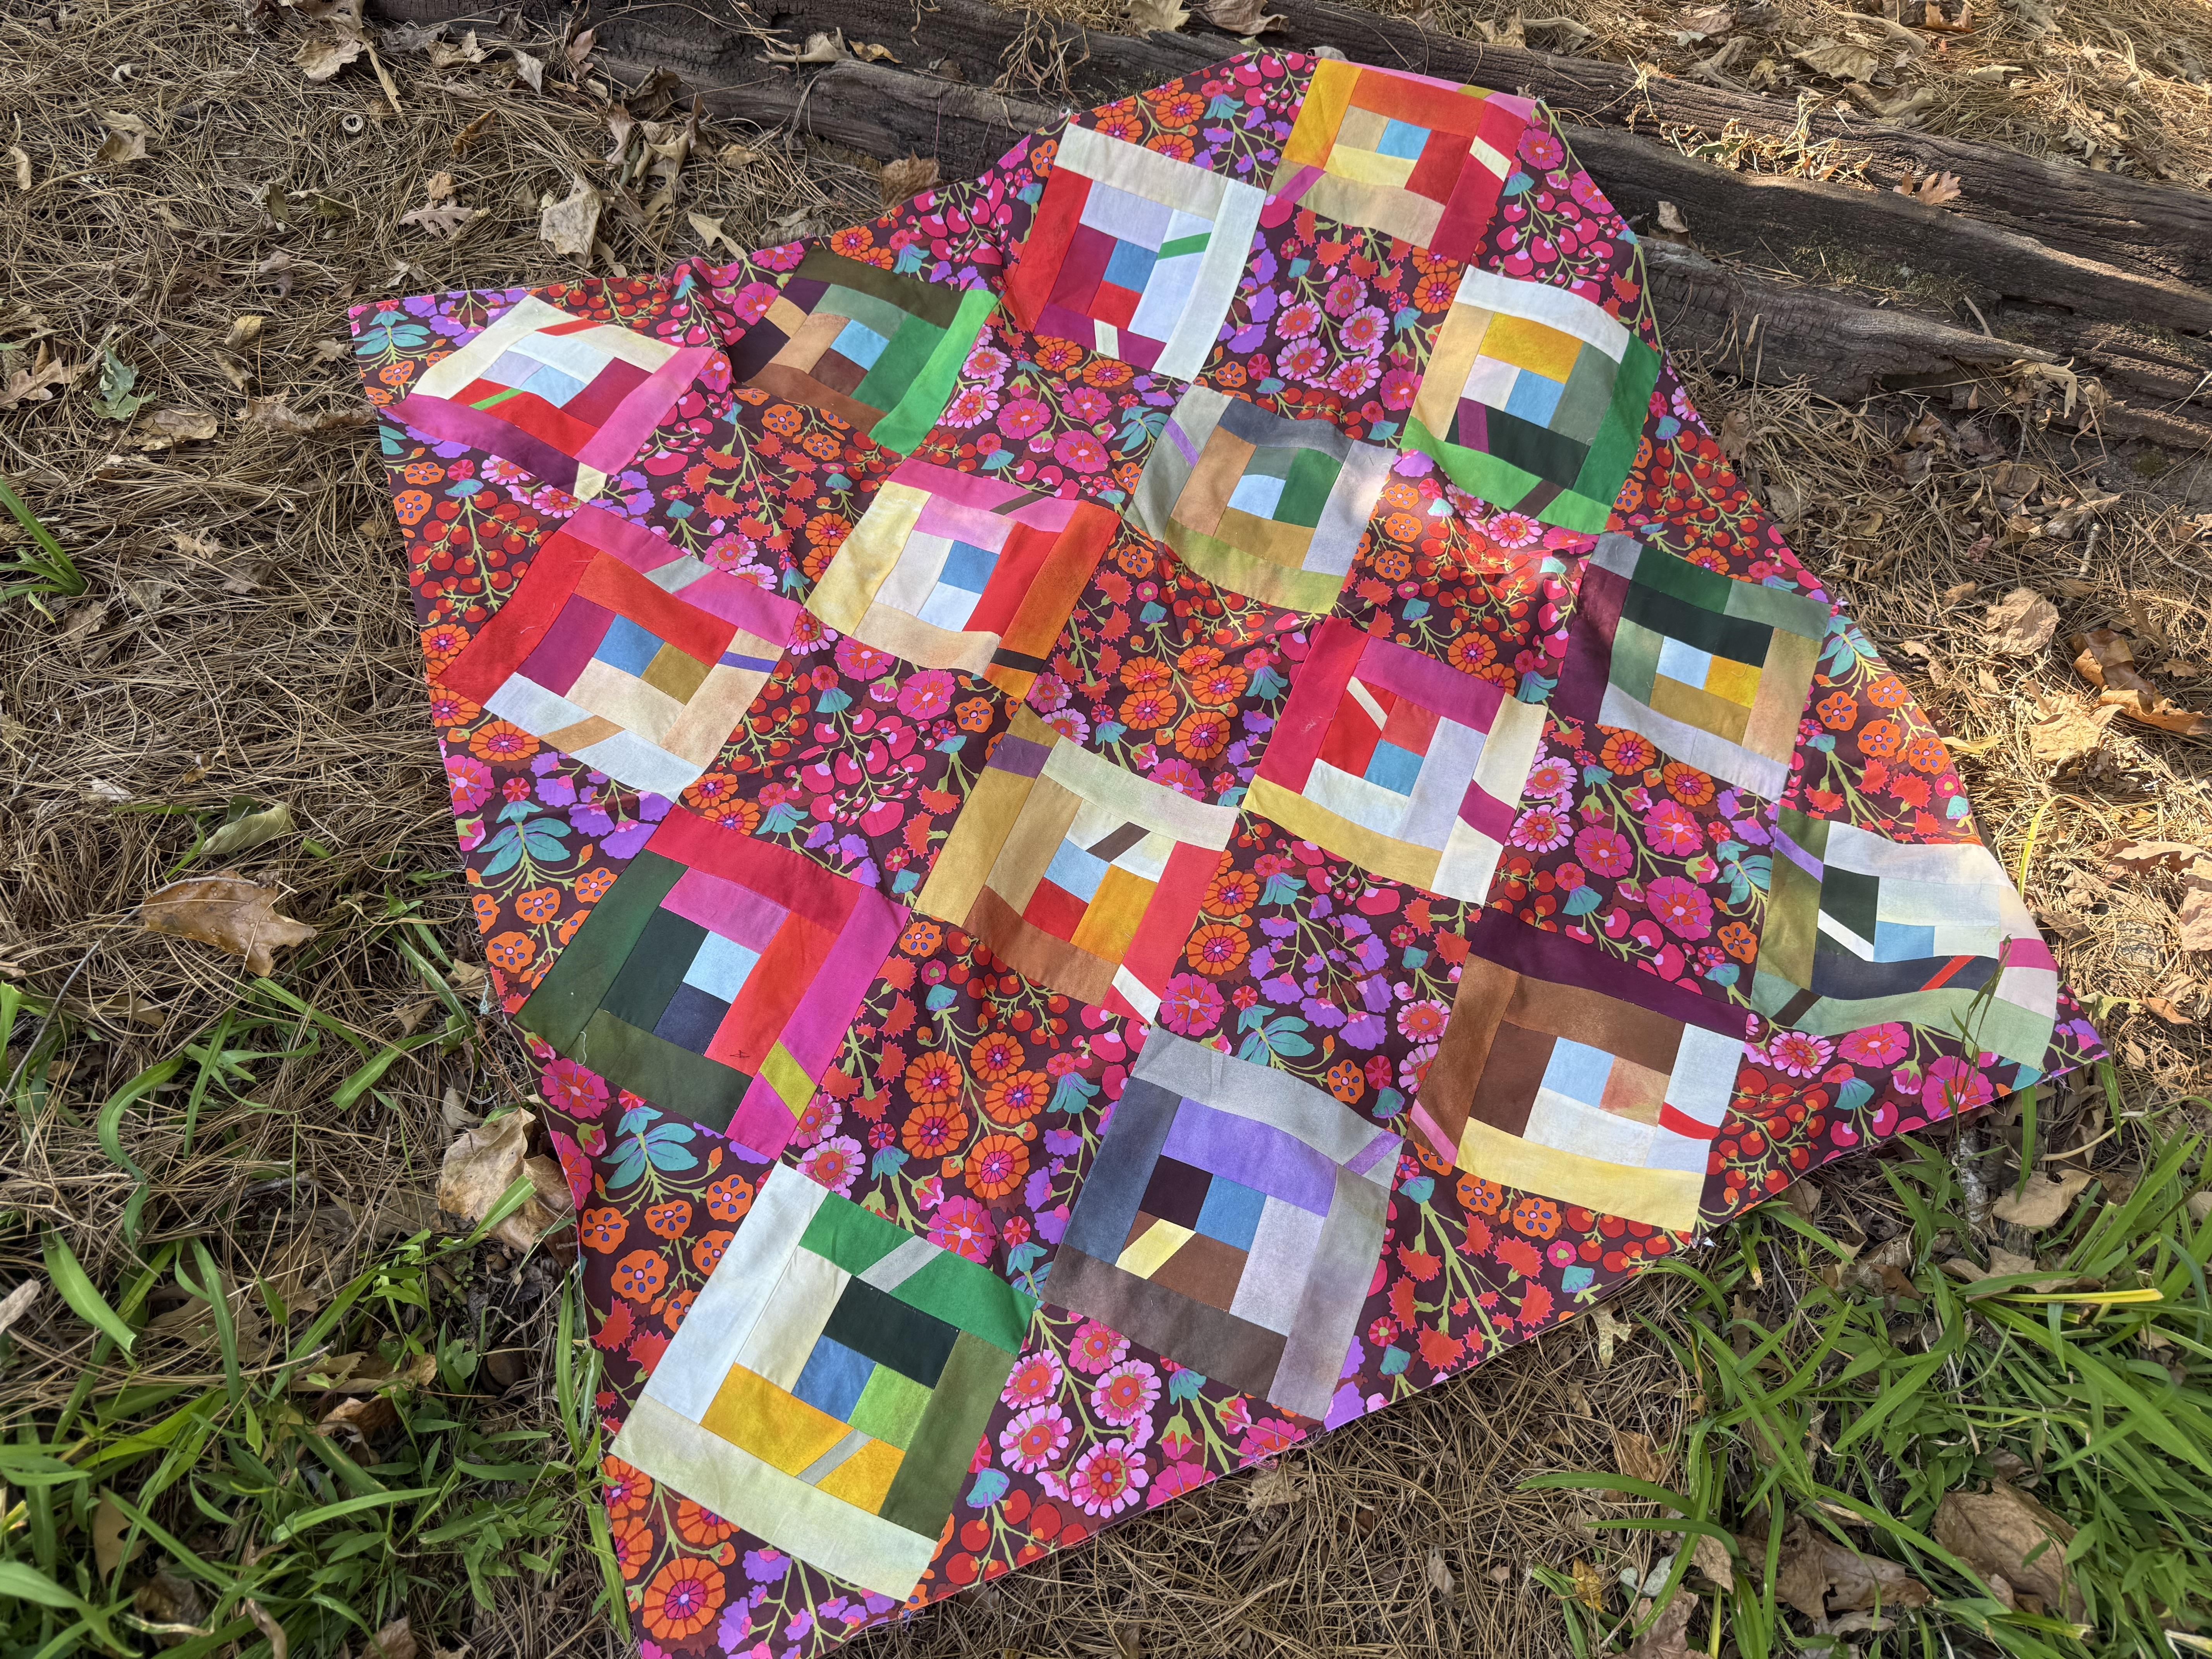
Wonky Log Cabin
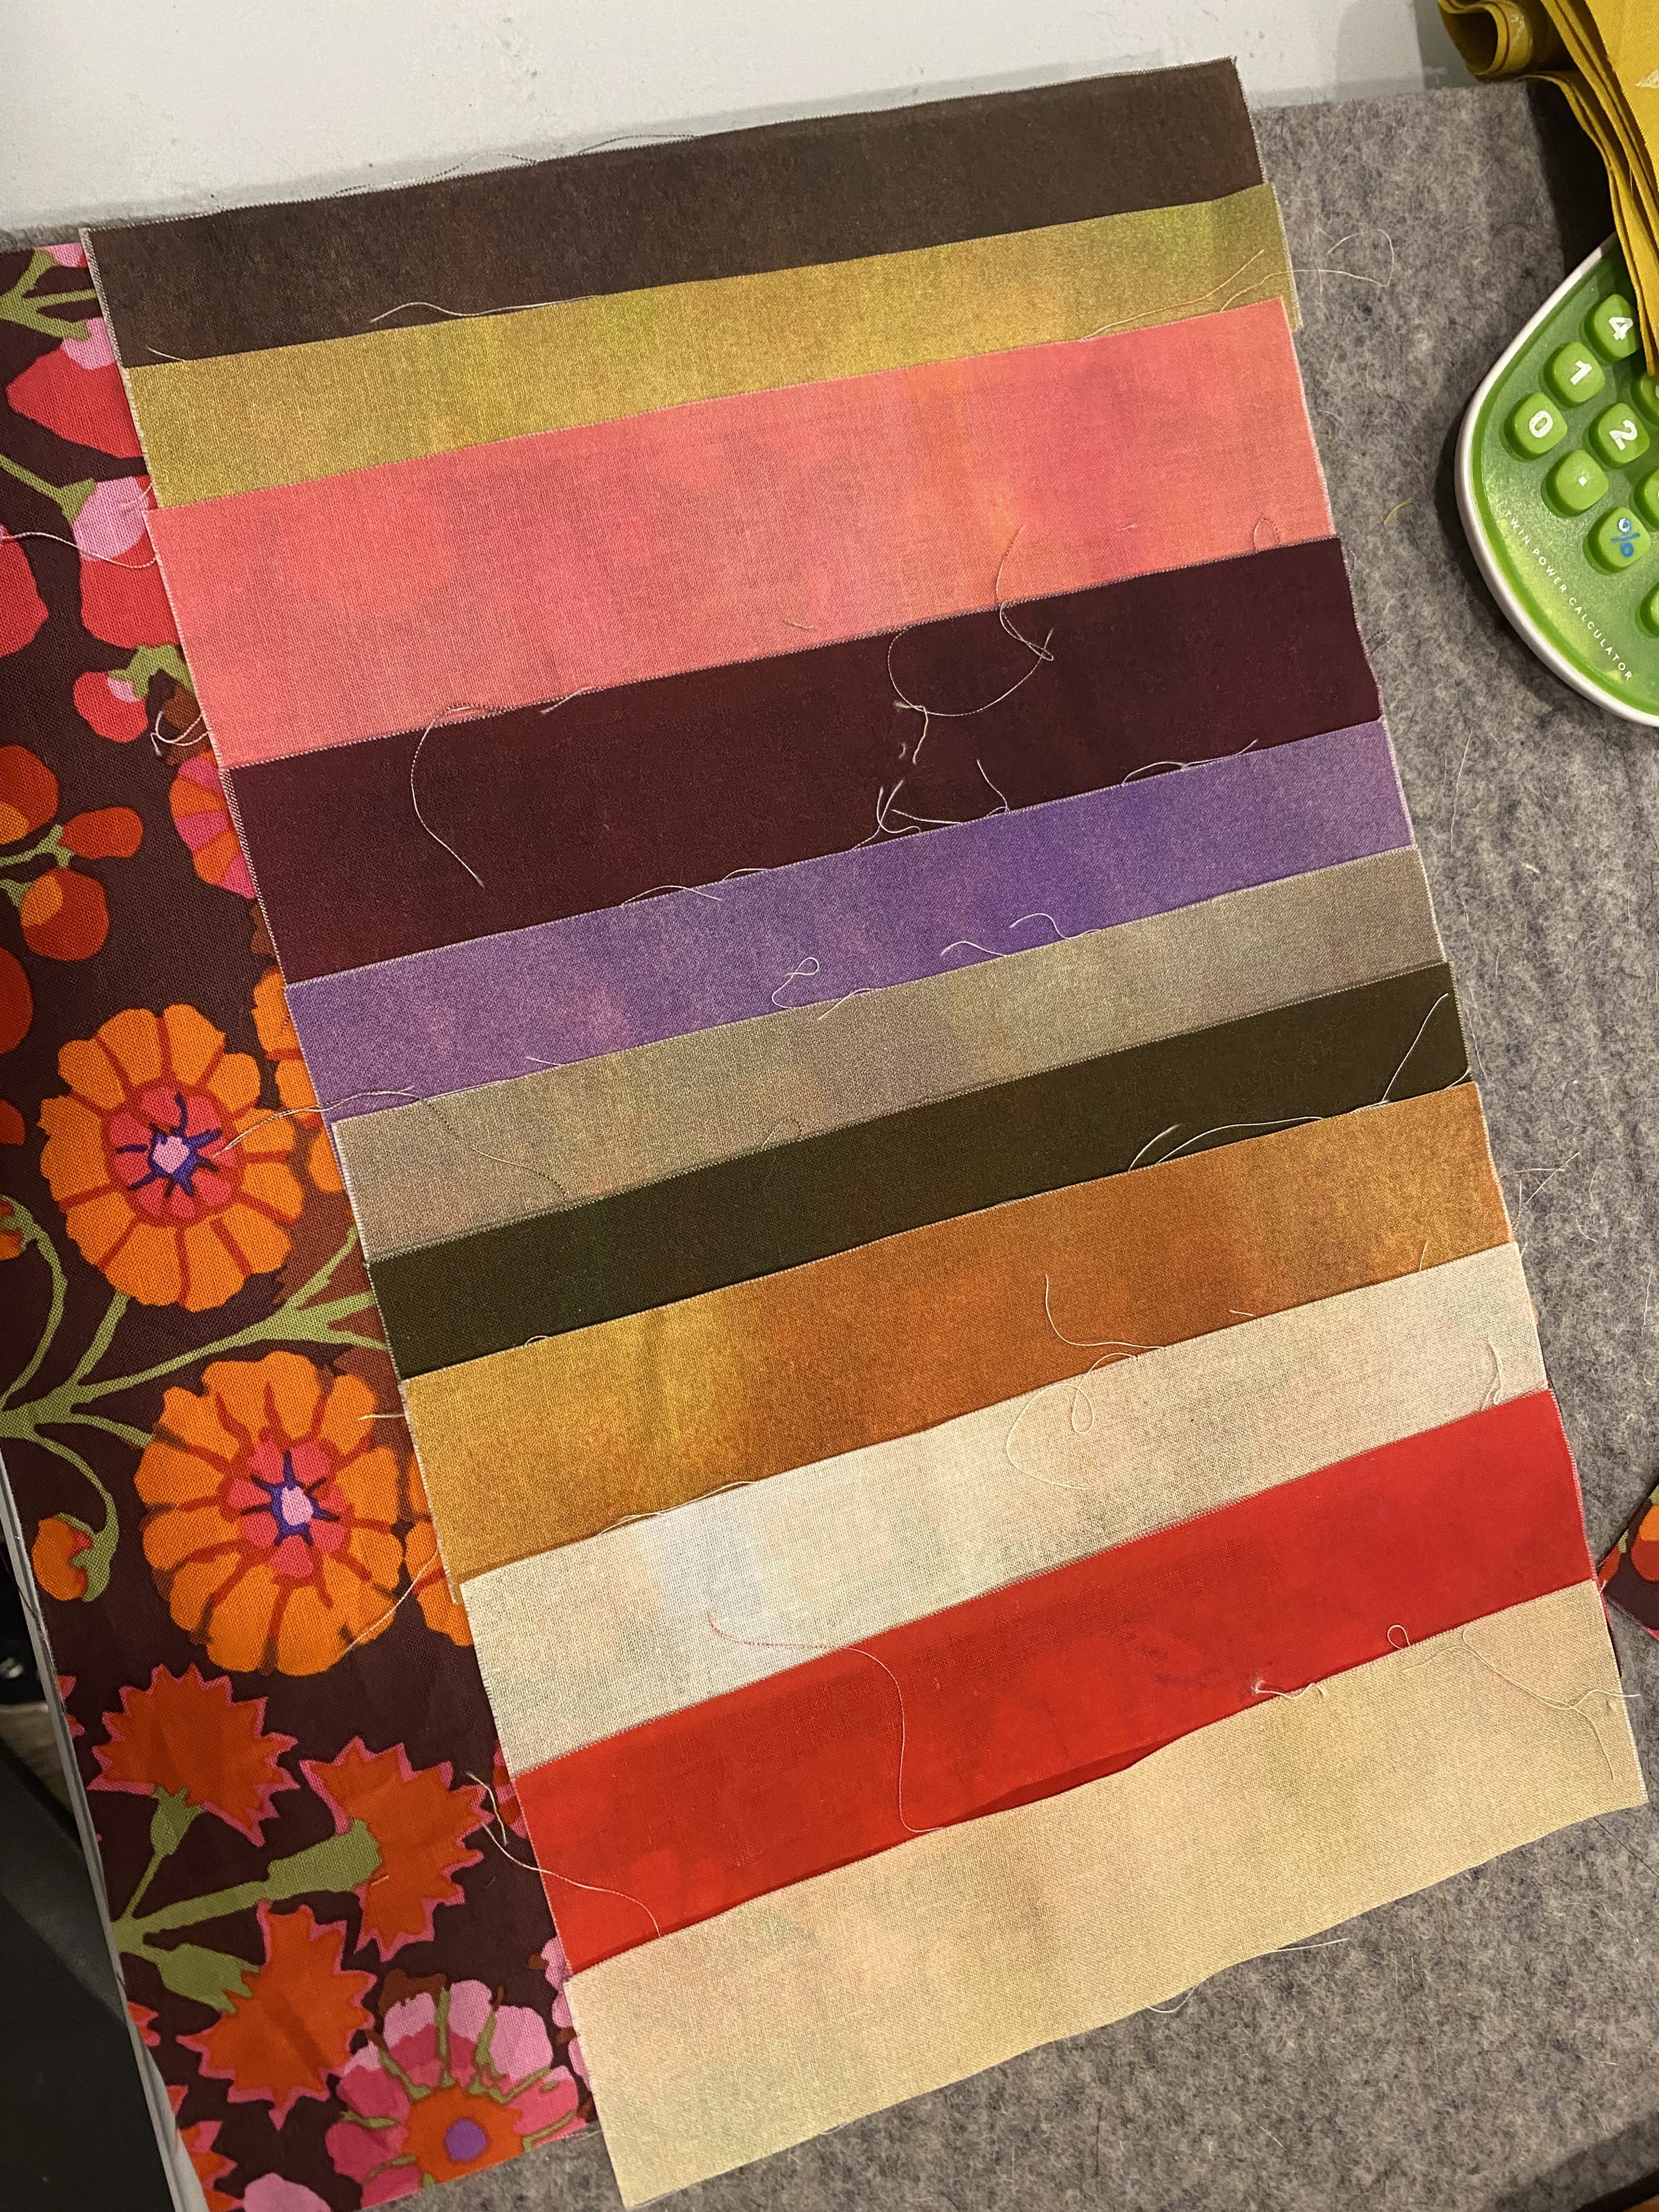
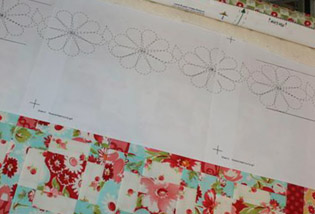
I used the leftover yardage to create strips and inset small, angled off-cuts into them to create this updated Log Cabin quilt. The on-point floral fabric is a Kaffe Fassett that I cut on the bias so all the flowers would be facing the correct direction.
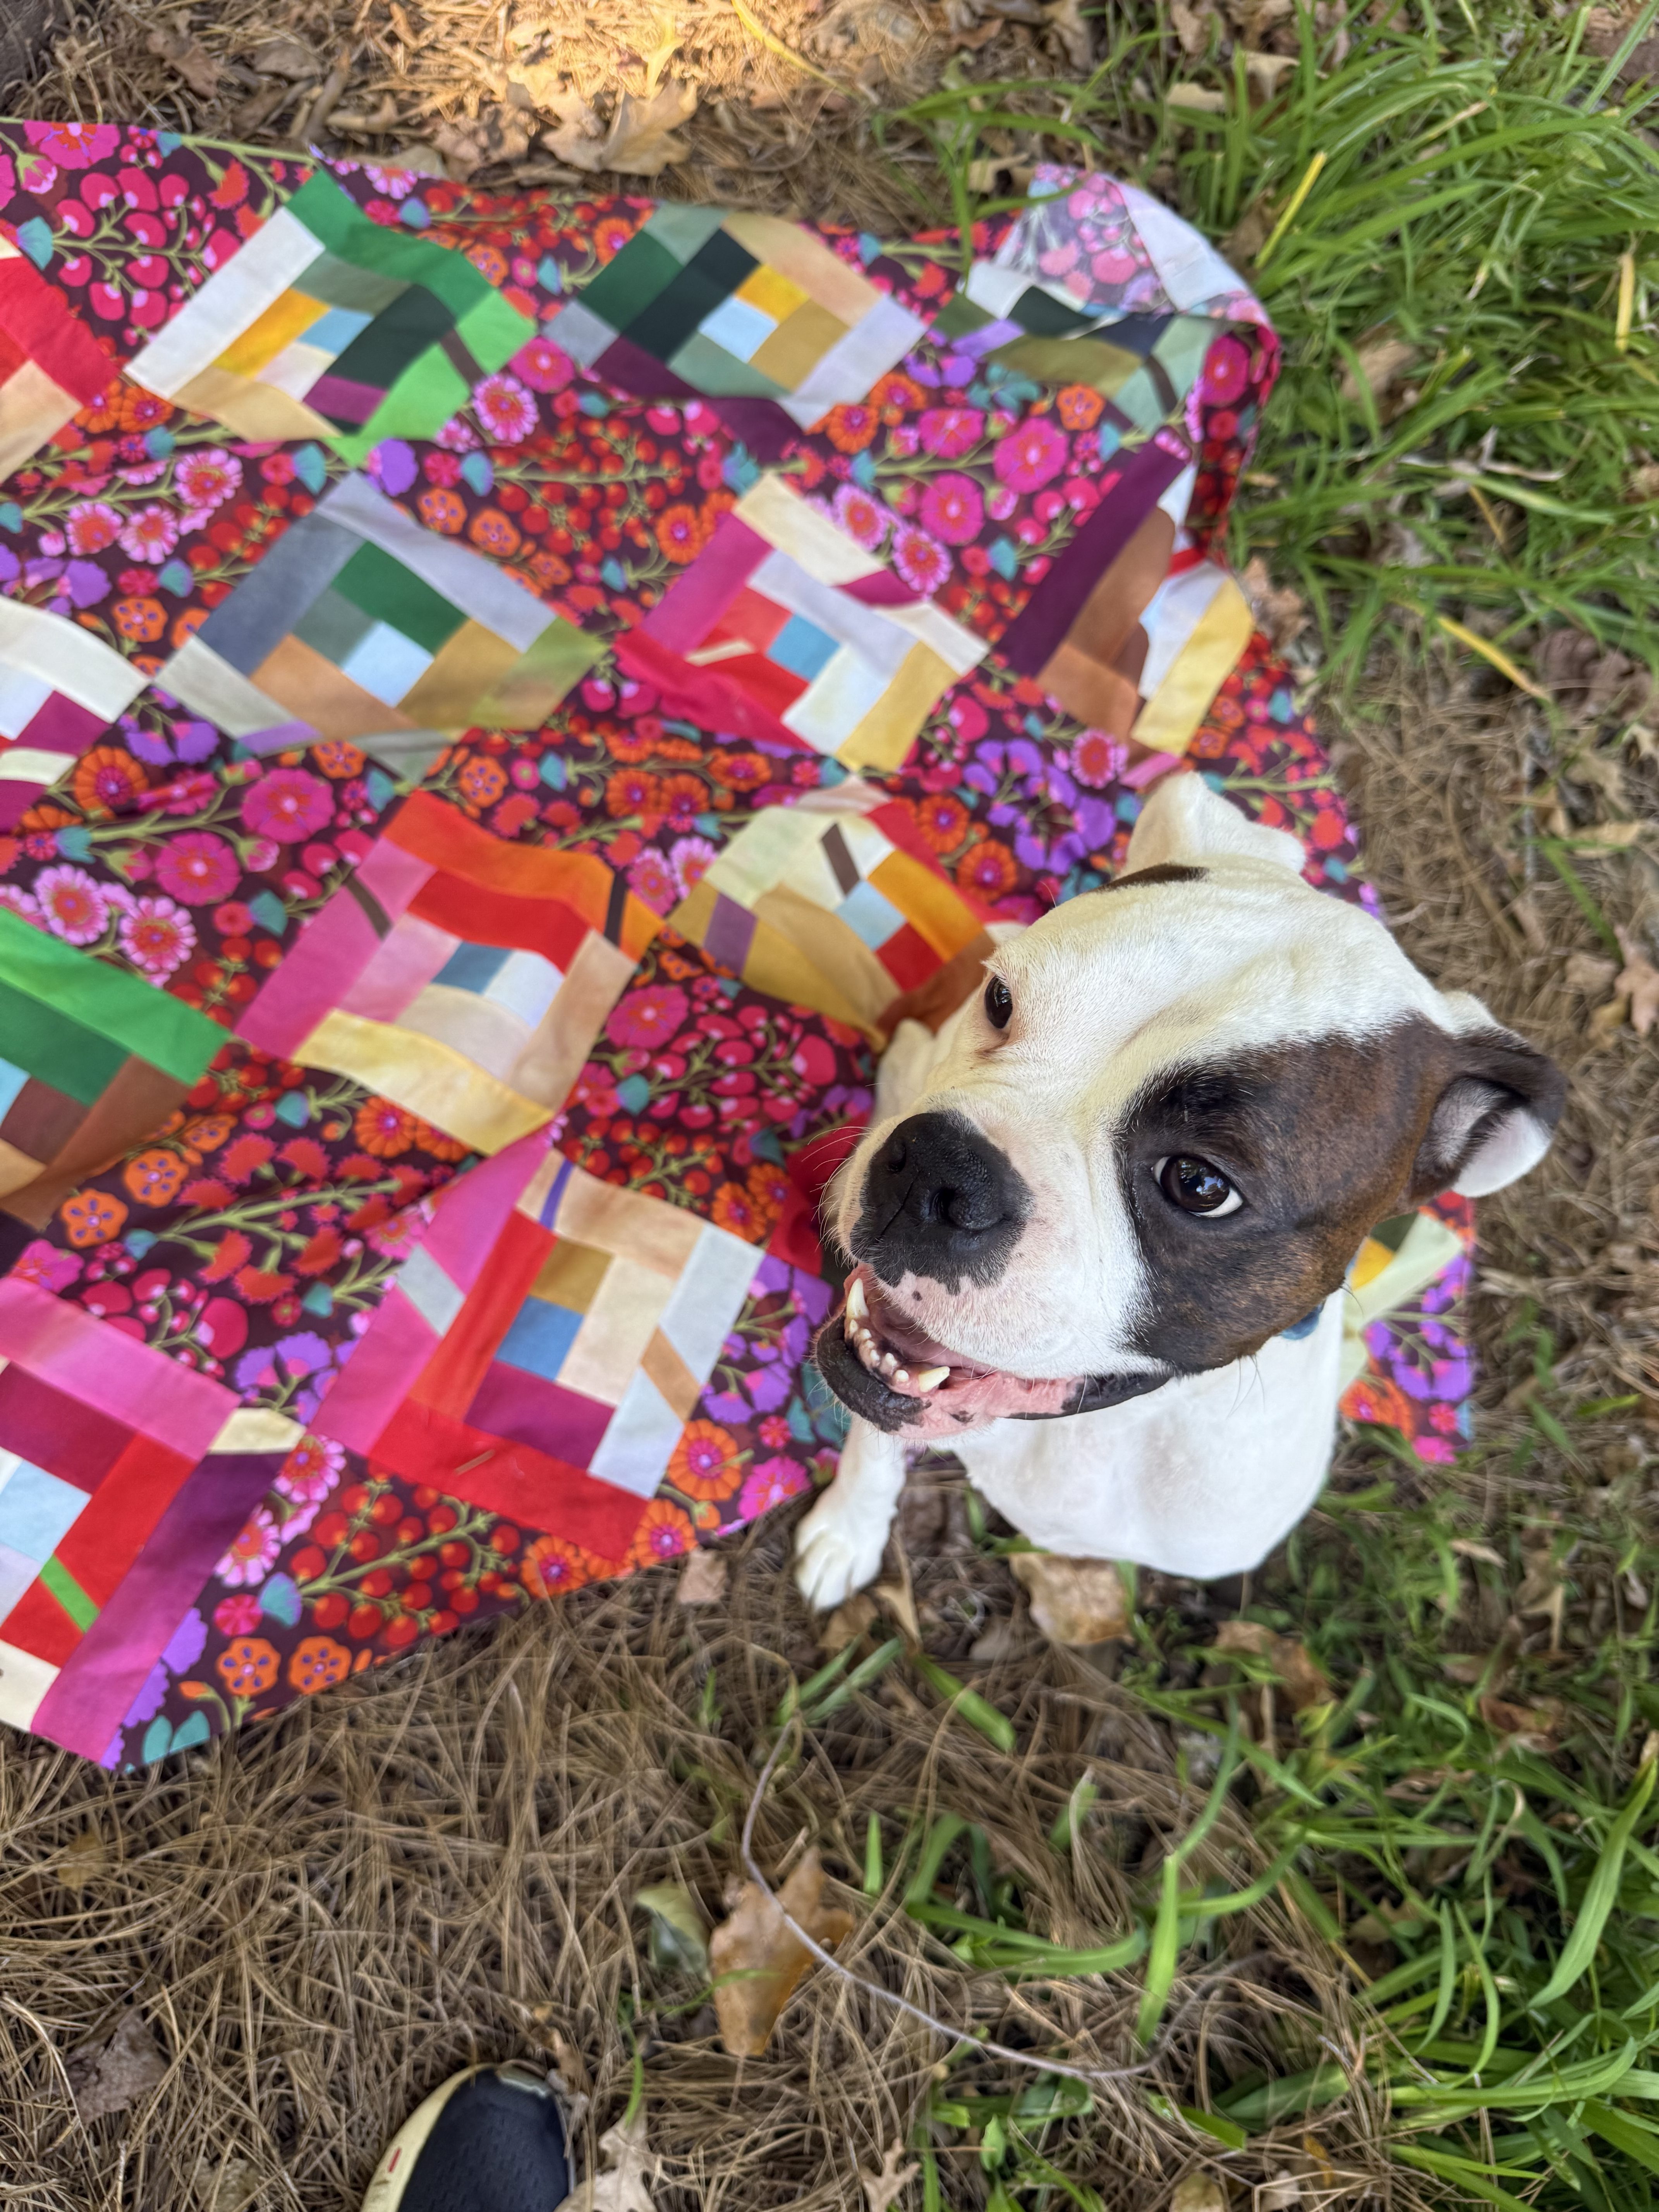
A still of the quilt.
Here’s what actually happened when I was trying to get a photo. Cute but not helpful.
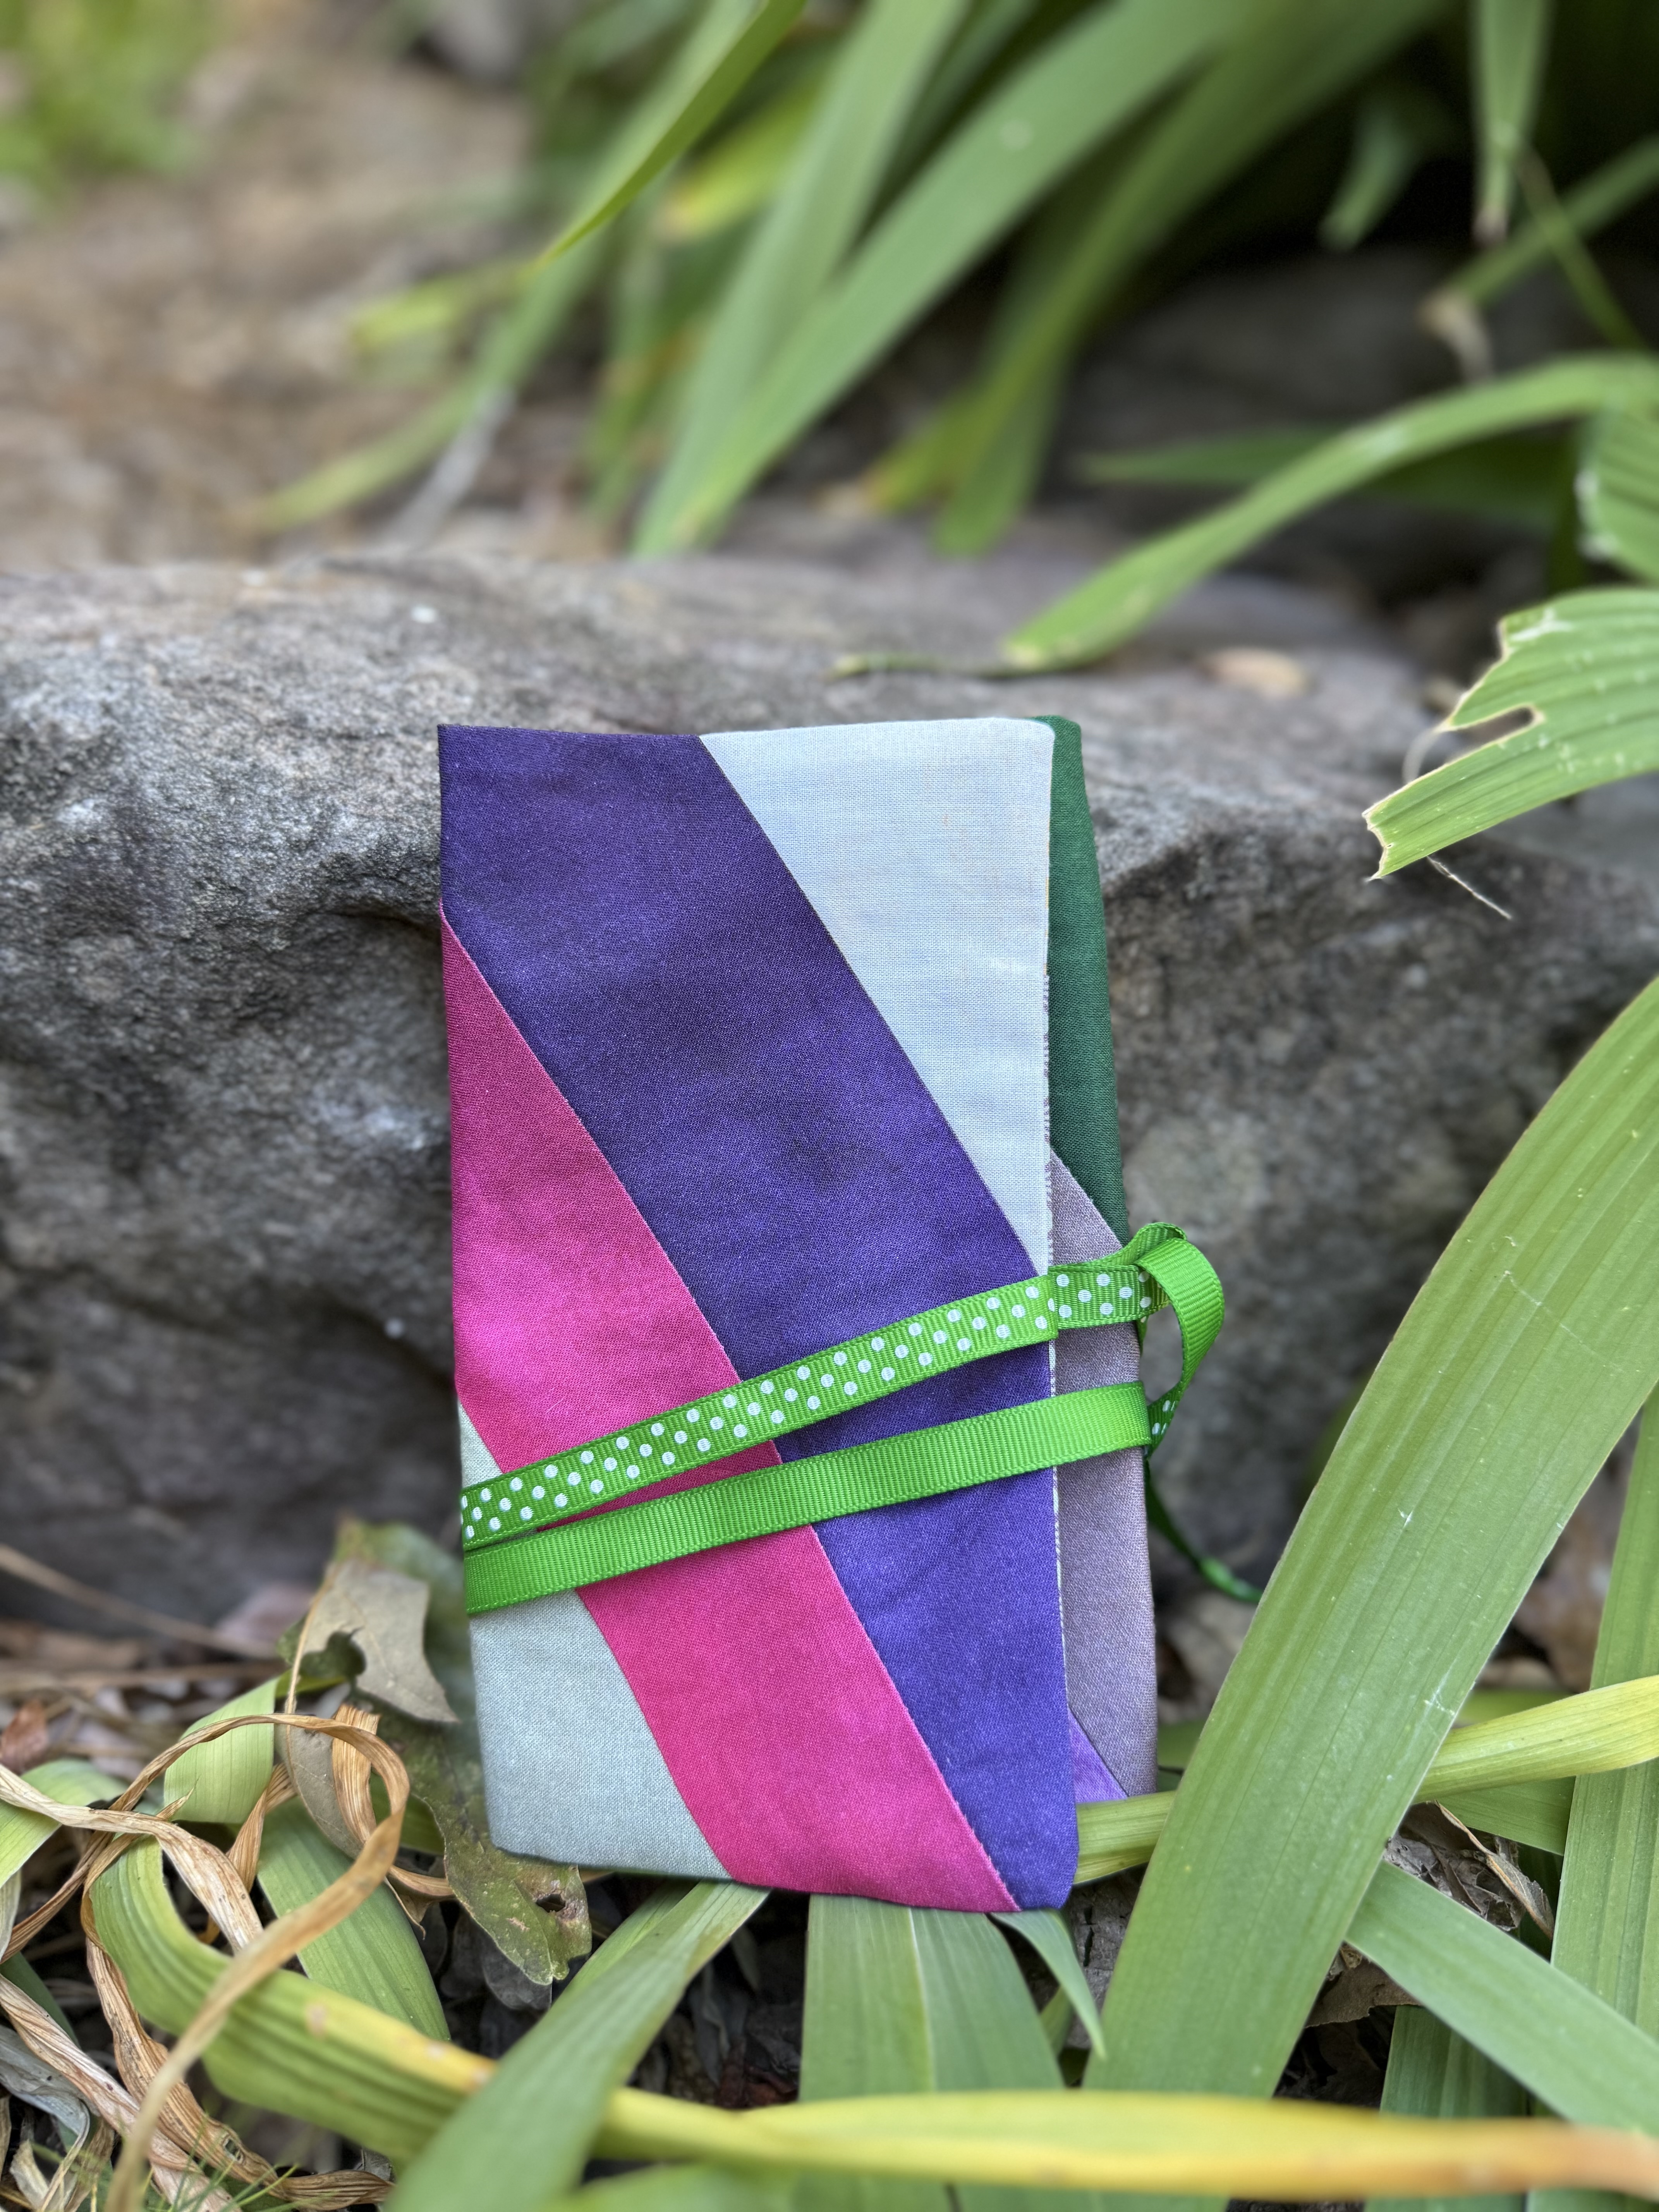
Crochet Hook Holder
I had three pieces remaining after I created my pillow and after some thought, I decided a crochet hook/needle holder would be the perfect project to make. The pieces were the correct size to come together in this small carrying case. I used some scraps for the lining and pocket pieces.
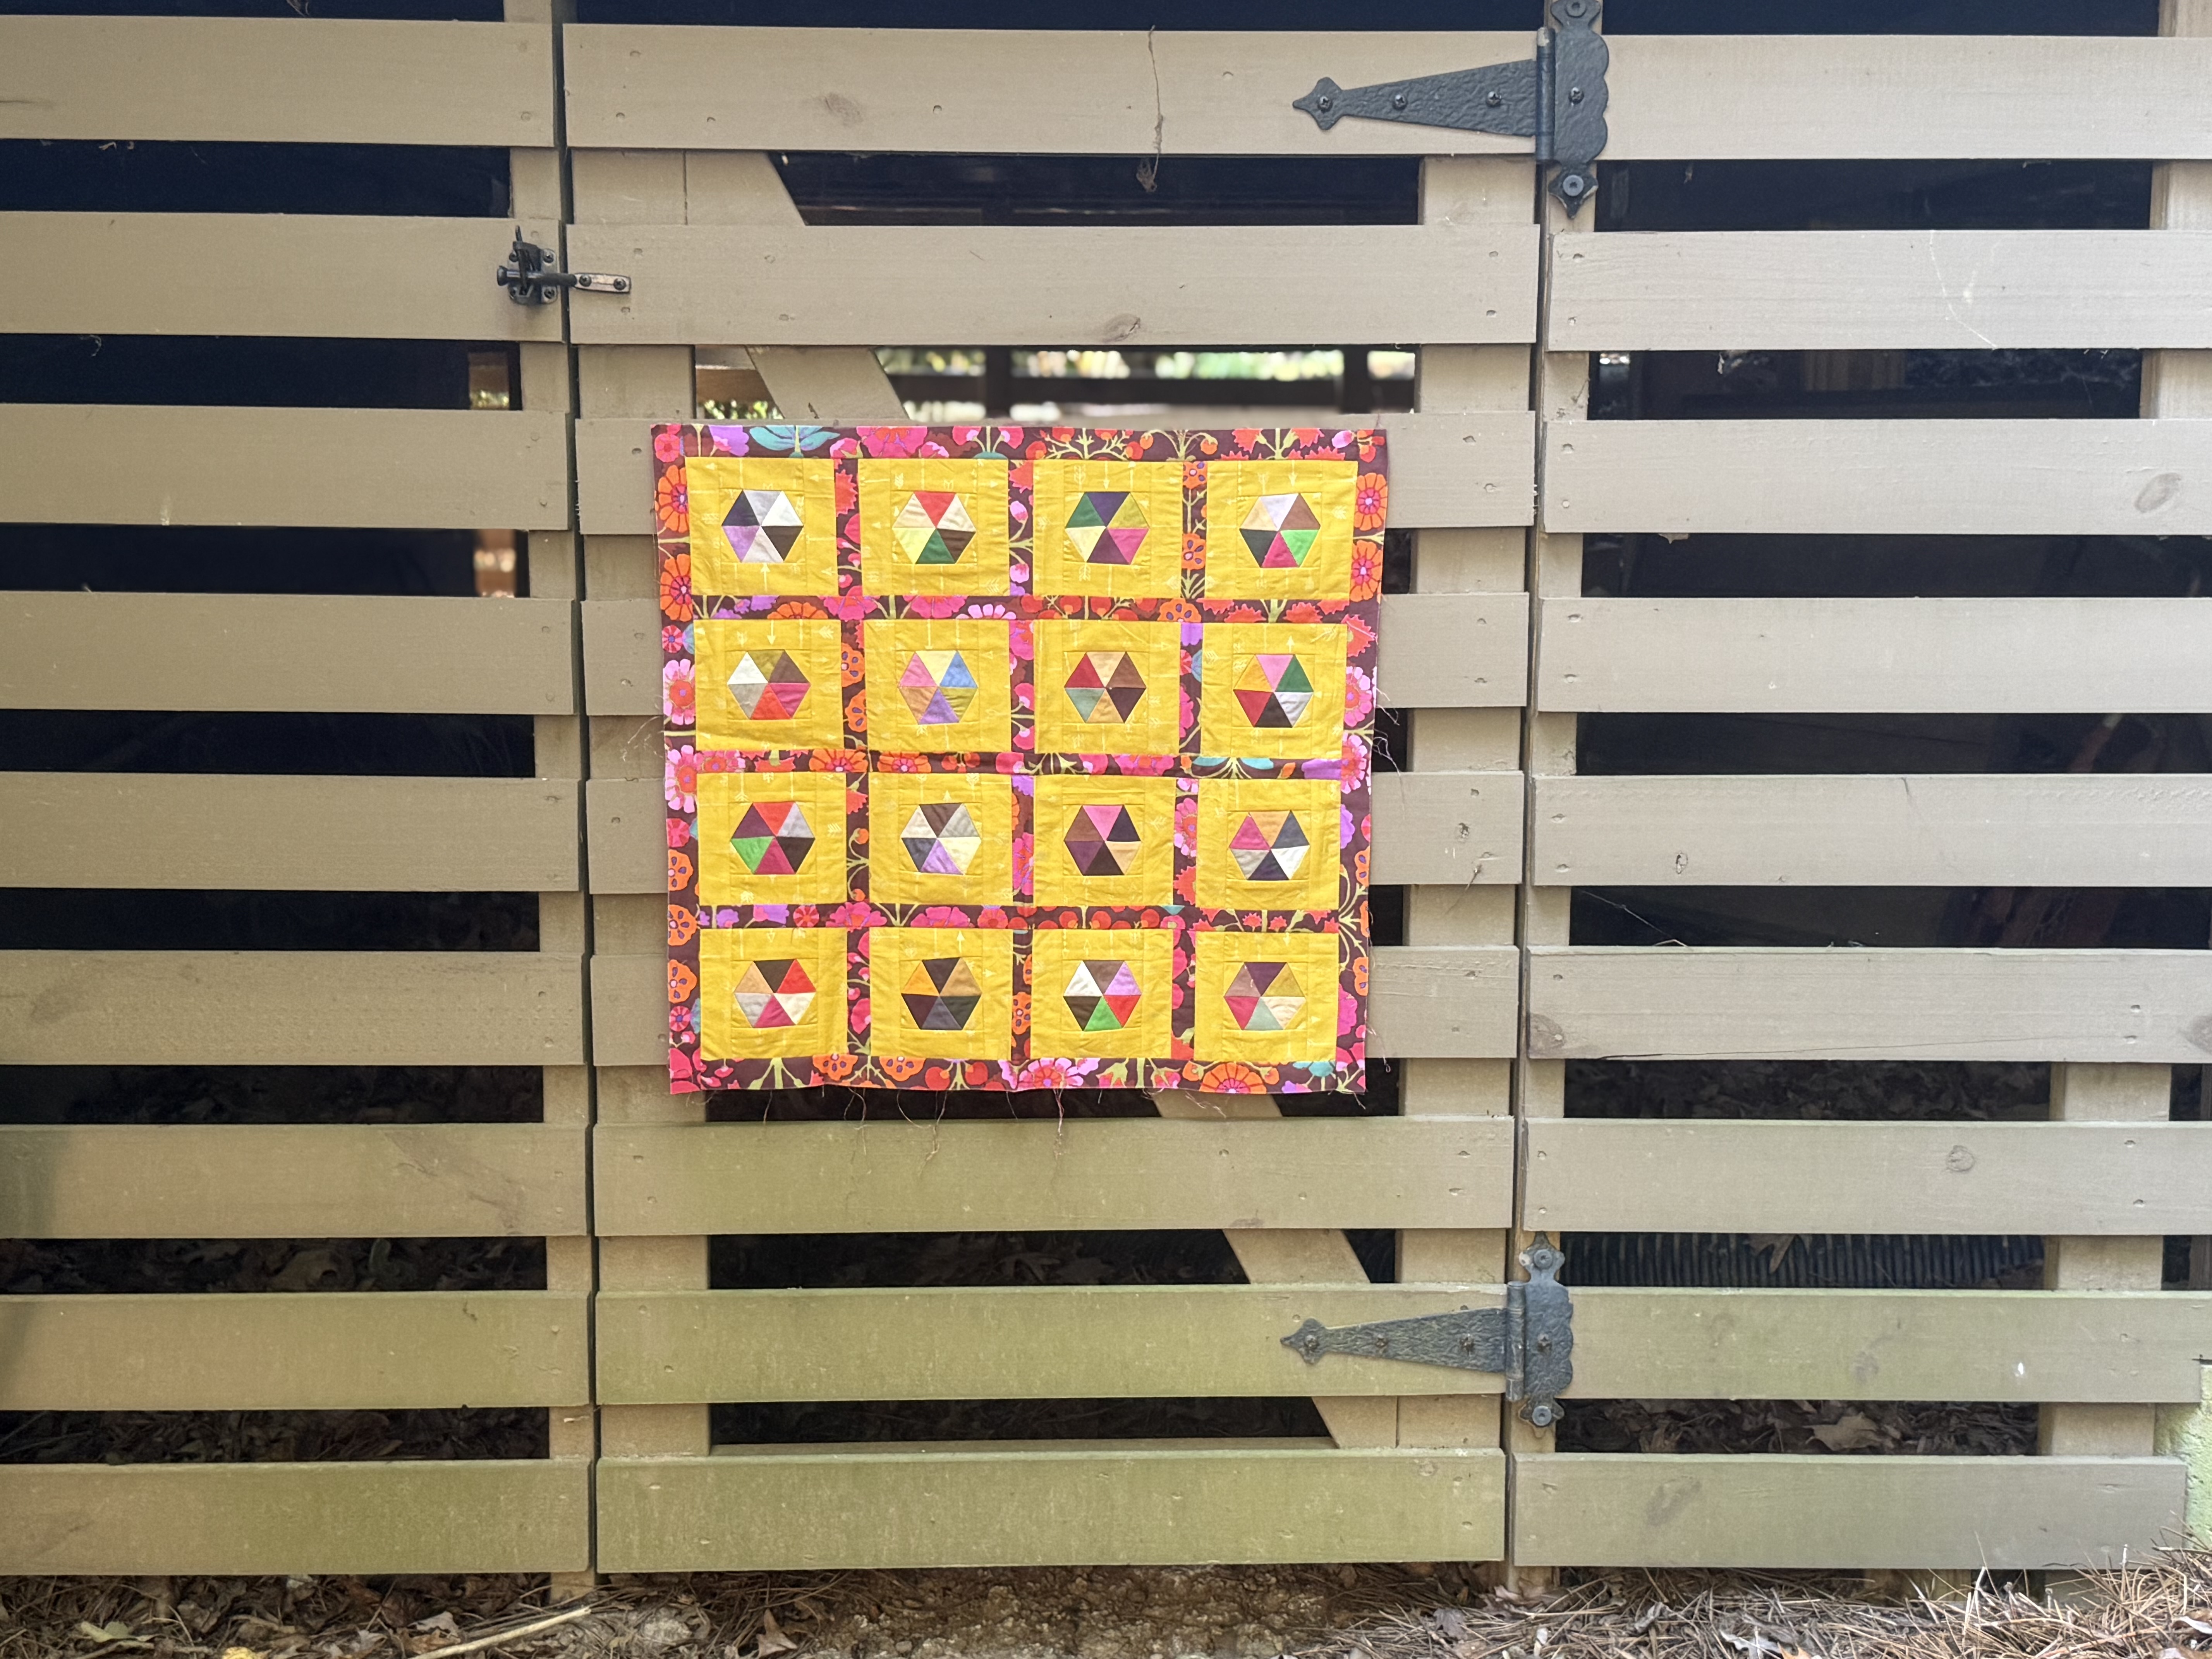
Even Smaller Quilt
The even smaller pieces became hexagons in this small wall hanging.
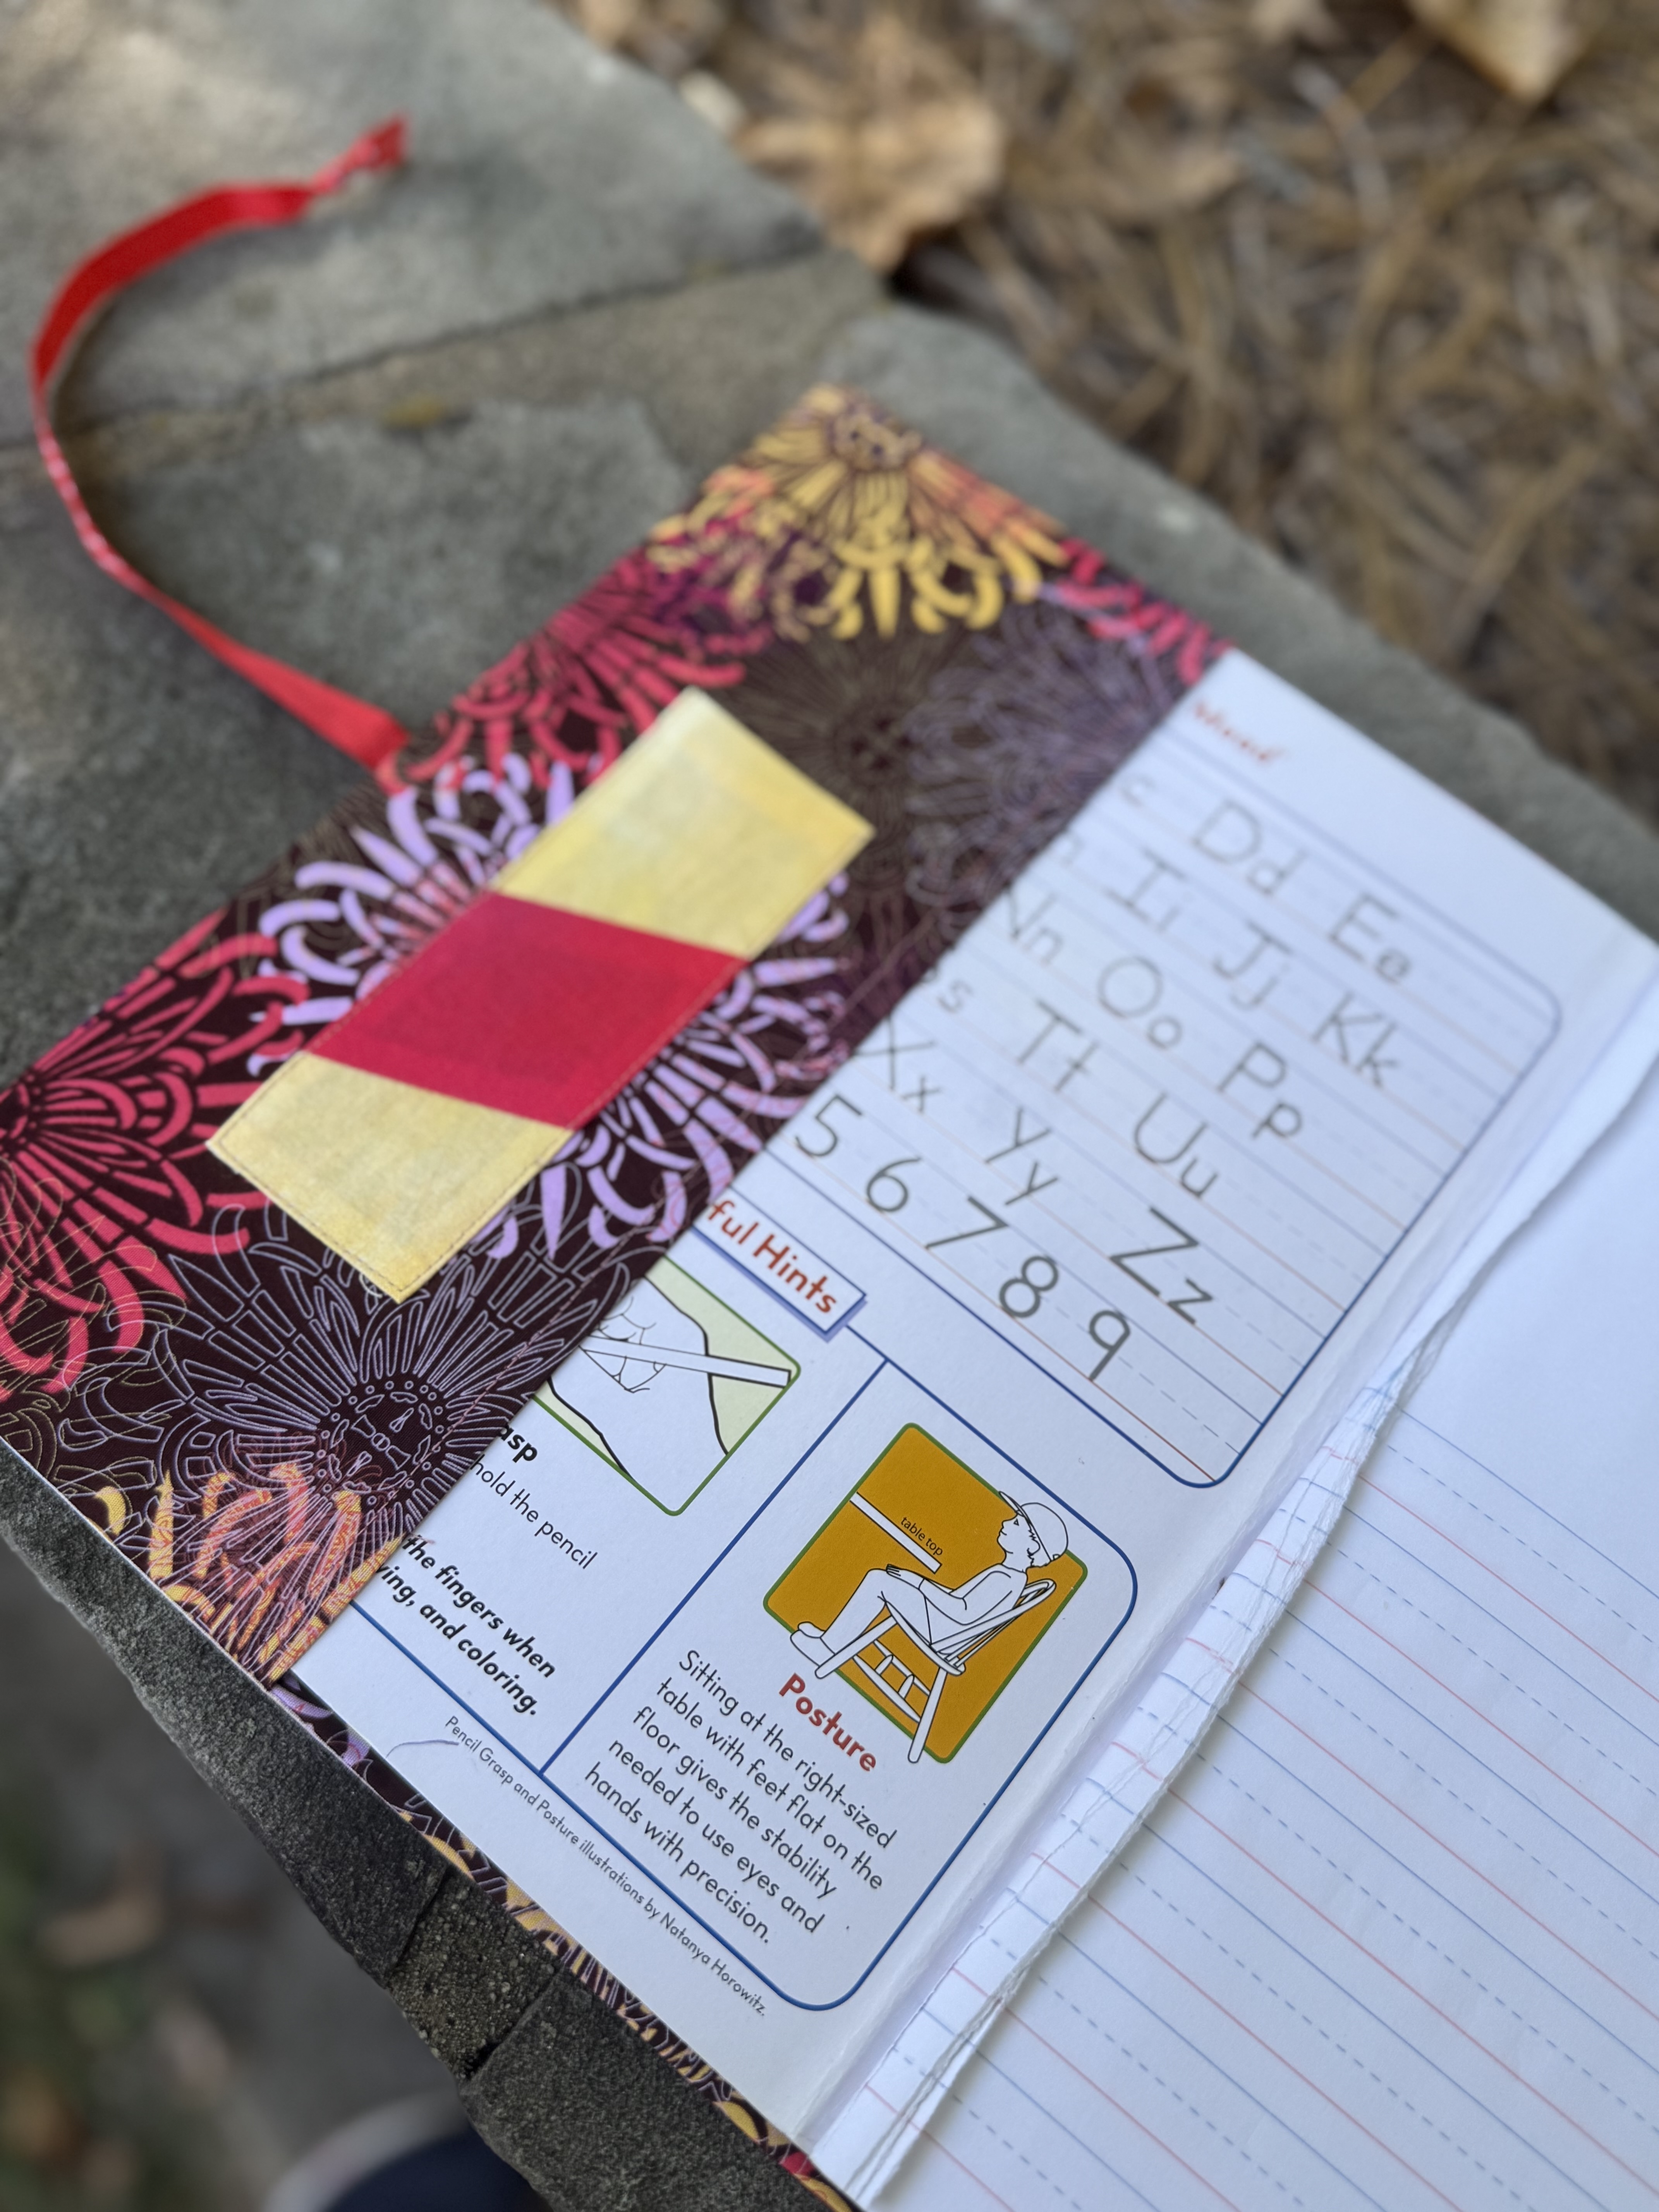
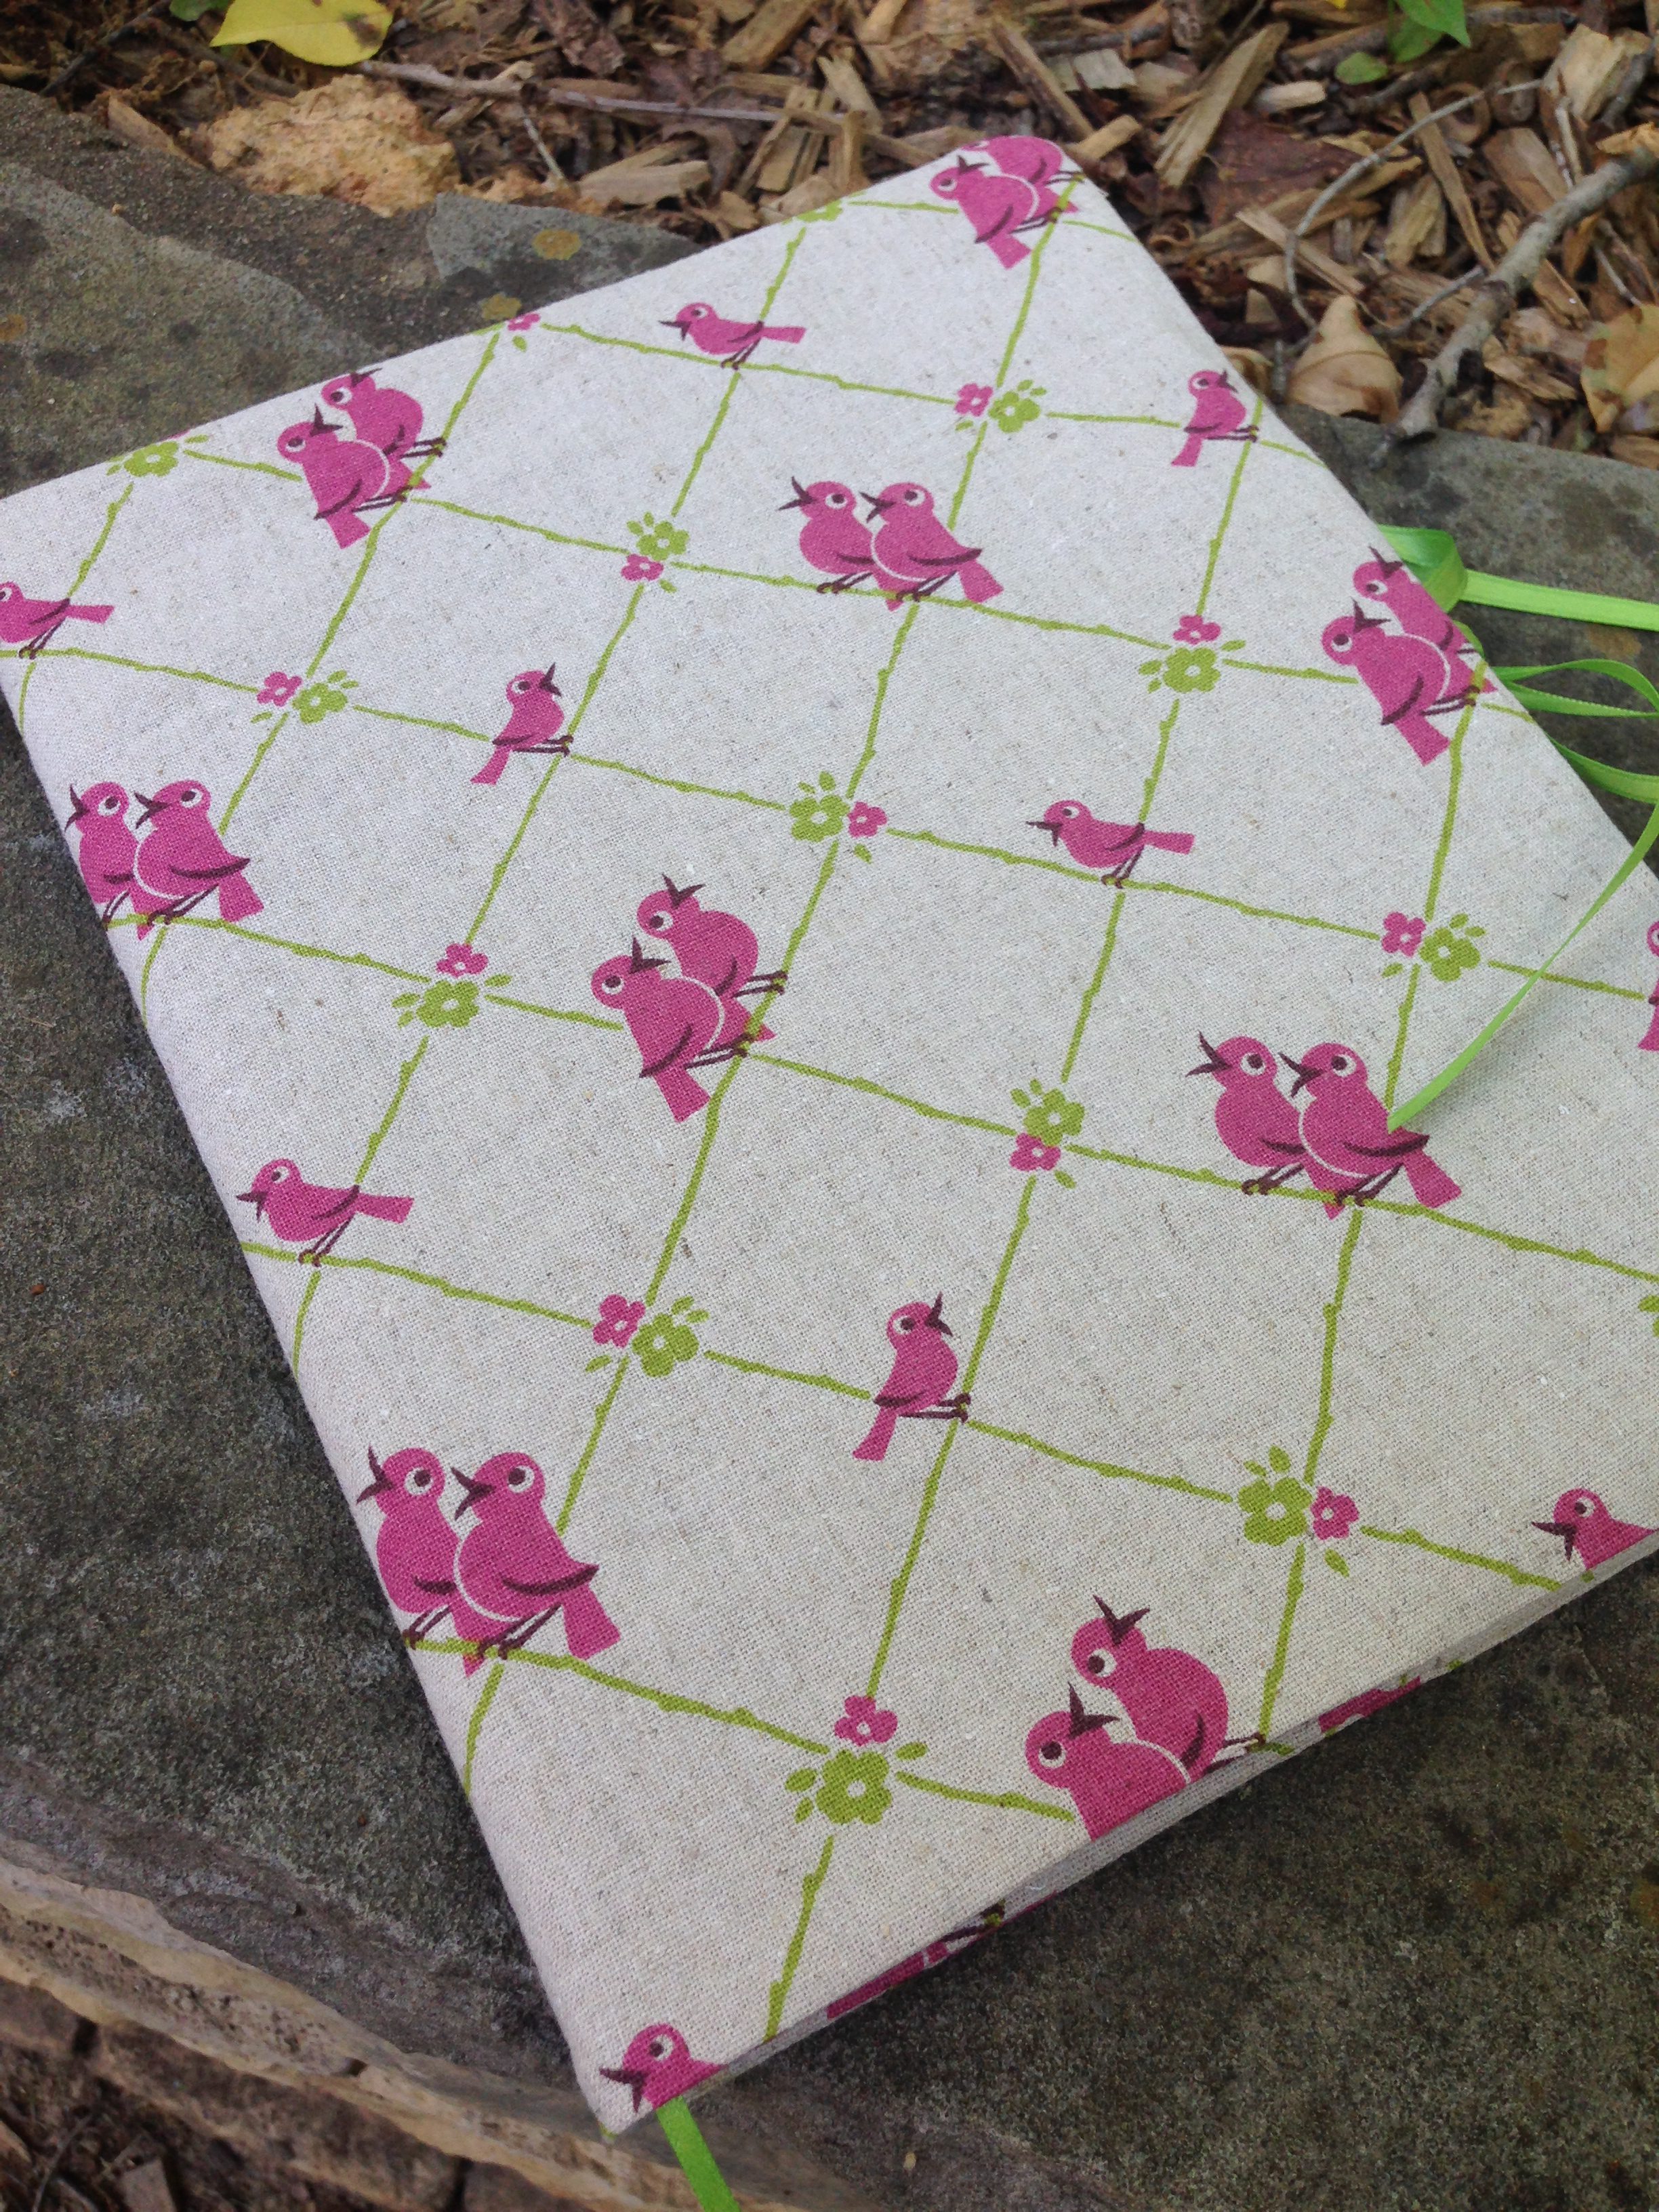
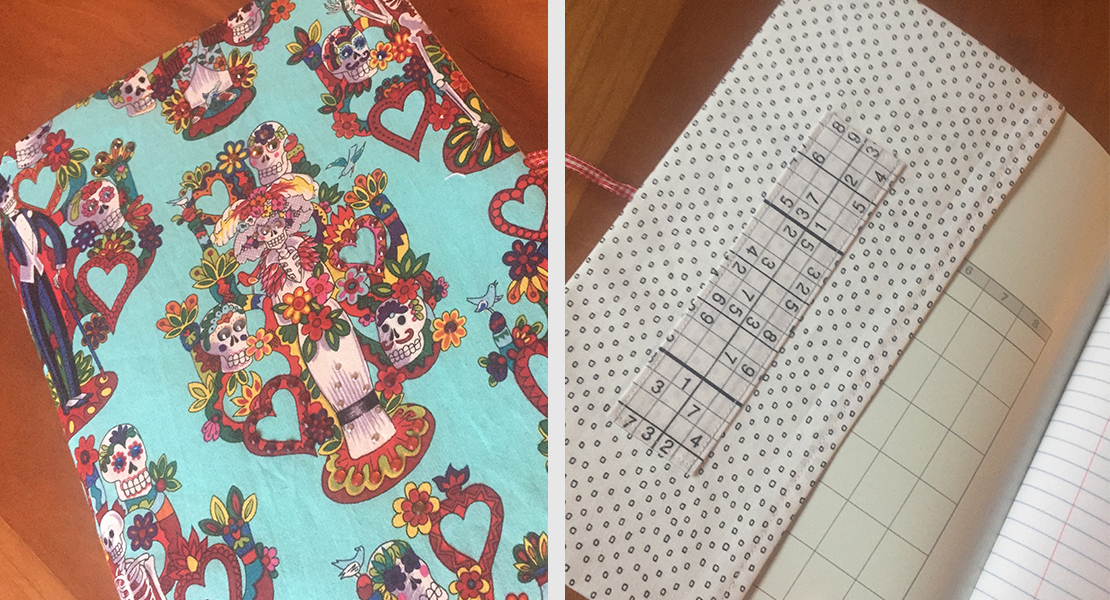
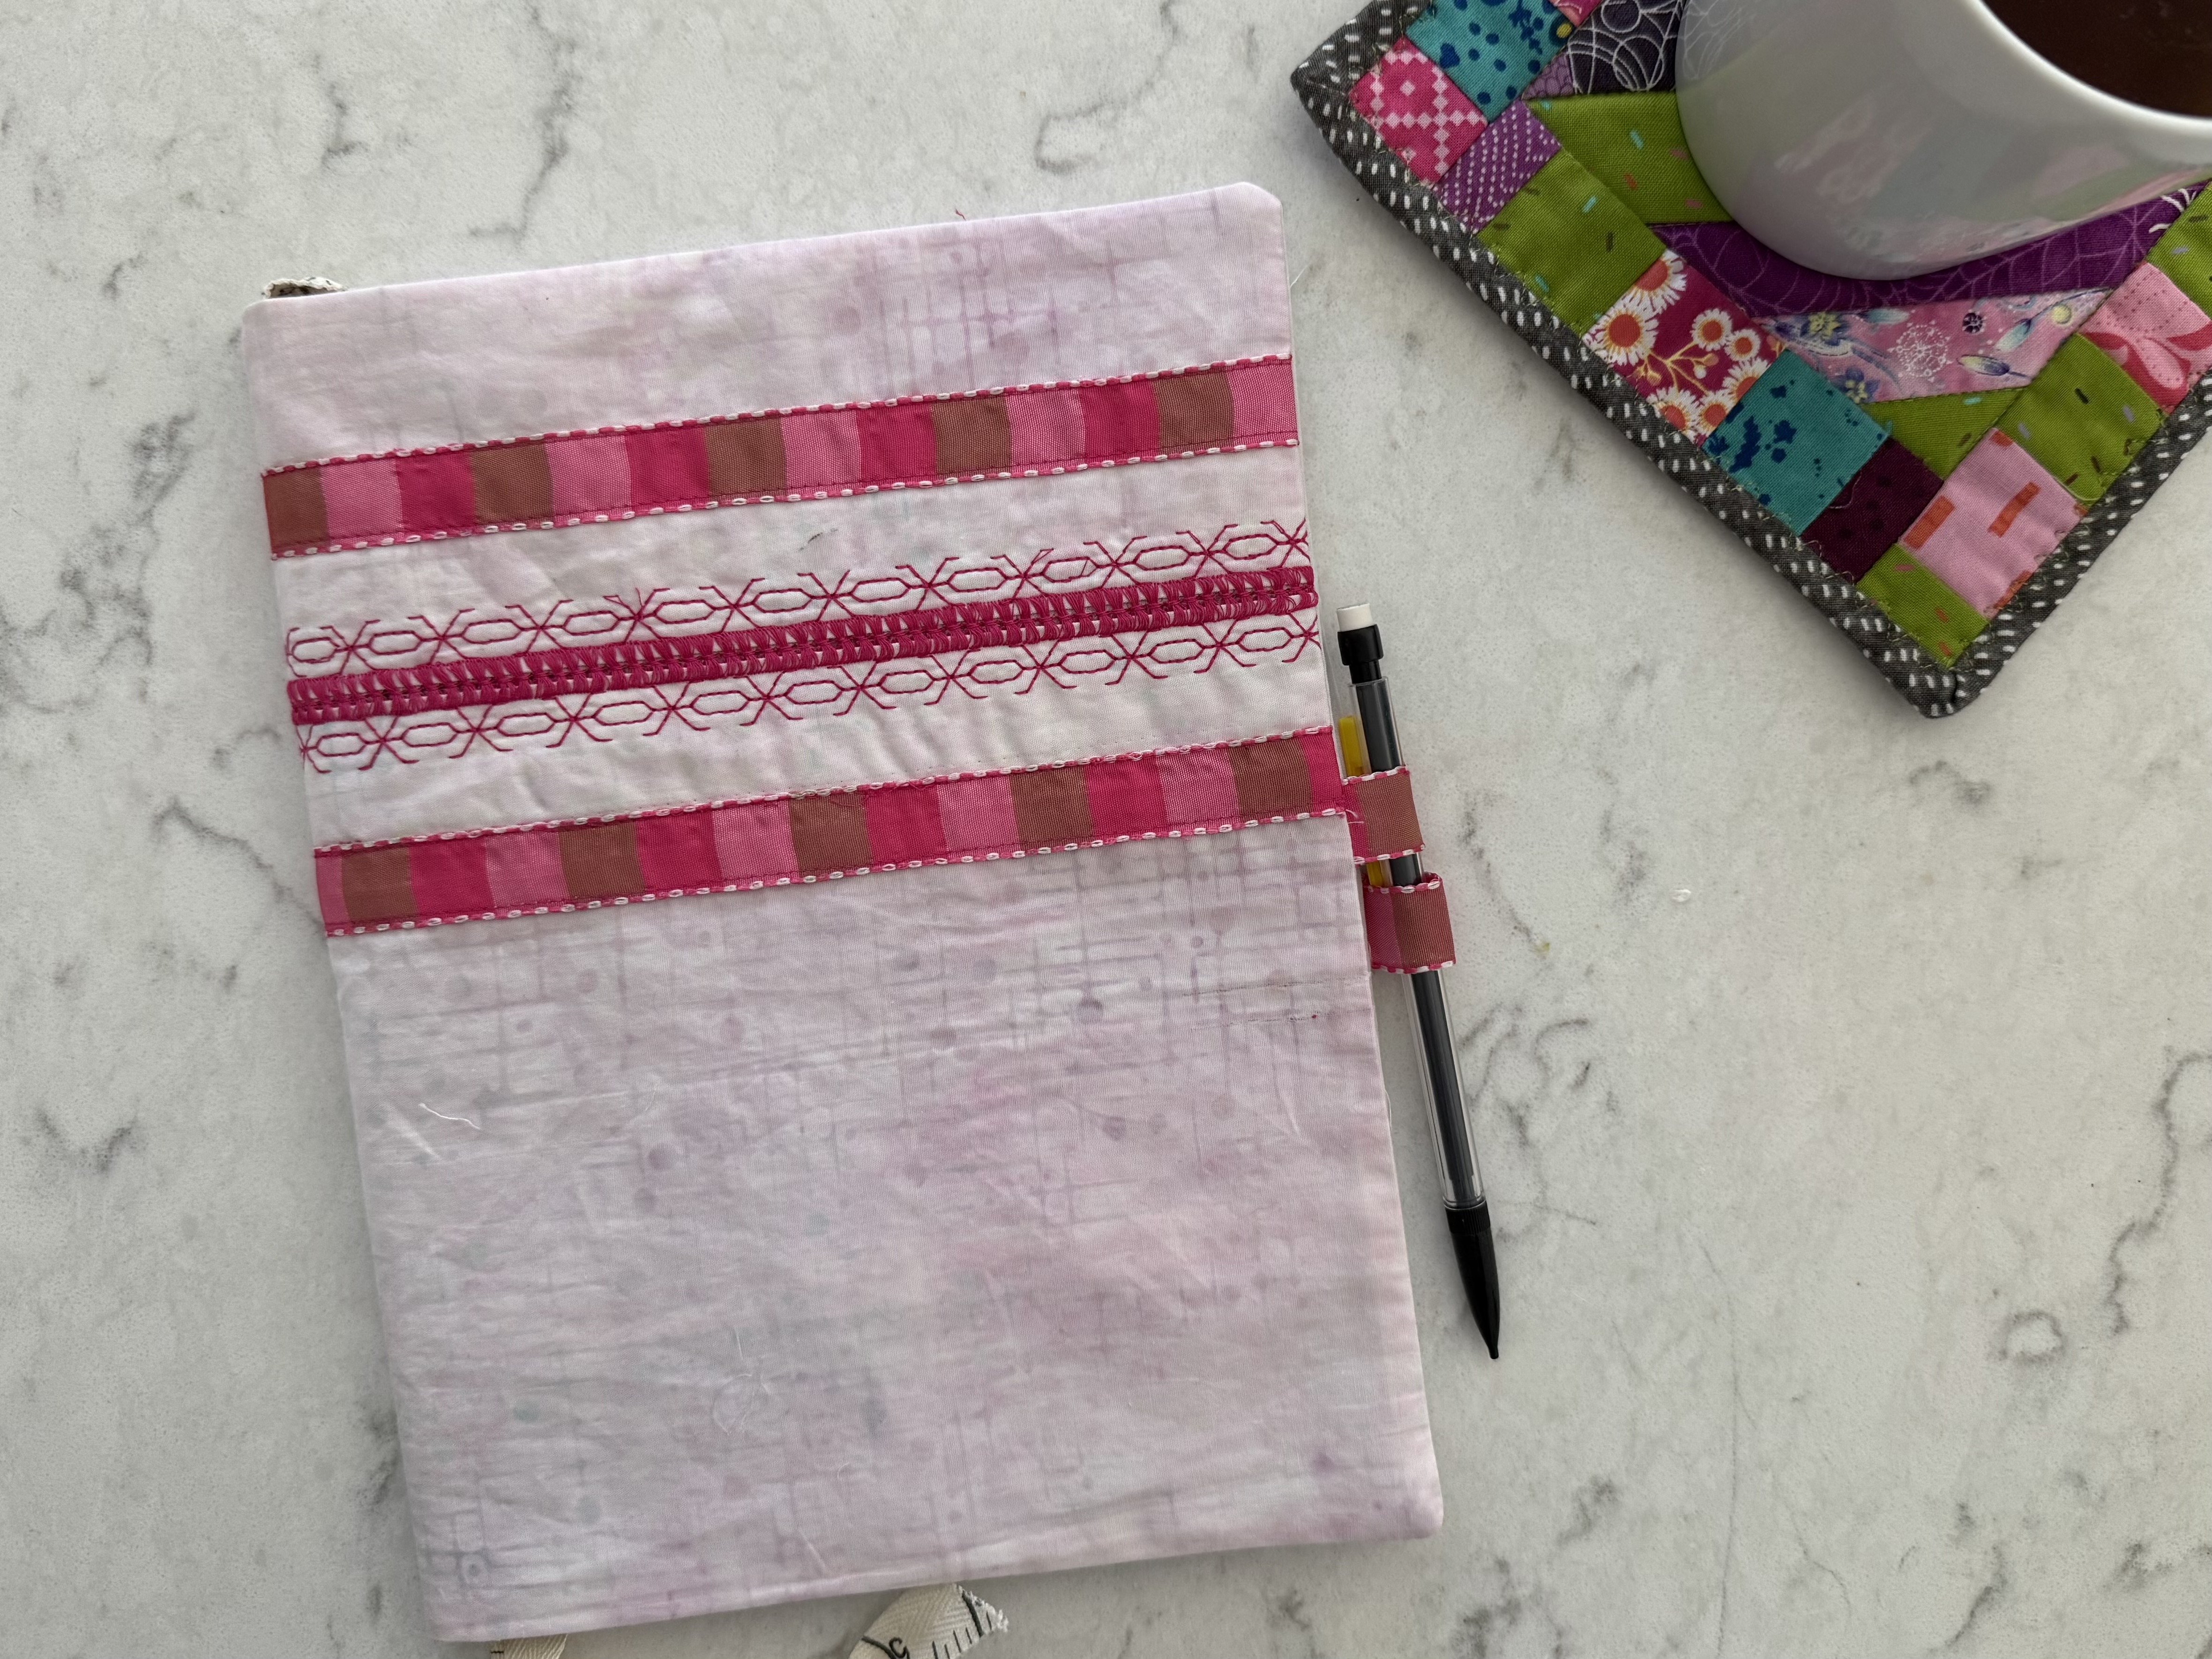
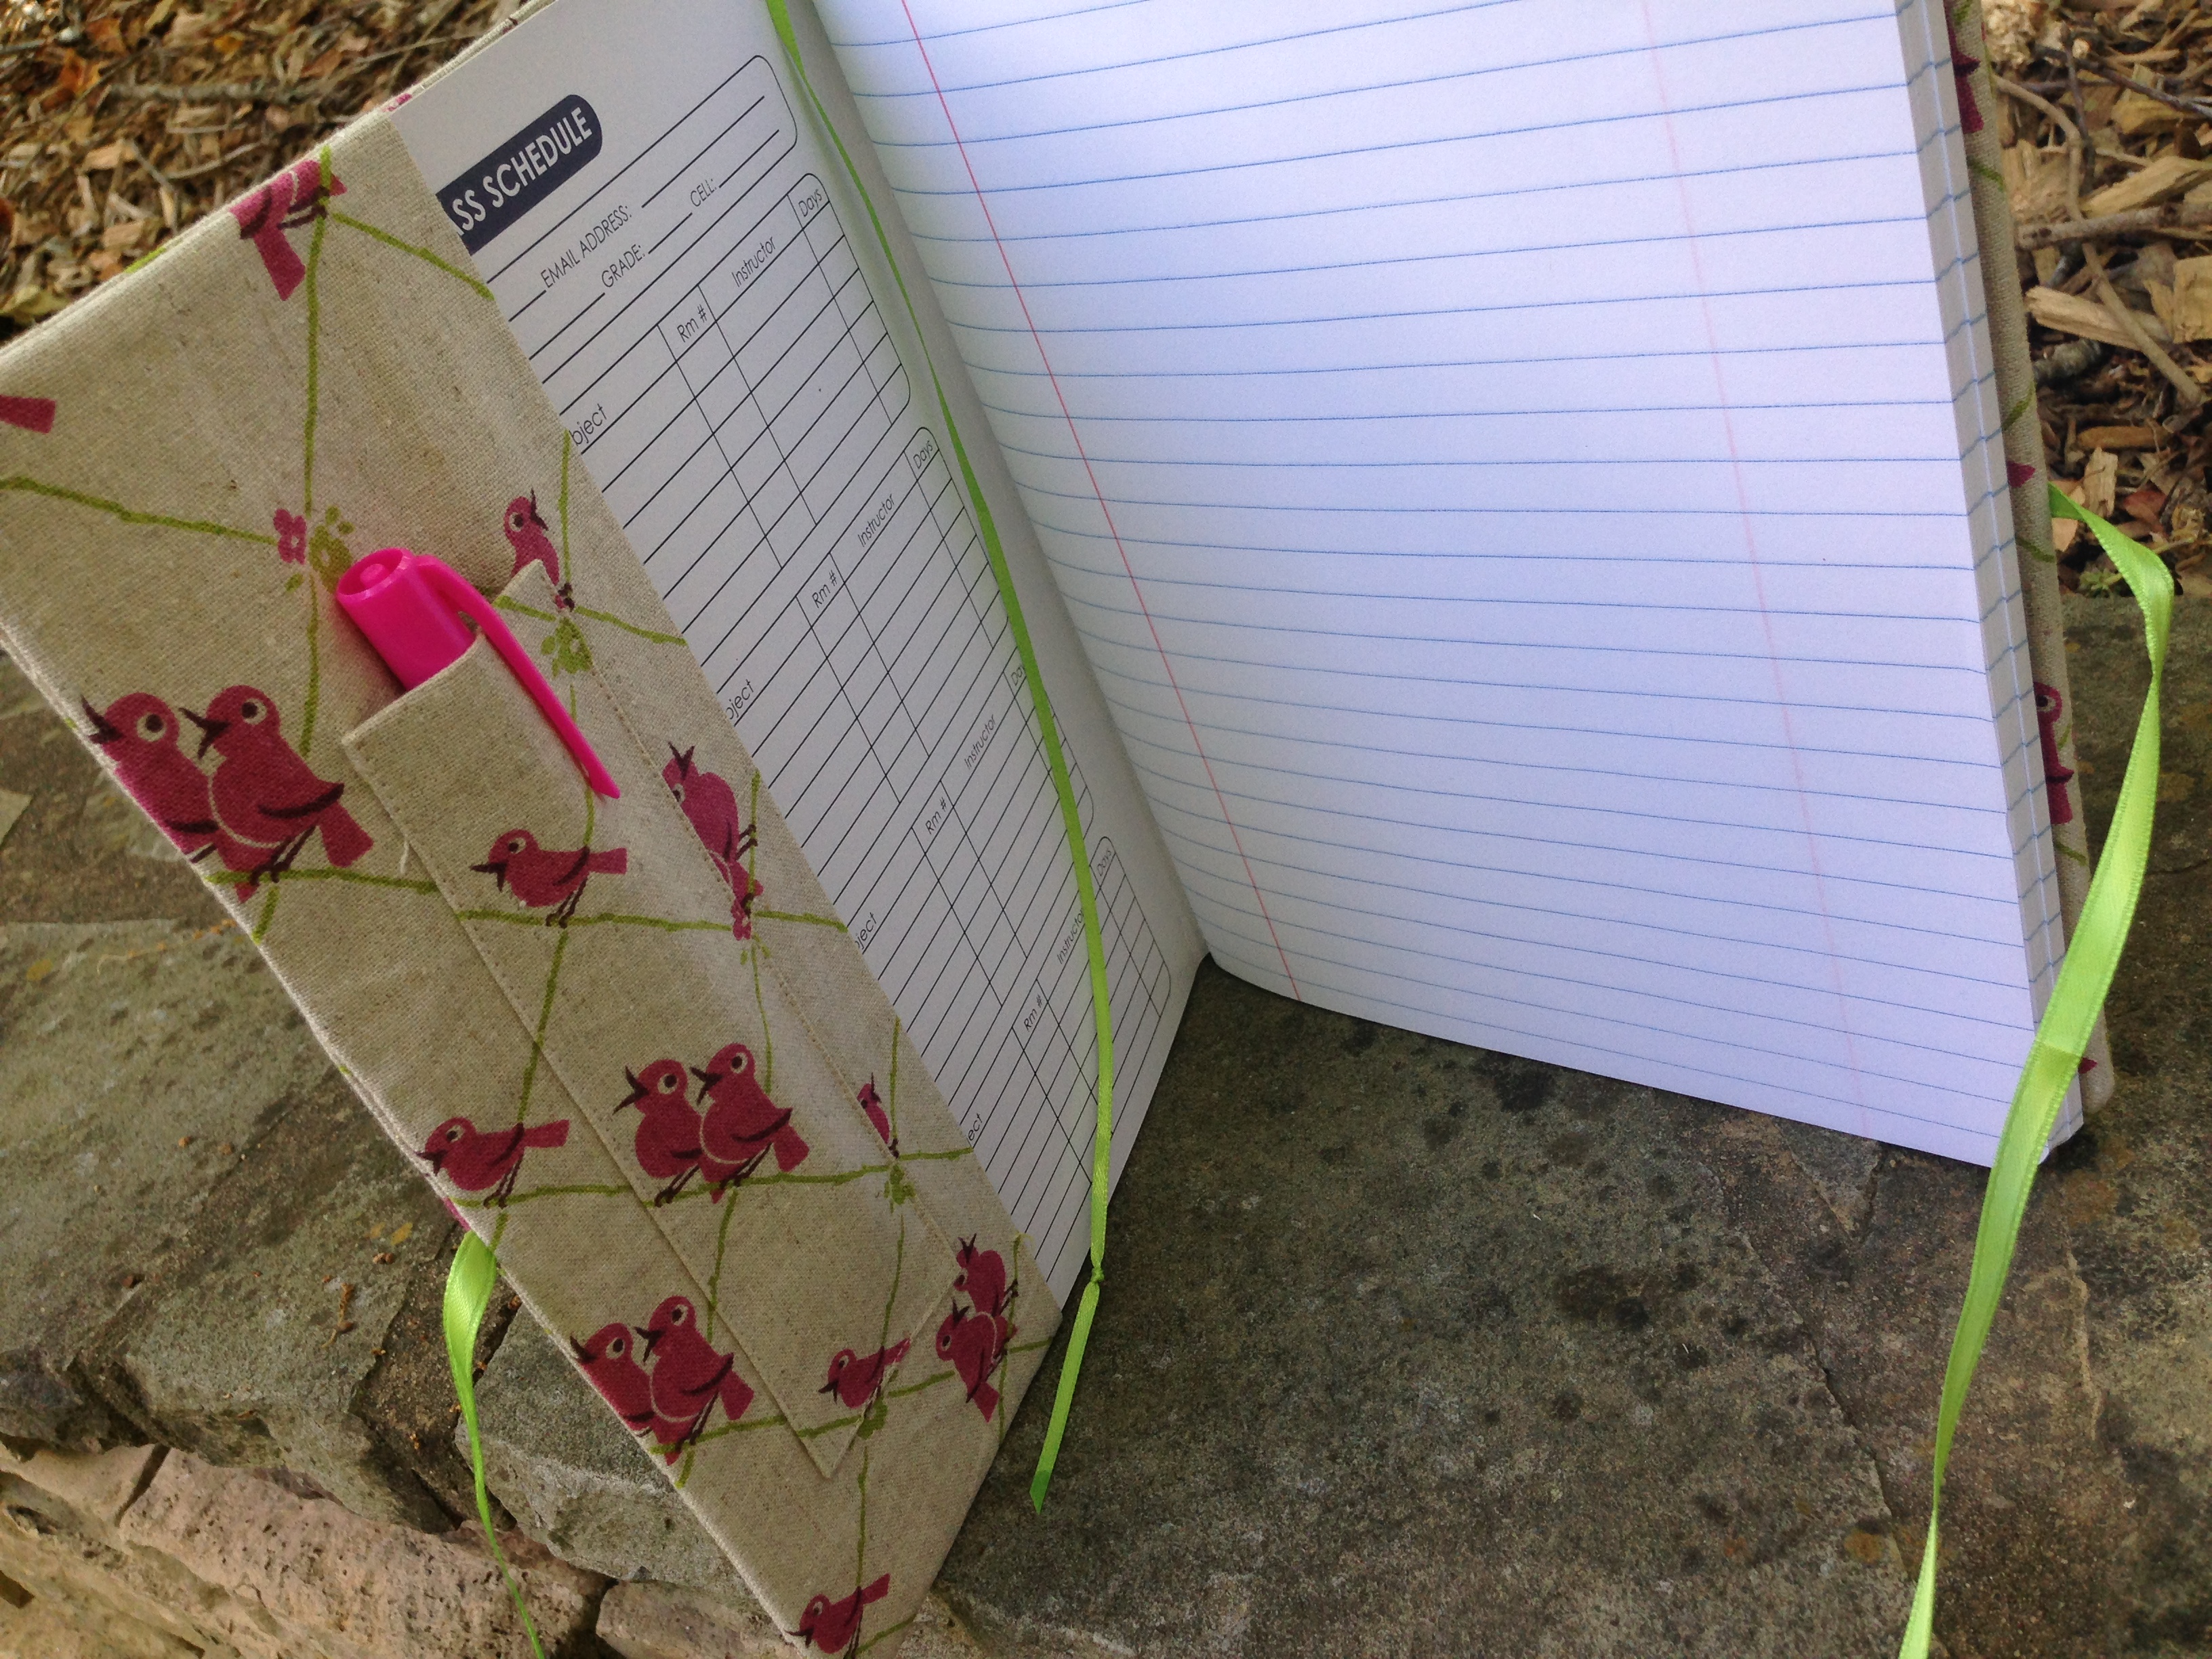
Composition Notebook
As the pieces whittle down, I’m forced to get even more creative with the projects I make. Working within a set of constraints challenged me creatively and I’m proud of each project in this series. That said, the leftover strips stumped me for a bit before realizing they would make a lovely Composition Notebook cover. I used some of the leftover floral fabric from the Log Cabin quilt for the back and some scraps I had on hand for the inside.
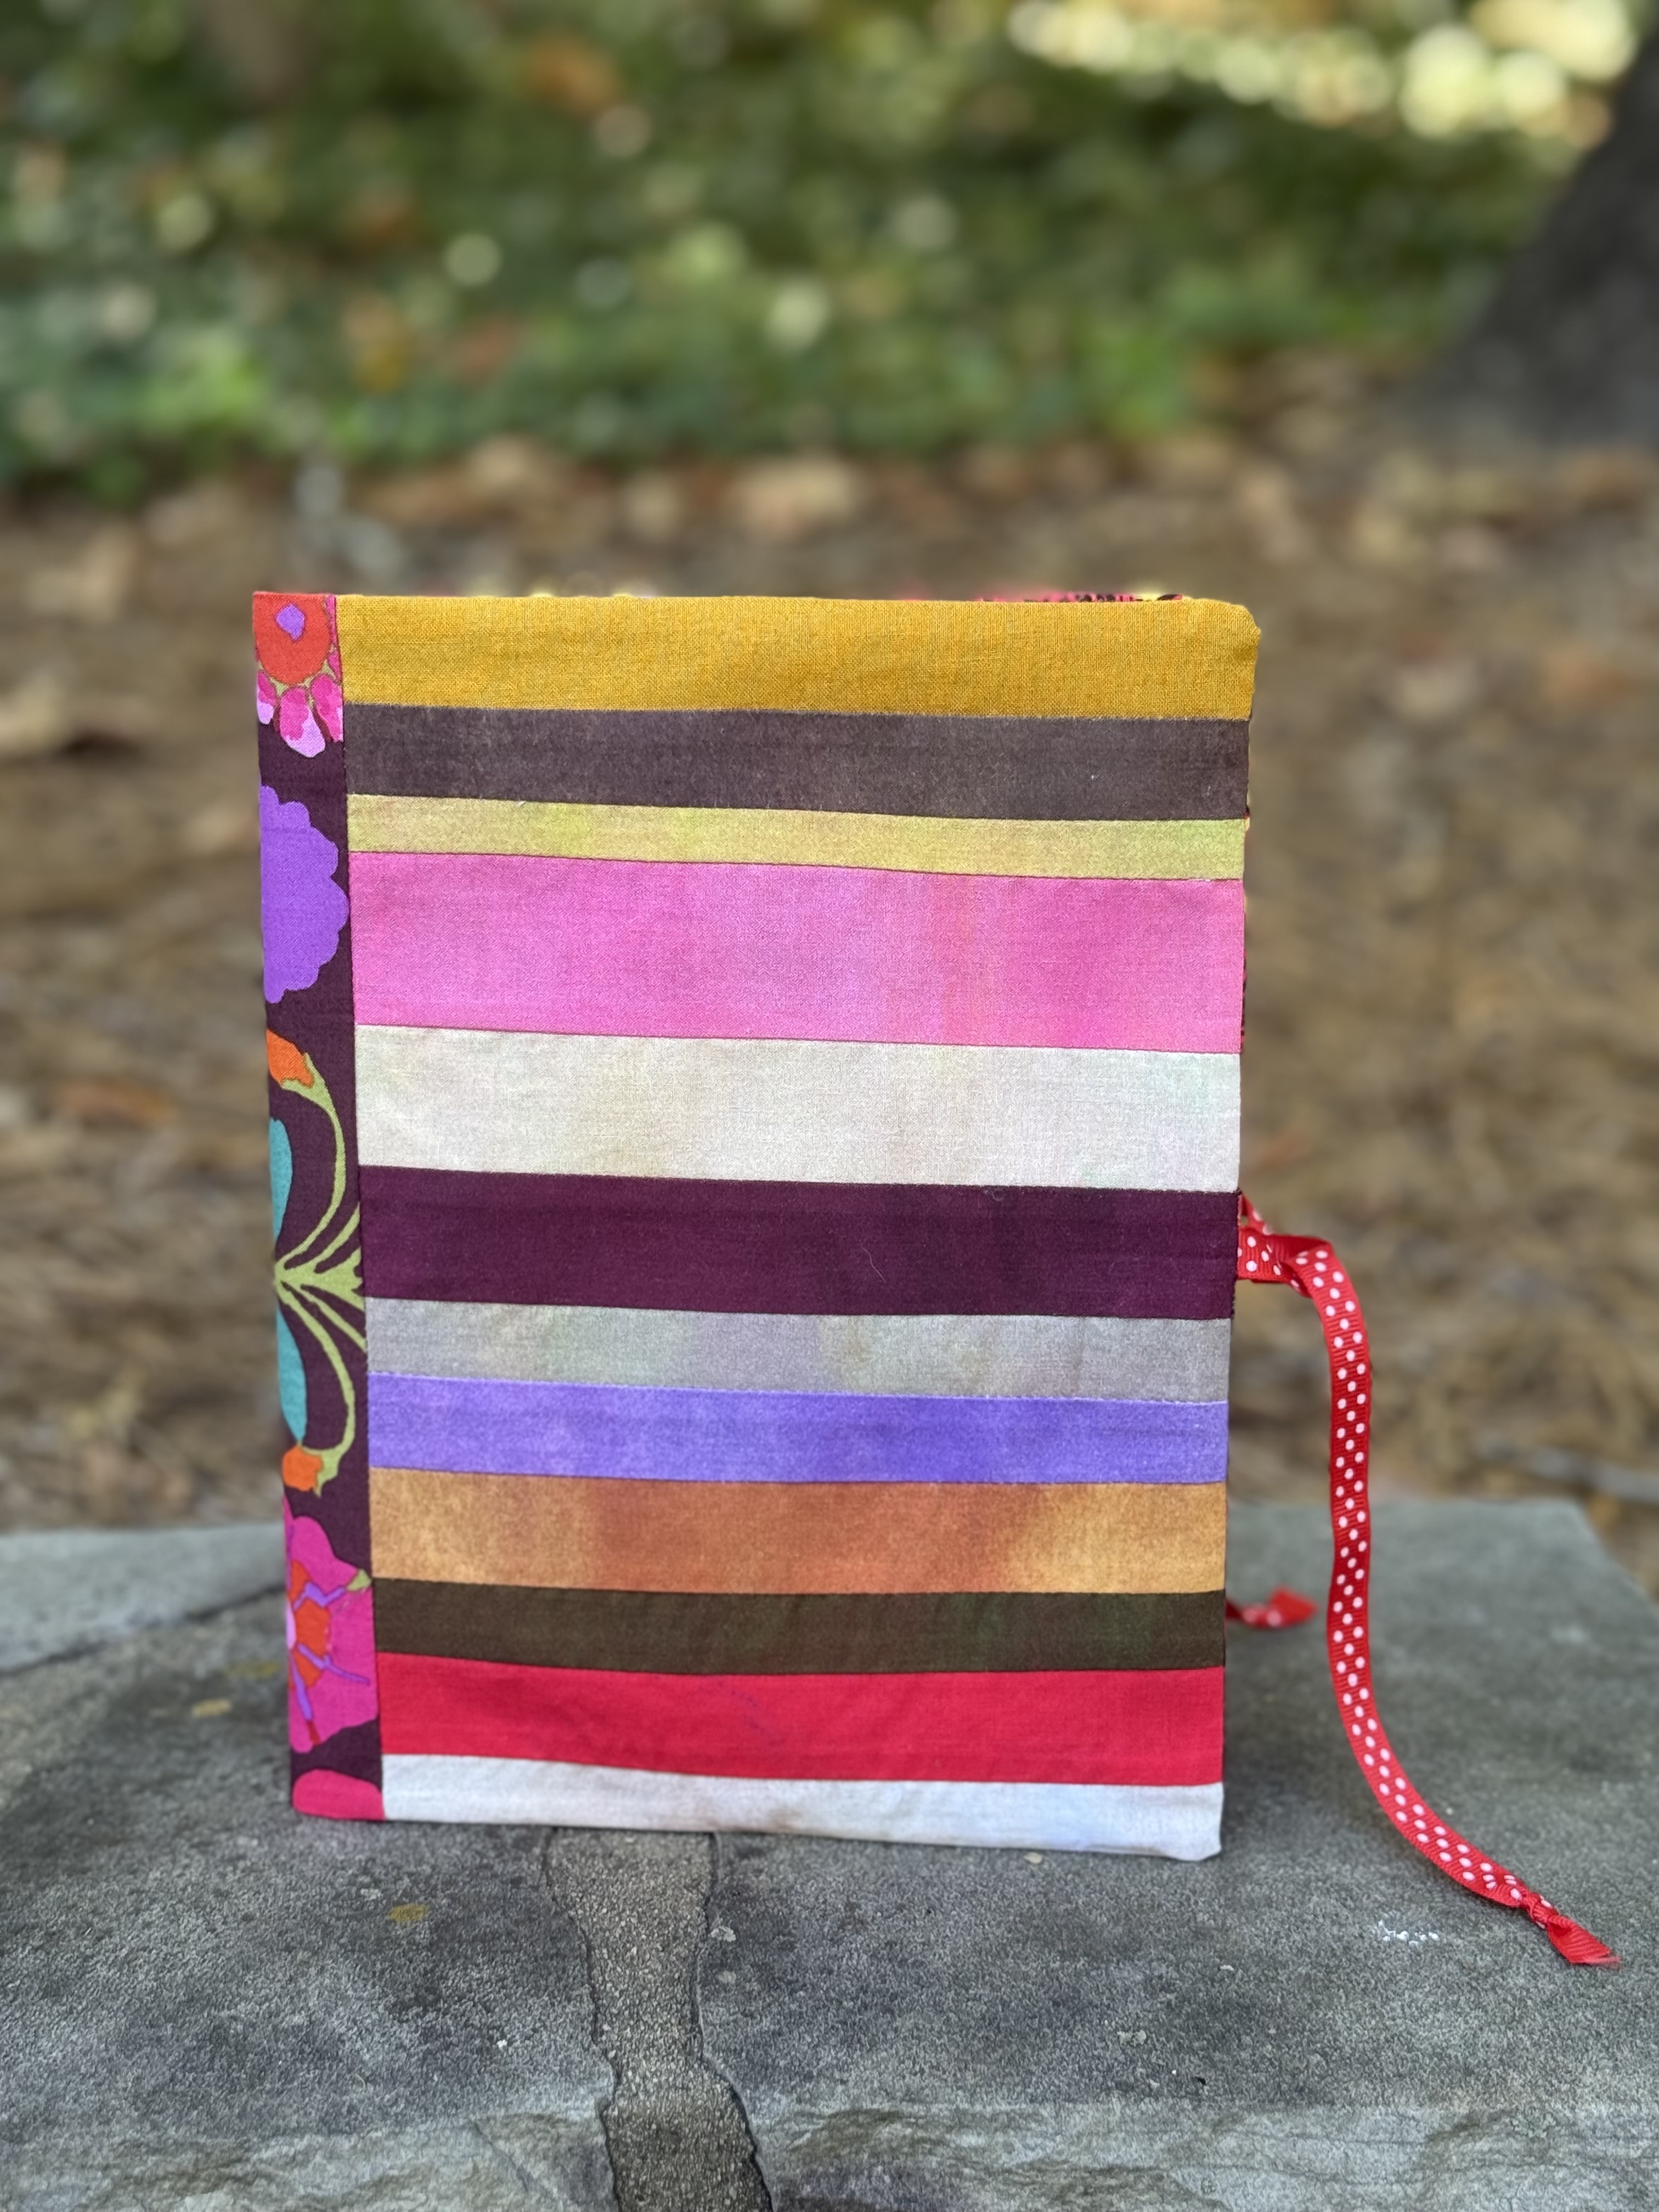
Yes. This is an old Composition Notebook from my kids. They never used entire notebooks in elementary school and I couldn’t bear the thought of tossing perfectly good paper so I use them for scrap (and photo ops!) in my studio.
*There’s a tutorial for the Composition Notebook further down in the post and a free pattern on my website, www.pattymurphyhandmade.com
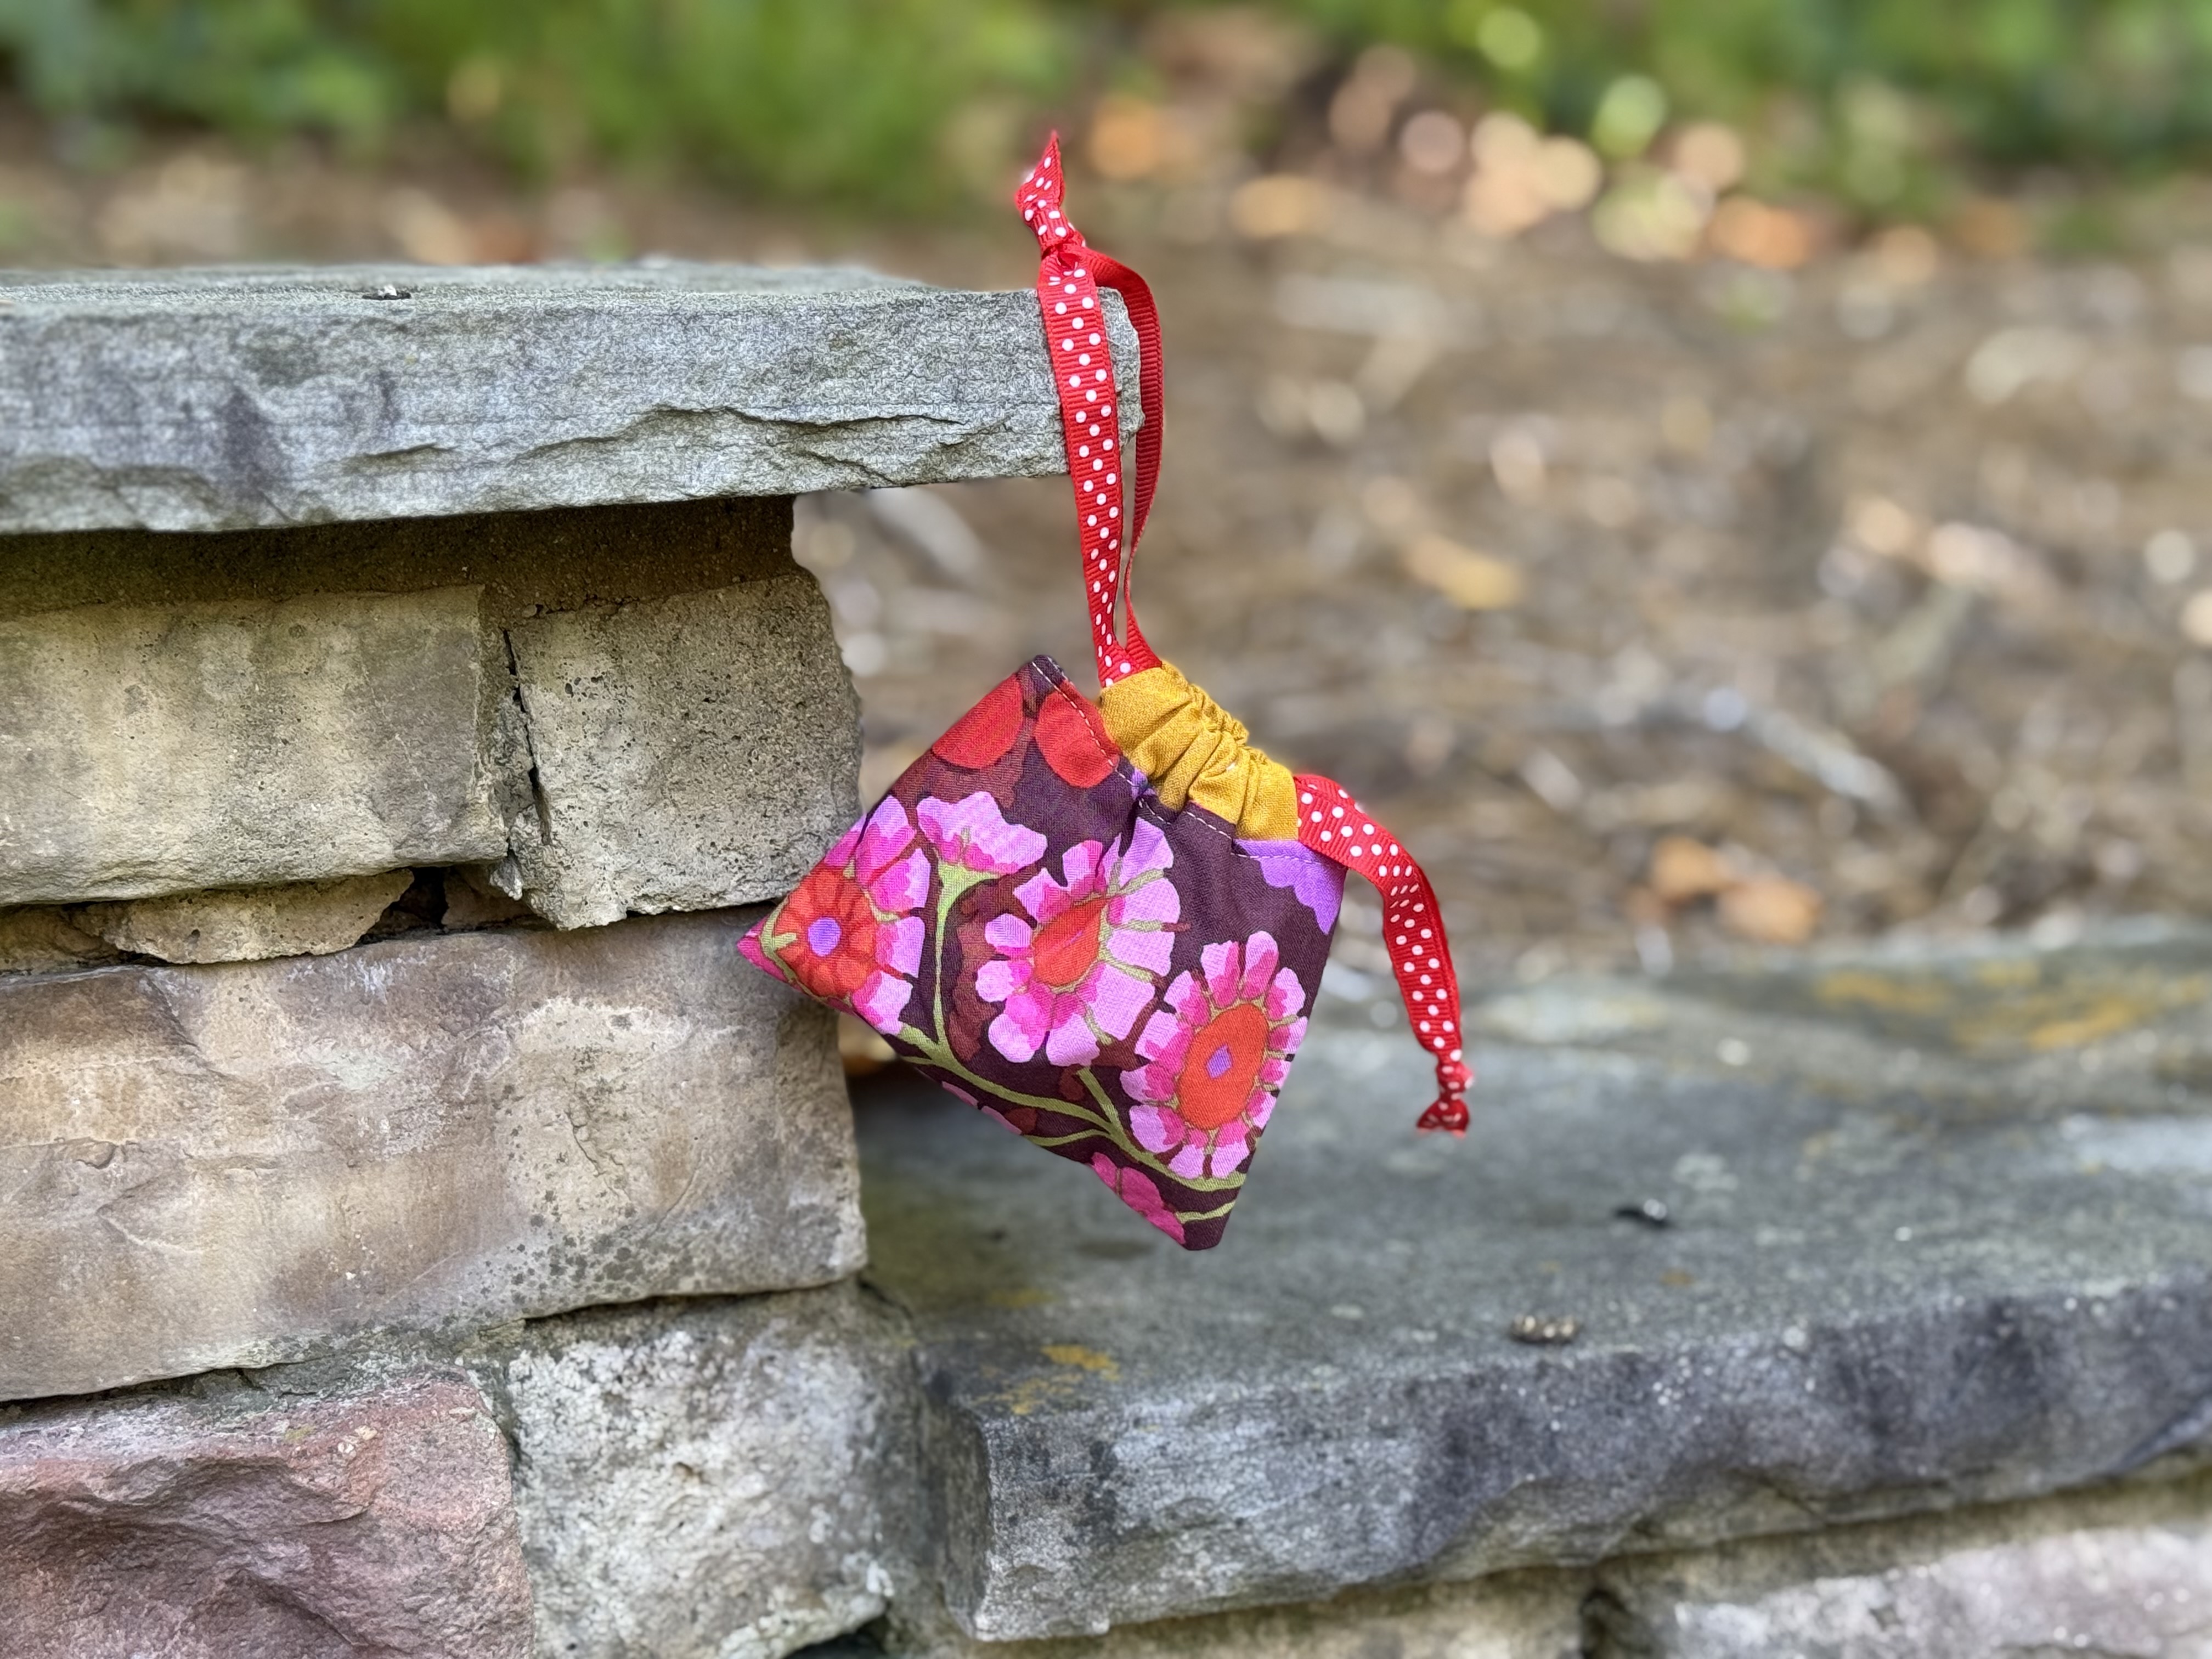
Tiny Bag
This is seriously one of the cutest bags I’ve ever made. It’s sweet and small and I just love it! The perfect jewelry or small gift pouch E V A H!
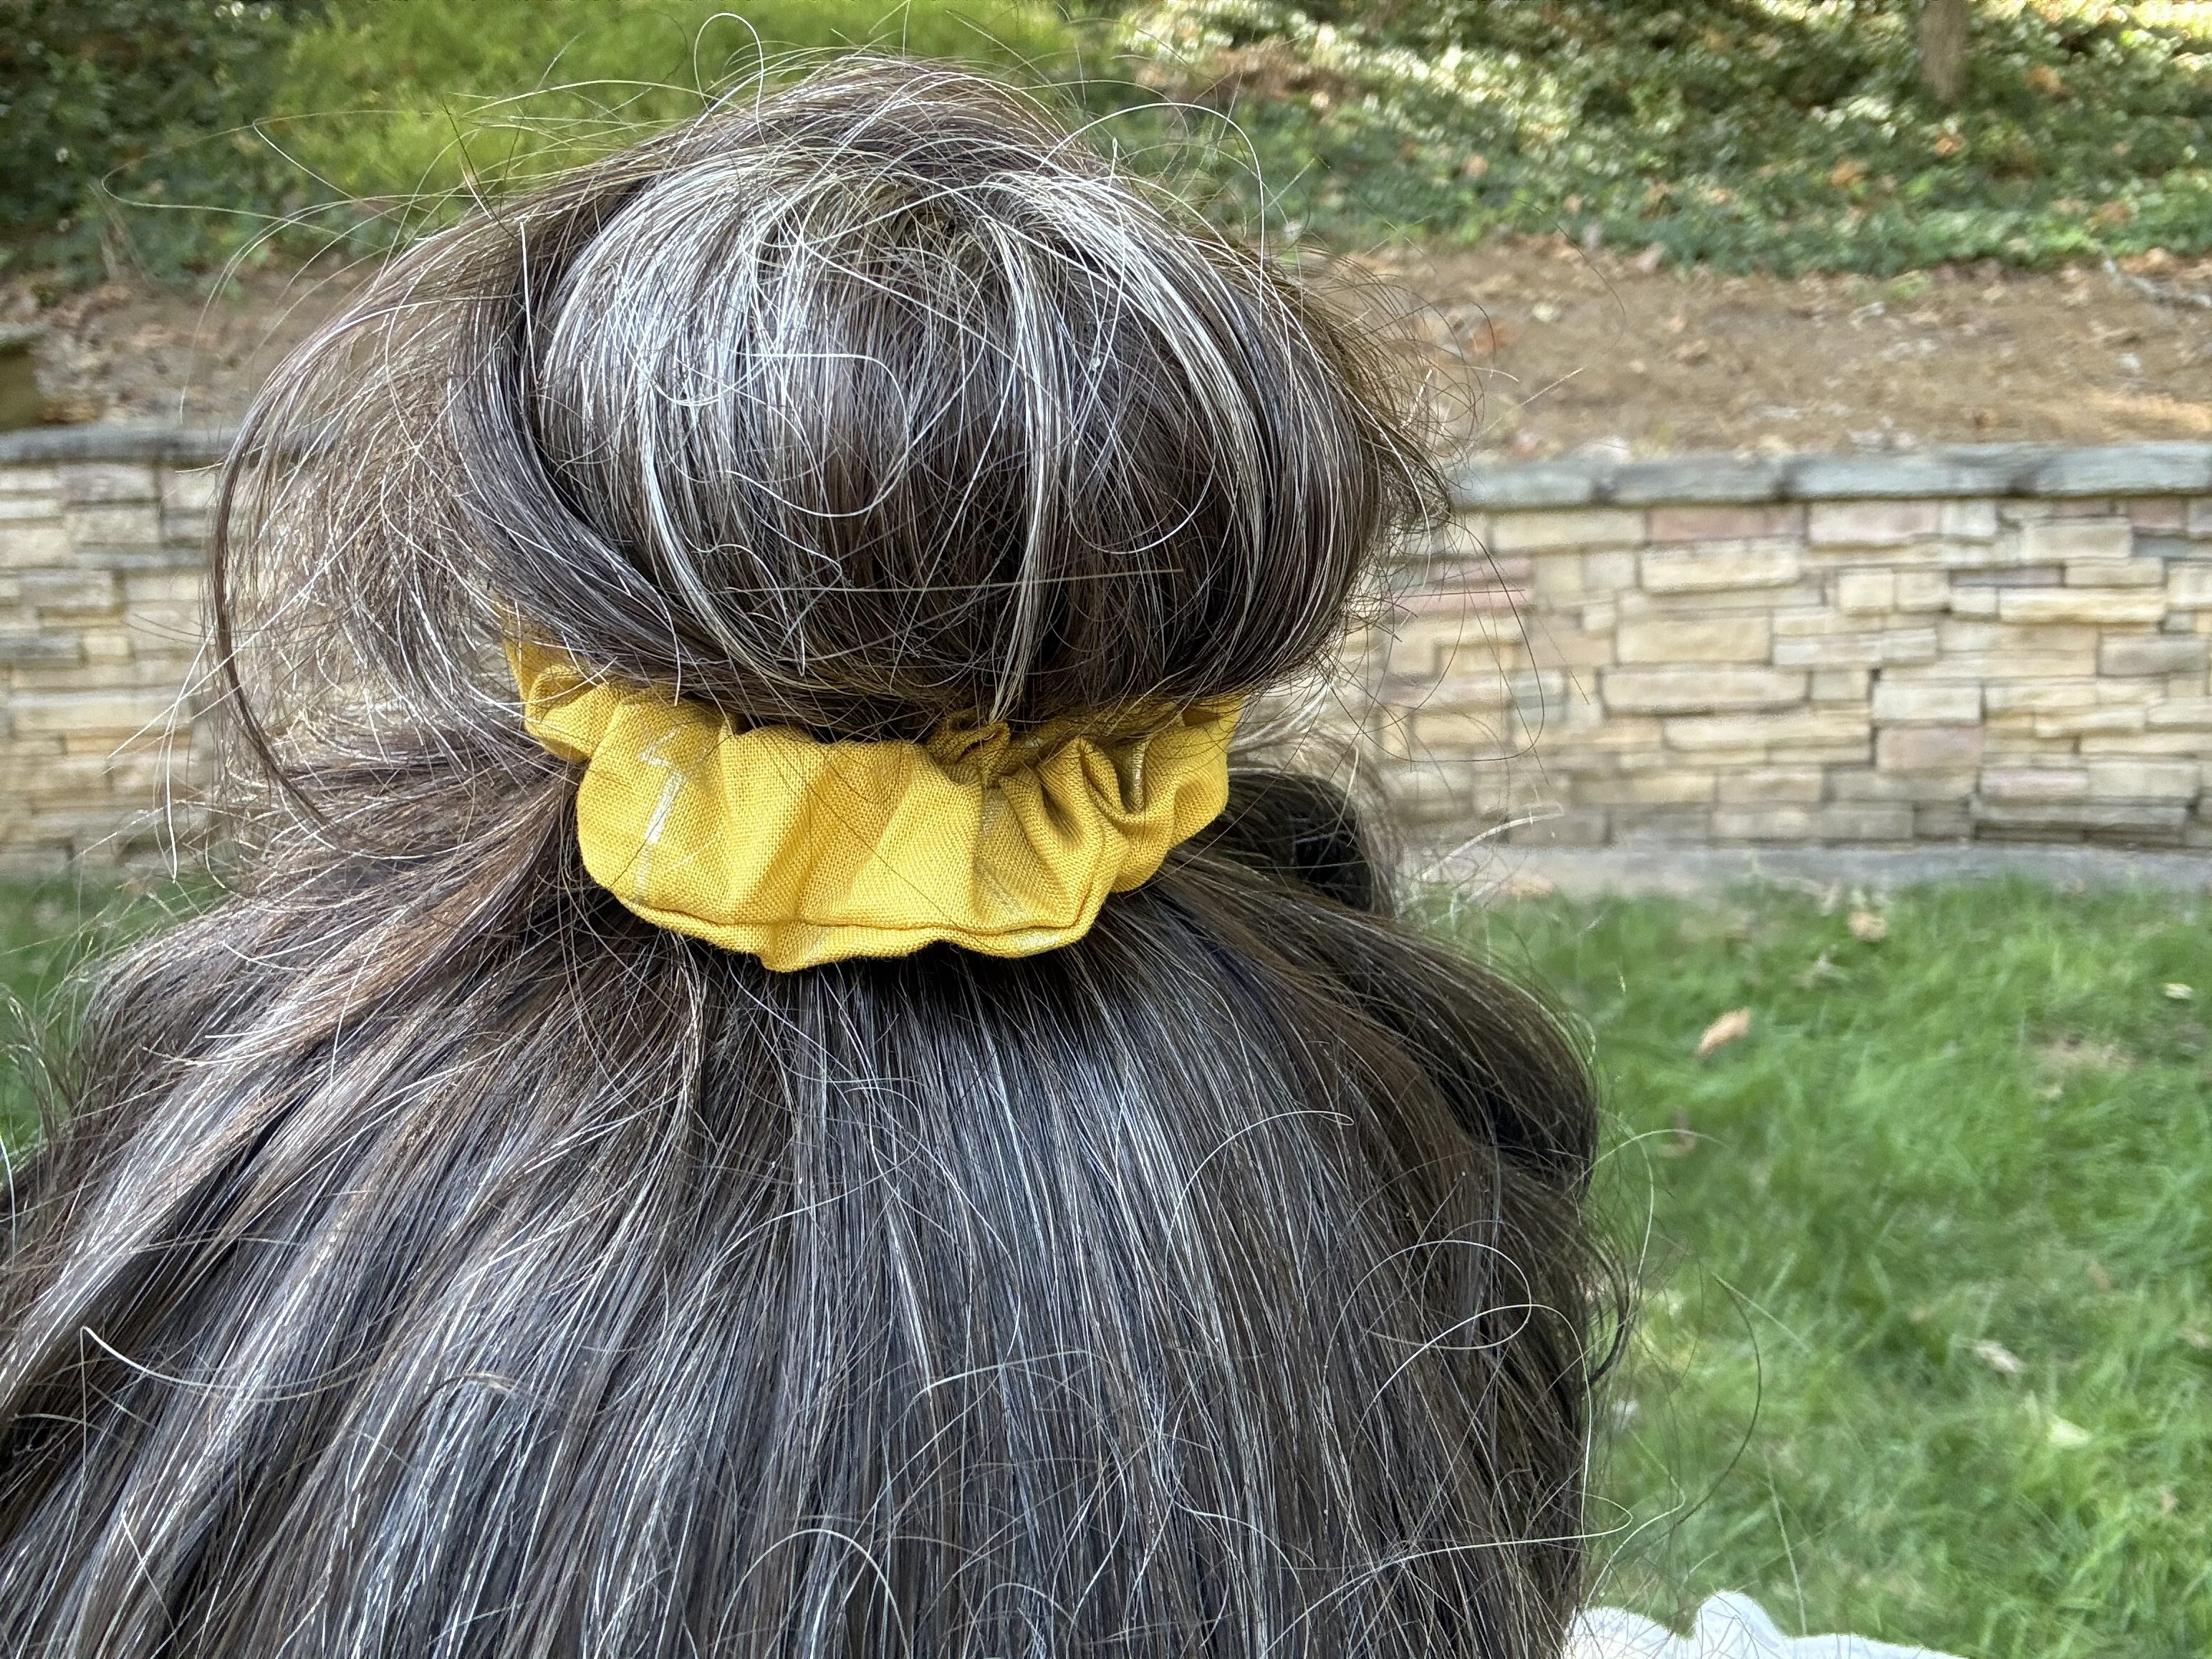
Return of the Scrunchie
It took me a while to get on board with the scrunchies are back trend but now I’m fully engaged in it. So much so that I made one using the smallest strip of fabric I had remaining. It’s also worth noting that taking a photo of a scrunchie on one’s own head is a challenge.
So What’s the Takeaway?
The takeaway is that when you make a quilt, challenge yourself by using all the material. If you start with 6 yards of fabric, make your quilt then see what other things you can create with the leftovers. You’ll surprise yourself with what you can come up with and you’ll create a lovely capsule collection of projects to keep on hand for when you need a little something. I promise, it’s worth it!
Let’s Make a Composition Notebook Cover!
I’ve been making these Composition Notebook covers for years. They are quick and easy, and you only need a little bit of fabric plus some trim to make one. These Composition Notebook covers make fantastic gifts for teachers, artists, anyone!
The Composition Notebook cover pattern available as a free download on my website, www.pattymurphyhandmade.com.

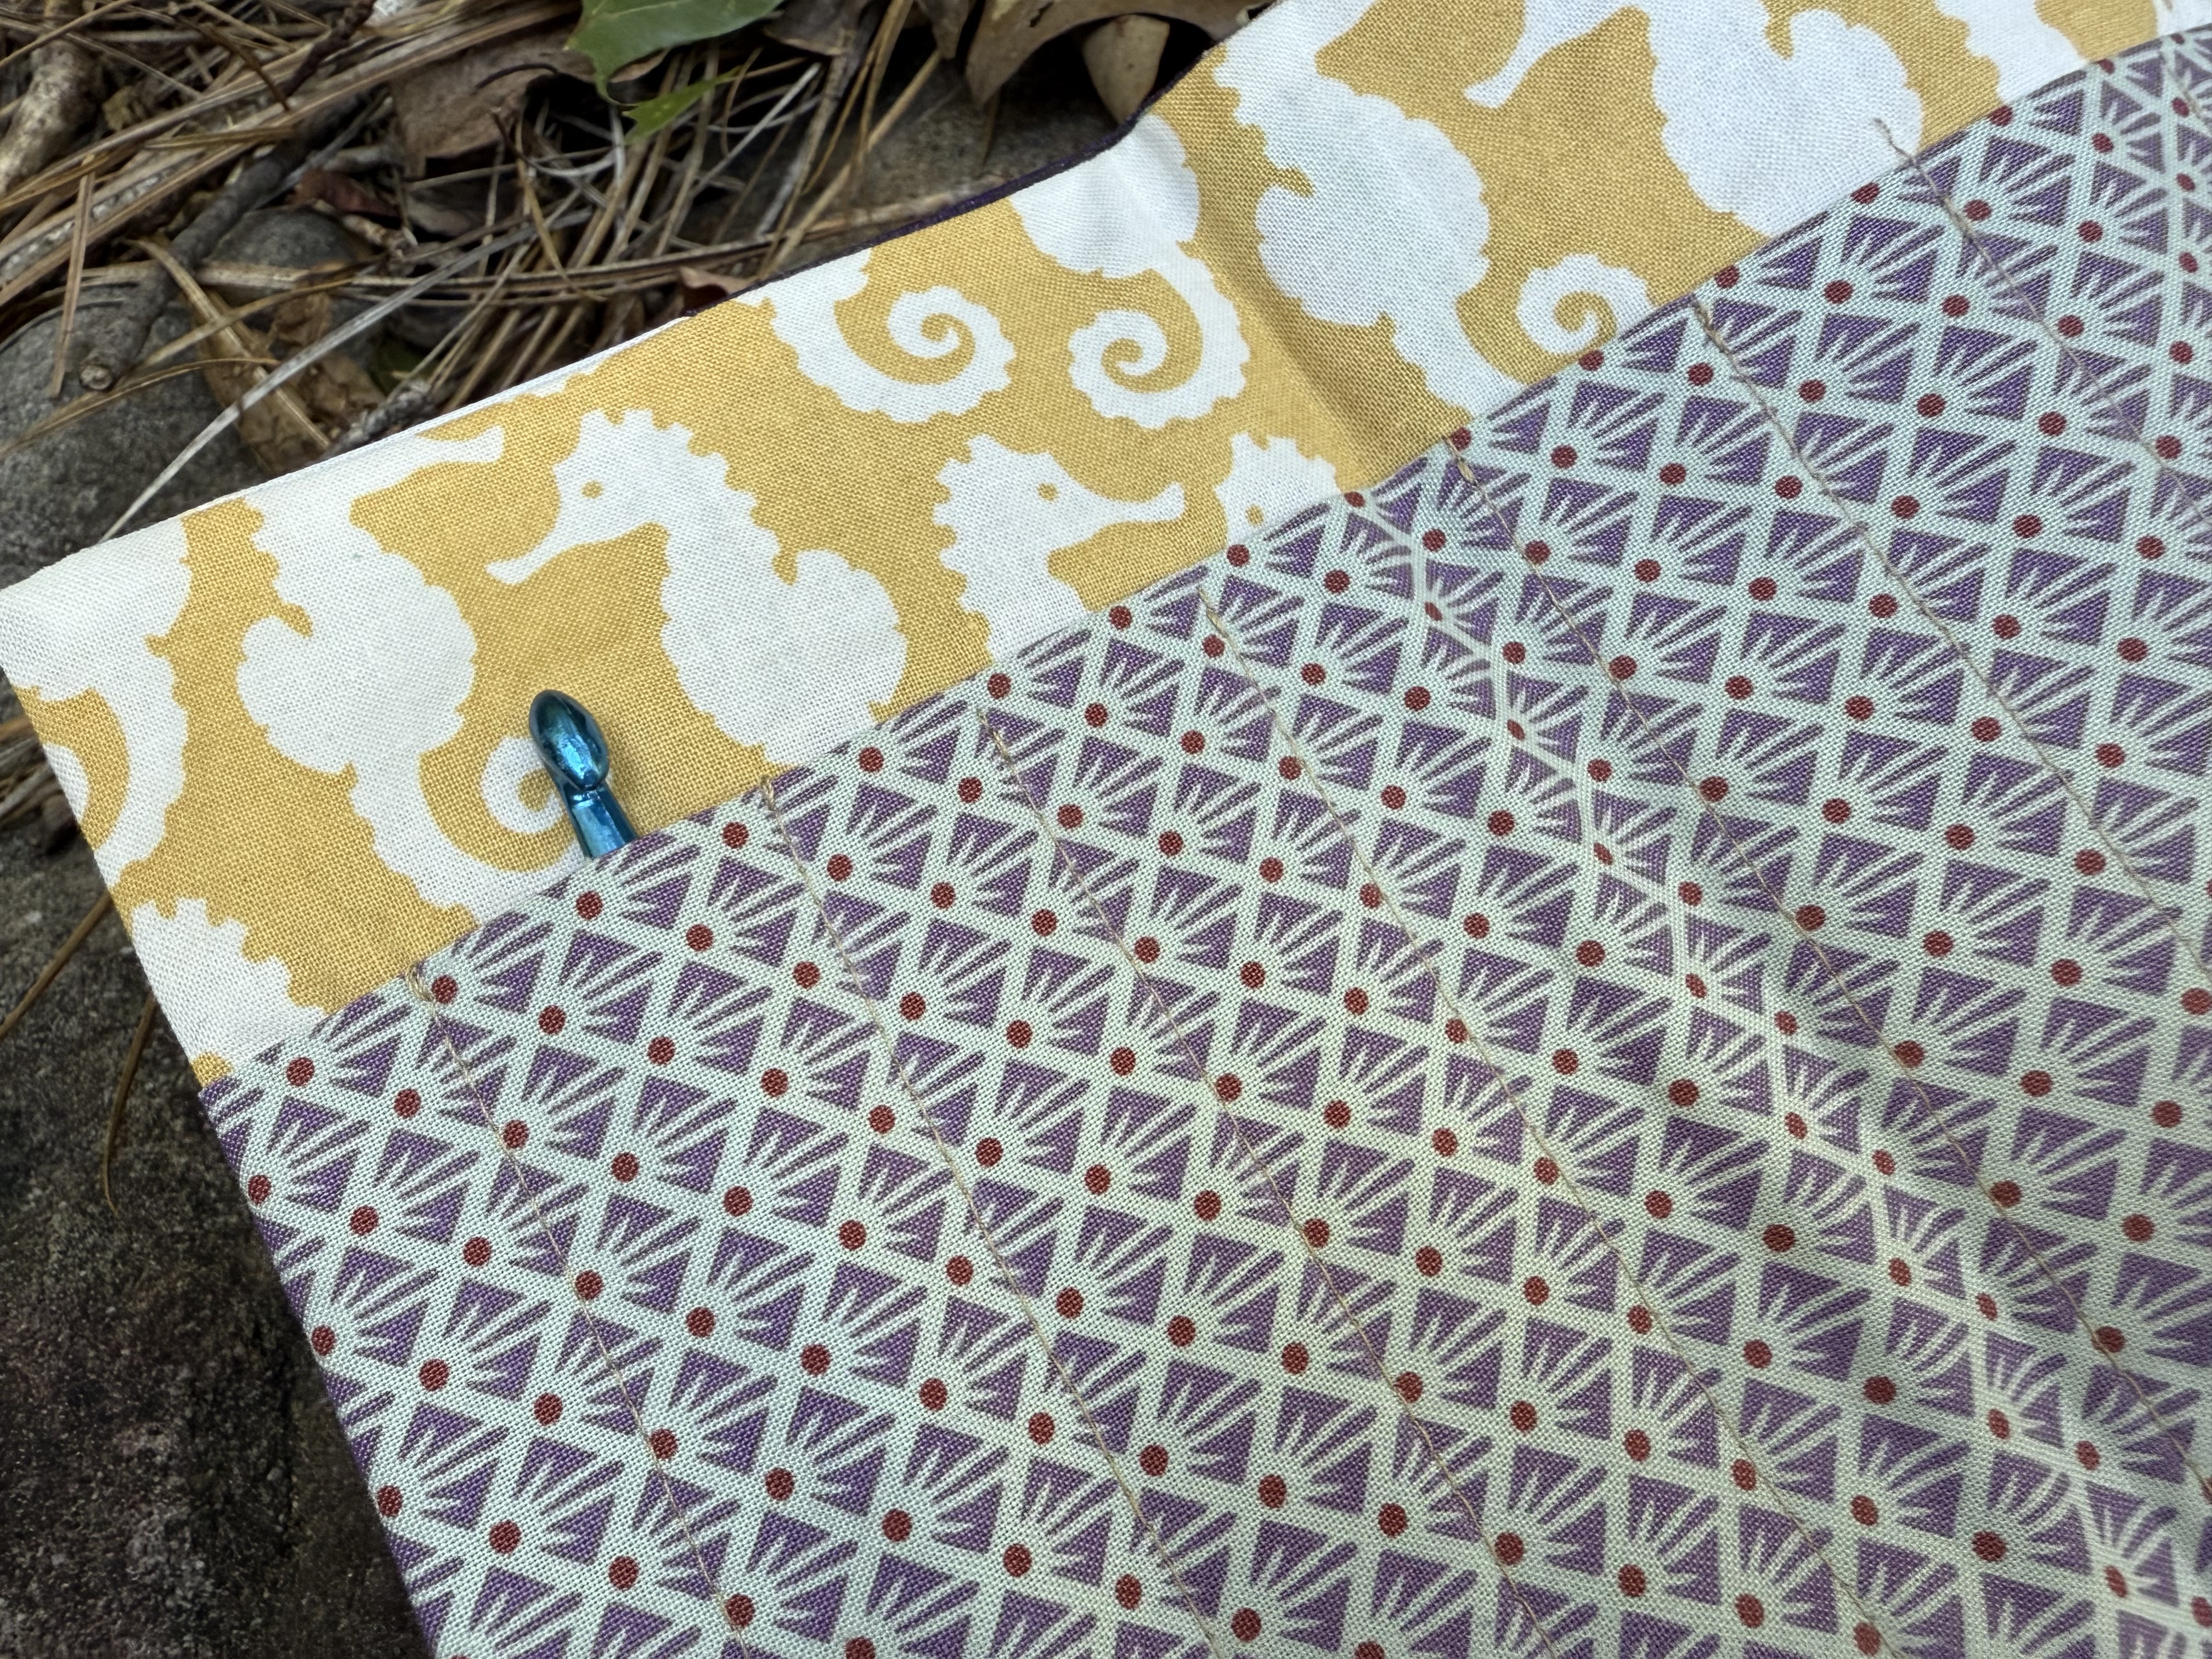
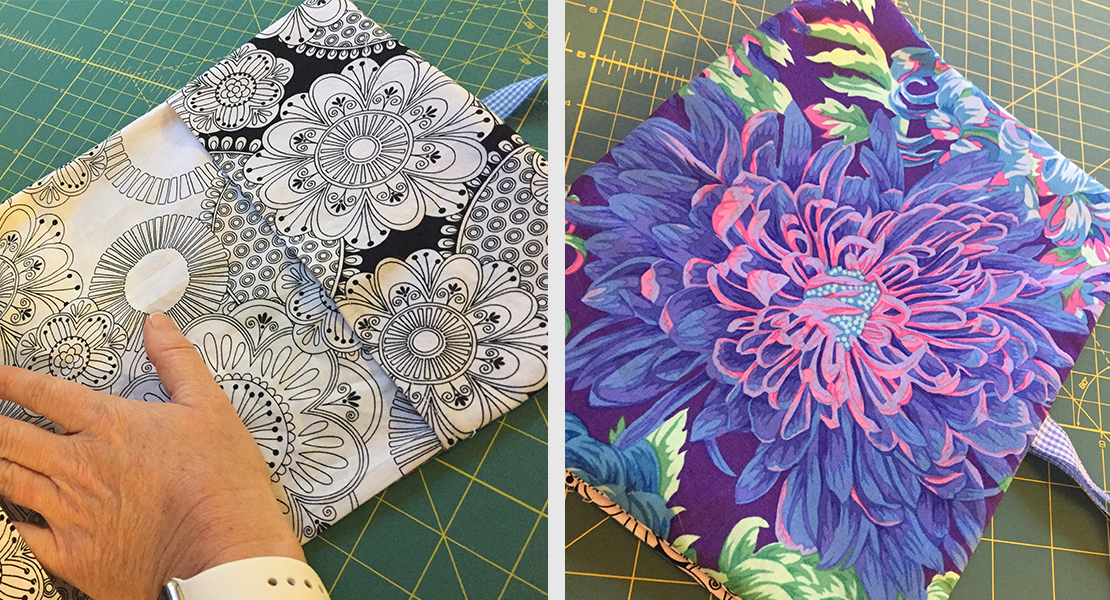
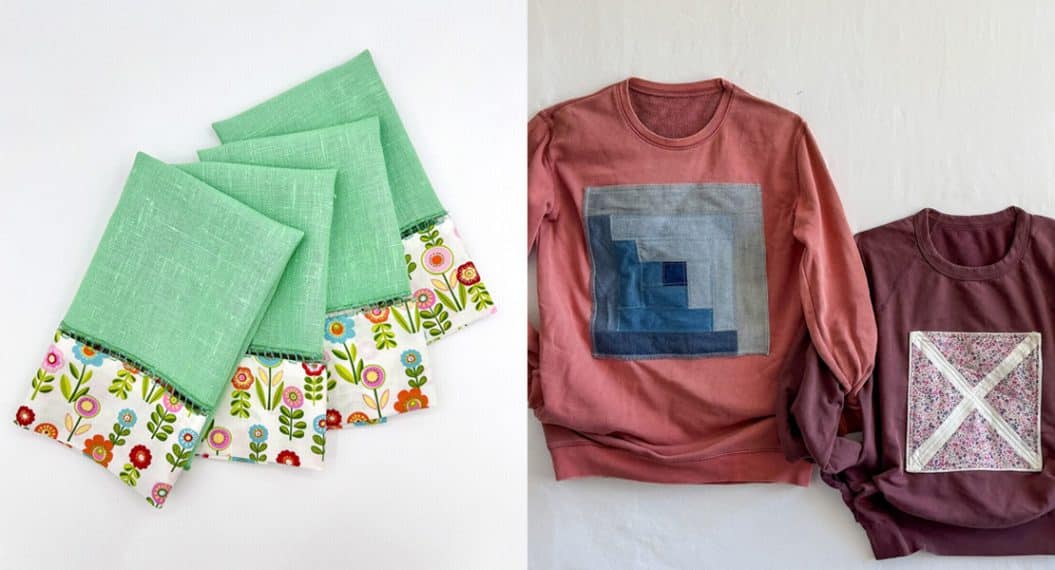
Mix It Up
One of the things I love about these notebook covers is that you can mix and match fabrics for your cover, pocket, lining, pencil holder – anything! It’s a great way to use leftover pieces from a quilt or any other project.
Here are examples of Composition Notebook covers with one piece of fabric for the cover and different lining, interior flap and pencil pocket fabrics:
In taking a zero waste approach, I have been exploring how to use scraps and other oddly sized pieces of fabric to make interesting covers.
Here are examples of Composition Notebook covers that take a zero waste approach for the covers:
First Things First. The Cover.
If you are going to take a zero waste approach and build out the cover from scraps, know this:
You can do whatever you want – use leftover blocks, strip pieces together, use embellishments – as long as the unfinished cover piece measures 10 1/2’’ x 16’’.
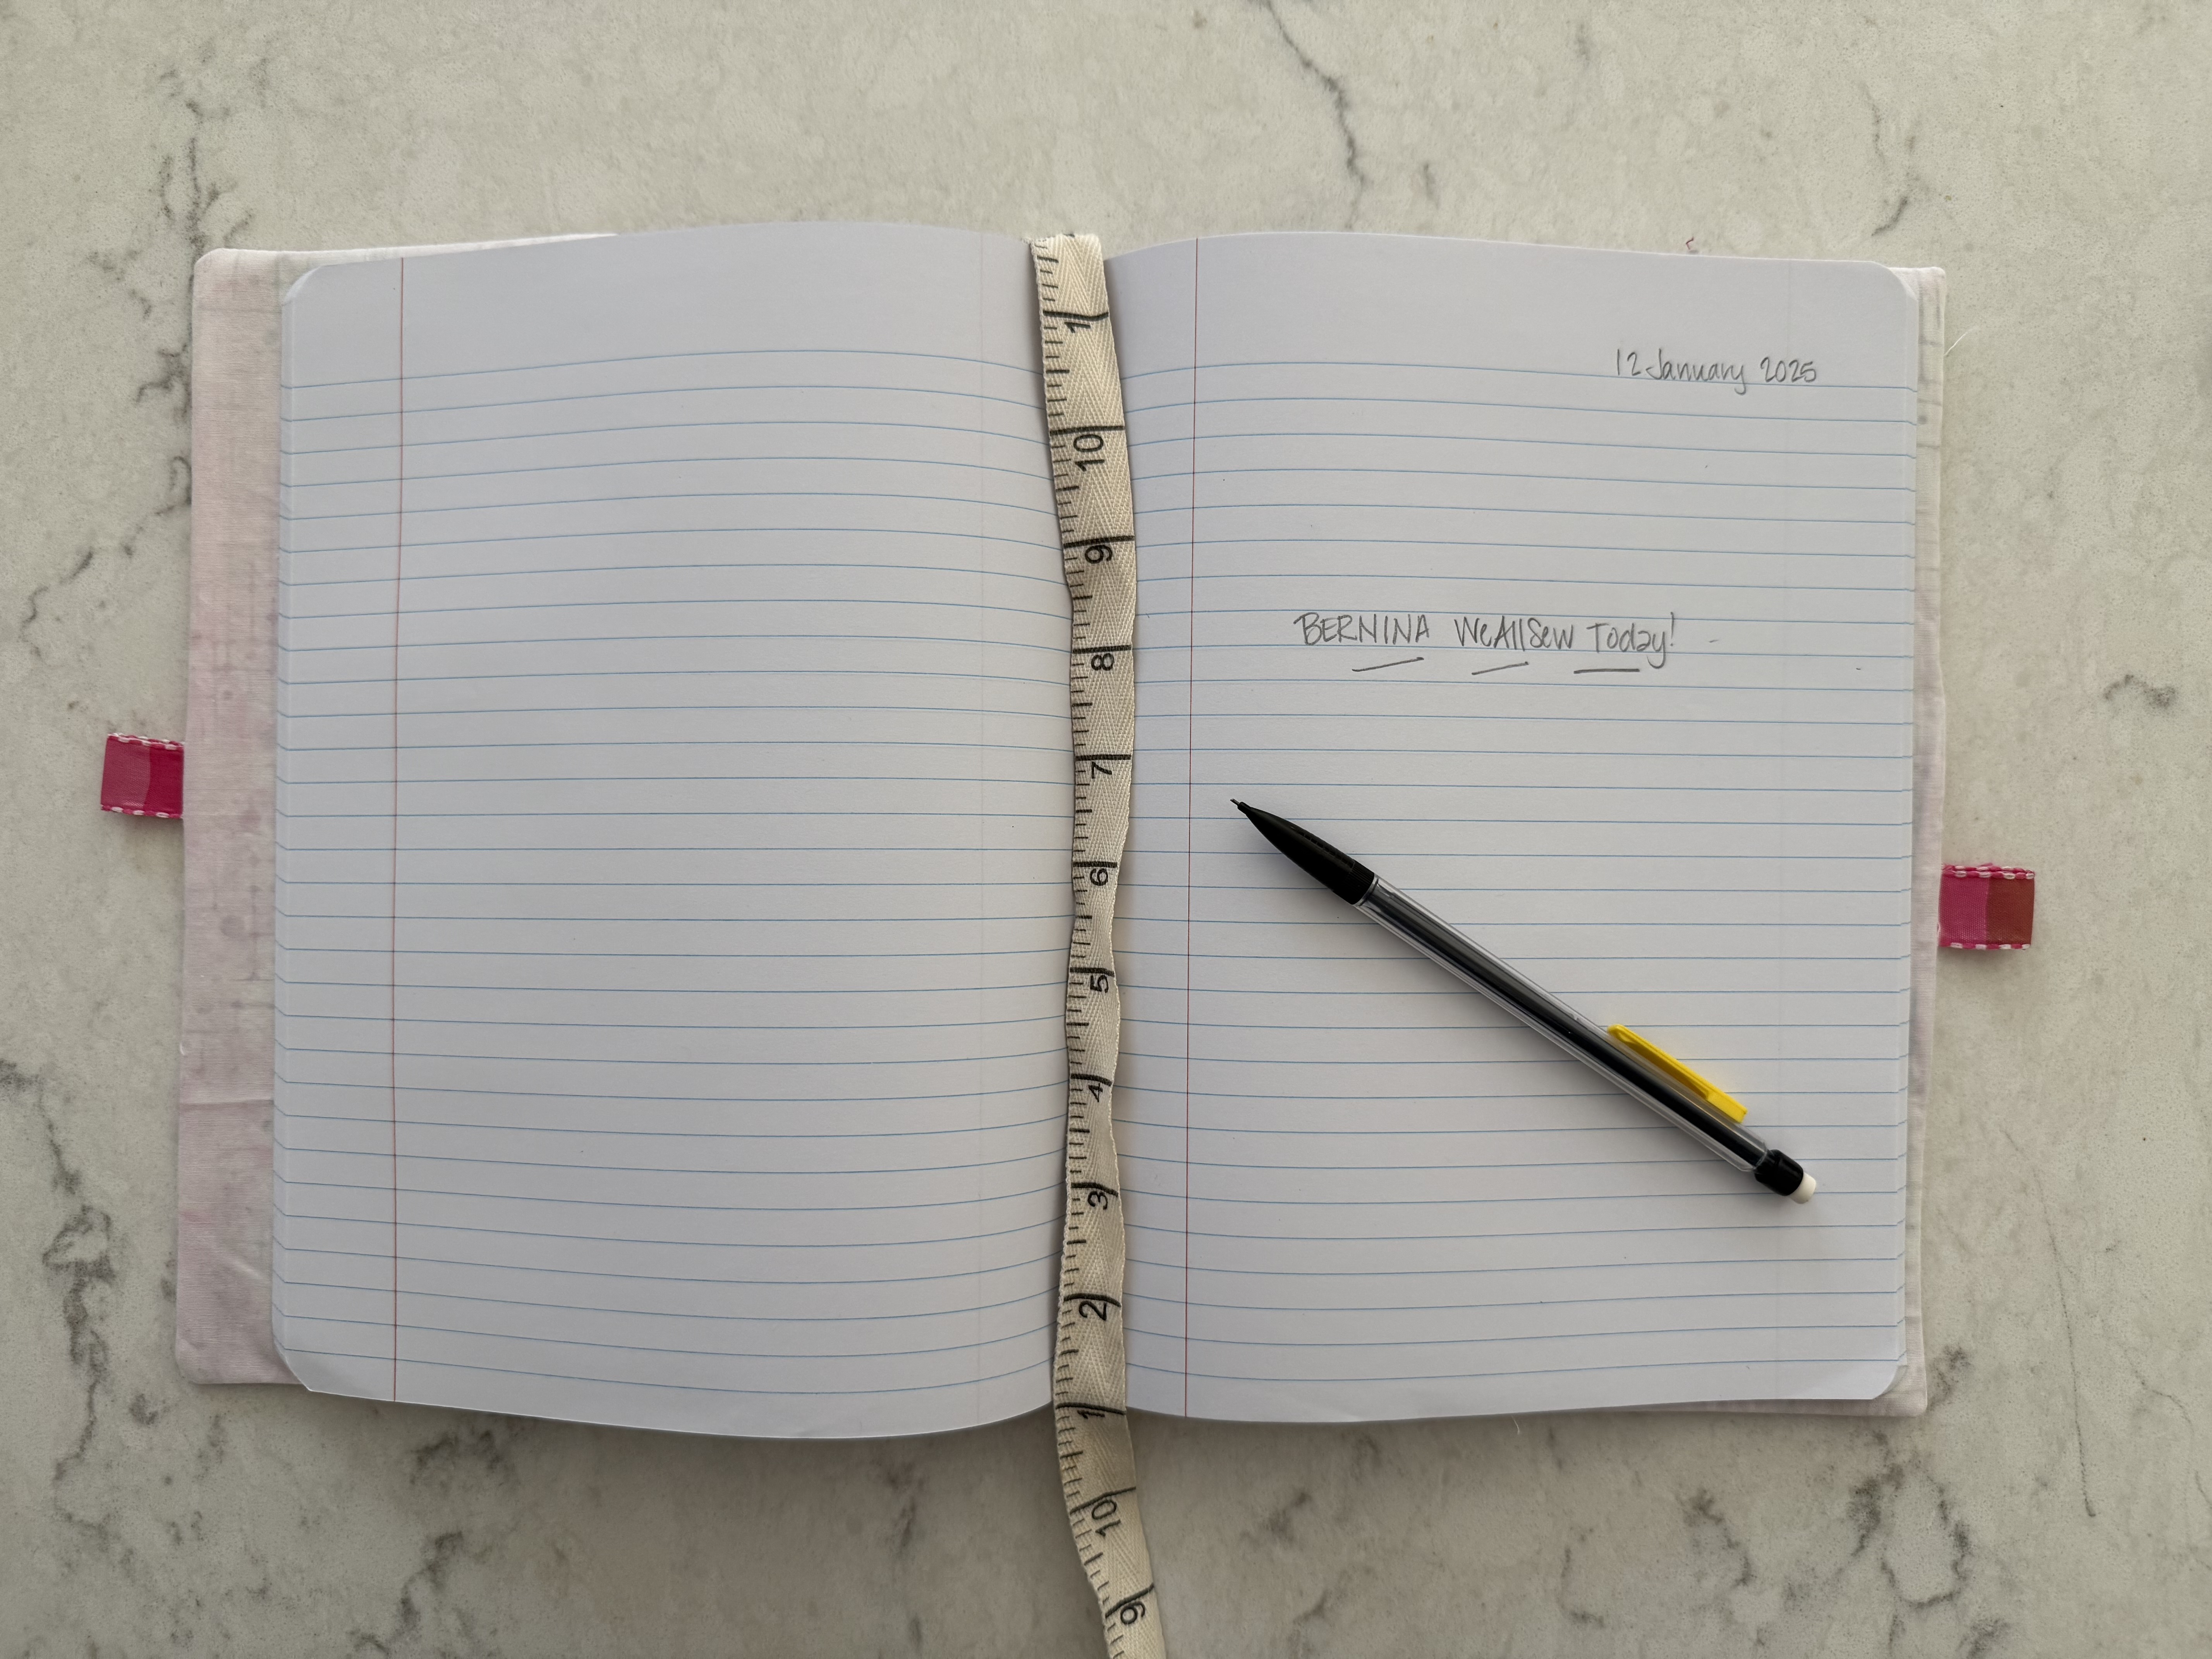
The Composition Notebook cover was made with leftover strips from Persephone Awaits. I used an assortment of strips that each measured 7’’ wide long by assorted heights. I sewed them together to create a 7’’ x 10 1/2’’ piece of fabric before sewing a 9 1/4’’ x 10 1/2’’ piece of fabric to have a 10 1/2’’ x 16’’ unfinished cover.
Sadly, I didn’t take photos of this as I made this cover.
Challenging Myself, Going Further
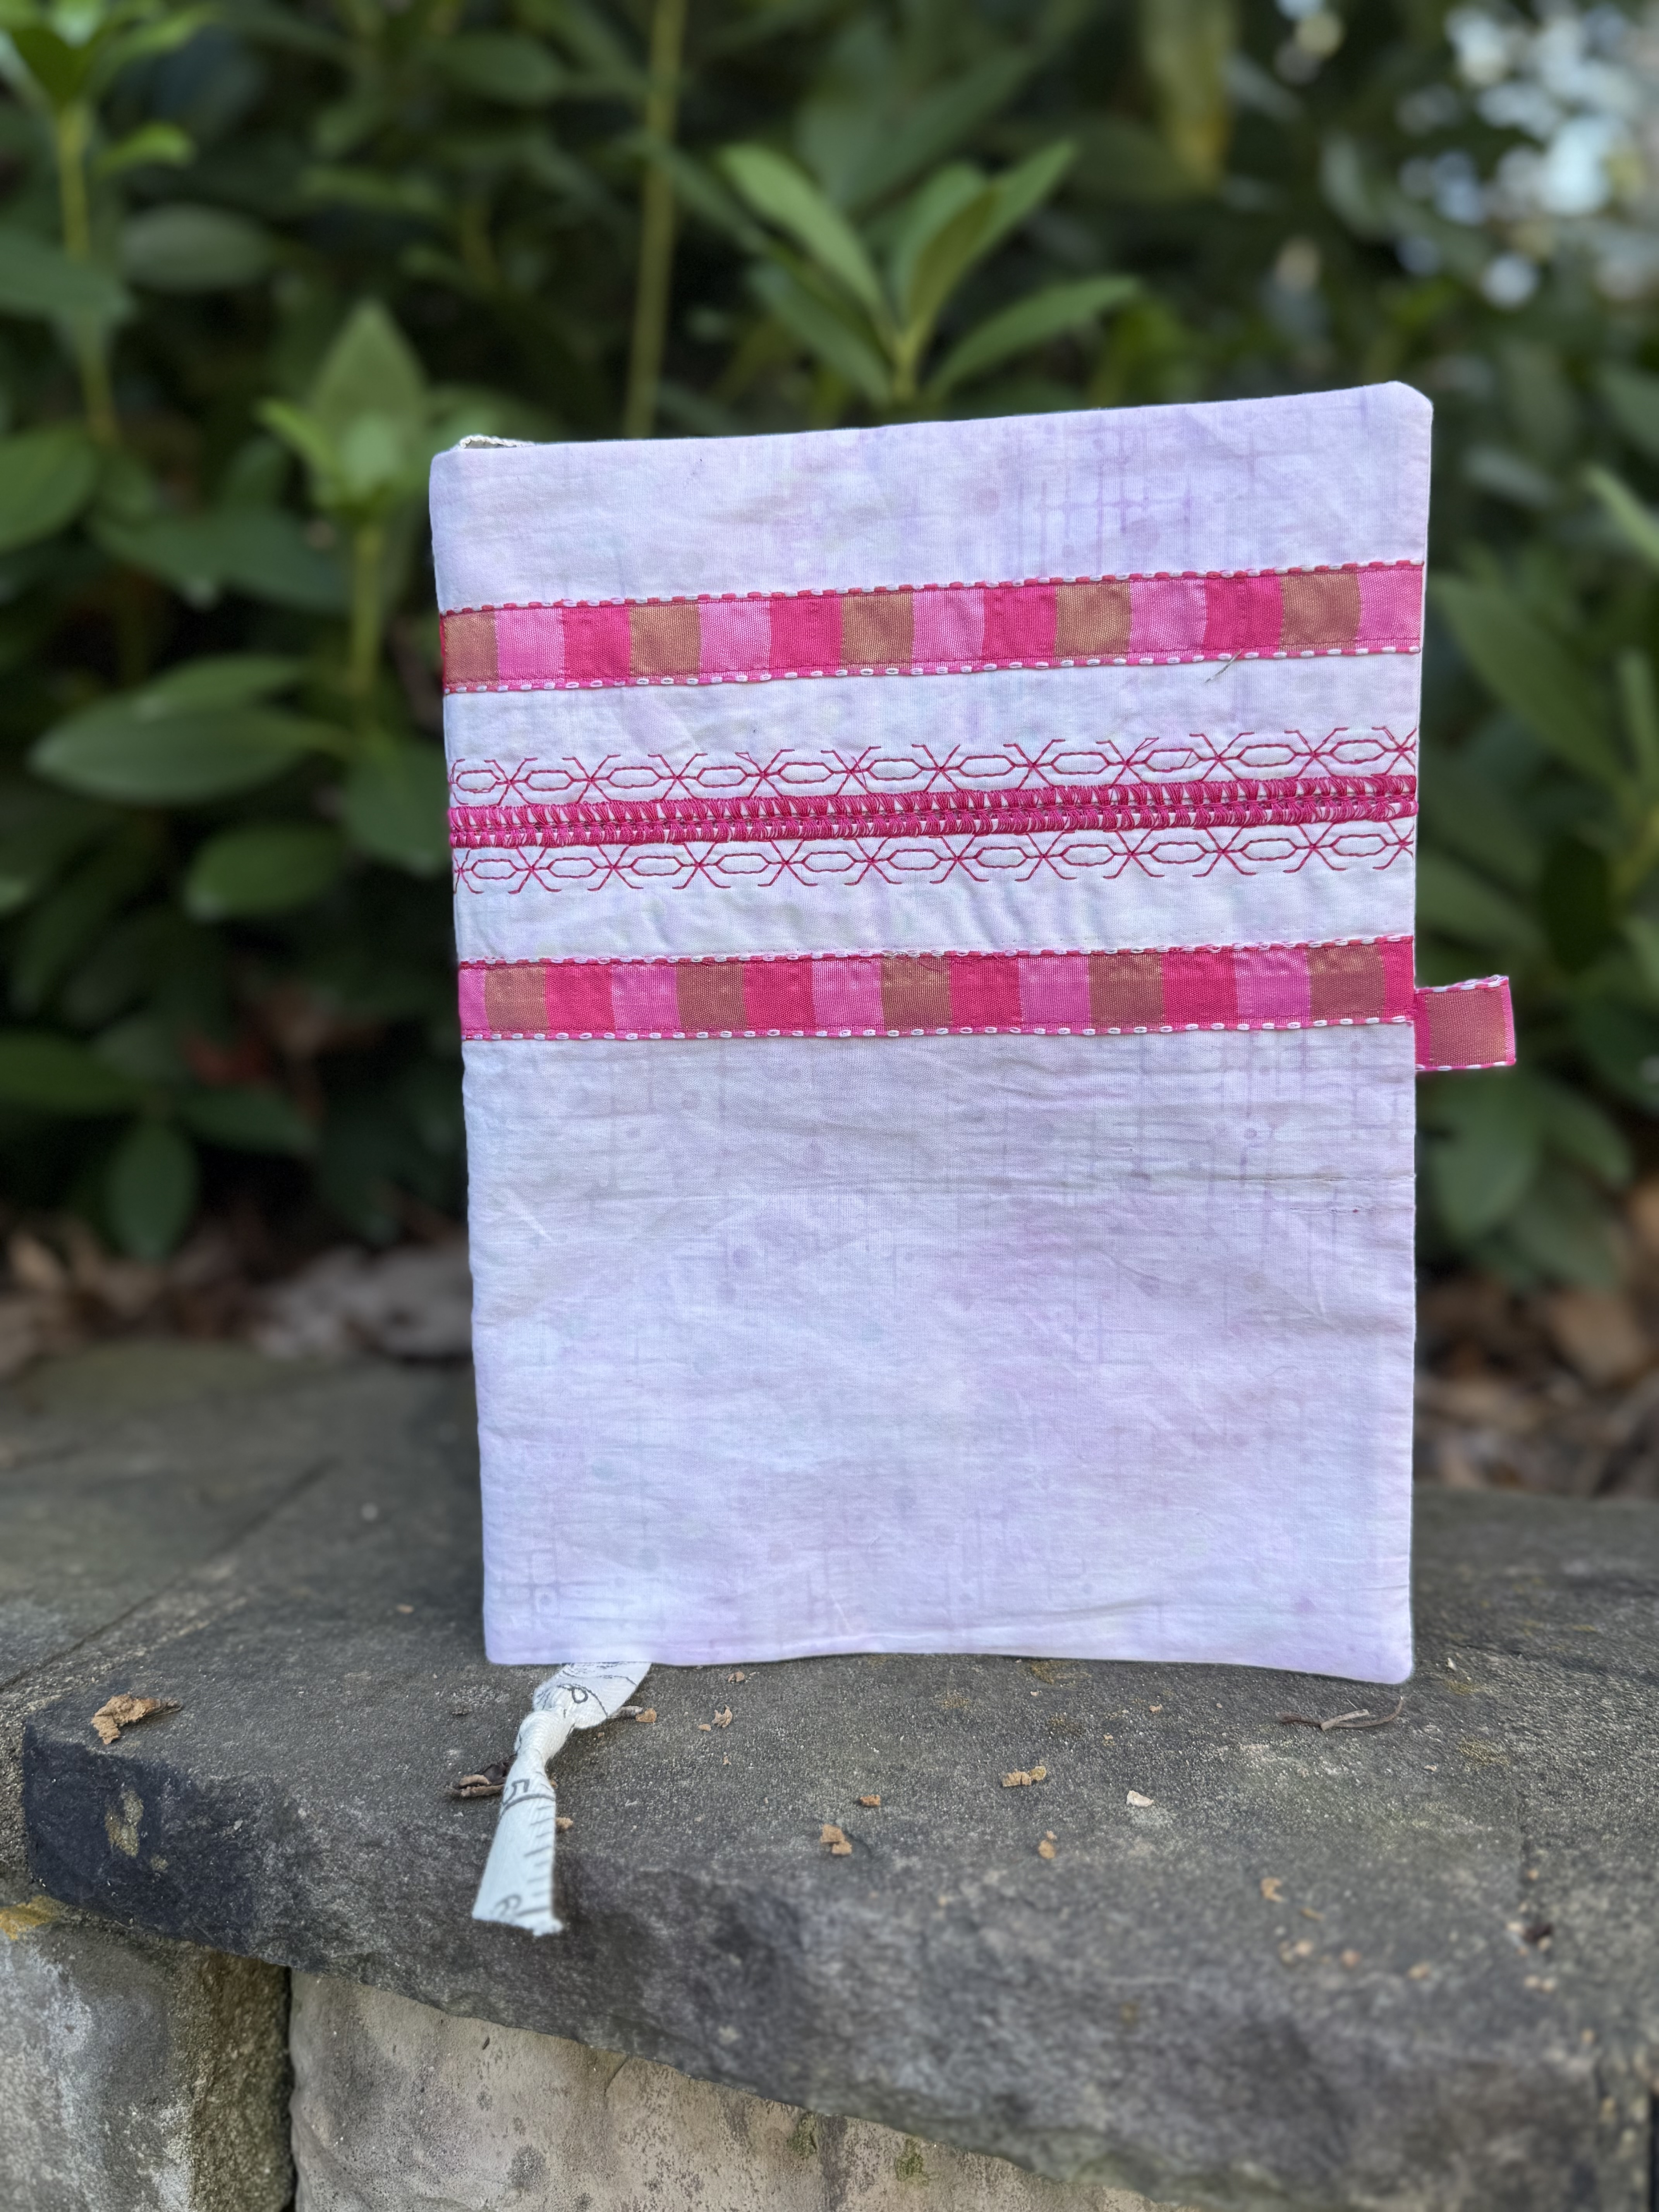
I wanted to challenge myself for this post and spent some time thinking about what I could do with leftover fabric in my studio. I knew I wanted to share the Composition Notebook cover pattern with you and I knew I wanted to take it up a notch. But how?
As I stared at my shelves, I saw a soft pink batik that I had used on the back of a quilt years ago. The quilt finished around 60’’ wide meaning I had a 10’’ x some length of fabric remaining. I never quite know what to do with these long, skinny pieces I have after a quilt has been quilted, so they either become a quilt sleeve or they sit on my shelf. That’s when it occurred to me! Embellish with thread!
No Measurements. No Problem!
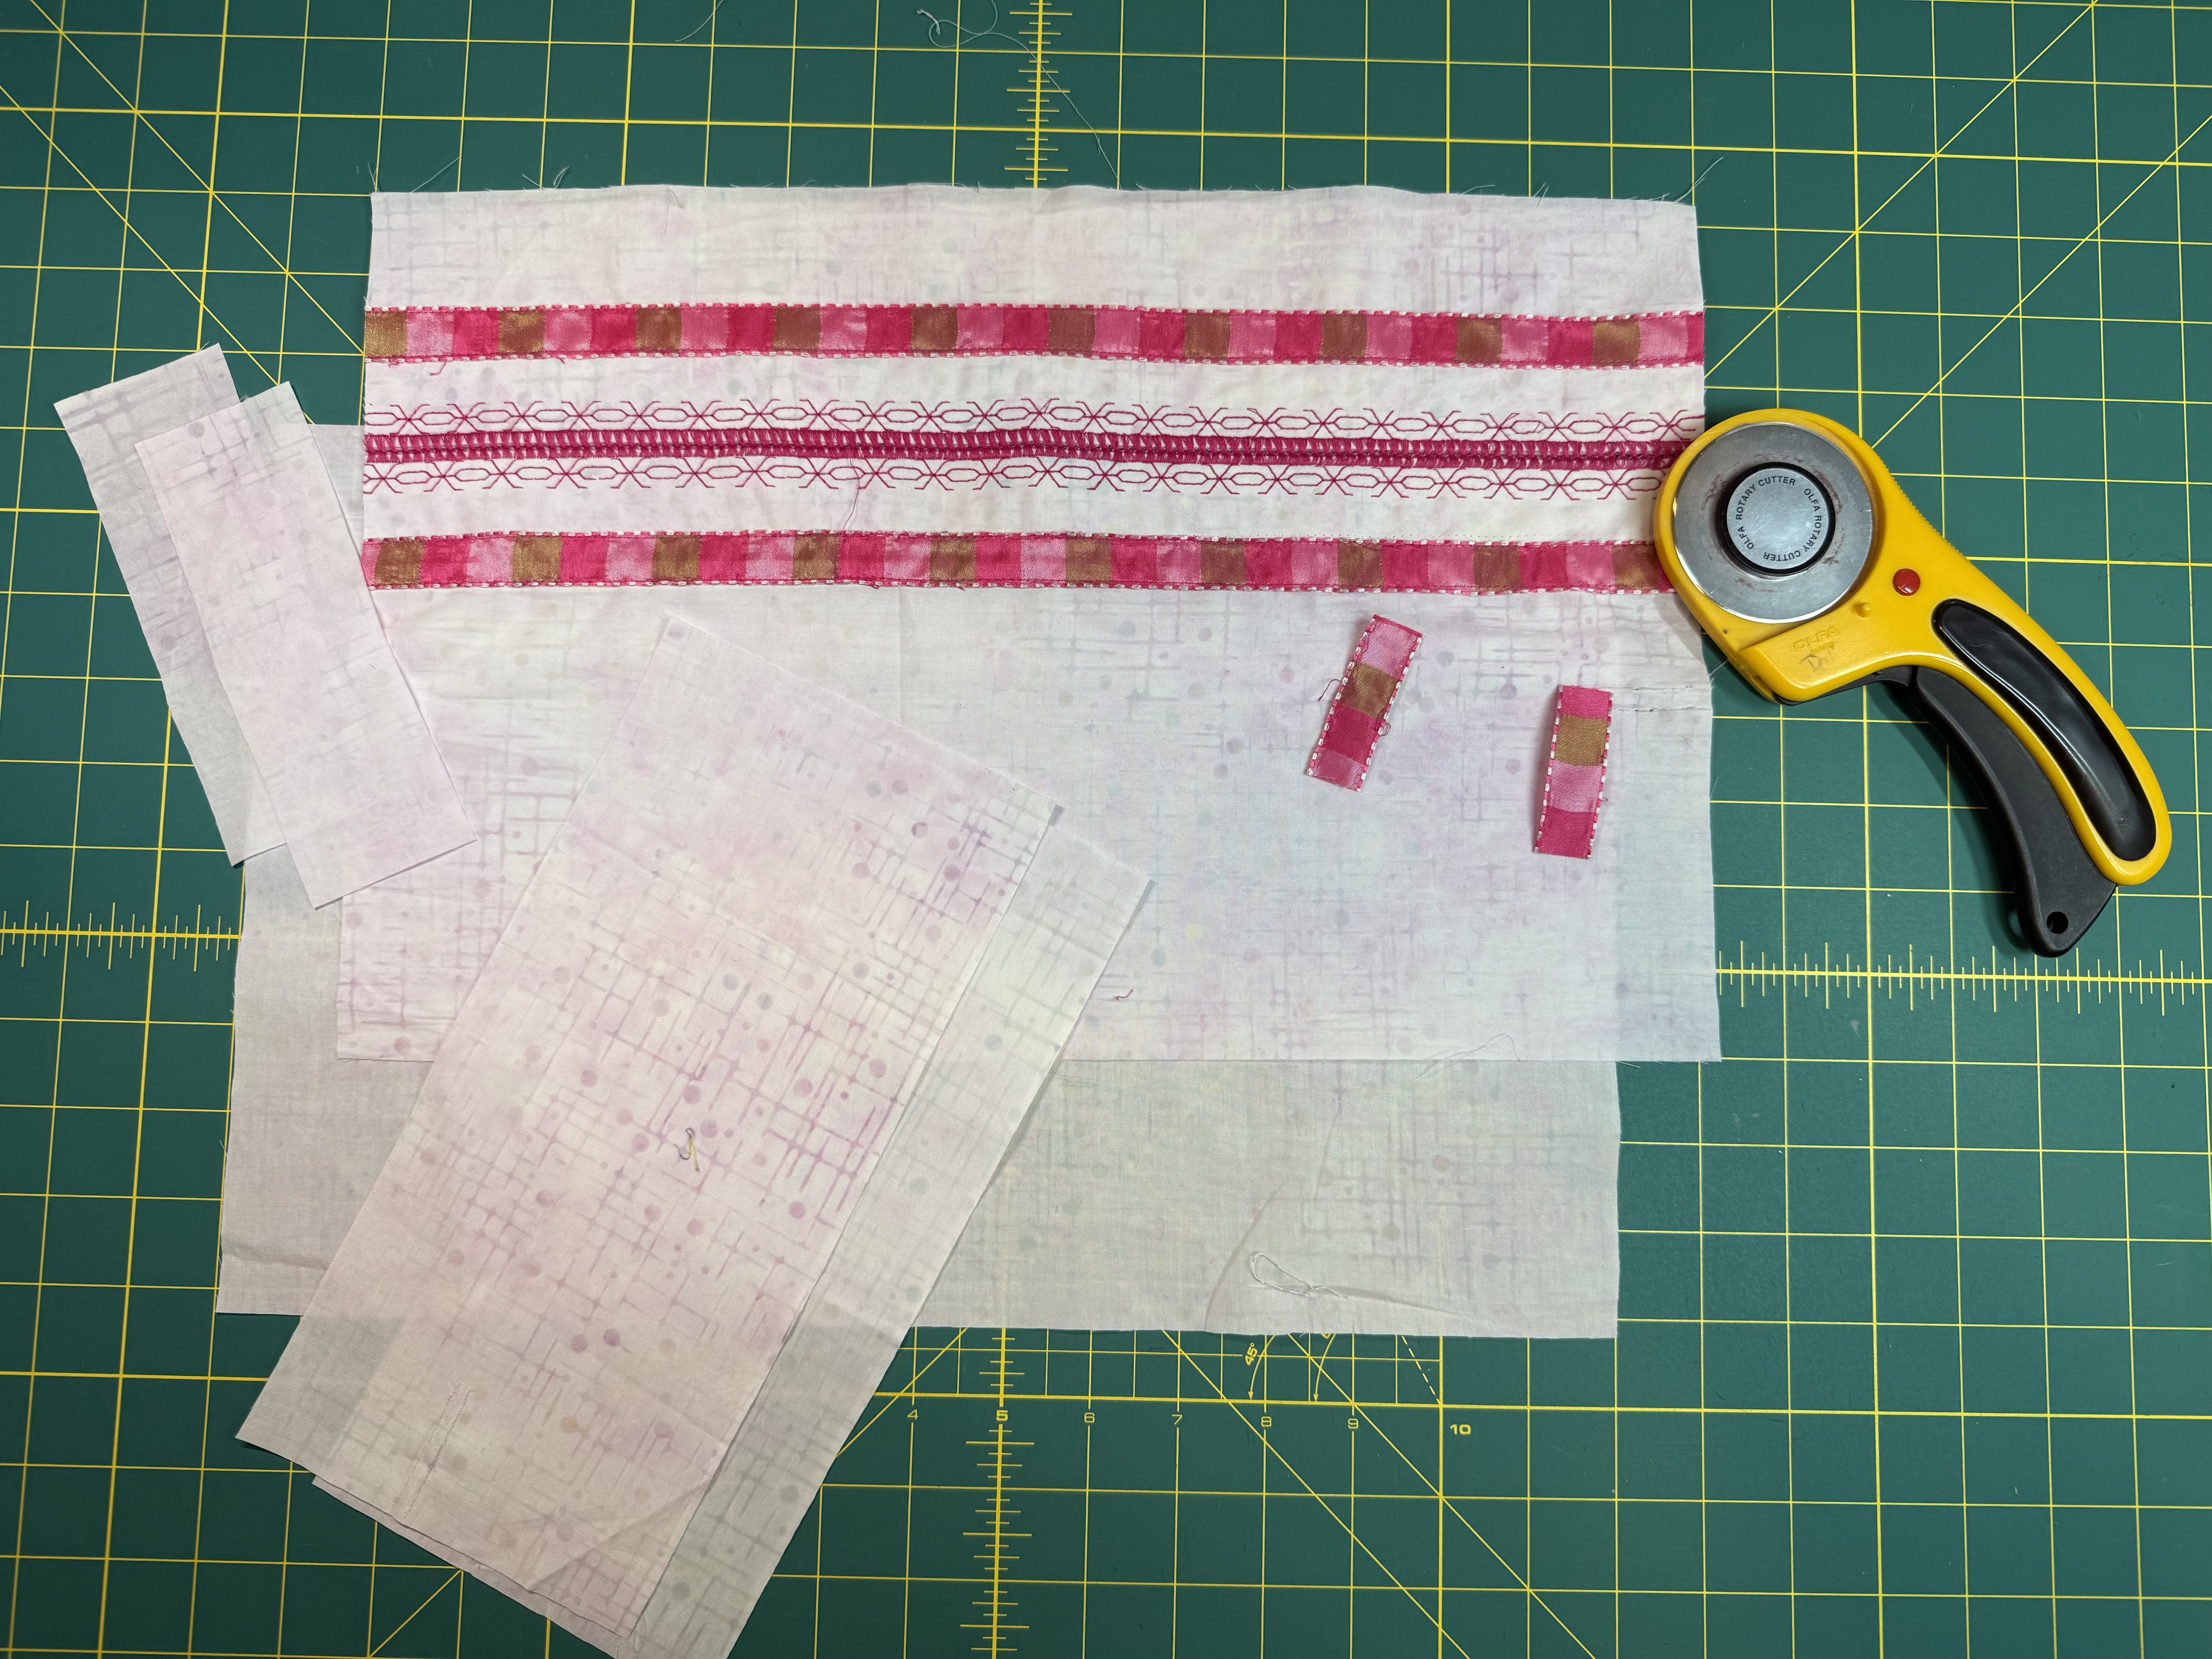
I’m going to share how I put this together with general measurements because the big takeaway is that you can do this with any size scraps you have to make a 10 1/2’’ x 16’’ Composition Notebook cover. My scraps are most likely not the same size as yours. Just keep adding fabric or adjust the measurements until you get the size you need.
That said, the top piece of my composition notebook was about 6’’ x 22’’ and the bottom piece was about 10’’ x 22’’. Make sure you cut the pieces WIDER than you think because you can cut them down later.
Dress You Up With My Stitches
Now that I had chosen the fabric, I needed to figure out how to make it shine. I sat on that for a bit then, seeking inspiration, I turned to the Big Book of Feet and the Big Book of Stitches.
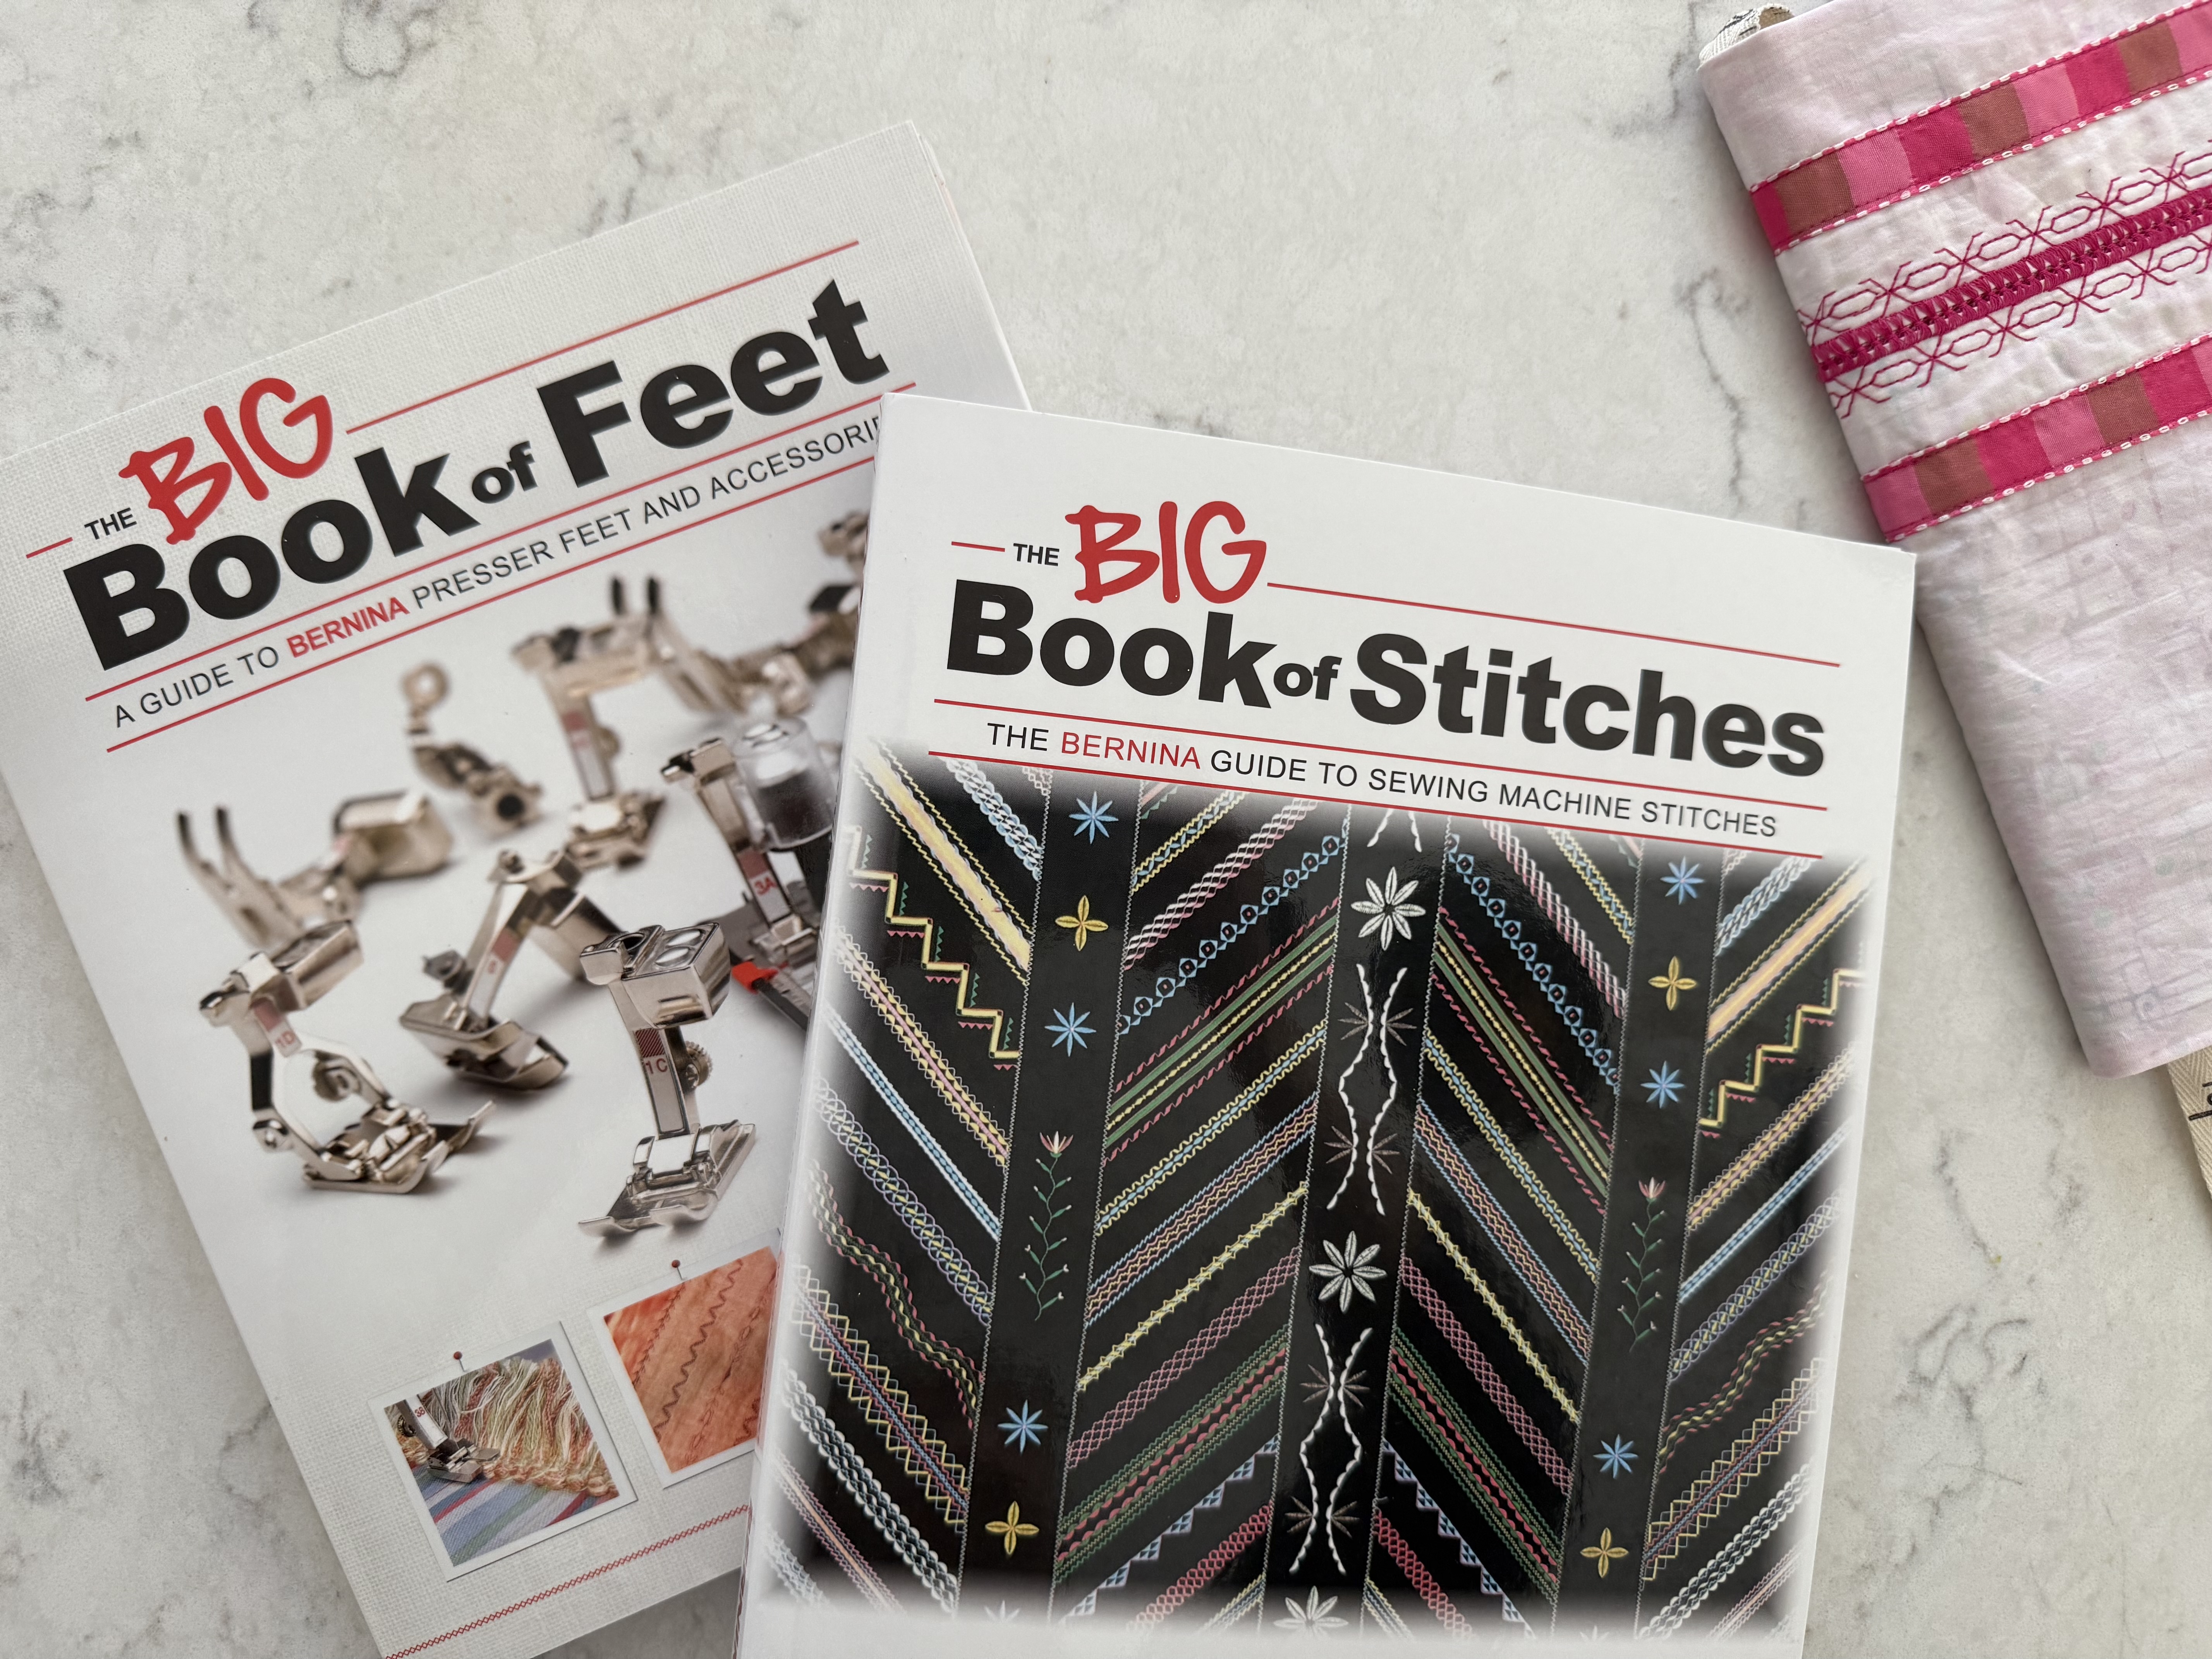
I recommend these books for your sewing and quilting arsenal. They are invaluable.
The Big Book of Feet shows you all the quilt feet BERNINA offers and how to use them. The Big Book of Stitches gives you tons of inspiration and shares, among other things, how to manipulate the stitches on your machine to create one of a kind creations.
The short version is that I found the inspiration I needed.
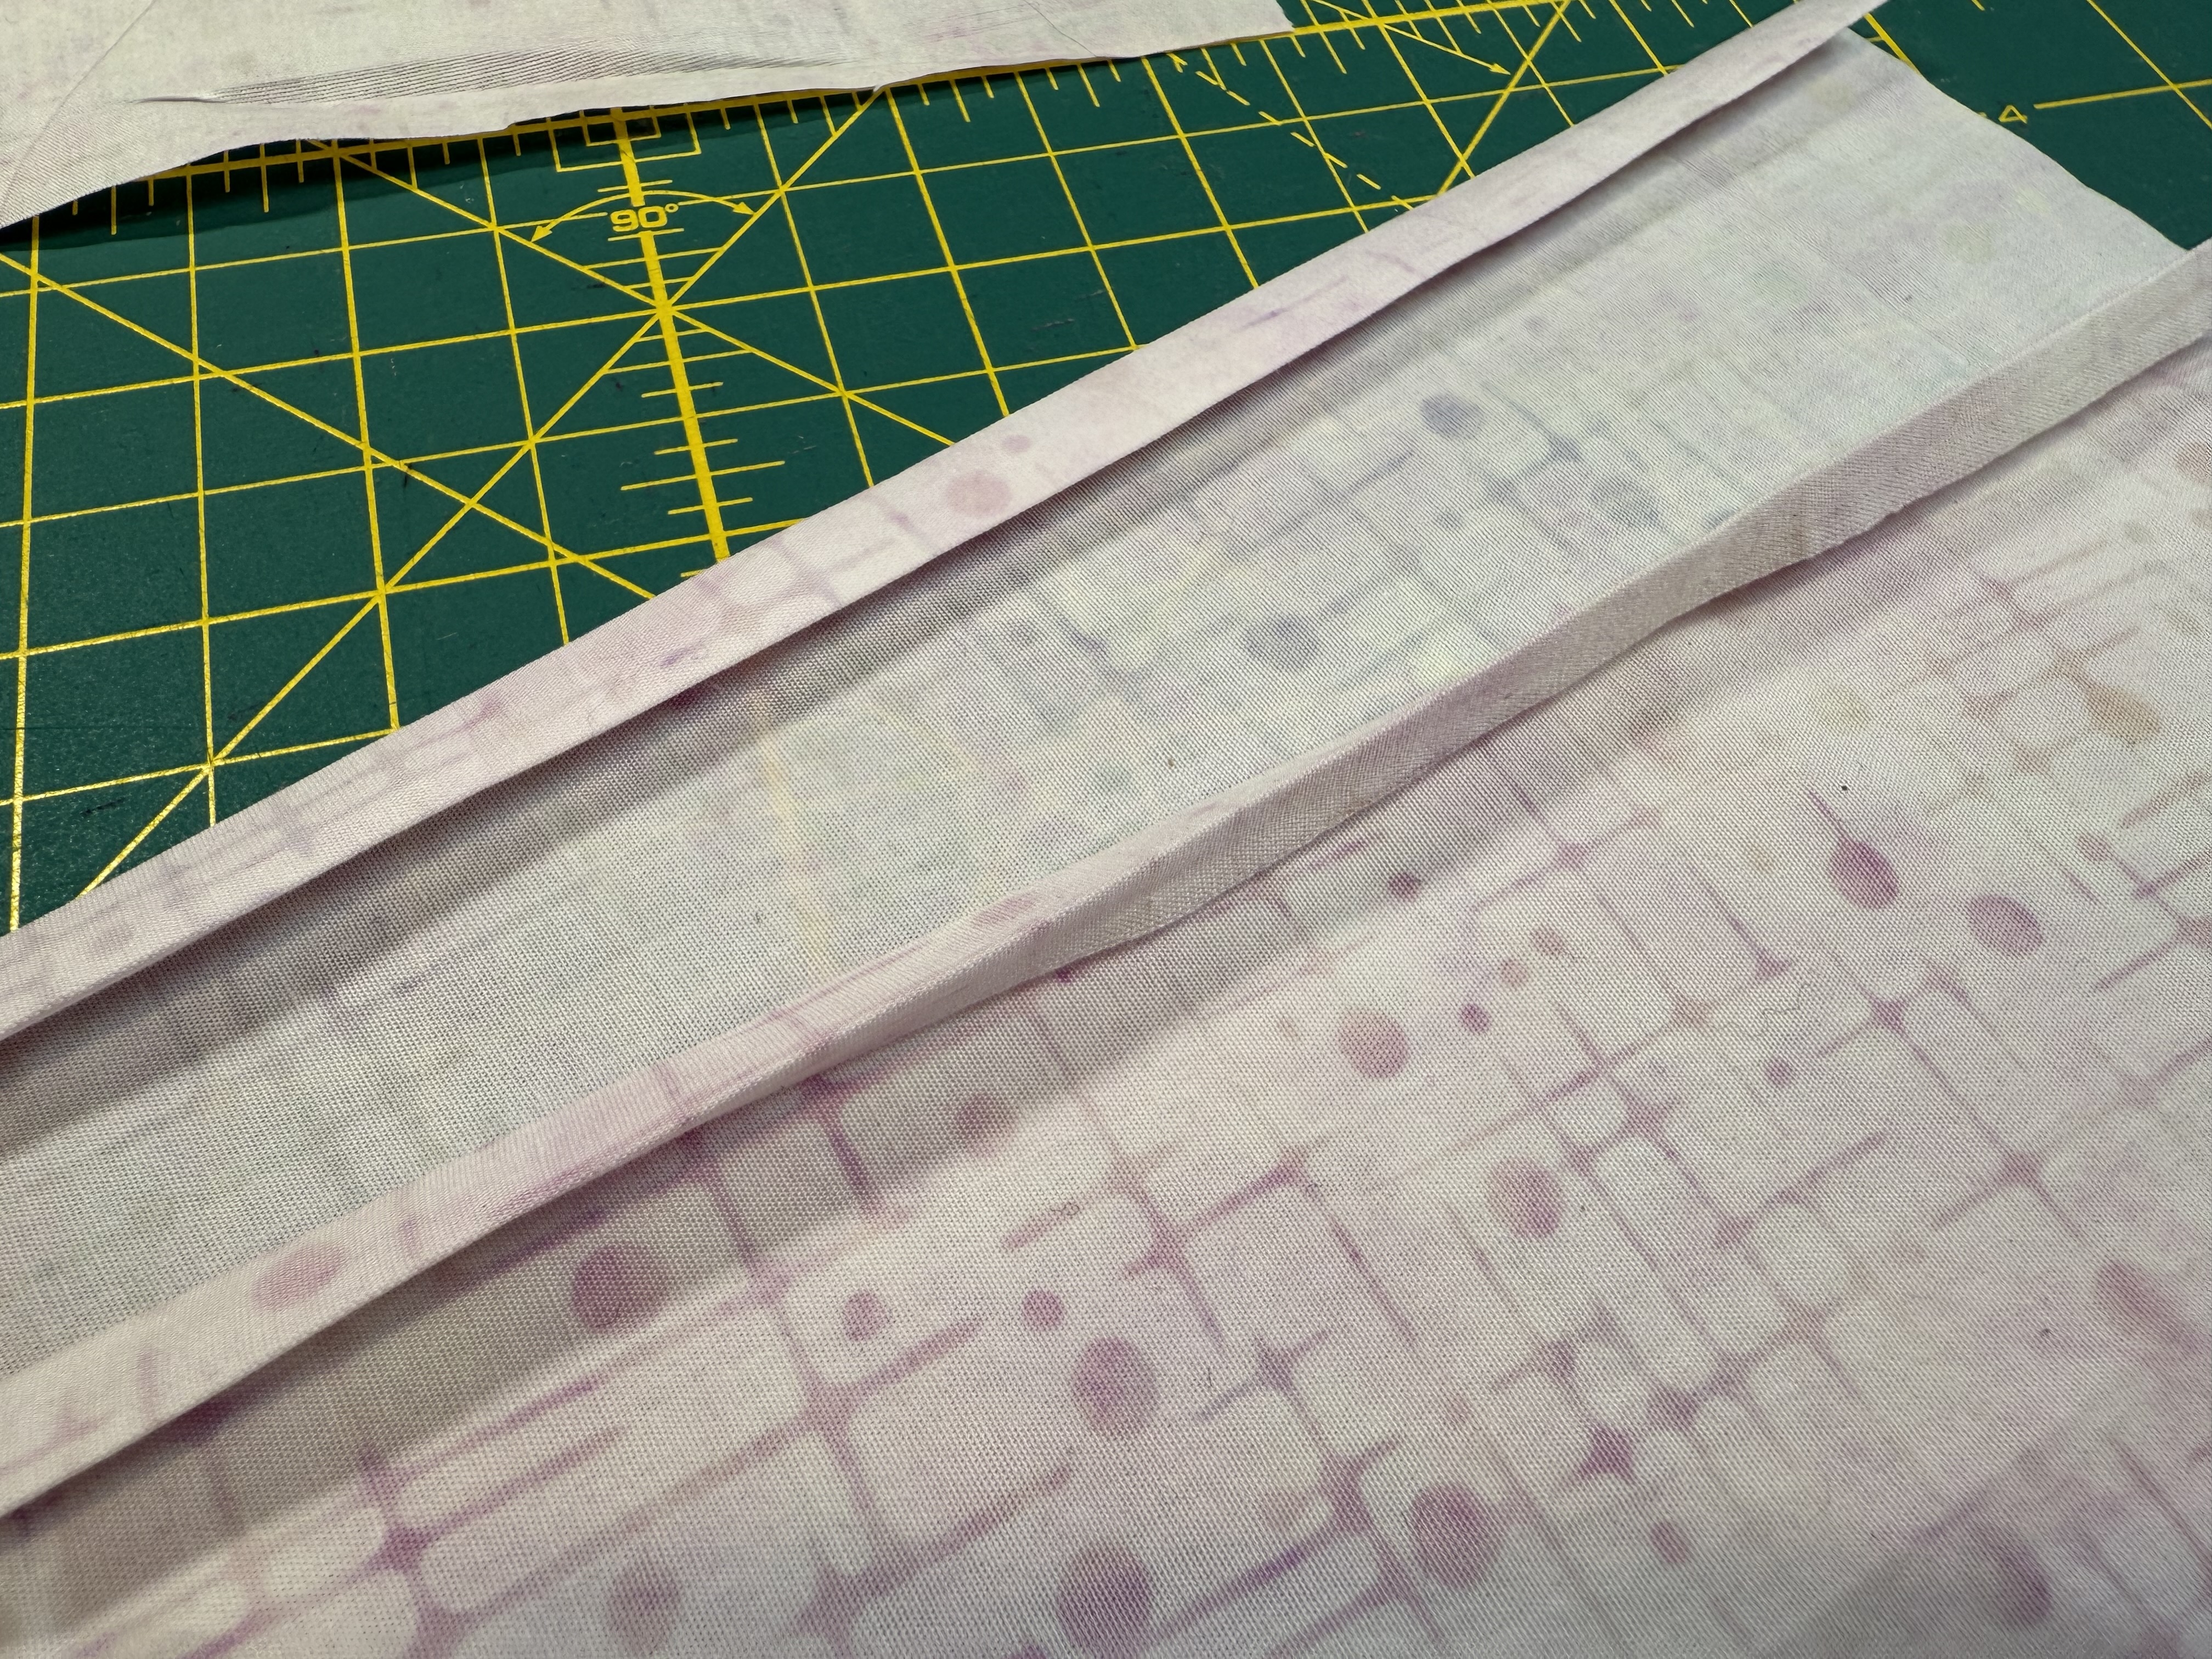
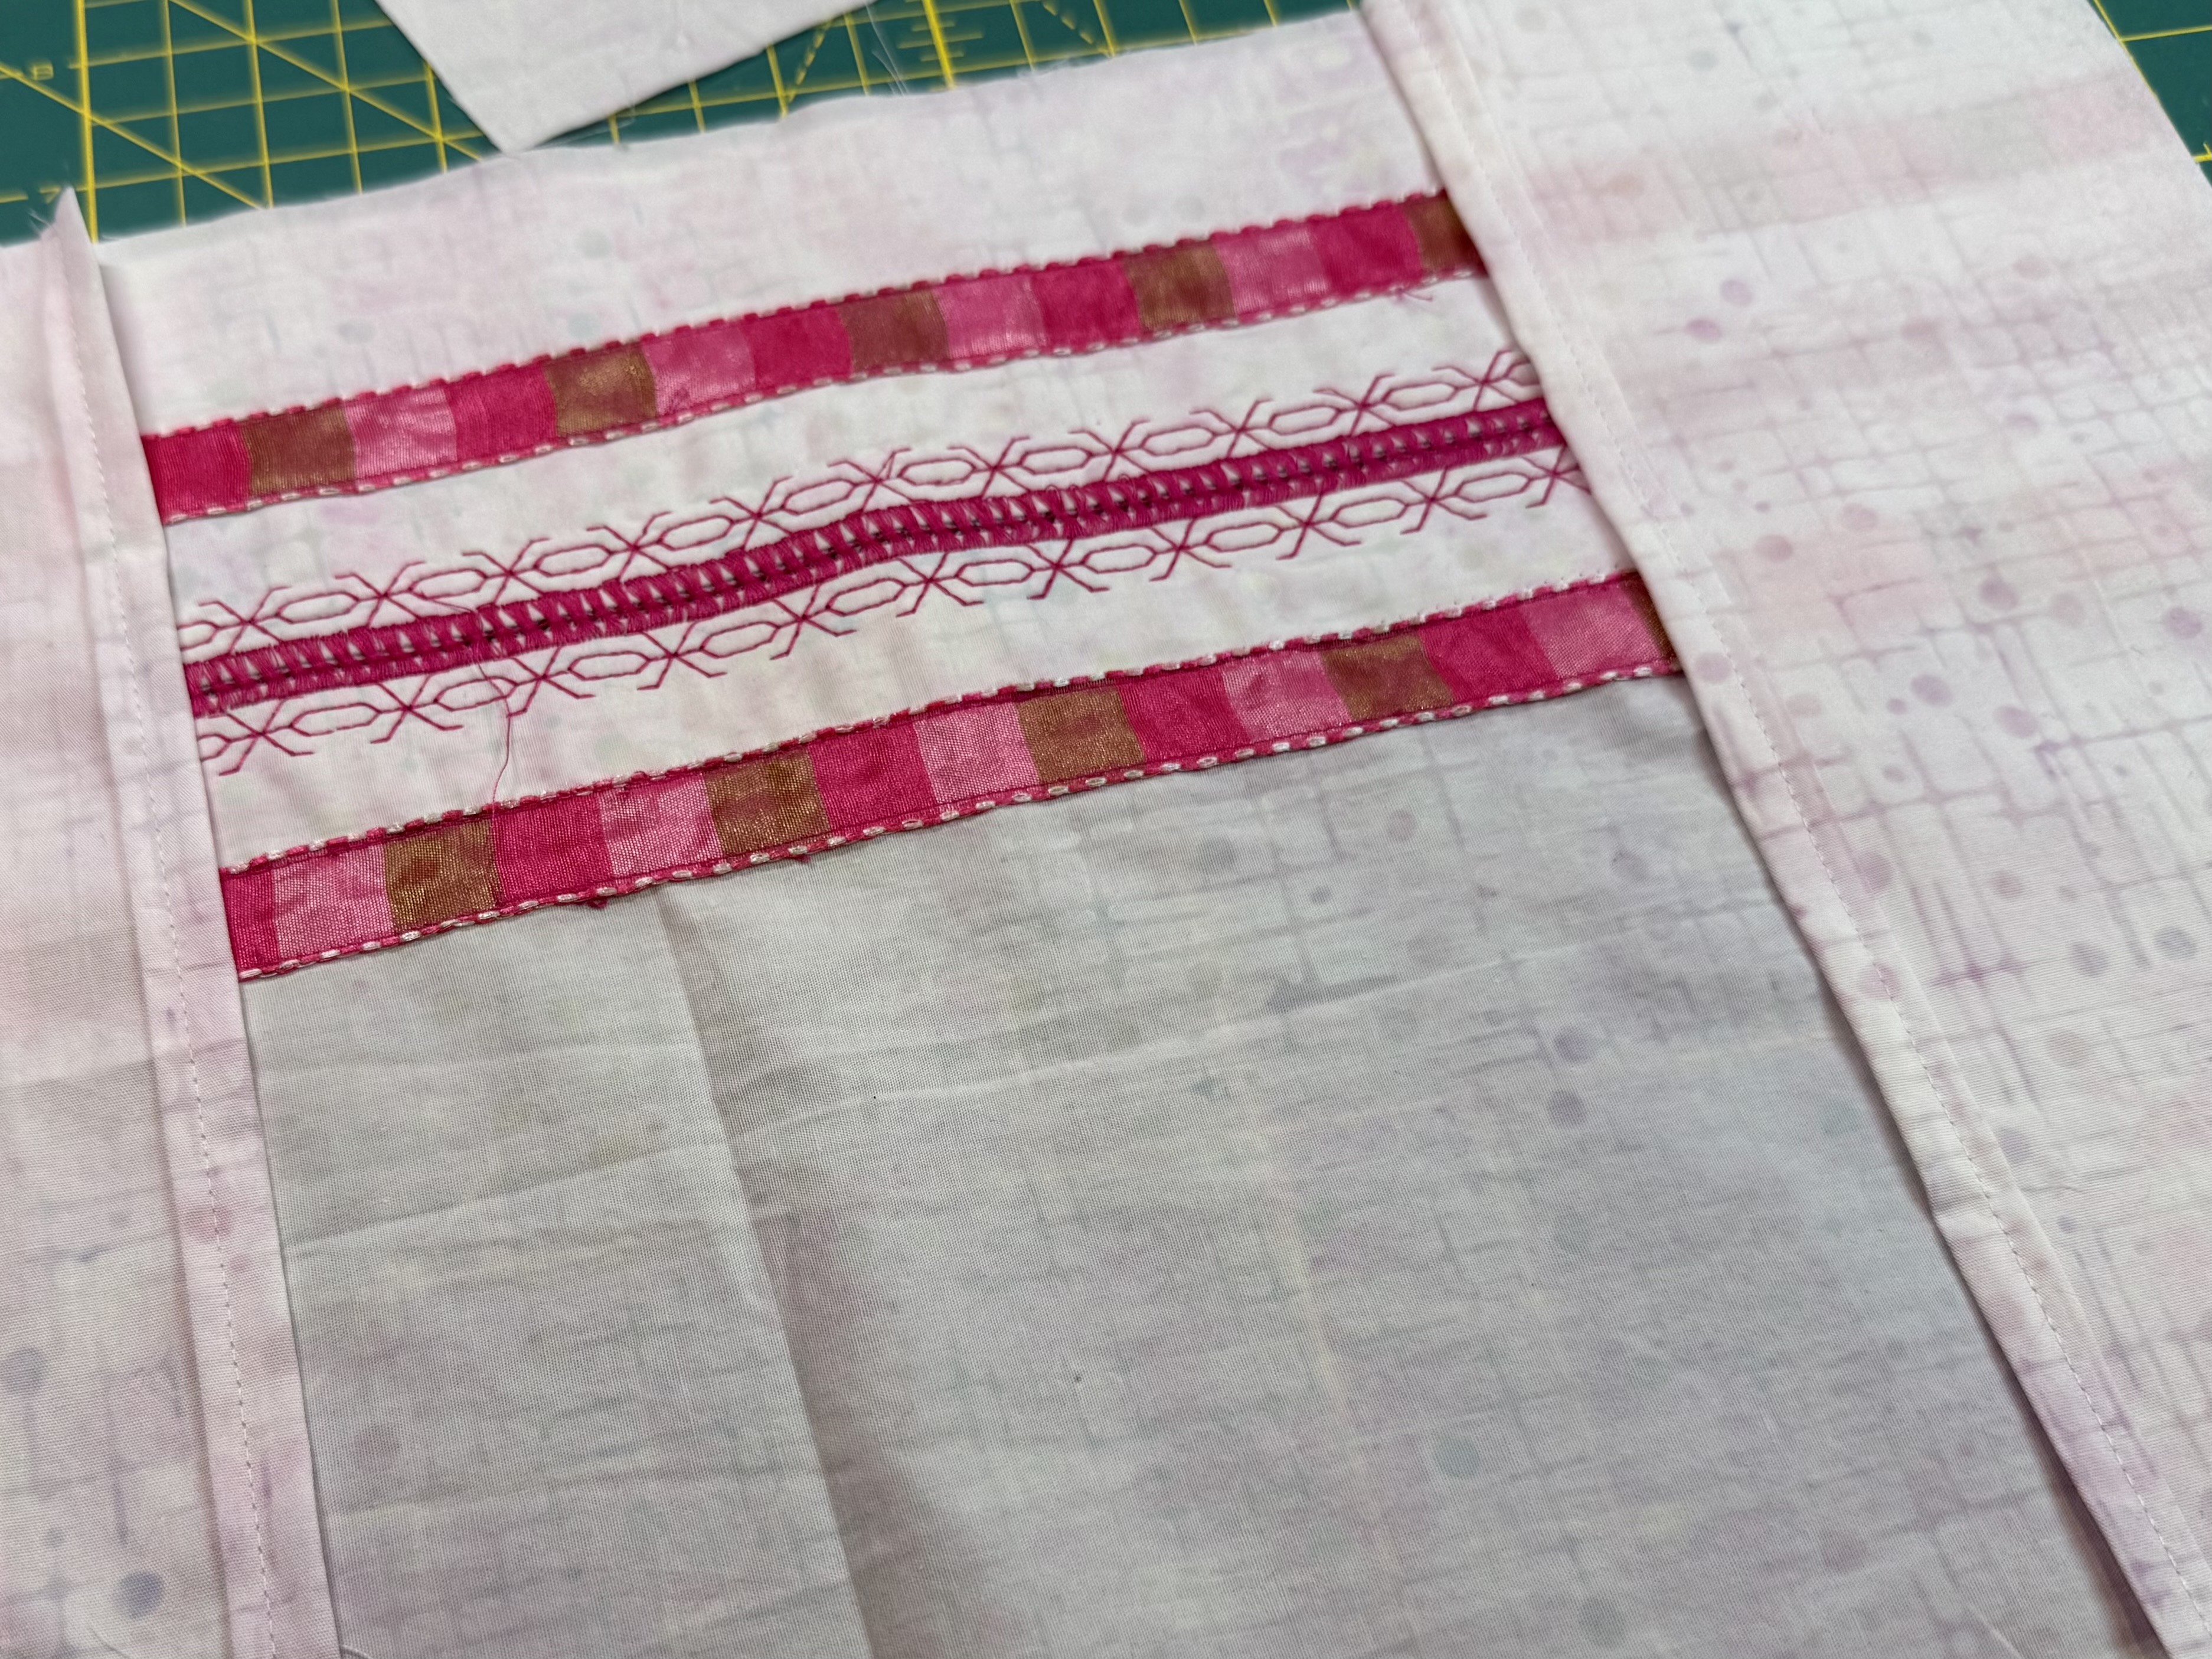
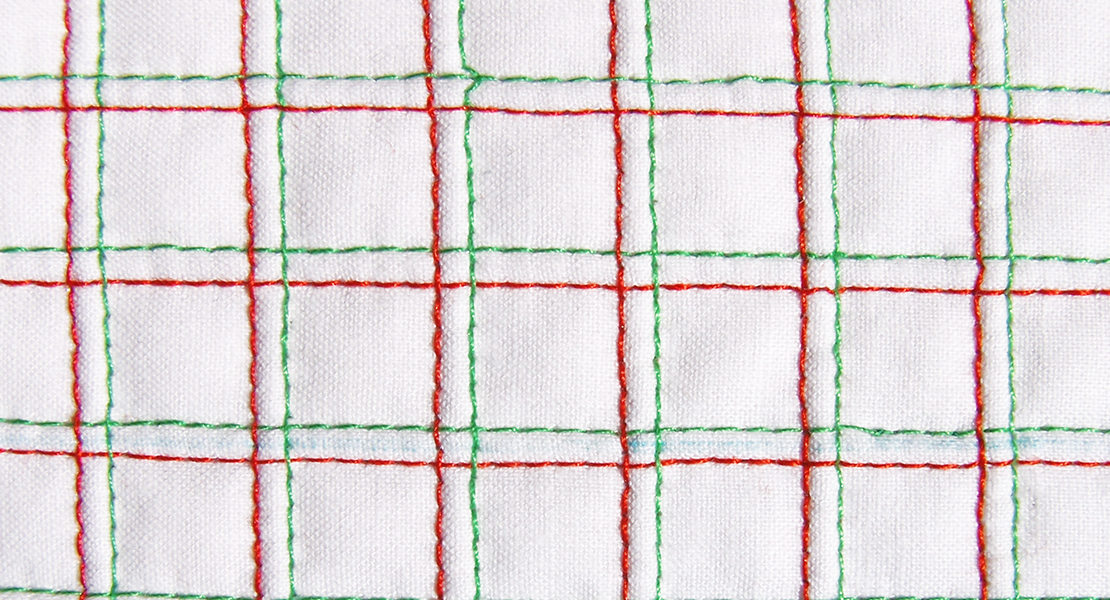
Fagoting Stitch
Part 1
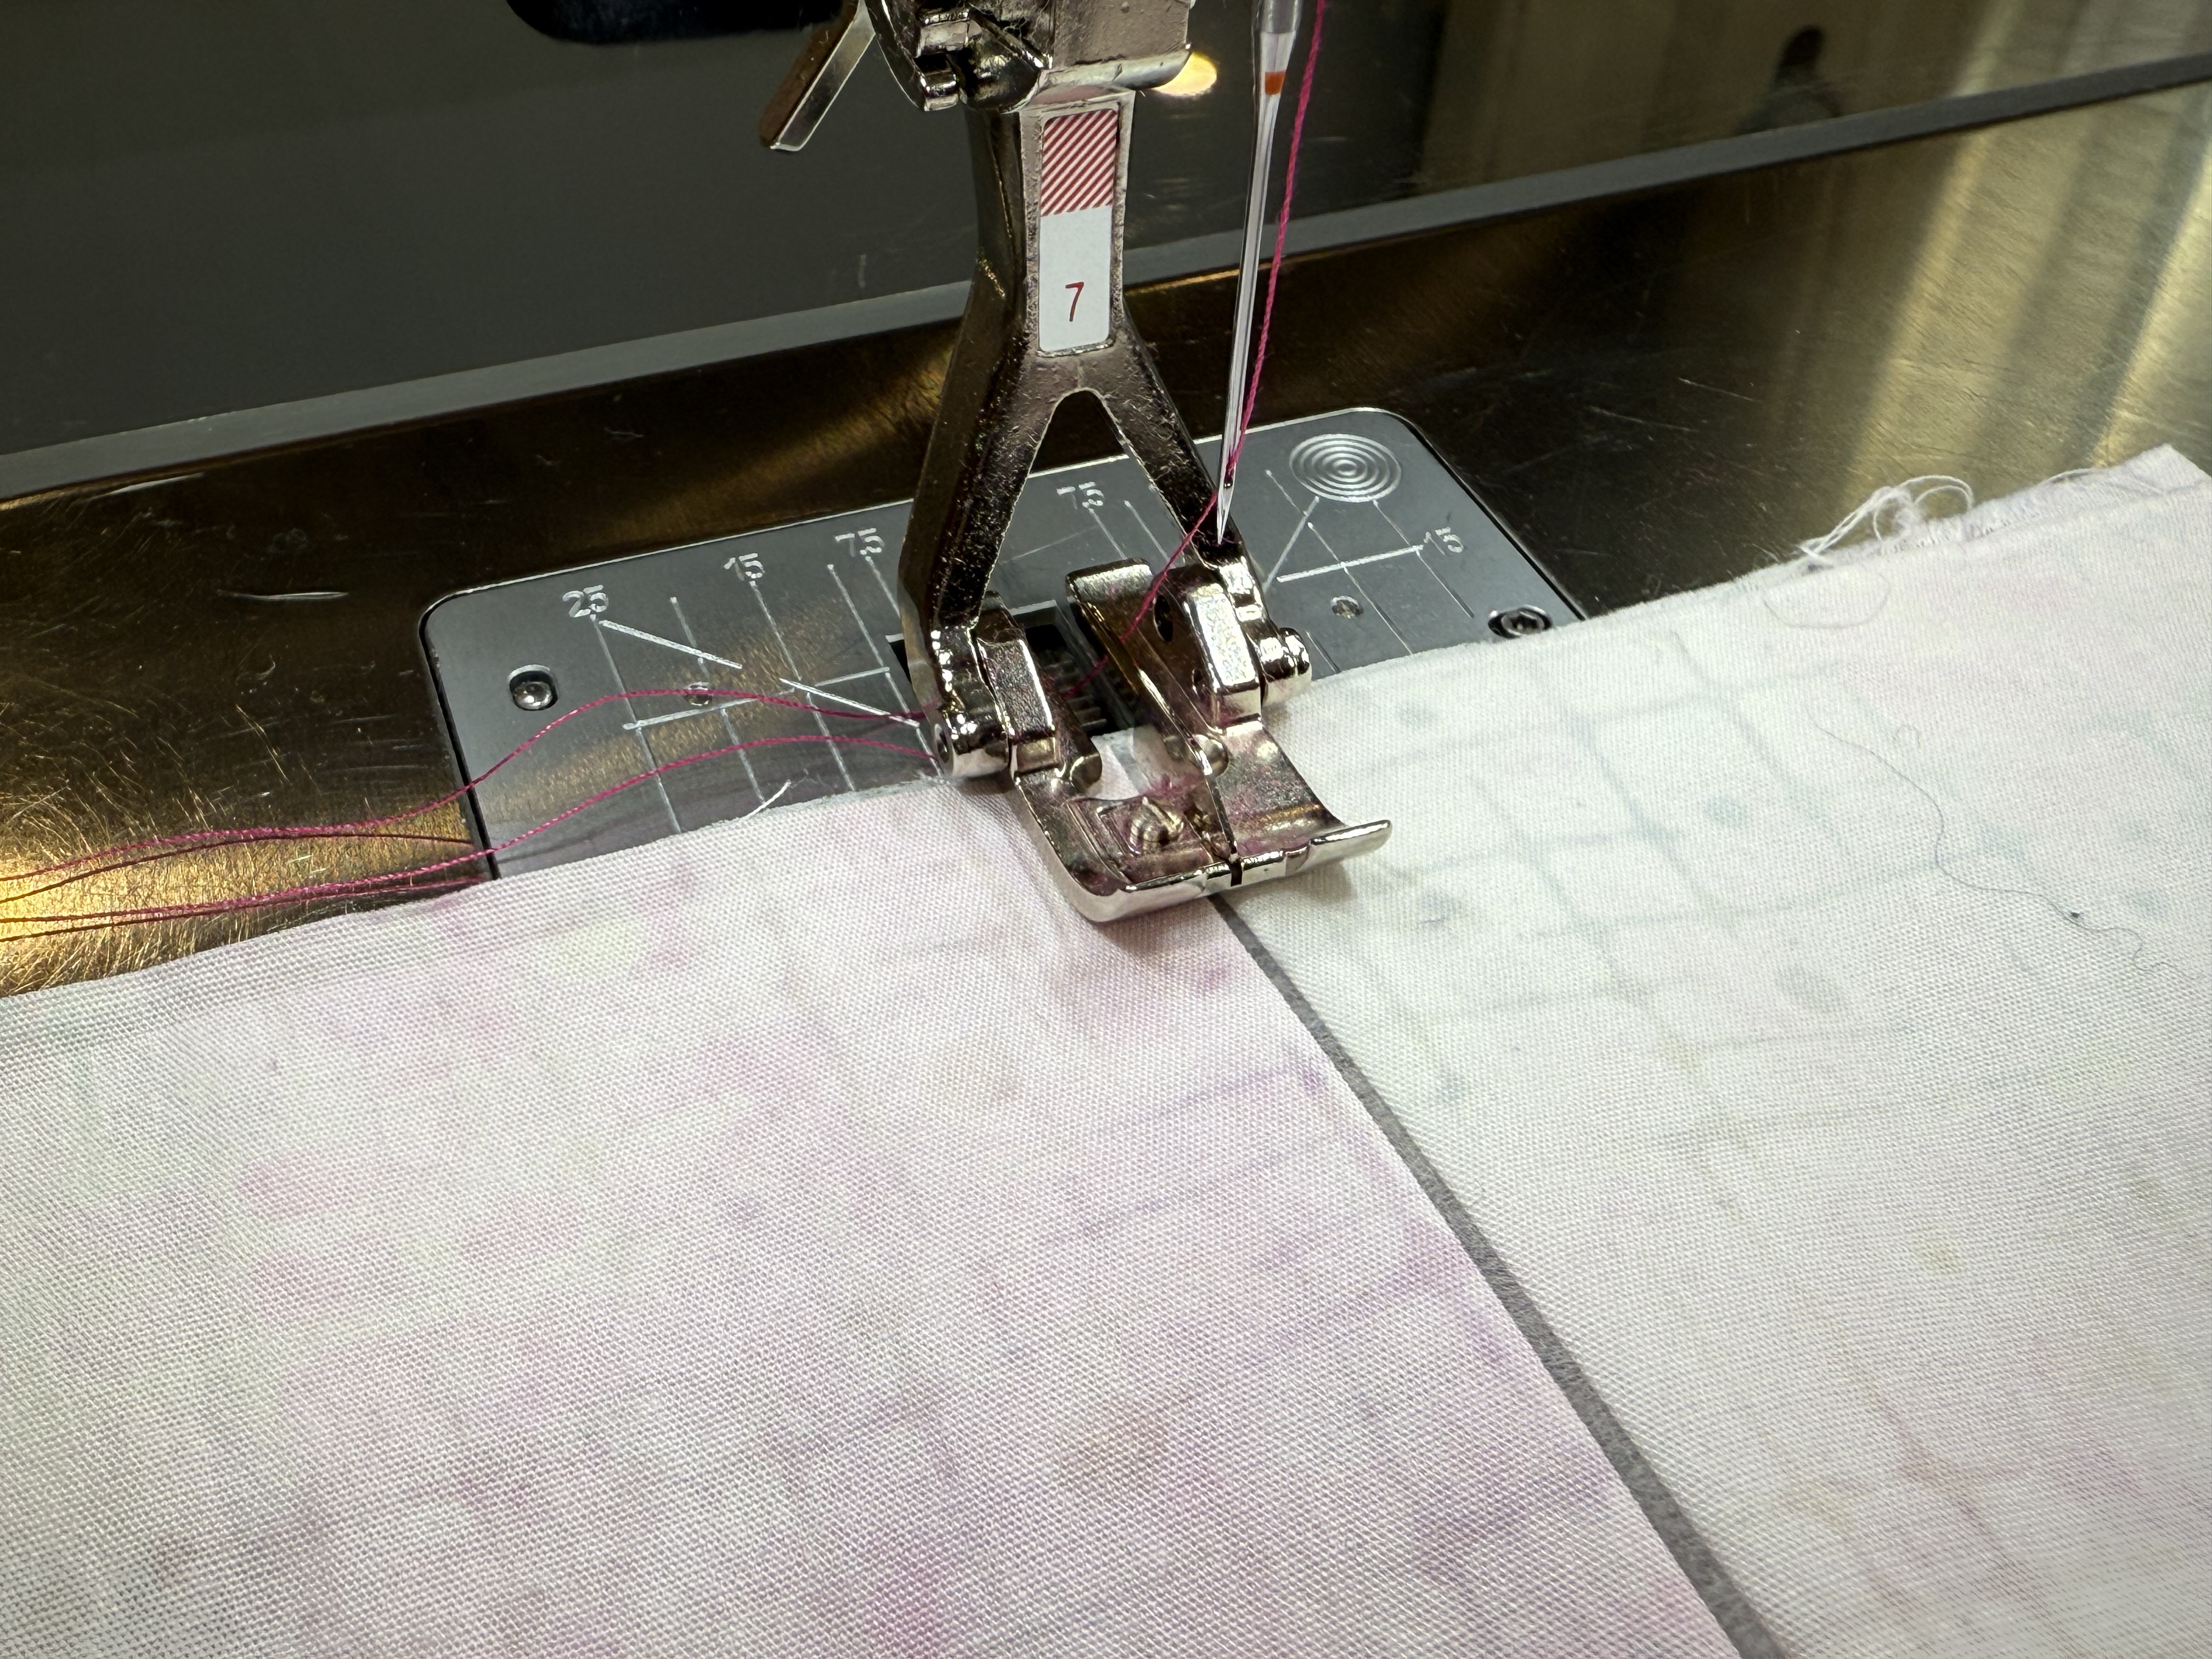
I decided to attach the pieces using a fagoting stitch. I pressed each piece 2’’ to the back to create a fold along the length of my scraps resulting in 4’’ x 22’’ and 8’’ x 22’’ pieces.
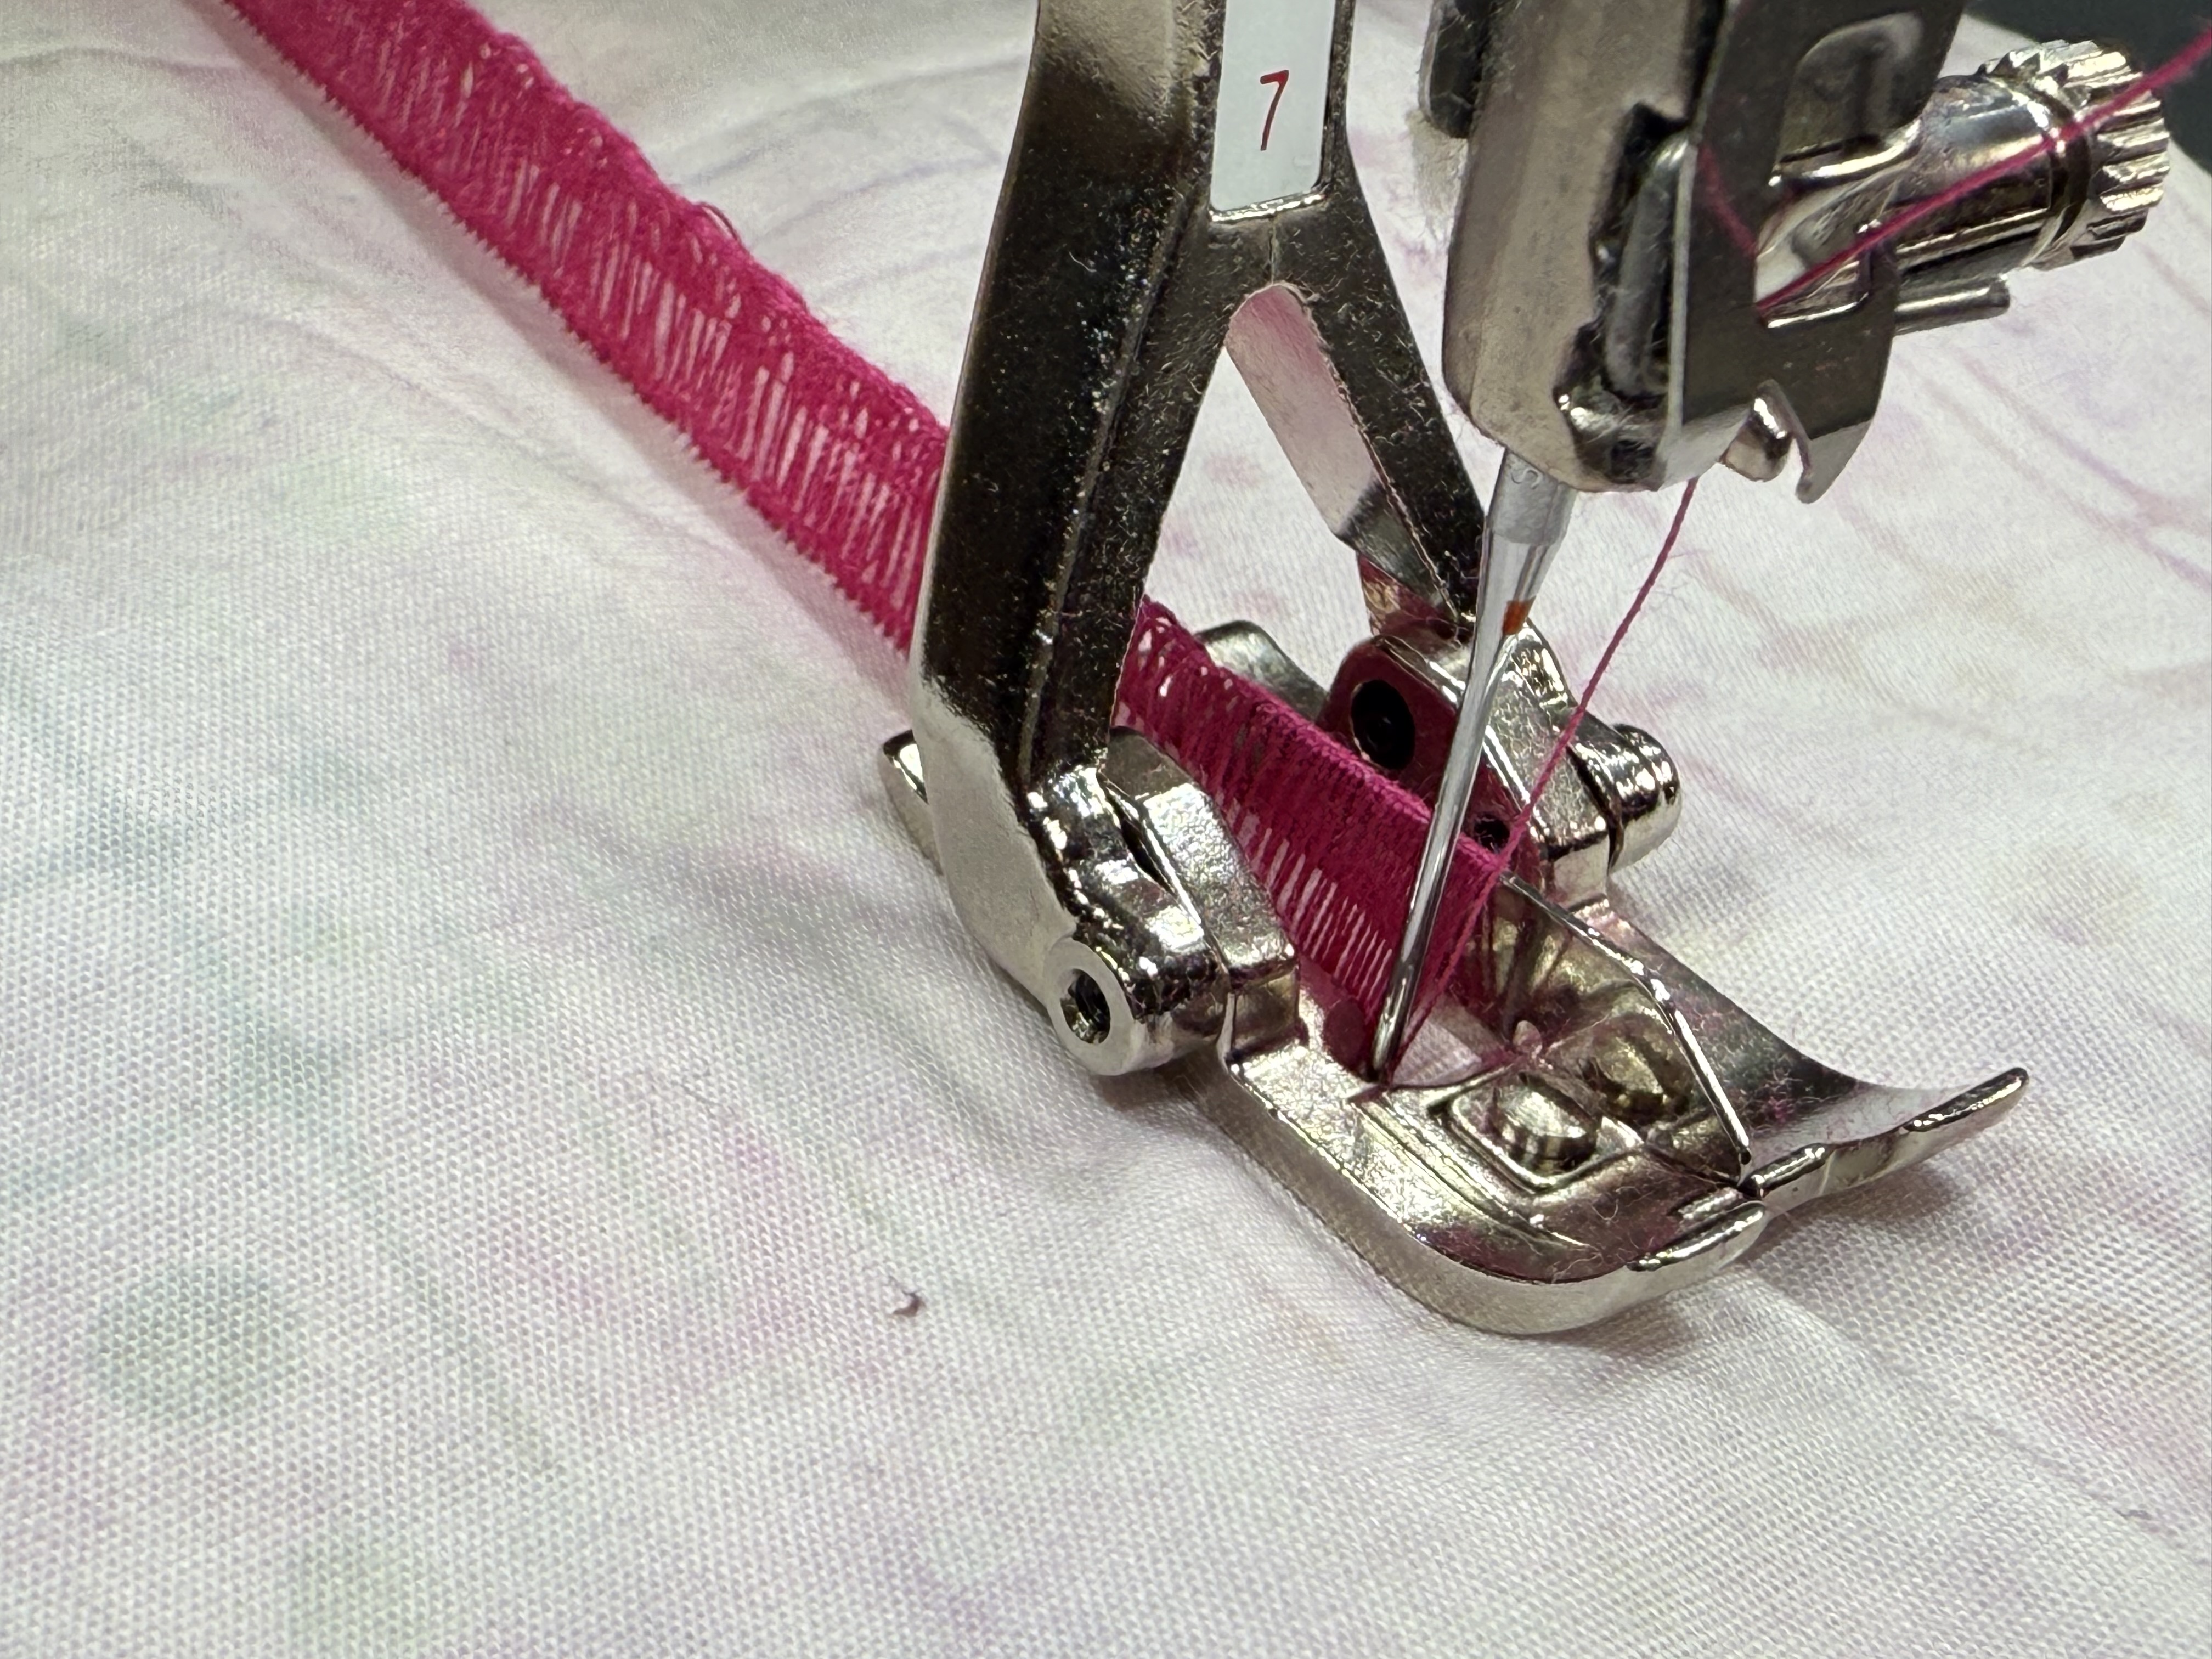
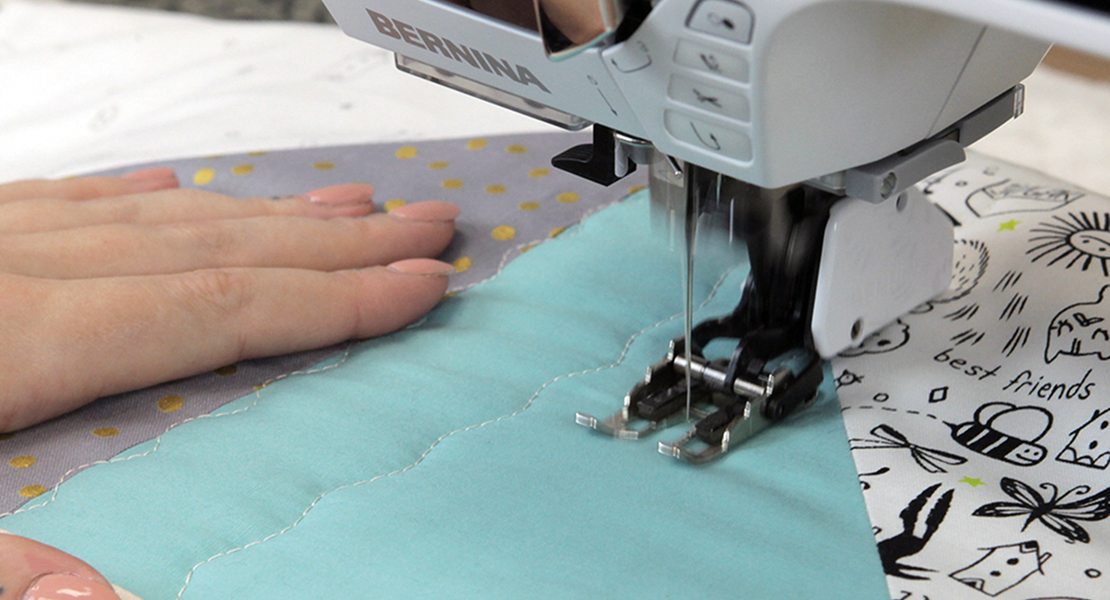
To create this stitch, use the #7 foot. Set your machine for a 5.5 width zig zag stitch, 0.3 stitch length and an upper thread tension of 0.75-1.0 (you may need to play around with the tension).
I placed a piece of lightweight stabilizer behind the fabric for some added stability. The two pieces of fabric should butt next to one another when you are sewing but you can see the stabilizer peeking through here before stitching.
Close-up of how the thread will look like this while you sew.
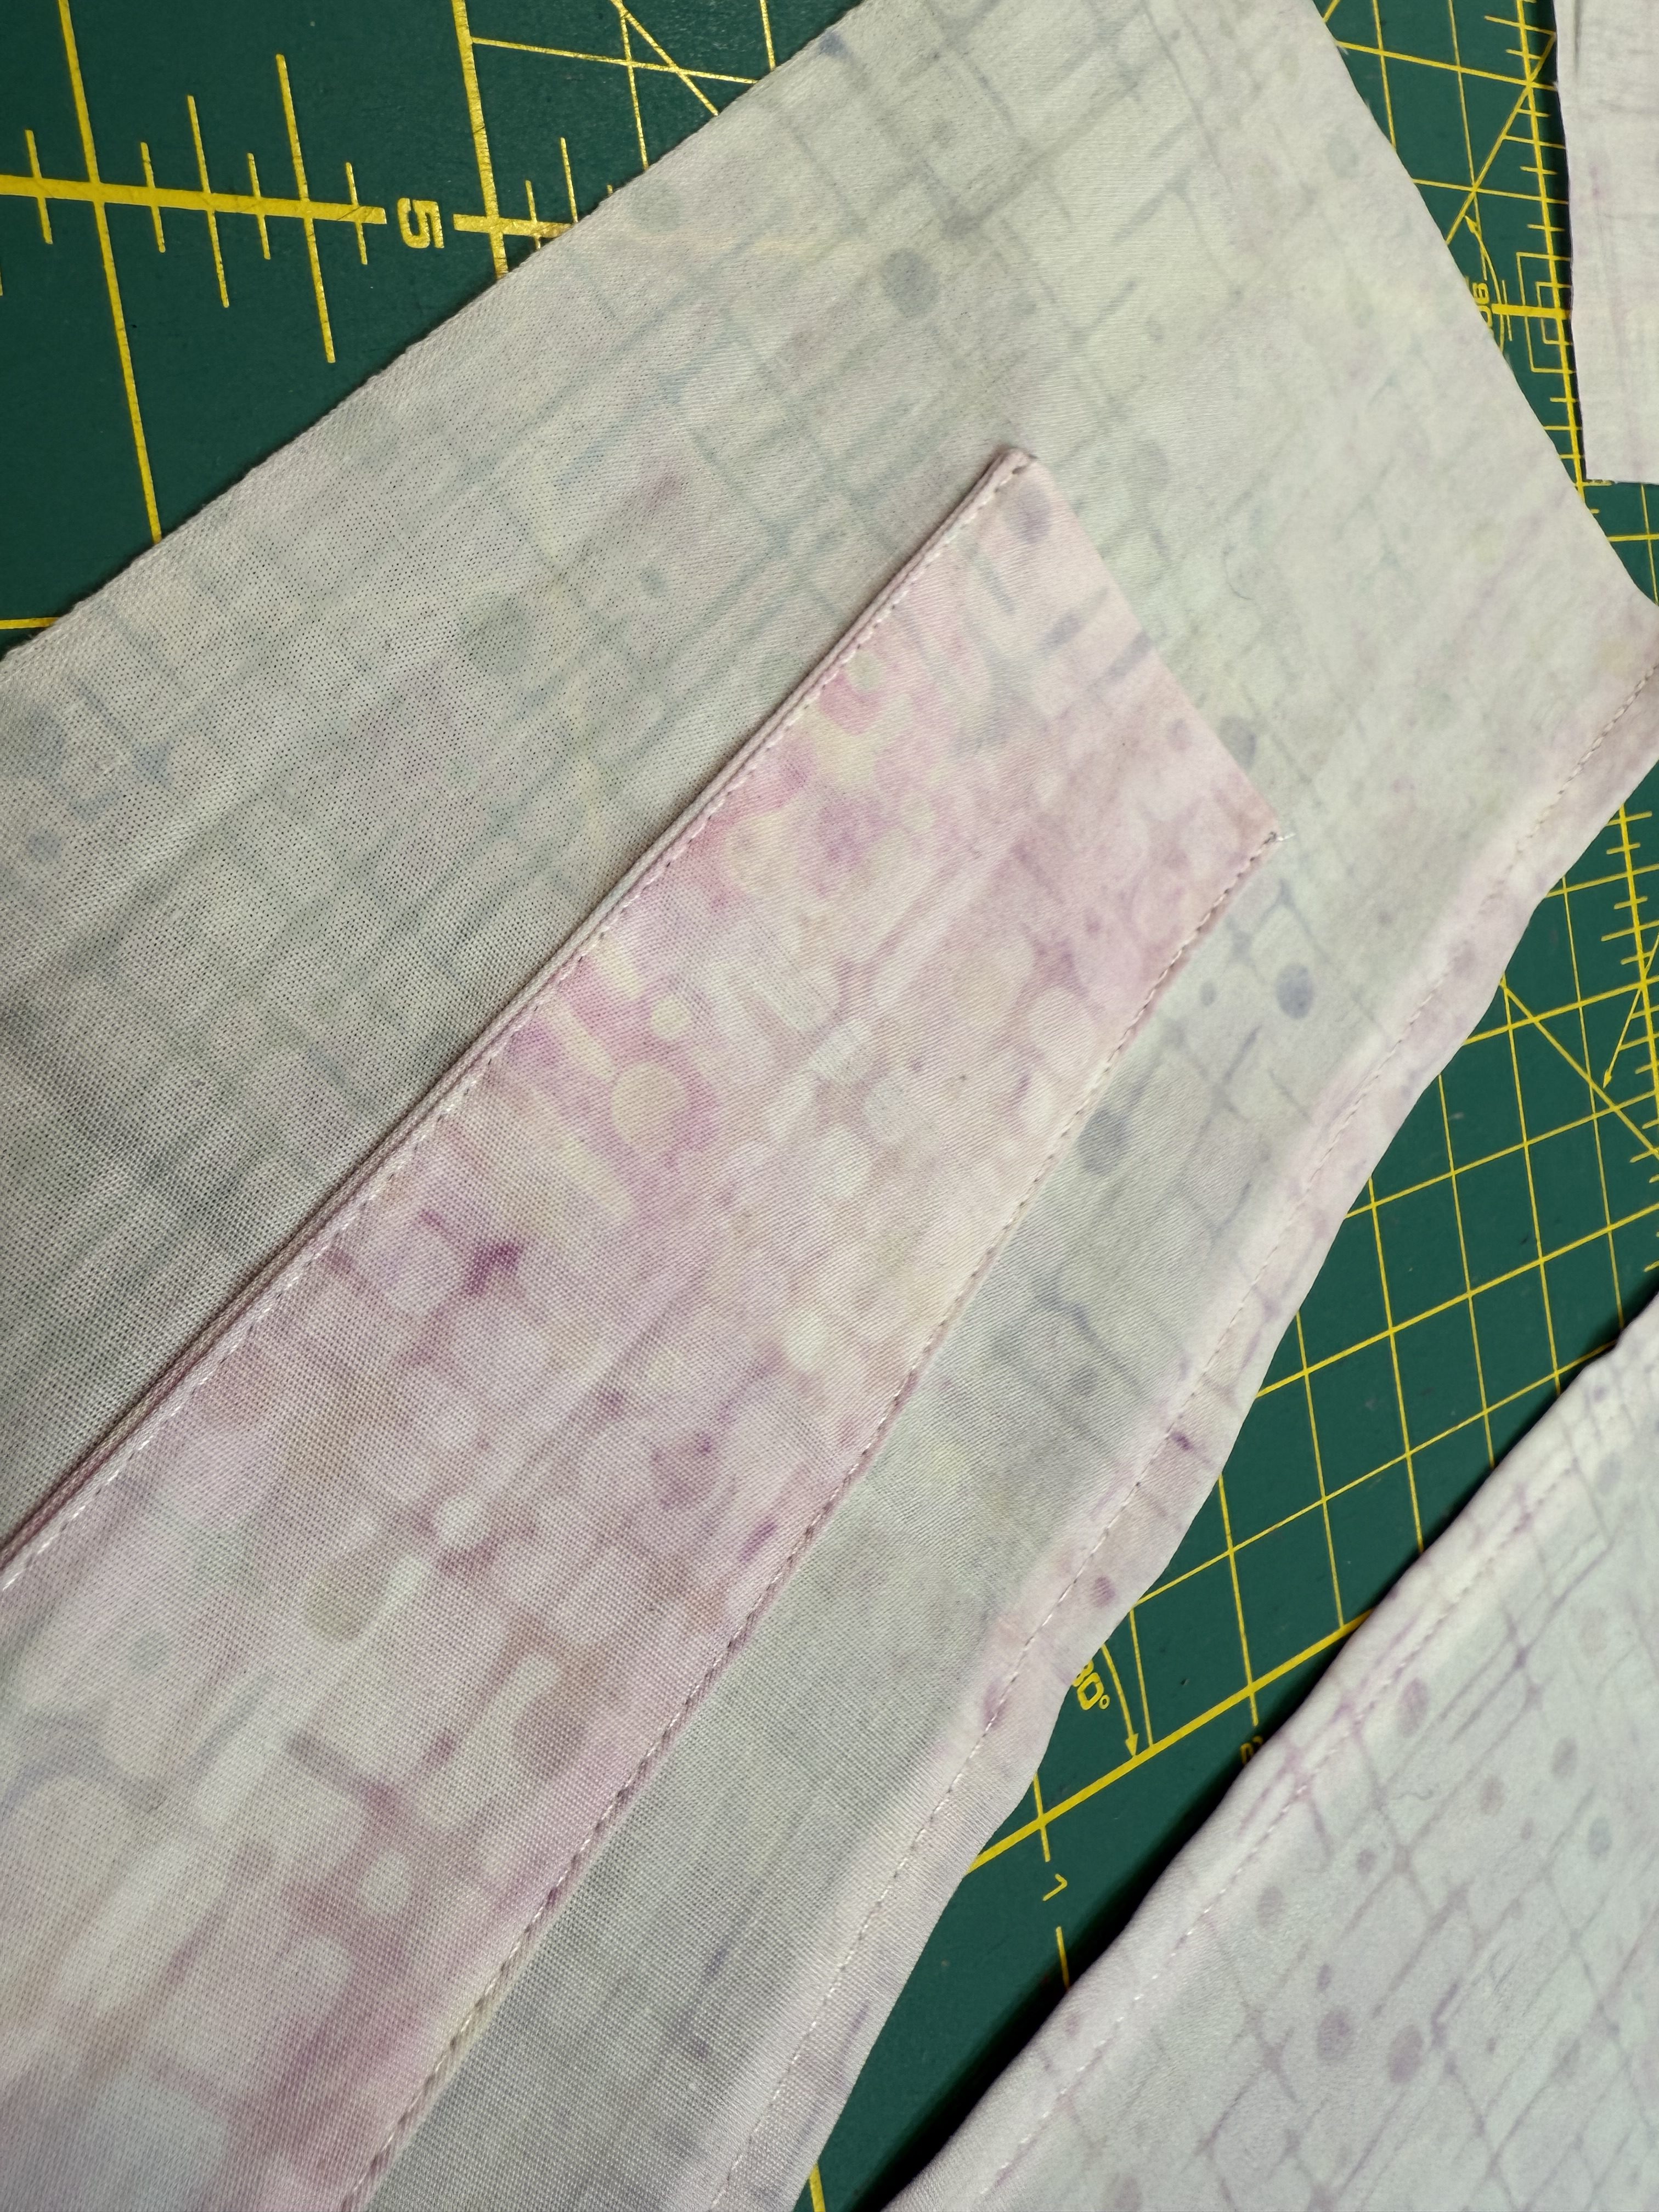
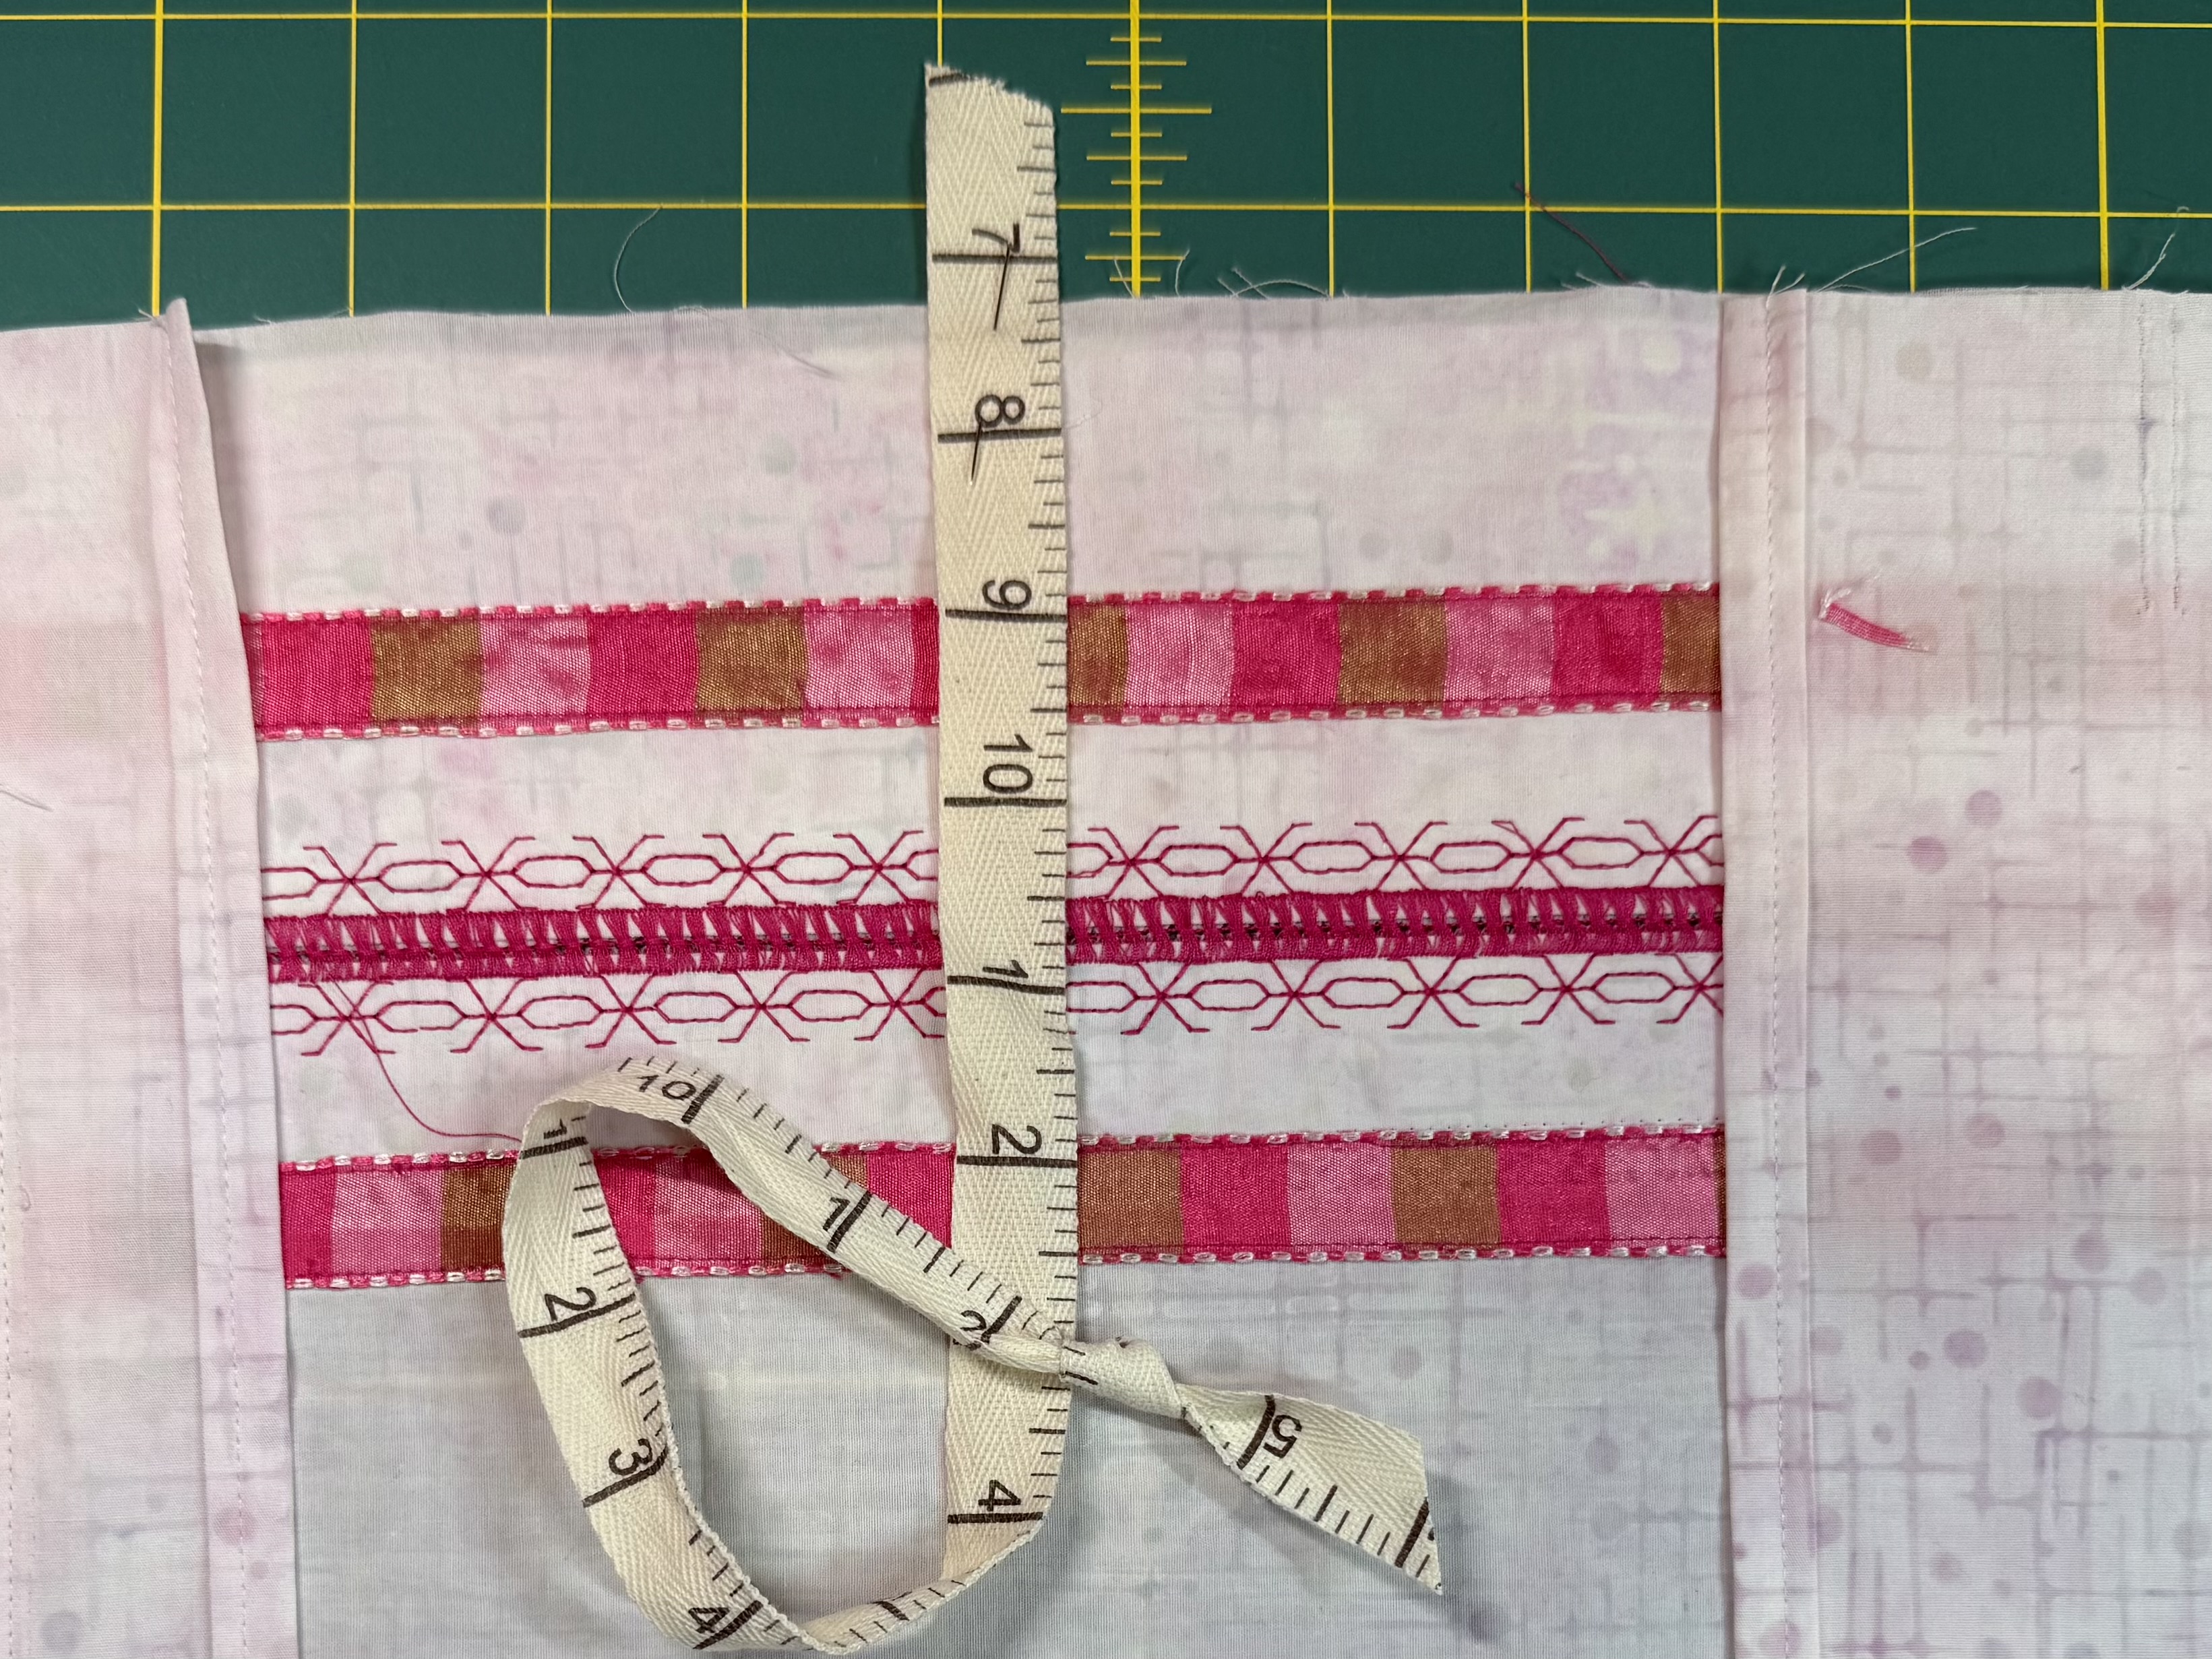
Part 2
I used my 20C foot to create the heirloom look. I adjusted my upper thread tension back to normal and set the #6 triple stitch with a 3.5 stitch length. Next I gently pulled the fabric (and thus, the stitches) apart to open the space between the two pieces.
When I sewed, the triple stitch gathered every few threads in the open space between the fabric to create a hemstitch look.
Then I picked a decorative stitch I liked to sew on either side of the fagoting.

Part 3
I’m a believer that it’s not done until it’s overdone so I decided to add some ribbon to each side of the decorative stitching.
I attached the right seam guide to my presser foot so I could accurately sew down the ribbon.
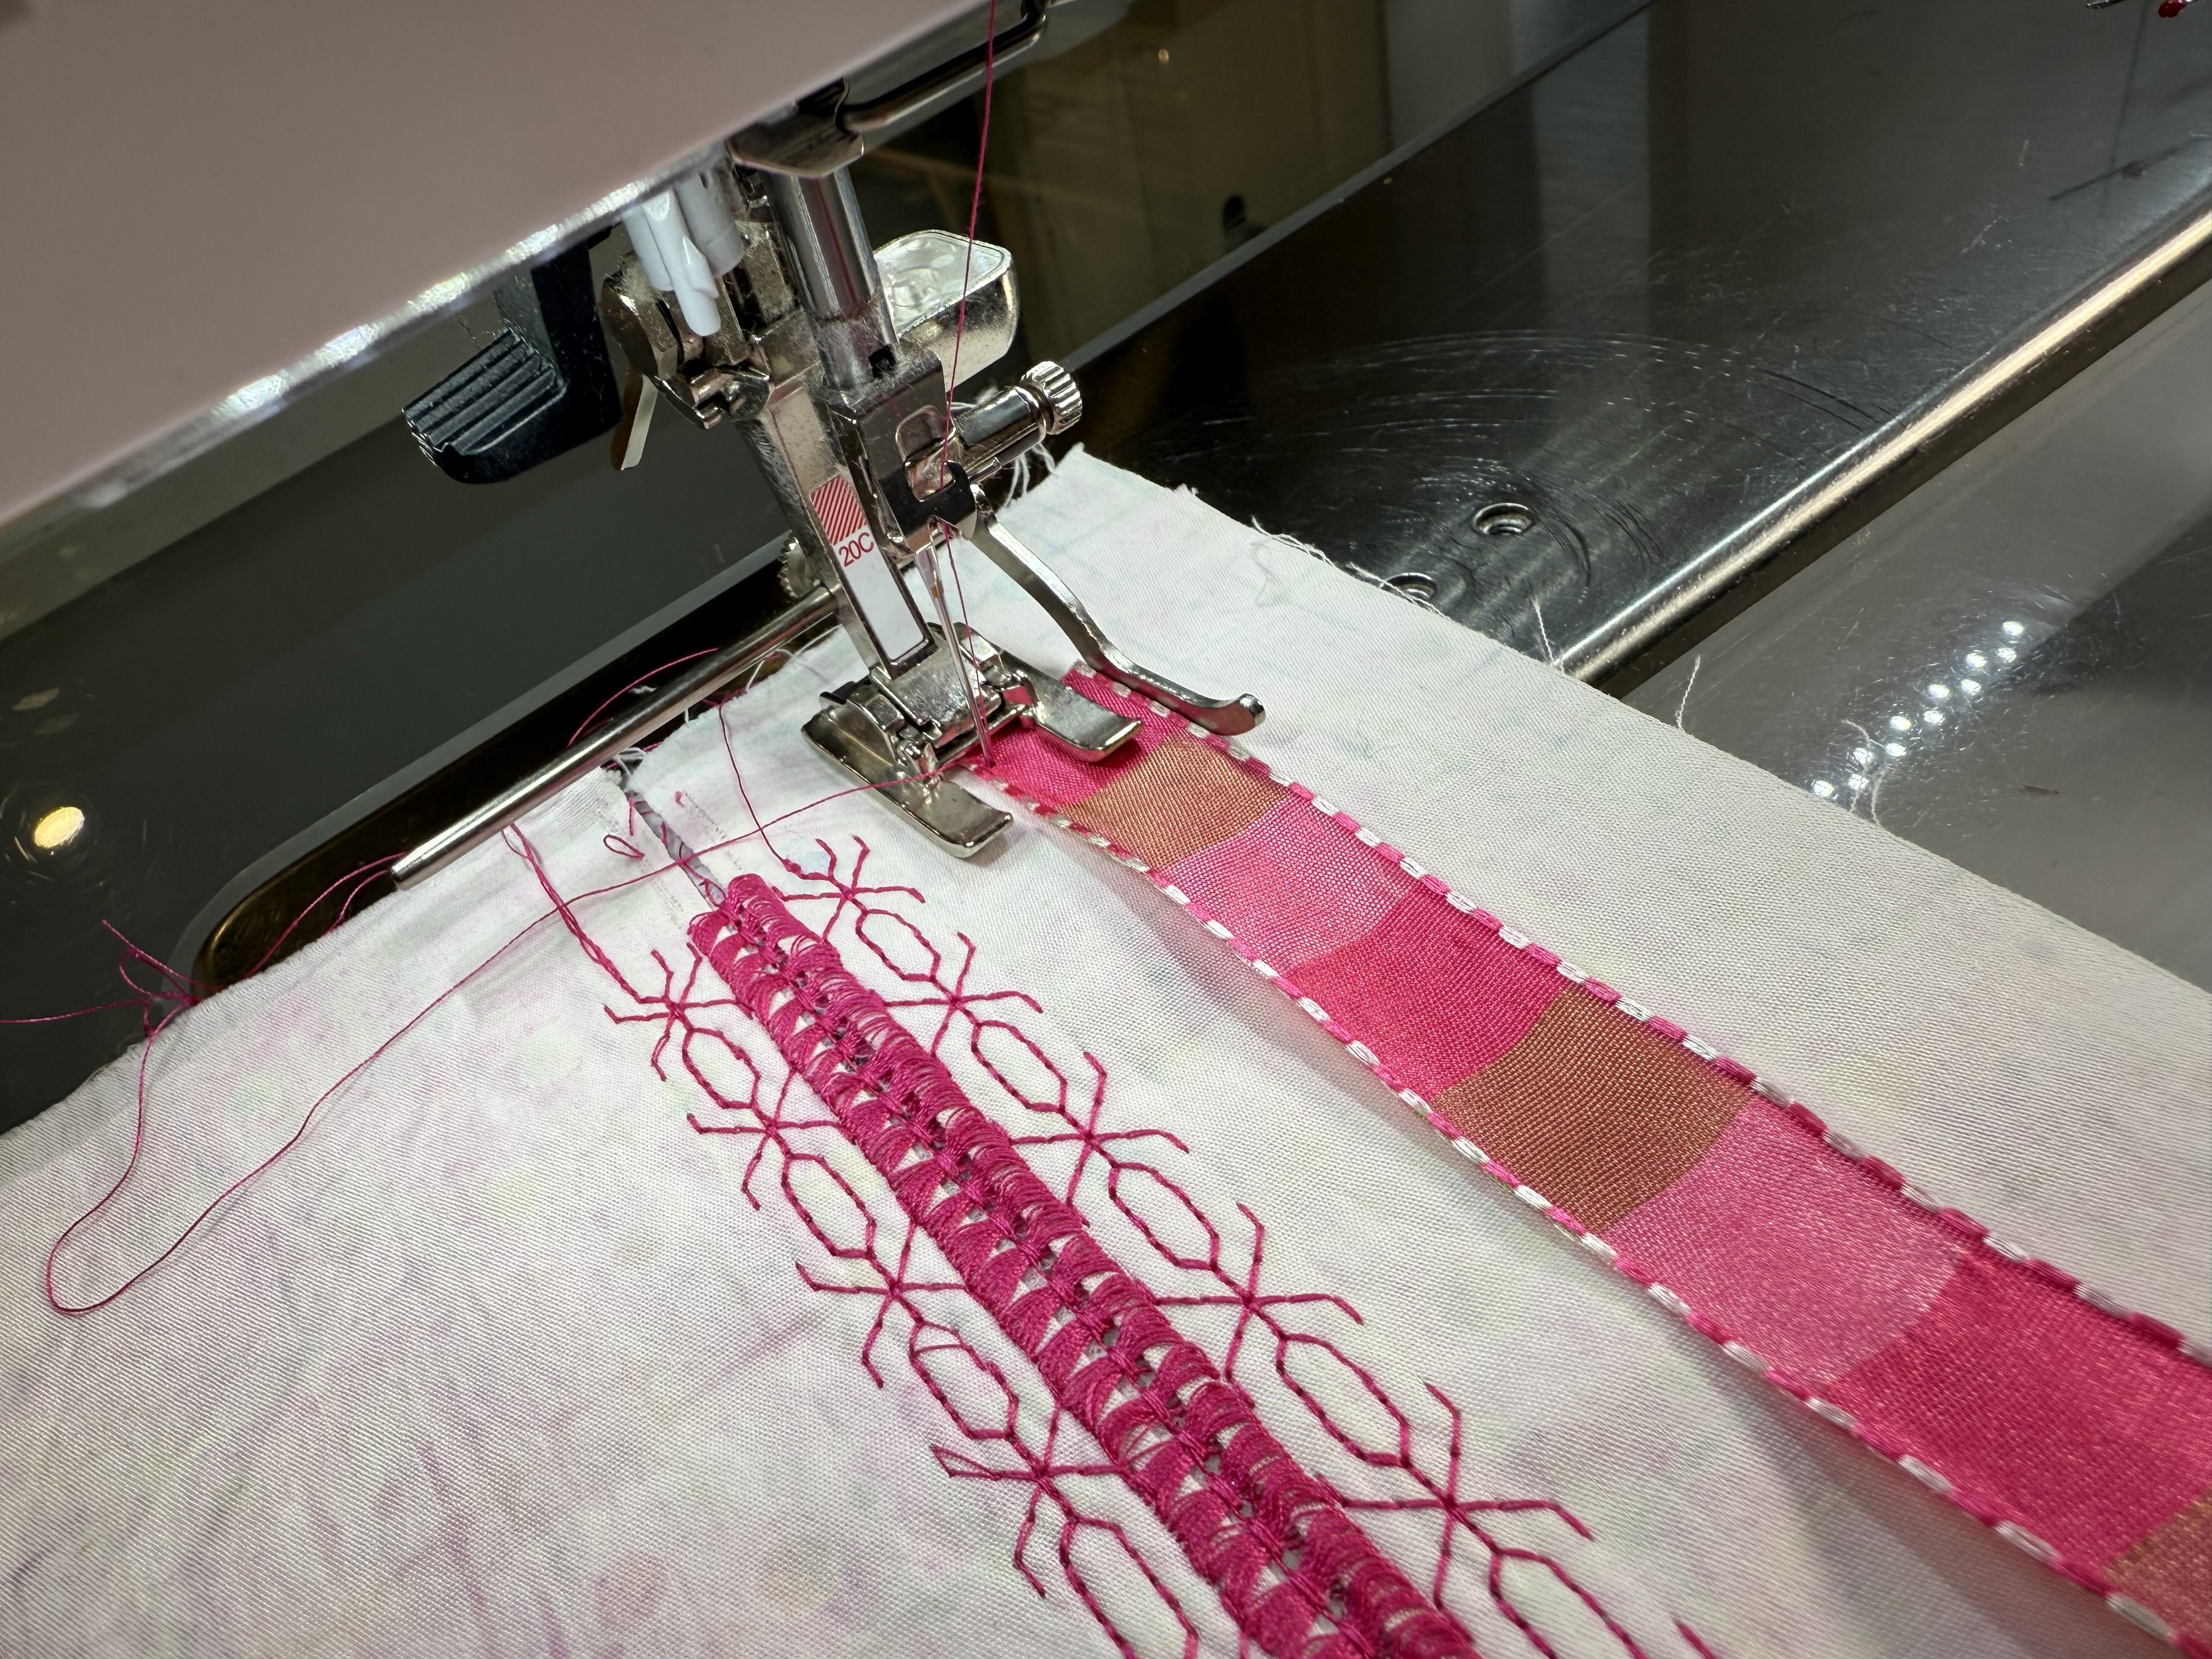
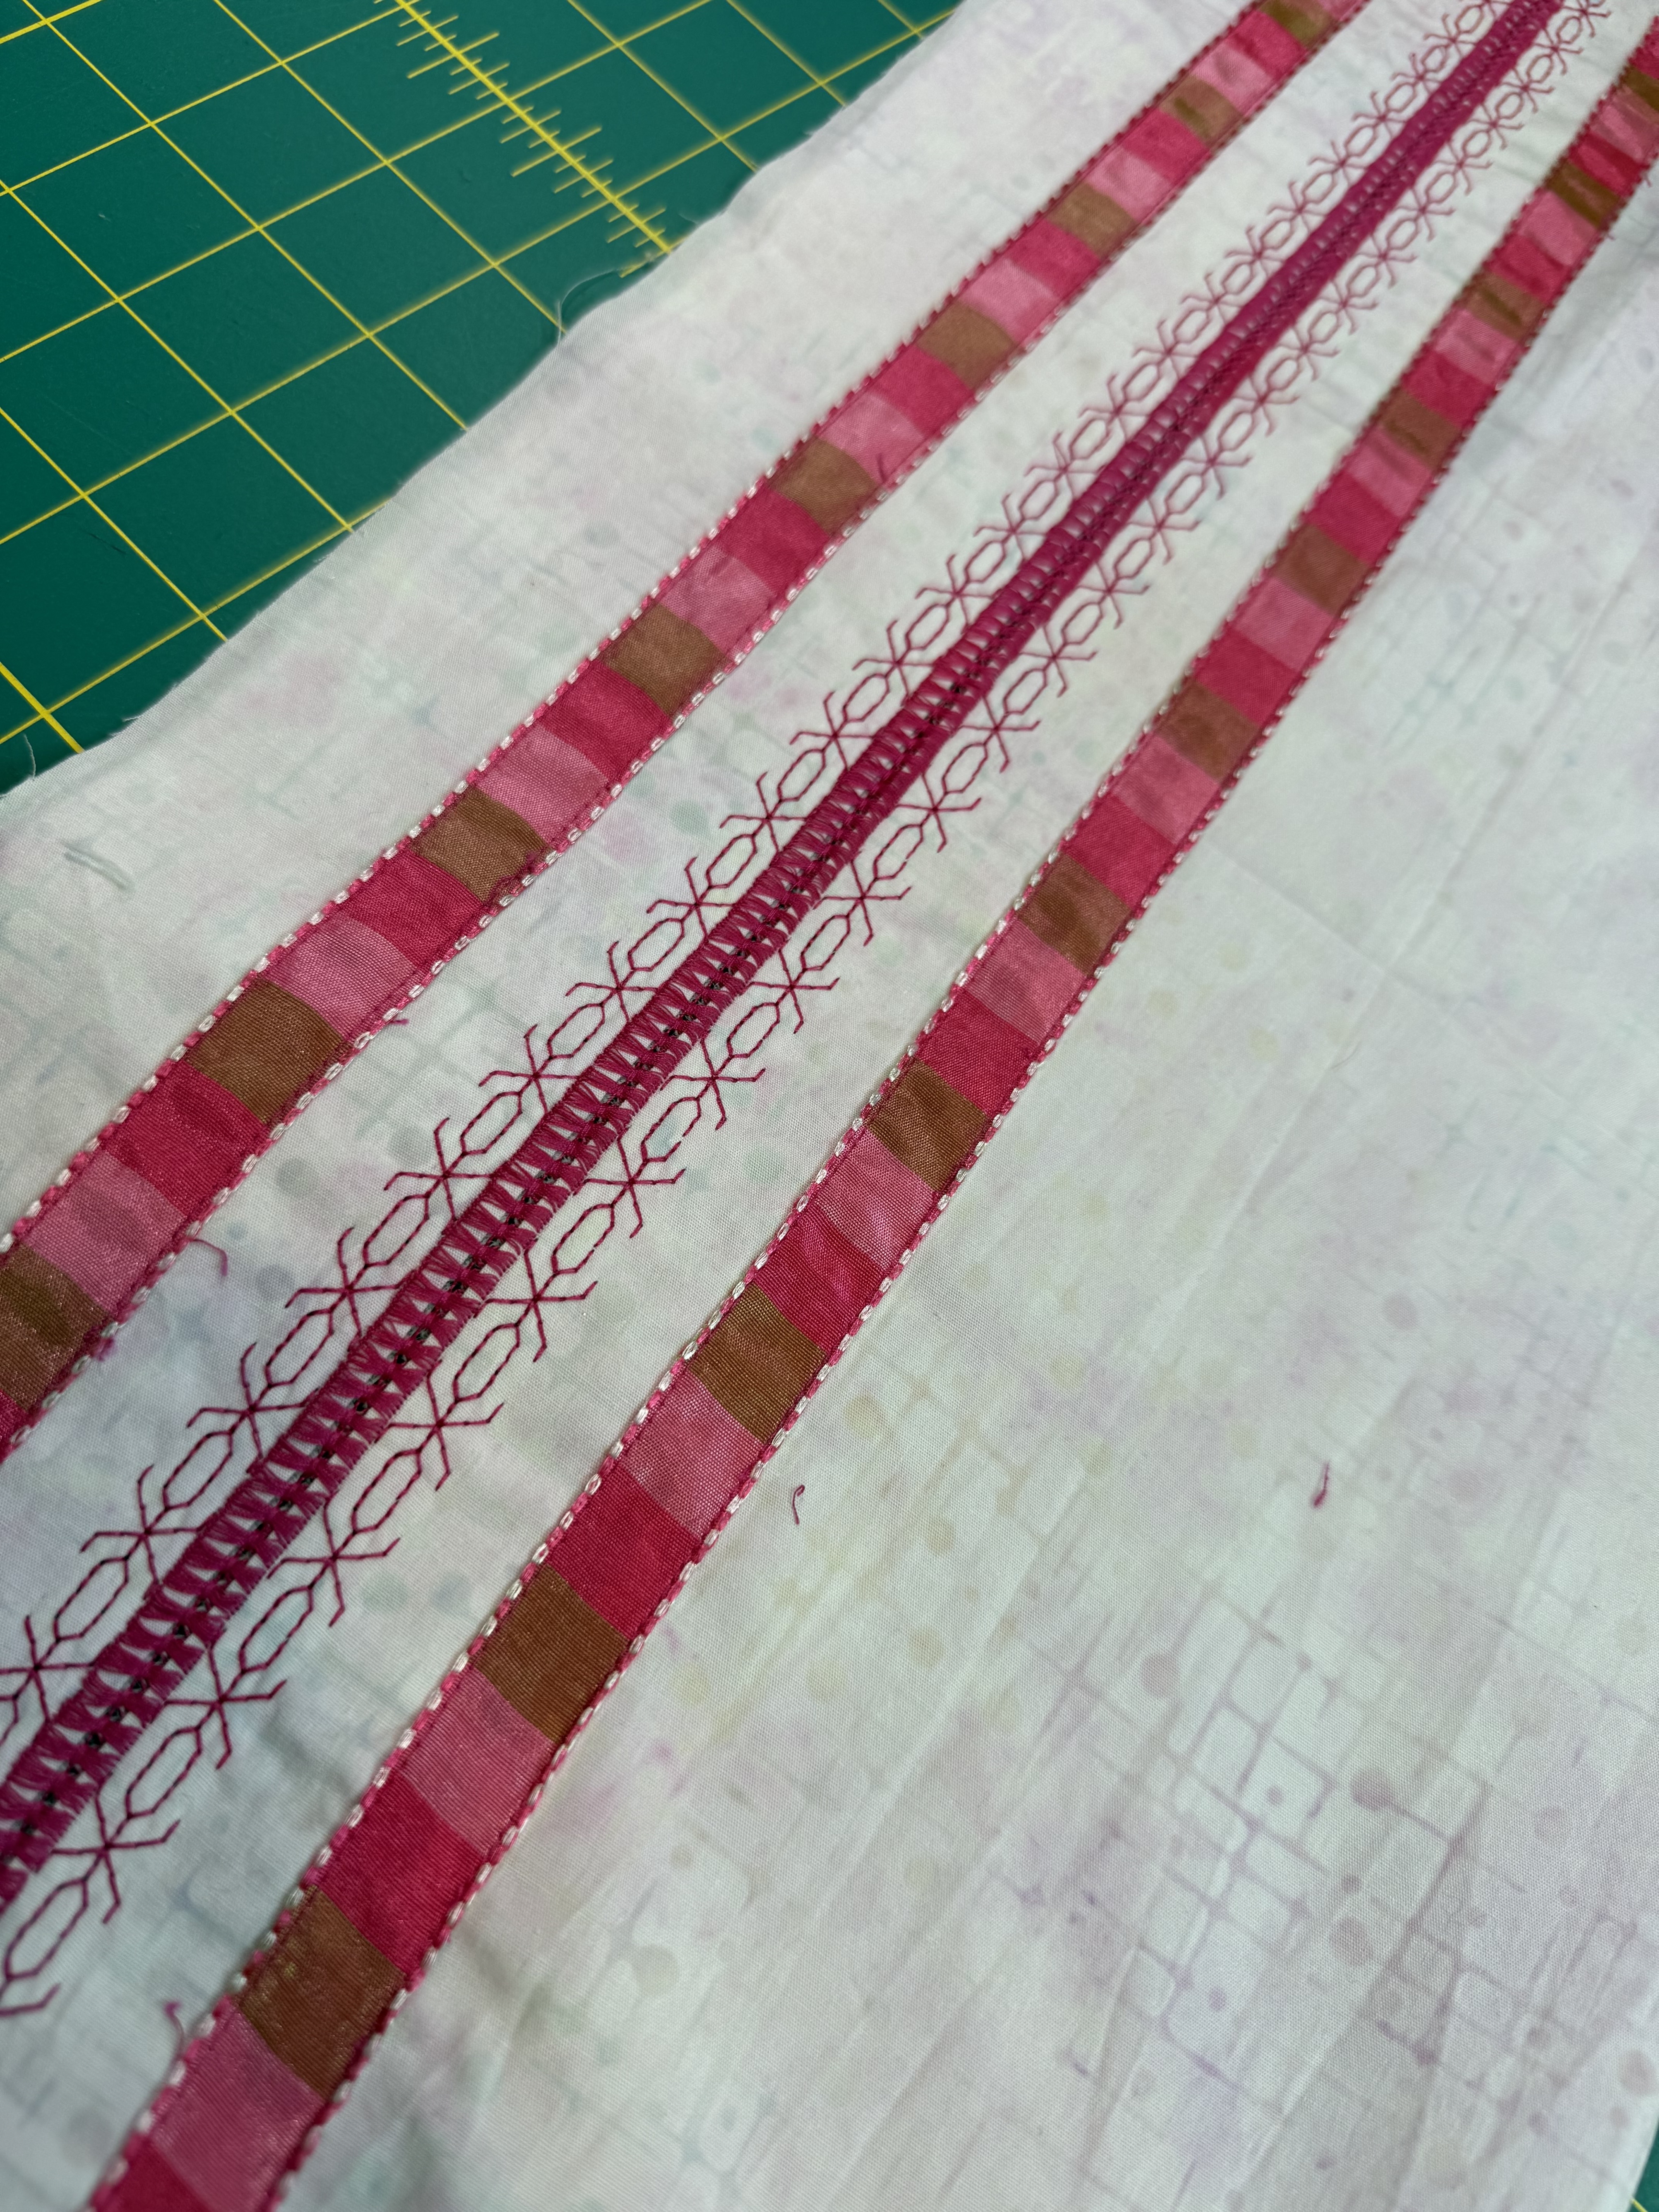
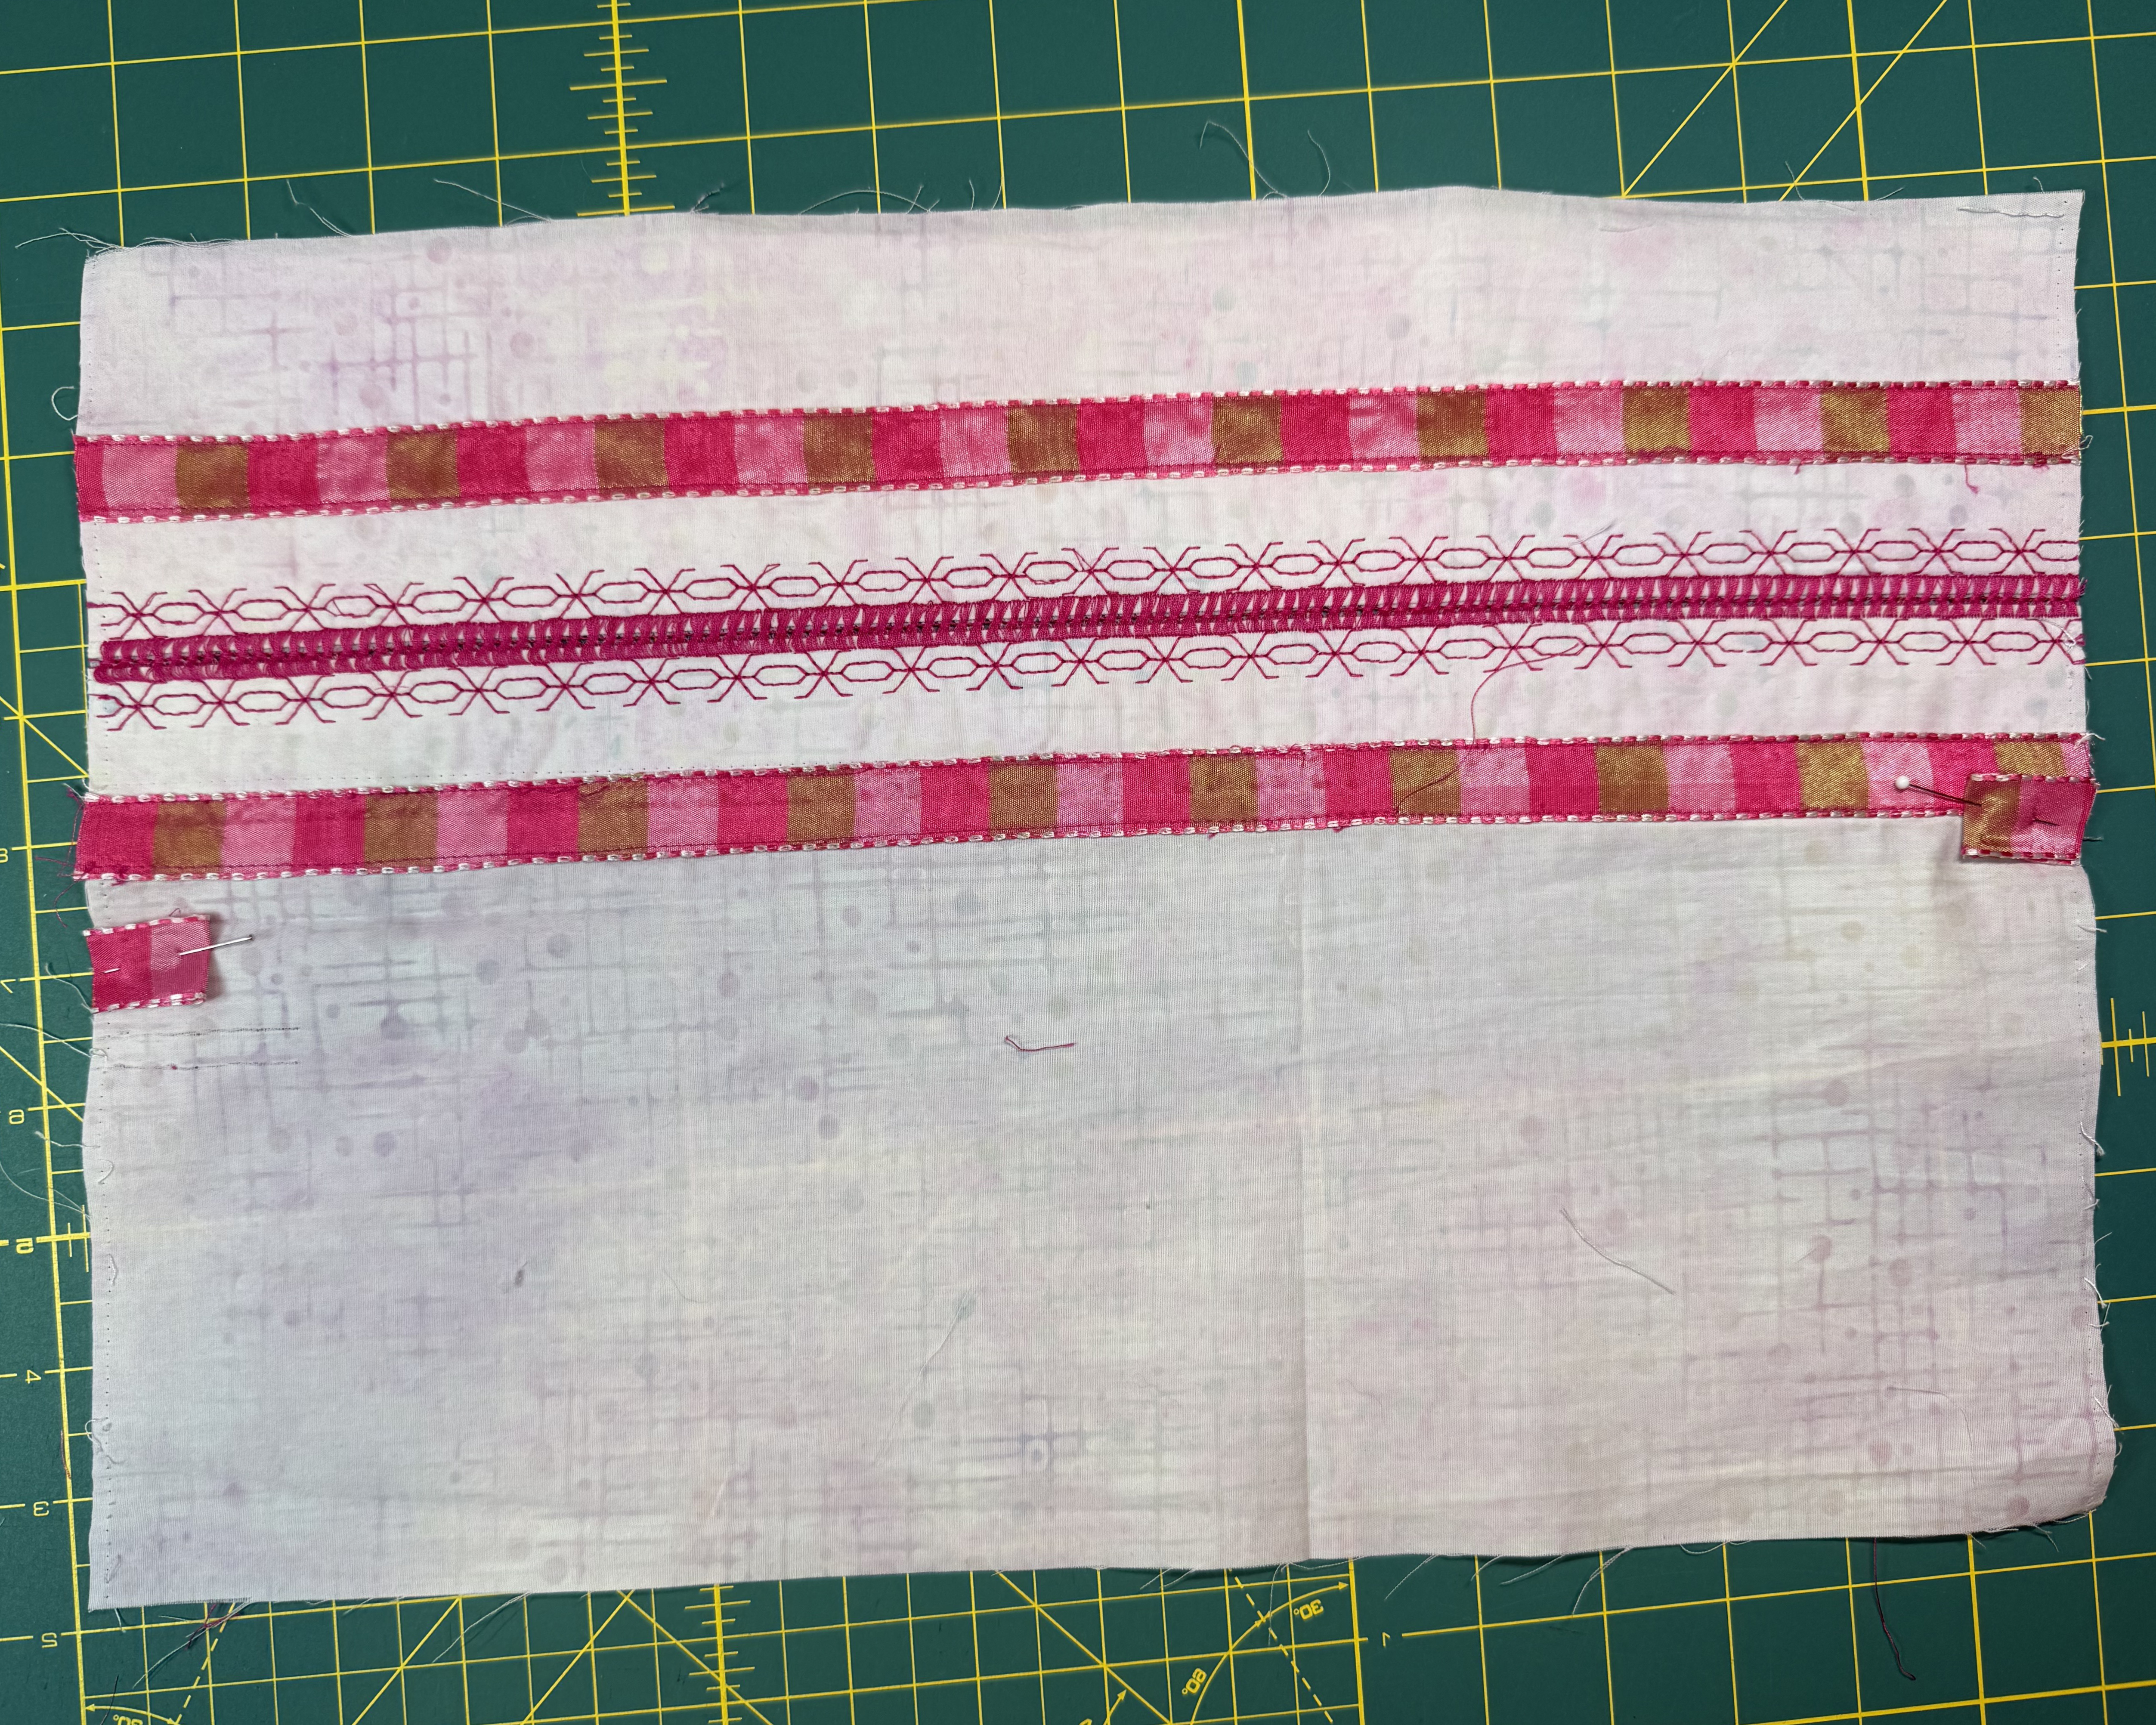
I trimmed the cover to 10 1/2’ x 16’’.
Put It All Together
Materials Needed
- 1/2 yard fabric, 3/4 yard if fussy cutting
- 1/2 yard ribbon, or other trim for tying
- thread to match
Cutting Instructions
- cut (2) 16” x 10 1/2” pieces*, one for the outside cover and another for the lining
- *IF YOU USED THE ZERO WASTE METHOD, BUILD OUT YOUR COVER PIECE TO 10 1/2’’ X 16’’ and cut one rectangle 10 12/’’ x 16’’ for the lining
- cut (2) 10 1/2” x 5” pieces for the inside flaps
- cut (1) 1 1/2” x 6” piece for the pen/pencil holder
- cut (2) 8” pieces of ribbon or trim for tying -or- cut (2) 2’’ pieces for pencil closure
Assembly Instructions
Make the Inside Flaps
- Place the two 10 1/2’’ x 5’’ inside flap pieces on a table, wrong side up.
- Fold the right side of the left flap to the back side of the fabric by 1/4’’ along one 10 1/2’’ side. Press. Repeat with a 3/8’’ fold. Press. Straight stitch along the edge to keep the seam in place. Set aside.
- Fold the left side of the right flap to the back side of the fabric by 1/4’’ along one 10 1/2’’ side. Press. Repeat with a 3/8’’ fold. Press. Straight stitch along the edge to keep the seam in place. Set aside.
I used the seam guide and a 1/4’’ seam to secure the flap edges but you could use a contrasting decorative stitch, handstitches or an edgestitch to secure the seam.
Make the Pencil Holder
Option 1
- Fold the sides of the 1 1/2’’ x 6’’ pencil holder back by 1/4’’ on ALL sides, bringing the front of the fabric to the back. Press.
- Sew the pencil holder to the left flap taking care to center it.
Option 2
- Cut two rectangles 2’’ x 6’’. Place them right sides together and sew 1/4’’ around the edges, leaving a 2’’ opening along one side.
- Clip corners, turn right side out, and press.
- Sew the pencil holder to the left flap taking care to center it.
Option 3
- Cut 2 pieces of ribbon 2’’ long. Set aside.
Adding the Ribbon
Mark 5 1/4’’ up each side of the Composition Notebook holder.
Option 1
- If you plan to use a small ribbon closure instead of or in addition to the interior pencil holder, fold the ribbon in half.
- Place the ribbon on the right side on top of the center mark and place the ribbon on the left side below the center mark.
Option 2
- If you plan to use ribbons to tie the notebook closed, place one edge of the 8’’ long ribbon at the 5 1/4’’ mark. The ribbon will across into the center of the cover. Baste.
- Repeat for other side.
Place the inside flap pieces right side together with your cover piece. The finished edges of the flaps will be facing the center. Sew a very scant 1/4” from the top to the bottom of the outside edges on the left and right sides.
Putting It Together
- Place the 16” x 10 1/2” piece you want to use for the FRONT cover FACE UP on a table, cutting mat, etc.
- Place the flap pieces right side together with your cover piece. The finished edges of the flaps will be facing the center. Sew a very scant 1/4” from the top to the bottom of the outside edges on the left and right sides.
- OPTIONAL: If you would like to add a bookmark to your Composition Notebook holder, cut a piece of ribbon or trim approximately 12’’ long. Tie one end of the ribbon in a knot and place one end of the ribbon at the top of the Composition Notebook Holder. Pin in place.
- Place the lining piece face down on top of the assembly from step 2. Sew 1/4” around all edges EXCEPT for a 2” gap along one flap.
- Turn right side out, press, and put over Composition Notebook. Enjoy!


What you might also like


55 comments on “Transforming Fabric with Zero Waste Quilting”
-
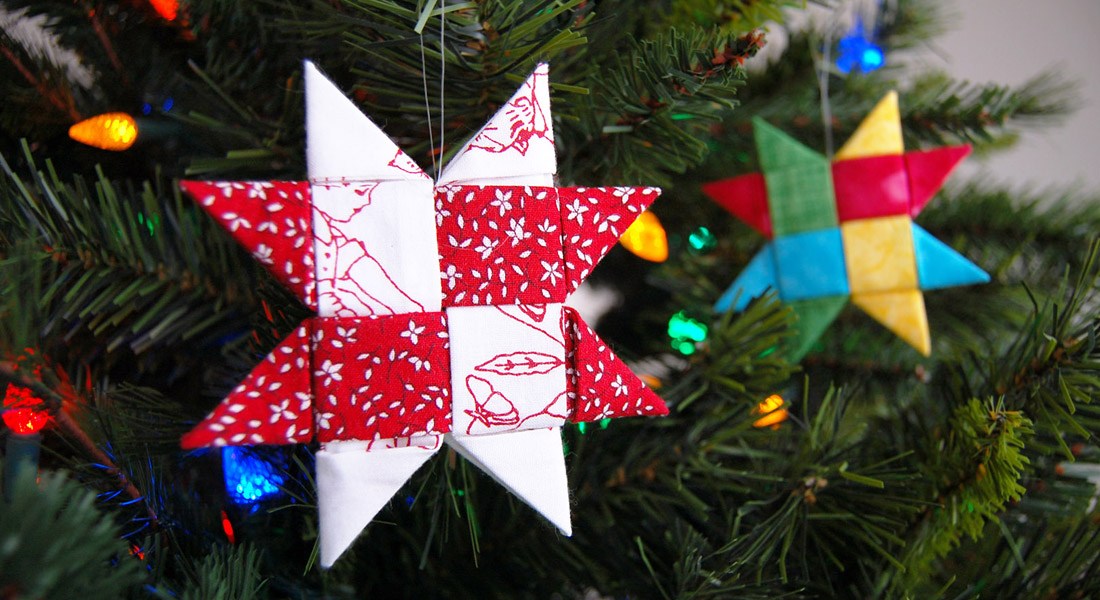
My favourite way to use fabric scraps is to make small ornaments and gifts for Christmas.
-
I like to make potholders and hot pads. Uses up scraps and creates a useful product that I can use as gifts.
-
-
Thanks for telling us about the book! Great idea. I use my scrap fabrics in smaller projects like linings, quilt blocks, scrappy quilts.
-
“What’s your favorite way to use fabric scraps?” I like to use my scraps by making smaller quilting projects – placemats, table runners, small wall hangings. want to do more zero waste quilting in 2025
-
I have been sewing since high school in the 70’s. I cannot throw away scraps. I’ve made crumb projects, selvage projects, cut a variety of strips and squares for future projects, zip pouches, the list goes on. And I’ve given trash bags full to hand piecers who love tiny scraps.
-
I’ve made mug rugs & small trays from fabric scraps, but my favorite is to donate them to a quilting friend who make donation quilts from them. Thanks.
-
My favorite way to use scraps is with “made fabric”…just sewing scraps together and then cutting the “made fabric” into the desired shapes for quilts. I have a pile of these “made fabric” squares already. I am almost at the point to make a full quilt with them. It is fun to see all my previous projects in these made fabric squares!
-
Love my walking feet for piecing and adding borders have used scraps for a multitude of projects including tiny ones to stuff cat/dog beds to donate
-
I make crate mats for my local vet.
-
I love to use fabric scraps to create art. Suitable fabrics go into landscapes. Others go either into pictorial collages or crazy quilts.
-
I love to use my scraps for small q
Items like bags and mug rugs. -
My favorite way to use scraps is to make mug rugs, add them to quilt kits I’ve purchased, and add them to any project that I think they will fit. 🙂
-
I love to use my scraps to make mug rugs to practice my free motion quilting and then give them away to my guild friends. I also give my scraps to my friend Julie, and she makes ‘ditty bags’ that she donates to church fundraisers!
-
I take my die cutting system and cut them into smaller shapes such as squares or triangles. I then organize them by color in a storage box. This creates the fabric for the next scrappy quilting project whatever that might be. The left over tiny pieces go into a bag to be used as pillow stuffing.
-
I use them up making mug rugs and then pass them out to people needing a day brightener! Also a great way to use up smaller pieces of leftover batting. 😊
-
I used mine to use for appliqué items and to make Christmas ornaments.
-
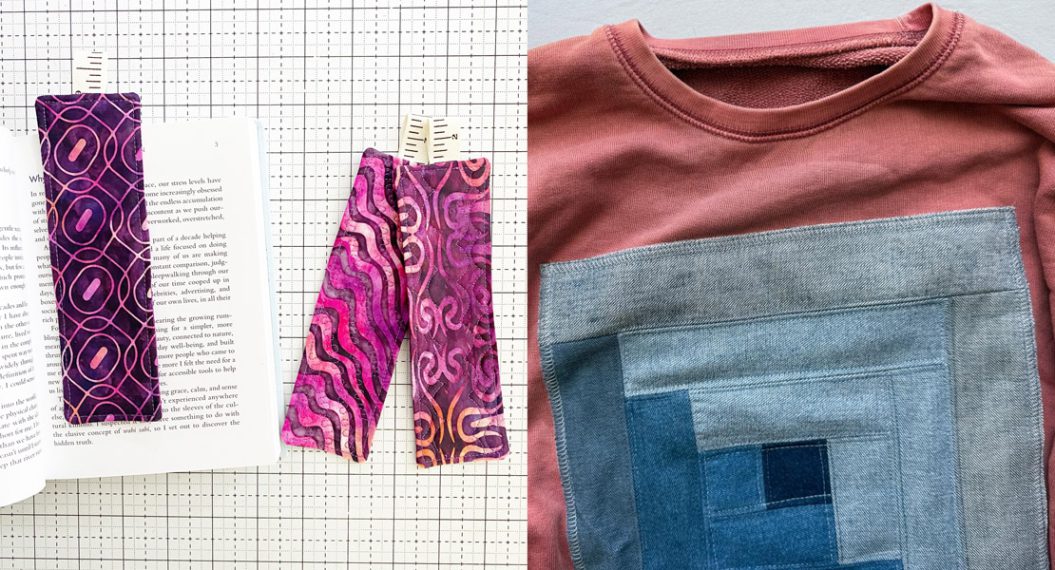
I love using all my scraps in scrappy quilts and small gift items like dog scarves, book marks etc.
-
All small scraps go into a pillow for a dog bed.
The remaining strips of various lengths are saved for random strip pieced squares that are the made into quilts for foster children.
-
My larger scraps are donated to my church sewing group that sews many things for missions. The smaller scraps are used for table runners or mug rugs.
-
I use scraps to make quilts for a homeless shelter. My friends gave me part of their scraps when they were unable to sew because of health problems.
-
I use my scraps in smaller projects often creating fabric by stitching together in a QAYG method.
-
I love to make crazy quilts with my leftovers. They work great for this for they don’t need to be any one shape or size.
-
I love all the these patterns and the bold use of colors. Love the book.
-
I like to use quilt scraps in my art quilts, along with fabric scraps from other projects.
-
Great ideas in this article. Thanks for the inspiration. I like to make small quilts, mug rugs and small tray.
-
Love this concept. I always try to make a scrap quilt immediately after I finish a “non-scrap” quilt so my scraps don’t take over my space. I also use scraps for small projects for my grandchildren, small bags, notebook covers, potholders and mug rugs. My quilt guild also has a scrap table where we can take scraps we no longer need and gift them to someone who can use them.
-
My current favorite way to use my scraps is using scrap tape with shorter pieces and making log cabin blocks with longer pieces. I’ve been collecting different greens for tree blocks and different blues to make a Boo quilt for this coming fall. My friends have been generous enough to collect green and blues for me also so I have a bigger variety.
Thank you for the tutorials especially the book covers! -
i use most of all my scraps for making Mug Rugs
-
I use small scraps to make coasters and mug rugs.
-
I cut my mounds of scraps into precuts & made scrappy quilts & a few scrappy jelly roll rugs & gave em as christmas gifts
-
I love making scrappy quilts while trying new block patterns. I also make tiny fabric dollhouses and dolls for my grandkids.
-
My favorite way to use my leftover fabric is to make stitch and flip quilts for charity, Habitat for Humanity quilts, church quilts for donations we use for charity projects and a Christmas quilt for my brother who is in a nursing home.
-
Great article. Need to get that Bernina Stitches book!!
-
I cut all my leftovers into squares of different sizes from 1 1/2, 2,
2 1/2, 3, 3 1/2, 4, 5, 6, and 10 inches. I leave long strip alone. that way when I want small pieces they are already cut. I used 4 inch squares that I had to make bookmarks, 3 squares for each one, they were also good for coasters. I also put pieced squares in with them that i didnt use in a quilt for one reason or another and that was great when I was making coasters. -
If I have enough leftover fabric, I make baby quilts. Otherwise, I make trivets, pot holders and ornaments and donate them to my grandkids Santa Workshop at Christmas.
-
One of the things I like to make with my scraps is cat toys.
-
Honestly, my favorite thing to do with scraps is to give them away to quilters who love to use them. It’s a win-win.
-
I use scraps often in applique and collage. I love some of these new ideas.
-
So far I’ve been using scraps to make matching pillows. I have also been saving specific scraps for a scrap quilt I have a pattern for. The idea of Zero Waste, though, is quite intriguing!
-
I like to make scrap quilts. My brother has a place nearby that recycles fabric, so I save the trimmings & other small scraps for him to take in.
-
The fun for me with scraps is finding “just the perfect” piece to complete my scrappy project: zipper cosmetic or wet bathing suit bag, mug rug, etc. often the scraps can be utilized in full sized quilts. Love the ideas this book provides!
-
I use my scraps for applique as well as scrappy quilts.
-
The projects shown with scraps are amazing. I cut fabric scraps into
2 1/2″ pieces and they are sorted by color in zip bags in a big plastic container.
My husband and I use them to make kid quilts for a charity. Sometimes, they
look crazy when we sewing them together . Most times when the quilt is completed, the scraps look pretty good. Thank you! -
I have multiple ways to use up scraps from each quilt:
1. Scrappy bindings
2. Pieced together backs with as many left overs as possible making it reversible
3. Cut blocks and collect until I have enough for a crazy quilt, baby quilt, or throw
4. Matching pillows
5. Small travel bags
6. Give them to friends who want and use them.I also get all left over pieces back from my longarmer. That includes all batting. The batting I use to make stuffing for the pillows and other projects. Plus I can join together the larger
section to make “Frankinbatting”. Once it’s joined and inside the quilt sandwich you can’t tell it’s been pieced. Quilts up and wears just perfect. -
I love to quilt, so almost all my fabrics are used for quilts, bags, placemats and table runners.
-
I make a lot of pouches in all sizes! Potholders also.
-
I love to use my scraps to make crazy quilts and I can also make small (4 x 4) blocks to go into something else. Recently, I used scraps to make scrappy blocks to make a panel quilt larger! I like to challenge myself to even find a use for a very small scrap! Amazing blocks can be made and it’s fun to see the tiny piece in the center of a block!
-
My favorite use is to make crumb quilt squares or strips to Quilt as I go! I often zig zag the tiniest pieces together and make bookmarkers.
I have a used a lot of scraps stashed into dog pillows as filling also.
Marsha -
I like to use my scraps to make small bags, pouches, wallets, etc. Also for applique projects! Love the Zero Waste idea!
-
I like to use my scraps for small projects like mug rugs, placemats, and table runners.
-
I make pocket quilts to give away when visiting friends. I use them as Leaders and Enders. It uses up scraps of fabric and batting. Plus I can practice free motion quilting on a small project.
-
I like to make scrappy quilts.
-
Use scraps for applique in the hoop
-
I keep selvages for staking baby trees or tomato plants, skinny strips of fabric to make “twine” (just twist a couple together and tie new strings together to keep going), bigger strings become string blocks, and small pieces become “crumb cakes” for use in other quilts. 🙂
-
Scraps from paper piecing replenish my stash. I try to make ornaments, pillow cases and placemats.
Leave a Reply
You must be logged in to post a comment.

Zero Waste Quilting Giveaway
This giveaway is now closed. Thank you to all of our WeAllSew fans who entered!
Congratulations to our winner(s):