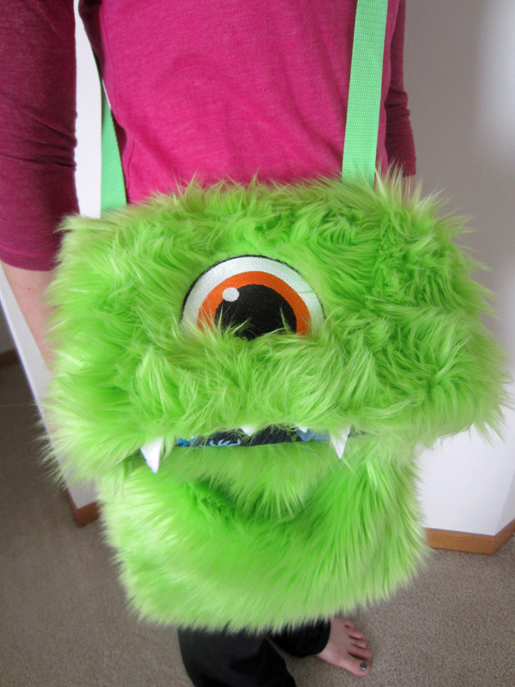
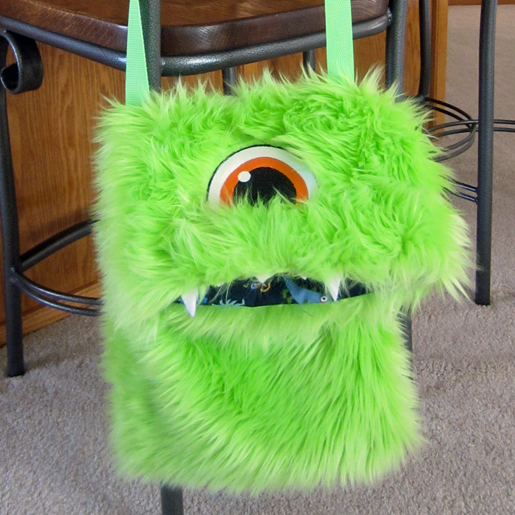
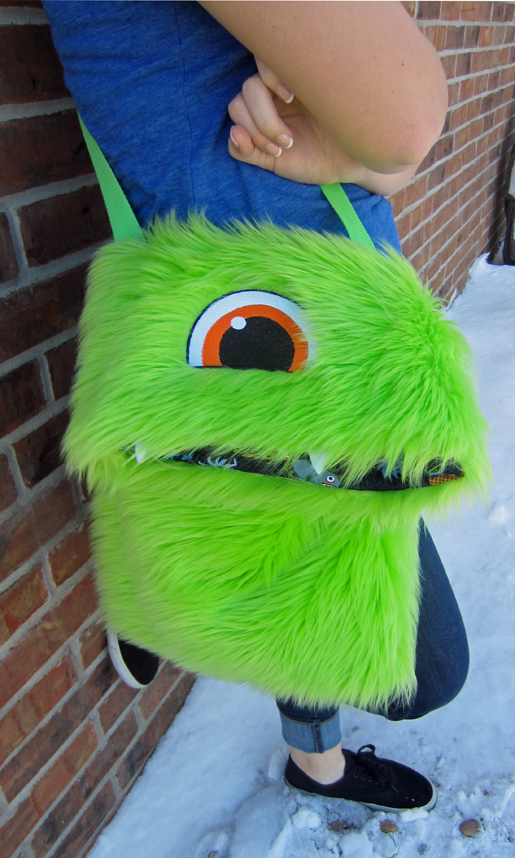
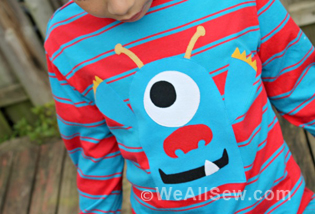
DIY Fuzzy Monster Tote
Team up your little one with this furry monster friend. It’s the perfect companion for school or a play date. A clever bag that will gobble up all the stuff they carry around.
Supplies
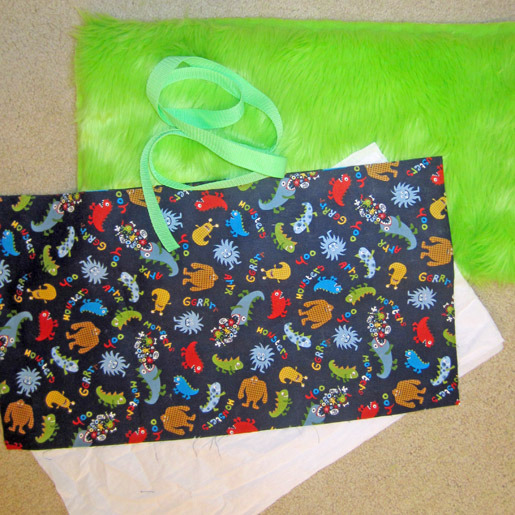
- 1/2 yard of faux fur
- 1/2 yard of cotton fabric for lining
- 1/2 yard of fusible interfacing
- 1-1/2 yards of webbing for strap
- Remnants of felt or fleece for fangs and tongue (optional)
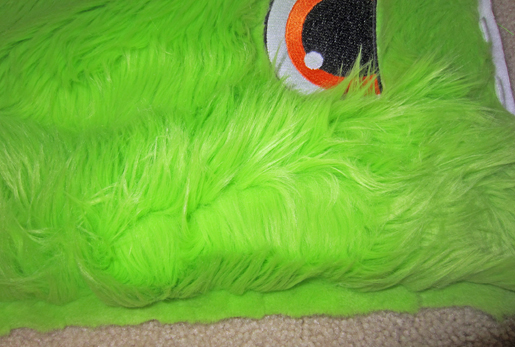
- Cyclops eye design from Urban Thread’s Monster Factory collection (also available for handstitched embroidery)
- OESD HeavyWeight Cut-Away stabilizer
- OESD Water-Soluble AquaFilm Topping or AquaMesh stabilizer
- Craft knife or “surgical” seam ripper
- Razor or electric moustache trimmer
- Water-soluble fabric marker
- Hand-sewing needle
Step 1) Embroider the eye.
Cut two 13″ x 23½″ rectangles from the lining fabric and two from the interfacing.
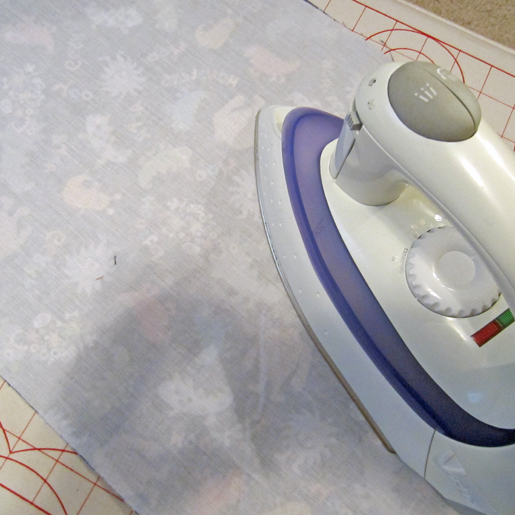
Fuse an interfacing rectangle to the wrong side of each lining fabric rectangle following the manufacturer’s instructions.
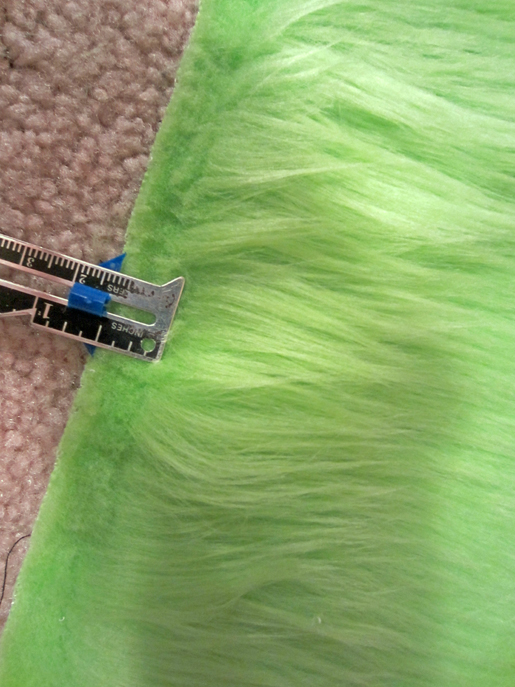
Cut a 13″ x 45″ rectangle from the faux fur. When cutting faux fur, it’s best to use a craft knife instead of scissors to prevent the fibers from being snipped. Instead, flip the fur so the backing is facing you and cut the material to size.
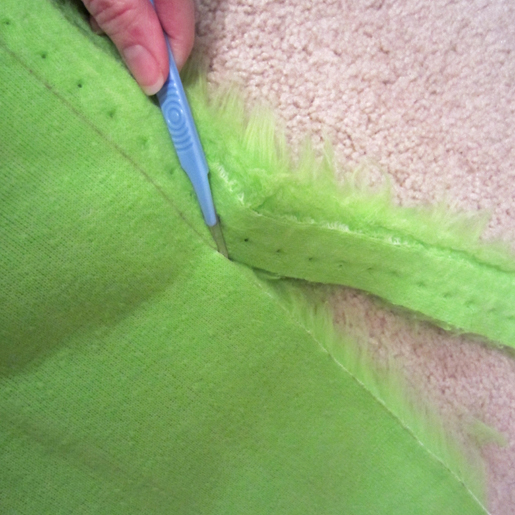
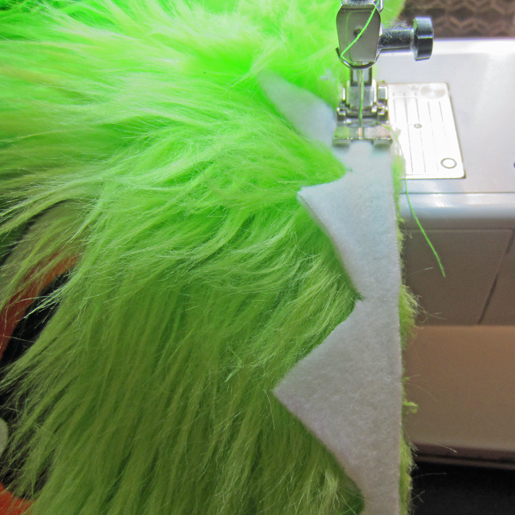
To reduce bulk and keep fur from being trapped in the seams, remove the long fibers from the seam allowances. To do this, use scissors to trim the fur close to the backing along each 1/2″-wide seam allowance. If necessary, use a razor to remove shag until the area is smooth and free from fur.
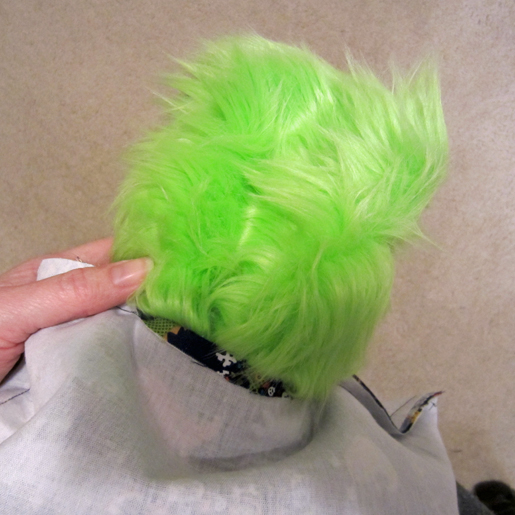
Print a copy of the embroidery design to use as a reference for positioning the eye.
Place the eye approximately 3″ from one short edge of the fur rectangle. This will ensure that the design is right-side-up when the flap is folded to the front.
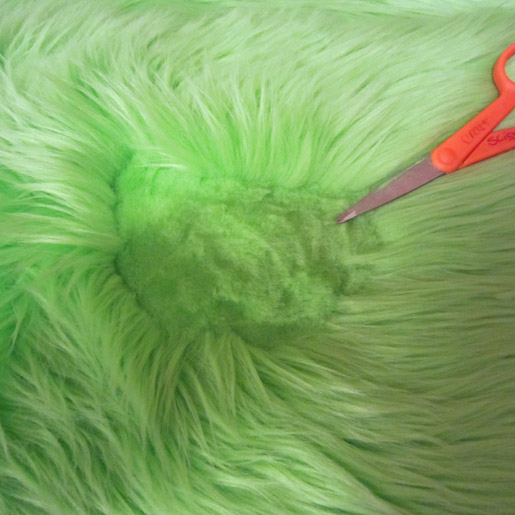
To create a smooth surface to embroider on, remove the fur (as described above) in the area that will be stitched. Use the printed template as a reference to keep from removing too much or too little fur.
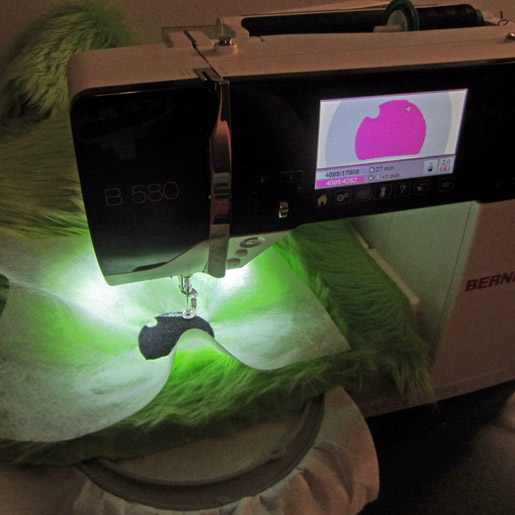
Hoop a sheet of cut-away stabilizer and spritz it with 505 temporary fabric adhesive. Smooth the fur in place on top, positioning the shaved area in the middle of the hoop.
Place a layer of water-soluble stabilizer on top, being sure to brush the shag away from the design area.
Embroider the eye.
When embroidery is complete, gently pull away the water-soluble stabilizer from the top of the design.
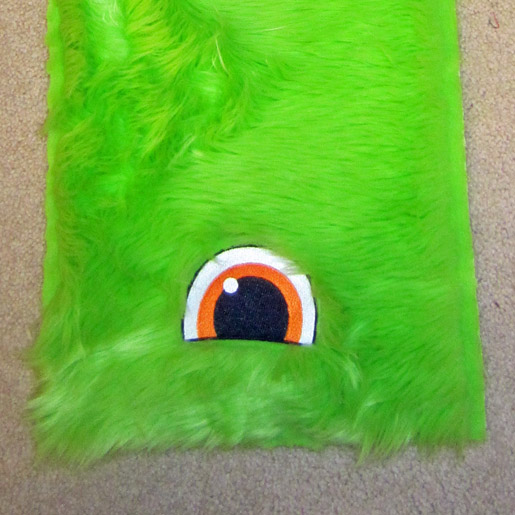
Trim away the excess cut-away stabilizer, leaving about 1/2″ around the outer edges of the stitched design.
Step 3) Add facial features.
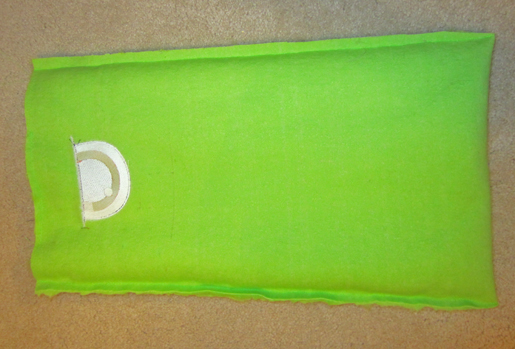
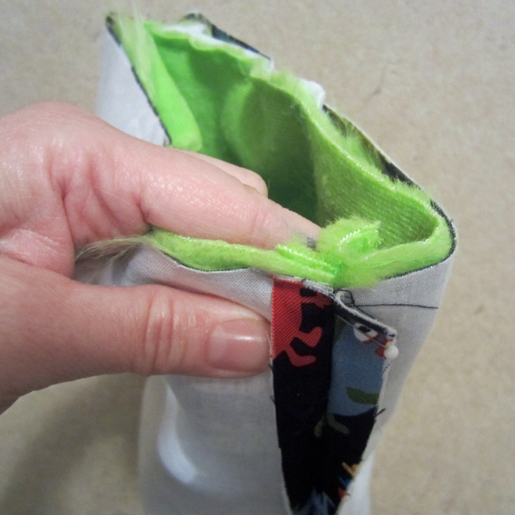
To add teeth, fangs, and/or a tongue to your monster, cut the desired shapes from remnants of fleece or felt.
Baste them to the edge of the fur panel under the eye, keeping the raw edges even.
Step 4) Construct the body of the bag.
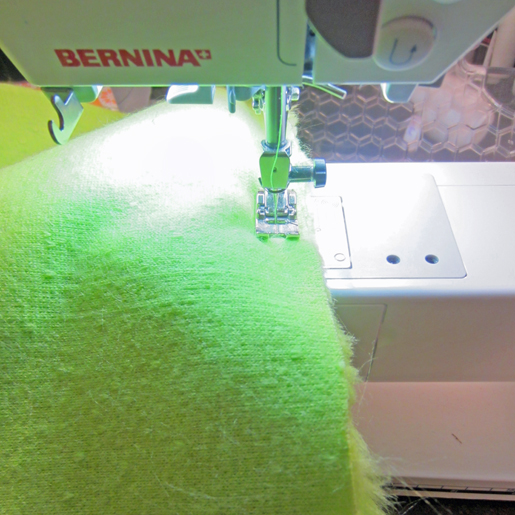
Fold the fur rectangle in half, right sides together, brushing the fabric away from the seam allowances (this will keep the shag fibers from getting trapped in the seams).
Sew the two long edges, leaving the end open. Finger press the seam allowances open.
Step 5) Add the strap.
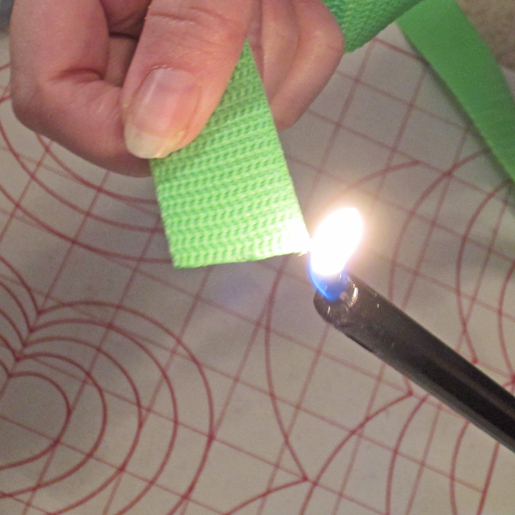
Finish the ends of the webbing:
- If using cotton webbing, the ends do not need finishing; simply fold them under when you attach them to the tote.
- If using polyester webbing: Prevent fraying by carefully passing the cut edges over a candle or lighter flame to melt the plastic.
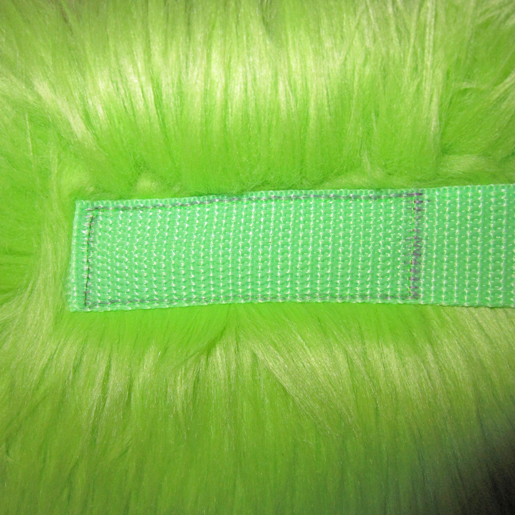
With the right side of the bag facing you, measure up 12″ and over 1″ from the lower right corner; mark.
Place one end of the strap at this mark and pin it in place.
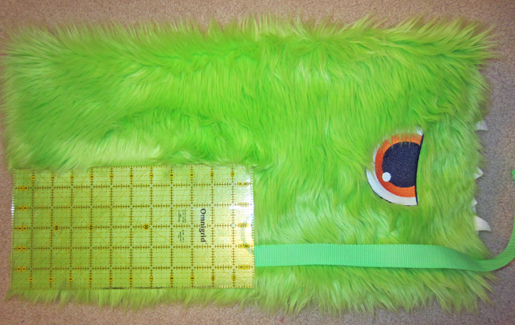
Repeat for the opposite end of the strap, measuring from the lower left corner.
Stitch along the lower edge of the webbing and 3″ up the side, then stitch across the webbing and back down the second side.
Repeat for the other end of the strap.
Step 6) Add the lining.
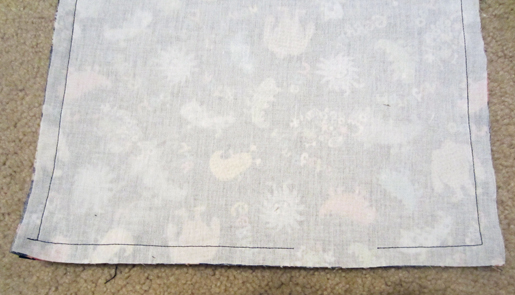
Place the two lining fabric rectangles right sides together, matching the edges.
Sew the two long edges and one short edge, leaving a 3-4″ opening for turning. Leave the remaining short edge open. Press the seam allowances open.
With right sides together, place the faux fur bag (right side out) inside the lining (right side in), matching the side seams and raw edges. Brush the excess shag fibers away from the seam allowances.
Stitch around the entire upper edge of the bag.
Turn the bag right side out through the opening in the lining.
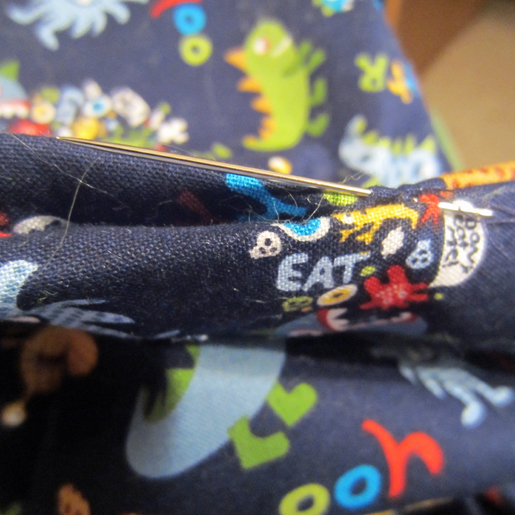
Slipstitch the opening closed by hand.
Visit Stacy at her blog, Diary of a Fabric Junkie, at stacysews.com.


5 comments on “DIY Fuzzy Monster Tote”
Scary!