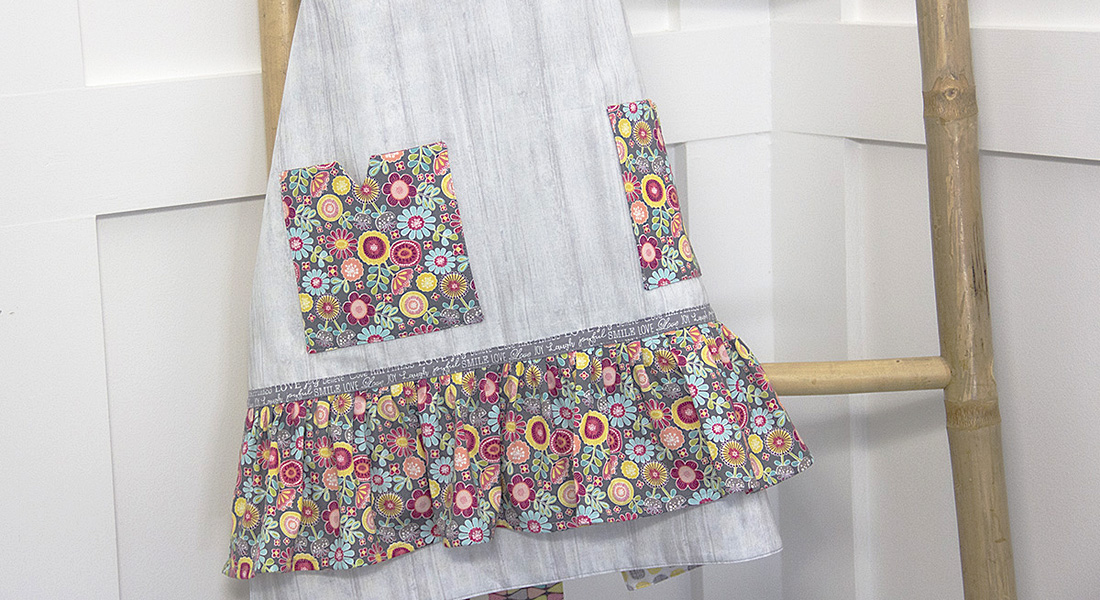
Apron Tutorial from Art Gallery Fabrics
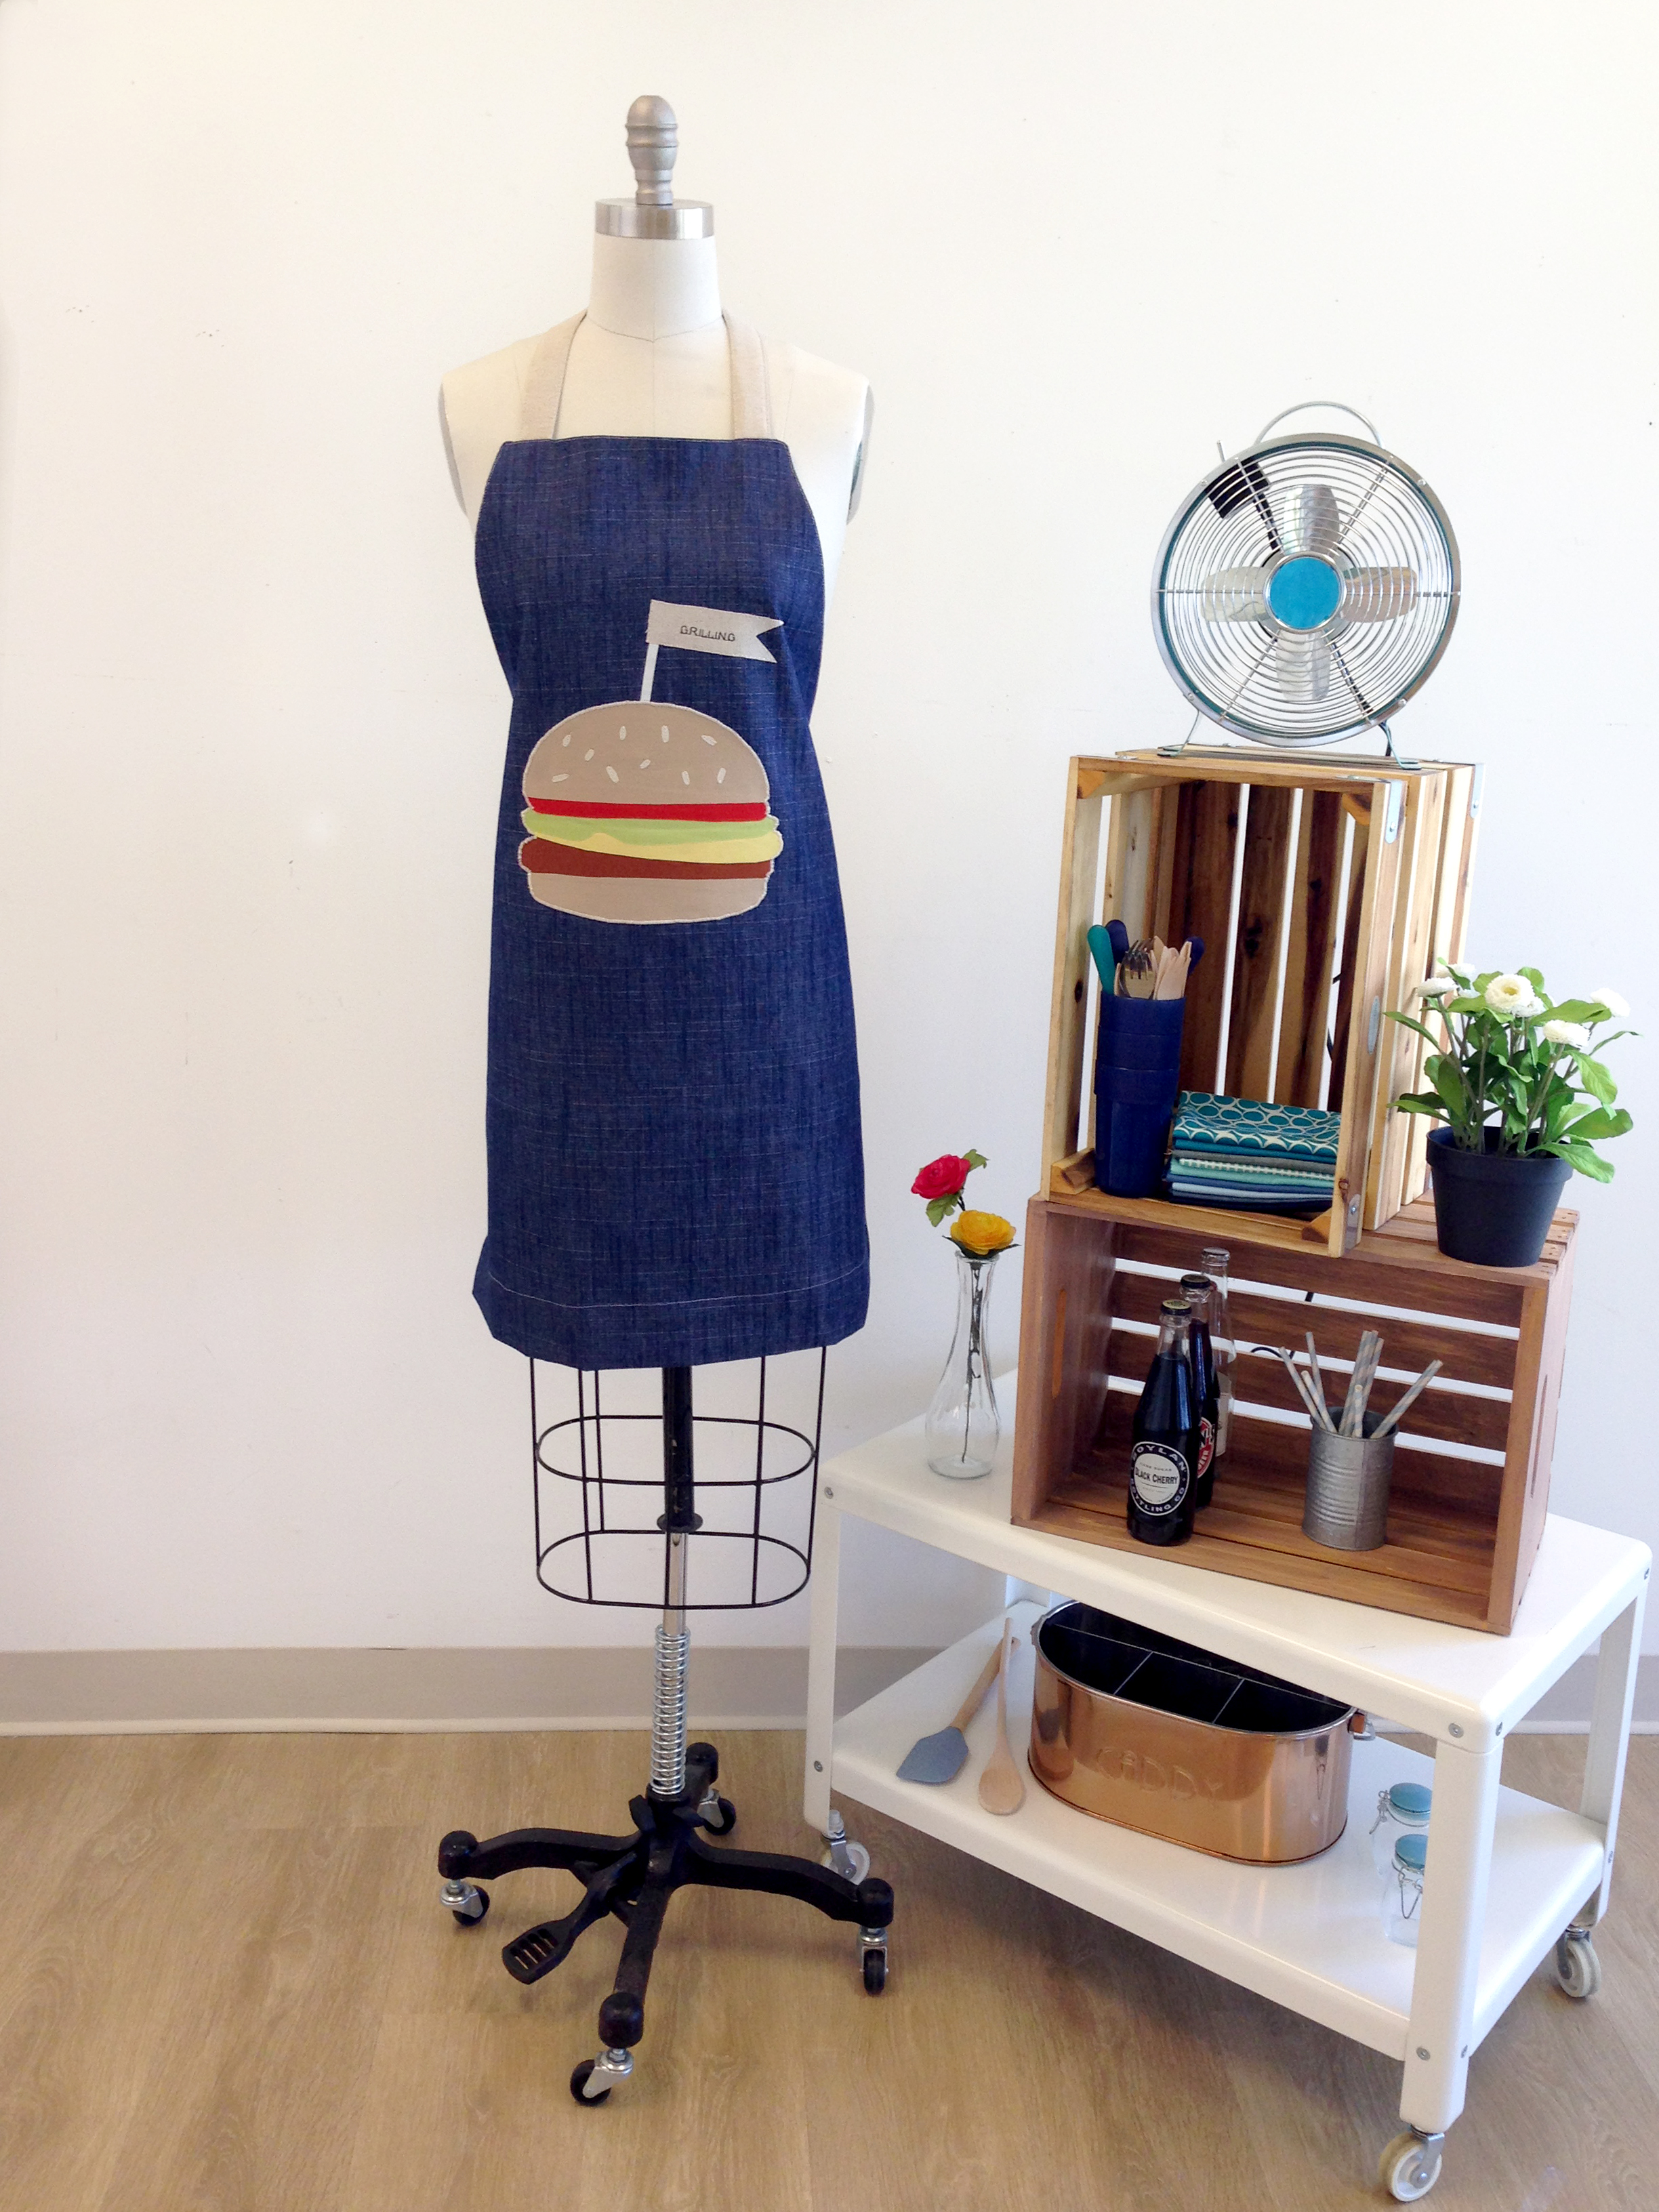
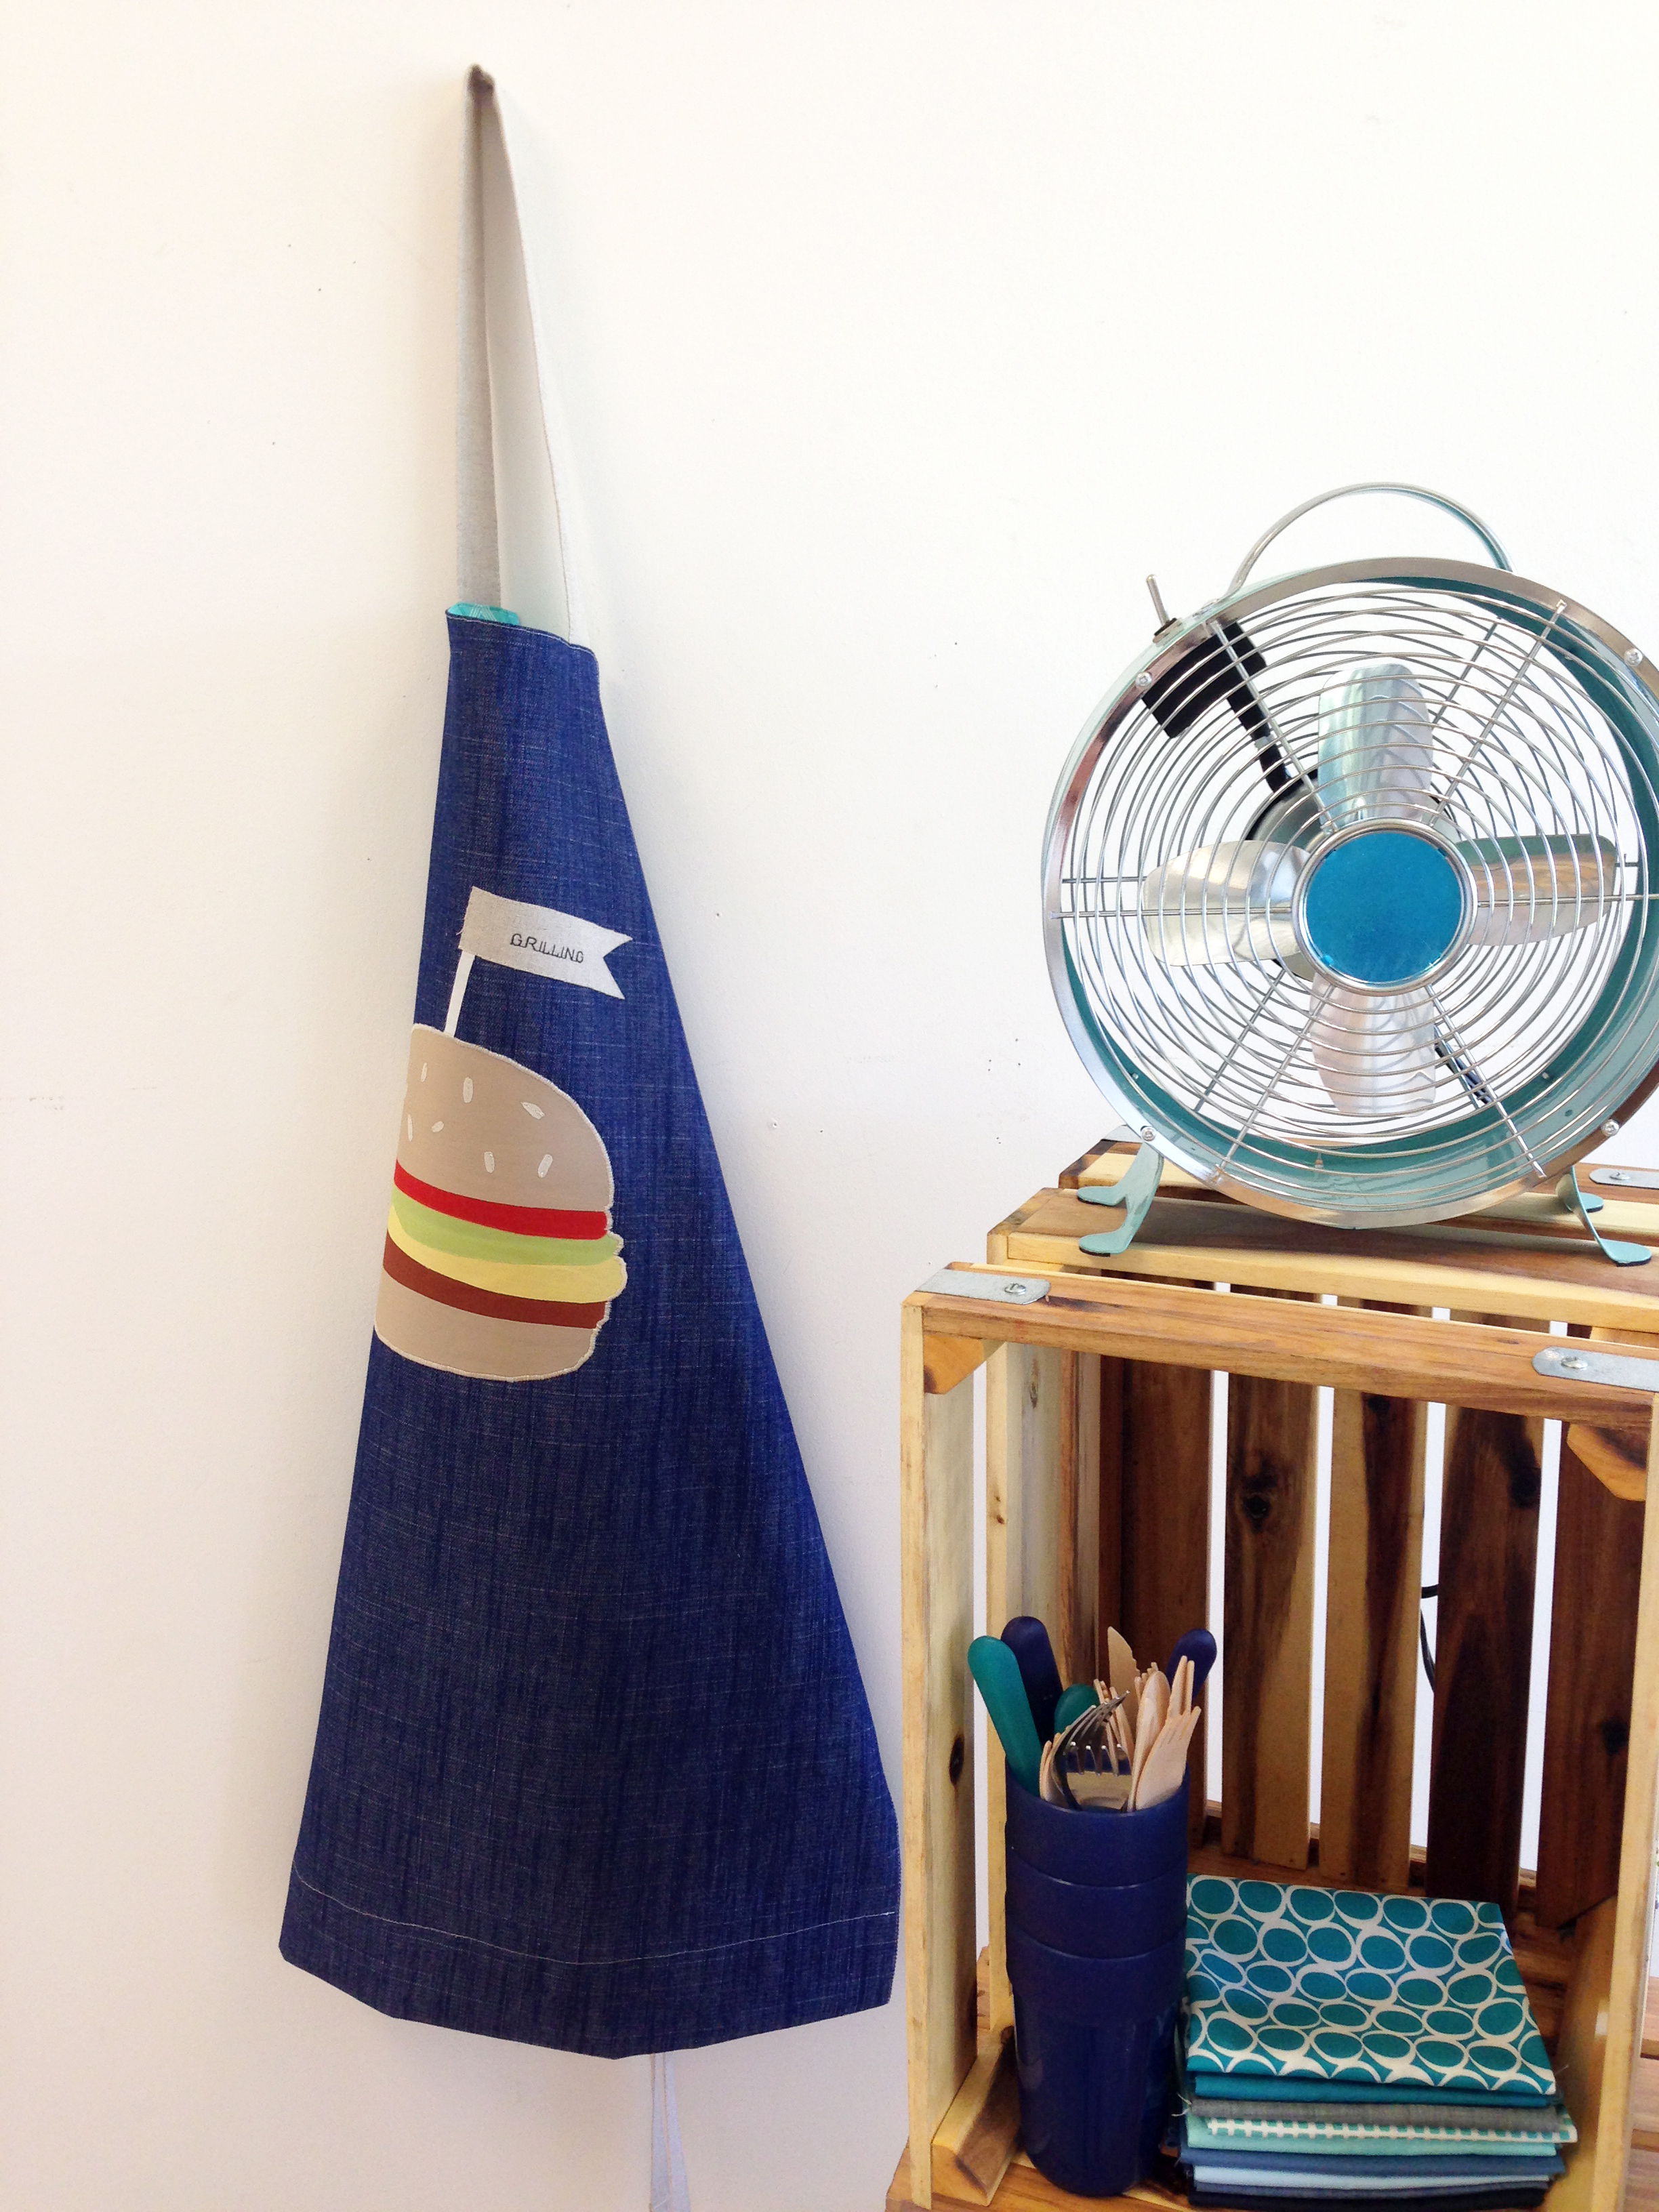
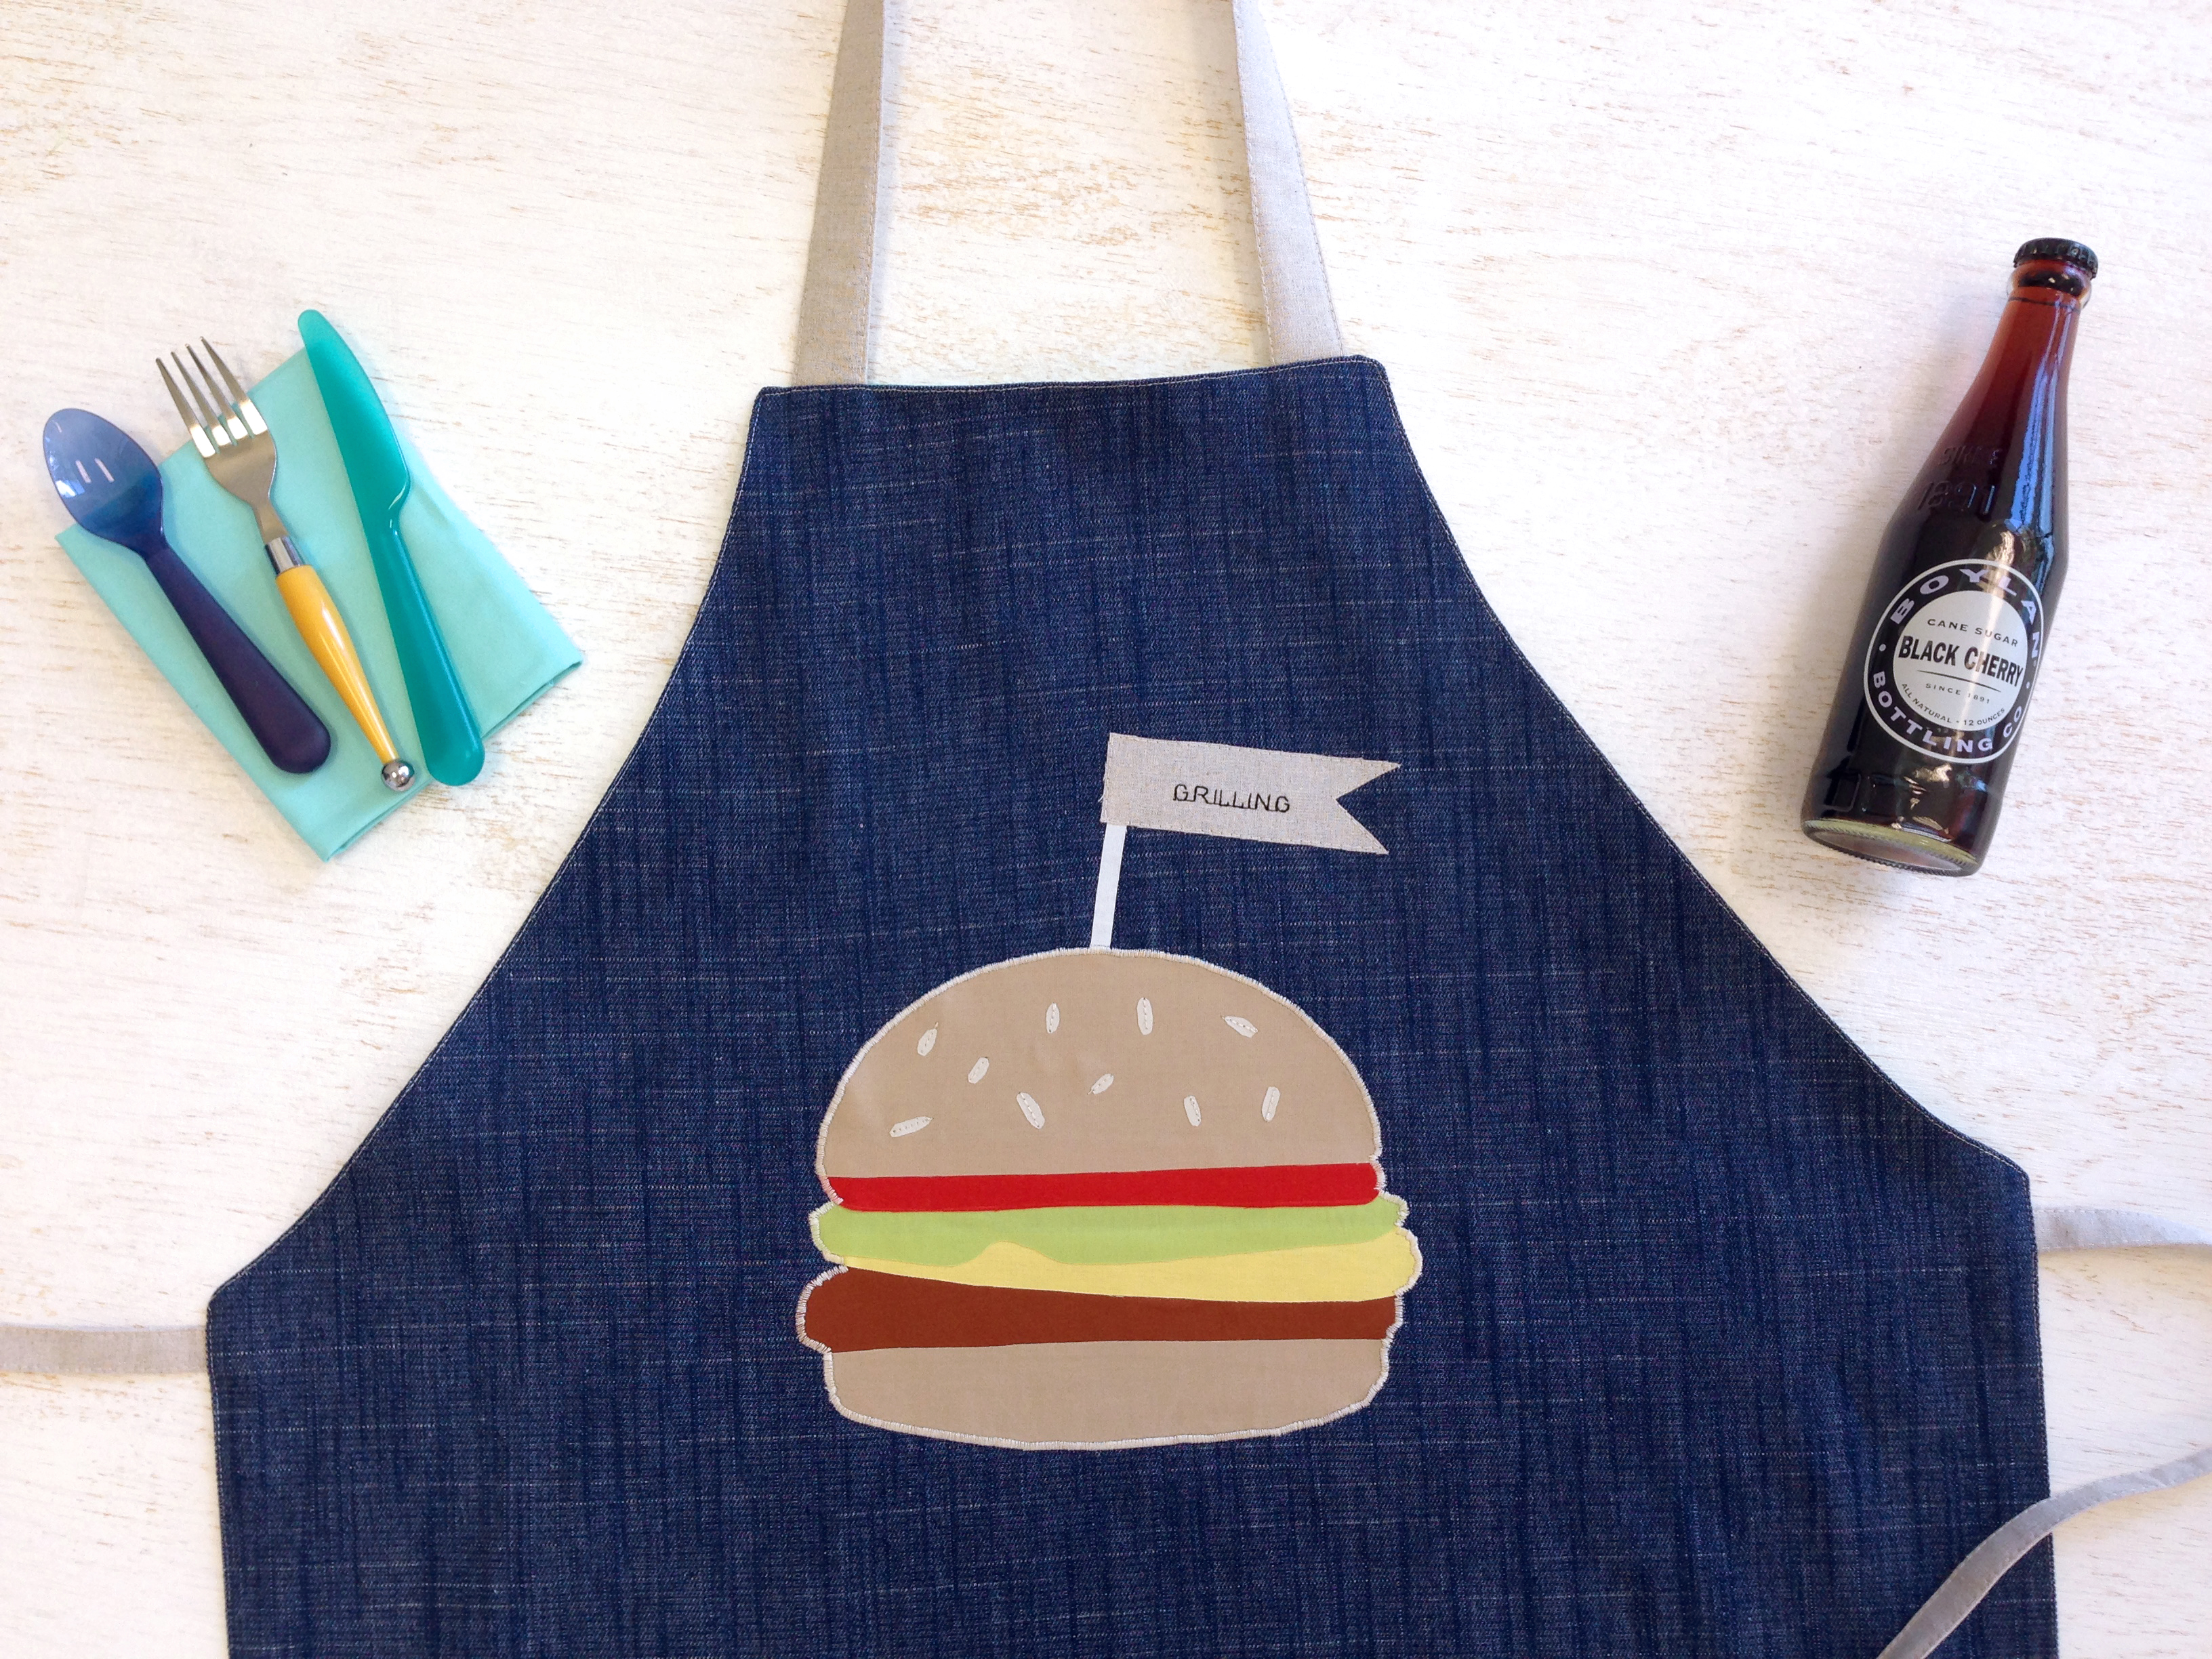
Hello Everyone! How is your summer going so far? We are having a great summer here at the AGF Headquarters! To keep your summer going on the right track we have another summertime project for you! We created a simple cooking apron that is sure to put a smile on your face, because nothing says summer like grilling for family and friends!
We used our Denim Studio linen for the straps, and our solid textured blue denim for the apron. This apron is beautifully lined with our Prisma Element fabric. The appliqué features our Pure Elements which really makes the burger come to life, and I warn you, after sewing this project you may be craving a burger! You can pick up these fabrics online or in your local store.
Materials to make a Summer Apron:
Fabric Requirements
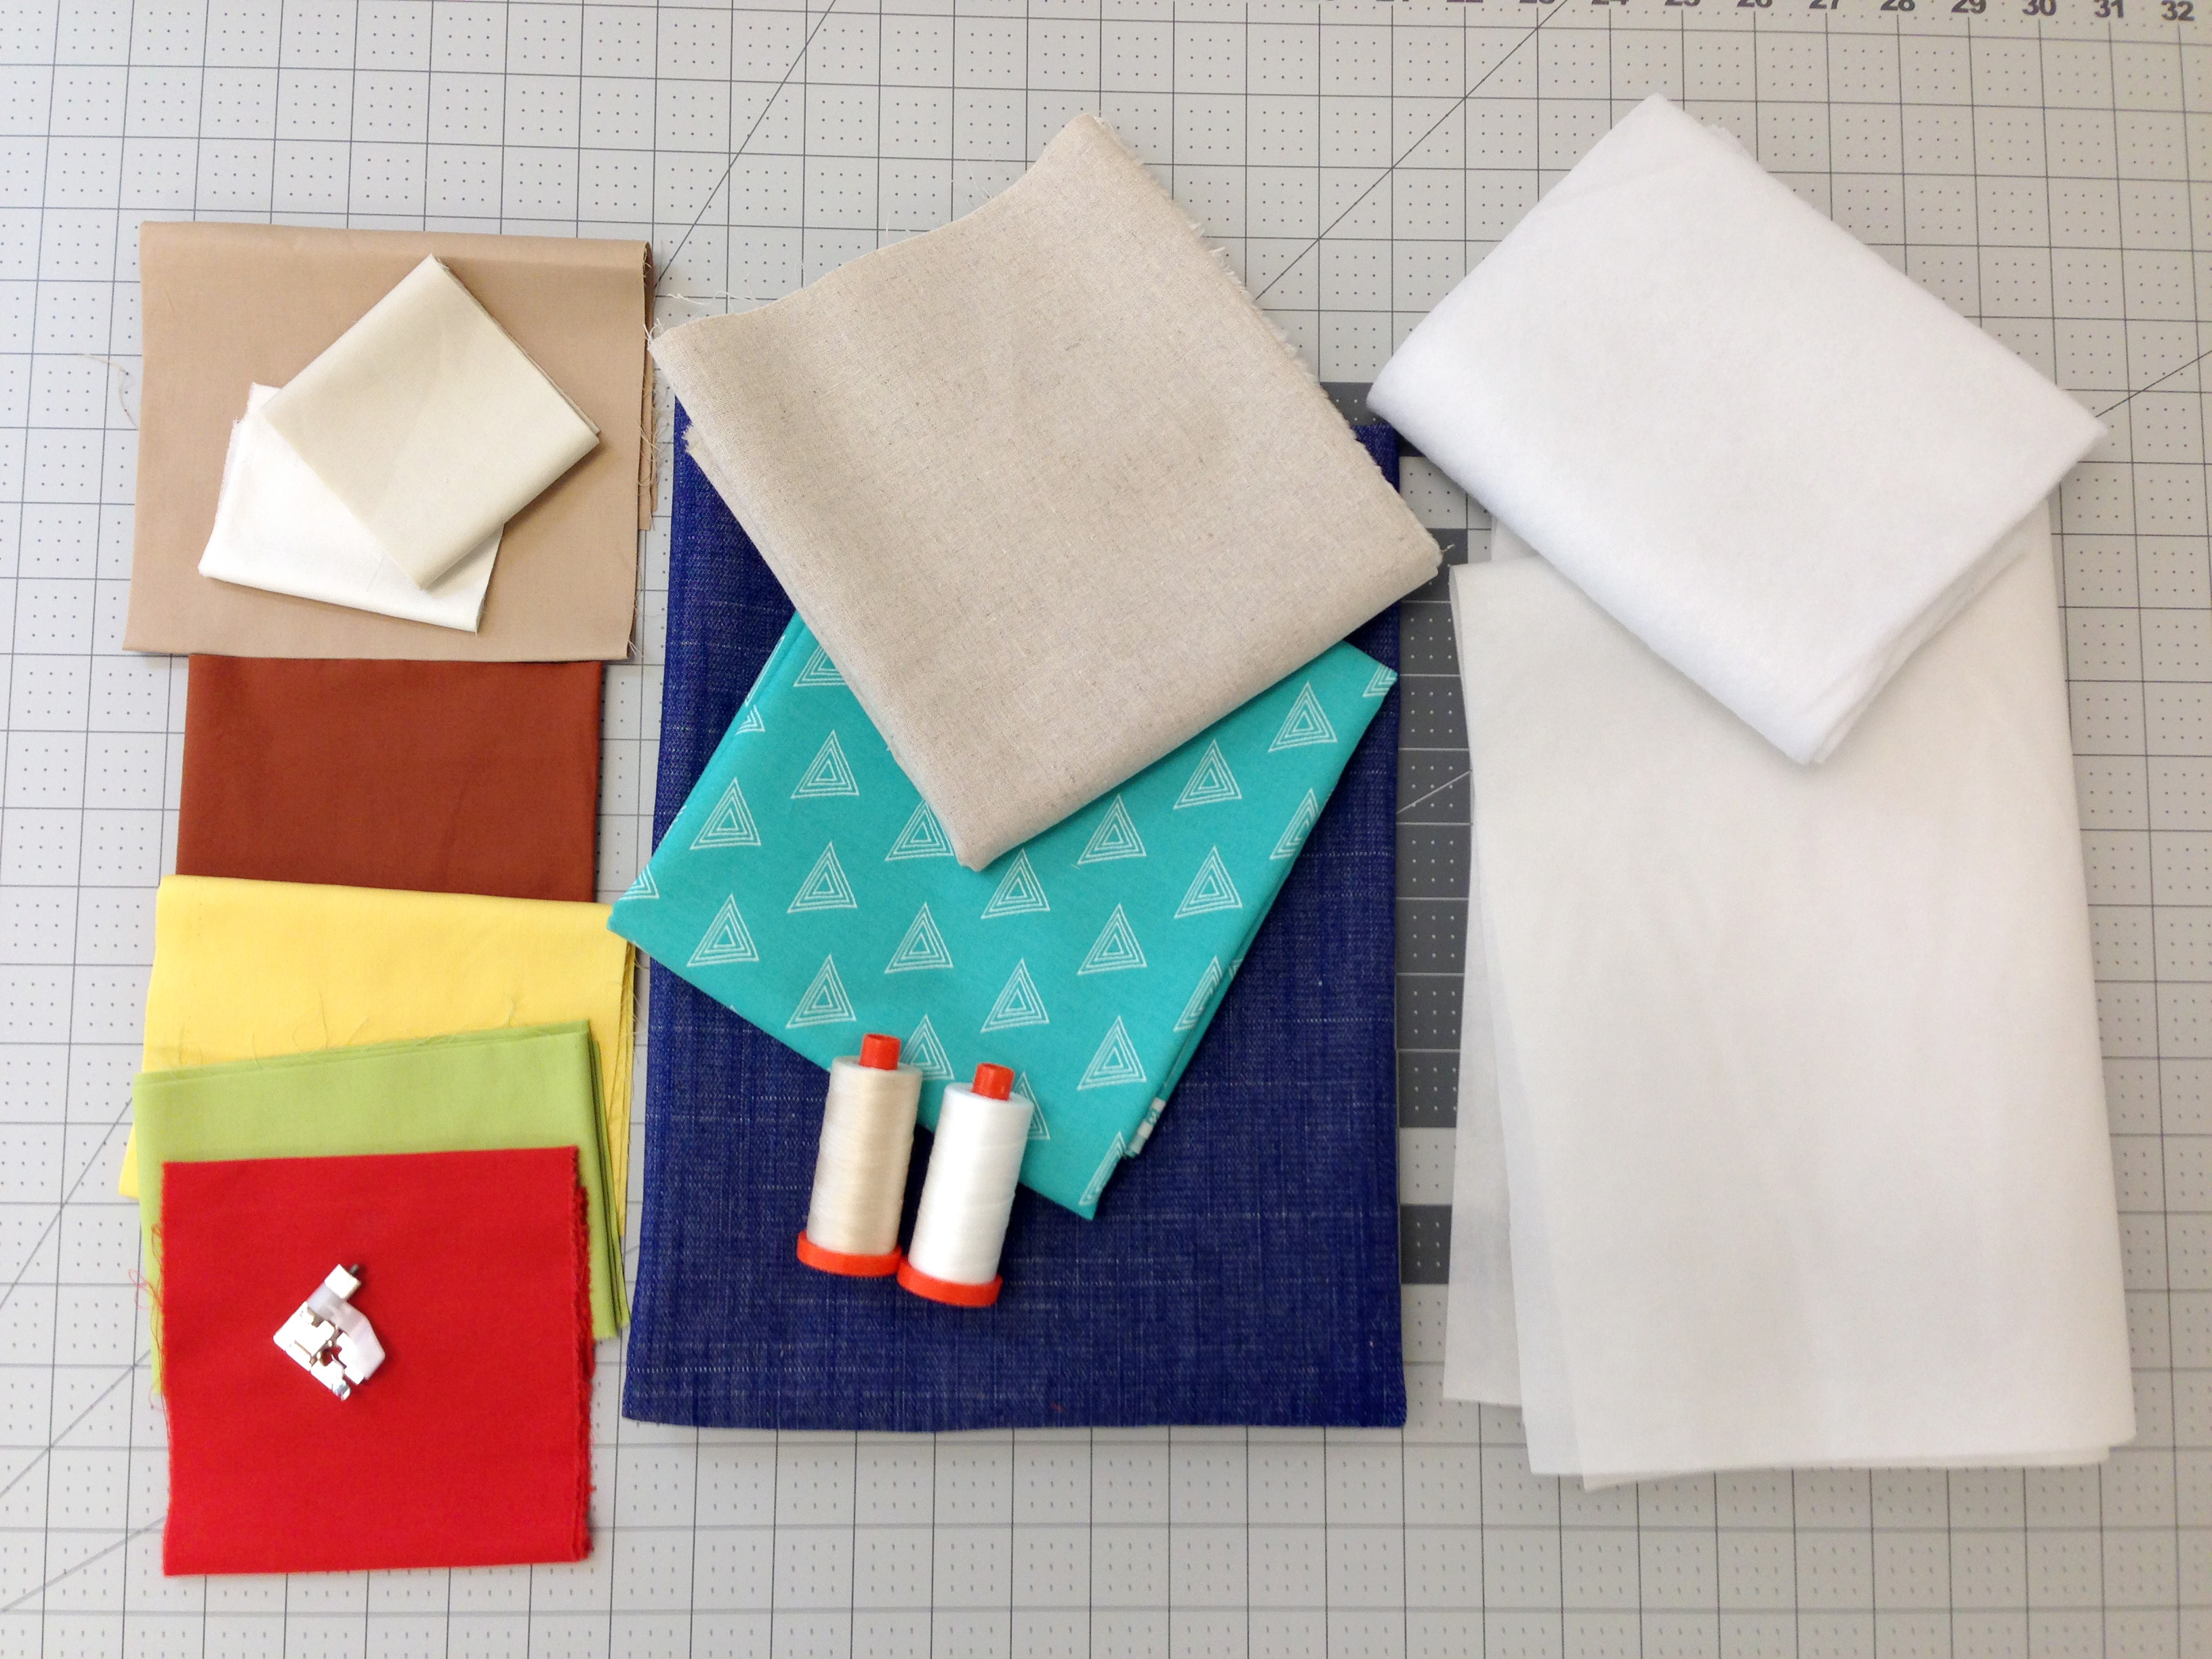
Fabric A– DEN-T-3000 – 1 1/8 yds. – (Front Apron)
One (1) 29″ x 30″ rectangle
Fabric B– DEN-L-4000- 1/3 yd. – (Straps)
Two (2) 2 1/2″ x 25″ strips
One (1) 4 1/2″ x 21 1/2″ strip
One (1) 1″ x 25″ strip fusible fleece
Fabric C– PRE-808-1 1/8 yds. – (Lining)
Burger Applique Pieces
Note: Cut Steam – A- for each piece slightly smaller.
Fuse Steam -A- Steam to each of the following pieces .
Download the burger templates
Fabric B-DEN-L-4000
One (1) 2 1/2″ x 4 1/2″ strip (Banner)
Fabric D– PE- 440
One (1) 4″ x 8 1/2″ strip (Bun Top)
One (1) 2 1/2″ x 8 1/2″ strip (Bun Bottom)
Fabric F– PE-432
One (1) 3″ x 10″ strip (Sesame Seeds)
Fabric G– PE-422
One (1) 4″ x 9 1/2″ strip (Burger)
Fabric H– PE-423
One (1) 3 1/2″ x 9 1/2″ strip (Lettuce)
Fabric I– PE-437
One (1) 2″ x 9 1/2″ strip (Tomato)
Fabric J– PE-435
One (1) 3″ x 9″ strip (Cheese)
Fabric H– PE- 408
One (1) 1 1/2″ x 3 1/2″ strip (Stick)
Other supplies used:
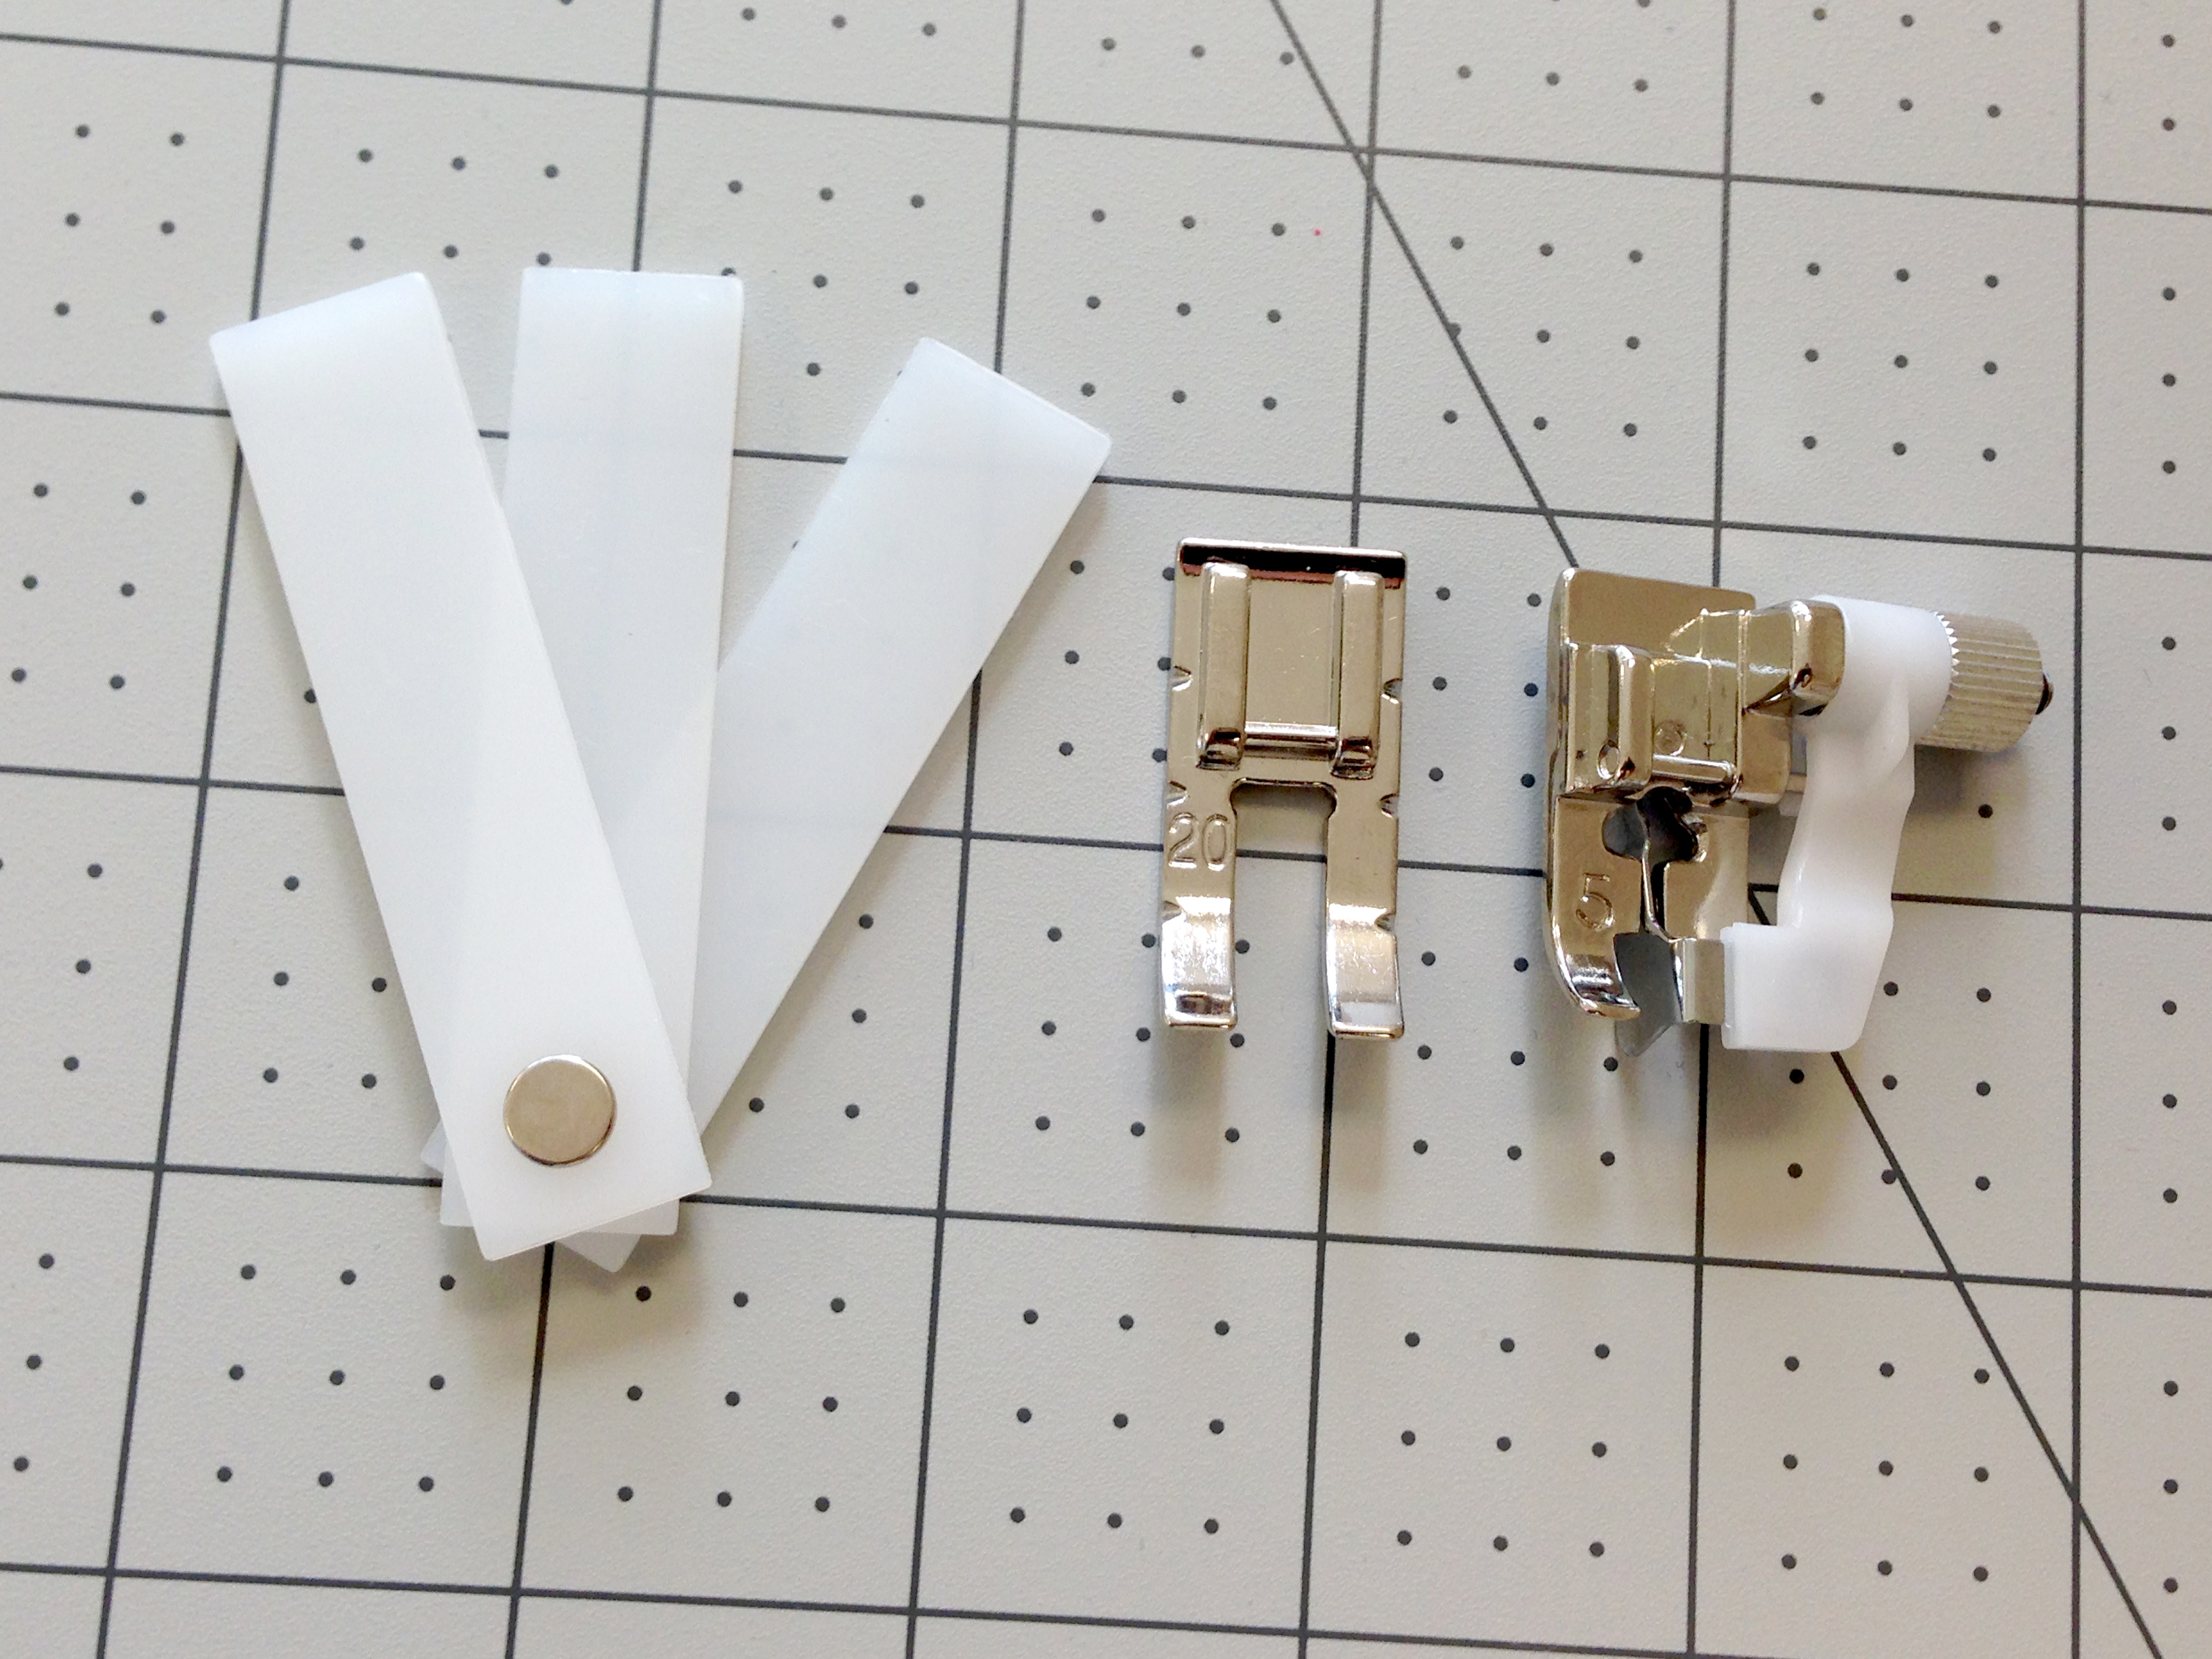
- Sewing machine (we use a BERNINA 350 PE)
- Reverse pattern foot #1/#1C/#1D
- Blindstitch foot #5
- Open embroidery foot #20/#20C/#20D
- Height compensating tool
- Aurifil Thread #2000- Light Sand
- Aurifil Thread #2021- Natural White
- Aurifil Thread #2692- Black
Step 1: Creating Apron Pattern
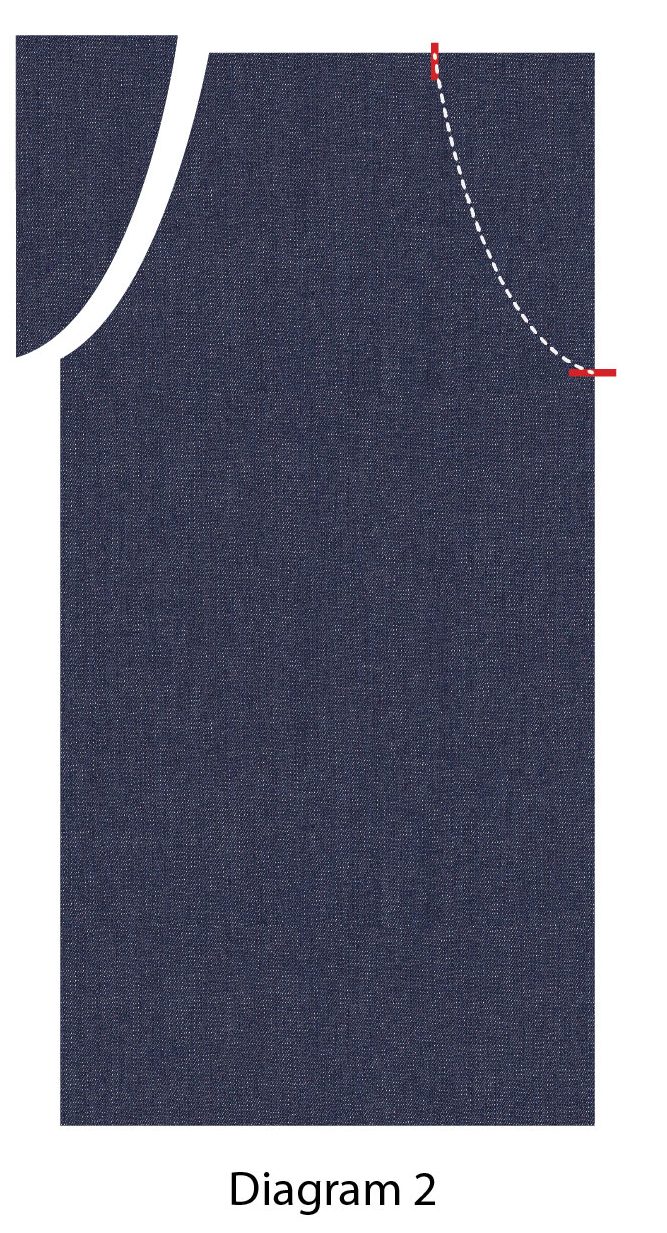
Take your 29″ x 39″ rectangle from Fabric A and place the rectangle where you would like the top part of the apron to lay on your chest. Measure in about 9″ from each side and mark. It should be about 4″ in from your side seam. Next measure about 2″ above your belly button, mark on each side of your piece. (Diagram 1)
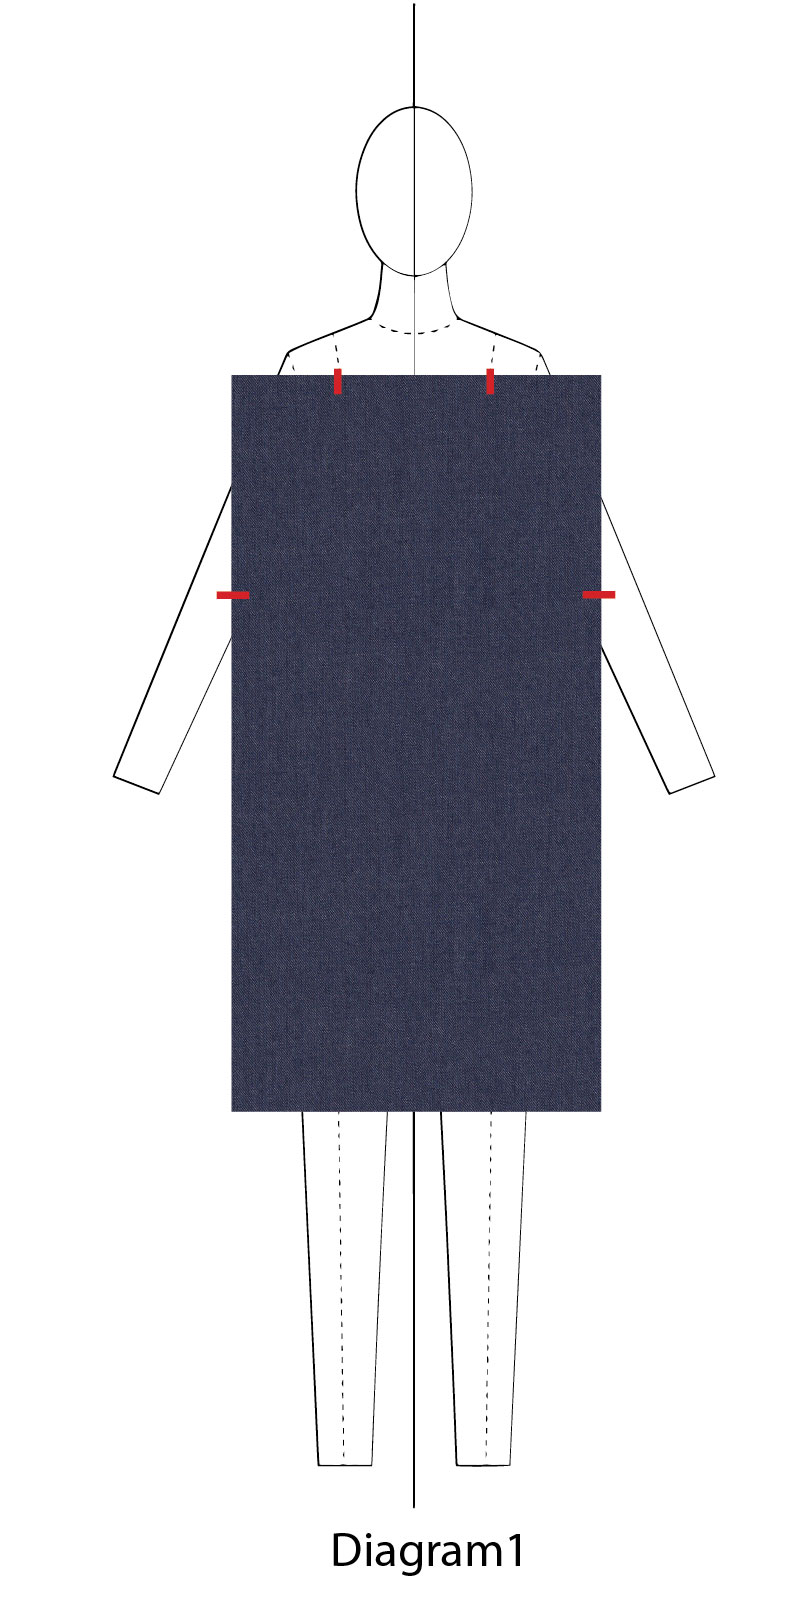
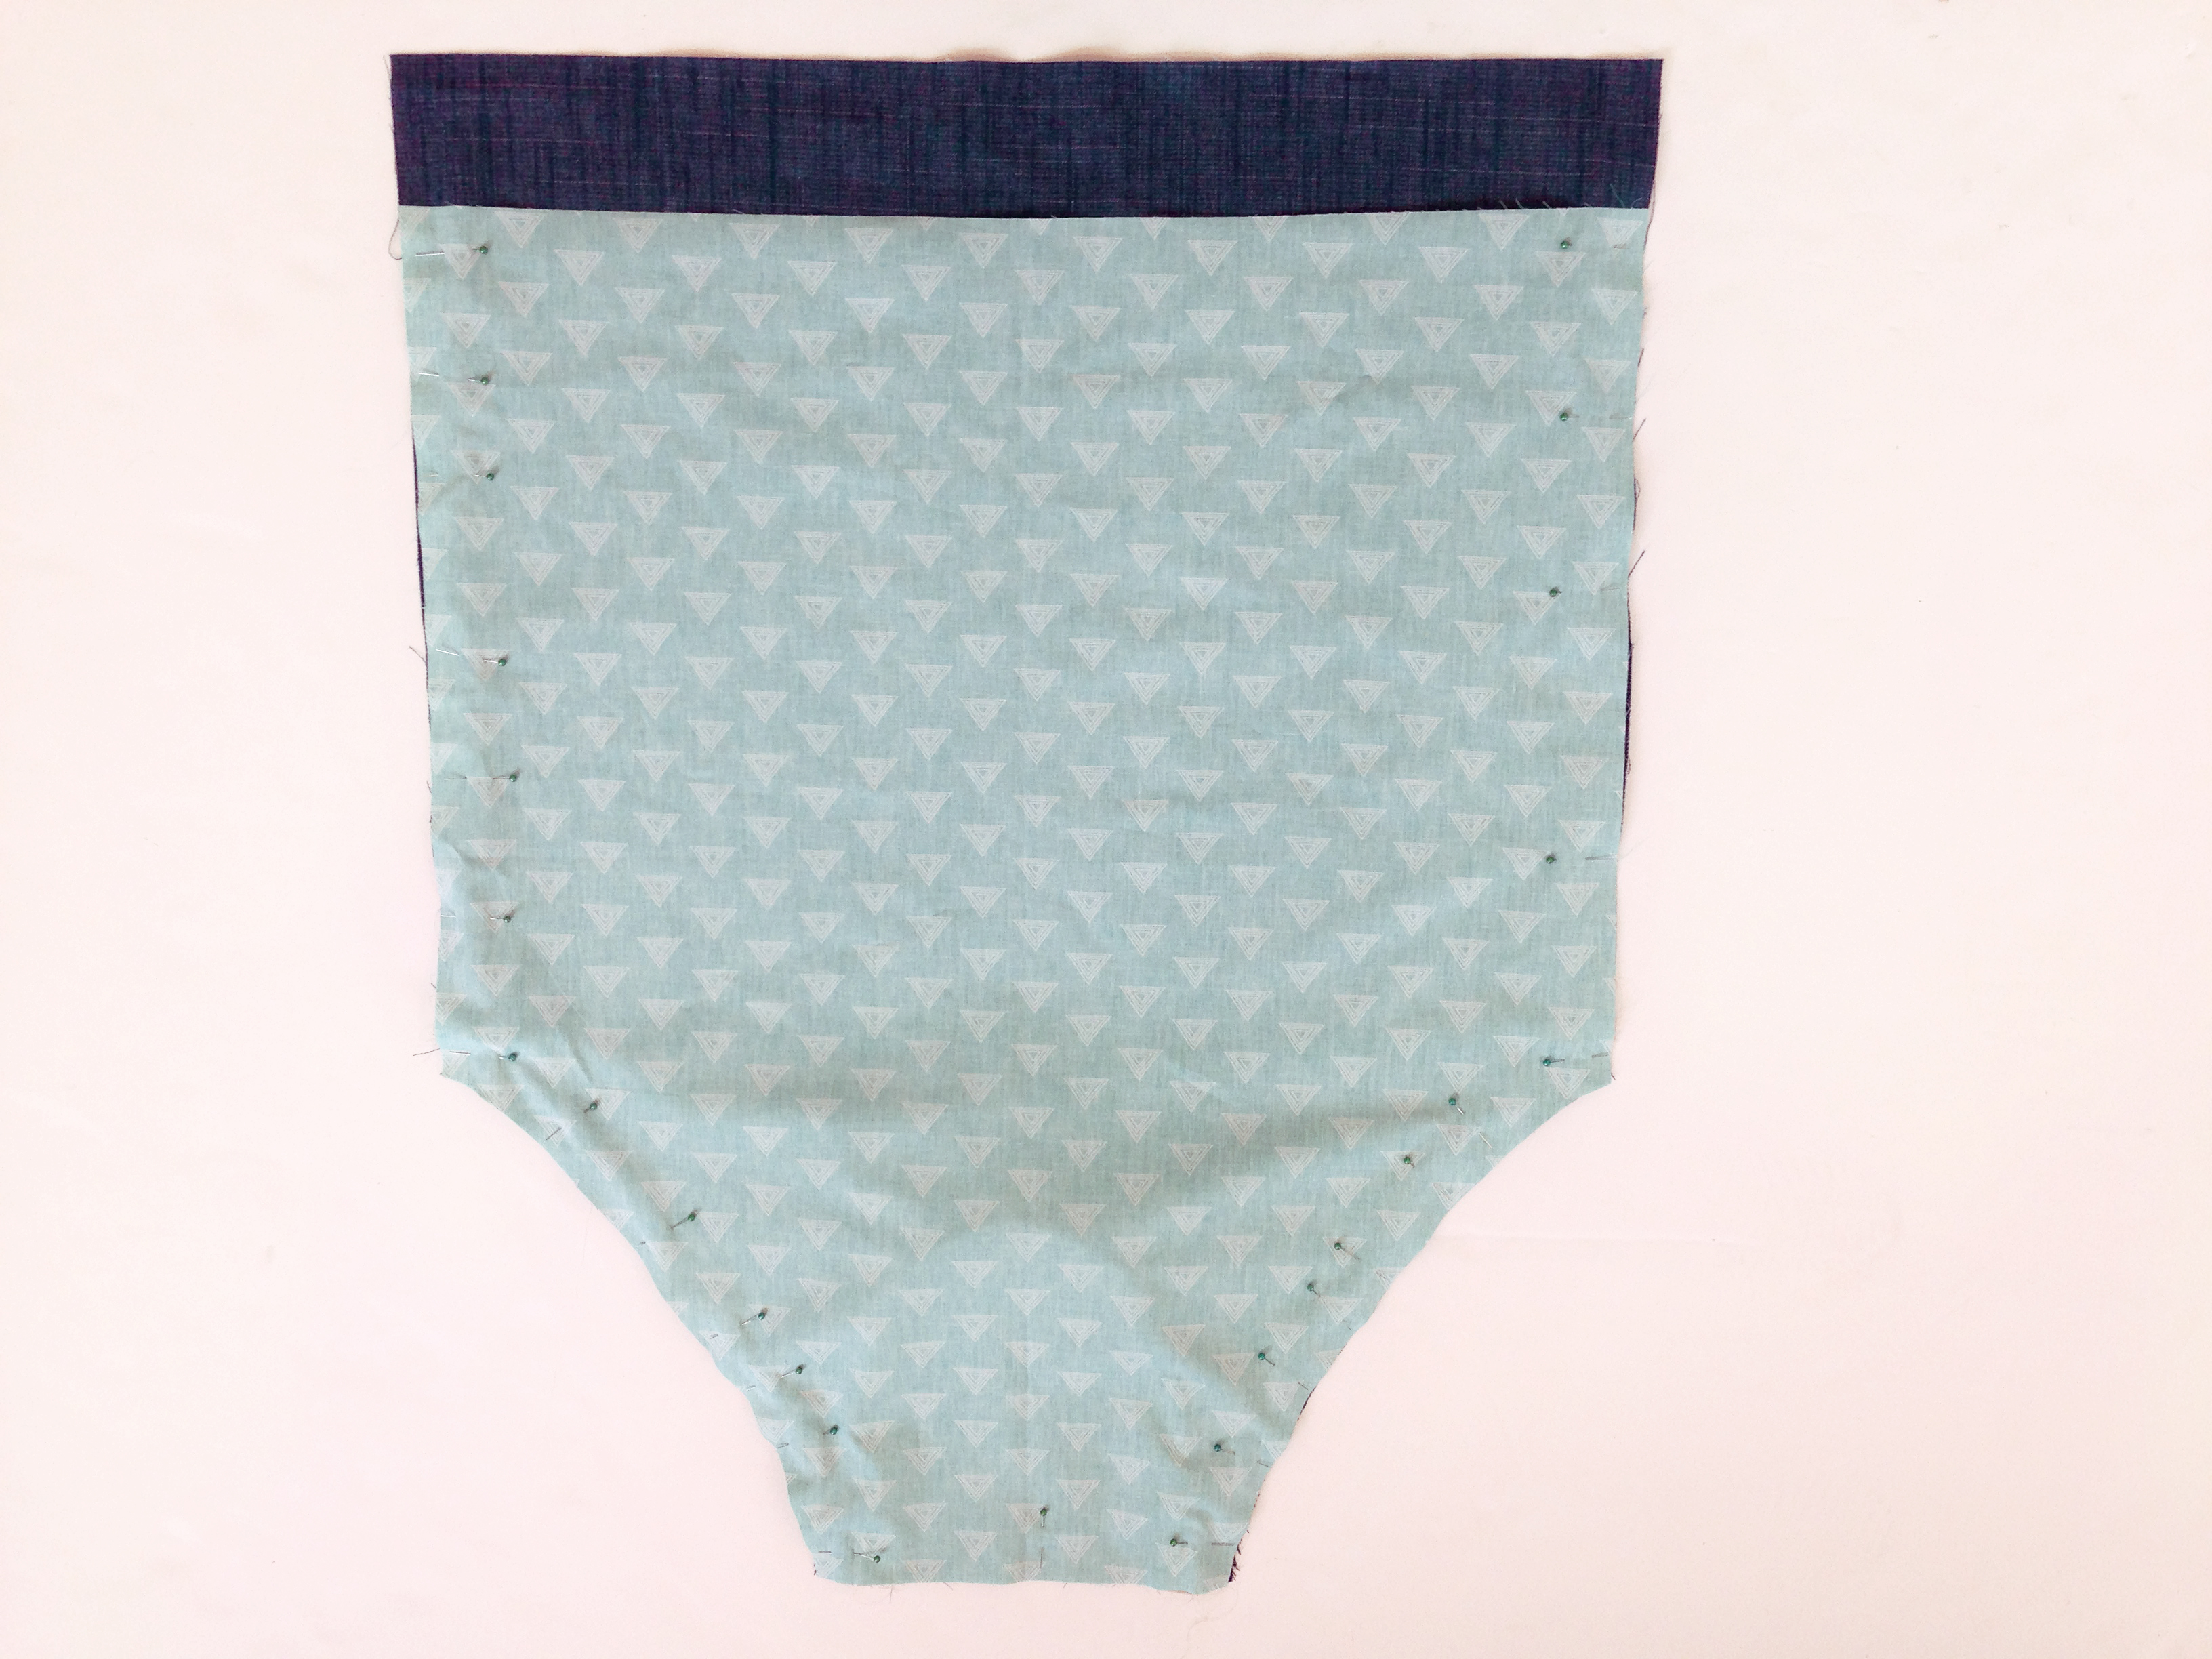
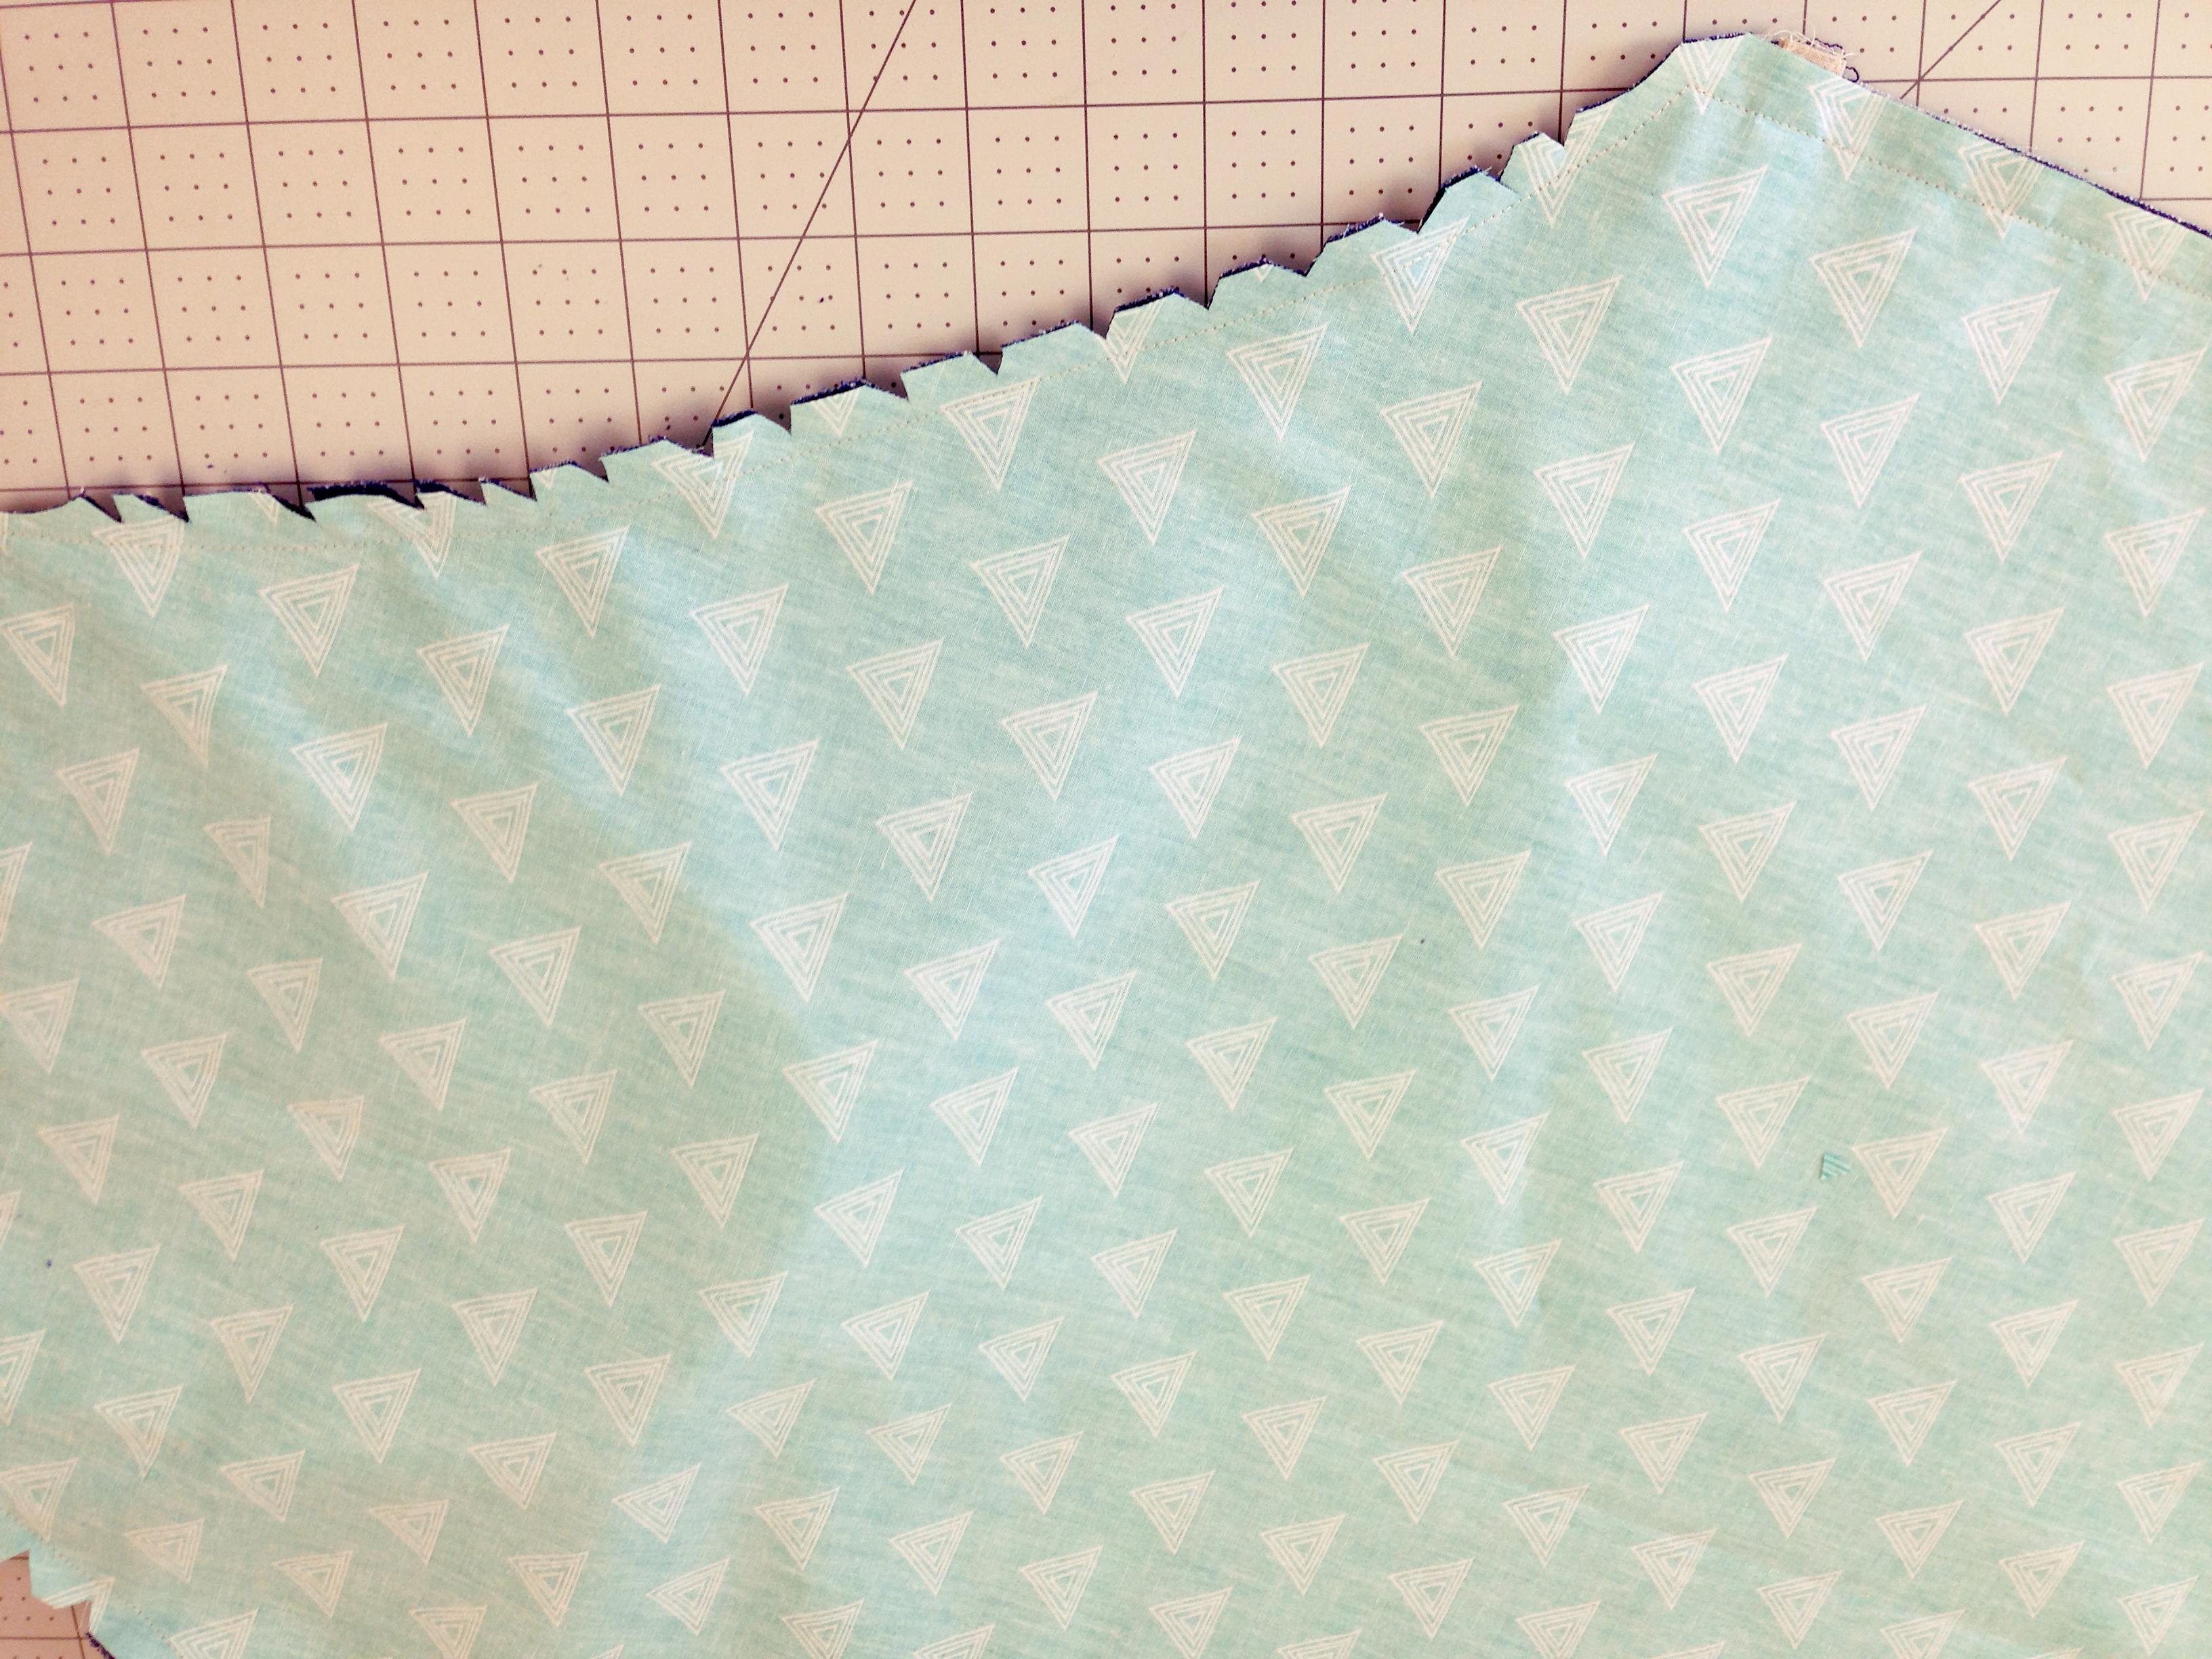
Draw a curved line connecting both points. Cut on line. At this time trim sides of your piece to go about 4″ past your side seams. This apron calls for a 4″ seam allowance. Measure how long you want your apron to be and add 4″. Trim off excess. I trimmed about 3″ from the bottom and the apron will hit right above my knee. (Diagram 2)
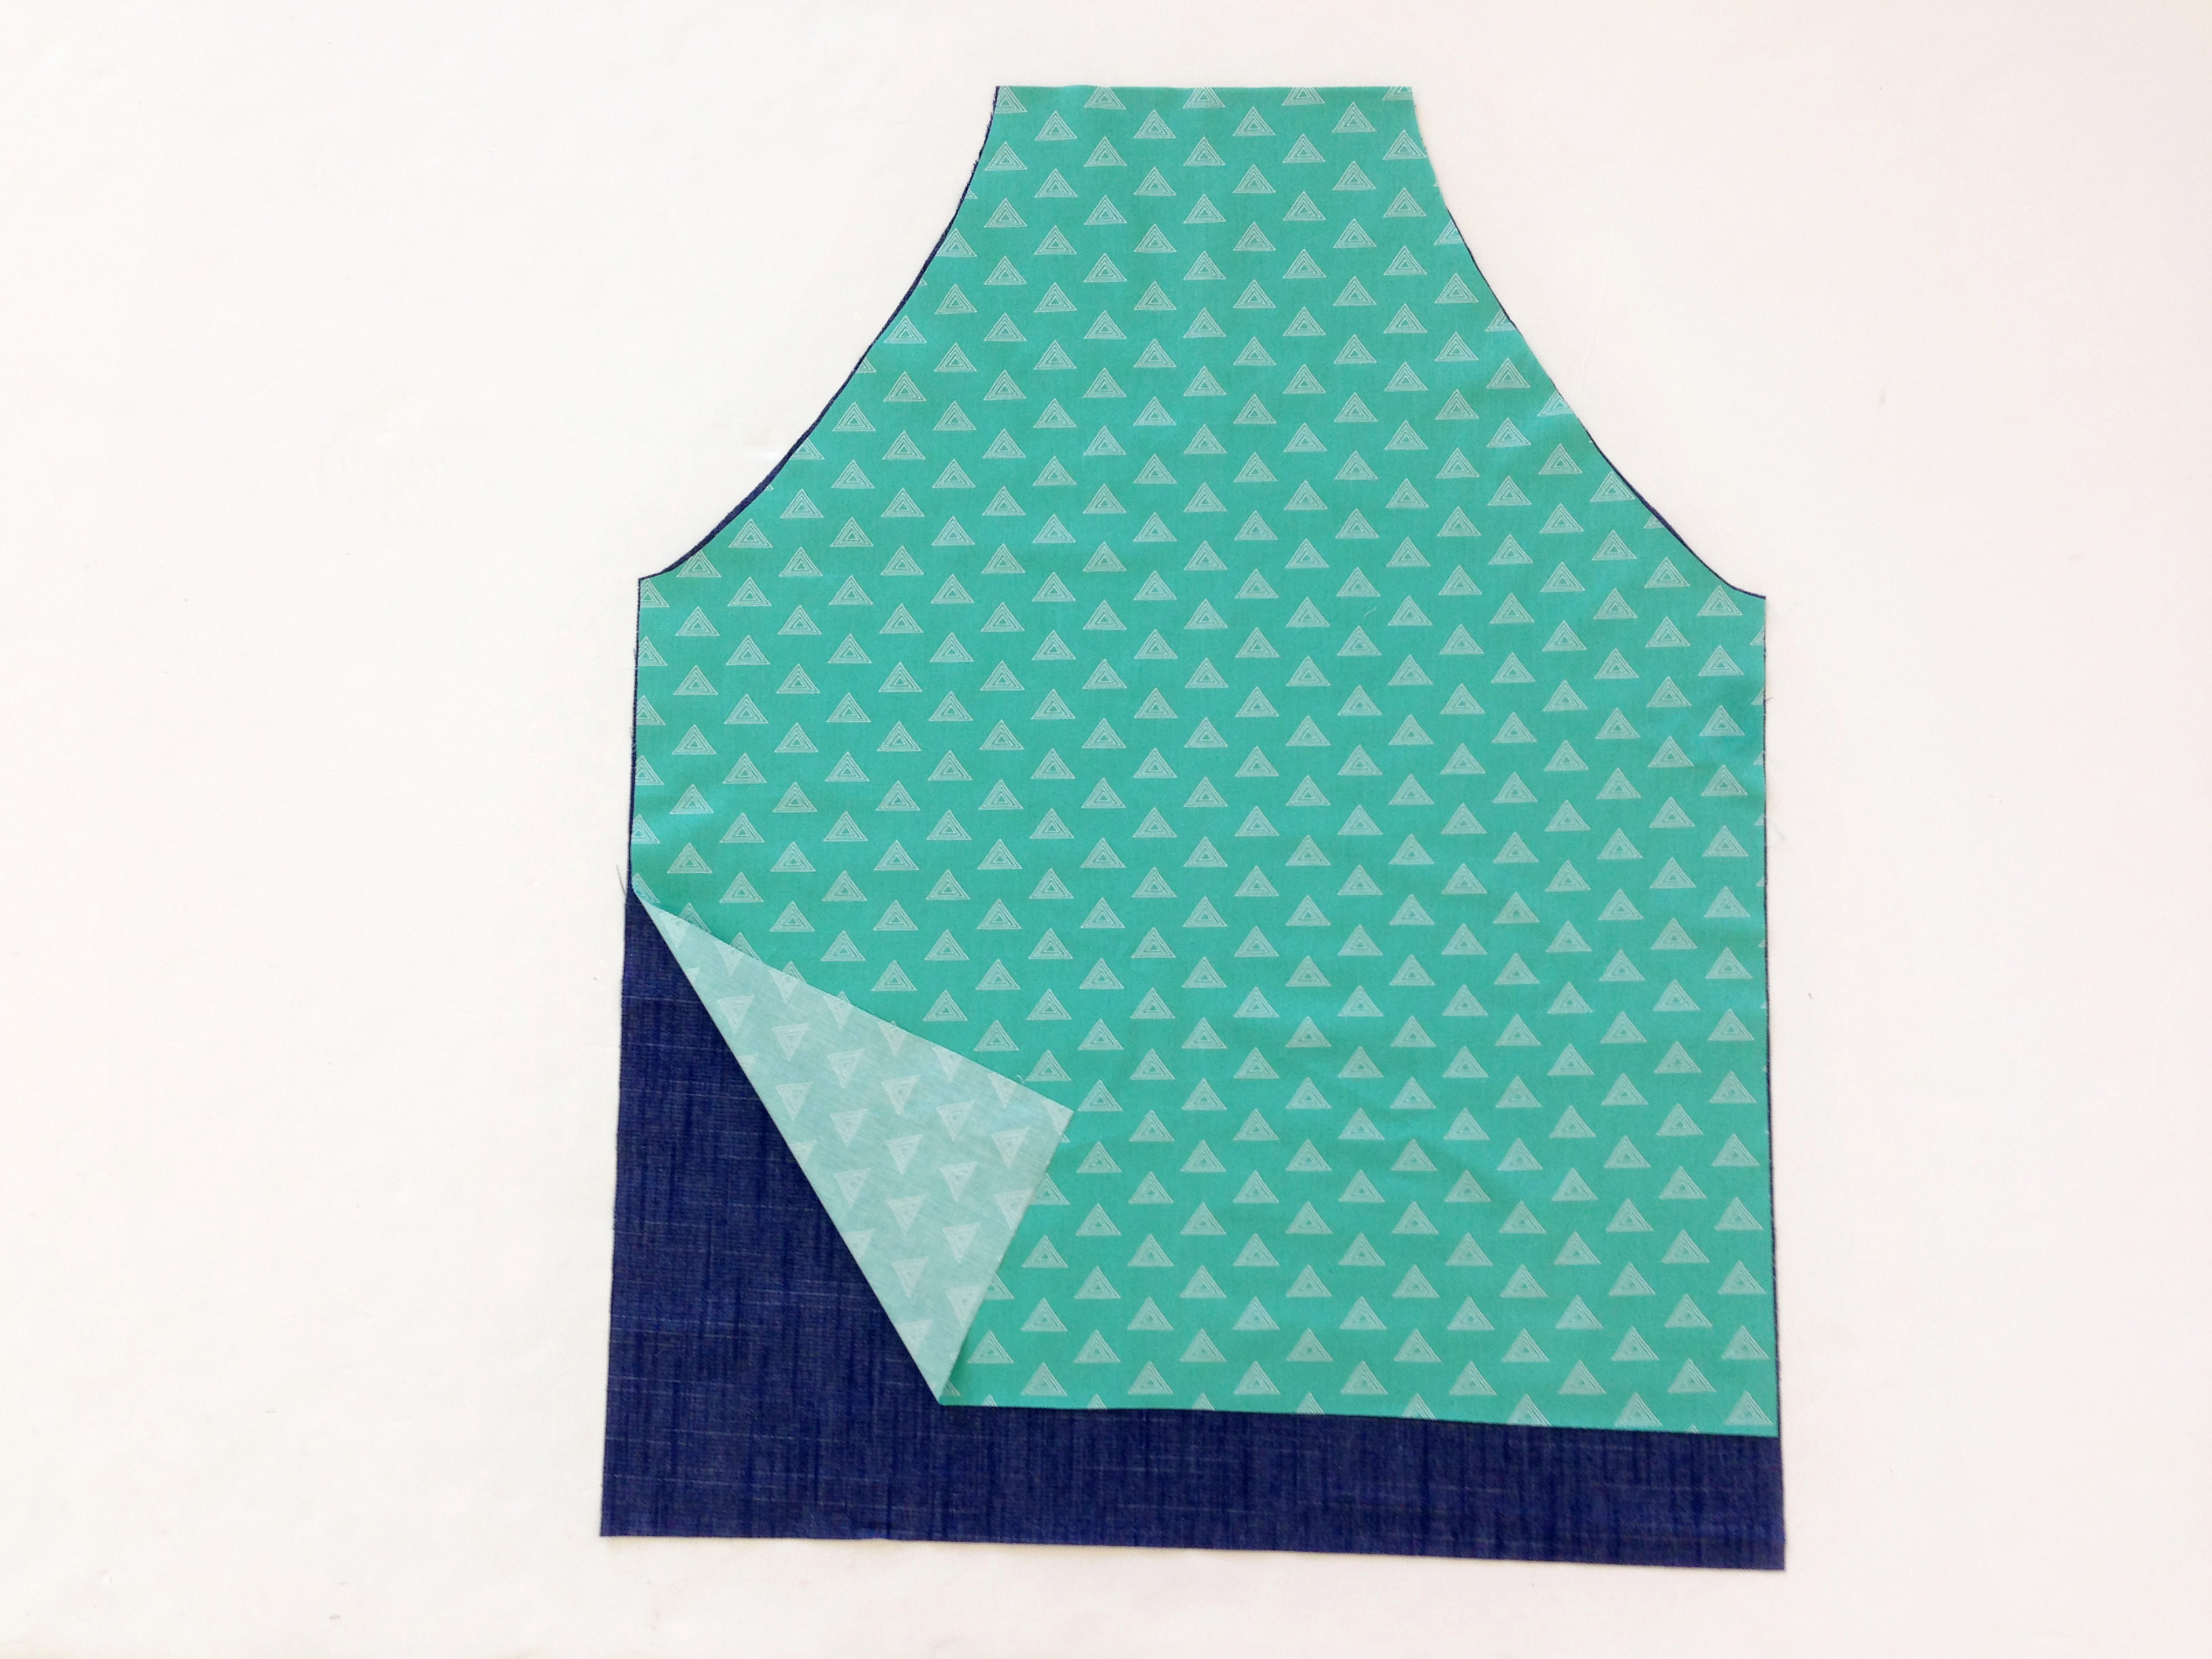
Use front apron as a template to cut out your lining. Fold rectangle in half to make this step easier and your pattern symmetrical, and cut on the curved line. Cut lining 3″ shorter than the main apron.
Step 2: Burger Appliqué
Apply Steam-A-Seam to all of your burger fabric pieces. Trace templates onto fabric pieces and cut out. To create the sesame seeds cut out small organic oval shapes small enough to fit on your top bun template.
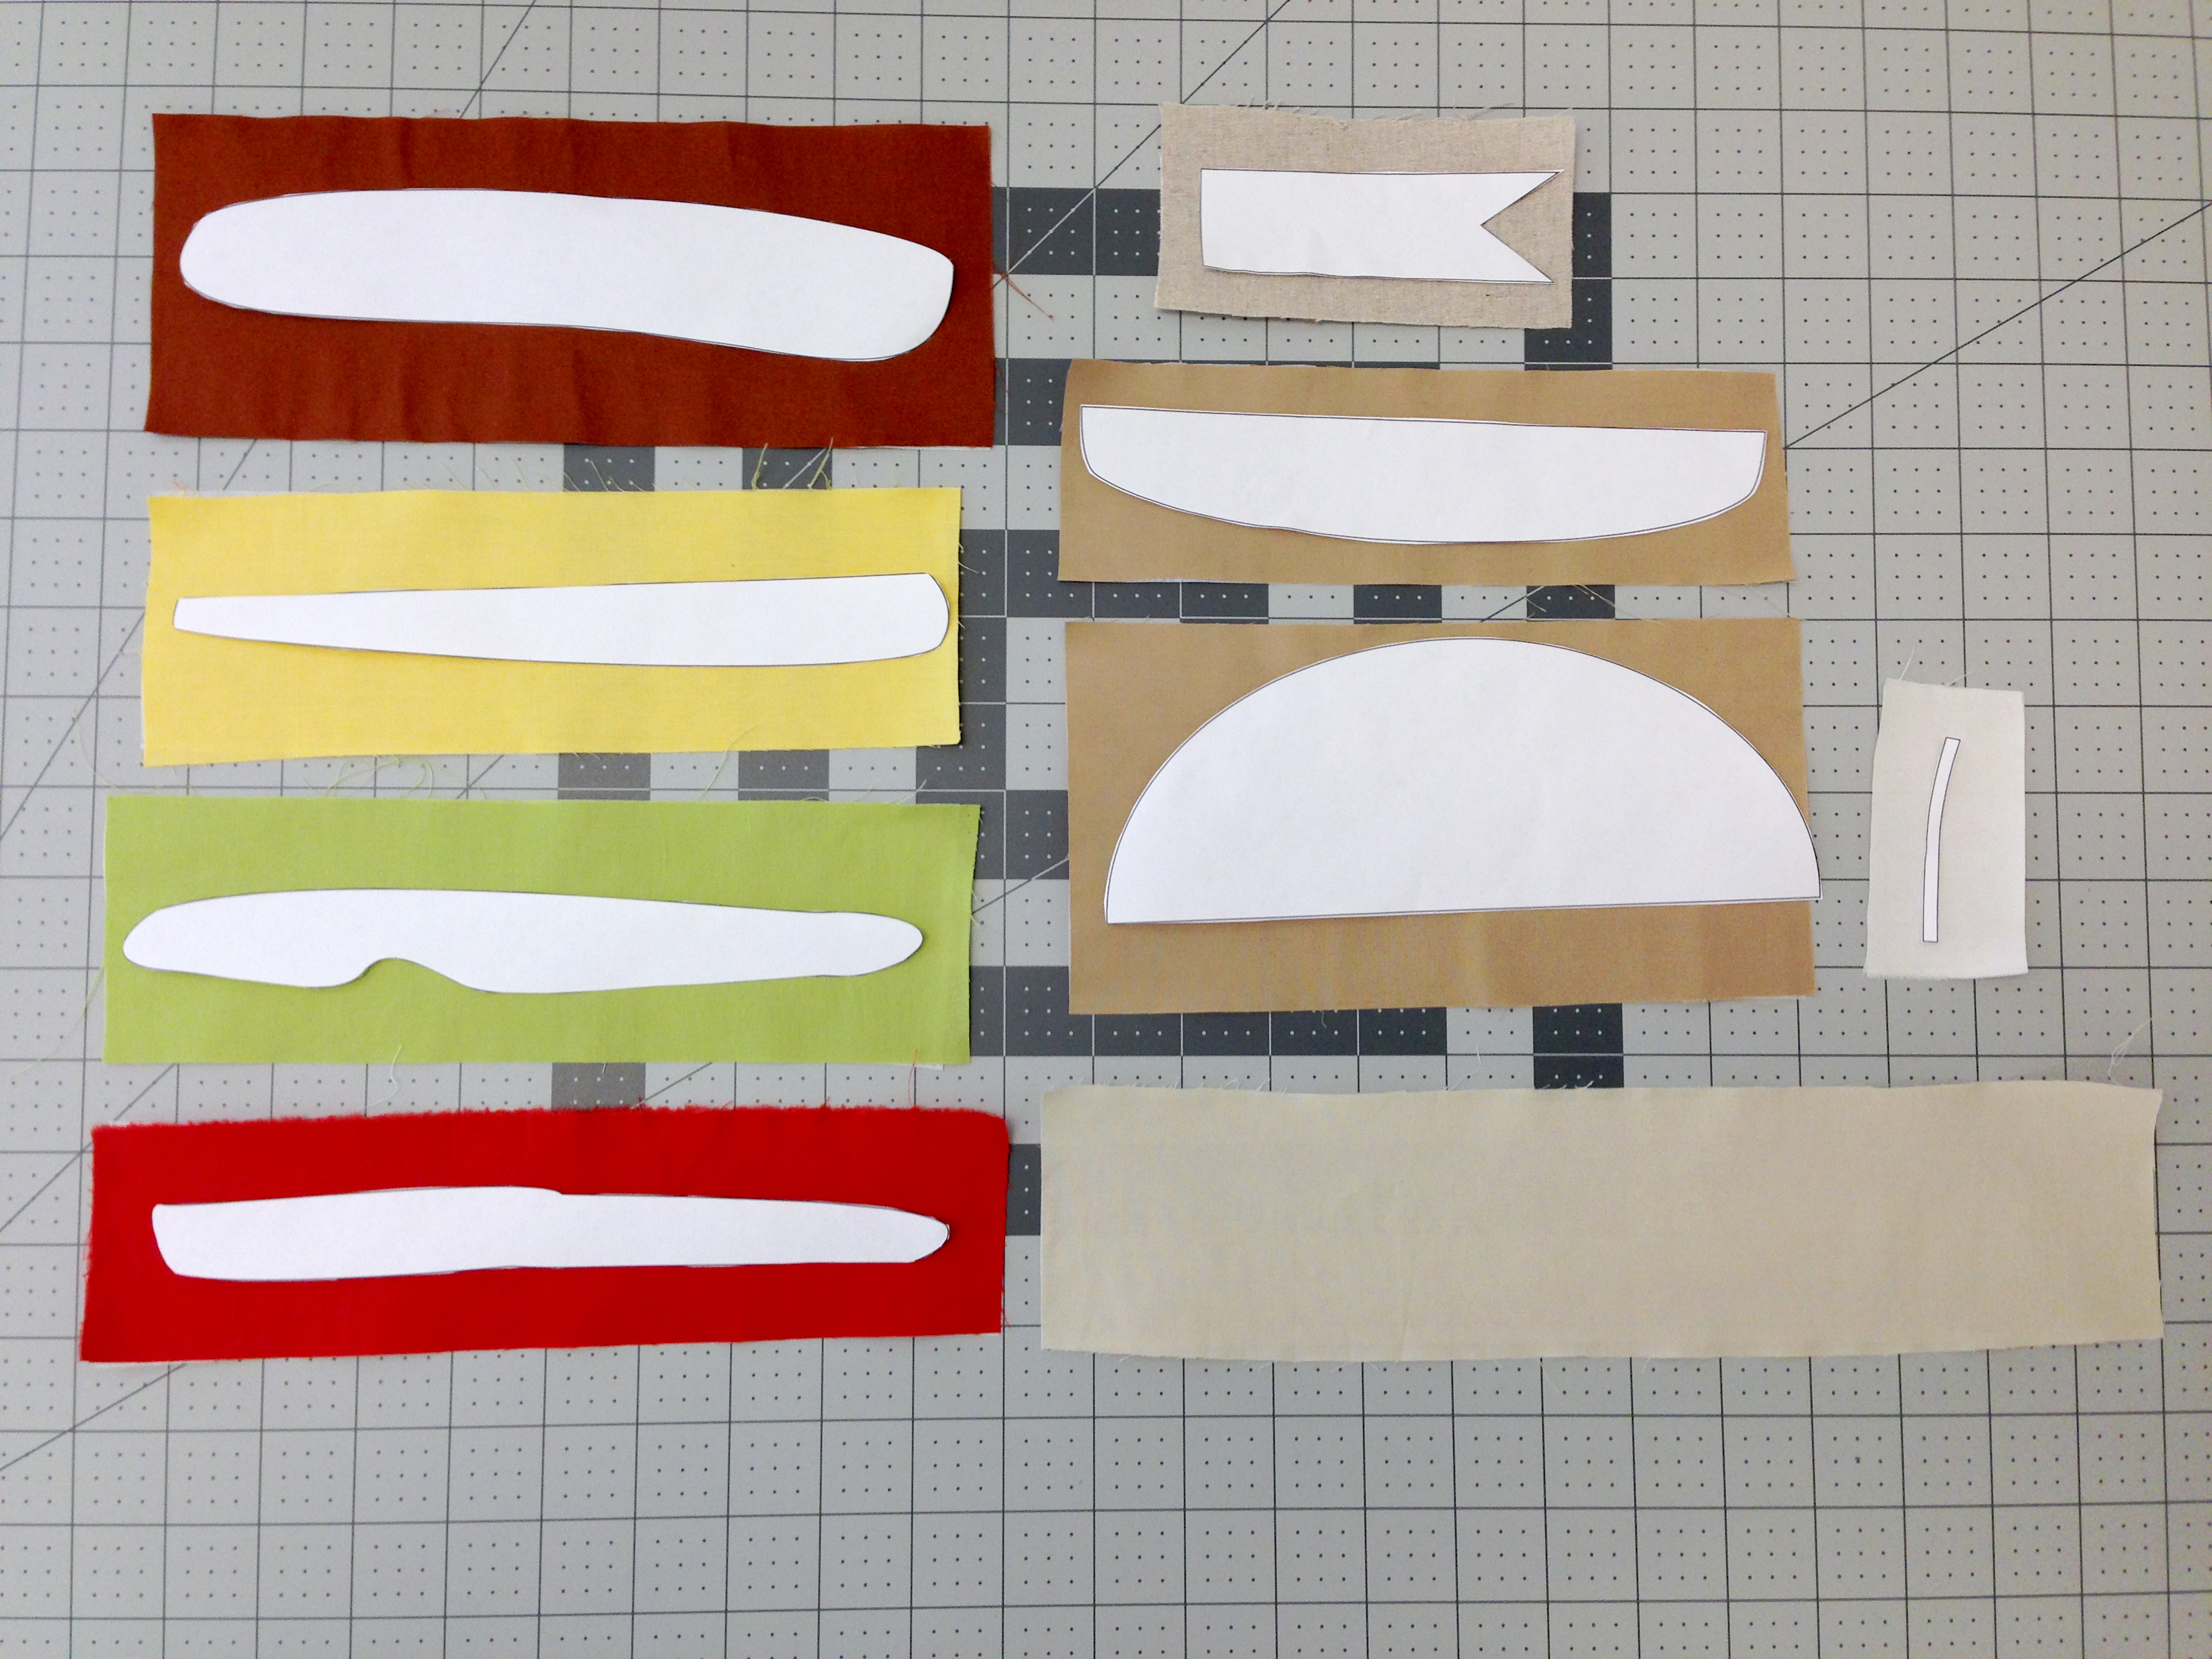
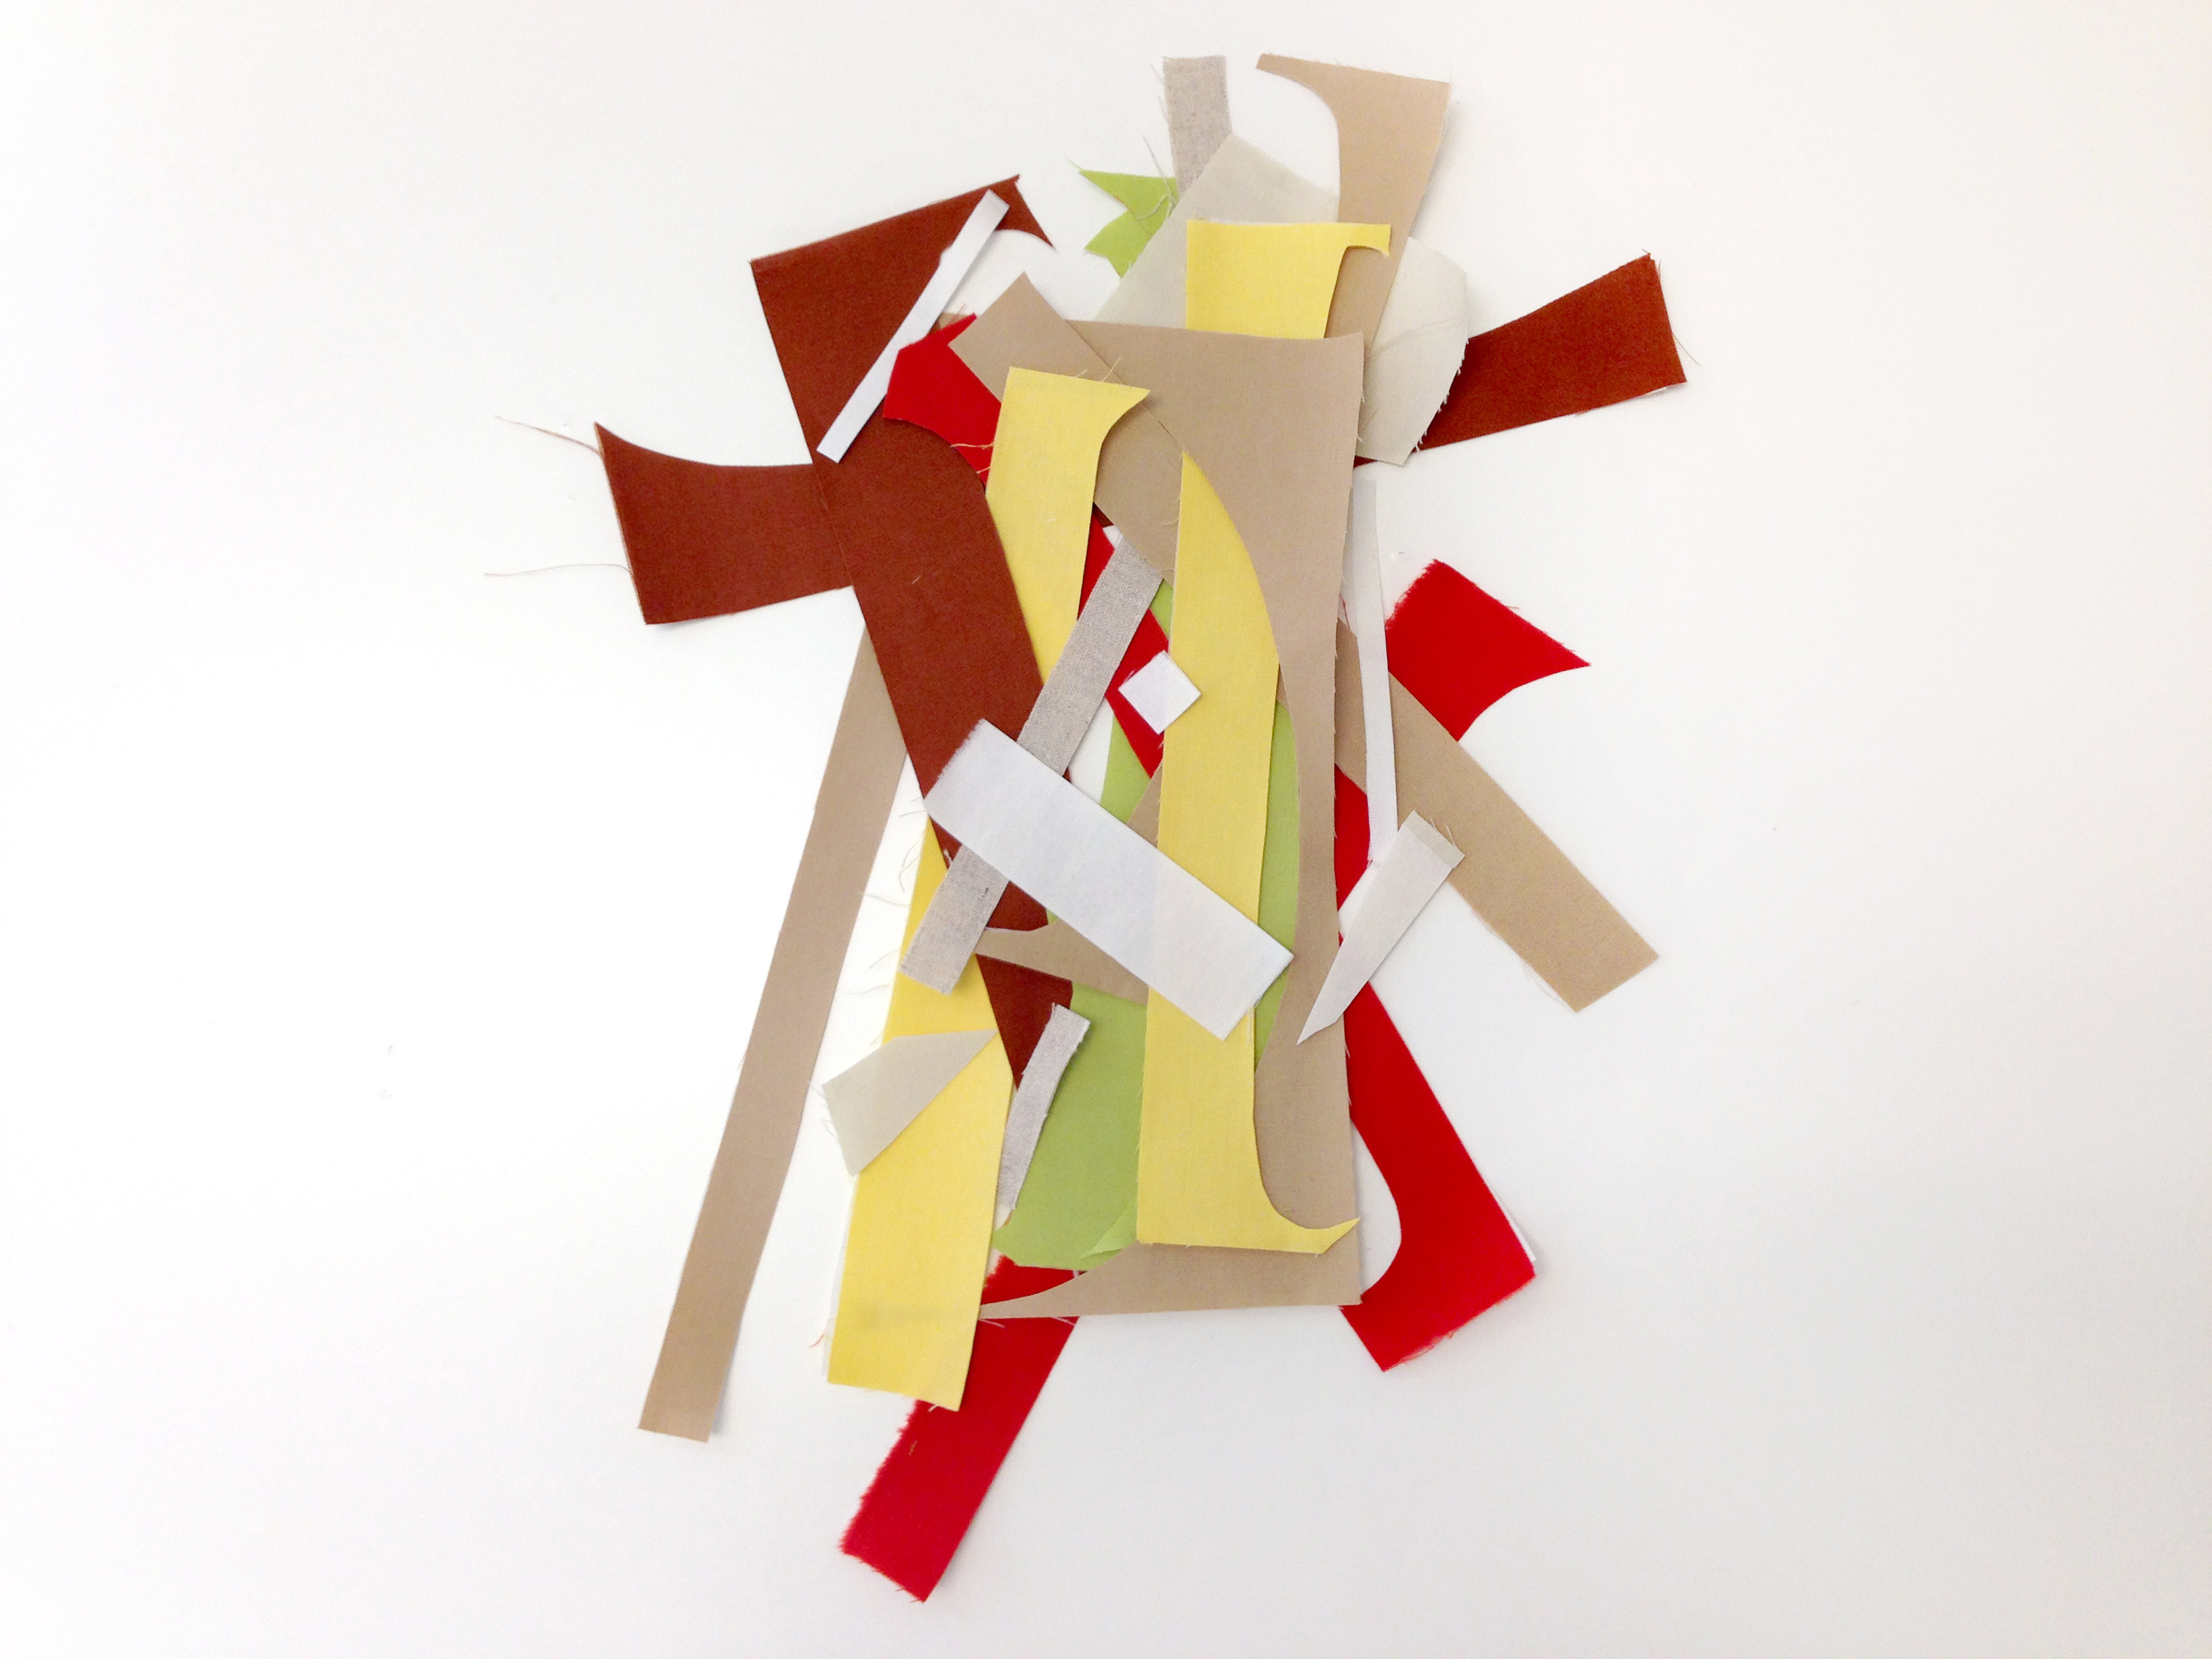
(Keep your scraps with Steam-A-Seam on them for future projects. The small leftover pieces are perfect for making fabric collages.)
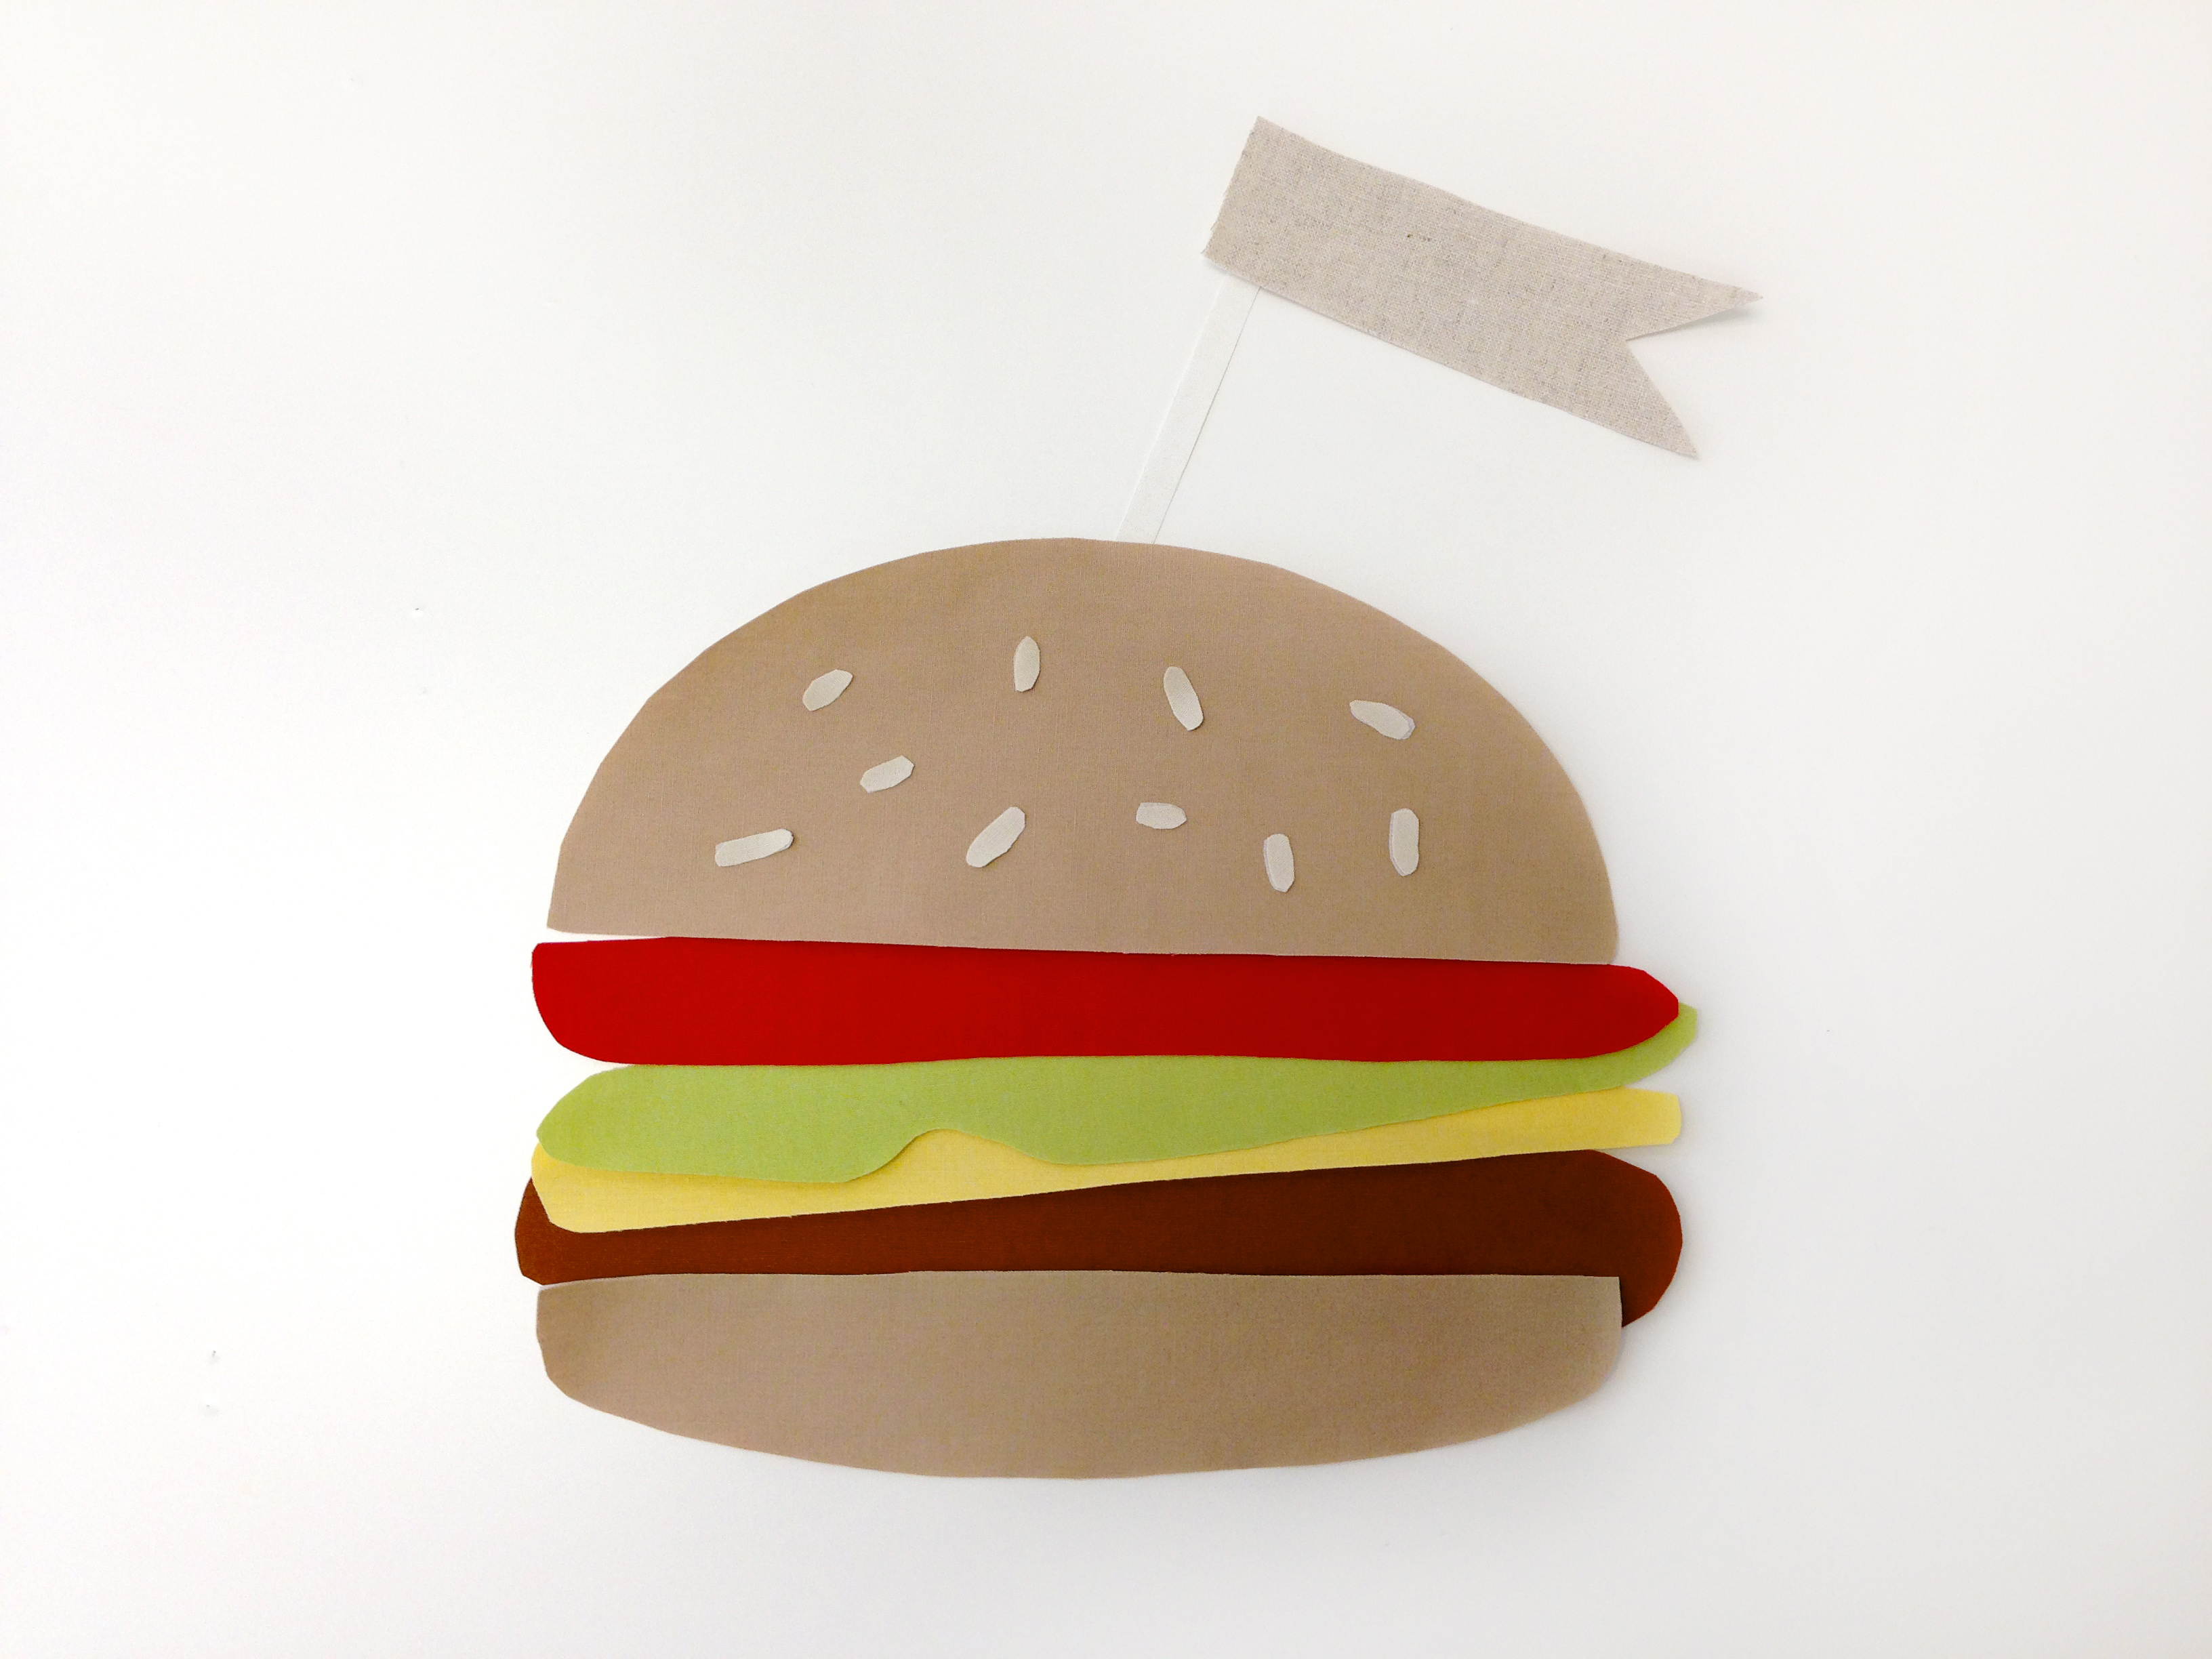
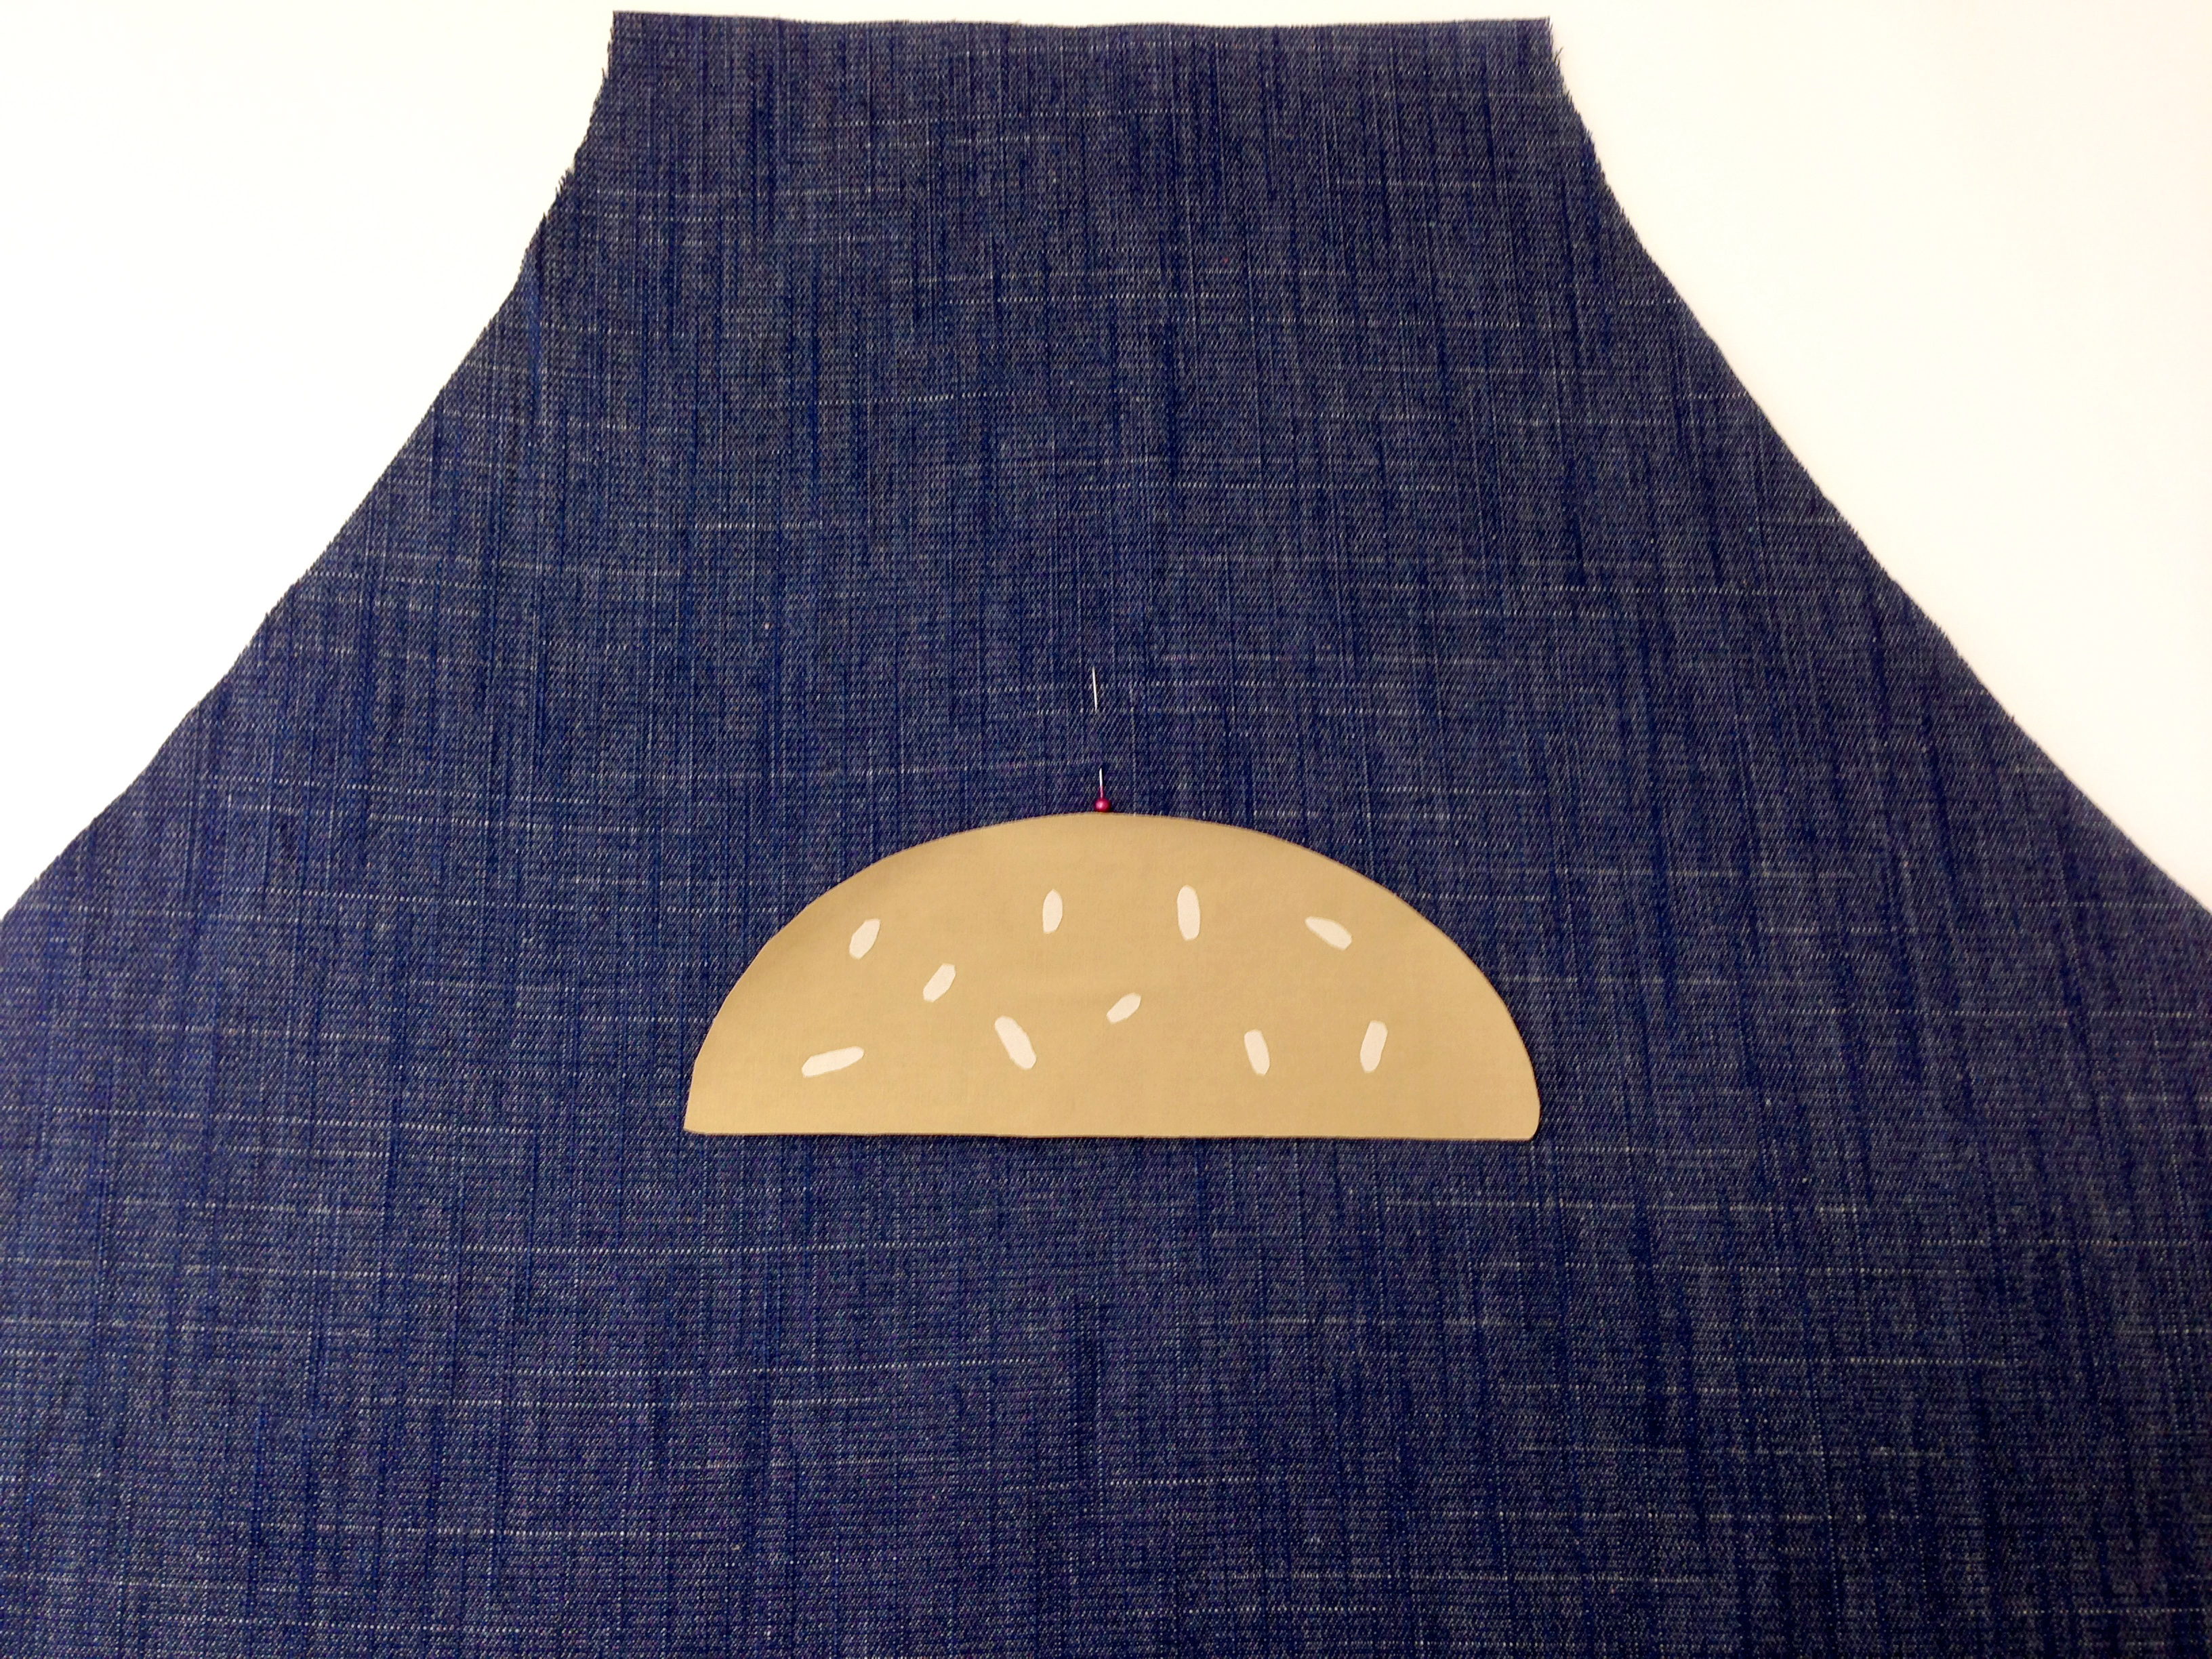
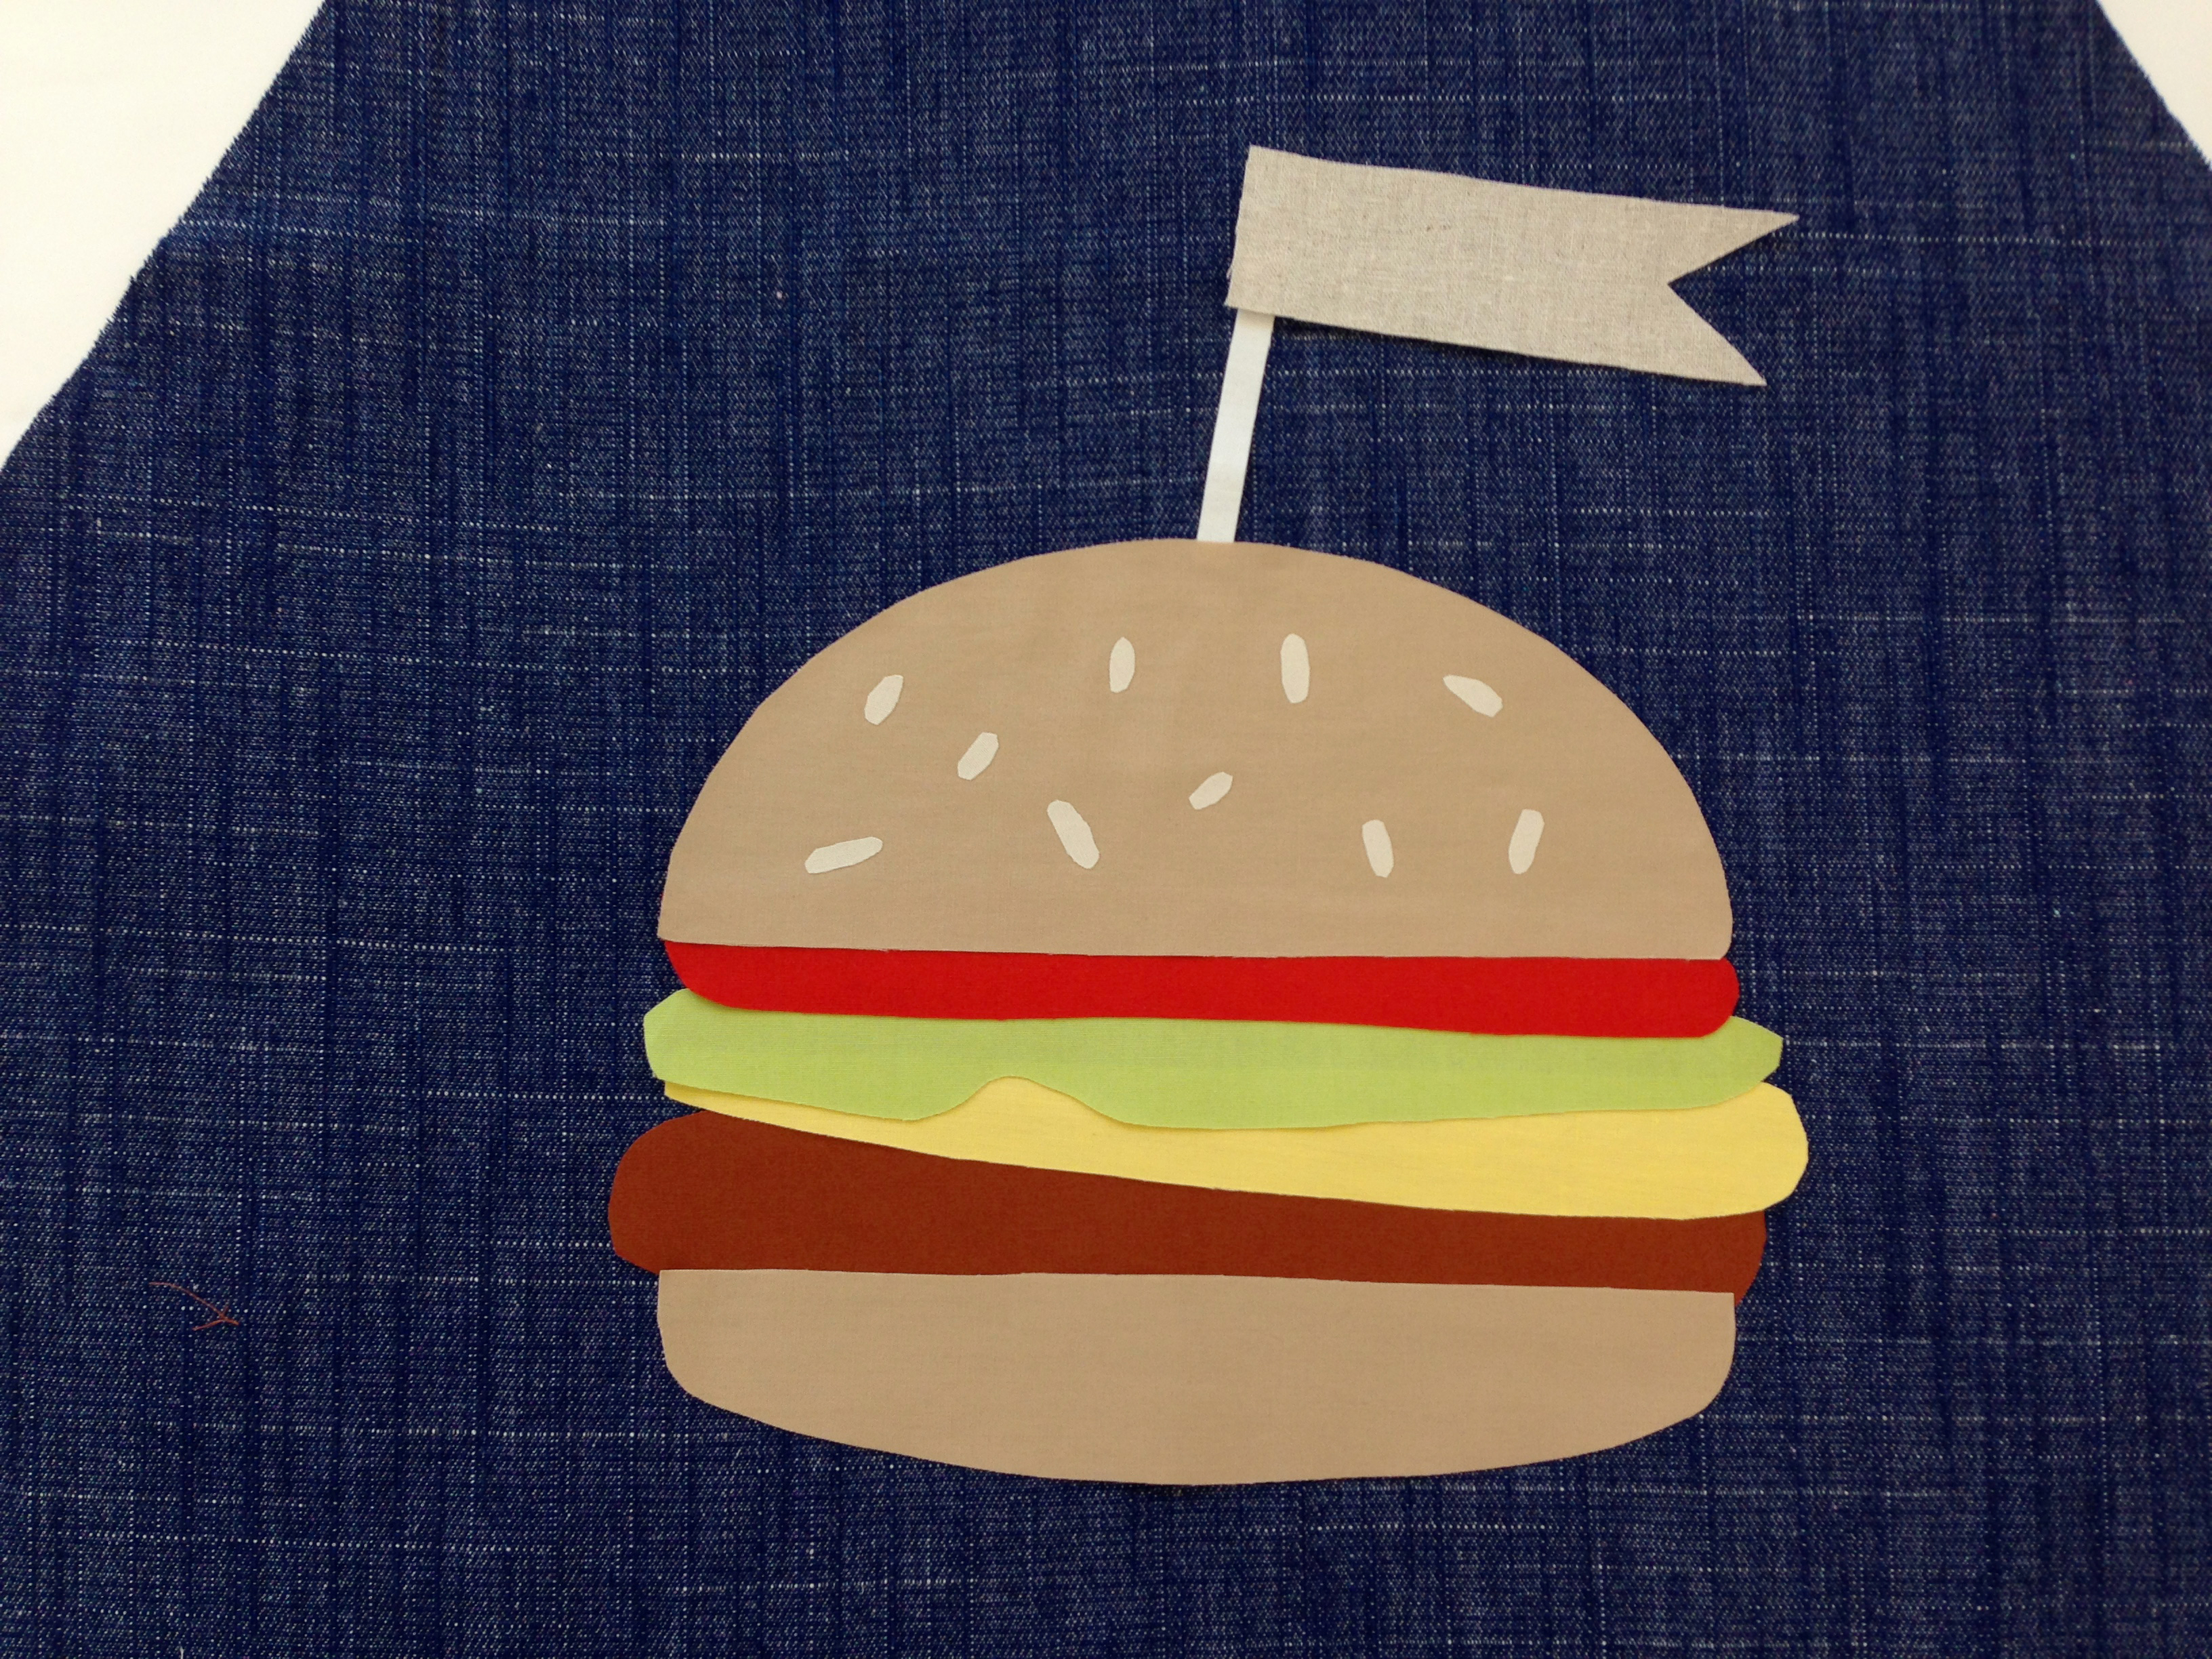
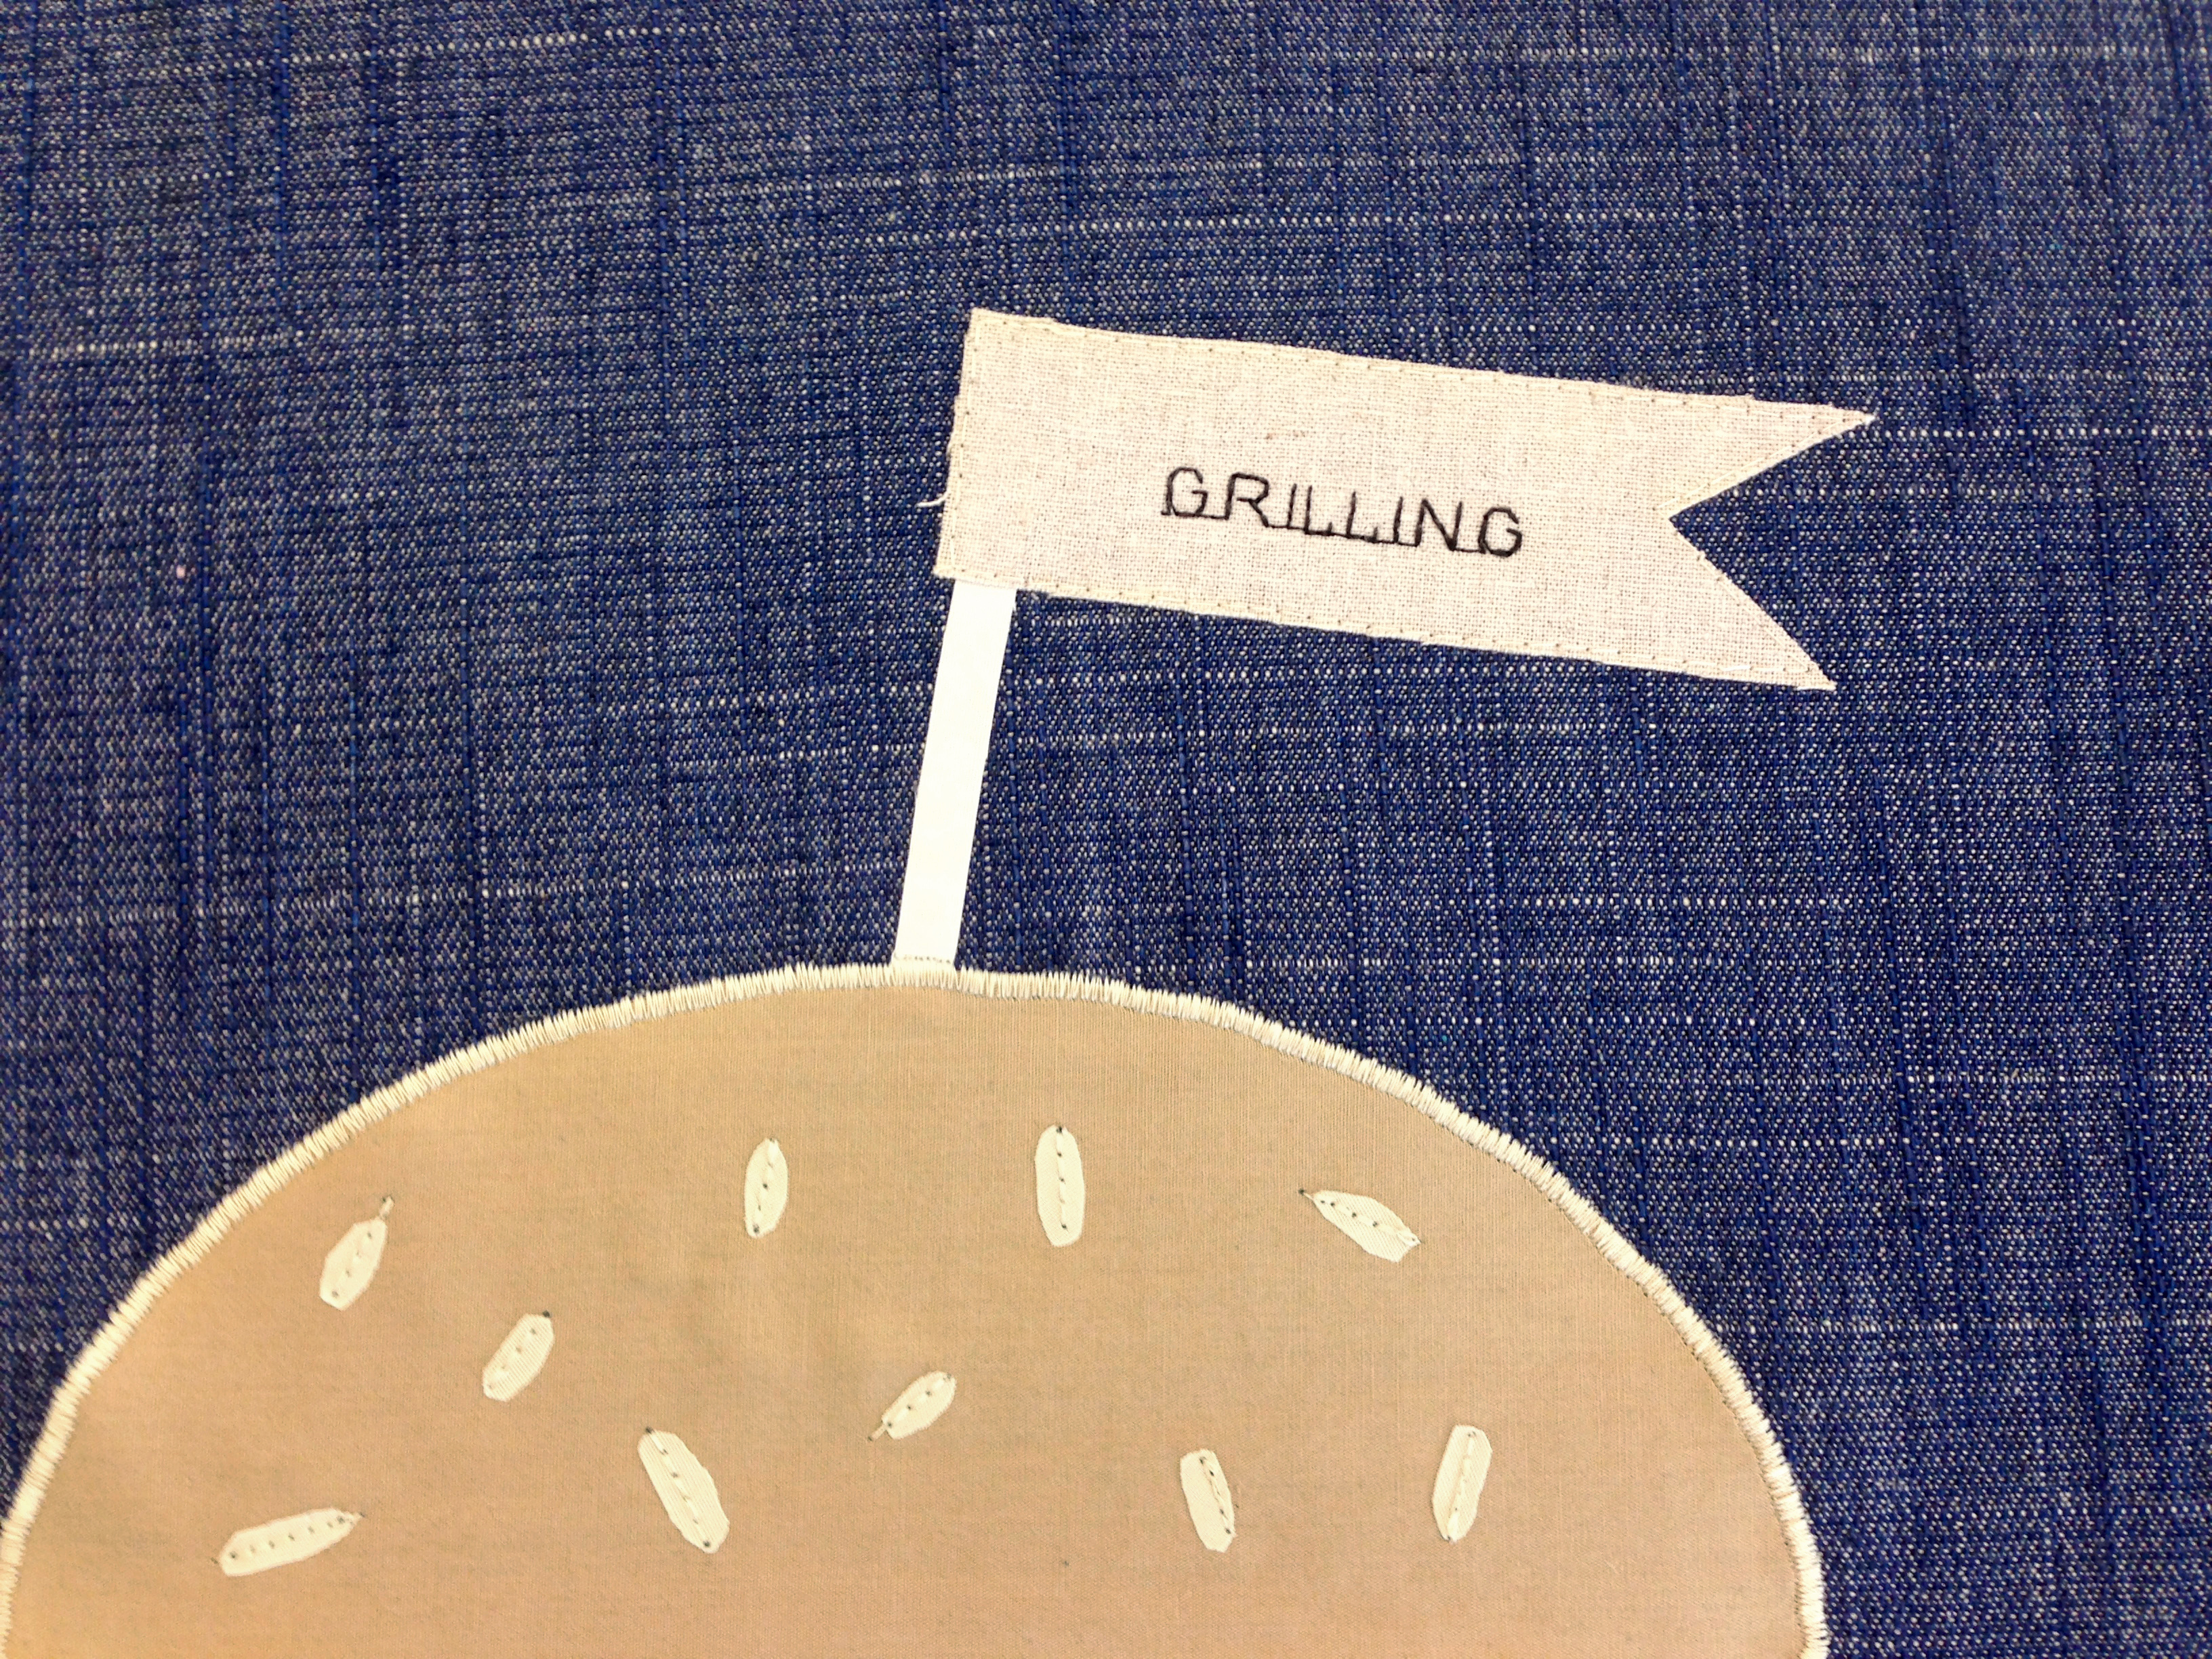
Take the backing paper off the sesame seeds and place onto your top bun and iron. Place your top bun centered to your front apron displayed where you would like it. Start peeling off the backing to all of your pieces and overlapping or tucking pieces under to create your burger .
Step 3: Securing your Appliqué
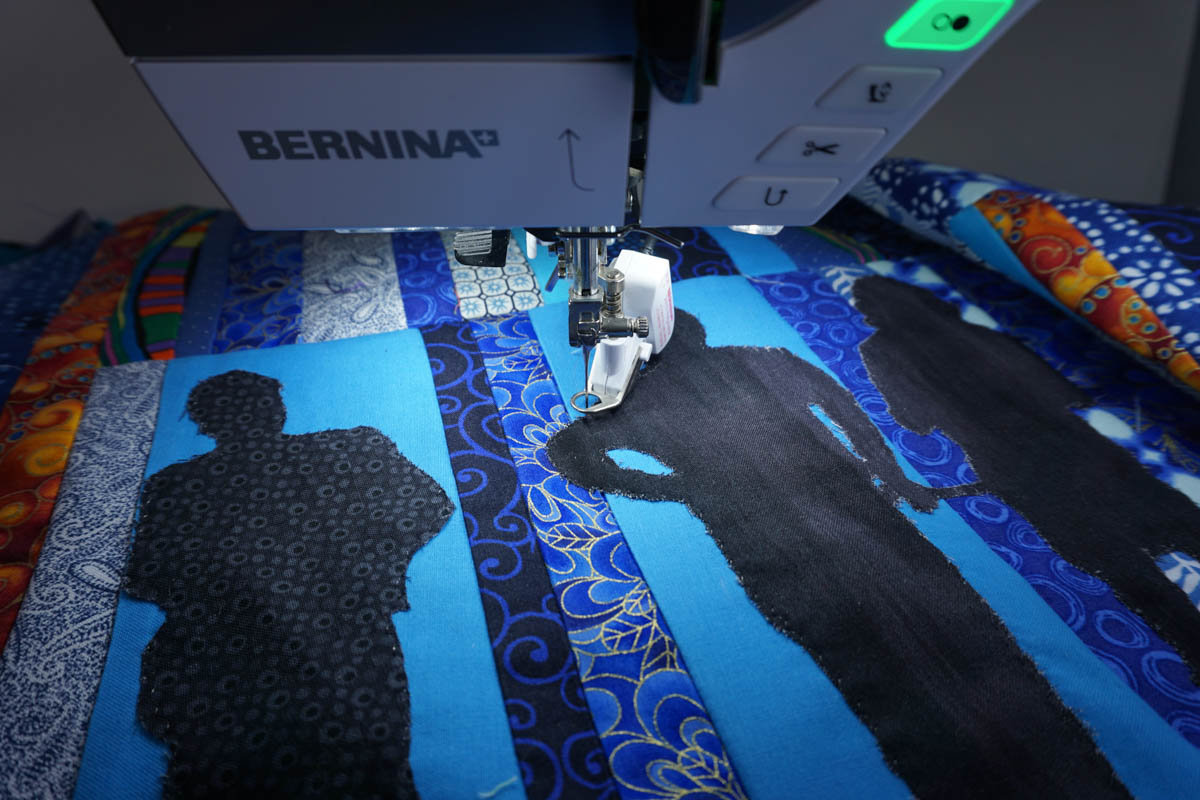
Select a small zigzag stitch and attach the Open embroidery foot #20 to your machine. Slowly sew around your burger appliqué using the BERNINA Free-Hand System as a tool to pivot around the corners.
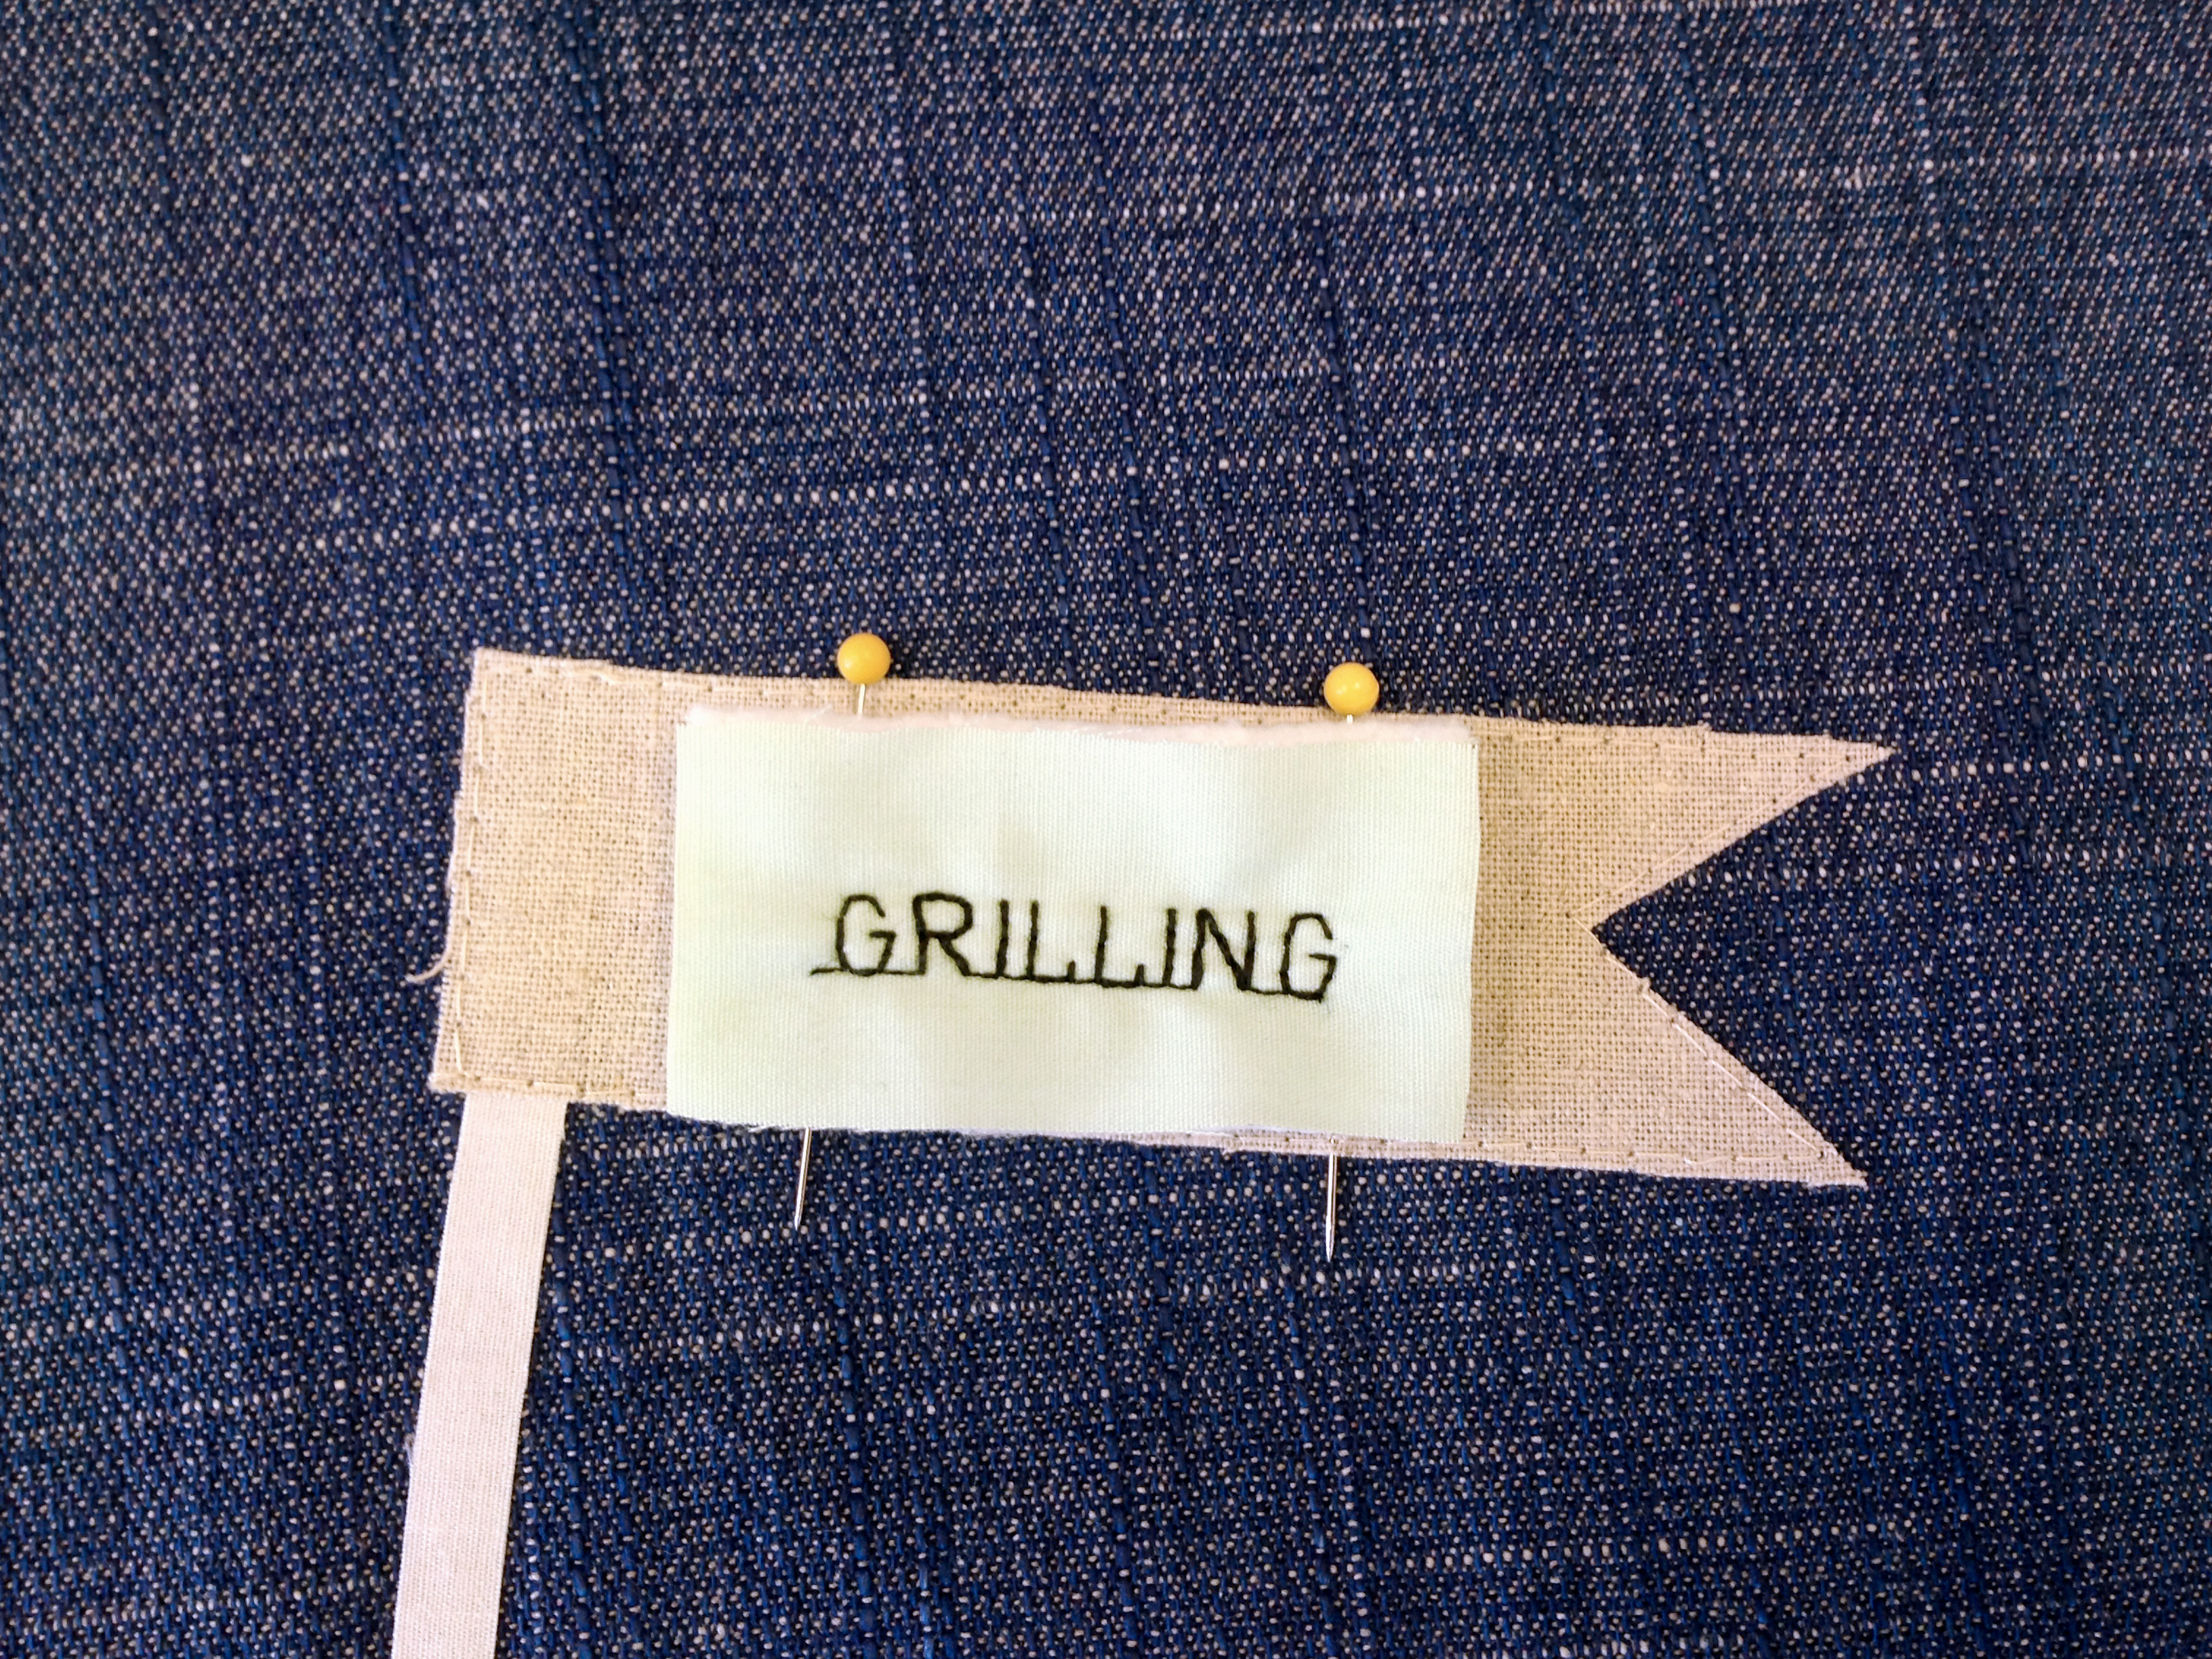
To secure the banner I used the Blindstitch foot #5 and a straight stitch. Place your needle all the way to the left and place the metal guide at the edge of your banner, and stitch around piece. This allows for a nice close stitch.

Step 4: Sewing Text
To learn how to program alphabets and numbers on your BERNINA machine click here.
I programmed the word grilling. Use a test piece of fabric to see how long and wide your word will be. Place two pins where you would like to sew the text, placing them at the start and end of your word.
My screen looks like this after I programmed my letters.
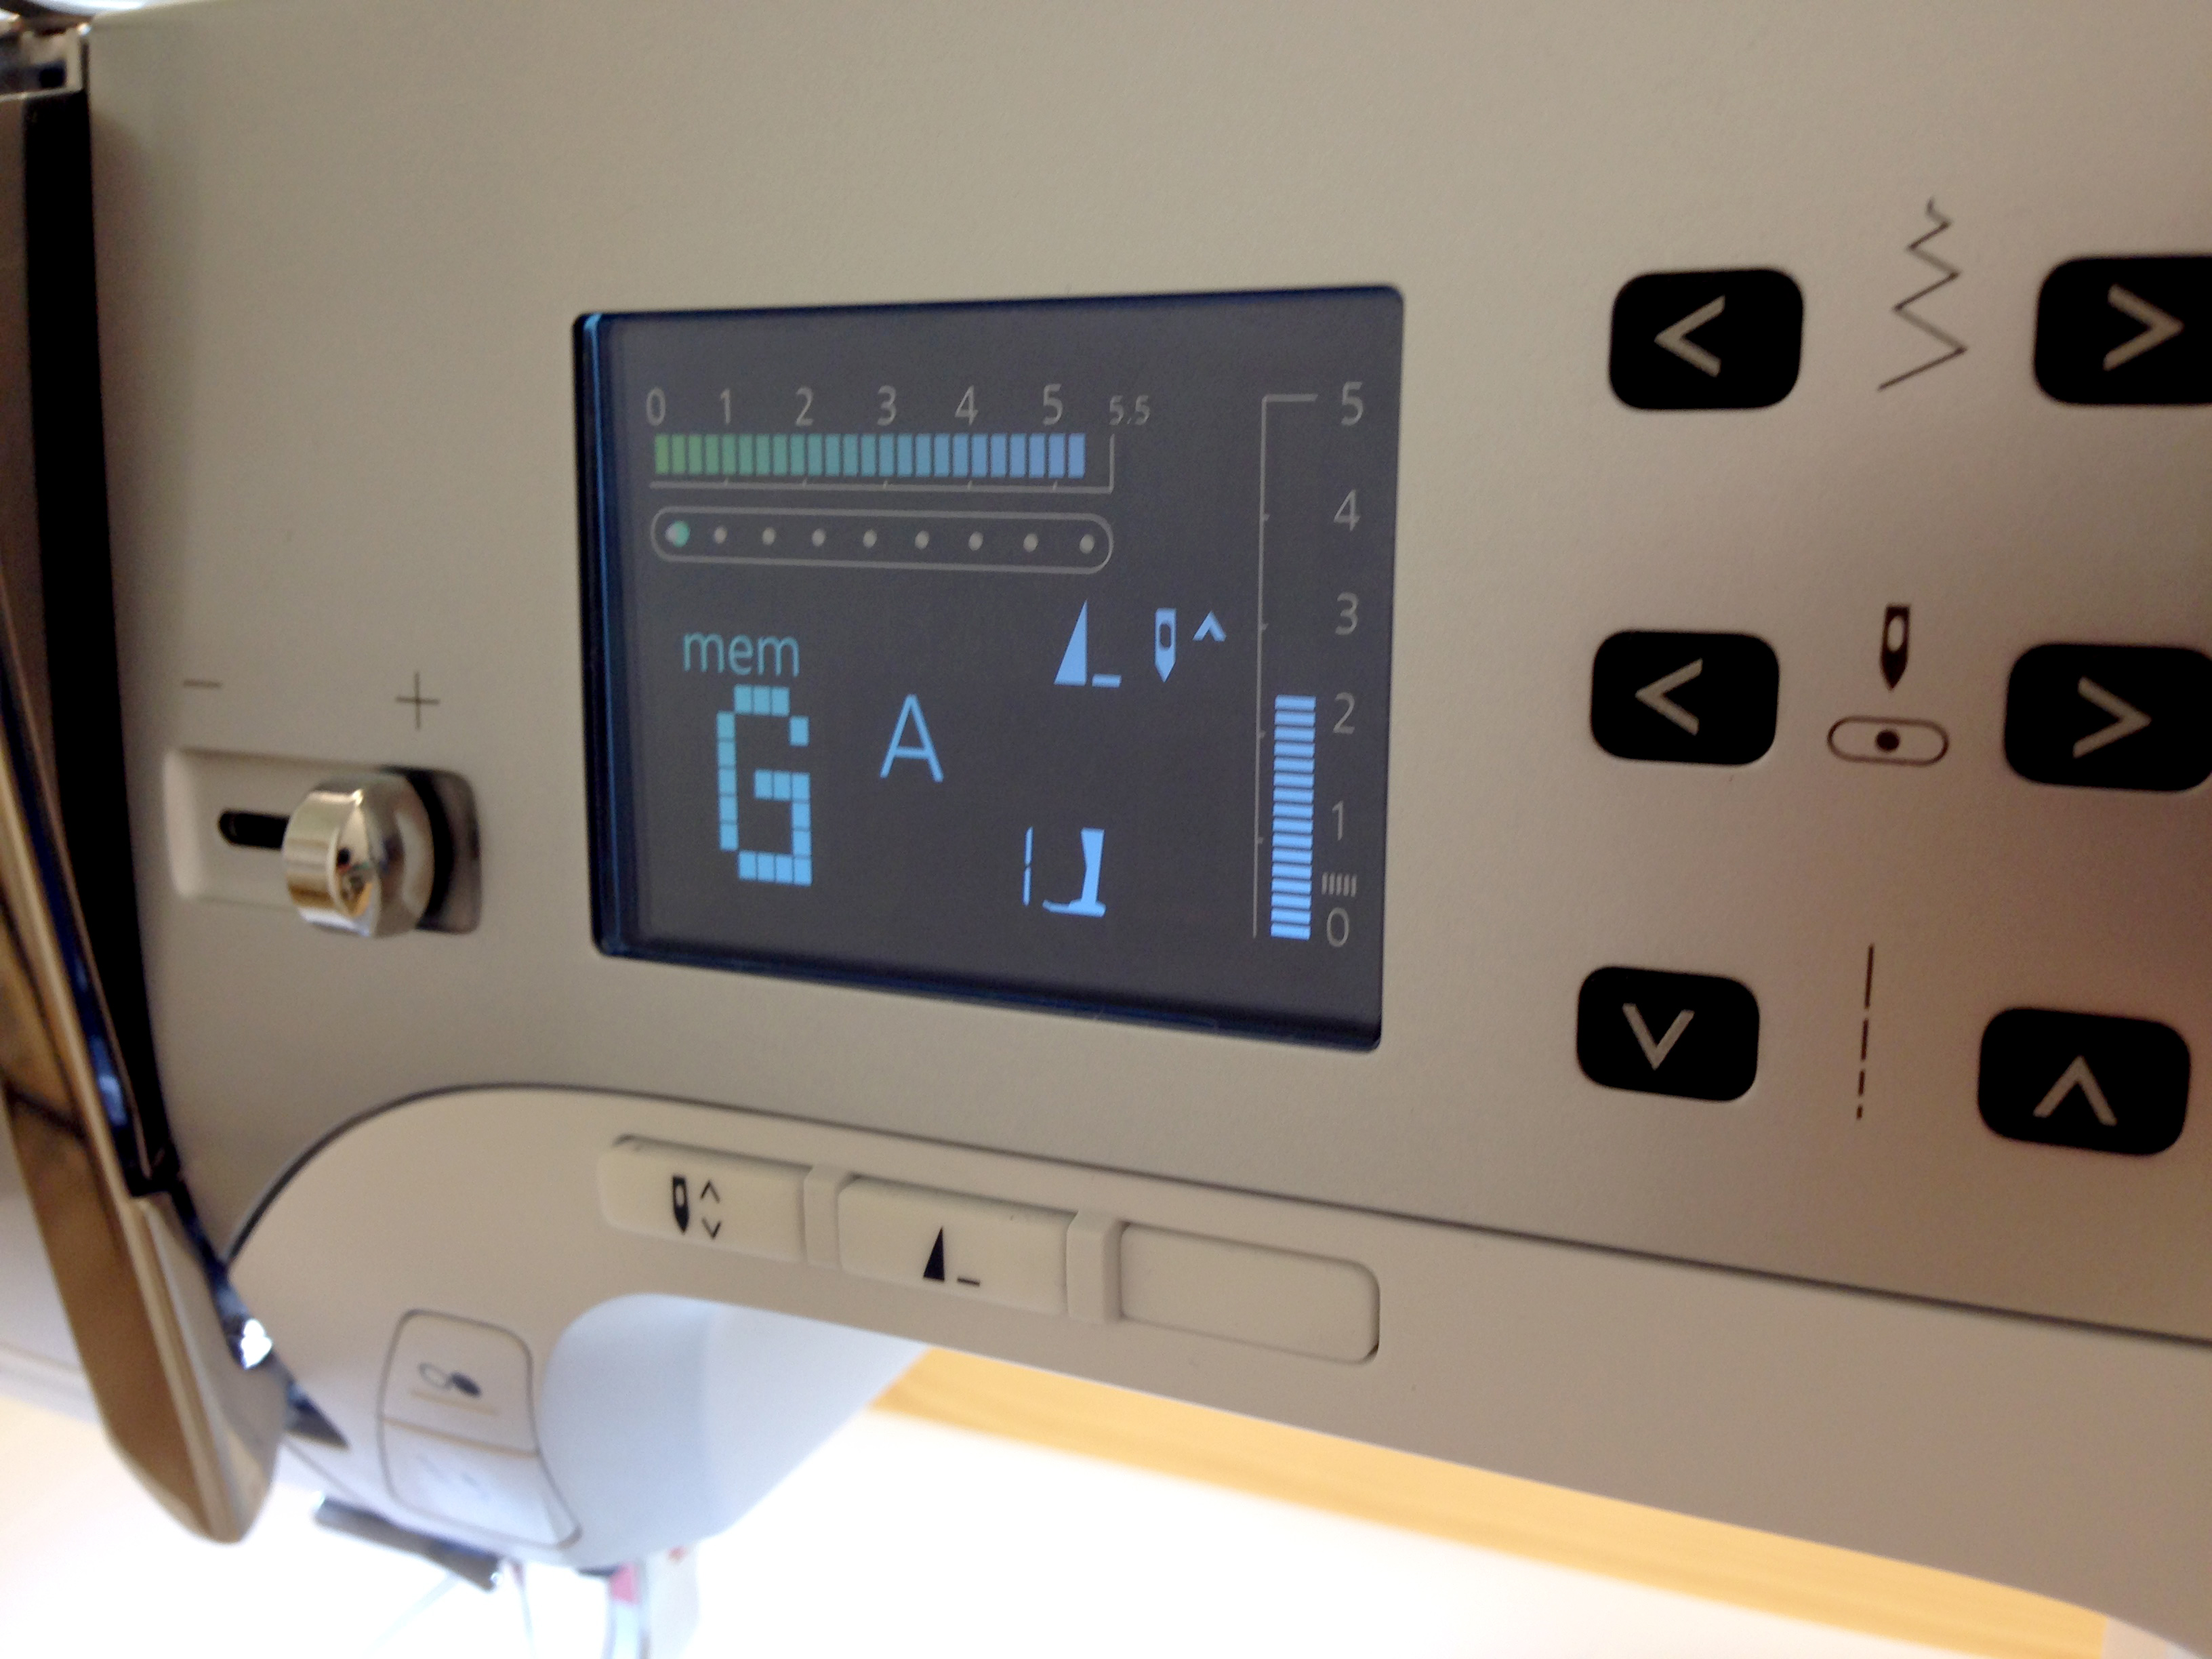
Make sure to push the pattern end button so your machine will stop sewing after your word is stitched.
Step 5: Creating the Straps
To find out what your neck strap measurement will be, use a measuring tape and place it around your neck. Place the ends where your apron will sit on your chest. My measurement was 21 1/2″ long. With this measurement, once the strap is sewn to my apron it will lay where I want it and I am able to pull it off and over my head.
Watch this video and learn how to sew the straps for your apron.

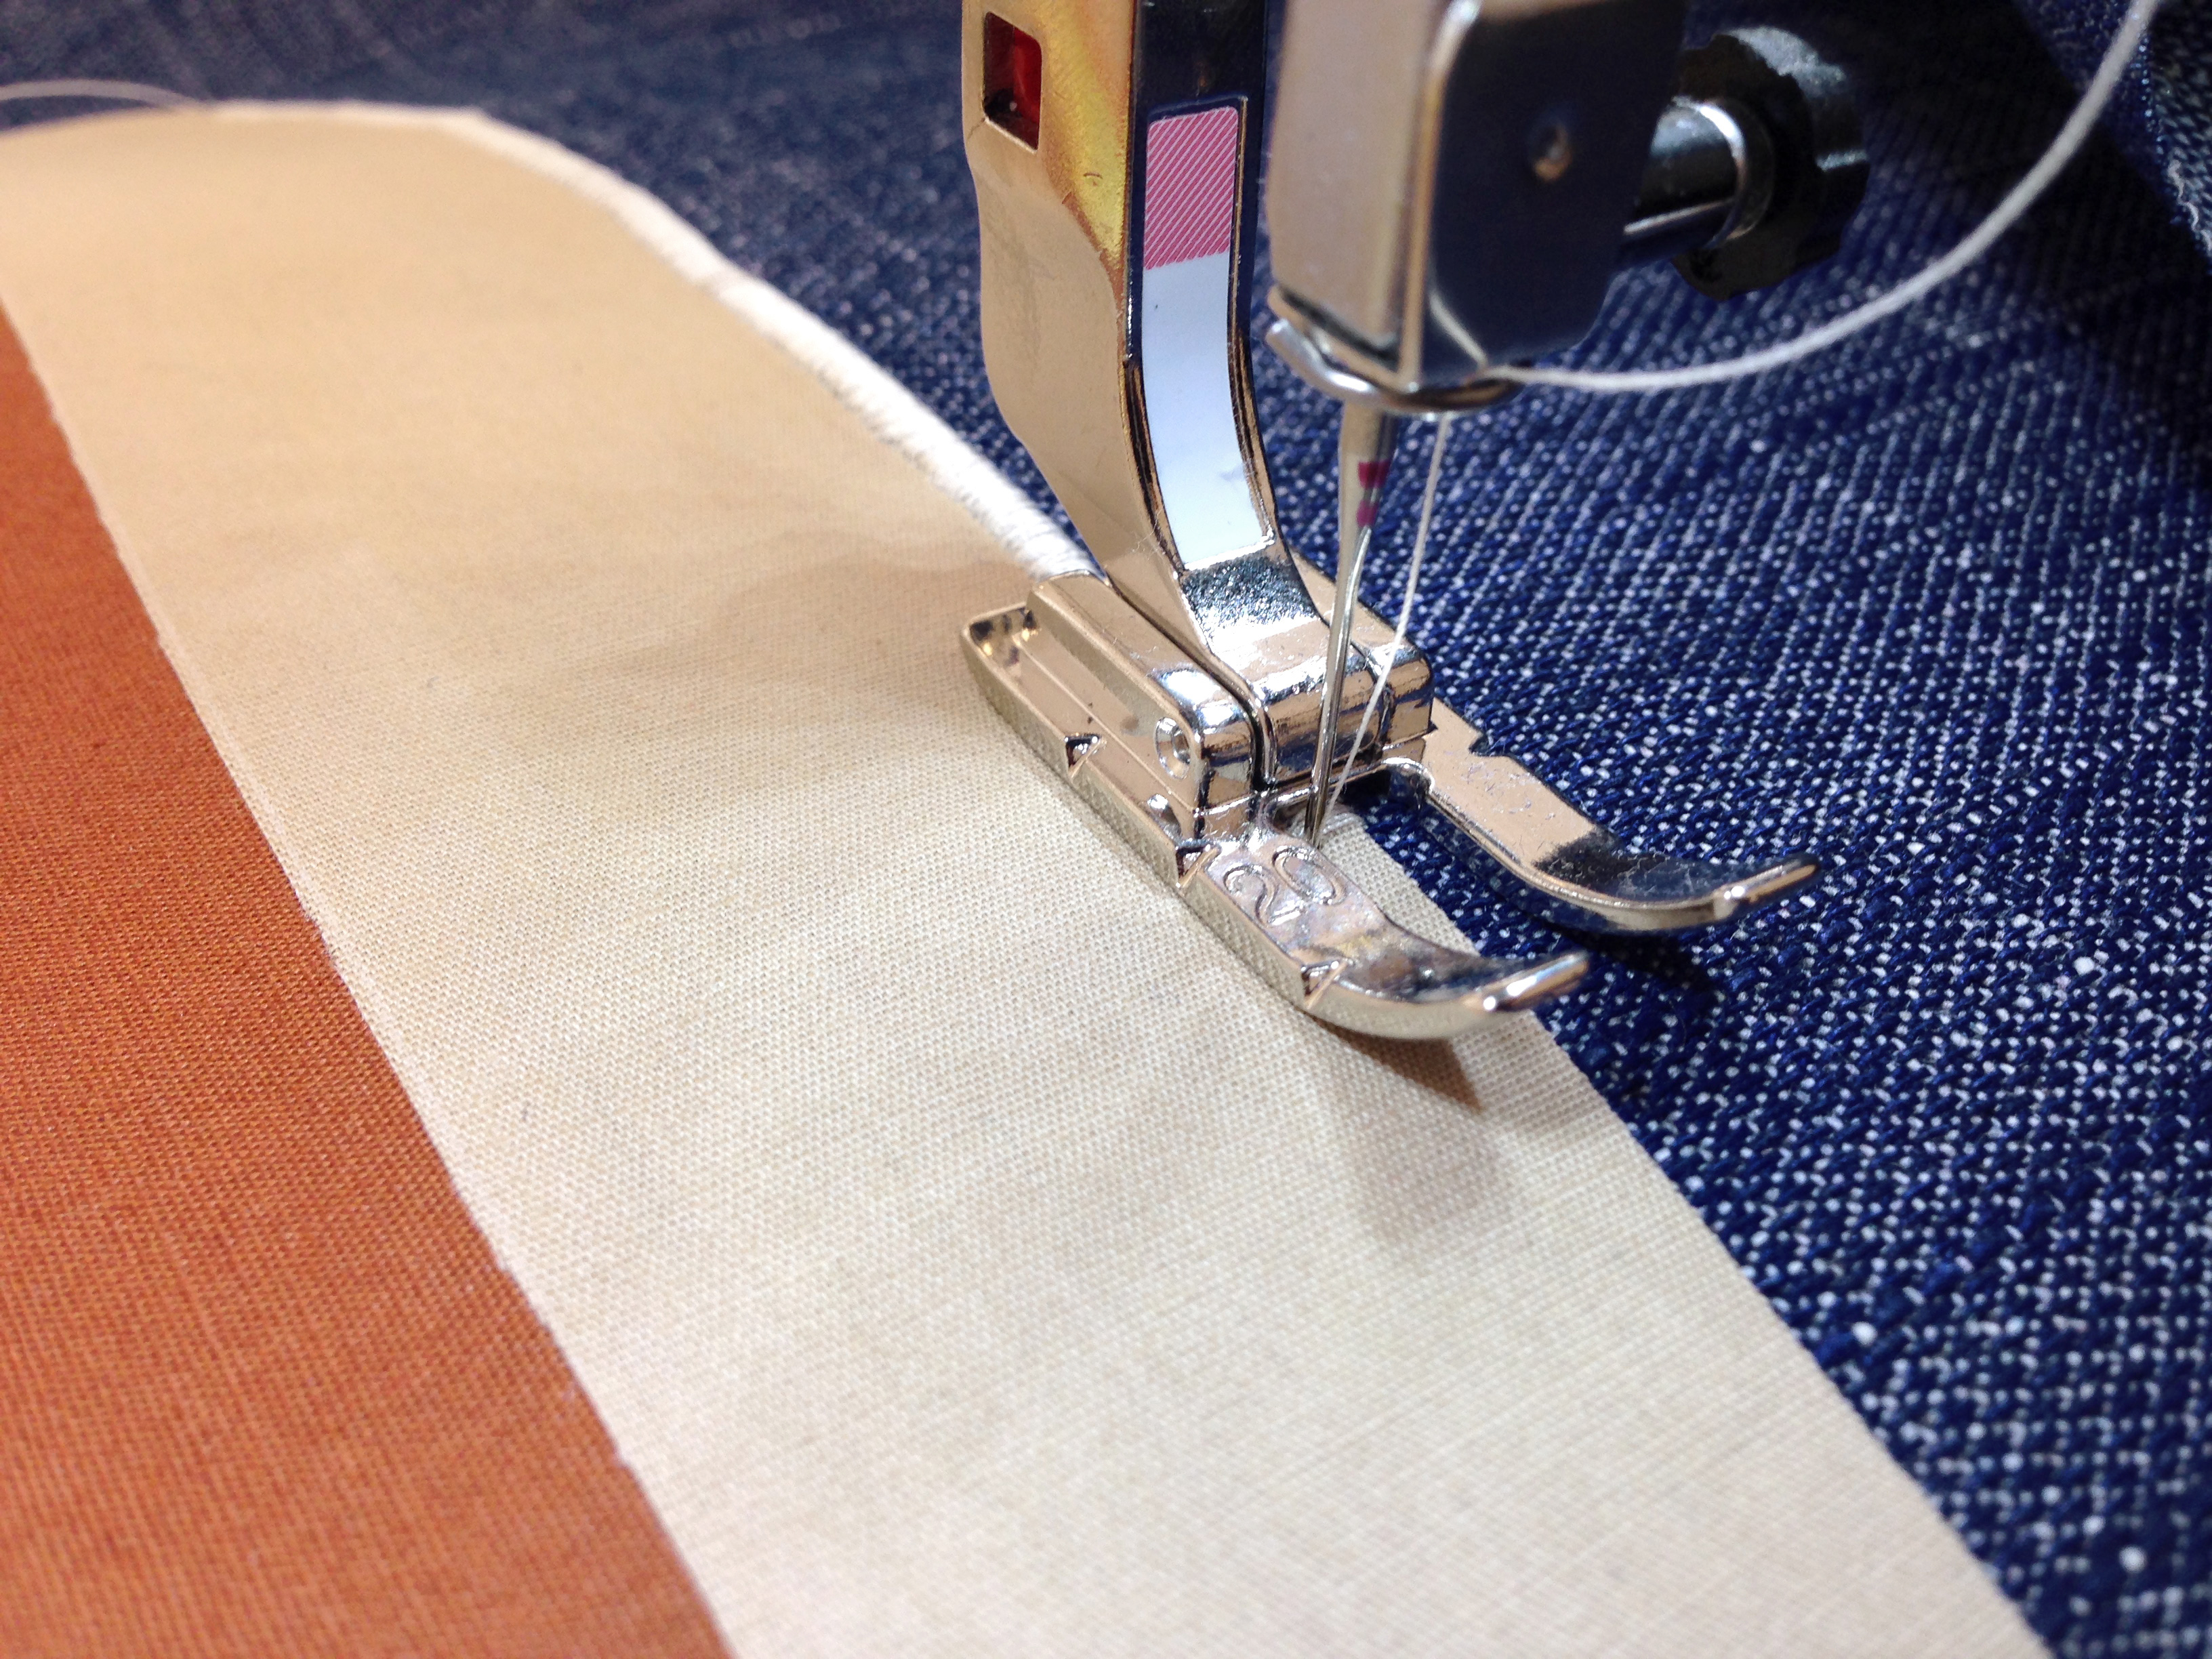
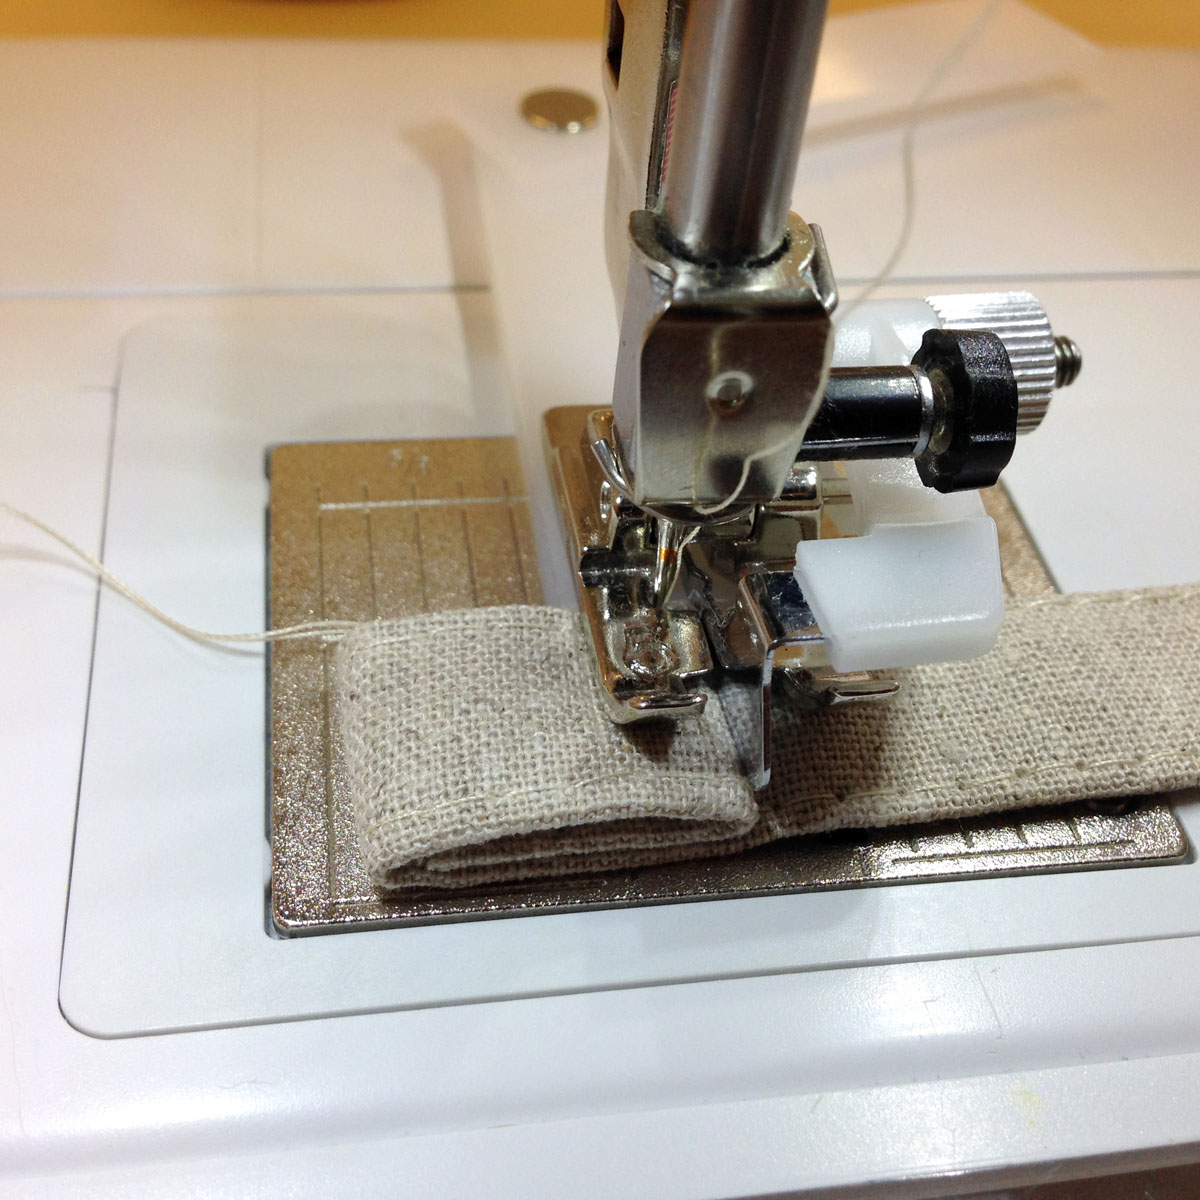
Take your neck strap and fold raw edges into the center of your strip and press. Fold open piece and fuse a 1″ wide strip of fusible fleece, lining it up with the crease you made when pressing the piece. The fusible fleece makes a nice and comfy neck strap. Fold piece in half and press. Topstitch on both sides of your strap.
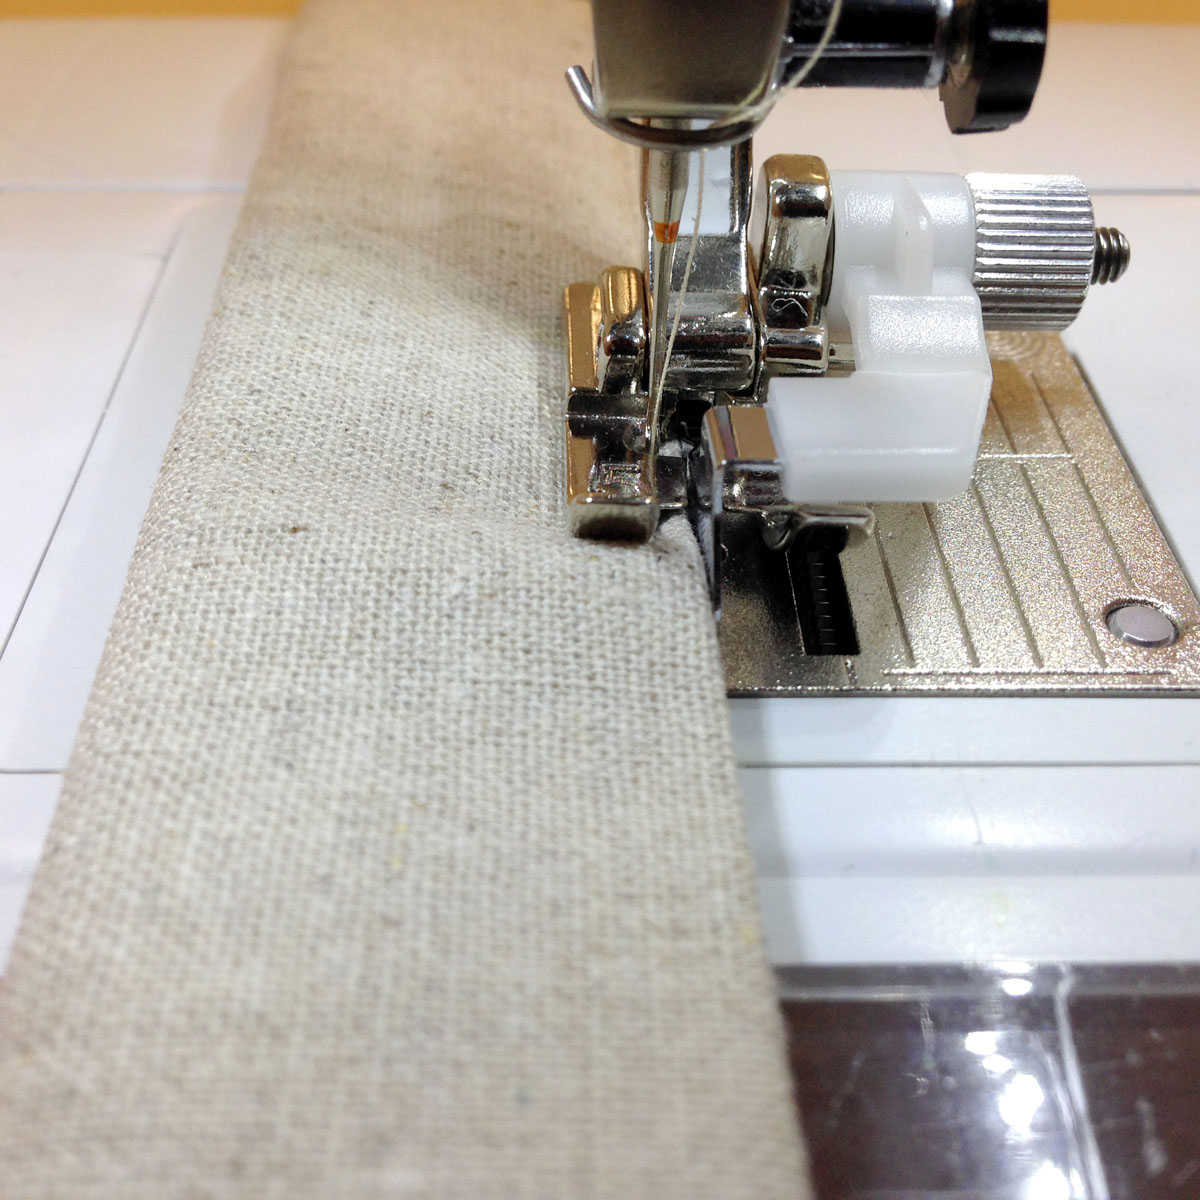
I used the Blindstitch foot #5 to get as close to the sides of the strap while helping you to keep my stitching nice and straight using the guide on the foot.
Use this same method to create your waist tie straps. You will not need any fusible for these straps.To finish one of the raw ends on your waist tie straps fold end 3/4″ and then fold 3/4″ again and press. Using the Blindstitch Foot with the needle all the way to the left and the needle down activated. Stitch from one end to the other. Stitch a few times to make sure end of strap is secure.
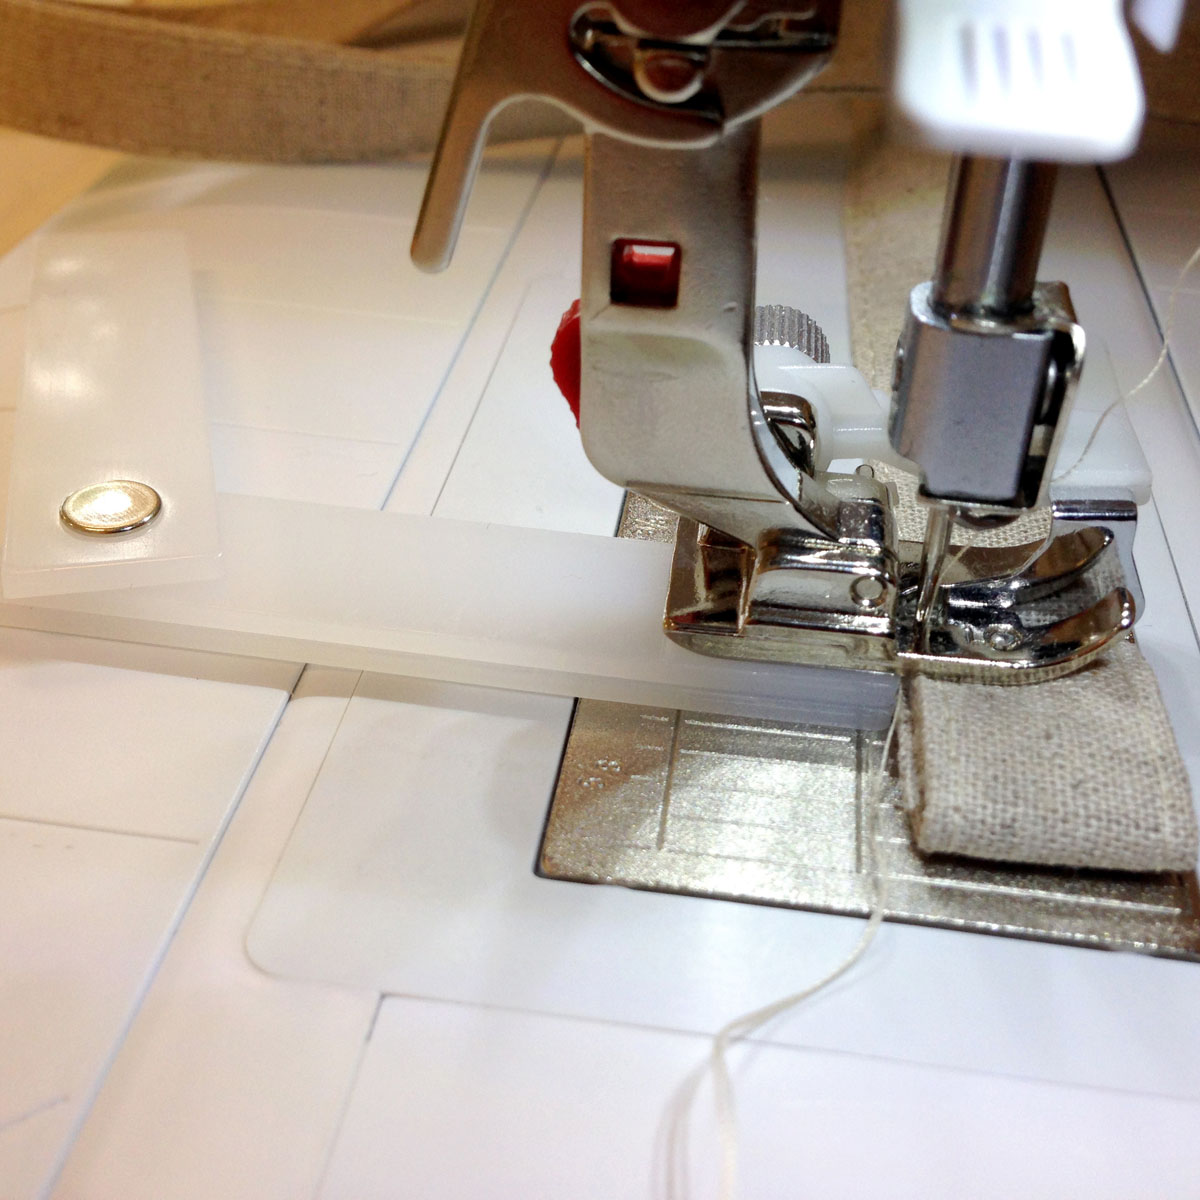
When sewing the ends of the strap the height compensating tool comes in handy. Place under your presser foot to even out the foot. Using this strap making technique as well as using your height compensating tool and Blindstitch foot will make for perfect and professional looking straps every time.

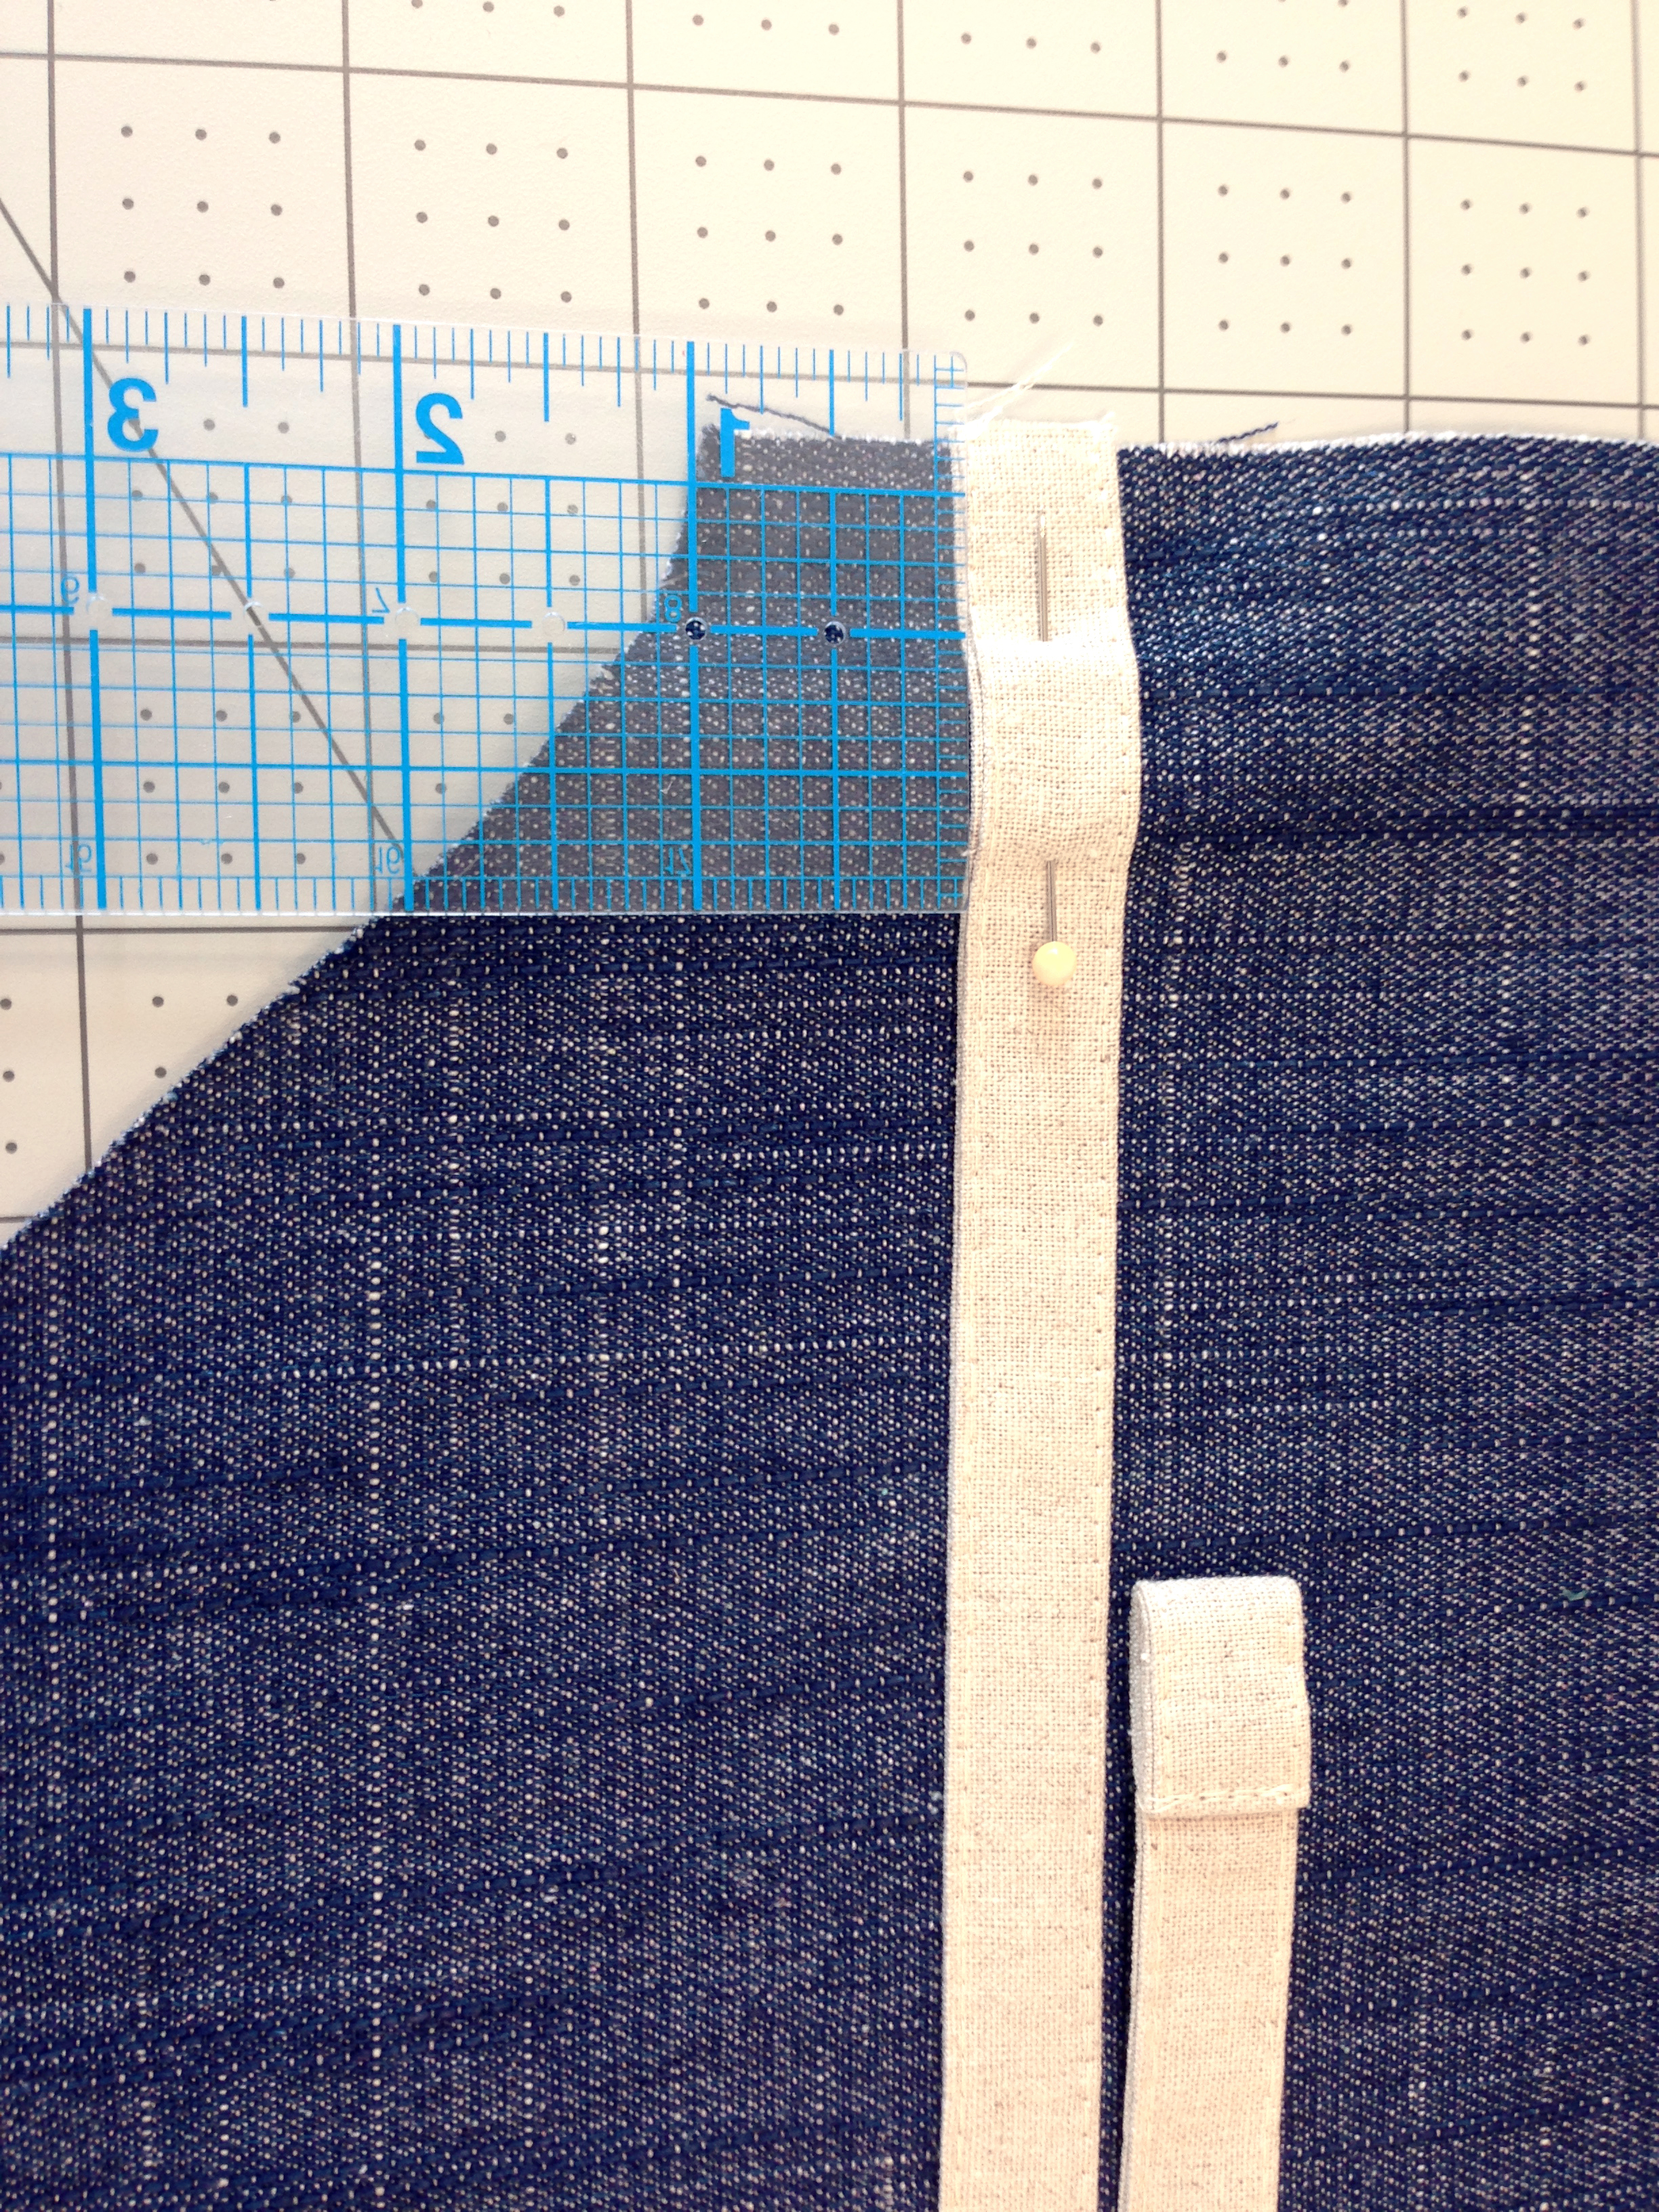
Step 6: Sewing the straps to your apron
Sew at 1/4″ to secure straps to apron. Sew your finished neck strap ends about 1″ in from the top of your apron.
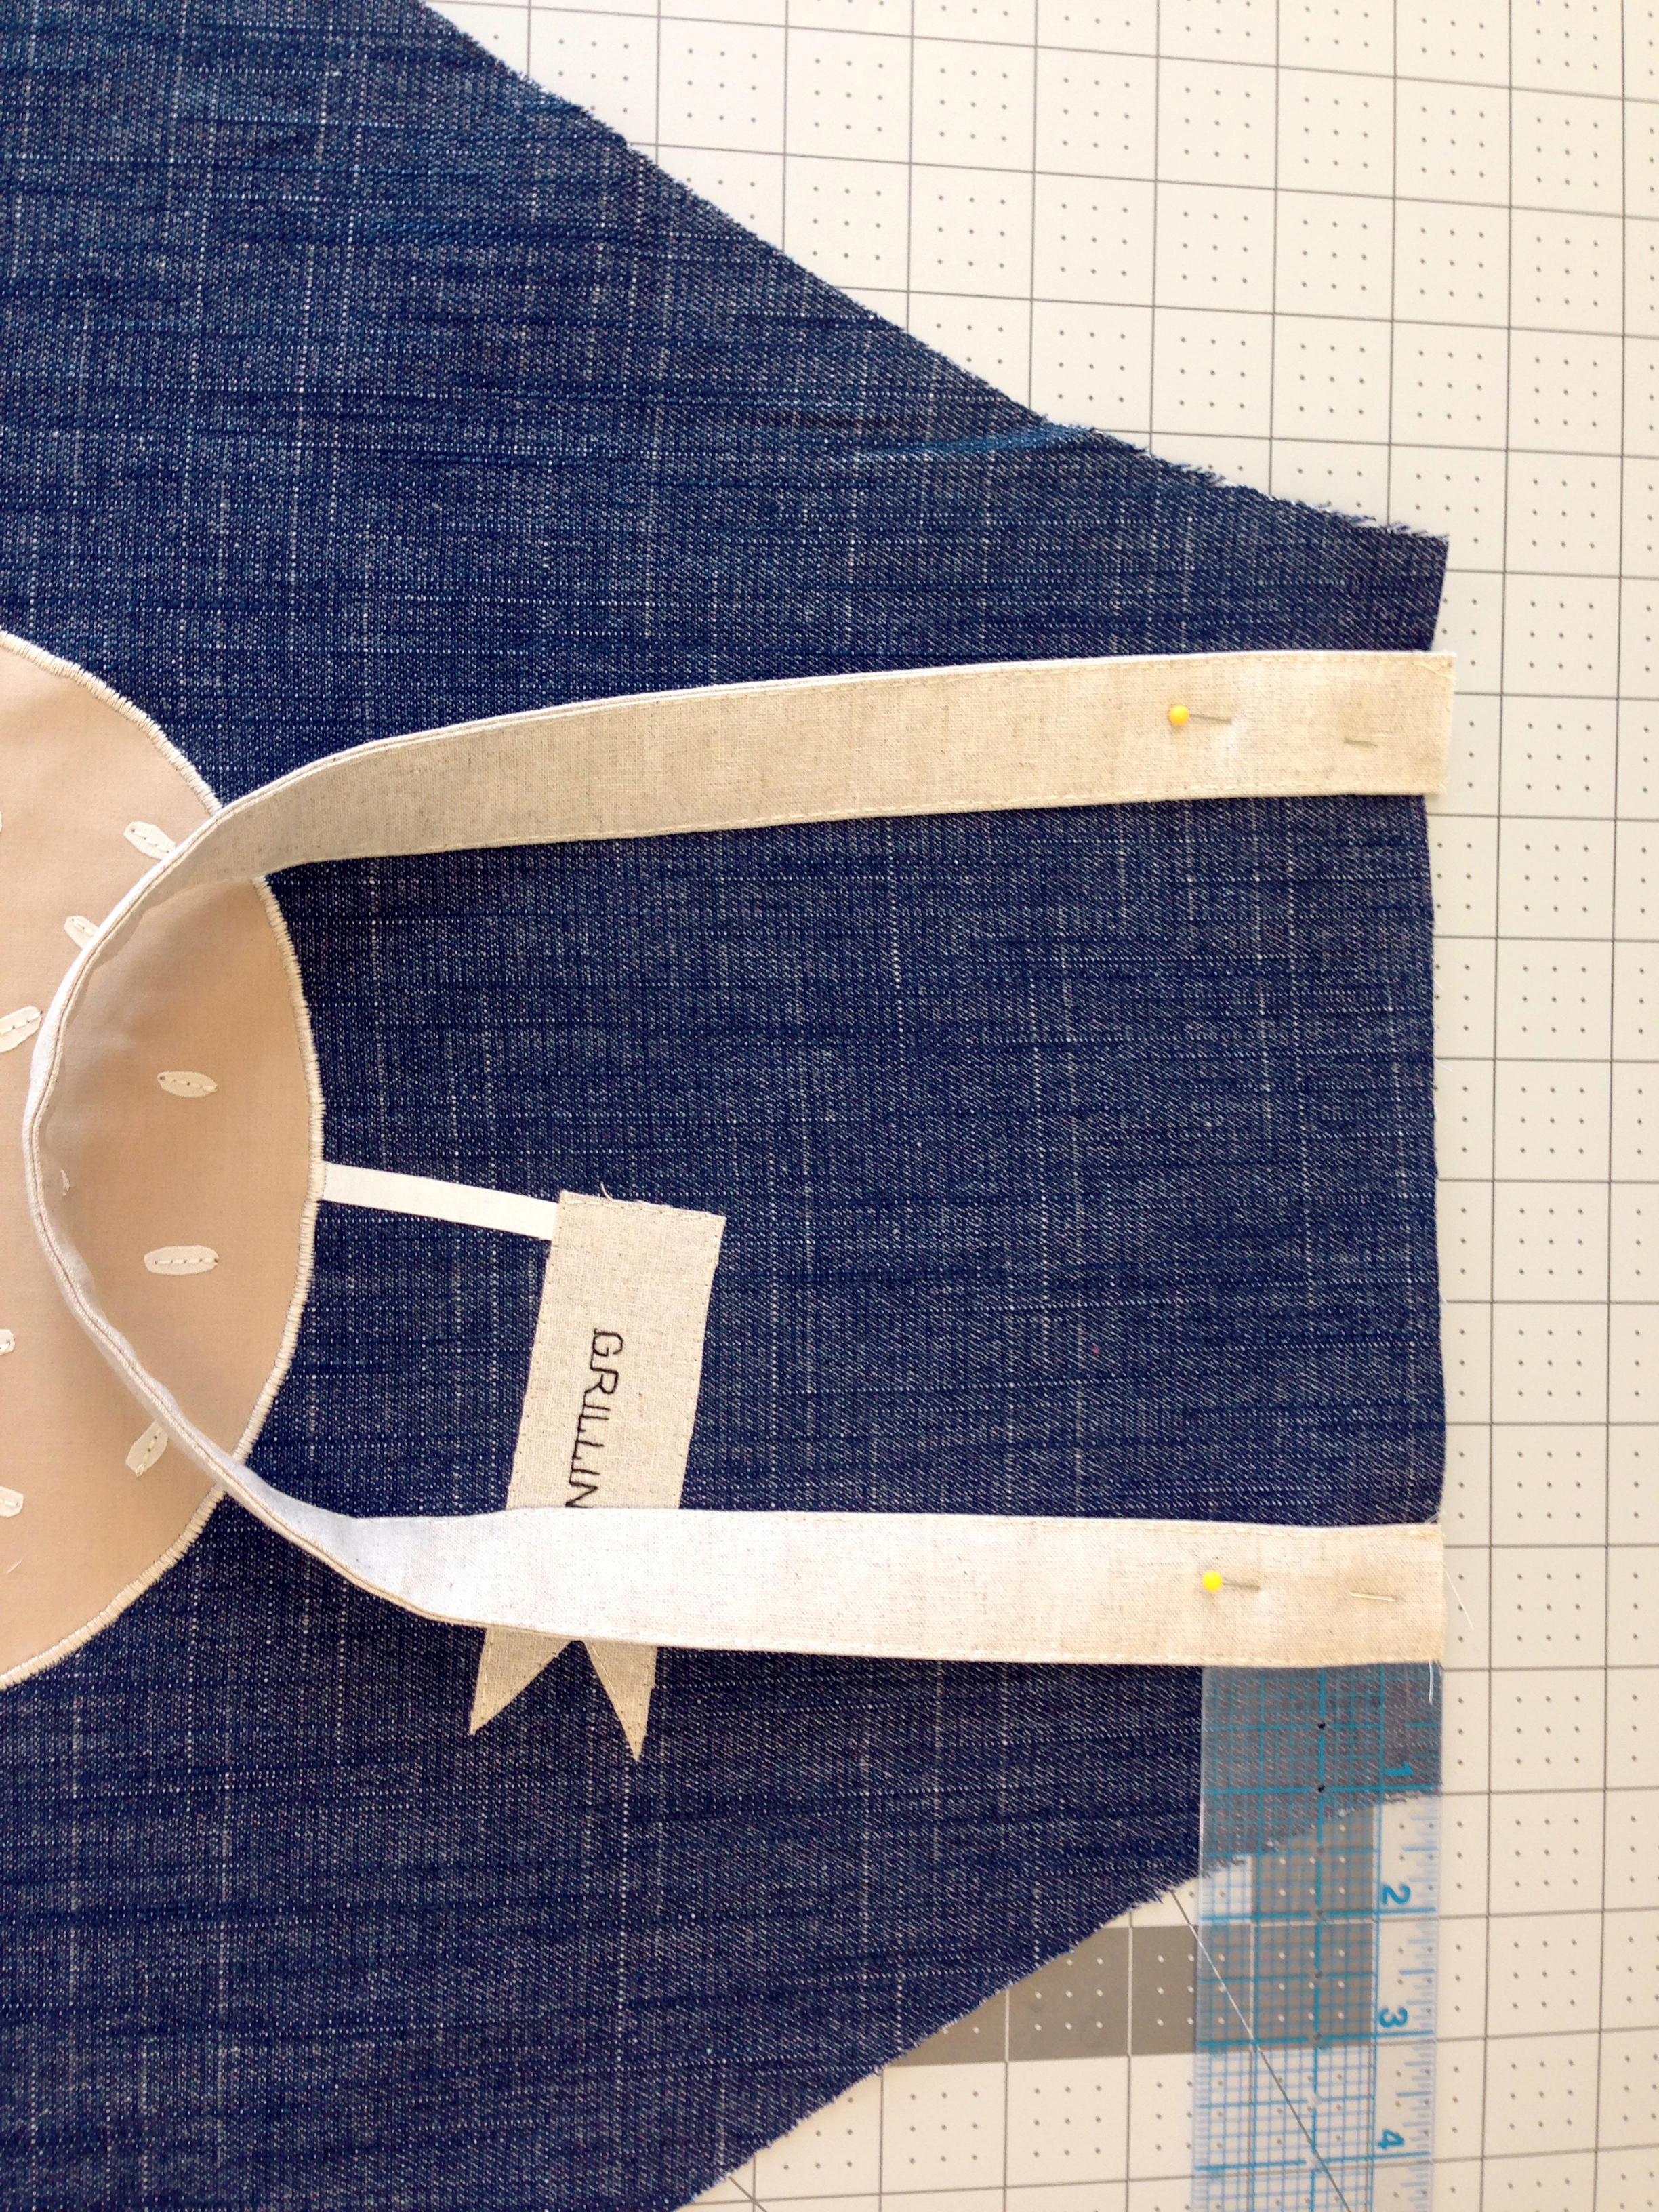
Sew your waist tie straps about 1″ down from your side seam.
Step 7: Attaching the Lining
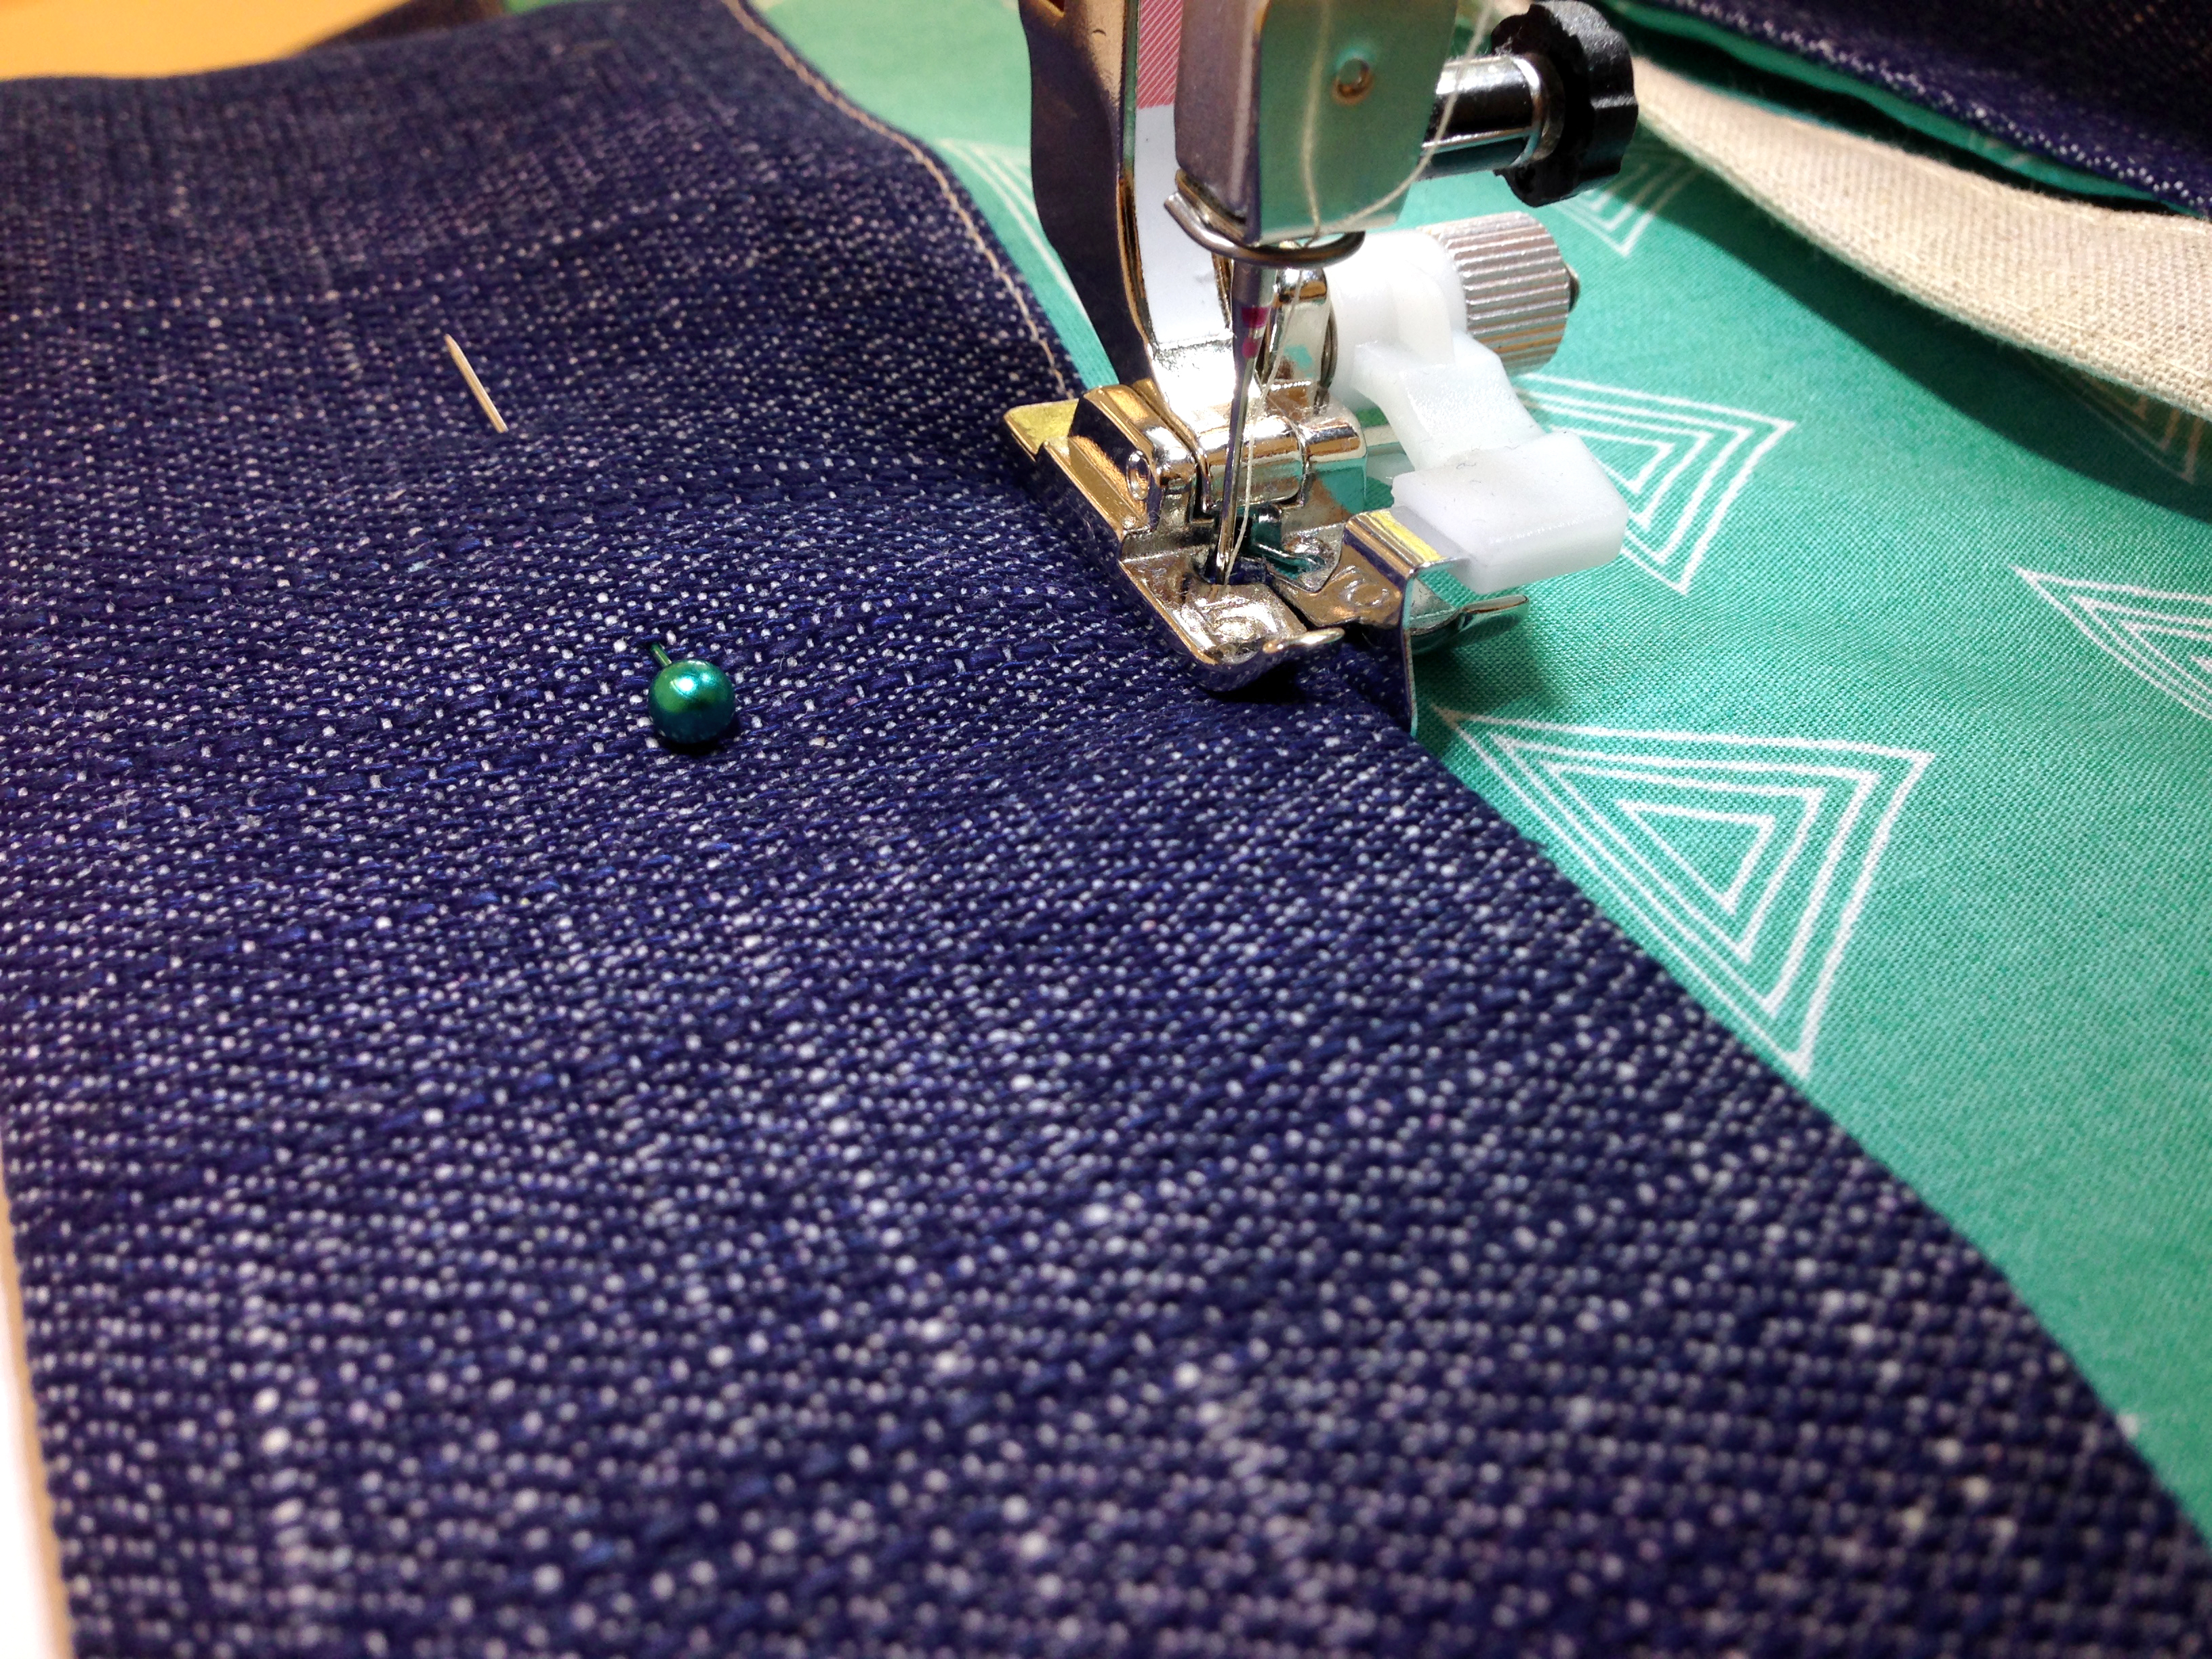
Pin your lining and front apron right sides together and sew around piece at 1/2″ seam allowance.
Clip on the seam allowance around the curve and corners. Turn your apron right side out through the bottom of the apron.
Turn hem under 1/2″ and then fold 3″ to encase raw edge. Use Blindstitch foot #5 to finish the hem of your apron.

The last step is to use your Blindstitch foot to edge stitch around your entire apron.

Your apron is complete and ready for a day full of grilling and summertime fun!
Happy Sewing,
AGF
Used Products


What you might also like


3 comments on “Apron Tutorial from Art Gallery Fabrics”
-
-
Hi landa,
Here is the link to the templates https://weallsew.com/wp-content/uploads/sites/4/2016/07/burger-Ttmplates.pdf
The link to the templates where located under the Materials to make a Summer Apron. Hope you give this tutorial a try. Happy Sewing. 🙂-
Thank you. Sorry I missed it. Am anxious to try.
-
-
Leave a Reply
You must be logged in to post a comment.

Loved the tutorial. I didn’t find the templates for the hamburger. Can you guide me to them.