Charming Pocket Apron Tutorial
Hello friends,
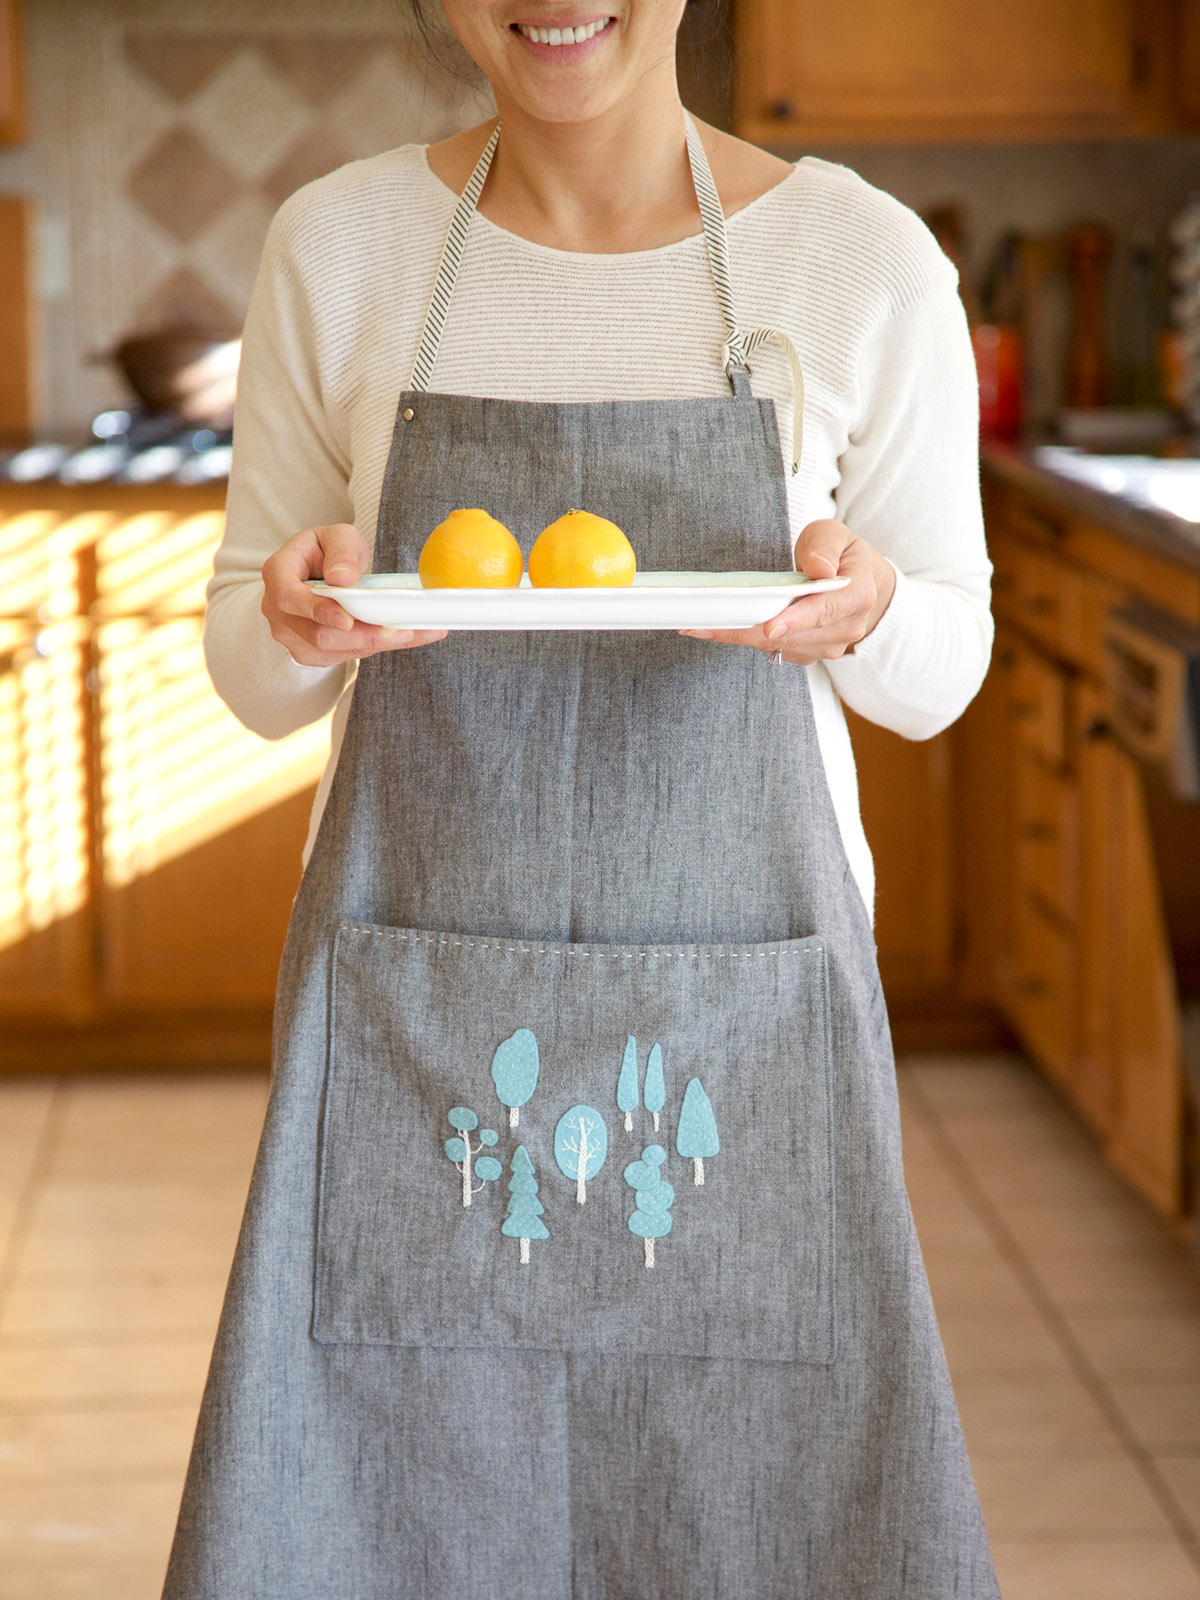
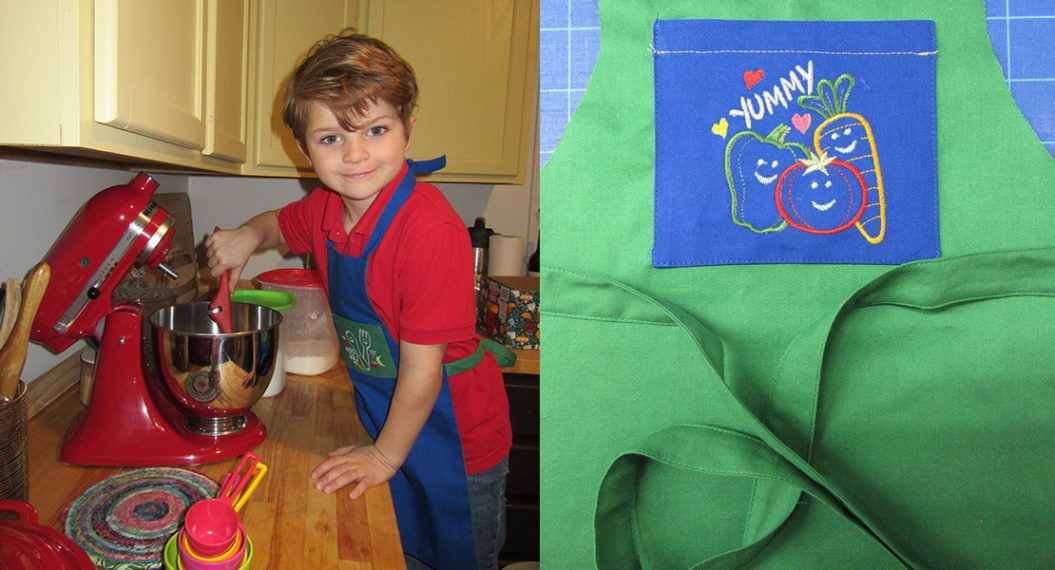
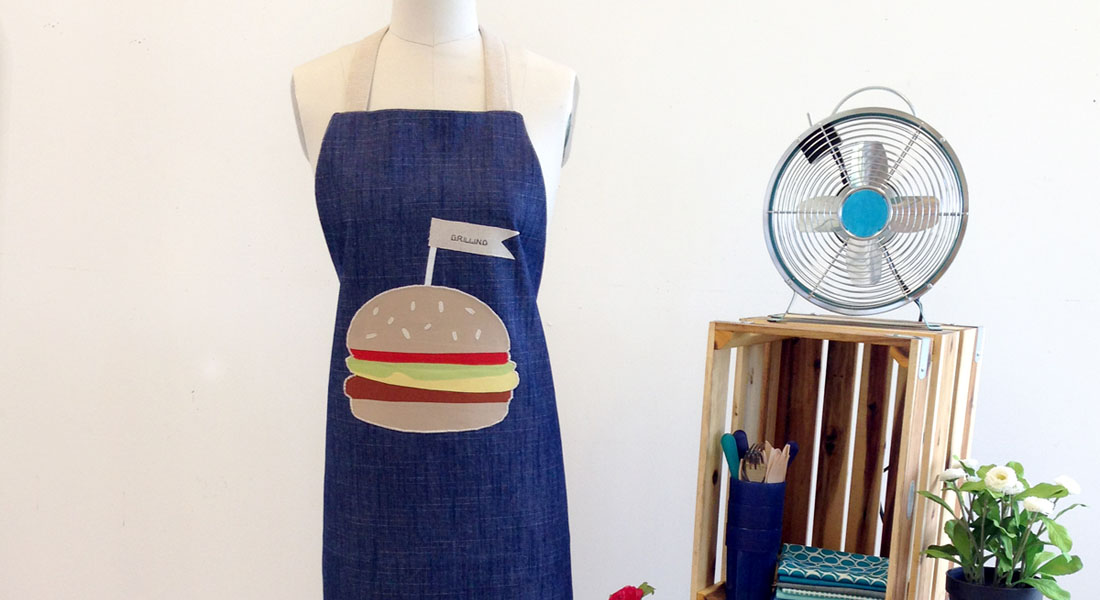
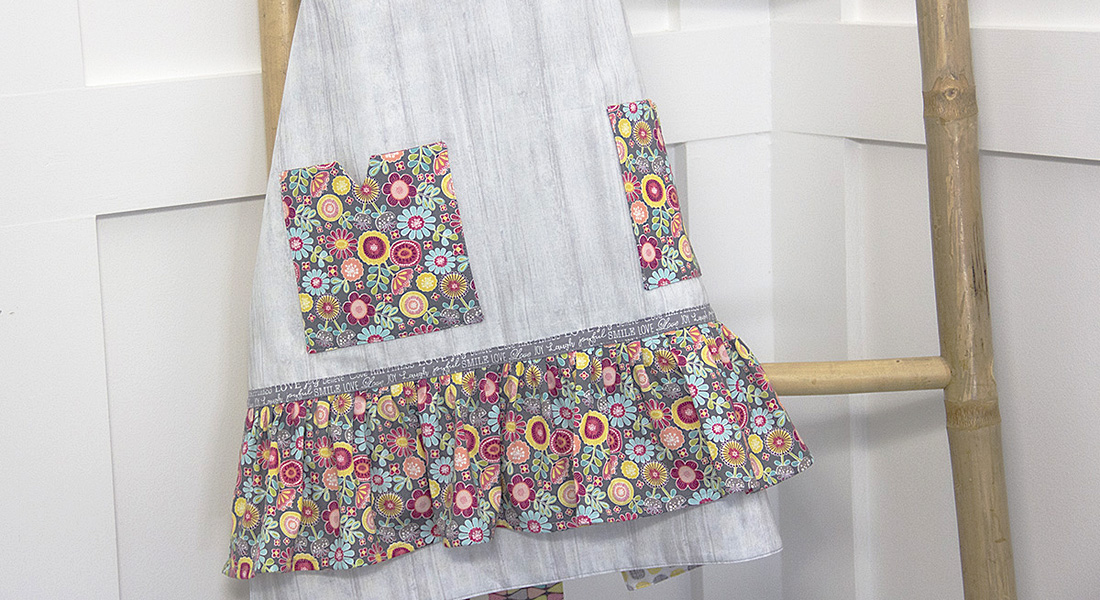
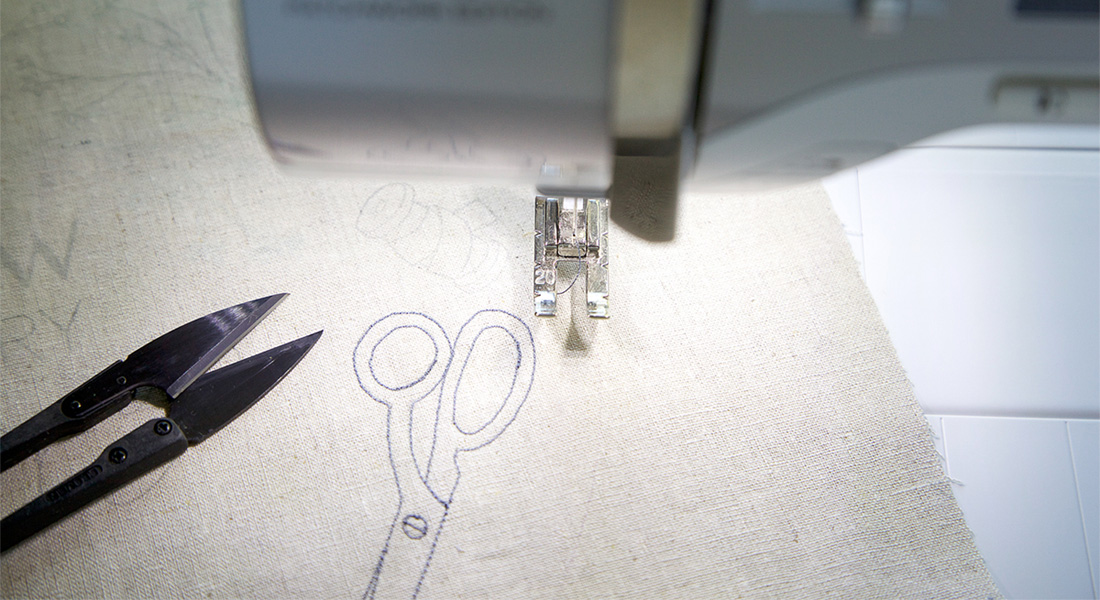
It’s Minki from Minki’s Worktable. I would like to share how I made this simple apron with appliqué designs on the pocket.
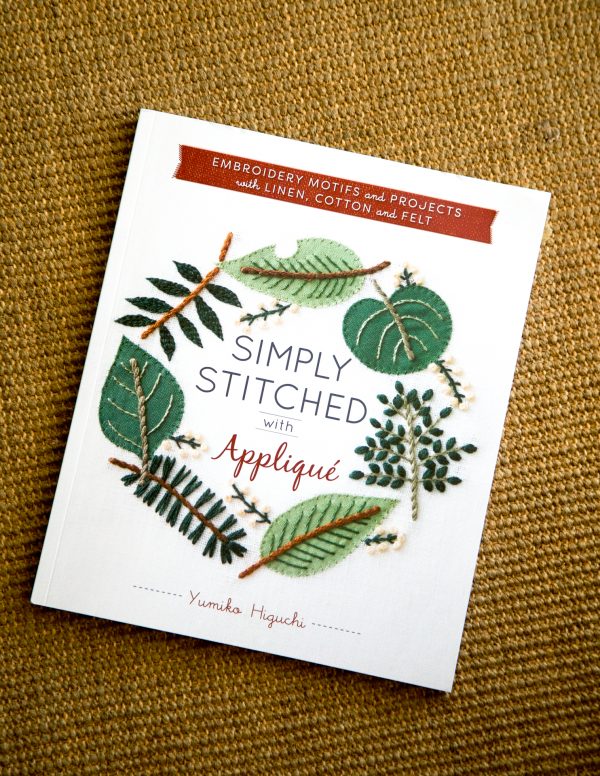
The sweet hand embroidery pattern is from Simple Stitched with Applique by Yumiko Higuchi, published by Zakka Workshop. Zakka Workshop will send a copy of this book to one lucky winner, so scroll down to the bottom of the tutorial to read how to enter!
Materials to Make a Charming Pocket Apron
- 1 1/4yard of gray cotton + Fat quarter for the pocket (I used yarndied fabric by Lecien fabrics.)
- 1 yard cotton ribbon
- 1 set of snap fastener kit (I bought at Joann fabric store.)
- 1 set of eyelet
- Felt scrap
- Embroidery floss ( I used Aurifil 12wt no.2311)
- 1 small D-shape ring
- cotton label
- Download the Charming Pocket Apron Template
How to Sew the Charming Pocket Apron
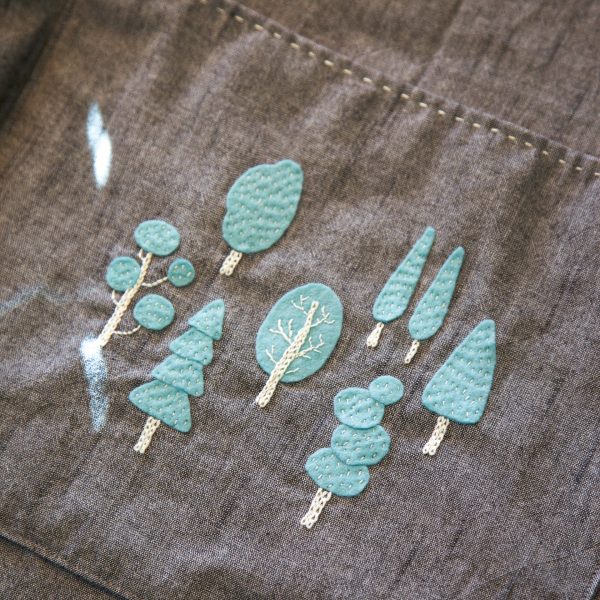
- Cut two (2) 12” x 10” rectangles of gray cotton for the pocket. Stitch designs on one square for the pocket as you desire. With right sides together, sew all the way around leaving a gap for turning. After stitching, turn the pocket right side out and press.
- Close the opening on the top of the pocket with a quick running stitch.
- Refer to the Apron Diagram below and fold the fabric in half. Draw the apron shape. Cut.
- When sewing the apron corners, follow the steps below.
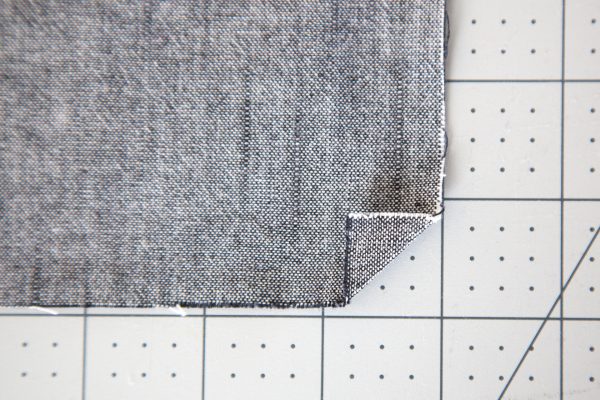
Fold up the corner about 1/4″ and press.

Fold the corner up again another 1/4″ and press.
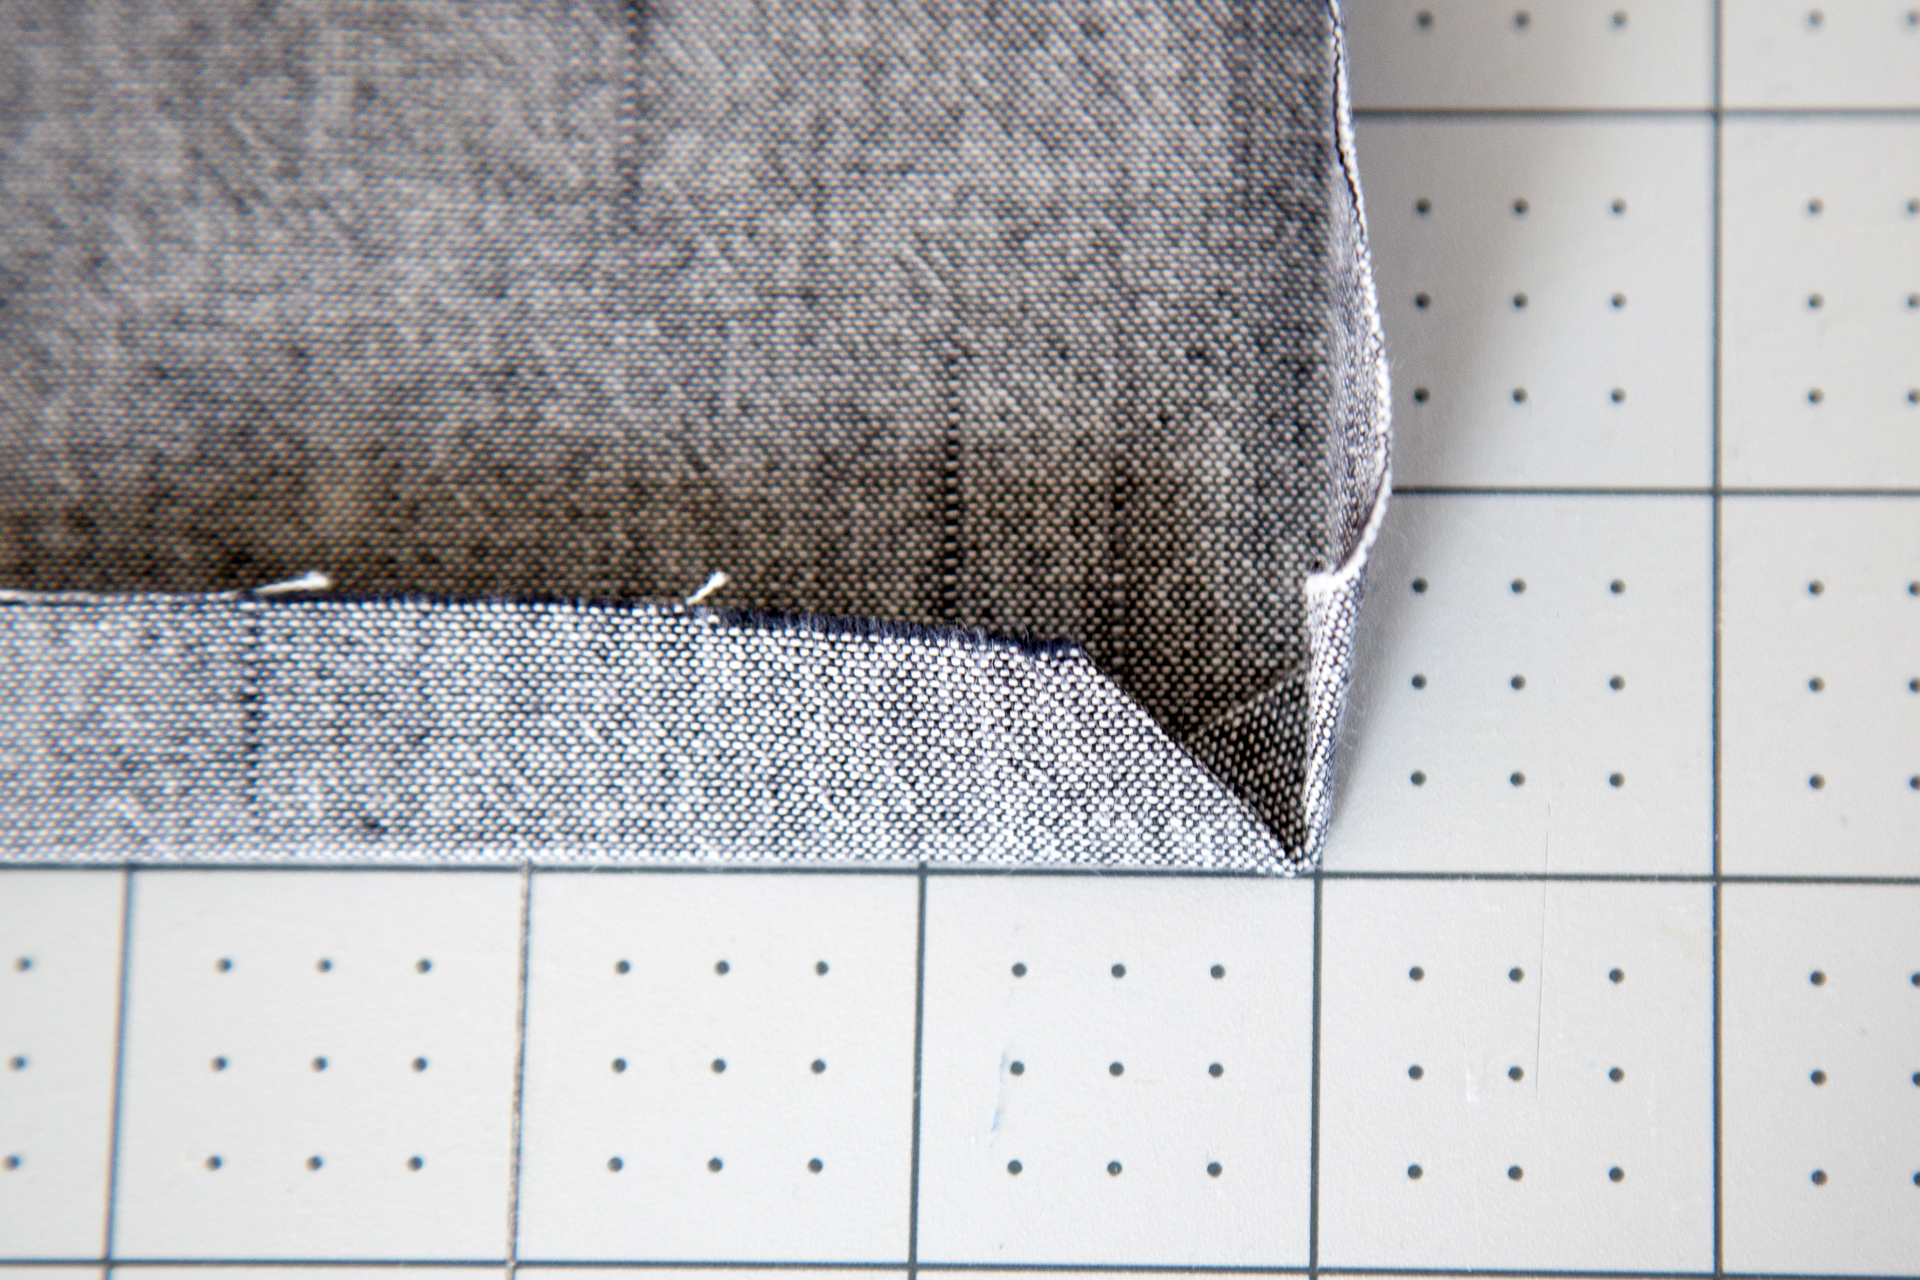
Next, fold edges up 1/2″ inch and press.
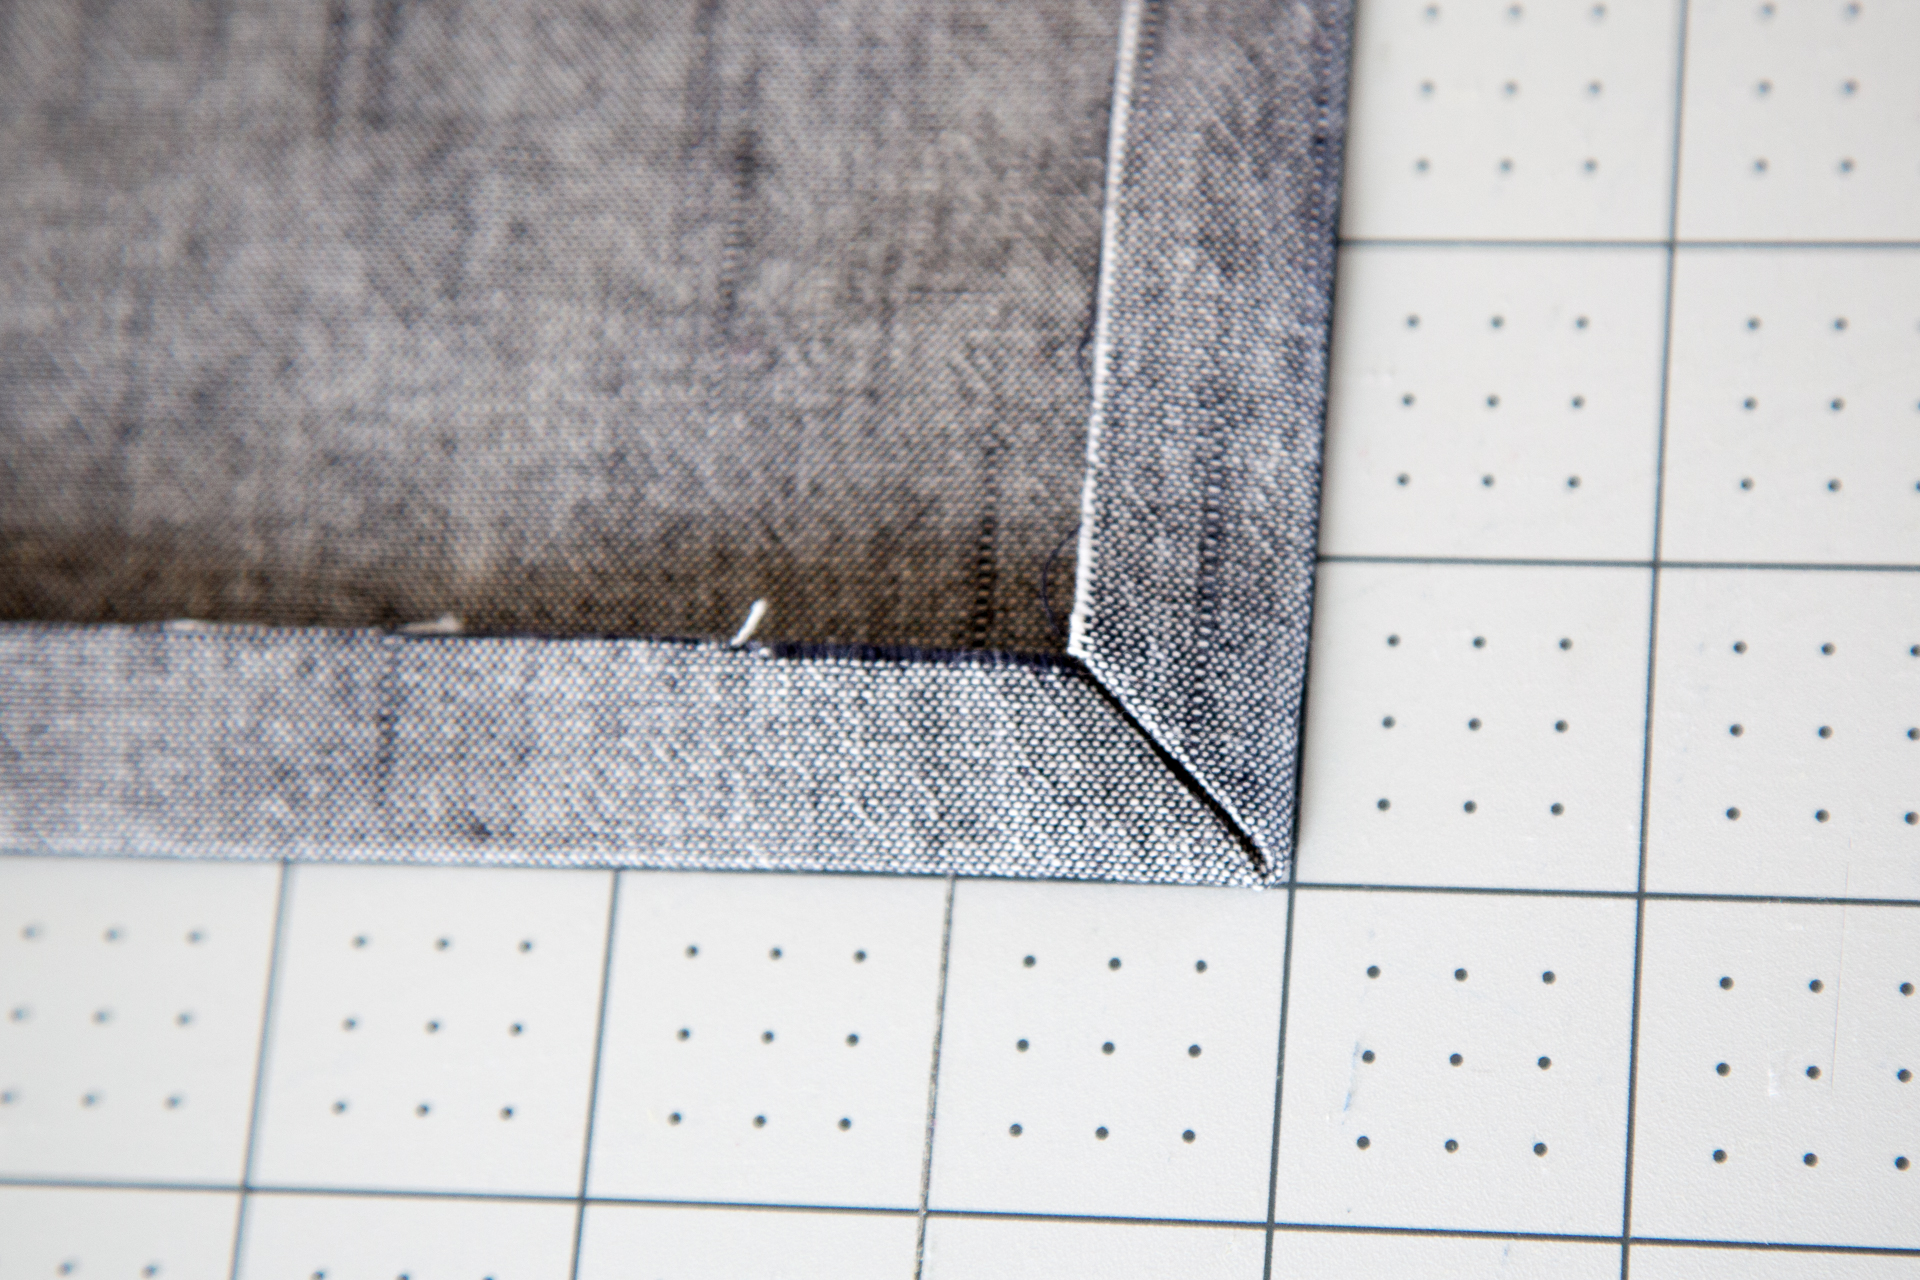
Make sure corner folds meet nicely, and press these corners well.
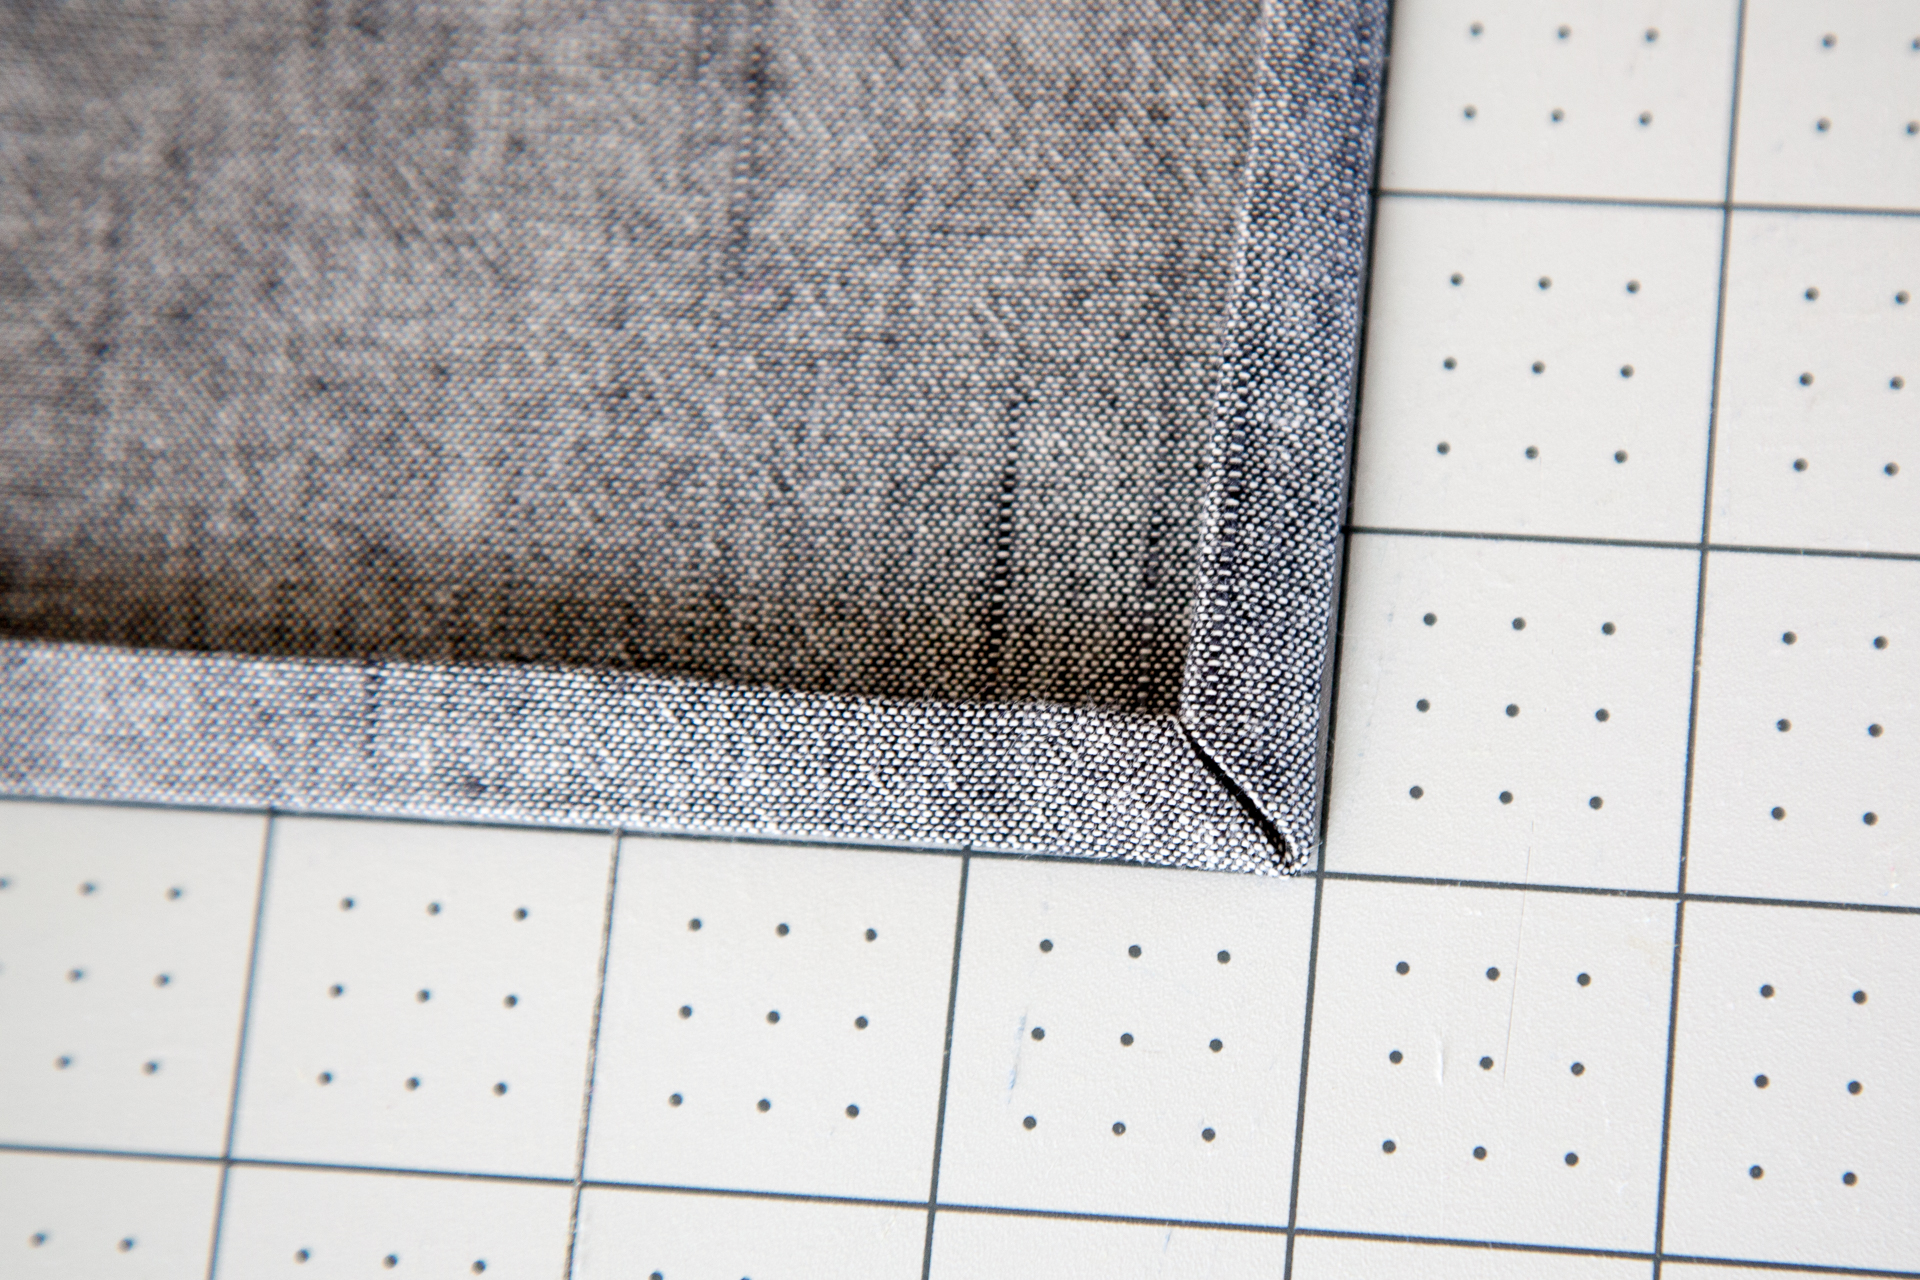
Turn raw edges under to the folded edge, press well.
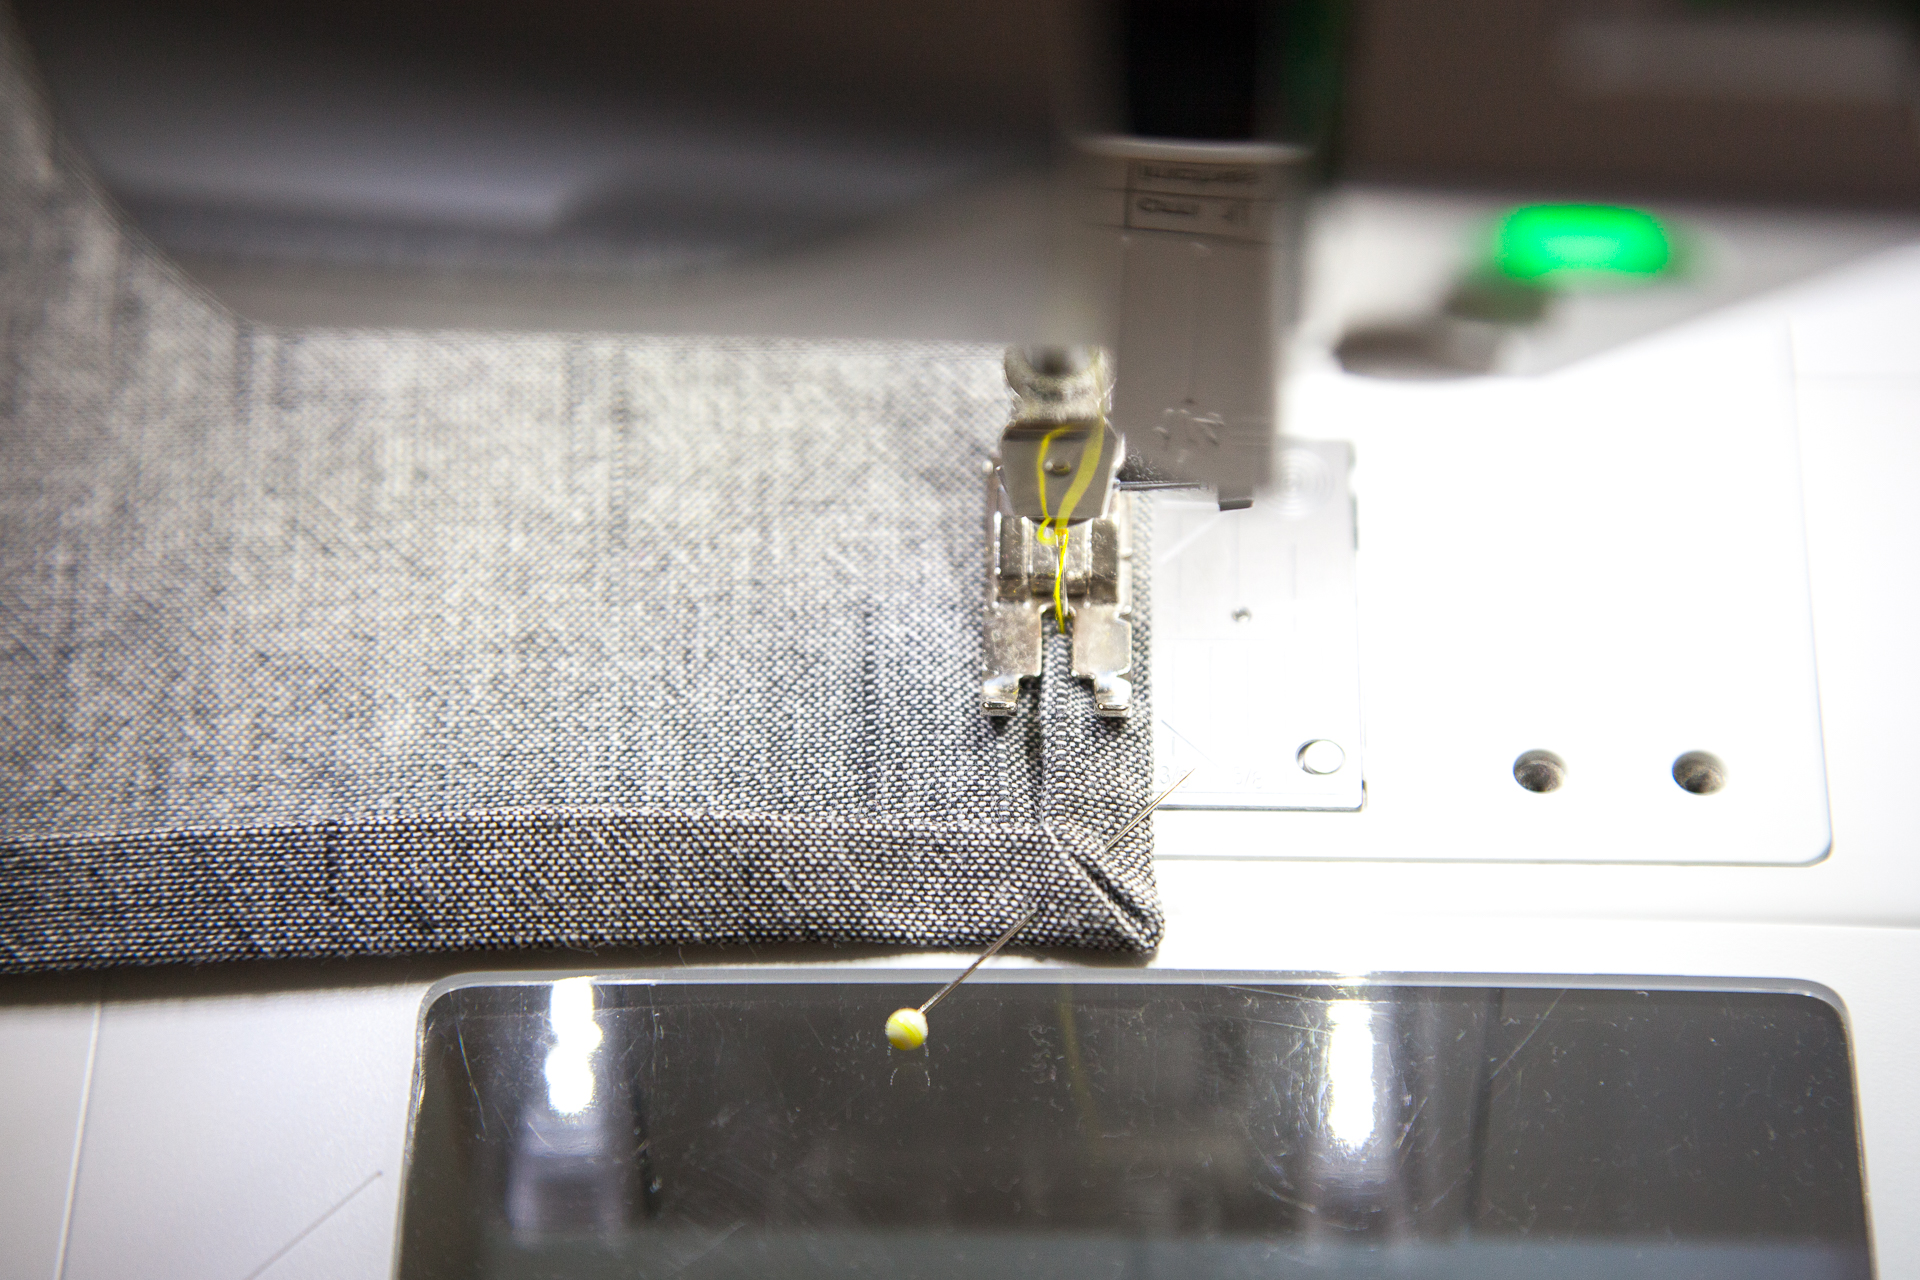
Topstitch on folded edge using a straight stitch foot like the Patchwork foot #37.

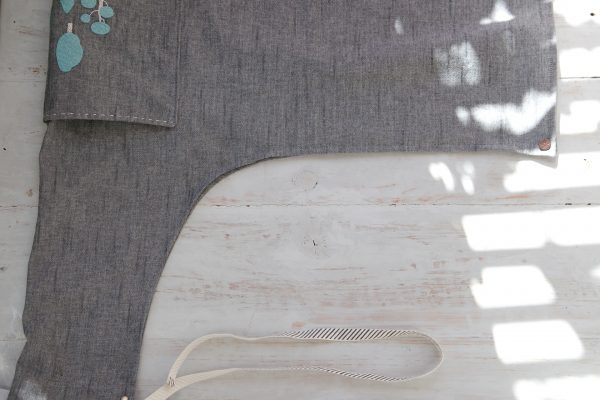
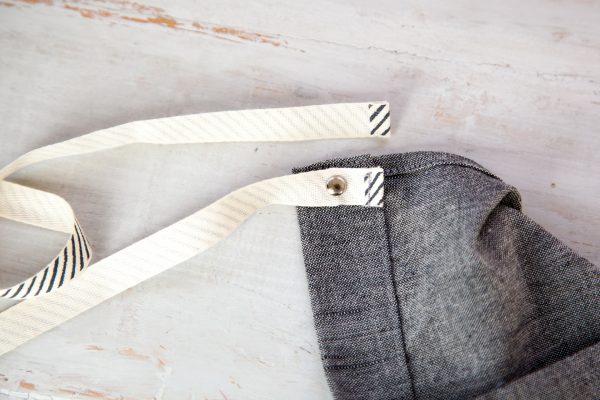
5. For top edge of apron, fold down 1/4″ and press, then fold down 1″ and topstitch. For the neck strap, cut one 29” piece of cotton ribbon and fold both ends, stitch to one corner of the apron to secure. Attach eyelet on one side.

6. Bias fold 2” x 1 1/4” gray fabic and slide in D-shape ring. Pin in place on the other corner of the apron, and cover with decorative label. Sew a couple times to secure.
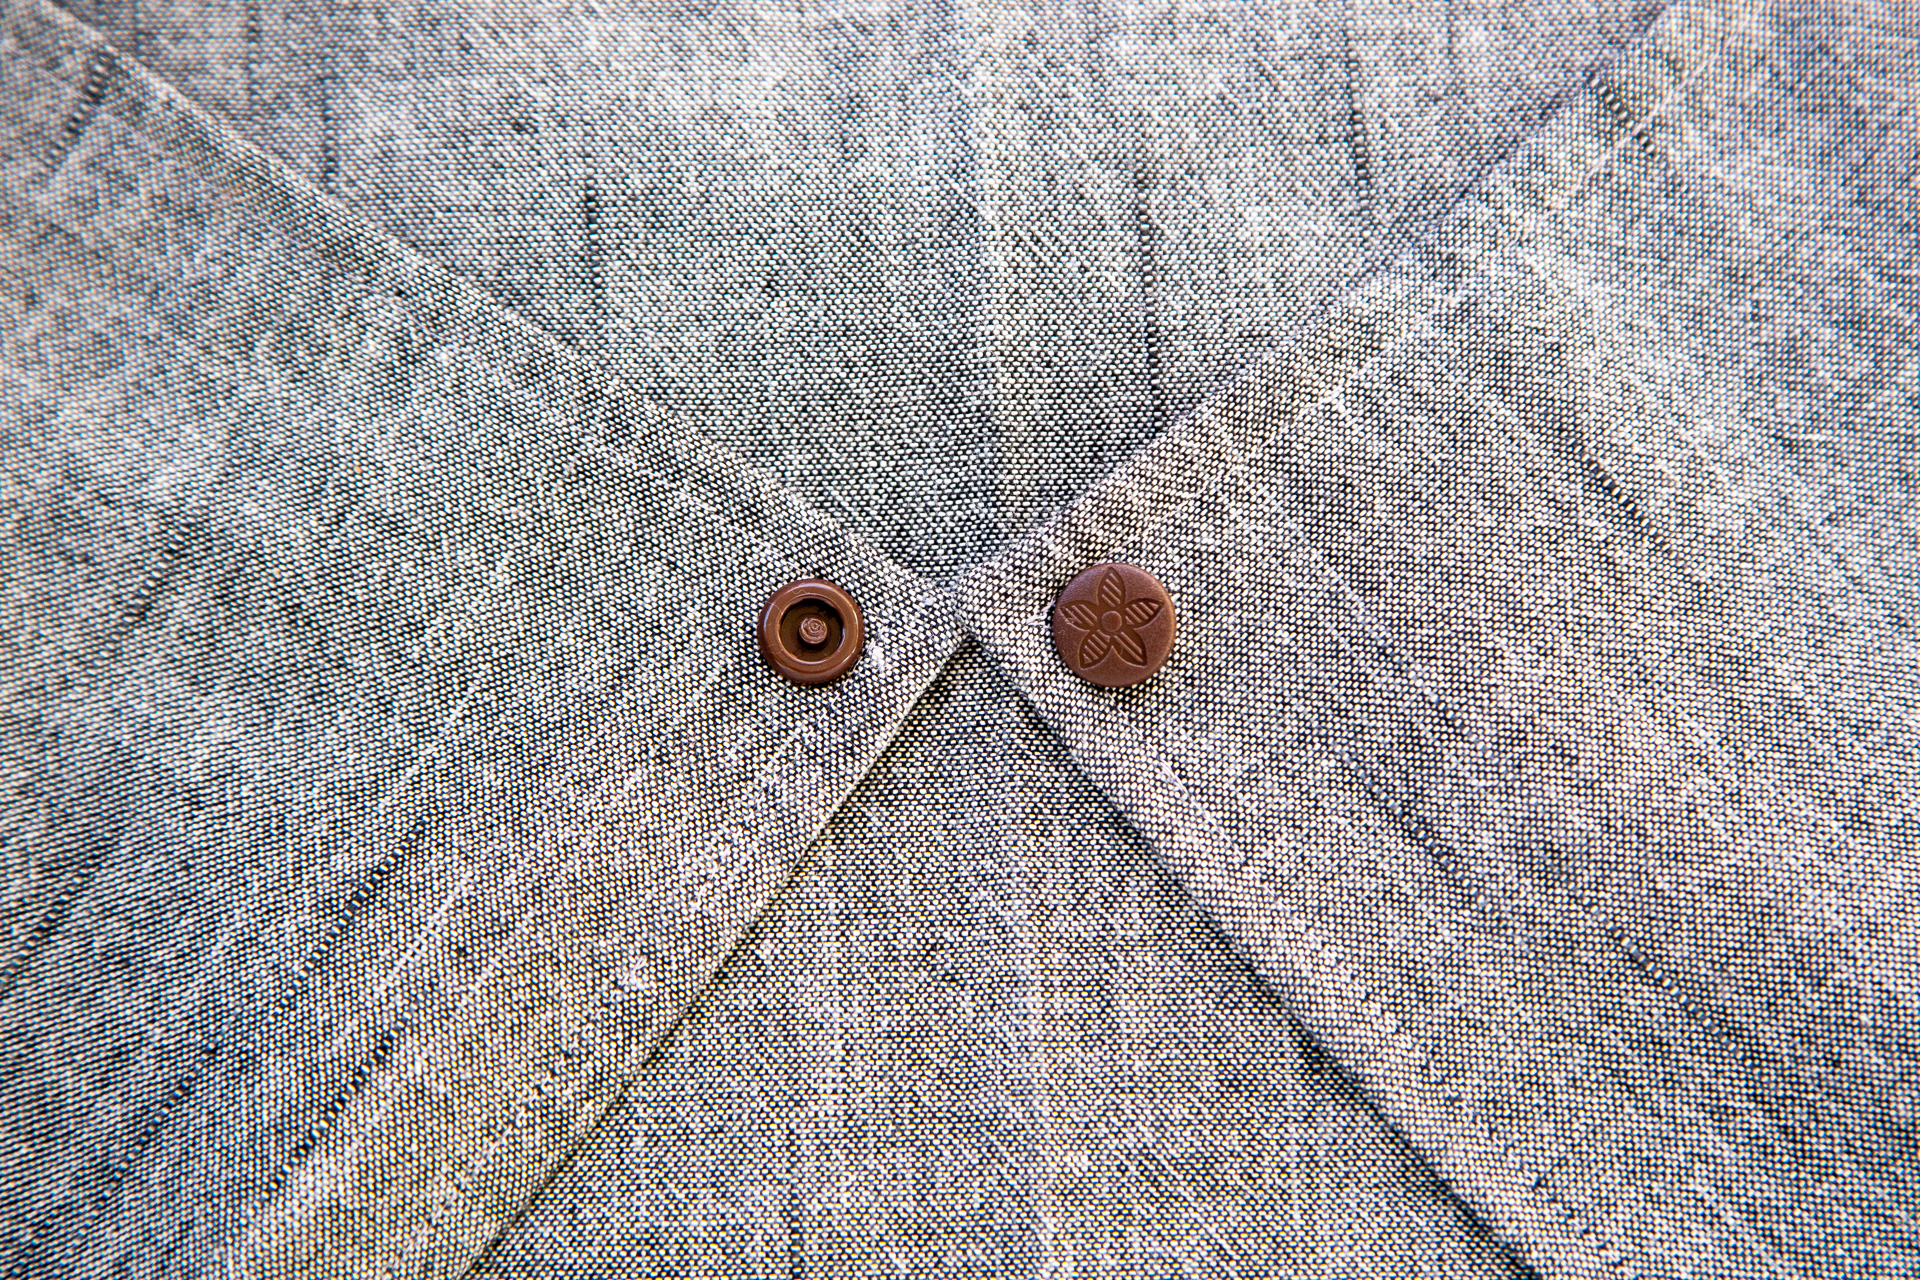
7. For the waist closer, attach plastic snap fastener to each back corner of the apron following manufacturer’s instruction.

Enjoy your Charming Pocket Apron! I hope you enjoy making this charming apron. It will make a perfect Christmas gift as well.
Win a copy of Simpy Stitched with Appliqué
One Lucky WeAllSew fan will win a copy of Simply Stitched by Yumiko Higuchi! All you have to do is post a comment below and answer the question, “Do you wear an apron in the kitchen?” The the giveaway is open through Friday, November 24.
The giveaway is open to residents of the 50 United States and the District of Columbia. One comment per fan. Comment must be submitted to the WeAllSew.com blog by Friday, November 24, 11:59 PM Central Time. Winner will be chosen randomly. Winner will be notified by email and will have 48 hours to contact to claim the prize.
Used Products


What you might also like


99 comments on “Charming Pocket Apron Tutorial”
-
-
So hard to find a good apron, love this one simple, practical and covers well.
love the embroidery. thanks for the pattern. -
I do use an apron in my kitchen when I cook and also keep a spare for a helper. I will be making a couple of aprons with the unique embroidered design in two different colors in case my helper wants to keep hers.
-
I do wear an apron in the kitchen. I’m kind of a mess otherwise. Love the pocket!
-
I love aprons with useful pockets. This looks perfect.
I hope to learn appliqué . I have a
New Bernina embroidery machine and loving how well the B590 Chrystal performs.
Thanks so much for easy tutorial -
I love aprons with useful pockets. This looks perfect.
I hope to learn appliqué . I just upgraded to Bernina 590 Chrystal and love everything about the sewing machine and embroidery
Unit.
Thanks so much for easy tutorial
-
-
Don’t wear an apron but probably should. Cute apron pattern.
-
Love the woven fabric and wool! Perfect project for Holiday Aprons ?
-
Looking forward to trying this! So cute!
-
I am so delighted that you shared this pattern. I can’t wait to make it up. I appreciate your talent and your generosity.
-
I wear an apron and so does my granddaughter while we cook together. I cherish the time we share cooking and learning together.
-
I do sometimes wear an apron, especially if the job is messy. It saves my clothes when entertaining. In fact I have a collection of many vintage ones! But, my favorite is one that I made using a vintage linen towel and coordinating quilt blocks. ( BTW, I love doing wool applique!)
-
Yes, I love my aprons! Always have a pocket at hand and protection for my clothes. So glad they are popular again.
-
Love aprons! This would be a great hostess gift too.
-
No, I don’t wear an apron. I’ve been thinking about making one for messy arts and crafts, though.
-
Great apron tutorial! Thank you! I do not wear an apron in the kitchen however my daughter and daughter in law both do. I would make one each for them for the Holidays! It will go great with the potholders and oven mitt I’m making for them!
-
Yes, I wear an apron in the kitchen. Love this one withe neat leaves, etc on the pocket.
Leota 01 -
I wear an apron more on special occasions. I certainly love this one. Thanks
-
I love an apron, but I’m always loosing them!!
-
I only wear an apron when I know I’m going to make a mess. Usually when I’m baking, but I’ll be wearing one on Thanksgiving. Love this pattern.
-
Such a cute apron! Love aprons in the kitchen – saves my clothes and eliminates those embarrassing flour hand prints on my posterior! LOL
-
I do not wear an apron but this one looks cute enough to try!
-
I do not wear an apron, but that’s because I don’t have one! I sure would enjoy making the right apron for me!
-
Yes, I do use an apron. This one looks easy to make.
-
Yes I do wear and apron and I love this one! The snaps are too cute!
-
I wear and make aprons. Have several for everyday and a lot for all the holidays. They are so much fun to make and give to all my daughters and daughter in laws.
-
I do wear an apron when cooking. I even have one that has flashing lights. ?
-
I do wear an apron when cooking. I even have one that has flashing lights.
-
-
I do wear an apron in the kitchen. Thanks so much for the tutorial. I can’t wait to try it and I would LOVE to win a copy of Simply Stitched with Applique! Thanks for the opportunity!
-
Yes. I wear aprons part of the time, especially when I am frying foods and don’t want my clothing ruined!
-
Awesome! Great project for gifts.
-
“Do you wear an apron in the kitchen?” Always! Some I made, some bought.
-
I do not wear an apron in the kitchen but I do make aprons as gifts! Love this 1❤
-
Yes, always! (when I Remember to!) ?
-
I don’t normally wear an apron but I probably should sometimes. This is a cute apron. I need to make it so I have one to wear.
-
I do wear an apron in the kitchen! And this apron is very cute!
-
How adorable! And so perfectly timed for the holidays! I’ll wear the occasional apron especially when making “messy” food. ?
-
I wear an apron when doing a lot of cooking- like preparing a meal or baking a lot of cookies! What a special apron you have created.
-
Love this Apron. I wear one in the kitchen when I am doing major cooking, especially around the holidays.
-
I always wear an apron! I have a few that my mom made when she was a teen and I love them!
I am new to your site/Blog and love it! -
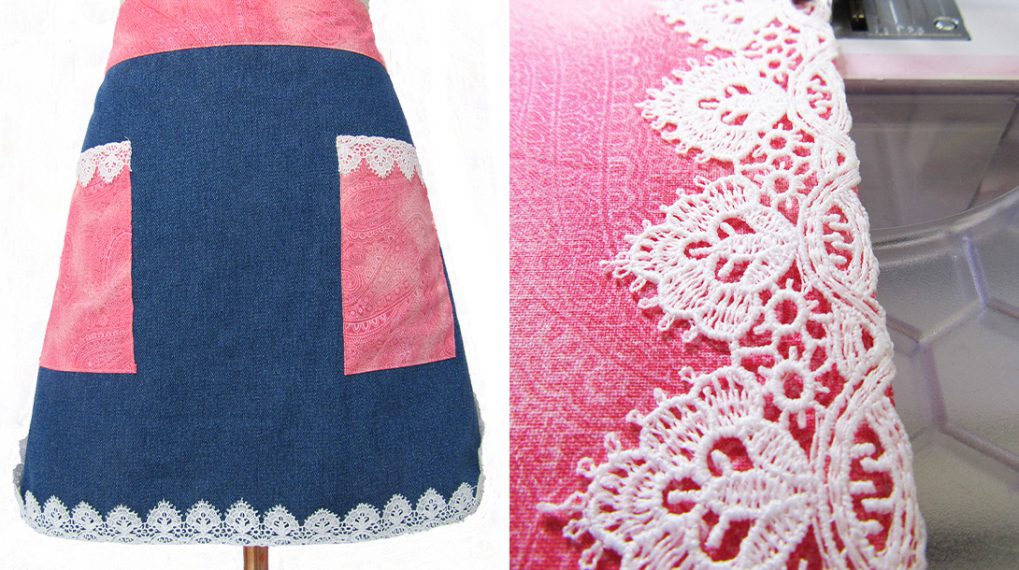
What an adorable apron! I wear a repurposed jeans apron at work.
-
I don’t wear an apron but should!
-
Not always, but when I do, it’s a cute one!
-
What a great apron and tutorial. I do wear an apron in the kitchen, especially cooking a big dinner or something that is really messy.
-
I do wear an apron! This one is so cute
-
Occasionally. I have to admit I have some, but usually to lazy to put one on!
-
I usually wear an apron!
-
I am a bit of a messy cook and dish washer, too, so I have several aprons that I keep at hand. None of them are as cute as this applique apron, I admit!
-
I always wear an apron. Will put this one on my to-do list.
-
I usually wear an apron to protect my clothes. I’ve ruined a few of my favorite shirts in the past and don’t want to repeat that. Thanks for the chance to win!!
-
I wear an apron when I cook/bake. I’ve had it for years! Probably time for a replacement.
-
I am always looking for a new apron idea. I sew for my daughter-in-law. She sells my aprons at a local craft market, making money for herself, and I get to sew which I love. I just bought a new 830. What an improvement over my old sewing machine. I also get extra playtime with my grandchildren. Win-Win.
-
Yes, every Christmas!
-
Always! I even have one just for Christmas! Thank you, Susan. [email protected]
-
This is such a sweet apron and embroidery project. And I love the back closure on the apron- usual and VERY practical. thank you!
-
I do wear an apron on occasion, have made them for gifts and door prizes. Love the pattern and the excellent directions. Thanks
-
Love the simplicity of this apron. The applique pattern is beautiful! I can see it in Essex yarn dyed linen.
-
Occasionally, and I should do it more often, since I am messy and I could possibly avoid all the stains if I would wear one always. Maybe if I had one this cute I would wear it?!
-
I definitely need to wear an apron in the kitchen!! I will be making this apron then I’ll always have one handy to wear. Thank you so very much for the great pattern.
-
I wore an apron when I was younger the kitchen but currently don’t have one to wear. This apron is so pretty I am going to make it. Thanks so much for this delightful pattern.
Once a pon a time everyone wore an apron, then they fell out of favour. Welcome back!
-
I’ve never worn an apron… this lesson and the comments have inspired me to try it out and to make this one. Thanks for sharing and for a chance to win your book!
-
PS – are there any pictures from the back side available so we can see how the snaps work and the fabric falls?
-
-
I’m a slob in the kitchen, so an apron is an absolute necessity. The aprons will be great gifts for my friends at Christmas. Thanks so much for the excellent tutorial.
-
I only wear aprons when I’m baking, or when I making a big dinner for multiple guests…I don’t wear one for every day meal prep.
-
I will be wearing a brand new one soon. Many thanks for the pattern and opportunity for a chance to win this book!
-
I wear an apron only around the Holidays because that’s the only one I have. I could certainly use a couple more as I am an extraordinarily messy cook. Plus I love the embellishment shown in this tutorial.
-
Love the snap fastener on the back. I occasionally wear an apron in the kitchen. I plan on making one like this!
Susan V -
Yes, I DO! After ruining my tops while preparing foods I have learned to wear an apron, plus I’ve come to enjoy the pockets too
-
Well….yes and no….I wear an apron when my favorite one is clean…if its being laundered, no because I only seem to like one apron at a time….but when it’s clean I do enjoy (really!) wearing one. Makes me feel as if I am master of my own kitchen lol.
-
I wear an apron all the time. They went out of style for awhile, but they are back now, and cuter than ever. Great apron idea!
-
Always wear an apron! Mine make me feel old though, like I am my nan’s age! Must make this stylish apron in linen. Bang on thrend! Thanks for the pattern!
-
What a charming apron! I usually wear an apron if I’m not just heating up leftovers! I am a teacher and I took in some of my aprons for the kids to wear during our annual “Pumpkin Fluff” cooking day. Some did not know how to put an apron on so I can fairly say I introduced some to aprons!!
-
I have several aprons of my grandmother but I wish to make my own. This plan looks easy to make and so functional. I never thought about adding applique instead of embroidery like the old ones have. Thank you for sharing your ideas. I do wear a ugly apron when making lard and soap and nicer ones when being fancy in the kitchen 😉
-
I wear an apron ALL the time! In fact, I’m due for a new one as the pocket on the front of my oldest one has work right through… This would make a sweet replacement. Thanks for the inspiration!
-
… has WORN right through
-
-
Love this apron! Most of the time I wear them!
-
This apron looks quick and easy. Love to applique. I don’t usually wear an apron, but give them for gifts.
-
I wear aprons occasionally – mainly for holiday parties.
-
I’ve made several of my own aprons & wear them off & on depending upon what I am making. I would wear them more if all had pockets!!! Love pockets. Holiday baking is one good reason to wear one because a big mess is made with flour & sugar all over the place when I bake.
-
Yes, most def!
-
I don’t wear one but I should since flour on my shirts isn’t fashionable!
-
I seldom wear an apron. However, if I take the time to make this lovely apron, I’m sure I will wear it !!
-
I always wear aprons, but mine are hand me downs from my son who used to work at a grocery outlet. This is so darling that I think I will make it in Autumn colors- such a great idea !
-
I do sometimes!! this is adorable and would be an awesome gift for an upcoming event. there is something so satisfying about hand embroidery!
-
I always wear an apron in the kitchen! Pockets are a must. I have several. I rarely get more than 3 days out of one apron. Can’t wait to make this one.
-
No, I don’t wear an apron. Thanks for the give-a-way!
-
I do wear aprons when cooking a big meal. I tend to not wear them when throwing together dinner but this one is so cute, I’d never forget to put it on.
-
I don’t wear an apron in the kitchen, but I will now! Love it!
-
I wear an apron while cooking, sewing, making books, and for a various other activities. I think full aprons are really fun. This one is great.
-
Yes! I wear an ugly apron at work (cafeteria school) and I use an not too ugly but old apron at home, I need a new one!! So on winter break definitely I’ll do this one.
-
I have many many many aprons! I get and give as gifts. I love making them as they are quick and simple or time consuming and complex but all are needed, used, loved and fun,fun,fun. Thank you for the new apron pattern to add to my collection. I can’t wait to make and use it.
-
Yes, but only when I’m wearing something nice!
-
Yes, I wear an apron when I cook and clean up the kitchen. I have quite a few, but I tend to wear a chef’s apron, a white one, at home.
-
Yes, and so do my daughter and daughter-in-law and her mother! THANKS FOR THE POCKET PATTERN AND THE GREAT IDEAS,
-
No because I don’t have one. I will make this one as I need it.
-
I have very fond sweet memories of my mom and grandmother wearing their aprons while cooking. I inherited some of their old aprons and I wear them when I bake. I feel like I am wrapped in a hug when I wear them!
-
I wear an apron with holiday meal preparation to protect my good clothes. I will be making this pattern for myself and to give as hostess gifts and gifts for friends. I love the simplicity and the options of decorating and fabric choices!
-
I don’t normally wear an apron, but sometimes if I’ve already dressed up, then it’s a good thing!
What a great applique! Love the combo of stitching and felt.
Leave a Reply
You must be logged in to post a comment.

A great week-end project.