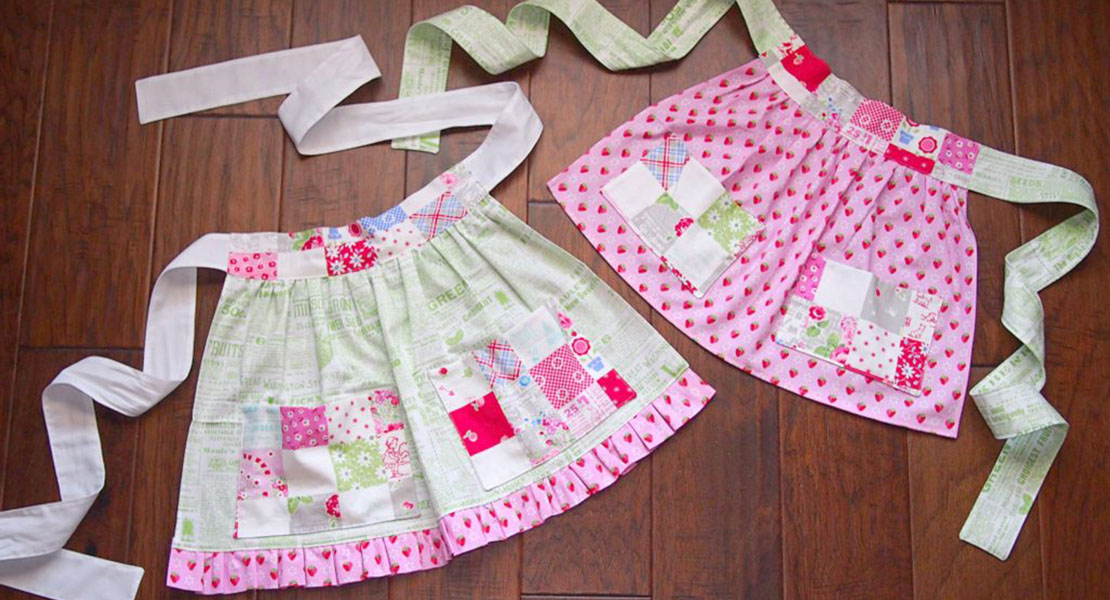
Easy Kid’s Apron Tutorial
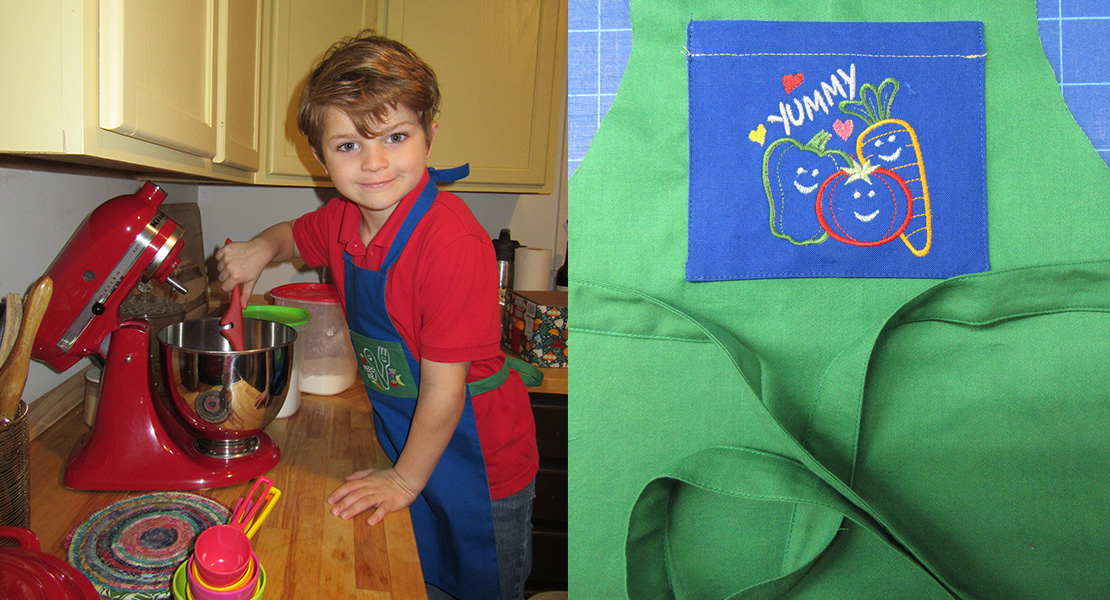
When my boys were little they loved working in the kitchen with me. Part of the fun was getting to wear an apron “just like mom”. In this blog I’m going to share the easy Kid’s Apron Tutorial that shows how to make the same apron I made my boys almost 20 years ago. It was a hit then, and I’m sure it will be a hit with your little helper now.
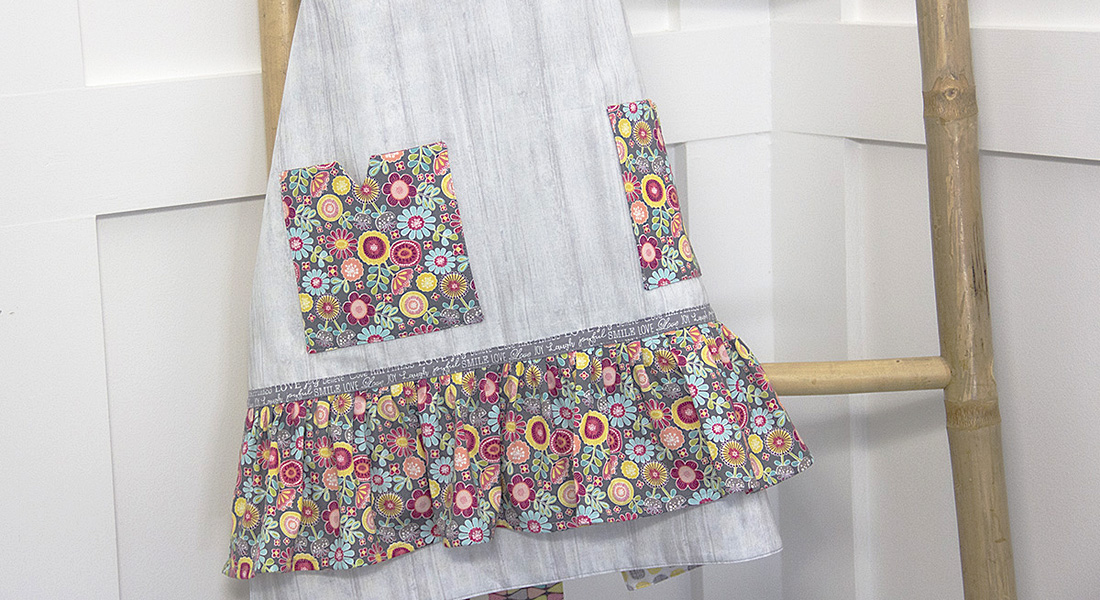
The apron is reversible so have fun picking out the fabrics for each side. I used two solid colors for this apron, but you could also use fun prints. Get your child involved with the project. They can help pick the fabrics and, depending on the age, hand you supplies while you sew. This apron will fit most kids between three and 6 years of age. You can easily adjust the pattern to accommodate a smaller or larger child, or even to make yourself a matching apron.
As this will be used regularly, and washed often, I recommend prewashing all fabrics before starting this project.
Materials Needed
- 3/4 yard each of two contrasting colors or print fabrics
- Stabilizer for Embroidery
- Yellow high tension embroidery bobbin
- Embroidery Thread
- Embroidery Designs
Easy Kid’s Apron Prep
Step 1
Cut out one rectangle measuring 24 inches by 15 inches from each of the contrasting colors. Cut one 6-inch by 6-inch square from each of the contrasting colors.
Step 2
From one of the colors cut 2 strips 32 inches by 2 ½ inches and from the other cut 2 strips 18 inches by 2 ½ inches. These will be the waist and the neck ties respectively.
Step 3
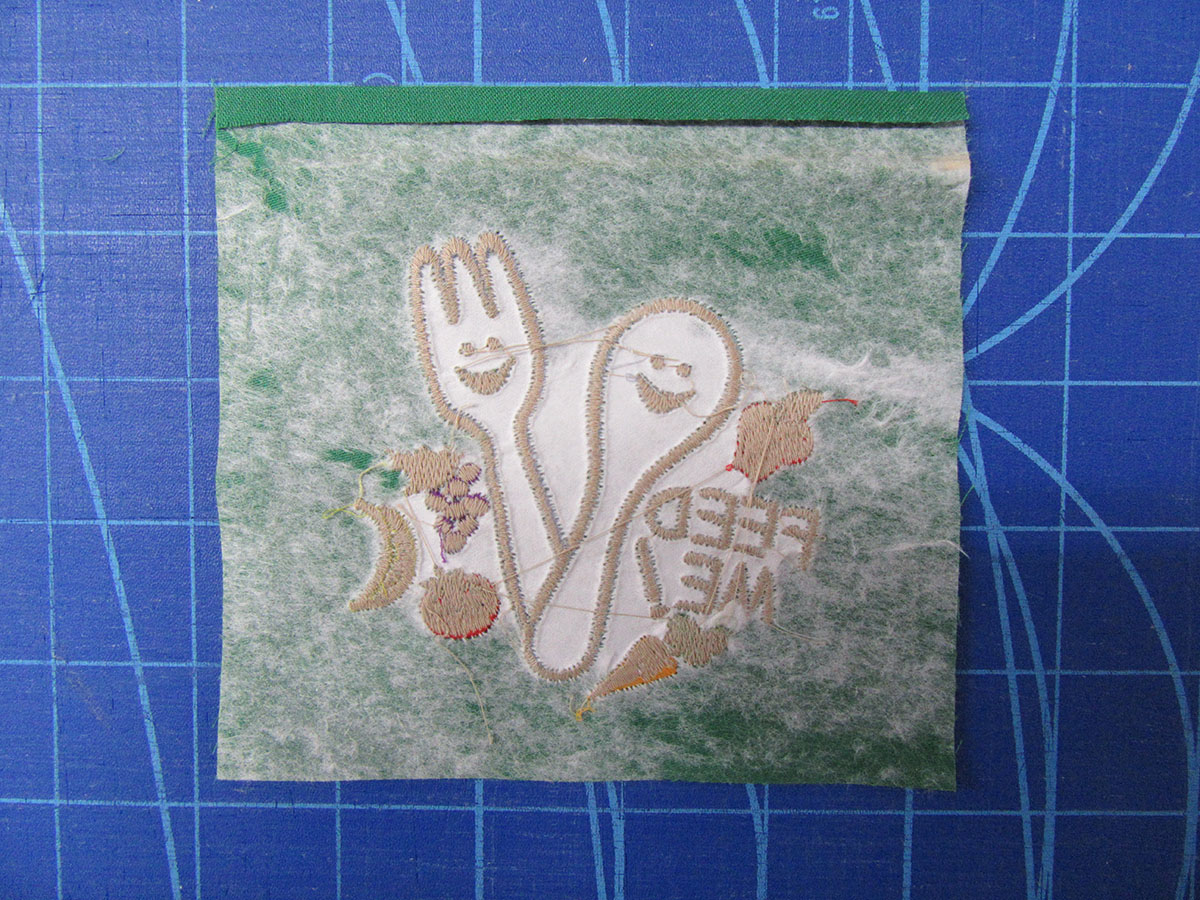
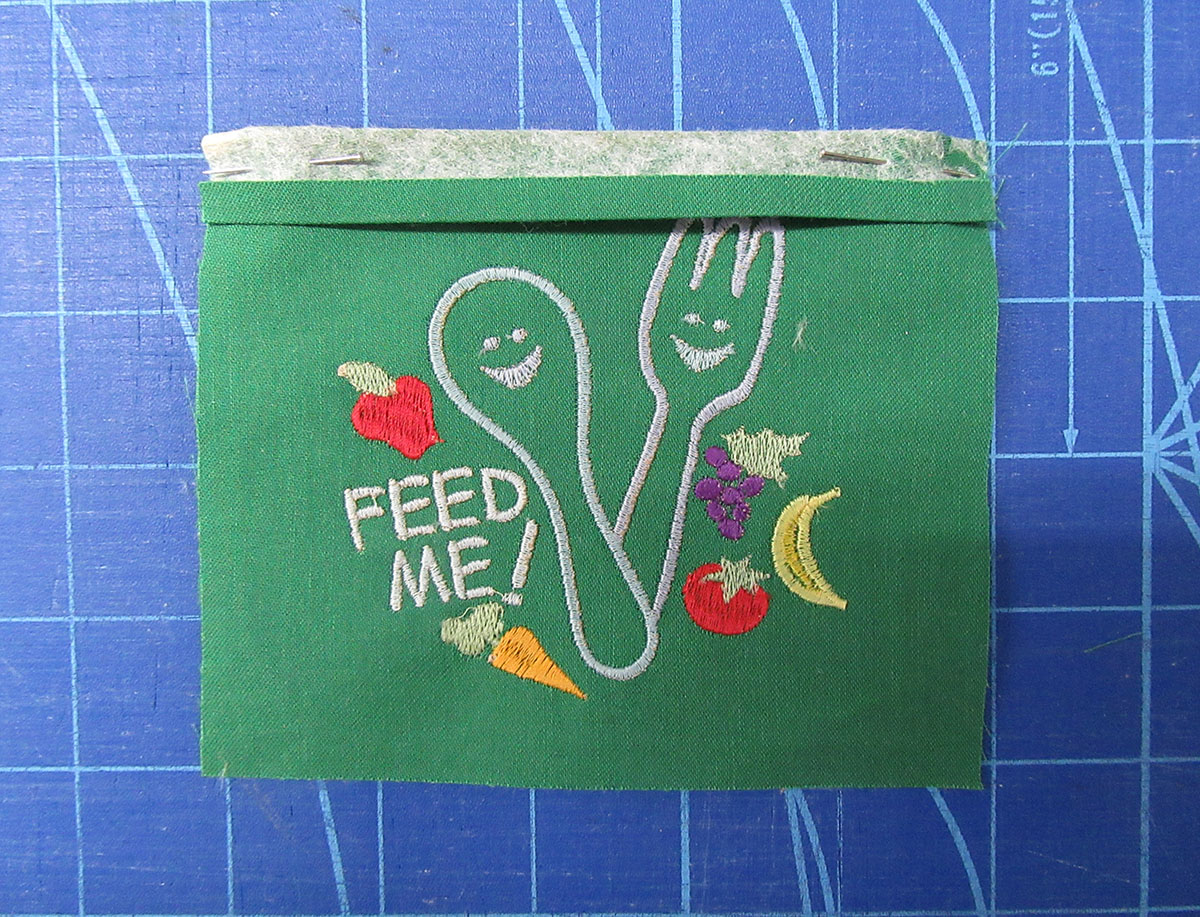
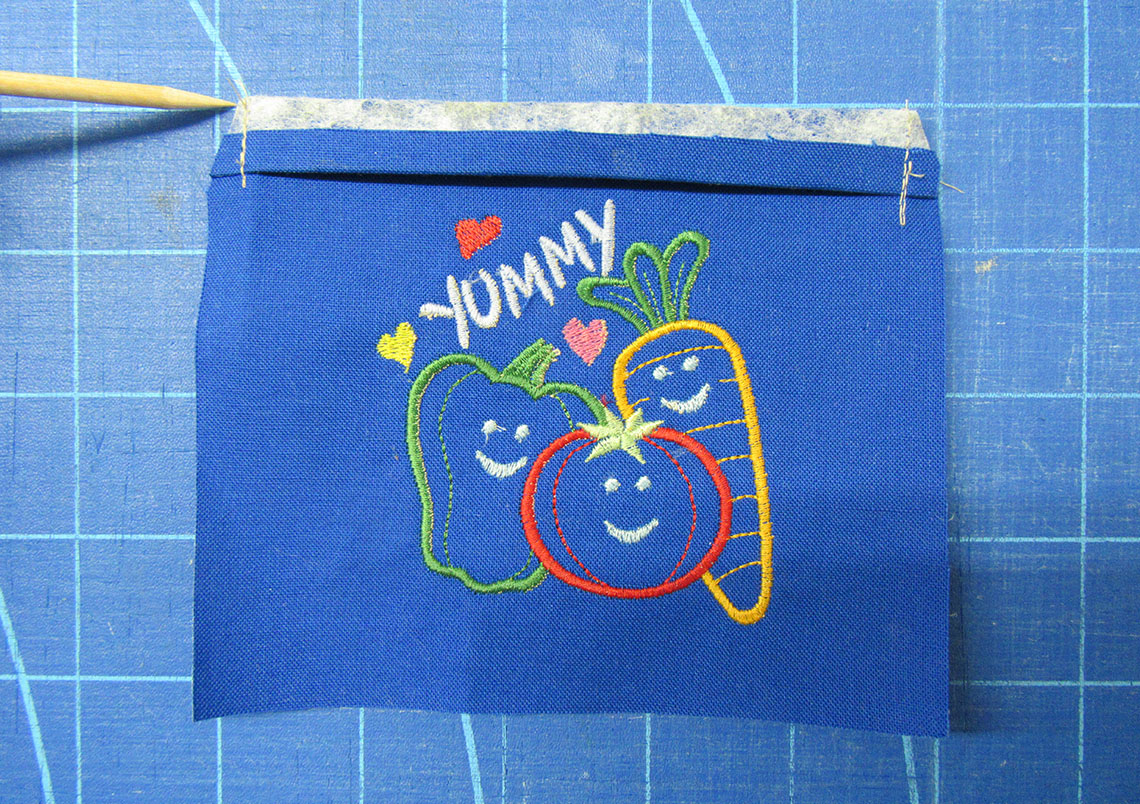
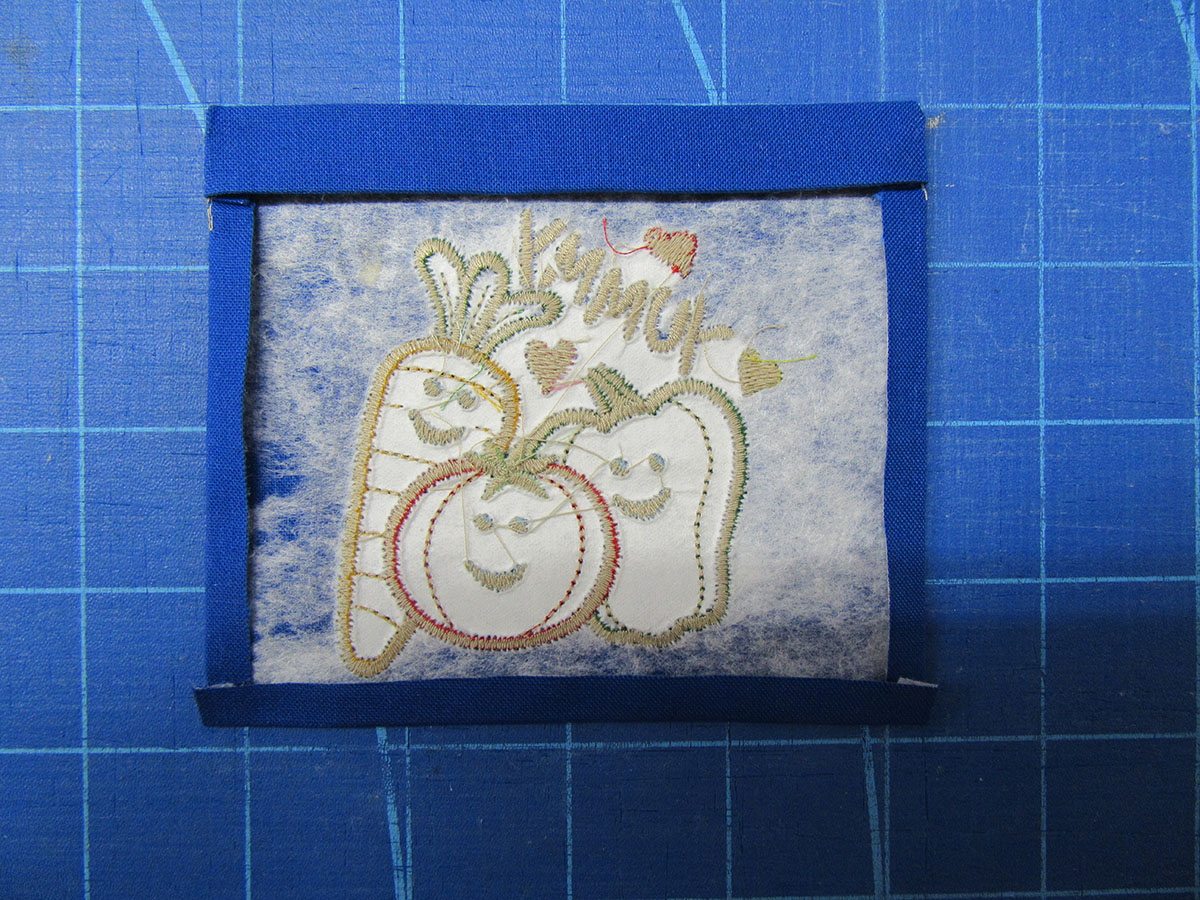
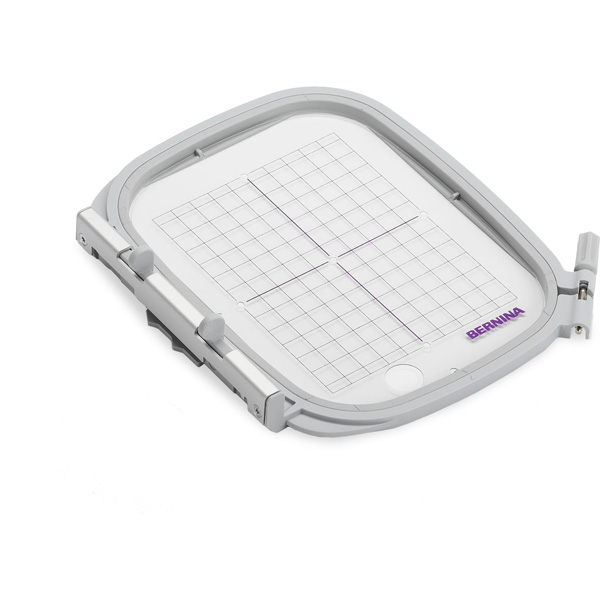
Apply stabilizer to the wrong side of each 6-inch square and center square in your embroidery hoop.
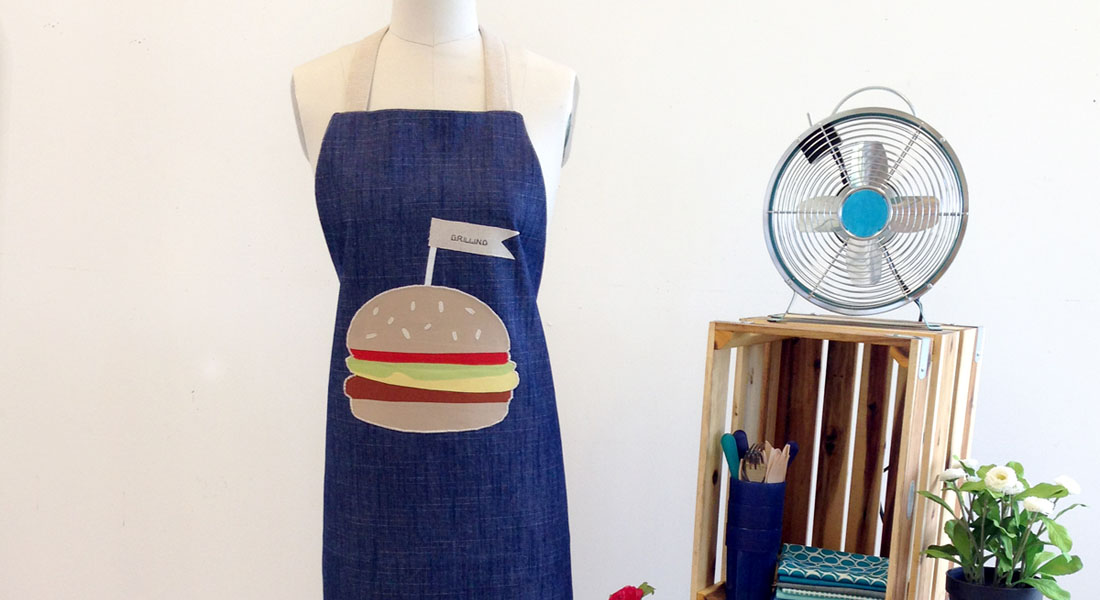
Embroider desired design. I used Vegetables CK744 and Feed Me CK753 from OESD. Remove excess stabilizer and press to flatten.
Step 4
Center embroidery designs and recut squares to 5 inches.
Step 5
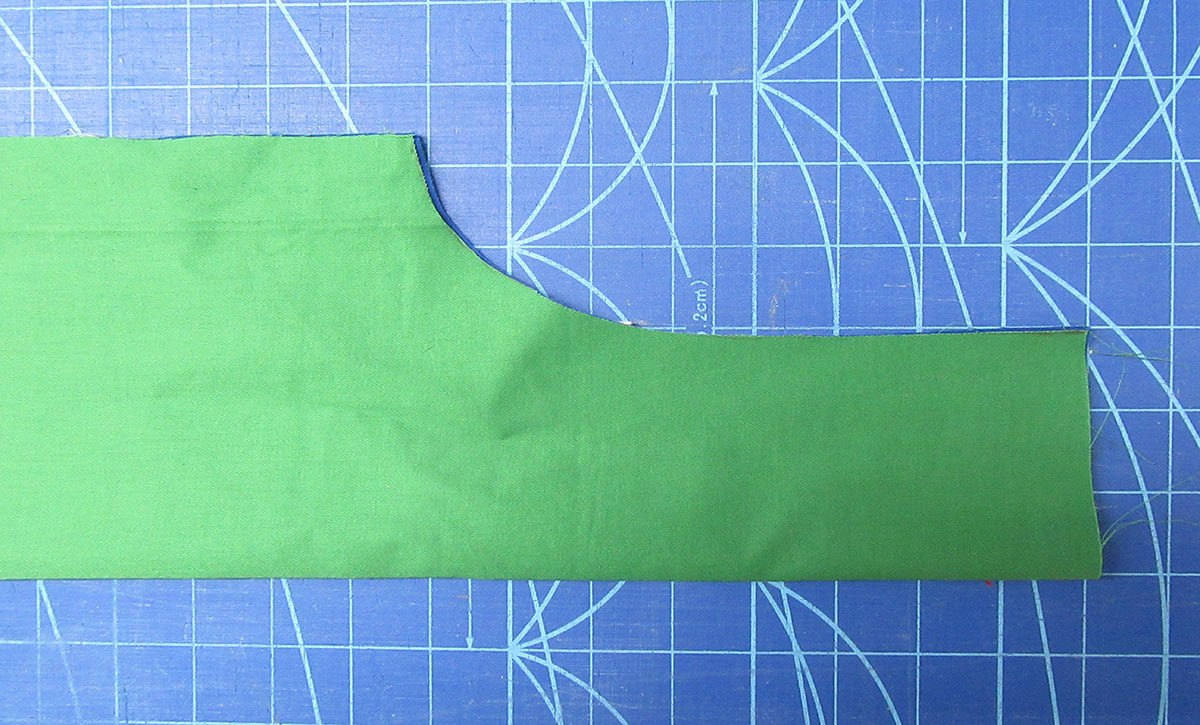
Lay one of the rectangles from step one on top of the other rectangle from step one right sides together aligning raw edges. Fold in half bringing long sides of both rectangles together.
Step 6
Make a mark 2 ½ inches in and 8 inches down from top and side raw edges. Draw a gentle curve to connect the marks.
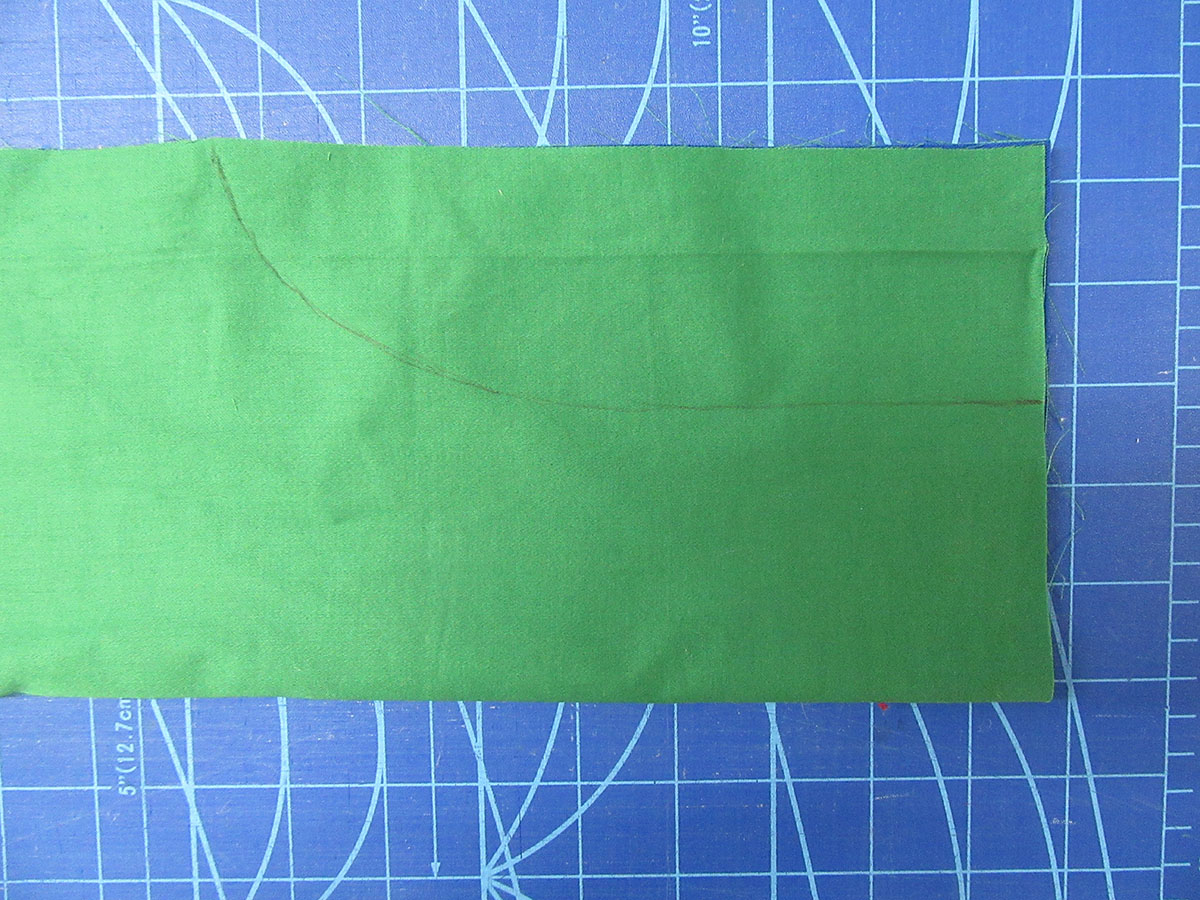
Step 7
Pin along drawn line making sure to keep the pins on the inside of the line towards the fold of the fabric. This will keep all the layers stabilized. Cut along marked line.
Easy Kid’s Apron Assembly
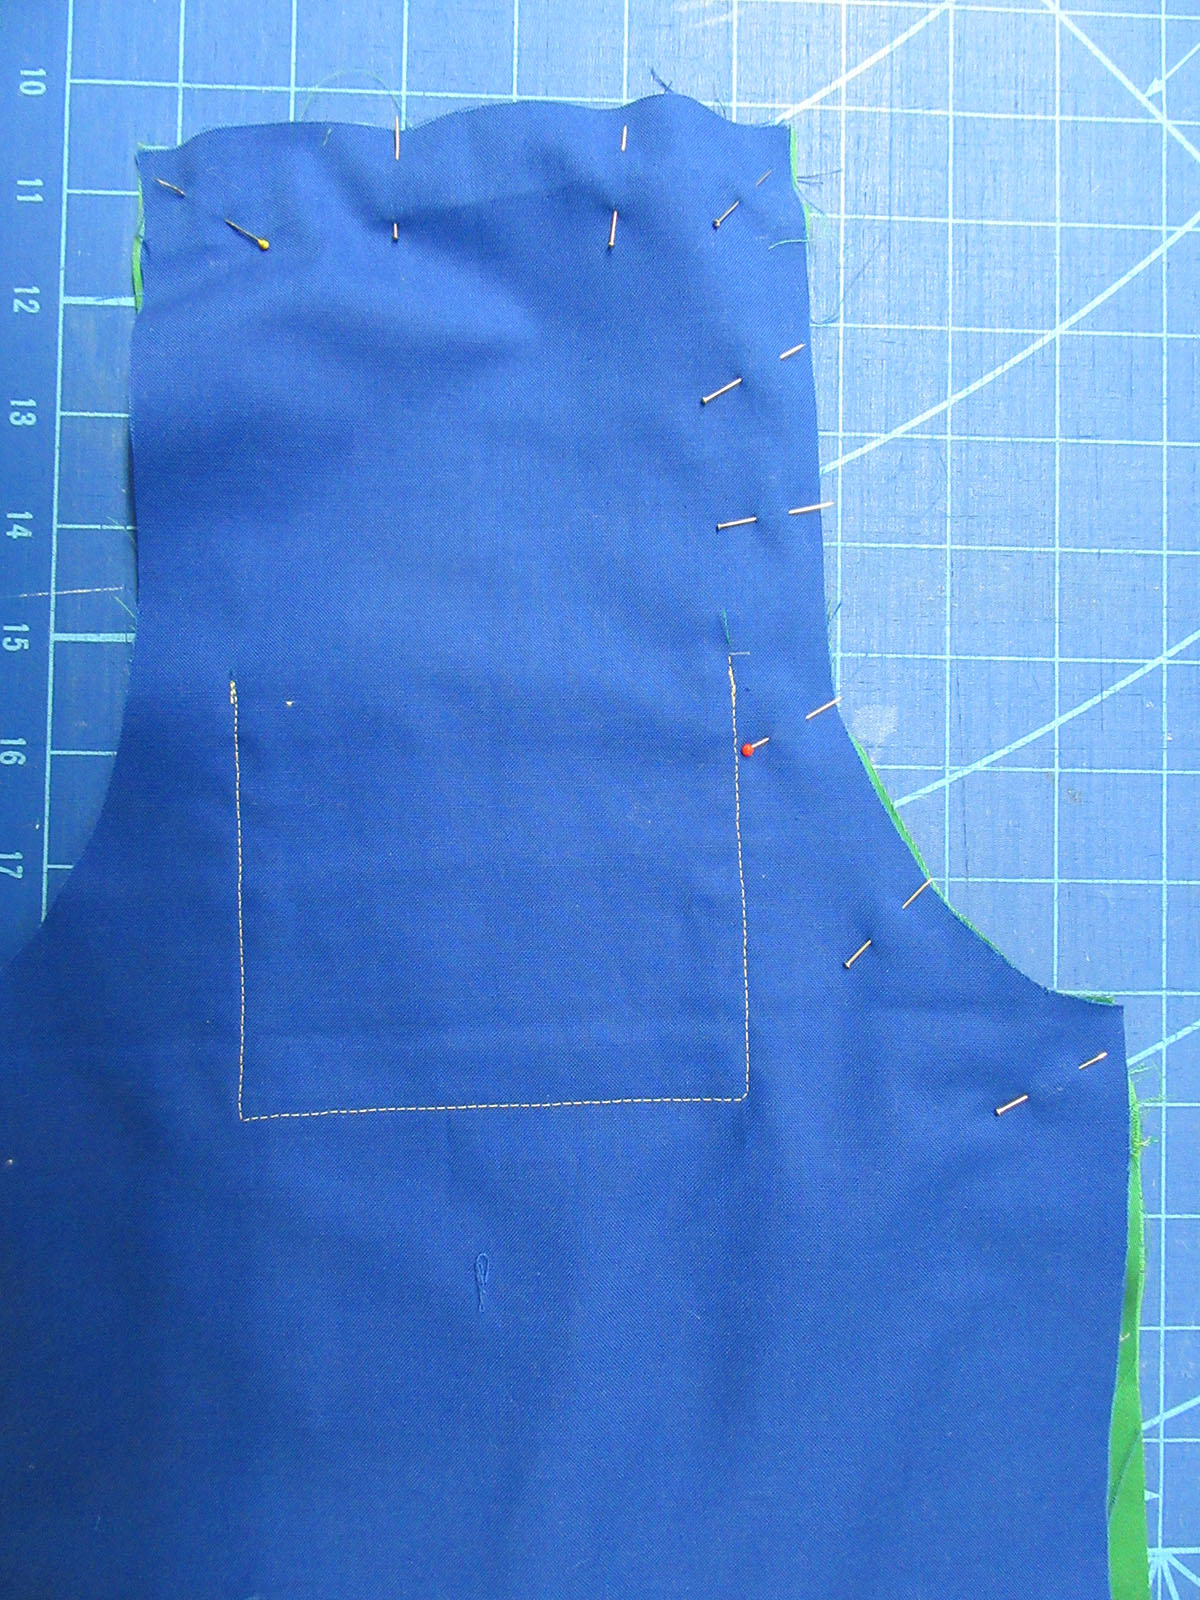
Step 1
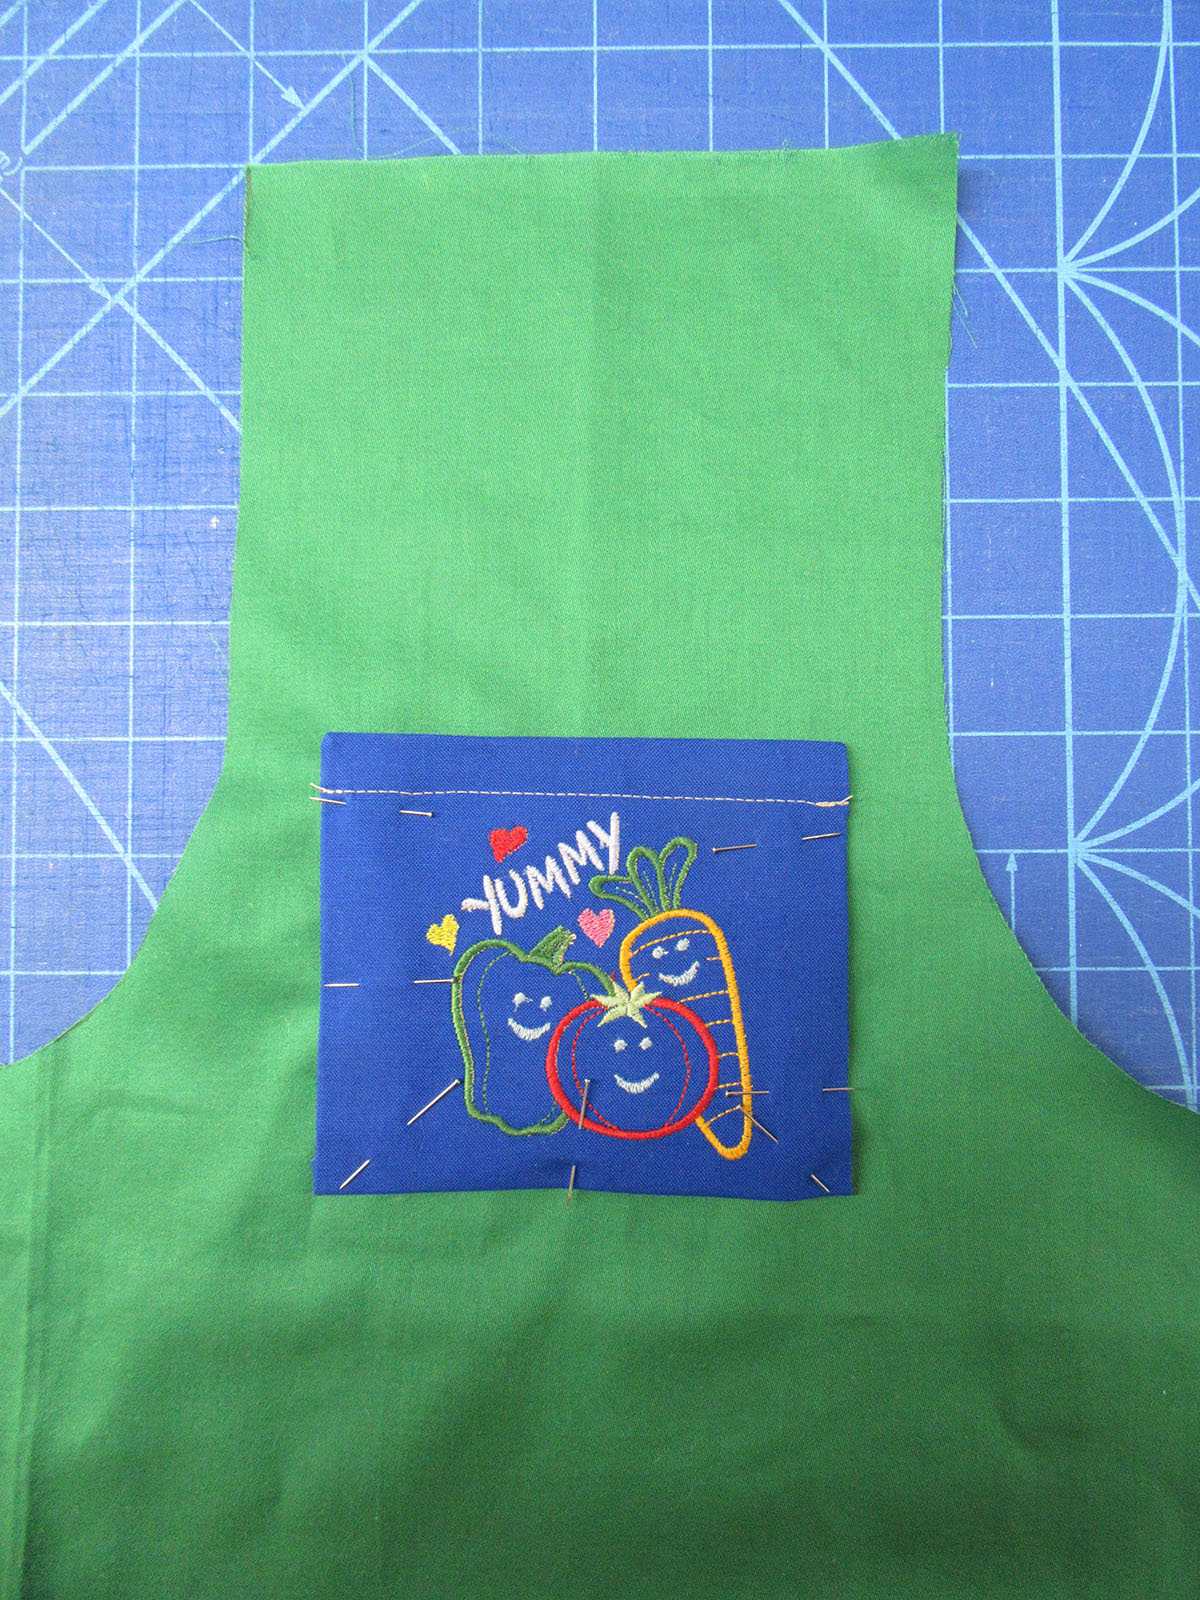
Fold over ¼ inch along top of each embroidered pocket. Wrong sides together and press.
Step 2
Fold over ½ inch previously pressed top of pocket to the front right sides together. Stitch fold to front using a ¼ inch seam allowance.
Step 3
Trim corners of folded edge. Turn towards back and press. Sew along folded edge.
Step 4
Fold and press under remaining three raw edges ¼ inch.
Step 6
Repeat with second pocket square.
Step 7
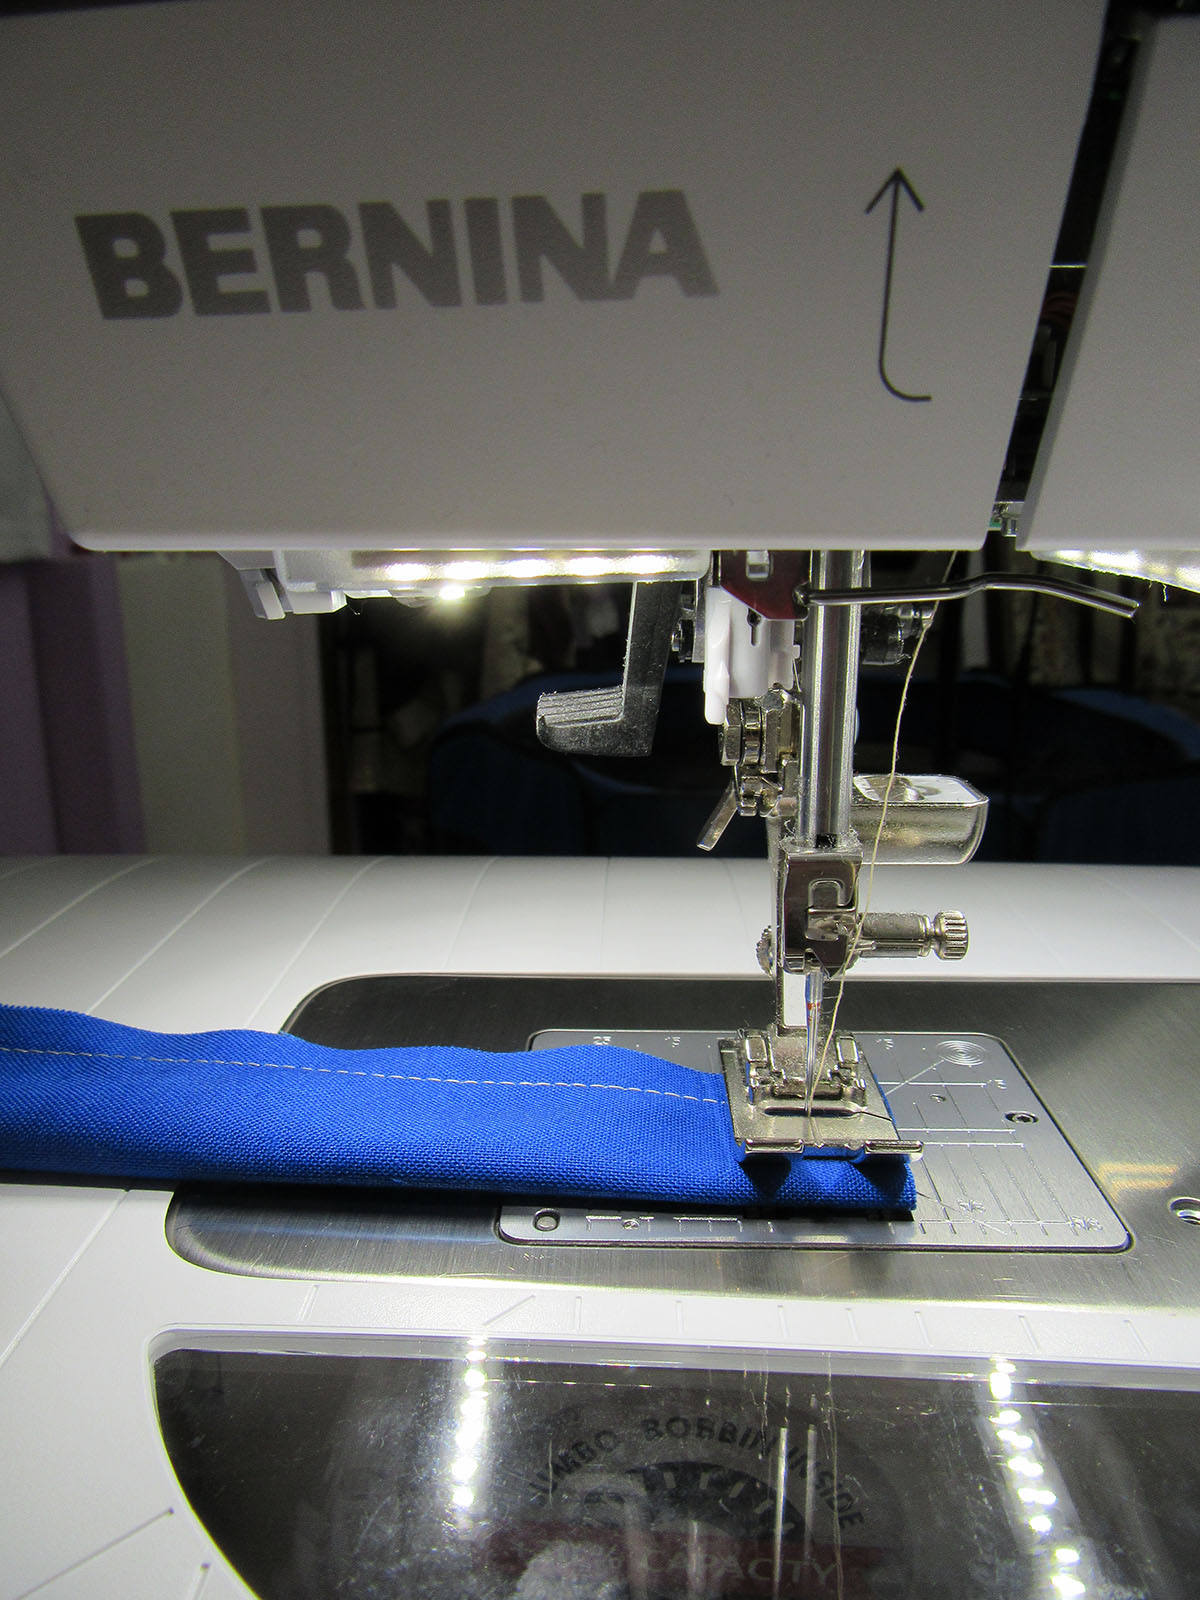
Fold one 2 ½ by 32-inch strip in half right sides together bringing long raw edges together. Sew along long edge and across one short edge using a ¼ seam allowance. Repeat with the remaining 32-inch strip and with both 18-inch strips.
Step 8
Trim close to seam line, turn right side out and press. Top stitch close to both long edges and across top. Repeat with remaining strips.
Step 9
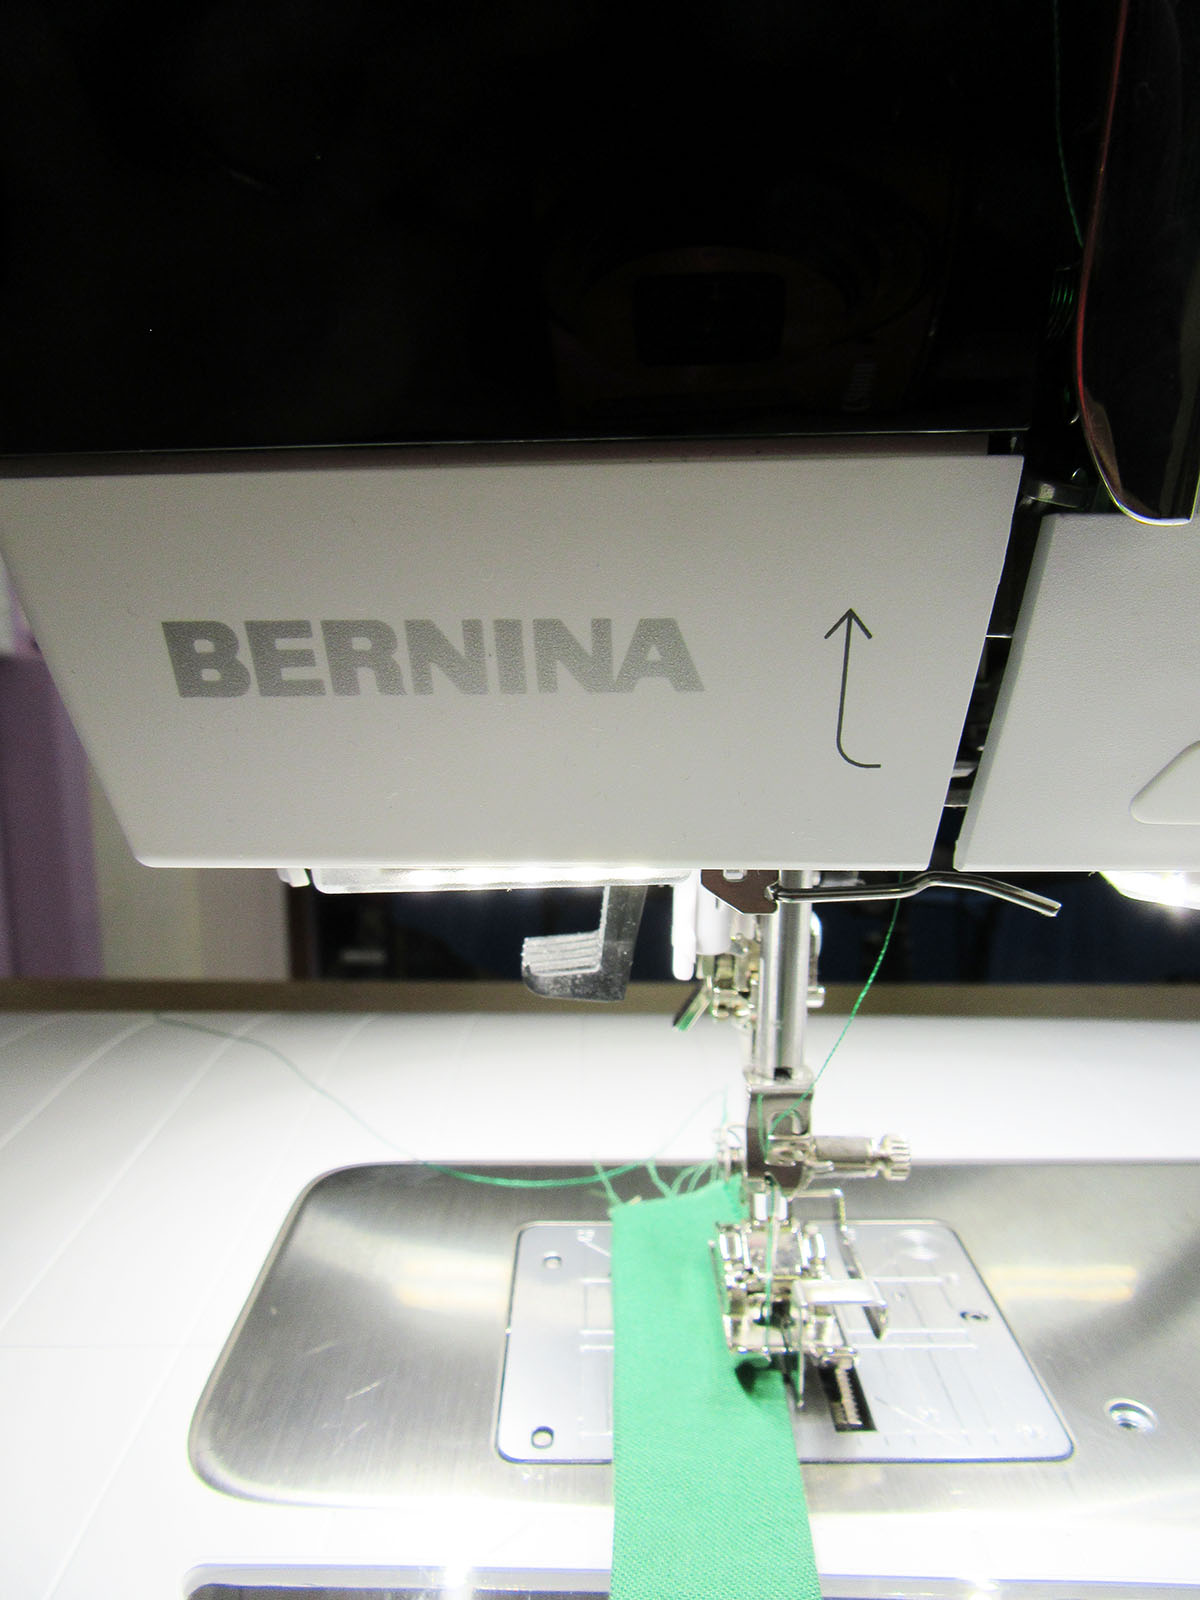
Pin one pocket to contrasting apron front. Sew, stitching close to edge of pocket leaving top finished edge open. Repeat with second pocket and opposite contrasting piece of fabric.
Step 10
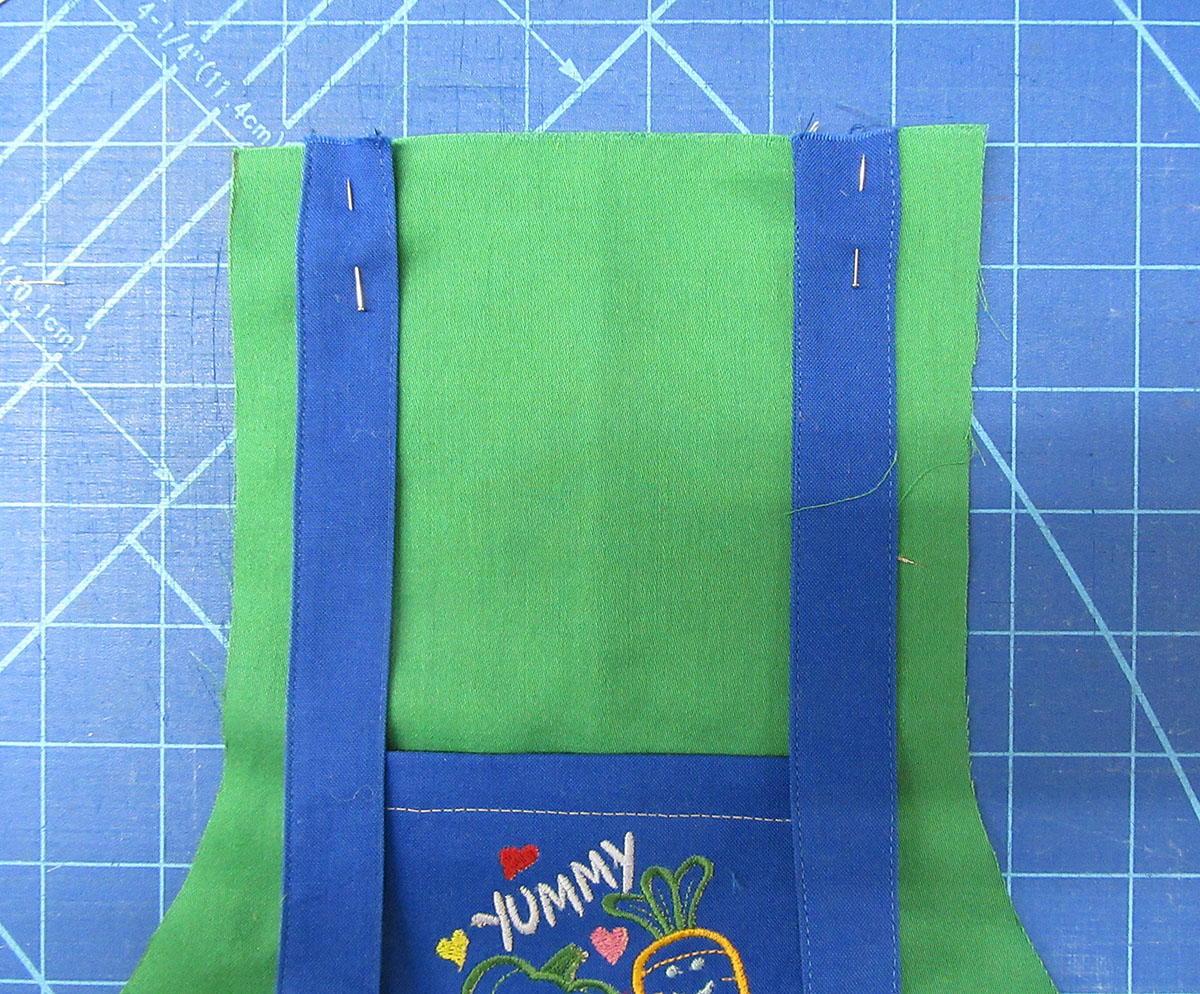
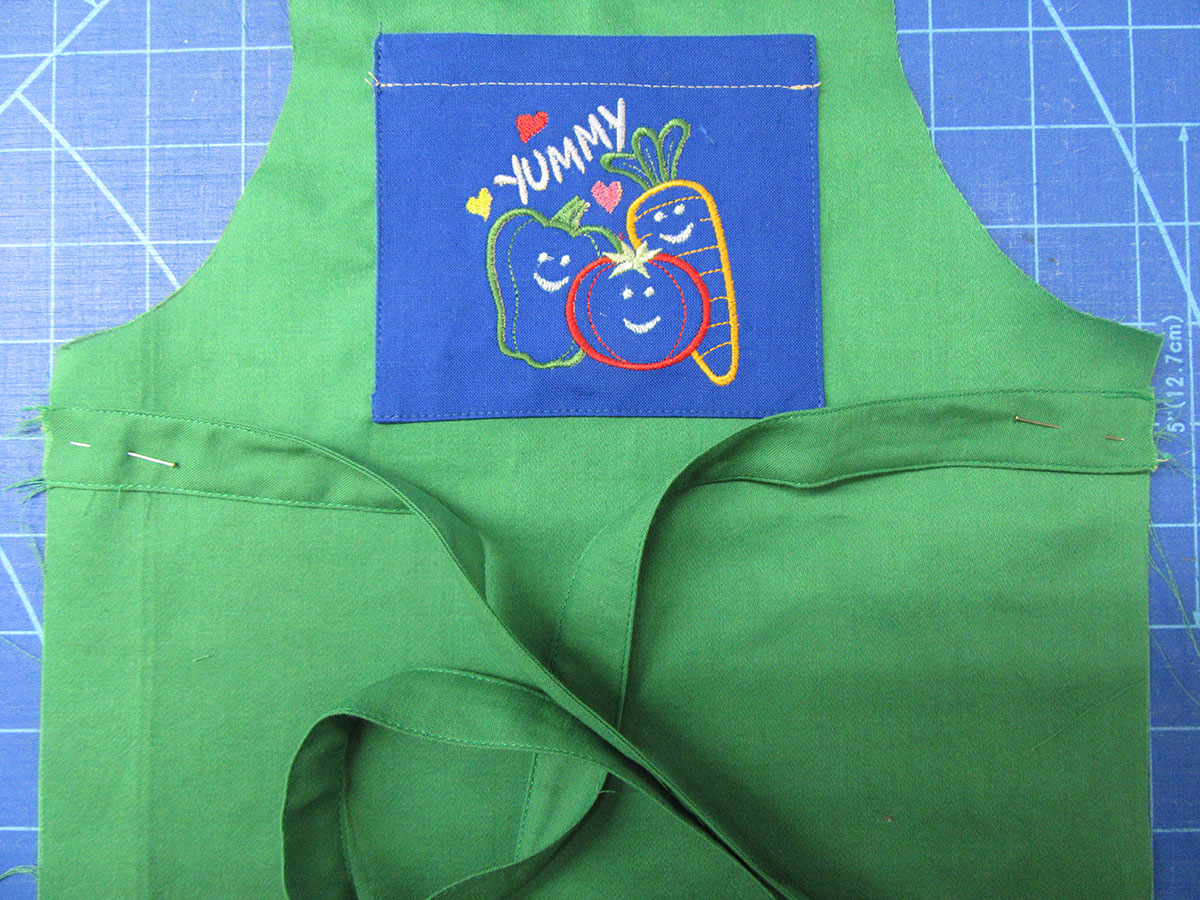
Pin short strips to top of one apron. Straps raw edges should be even with top of apron and 5/8 of an inch from each side. Baste using a ½ seam allowance.
Step 11
Pin long strips to sides of same apron section as in step 10. Straps raw edges should be even with side of apron and 5/8 of an inch down form arm hole. Baste using a ½ seam allowance.
Easy Kid’s Apron Tutorial Assembly Continued
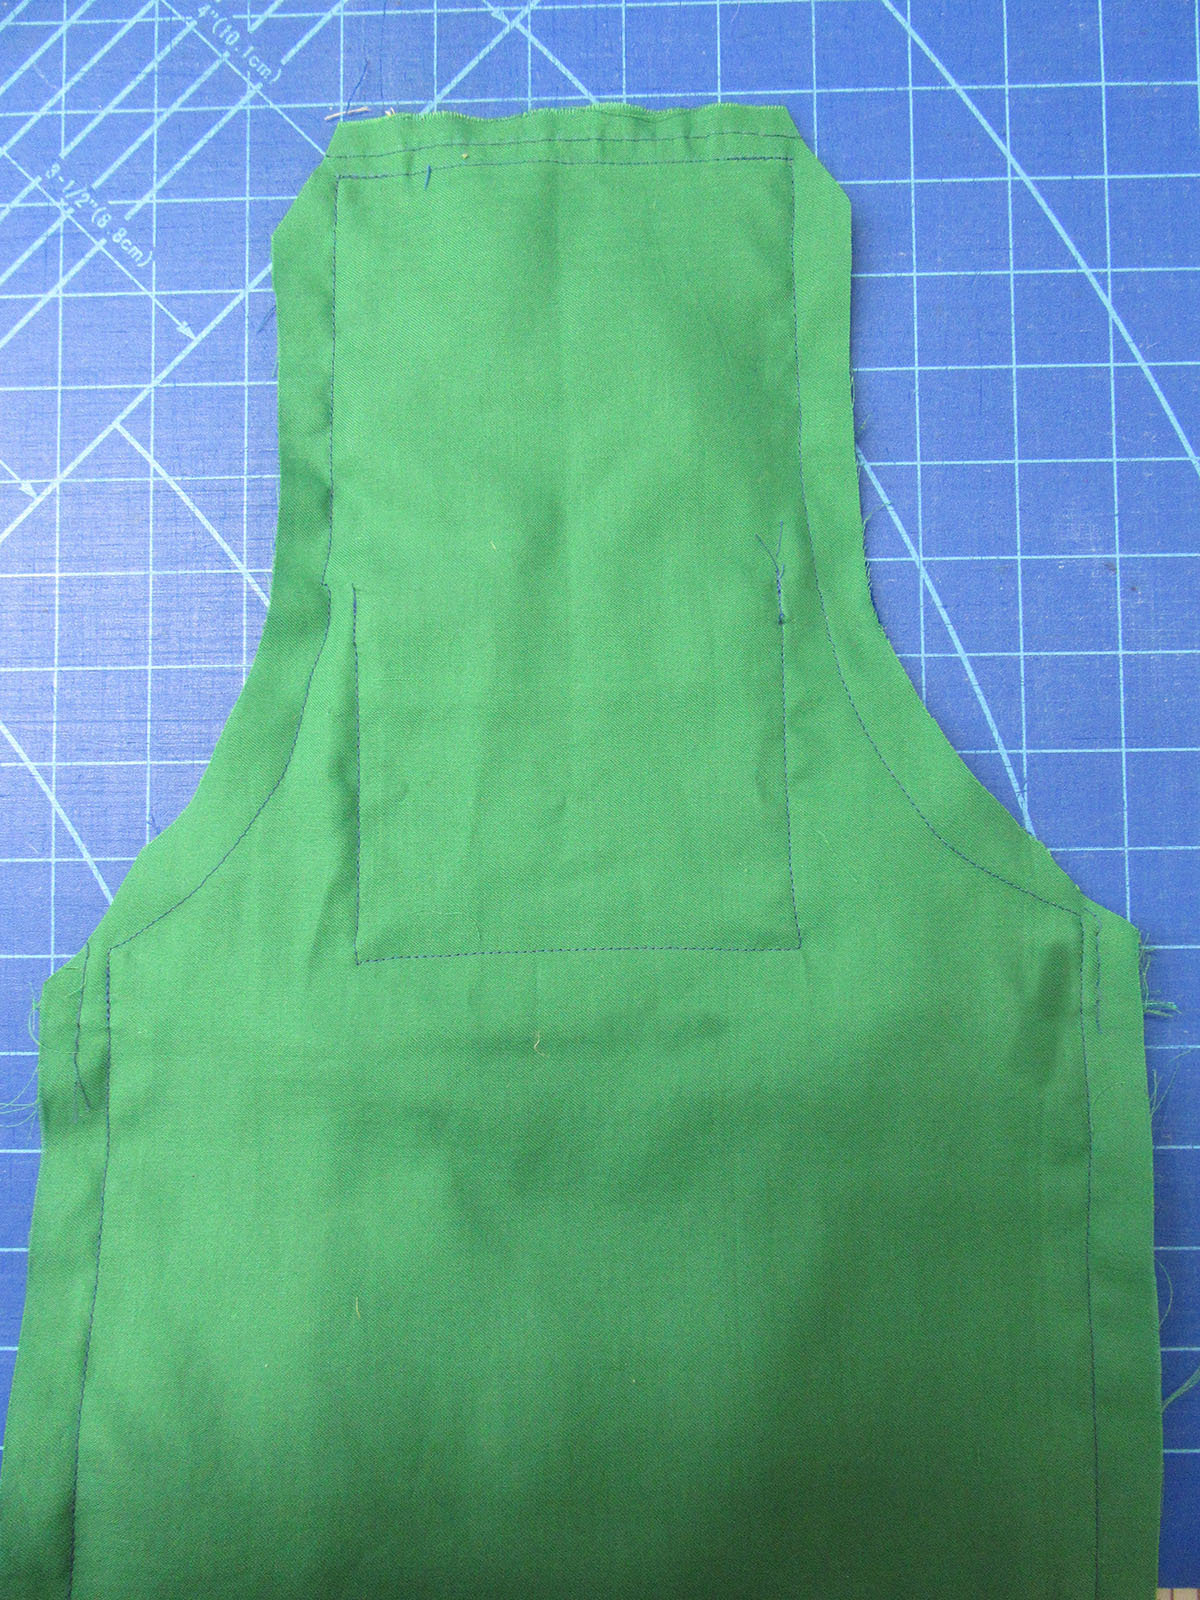
Step 1
Place the apron section with the straps face up on a flat surface. Lay the other apron section with the pocket already sewn on right side down on top of the first section. Line up raw edges and pin together. Make sure that all of the straps are inside the apron “sandwich” so that they will not be caught in the seam line. Sew around all edges of the apron using a 5/8-inch seam allowance. Leave an opening approximately 2 inches wide at the bottom for turning. Back stitch at each strap to reinforce. Be sure to only sew over previously basted parts of strap so as not to catch them in the arm side seams.
Step 2
Clip all the corners and trim seam allowance to ¼ inch. Turn right side out and press. Pin bottom opening left for turning closed. Top stitch around the outer edge of the apron, sewing closed turning opening in the process.
Your Easy Kid’s Apron is now ready for use. Put your little Sous Chef to work and have fun!
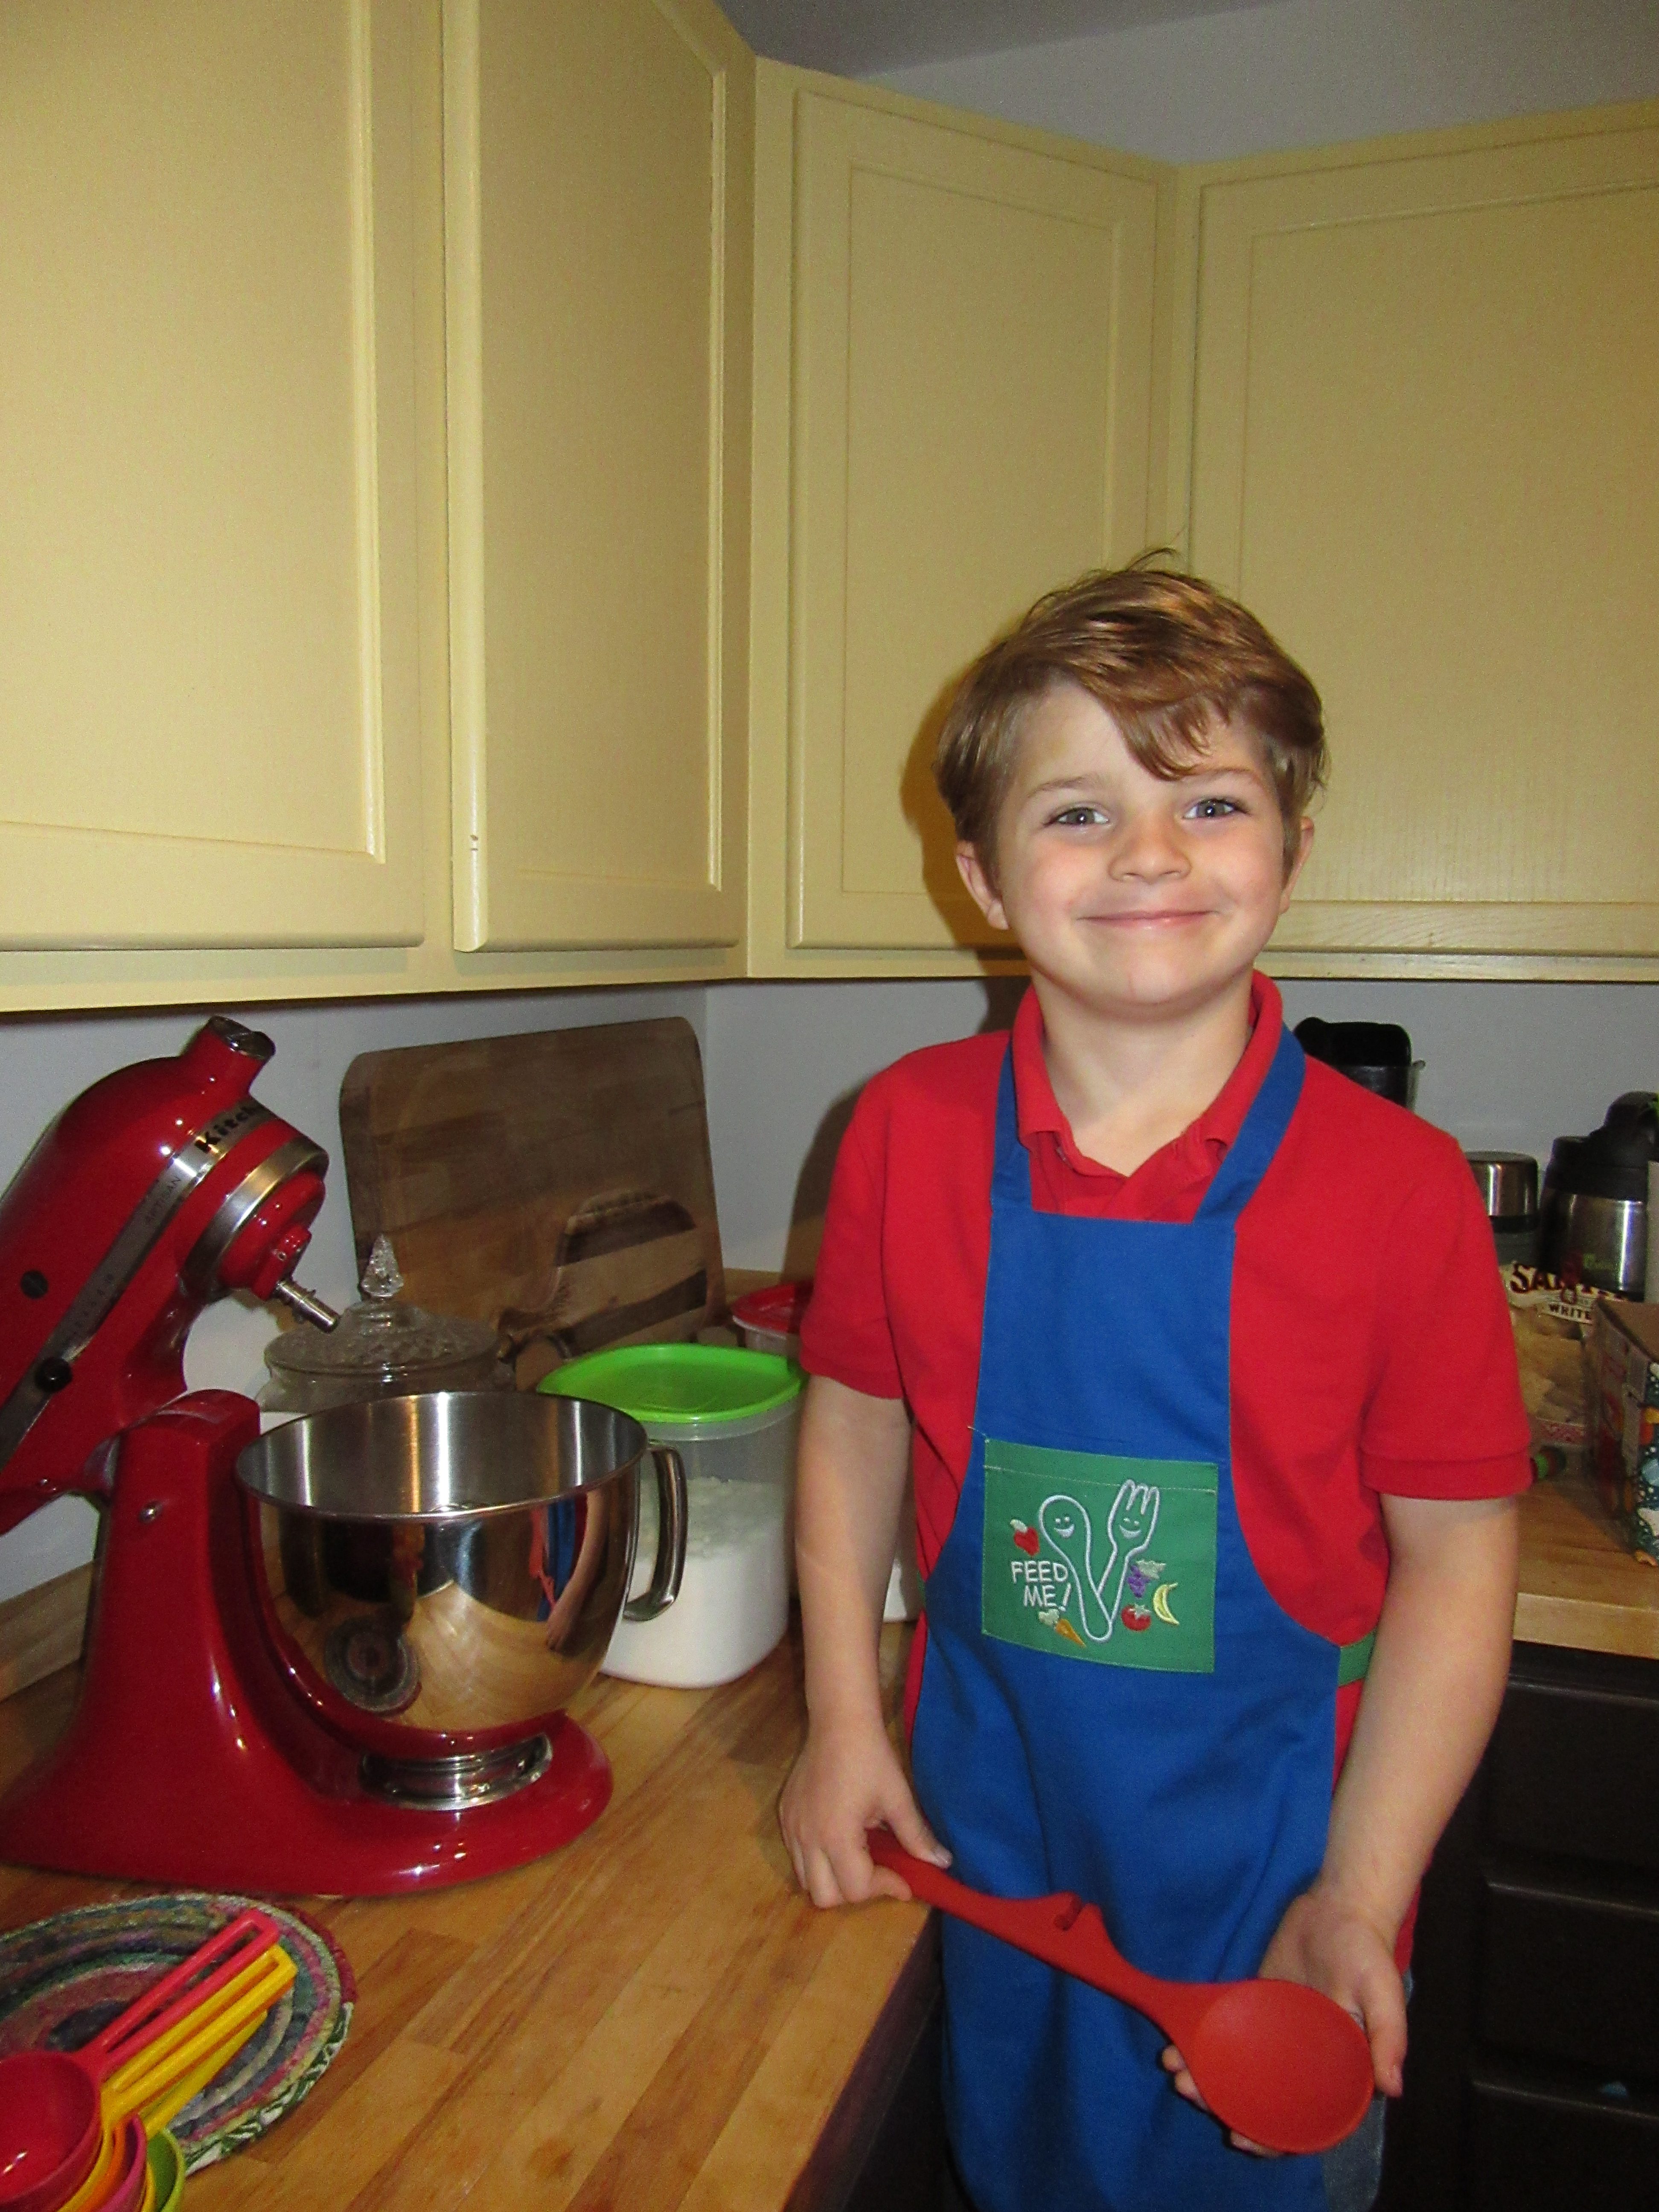
Many thanks to fellow BERNINA Ambassador @kristastitched for loaning me the use of her youngest to model the apron.
Used Products


What you might also like


2 comments on “Easy Kid’s Apron Tutorial”
-
-
I use the yellow high tension bobbin case, when I’m embroidering with my 790. I do occasionally have to slightly decrease the top tension, depending on the thread/fabric I’m using, but the yellow bobbin case greatly reduces the amount of adjustments I have to make. Hope this helps. feel free to contact me, if you have more questions.
-
Leave a Reply
You must be logged in to post a comment.

Clicked on “contact Us,” but no where to create and/or send an email to we All Sew. I am reaching out wondering how to set up the tension for machine embroidering a tea towel on the Bernina 770. I realize, fabric, thread, design, etc…. All are factors, however, I saw the design from OESD for the Kids apron and they used brown thread on the bottom and various on the top and the stitching was excellent. I tried for the first time a colored flour sac red tea towel, white top thread and red bottom thread. Both threads showed on the bottom. The stitch was nice. The top tension was fine, a few hic-ups. Any suggestions? I actually took out three rows of lettering the first round. Very time consuming. The design on the tea towel is all lettering, no figures. Hope someone will get back to me very soon. Thank you for your time.