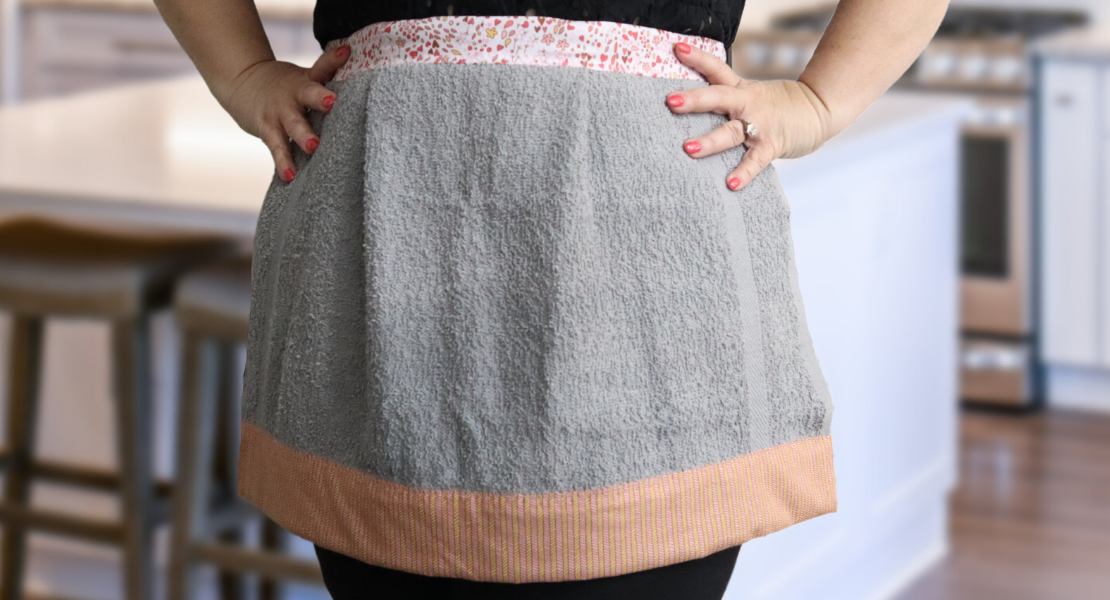
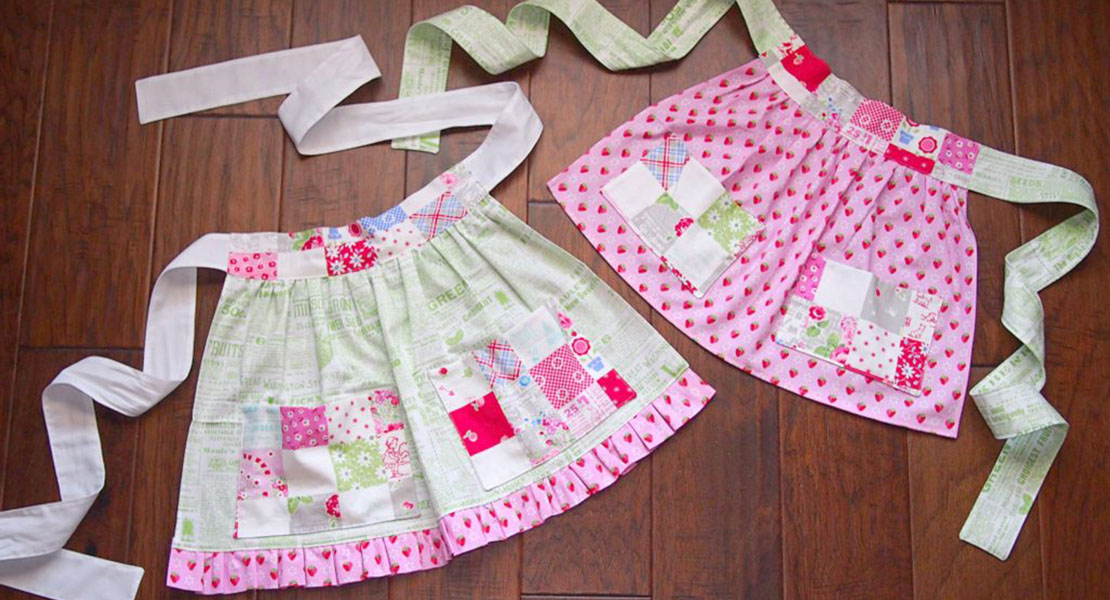
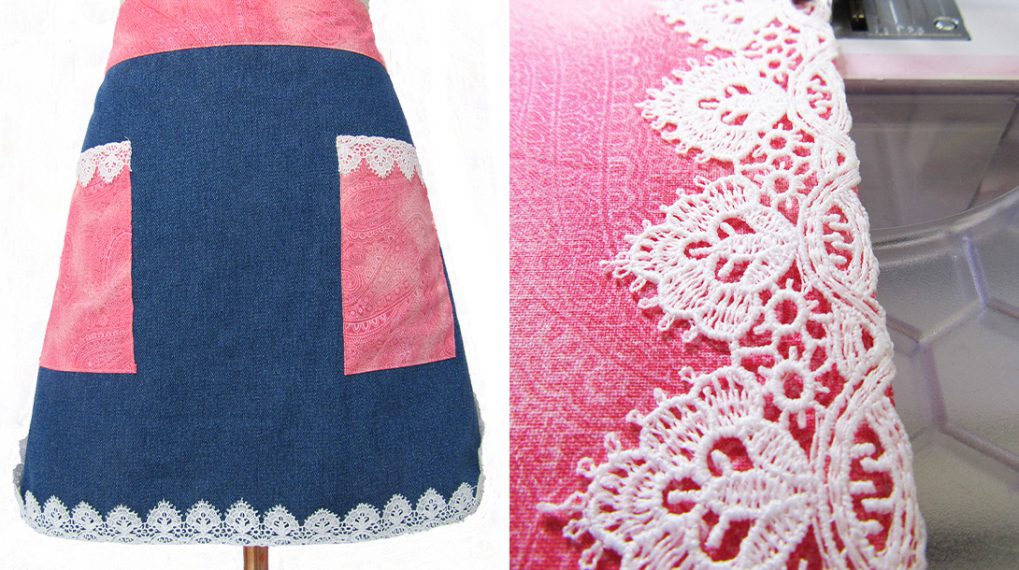
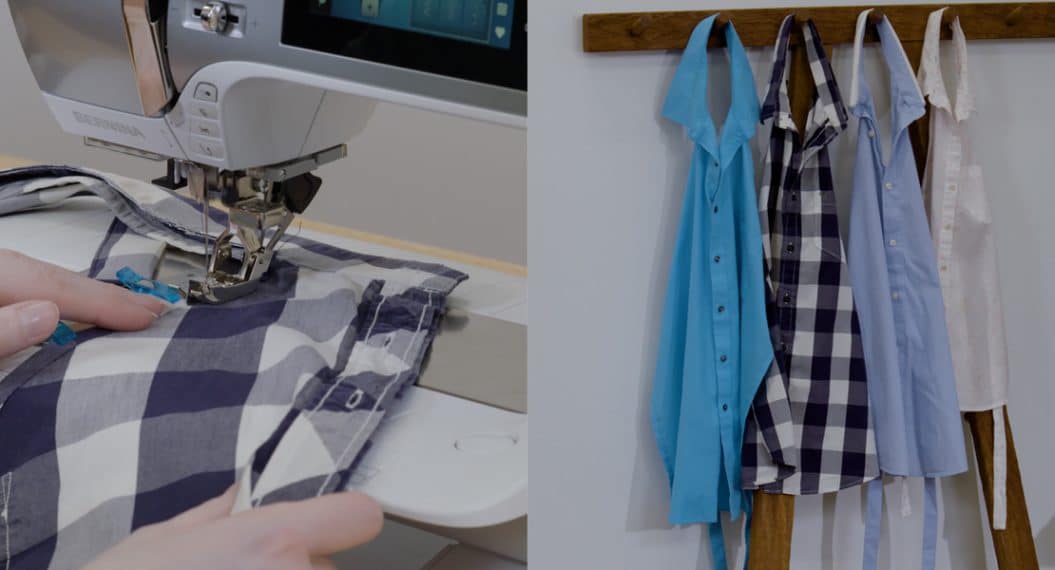
DIY Utility Apron
An apron is always a useful accessory, whether it is worn in the kitchen, in the garage, or even an art studio. They are also incredibly easy to customize and create!
One of my favorite parts about the apron I’m sharing with you today is that it is fully adaptable to suit any size, add features for a variety of uses, and add as many pockets as you might need.
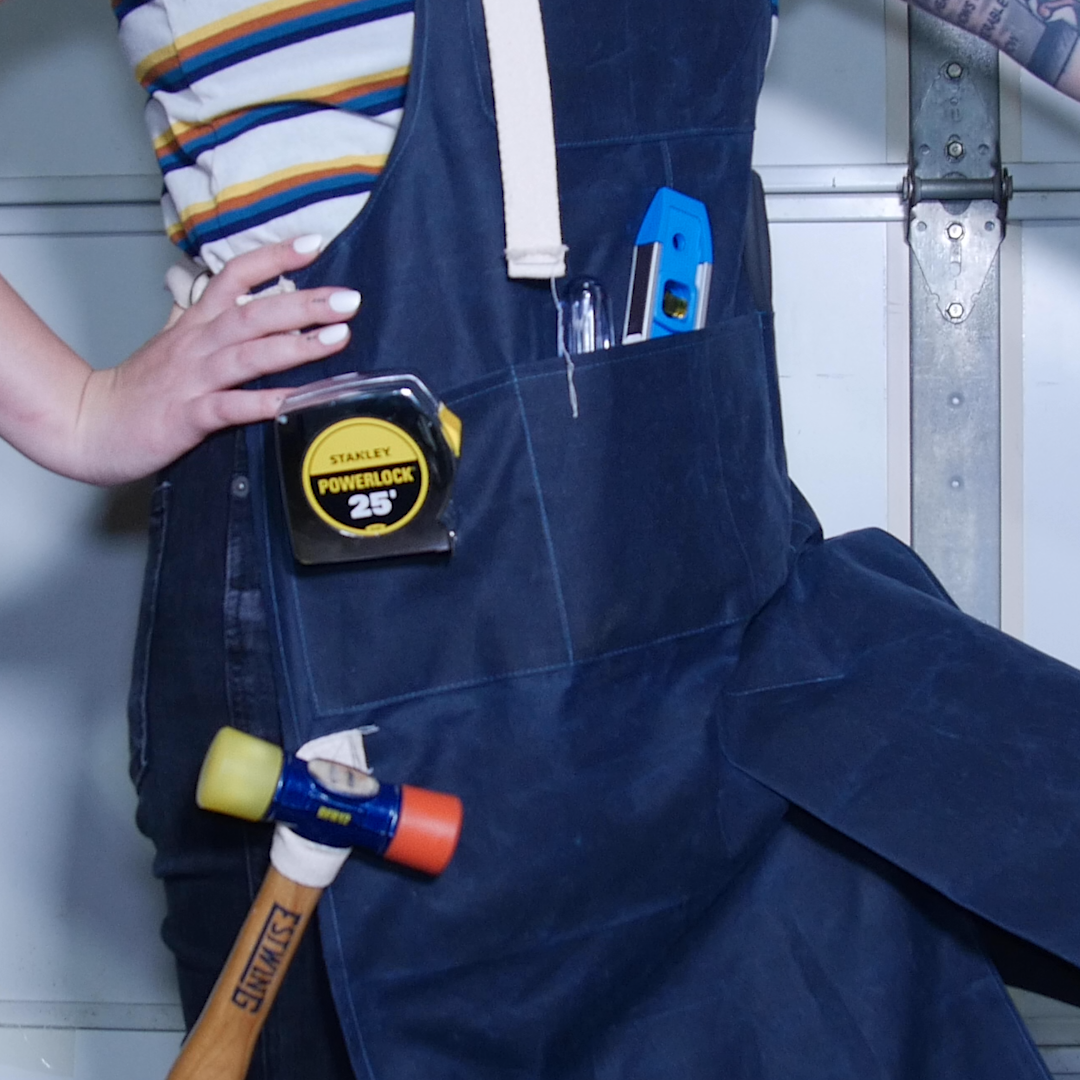
The other thing I love about this apron in particular is it is a split-leg design. With this design, the bottom of the apron can separate, making for more comfortable and protective coverage while sitting to work. Our apron today is also made out of a heavy duty waxed canvas which means it’s water repellant and can hold up to plenty of wear and tear!
Supplies to Make a DIY Utility Apron
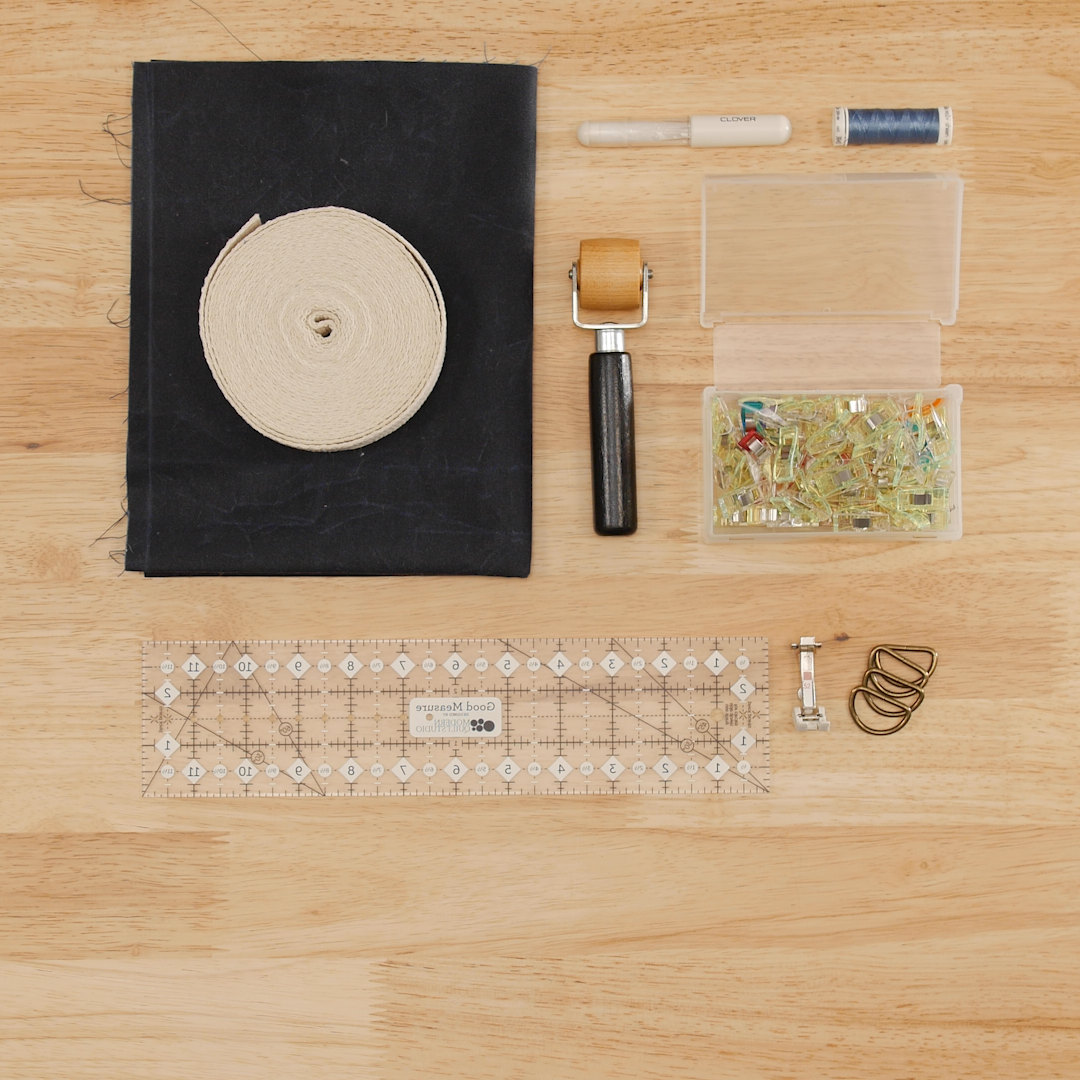
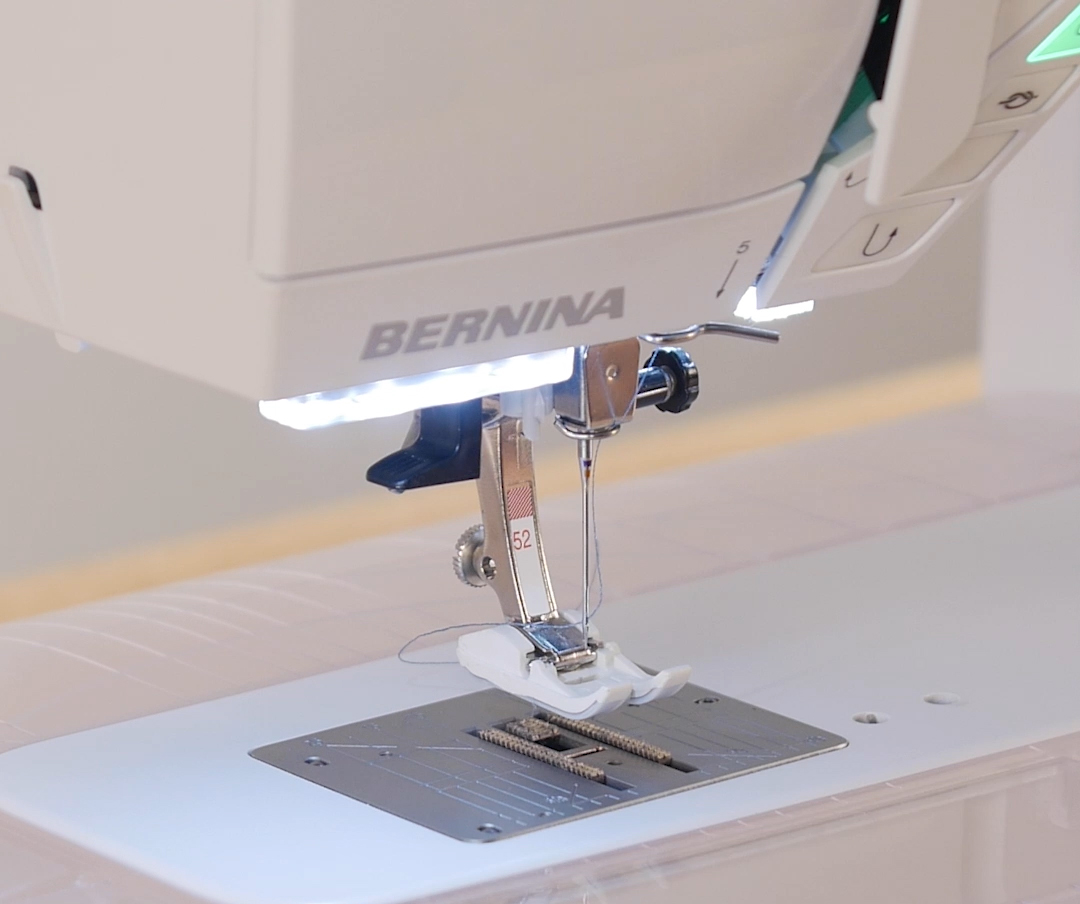
- BERNINA 435
- Zigzag Foot with Non-Stick Sole #52
- 1 1/2 yards heavy duty waxed canvas
- Polyester thread (like Mettler Metrosene)
- 2 yards 1” wide cotton webbing
- 4 1” D-rings
- Chalk marker
- Jeans Needle size 90
- Wonder Clips
- Seam roller
- Swedish tracing paper
Steps to Make a DIY Utility Apron
Step 1. Create Pattern and Cut Fabric
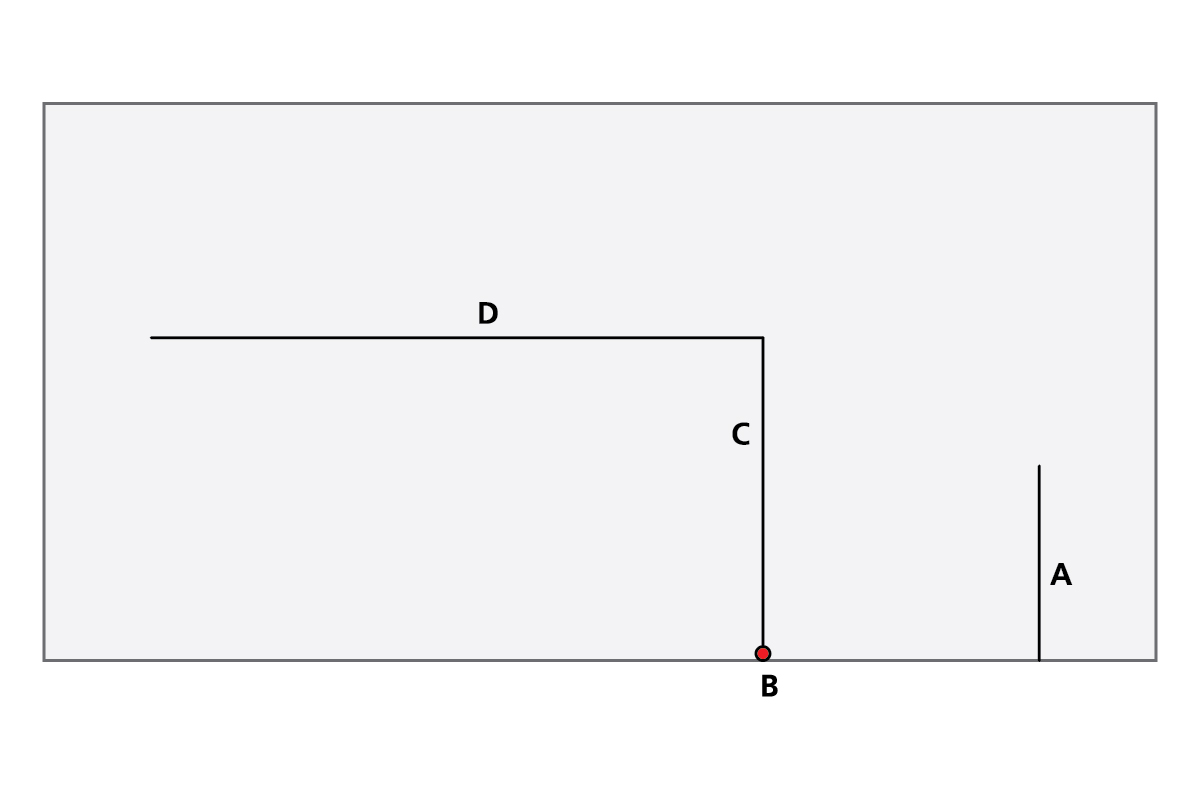
First, we need to create our apron pattern template. If you have an existing apron you love and simply want to make a new version, just fold it lengthwise and trace. But to make a custom fit apron, we need to do a bit of measuring and sketching.
First, determine how wide you want your apron to be across the chest. Add 1/2″ then divide that number in half. I’m creating my pattern to be cut on the fold so I will make this my starting point. We’ll call this measurement A.
Then, determine where you want the “waist” of the apron to sit and measure the distance between the top of the apron and this point. Add 1/4″ to this measurement. Add a marking at the edge of the pattern paper here. We’ll call this measurement B.
Now determine how wide you want the apron to be. I suggest having it wrap slightly around the body. Add 1/2″ to this measurement and divide that number in half. We’ll call this measurement C.
Finally, determine the desired length from the waist to the bottom hem. Likely this will reach to about the knees. Add 1/4″ to this measurement. We’ll call this measurement D.
Now, on your pattern paper, create the following shape, measuring out your appropriate lengths and points.
Then, connect these lines and points to create your apron shape. Where the apron top meets the bottom, you will want to connect these lines with a curve. You can use a tailor’s curved ruler to do this or just a large round object like a bowl or dinner plate. Cut out this pattern piece.
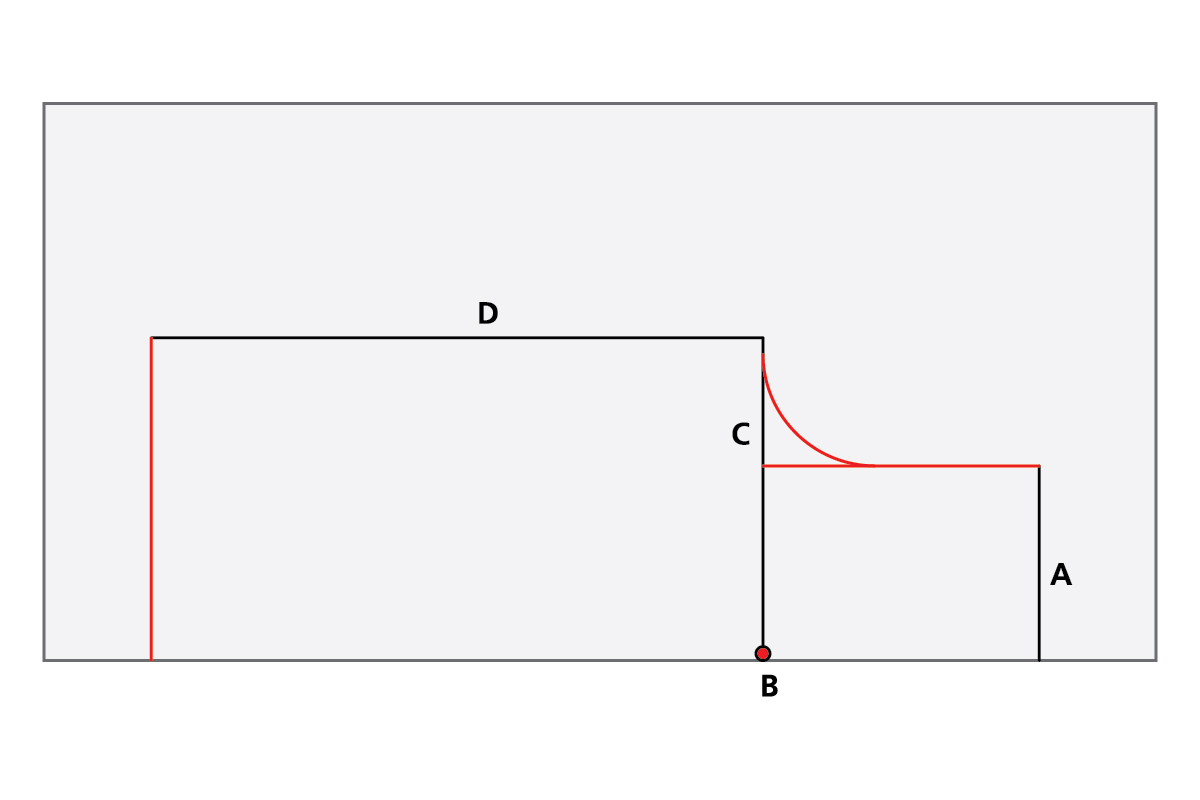
Now, to turn this into a split leg apron, we need to add a vent to the front. Measure the desired distance from the bottom hem up to the top of the vent. Cut another piece of tracing paper 4” wide by the length of your measurement. Cut across one of the short ends at a 45-degree angle.
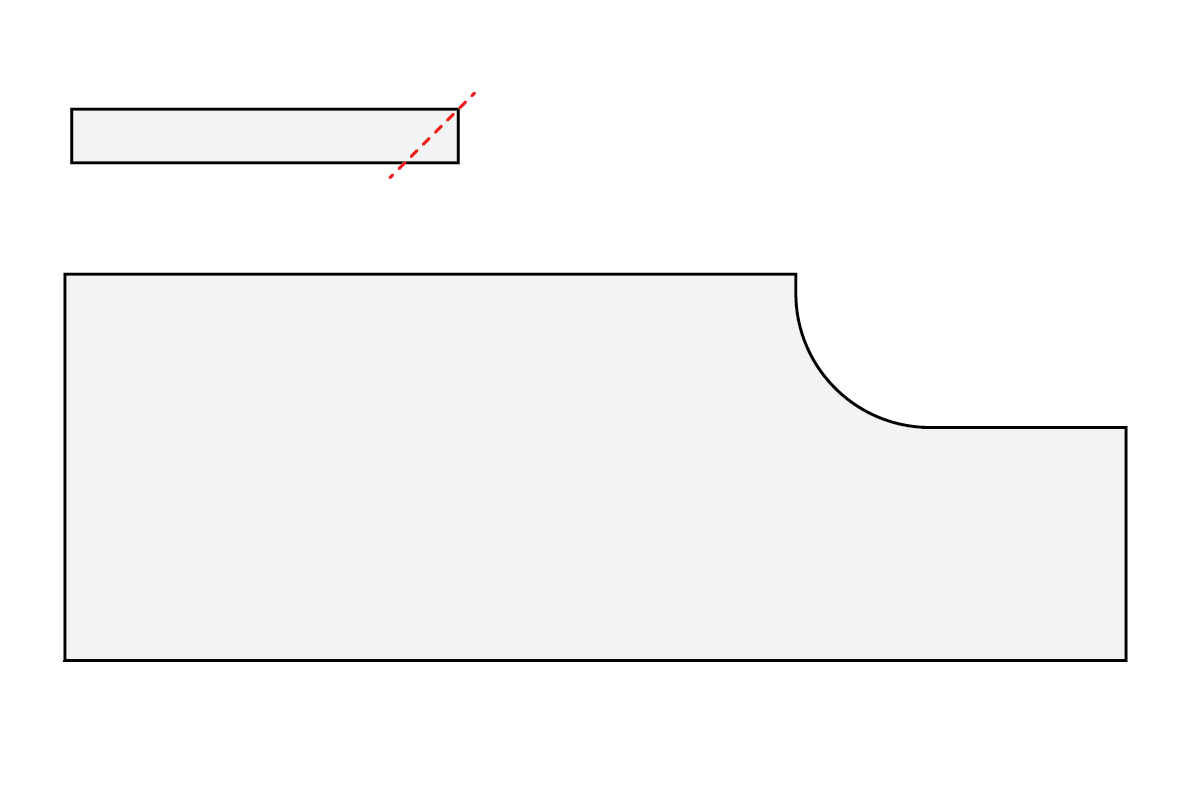
Now add that piece to the long straight edge (the centerline of our apron) aligned with the bottom. Tape in place.

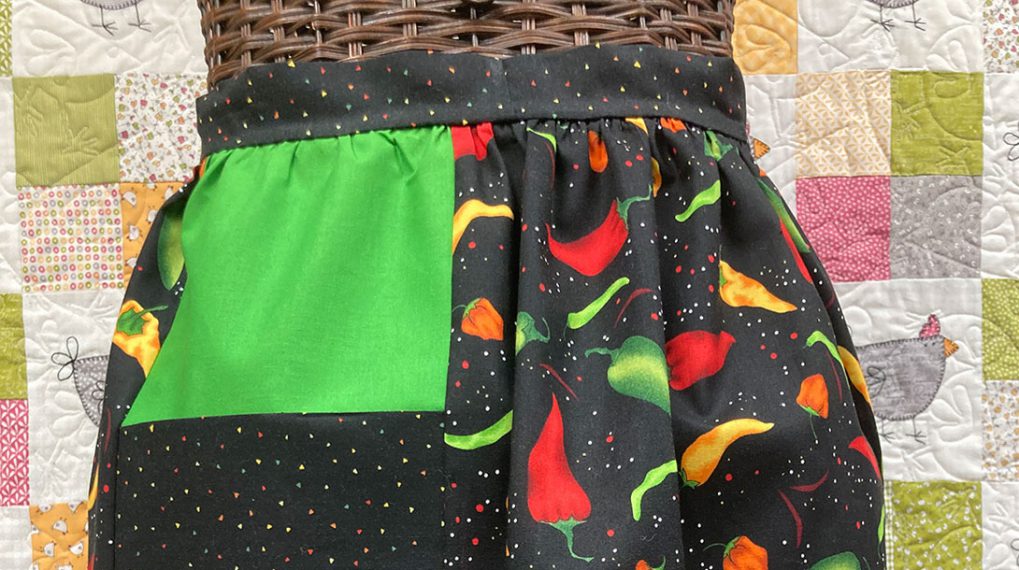
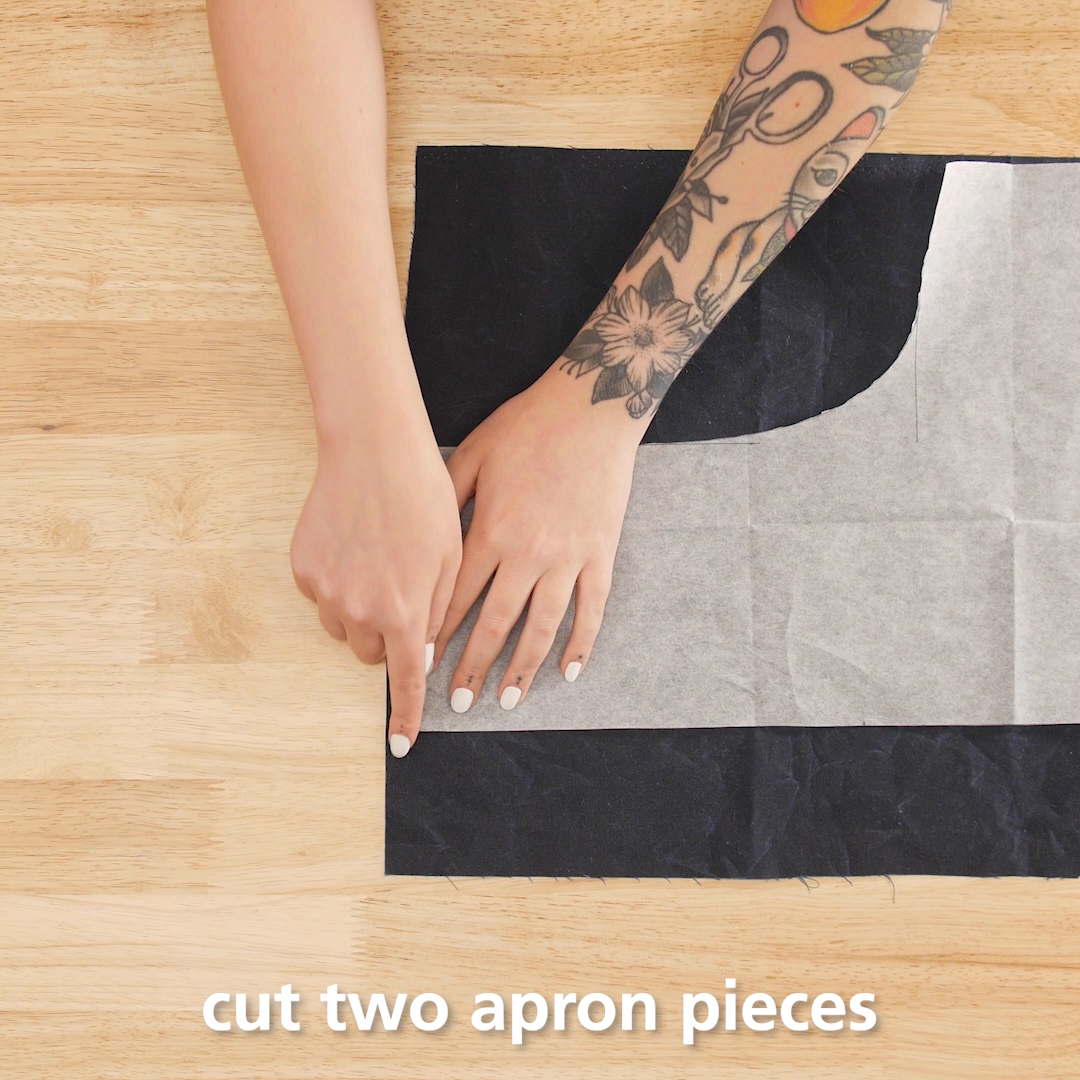
Your pattern is finished! Now trace and cut two of these pattern pieces from your waxed canvas. I recommend using pattern weights rather than pinning through the fabric. If you would like to add pockets to your apron, cut those out as well. I chose to add one wide pocket across the waist and a smaller pocket on the chest.
Step 2. Assemble Apron Body
One great thing about waxed canvas is that there really is no right or wrong side! This makes things a little less stressful when cutting and prepping. But once you choose what your “right” side will be, it can be helpful to mark that with something temporary like painter’s tape.
The first thing I want to do is hem the inside of the vent. Once that vent is stitched into place on the apron body, it will be more difficult to hem the edges so we will do that first.
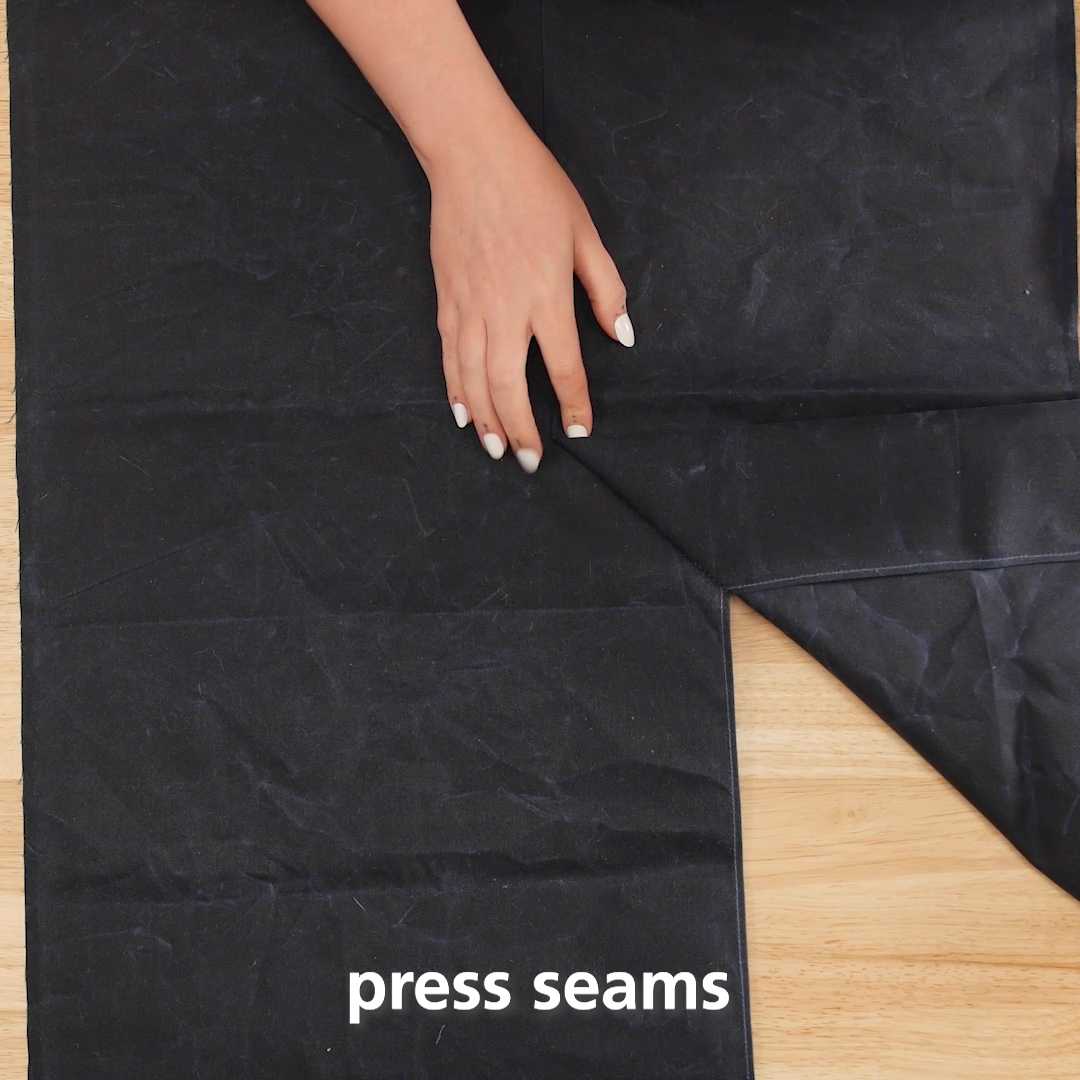
Fold the edge of the vent to the backside on both the left and right sides of your apron fabric, by about 3/8″. Press this fold with your seam roller and hold in place with Wonder Clips. A seam roller is a great tool when working with waxed canvas or any fabric that can’t be pressed with an iron.

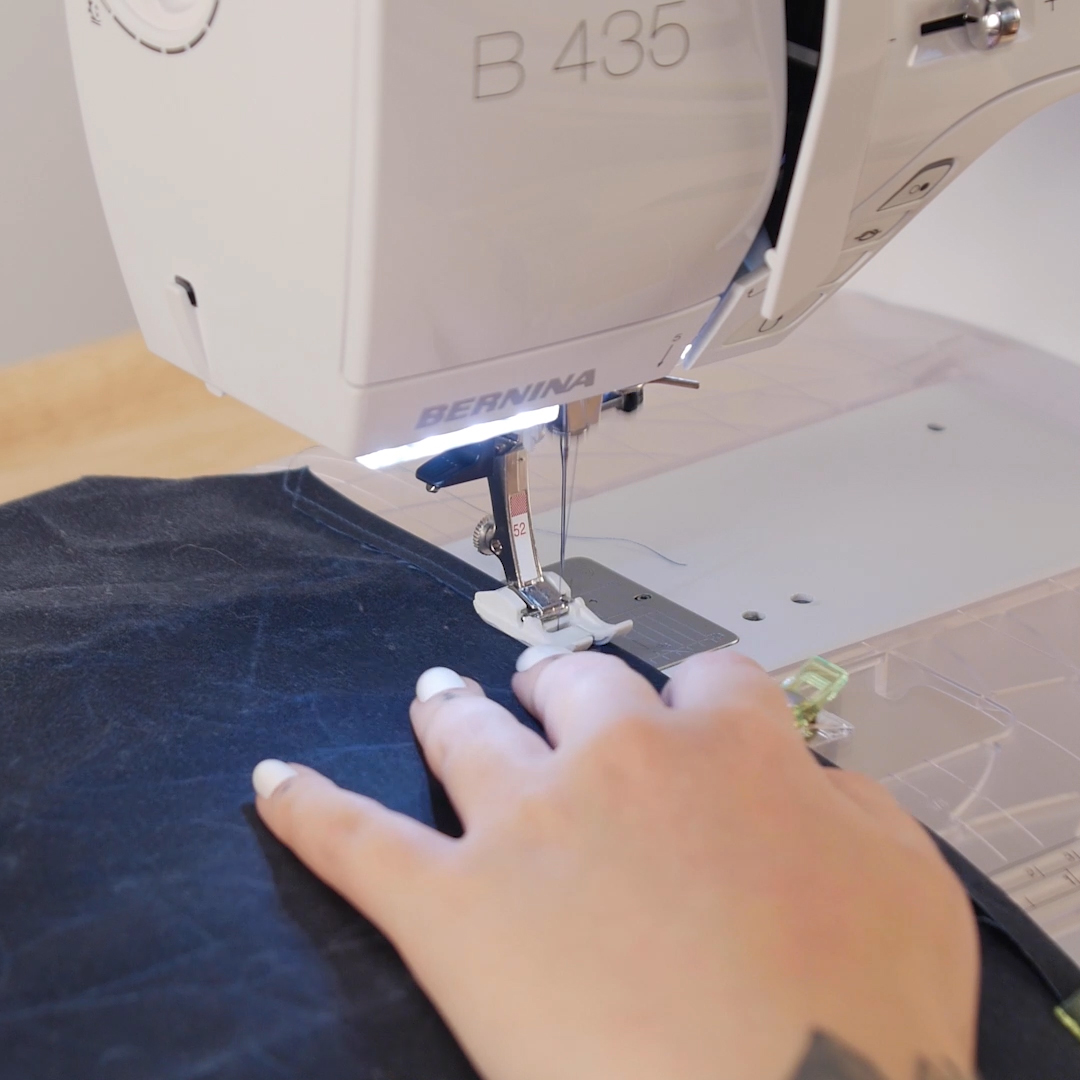
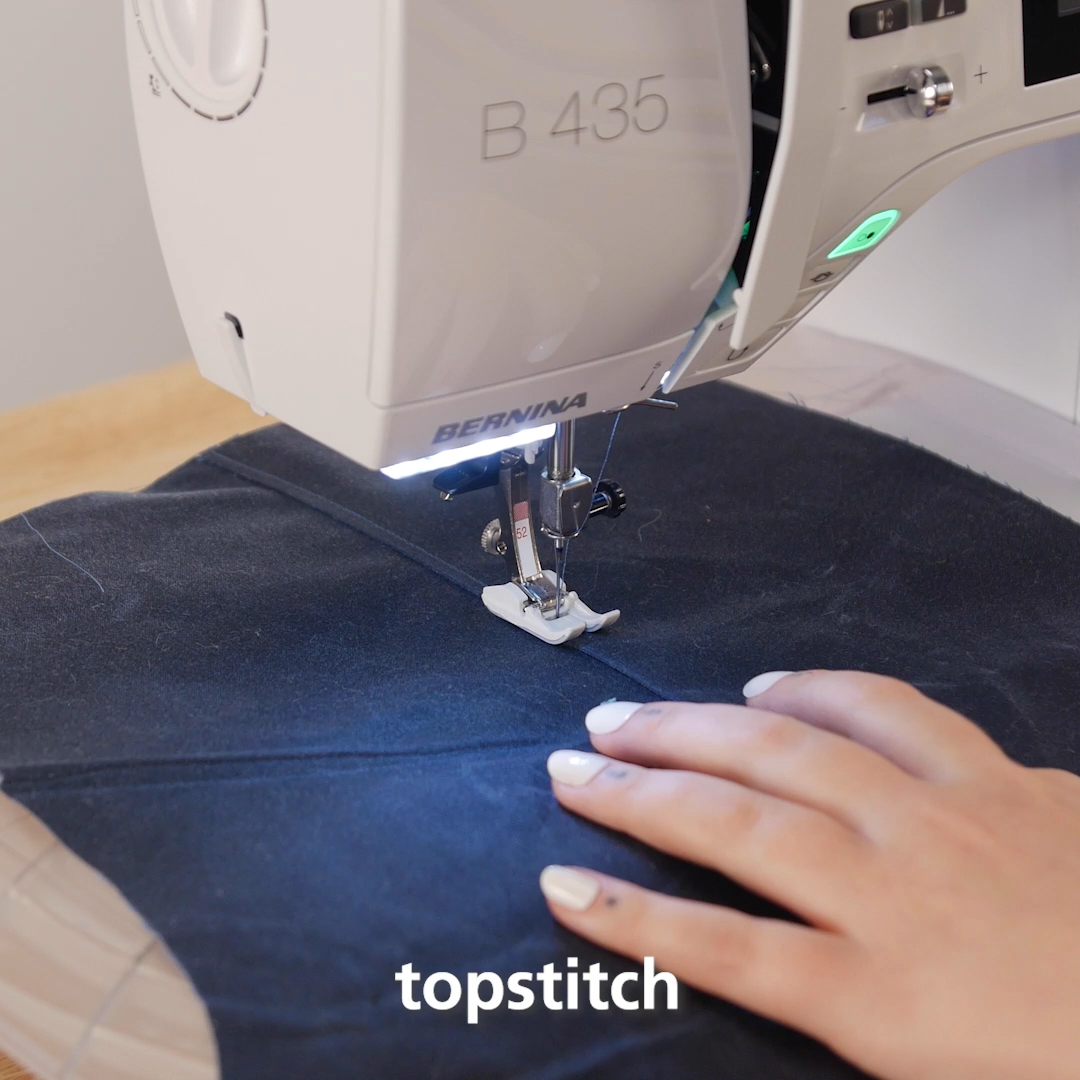
Attach Zigzag Foot with Non-stick Sole #52. This presser foot has a non-stick coating that makes it glide over textured or sticky fabrics smoothly.
Increase the stitch length to 3.0 mm. Sew down folded edge about 1/4″ away from fold on each vent.
Next, we will assemble the apron body, including stitching to create the vent. Place your two apron pattern pieces right sides together.
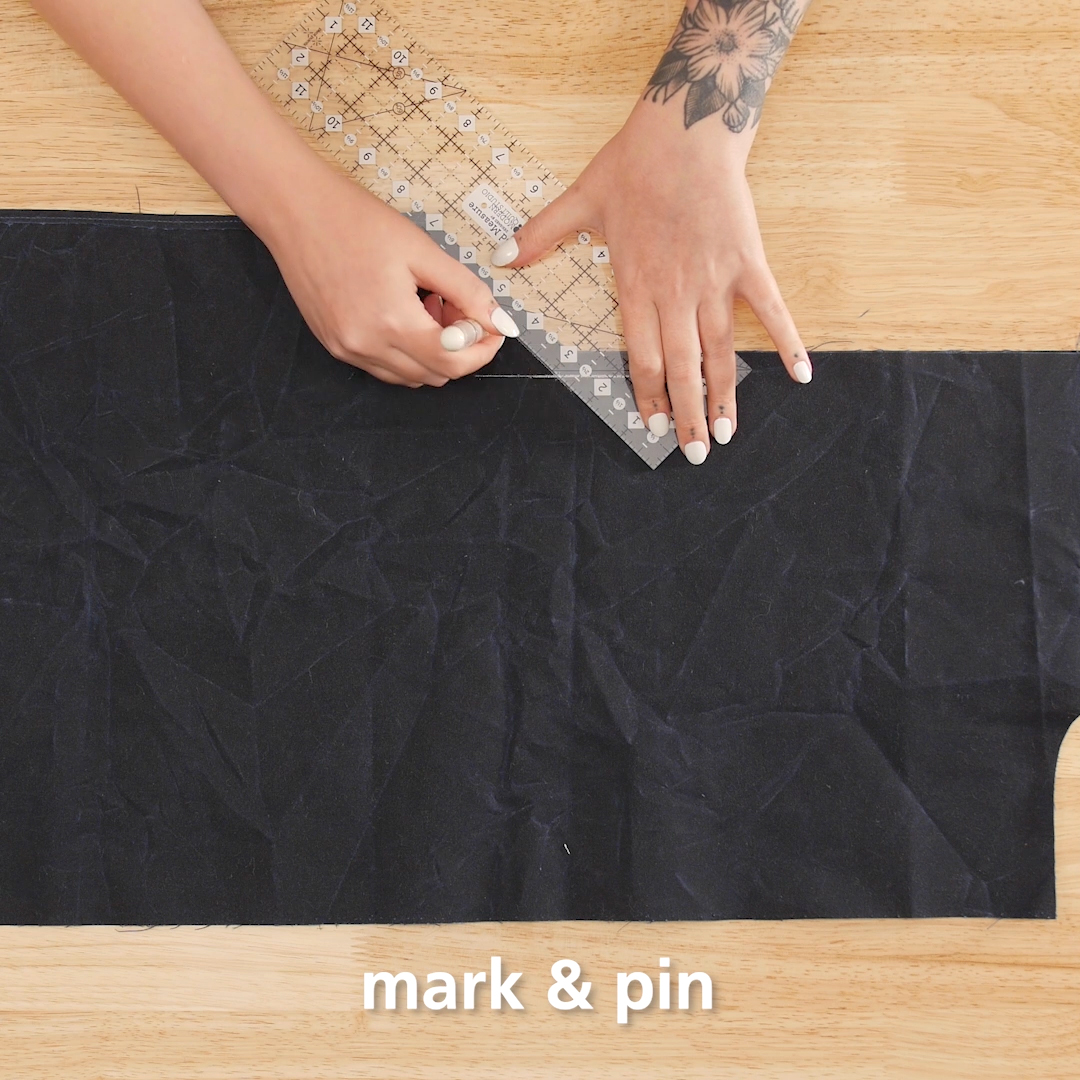
At the point where our center line pivots across the vent, use a ruler and a chalk marker to find your pivot point. We will use a 1/2″ seam allowance to assemble these pieces. Draw a line 1/2″ from the raw edge continuing straight down from the center line (past the pivot point for the vent).
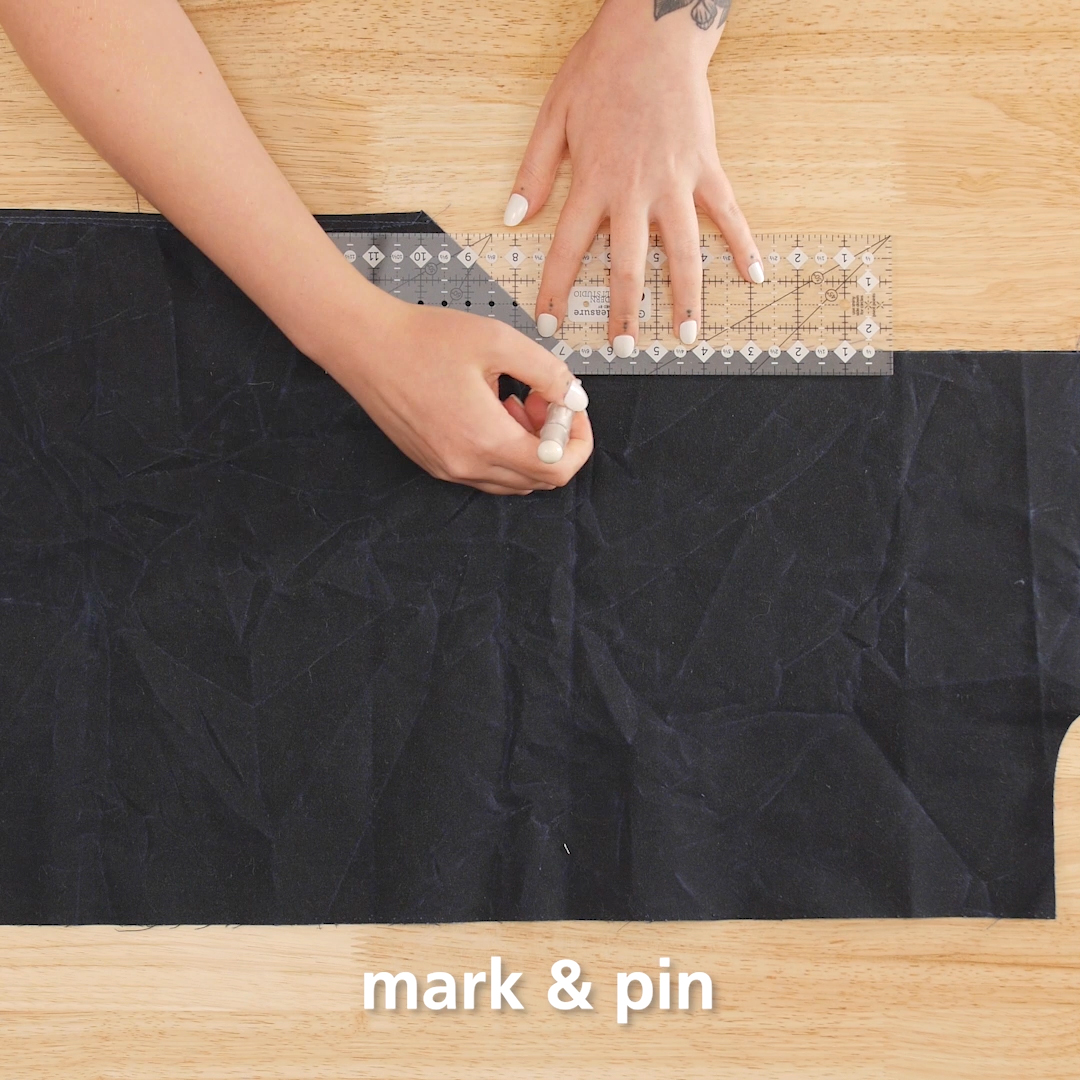
Then, draw a line 1/2″ from the angled raw edge at the top of the vent. Where these lines intersect is where we will pivot to stitch our vent.
Wonder Clip down the center line and across the angle of the vent.
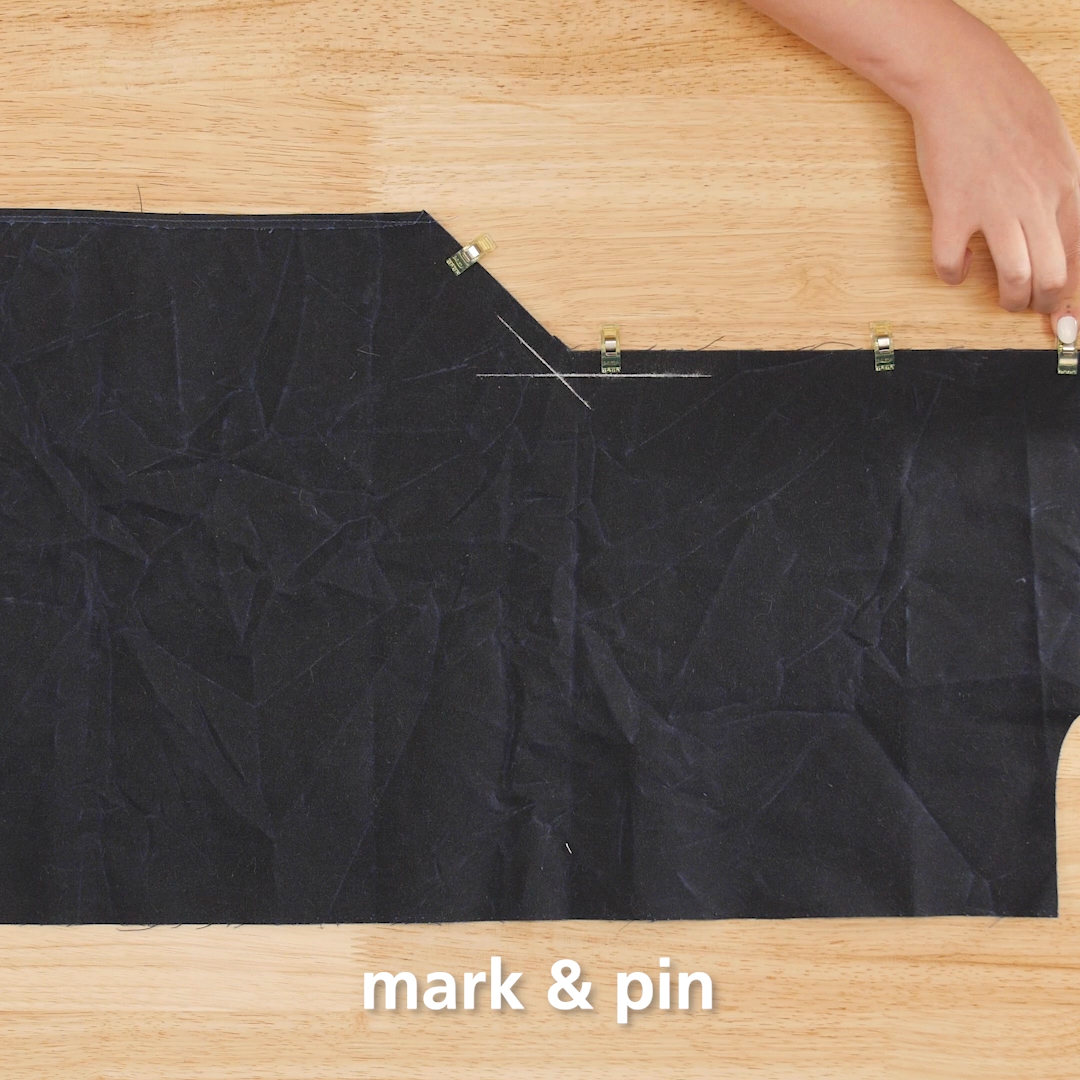
Beginning at the top of the apron, begin stitching down the center line with a 1/2” seam allowance. When you reach your pivot point, backstitch 2-3 stitches then return to the pivot point.
Raise your presser foot using the Free Hand System and pivot the fabric. Take a few stitches down this angled edge, then backstitch again back to (without passing) the pivot point. Continue stitching down this edge. Backstitch at the end to secure the seam.
Step 3. Topstitch the Vent
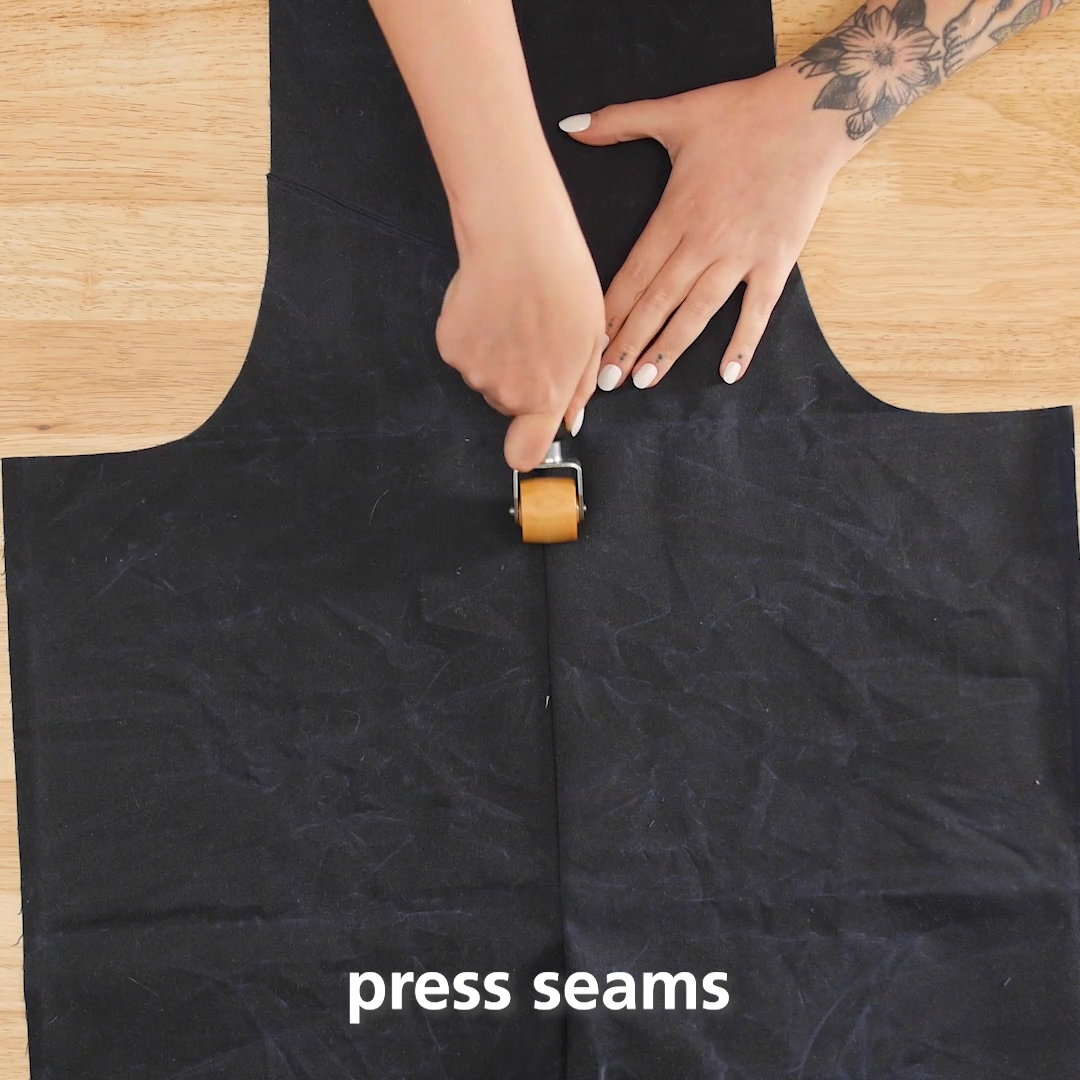
Using a seam roller, press the seam allowance and vent all to the same direction. Along the length of the vent, one side will fold in to overlap with the other side. From the front (right) side of the apron, it will appear as one continuous fold or seam down the length of the apron.
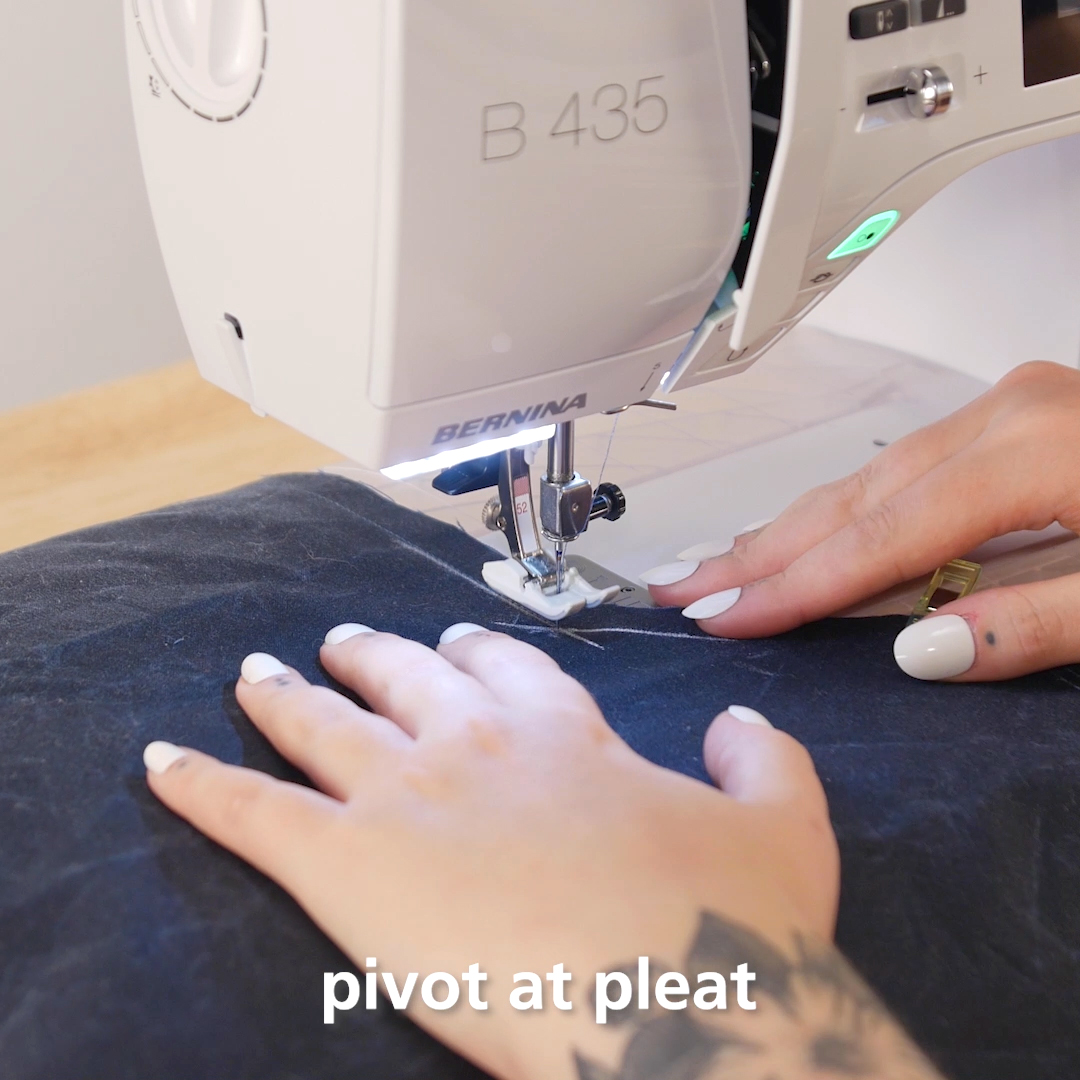
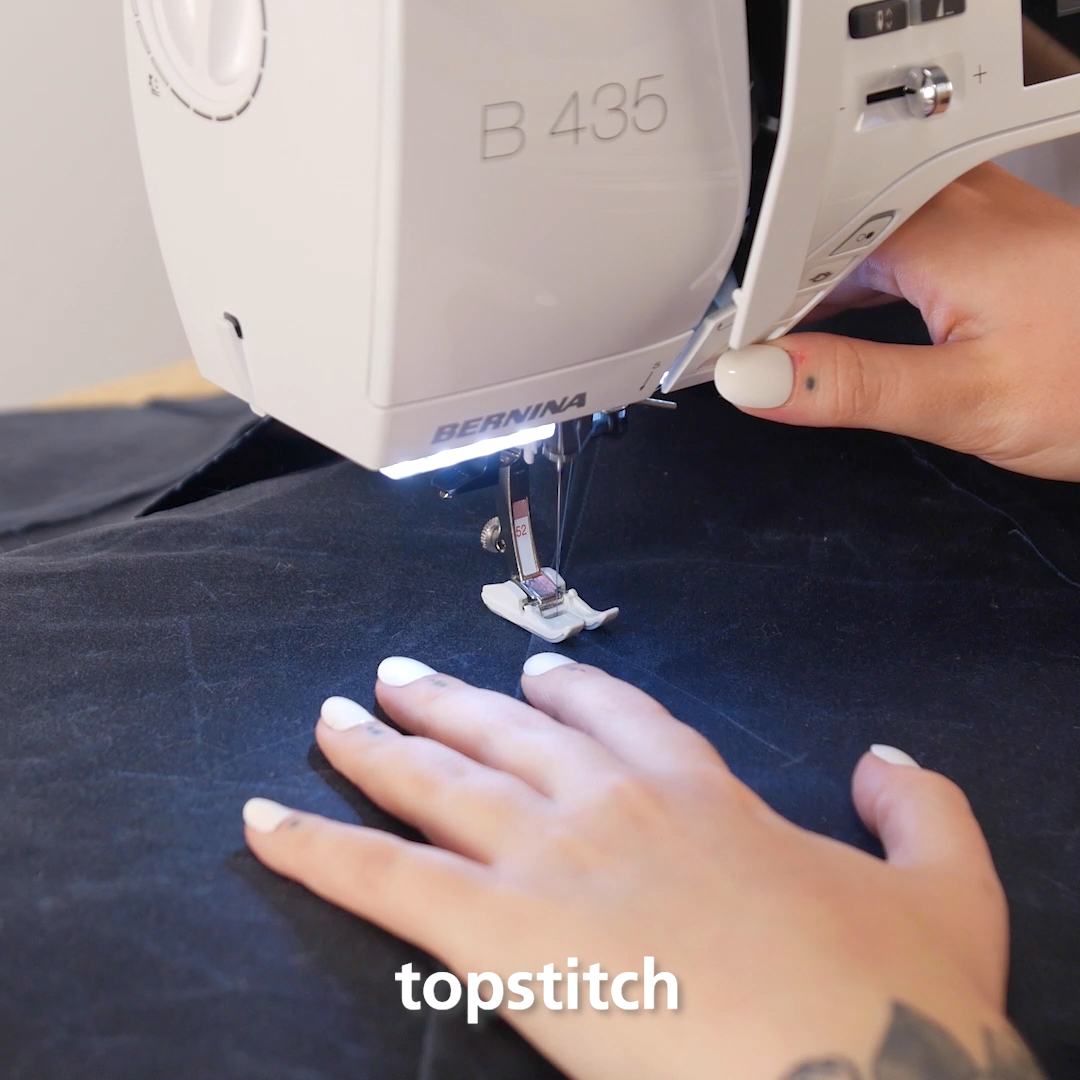
Next, we will topstitch this seam allowance and secure the vent in place. Locate the beginning of the vent opening.
Using your chalk marker and a ruler, mark a 3 1/2″ line following the same 45-degree angle across the top of the vent.
Since we are marking on the right side of the fabric, you may want to feel to make sure that this line will stitch through all layers of the apron body and vent.


Beginning at the top of the apron, topstitch about 1/4” away from the fold, through the apron front and seam allowance on the back side.
When you reach the marked line for the vent seam, backstitch 2-3 stitches, then return to the line. Pivot, begin stitching, back stitch back to the pivot point, and continue stitching directly on your chalk marked line. When you reach the end of your marked line, backstitch before cutting your threads.
Step 4. Add Pockets
At this point, attach any pockets as desired. Be sure to hem open edges before attaching and backstitch at the beginning and ending of seams.
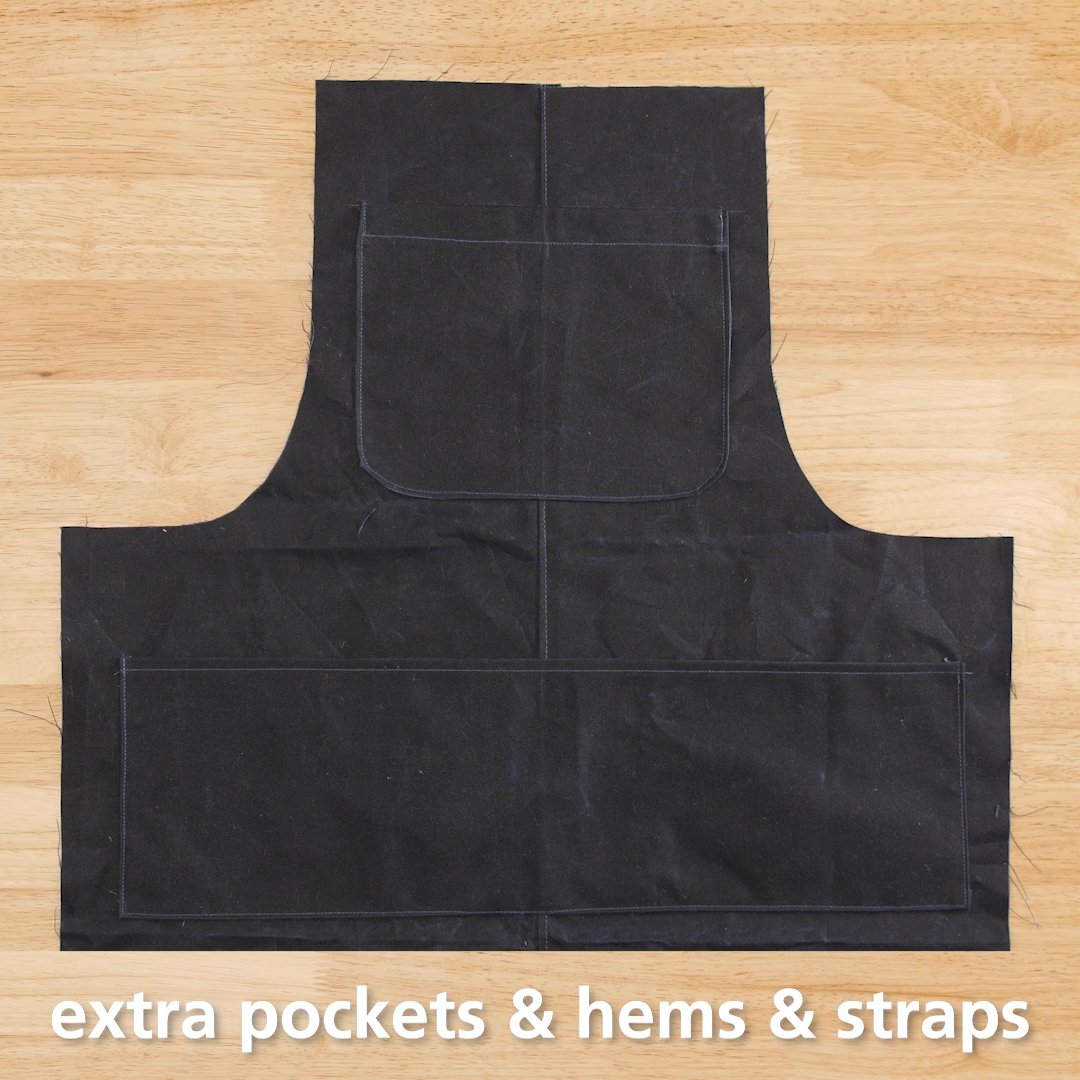
Step 5. Hem the Perimeter
To hem the edges around the apron, we will do a simple single fold and topstitch, just as we hemmed the opening of our vent.
On all edges around the apron (bottom hems, left and right side, and top), fold the canvas to the back side by 3/8”. Use a seam roller to press this fold and hold with Wonder Clips.
At the machine, stitch this hem 1/4″ away from the edge, backstitching to secure at the beginning and end of your seams.
- Add hardware
Finally, we need to add straps and hardware so that our apron may be worn! From your cotton webbing cut the following lengths:
- Two 6” pieces
- One 32” piece (neck strap)
- One piece equivalent to the wearer’s waist measurement (waist strap)
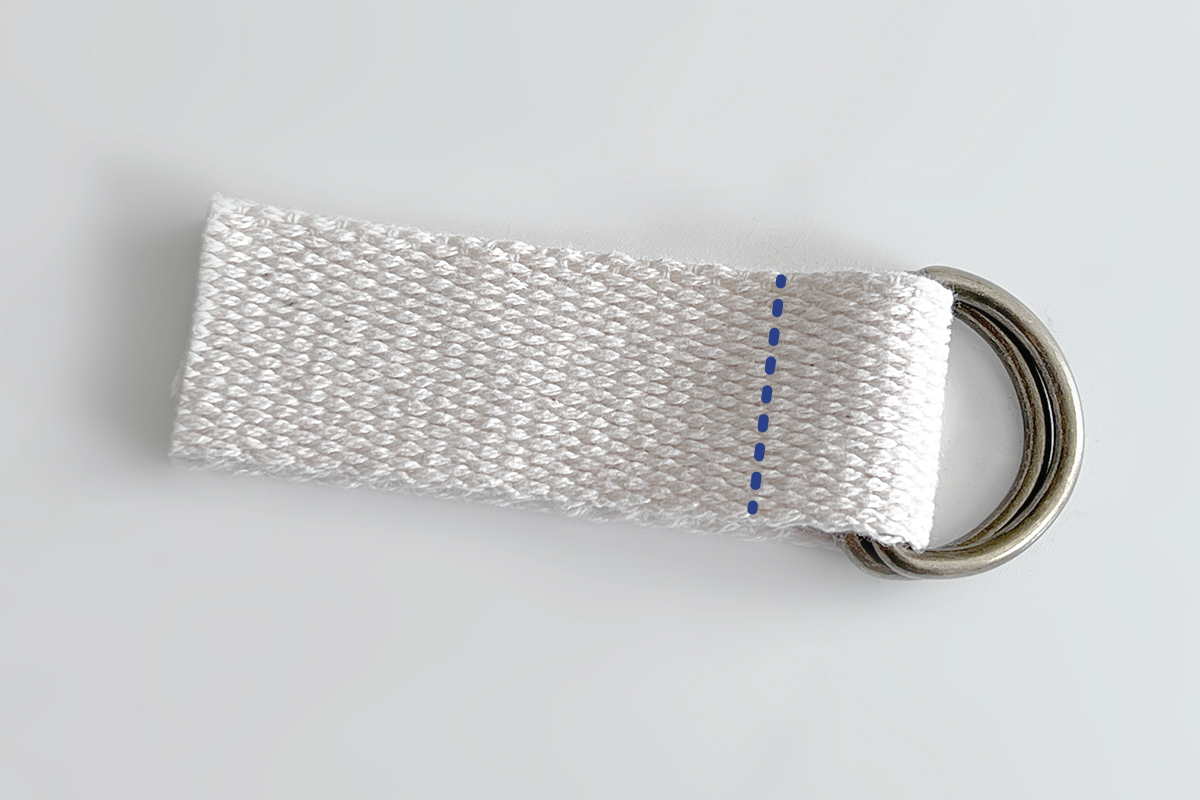
Take two D-rings and thread them on to one of the 6” pieces of webbing. Fold the webbing in half so that the D-rings sit at the center fold. Stitch the two layers of webbing as close to the D-rings as possible, backstitching at the beginning and end. Repeat with the second 6” piece of webbing and remaining two D-rings.
Align one of the D-ring pieces along the left side at the top of the apron so that the raw edges of the webbing point down toward the apron body and the D-rings point up. Stitch the webbing in a box shape with an X through the center as follows:
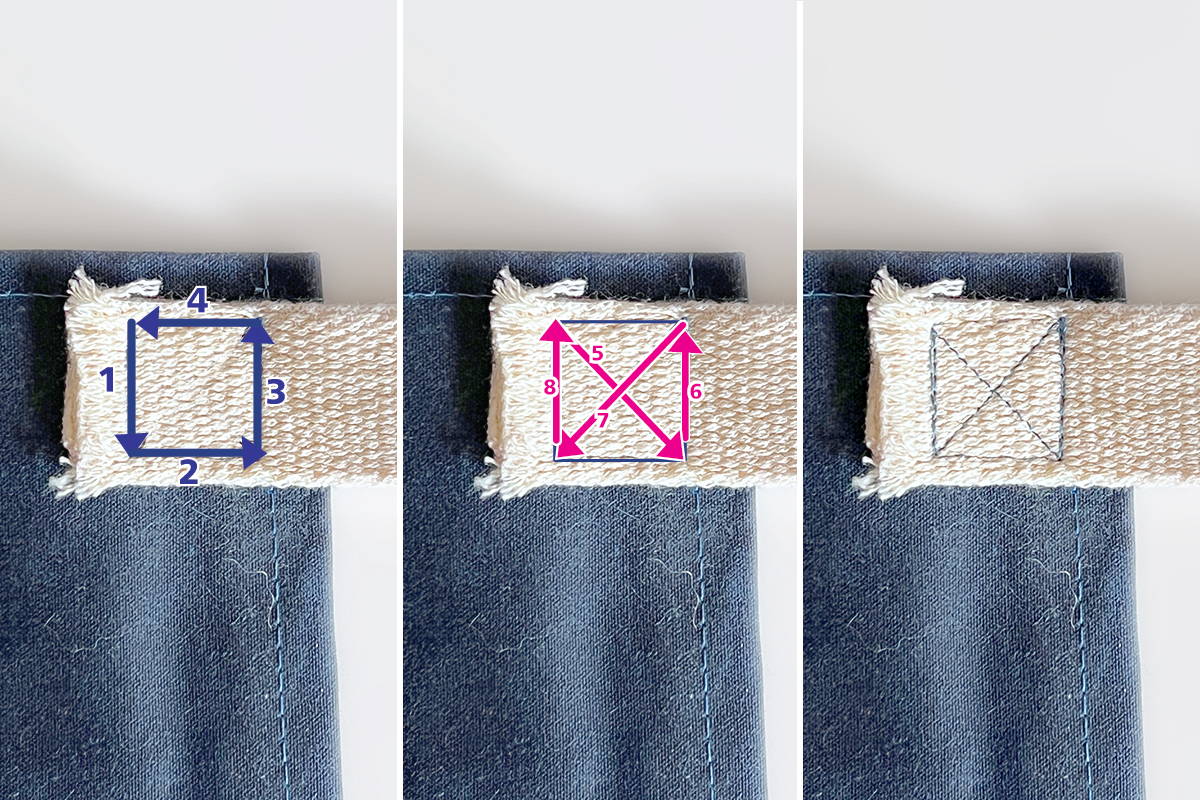
Align the other D-ring piece along the waist on the right side. Here, the raw edges of the webbing should point to the right, toward the apron body, and the D-rings should point left away from the apron. Stitch this tab down in the same manner as before.
On the remaining long straps, fold one raw edge over by 1/2″ and stitch down 3/8” from the fold, backstitching at the beginning and end to secure.
For the neck strap, fold the raw edge over 1 1/2″. Align this folded edge with the right side at the top of the apron, opposite the D-ring tab. Stitch this webbing down in the X-box shape, in the same manner as before.
For the waist strap, again fold the raw edge over 1 1/2″. Align this folded edge at the waist on the right side, opposite the waist D-ring tab. Stitch this webbing down in the X-box shape, in the same manner as before.

Your apron is ready to be put to use!