DIY Swing Tee
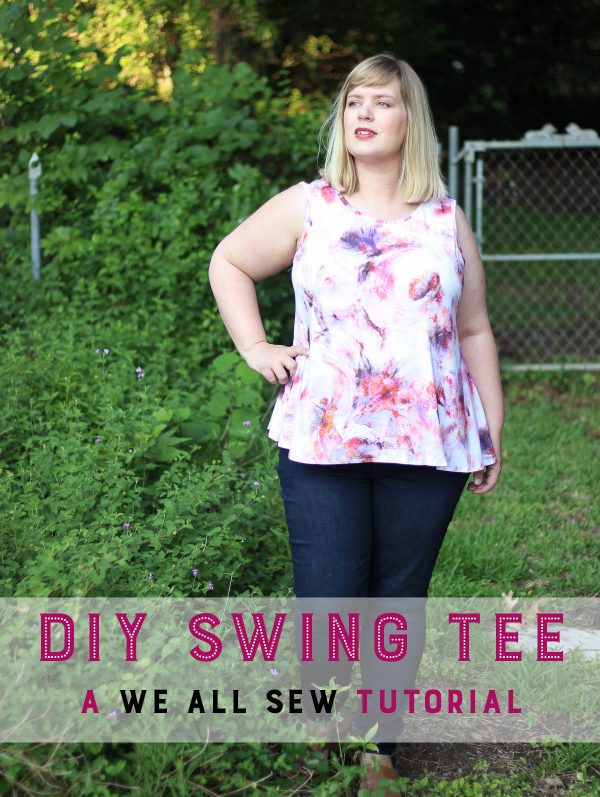
Good morning, lovelies! Down here in Texas, dressing for summer is an art. Balancing personal style with the desire to just wear giant, airy tents of fabric is difficult, especially when it’s well over 90 degrees and the air is so thick you could scoop it up with a spoon. Thank heavens for the swing tee! These flowing, A-line tops are ideal for surviving a southern summer. You can make them in chic fabrics, they’re super breezy and comfortable to wear, but are infinitely more stylish than a regular tee.
Even better? It’s simple to turn your favorite tee pattern into the perfect swing tee. Today, I’ll walk you through this easy summer pattern hack. Before you know it, you’ll have a closet full of swingy tees!
Supplies:
- Your favorite tank top or t-shirt pattern—This can be either a knit or a woven pattern, since this adjustment works for both types of fabric. Knits will be more casual and clingy, while woven swing tees are lightweight and billowy. For this tutorial, I’ll be using the Cashmerette Concord Tee, a knit t-shirt pattern.
- Tracing paper—A translucent paper for tracing is a must-have for all pattern adjustments. My personal favorite is bee paper, which I buy in rolls from a certain gigantic online retailer, but Swedish tracing paper or even plain medical paper work well.
- Pencil/Pen/Sharpie
- Tape
- Paper scissors
- Pattern Weights—I prefer large round washers, because they are slim enough to easily trace around.
- A BERNINA sewing machine, to sew up your cute top after adjusting! I use a BERNINA 350PE, which works beautifully on both knit and woven fabrics.
Swing Tee Pattern Adjustment:
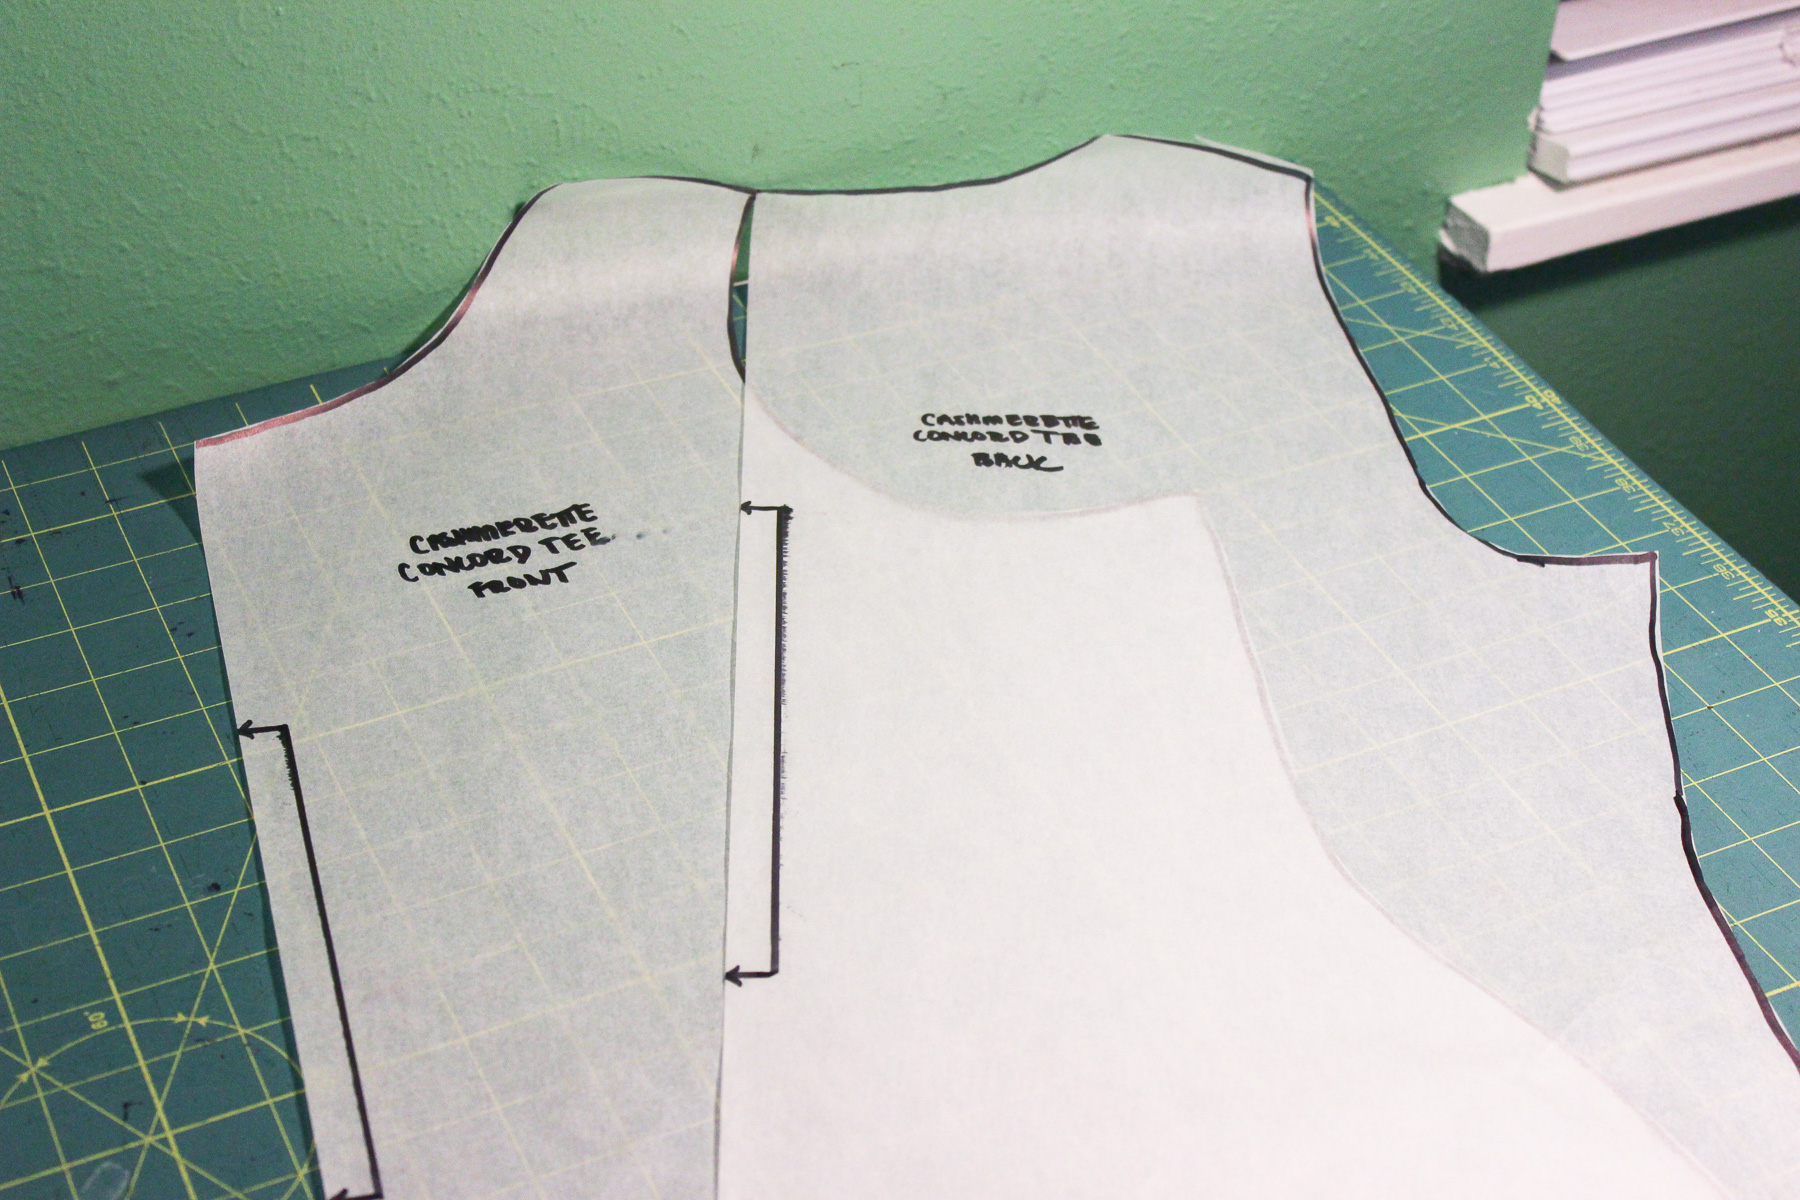
1. Trace off the back and front bodice pieces of your favorite tank top or t-shirt pattern. Mark all pattern matching lines and grainlines.
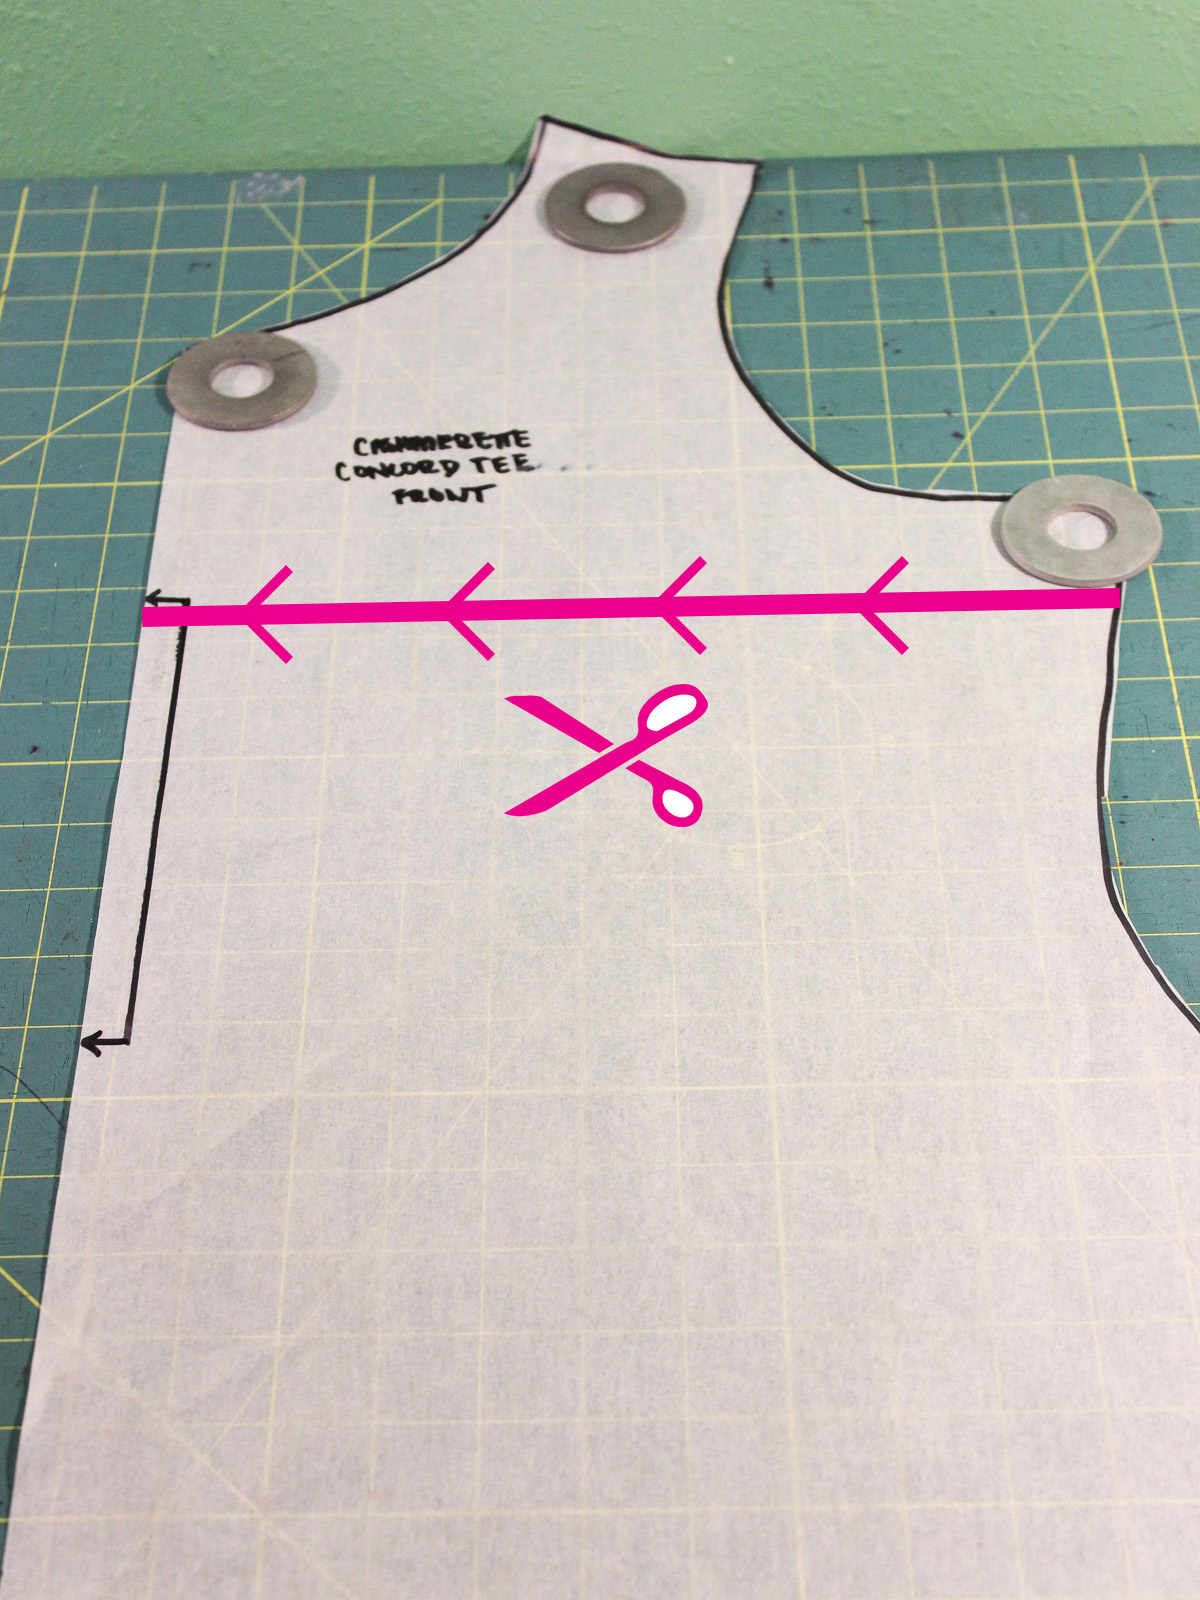
2. Draw a horizontal line across the bust point on your Front Bodice piece. If your pattern doesn’t have a marking for the bust, hold the pattern up to your body and mark the spot where it hits the fullest part of your bust curve.
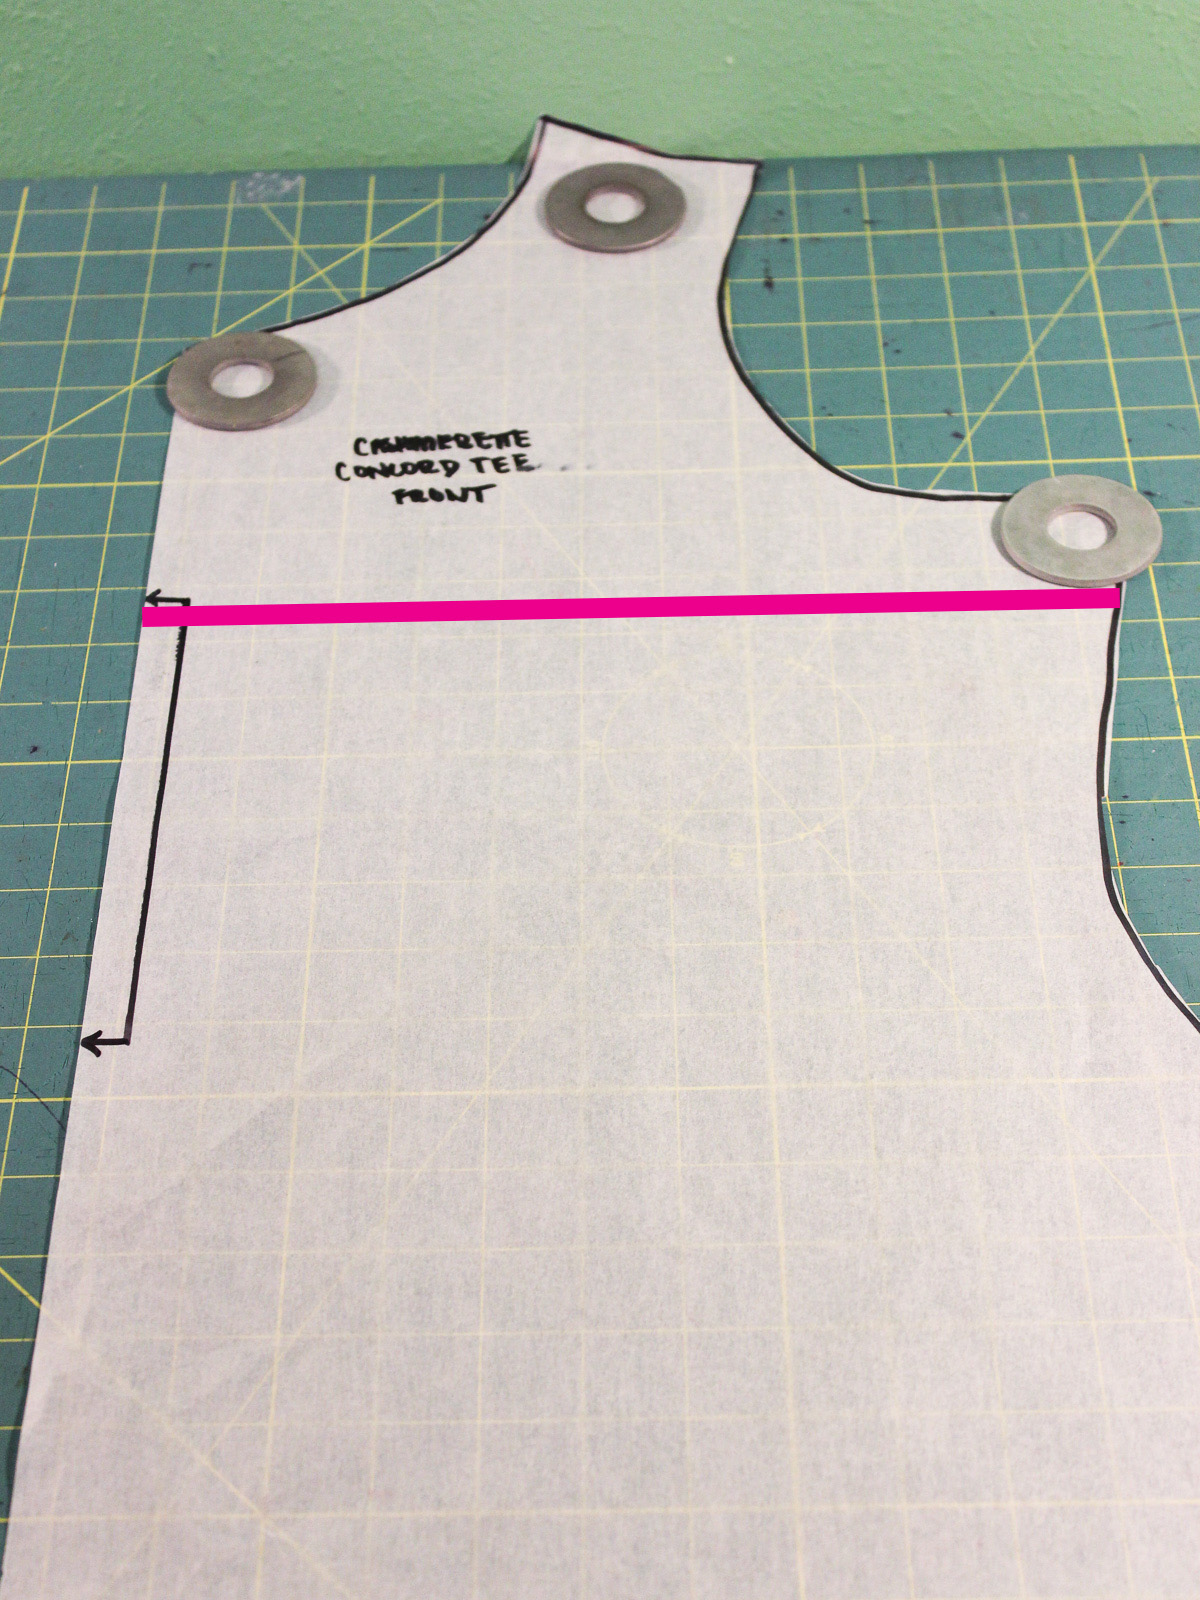
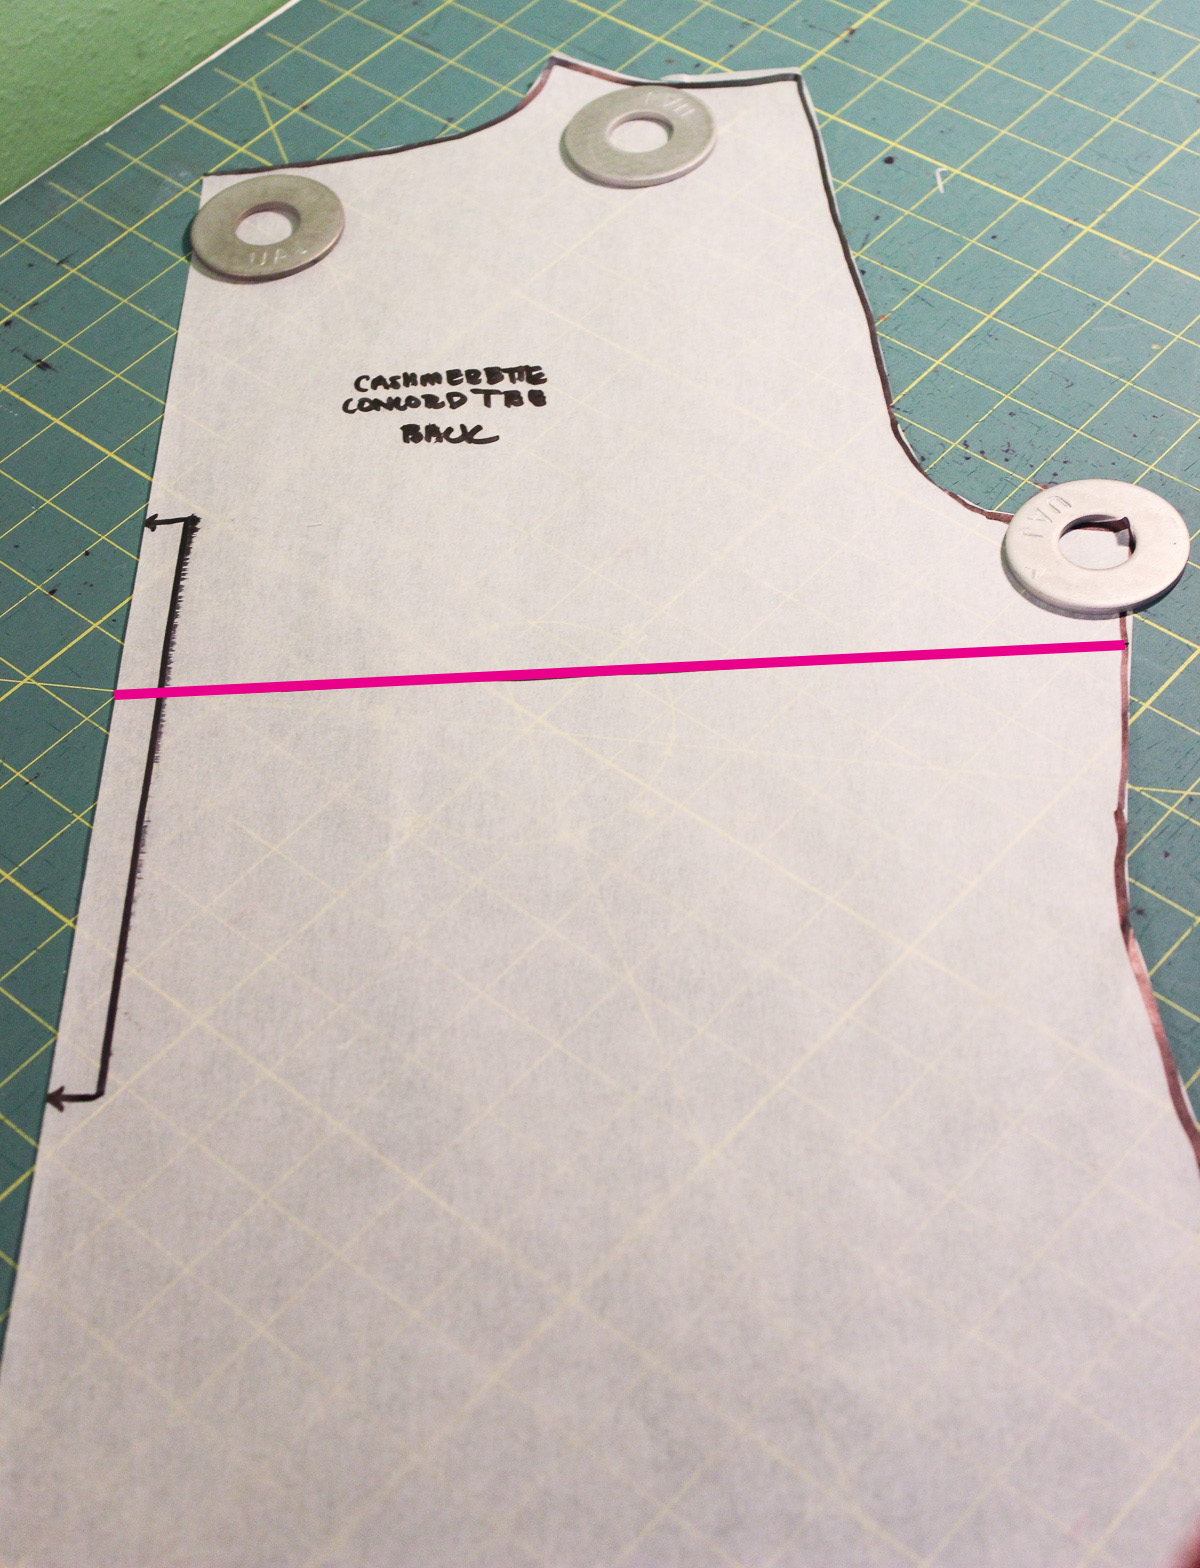
3. Draw a corresponding horizontal line across your Back Bodice piece. To do this, simply measure down from the armscye on your Front Bodice to your marked bust line. Then, measure that same amount down from your back armscye and draw a horizontal line there.
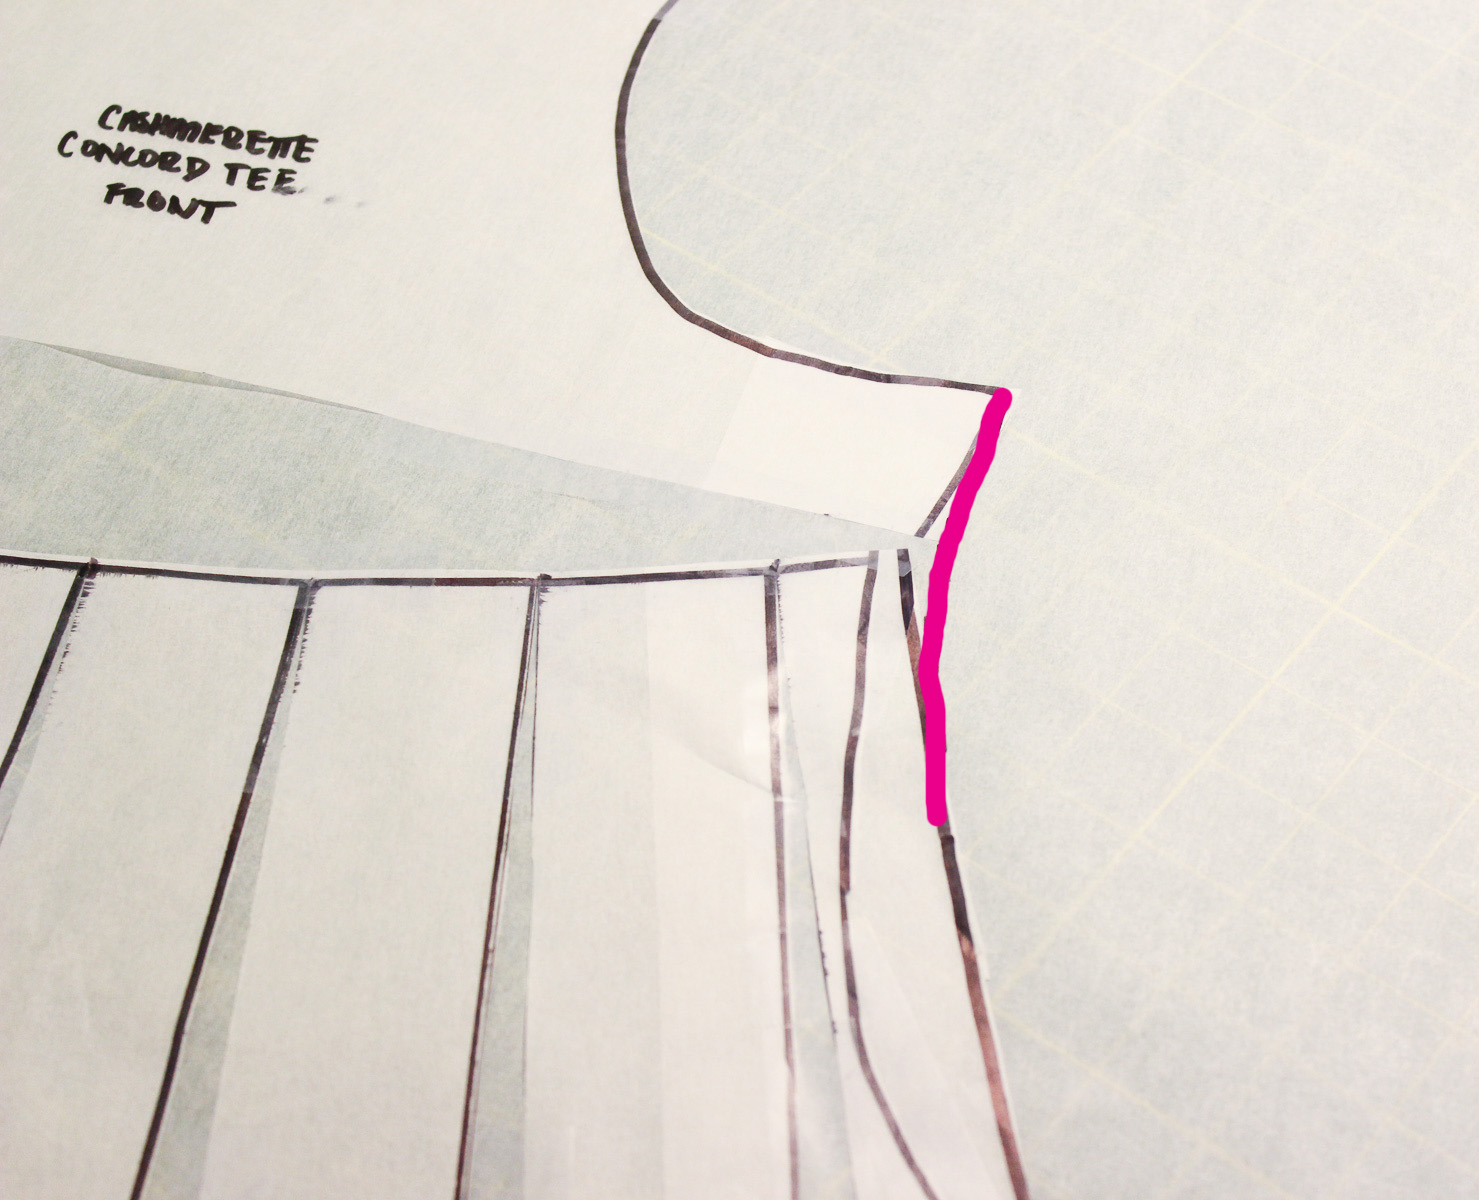
4. On your lower Front Bodice piece, draw a series of parallel vertical lines an equal distance apart, from your bust line to the hem. For more swing in your final tee, mark more lines. For less swing, mark less lines. We’ll be slashing and spreading along these lines to create the top’s new fullness. Mine are every 1.5 inches across the entire bodice.Note: If your side seam is curved, also straighten out that line, since you’ll want a straight seam for maximum swing!
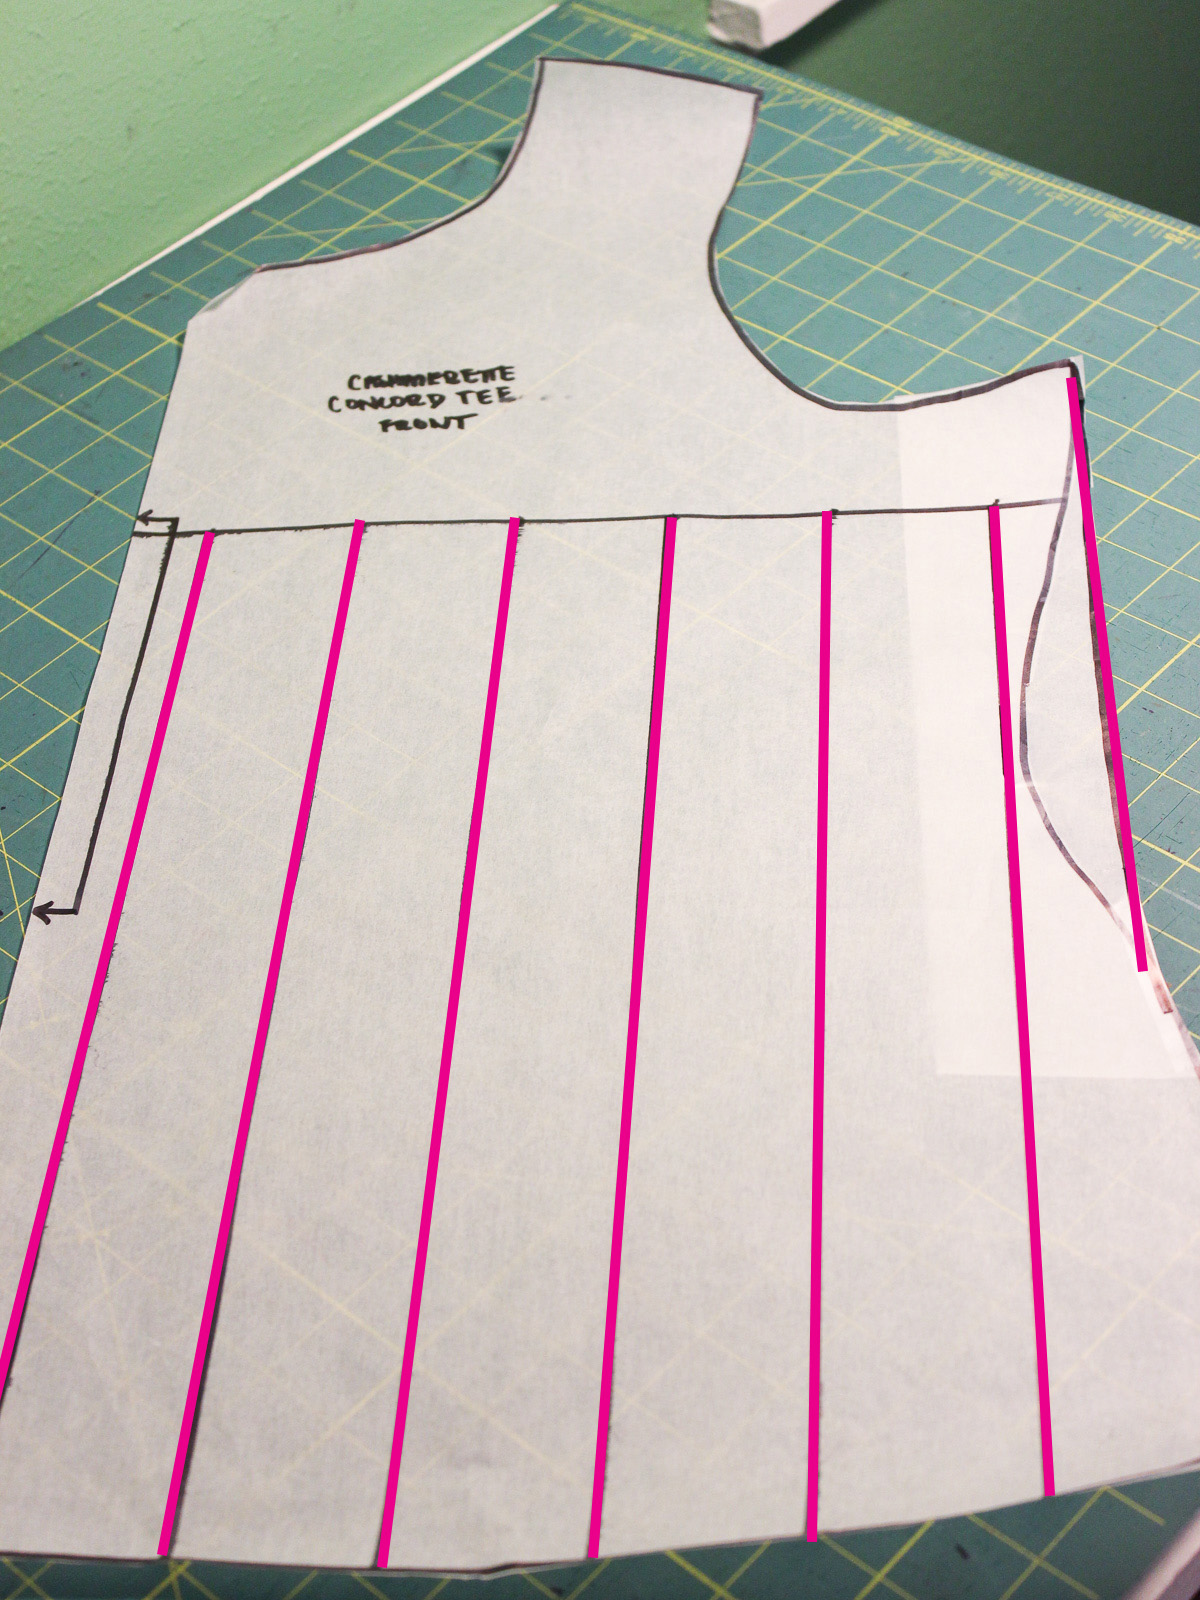
5. Cut along the bust line on your Front Bodice, separating top from bottom.
6. Move the top bodice piece out of the way and isolate your bottom piece (with all the lines on it). Now, we’re going to put the swing in our top by slashing and spreading. To do this, cut upwards along each vertical lines, stopping just before you get to the end, leaving a little hinge in the pattern. This allows you to spread the pattern, without breaking it. For more control, you can do steps 6 and 7 together for each line, before moving on to the next cut. You don’t need to cut every line at the same time, if you find it difficult to work with. It’s entirely up to you!
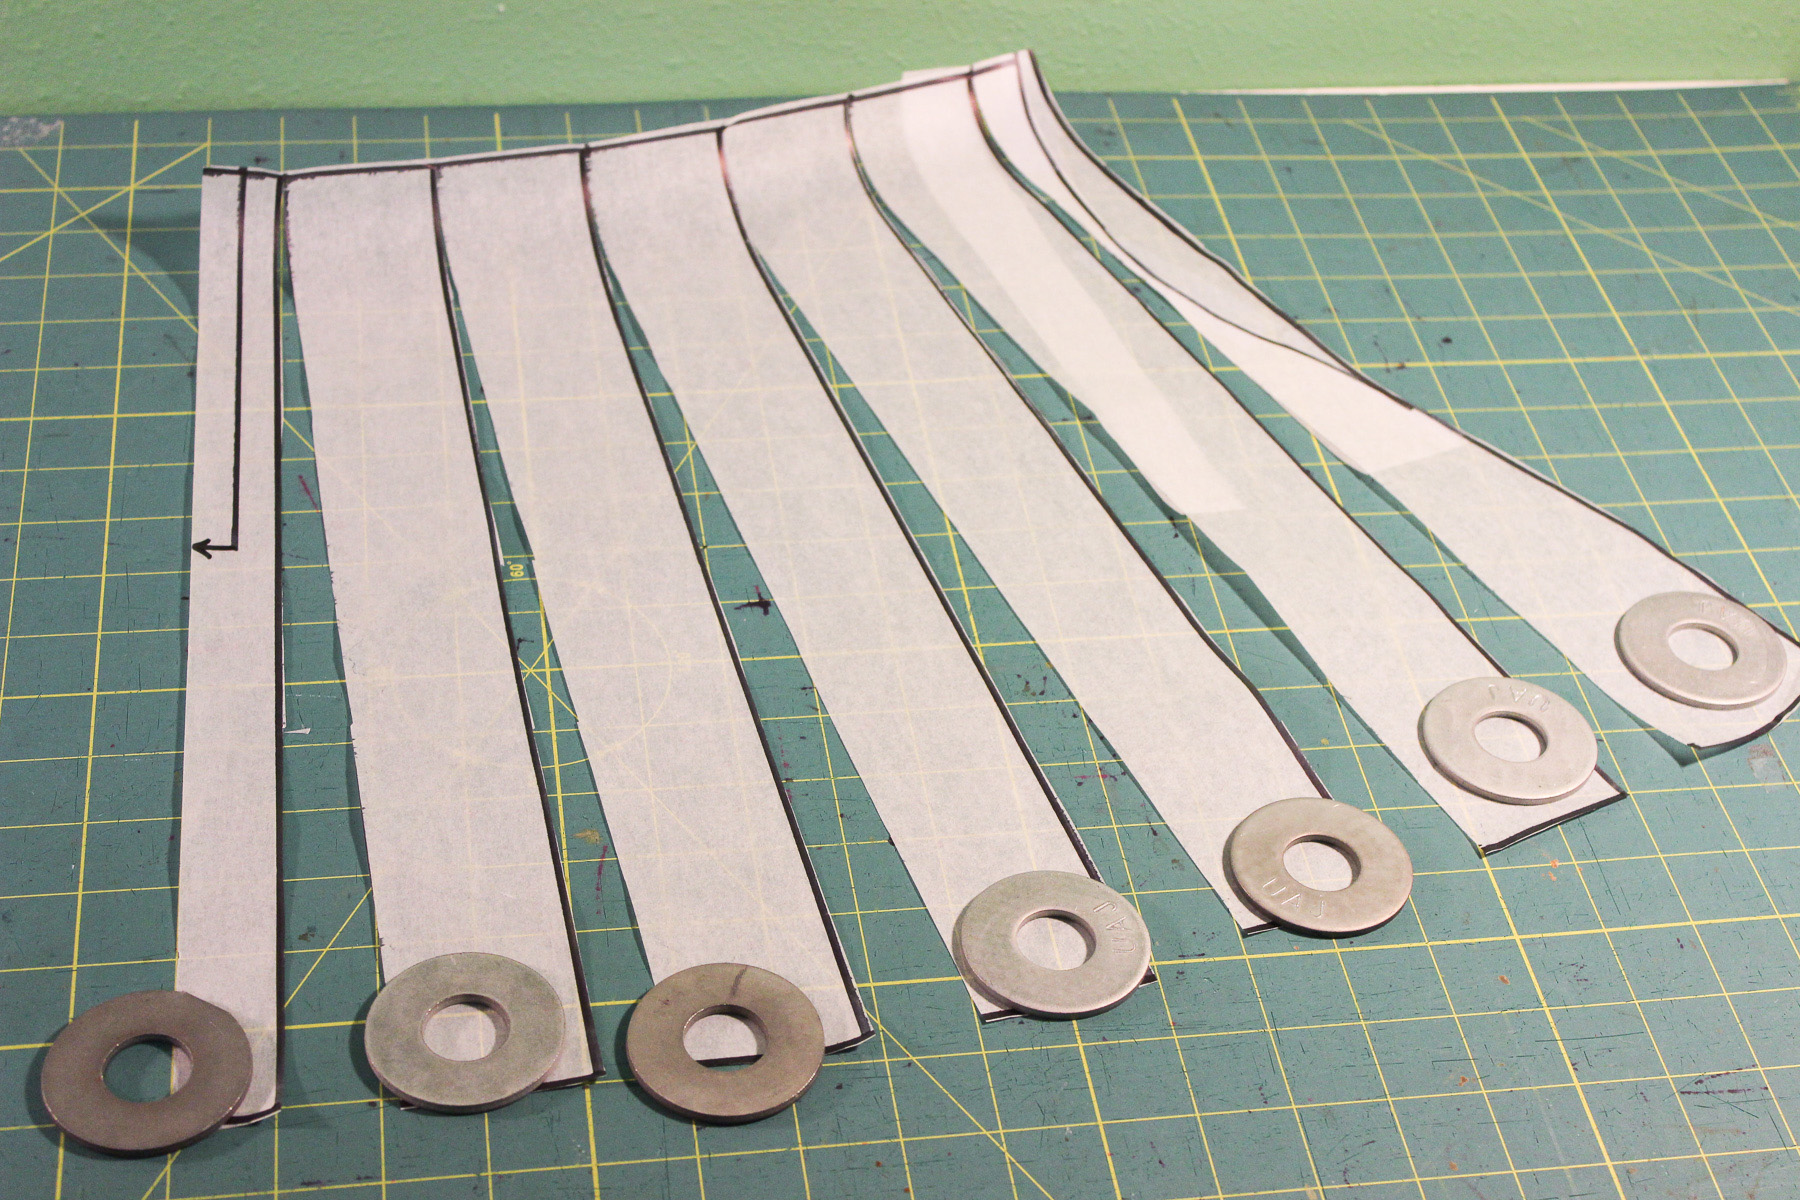
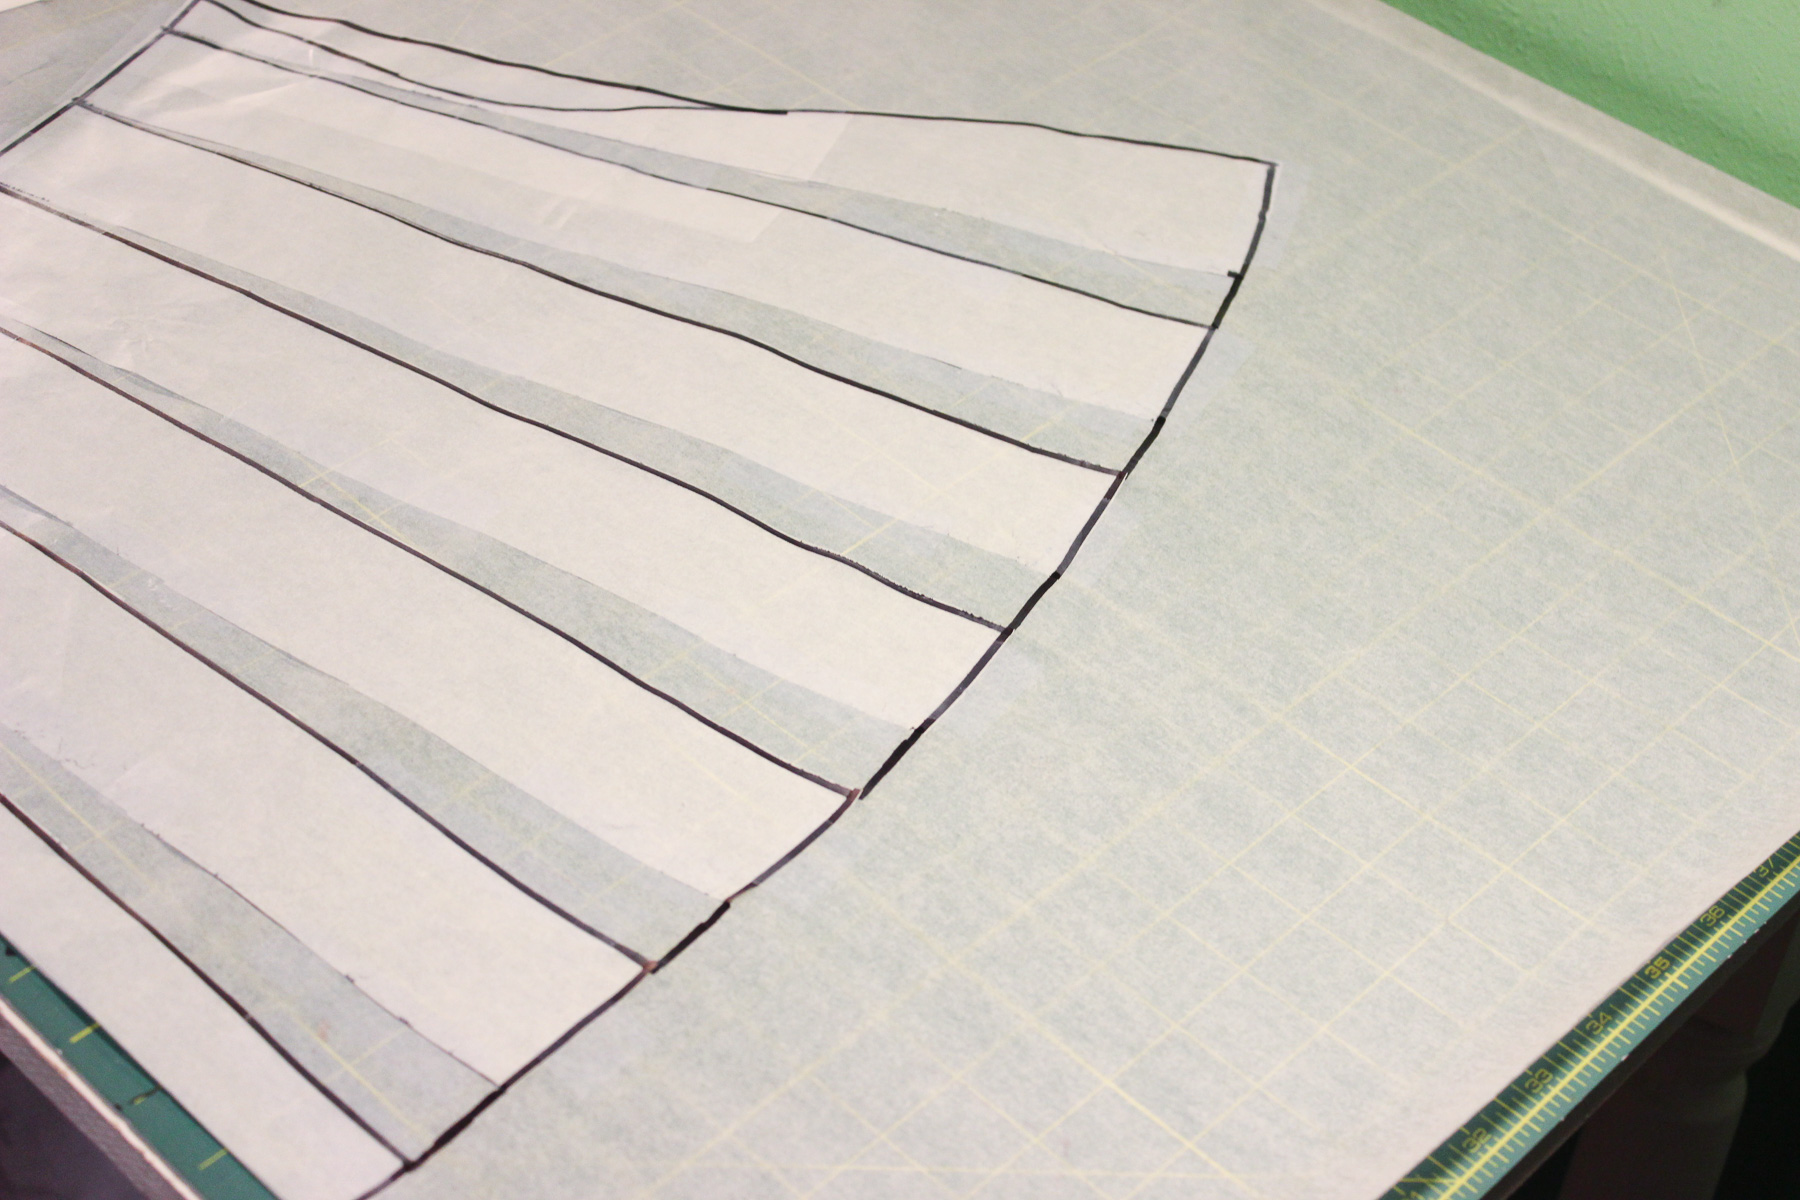
7. Place your pattern on a large piece of scratch paper. Now, spread each of your vertical lines by one inch, taping them to the scratch paper below as you go.Note: measure the one inch at bottom of the lines, the widest point in the gap.

8. True the hemline. To “true a line” just means that you should connect your broken pattern line for a smooth curve. You can do this freehand, if you feel comfortable, or with a french curve ruler.
9. Reattach the top and bottom bodice pieces. Your bottom piece will now curve at the top, which is totally okay! Keep your center front lines straight, when re-attaching your pieces, and don’t worry about the additional length below your bustline. This adds to the swing design of the tee. 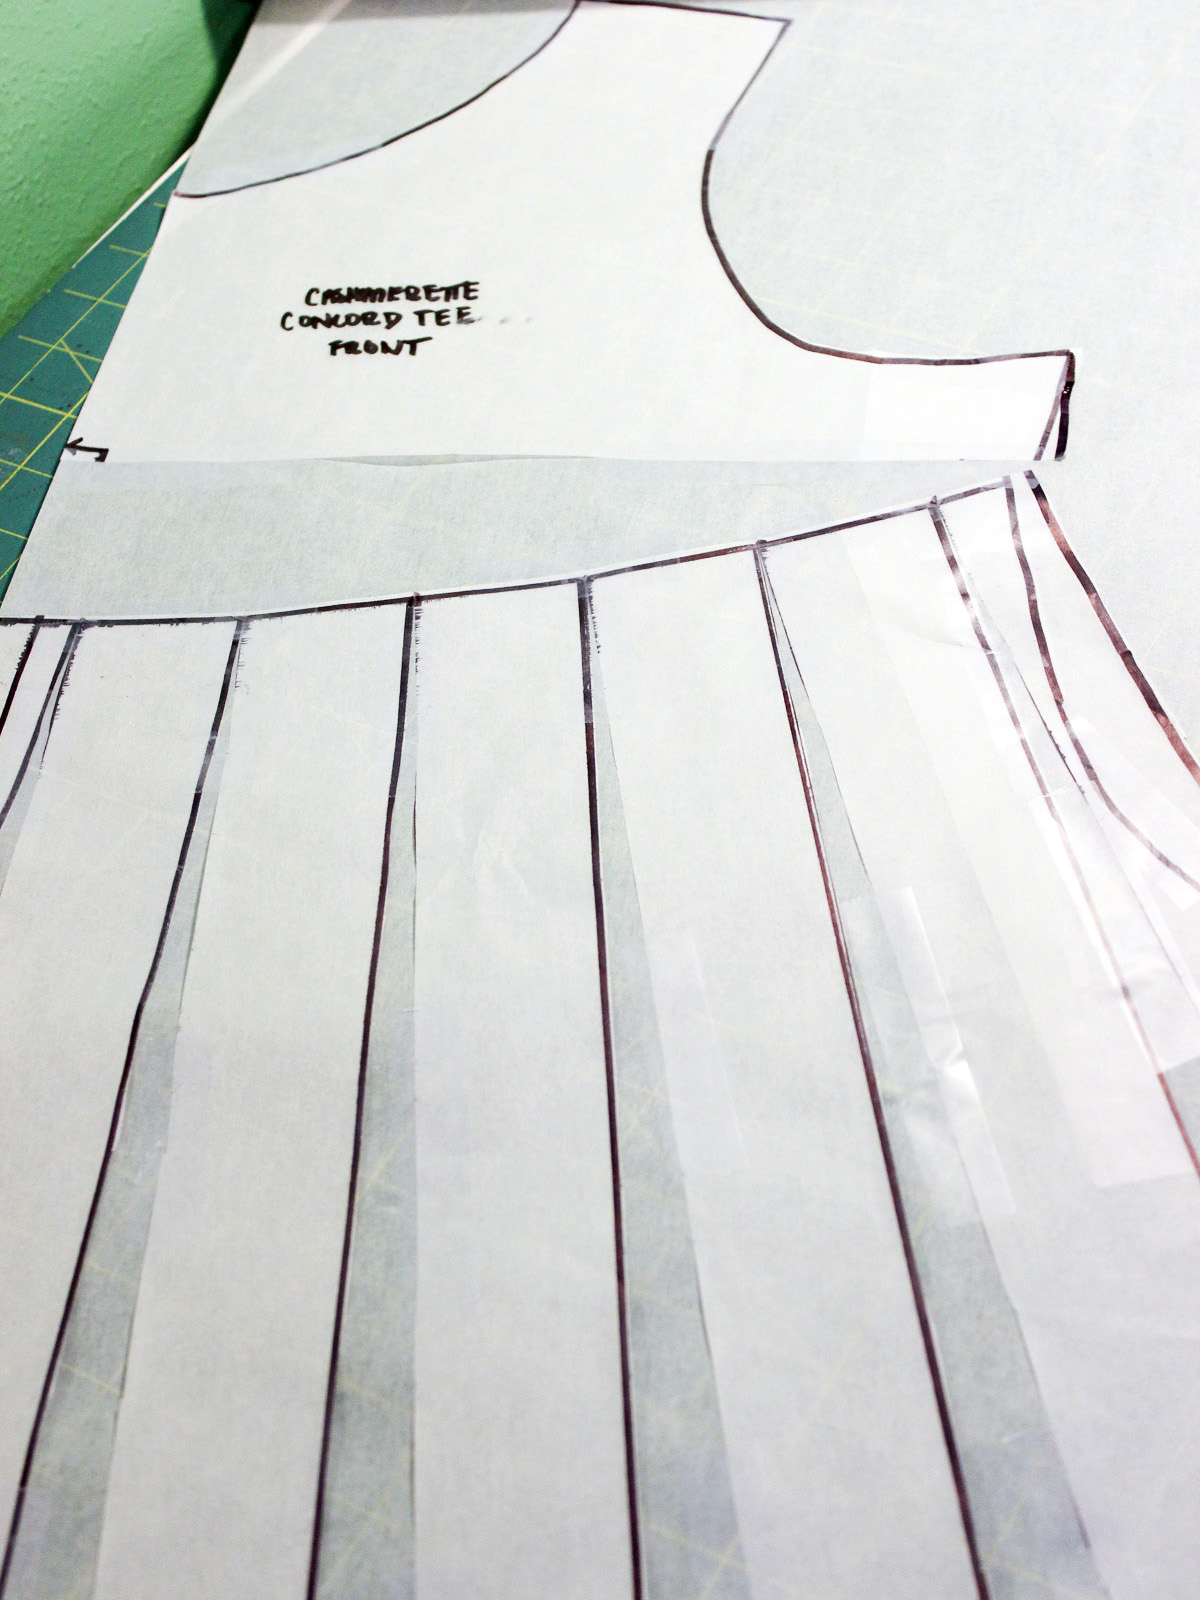
10. True the side seam of your pattern piece, joining the broken lines in a gentle curve.
11. Repeat these Steps 3-10 for the back bodice.
12. Optional: Adjust your hem sweep to suit your preferences. The tee in currents iteration will have a smooth curve from the center front to the side seams, but you can easily make this a high-low hemline by raising the curve in the front, then lengthening it in the back. Play around with different looks and find what works for your style! I’ve done cropped tees, asymmetrical tees, and tons of high-low tanks with this method.
13. Sew up your pattern as originally directed. Nothing has changed about your pattern except for the new fullness along your hem, so your original pattern instructions still work perfectly. Sew and finish the pattern, as you would in its normal form.


What you might also like


4 comments on “DIY Swing Tee”
-
-
Wow, I’ve done this technique on a maternity top, but only moved it away from the fold, this adds the perfect swing all the way around….love this technique! So my calculations is, you’re adding like quite a few inches to the total circumference Correct? How did you come up with the finished circumference? Thank you?
Gina -
Love these loose tops for the summer months. I made a a similar top but simply extended the hem outwards and drew a connecting side seam to the underarm seam. Looks and moves great with less work. Was this a correct method?
-
Hi, this tutorial is brilliant! How would you add swing to a top with side bust darts, any ideas please?
Leave a Reply
You must be logged in to post a comment.

I love this tutorial. I’m so happy to find a sewing blog that is a bit more technical than the norm. The tutorial is similar to what I’ve done many times for skirts and dresses, but it never occurred to me to make it into a top. This is my next project and is on the drawing boards now. Thank you for the great idea. You look great in the top. It’s very flattering, flowy and feminine.