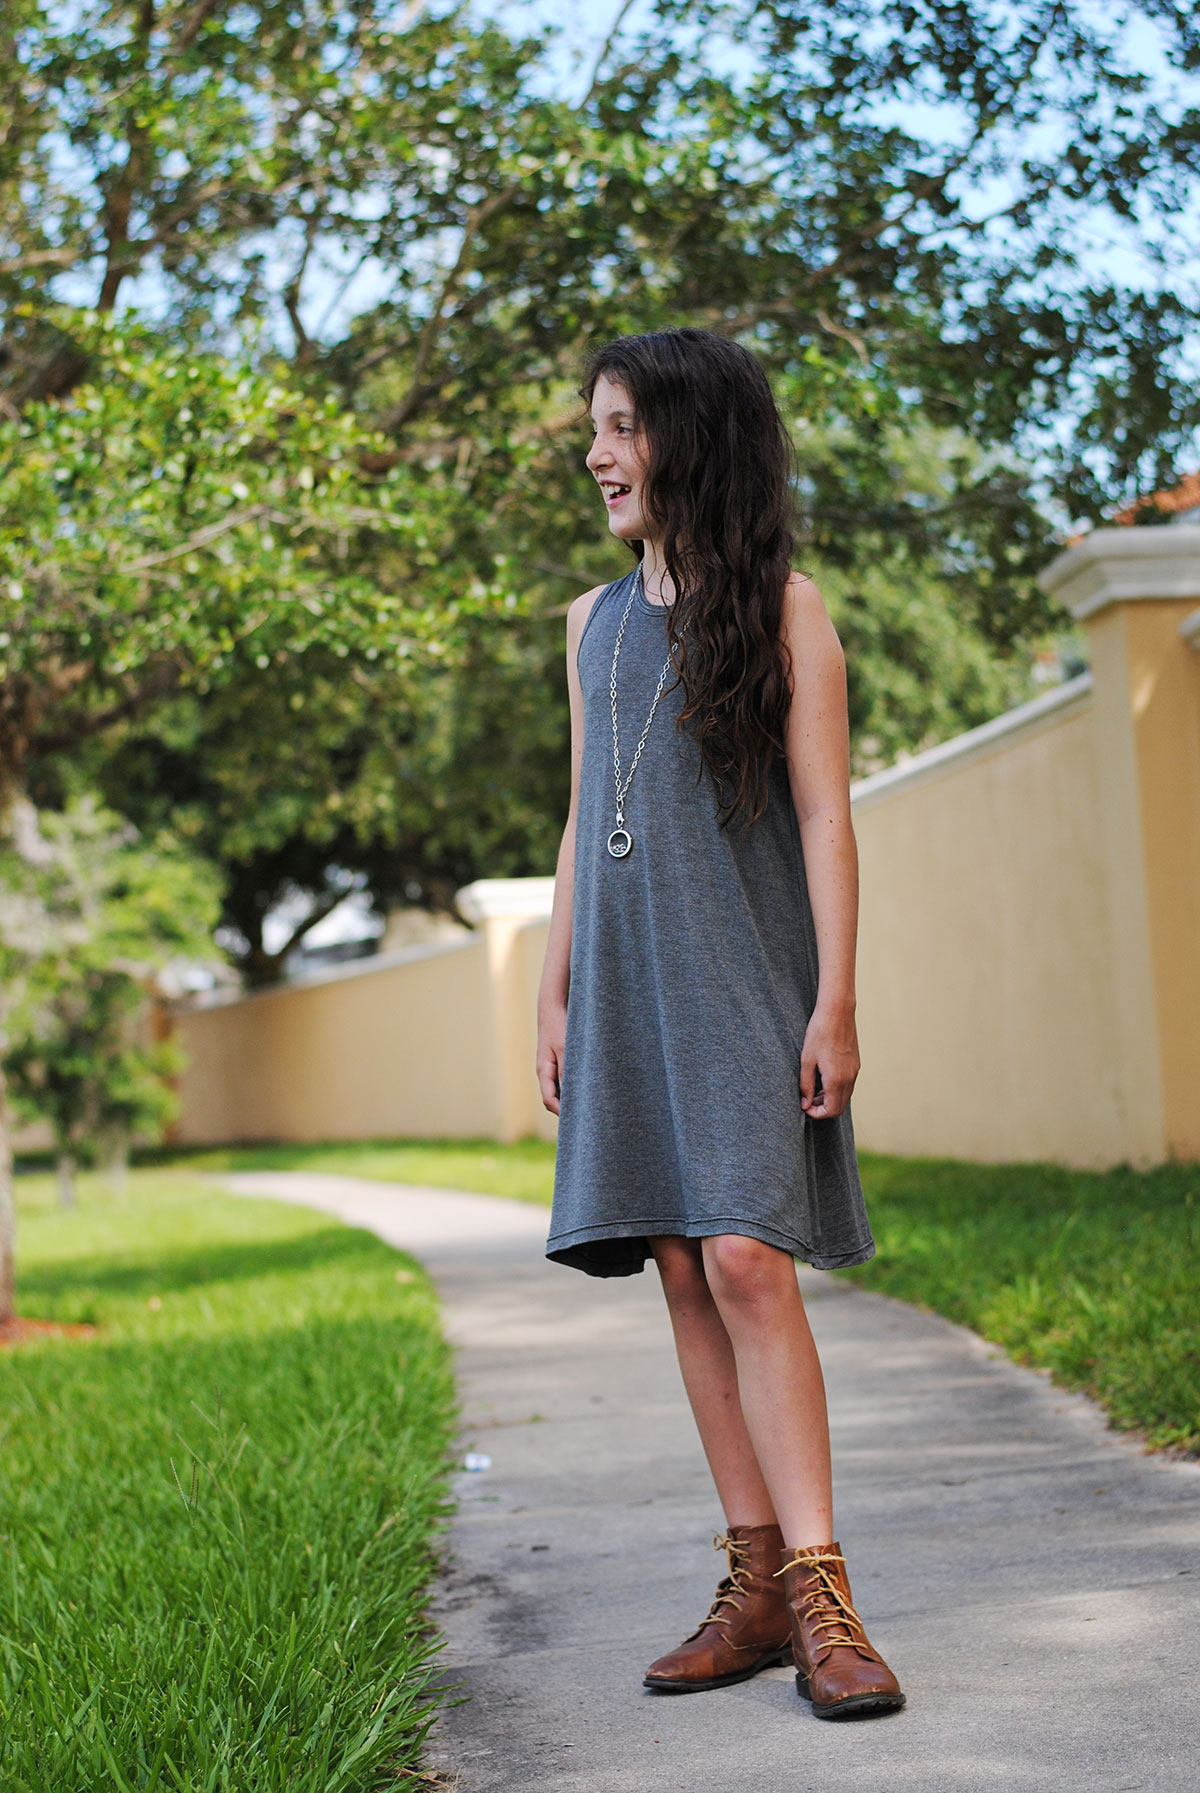
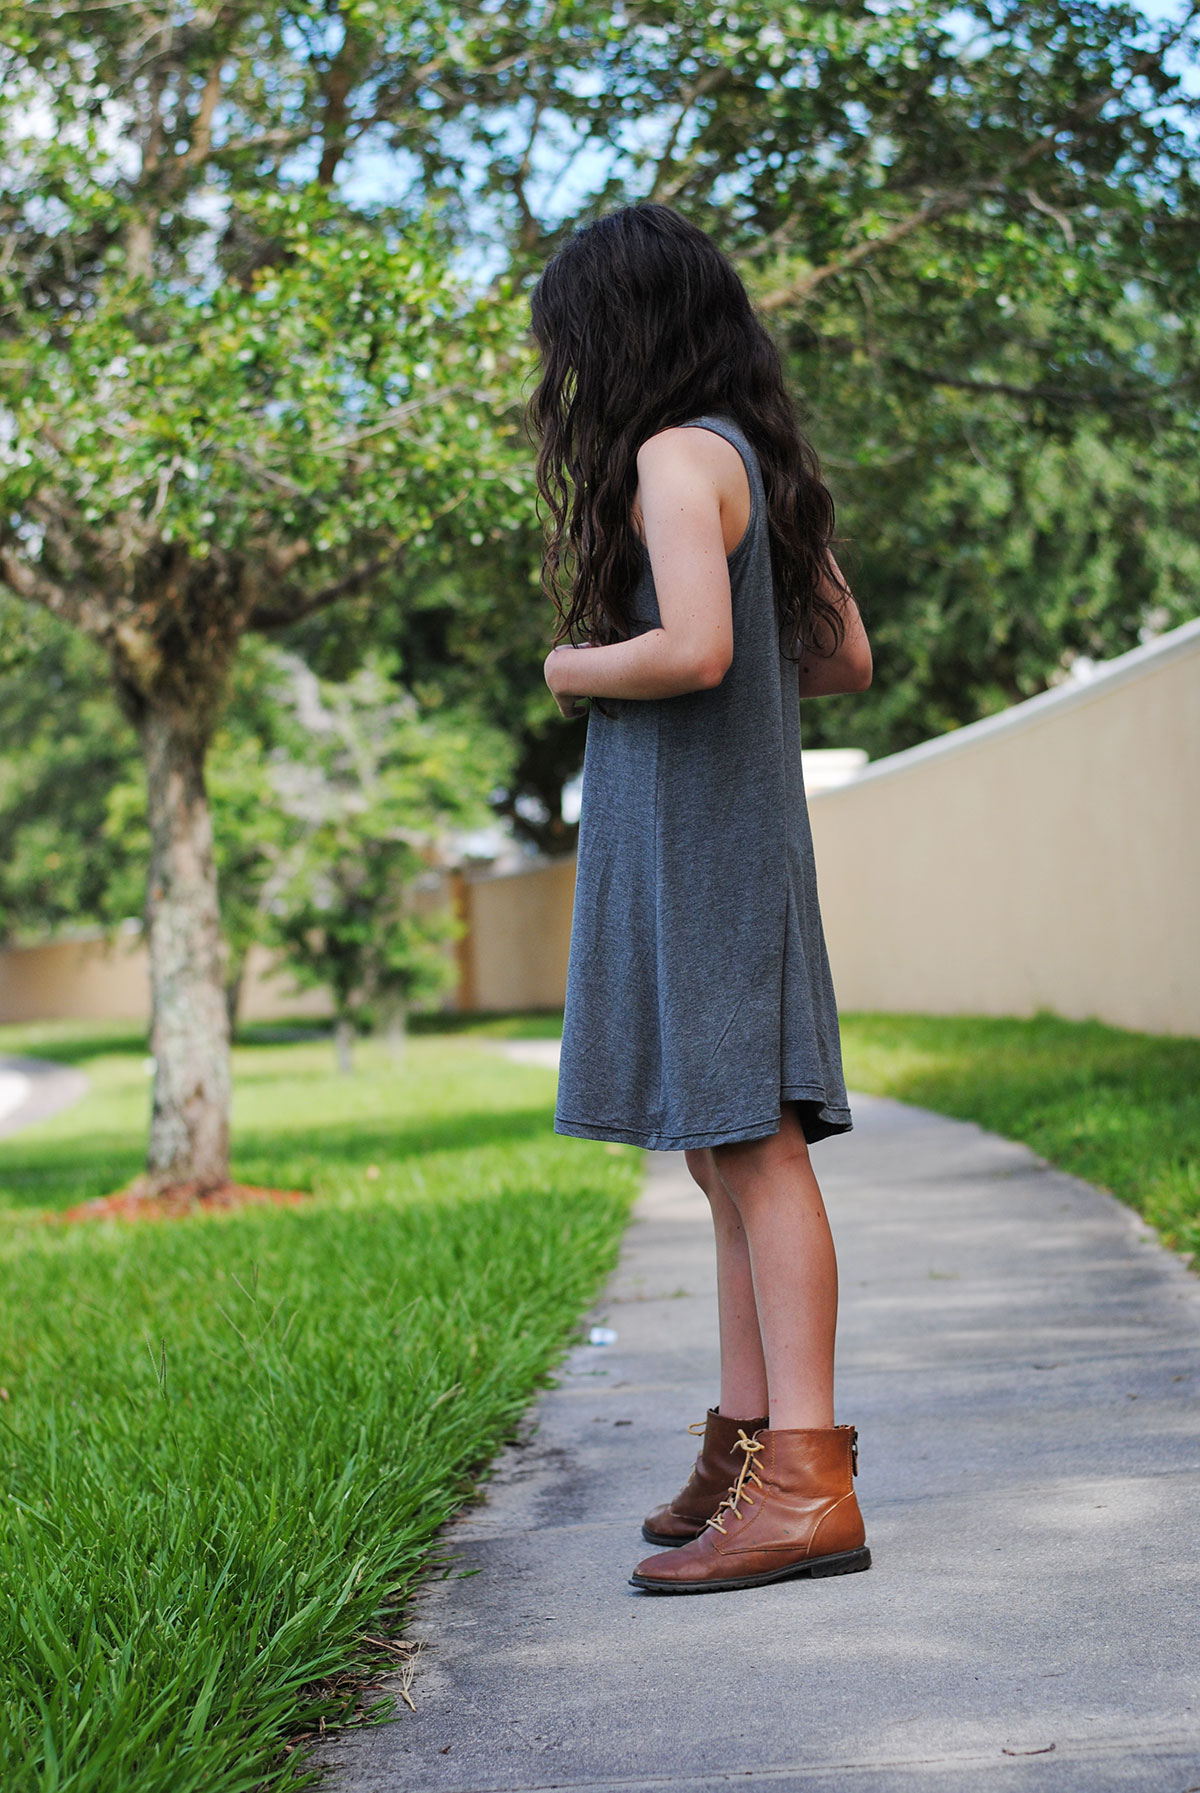
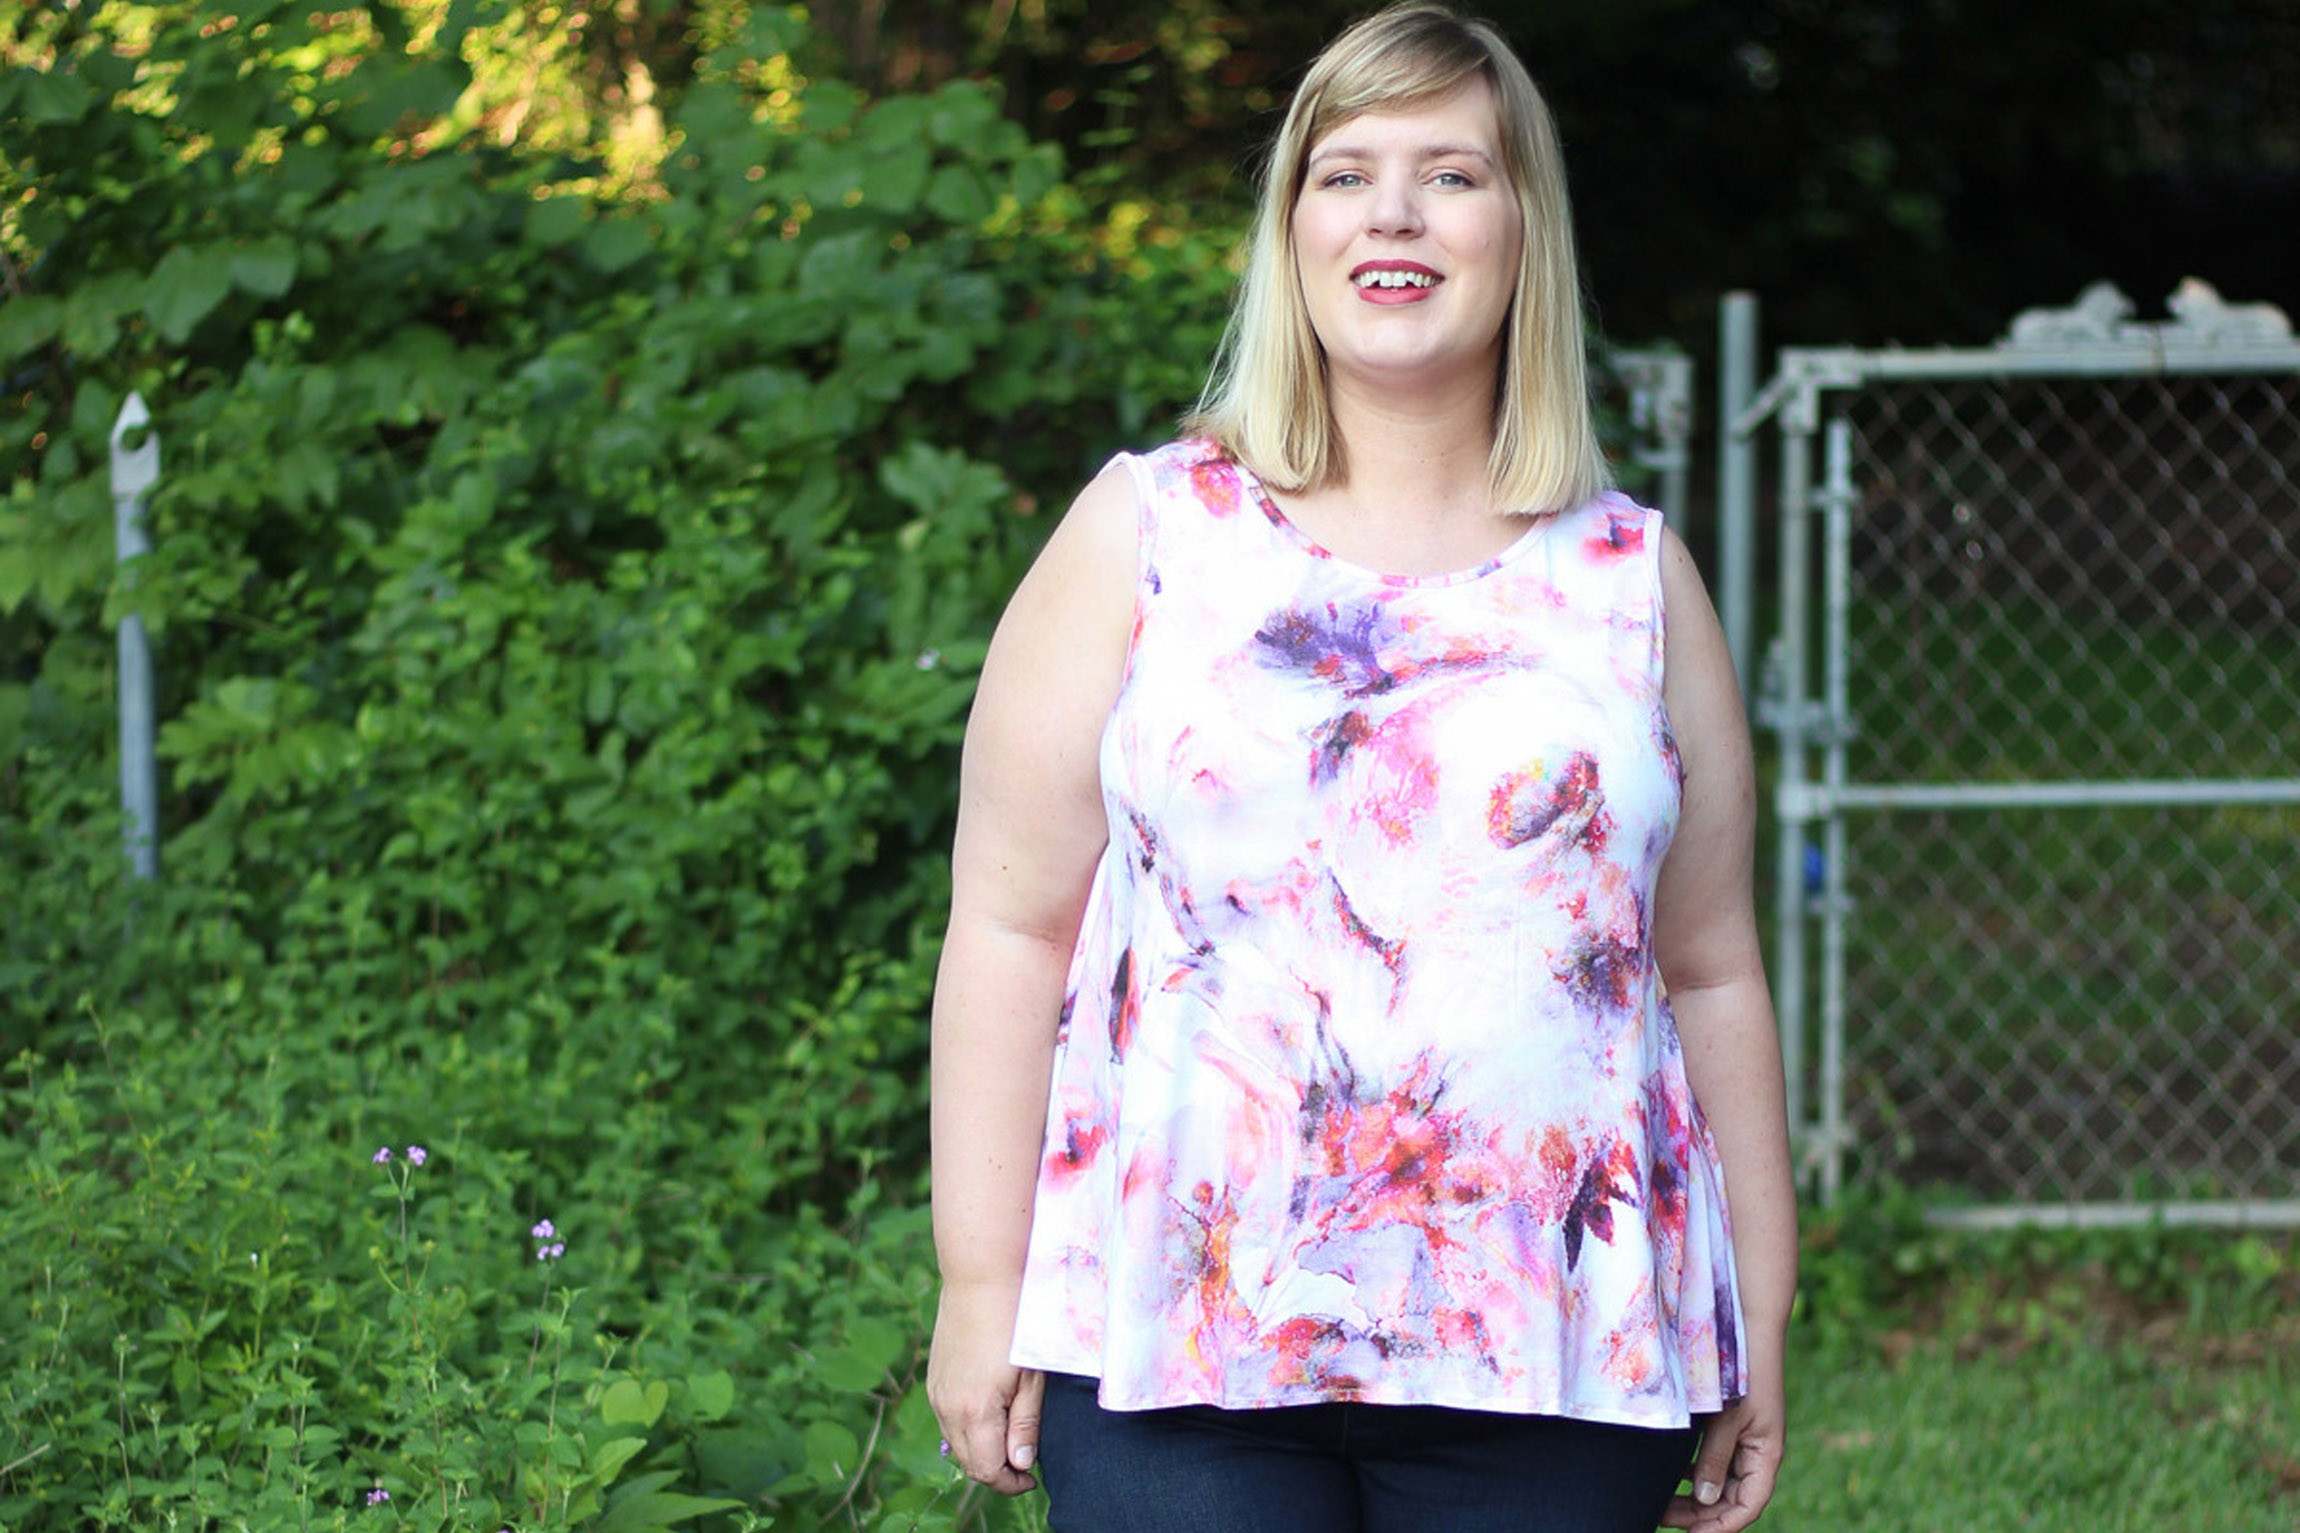
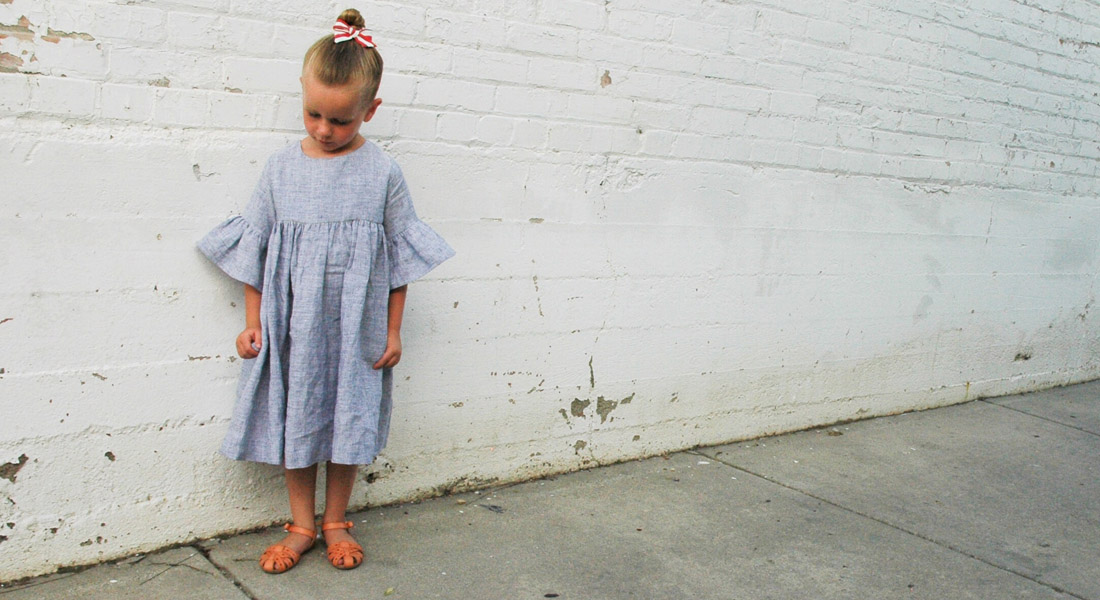
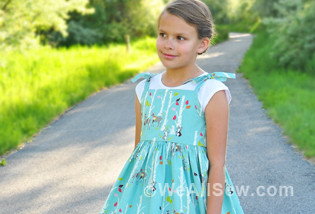
Swing Dress Tutorial
With summer here, the temperatures are rising and we are doing just about everything in our house to help stay cool! My daughter was in need of a few new summer dresses, and an airy, knit swing dress was in order!
This is a simple dress to make that will only take you a couple of hours. This tutorial would work perfectly for adults or children. If you have a favorite knit tank top, you are all set and ready to go, so let’s get started.
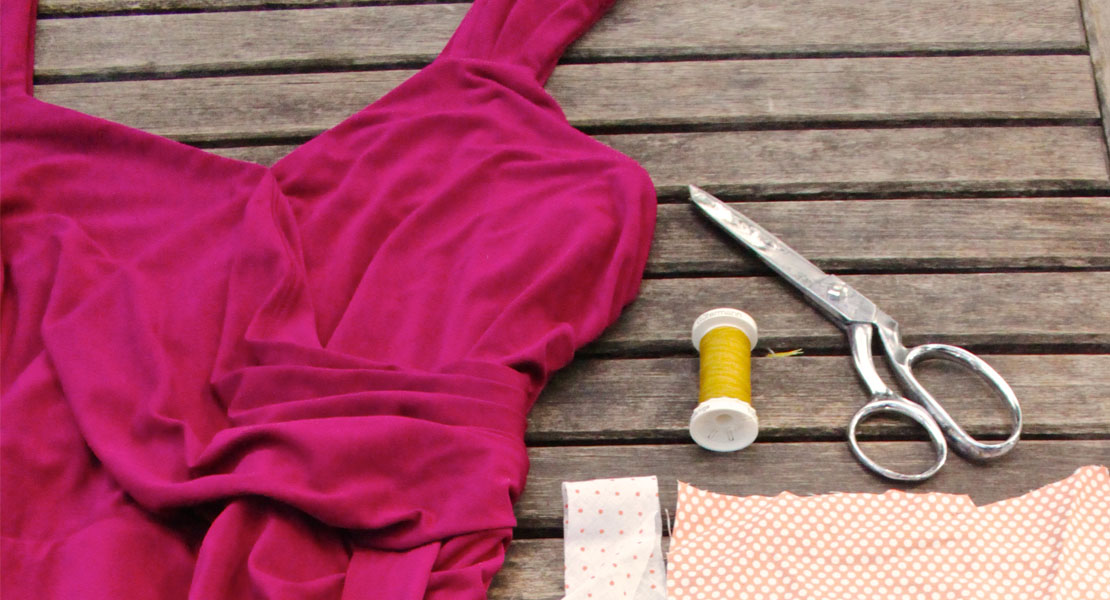
Materials to sew a swing dress
- Large tracing paper, draft paper or freezer paper to draw your pattern
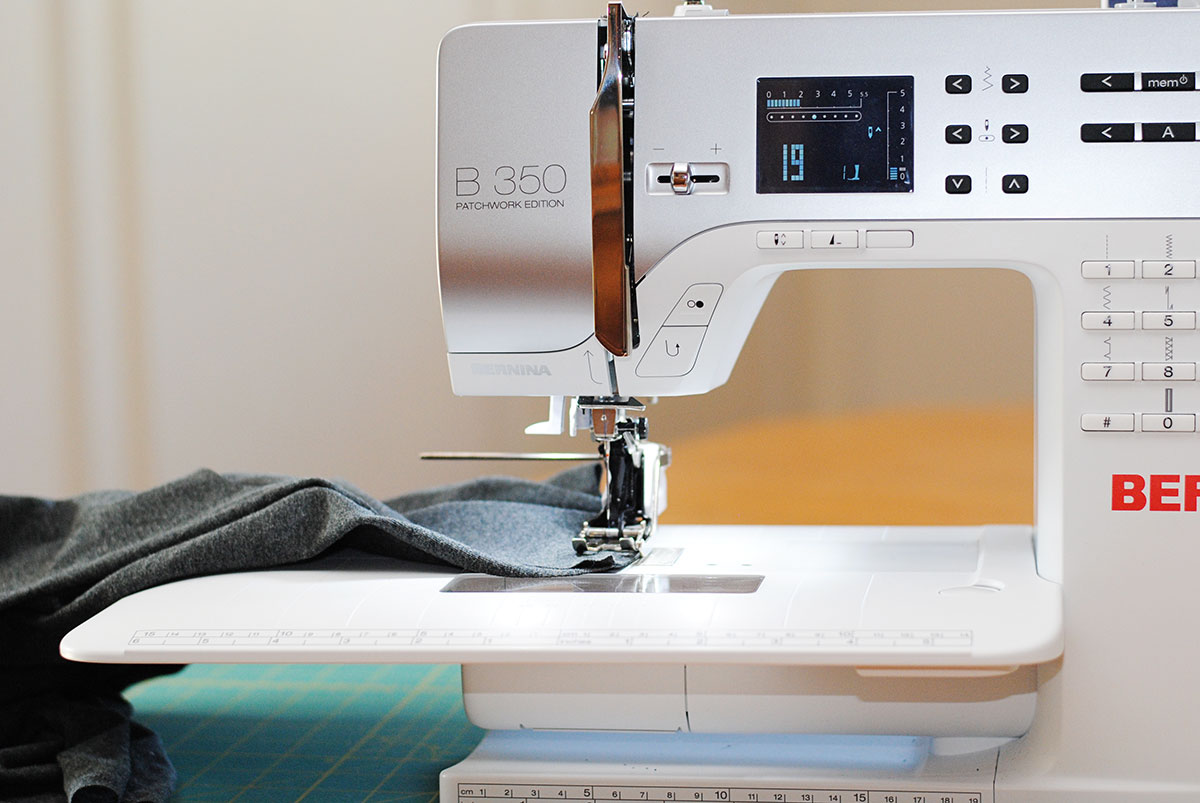
- Sewing machine, I used my BERNINA 350 PE
- 1.5 yards of knit fabric, fabric with drape such as rayon knit works best
- Twin needle and ball point needle
- BERNINA Walking Foot #50
Instructions to sew a swing dress
STEP ONE – favorite tank top
Grab your favorite knit tank top, one that fits well in the bust area.
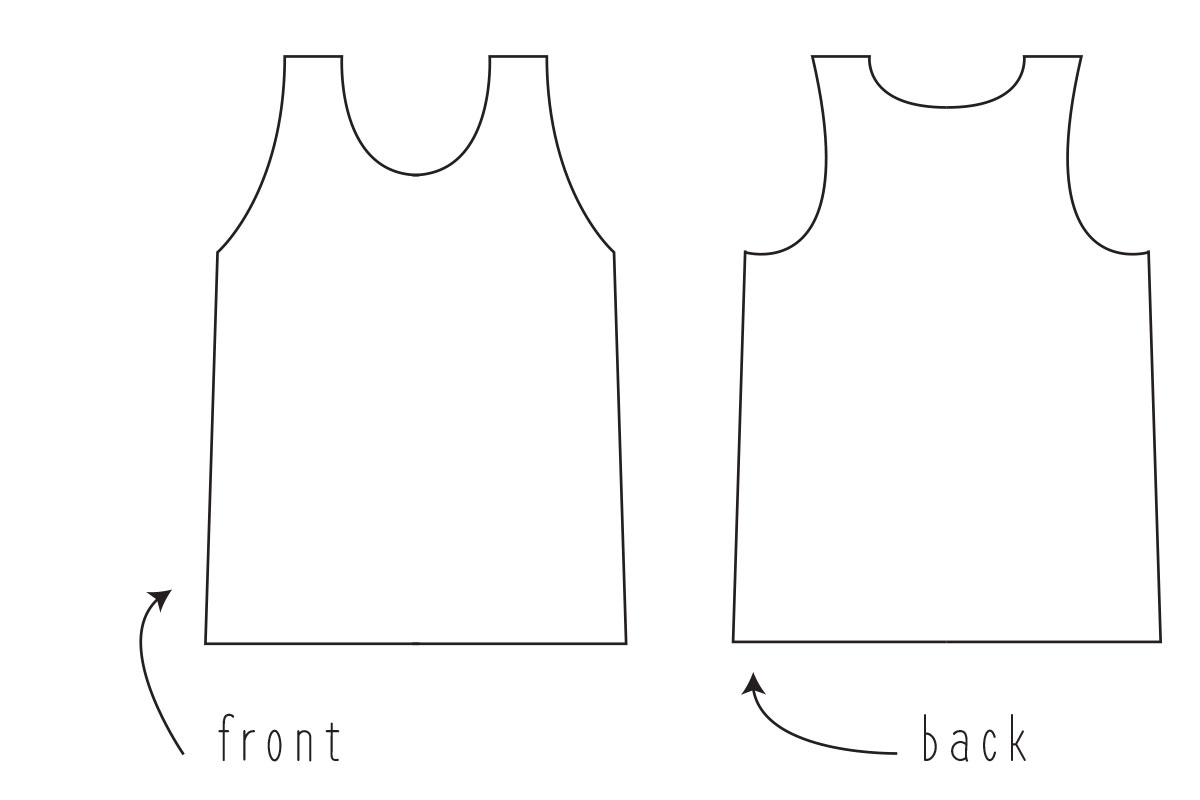
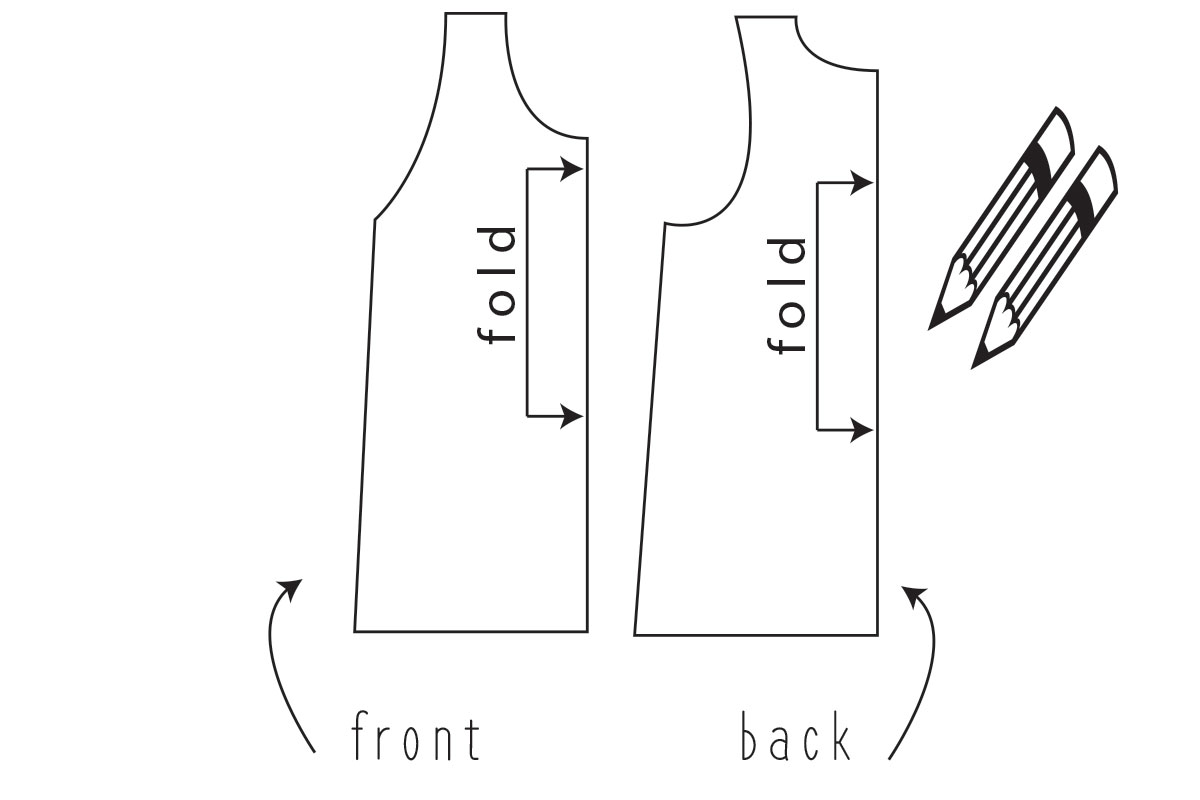
STEP TWO – trace tank top
Fold your tank top in half, down the center line. Grab two pencils and trace around the front of the tank top, with the two pencils side by side. This gives you the perfect 1/4 inch seam allowance when you are tracing your pattern. Now fold your tank top in half so that the back of the tank top is facing out. Trace around the back. You now have a back and front pattern for the tank top.
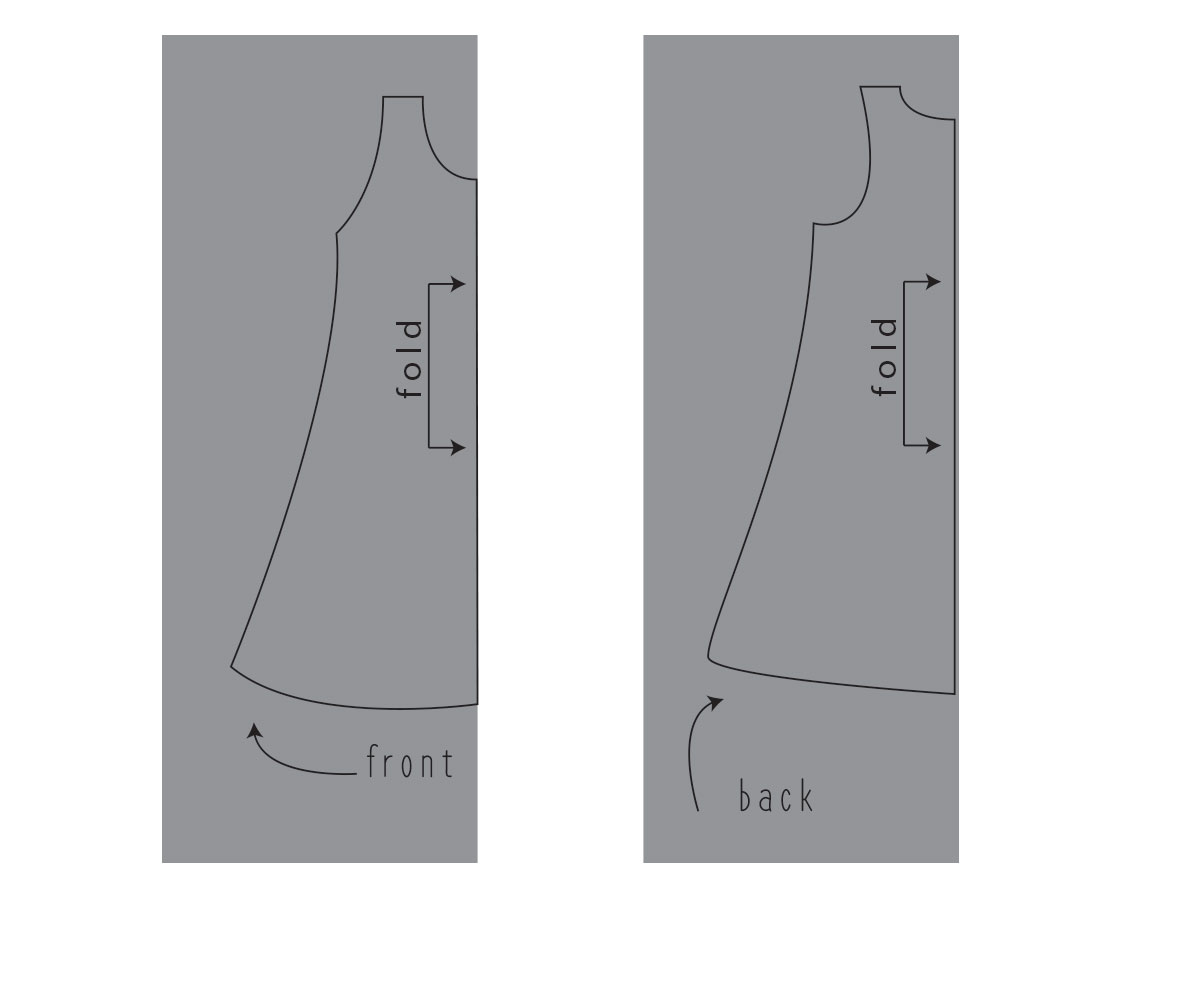
STEP THREE – slash and spread tank top pattern to create dress
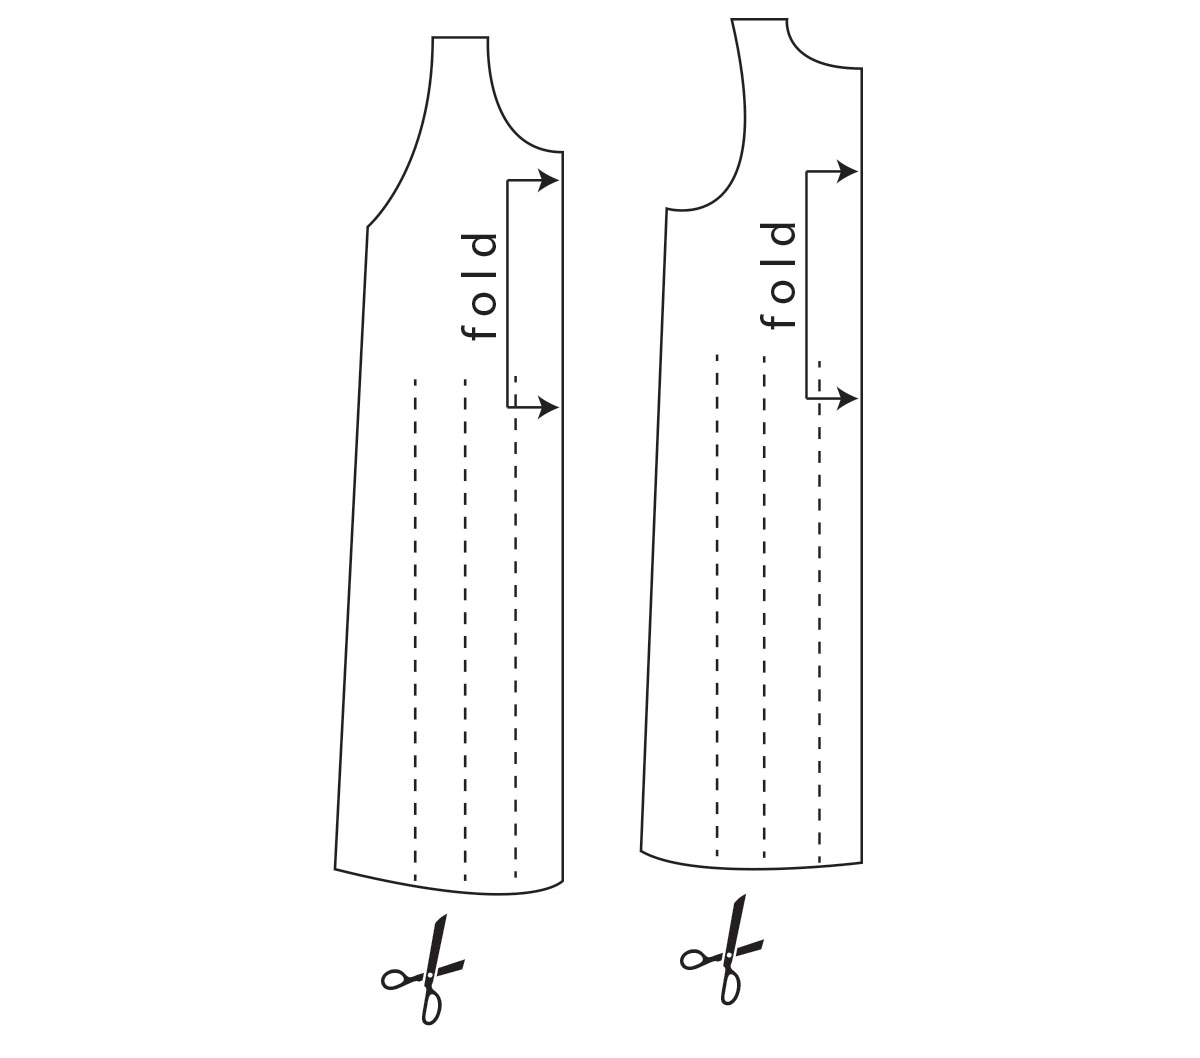
Extend your lines down, so that your tank top pattern is now dress length. You can make this as long or as short as you want. Now draw three vertical lines in your pattern, stopping right at your natural waist line. We are going to slash and spread our pattern to create the swing and flare in the dress. Cut these three lines and spread the pattern apart. Make sure that your center fold line is still a straight line. The spreading needs to only extend out toward the side seam line.
STEP FOUR – trace new dress pattern
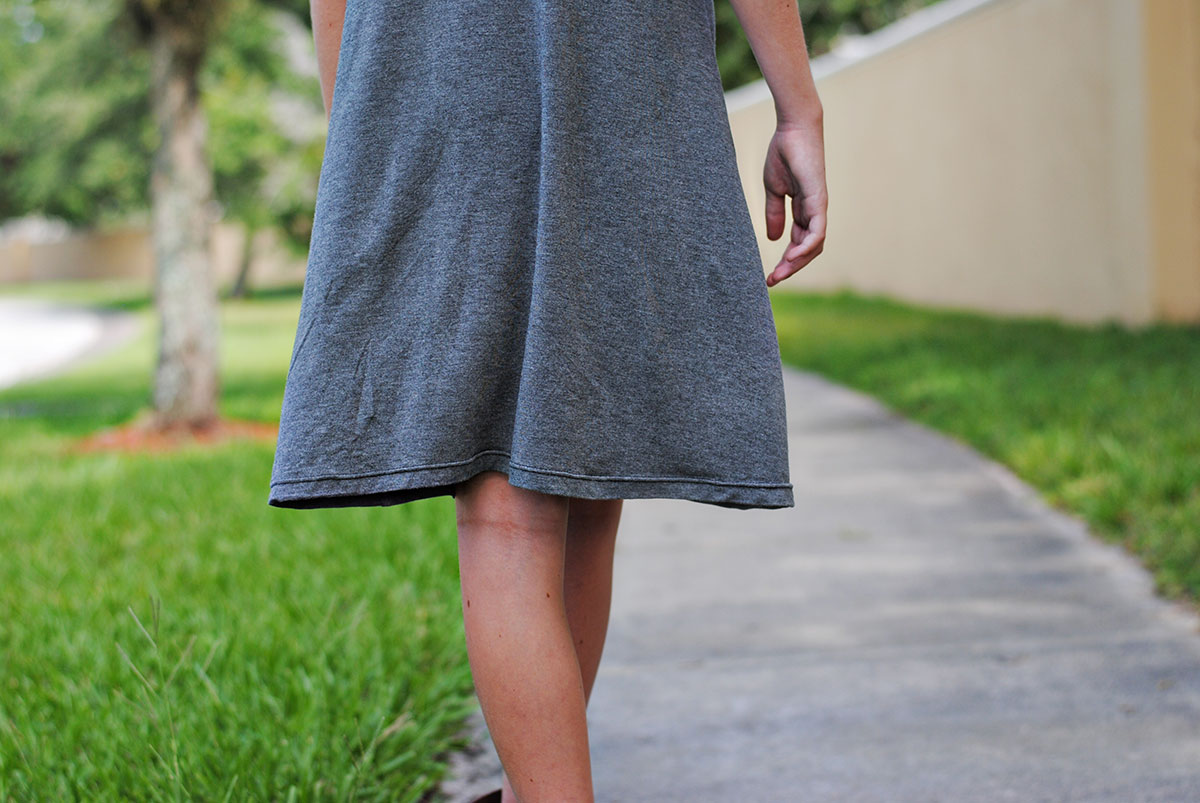
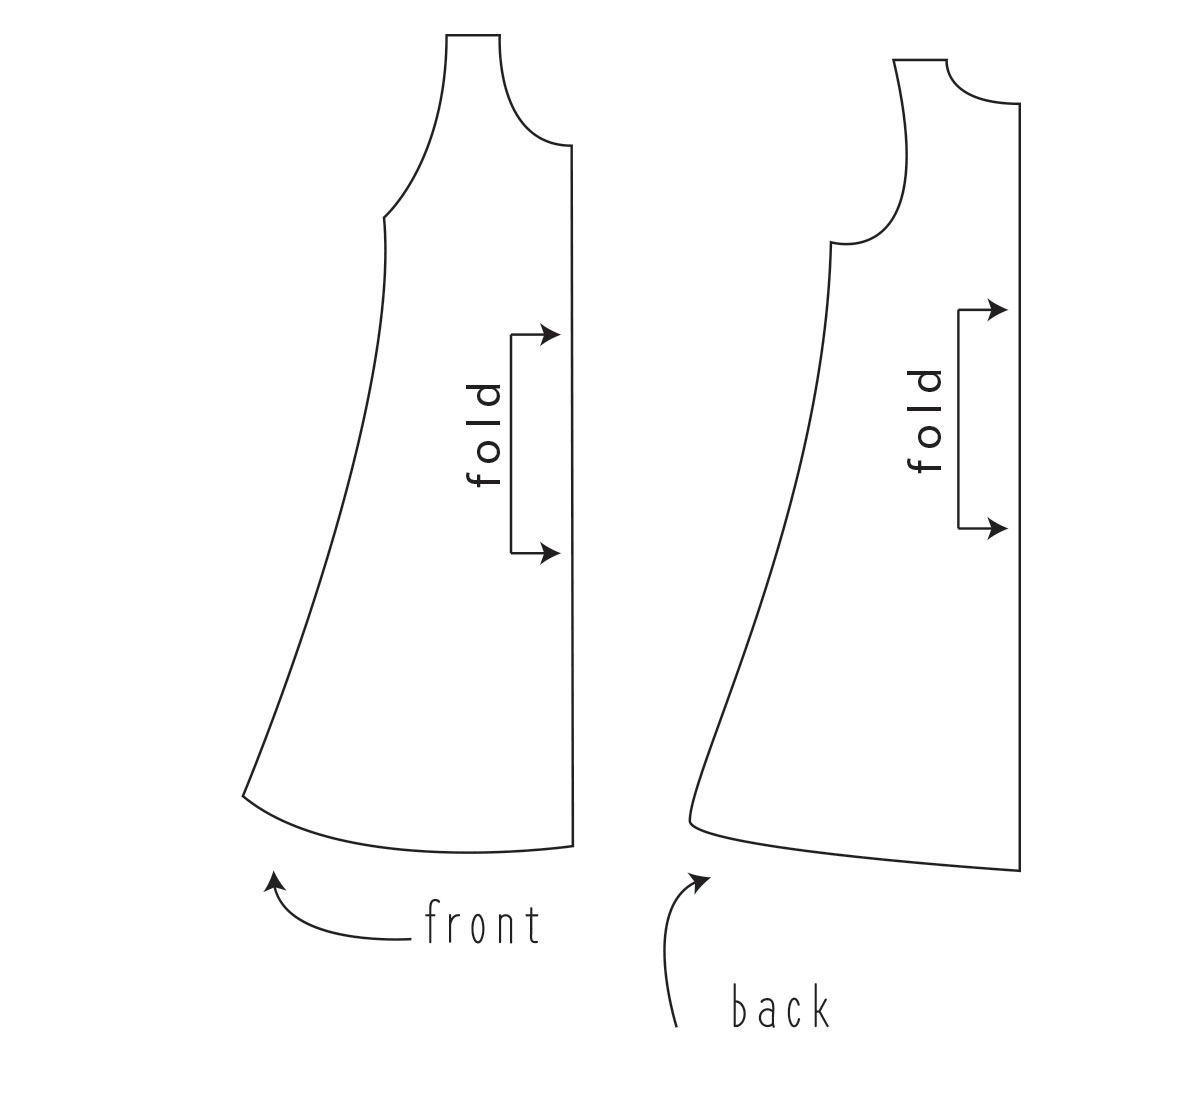
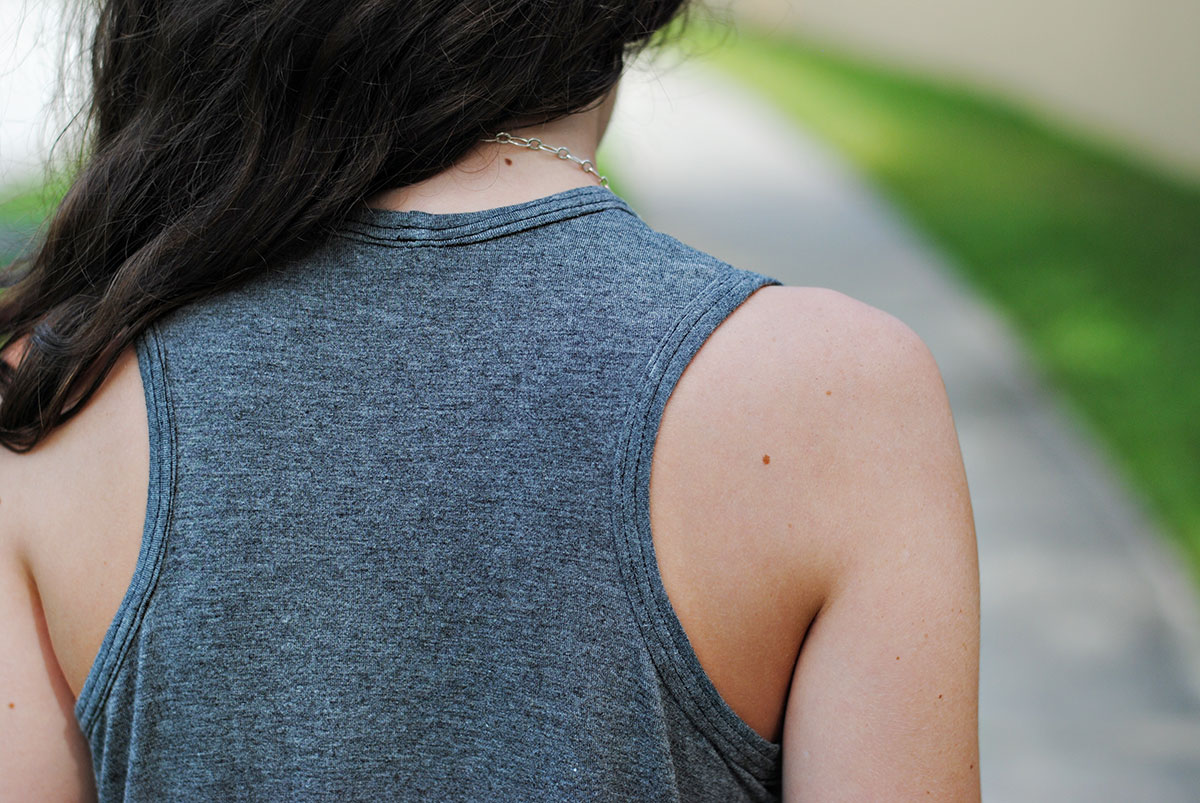
Trace around your new pattern. Notice that the bottom hem line curves up toward the side seam. This is correct and needed, otherwise your dress would dip low on the side seams.
STEP FIVE – cut out dress pattern
Grab your fabric and fold it in half, with the direction of greatest stretch going across the fabric, perpendicular to the fold. Cut out your front and back pattern pieces.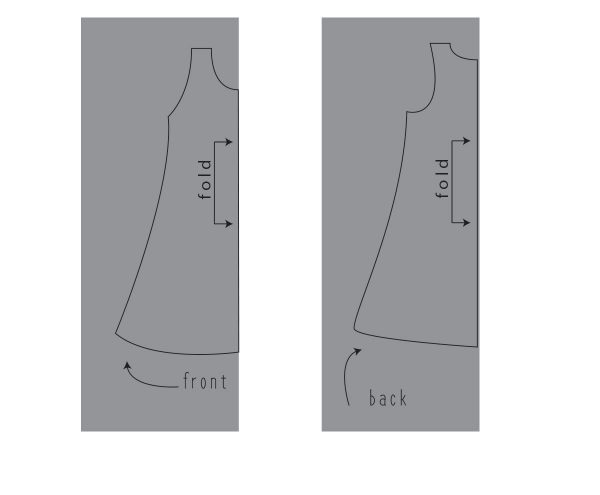 STEP SIX – sew shoulder seams
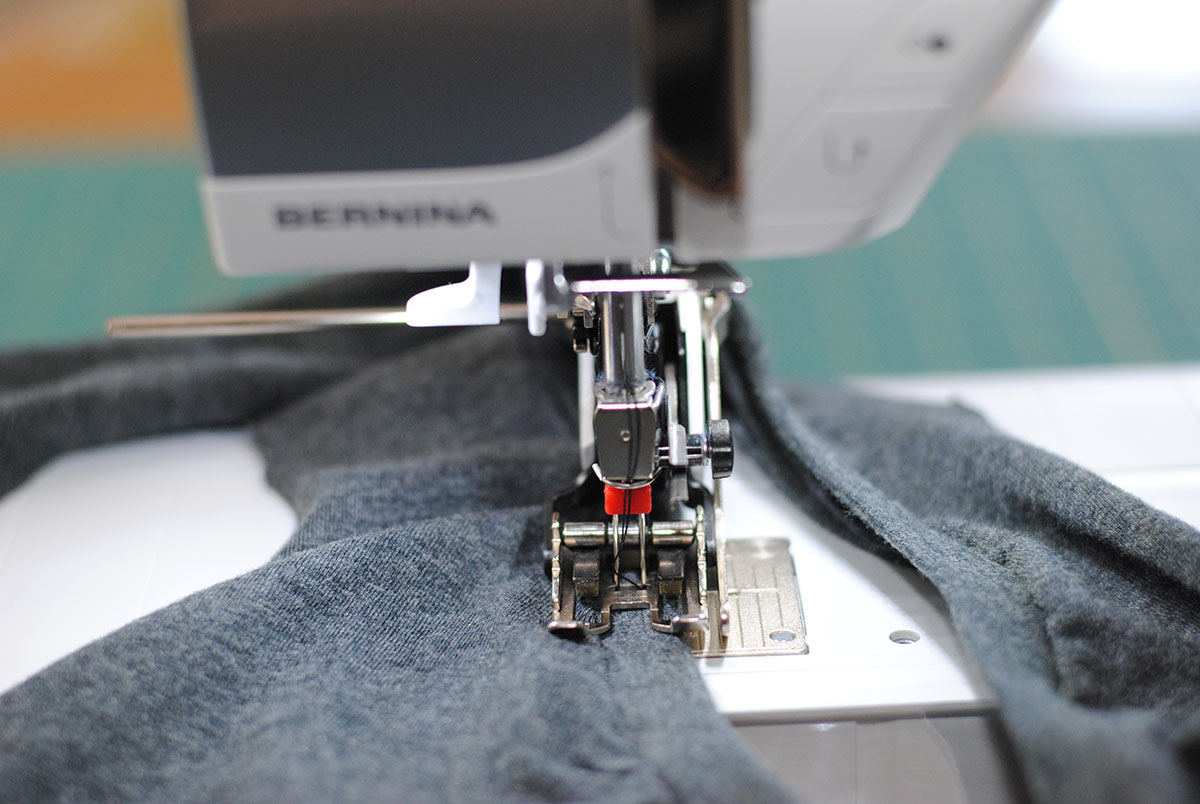
We’re now ready to sew. Make sure your sewing machine has a needle that is suitable for knit, such as a ball point needle. Also, using your walking foot is extremely helpful. It ensures that the fabric is moved through your feed dogs evenly without stretching the dress. Grab your front and back dress pieces and sew, right sides together, using a 1/4 inch seam allowance just the shoulder seams. I used the stretch stitch on my BERNINA 350 PE.
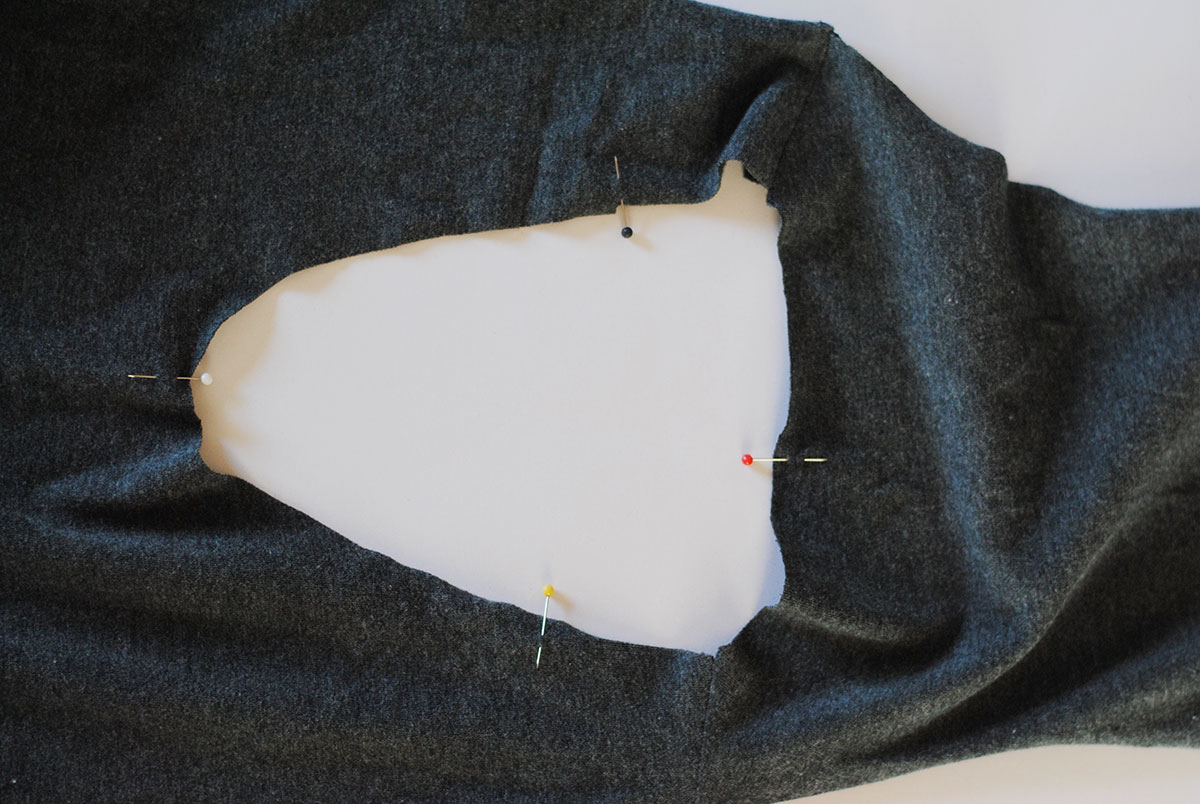
STEP SEVEN – measure and cut neckline and armhole bindings
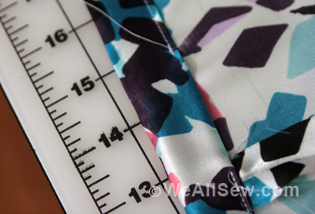
We now need to make the neck and armhole bindings. Measure around the neck and armhole openings. Take this measurement and multiply it by .85. The neck opening on my dress was 17.5 inches and the arm opening measured 19.5 inches. Each number multiplied by .85 equaled 14.875 and 16.575 respectively. The neck binding and armhole binding need to be cut by 3 inches. So I cut two 16.575 x 3 (one for the left armhole, one for the right armhole) and one 14.875 x 3. Sew the short ends of the neck band together, right sides together. Fold the neckband in half, right sides facing out, wrong sides together. Divide the neckband into quarters and mark with pins.

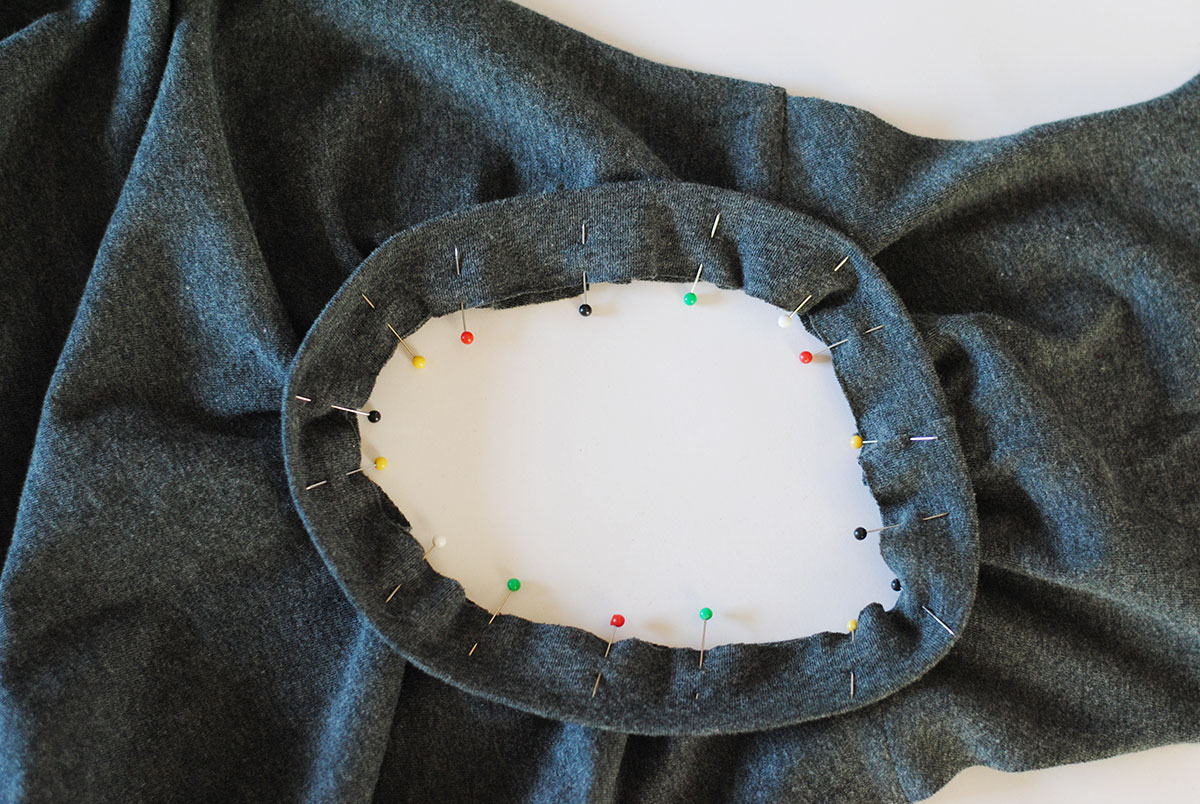
STEP EIGHT – sew bindings
Divide the neck line on the dress into quarters and mark with pins, just as you did with the neck binding. Pin the neckband to the neck line, right sides together, matching the pins and stretching the neckband to fit the neck line. Sew with a 1/4 inch seam allowance.
STEP NINE – topstitch neck binding
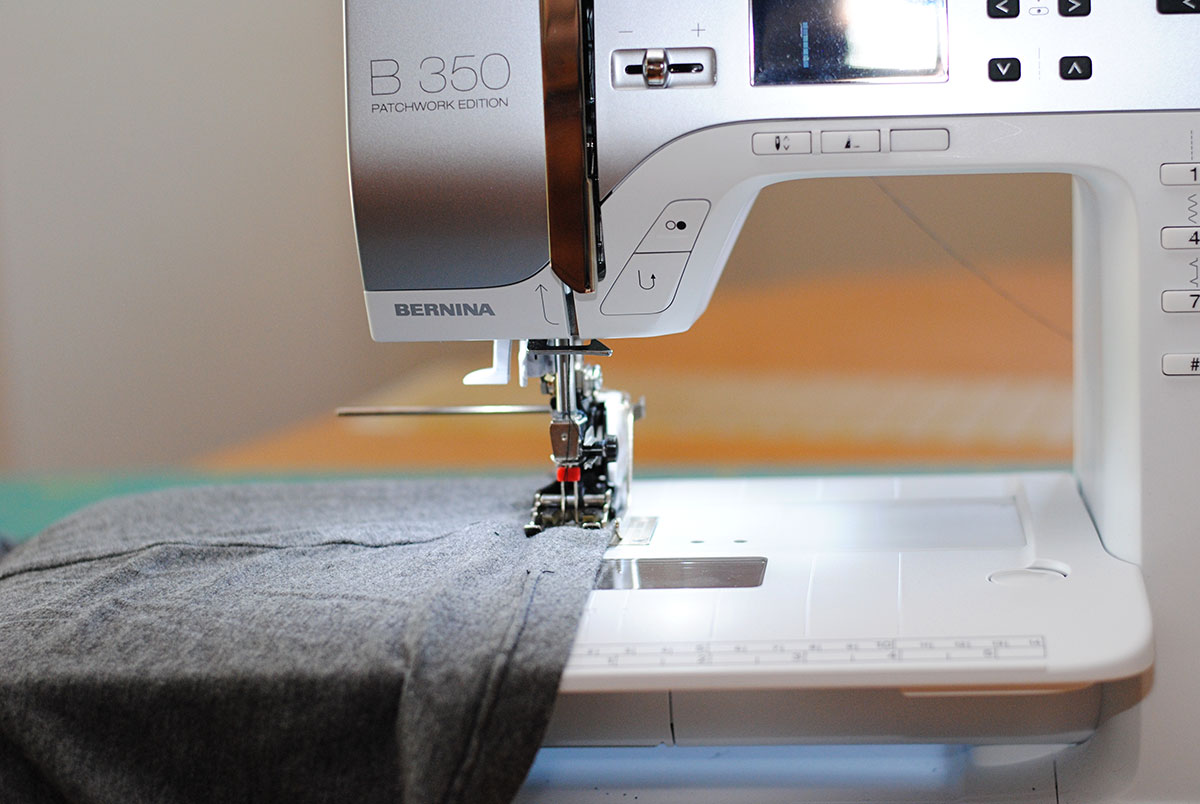
Fold the folded edge of the neckband over to the inside of the dress, covering the seam line you just sewed. Switch to your twin needle and your straight stitch to begin topstitching the binding in place. When sewing with a twin needle, you thread your machine as usual, but with two spools of thread instead of one. Before using the twin needle on the dress you are sewing, practice on some scrap knit fabric to ensure you get the correct stitch. You may need to adjust the stitch length to avoid any puckering in your fabric.
STEP TEN- hem dress
Fold the bottom hem up 1/2 inch, stitch in place with a twin needle.
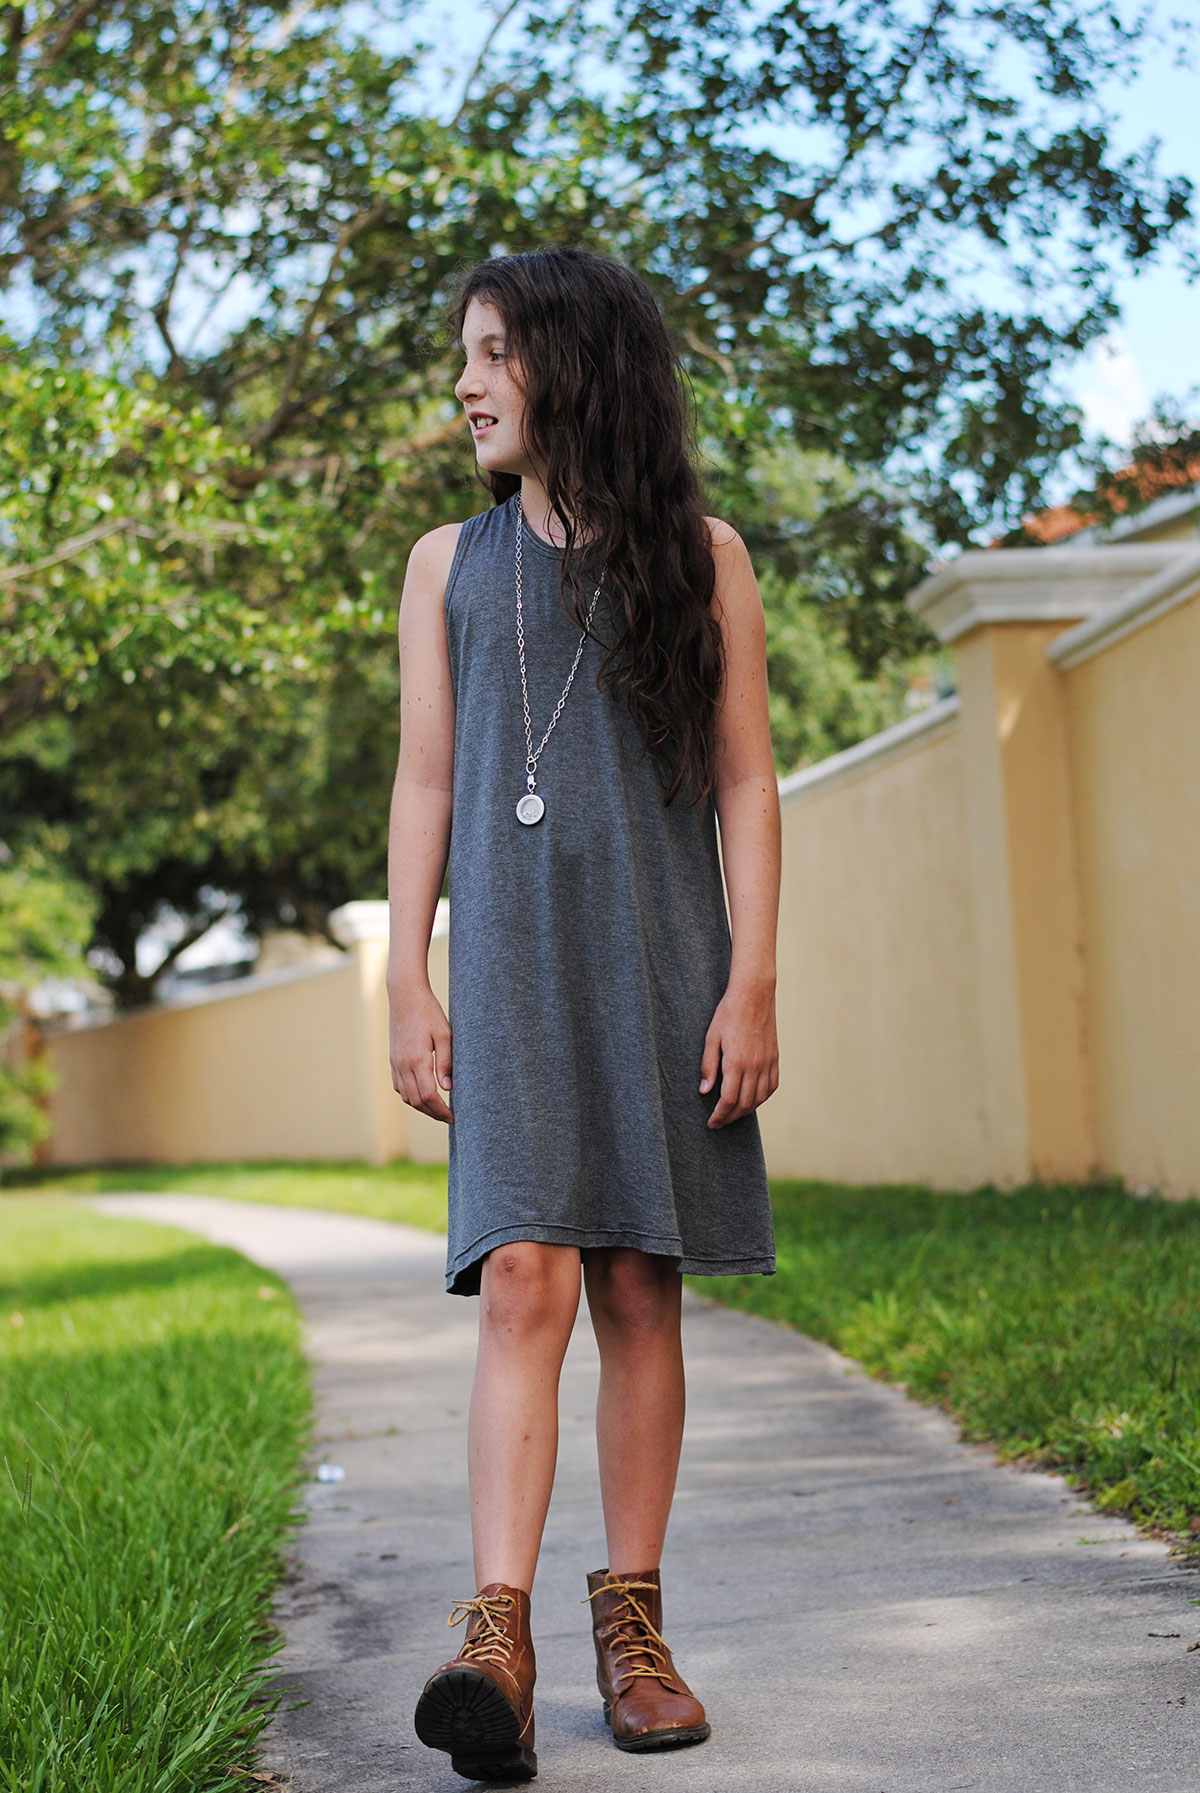
That’s it! Your swing dress is done and you are ready to wear it out and about! I can’t wait to hear what you are sewing this summer!


What you might also like


8 comments on “Swing Dress Tutorial”
-
-
Awww…thanks Michelle! She definitely is my mini me 🙂
-
-
Love this. Your daughter is beautiful.
-
Thank you!
-
-
Love this easy dress. Will it work with a rayon fabric? Any quick tips on making the back shoulder/armhole openings wider so there is more back coverage? At 67yrs this would be most helpful.
-
This one was sewn with a rayon knit fabric, which is perfect since it is stretchy and has great drape. The tank top I traced for this dress was a racer back tank, but if you grab any of your other tank tops to make a pattern from (with more back and shoulder coverage) it would work just the same and look great! I can’t wait to see what you sew!
-
-
I have sewn knit dresses and have been disappointed because the fabric shrinks. Do you pre-shrink your knits?
-
Love this I’ll be making this very soon! Thanks.
Leave a Reply
You must be logged in to post a comment.

I love how Mini Teresa rocks her boots with anything! This is a super cute and quick dress!