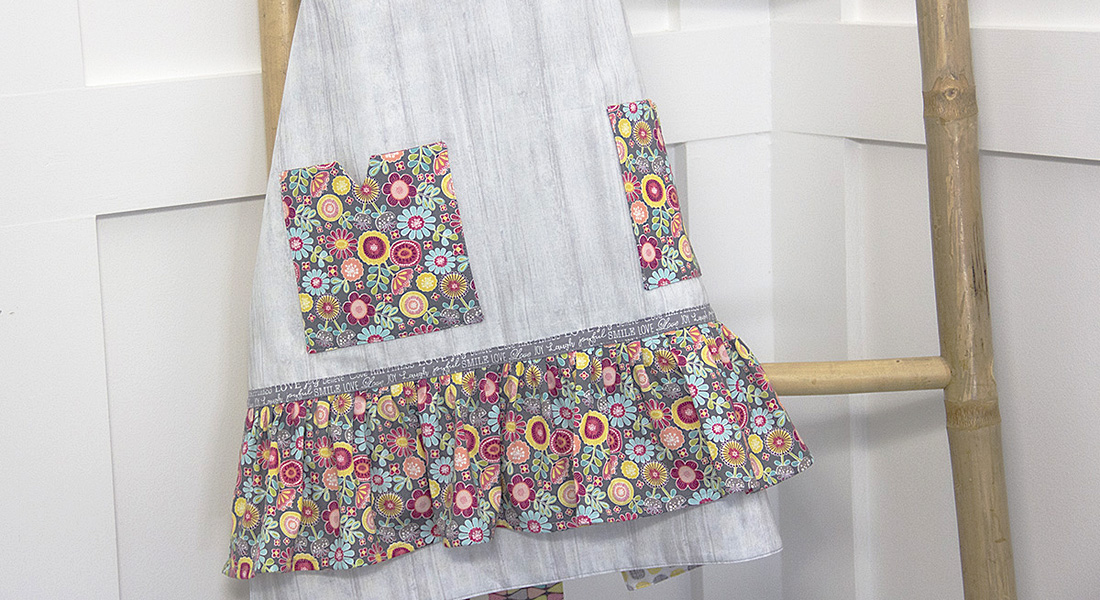
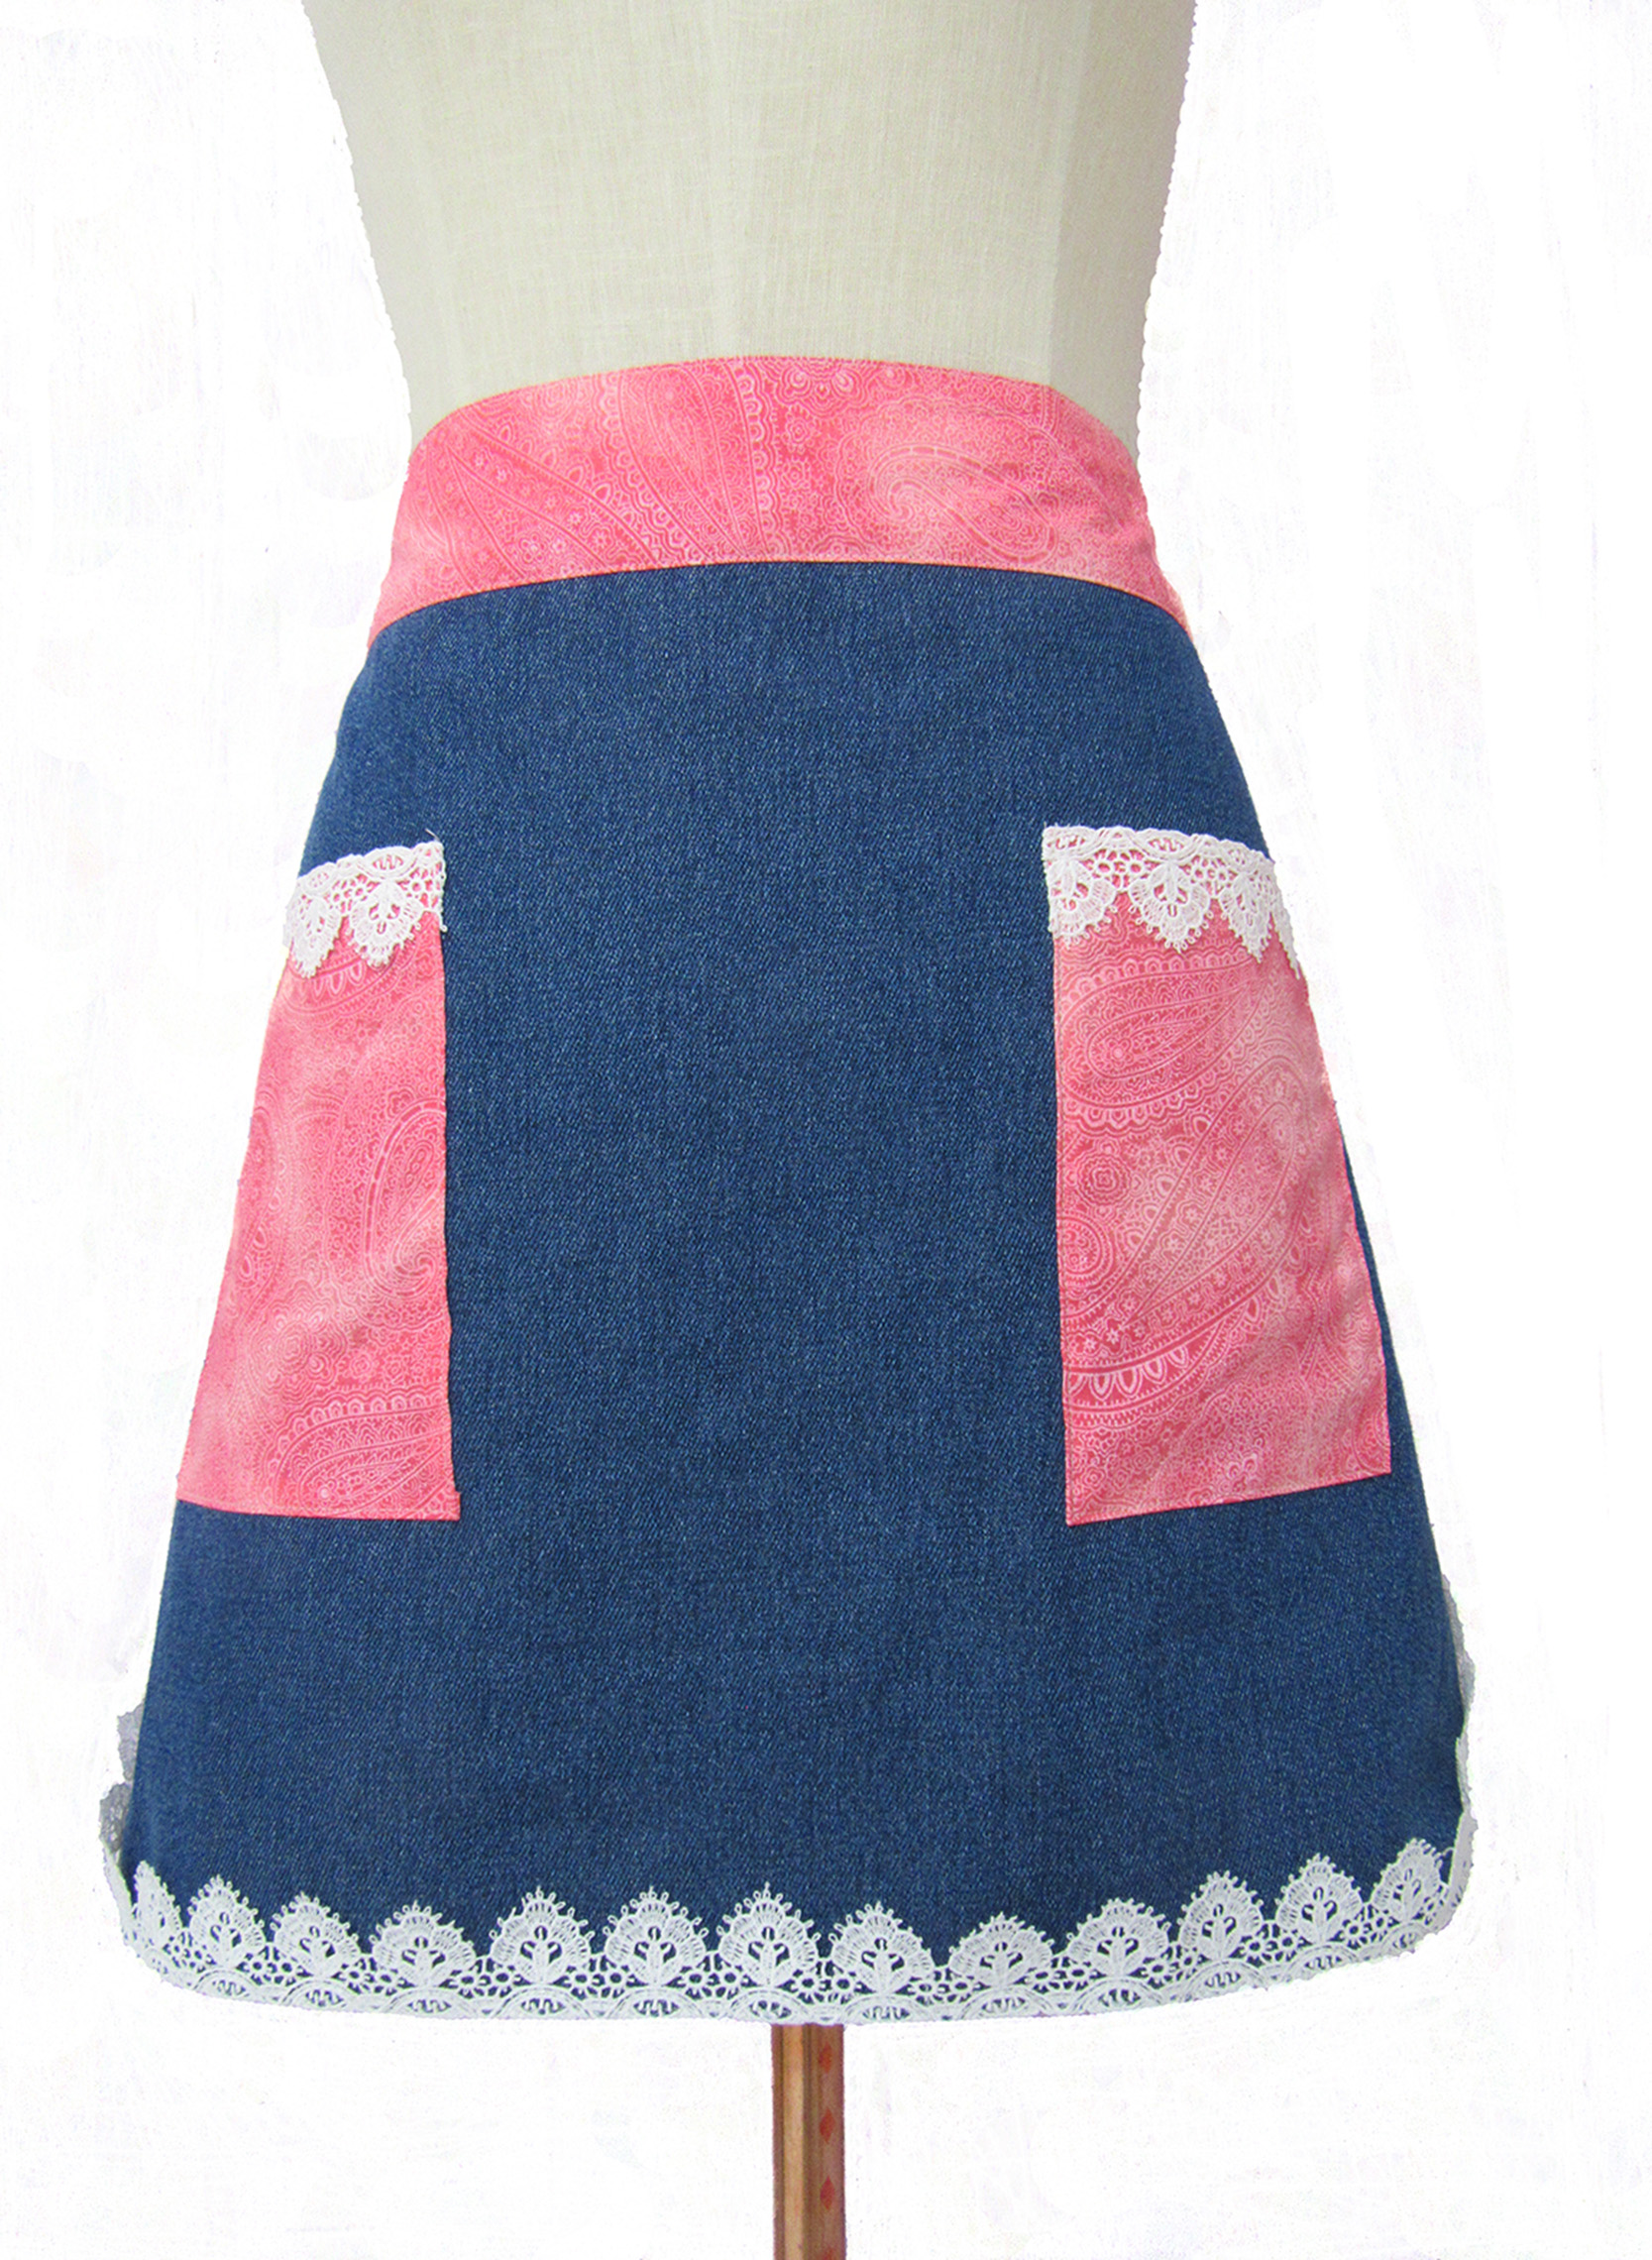
Fast and Easy Apron Tutorial
I love to cook, but I’m not the neatest person when it comes to adding ingredients. I always wind up with almost as much on me as in the bowl. That’s why I love aprons. This fast and easy apron tutorial shows you how to make a cute and functional apron in no time. Best of all, the hemming and trim are done in the same step.
Materials to Make a Fast and Easy Apron
- ½-1 yd — Heavyweight material. i.e. denim, canvas, duck cloth
- 2/3 yard — Contrasting cotton fabric for pockets and waistband
- 2 yards — 1” wide flat lace
Steps to Make a Fast and Easy Apron
Step 1
To determine the width of your apron, measure your waist using a soft tape measure starting at your belly button. (This is your waist circumference.) Divide this number by 2 and add 6 inches. For example, if your waist equals 32 (32/2+6=22) this is the width of your apron. The length of your apron is based on personal preference. I like mine to be slightly above my knees, so the length of mine would be approximately 14 inches, as I am fairly short.
Step 2
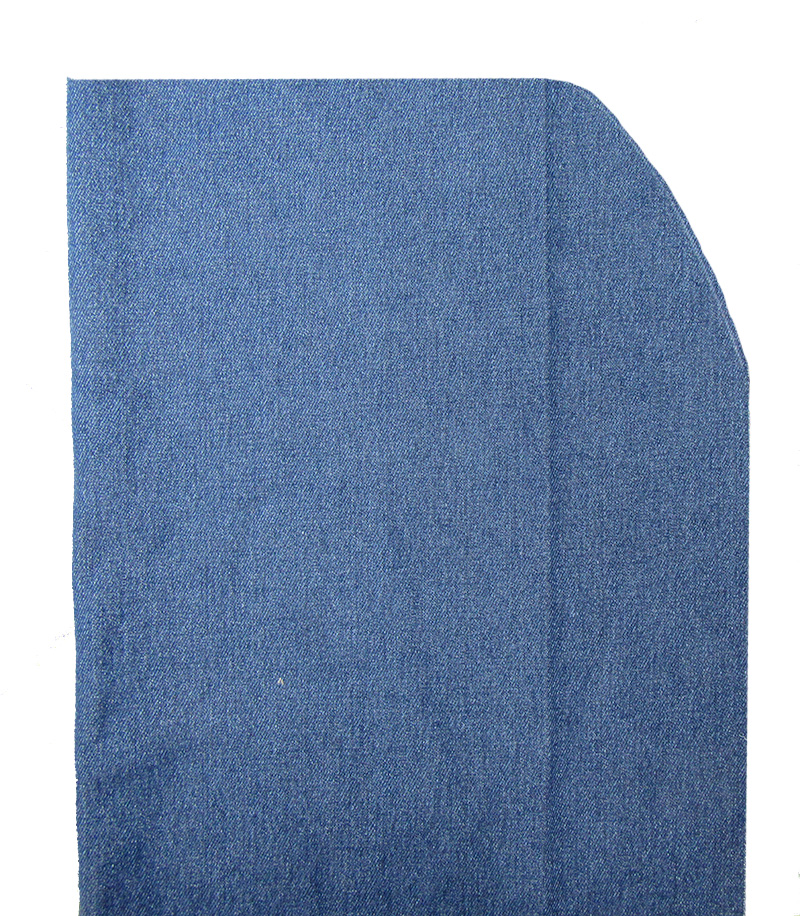
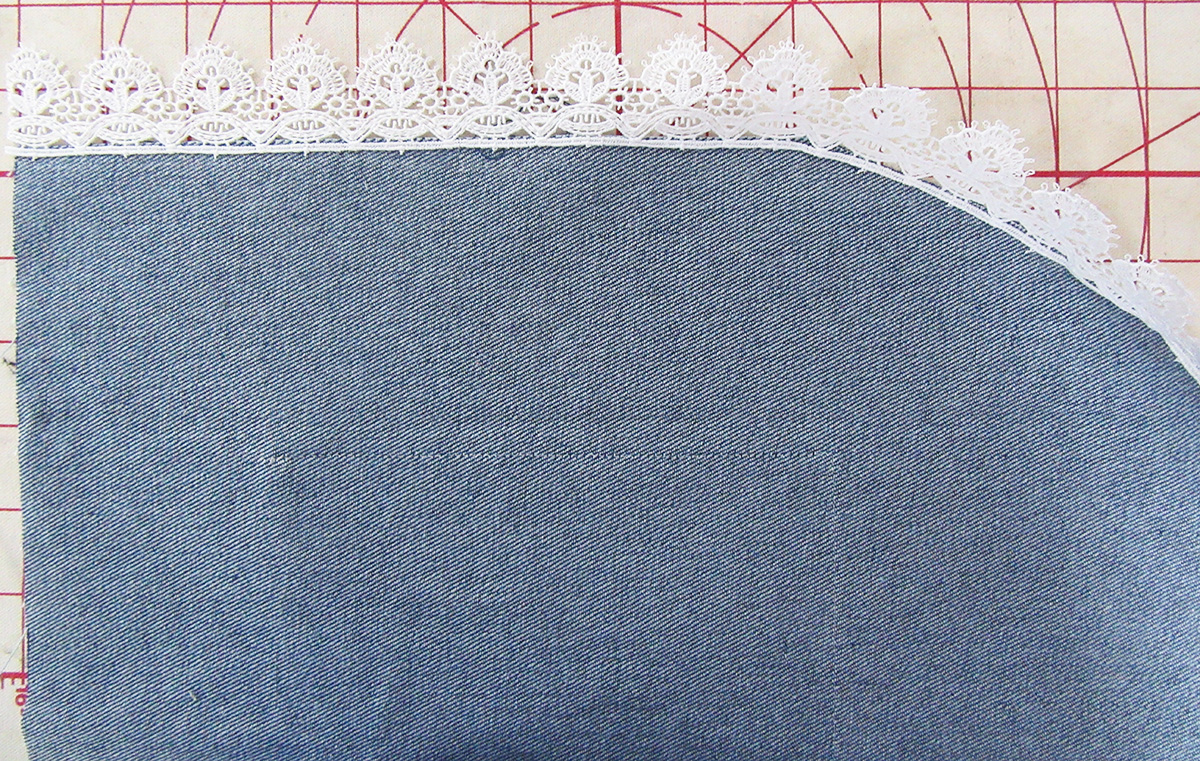
Cut a rectangle using the width and length you determined above. My rectangle would be 22X14 inches. This will be the body of your apron. Fold rectangle in half bringing short sides together. Using a template (like a large pot lid) with a gentle curve, mark a line starting approximately in the middle of the short side that curves in approximately 2-3 inches on the bottom of the rectangle, to round the corner. Cut along this line making sure to cut through both layers of fabric.
Step 3
Take your waist circumference determined in Step 1 and add 40”. (Using the measurement from the example above (32+40=72) This is the length of your waistband and apron ties. From contrasting cotton, cut a strip 5 inches by the length you just determined. You may have to piece your waistband to achieve the desired length depending on the size needed. Just remember to add in your seam allowances, or it will come up short. Cut 2 additional rectangles 5 inches by 7 inches. These will be the pockets.
Step 4
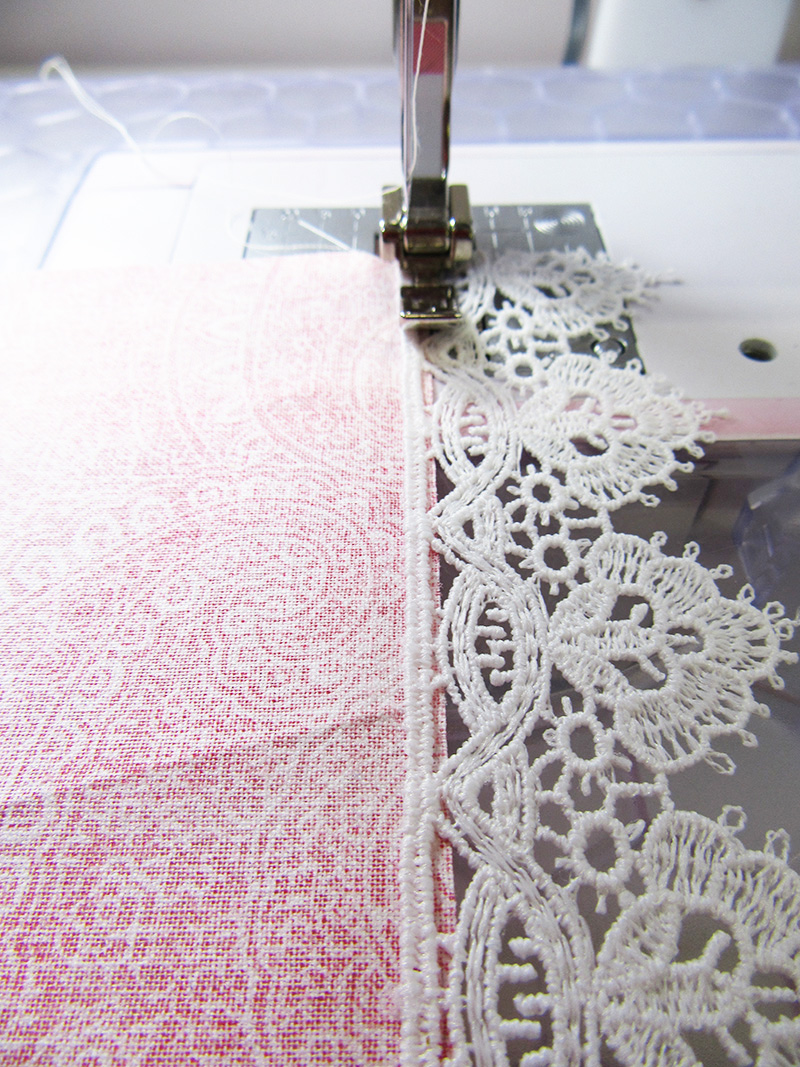
Cut two pieces of lace 5 inches long. Place lace along the short side of one the 5X7 inch rectangles right side up on wrong side of fabric. Line up the bottom edge of lace approximately 1/8 inch from the edge of the fabric. Lace will extend past fabric.
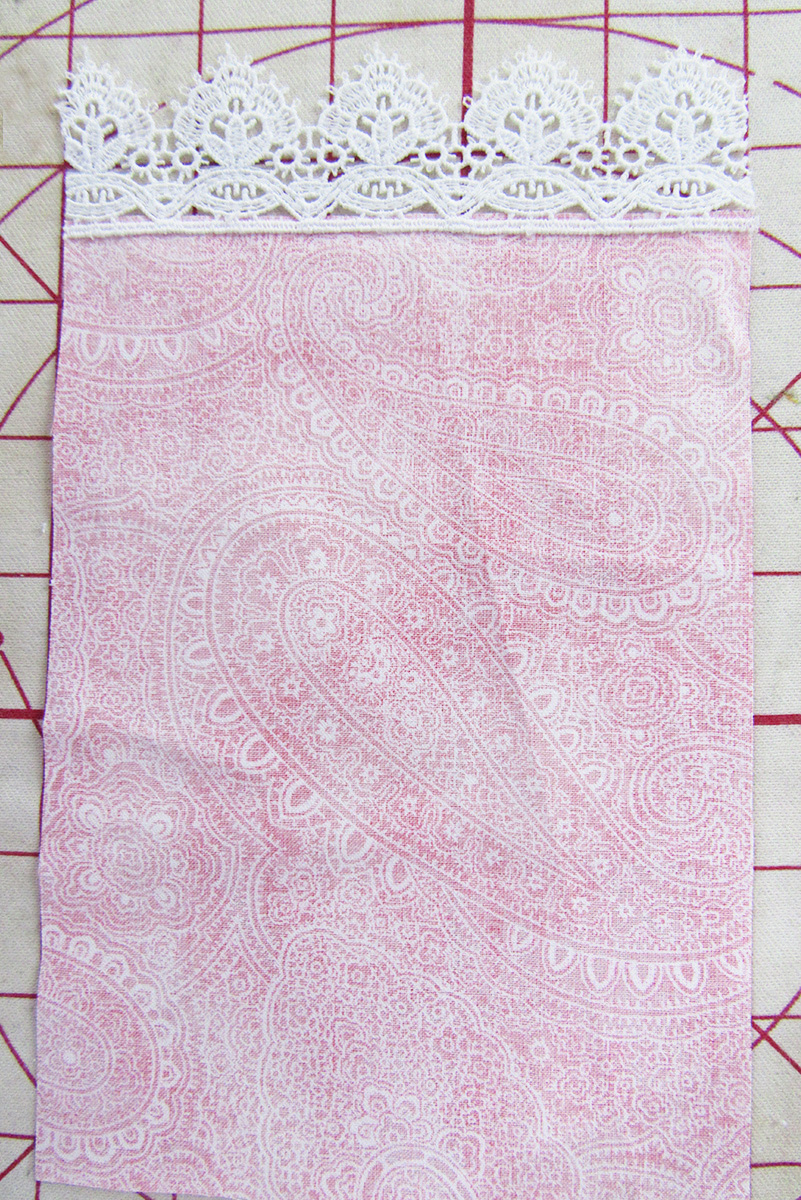
Using your BERNINA #4 Zipper foot sew as close to the bottom edge of the lace as possible. Repeat on second pocket.
Step 5
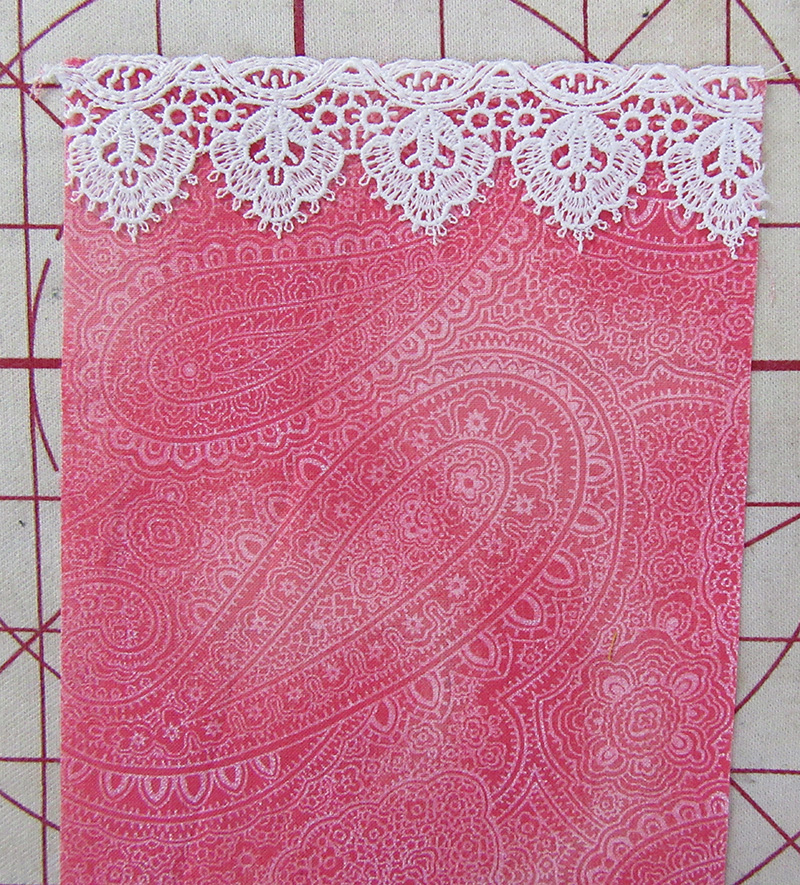
Fold lace towards right side of fabric being careful not to fold fabric. Lace will cover raw edge eliminating the need to hem/finish fabric. Press lace (Use a pressing cloth if necessary to avoid melting lace.)
Step-6
Using BERNINA Foot #5 top stitch lace to rectangle 1/8 inch from edge. Repeat with second pocket.
Step 7
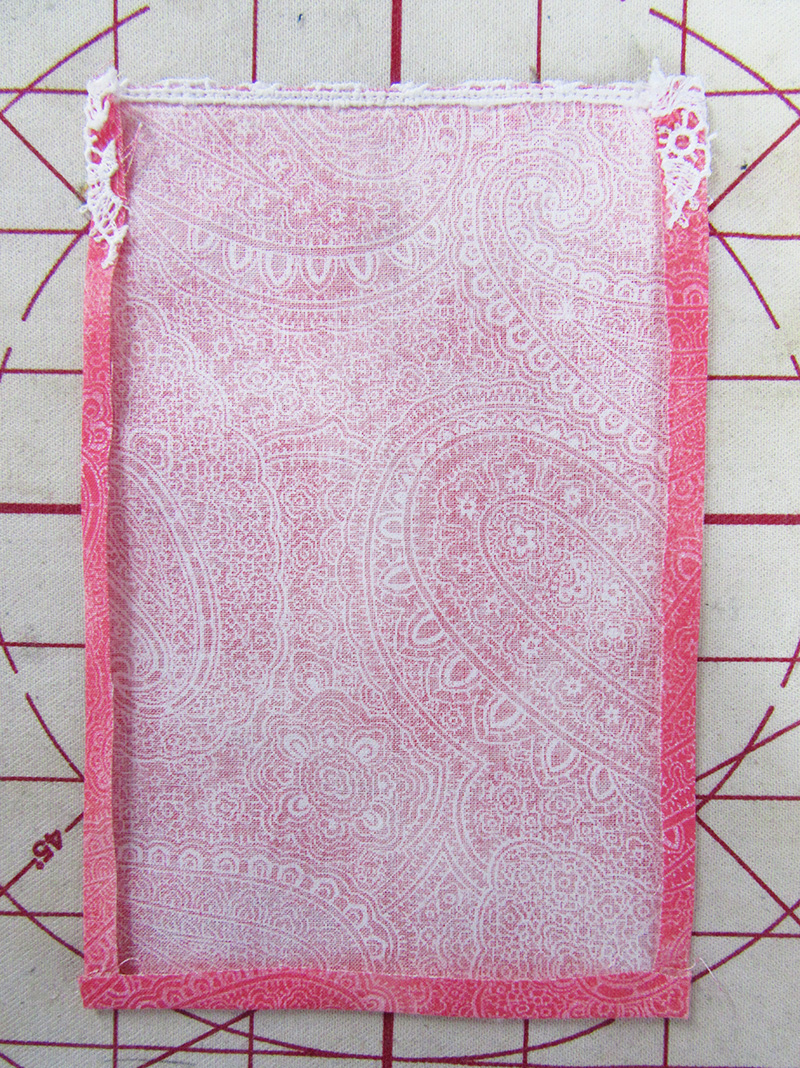
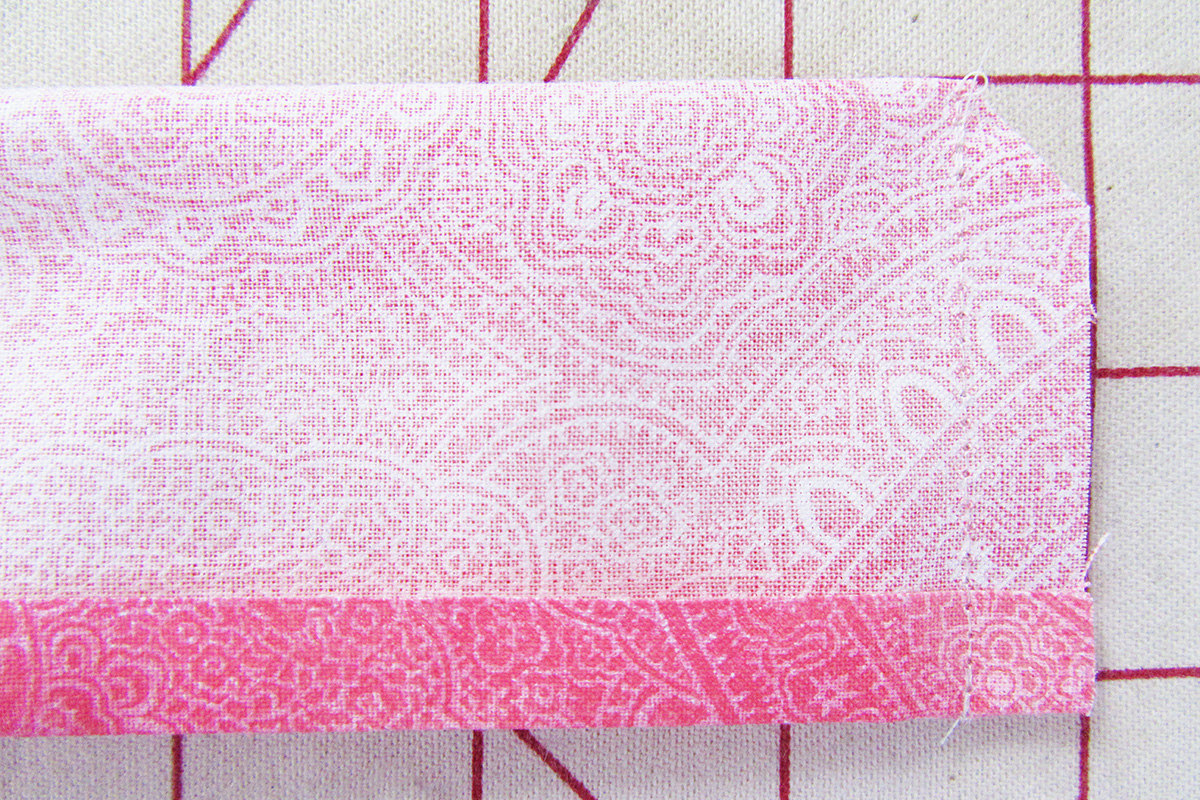
Fold sides and bottom (edge without lace) of pocket under ¼ inch wrong sides together and press. Repeat with second pocket.
Step 8
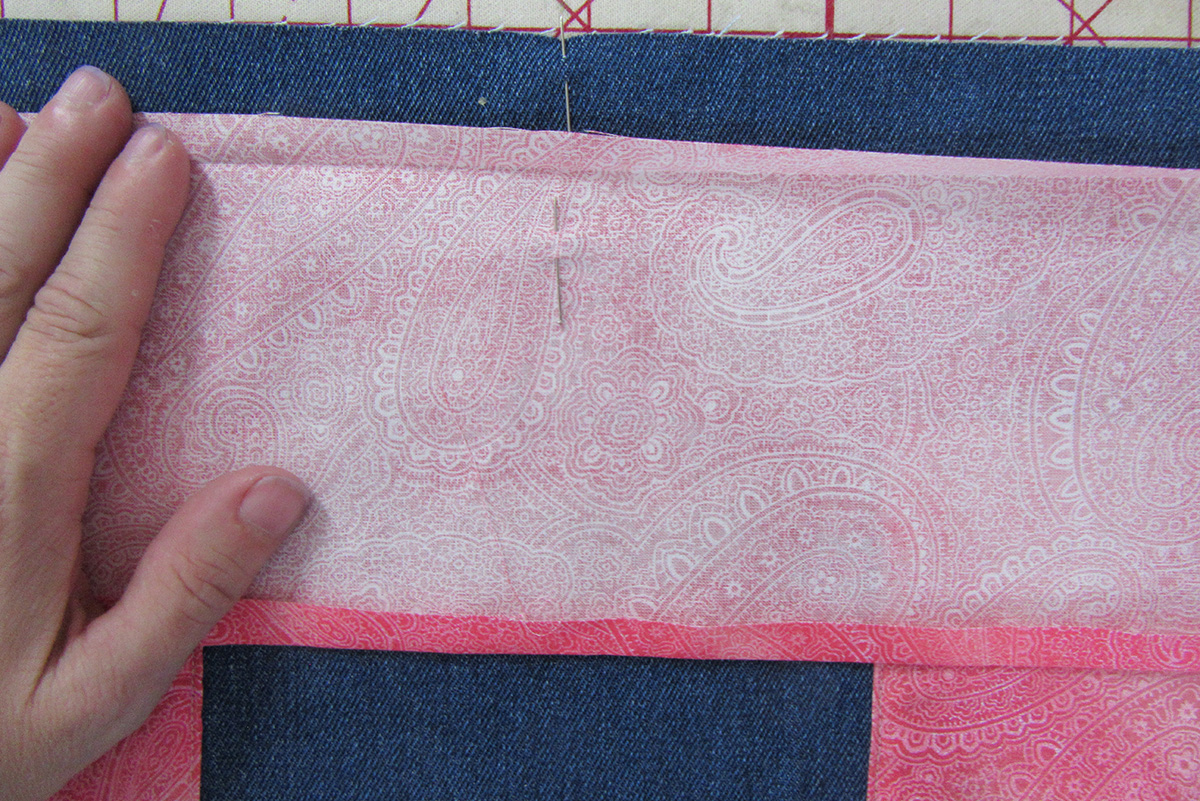
Find the center of the apron body you cut in step 2. Pin pockets to apron body approximately 3 inches from top and 4 inches from center of rectangle on each side of apron. Adjust as necessary to fit your body.

Step 9
Using BERNINA Foot #5 top stitch close to the edge of the sides and bottom of pockets on each side.

Step 10
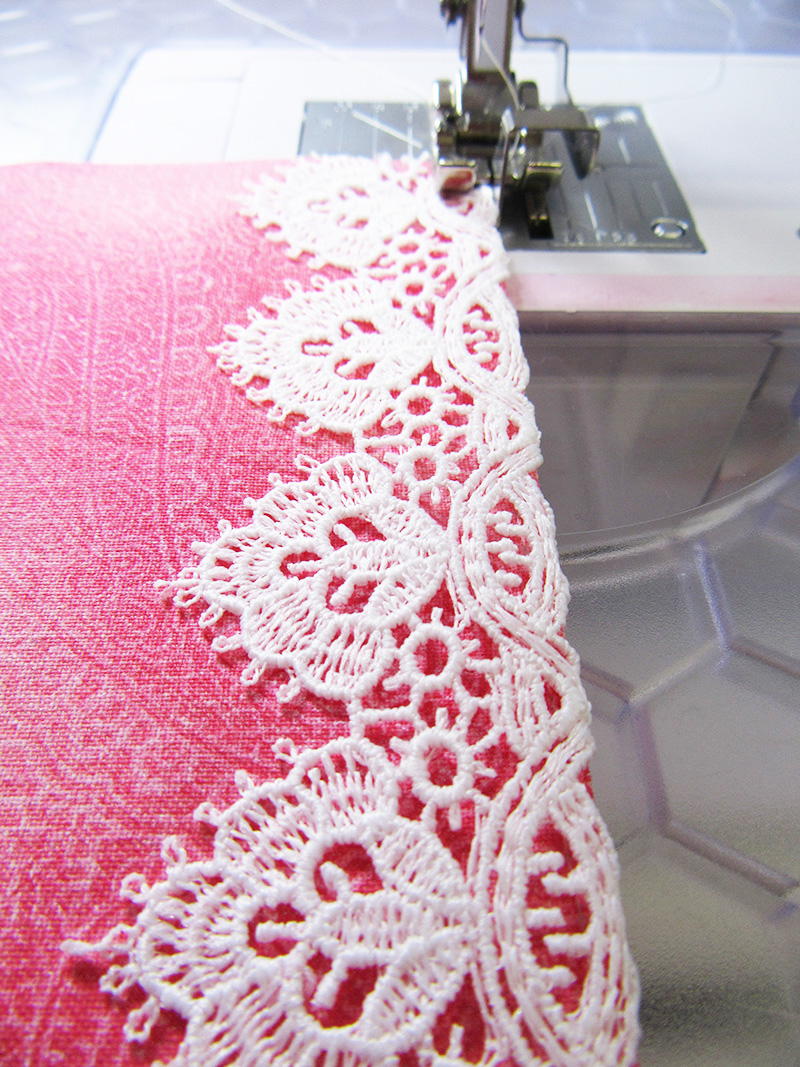
Starting with the top of one short side of apron body align lace on wrong side of fabric as in step 4. Pin or glue in place continuing around rounded corners and bottom until you reach the top of the opposite side. DO NOT APPLY LACE TO TOP OF APRON. Stitch as close to edge of lace as possible. Continue as in step 4 folding and pressing lace to front and top stitching in place.
Step 11
Fold under long sides of waistband ½ inch wrong sides together and press. Fold waistband in half lengthwise right sides together. Sew short edges together using a ½ inch seam allowance. Clip corners and turn right side out press.
Step 12
Find center of one long side of waistband, unfold edge pressed in step 11 and align center of waistband with the center of top of apron body, pin right sides together. Starting from center pin, continue pining waistband to apron body until you reach the edges of the apron body. Sew together using a ½ inch seam allowance.
Step 13
Press waistband up away from apron body on previously pressed line. Pin long edges of waistband together. Pining edge slightly below seam line joining waistband to apron body.

Top stitch around sides and top and bottom of waistband.

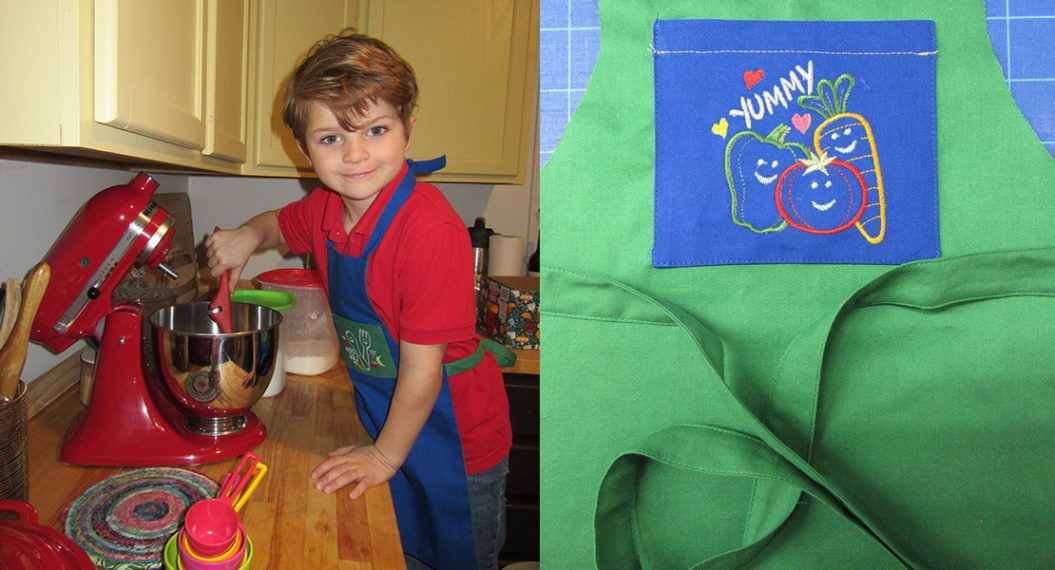
Have fun and personalize your apron by adding embroidery, decorative stitches, or iron on applique. Use your imagination and you’ll be cooking in style!