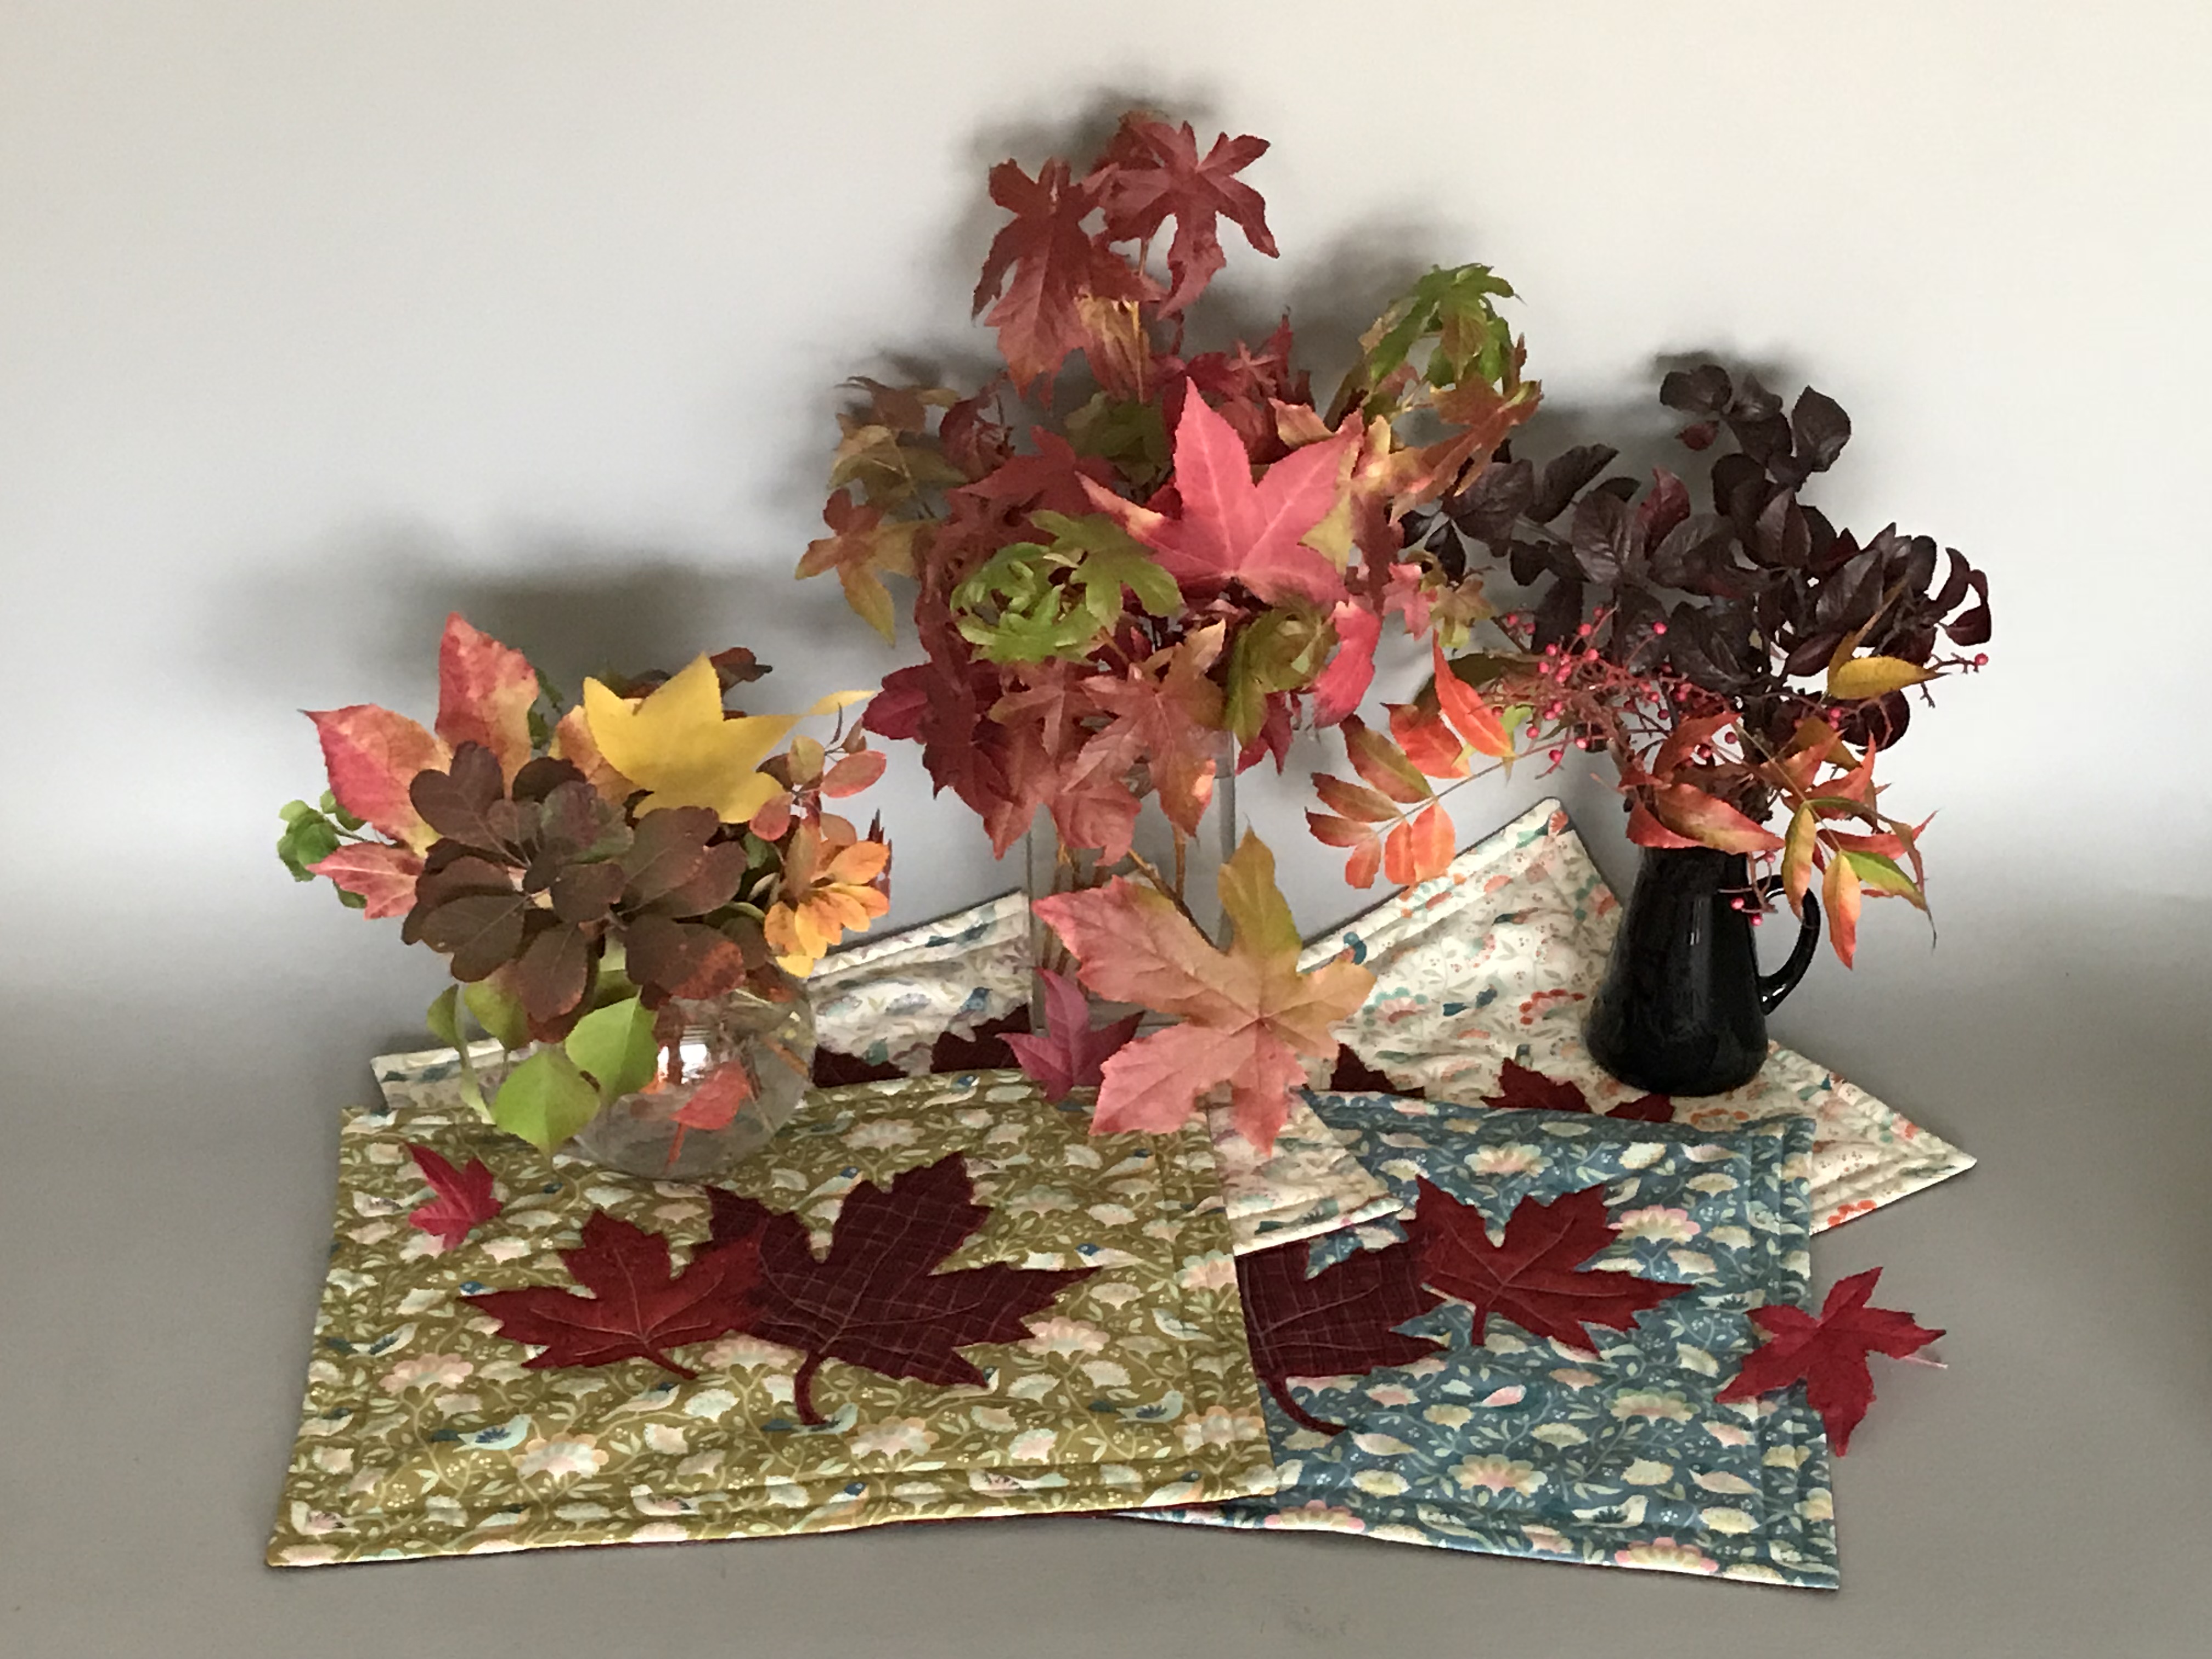
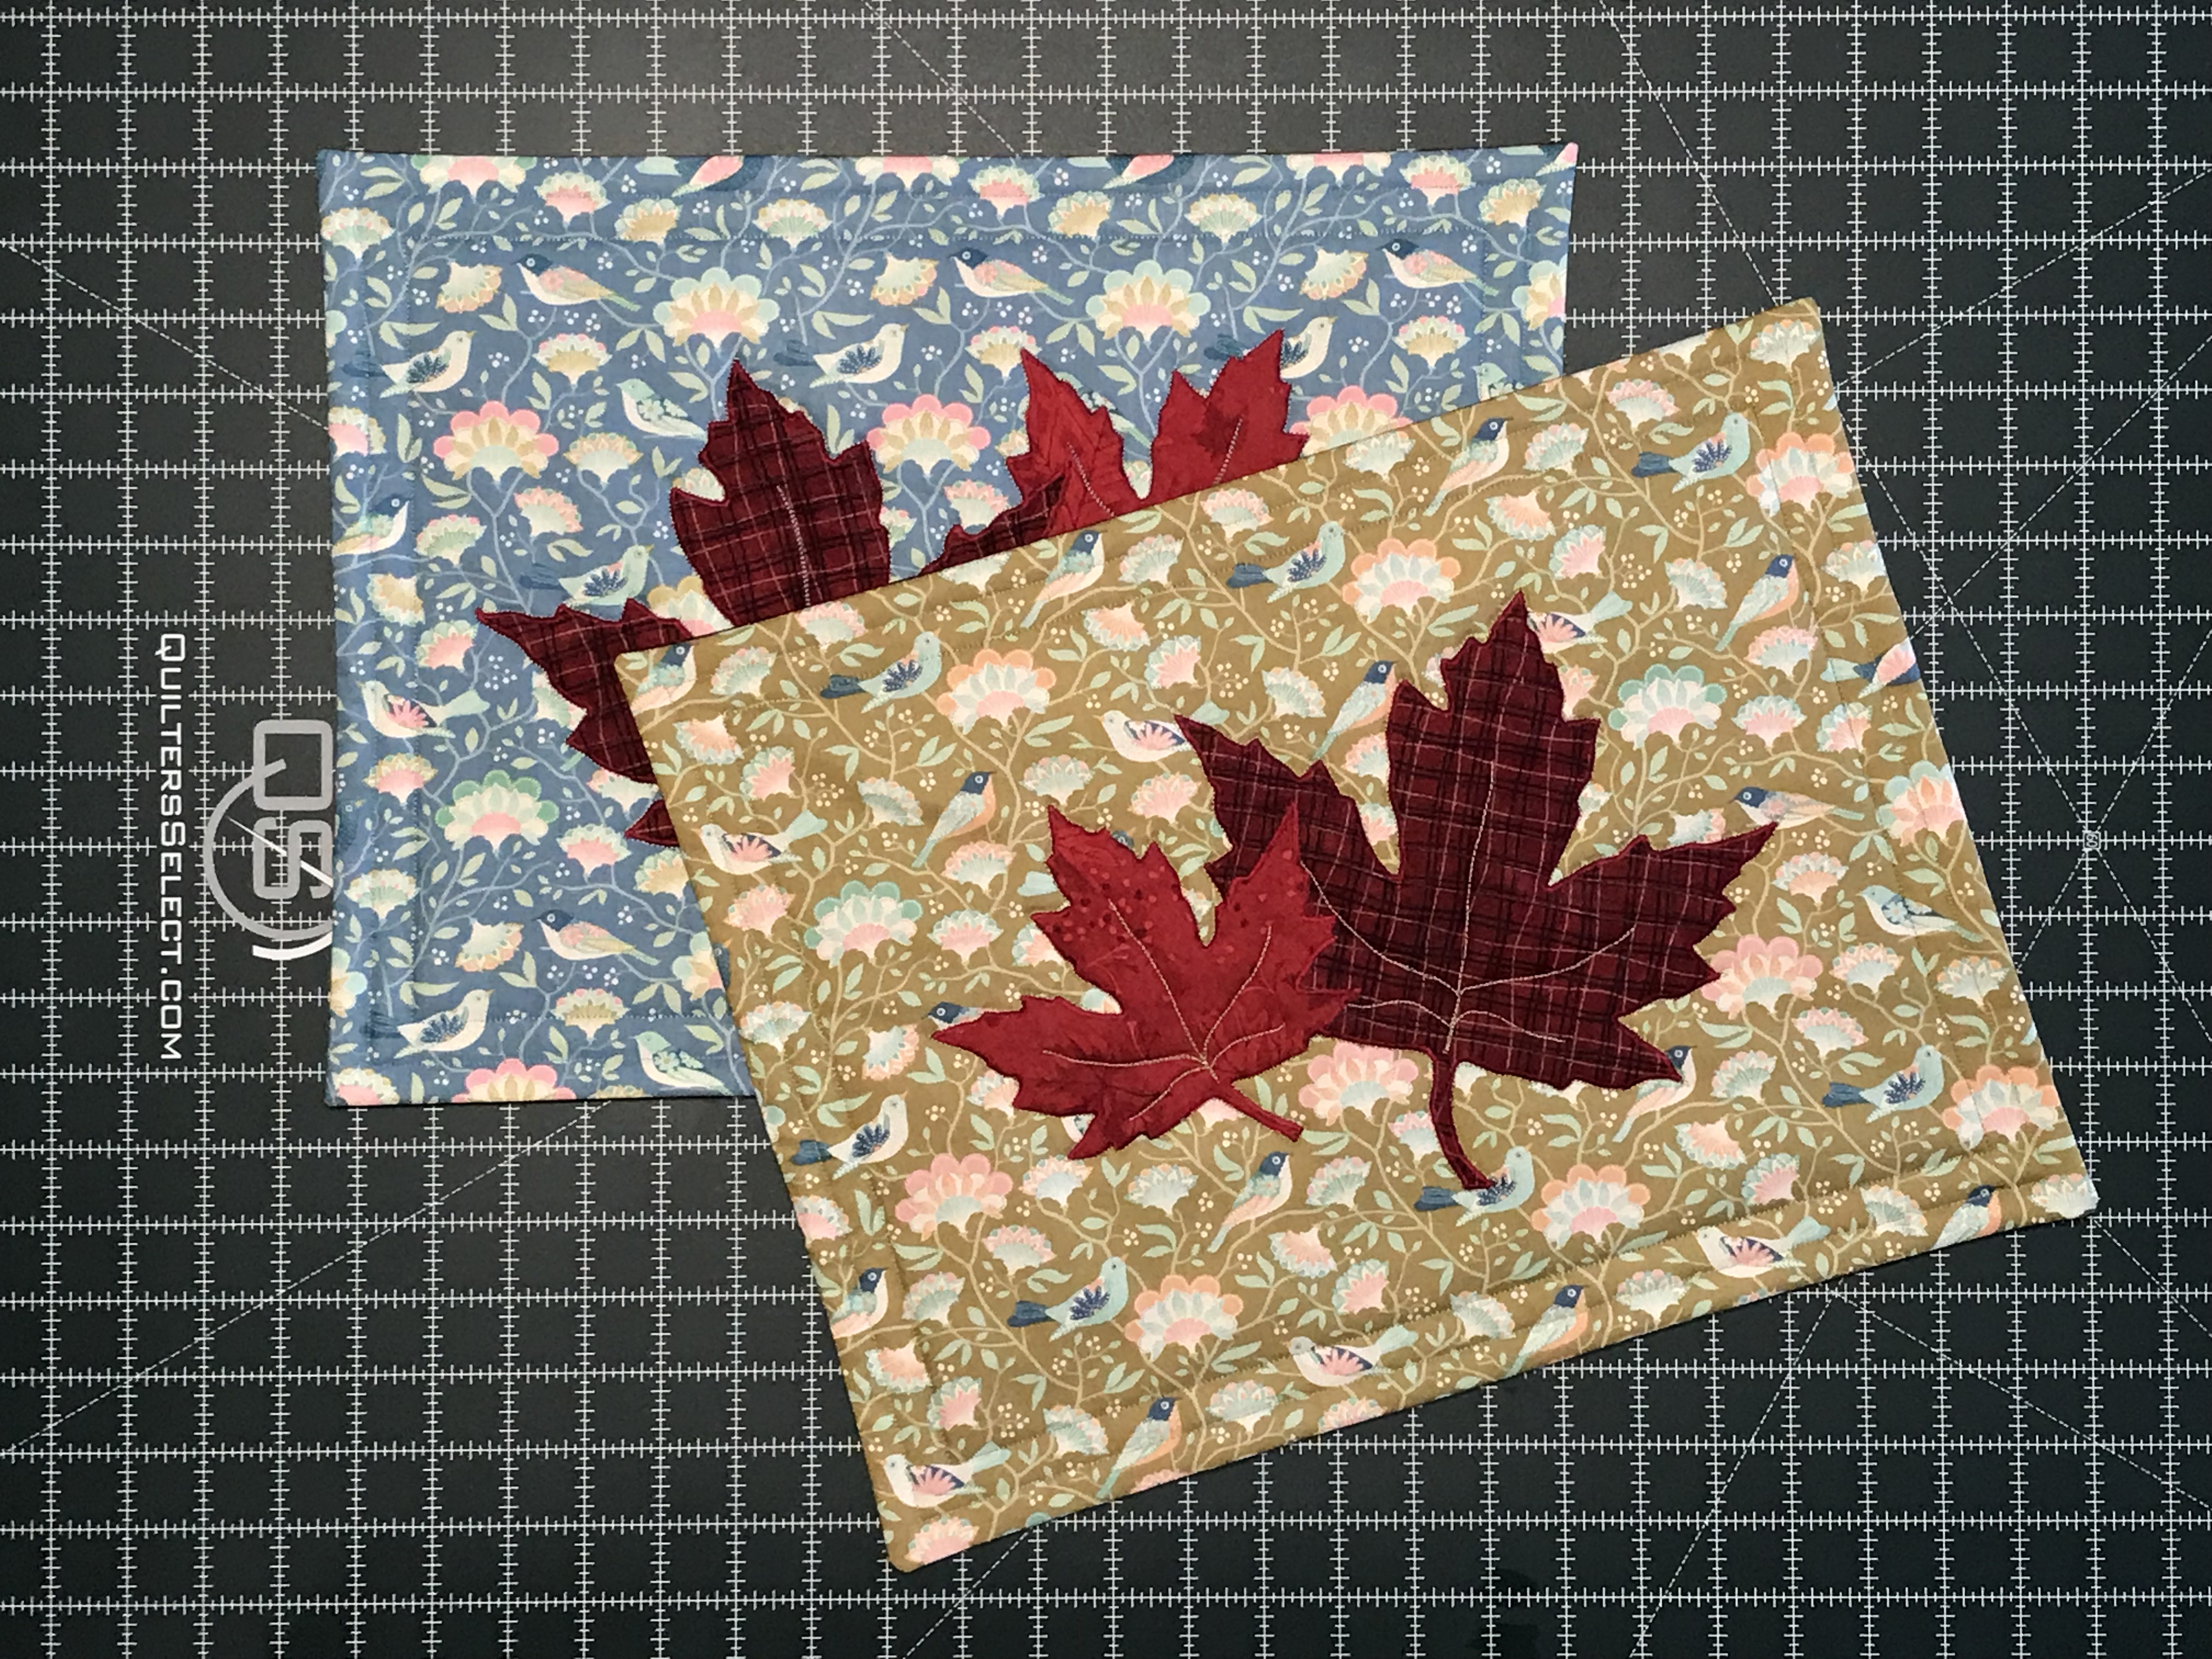
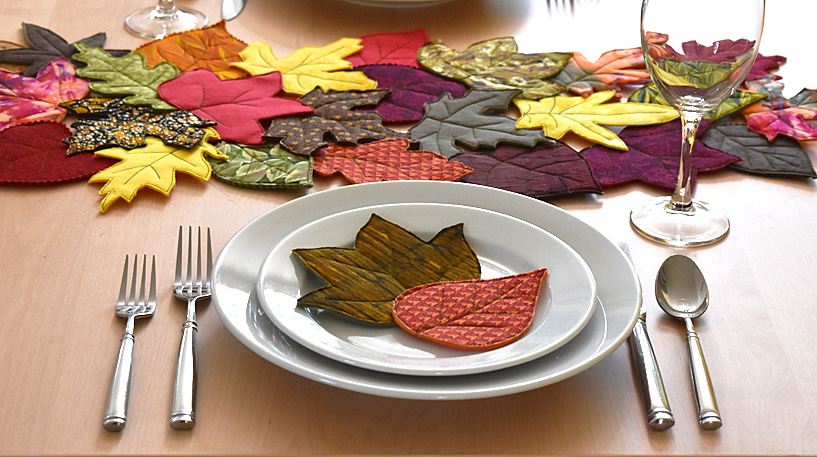
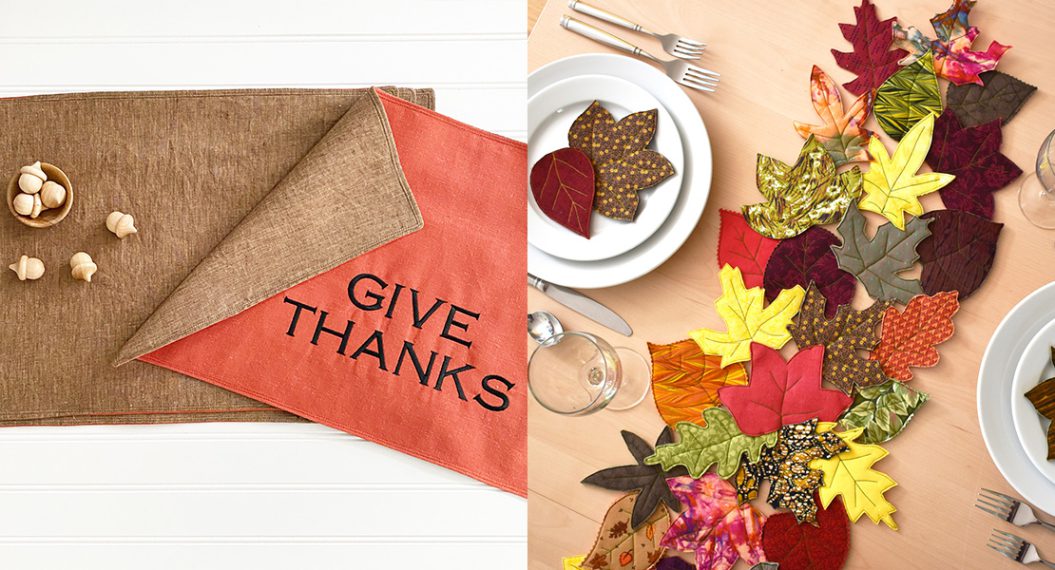
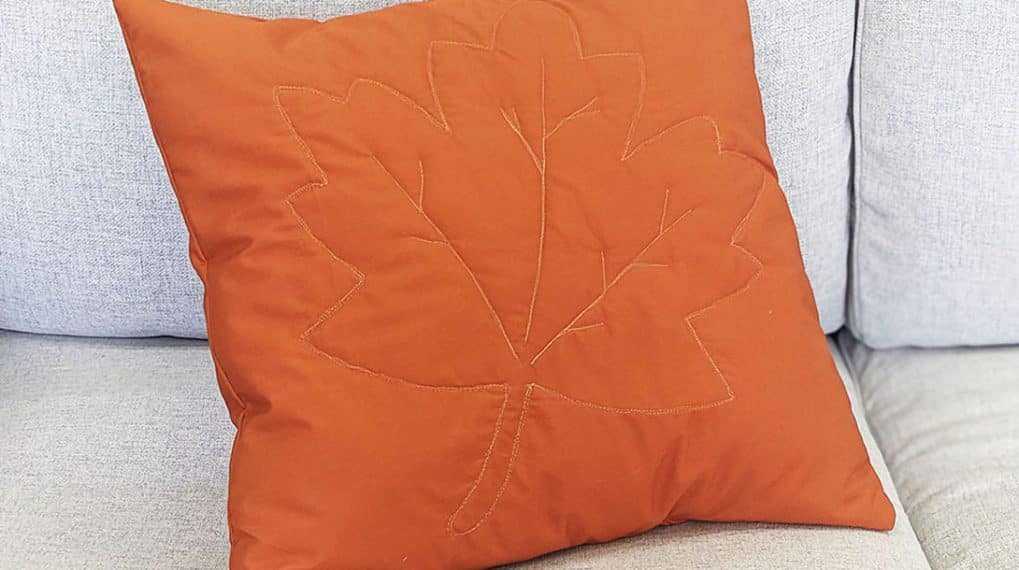
Autumn Leaf Placemats
Materials to create Autumn Leaf Placemats
- 1 yard for top background or 4 – Fat Quarters (Tilda Harvest Collection)
- 1 yard for backing and large leaves
- 1 Fat Quarter for small leaves
- 1 yard of batting (Ever Sewn: Needle Punch 100% Polyester Batting)
- Temporary Fabric Adhesive
- Threads to match fabric and basic sewing supplies
Equipment to Use to Create Autumn Leaf Placemats
- BERNINA sewing machine (I sew on a BERNINA 770 QE, however, any entry level sewing machine will do the job.
- Reverse Pattern Foot #1D
- Open Embroidery foot #20, 20C or 20D Open Embroidery Foot 37 or 37D Patchwork Foot
- Rotary Cutter
- Cutting Mat (Quilter’s Select)
- Iron (Panasonic NI-WL600)
- Basic sewing kit
- Colored pencil or quilters’ marking pencil
- Maple Leaf template
Overview
This is a fast and easy project to create a set of four new placemats for your holiday dinner. If you need more placemats, then increase the fabric accordingly for each set of four placemats. The pattern for the leaves that you will zig-zag appliqué can be downloaded here.
The placemats are designed to be washable. You may want to pre-wash and dry your fabric. If you want to cut the drying time you can take the fabric out of the washer after the last spin cycle and “iron it dry” to get the wrinkles out of it.

Directions to Create Autumn Leaf Placemats
Press and cut four (4) pieces of fabric 14″ x 18″ for the top of your placemats. You can use a yard of a single fabric or you can do as I did here, using four Fat Quarters of fabric from the Tilda Harvest collection that I obtained from Brewer. I chose to use the patterns with the birds. If you use a print like this that is directional, it is important as you are cutting the fabric tops to keep the pattern correctly oriented.
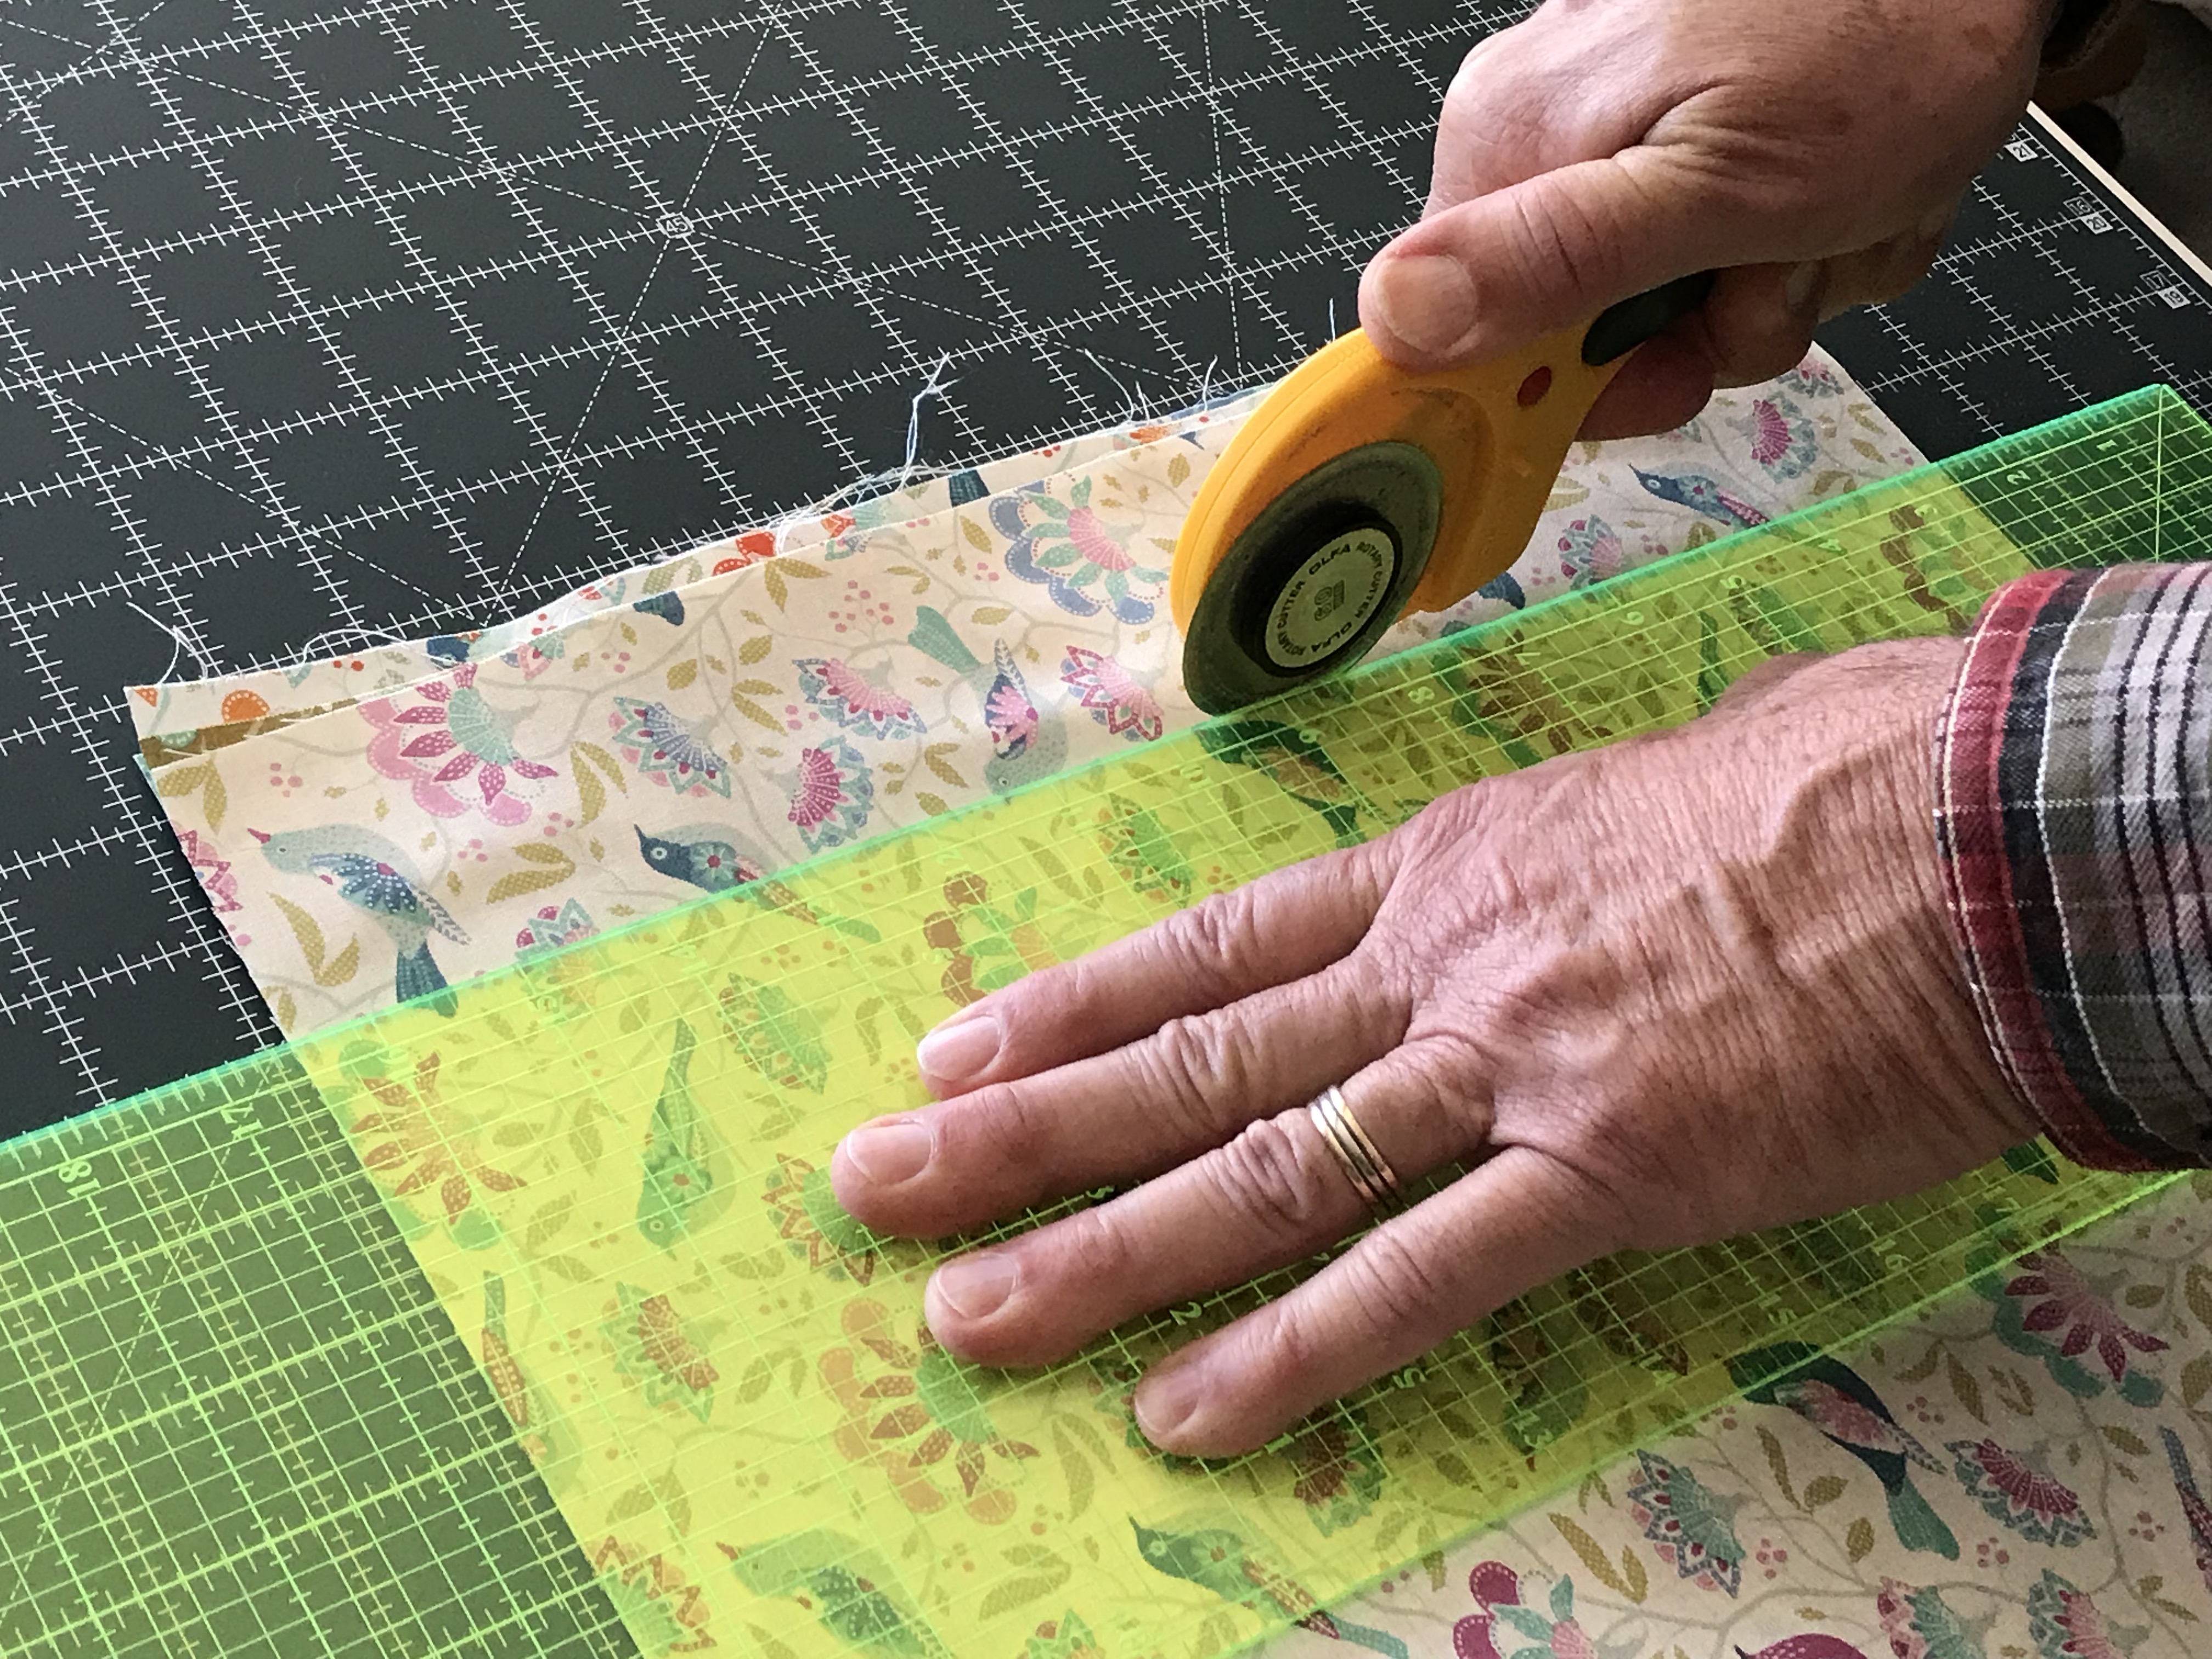
Cut four backings the same size (14″ x 18″) from the fabric that you want to use for the large leaf.
The batting I used is the Ever Sewn Needle Punch 100% Polyester Batting that is exclusively distributed by Brewer. Cut four rectangles of batting 14″ x 18″.
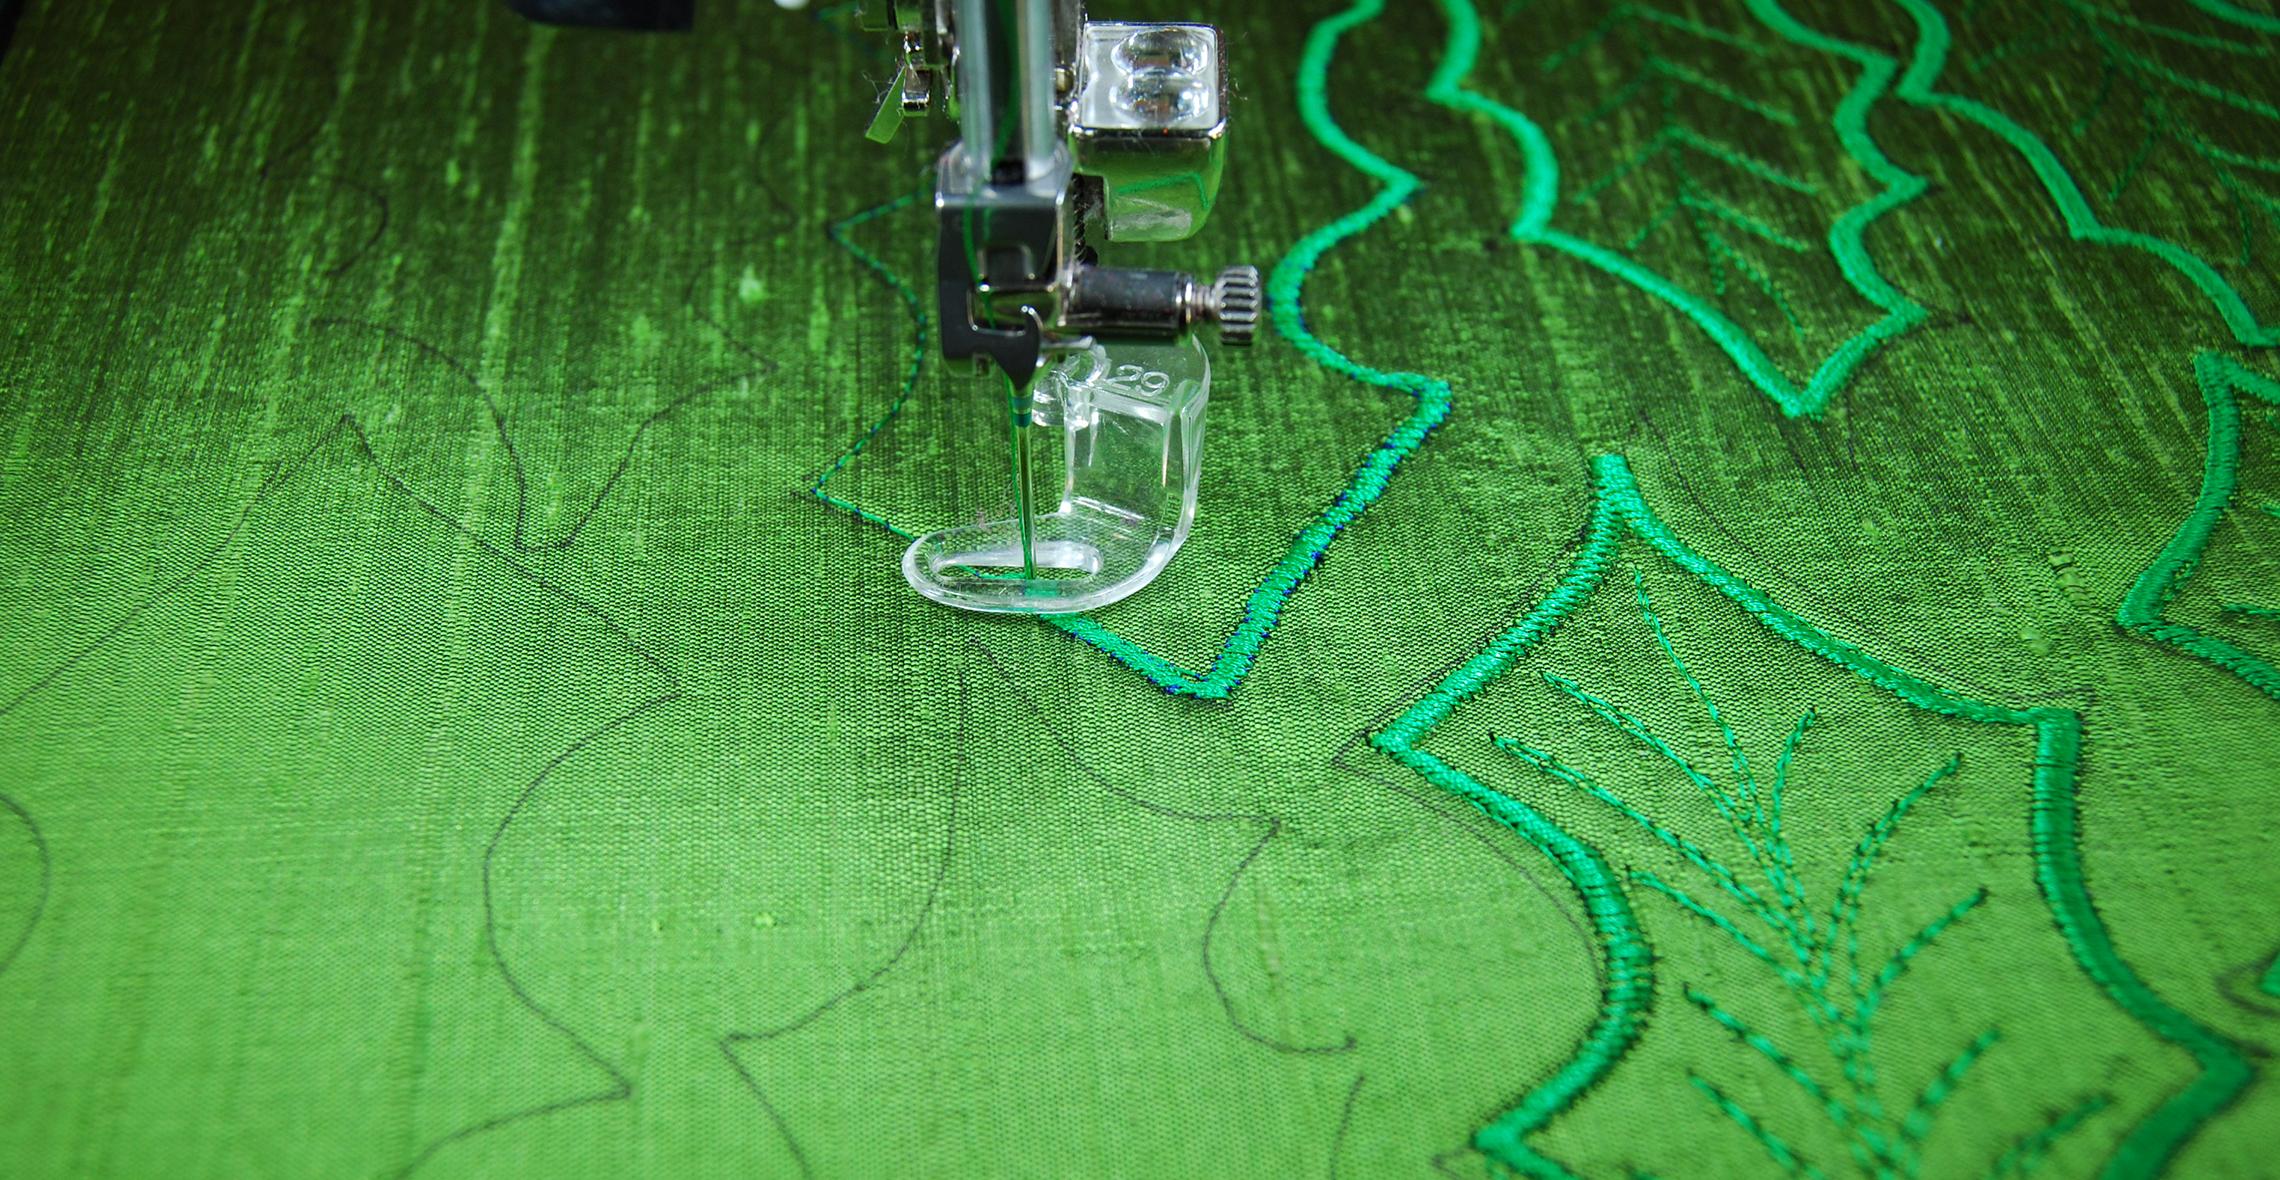
Downloaded the leaf patterns. Trace each of the leaf patterns on your fabric using a light box, or you can also trace them by taping the fabric and the pattern to a bright window. There are a variety of pencils you can use for marking on fabric. It is important to NOT use a pencil with graphite lead in it as it will smear on your fabric. The pencil used here was a white Prismacolor pencil.
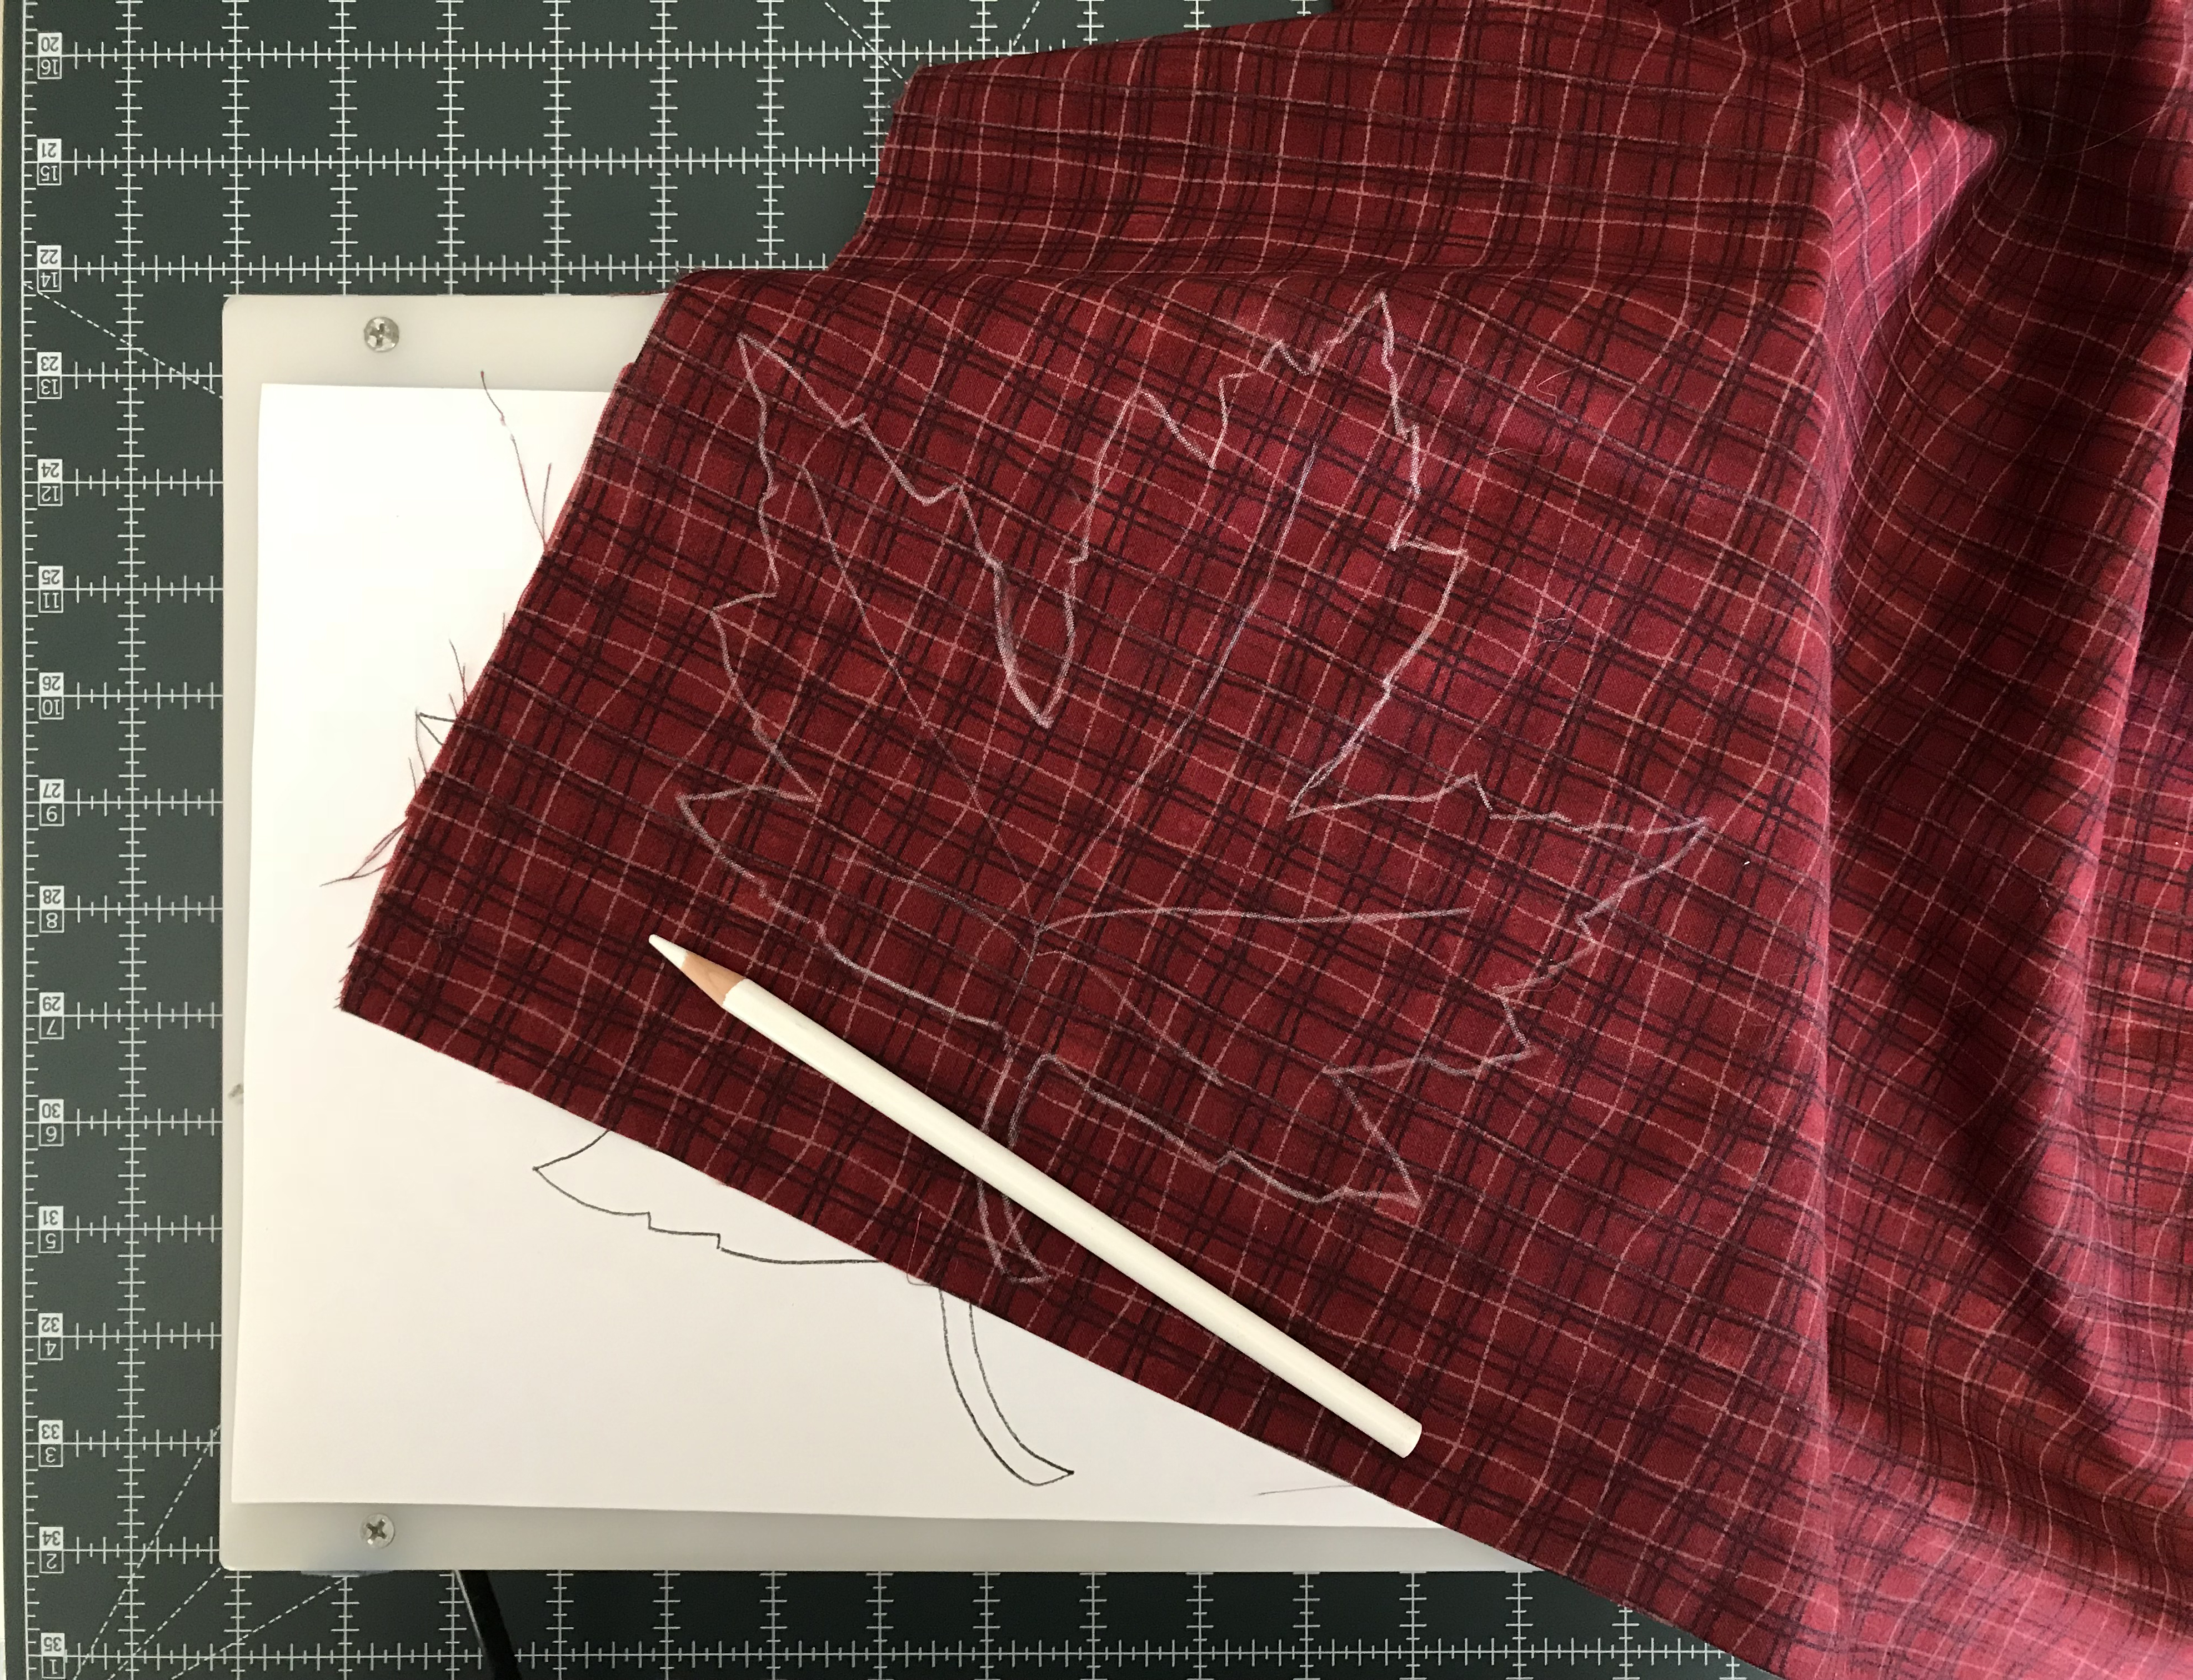
You only need to trace the top image as it is easy to pin four layers of fabric together and then cut the four leaves out at once. If you are not comfortable cutting through all four layers at once then you can trace the leaf pattern on to each square of fabric. Repeat the process for the four smaller leaves.
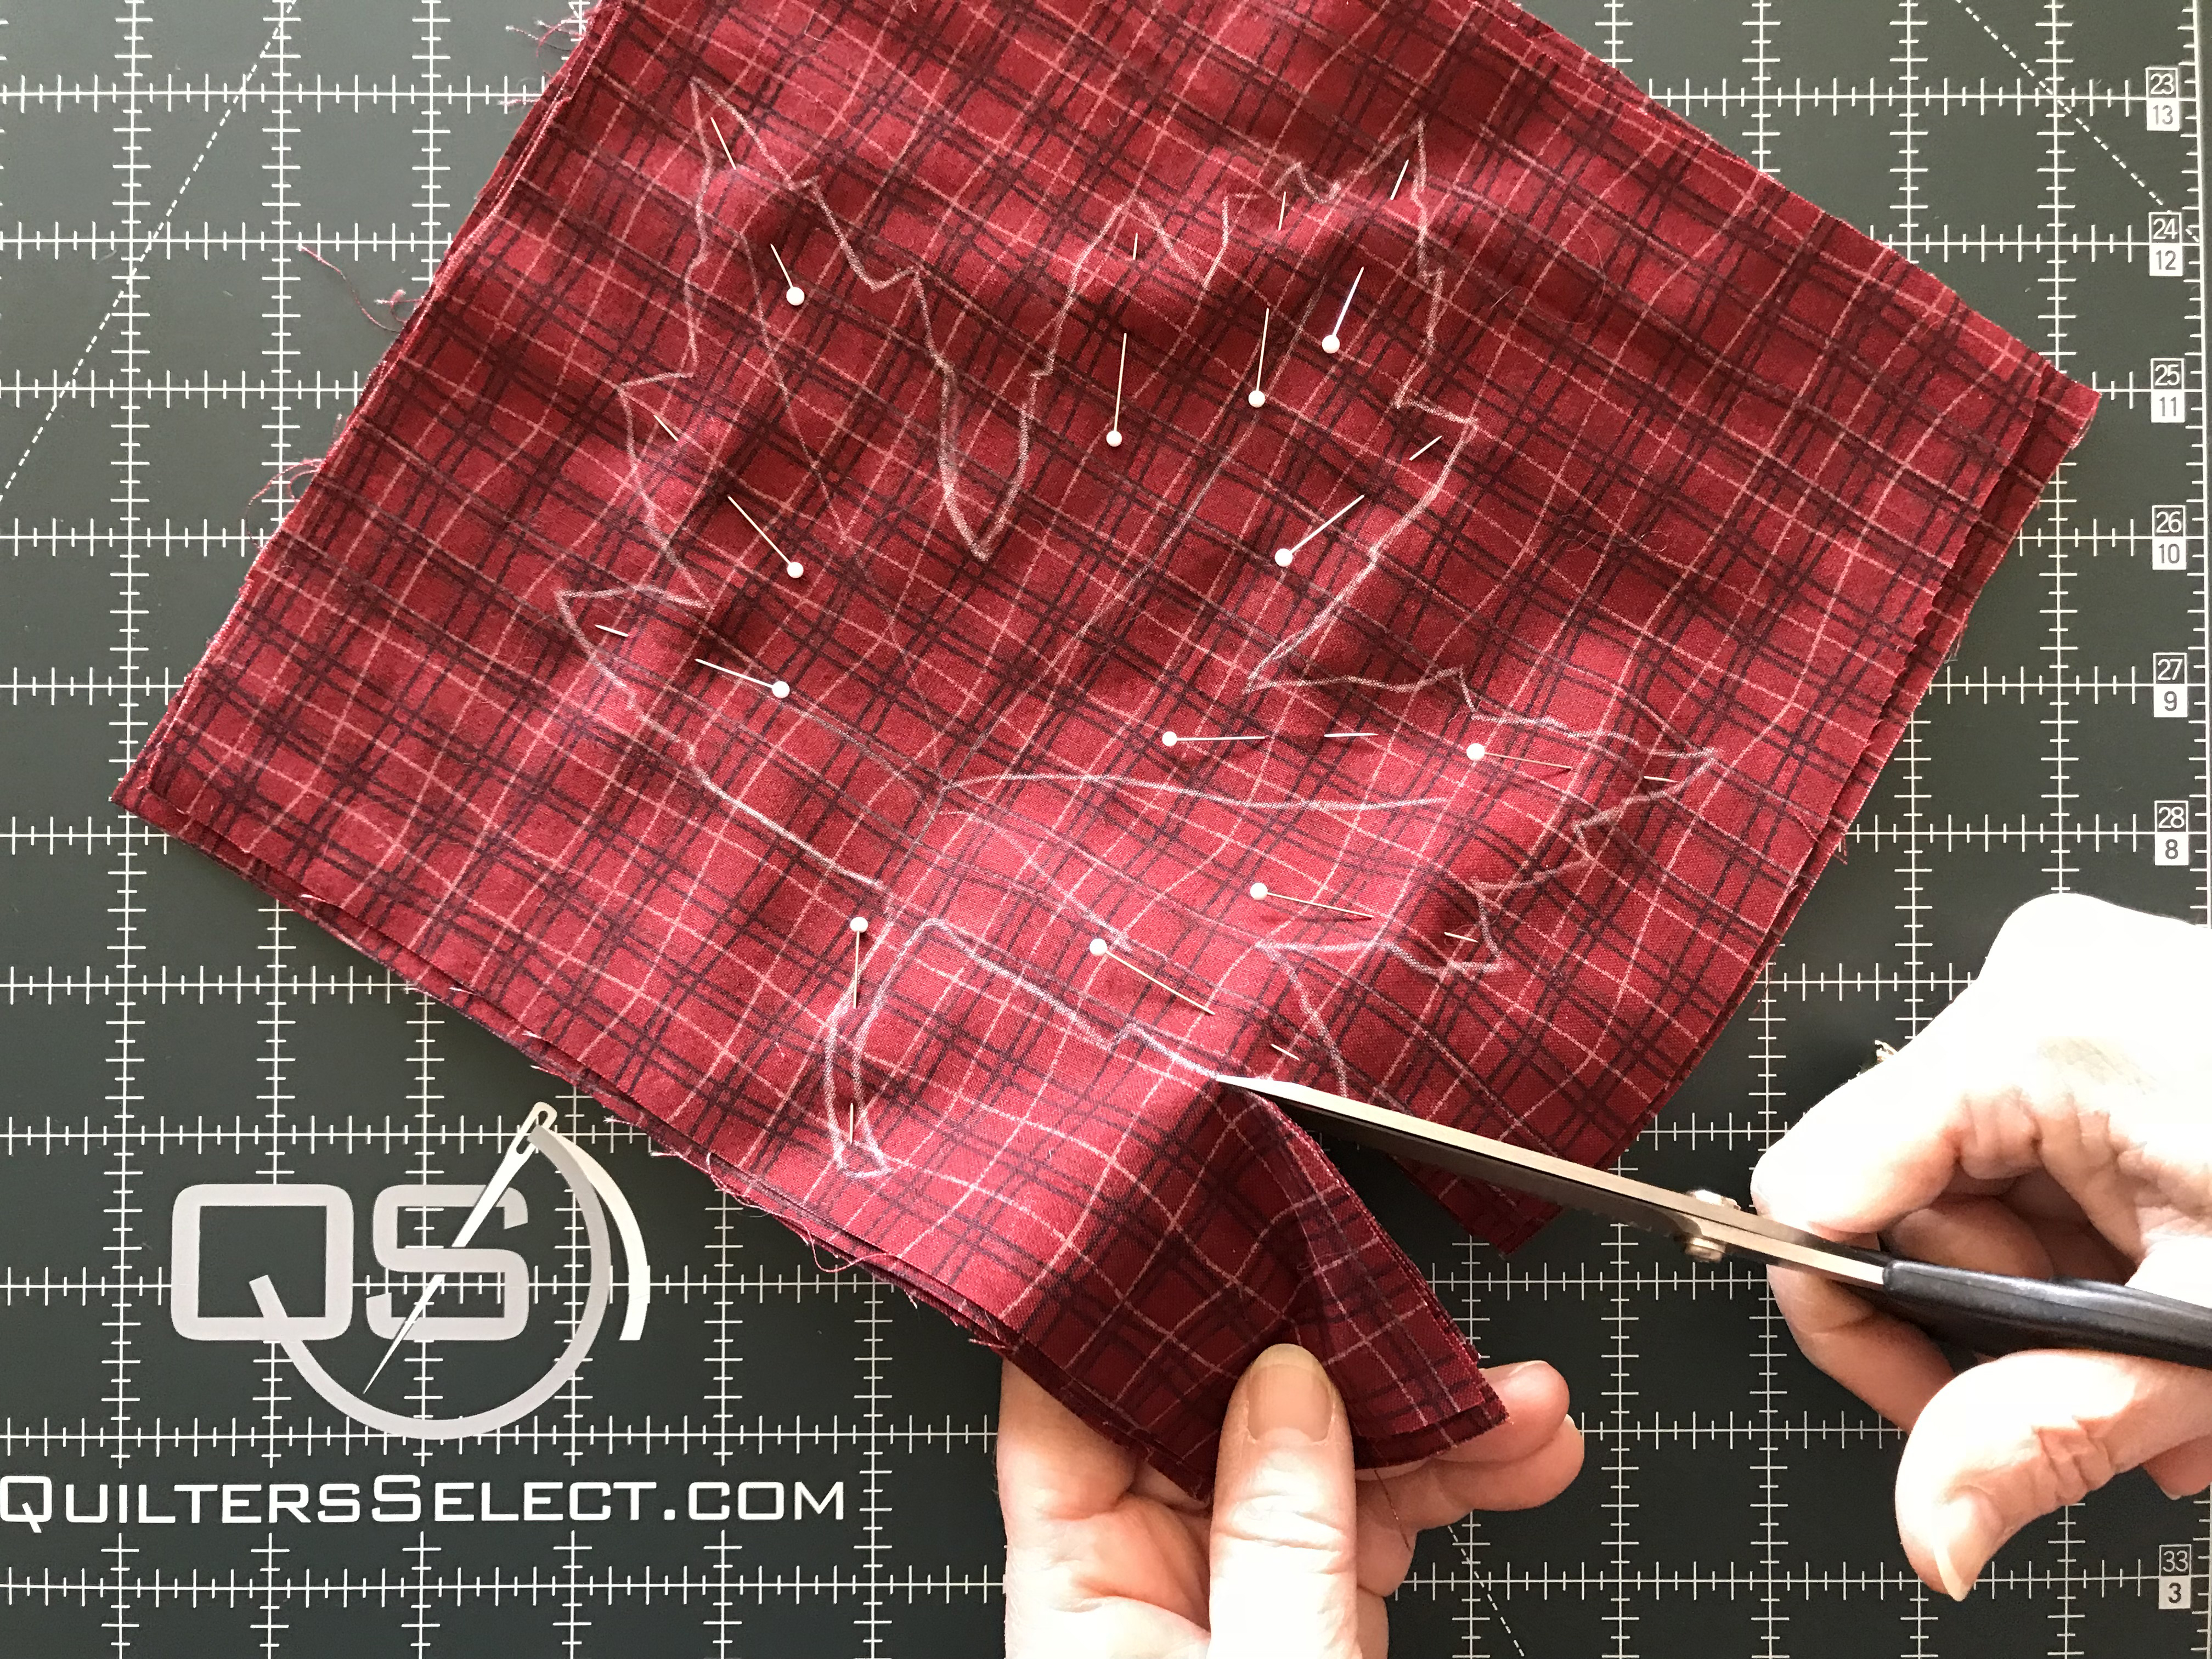
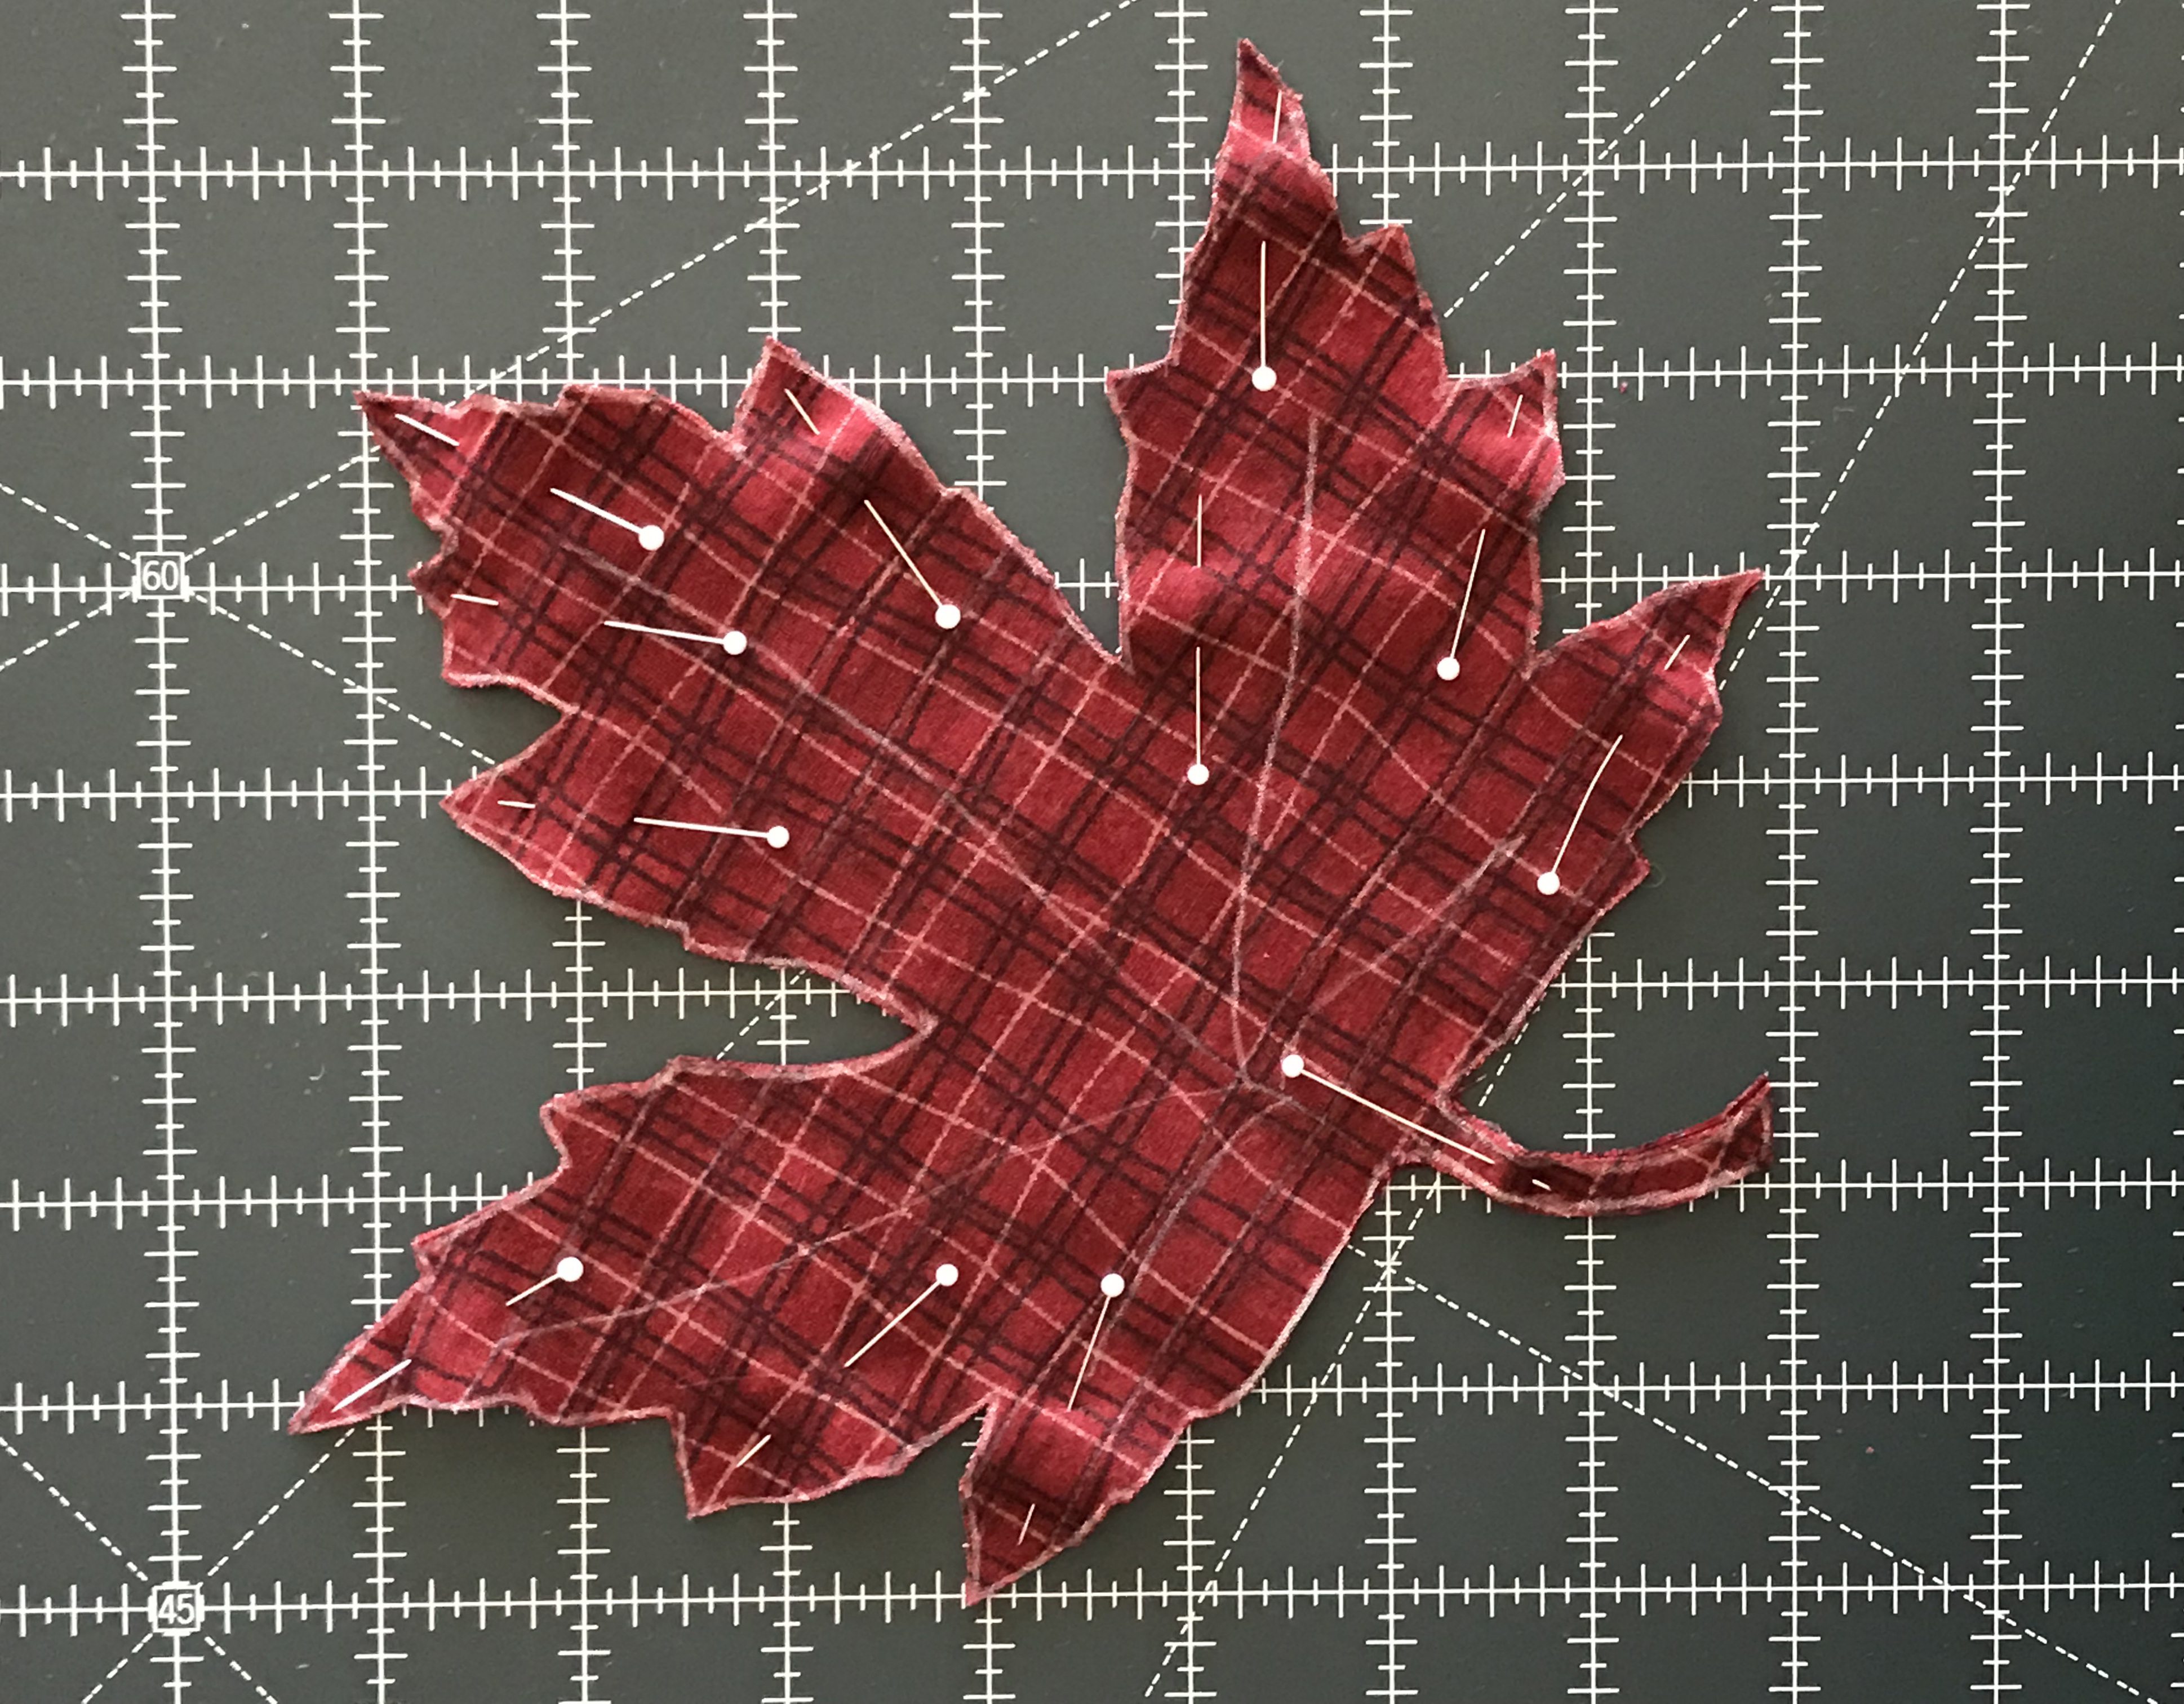
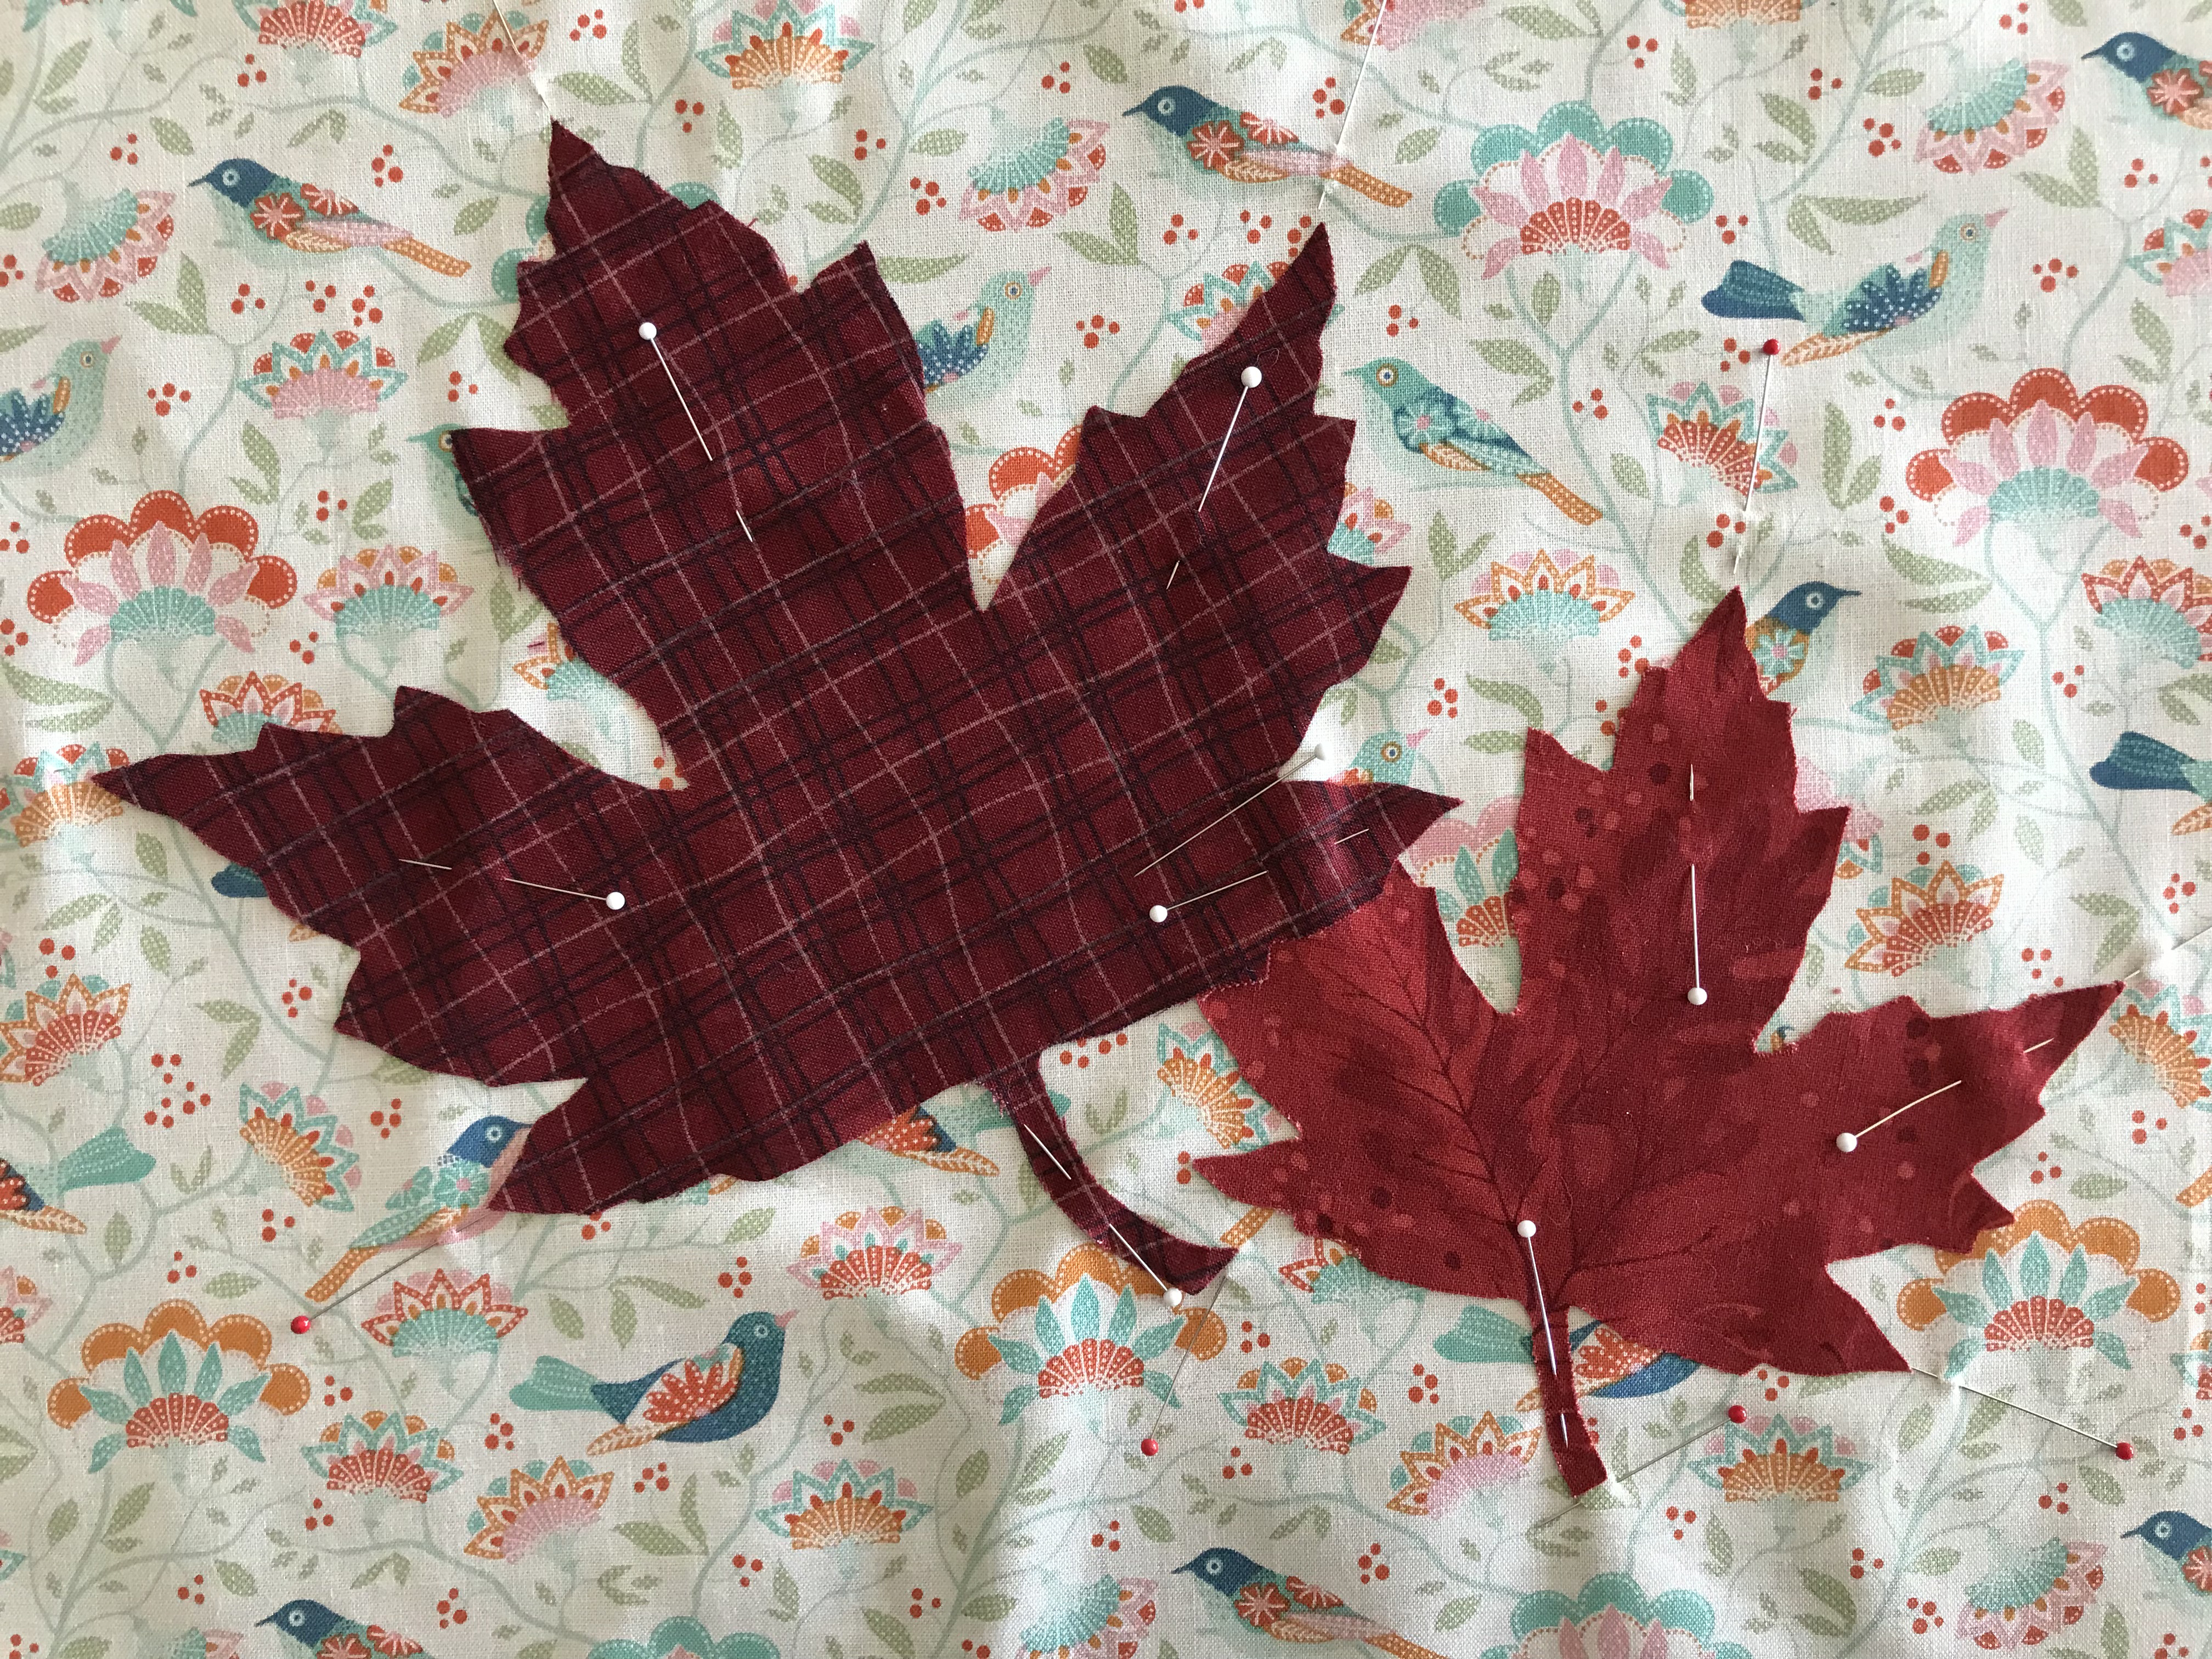
With your leaves cut out, place them on your fabric tops and position them where you want them. You can vary their arrangement on each placemat. Using pins, mark the location of the leaves on the top.


Using a temporary fabric adhesive, apply it to the back of the leaves. If you are using a spray adhesive, do it outside, and you may want to wear disposable gloves to keep the sticky spray off your hands. Once you have adhesive on the backs of the leaves, position them on your top using the pins as a guide. The adhesive is temporary. They can move on the fabric. Pin the leaves in place before starting to stitch them.
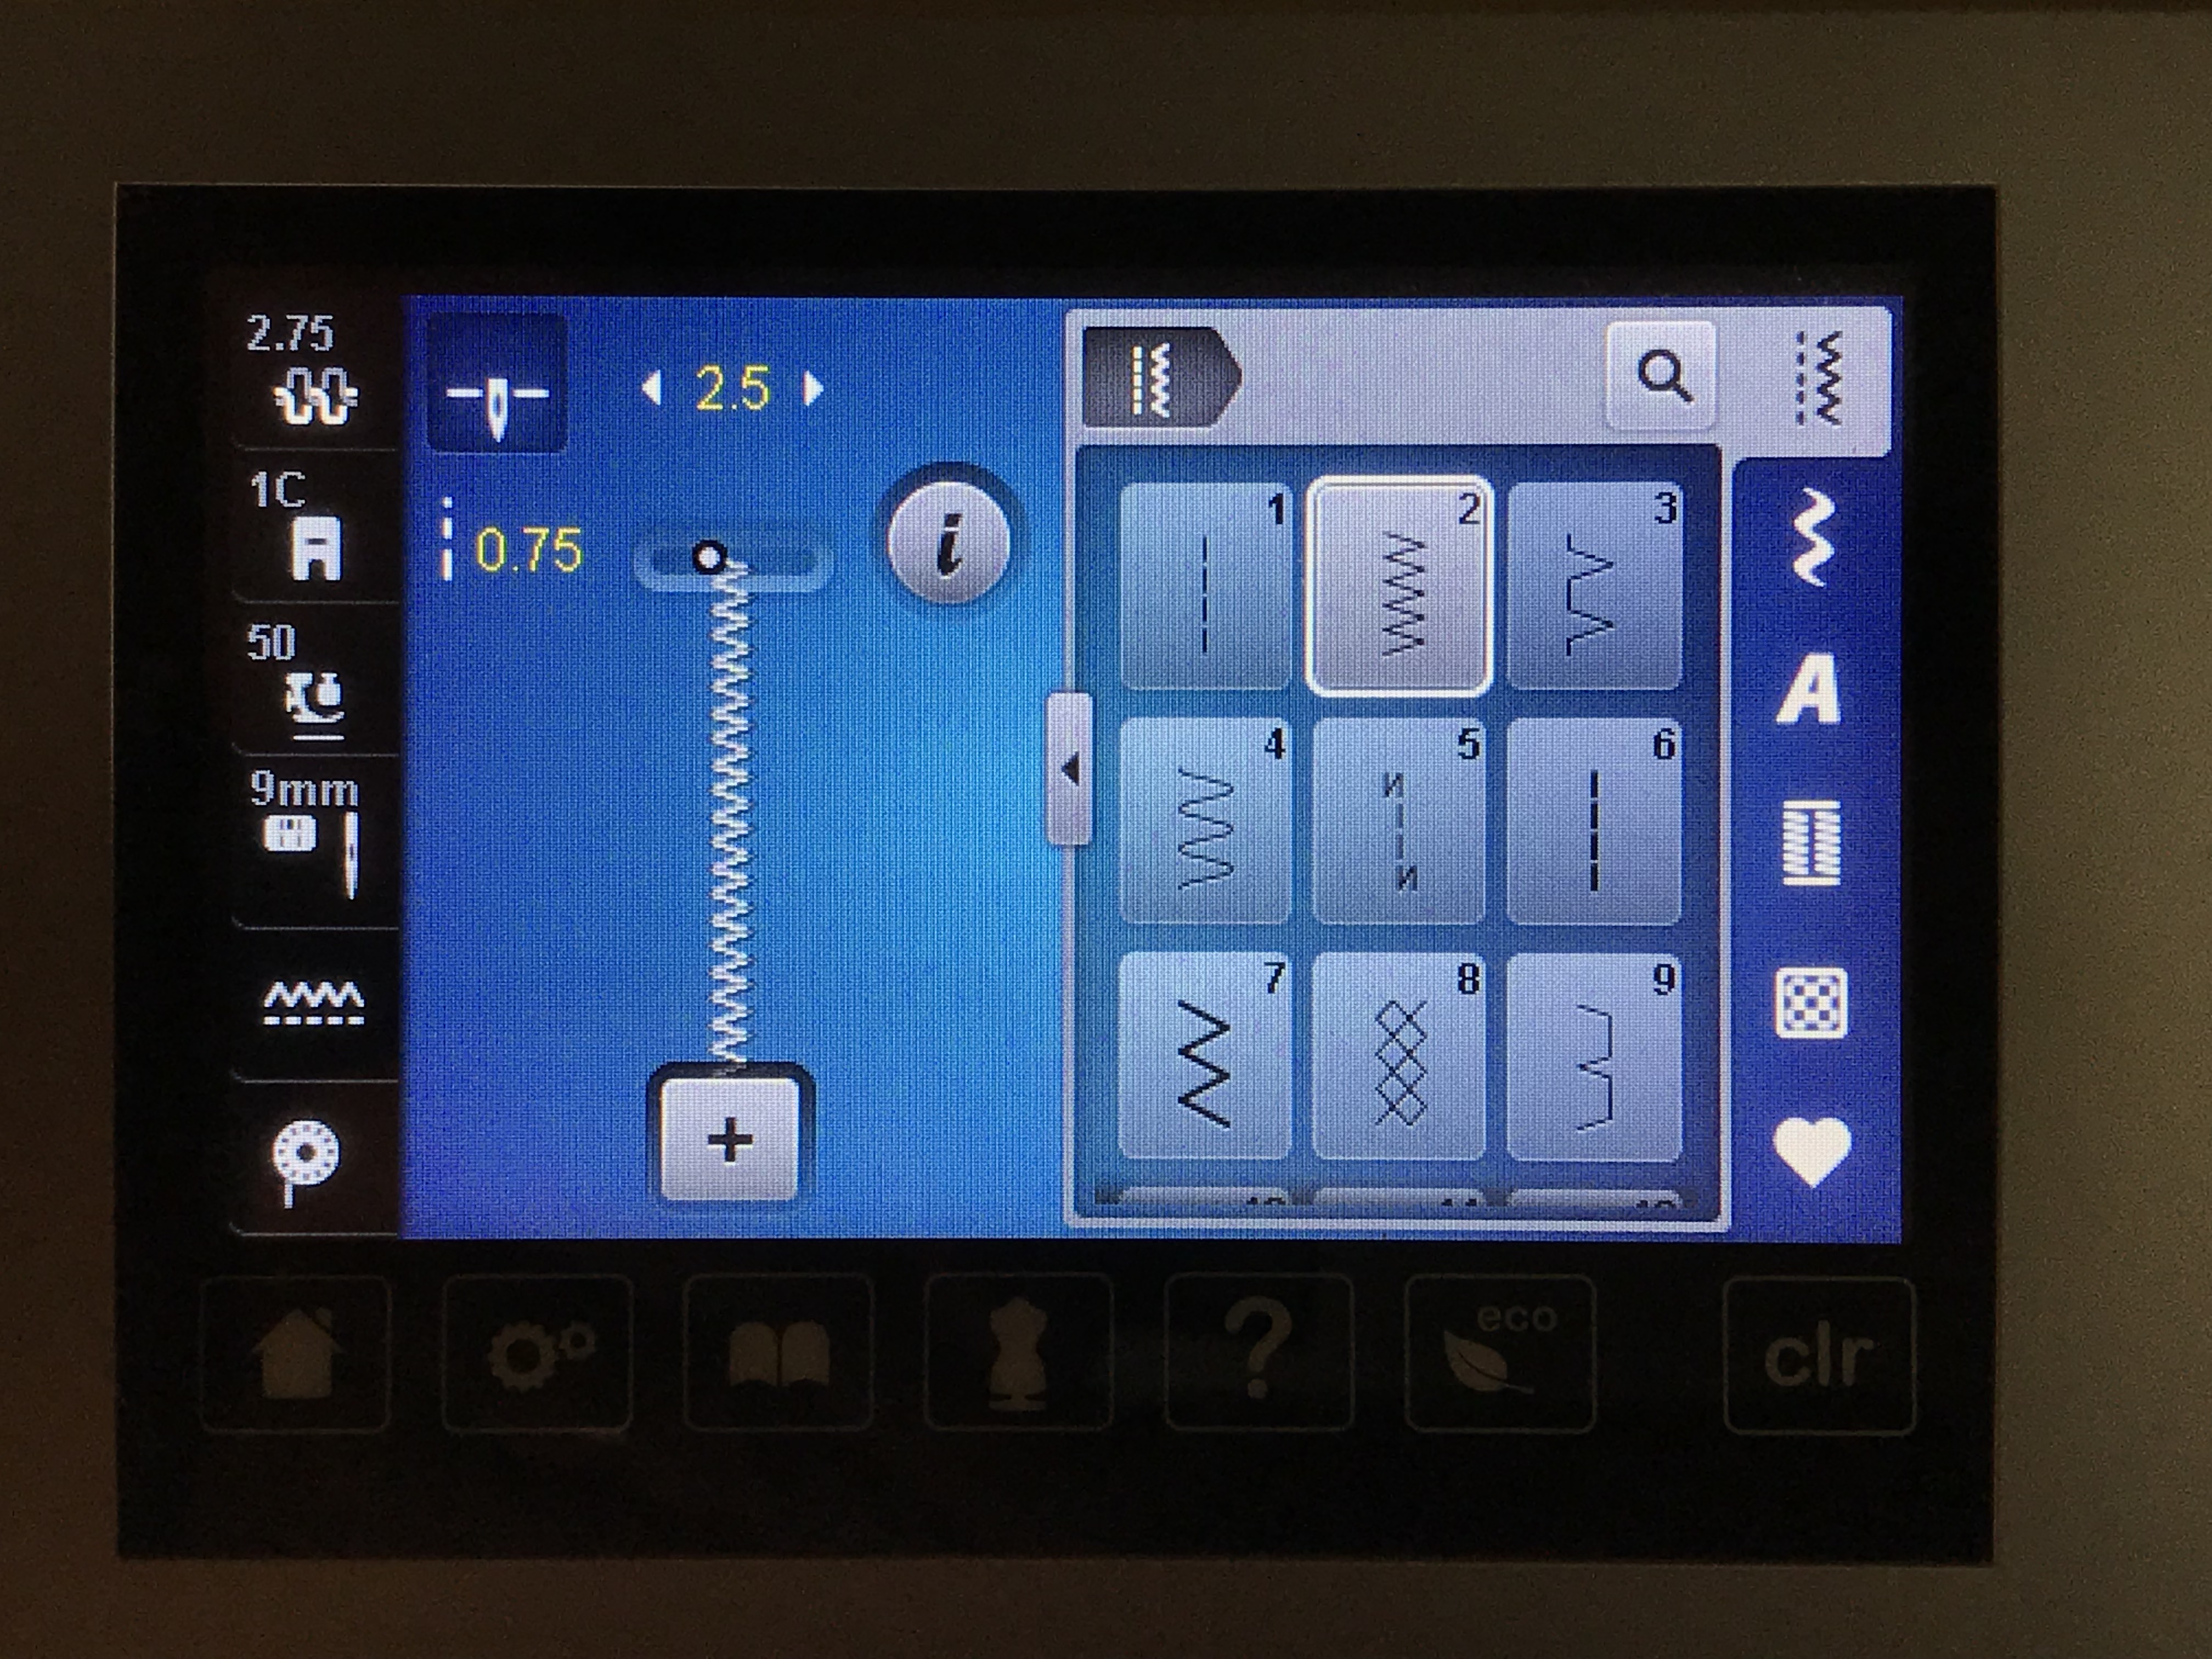
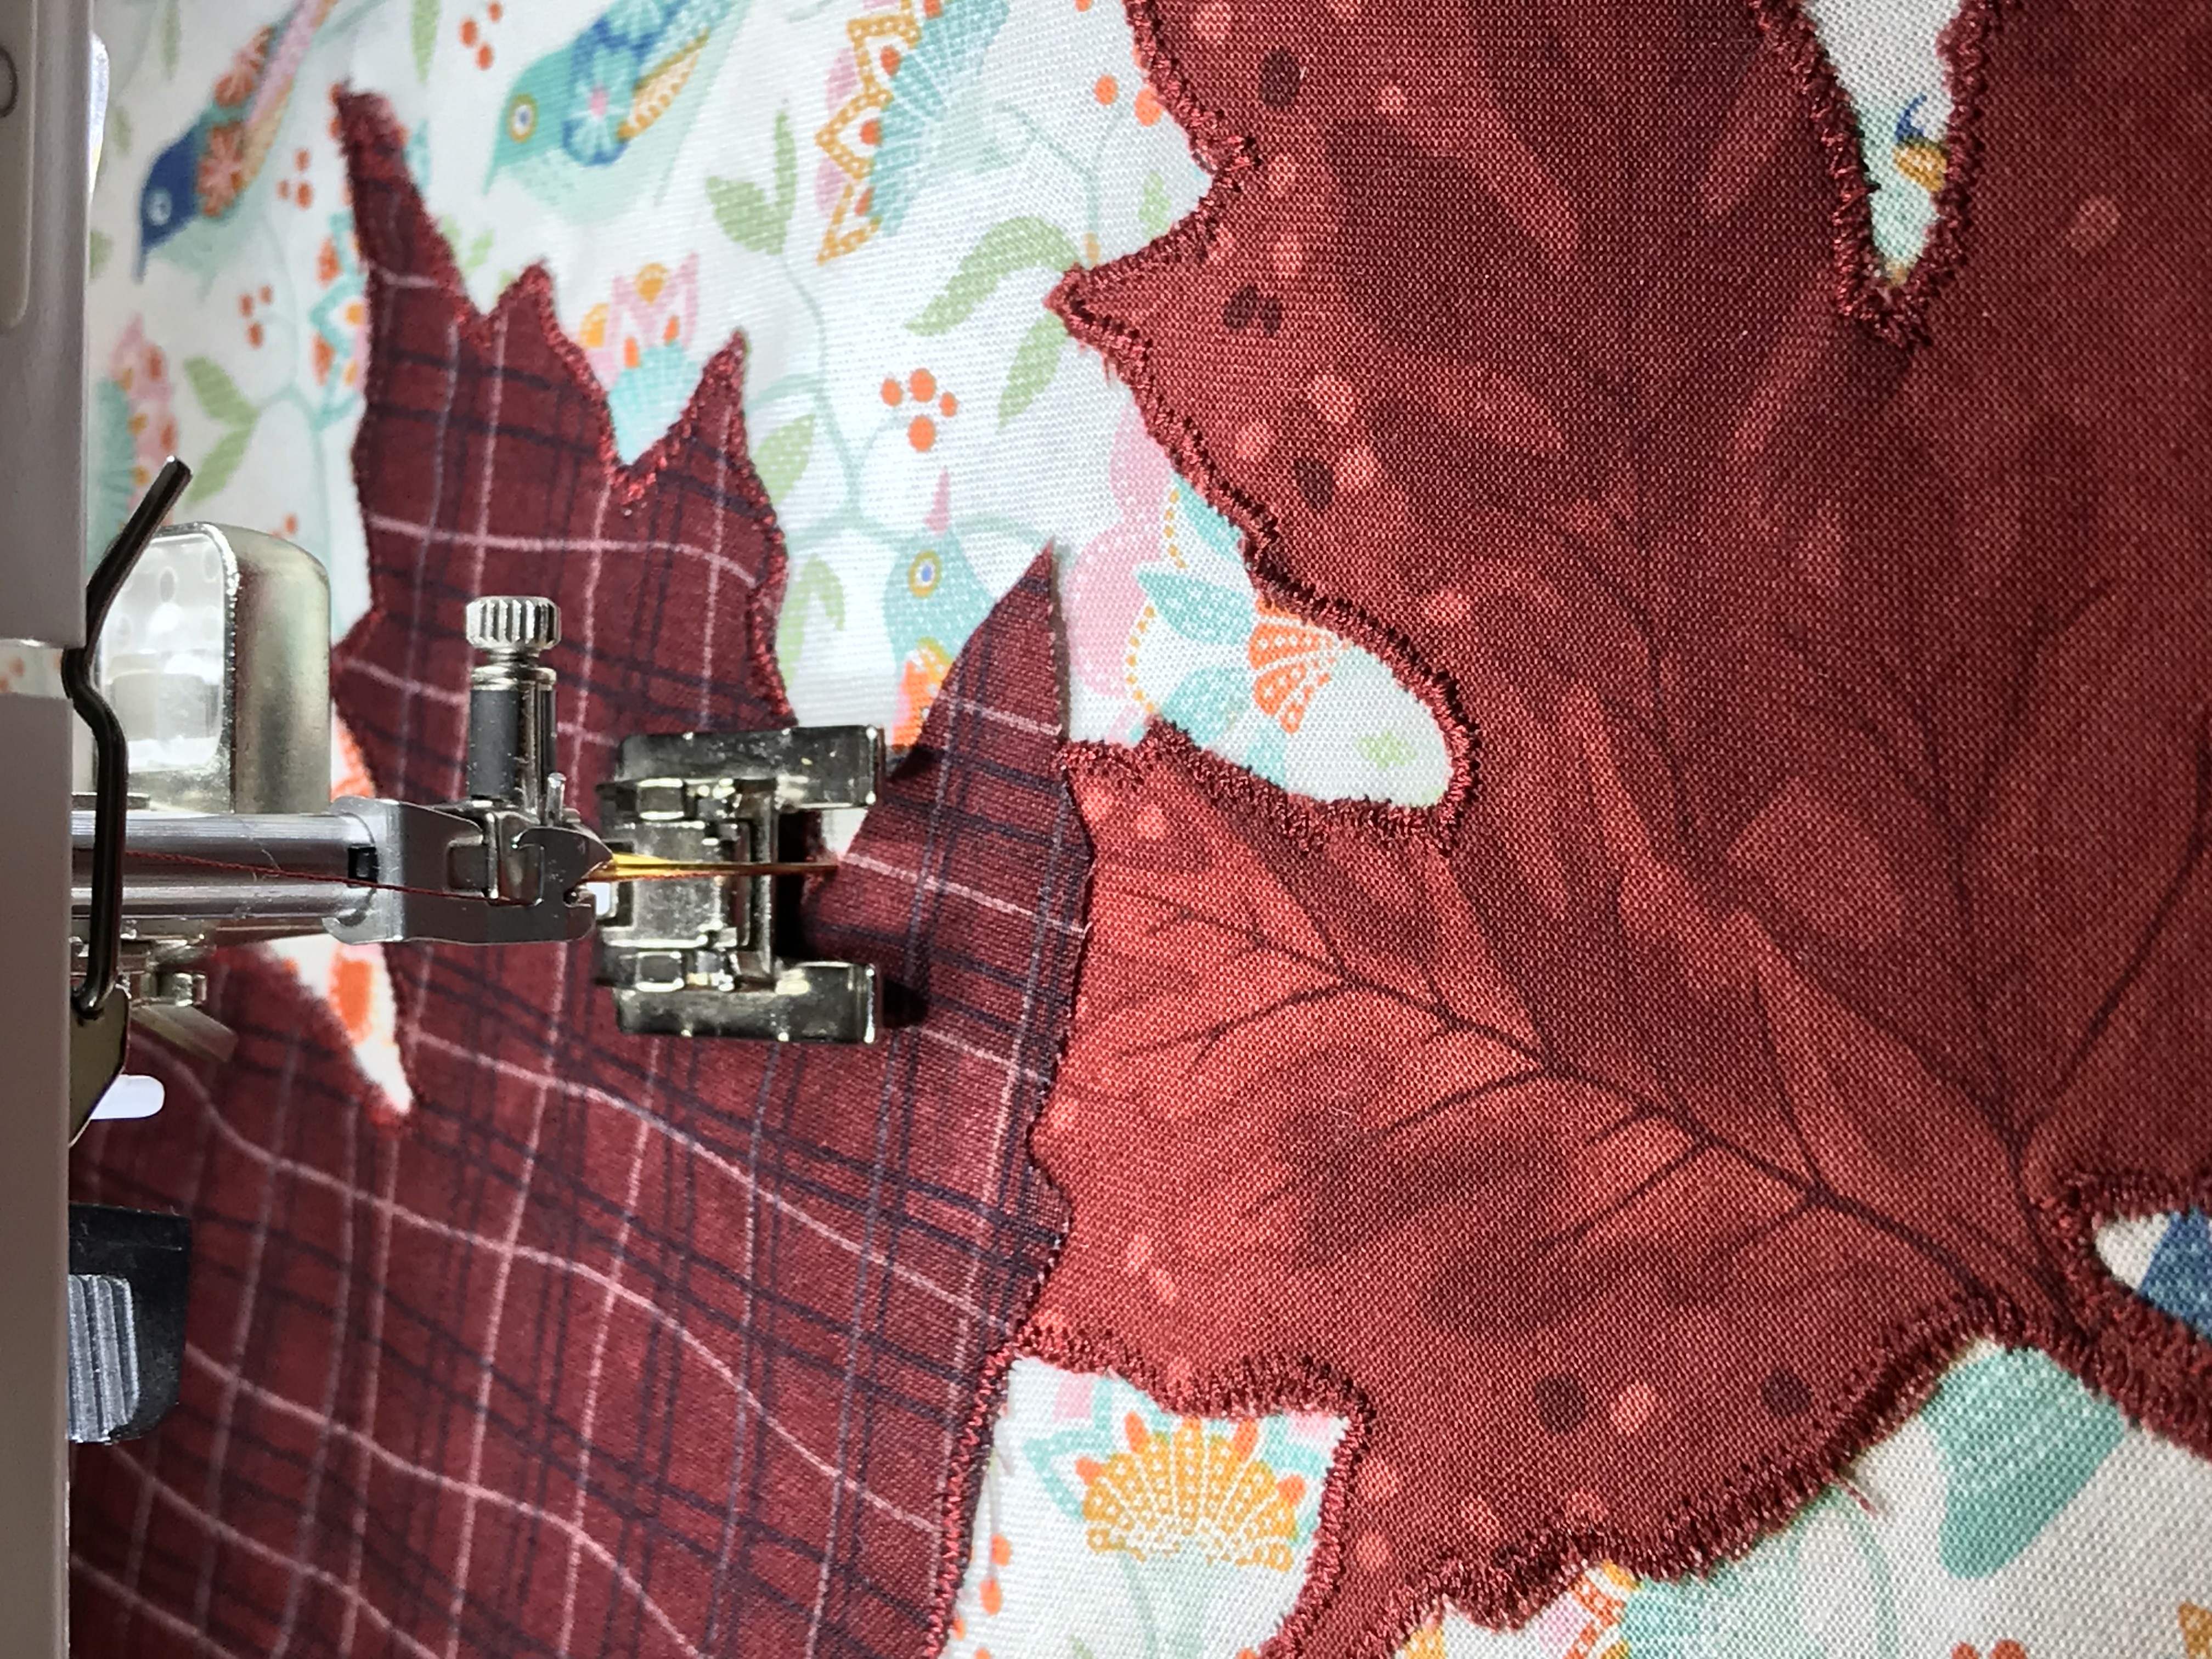
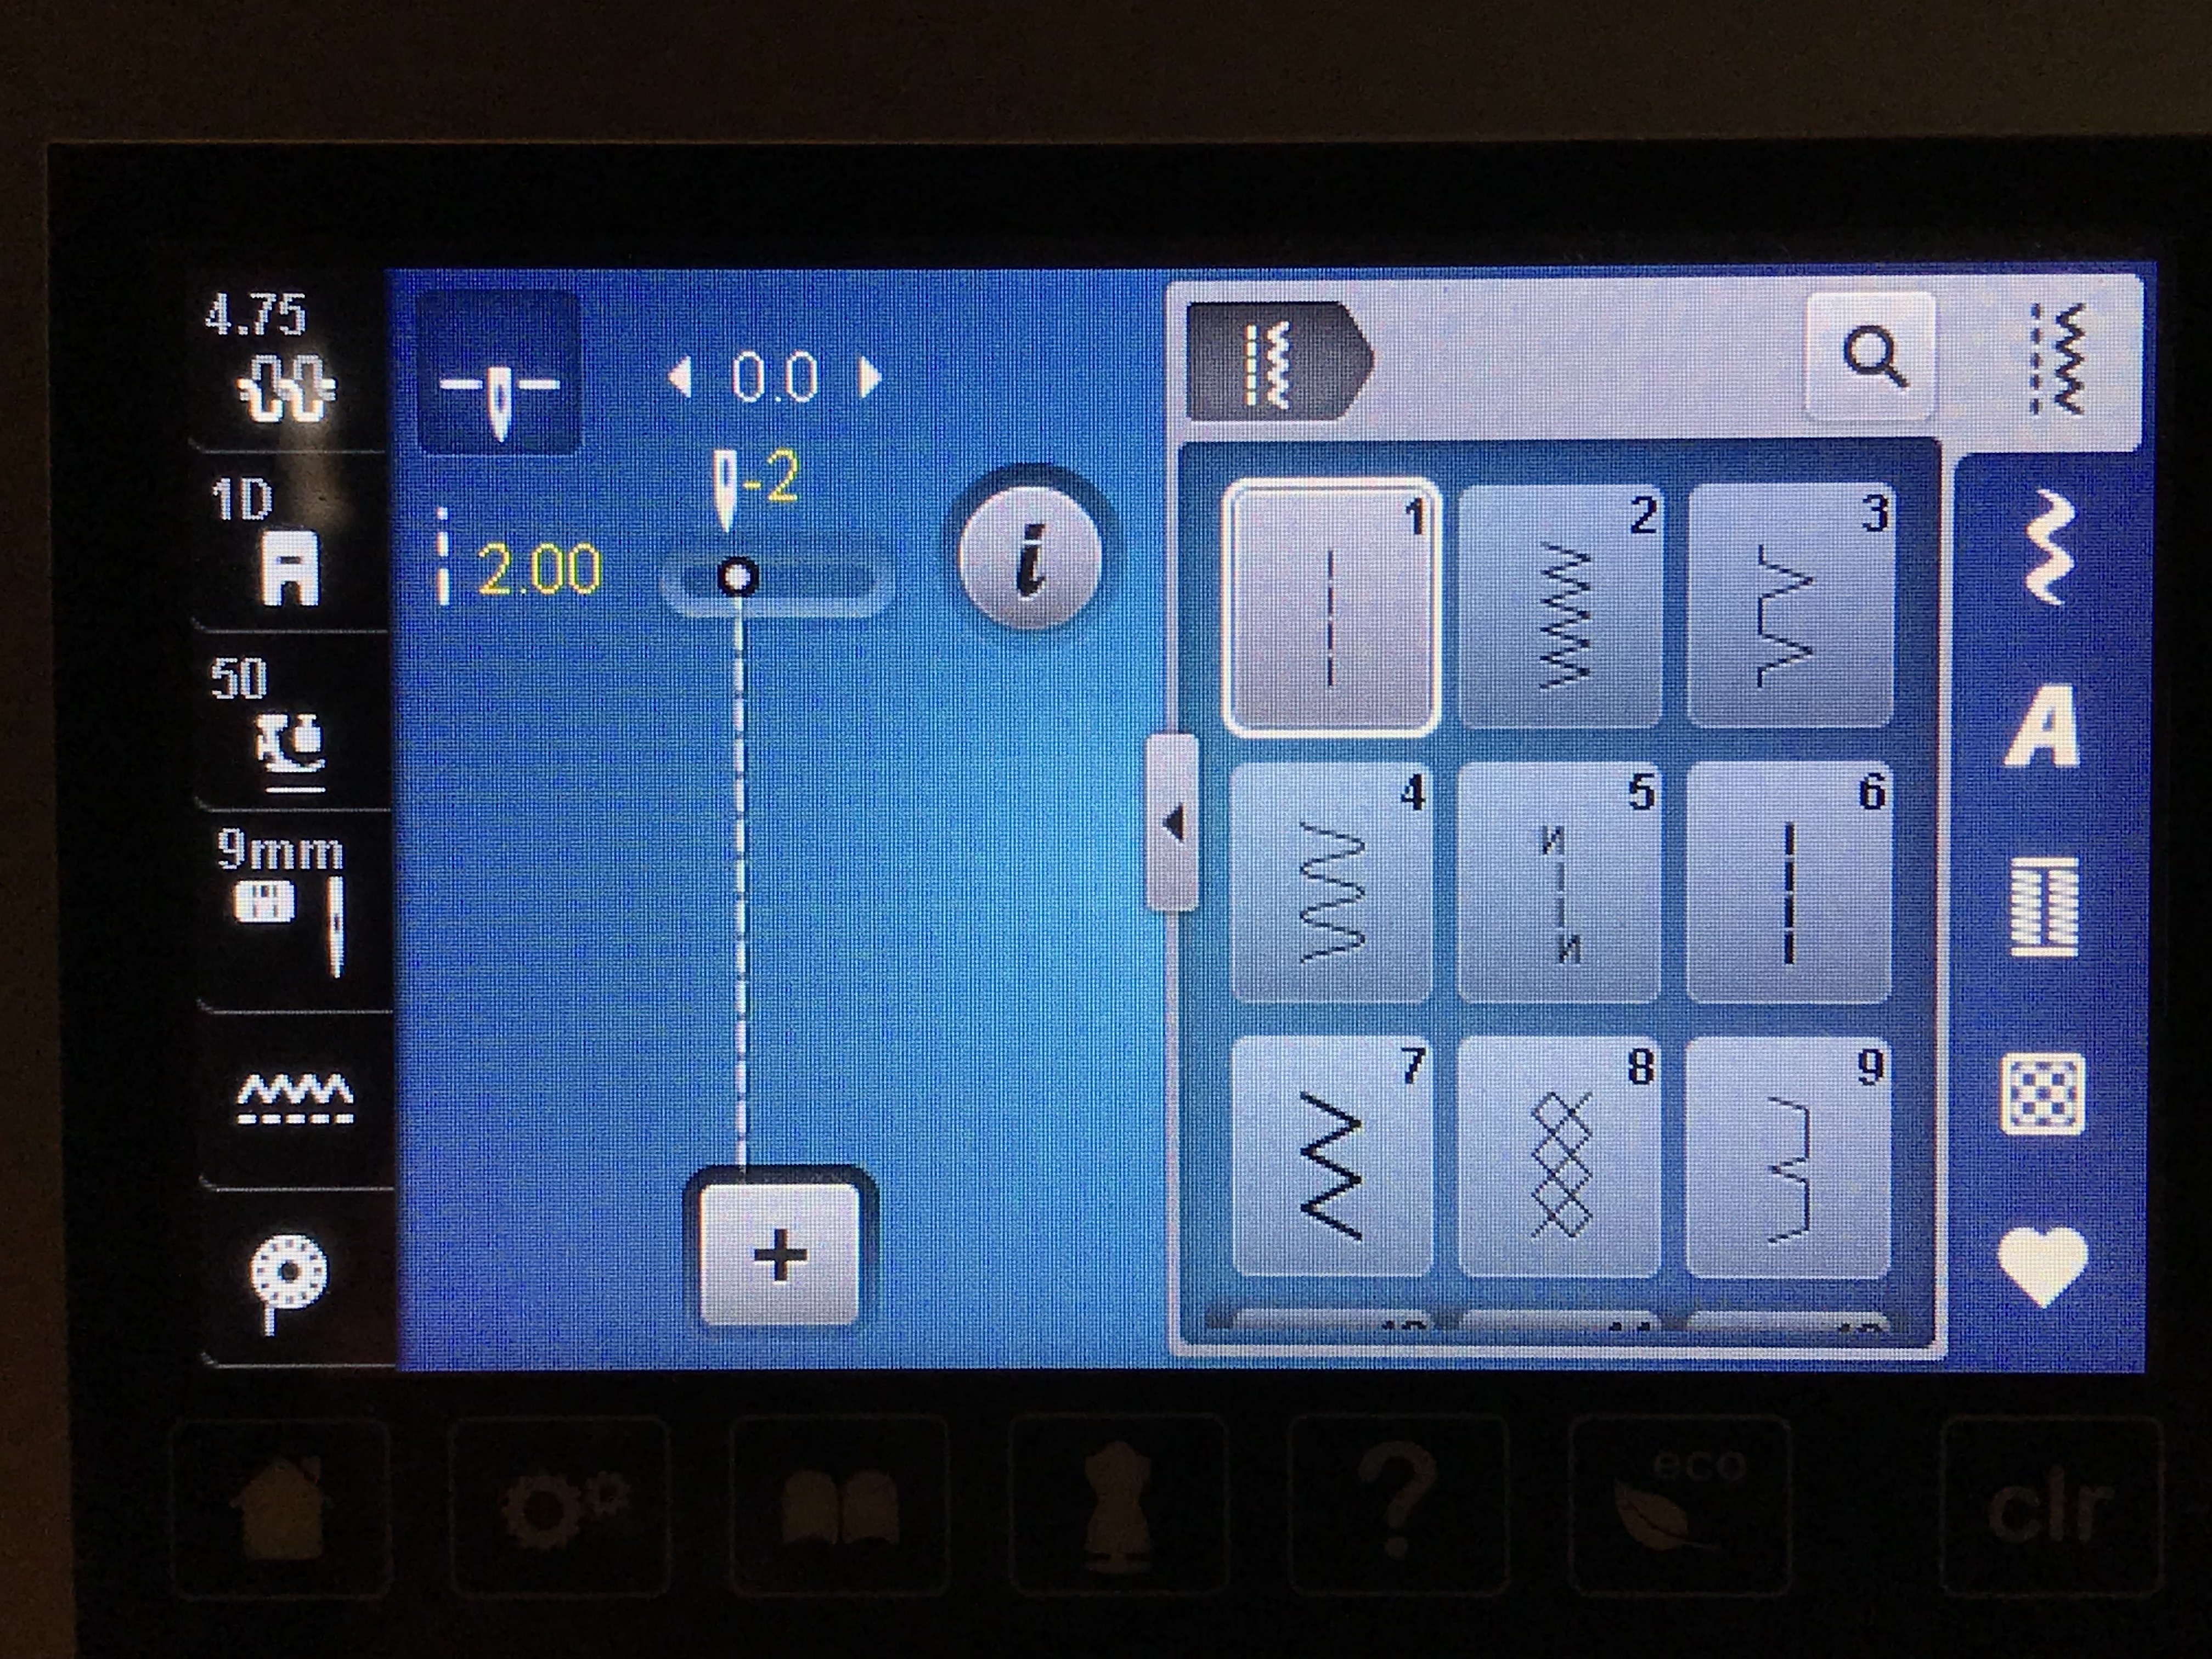
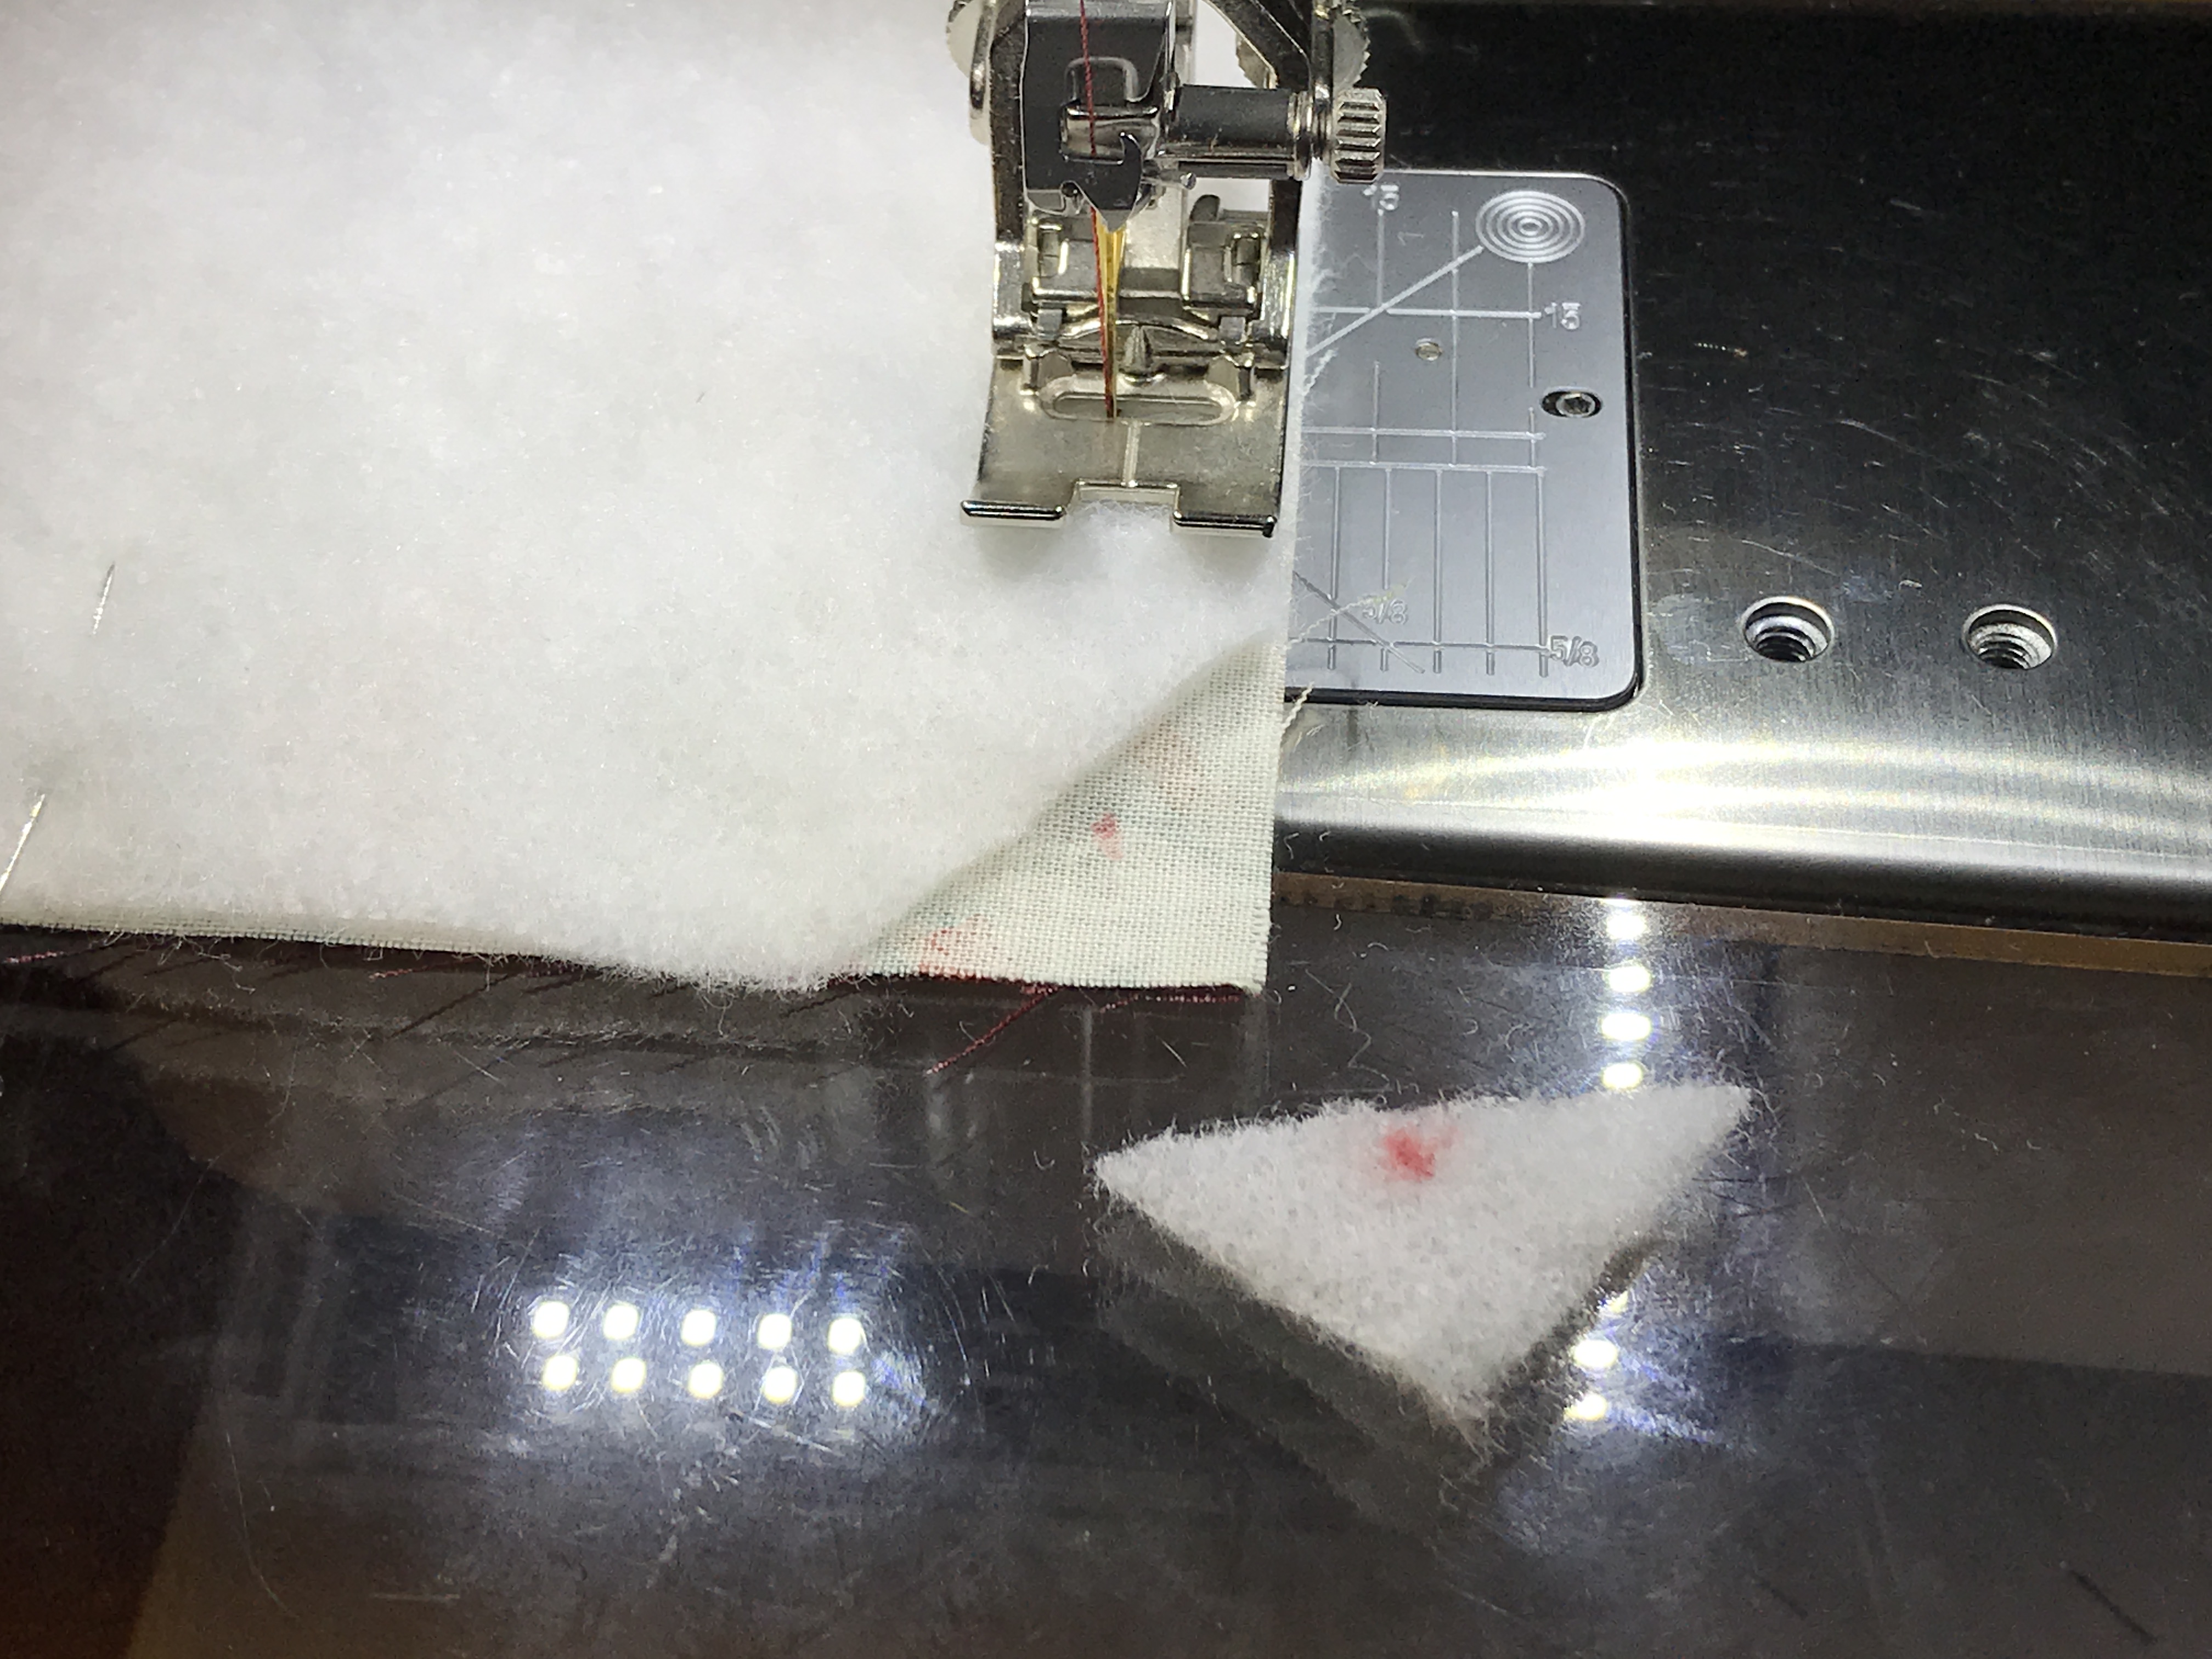
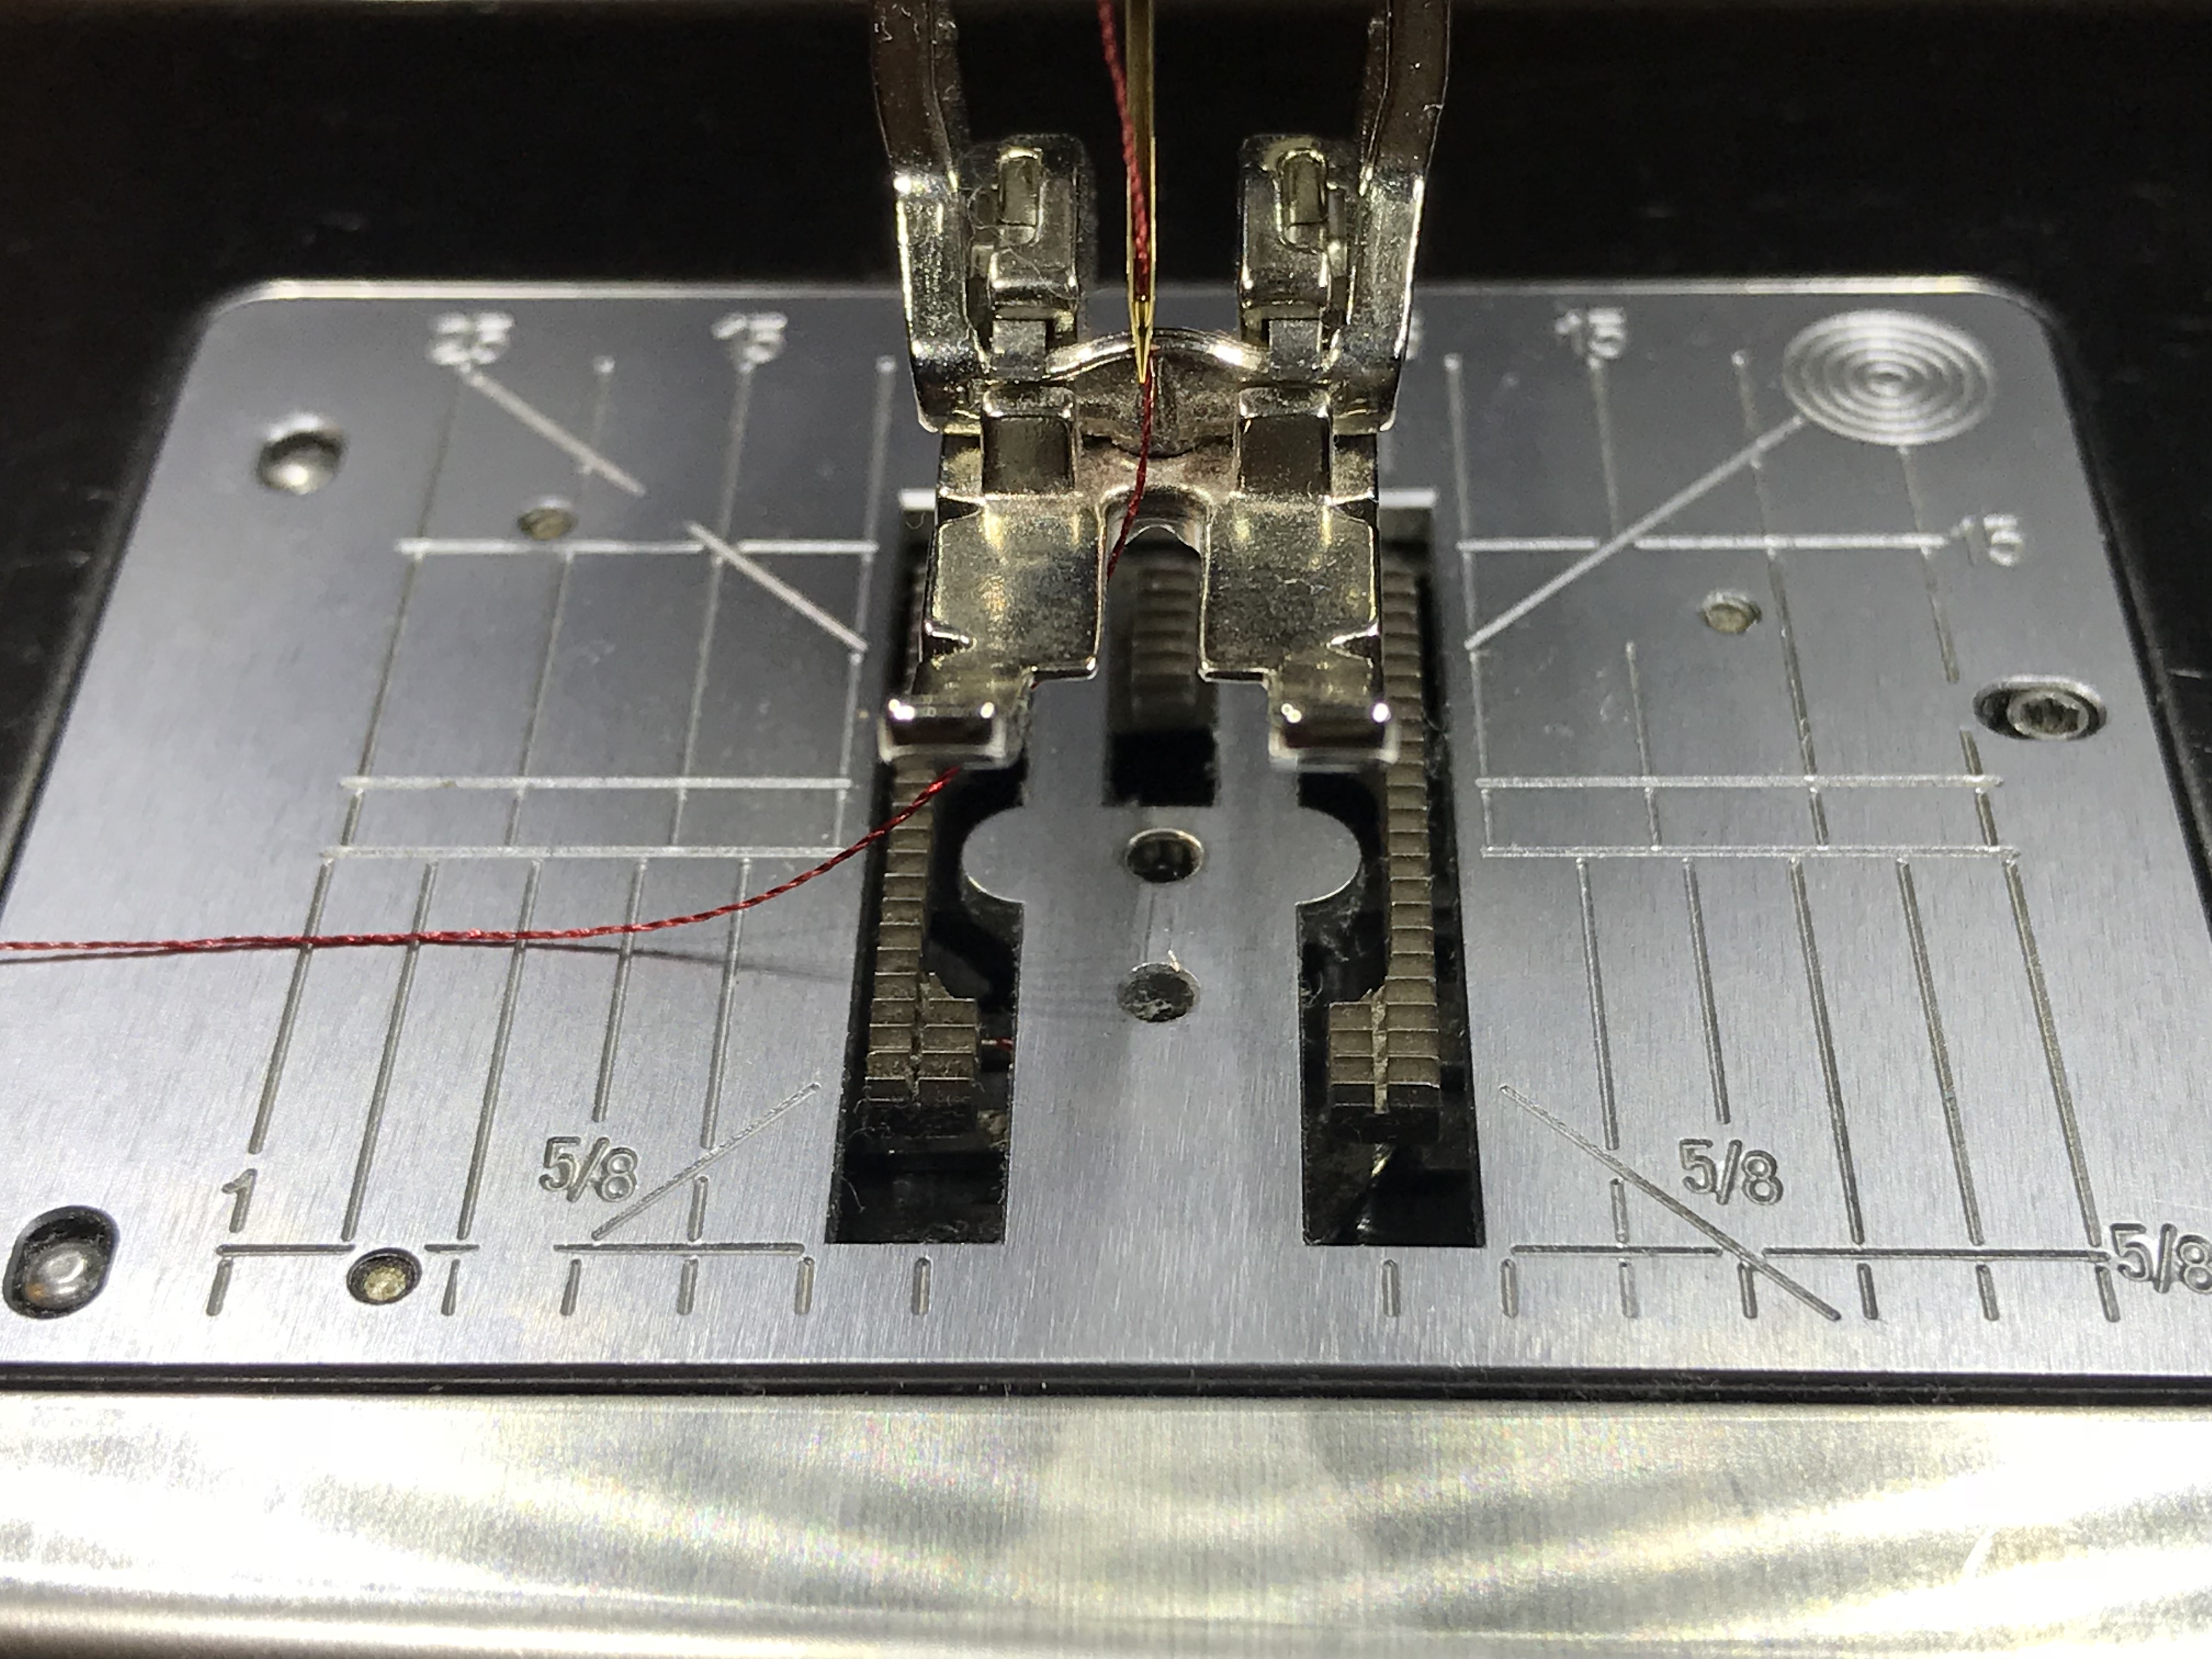
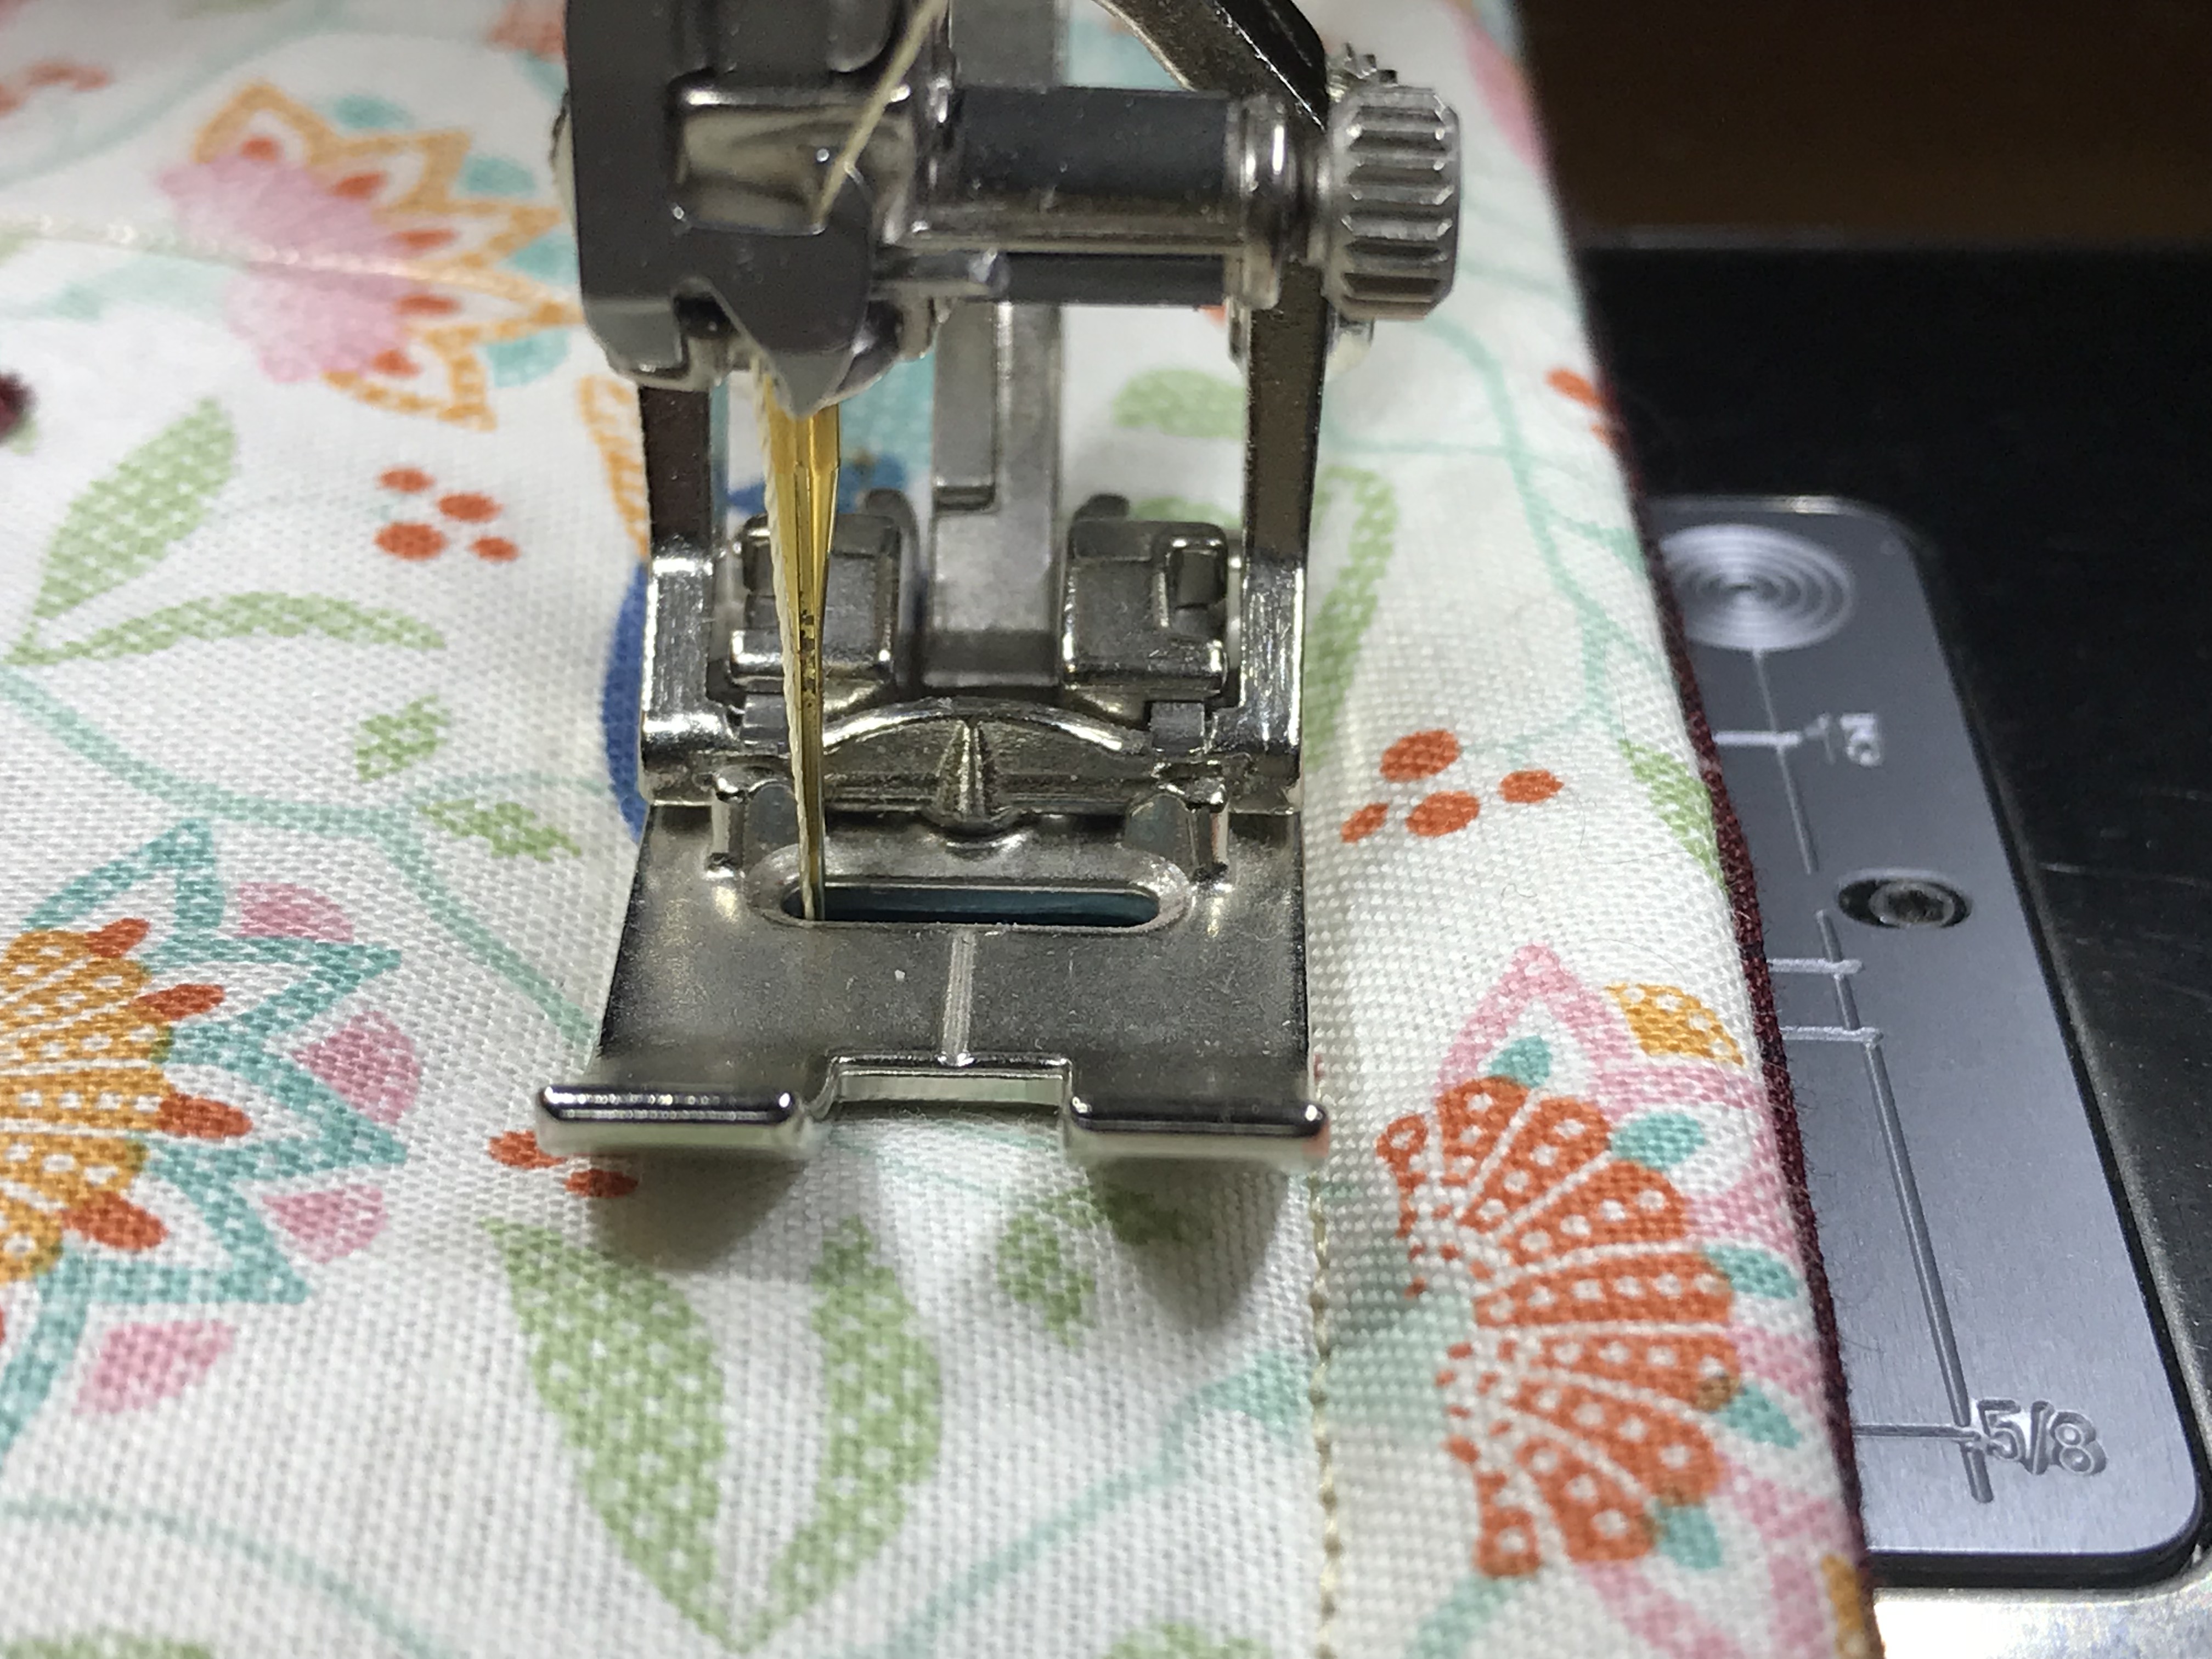
Use a zig-zag stitch to appliqué the leaves. The settings on my BERNINA 770QE were a stitch width of 2.5 and a stitch length of 0.75.
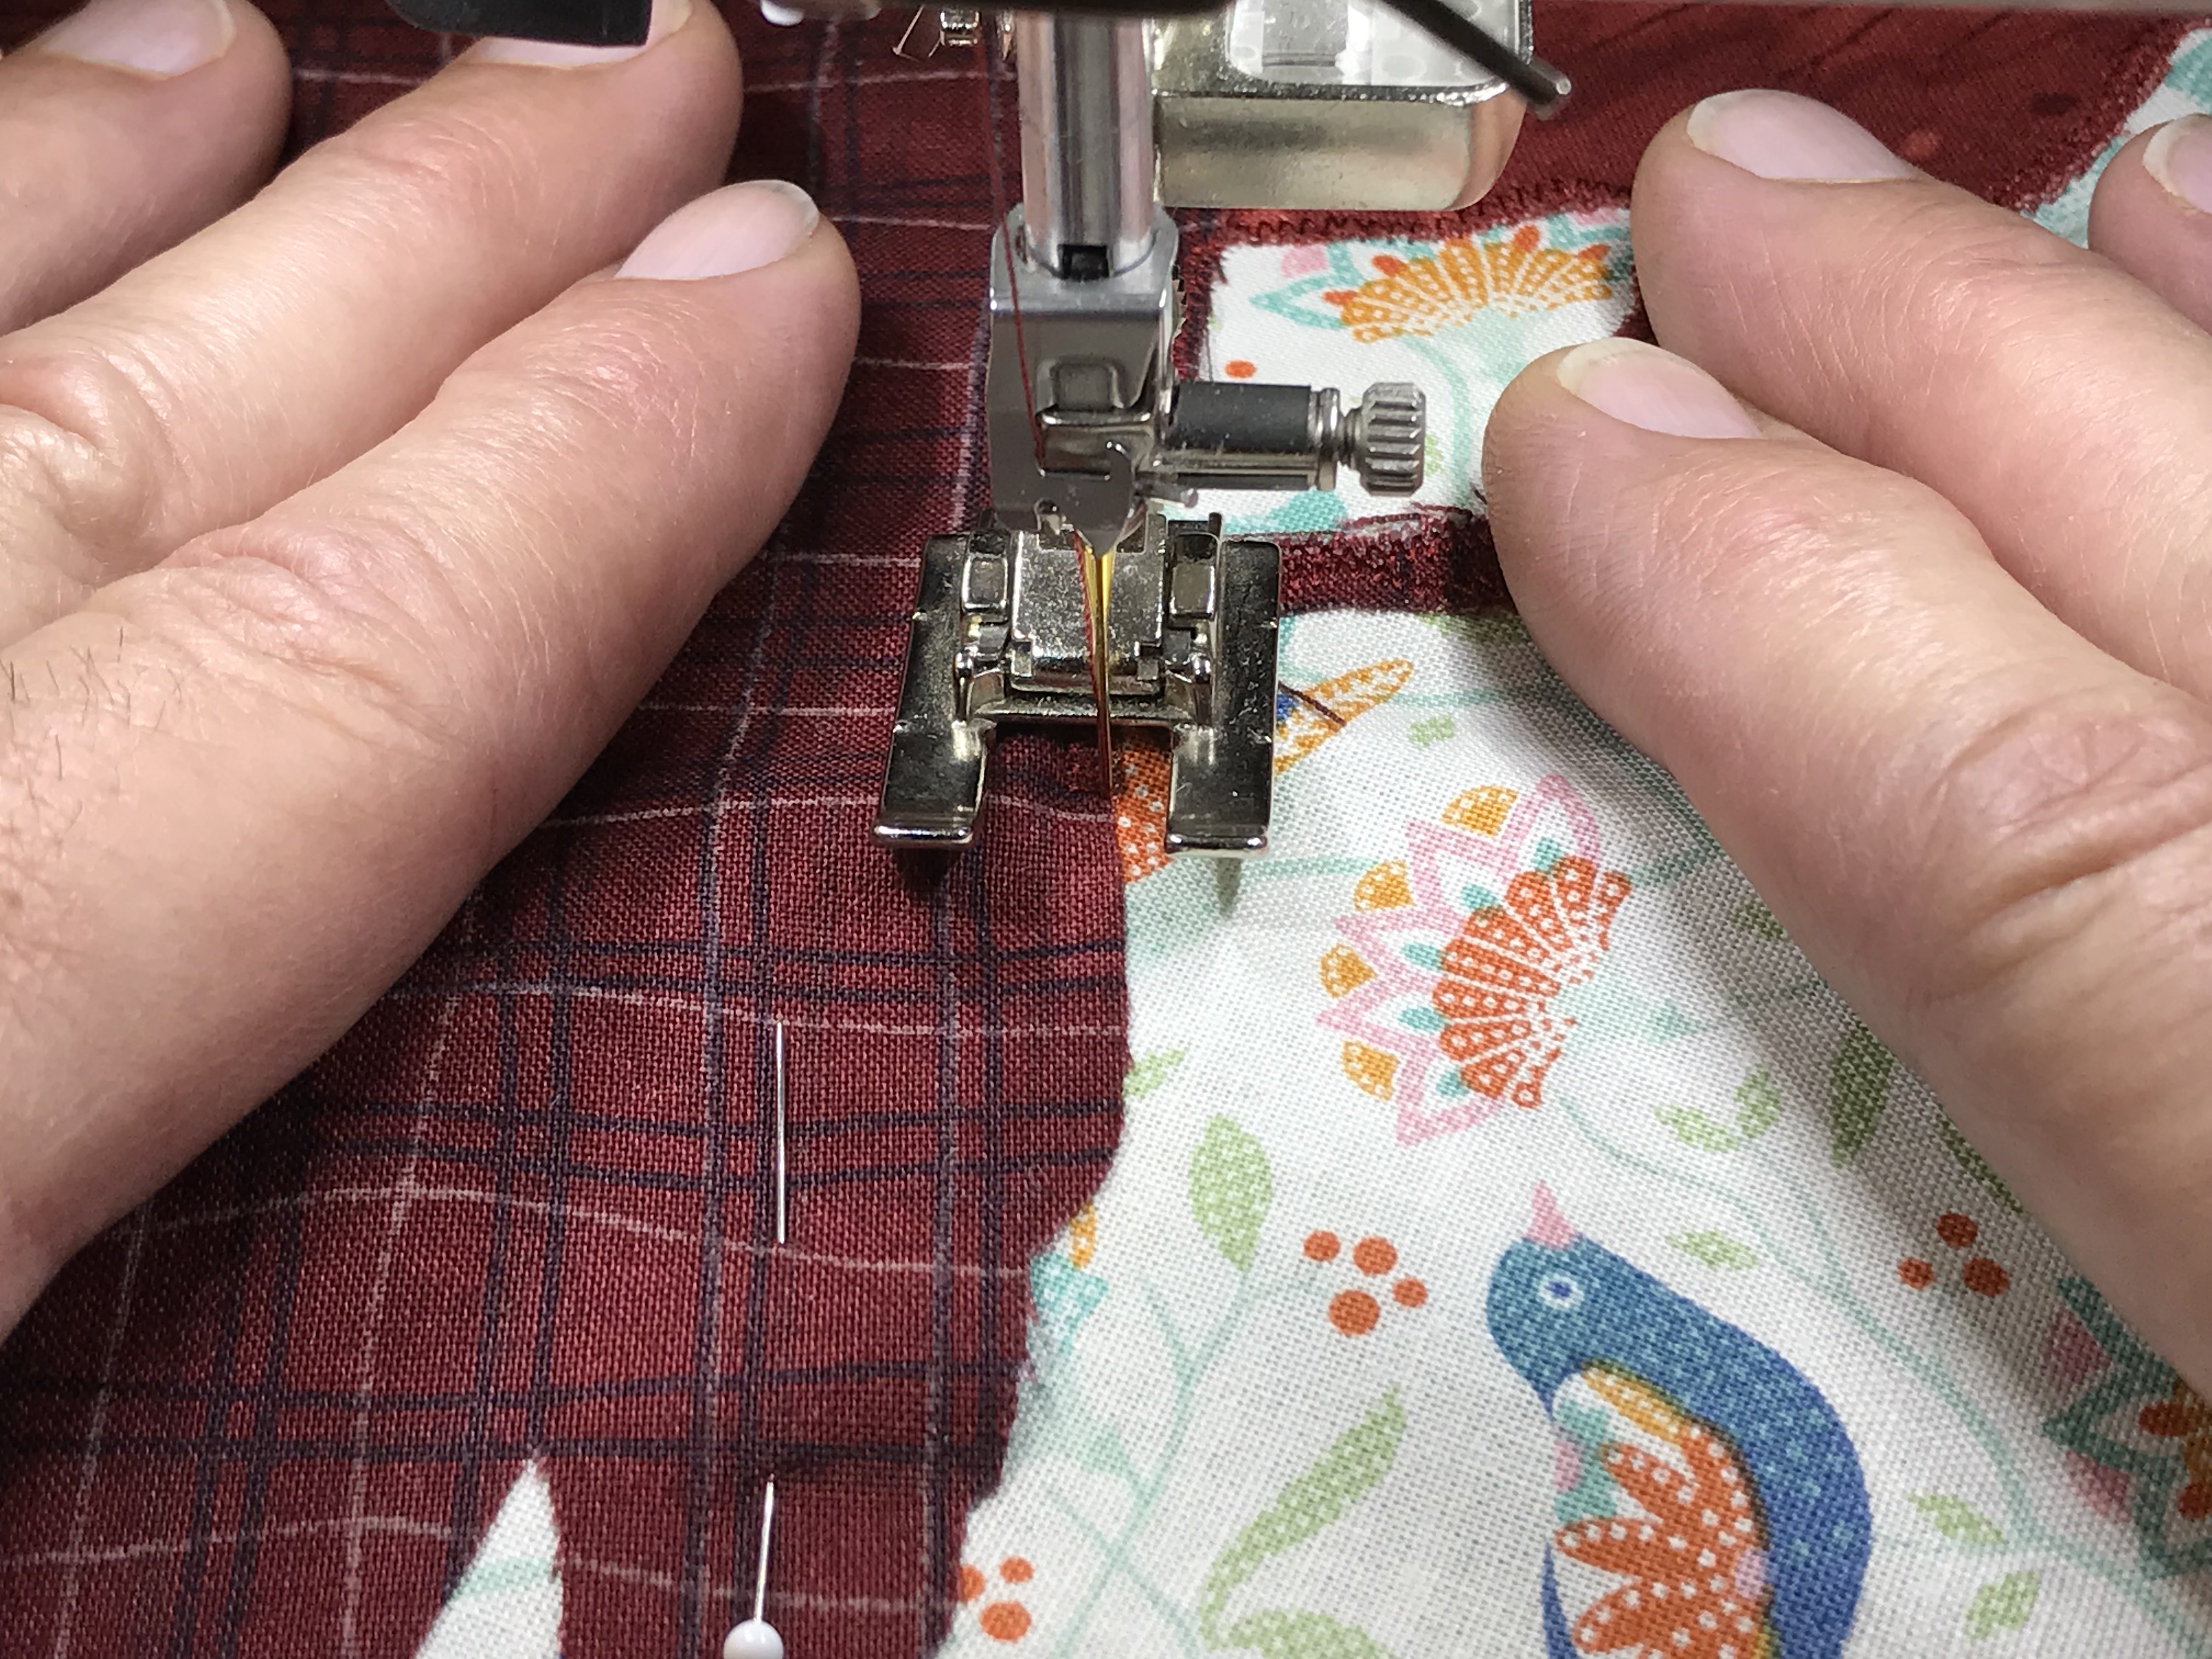
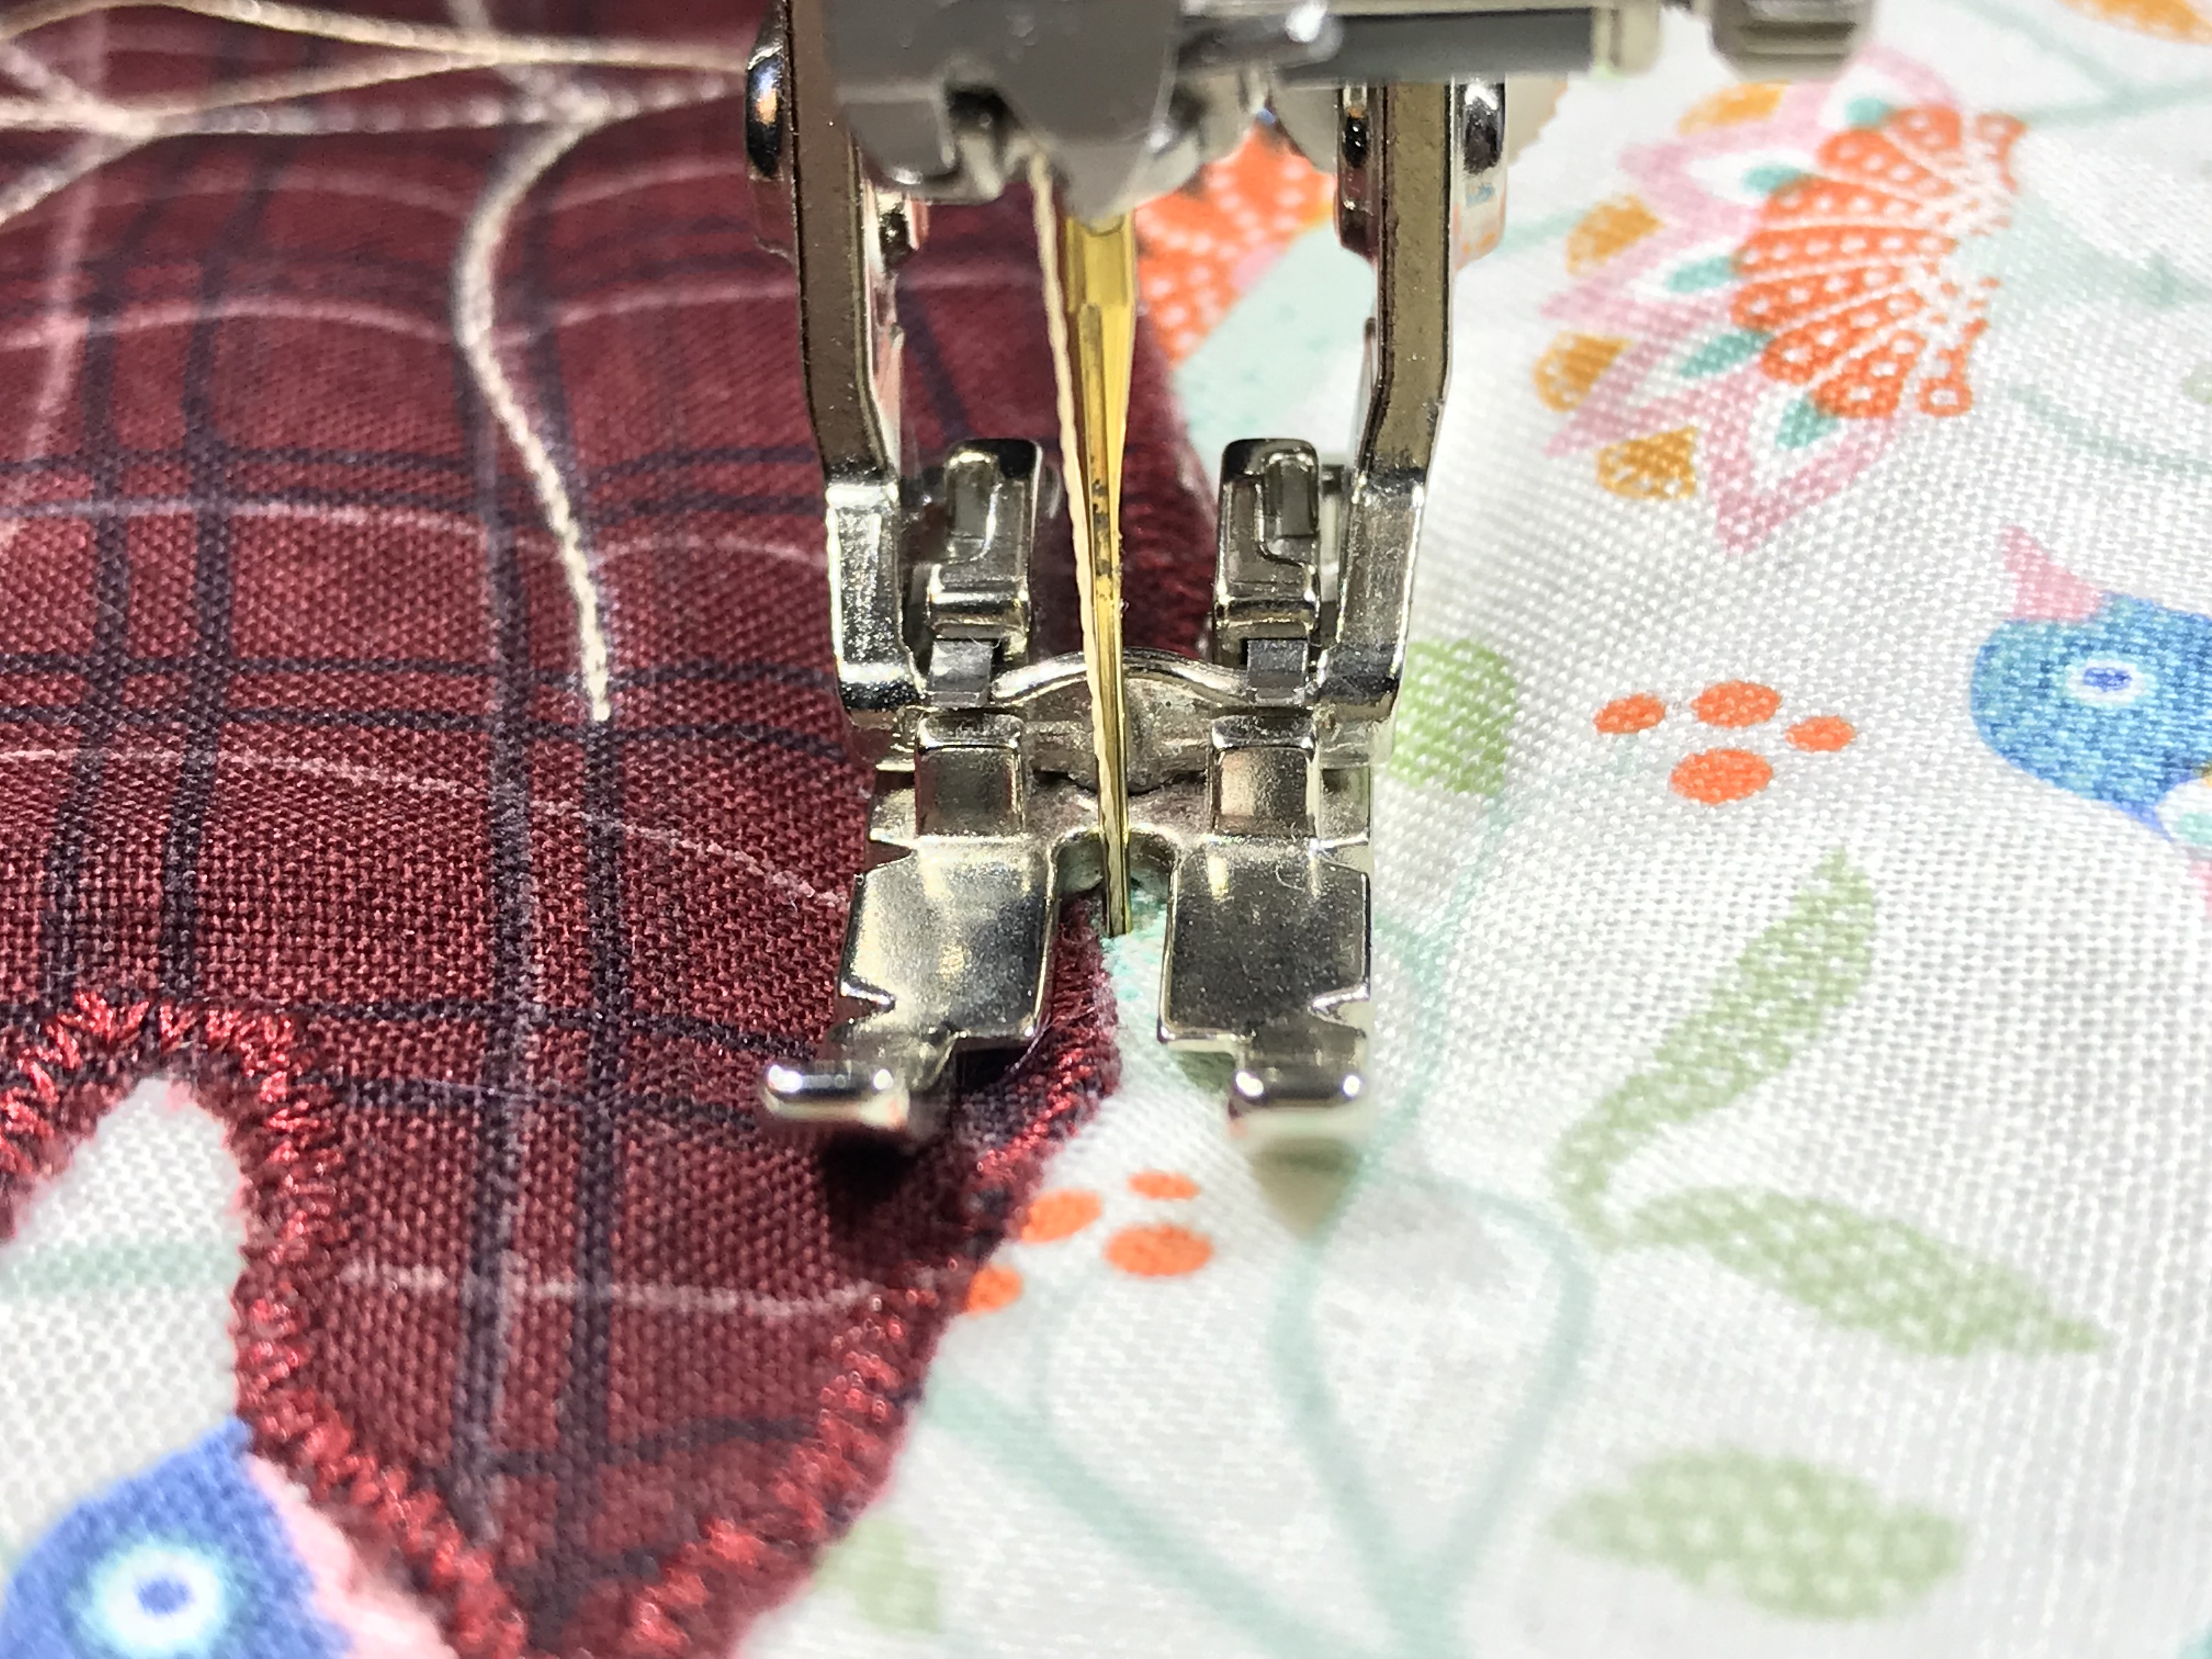
I used an open foot, the 20D because it makes it easy to see the outlines and points of the leaves as I stitched up to them.
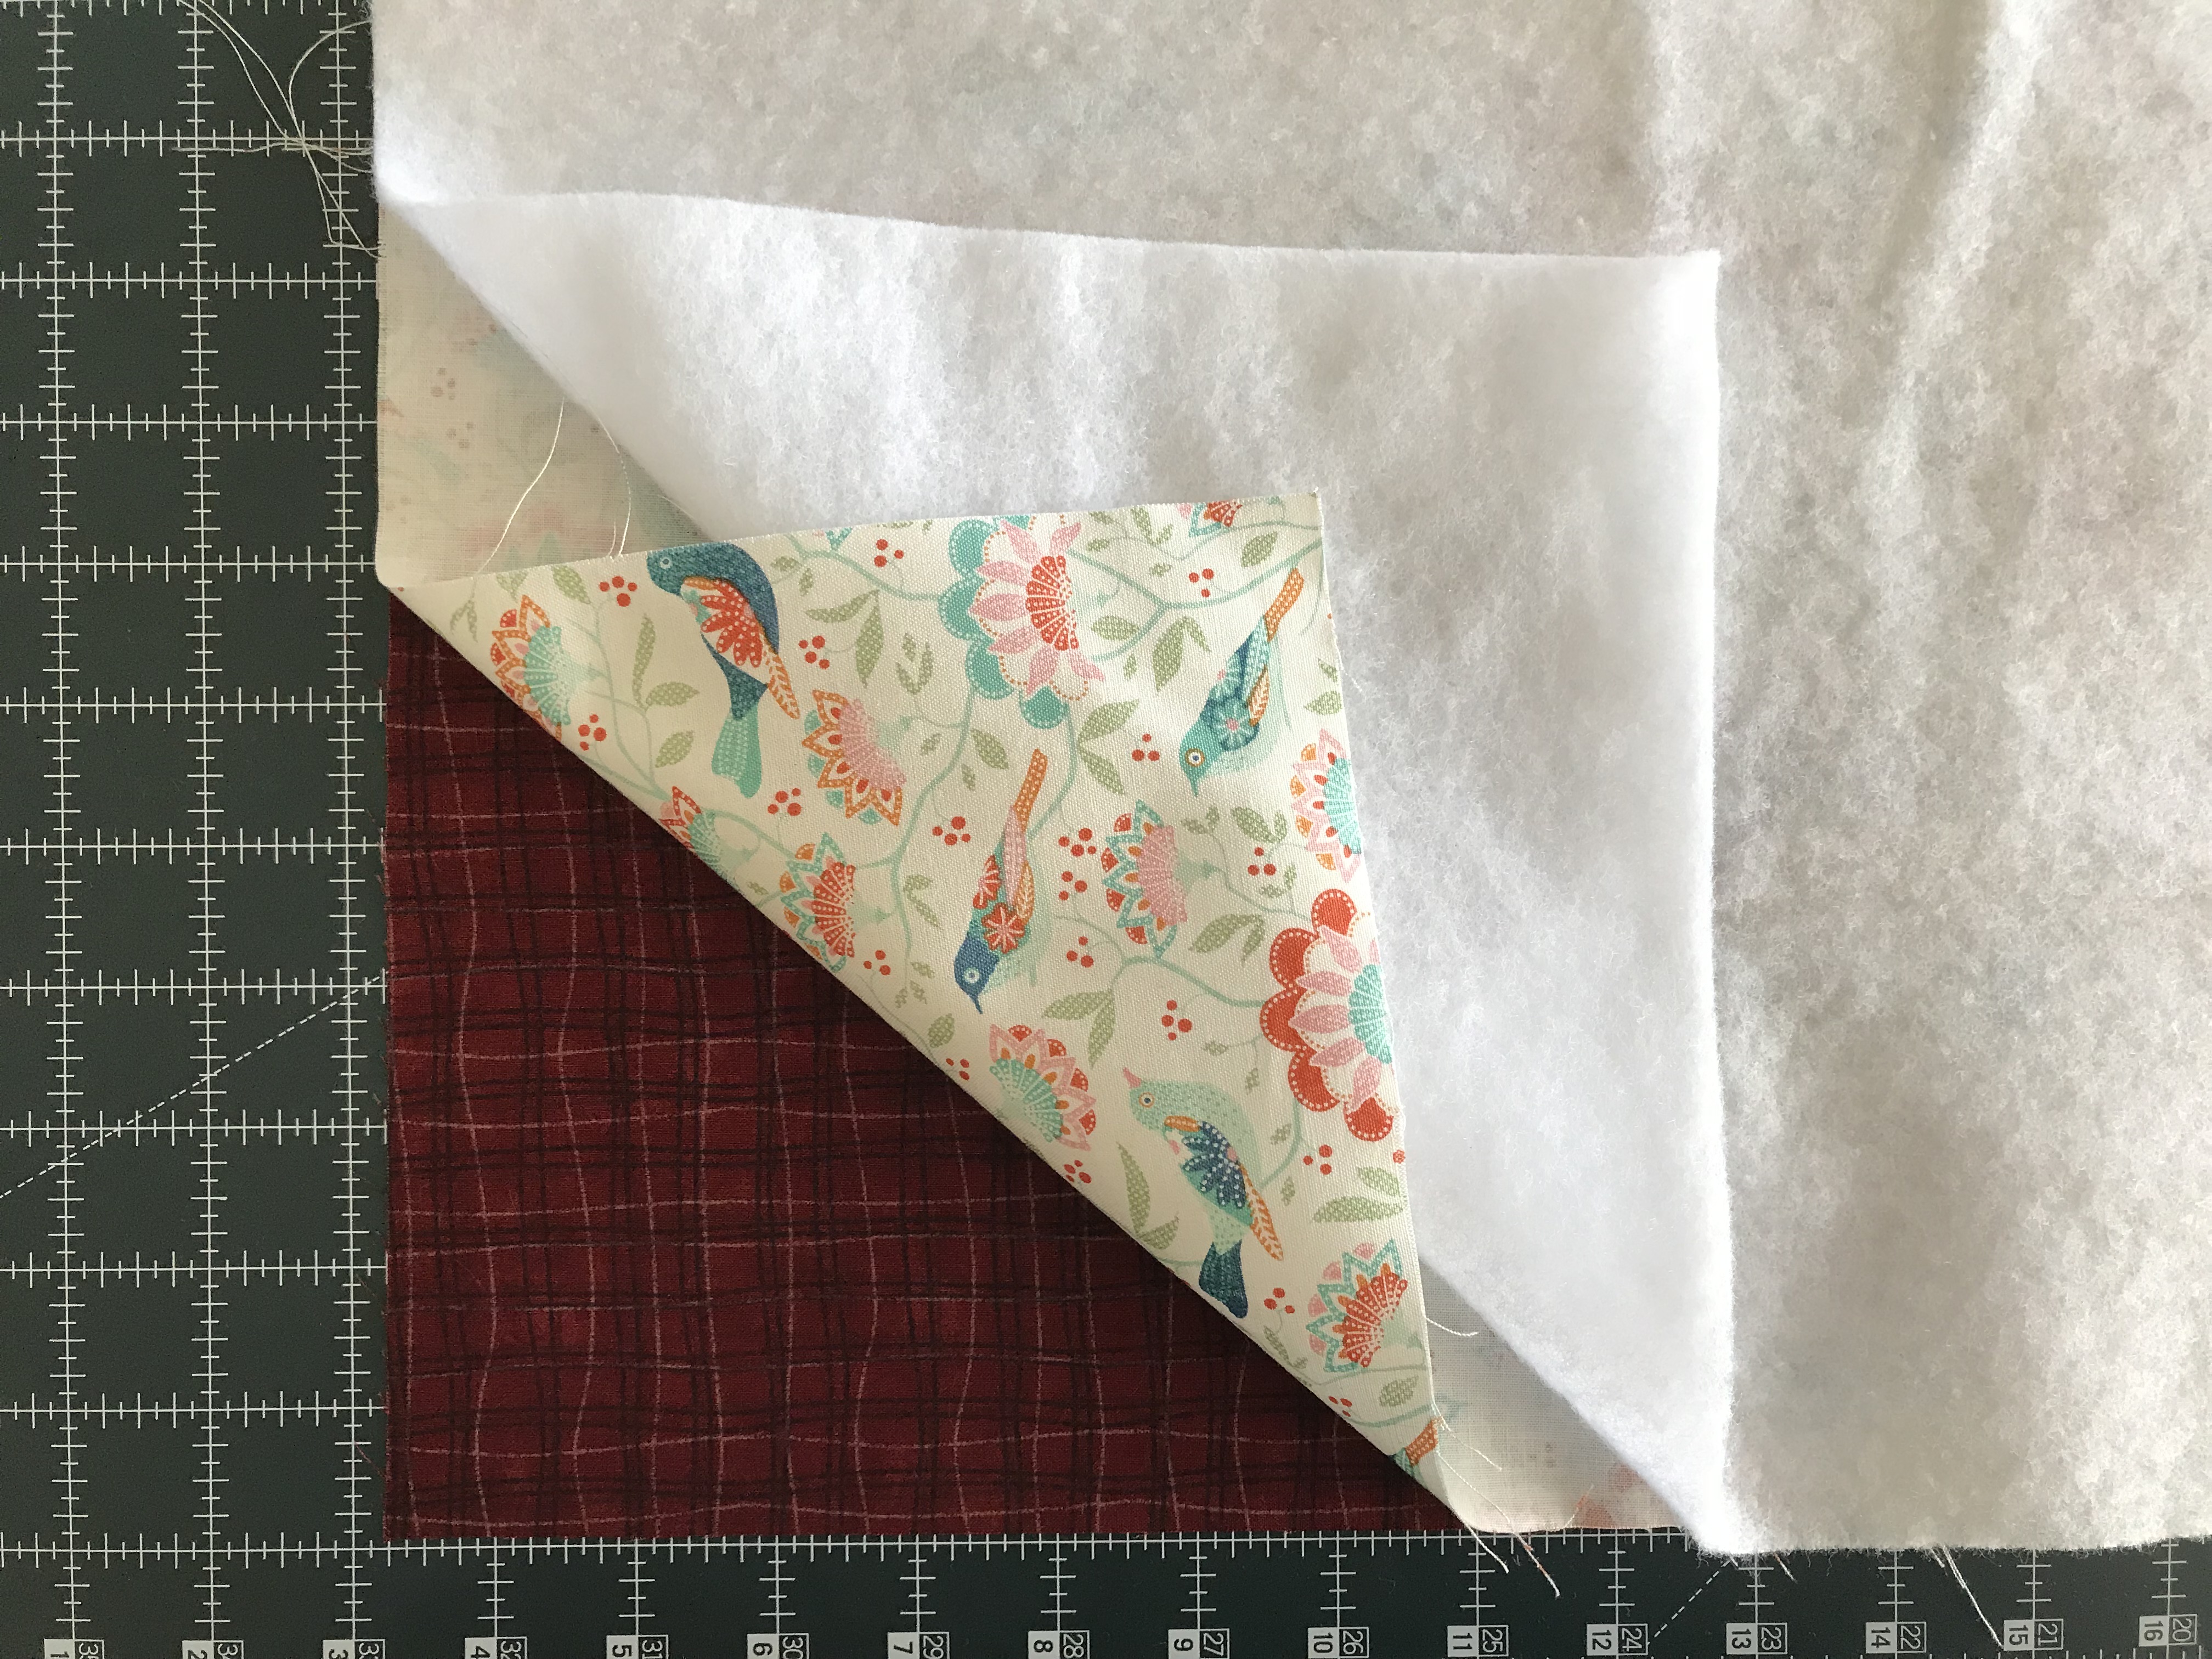
Once the leaves are stitched to the top of the placemat, place the top on the backing, right sides together. Place your batting on top of the back side of the placemat top.
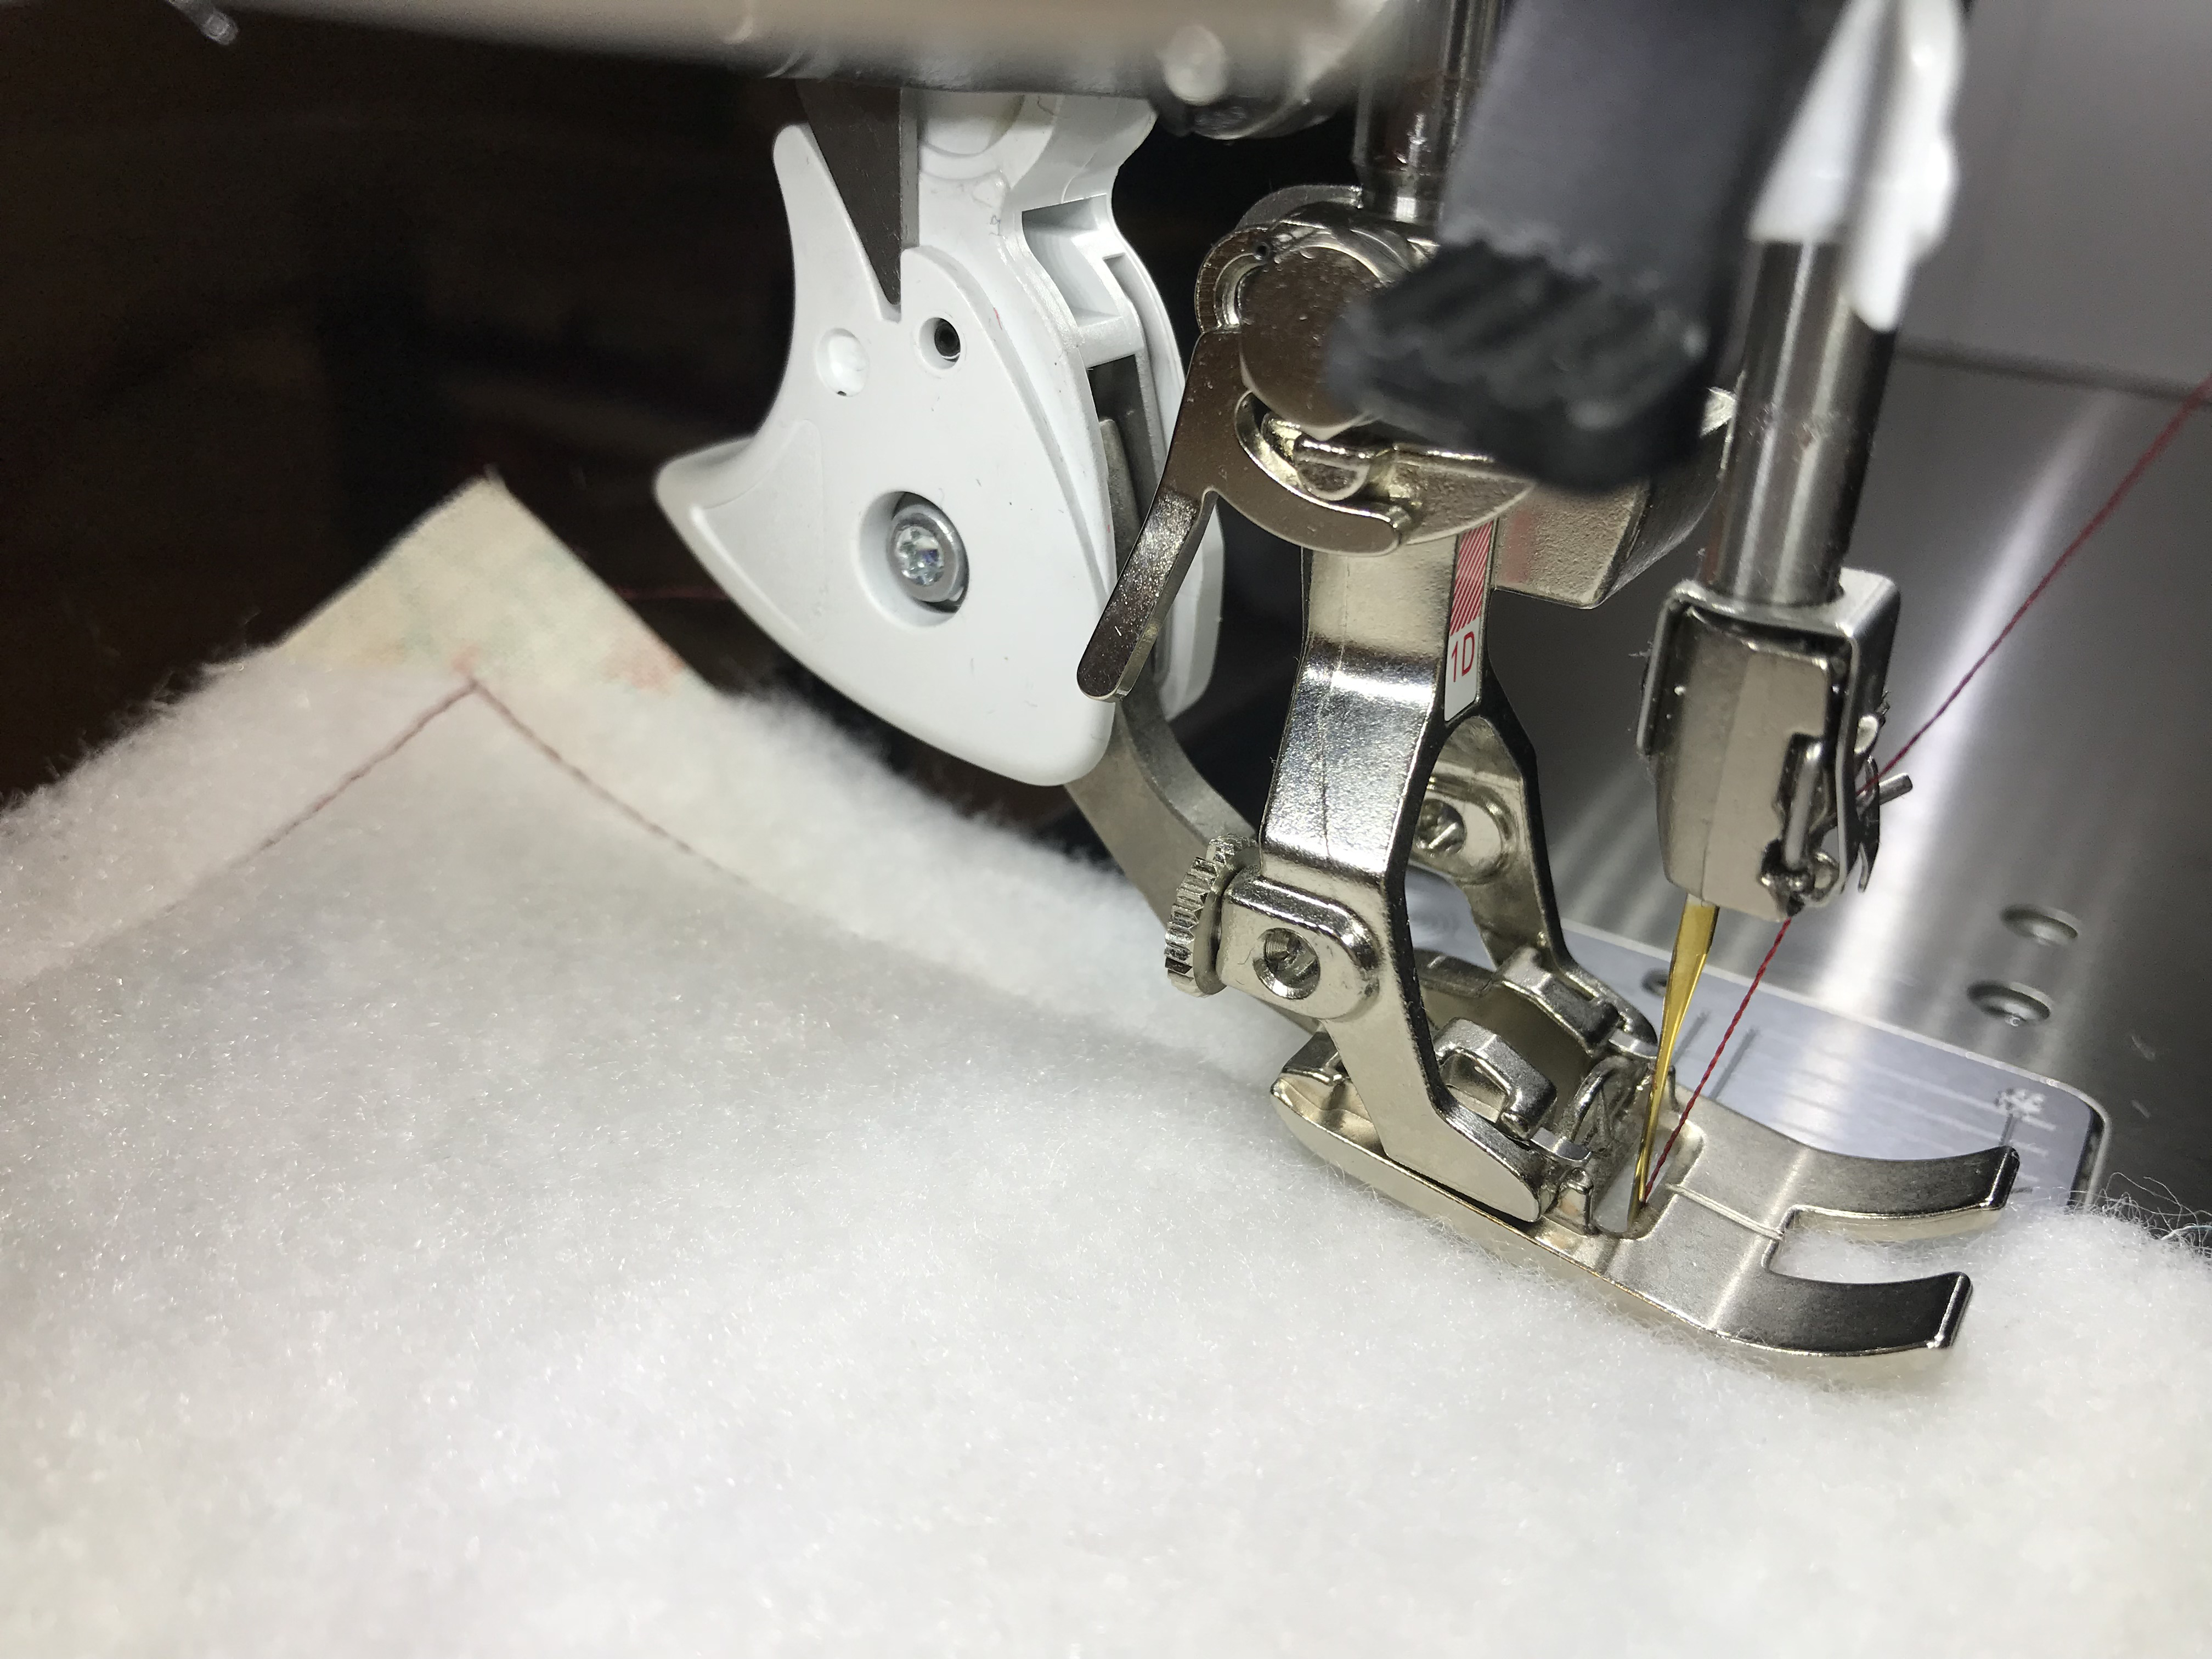
Pin edges and stitch all three layers together. The top layer of batting can move around a bit and to make sure that I am catching all three layers of fabric I choose to use a one-half inch seam allowance. I switched to the 1D presser foot because it is a wide foot and I can use the right edge as a guide.

By offsetting my needle position to the left or -2 position I can get a one-half inch seam from the edge. It also has the advantage of the being able to use the BERNINA Dual Feed which I engaged.
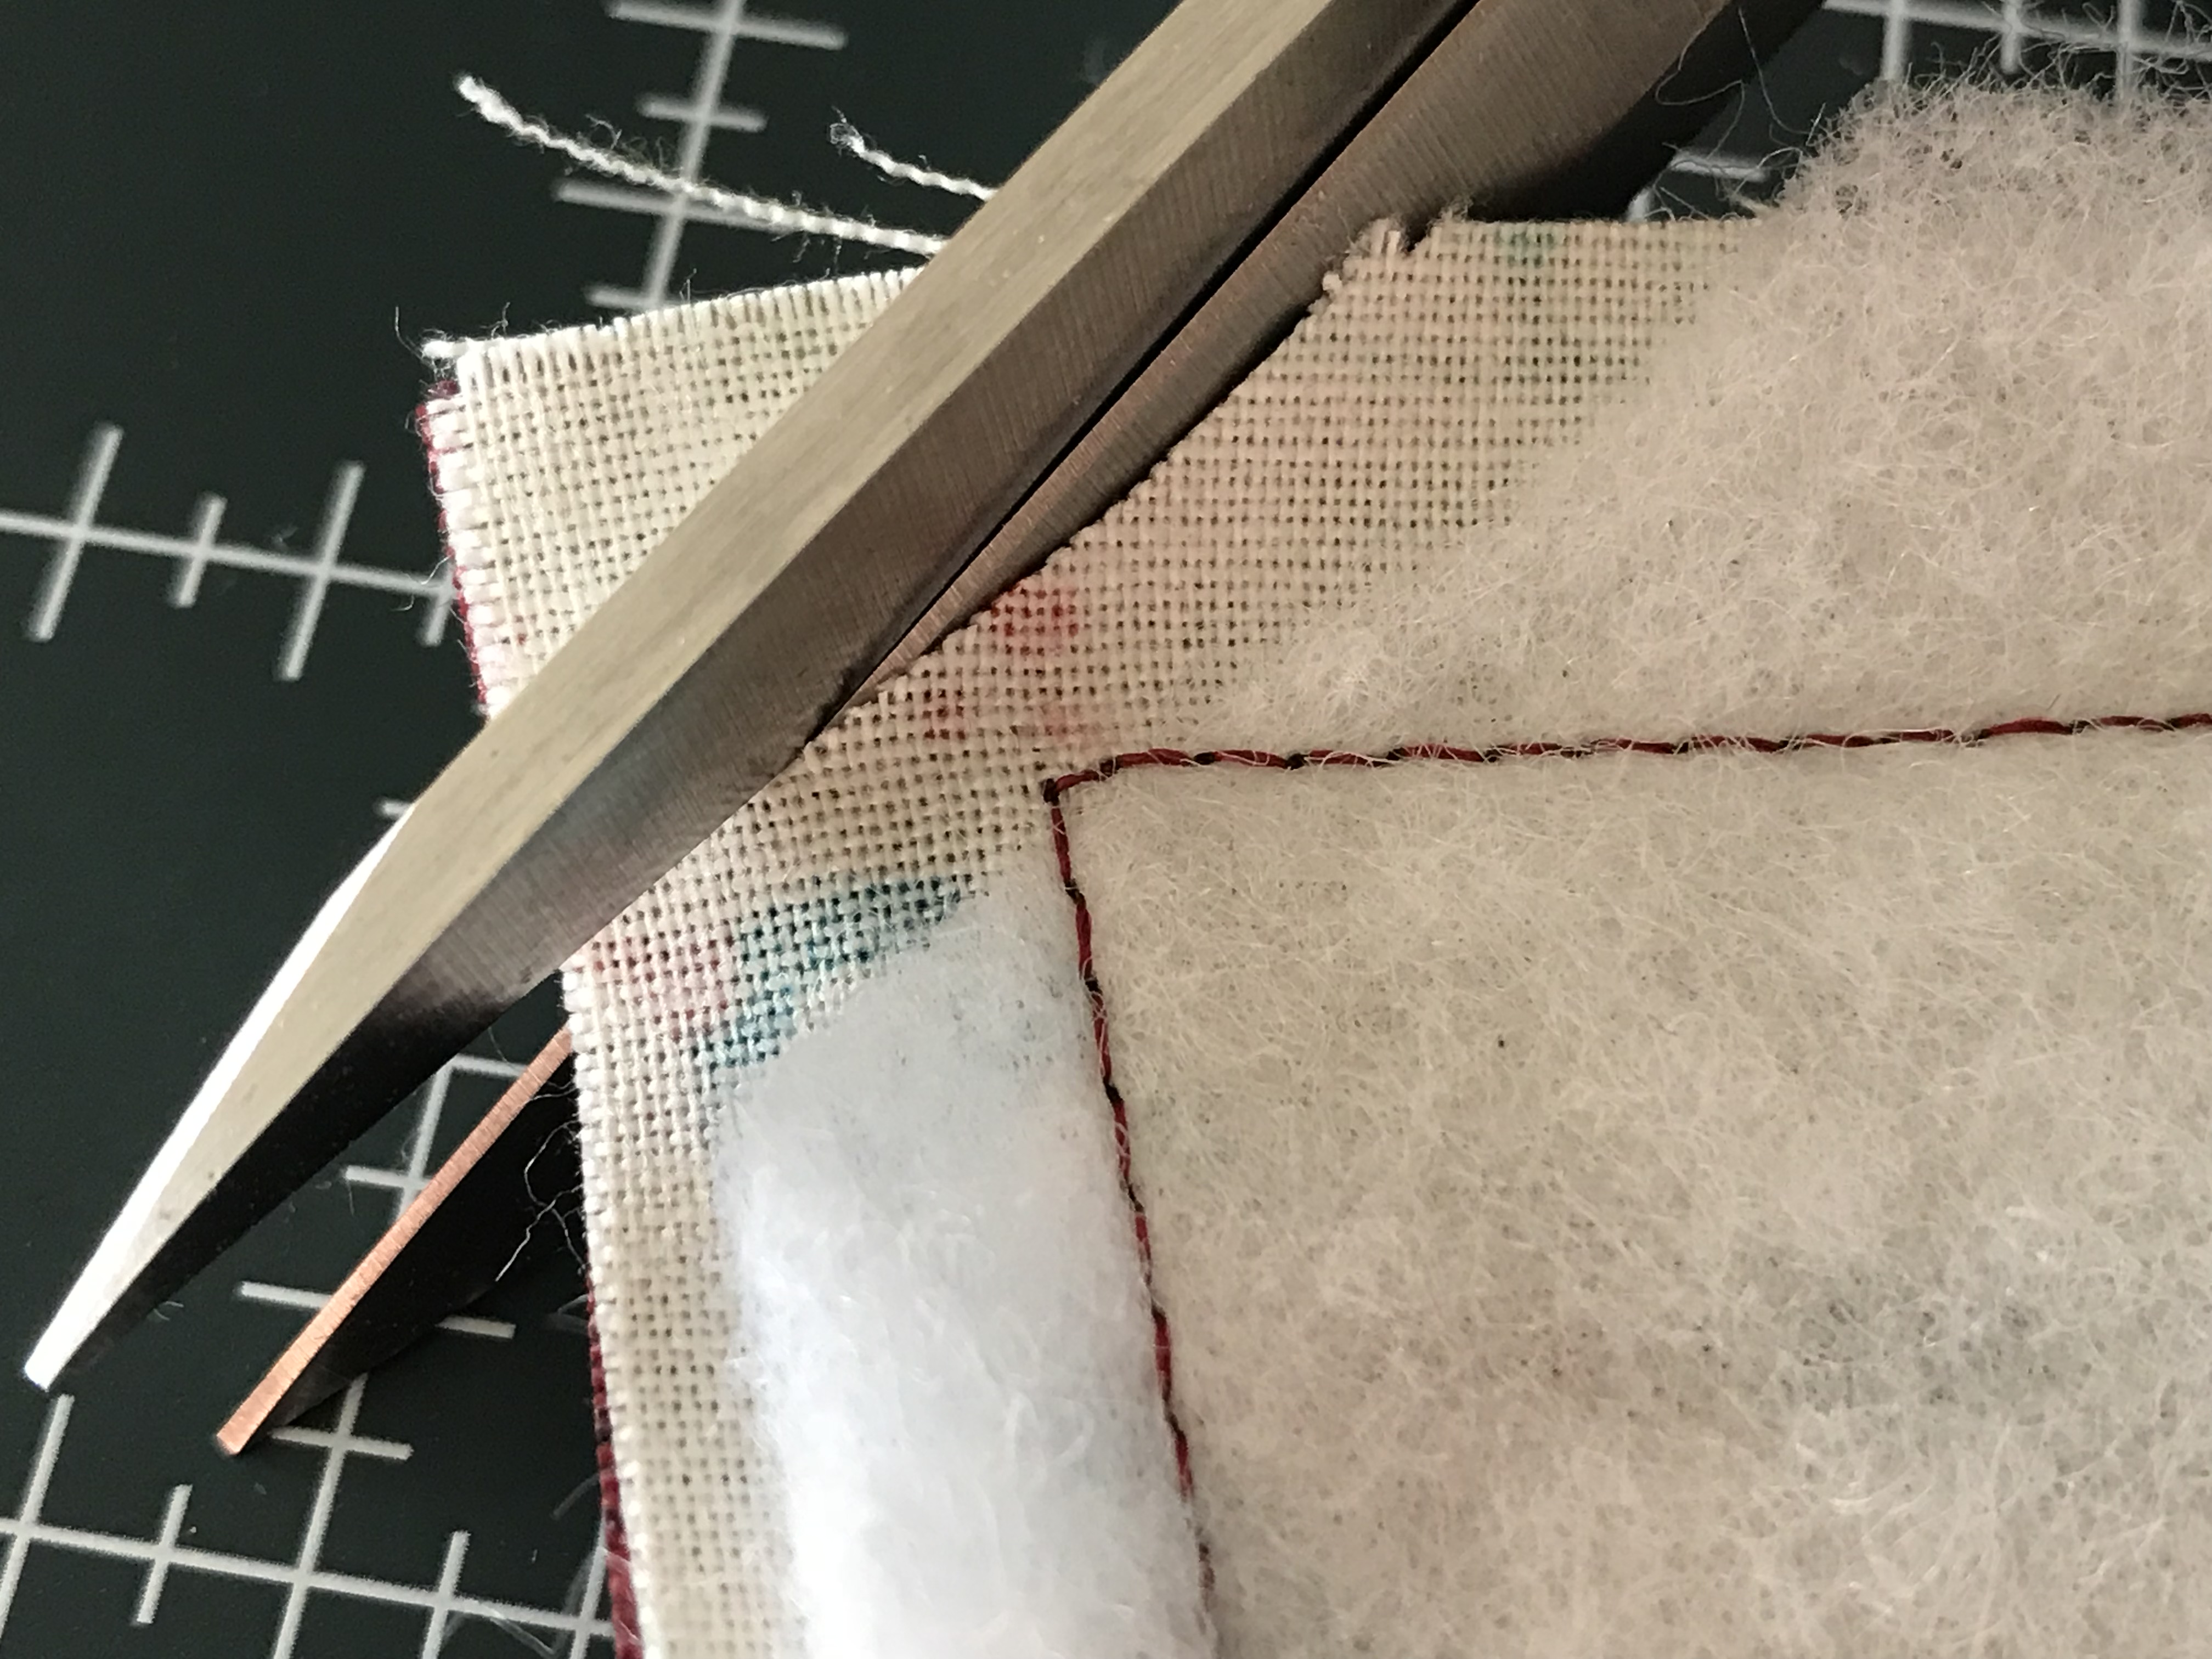
To make it easier to do the pillow case turn with less bulk at the corners, I marked a spot one-half inch in on each corner with a red Prismacolor pencil.

As I approached the corner I trimmed off a triangle of the batting. I also marked the same spot on the top. As I stitched up to the red dot with needle down, I made my right-angle turn.

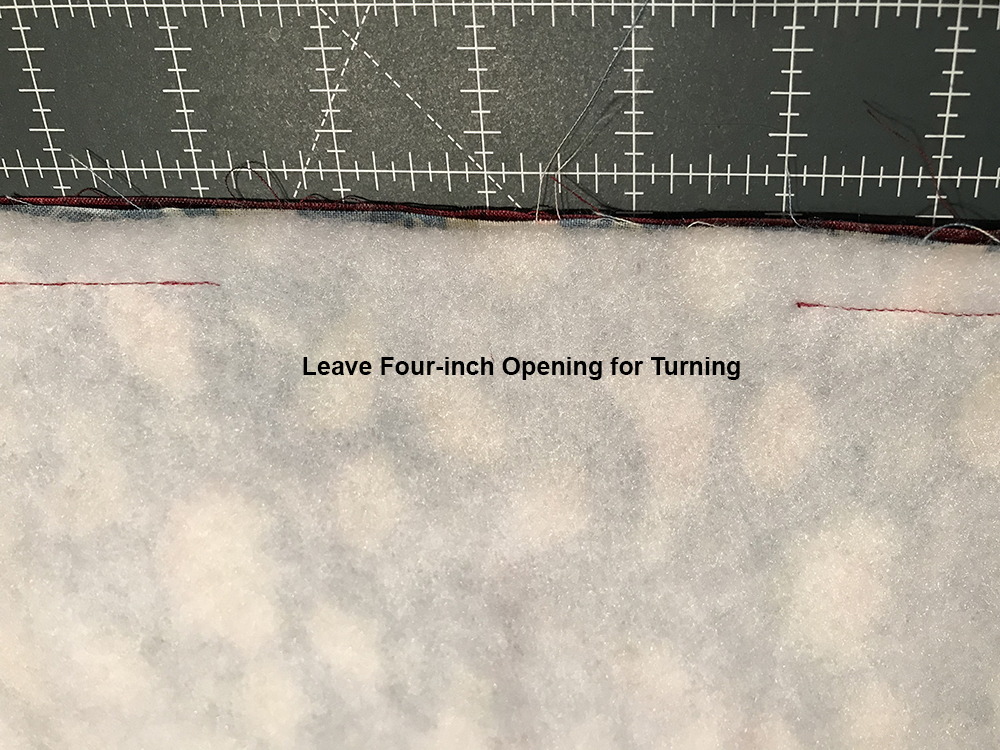
Make sure to leave a four-inch (4″) opening on the narrow sides of your fabric sandwich. Leave this opening to be able to make the pillow case turn later. Stitch up to the opening, then back stitch and cut your thread.
To decrease the bulk in the corners and to create good corners, trim off the fabric corner points about 1/8″ from corner stitching.
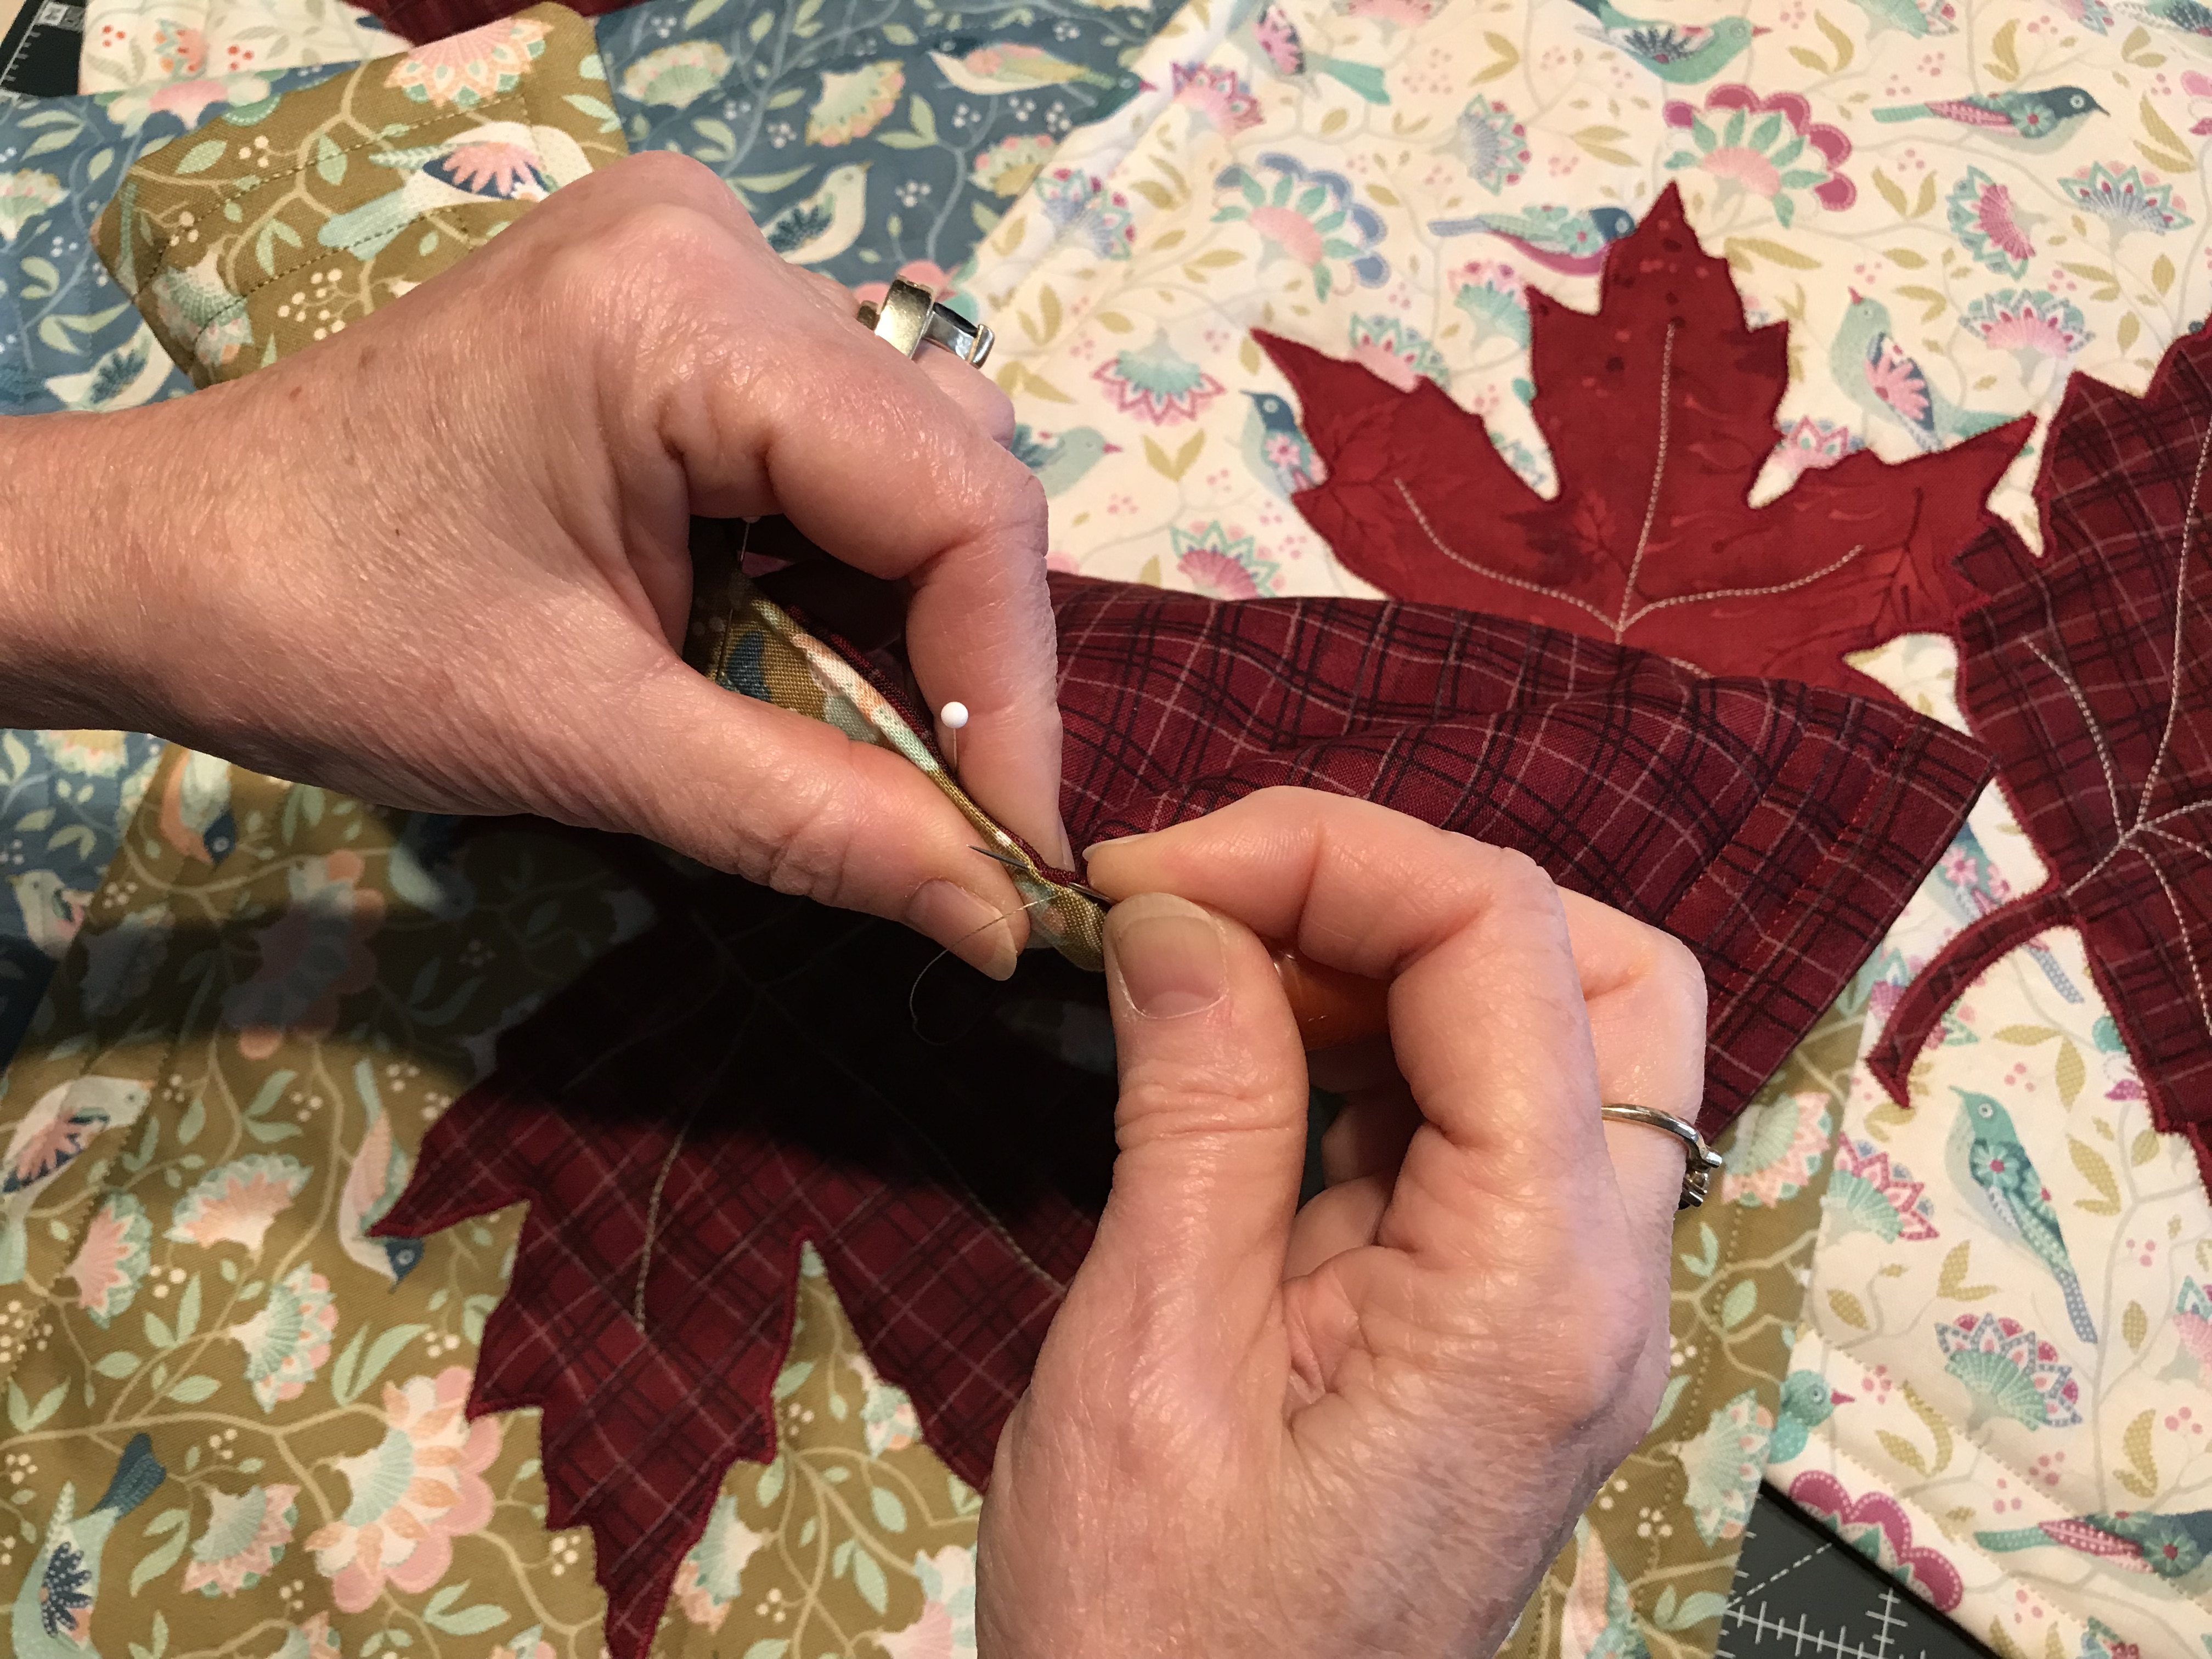
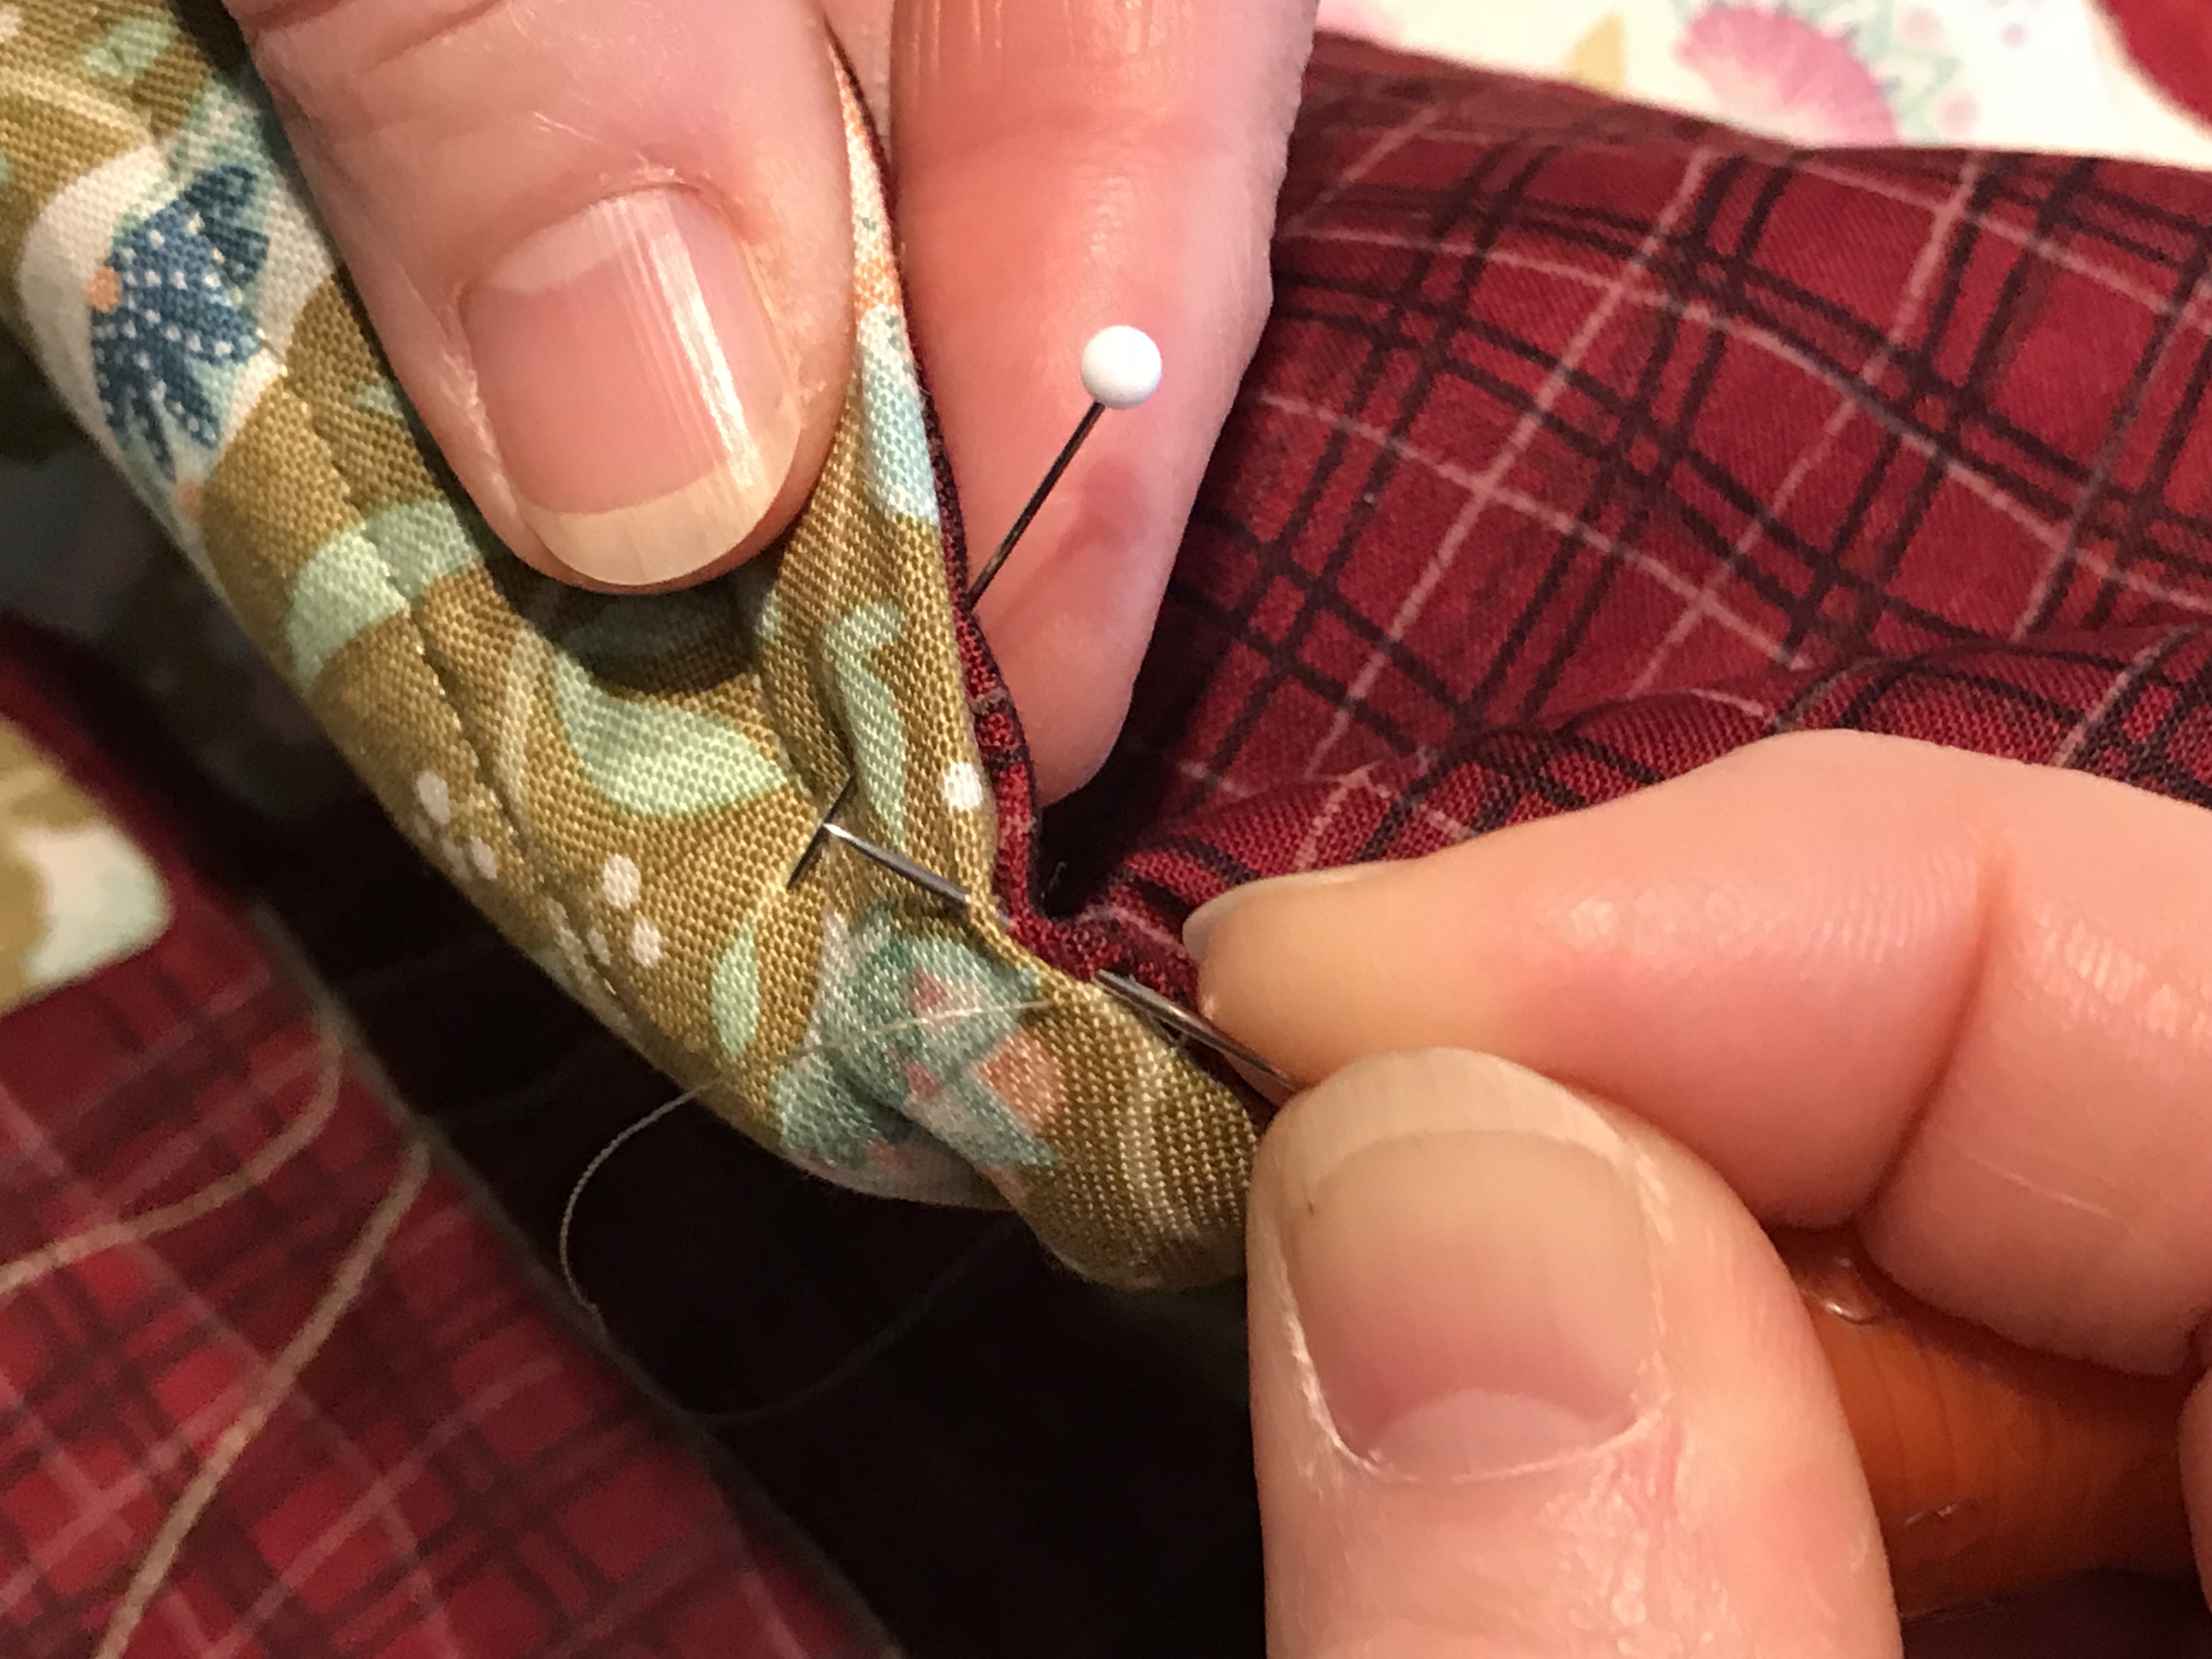
Turn your placemats right side out through the four-inch opening.

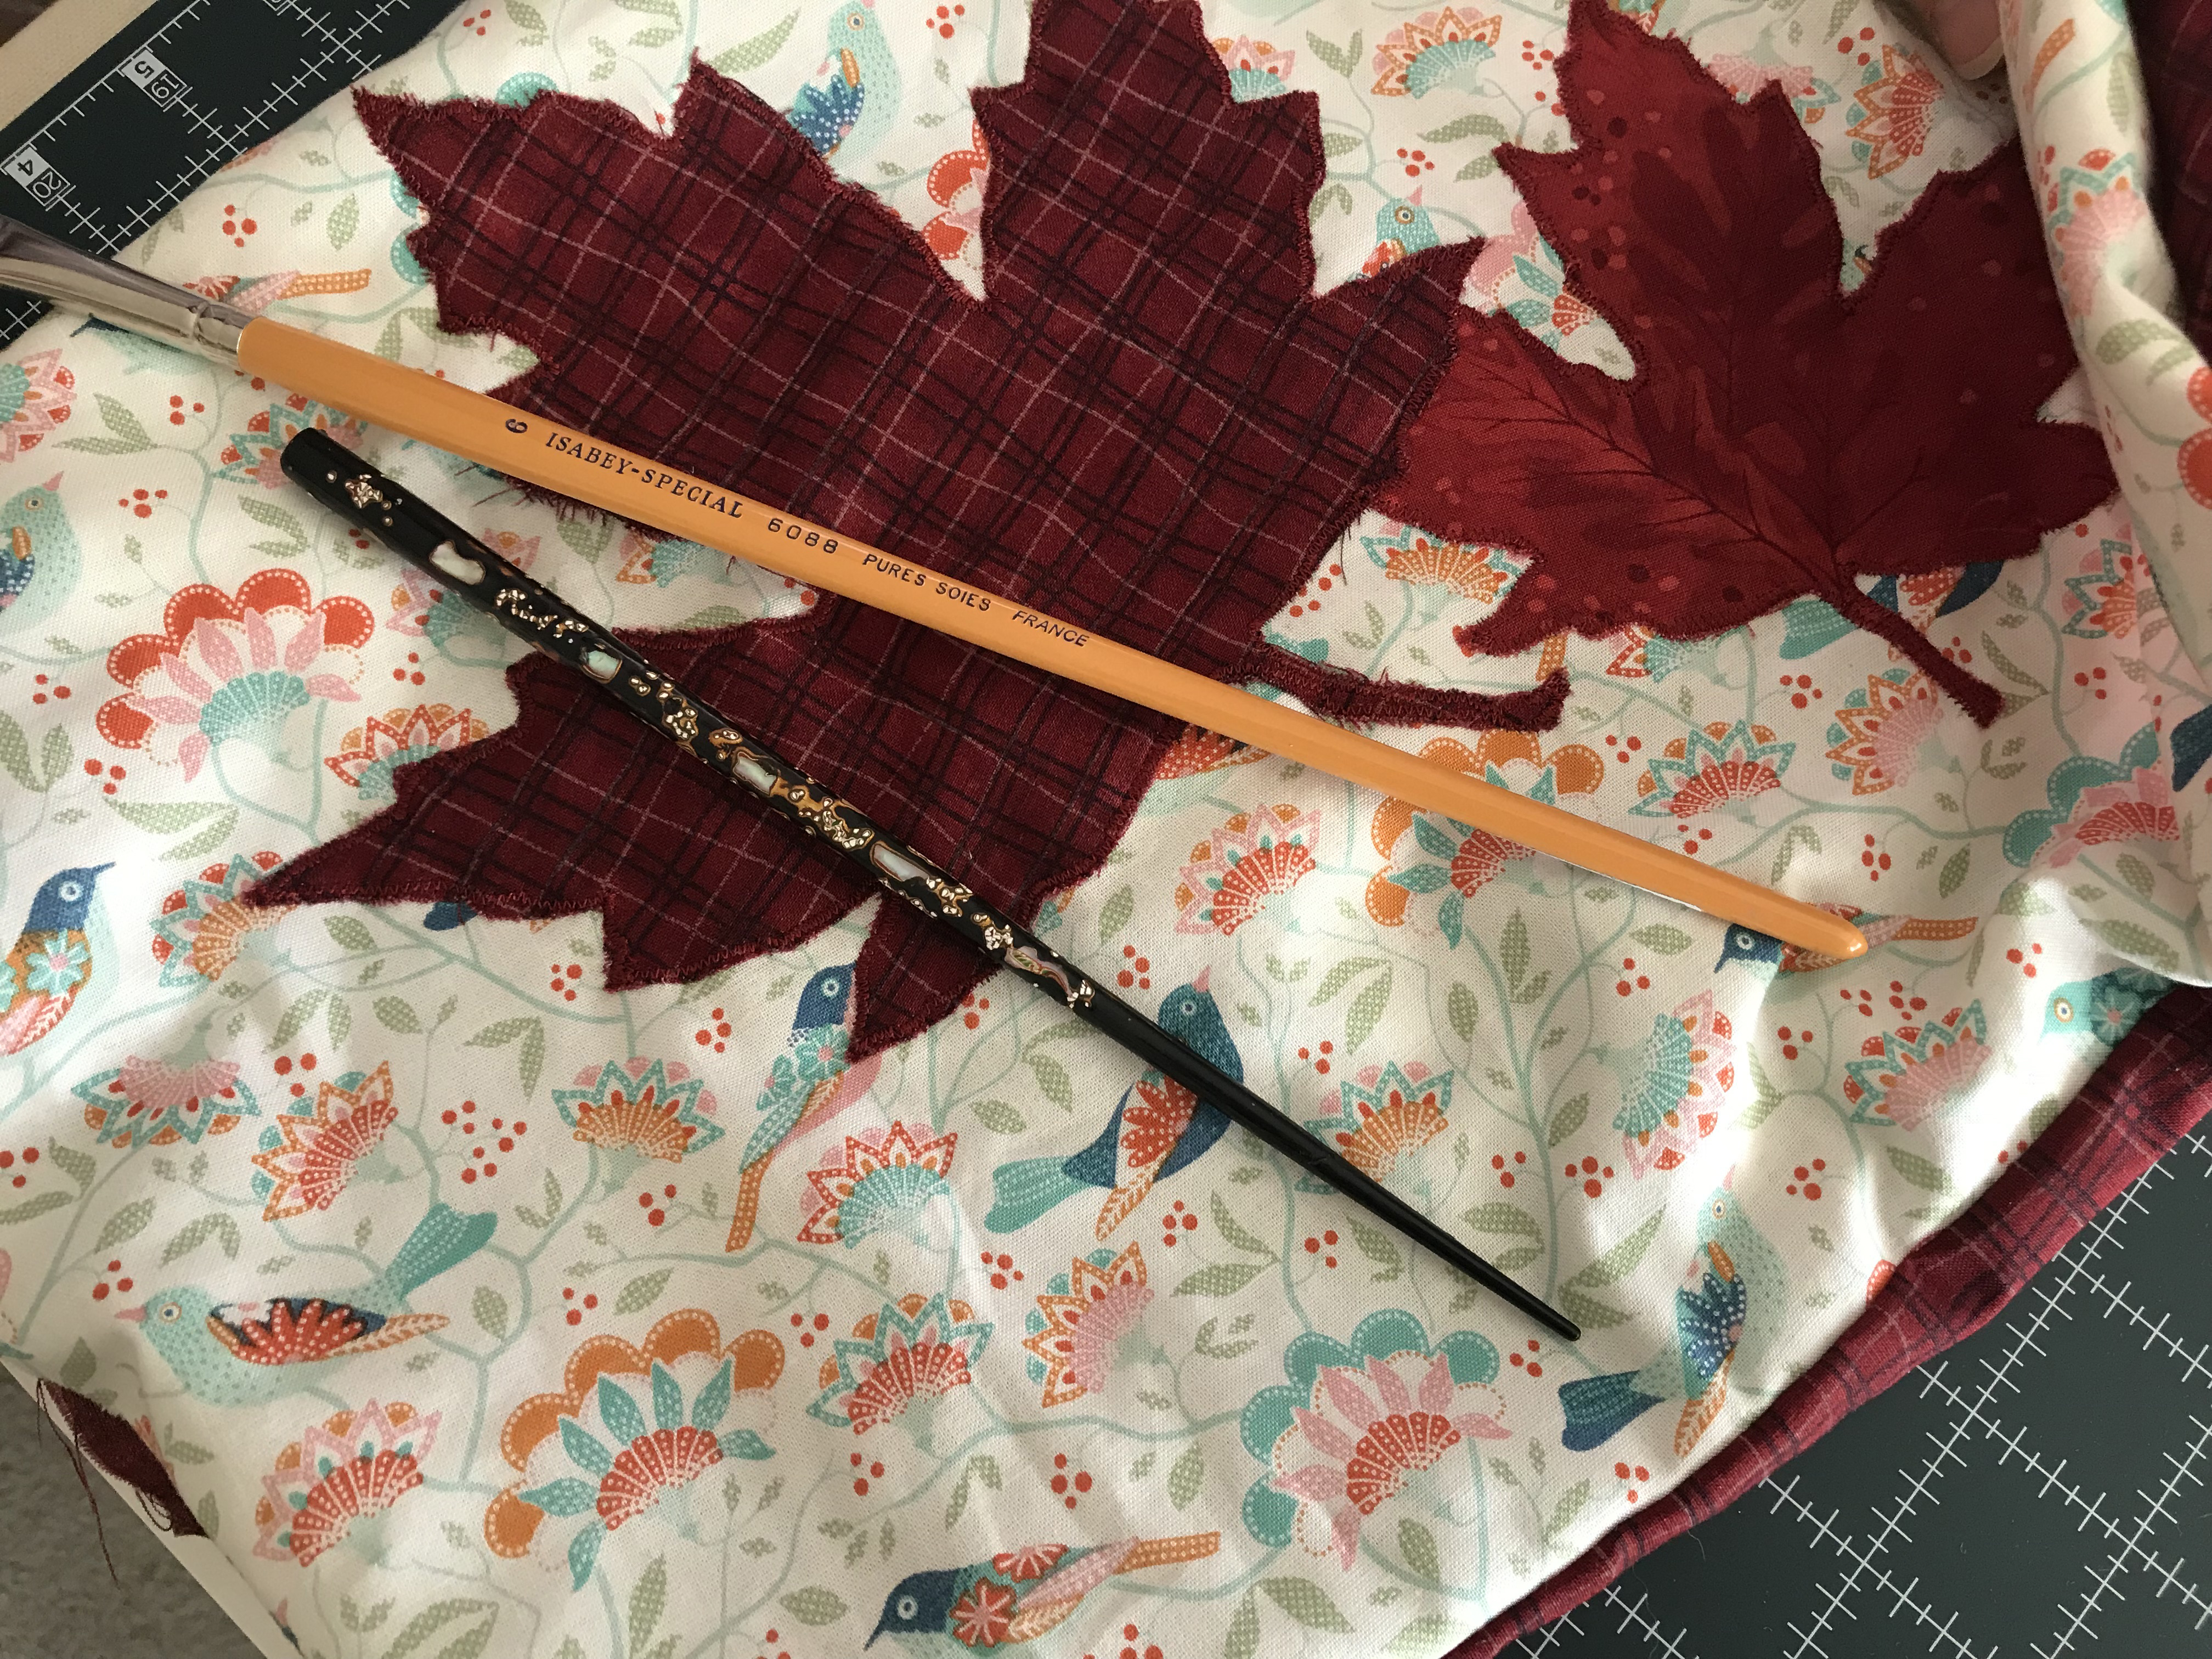
To get the corners fully turned a variety of implements can be used to poke out the corners. Two choices shown here are a chop stick and a paint brush end.

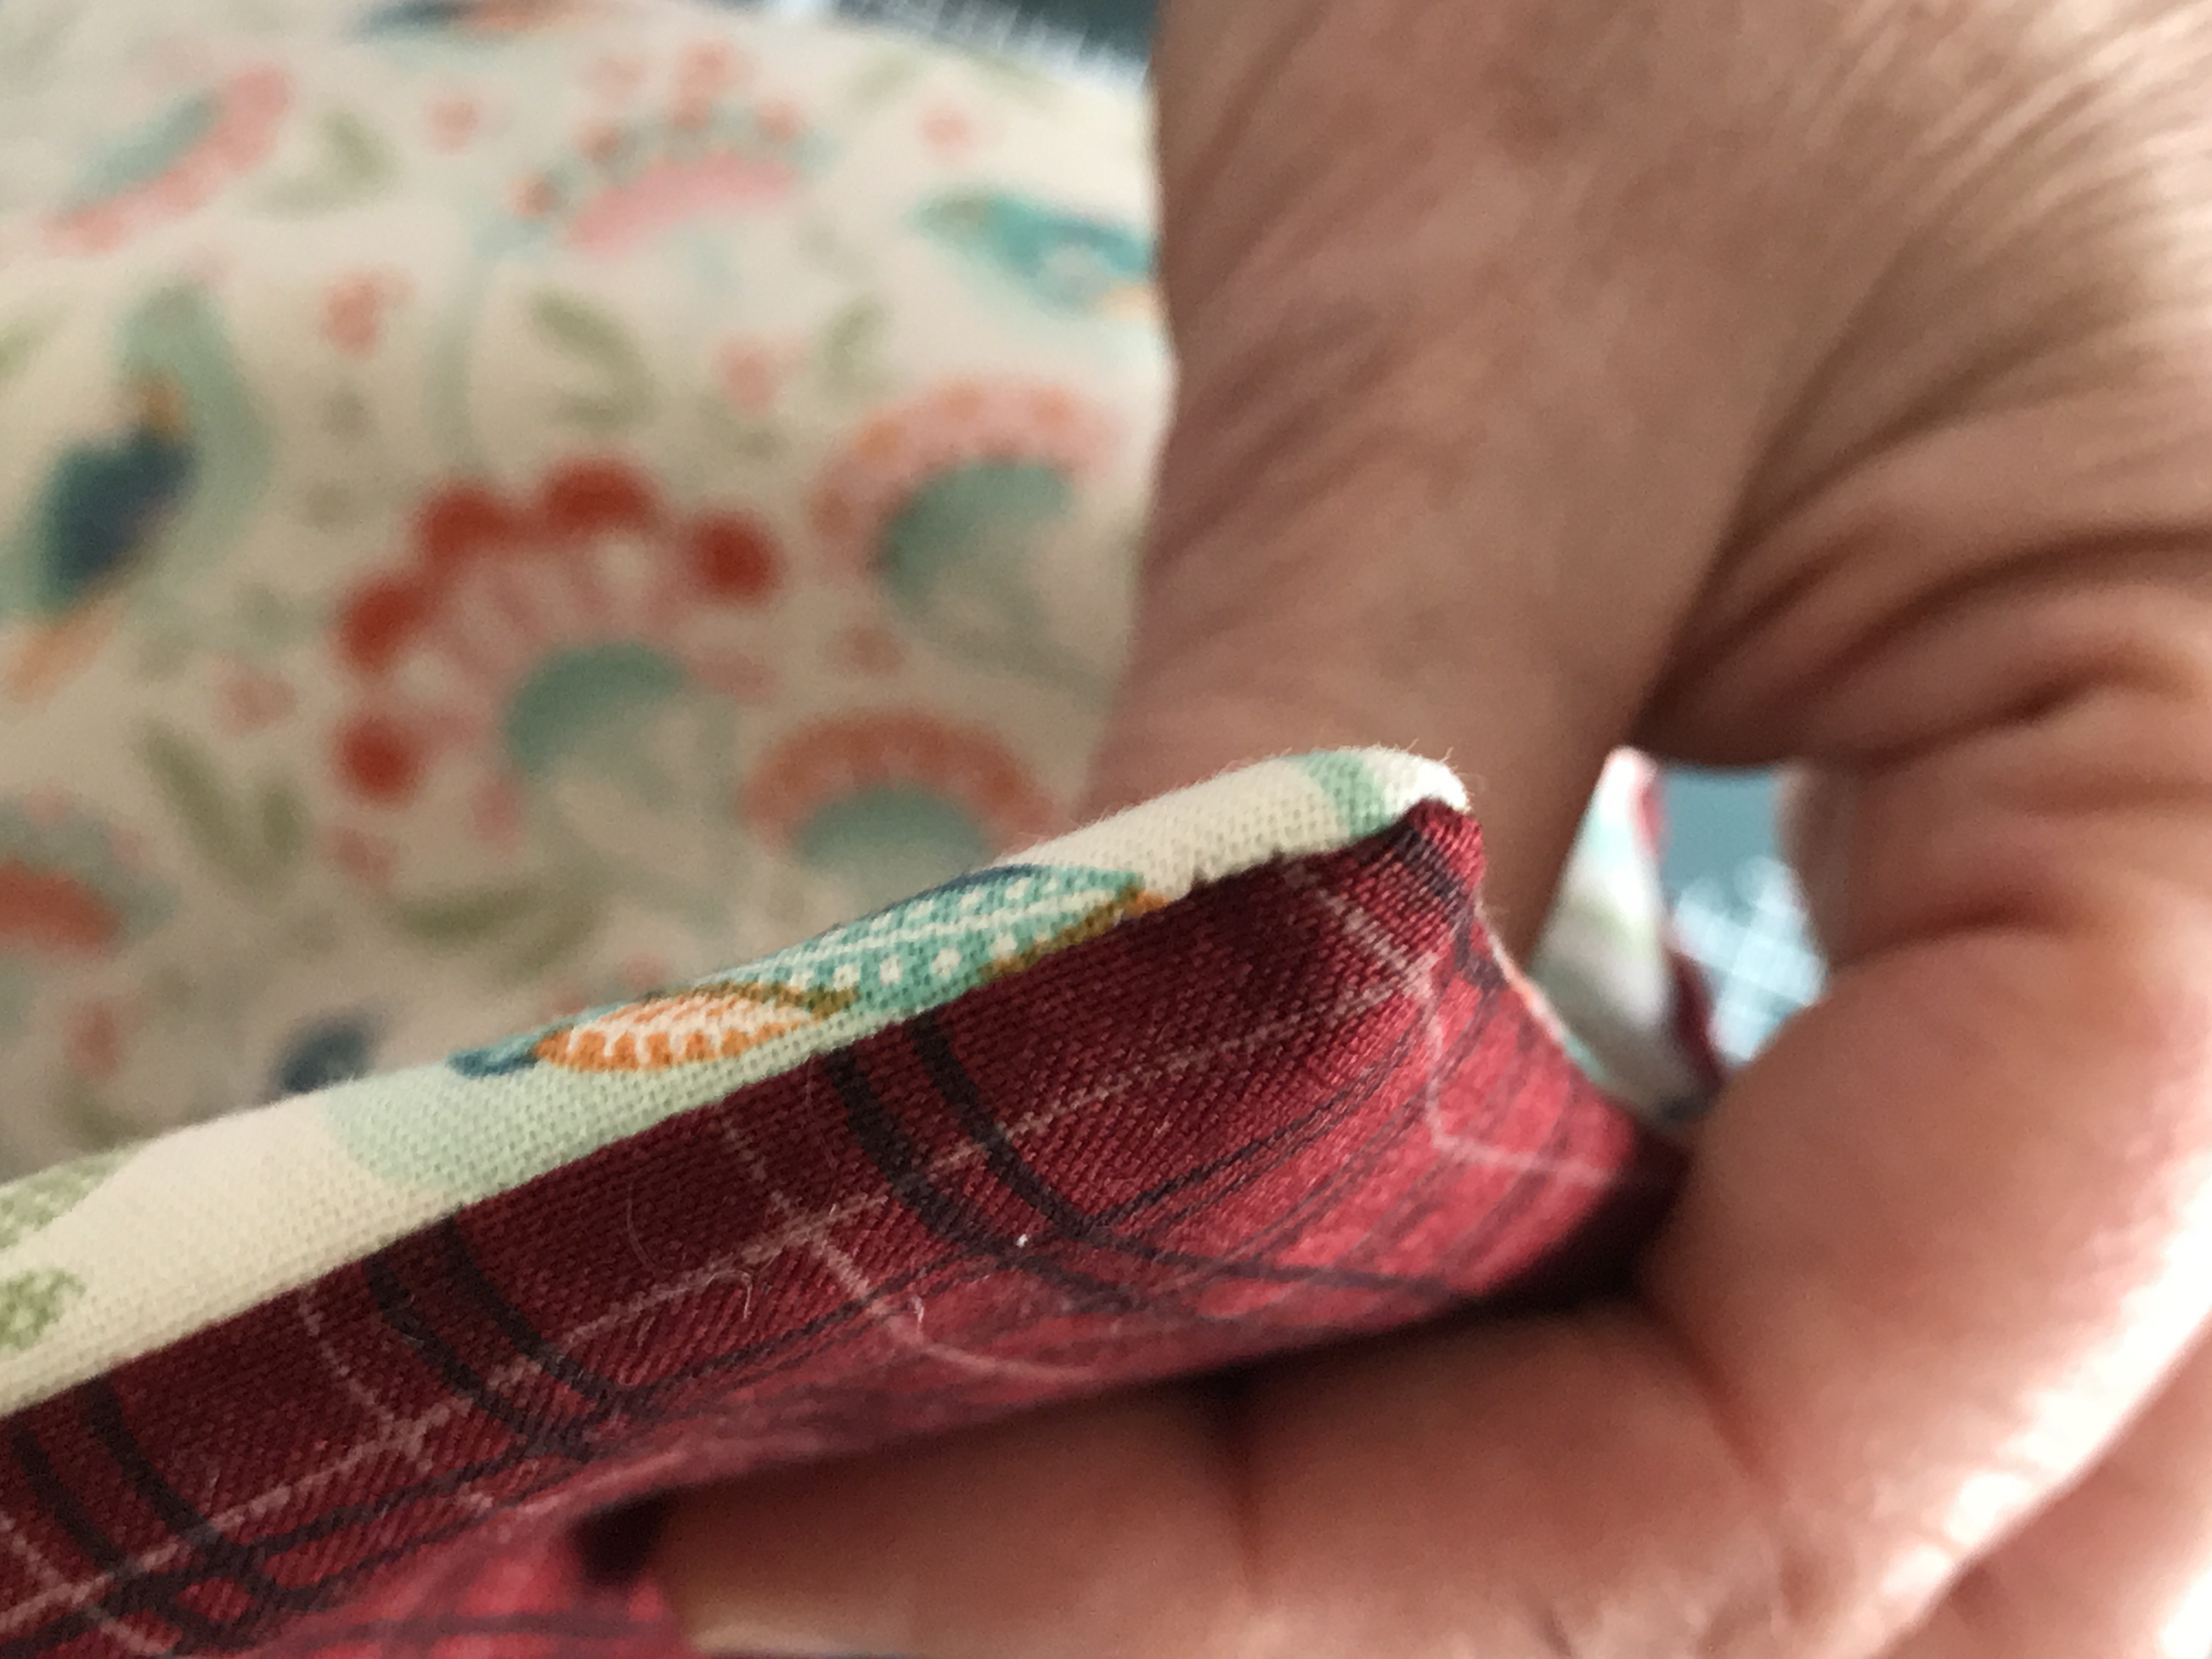
Press the placemat, taking care to push the seam out fully from the inside.
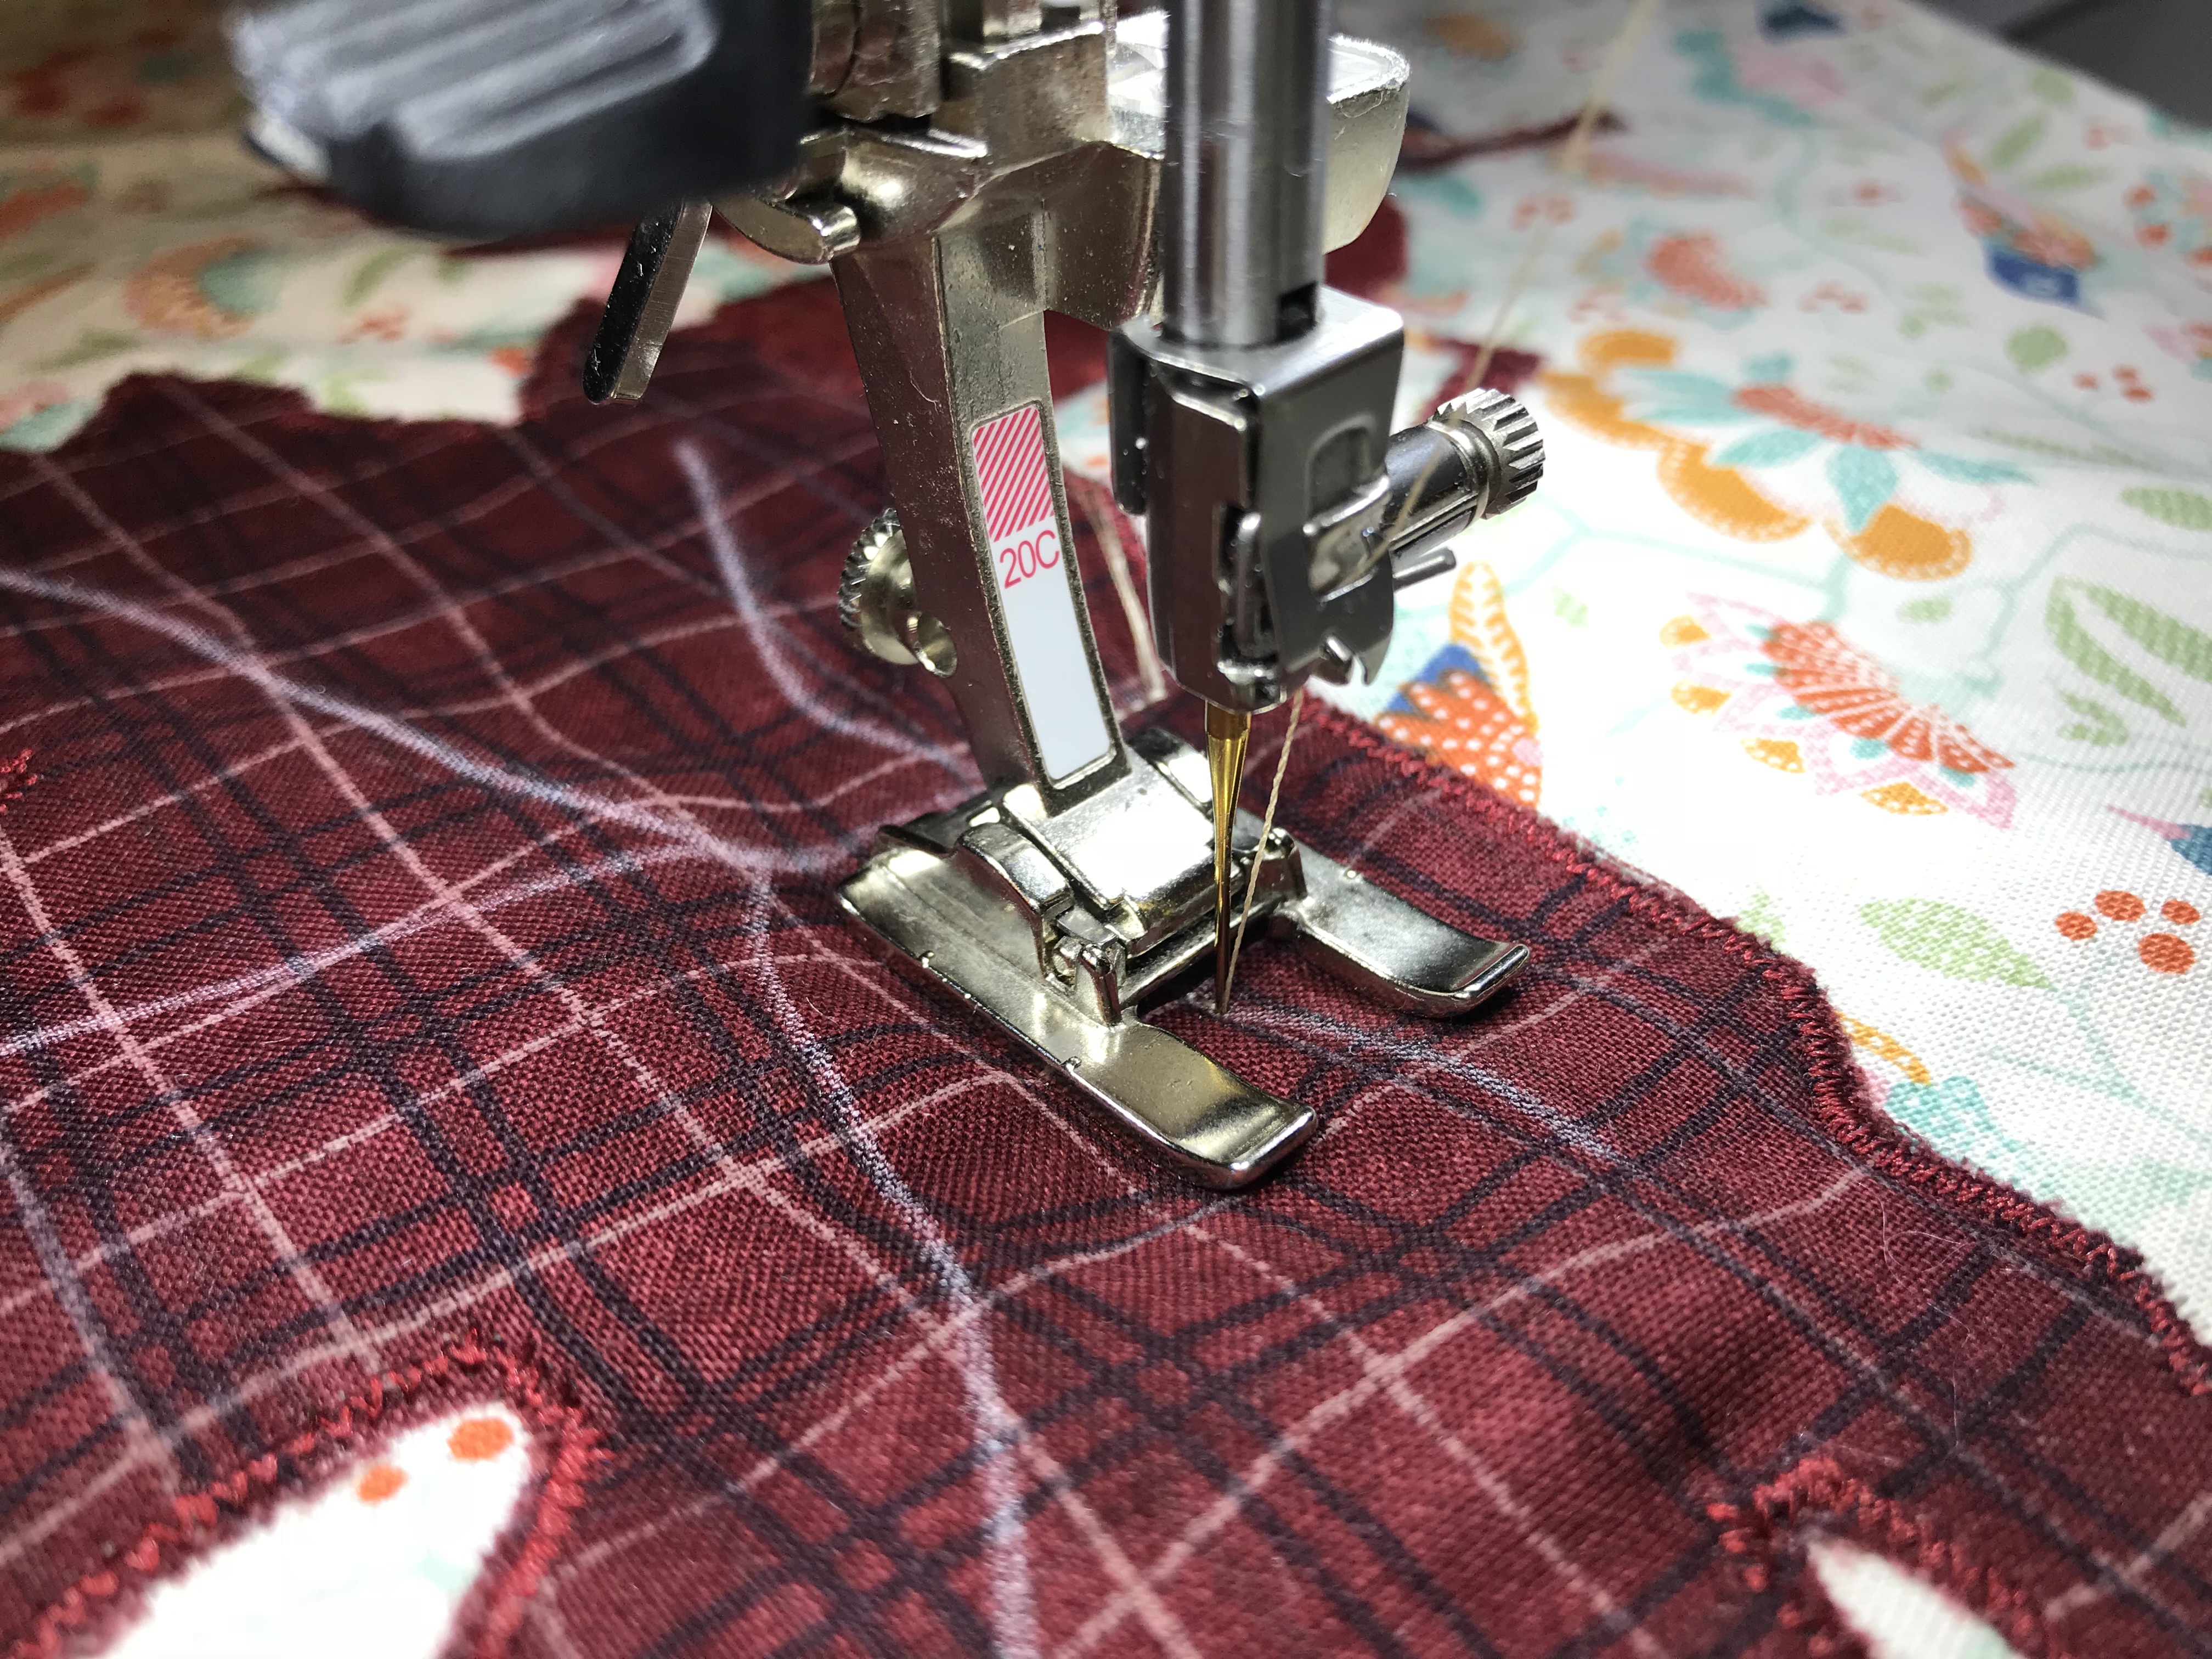
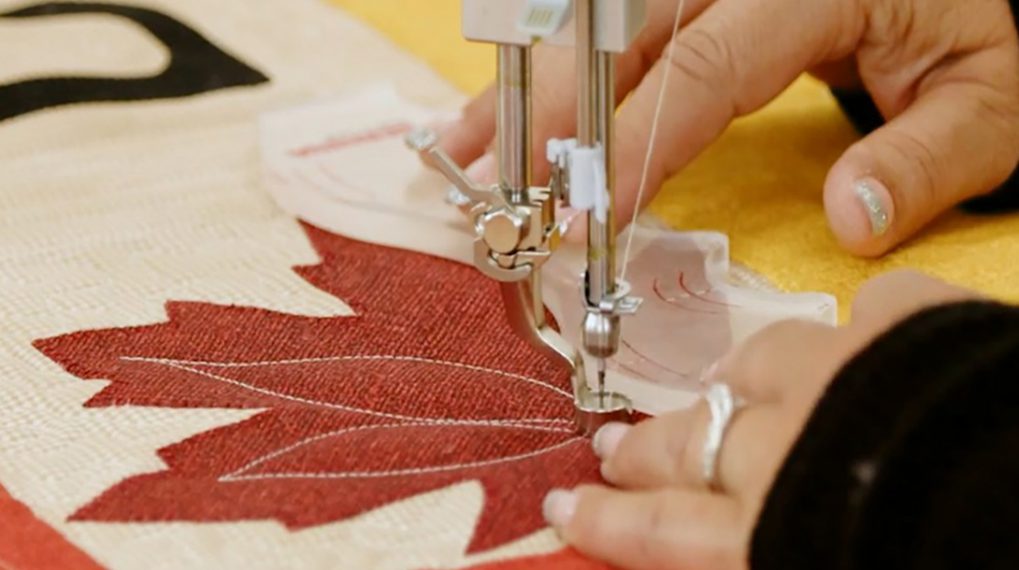
To stabilize all three layers, stitch the veins on the leaves. When I am straight stitching I like to switch to the straight stitch or 0 needle plate.

To minimize puckering of the fabric, start at the center of the placemat by stitching the veins on the leaves. To make this easy, use a colored pencil and lightly draw the veins on the leaves. I chose a thread color that echoed the placemat background on the leaves. Again, my preference is to use the 20D presser foot, so, I can see where I am stitching. You can also use the 37 or 37D foot as the front of it is open as well.
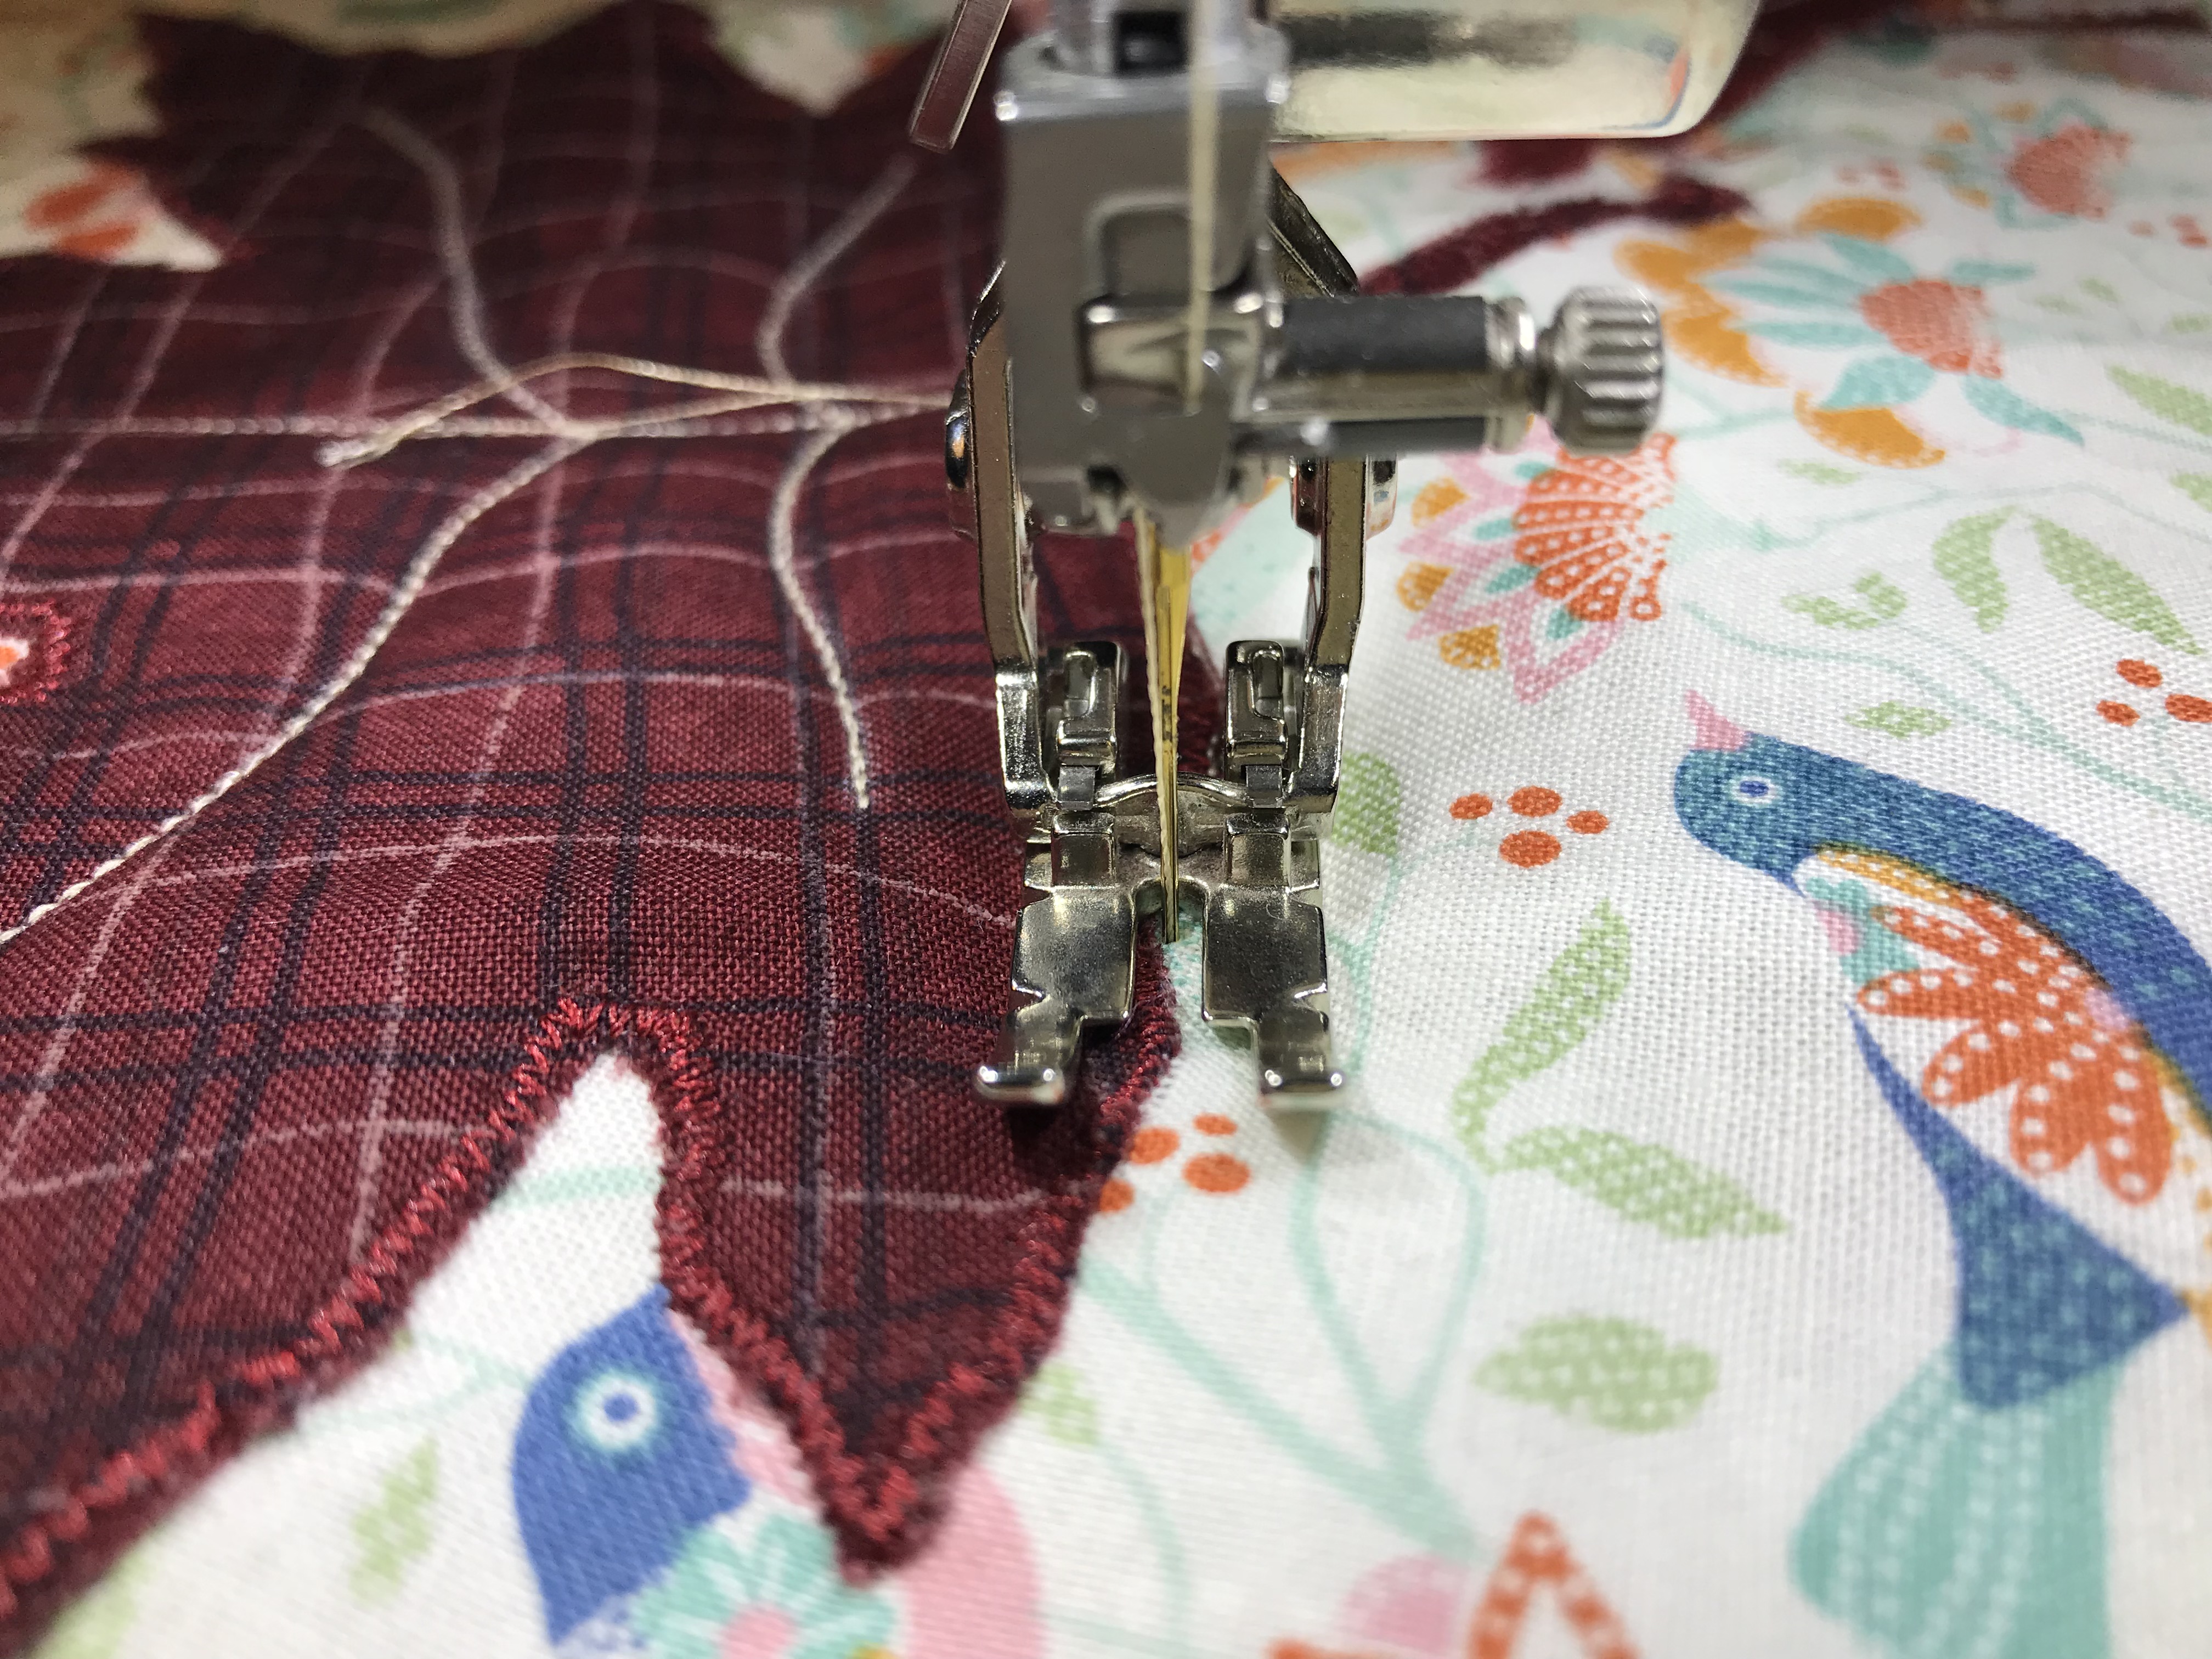
Once the veins are stitched in, I shifted to the 37D foot for stitching closely around the leaves, using the background color thread. The 37D foot gives more support to the fabric. I placed the left part of the foot over the zig-zag raw edge applique of the leaves to press it down as I stitched along the outside edge. You may also use the 37 Presser Foot as you do NOT need to engage the BERNINA Dual Feed to stitch around the leaves.

Finish the edges by quilting a double line of stitches around the edges of the placemat. For the first border I switched to the 1D foot, again, so I could use the right edge of the foot as a guide along the outside of the placemat.
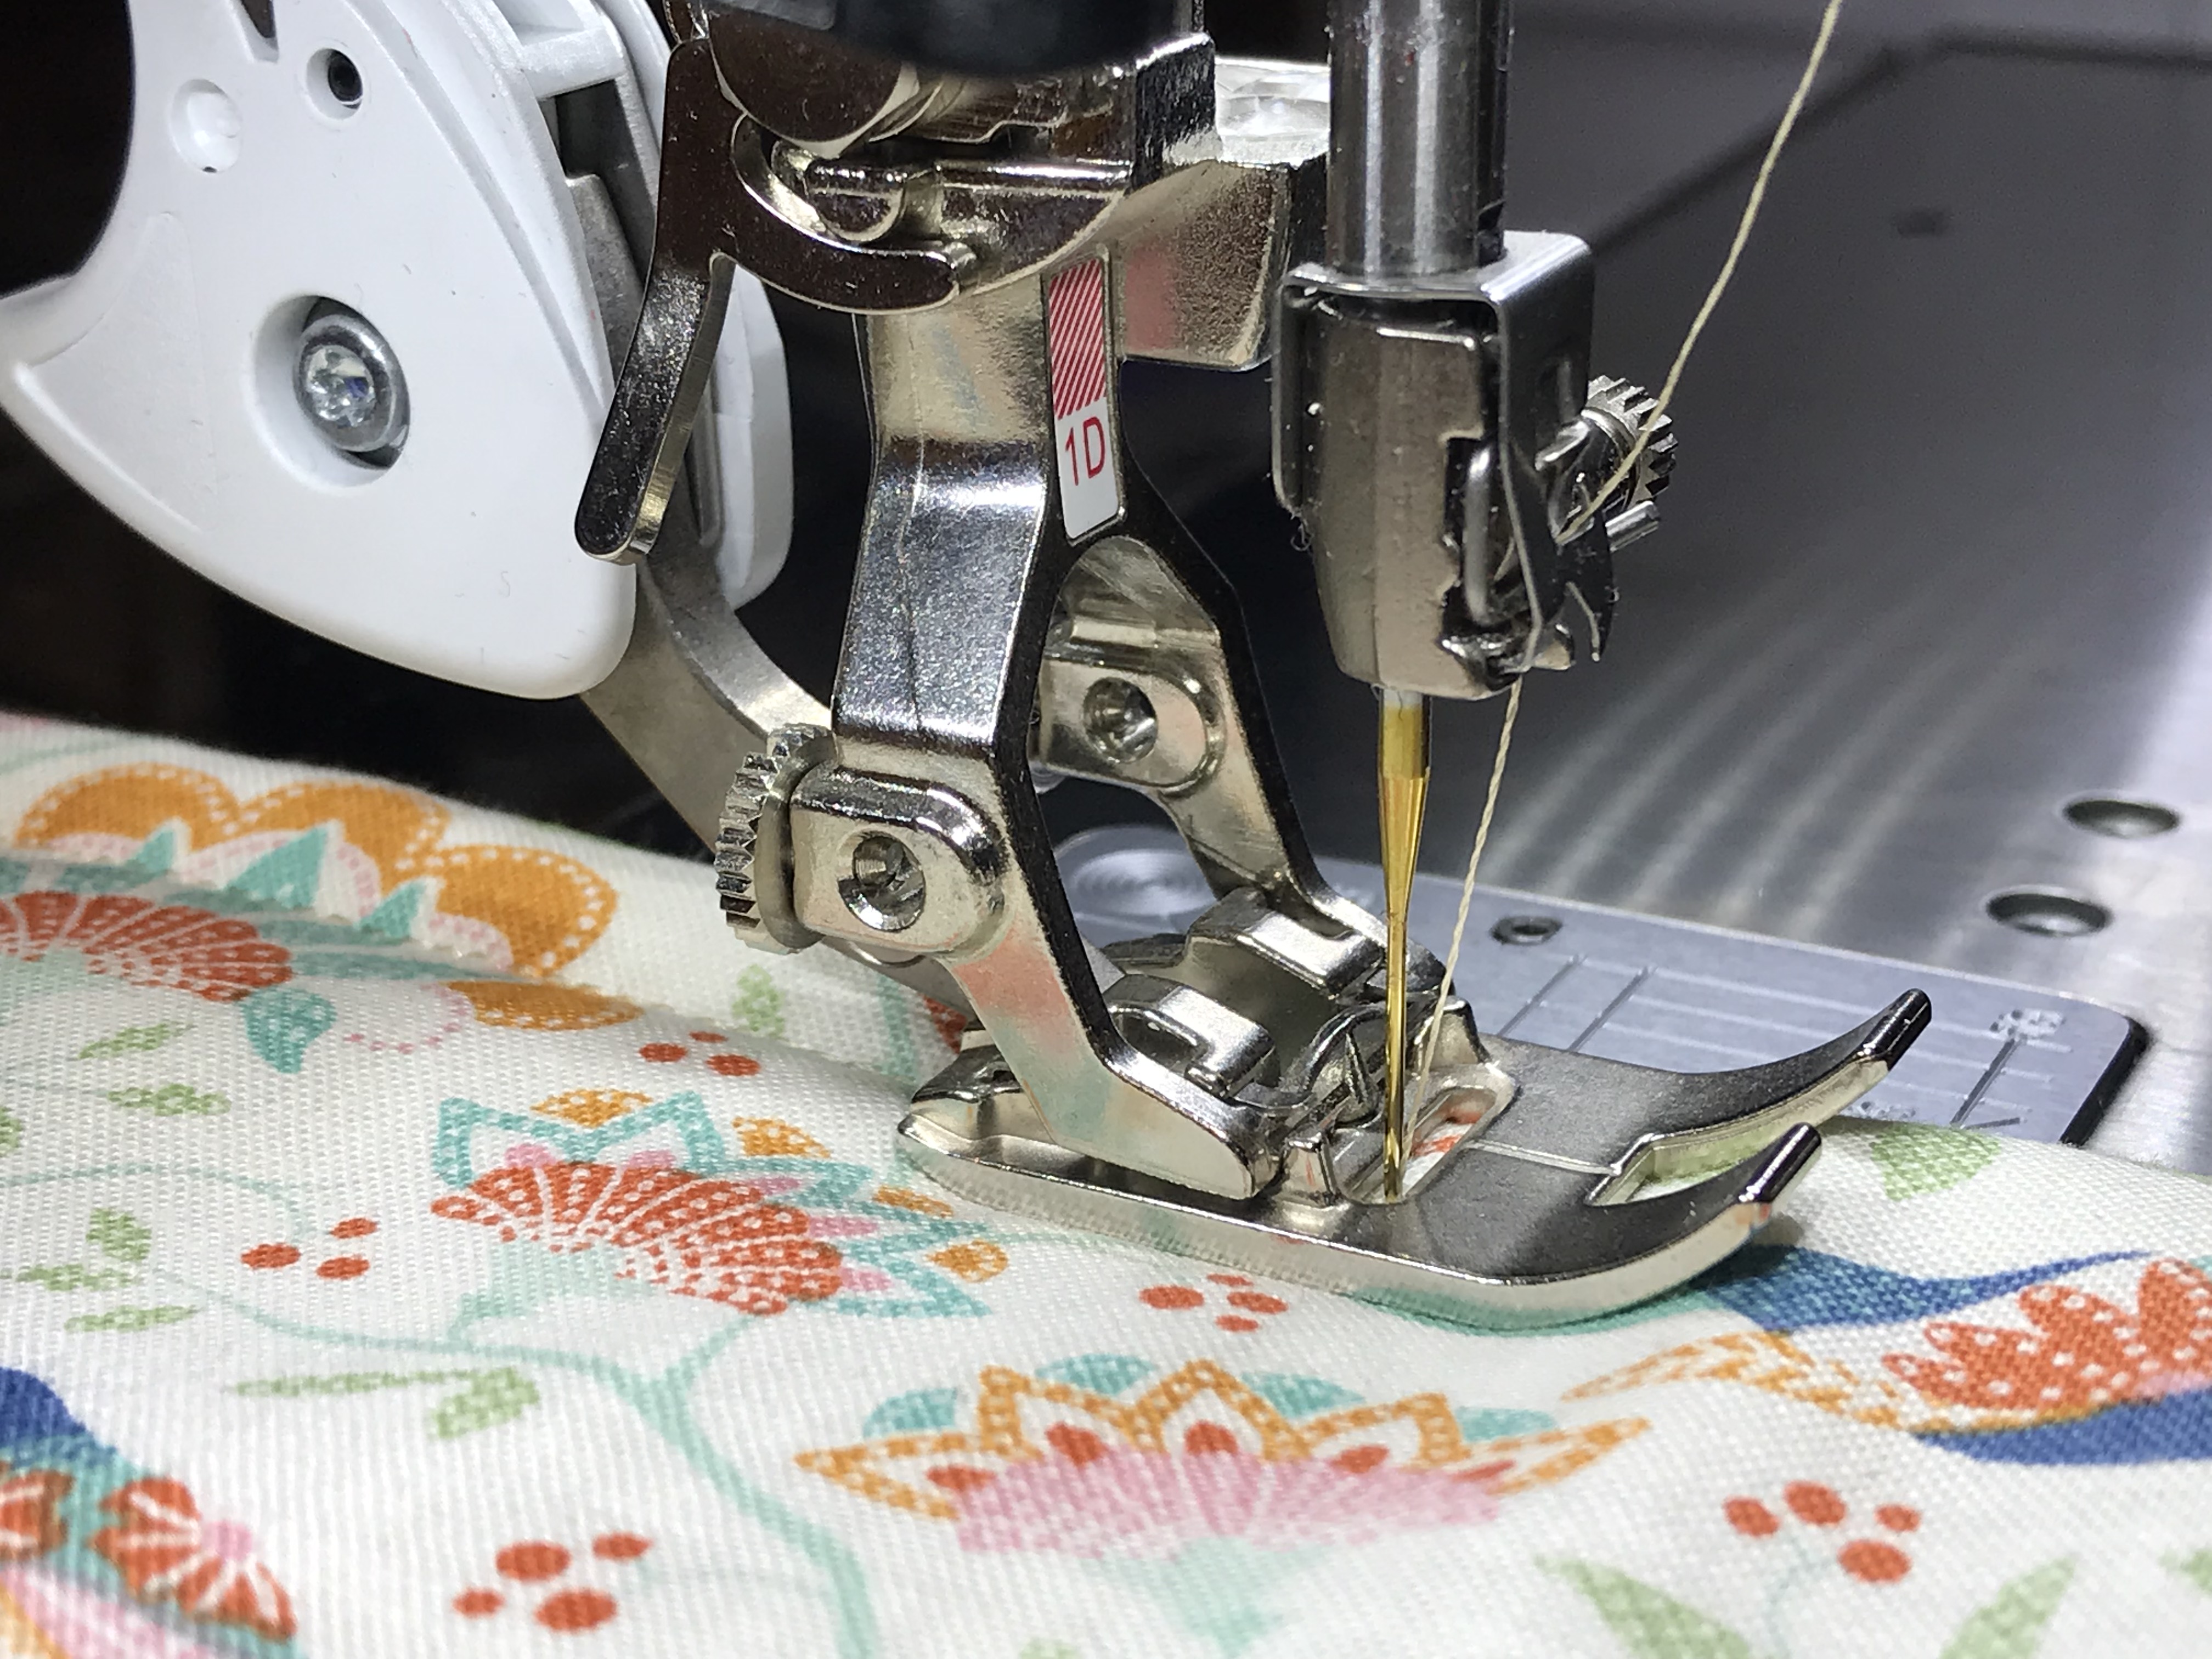
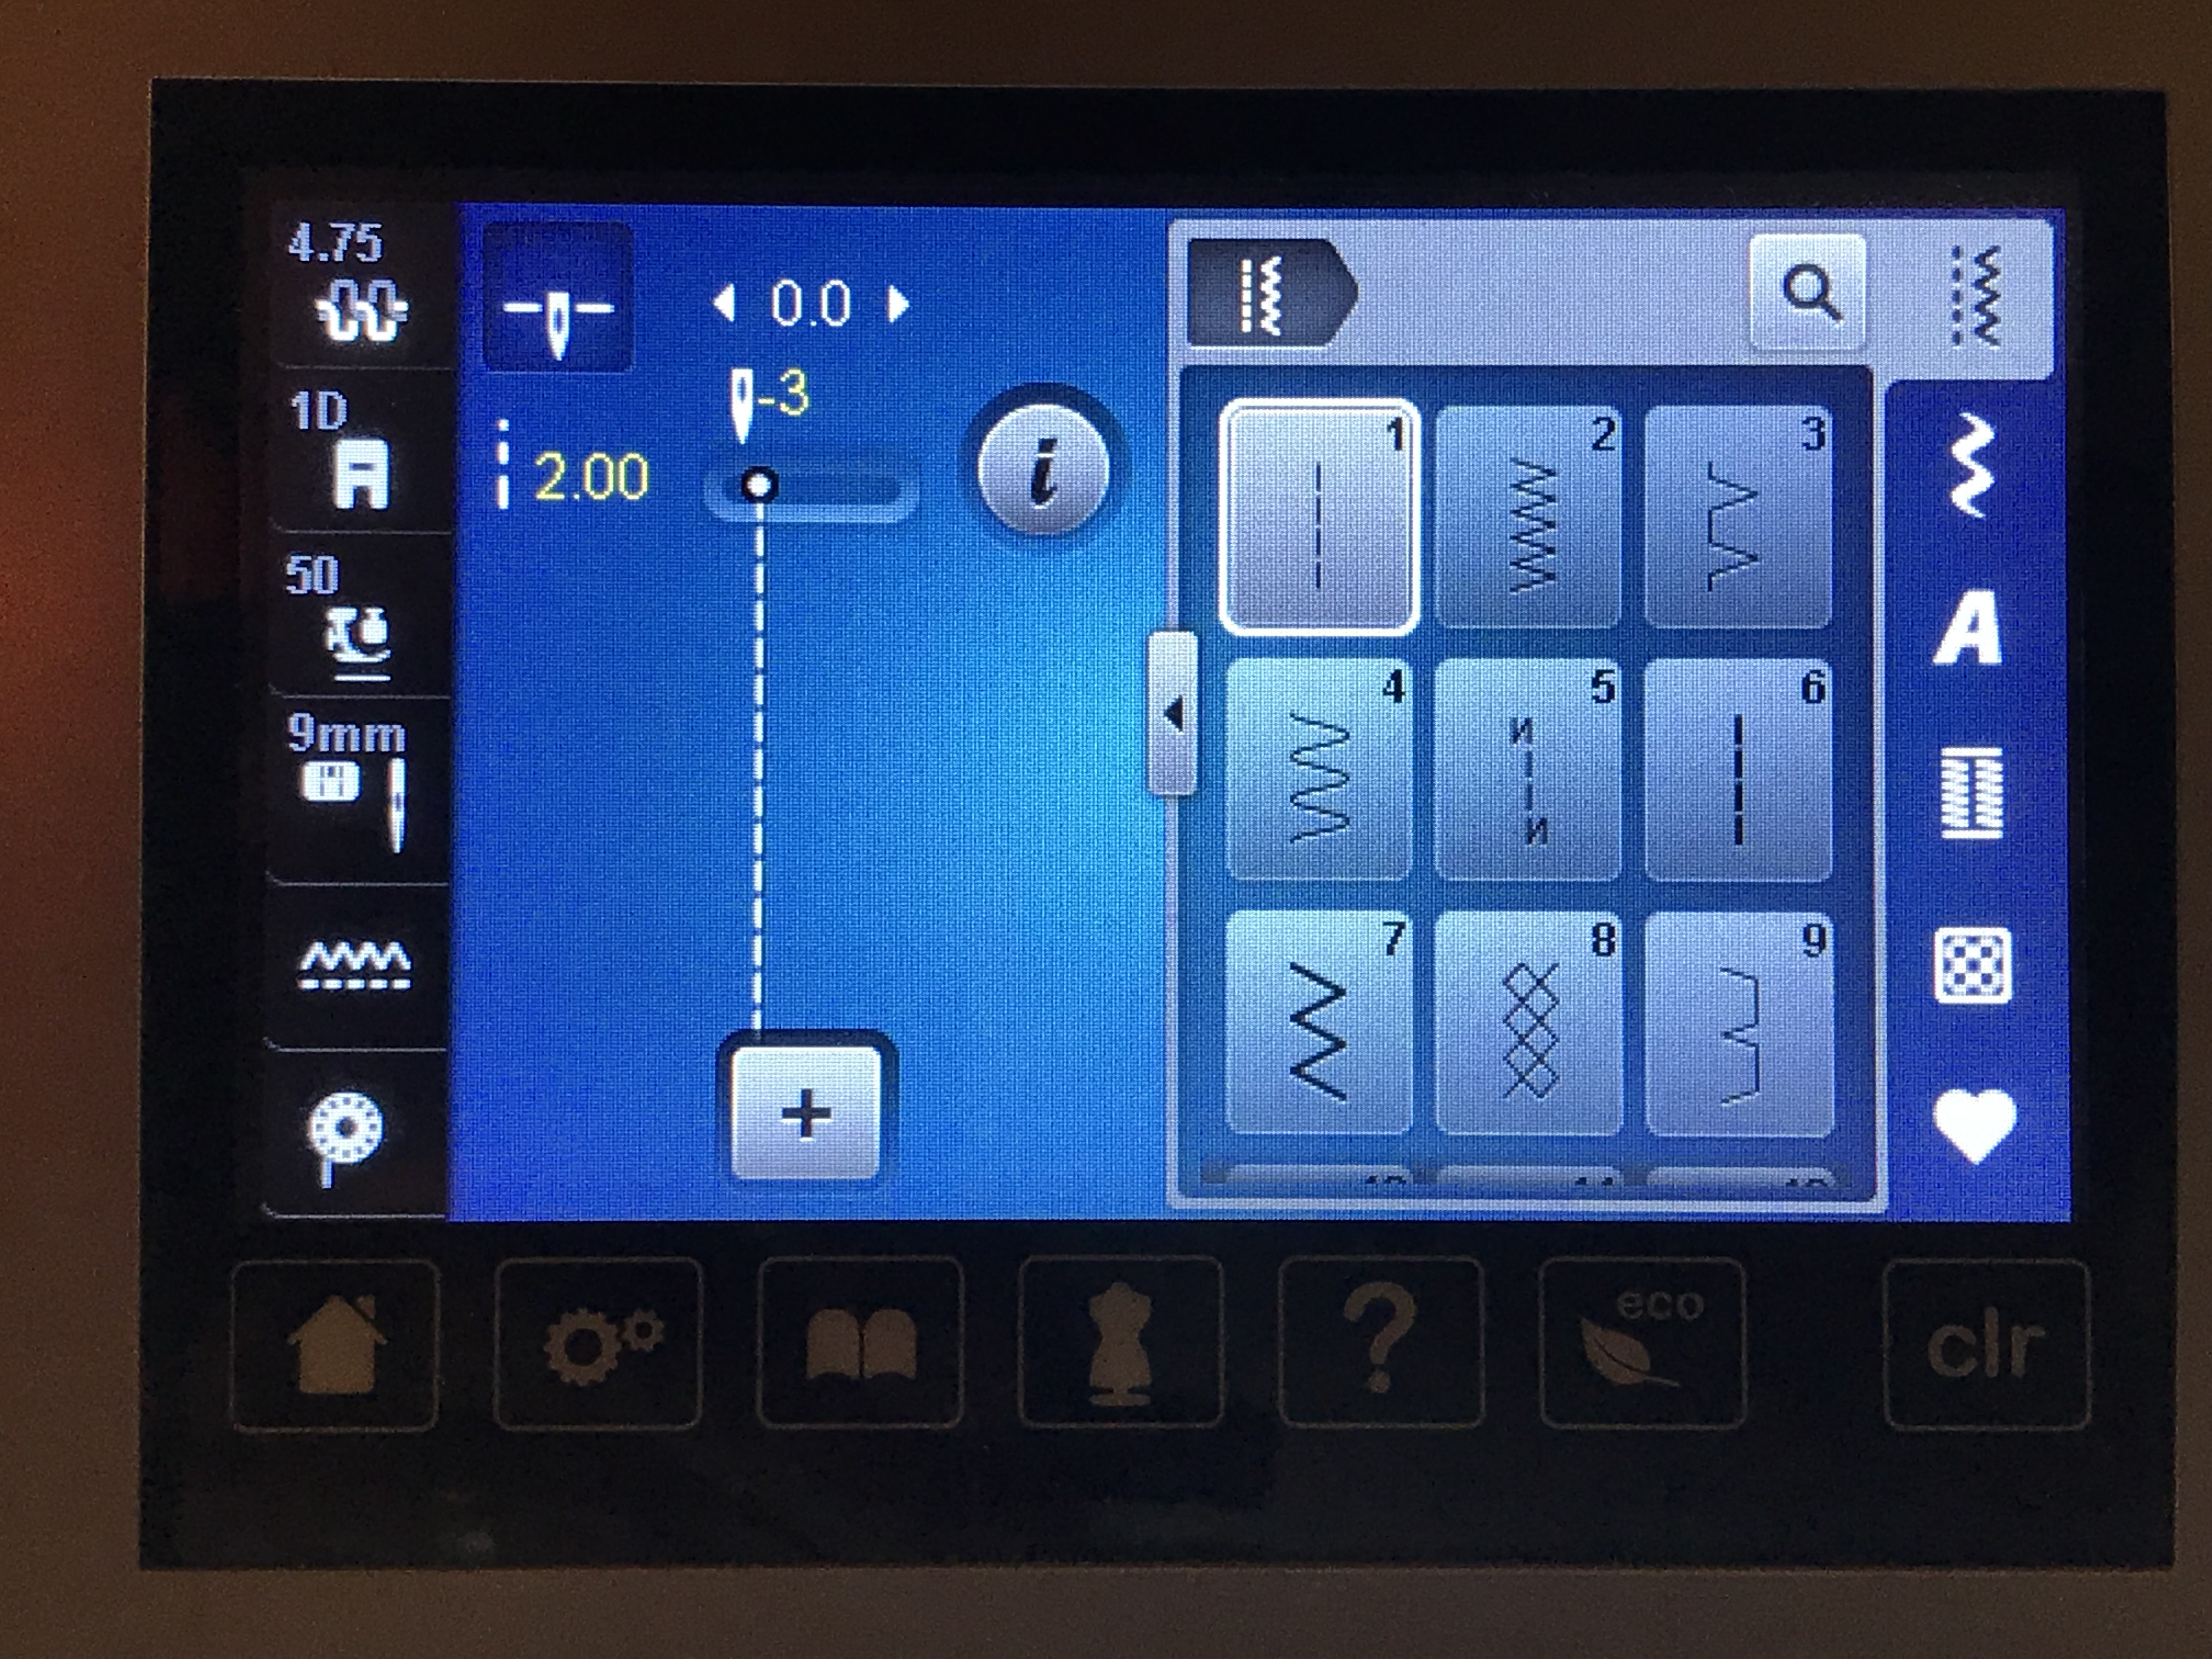
Because I wanted to offset my needle, I switched back to the zig-zag needle plate. My needle offset was -3 to the left. And again, I took advantage of the BERNINA Dual Feed, engaging it with the 1D foot.

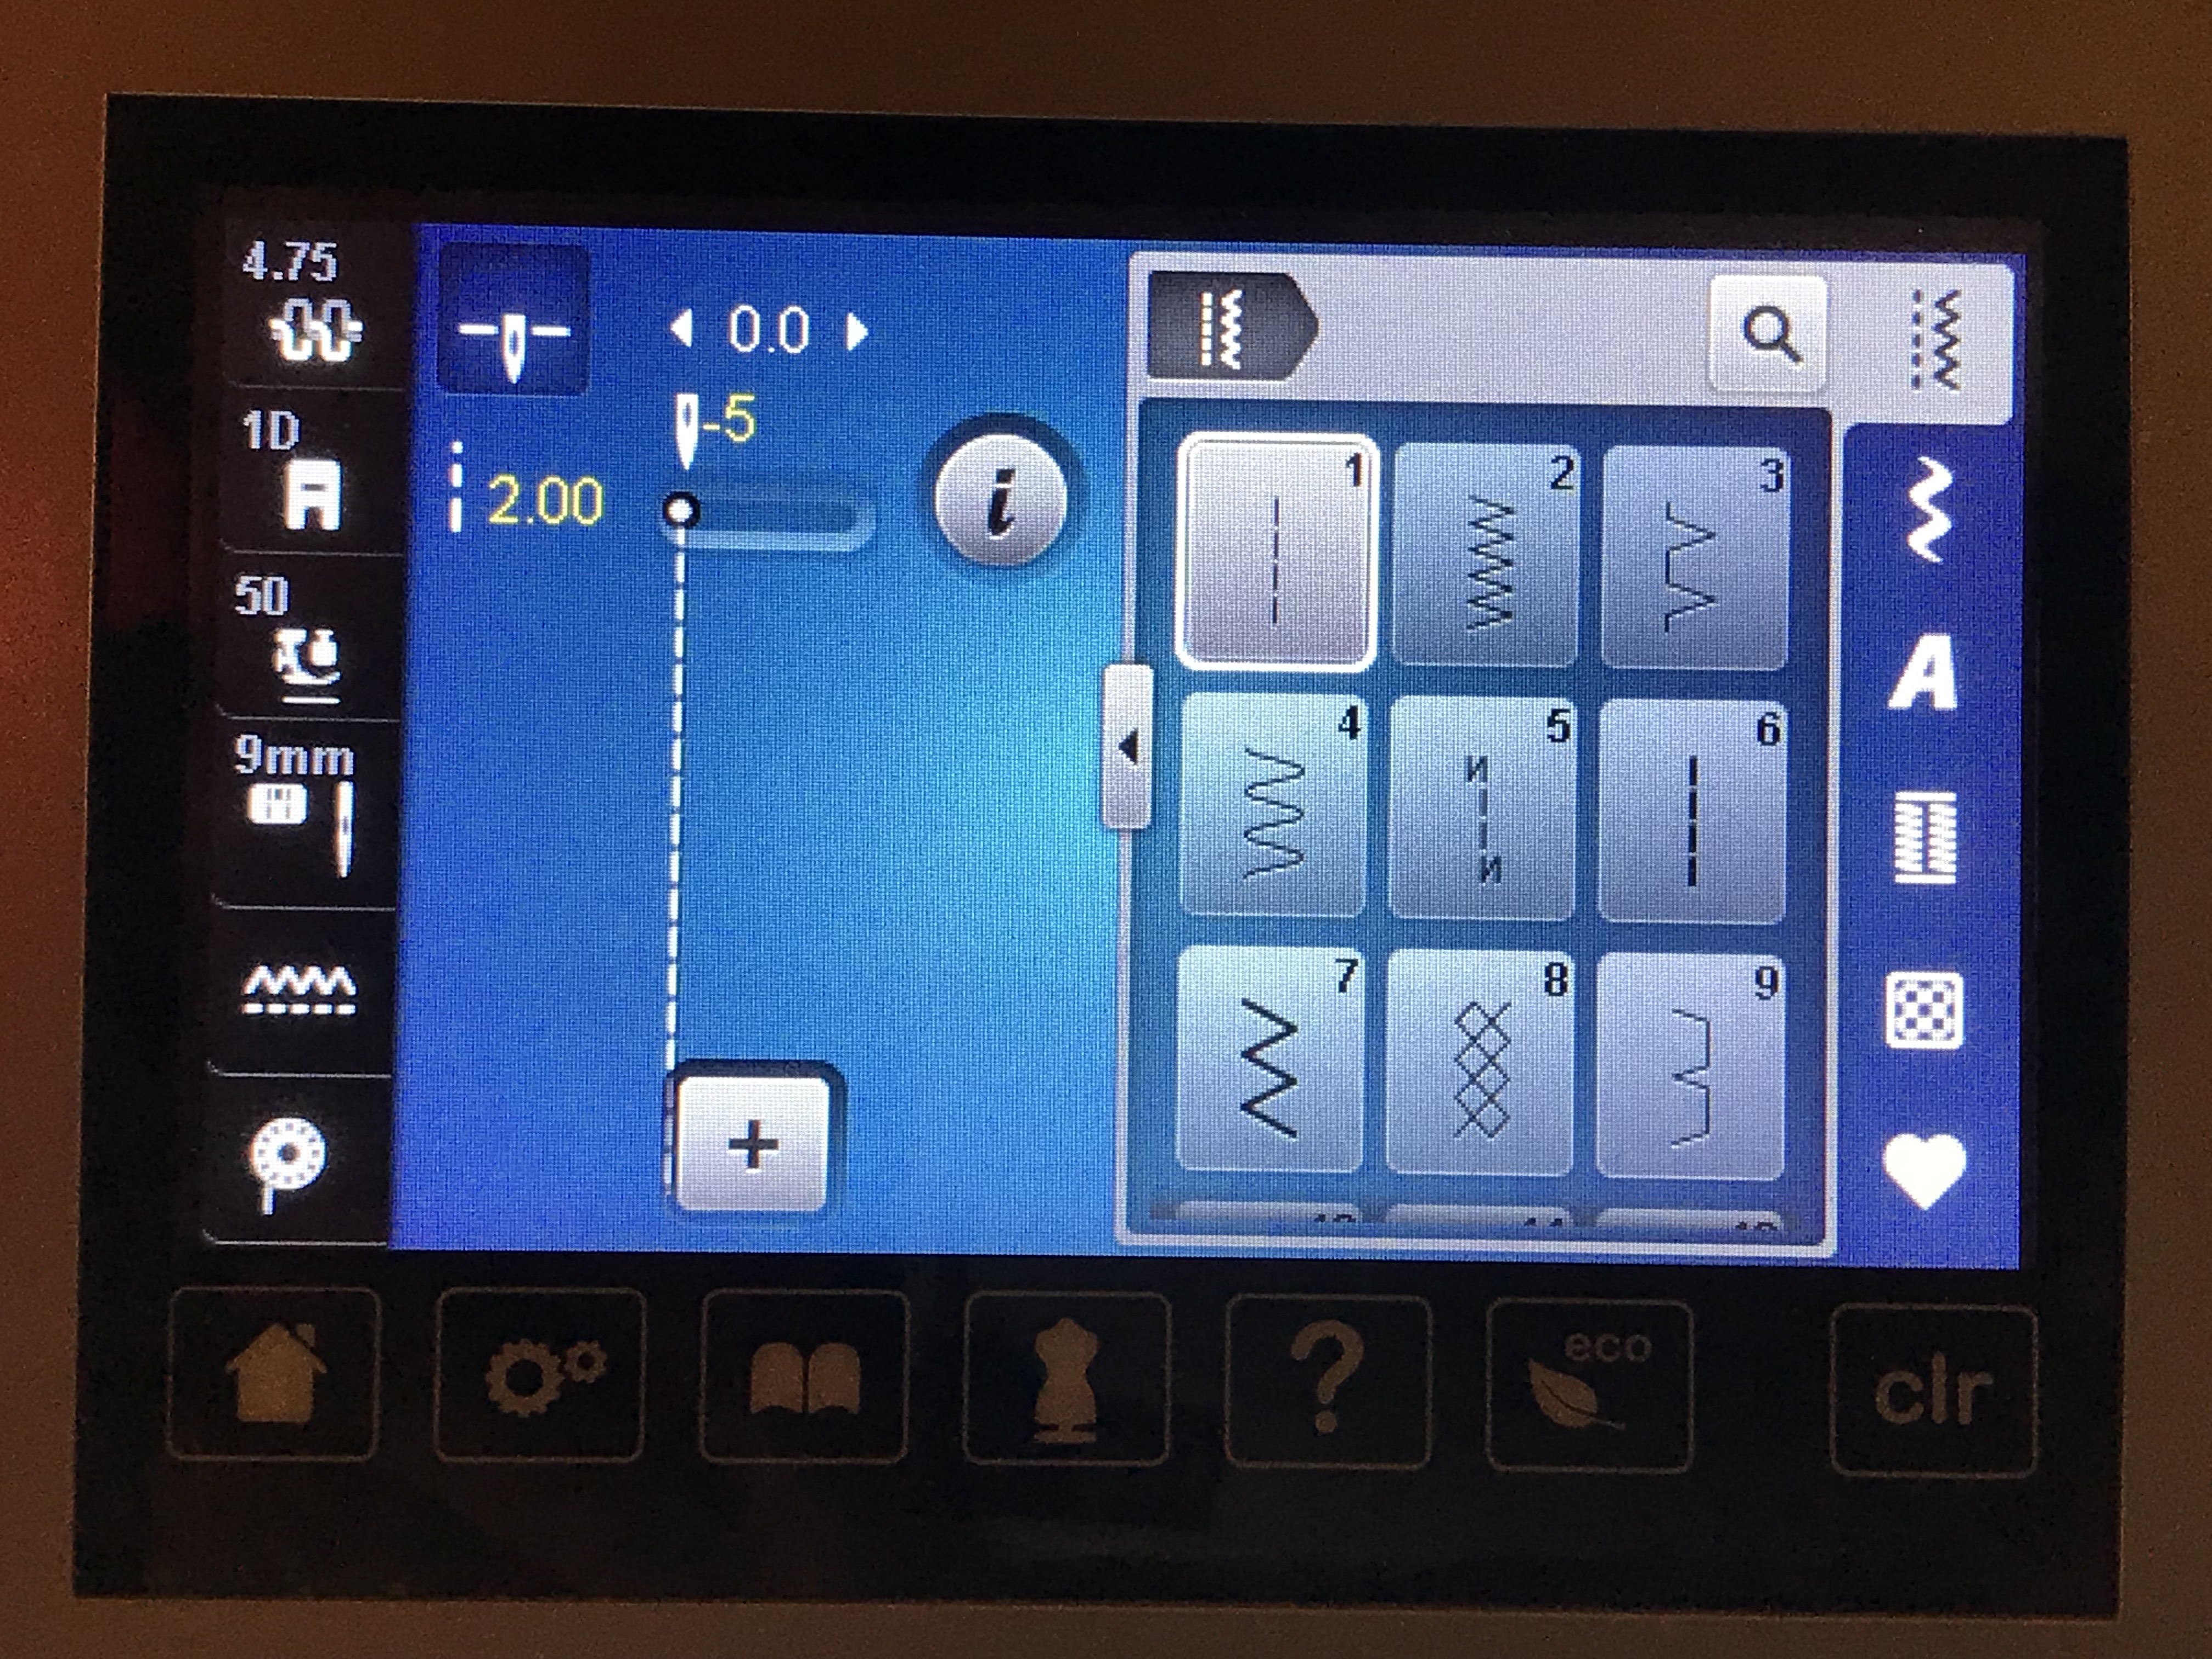
Since I wanted my second inside border a bit wider I increased the offset to -5 and used the first border as my right guide.

Whipstitch shut the opening where the placemat was turned, and press the placement flat.
Your placemats are now ready to use on your table for a holiday meal.


I liked your tip about cutting the batting just shy of the corner in order to reduce bulk. Thanks!