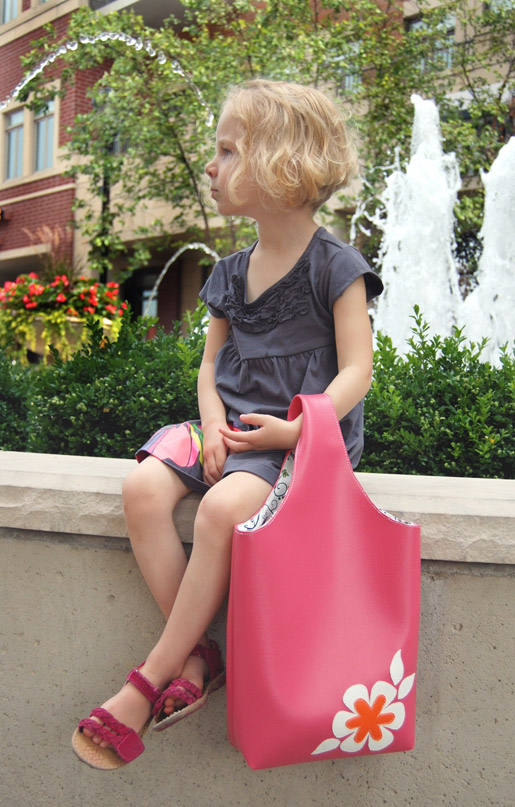
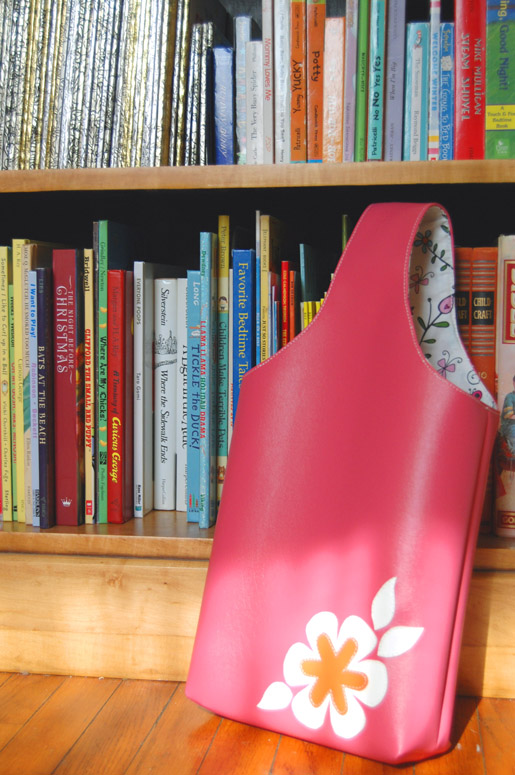
DIY Little Mod Bag
The simplest shapes often make the strongest impression. This bag epitomizes the marriage of form and function. Practical on the inside, fashion accessory on the outside. You won’t want to be seen without one. Beautiful in its simplicity… and simply beautiful!
Supplies
- 1/3 yard 54ʺ-wide RV/Marine grade upholstery weight vinyl
- Vinyl remnants, or 1/8 yard each of two contrasting colors for appliqué
- 1-1/2 yards of 45ʺ-wide medium weight cotton fabric for the lining
- Pattern paper or 1ʺ graph paper, 15ʺ x 22ʺ or larger
- Upholstery weight thread
- Matching all-purpose polyester thread
- Size 90/14 Topstitch needle
- Size 70/11 Sharp or Microtex needle
- Blue painter’s tape
- Small binder clips or Wonder Clips
- Pattern weights
- Fabric marking pencil
- All-purpose foot (BERNINA Reverse Pattern Foot #1/1C/1D)
- Walking foot (BERNINA Walking Foot #50)
Step 1) Prepare the fabric.
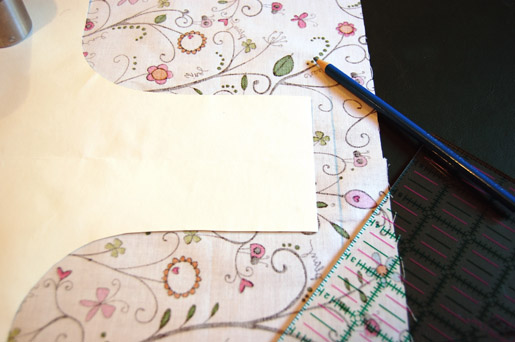
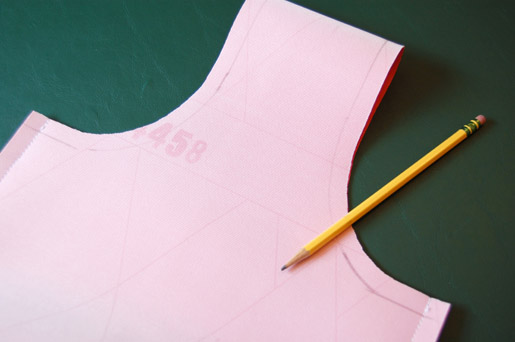
Download and print the Little Mod Bag Pattern: Mod_Bag_pattern_and_templates_111414.pdf
Following the diagram on page 2, draw the Little Mod Bag pattern piece. Cut it out.

Fold the 1/2 yard of vinyl in half, right sides together. Place the bag pattern on the vinyl with the bag handle on the fold, using pattern weights to hold it in place while you cut.
TIP: Use small soup or tuna cans if you don’t have pattern weights.

f your lining fabric is non-directional:
- Fold and cut in on the fold as above.
If your lining is directional (has a definite up and down):
- Cut the ½ yard piece in half to make two 18ʺ x 22ʺ pieces.
- Place them right sides together, making sure the prints are running in the same direction. Note which end is “up.”
- Place the bag pattern on top of the fabric pieces, with the handle at the “up” end, leaving at least 1ʺ at the top of the handle. With a fabric marking pencil, mark a line parallel to and 1/2ʺ away from the top of the handle. This marks the seam allowance for sewing the pieces together later.
Cut out the bag pieces, making sure you cut up to and across your drawn line to add 1/2ʺ to the top edge of the handle.
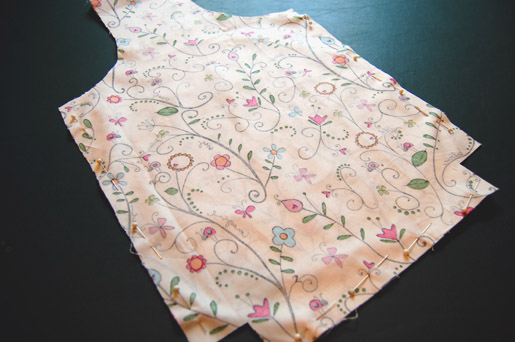
Step 2) Sew the lining.
Set up your sewing machine with a size 70/11 Sharp or Microtex needle, all-purpose thread, and an all-purpose or zigzag presser foot. Set it for a straight stitch 2.5mm in length.
Pin the two lining pieces together at the top of the handle, right sides together. Stitch using a 1/2ʺ-wide seam allowance, backstitching at the beginning and end. Press seam allowances open.
With right sides together, fold the lining in half at the top of the handle, matching the sides and bottom; pin. Stitch using a 1/2ʺ-wide seam allowance, backstitching at the beginning and end. Press seam allowances open.
To “box” the corners at the bottom of the bag lining:
- Open the bag lining and fold it so one of the side seams and the bottom seam are right sides together. Pin.
- Stitch the corners together with a 1/2ʺ-wide seam allowance, backstitching at the beginning and end.
- Trim seam allowances to 1/4ʺ.

Repeat for the second corner.
Stitch around each side of the bag opening, 1/2ʺ from the raw edge. Clip the curves close to the stitching.
Pin the two lining pieces together at the top of the handle, right sides together. Stitch using a 1/2ʺ-wide seam allowance, backstitching at the beginning and end. Press open.
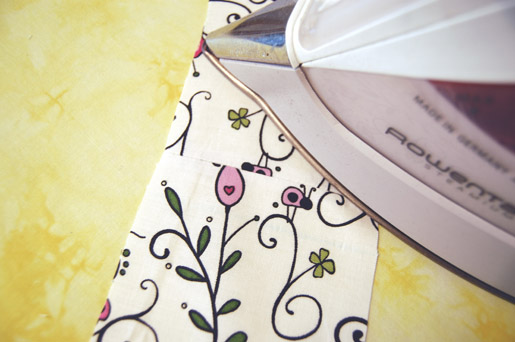
Fold the raw edge to the wrong side along the edge of the stitching; press.
Sew a basting stitch (or very long straight stitch) along each opening about 1/4ʺ from the folded edge.
Set the lining aside.
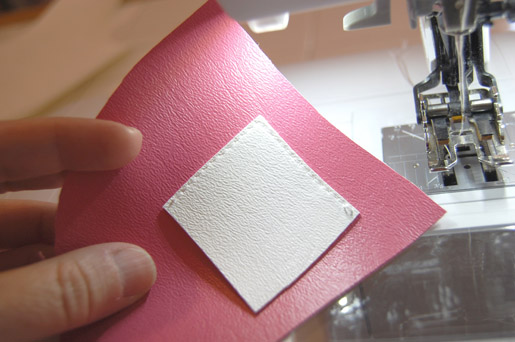
Step 3) Test sew on vinyl fabric.
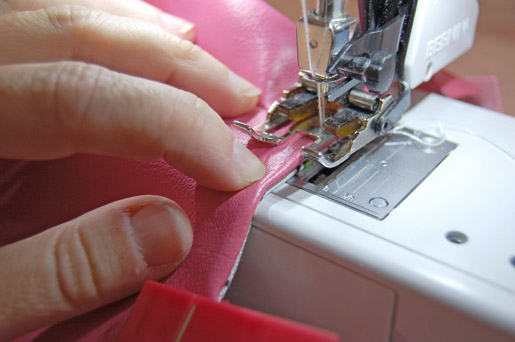
To sew the vinyl, set up your sewing machine with a size 90/14 Topstitch needle, upholstery weight thread, and a walking foot to help keep the vinyl feeding steadily through the machine. Set it for a straight stitch 3 to 3.5mm in length
Stitch two scraps of vinyl together to test the tension. You will probably need to adjust the upper tension. Move the knob a little bit at a time and test until the stitches look balanced from both the front and the back of your sample.

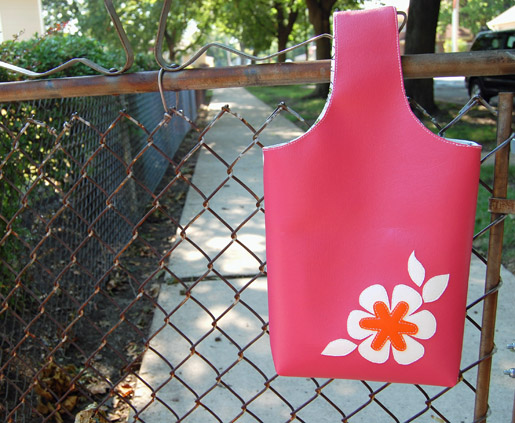
Step 4) Appliqué the flower.
Trace the appliqué flower and leaf shapes on page 10 onto the back of the vinyl scraps using a sharp pencil.
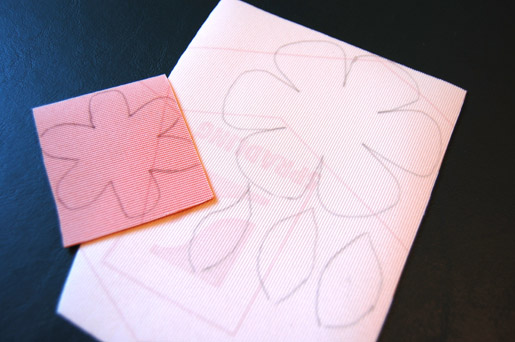
Carefully cut out the shapes.
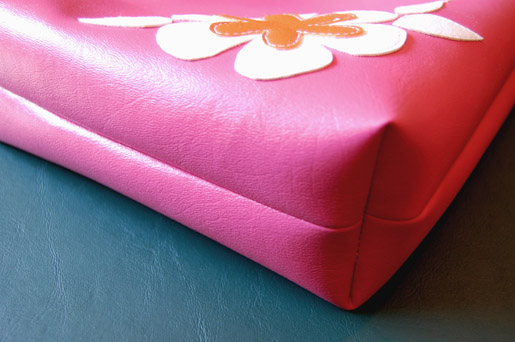
Arrange the appliqué shapes in the bottom right corner of what will become the front of the bag, placing them at least 3” from the cut edges to allow for the sides and bottom of the bag.
Use blue painter’s tape to temporarily secure the first layer of appliqué shapes in place (large flower and leaves).
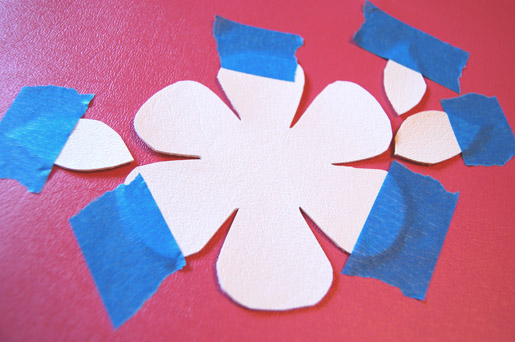
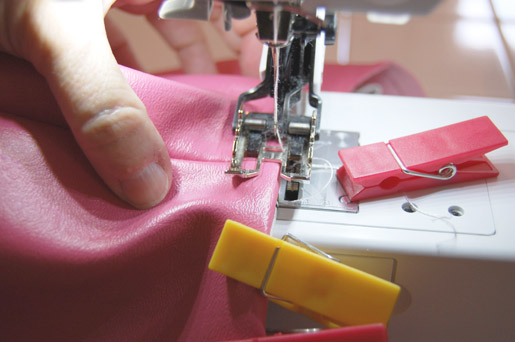
Stitch 1/8ʺ from the edges of the appliqué shapes, sewing very slowly and pivoting around sharp corners and tight curves. Backstitch one or two stitches when beginning to sew. When completing each shape, stitch back over the beginning 3–4 stitches.
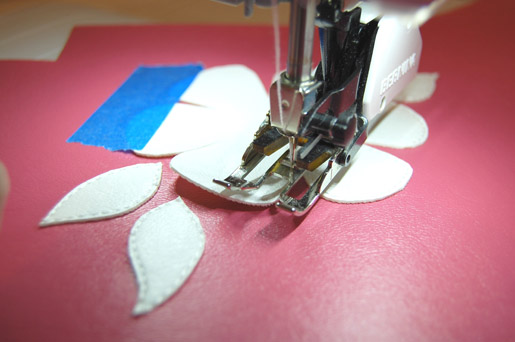
To finish the appliqué, place the small flower shape on top of the large flower. Secure it with painter’s tape and stitch as above.

Step 5) Construct the bag exterior.
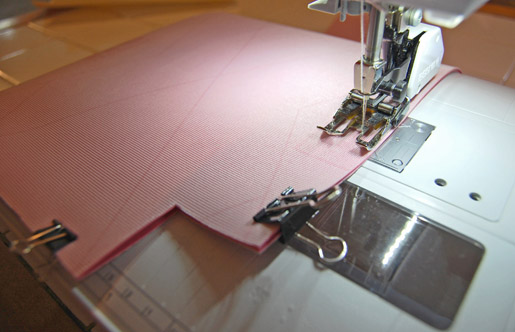
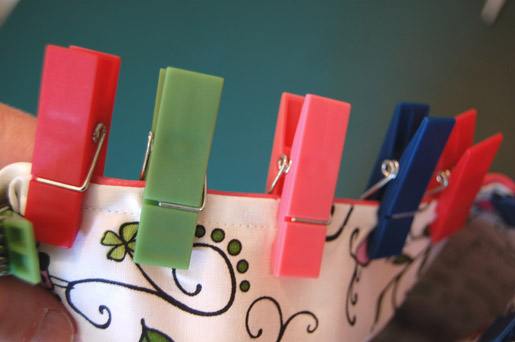
Clip the sides and bottom of the vinyl bag together with binder clips or Wonder Clips to avoid making pinholes in the vinyl.
Stitch the side and bottom seams with a 1/2ʺ-wide seam allowance, backstitching at the beginning and end.
Trim seam allowances to 1/4ʺ.
To “box” the corners at the bottom of the bag:
- Open the bag and fold it so one of the side seams and the bottom seam are right sides together. Clip.
- Stitch the corners together with a 1/2ʺ-wide seam allowance, backstitching at the beginning and end.
- Trim seam allowances to 1/4ʺ.
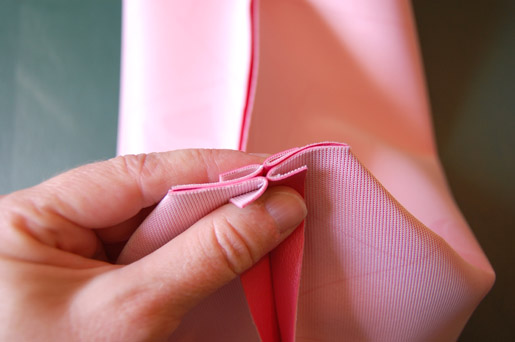
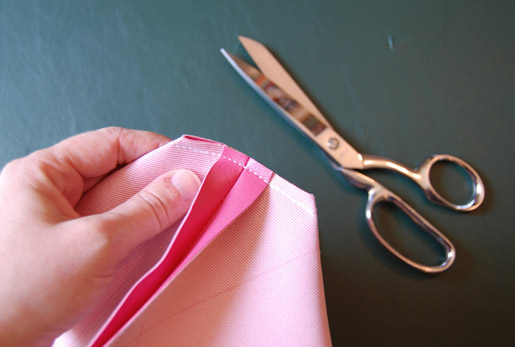
Repeat for the second corner.
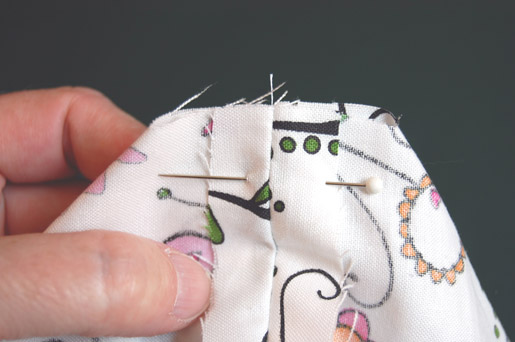
With a sharp pencil, draw a thin mark 1/2ʺ from the raw edge of the bag opening on the inside of the bag.
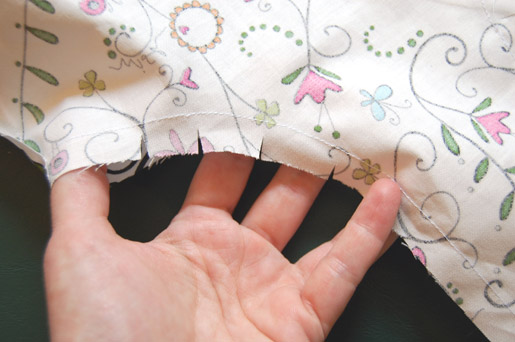
Clip a small triangle out of the side seam allowance by the 1/2ʺ mark and snip to within 1/8ʺ of the pencil mark around each curve.

Turn the bag right side out, gently pushing out the corners.
Step 6) Assemble the bag.
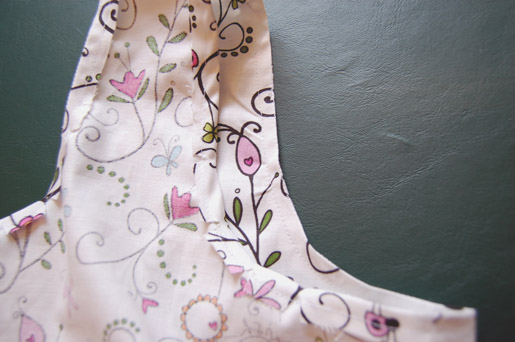
Insert the bag lining into the bag, wrong sides together.
Push the lining to the bottom of the bag while clipping the curve along the outside edge.
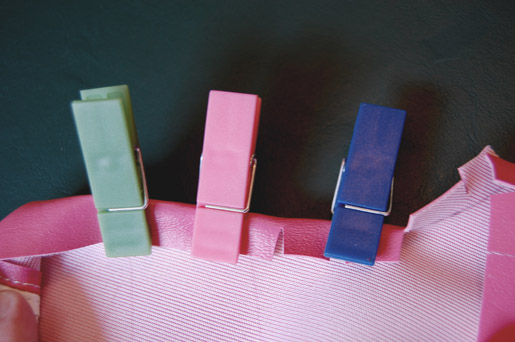
Using binder clips to avoid making pinholes in the vinyl, turn under 1/2ʺ around one side only of the bag opening. (You will stitch only one side in next step.)
Beginning at the side seam, match the bag lining to the edge of the bag exterior, lining up the edges so the lining is a scant 1/16ʺ below the exterior.
Get ready to topstitch the bag exterior and lining together using the free-arm of your sewing machine.
Remove enough clips from a 4ʺ section of the bag near the top center of the handle; this will clear a space for the walking foot.
Place the edge of the bag opening under the presser foot. Stitch about 1/4ʺ from the edge, making sure you are catching the lining in the stitches.
Stitch very slowly when sewing over bulky side seams. If your sewing machine has a motor control feature, use it to slow your speed.
Stitch all the way around the opening to meet the first stitches. Overlap 3–4 stitches, then backstitch to secure.
Repeat the above steps to finish the second opening.
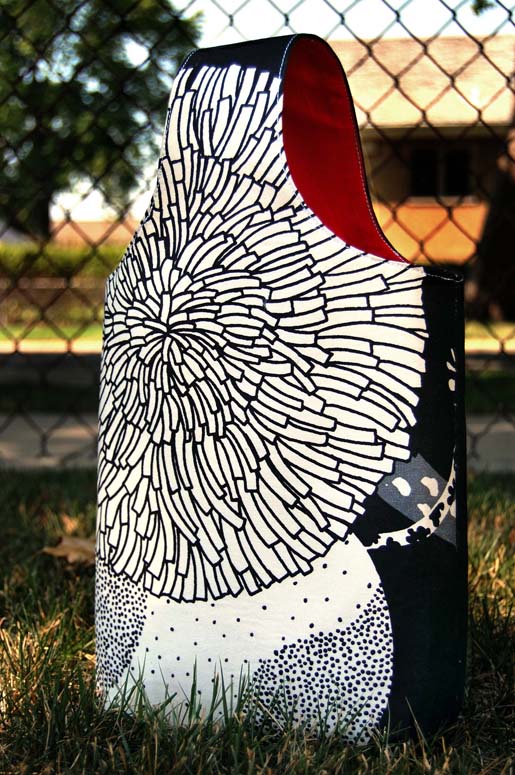
Little Mod Bag Variaion – Printed vinyl with no appliqué.
Visit Erika (a.k.a. Miss Sews It All) at her Miss Sews-It-All blog.


One comment on “DIY Little Mod Bag”