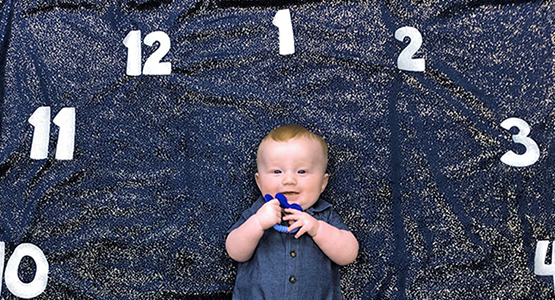
Minky-backed Patchwork Baby Quilt
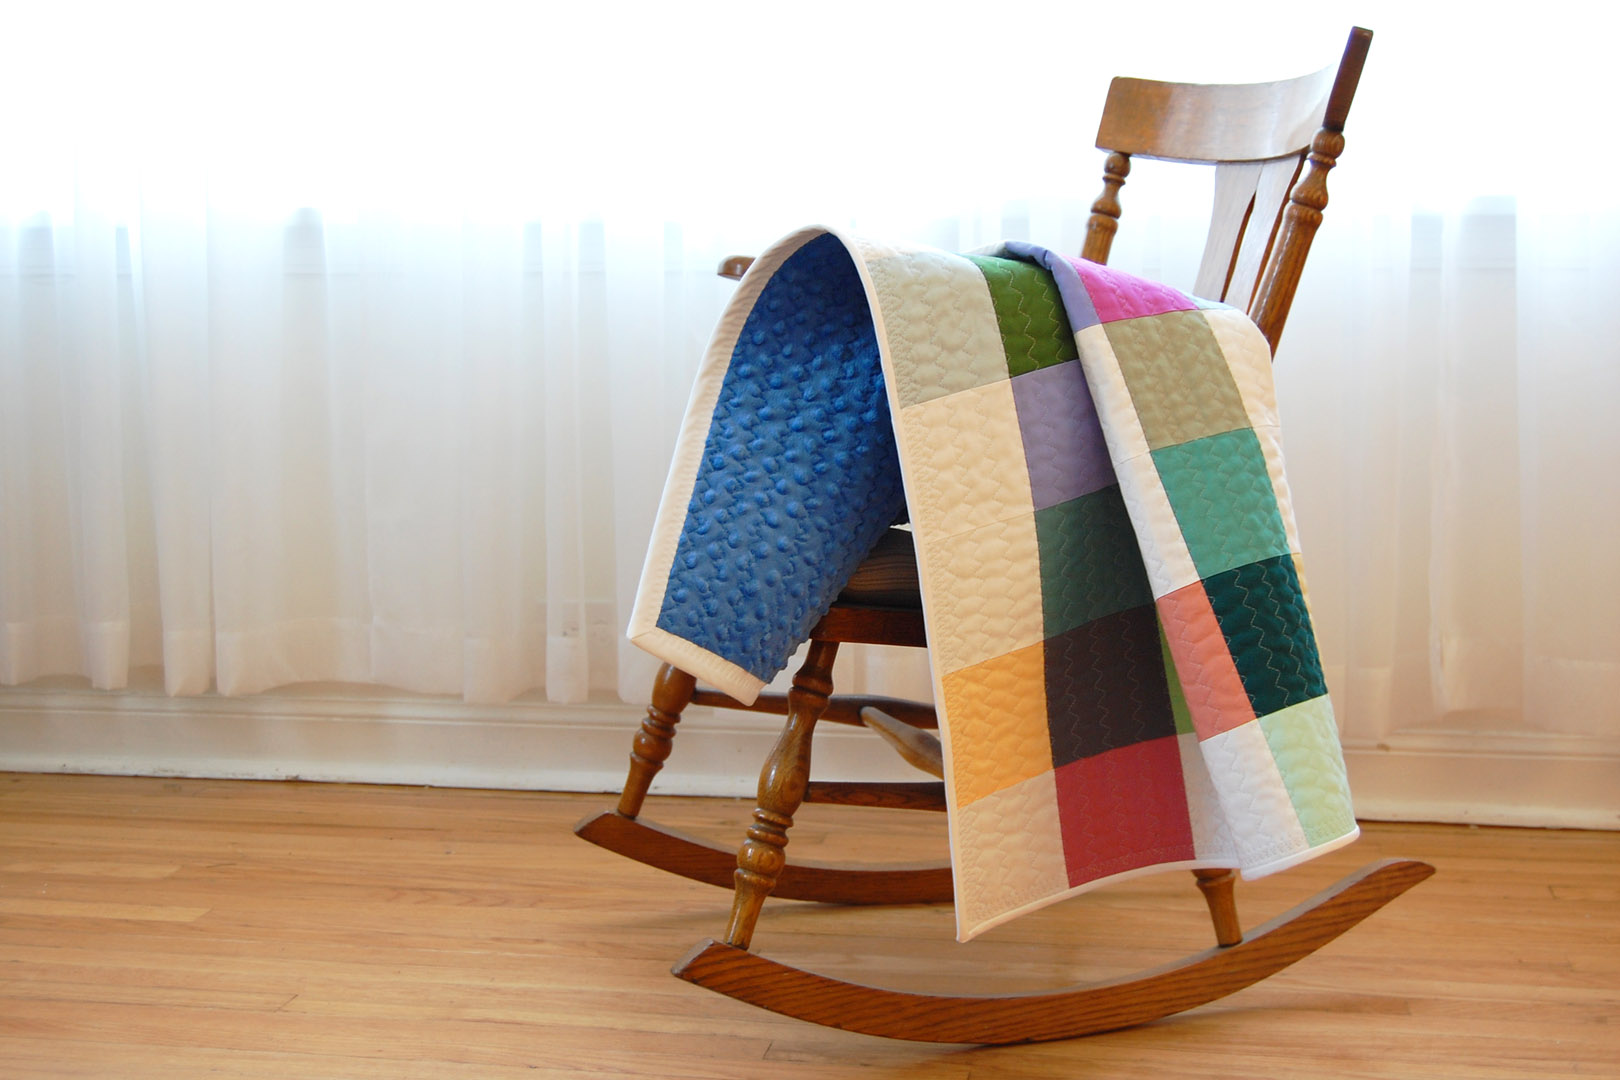
I love making baby quilts, they’re quick to sew and make for cherished gifts. This patchwork quilt is made for a very special baby boy and includes a super soft backing of Minky fabric. Don’t be afraid of working with stretchy, fuzzy Minky fabric! It’s easy to use as a quilt backing using a simple basting technique.
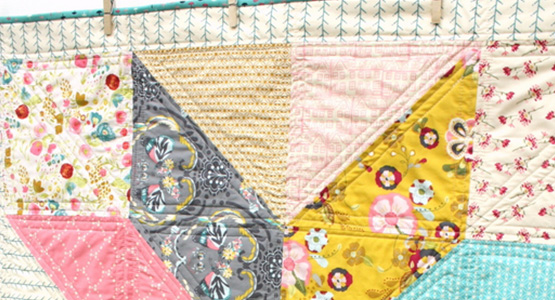
About Designing with Patchwork Squares
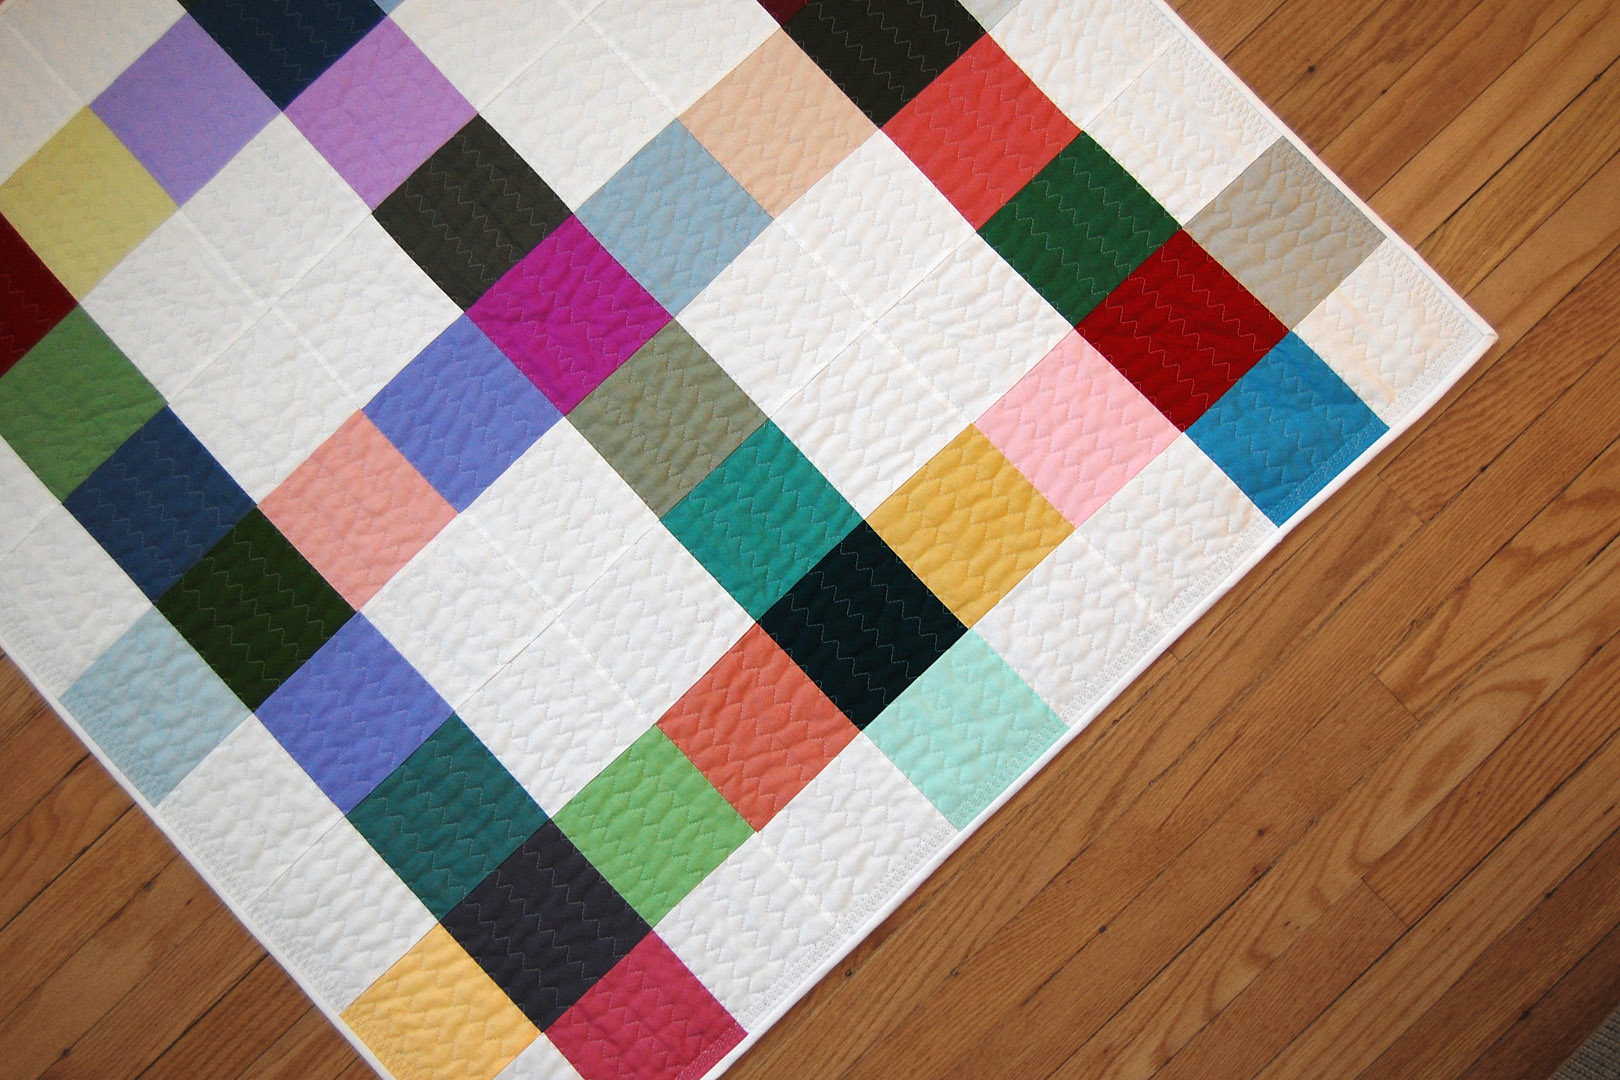
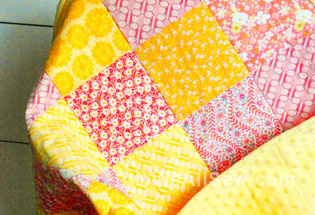
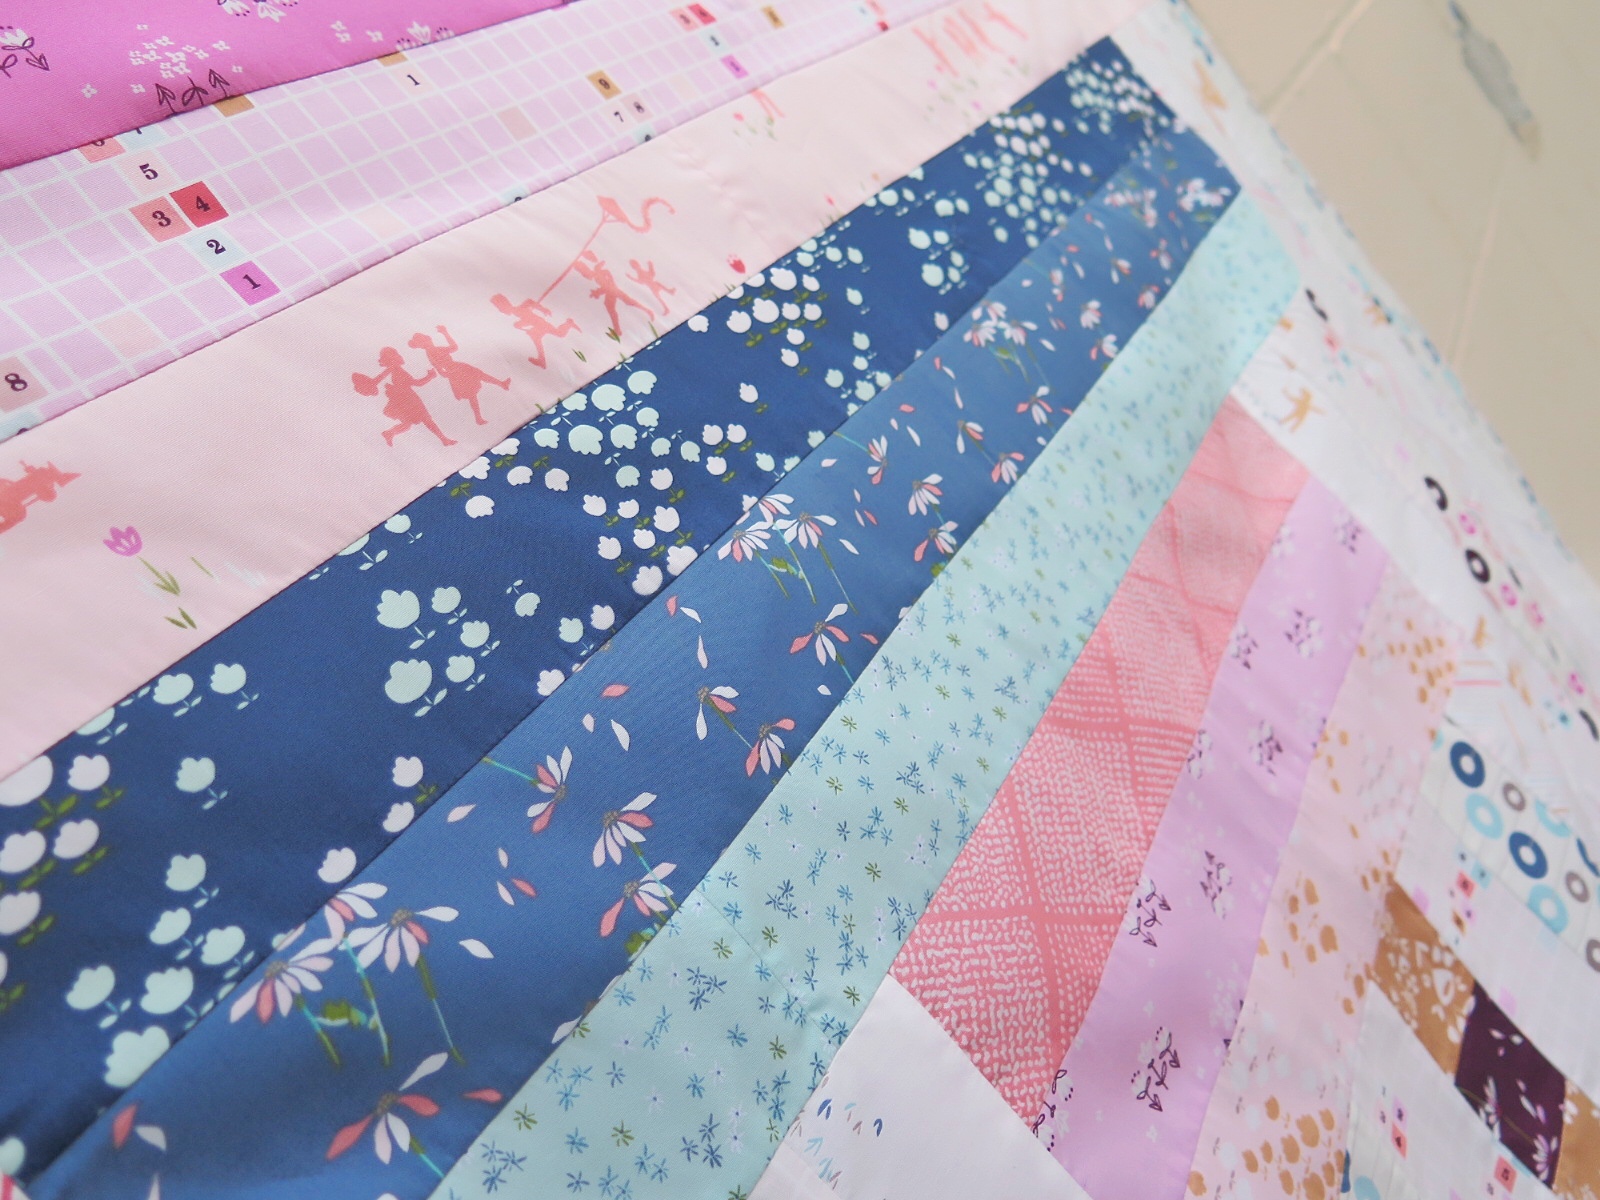
This quilt top is constructed of 5″ x 5″ squares arranged in a 9 x 9 square grid. There are lots of ways to design using simple squares! Use a completely random combination or create patterns based on a grid. You can play around with design options before you sew the quilt top by using graph paper, or by laying out your cut squares to find a good arrangement.
This quilt is based on sewing 9 squares together in a 3 by 3 grid, commonly known as a 9 patch block. There’s a lot of possibilities to design with a 9 patch block depending on how you arrange the squares, check out some basic 9 patch blocks in this post from Nancy Zieman, or look through these amazing 9 patch block quilts at All People Quilt for some different ideas. Read on below for step-by-step instructions to create my 9 patch quilt.
Materials to Make a Minky Backed Patchwork Baby Quilt
Finished quilt dimensions 40.5″ x 40.5″ square
- You will need 81 total squares cut 5″ x 5″ to create the quilt top
- I used 45 solid colored cotton fabric squares, 40 from a Michael Miller Couture Cotton “Top 40” charm pack plus 5 cut from my stash
- I used 36 solid colored cotton fabric squares for the background in white
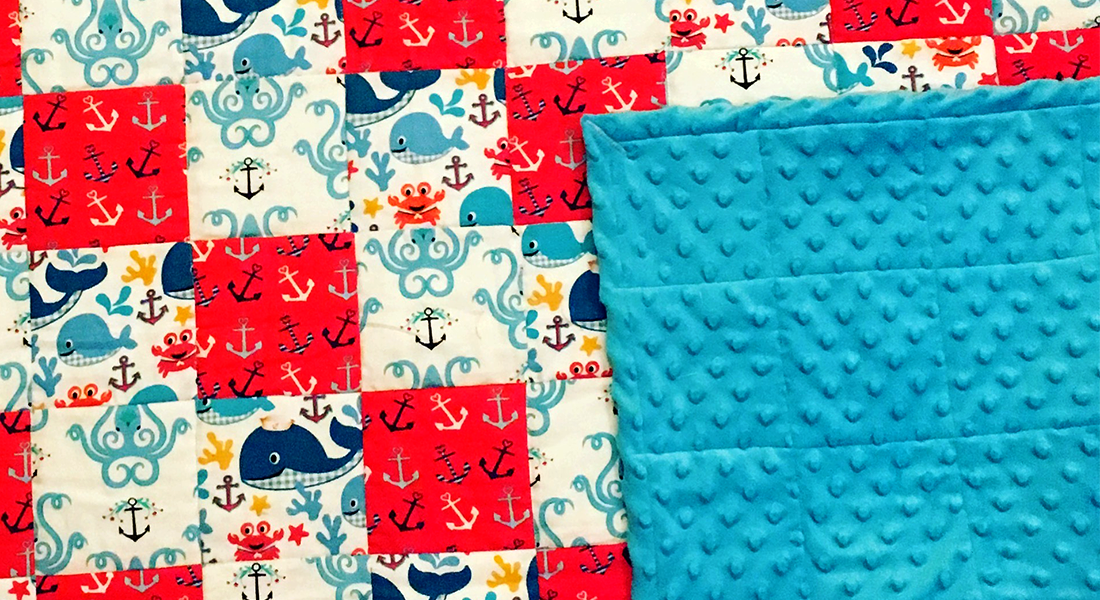
- 1 1/3 yards Minky fabric for backing
- 100% cotton quilt batting
- Temporary adhesive quilt basting spray
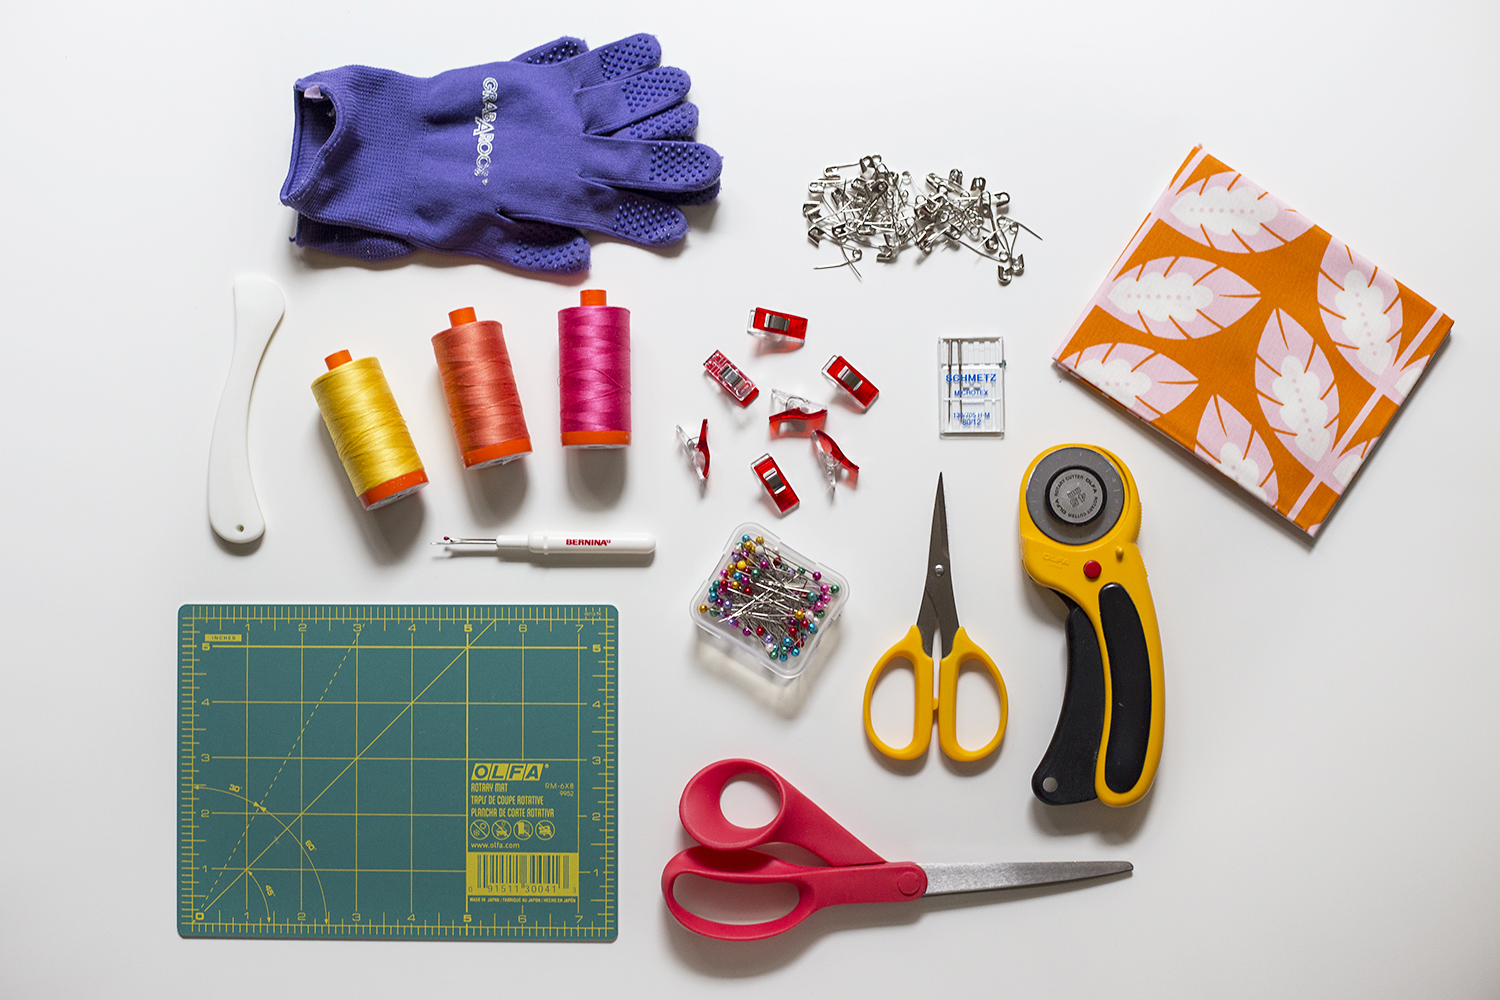
- Coordinating thread
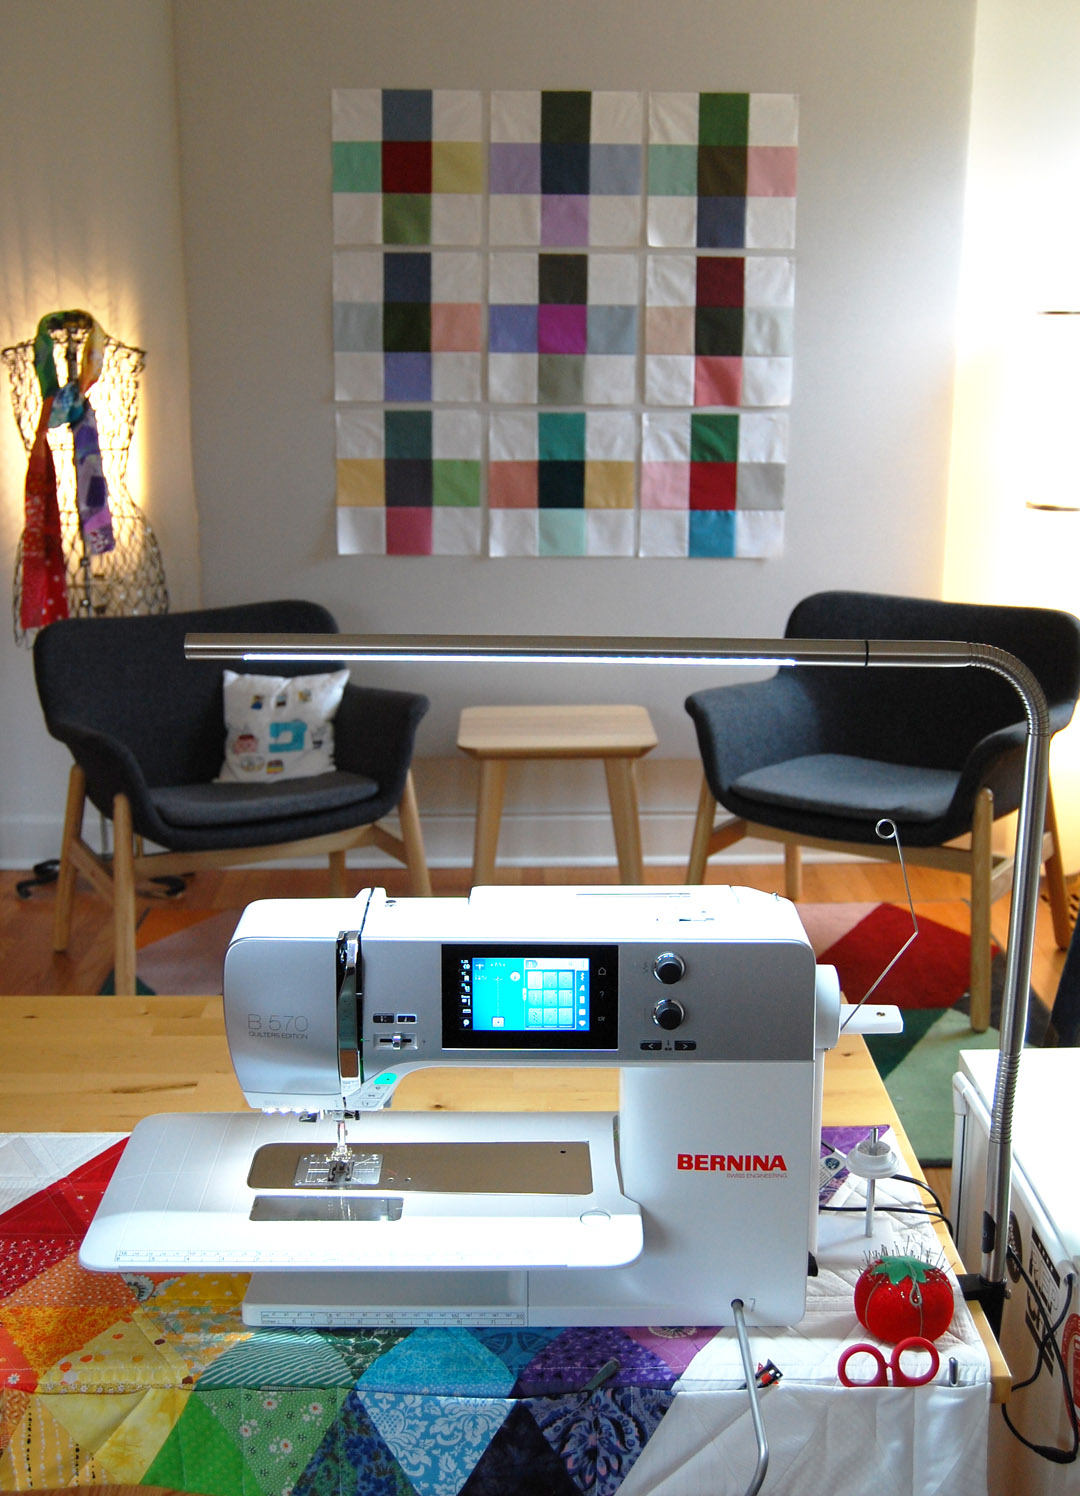
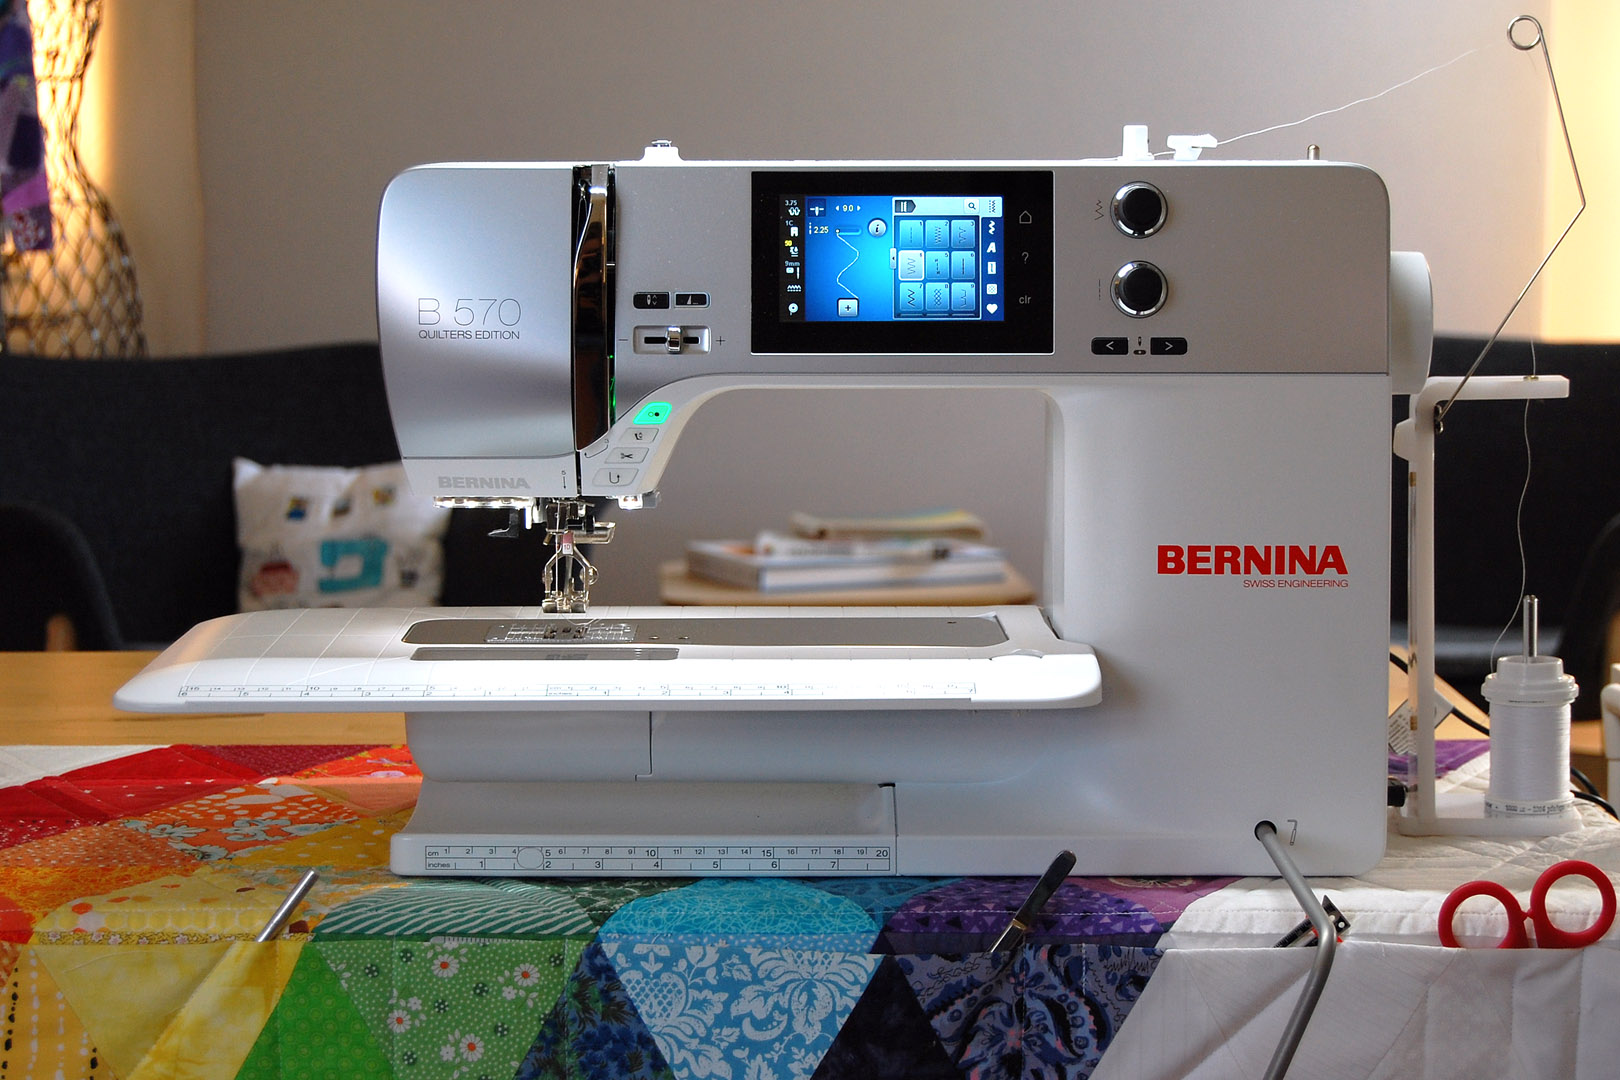
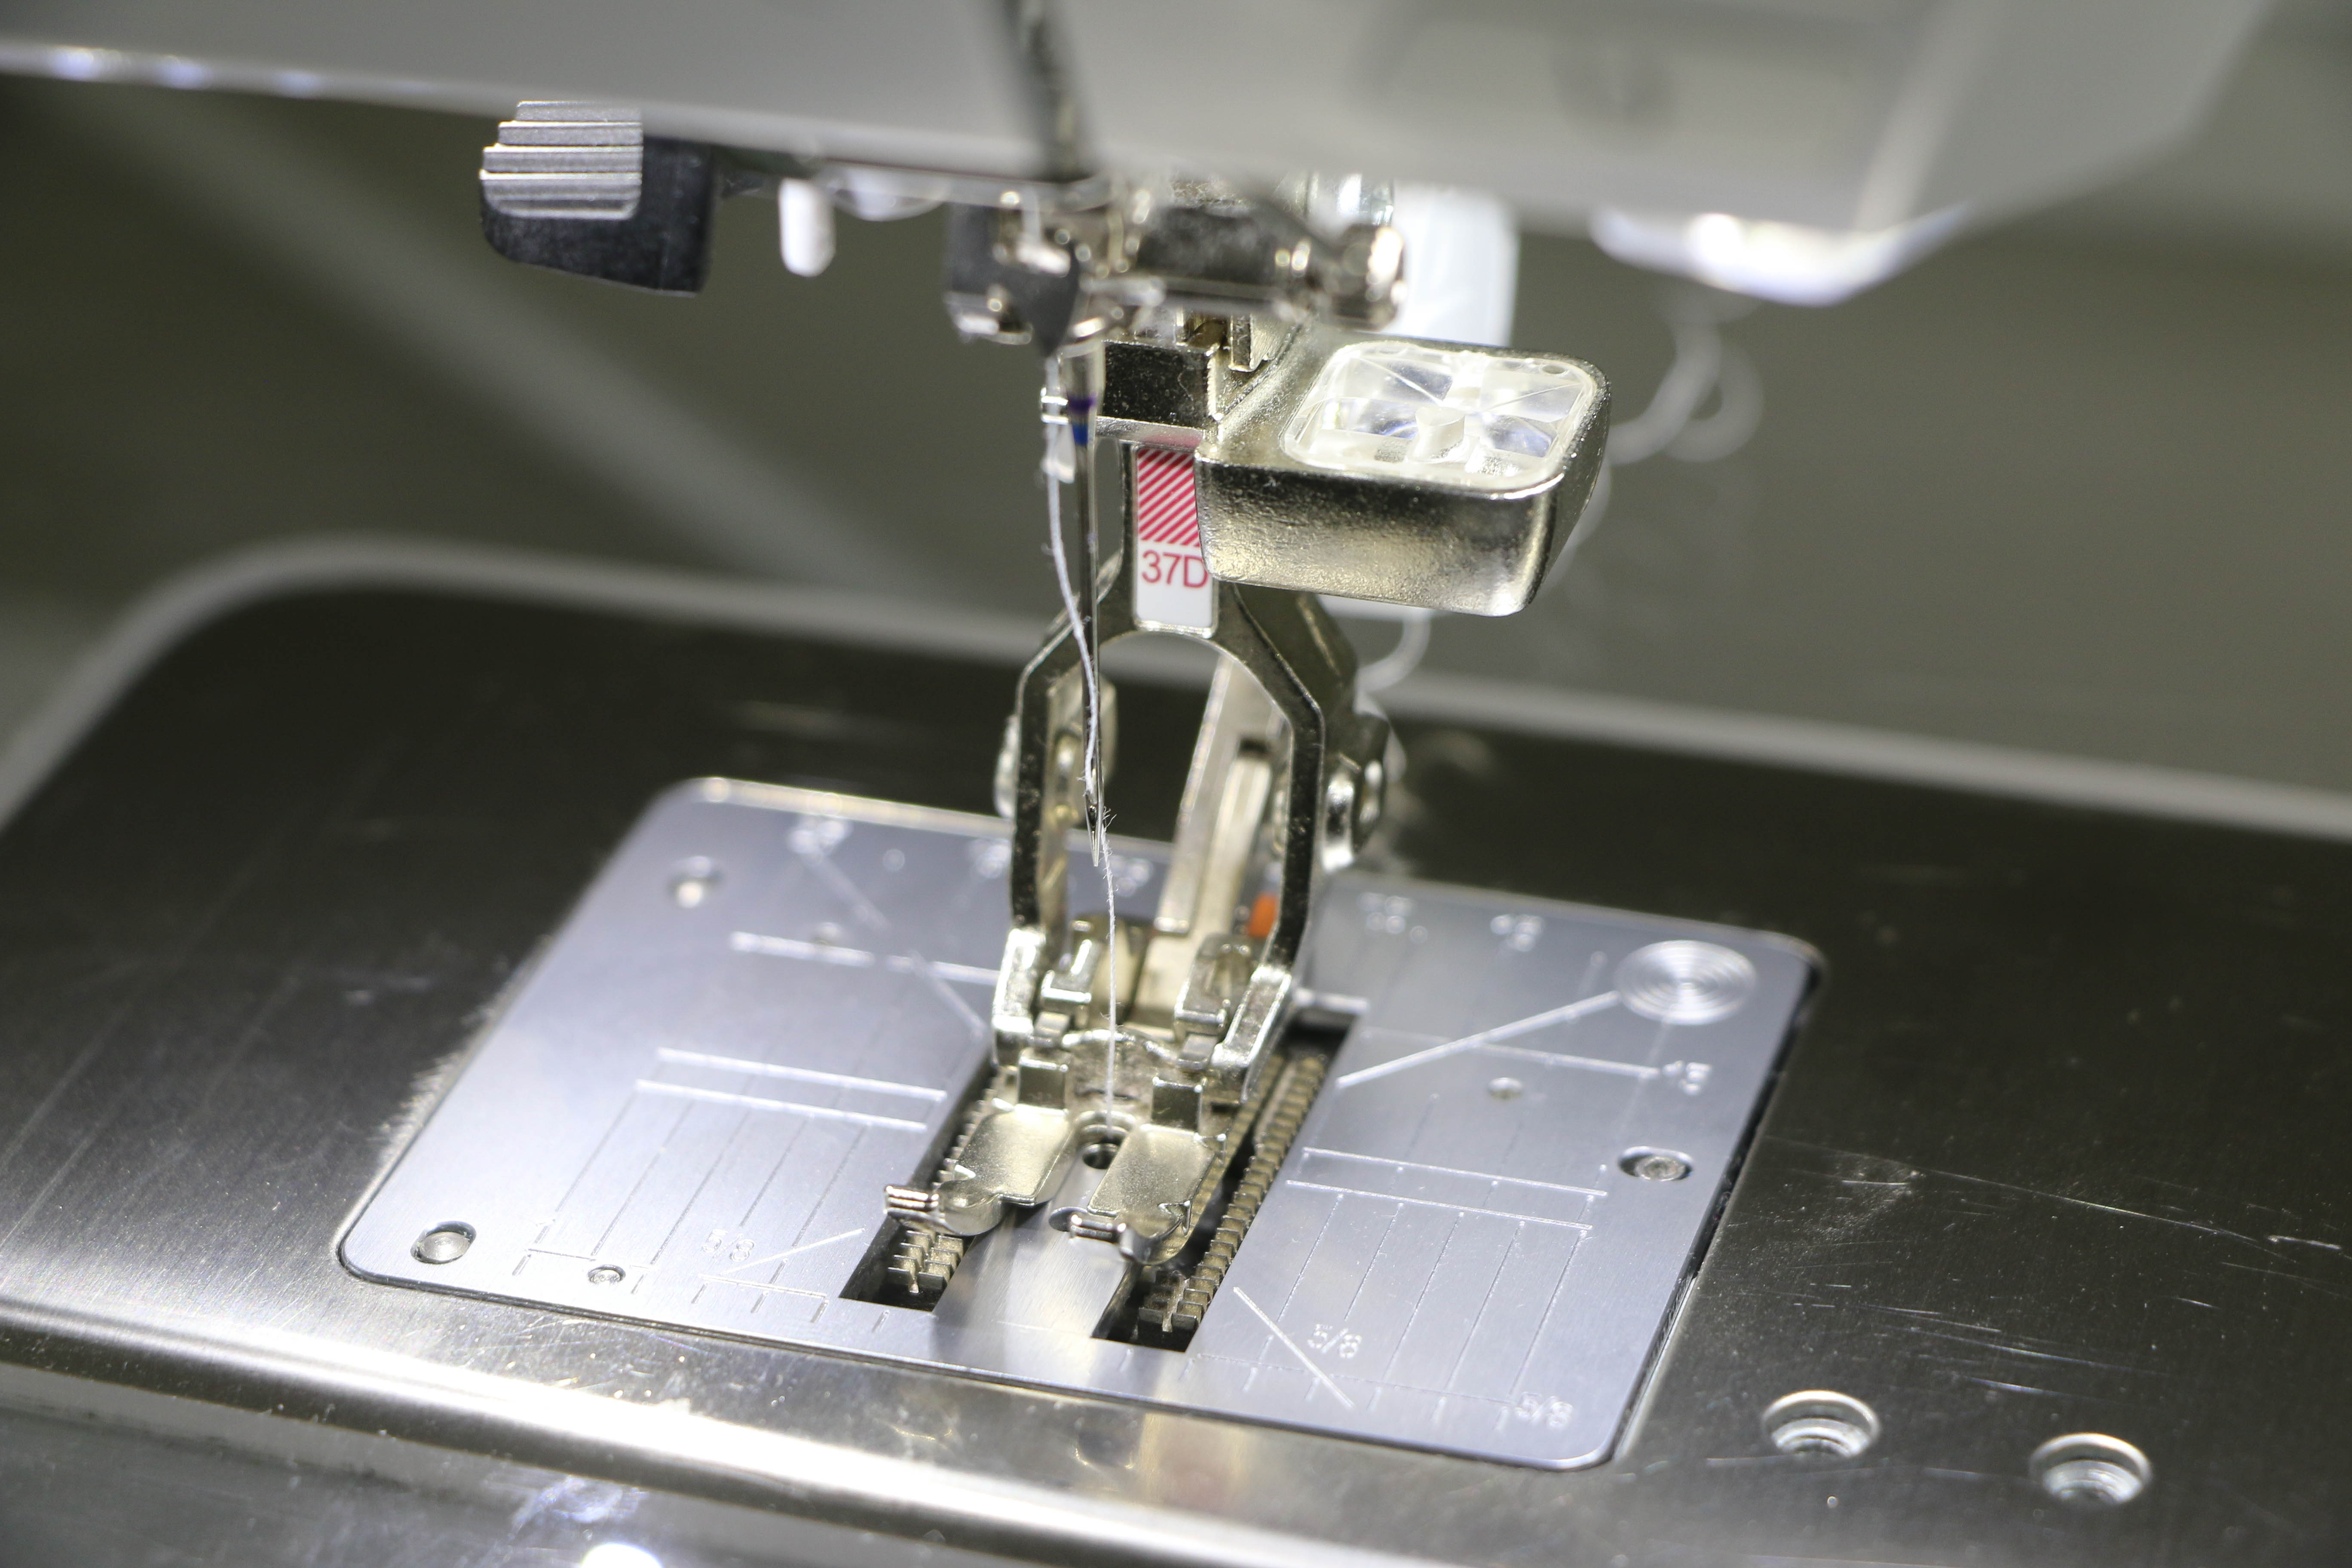
- Sewing machine (I sew with a BERNINA 570 QE)
- Patchwork foot #97
- Reverse pattern foot #1D
- Walking foot #50
- Rotary cutter/cutting mat/quilting rulers
- Steam iron/pressing surface
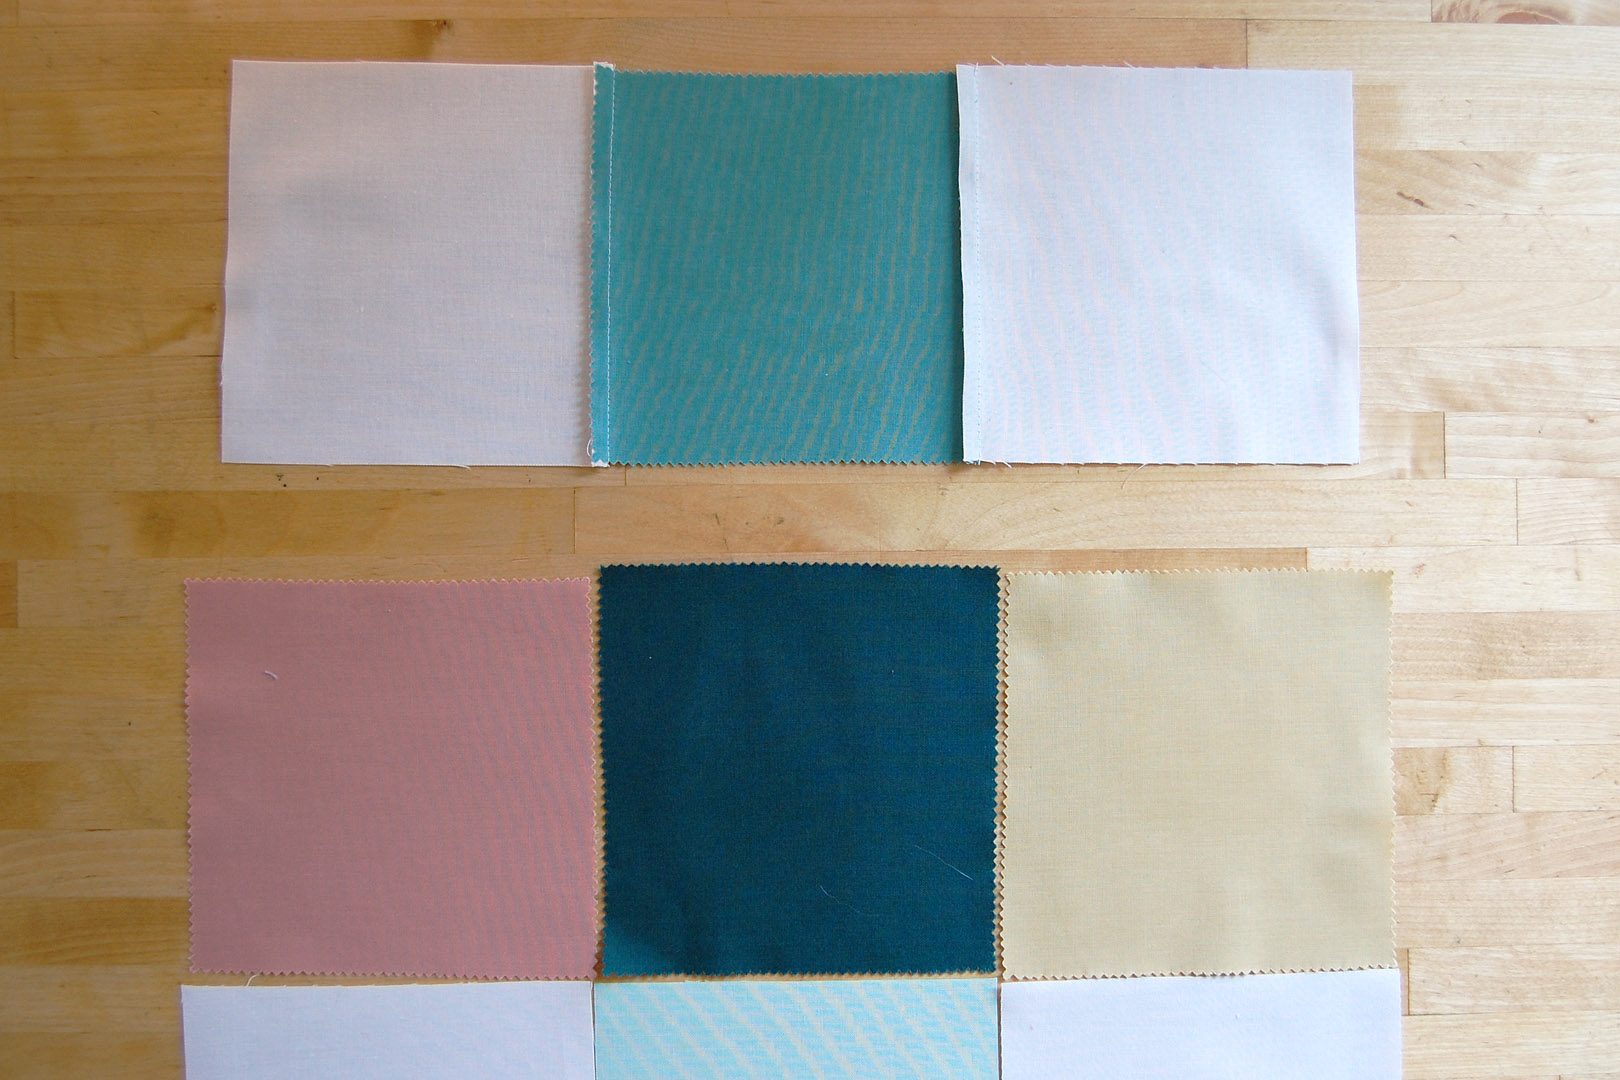
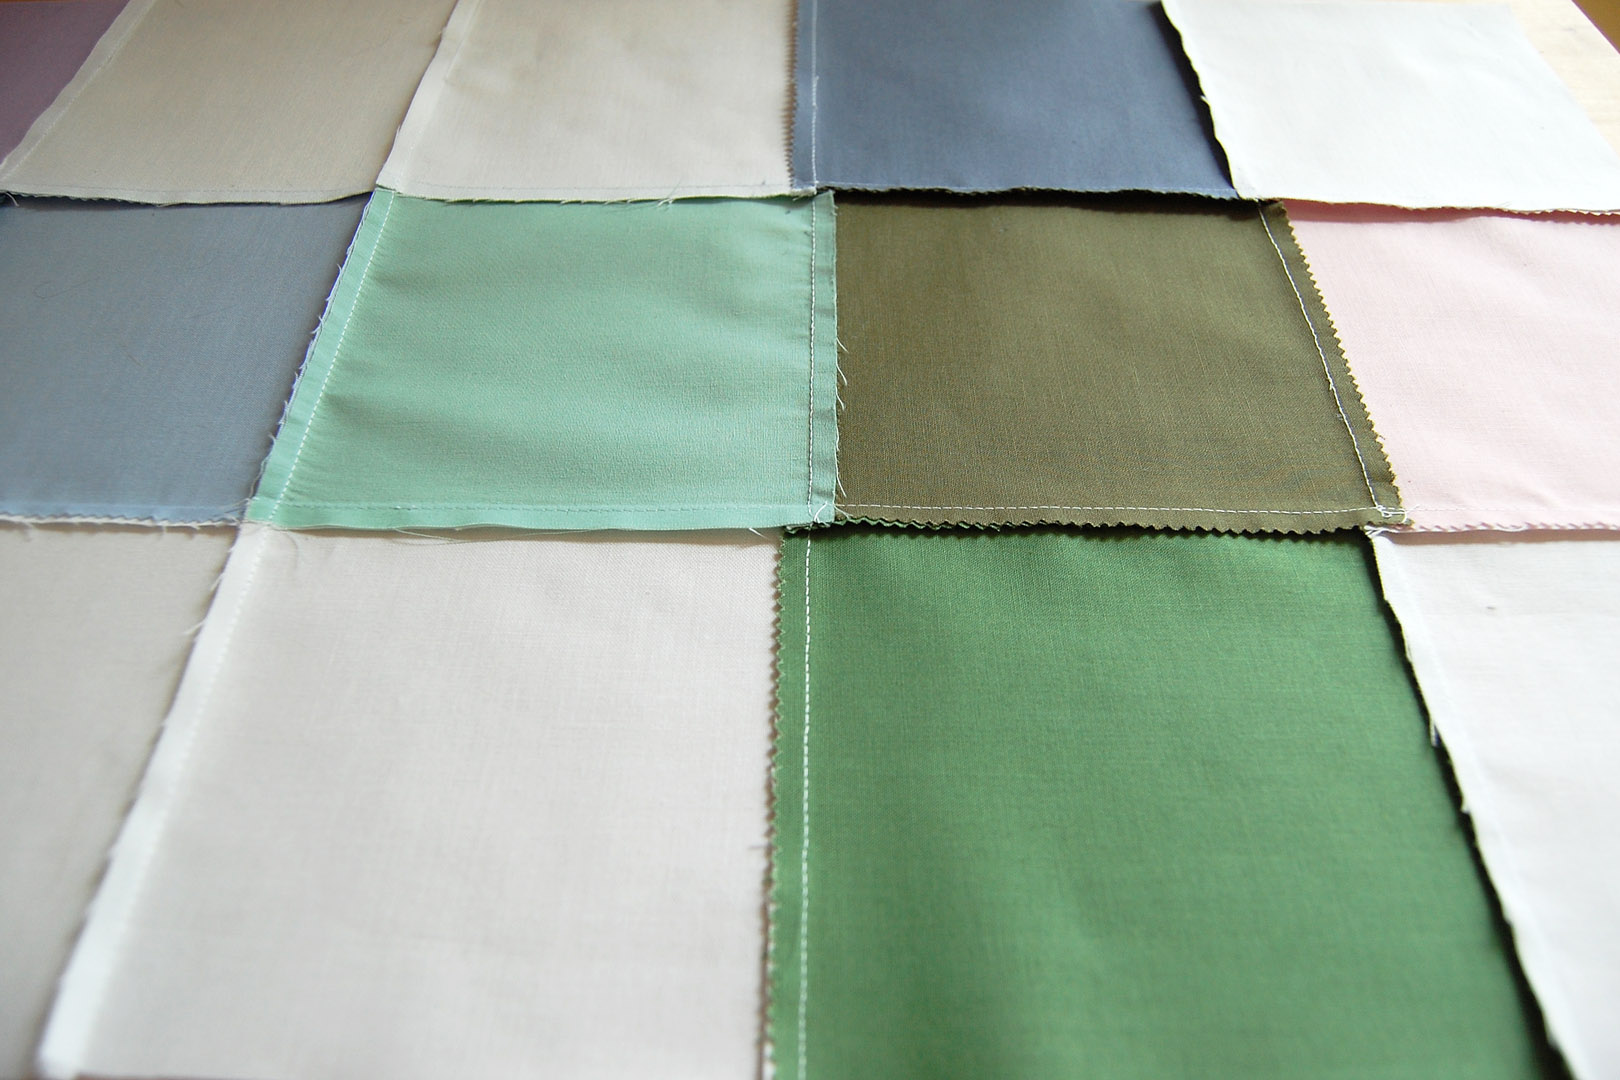
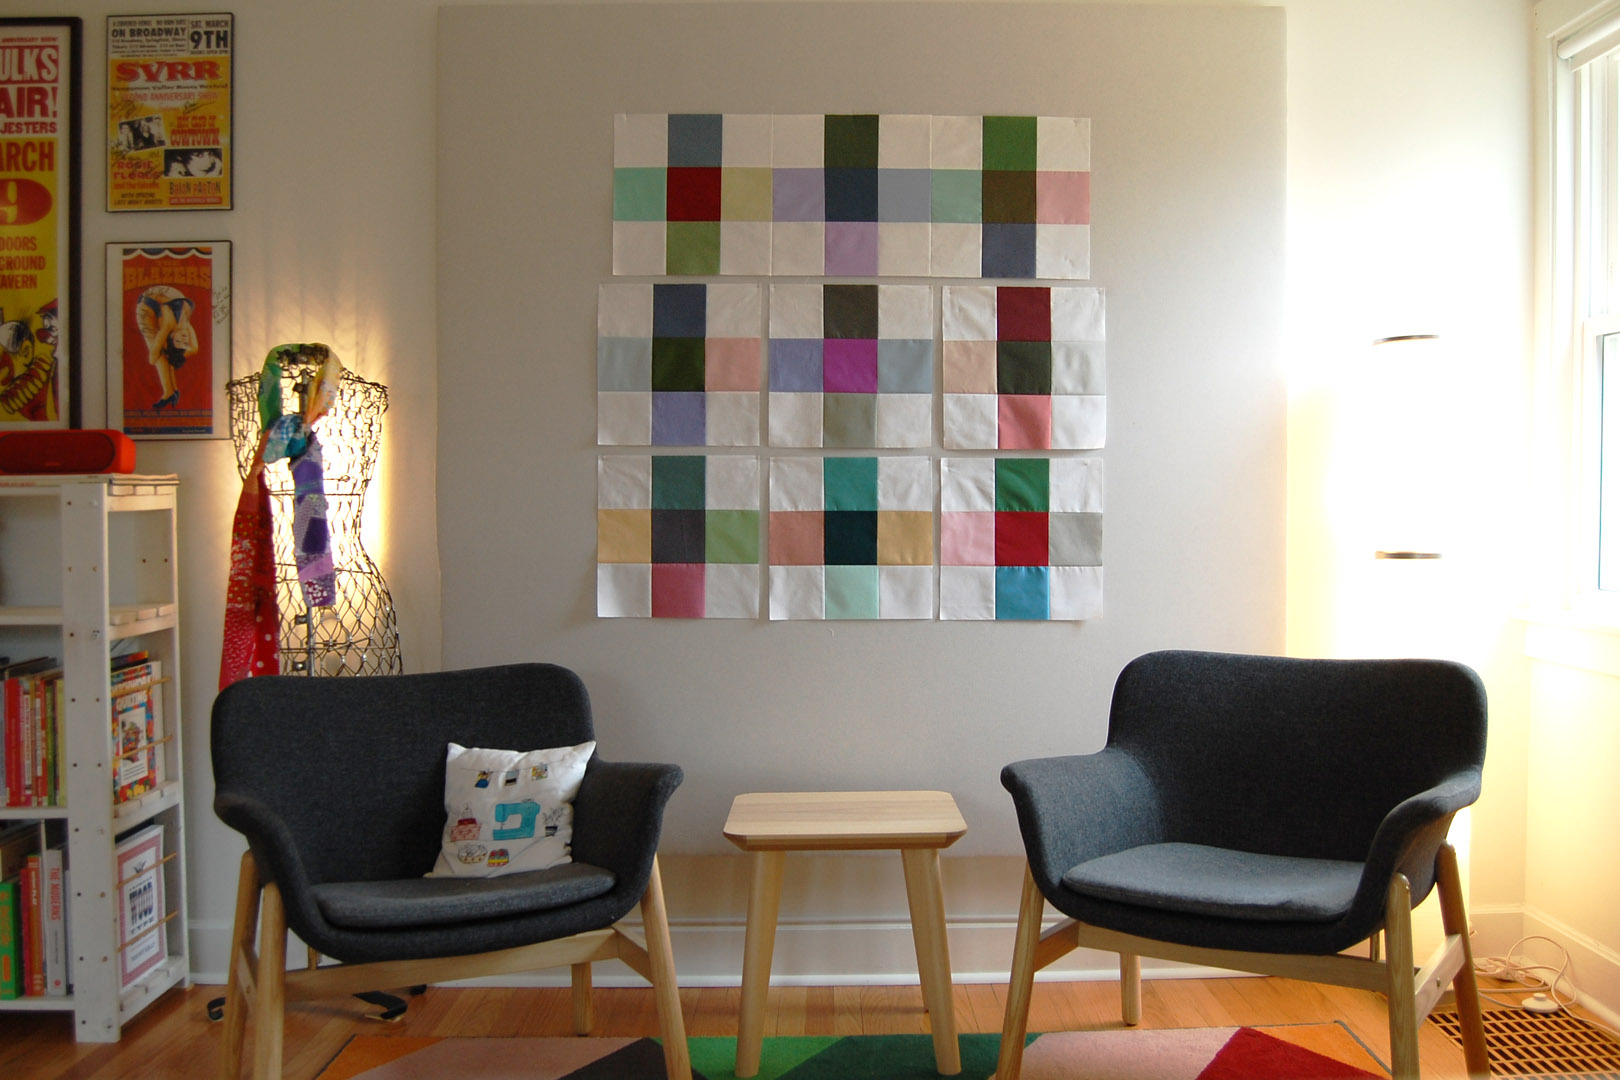
Use your favorite method to cut 81 5″ x 5″ fabric squares to make the quilt top. Some of my squares came as pre-cuts, and I used a rotary cutter, mat, and 6″ x 24″ quilting ruler to cut the rest. I used a simple 3 by 3 grid to create the basic 9 patch block for this quilt. I did use some simple rules for the layout of each 9 patch block, but the colored fabric squares are arranged somewhat randomly.
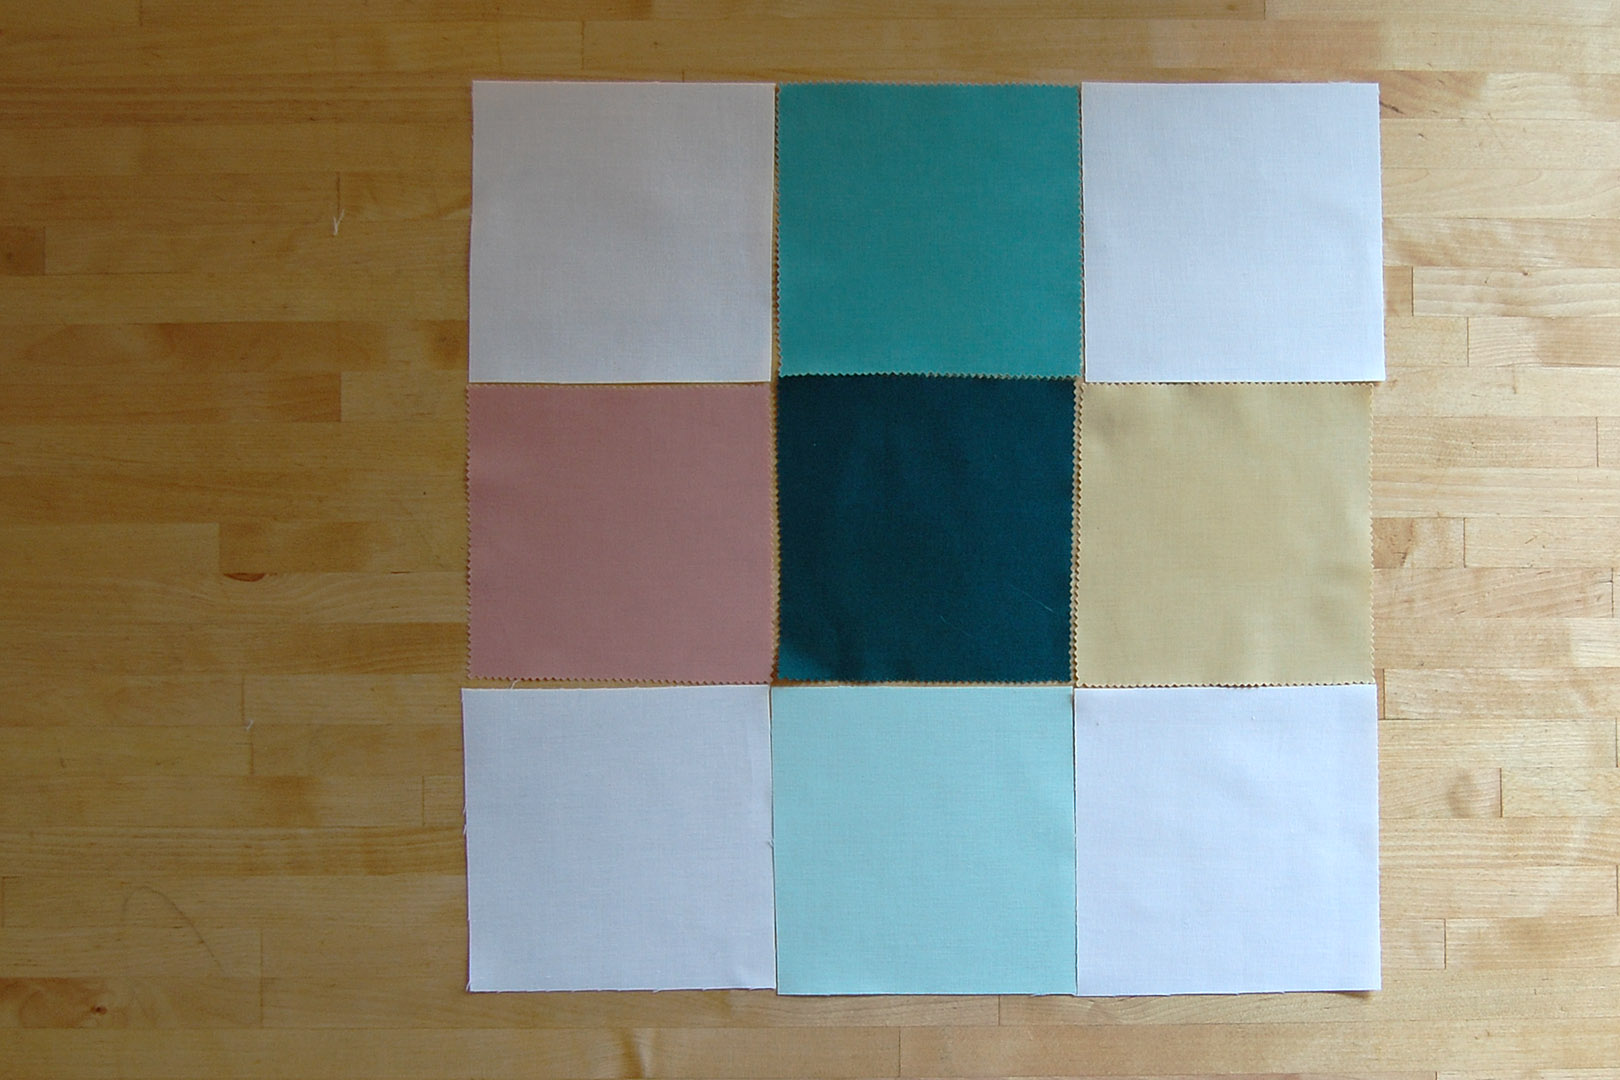
In each 9 patch block, the background fabric (white) is placed at the 4 corners. I placed one of the darkest colors in the center of each 9 Patch, and arranged the final four colors with darker colors at the top, lighter colors at the bottom. This creates a simple + design with a dark center. I also checked the layout of all the 9 patch blocks together to decide on a “final” design before beginning to stitch the 9 patch blocks together.
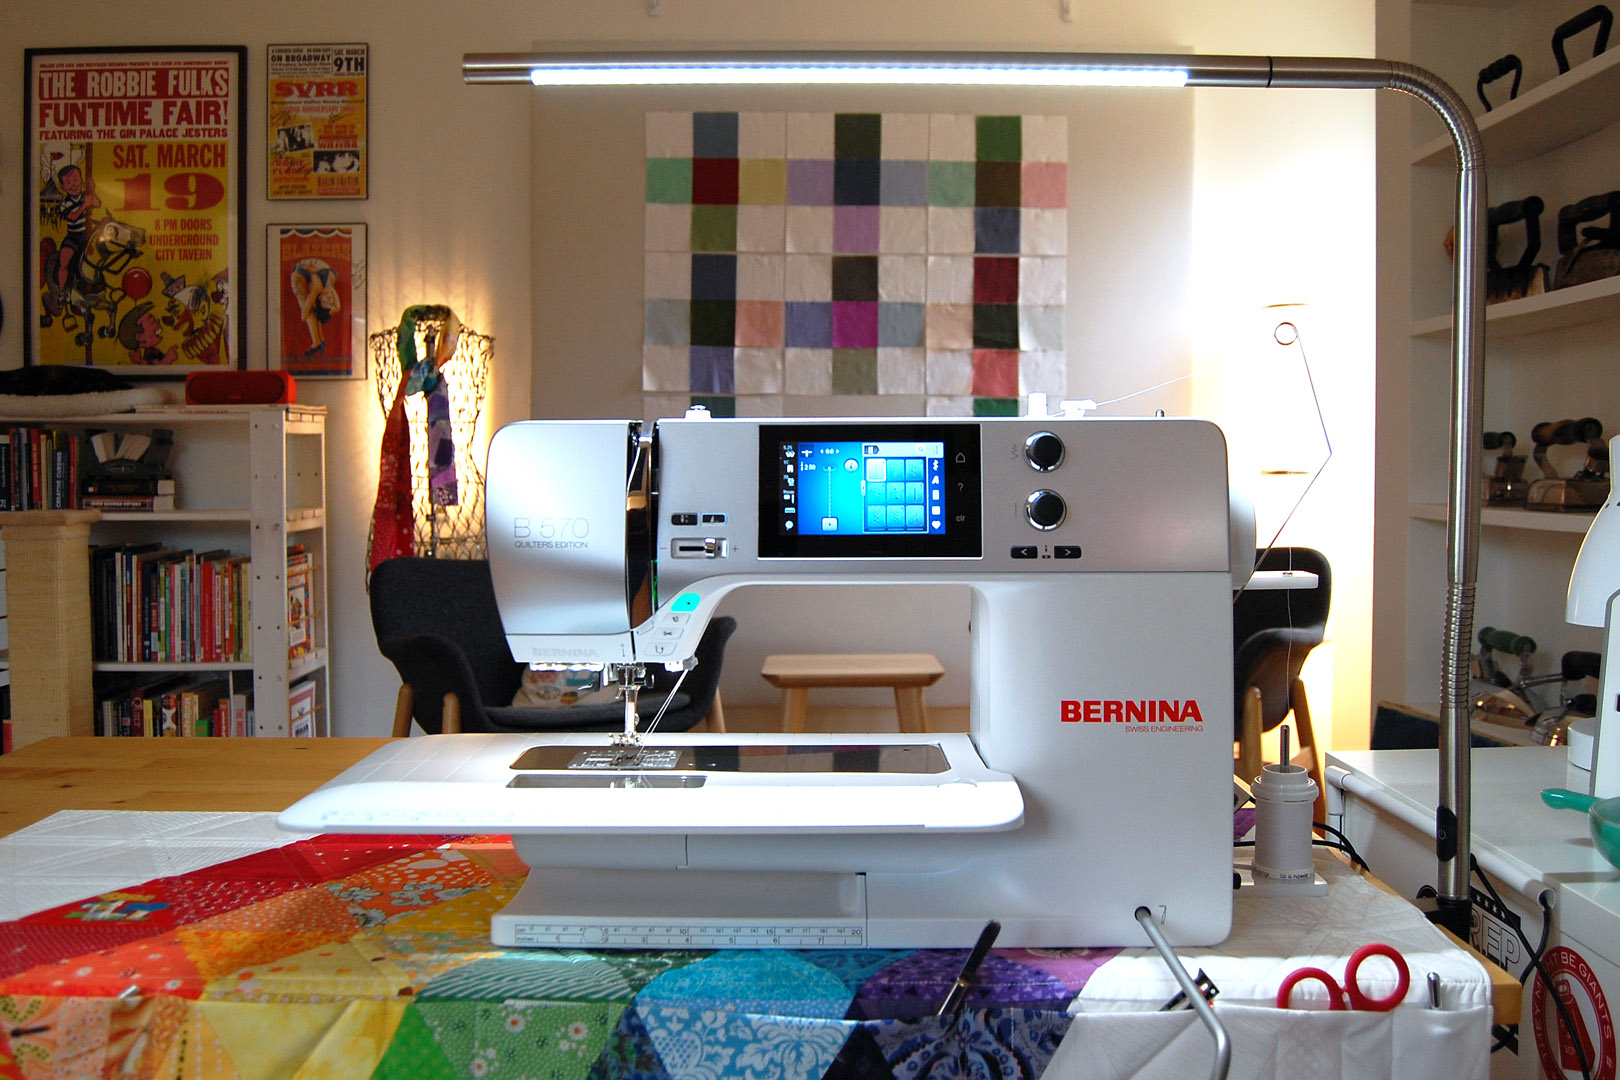
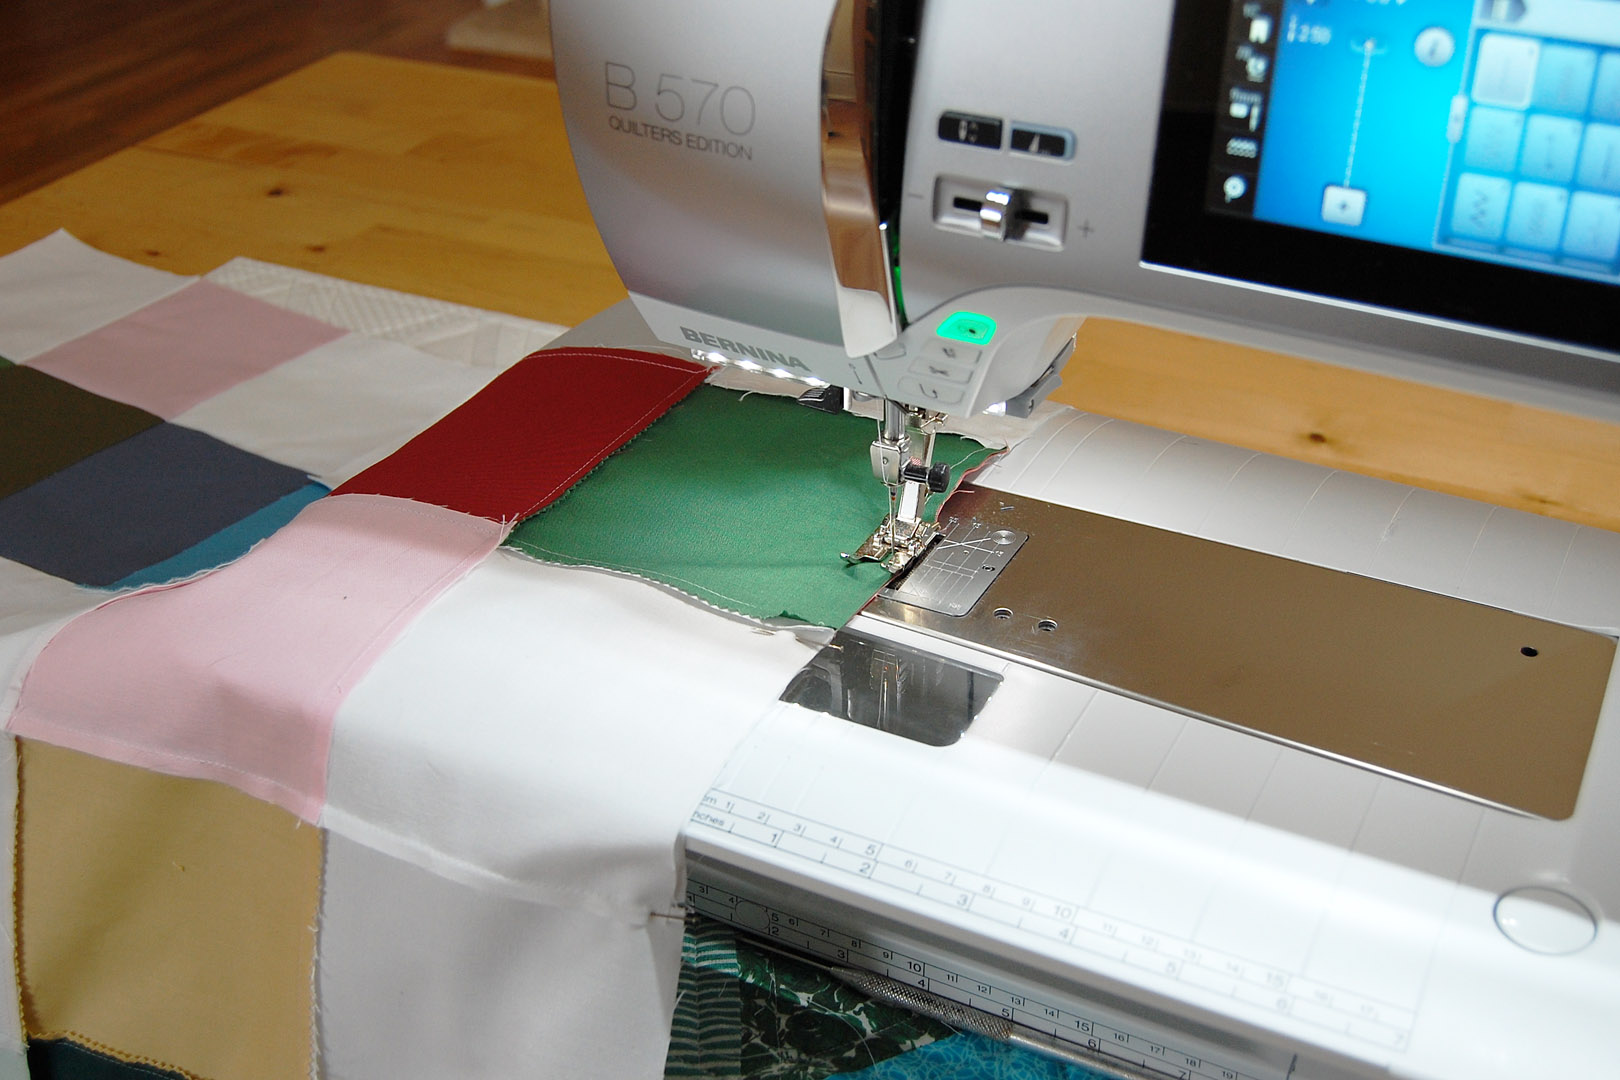
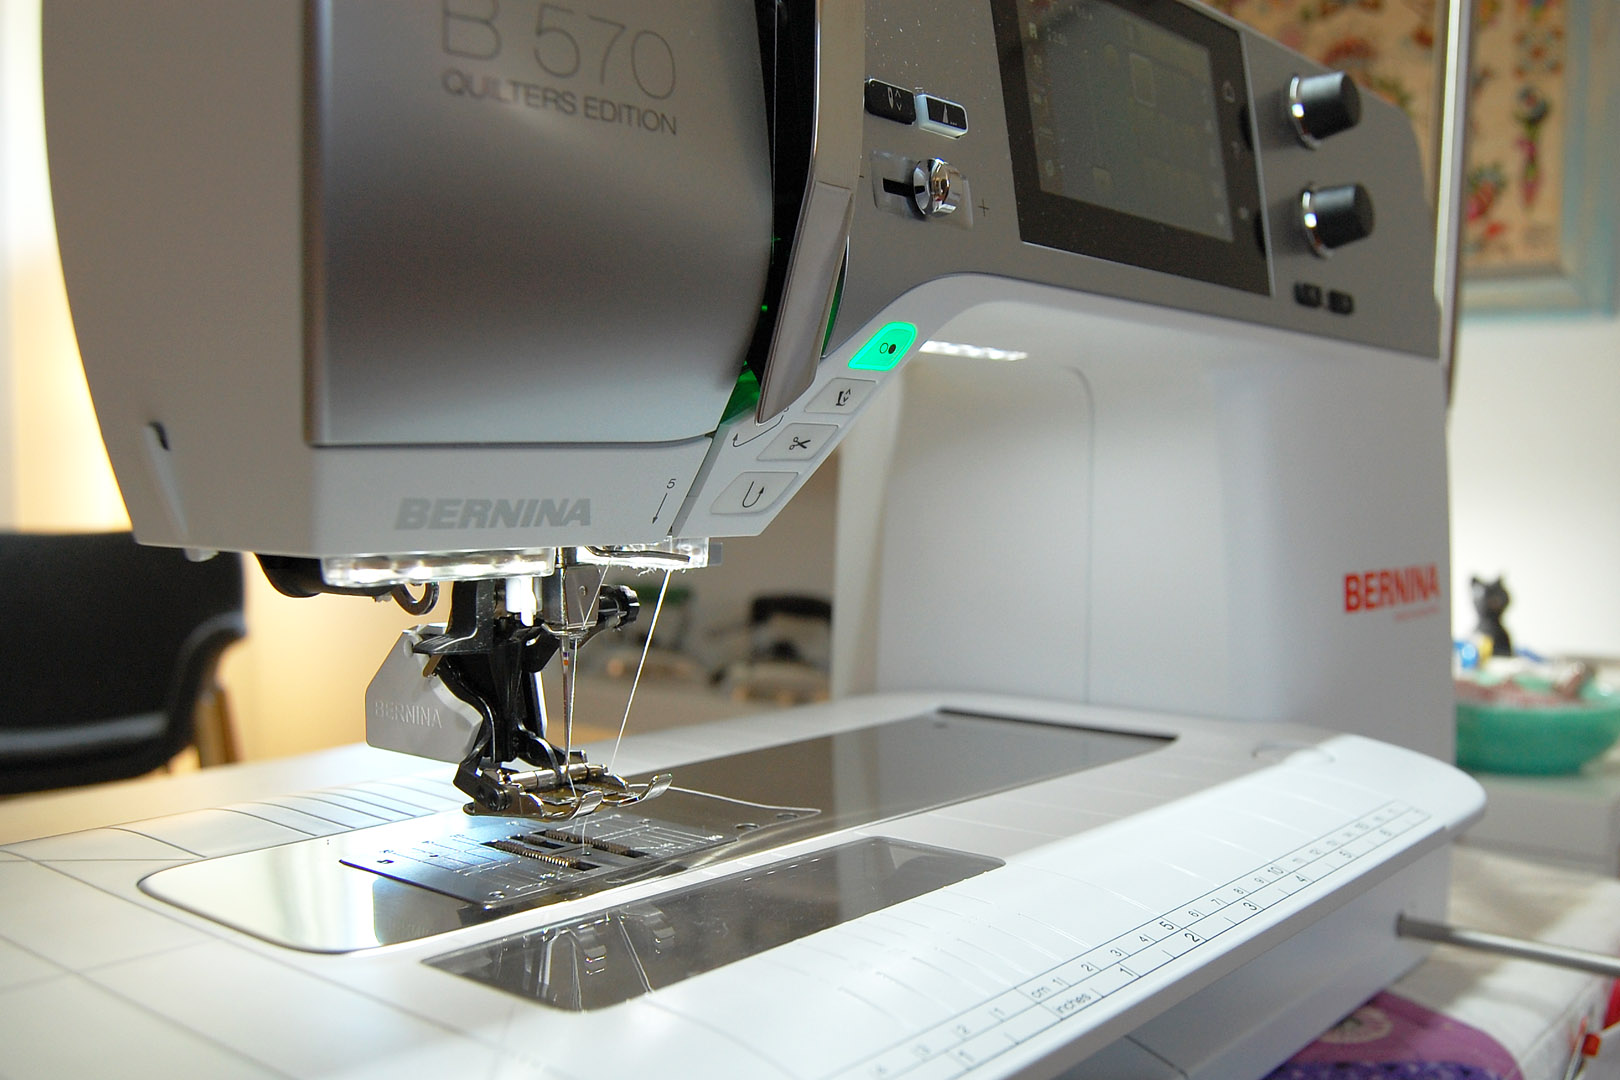
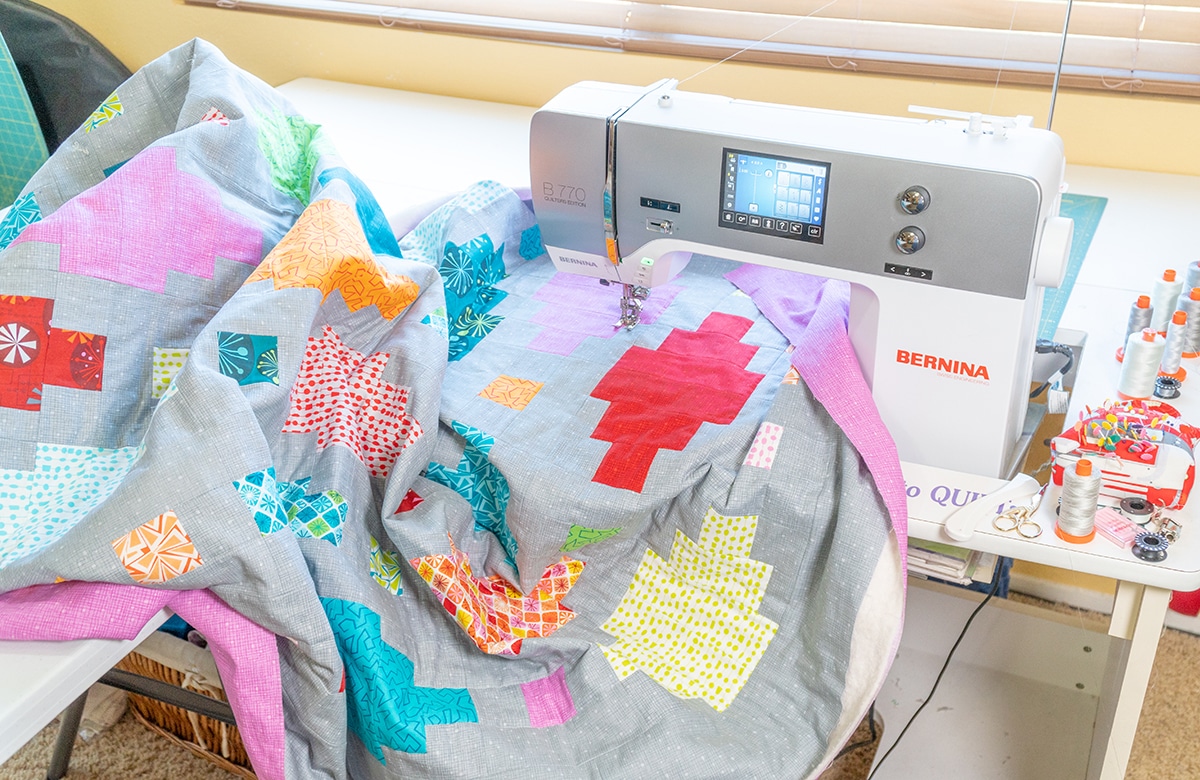
When I found a final layout I really liked, I started to sew the patchwork quilt top together. For this step I am using the Patchwork foot #97 on my B 570 QE. You can use any straight stitch foot for this step, like the Patchwork foot #37, #57, or #97.
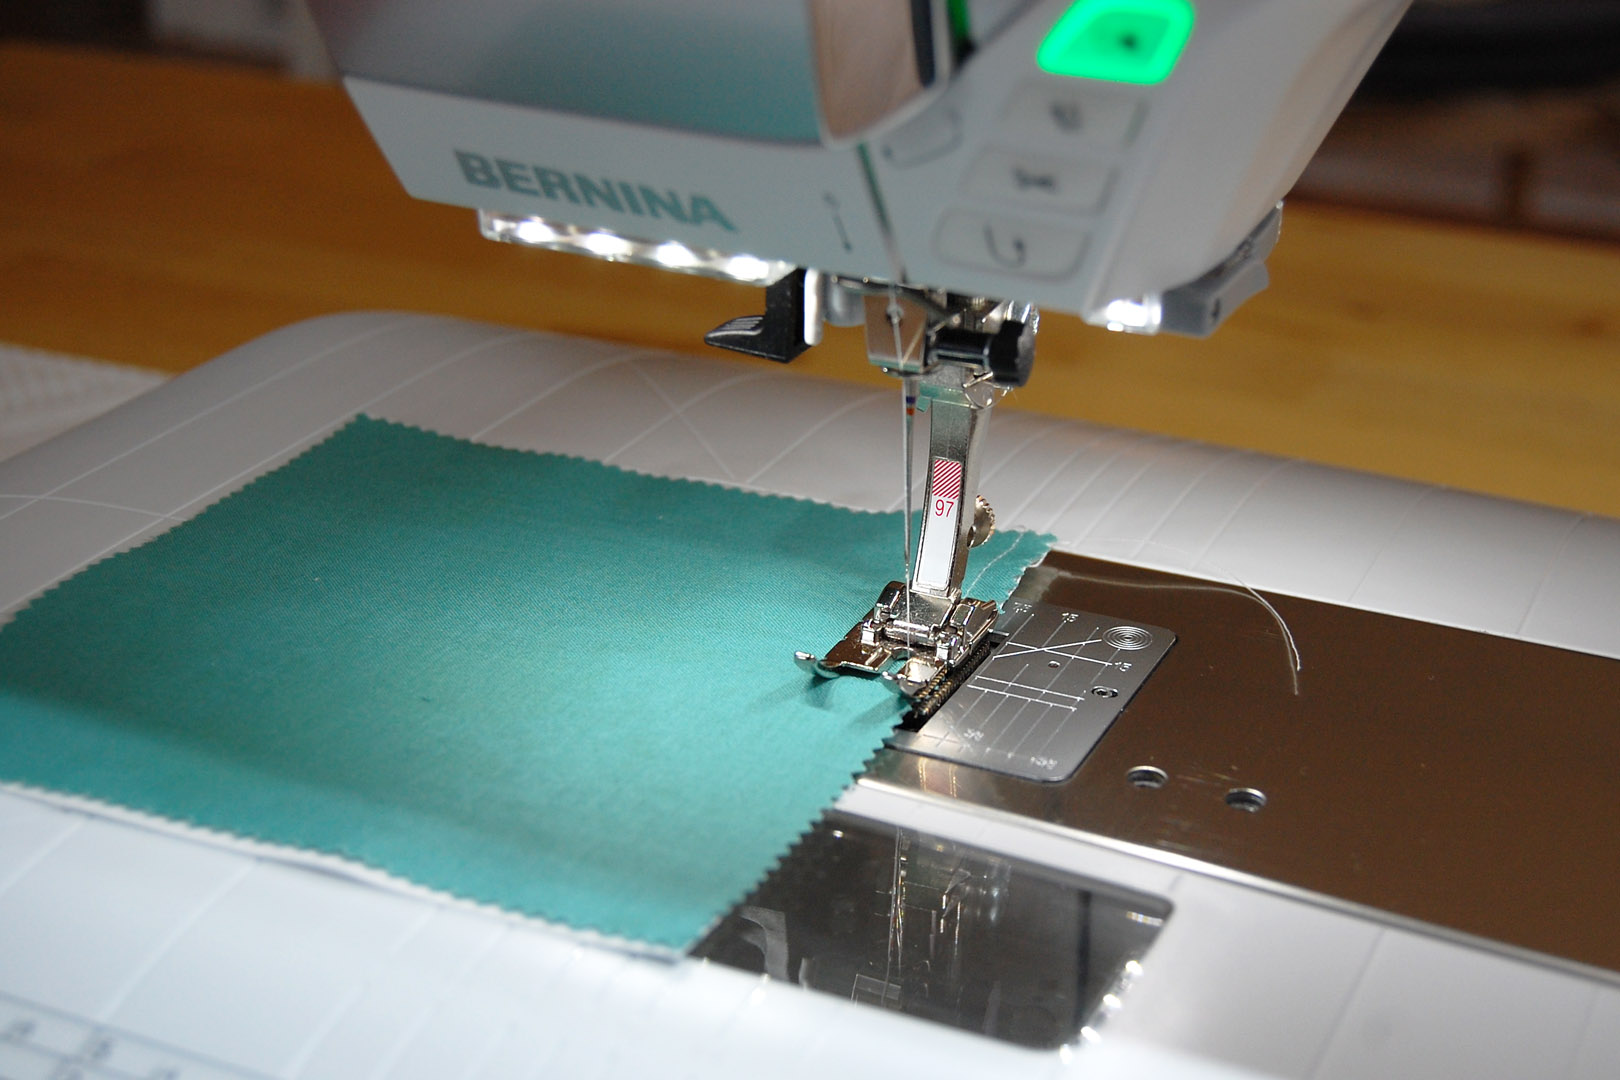
To create one 9 patch block, I first sew the three top squares together with a quarter-inch seam.
Quilters all have a preferred method for pressing seams. Some like to press seams open, others to the side, and some quilters are specific about which direction seams are pressed. When seams are pressed to the side, it’s common to press seams in each row in opposing directions because this makes it easier to match seams and can help reduce bulk. I press seams to the side in the first row and try to make sure seams are pressed in opposing directions for each of the following rows.

I say that I “try” to press in opposite directions because sometimes I get it wrong! If you do press in the wrong direction, you can go back and press again. For a project like this I usually just keep on keepin’ on and don’t worry to much about seam direction since the patchwork is so simple. The more patchwork pieces and seams are in a quilt top, the more it can matter which direction your seams are pressed!

Once each of the 3 rows of squares are stitched together, each row can be joined to create the 9 patch block. I pin by matching each of the rows together at the seams, and not at the ends of the blocks (matching the fabric at the end of each row can result in the seams being way off). When the blocks are completed I lay them all out together again. This is the perfect time to make any last-minute changes in your 9 patch block layout! I’m liking this arrangement, it’s looking like a colorful plaid or woven pattern.
I like to sew the 9 patch blocks together across rows first, and then join the rows as a final step.
When sewing each of the blocks together in rows, match and pin at the seams first.
I press seams to one side as I am sewing the blocks together, and also keep pressing all the seams nice and flat as I go.
Once the first row is stitched together, I move on to the next two rows.
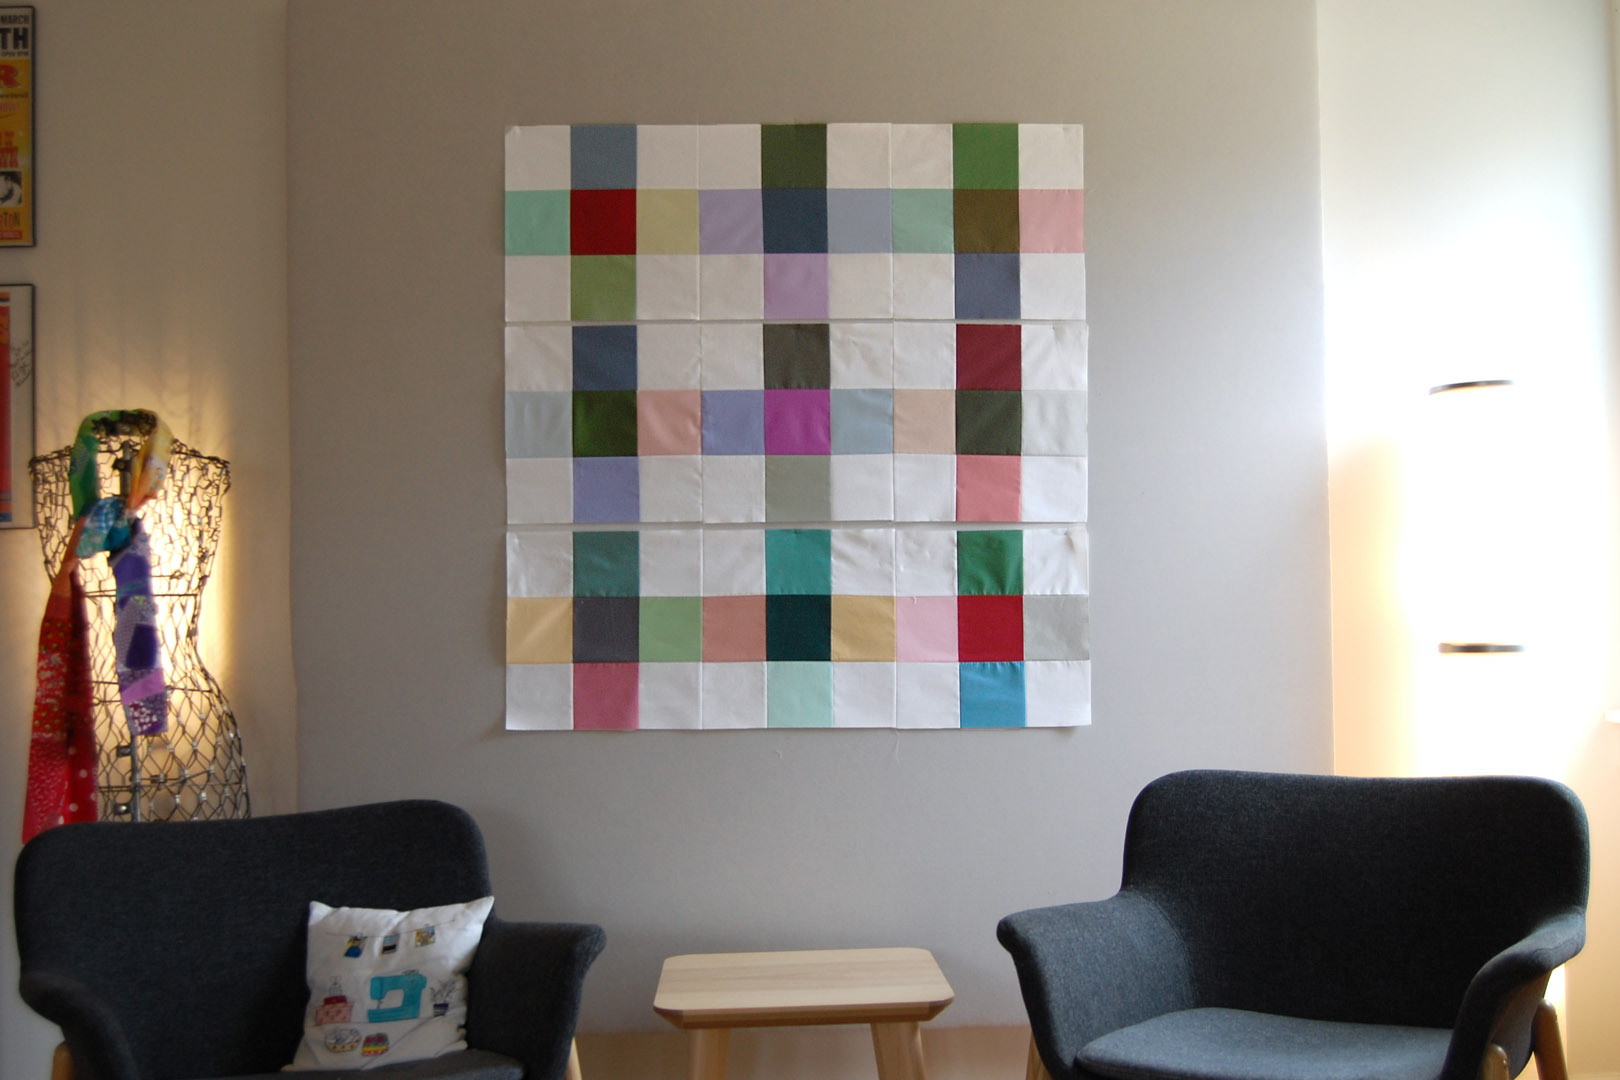
And when all rows are complete, it’s time to sew the rows together. As with joining the other blocks, I try to match seams together as closely as possible, pinning as I go.
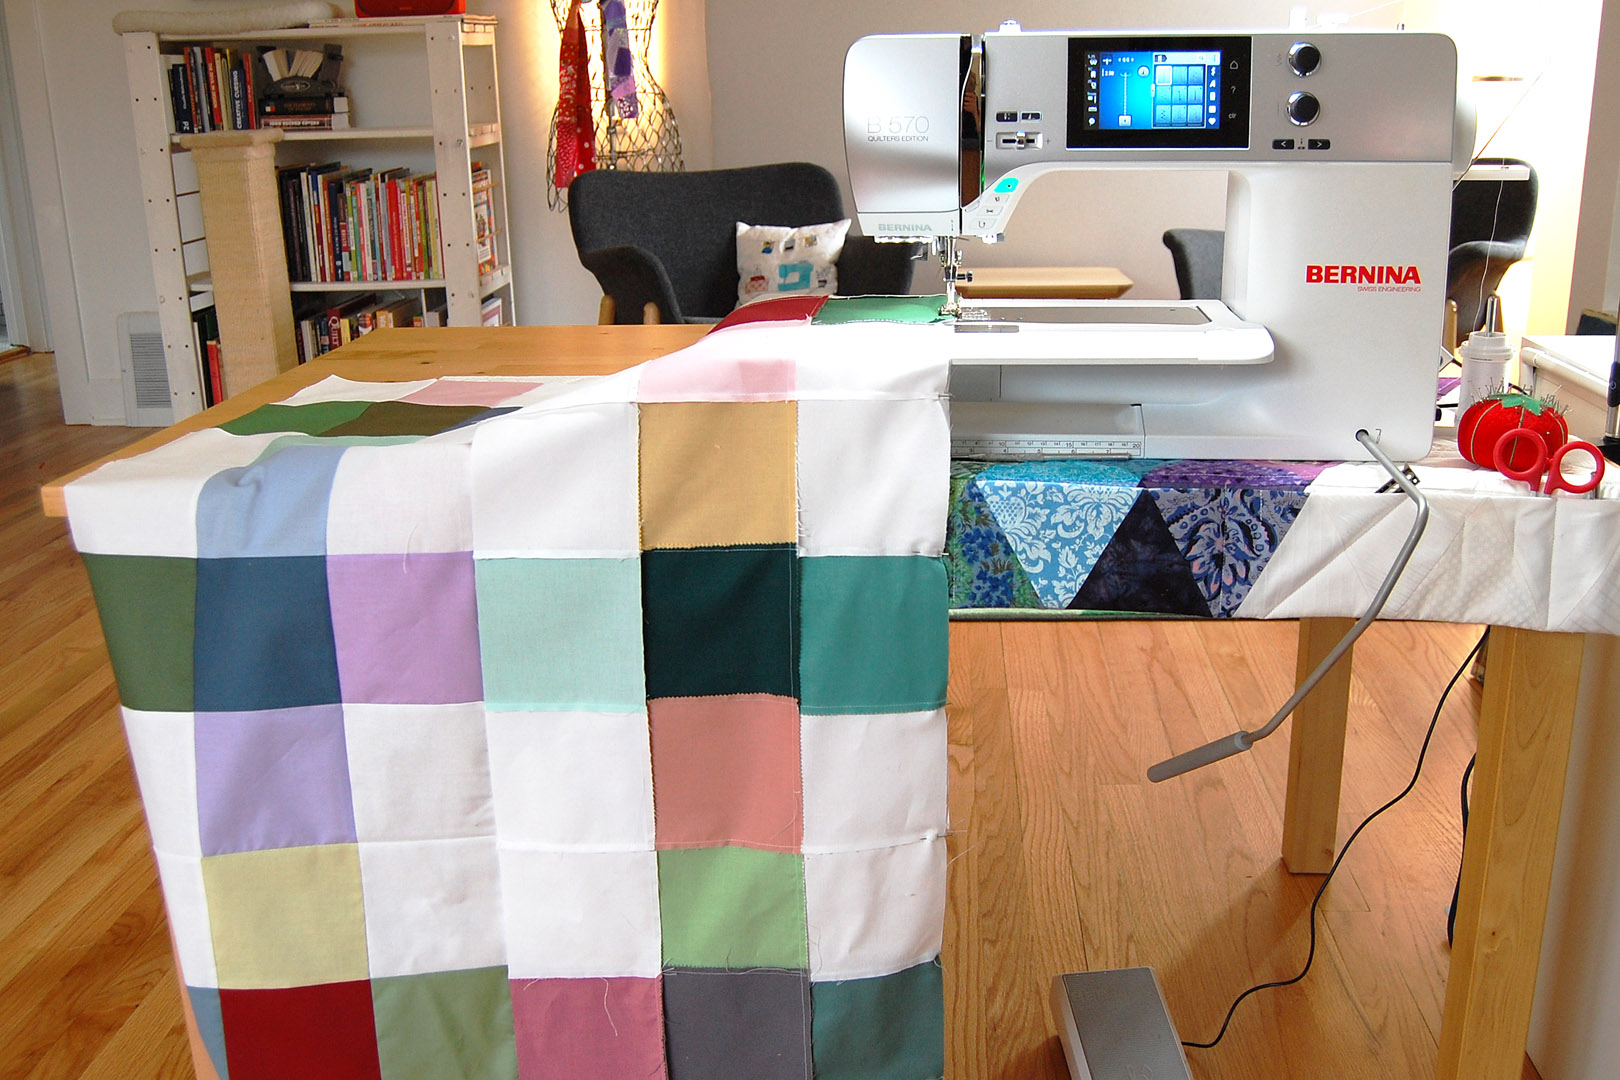
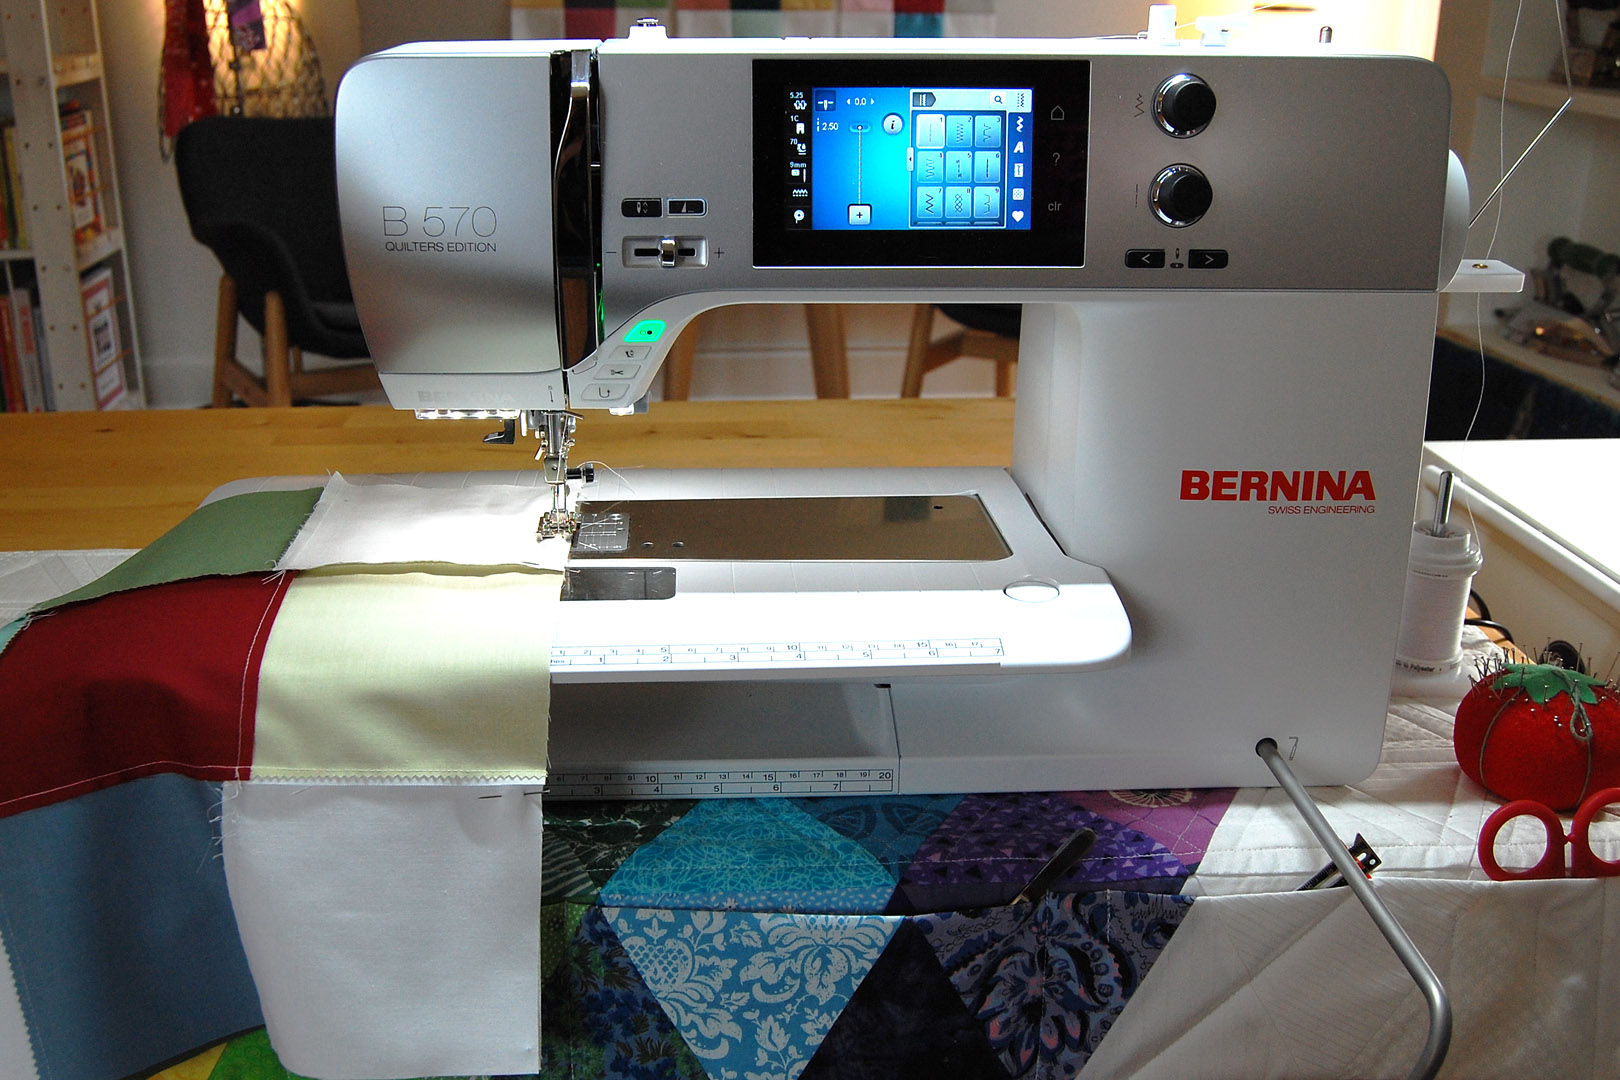
When your quilt top starts growing bigger, it can help to sew straight lines if your patchwork is fully supported as you sew. If you don’t have a large cabinet or table available to you, think about setting up a temporary support next to your machine like a card table or a few TV trays. I sew on an updated table large enough to support the quilt top.
Press the completed top well, making sure all seams are laying as flat as possible. This is also a good time to pull any stray threads or lint from the back of the quilt before you baste it all together.
About Quilt Edge Finishes
There are a few ways to finish the edges of your Minky backed baby quilt, and you need to have a plan before you start the basting process. I am finishing the edges of this baby quilt using my sewing machine and a wide double-fold quilt binding method.
You can also finish the edges with a self-binding method, bringing the backing forward to sew over the edges of the quilt. Learn about the self-binding method here. If you want to self-bind your baby quilt, you will need to make sure the backing is several inches wider than the quilt top, and be sure to start and stop quilting at the very edges of the quilt to make it easy to cut the extra batting away.
Another method to finish the edges is using the envelope technique, where the layers are stitched together inside-out, then flipped right-side-out before quilting. Learn about the envelope method here. If you want to use this method, you’ll be sewing the quilt together before getting to the quilting steps.
To finish by machine with the double-fold method, follow these steps. You can read a full tutorial on the double-fold quilt binding method here.
Baste your quilt layers. Cut the quilt batting a few inches wider than the quilt top. Make sure the quilt batting is flat by lightly pressing with a steam iron and press cloth. Set quilt batting aside.
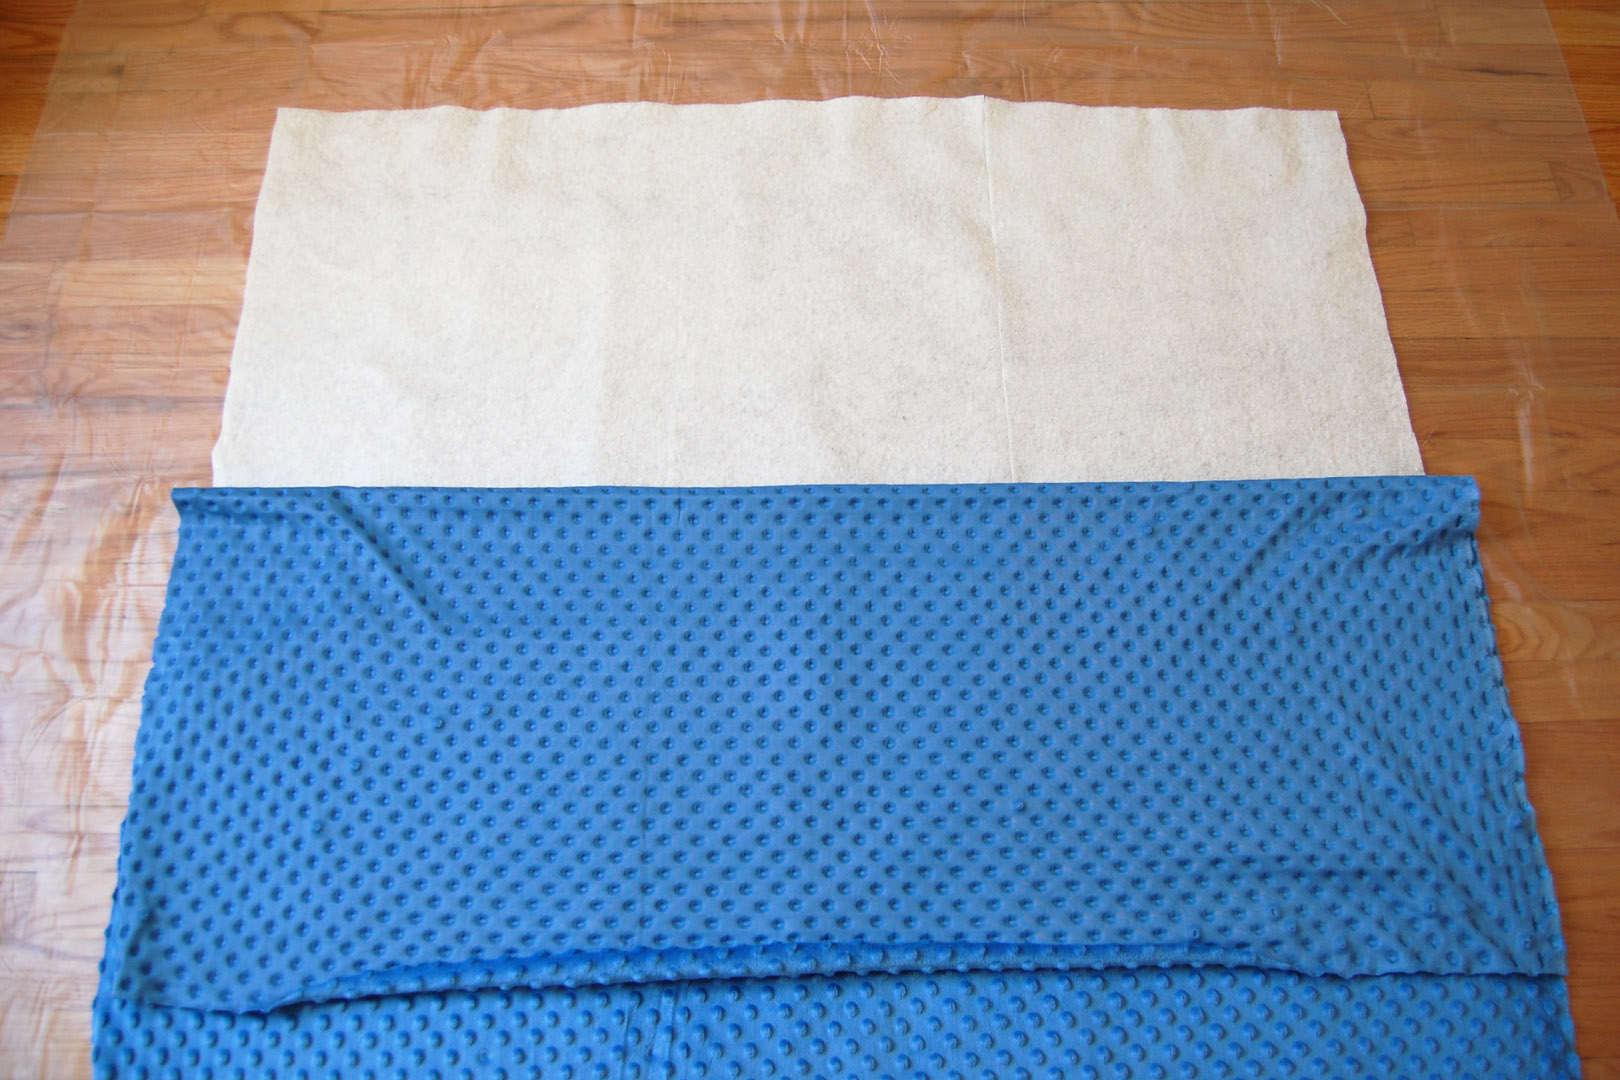
Cut the backing a few inches wider than the top. Set backing aside.
I use the spray basting method to hold the slippery, stretchy Minky fabric in place through the quilting process. To protect the floor from getting stick with overspray, I put an old shower curtain liner down. Layer the batting down first.
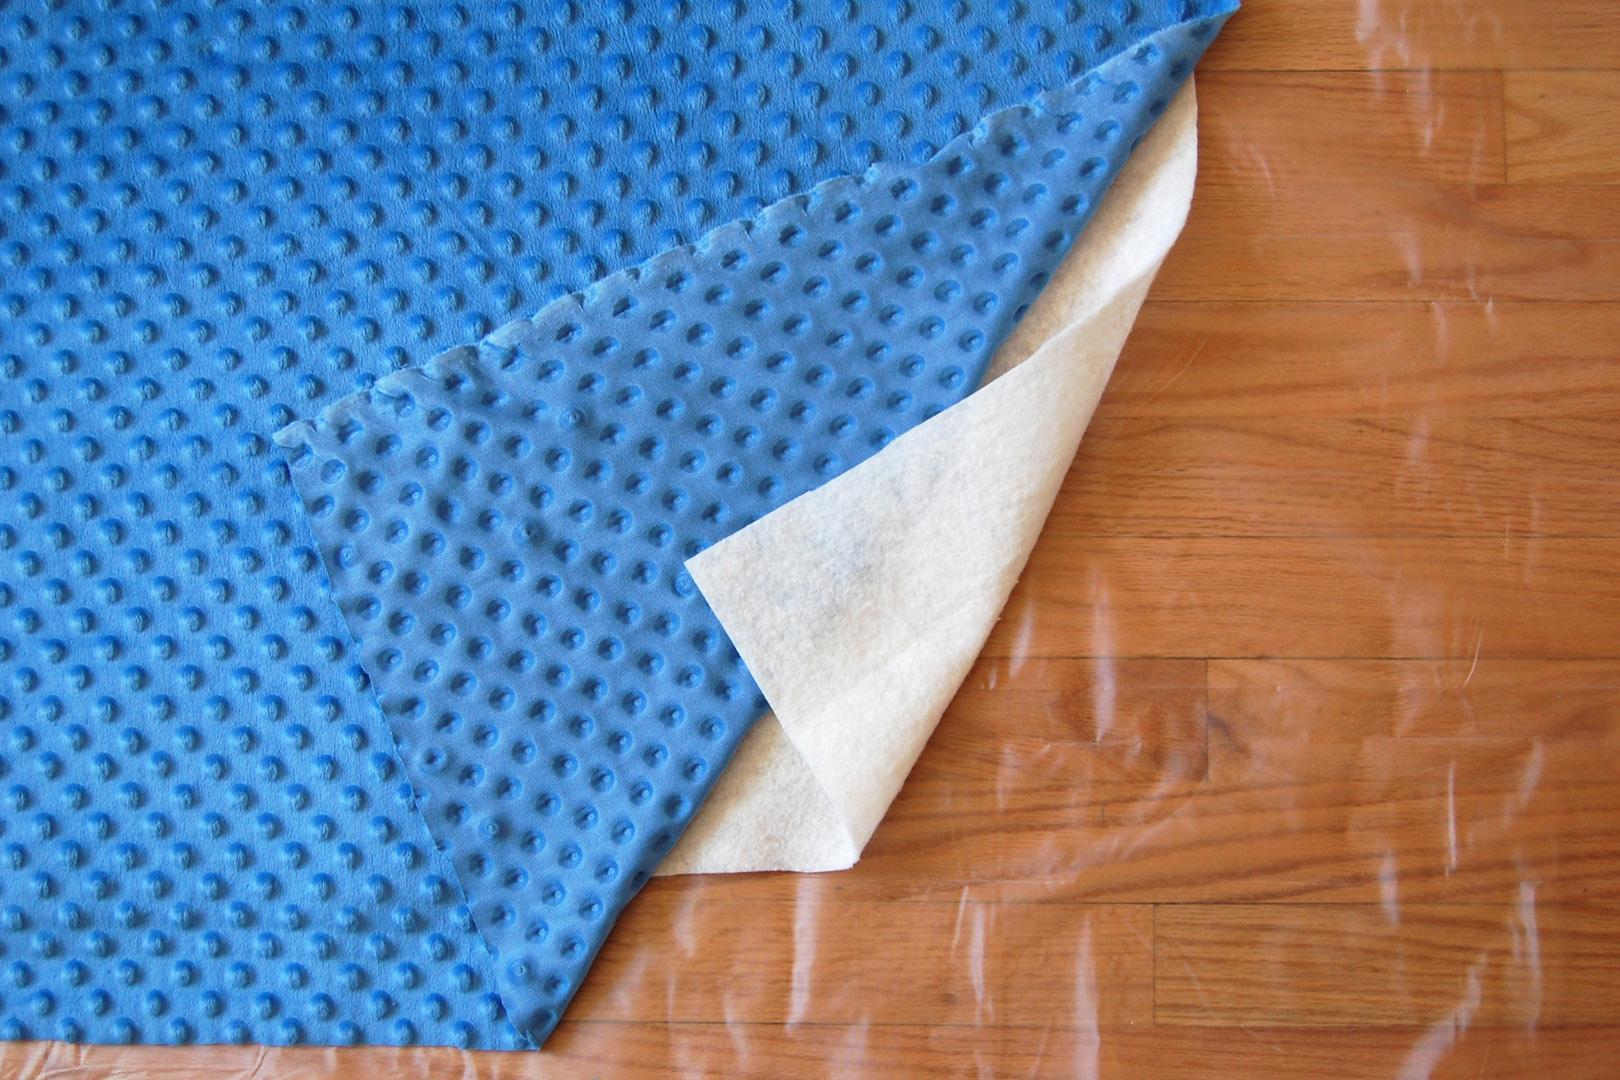
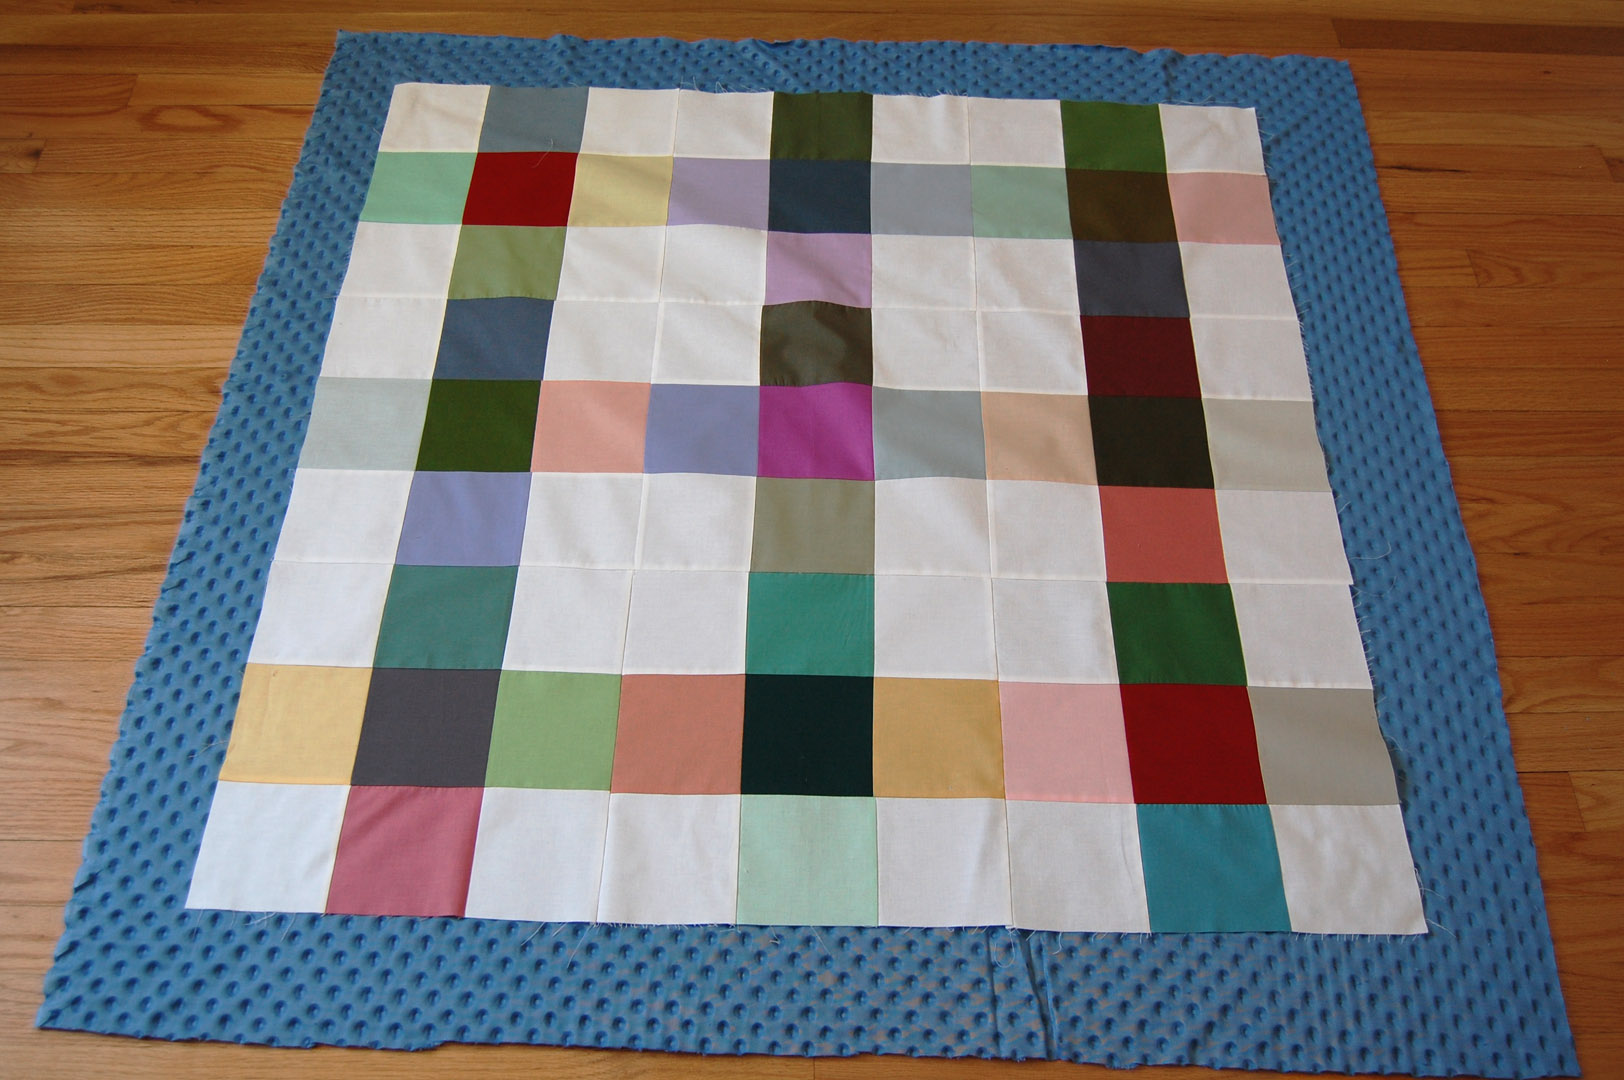
Lay the Minky backing on top of the batting, smoothing out all of the wrinkles as you go. You can spray baste the entire batting surface and place the backing down in one step, but I feel like I have more control over wrinkles and stretching by tackling this task in halfsies shown below.
I peel back one half of the Minky backing, applying the spray basting only on the batting, and carefully replace and press down the backing. Once half of the backing is flat and secured, I peel back the other half and repeat the process.
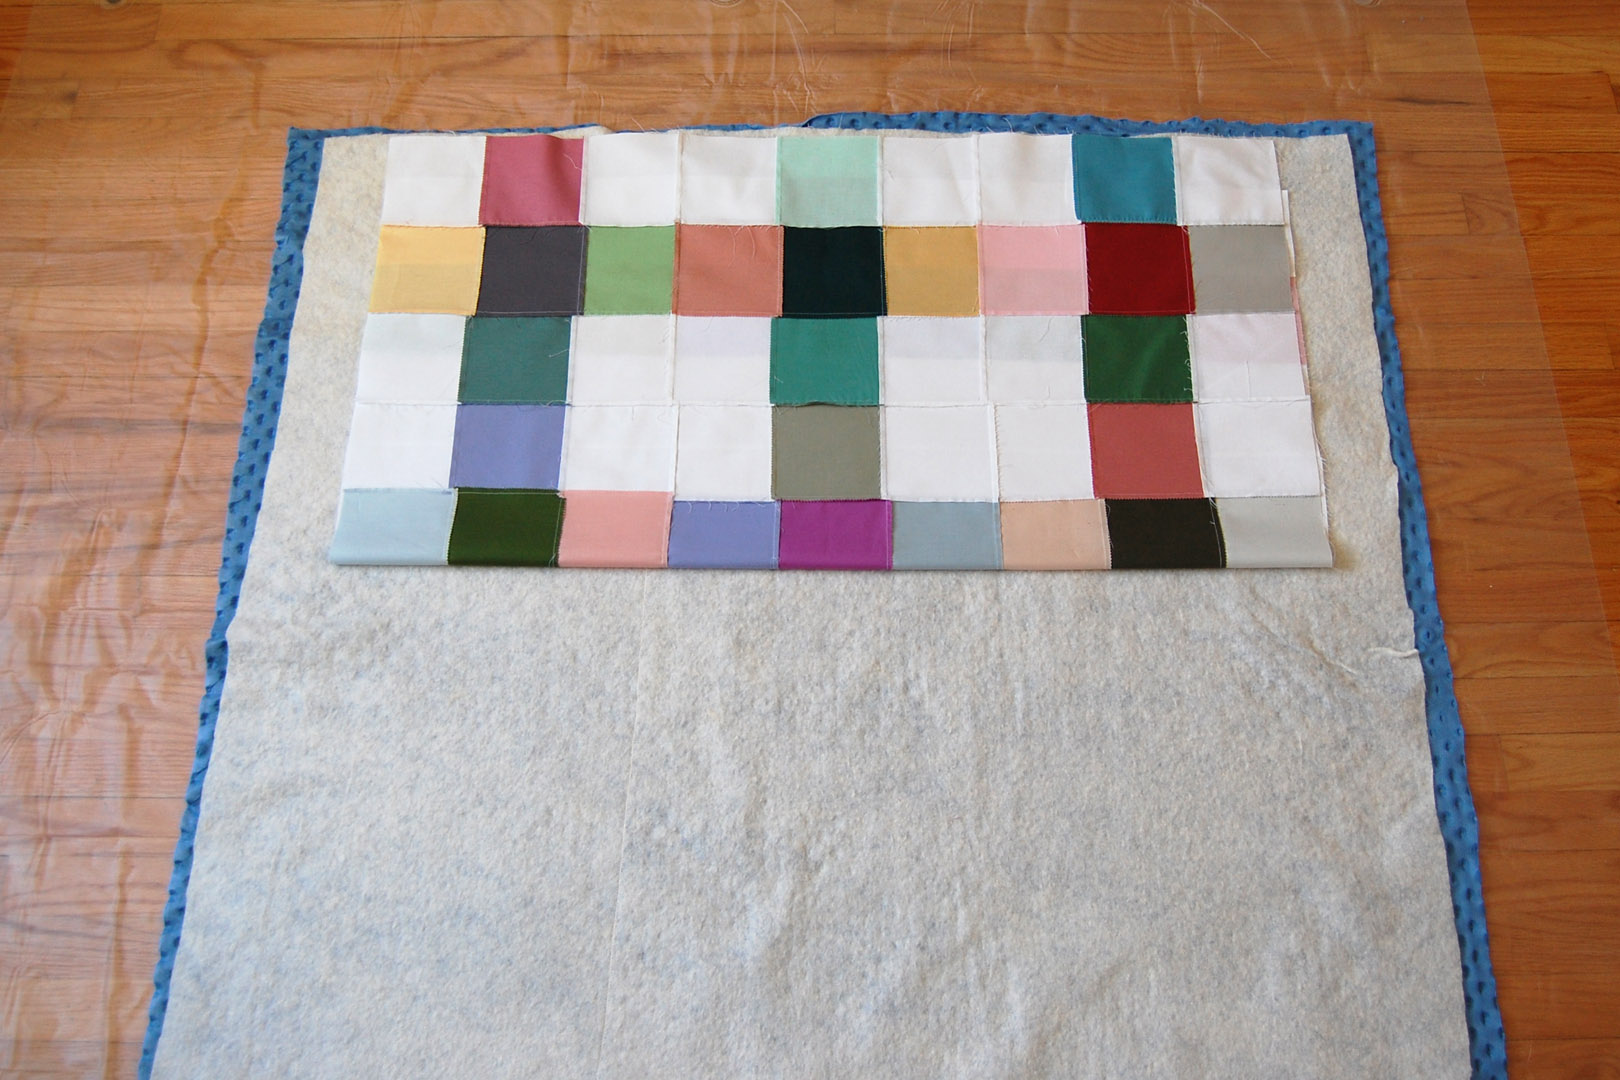
When the backing is adhered to the batting, I flip it over and carefully align the quilt top to the batting. I follow the same steps as above, basting half the top at a time, until the top is adhered smoothly to the batting. It’s time to start quilting!
Quilting the Minky Backed Patchwork Baby Quilt
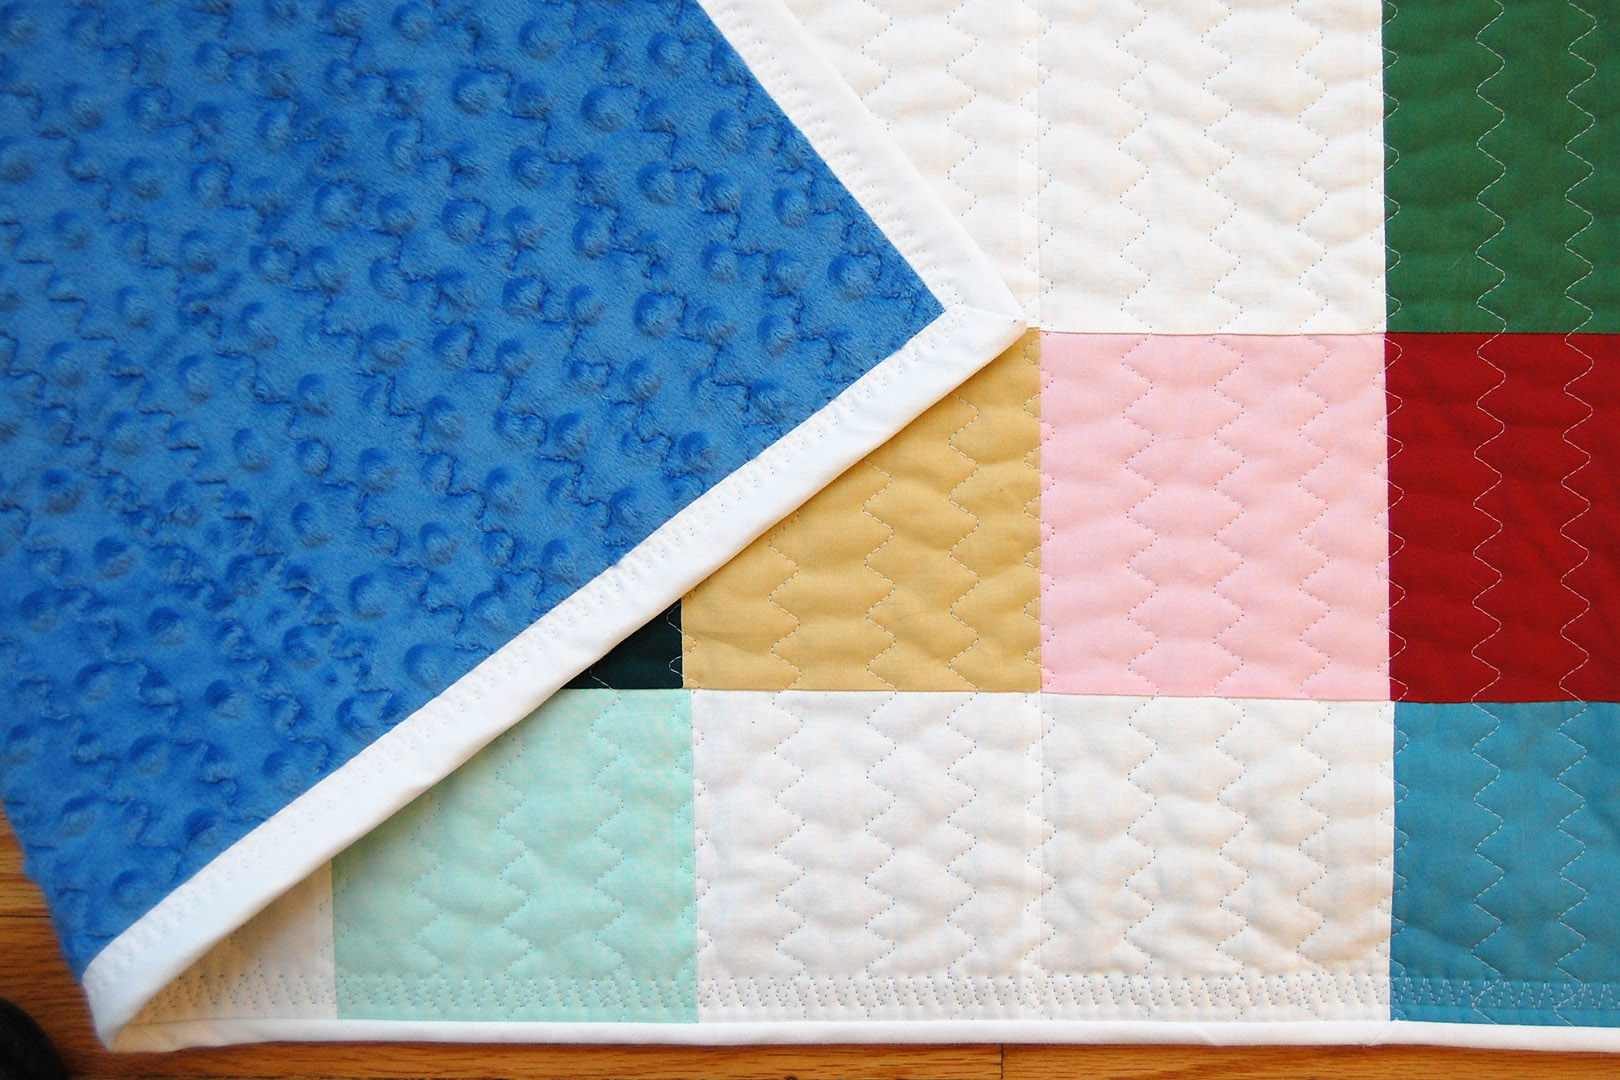
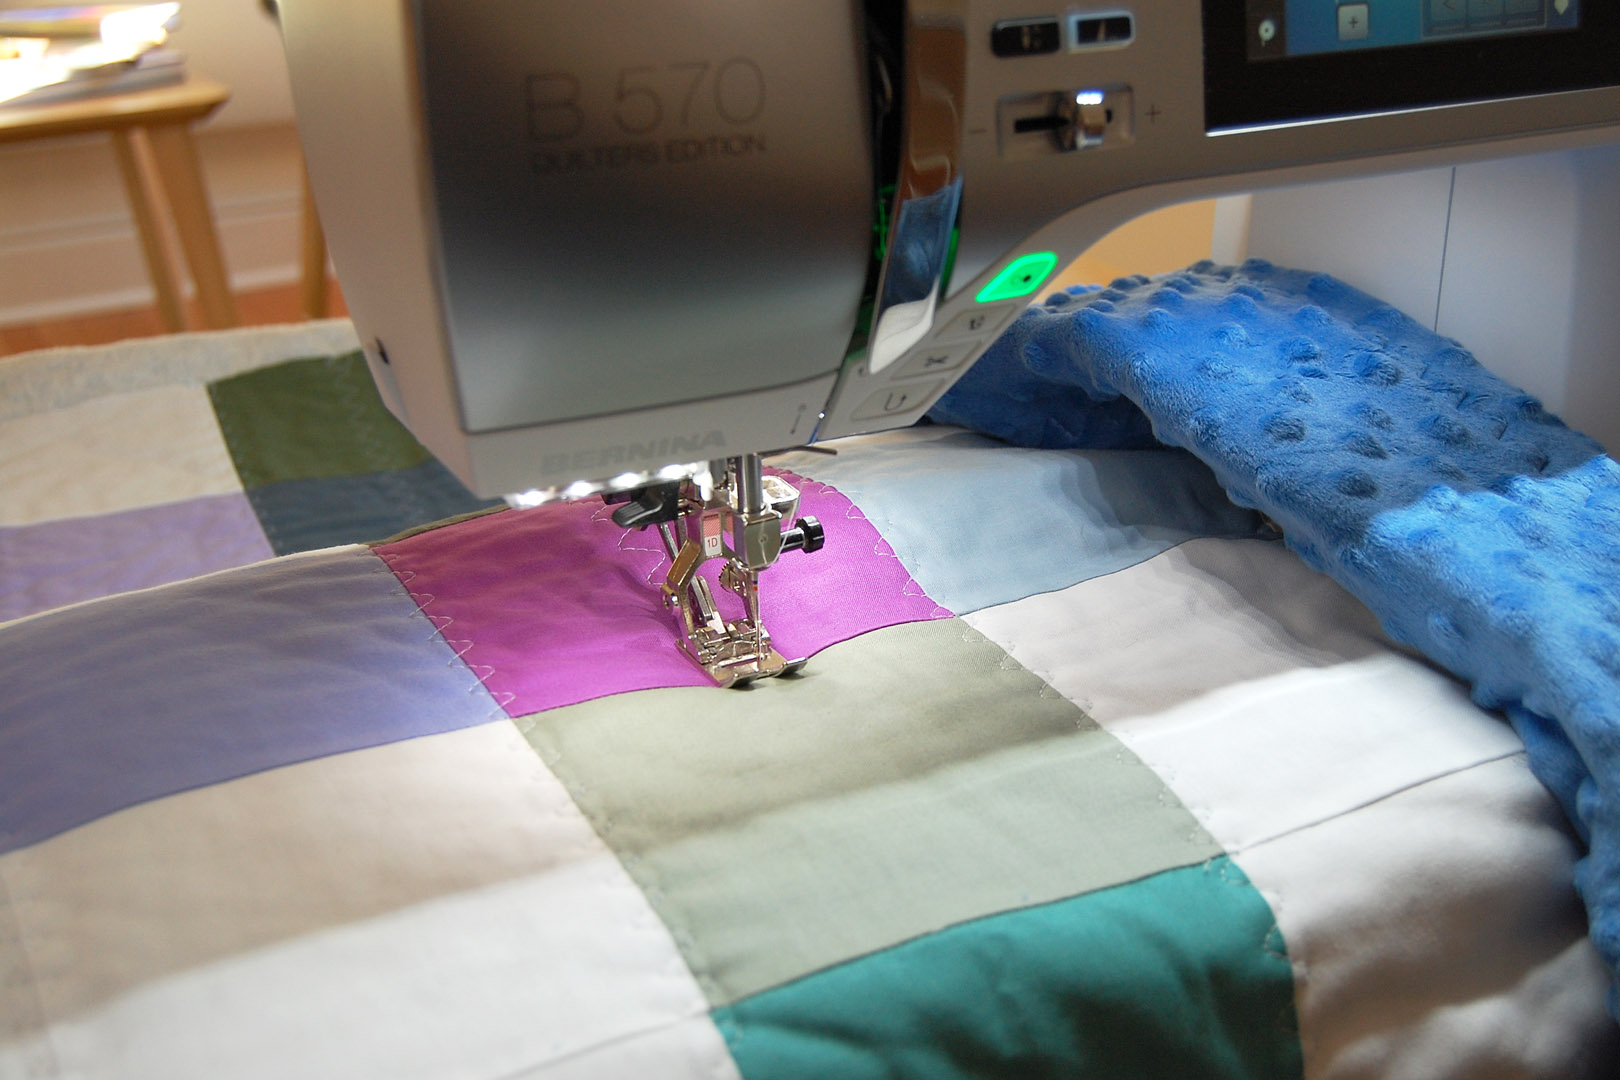
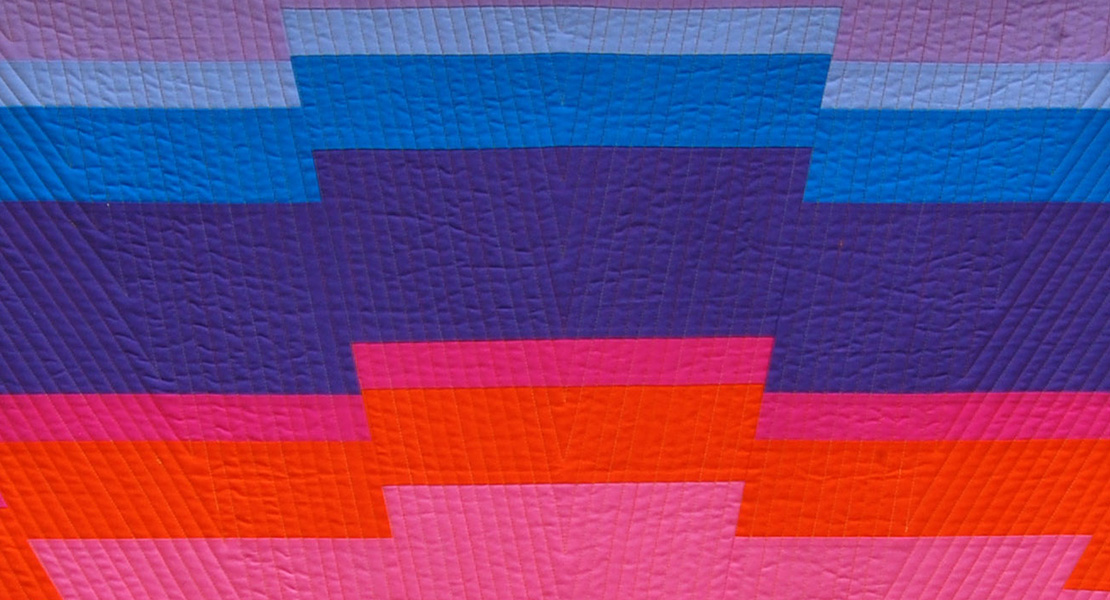
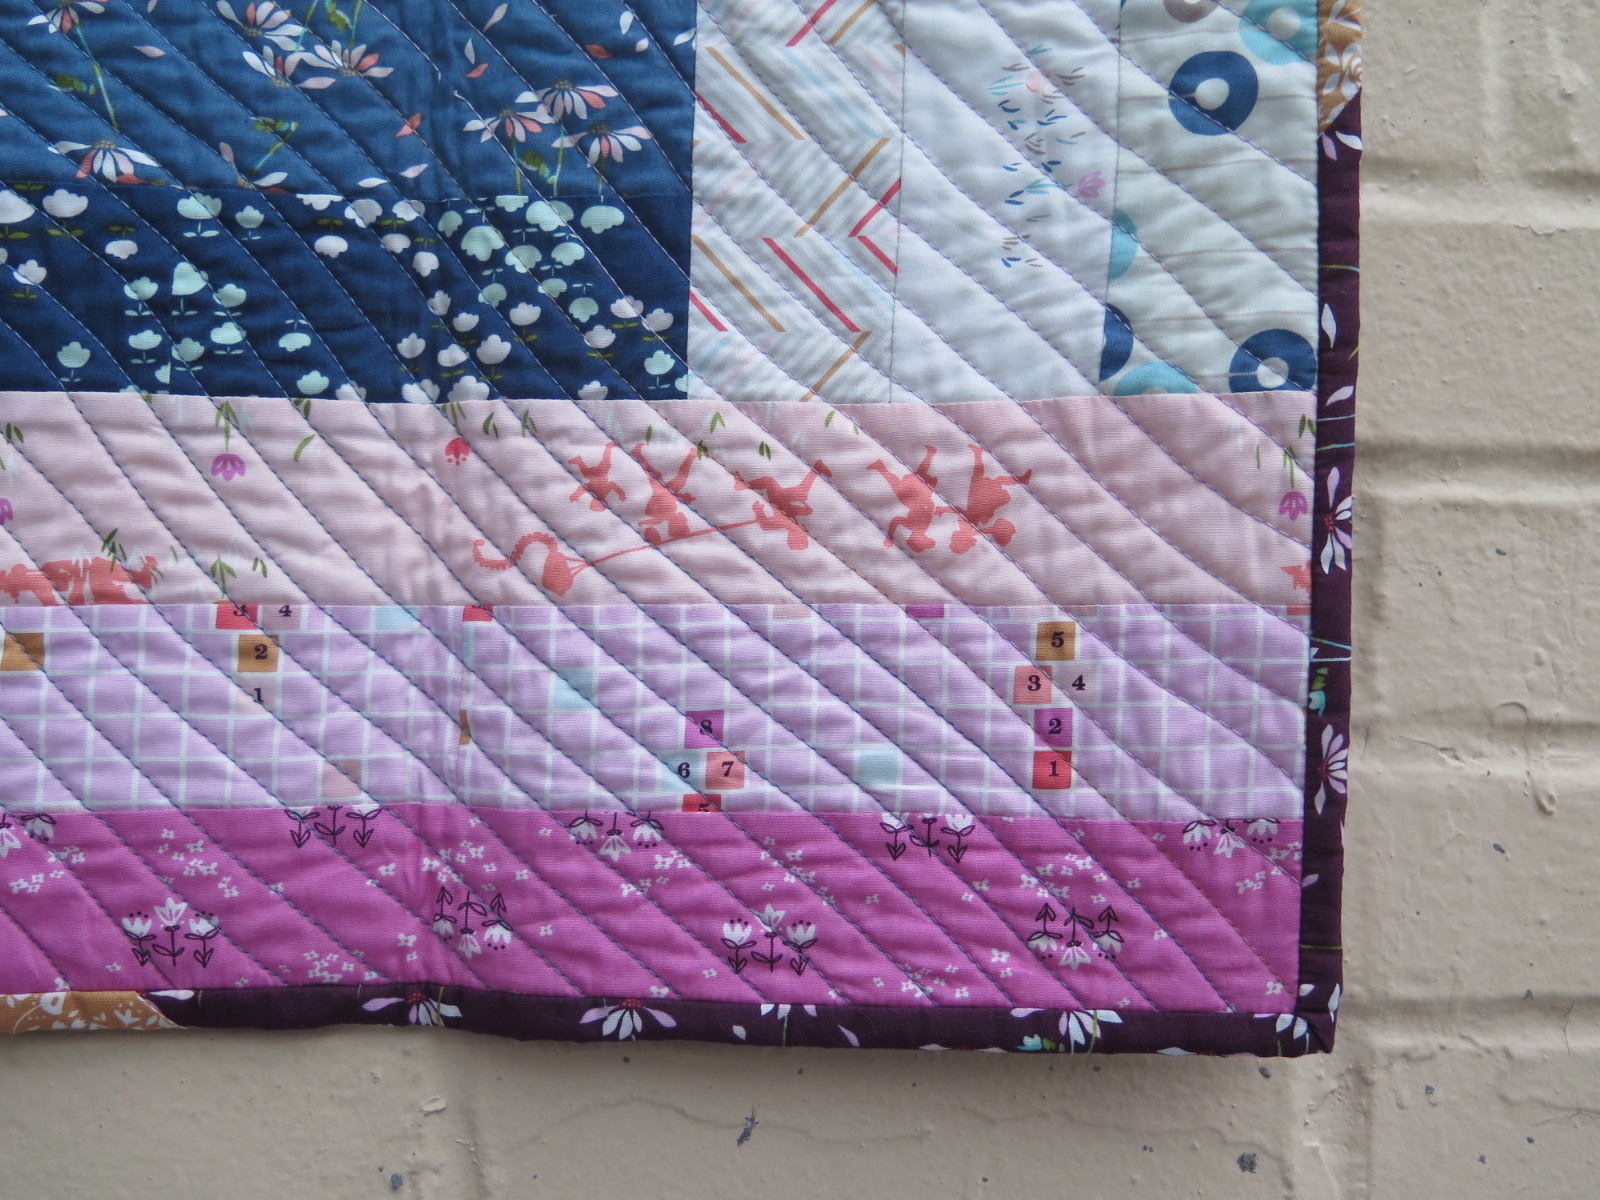
There are many ways you can quilt the baby quilt. I chose to use an altered utility stitch both for quilting and final steps in attaching the binding. The Running Stitch (stitch #4 on most BERNINA machines) creates a gentle meandering stitch when altered.
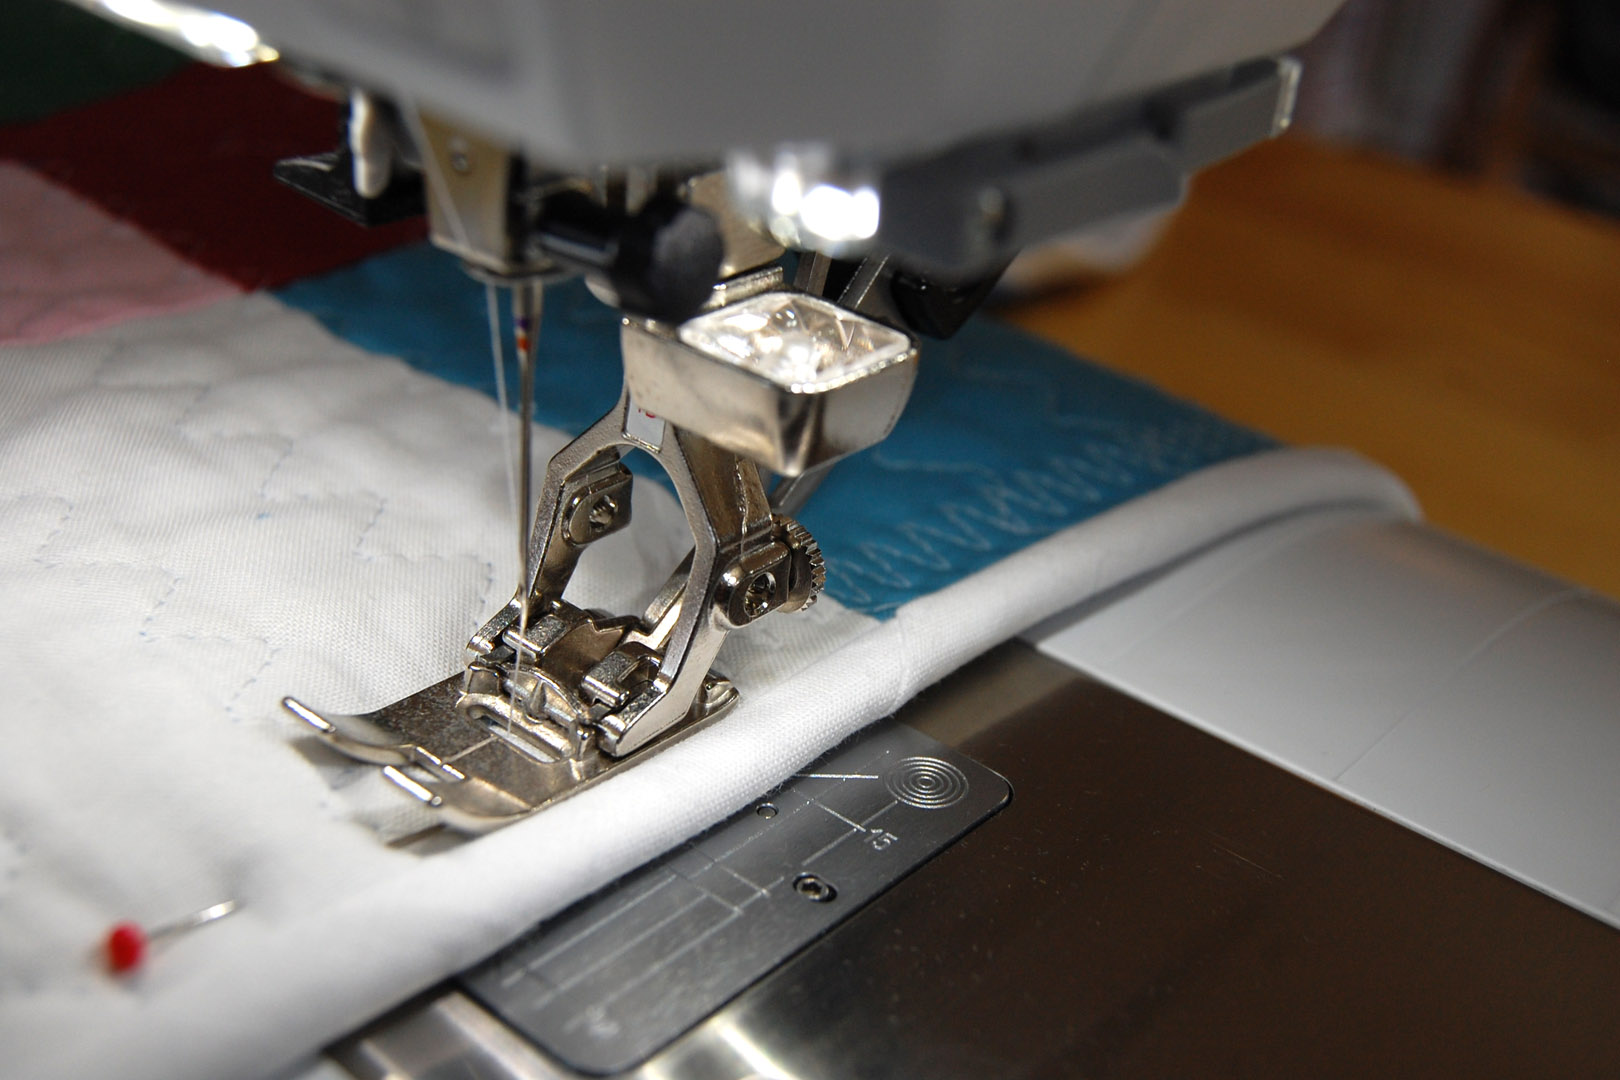
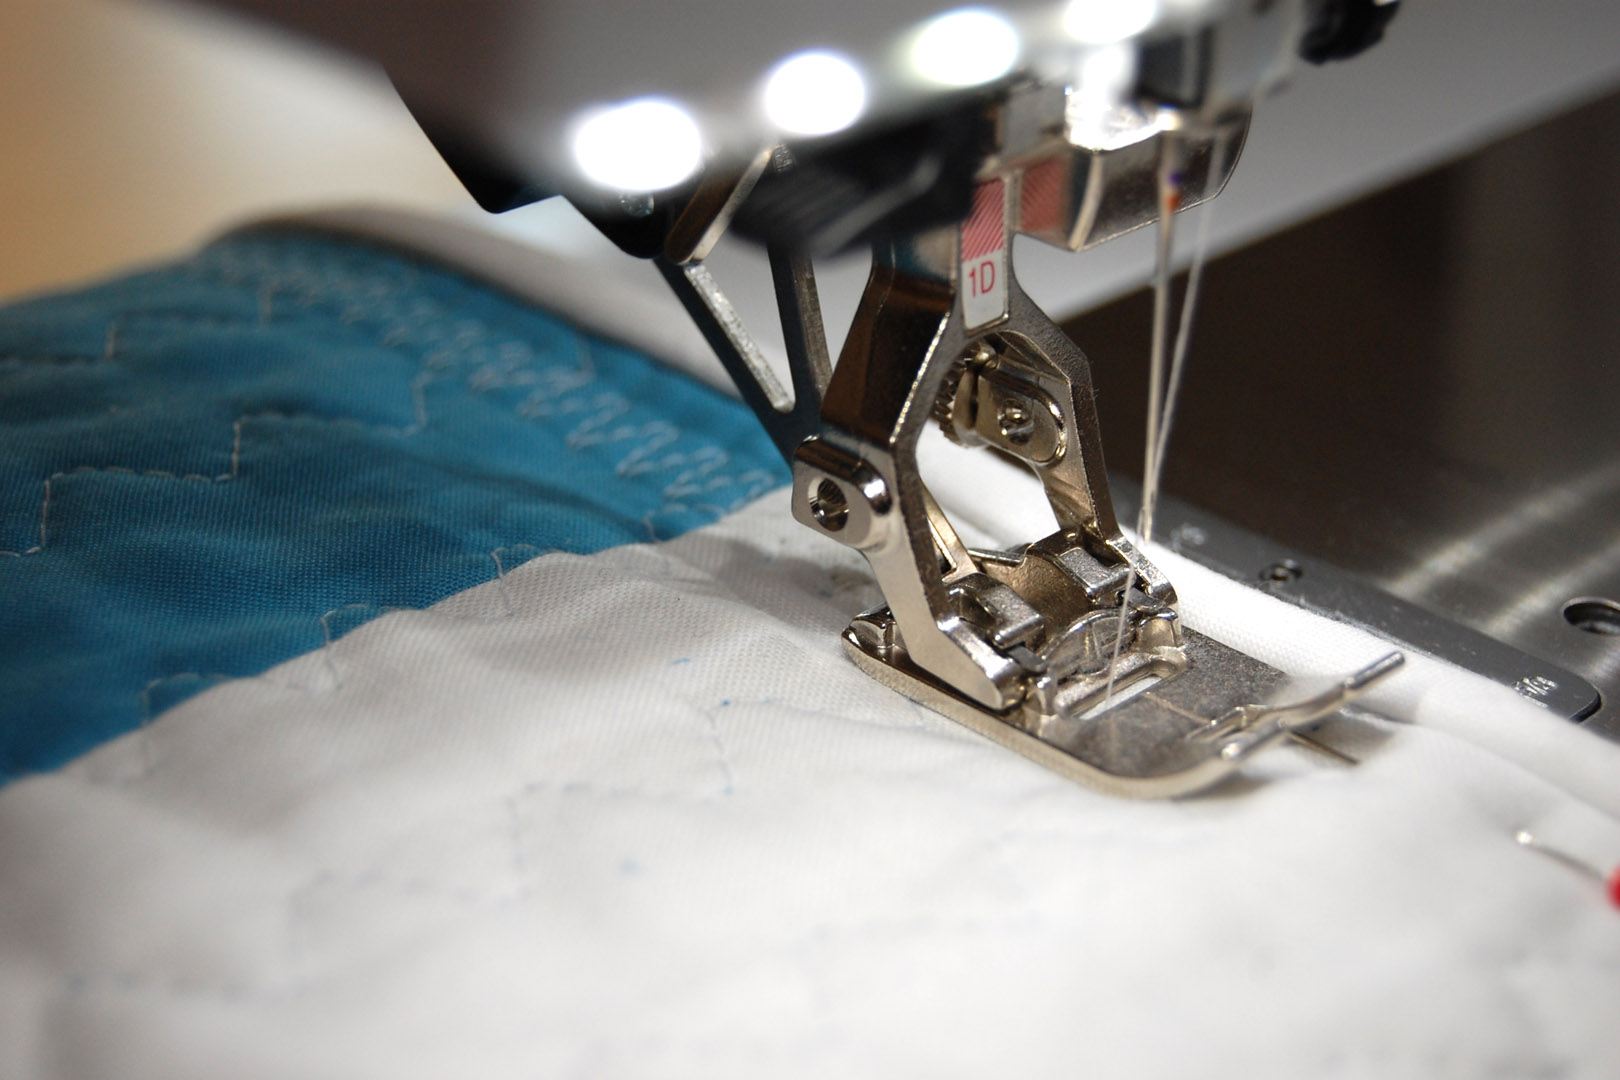
For this step I set up my machine with the Reverse pattern foot #1D with Dual Feed engaged. If you do not have Dual Feed, use the Walking foot #50 to help all the layers sew smoothly through the machine.
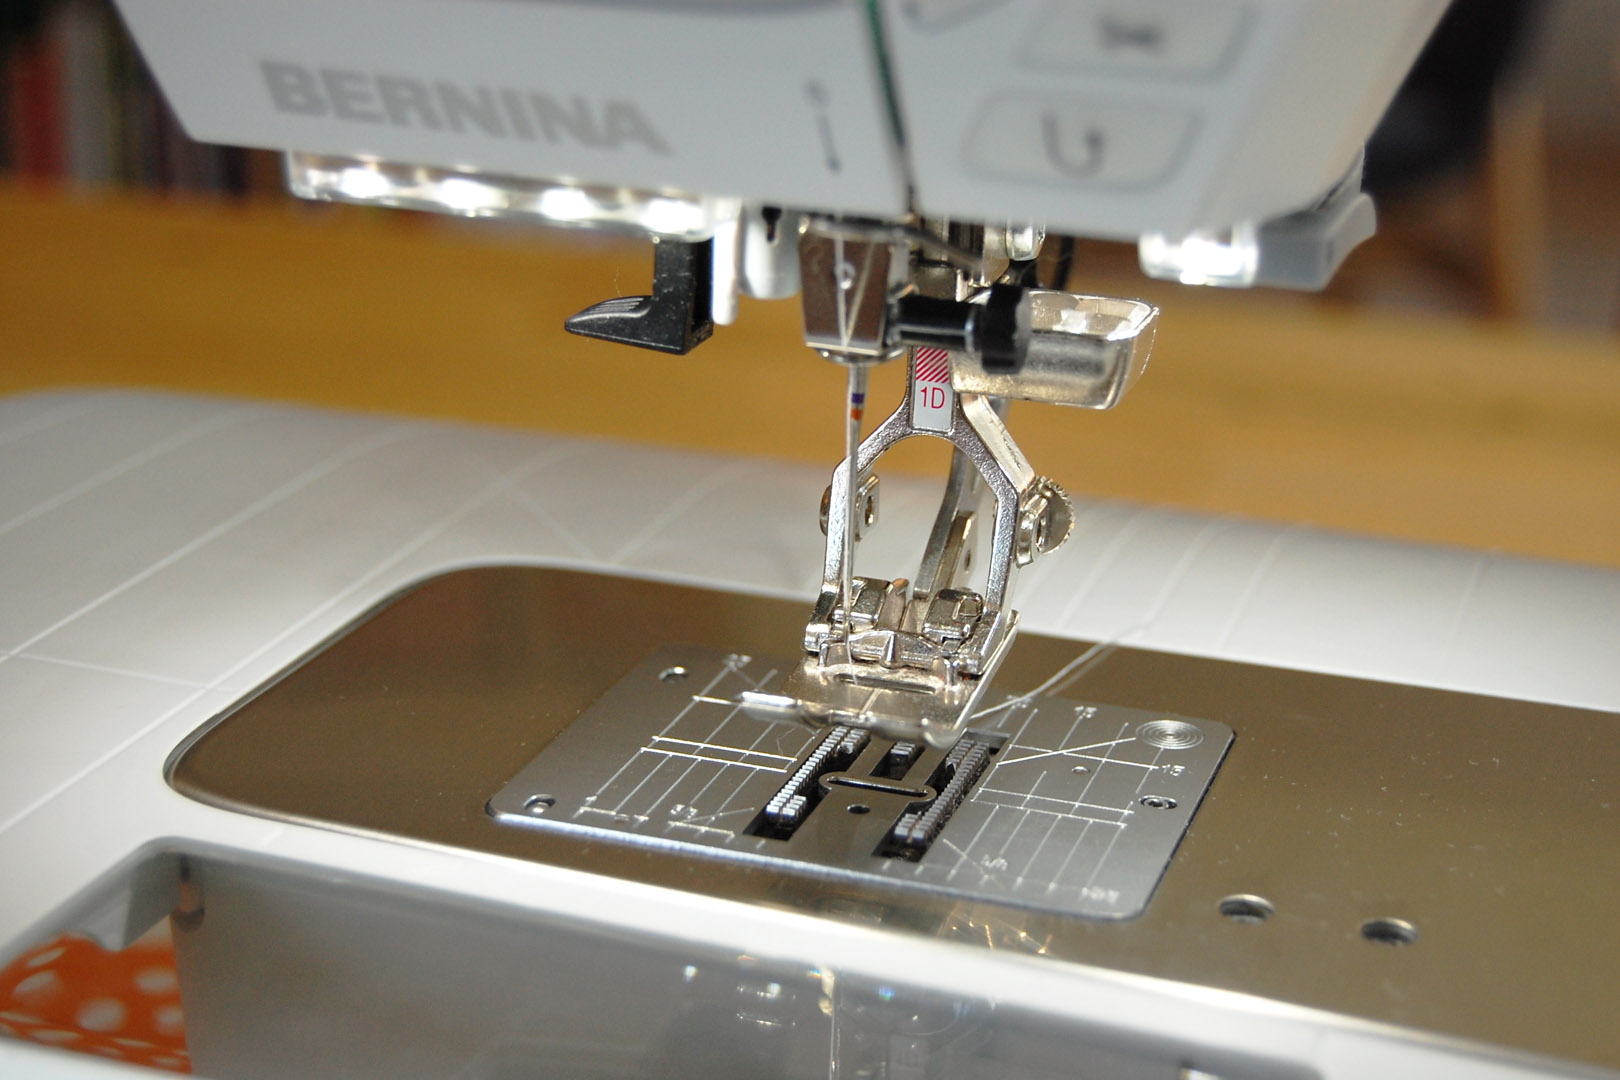
I did a few test-stitches to find the altered version of the Running stitch #4 I liked best for quilting. My machine is set with the widest possible stitch width (9.0), with a stitch length of 2.25 mm. I also reduced the presser foot pressure from a setting of 70 down to 50 to help reduce puckers and tucks while quilting.
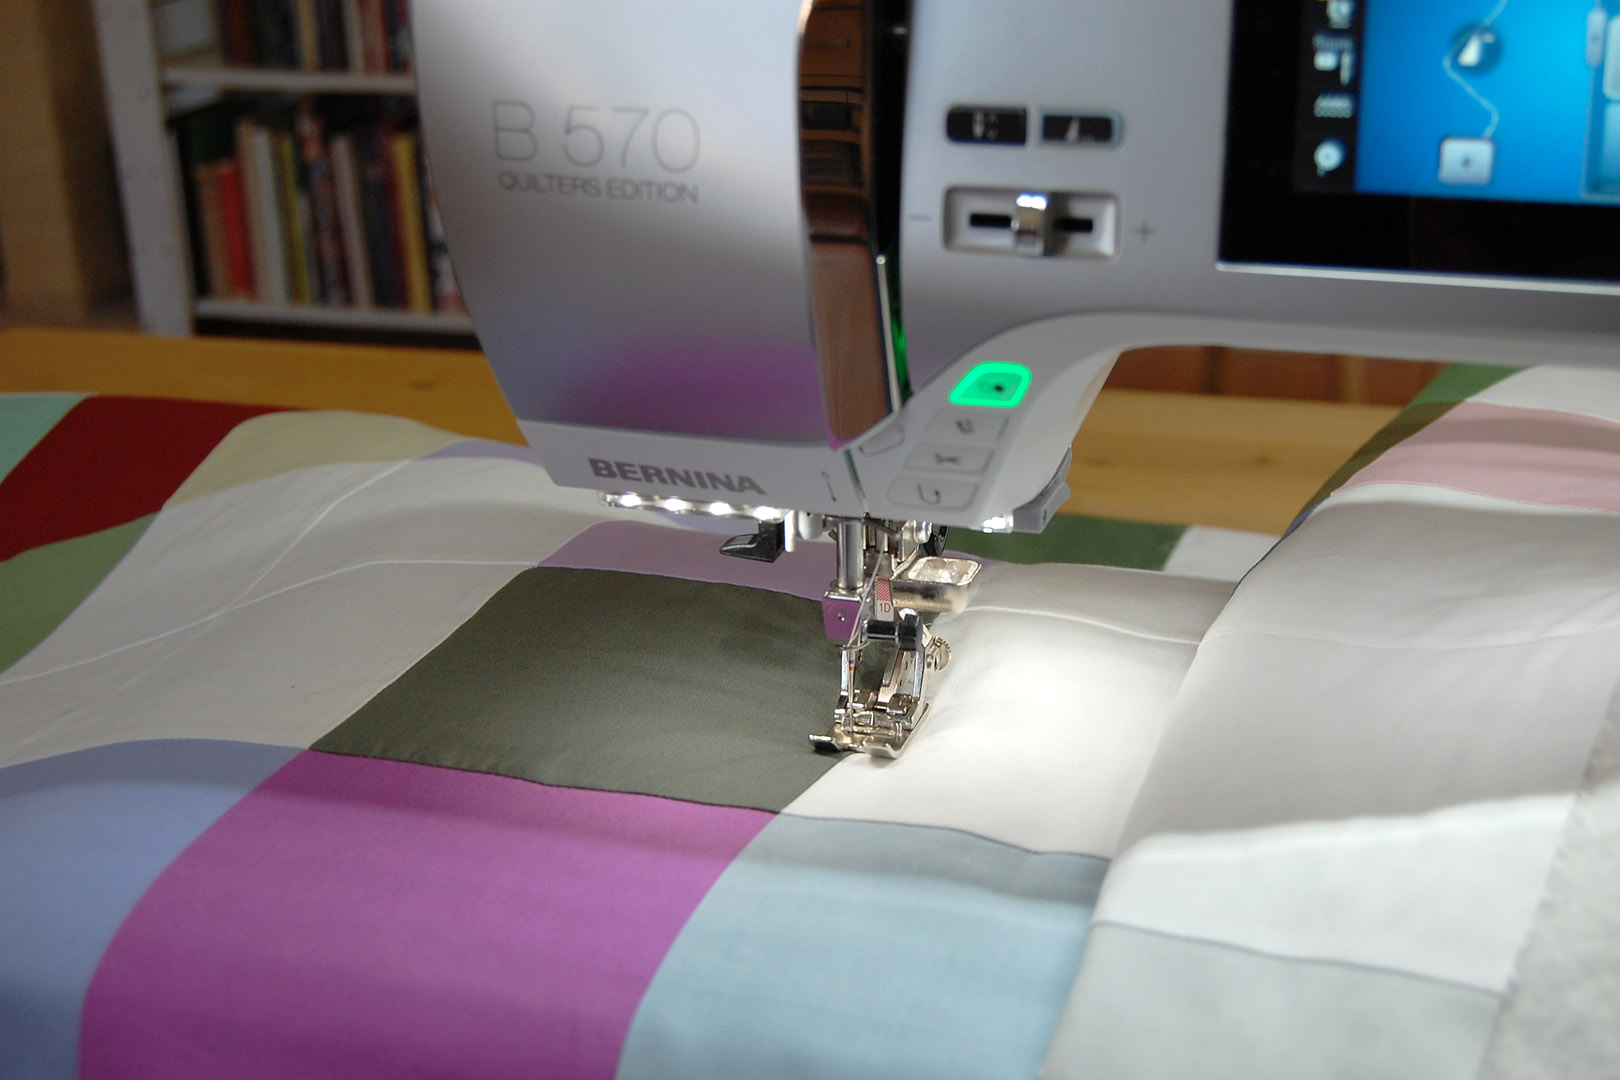
I first stitch along the straight seams down the entire baby quilt. I use the center mark on the Reverse pattern foot #1D to line-up with the seam and sew straight.
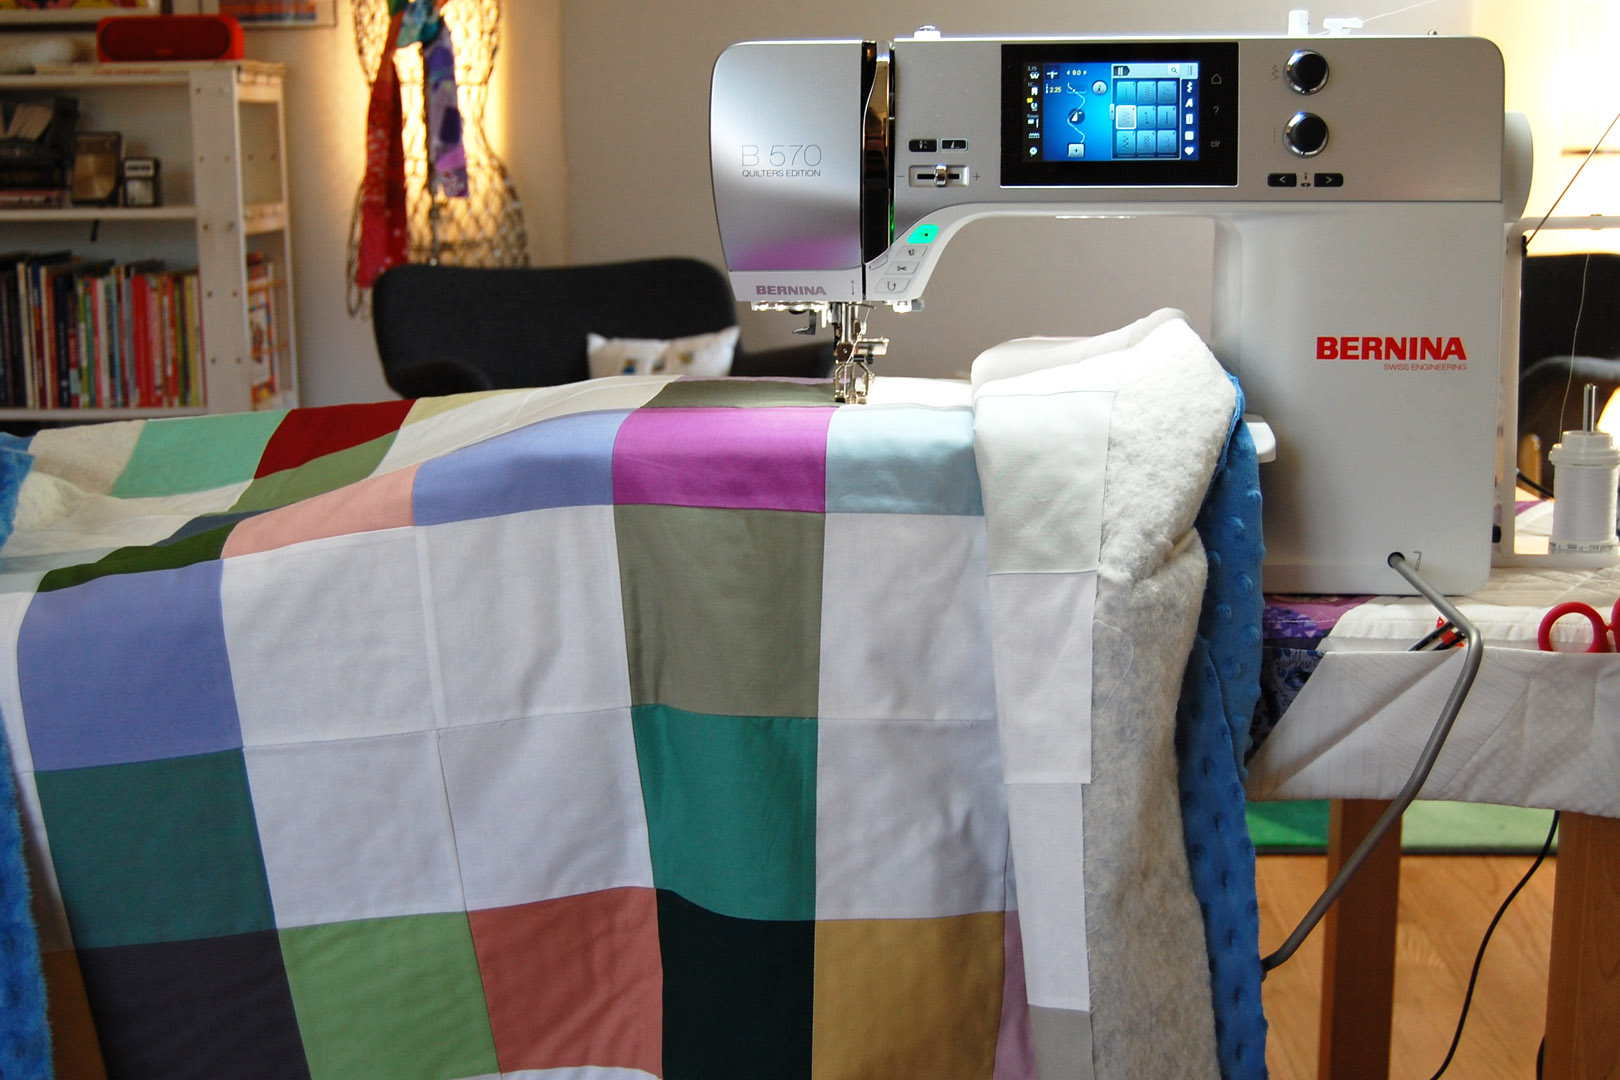
Gently fold the extra bulk of the quilt under the sewing machine free-arm as you quilt.
Once I stitched down all the seams, I stitched another line of quilting straight down the middle of each patchwork square. If you want to follow a line, you can mark the straight line with fabric marking pencil and a ruler. I simply eye-ball the line down between each seam as I sew.
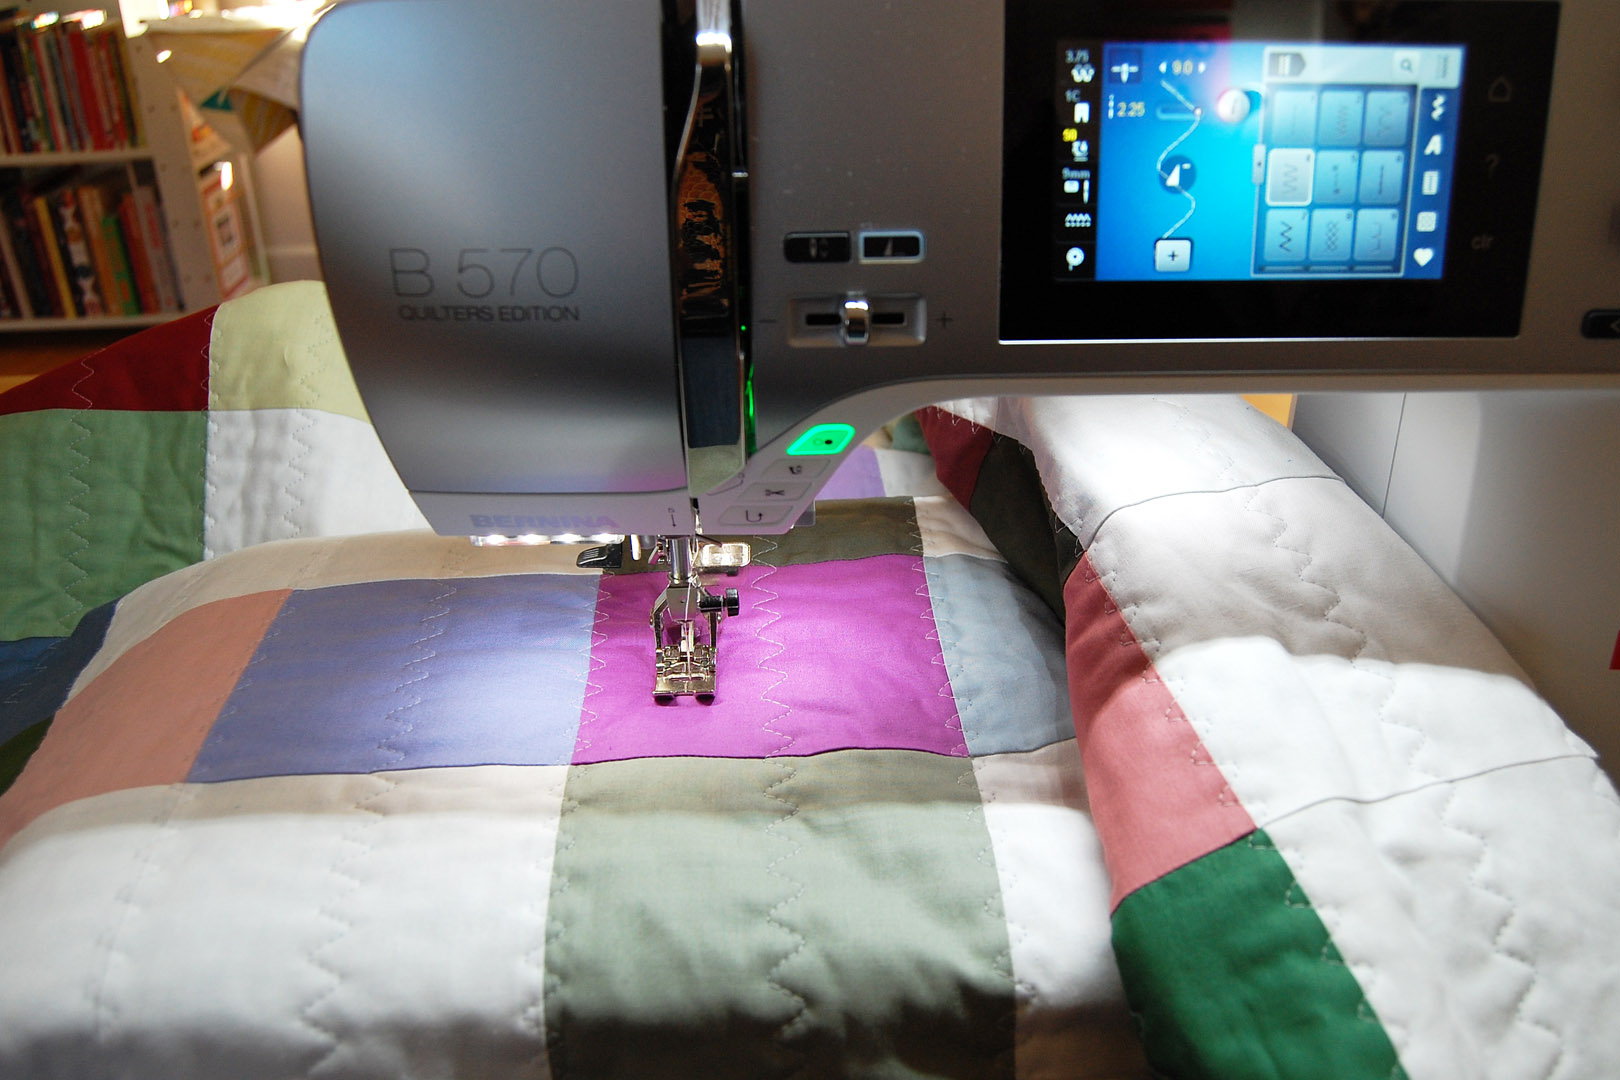
After finishing a line of stitching in the middle of the patchwork, I finish by quilting one more line of stitching in-between each of the previously stitched lines. Again, if you’d like a straight line to follow, create one with a ruler and fabric marking pencil.
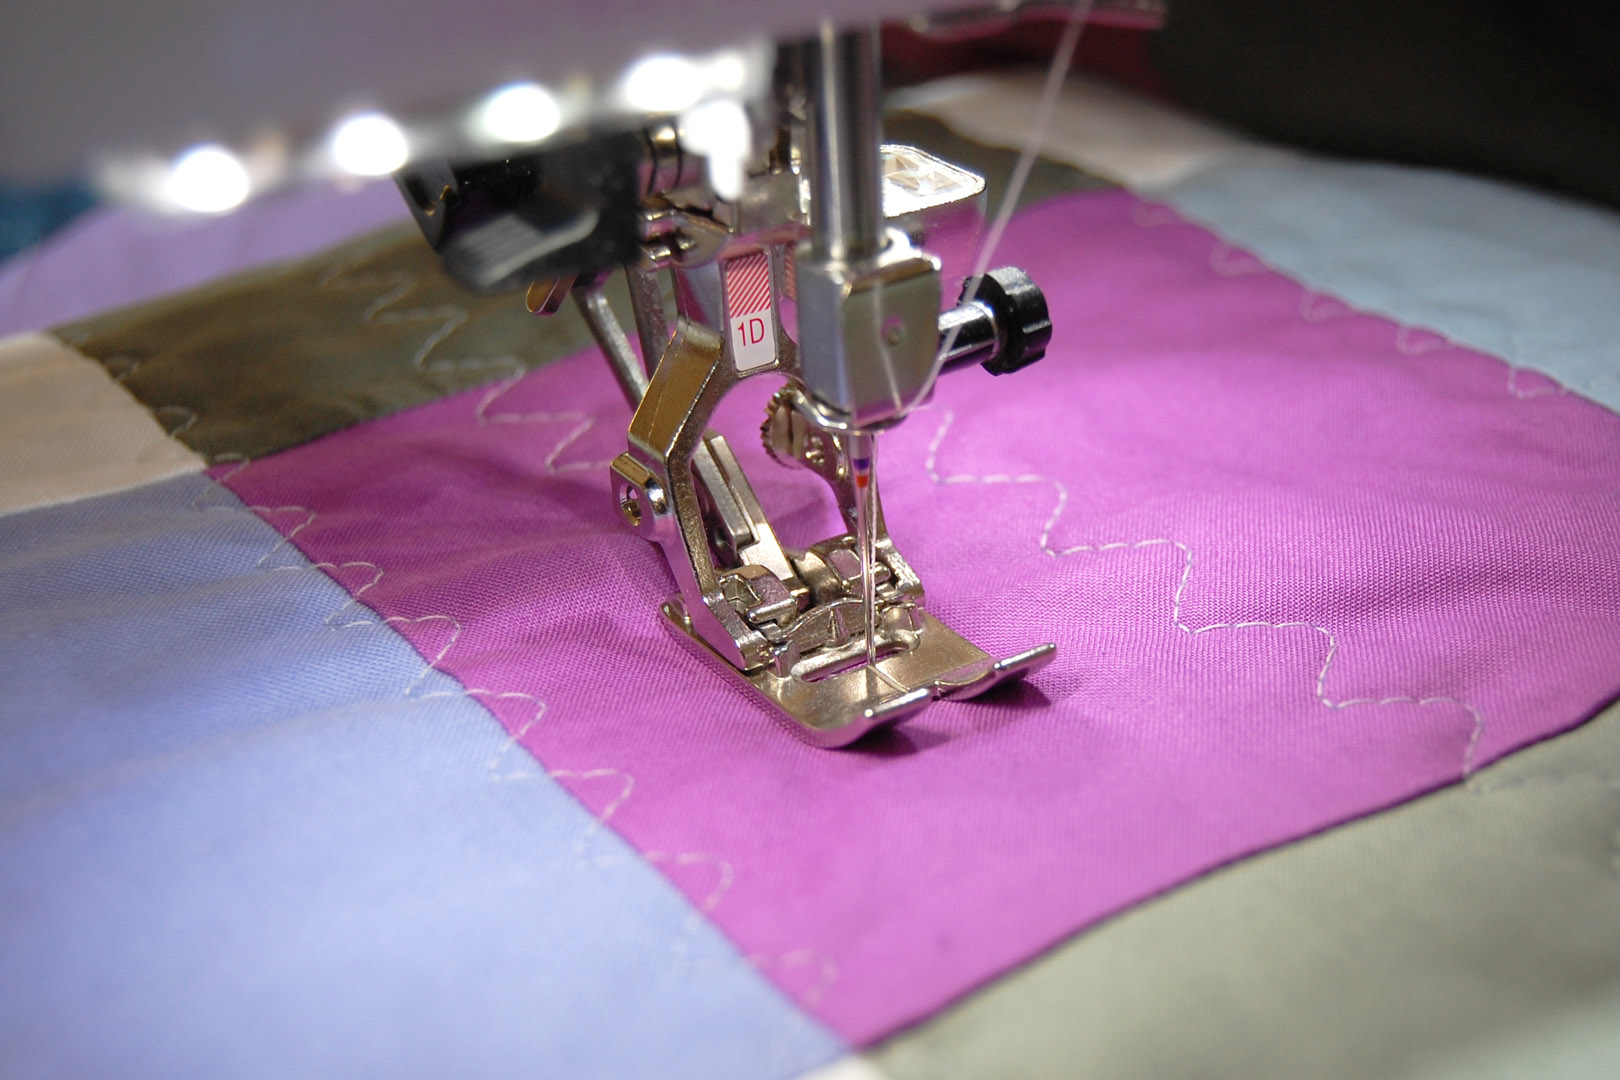
I simply eye-ball a straight line by aligning the foot between the two previous lines of stitching on either side.
After adding the quilting stitches it’s time to finish the edges of the quilt. I trim the extra batting and backing from the quilt using a large cutting mat, a rotary cutter, 15.5″ x 15.5″ square ruler, and a 4″ x 36″ ruler.
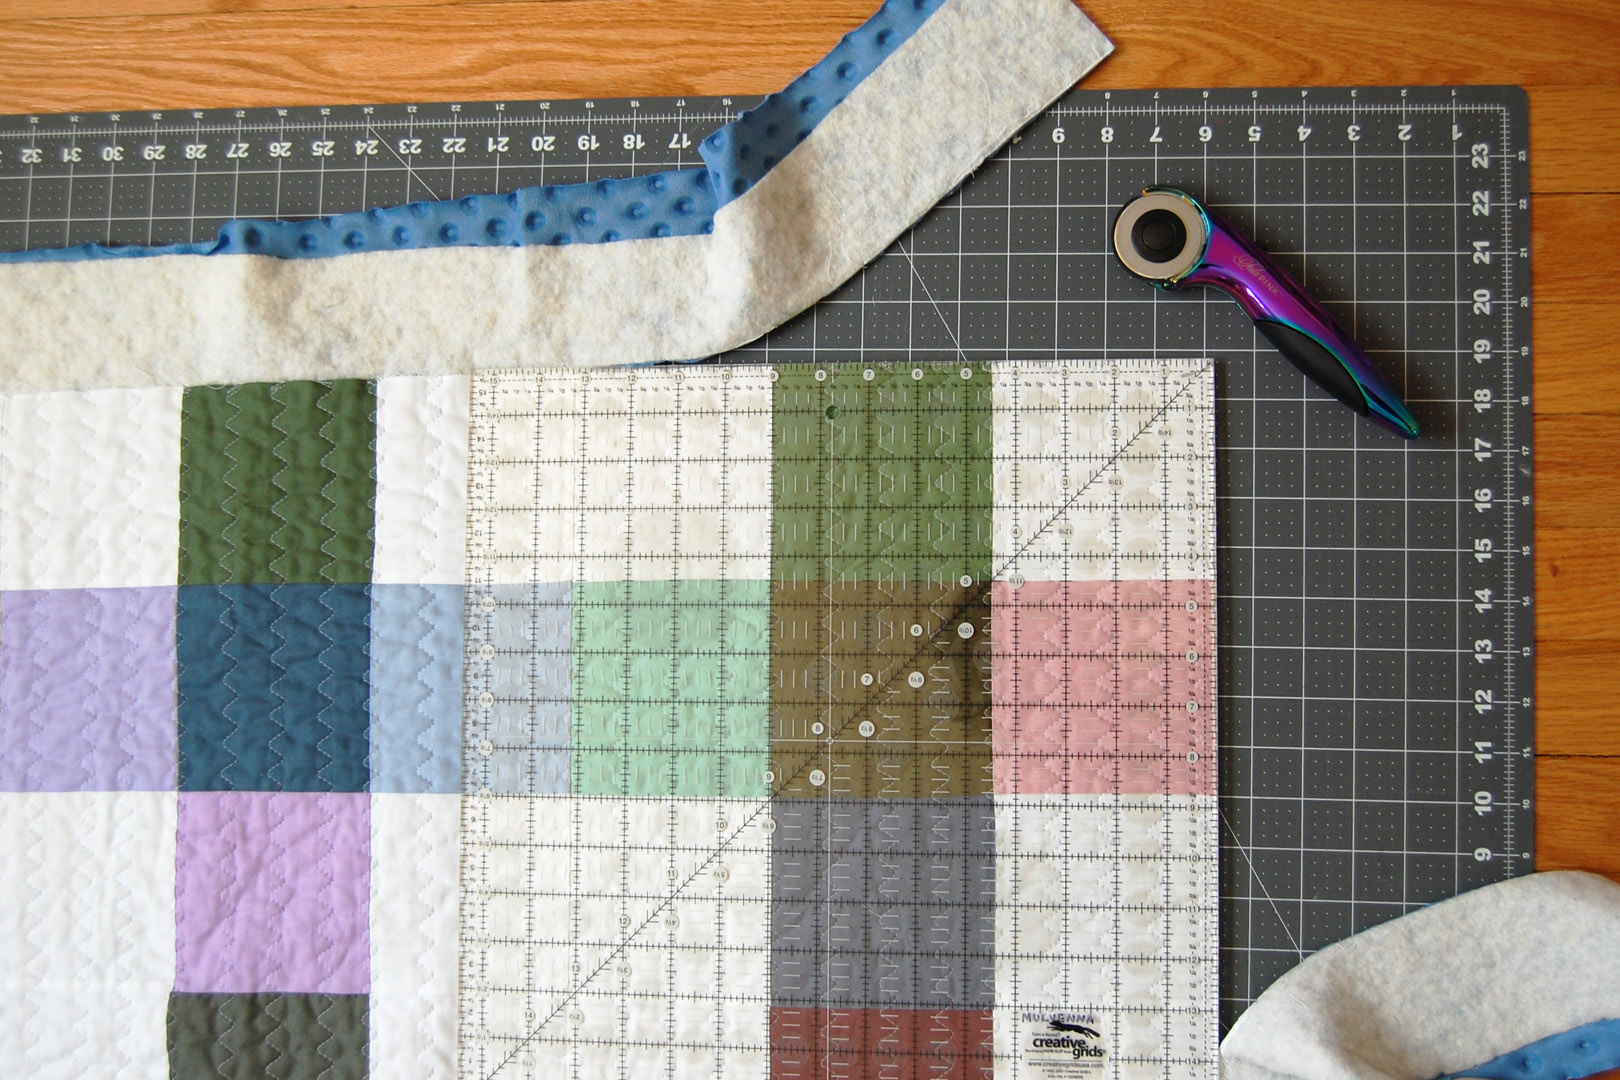
I use the large square ruler to make sure each corner is square and carefully trim the backing and batting.
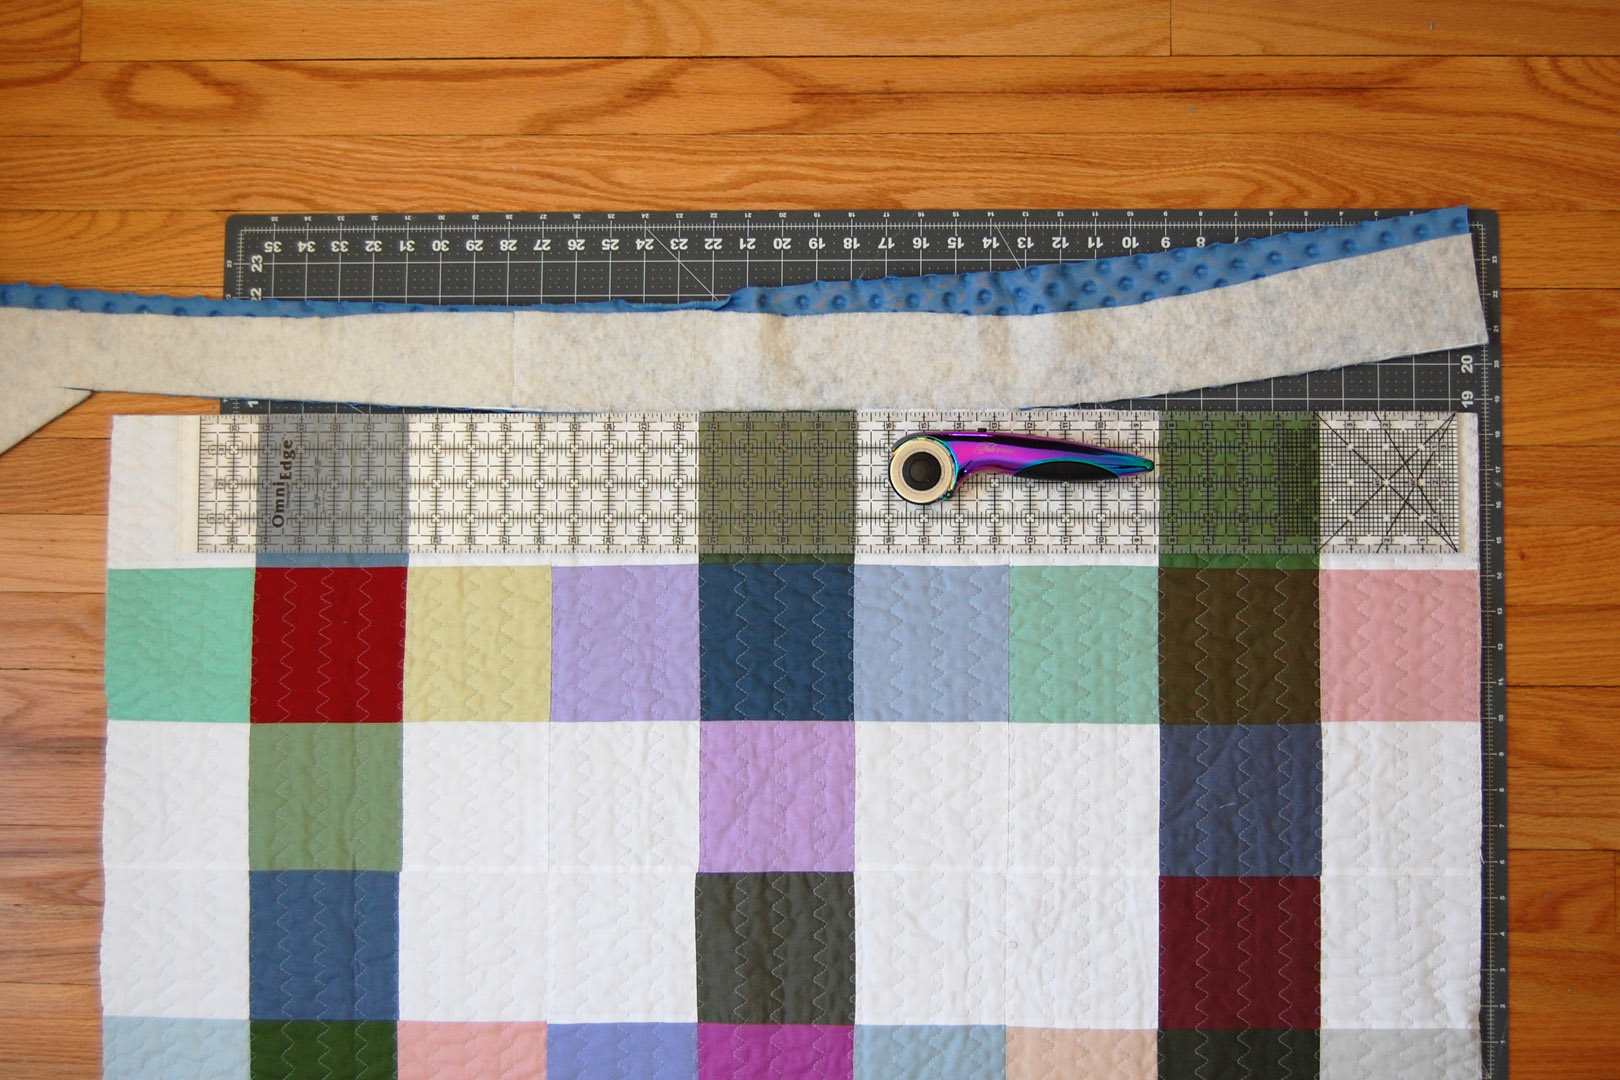
When all four corners are squared, I use the long ruler to connect the corners and cut off the extra backing and batting in the middle. The quilt is now ready to add the double-fold binding. I prepare my binding like Faith Jones in her tutorial here at WeAllSew, with a few differences to create a binding wider on the back in order to accommodate a wide machine top-stiching.
I cut strips on the bias 3″ wide with enough strips to create at least 175 inches of finished binding. After cutting the bias strips, follow the same instructions in the tutorial linked above to prepare the binding.
I am using the Walking foot #50 to attach the binding to the edge of the quilt, but you can also use the Reverse pattern foot #1D with Dual Feed. I personally like how the Walking foot #50 handles multiple layers with this step.
I like to pick a starting point to attach the binding about 12″ away from a corner of the quilt to leave enough space to join the edges. Leave a tail of 10″ – 12″ of binding before you begin attaching the binding to the quilt. Match the raw edges of the binding to the raw edges of the quilt and stitch with a 1/4″ seam. Check back with Faith’s binding tutorial linked about to see step-by-step how to miter the corners and finish sewing the ends.
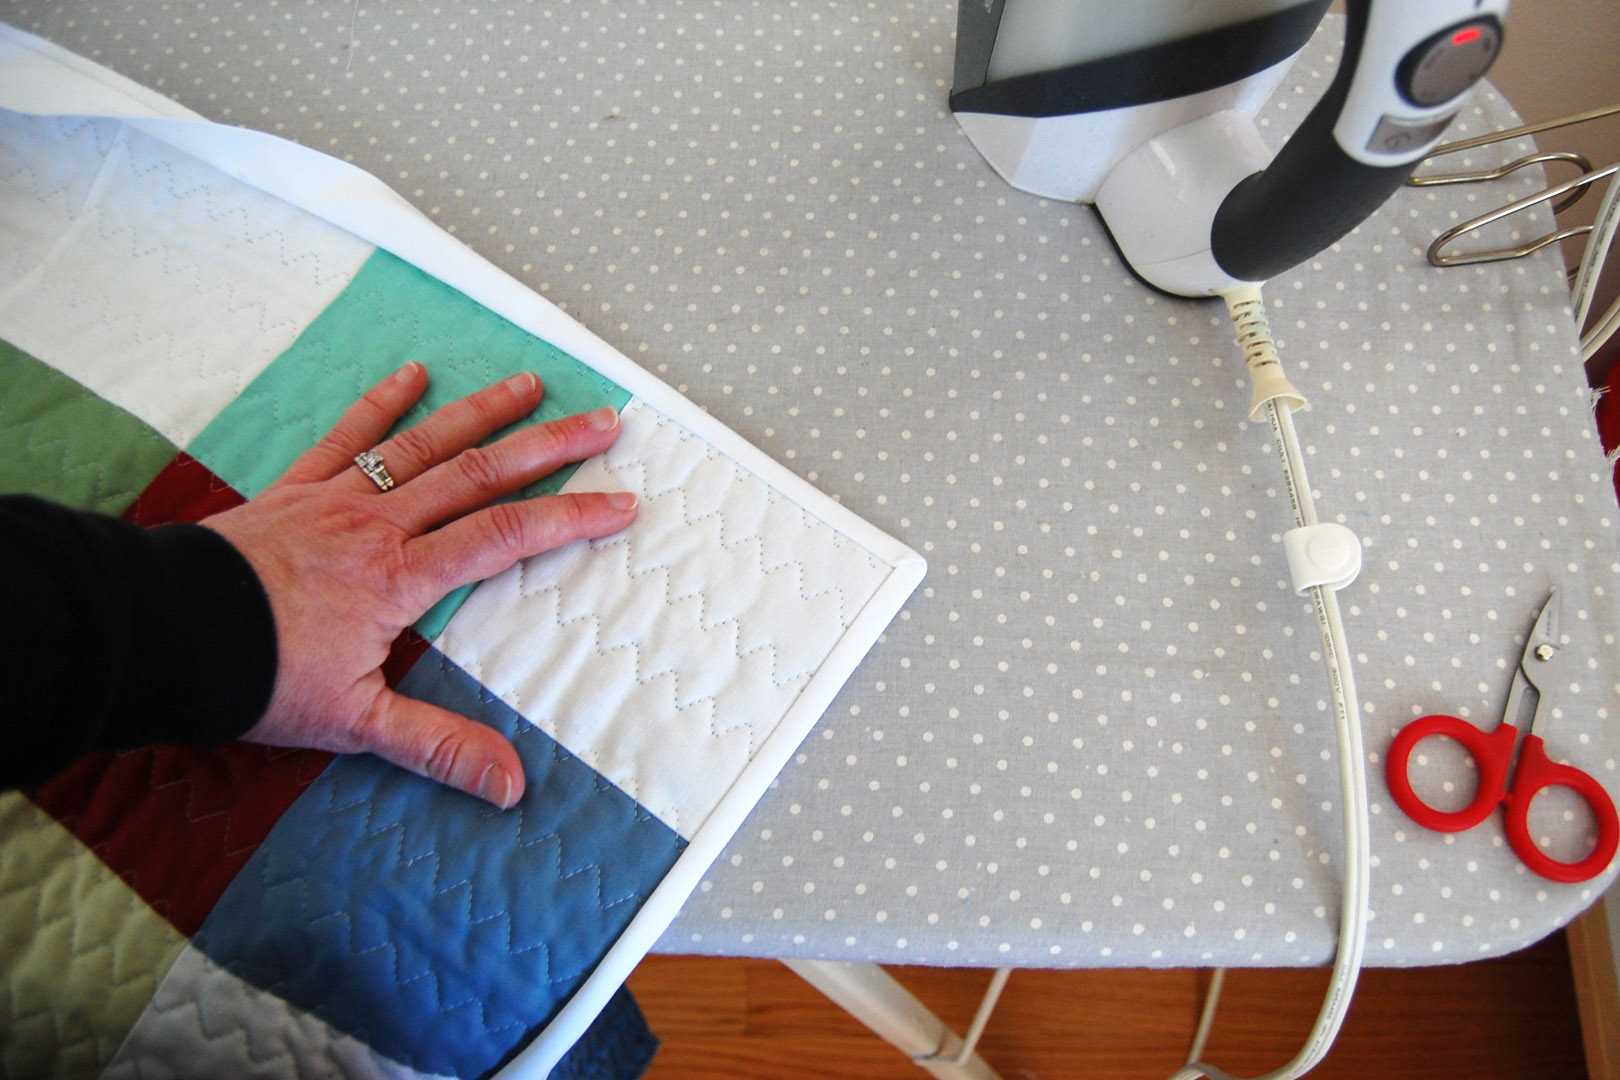
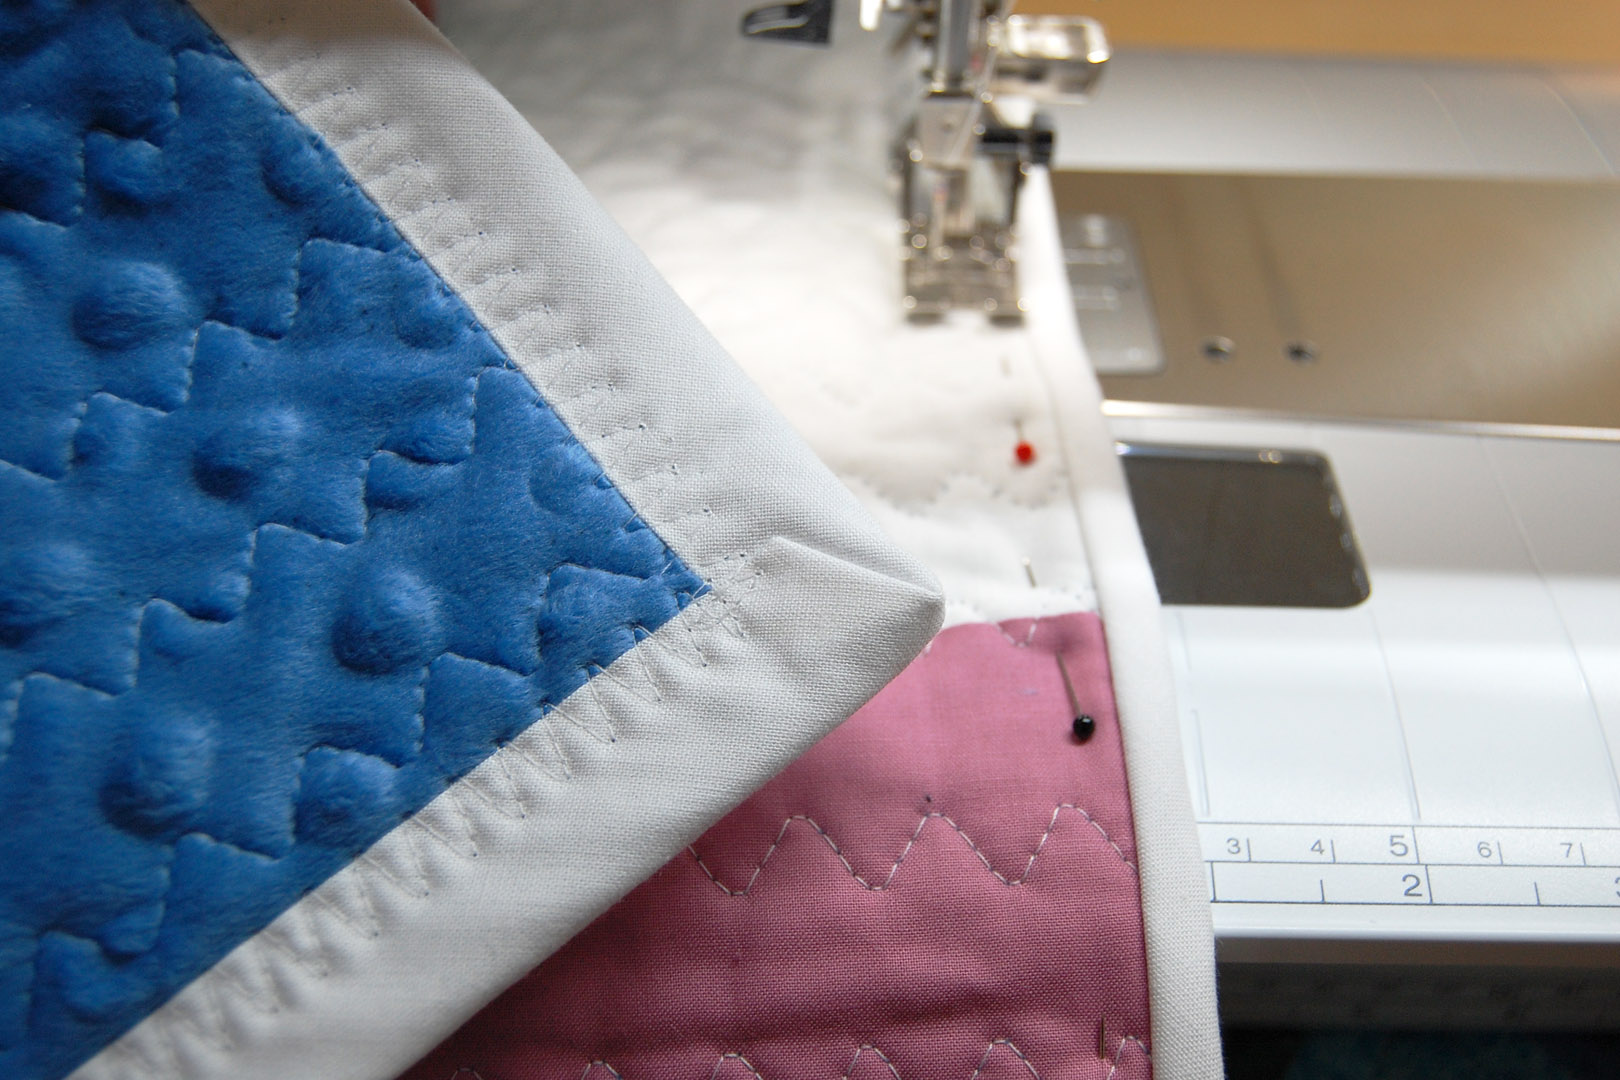
Once the binding is attached to the quilt top, the edges are turned to the back side and pinned in preparation for machine stitching the final step. I turn the binding to the back at each corner first, making sure the miter is laying nice and flat, and press well.
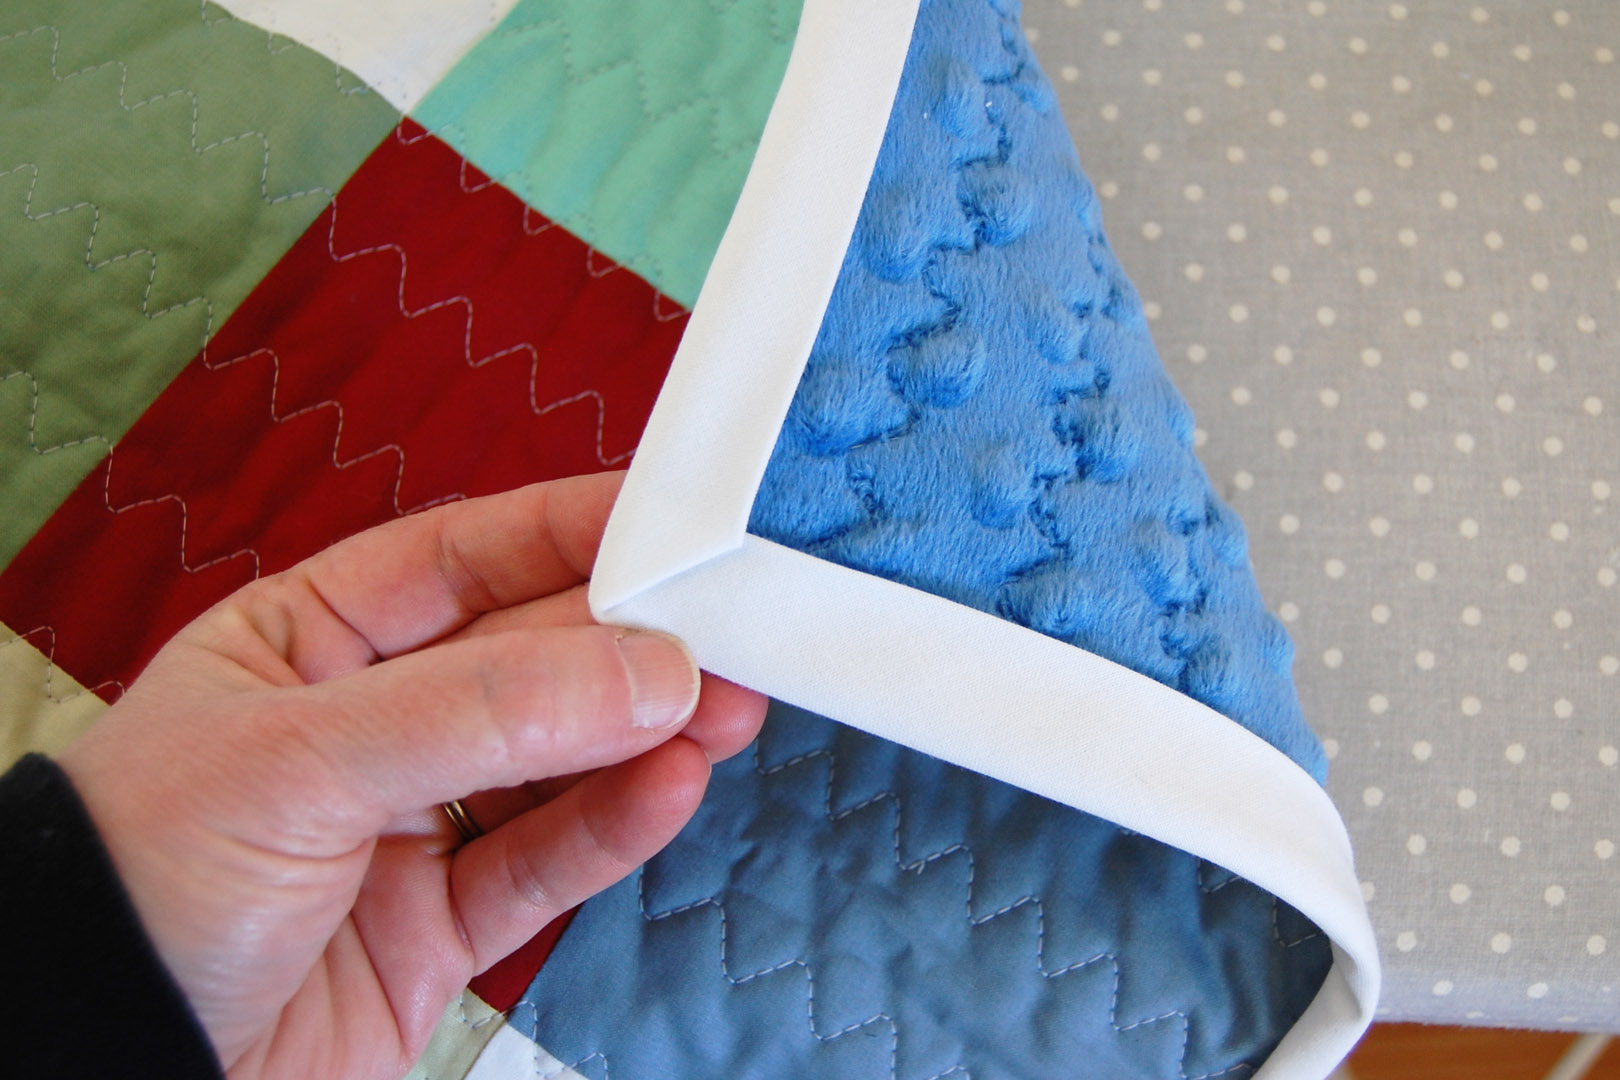
You can see above the nicely pressed corner.
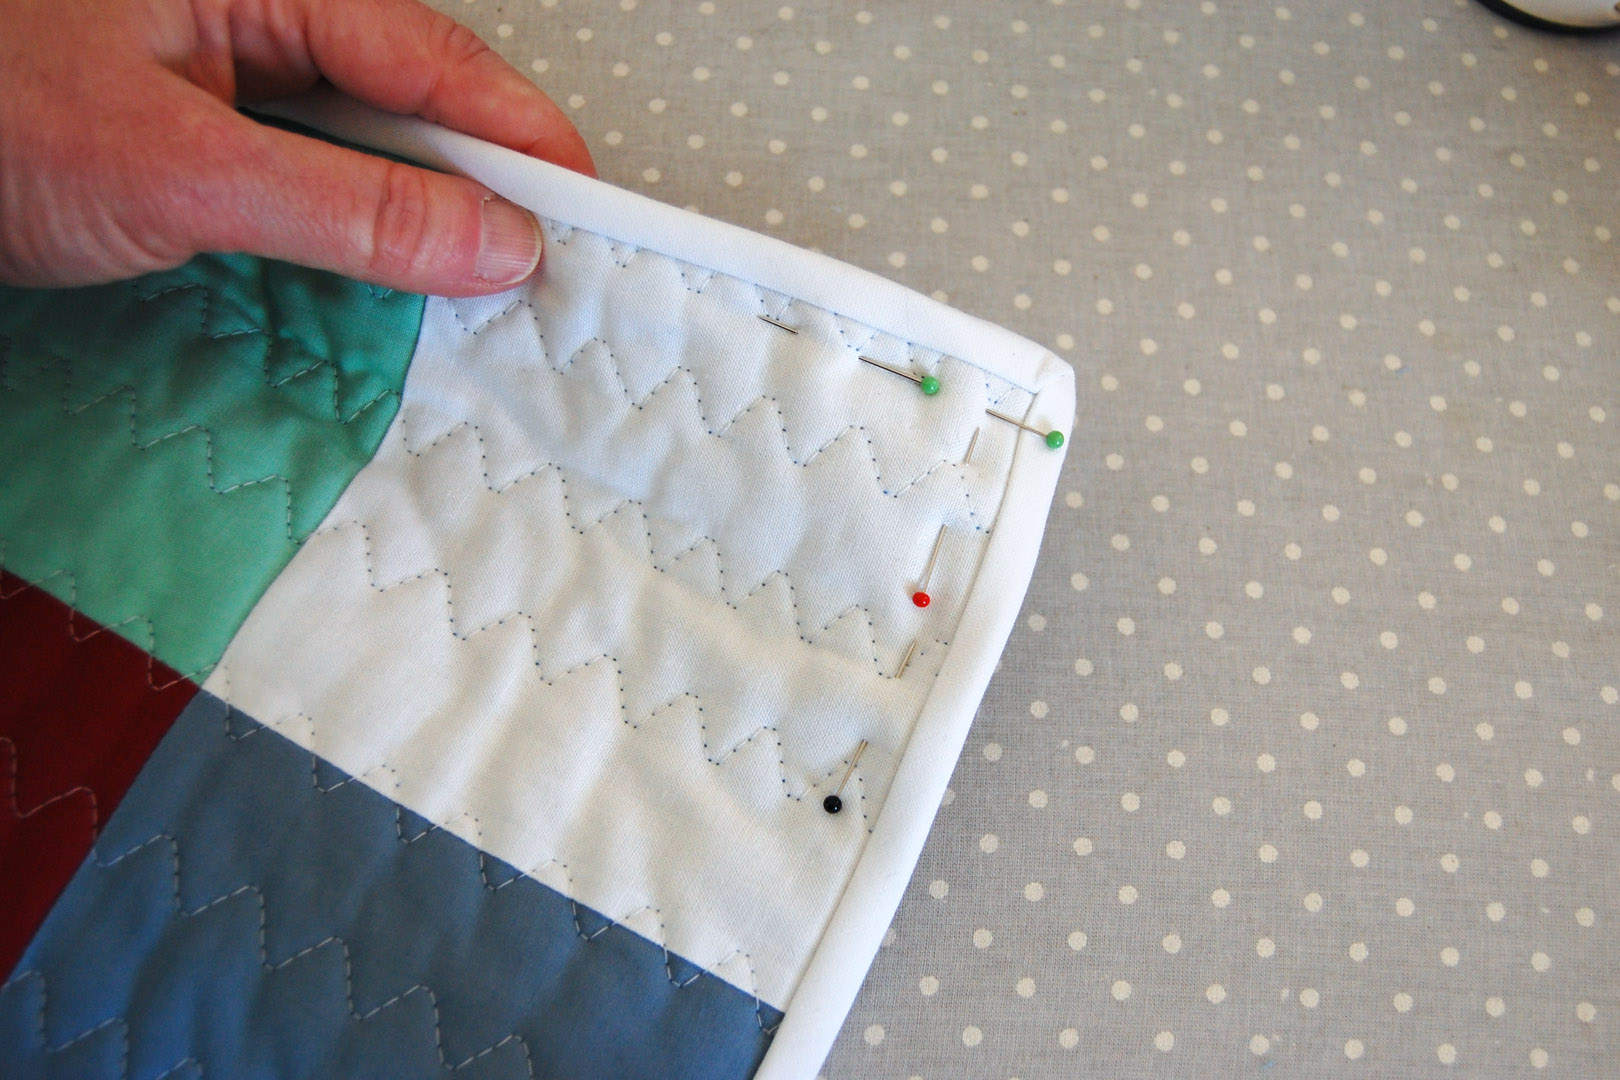
Place pins through the front of the quilt to secure the binding at the back. I start pinning with the nicely pressed corners before moving on to pinning the sides of the quilt.
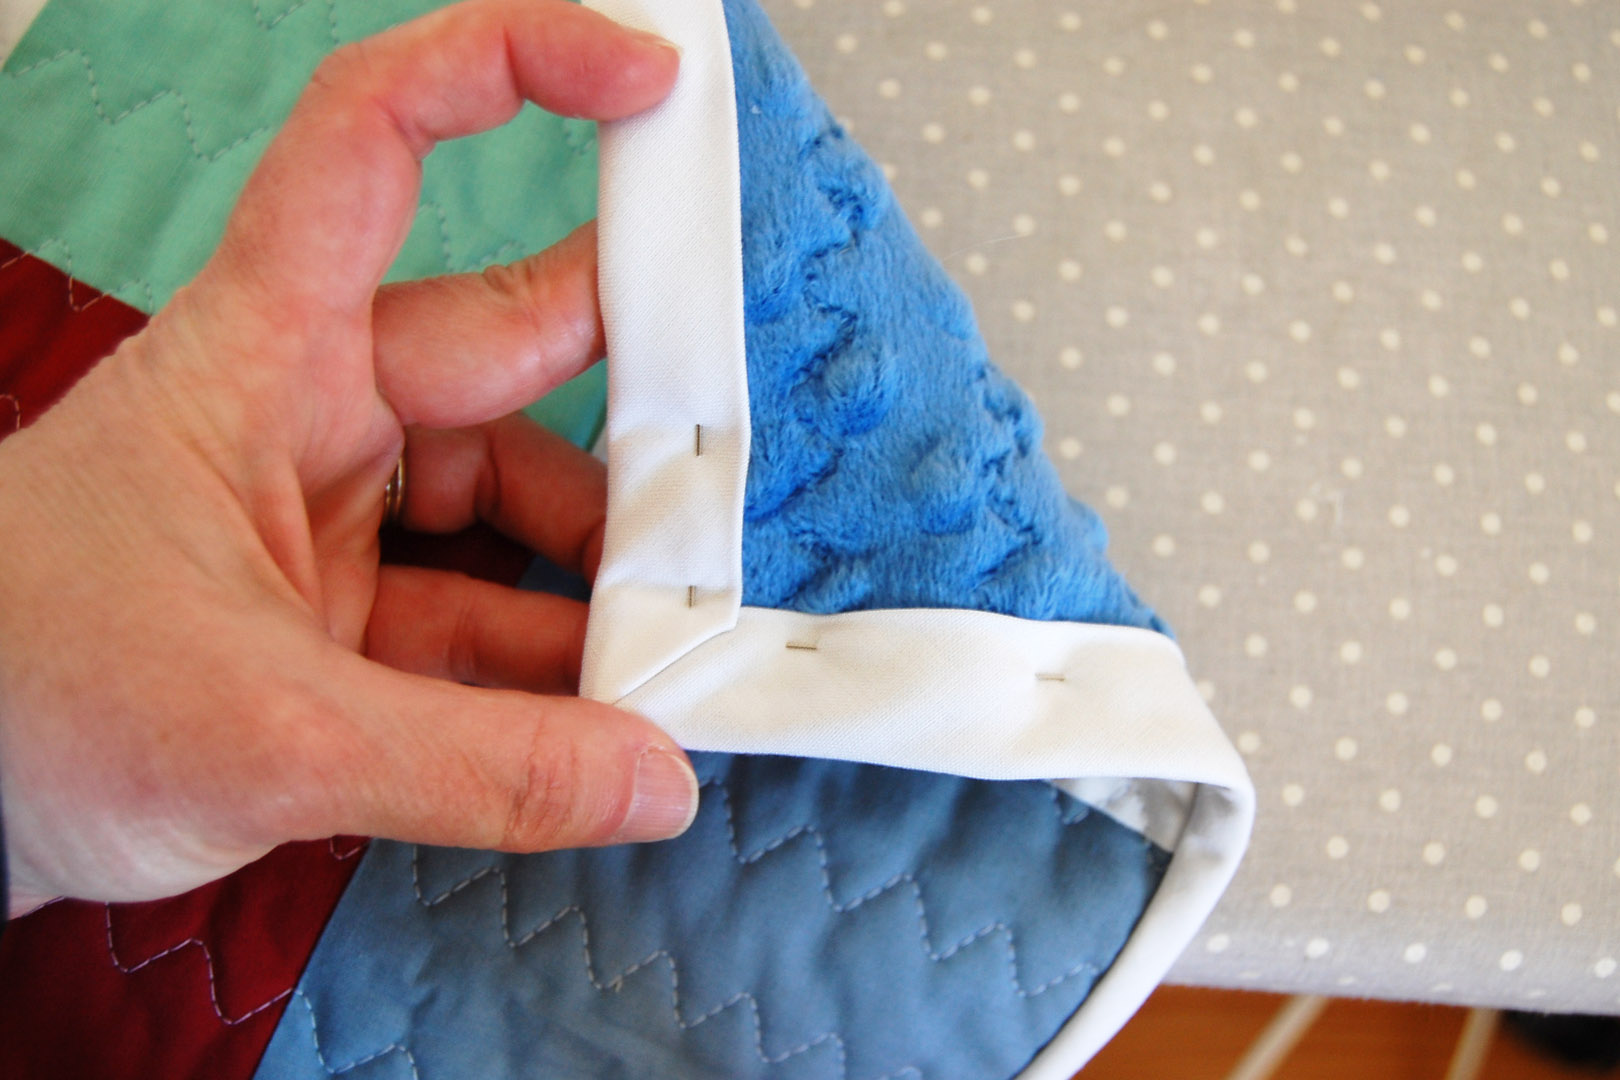
Flip the quilt over to make sure the pins are securing the binding through all the layers. Continue pinning the binding all around the quilt.
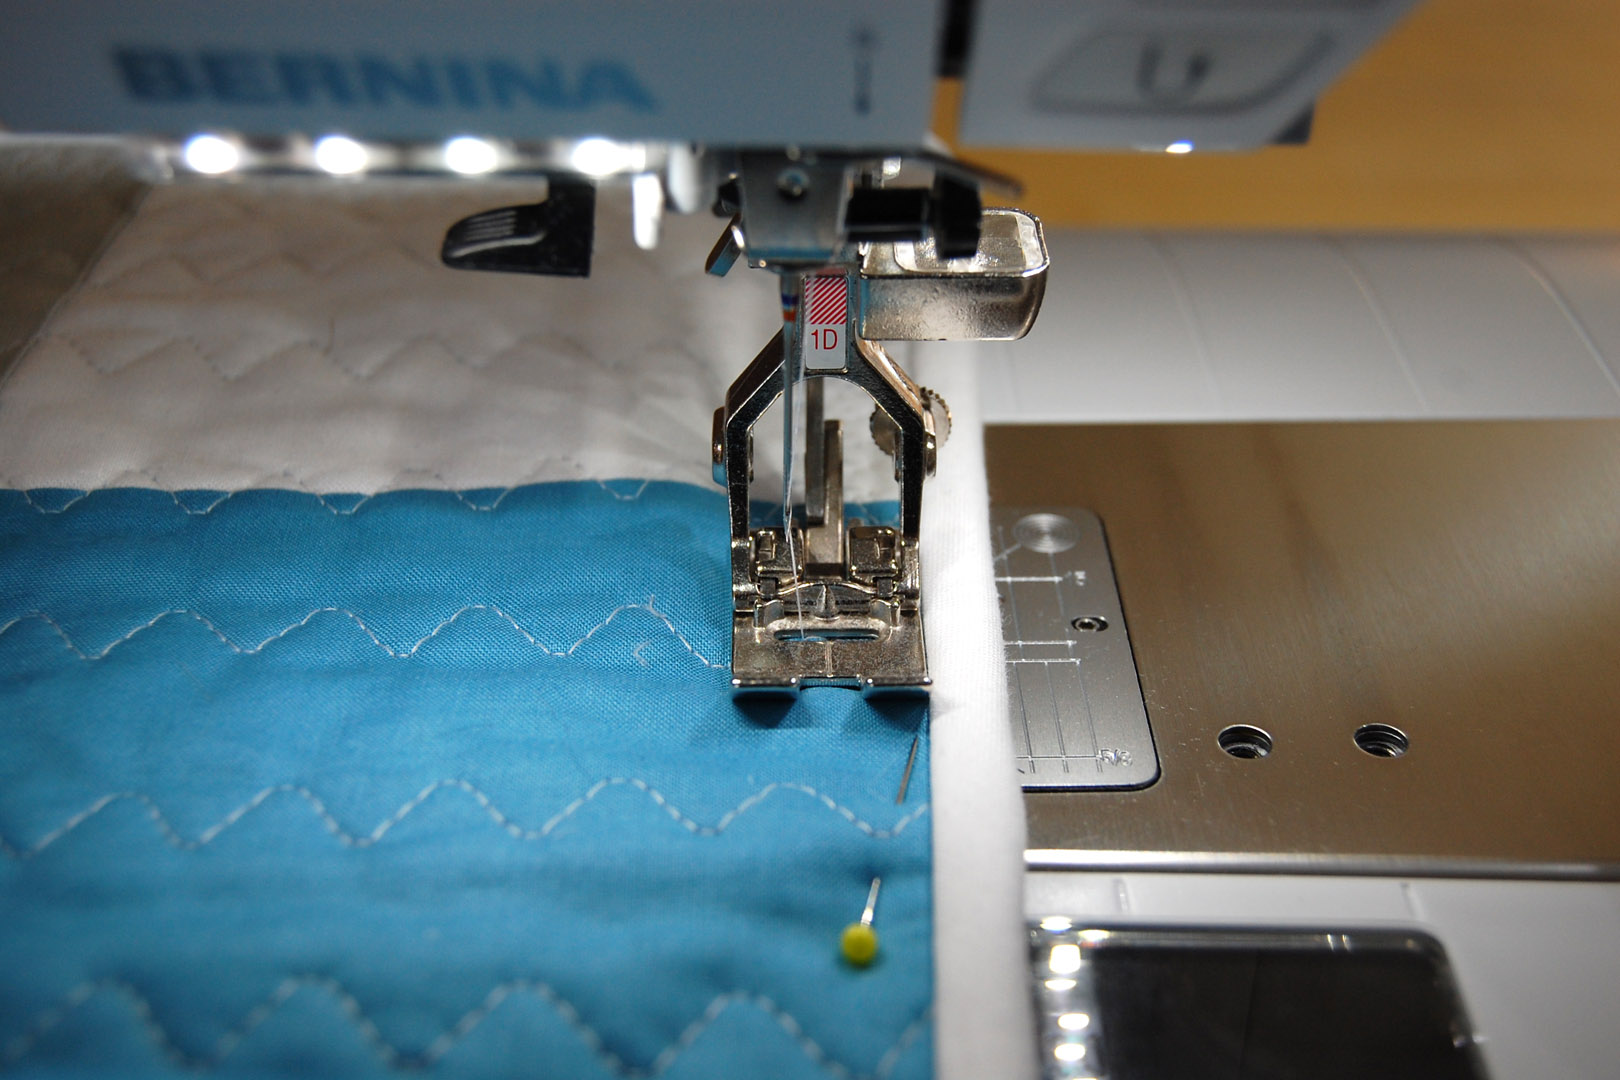
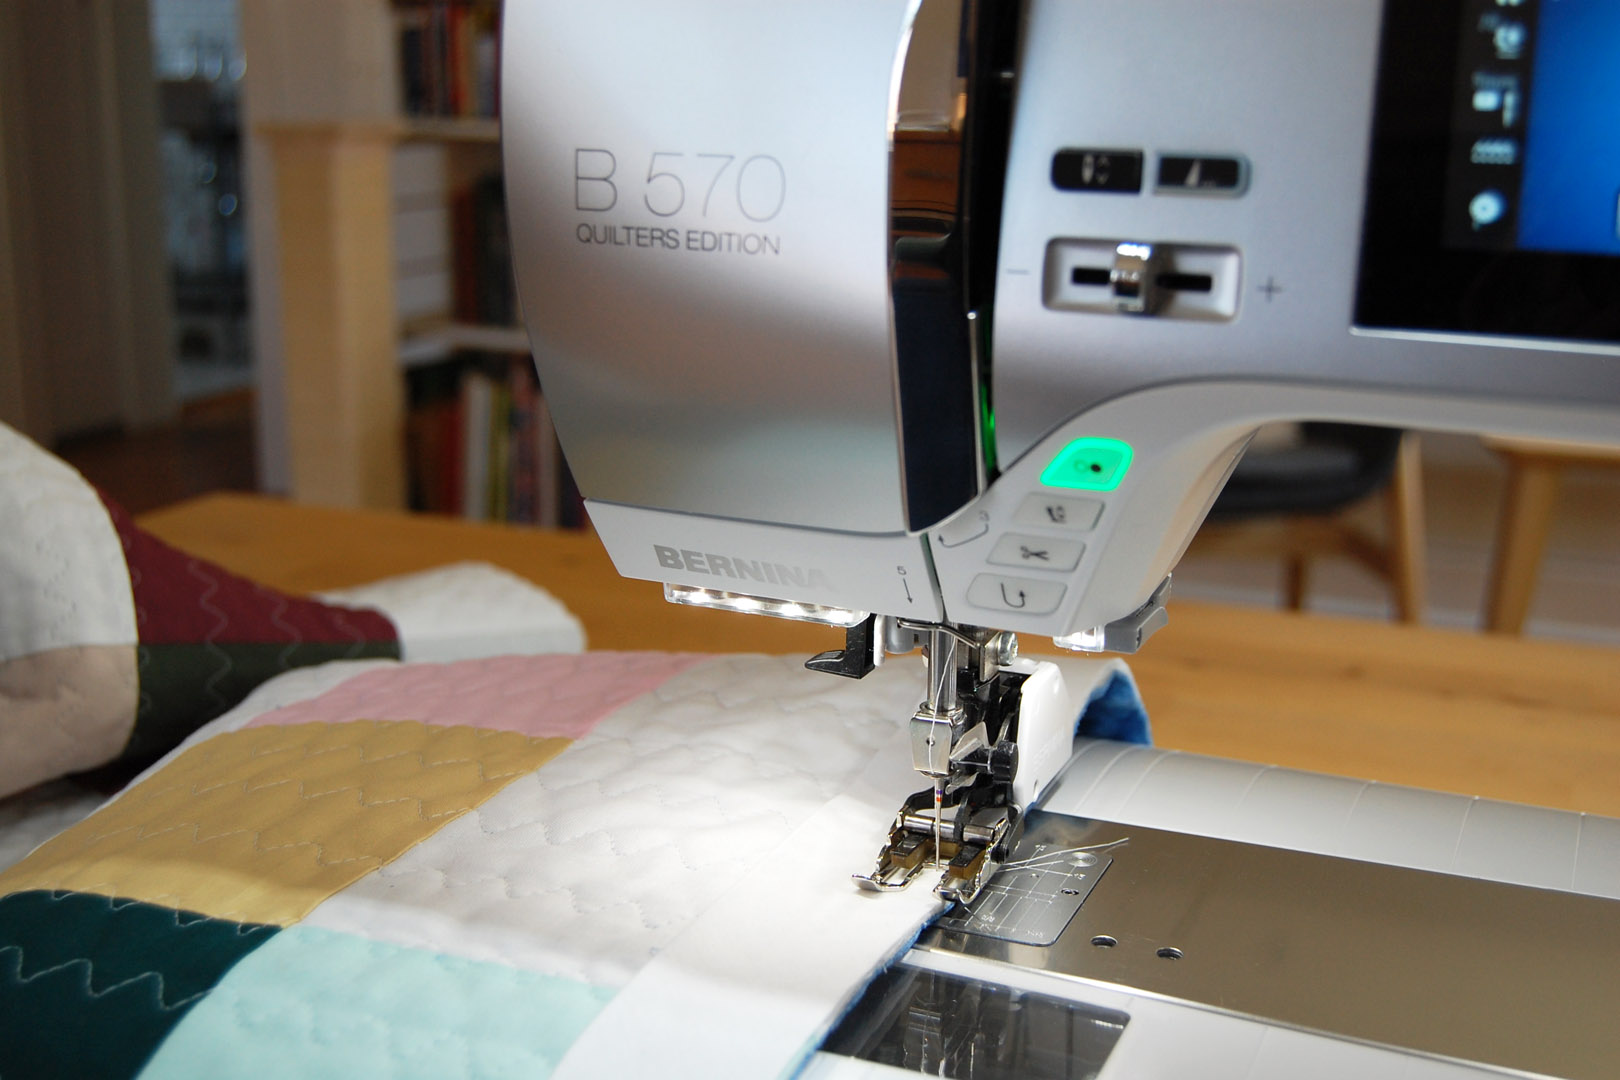
I switch back to the Reverse pattern foot #1D with Dual Feed engaged for the final step. The B 570 QE sewing machine is capable of 9mm wide stitches, which makes for a nice way to finish sewing the binding.
Any kind of stitch that is wide and tightly packed will work for the final step. The goal is to create top stitching that will secure the binding through the back of the quilt. I chose to use the Running stitch #4 once again with a shorter stitch length.
Do a test-stitch on scrap fabric to see how your stitch will look. I also did a bit of test stitching directly on the binding of my quilt to see exactly how the stitches looked on the back before deciding on the final stitch/machine settings.
I found that aligning the edge of the #1D foot with the binding seam placed the stitches perfectly along the edge. To begin stitching, secure your stitches using a straight stitch. Select the straight stitch #1 and set your stitch length at 0. Take a few stitches. Then select the stitch you have decided to use to finish sewing the binding.
I sew into one corner and sink the needle down, then pivot the quilt around, and start sewing out from the same corner.
This creates stitches that lay perfectly on the edge of the binding all along the back of the quilt. Remember to finish stitching by securing your stitches just as you did at the beginning of this step.
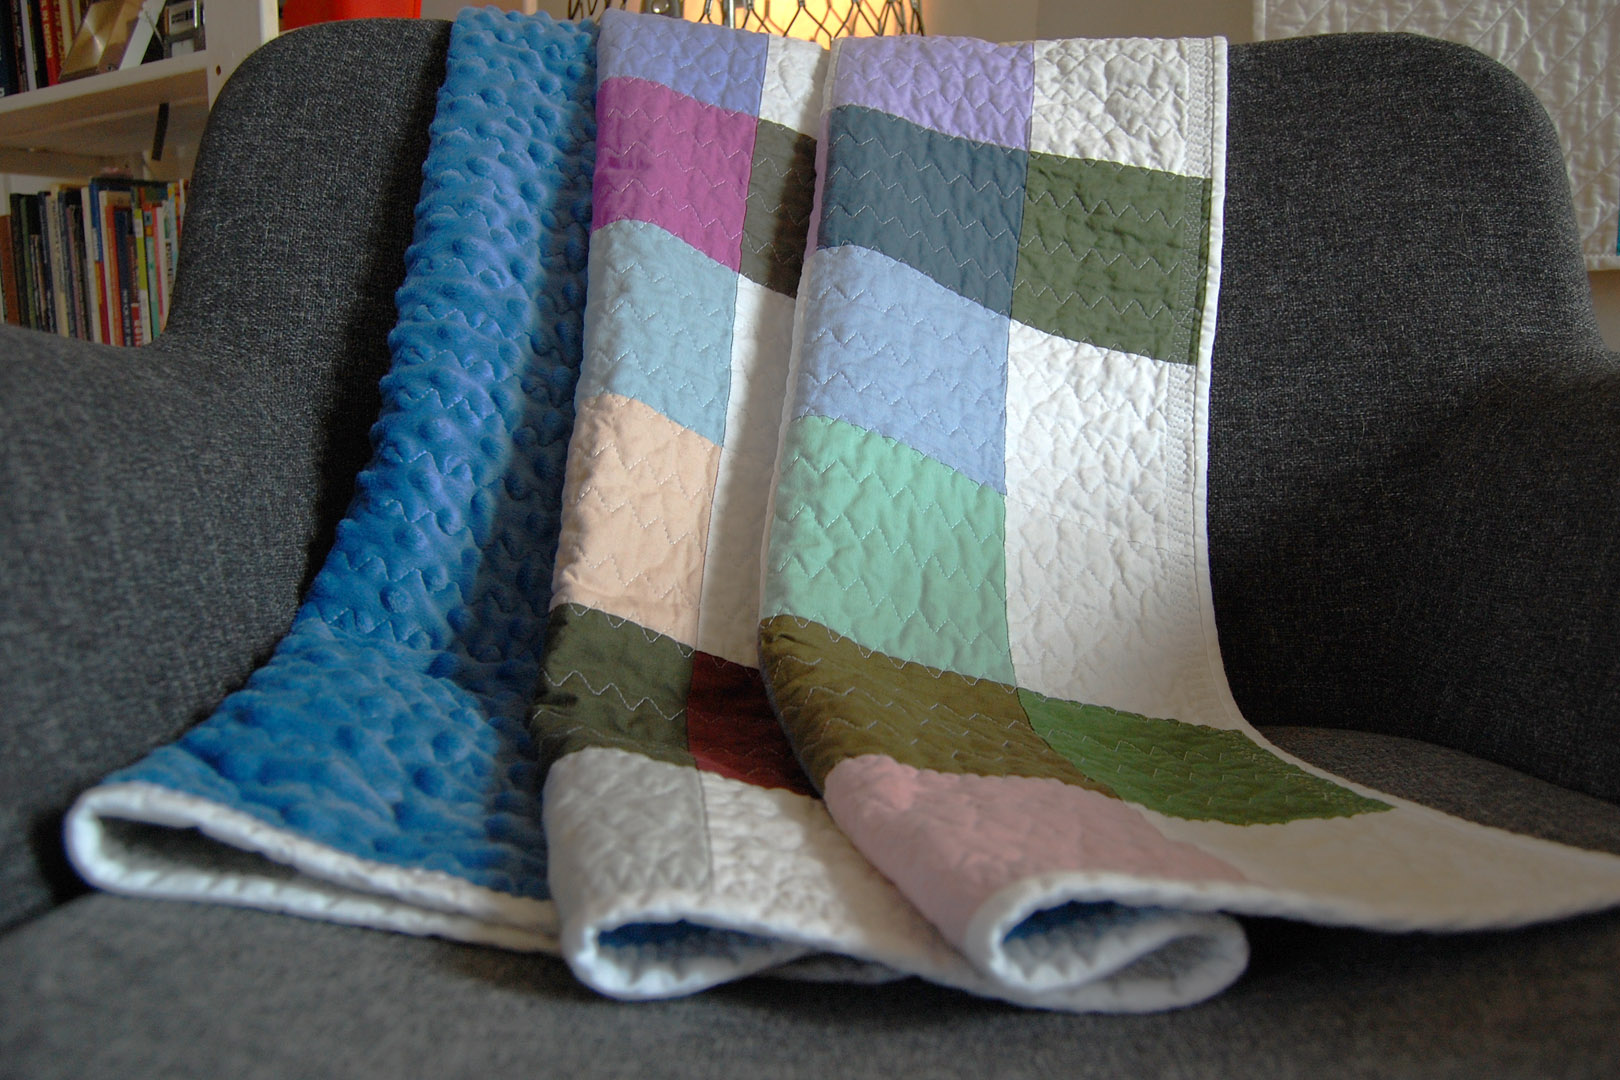
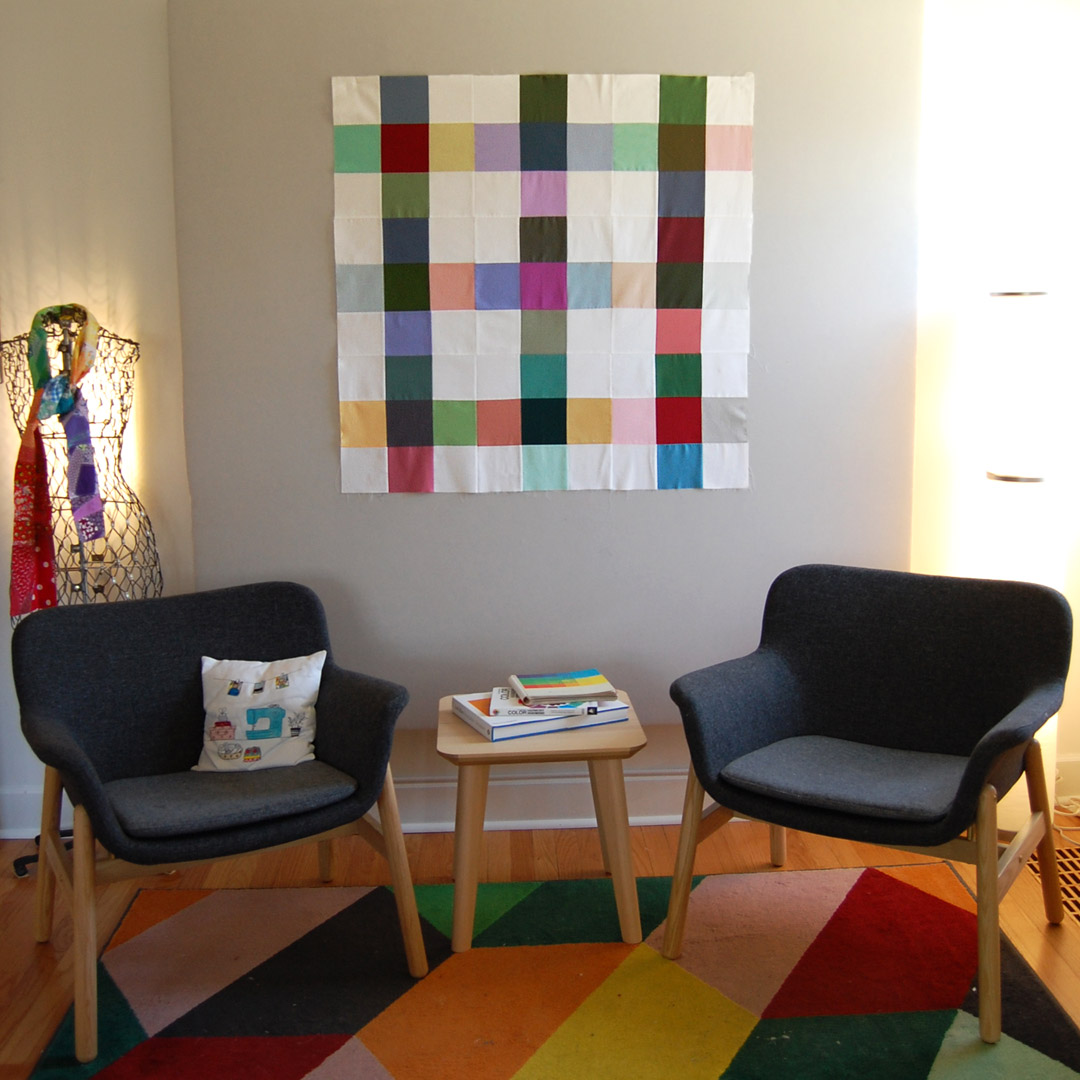
After stitching the binding in place, you are ready to pass along the patchwork baby quilt as a cherished gift.
The Minky backing makes for a cozy soft quilt, totally irresistible to cuddling as you can see!
Used Products


What you might also like


9 comments on “Minky-backed Patchwork Baby Quilt”
-
-
I Keep a supply of top sheets. Where the bottom sheet is worn out but the top sheet is just fine. It is lighter in bulk and weight.
-
-
Love this quilt and the pretty quilting (which thankfully I can handle! ?)
May I ask where you found a 36″quilting ruler? I must have one! ?-
Thank you so much! I bought the long quilting ruler through a BERNINA shop in the suburbs of Chicago. You might check in with your local BERNINA store to see if they carry this size, and if not, ask if they can order it for you.
-
-
I LOVE this so much! I am a new Quilter, and soon to be first time grandma. I would love to make this for my upcoming grandson. I have tried to find the charm pack that you used, but I can’t seem to locate it. Any hints on how to find it? I clicked on the link you put in your blog, but can’t find the pack there.
-
Michael Miller may not have the charm packs anymore, but you may be able to find the fat quarter bundles of these colors. https://www.michaelmillerfabrics.com/cotton-couture-new-colors-fat-1-4-bundle-38pcs.html I’d check at your local BERNINA or quilt store, and as a last resort you might search online. Happy quilting! – Erika
-
-
It seems you stitched your quilting all in one direction or without concern. Would you recommend alternating directions when quilting with the minky backing? Or does quilting in one direction give the best results?
-
Hi bluequiltlady, I stitched the quilting all in one direction. The Patchwork foot #1D used with the Dual Feed did a great job moving the quilt through the machine. I think you can quilt this project as you see fit!
-
-
I have a Bernette 77, what feet would I use and other changes that are different than the Bernina.
Leave a Reply
You must be logged in to post a comment.

You can also use flannel instead of batting. I put a layer of flannel between the top and the minky, then pin baste it. The flannel keeps the minky from stretching when you sew it and it makes a lighter weight quilt than using batting.