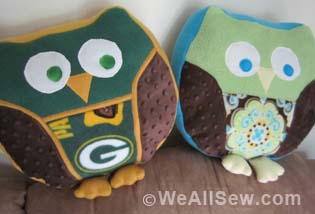
Owl Pillow Tutorial
Pat Delaney of Crabtree Lane Quilts shows you how to make a bright and colorful Owl Pillow with this free pattern and tutorial.
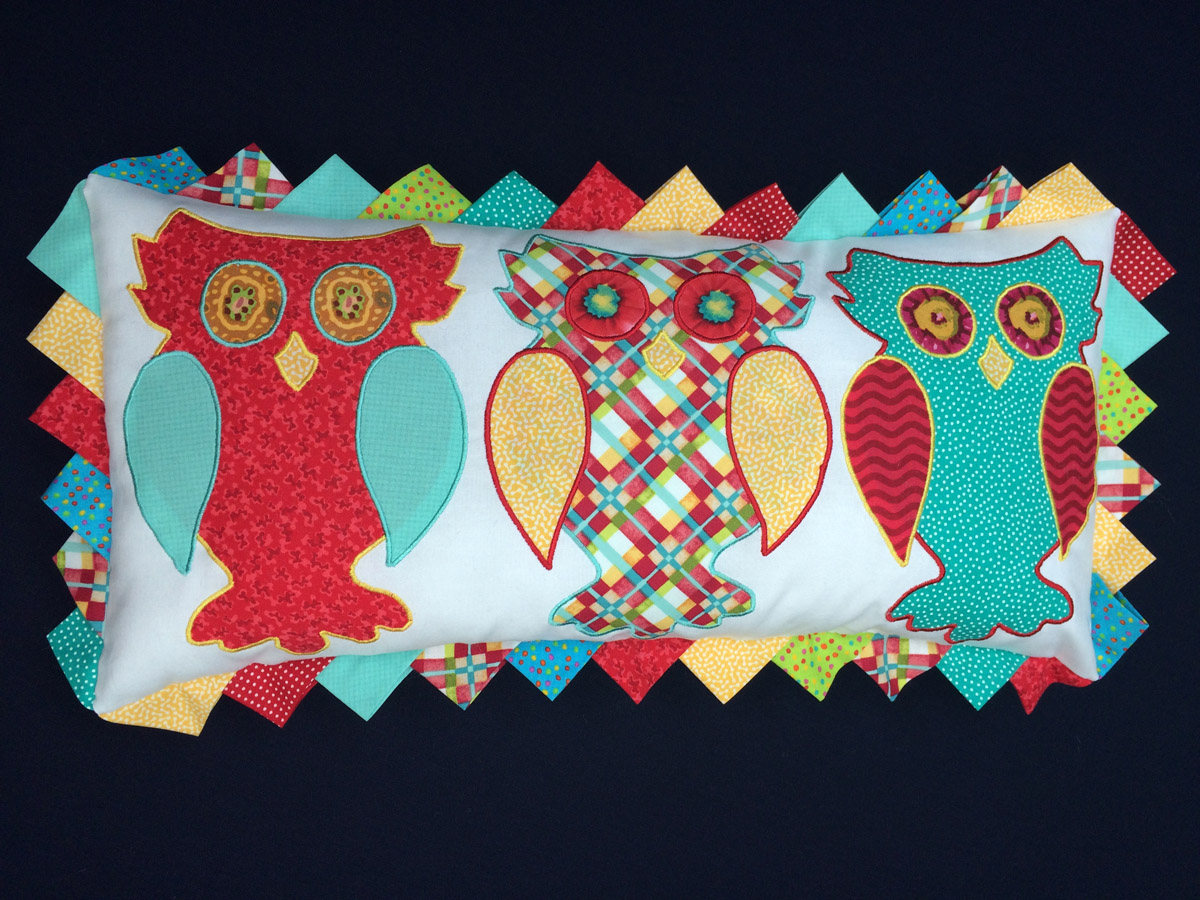
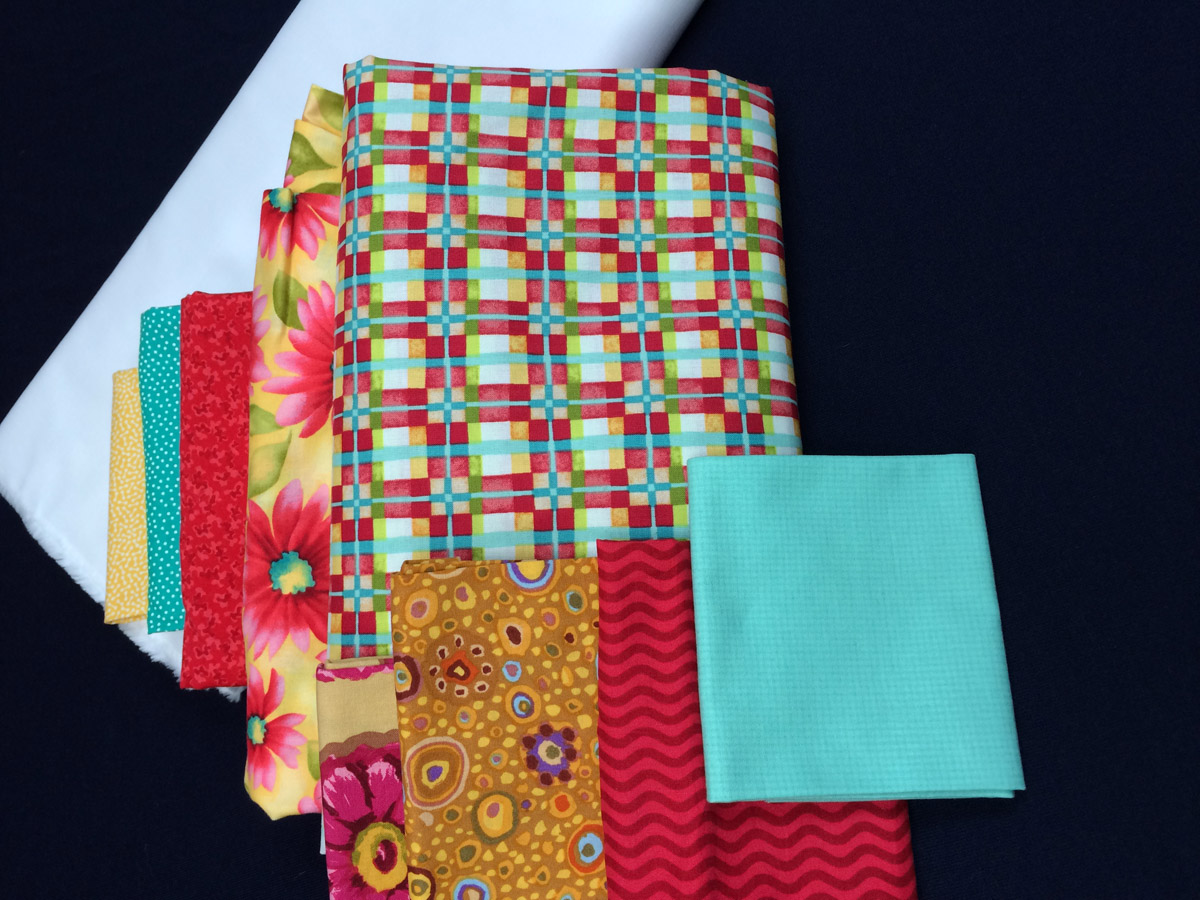
I needed a cute baby gift and thought these little fellows would be just perfect. The plaid fabric is the nursery theme fabric with red and aqua accents. Use your own desired fabrics to suit any style.
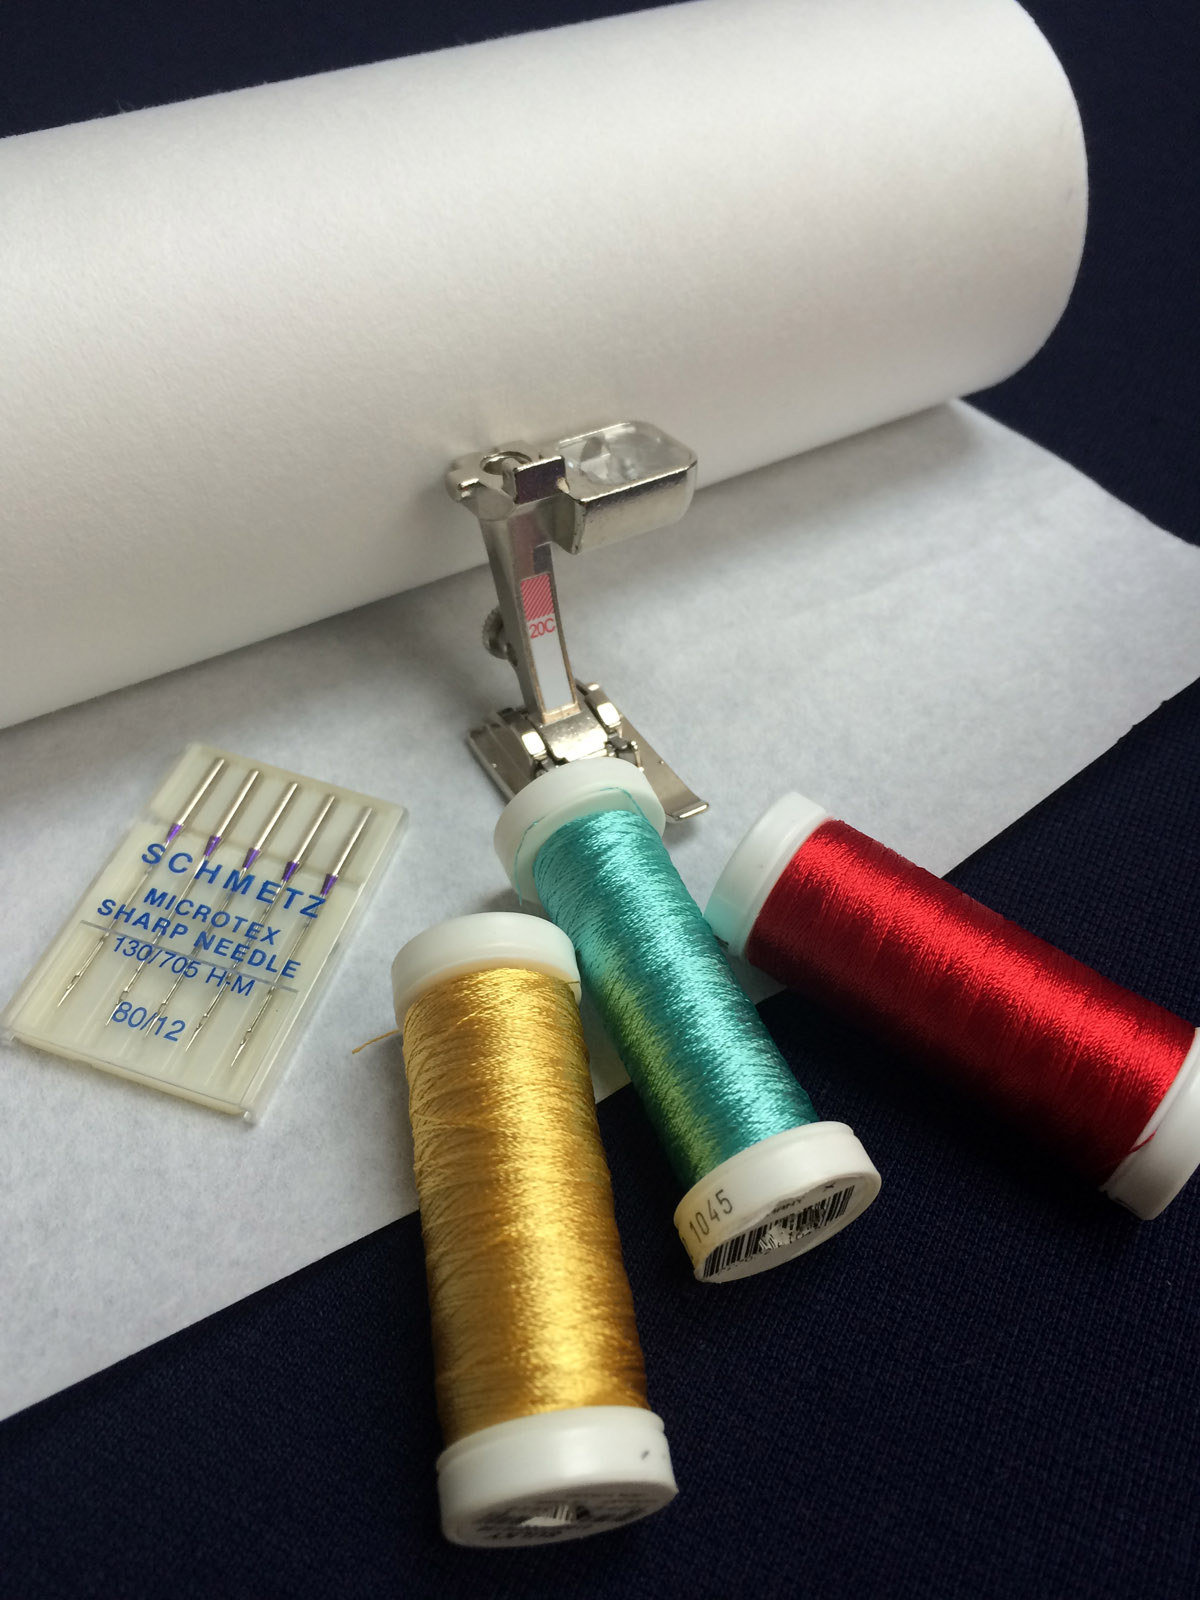
Materials to make an Owl Pillow
- 2-20″ x 10″ rectangles background fabric
- Fat quarters or large scraps in different colors for owls
- 36-3″ squares of colorful fabrics for prairie points around pillow
- Fusible webbing
- Matching threads
- Sewing machine (I use a BERNINA 790)
- Reverse pattern foot #1/1C/1D
- Open embroidery foot #20/20C/20D
- Owl Pillow Appliqué Pattern
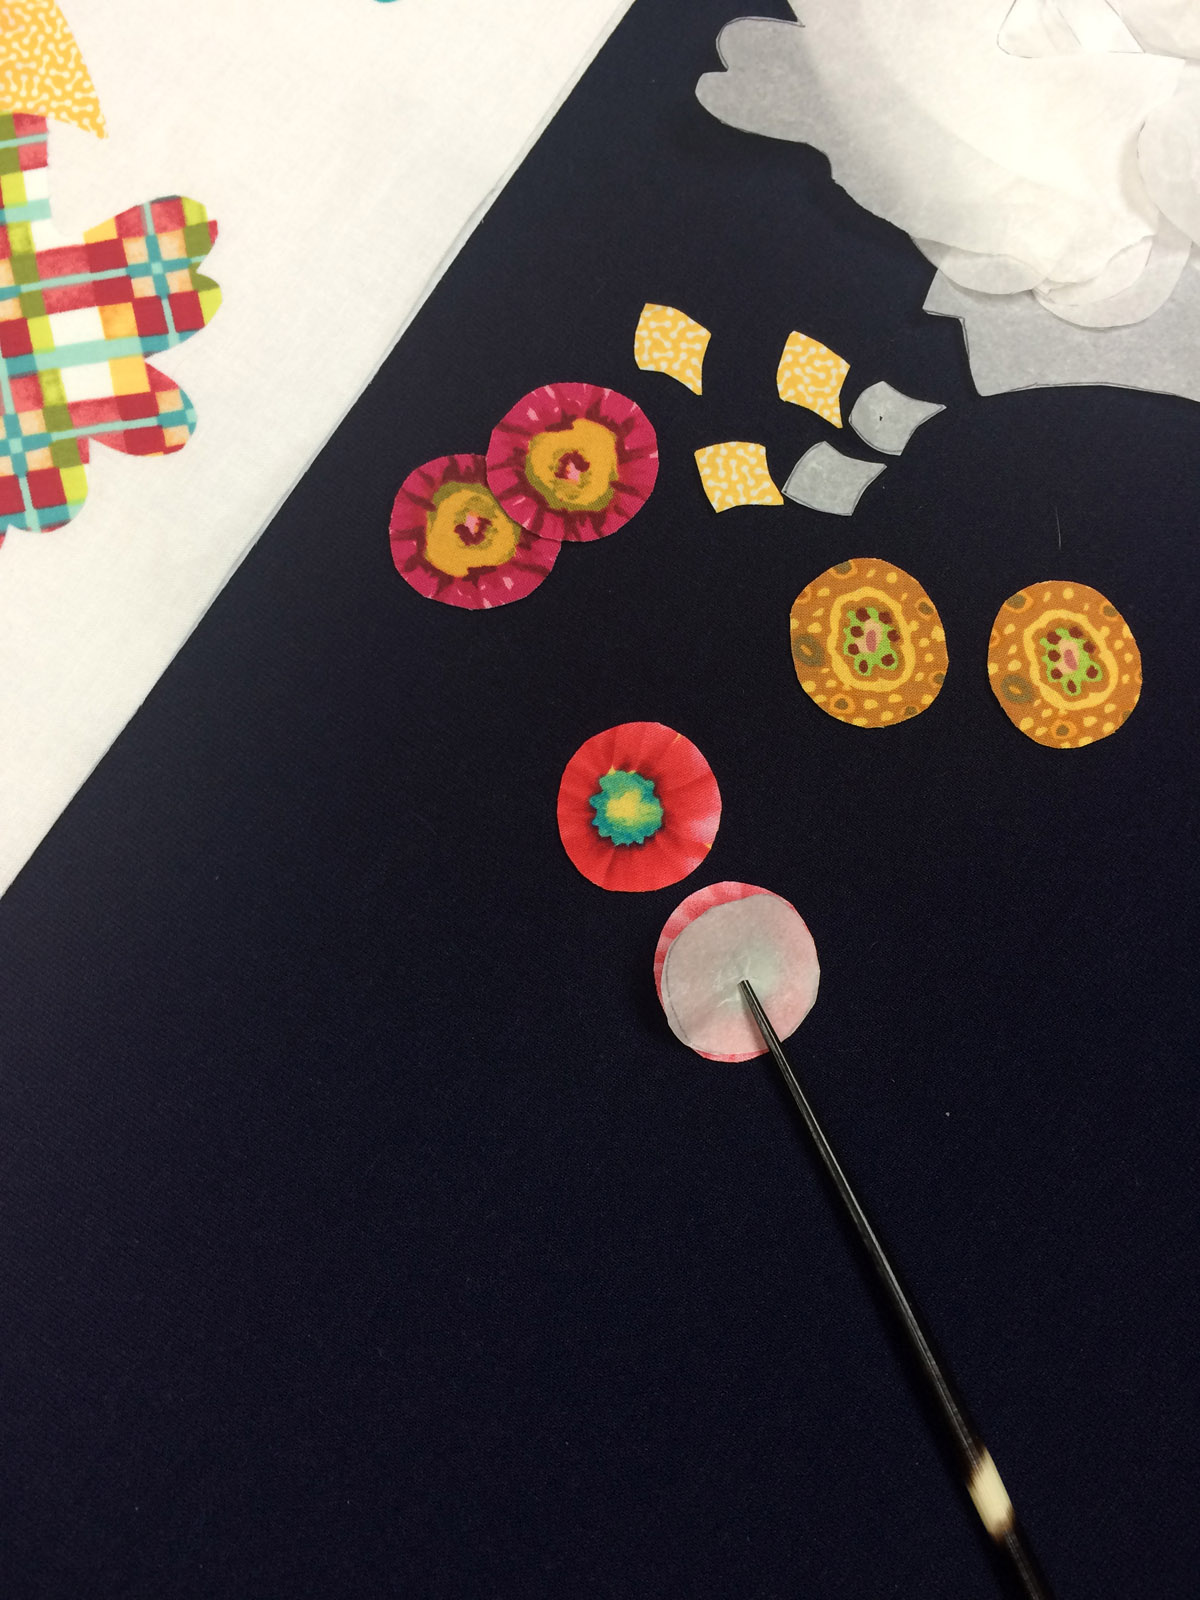
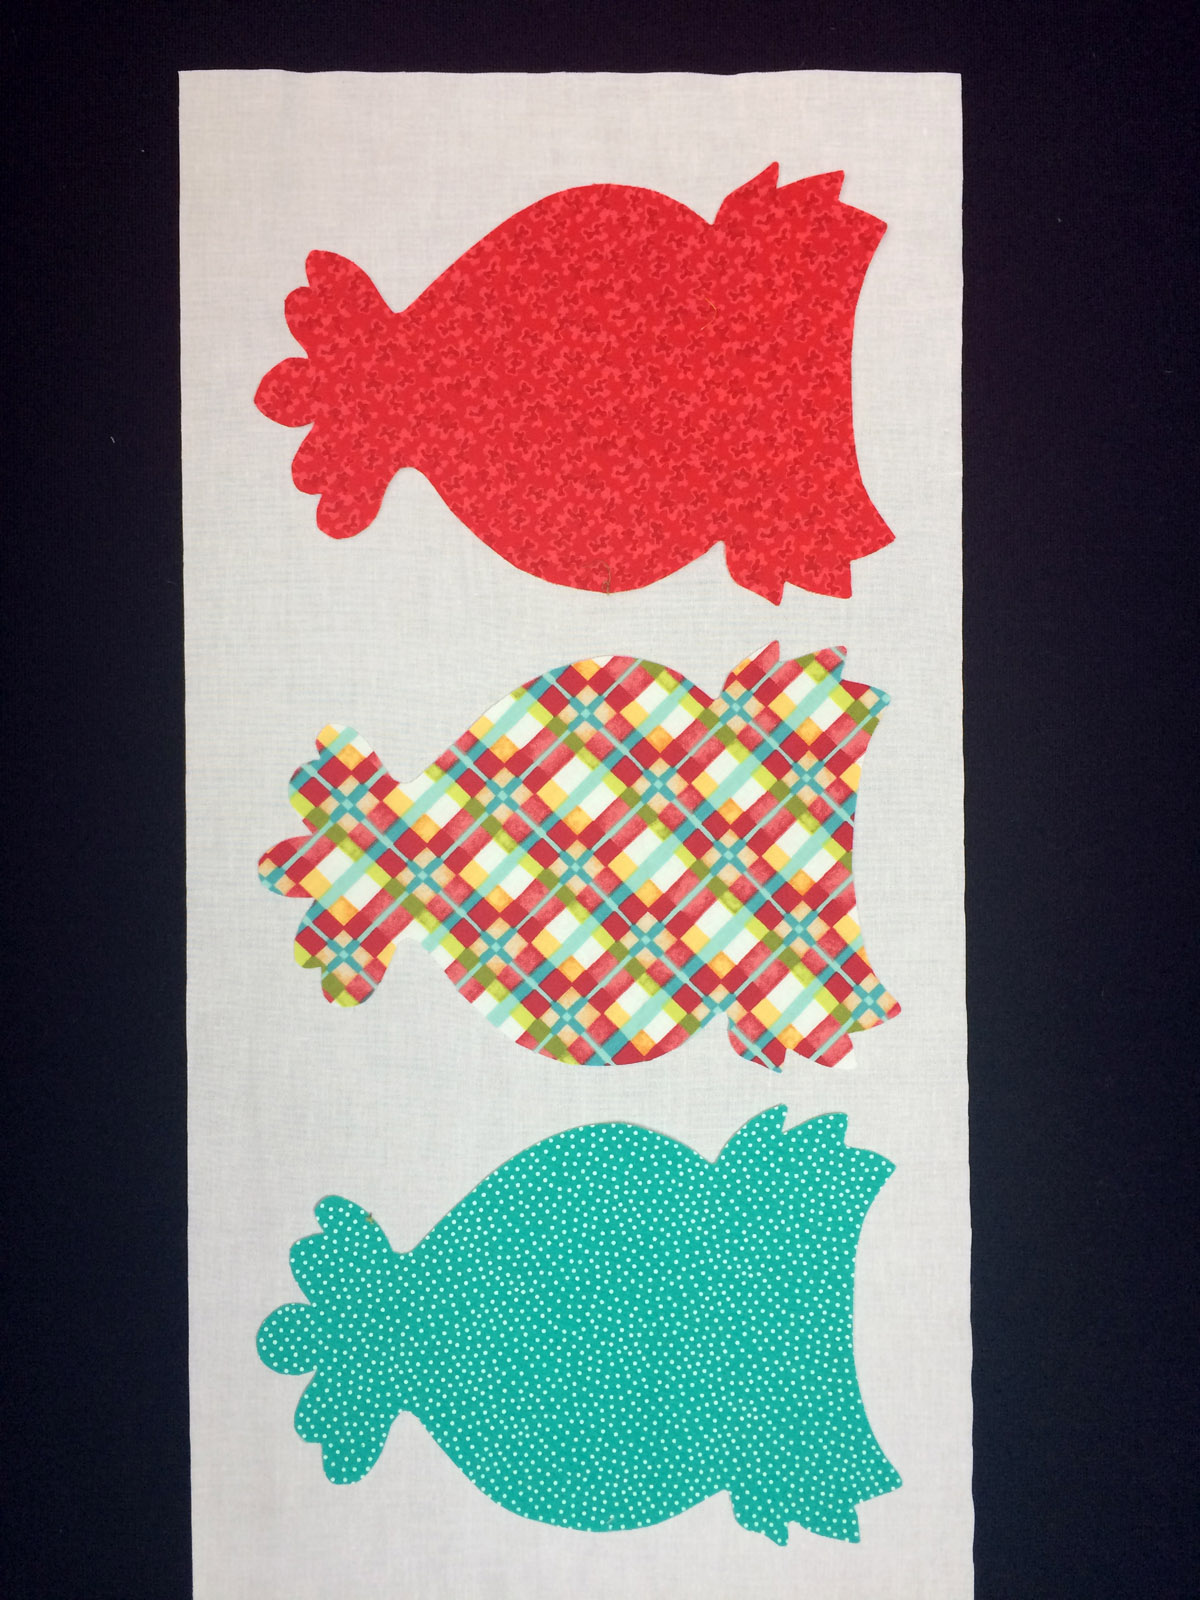
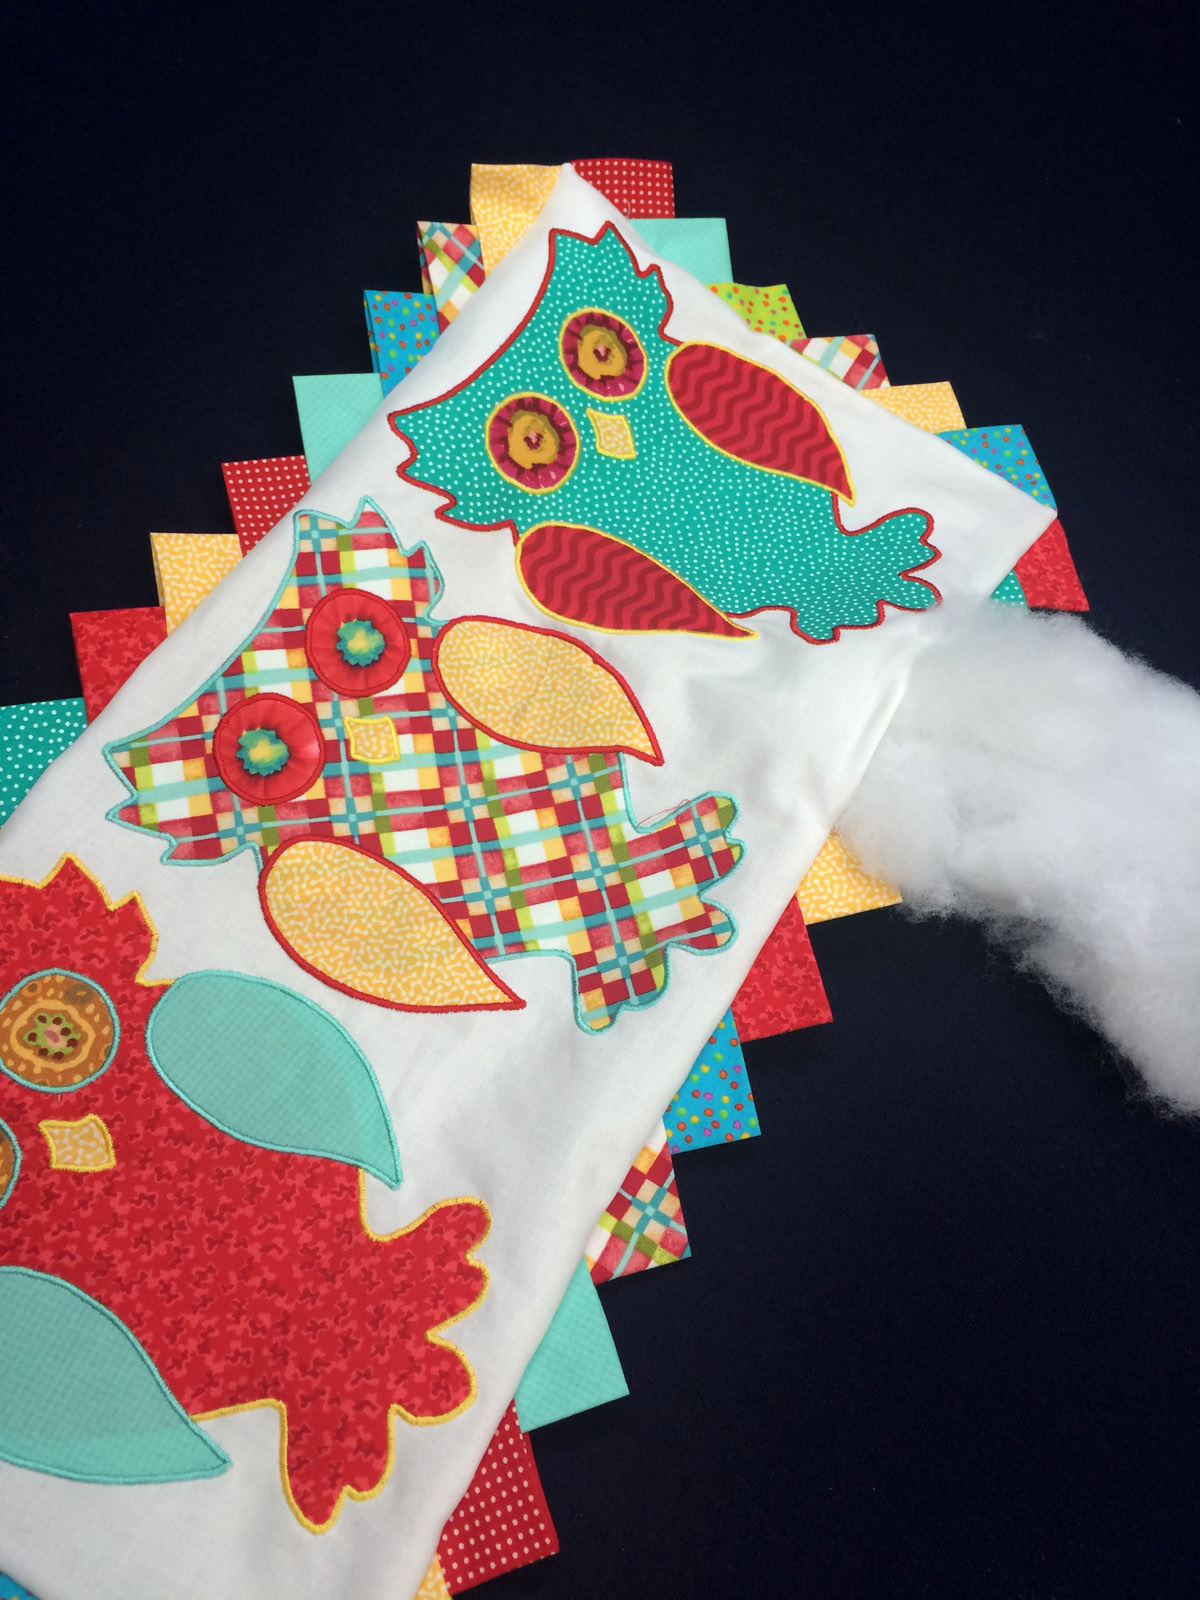
1. Assemble fabrics. I chose to use white as the background color, and three body colors and accent colors. I used floral prints and cut eye circles from the flower centers. Add other colors for the prairie points if you wish.
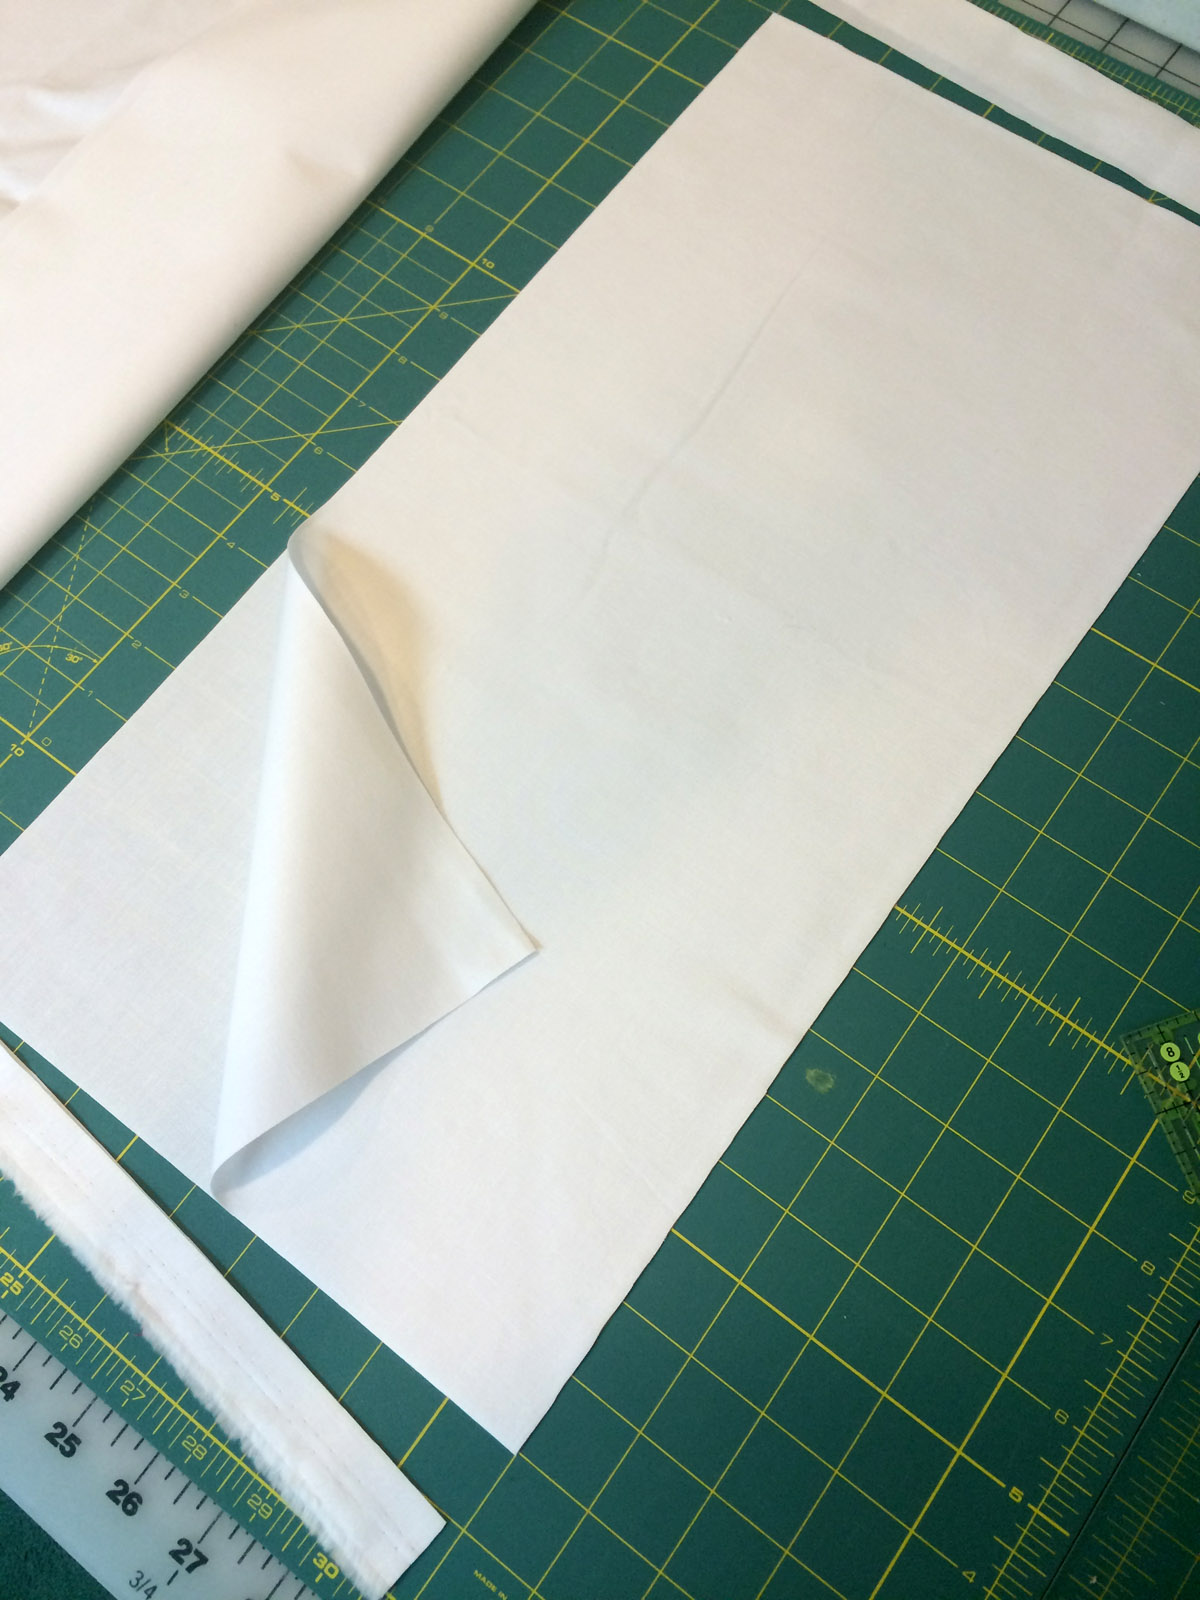
2. Cut out 2-20″ x 10″ rectangles from the white fabric.
3. Print out the owl pattern page.
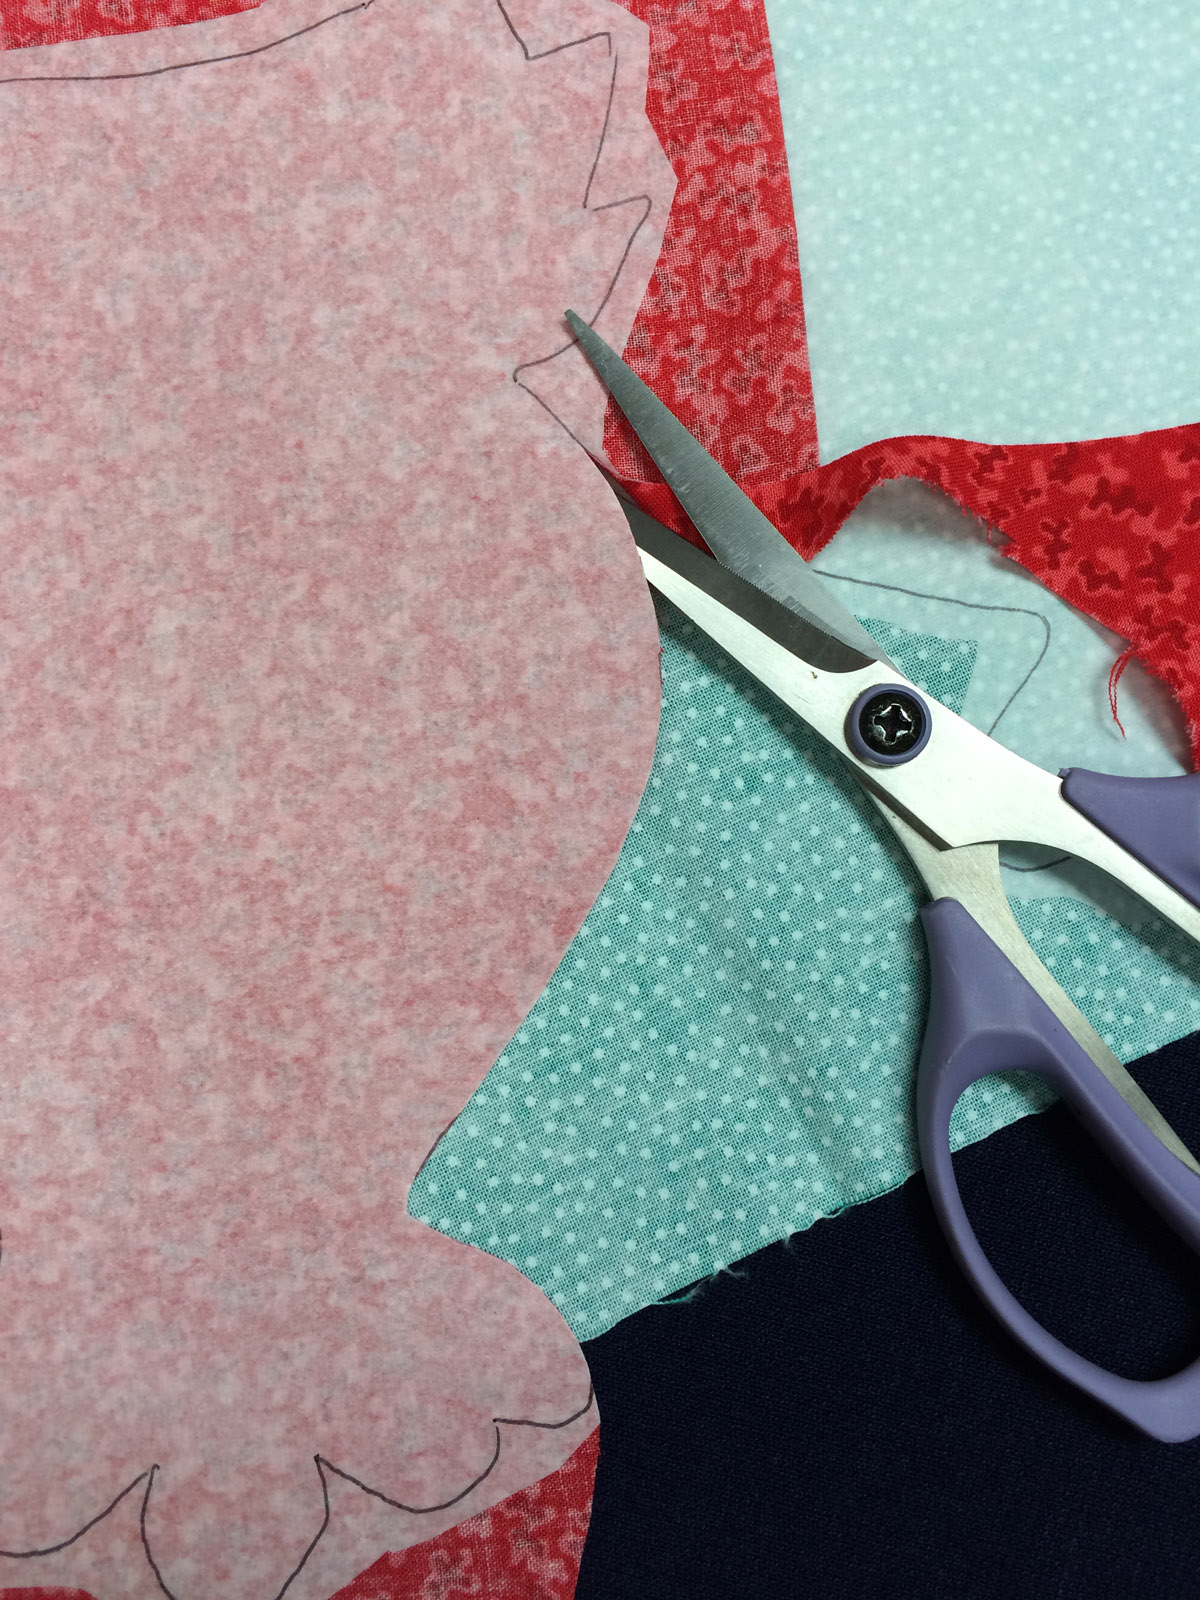
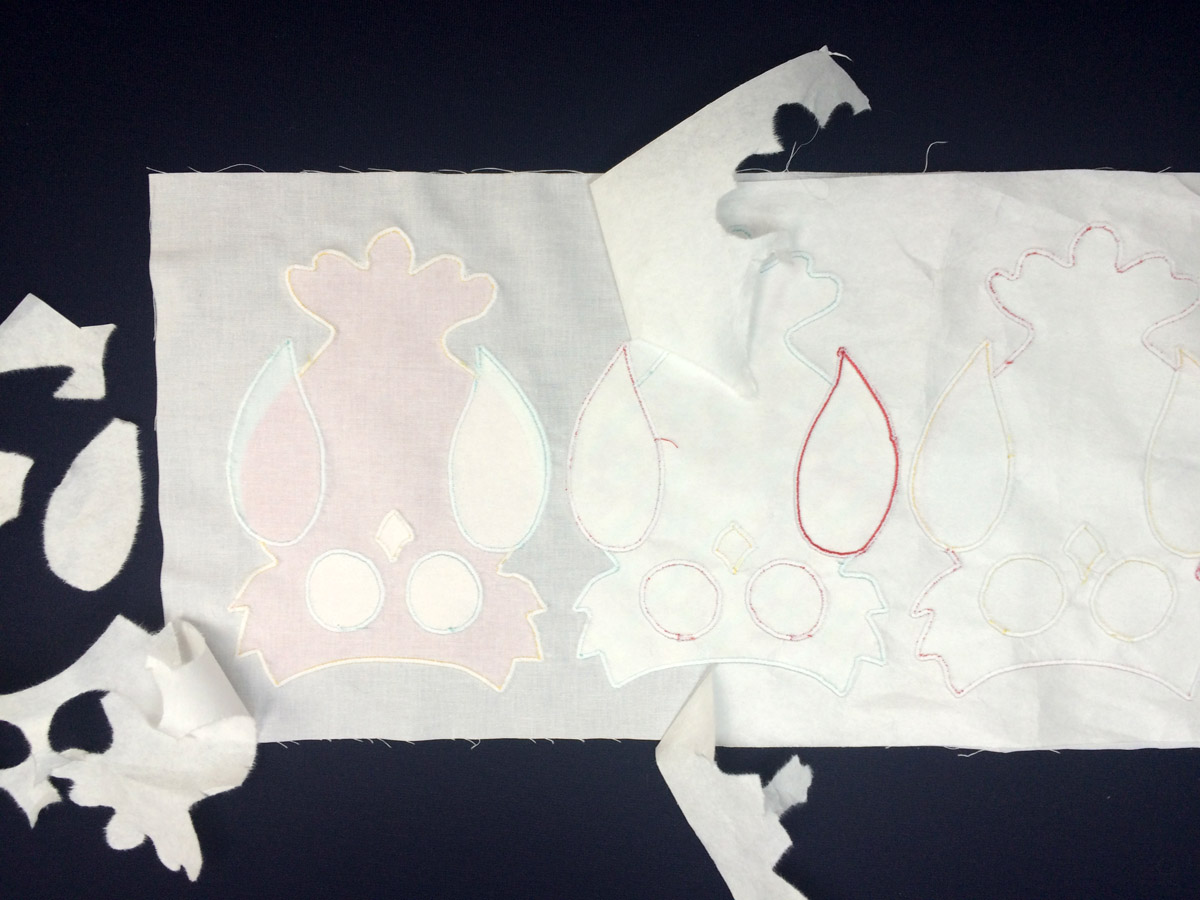
4. Trace bodies, wings, beaks, and eyes for three owls onto the paper side of the fusible webbing.

5. Cut out fusible leaving scant 1/8″ around each piece.

6. Following manufacturer’s directions, fuse to chosen fabrics using photos as suggested color choices. Once the fusible is ironed onto the fabric, cut out on the exact line.
7. Remove the backing paper and fuse the three body shapes to white background leaving about 3/4″ all the way around outside edges.
I don’t want to have stitching under the wings, so go ahead and fuse those on in place, too.
8. So, now we are ready to begin stitching. I use my BERNINA 790 which makes a beautiful satin stitch edge. It is set on stitch #2 using embroidery thread in various colors, a bobbin with a fine bobbin thread, and with a #20 C foot. I like a sharp microtex #80 needle and set the machine to 0.4 length and 2.5 width. It also is a good idea to put a sheet of stabilizer underneath to keep everything smooth.
9. Begin by sewing the body right up to the wings.
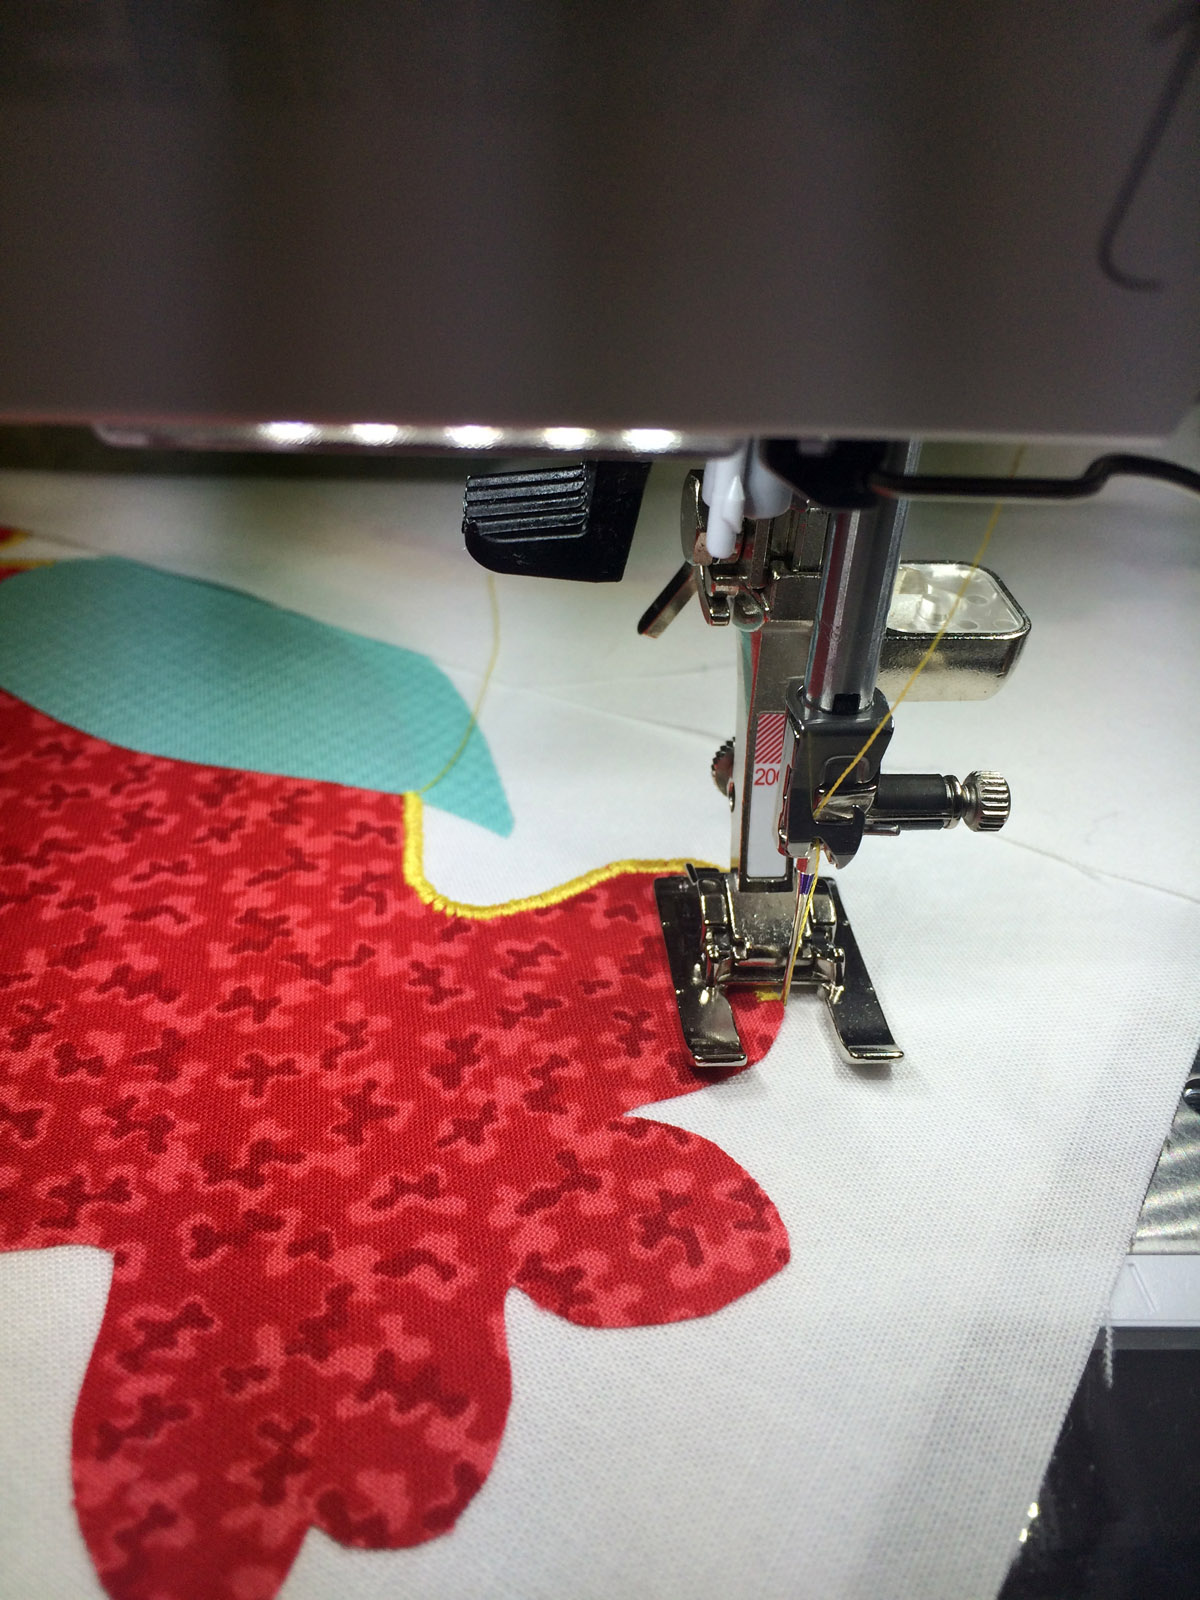
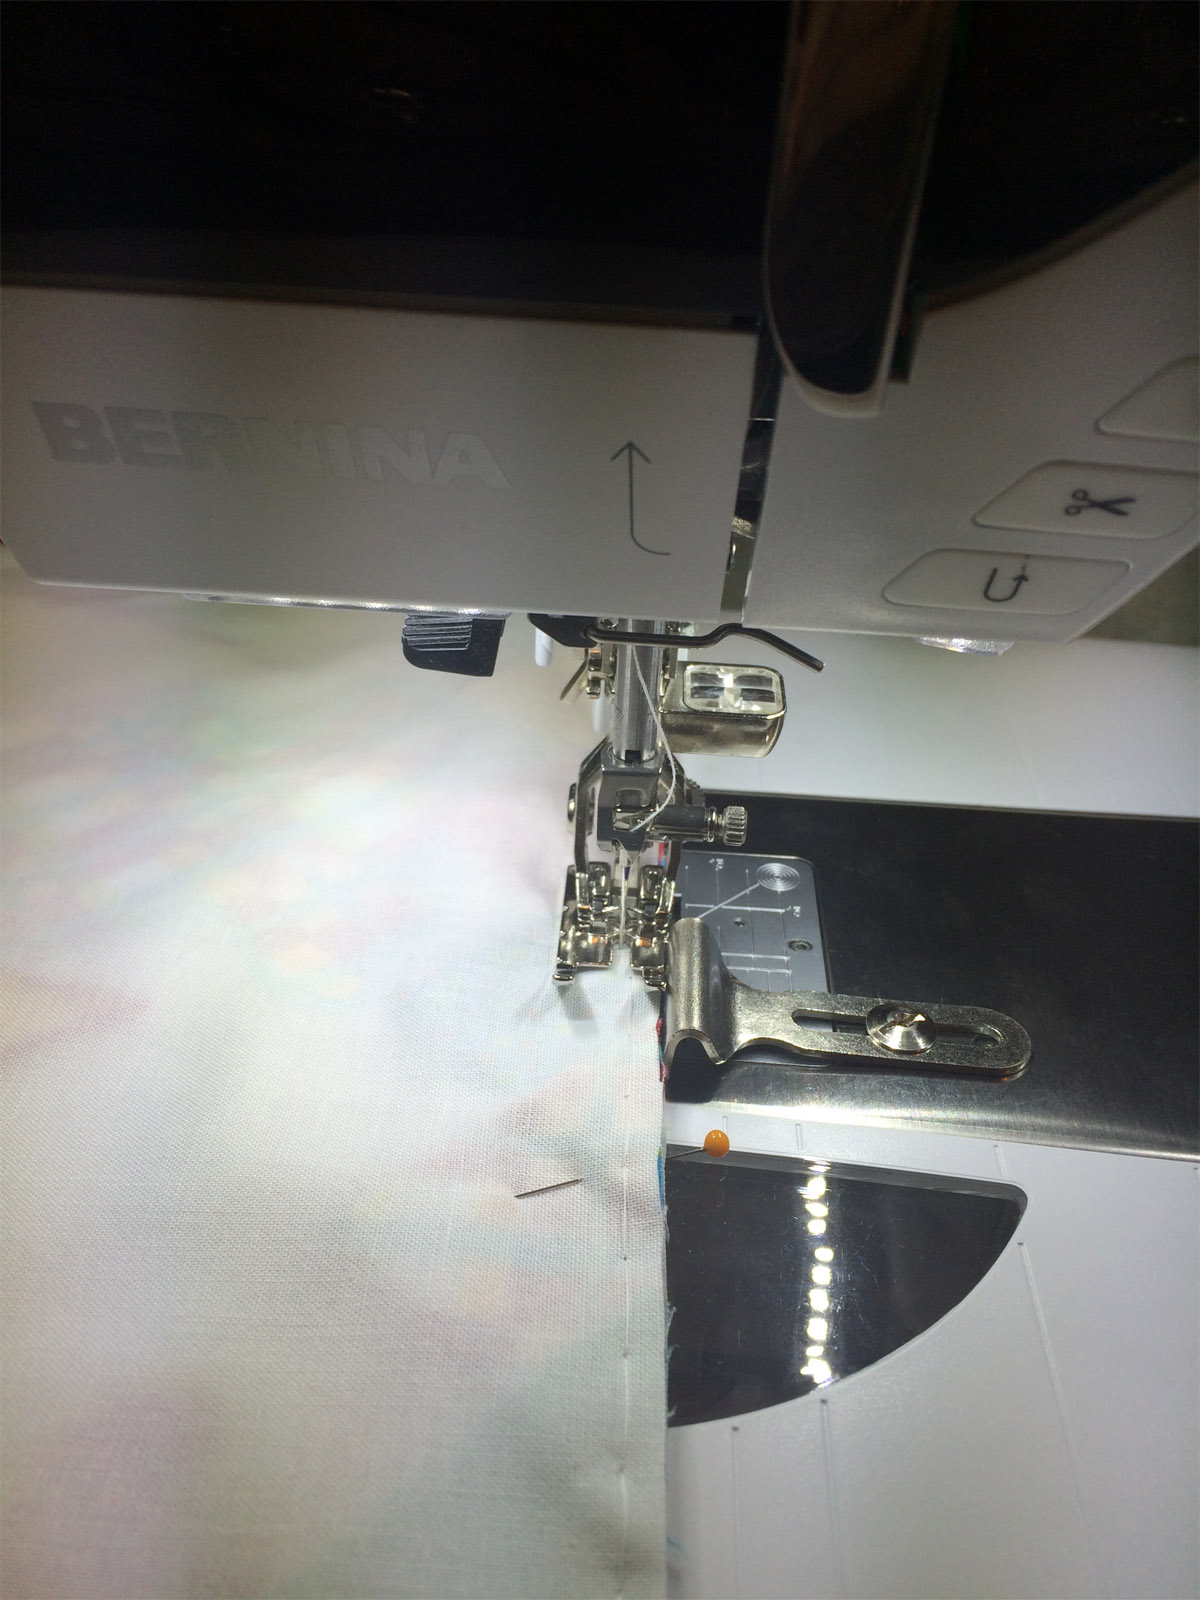
Don’t forget to set the needle down position and pivot around the curves stopping with the needle on the outside of the curve. The Free Hand System makes this so easy because you can release the presser foot just enough to pivot! Try to keep the fabric feeding in a straight line, not at an angle. You want your stitches to be at a right angle to the fabric edge for a nice, consistent look.
10. Now sew the wings covering the start of the body stitching. Notice how the fabric is feeding straight into the foot area.
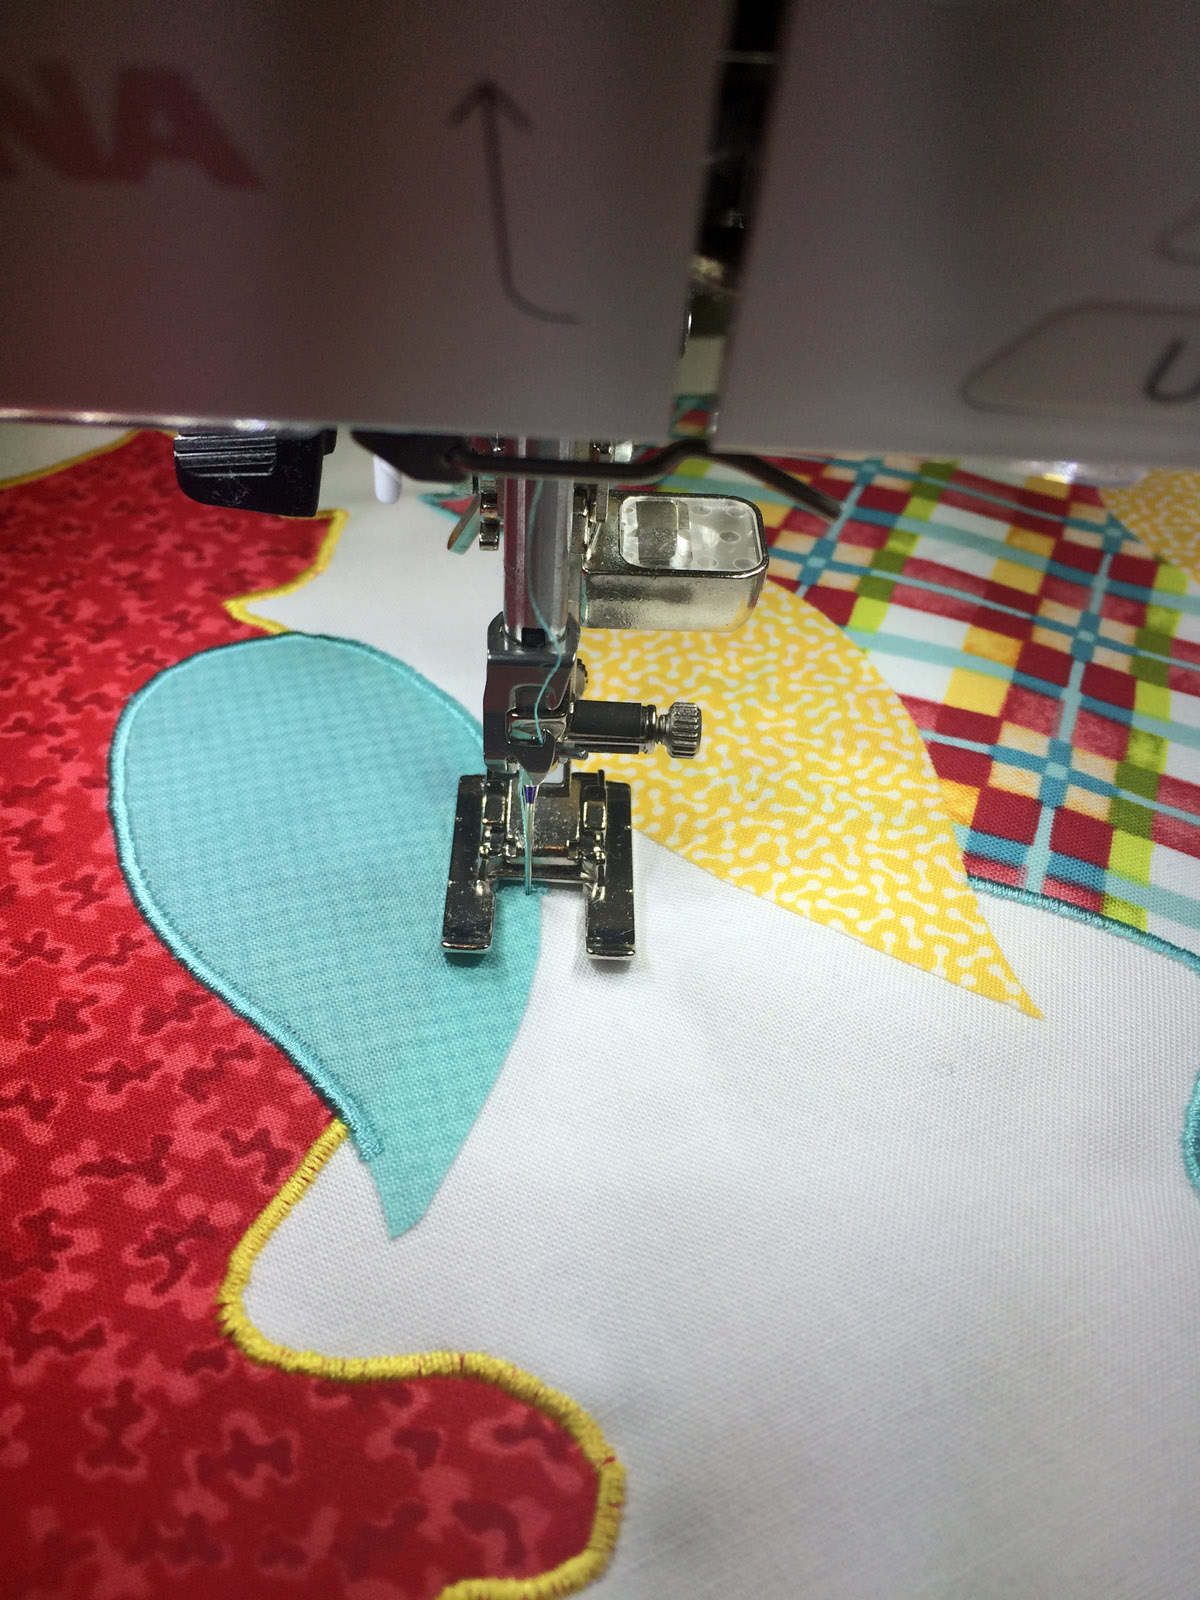
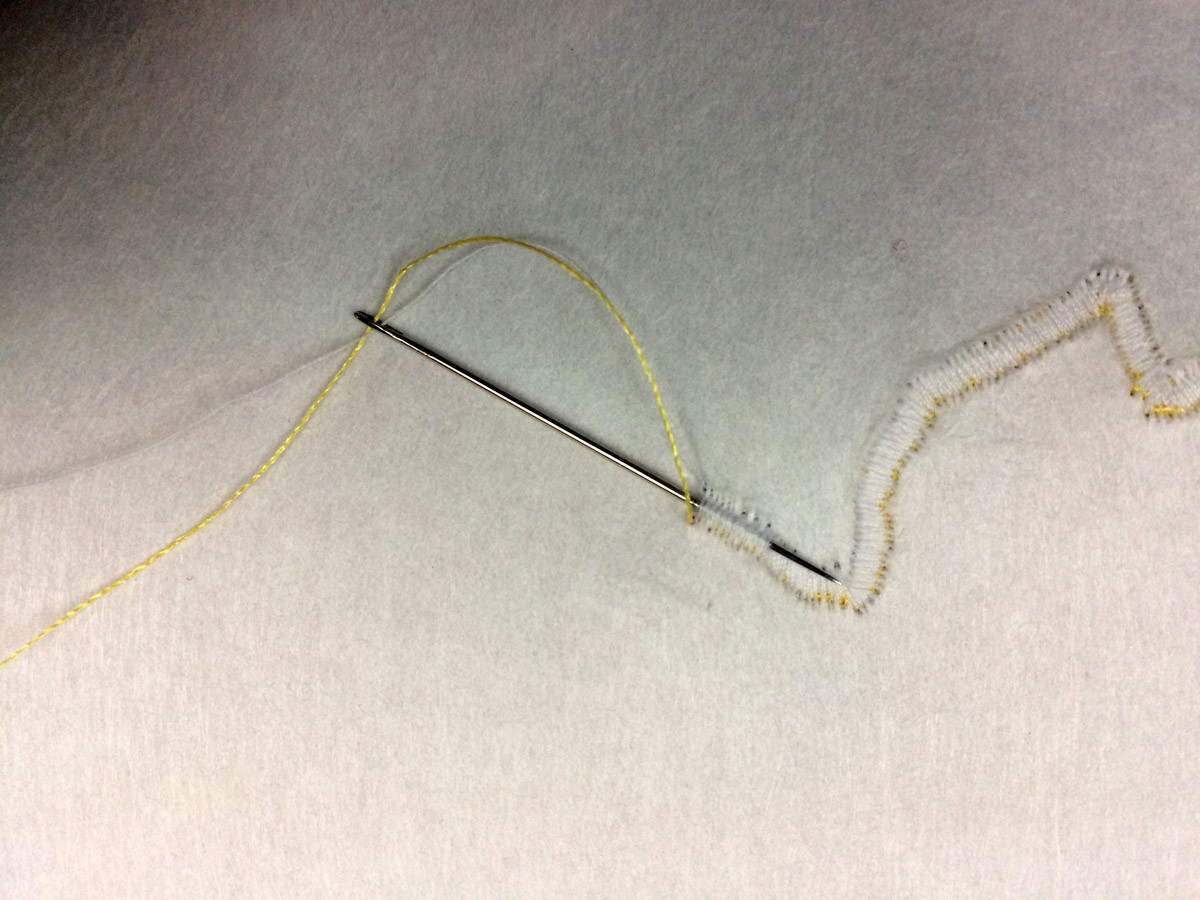
11. I like to pull up the bobbin thread at the beginning and cover that and the top thread with the first few satin stitches. At the end, I cut the threads leaving a few inches of tails, pull the top thread to the back, and with a sewing needle, bury them in the satin stitches.
12. Finish sewing the eyes and beaks and gently remove the stabilizer from the back.
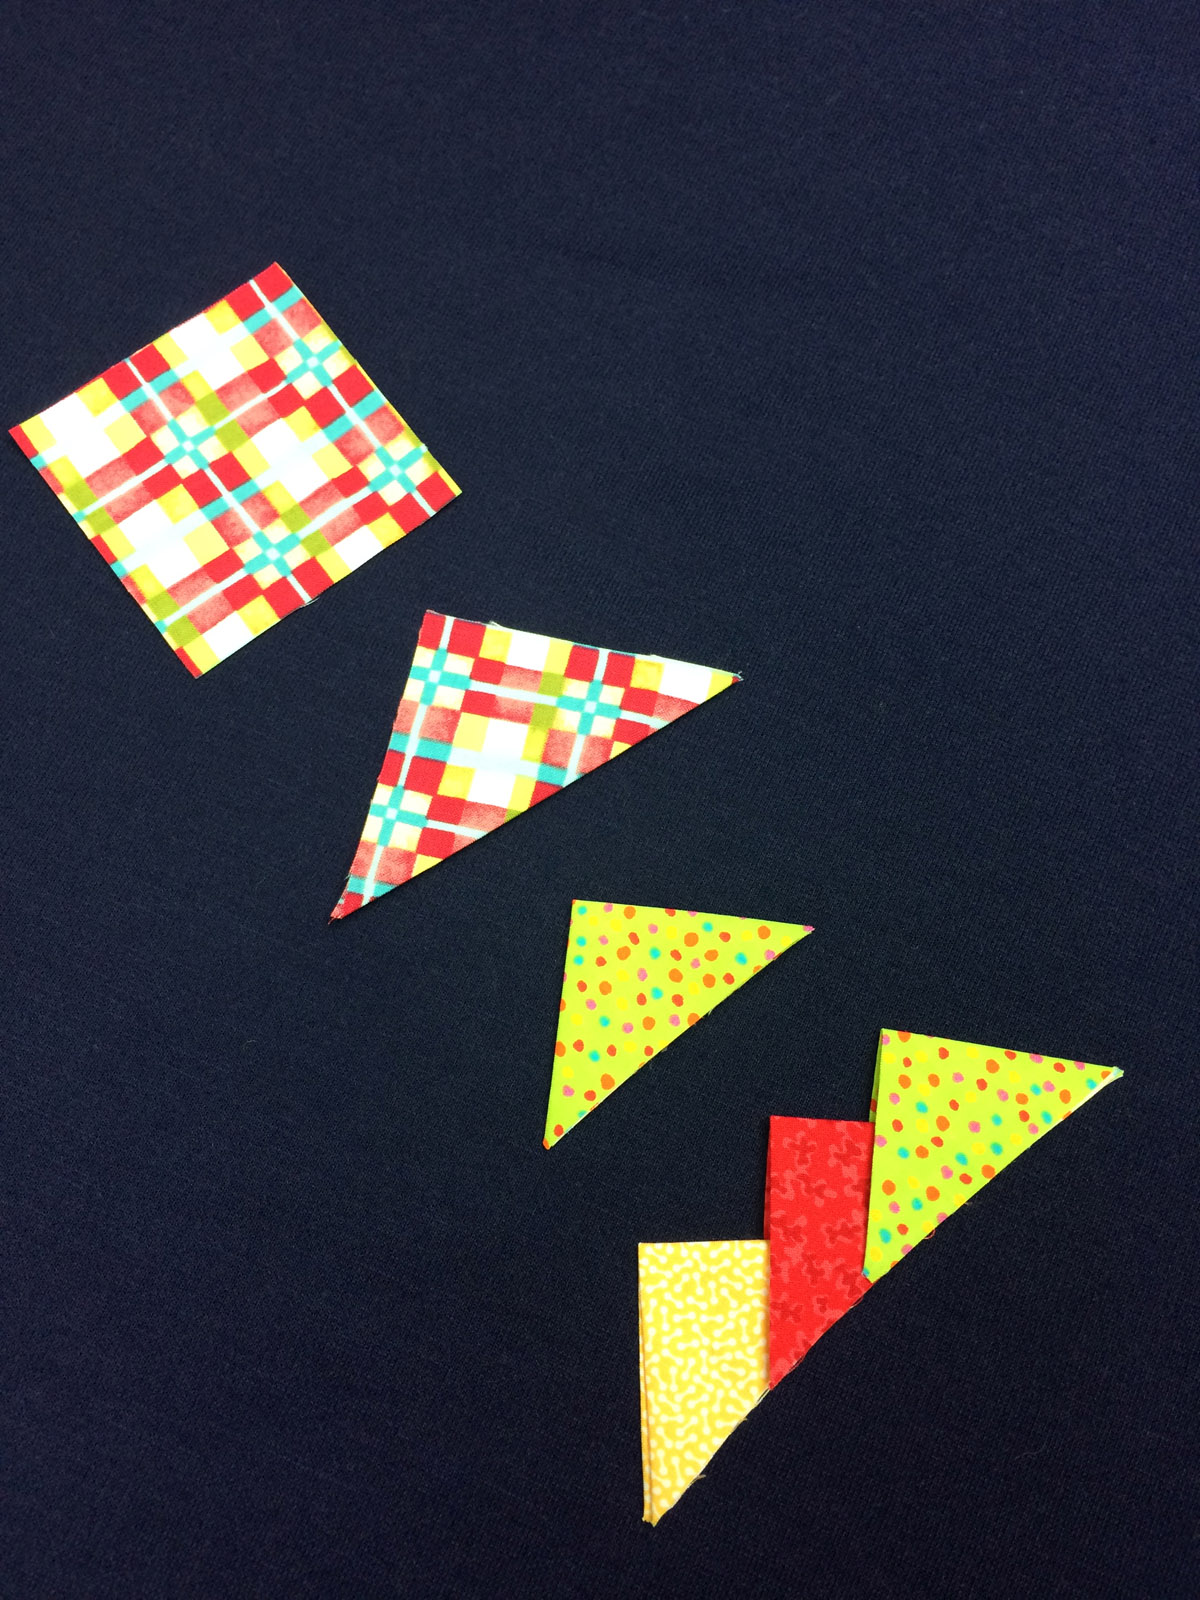
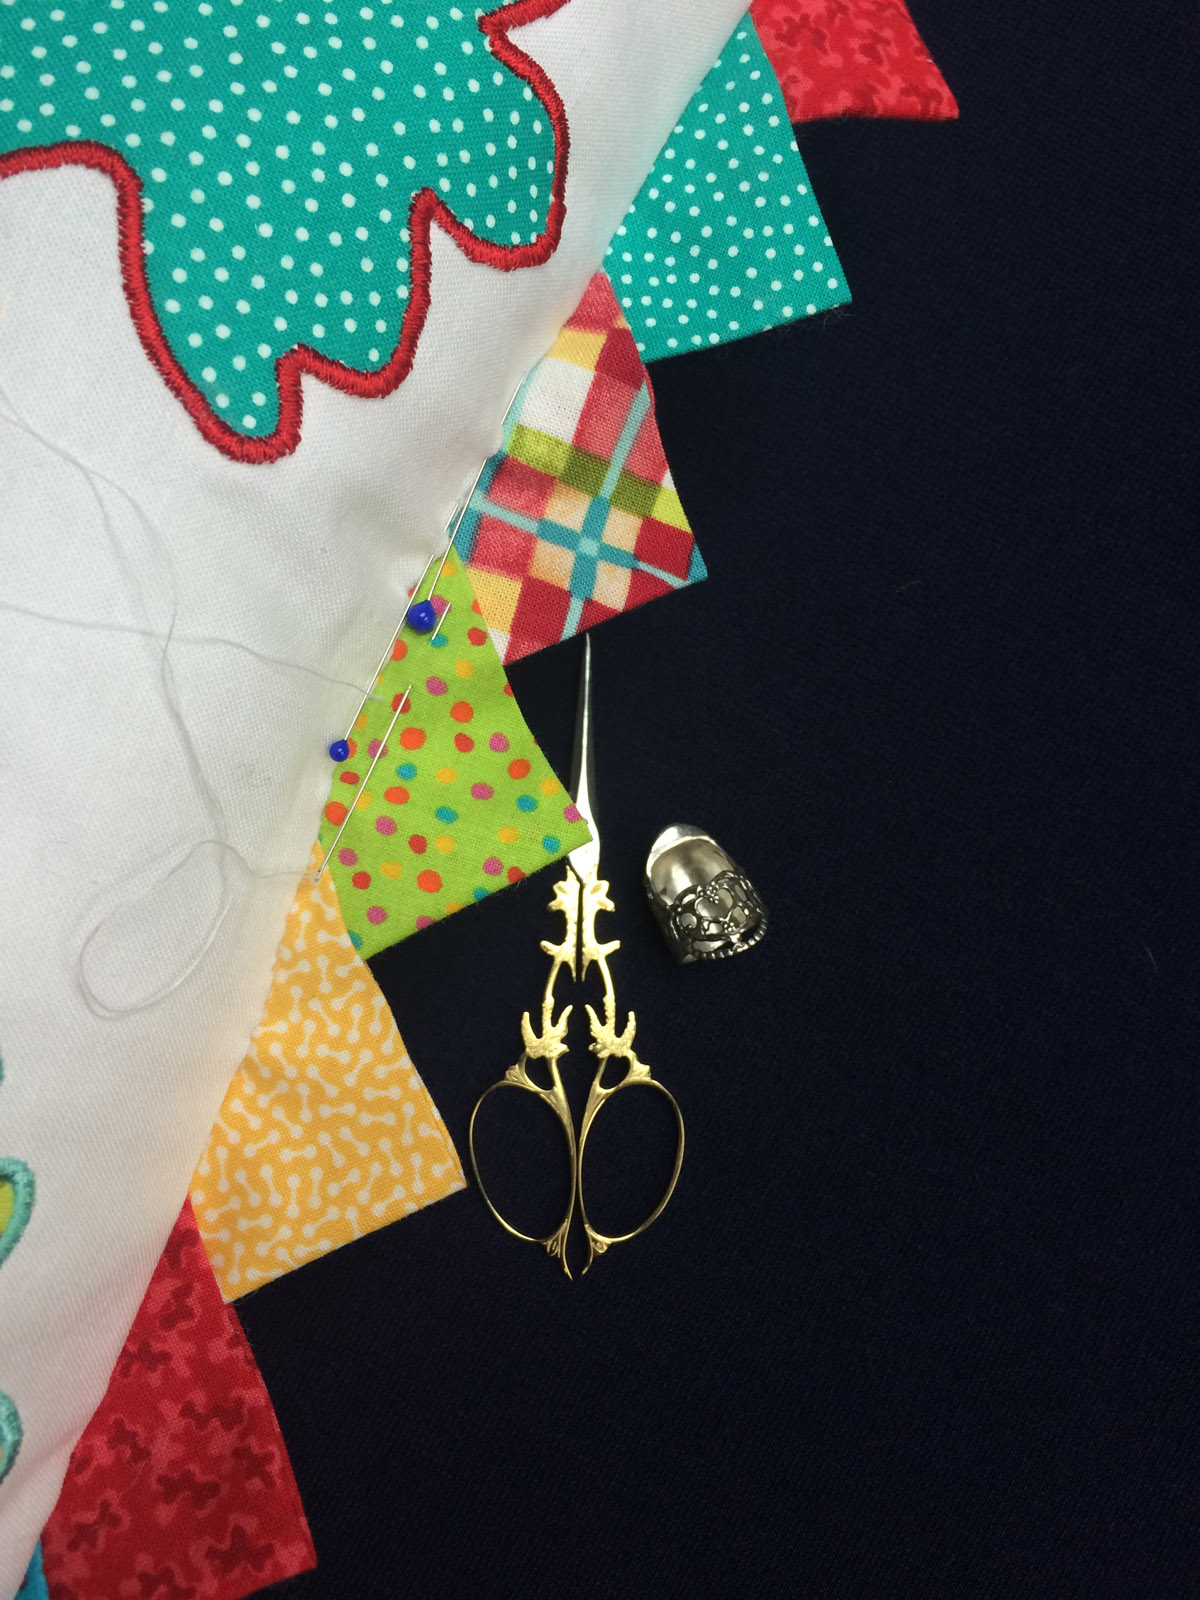
13. Cut 36-3″ squares for the prairie points. Fold on the diagonal and press, then fold diagonally again and press well.
14. Change to regular sewing thread, set for stitch #21, the basting stitch.
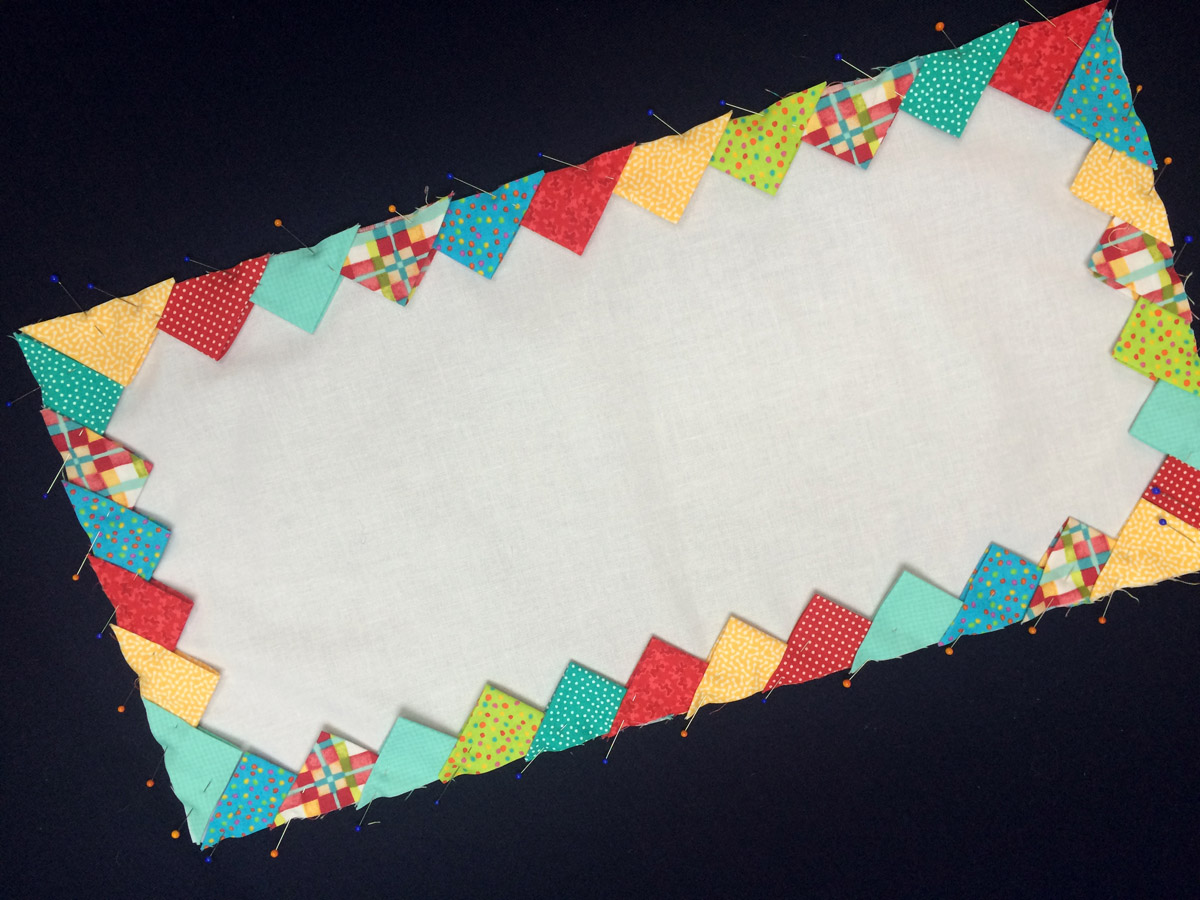
15. You will need 12 prairie points on each of the long sides, and 6 on each of the short sides of the pillow back. Tuck into each other to achieve the correct measurement. Pin in place and baste using a scant 1/4″ seam allowance.
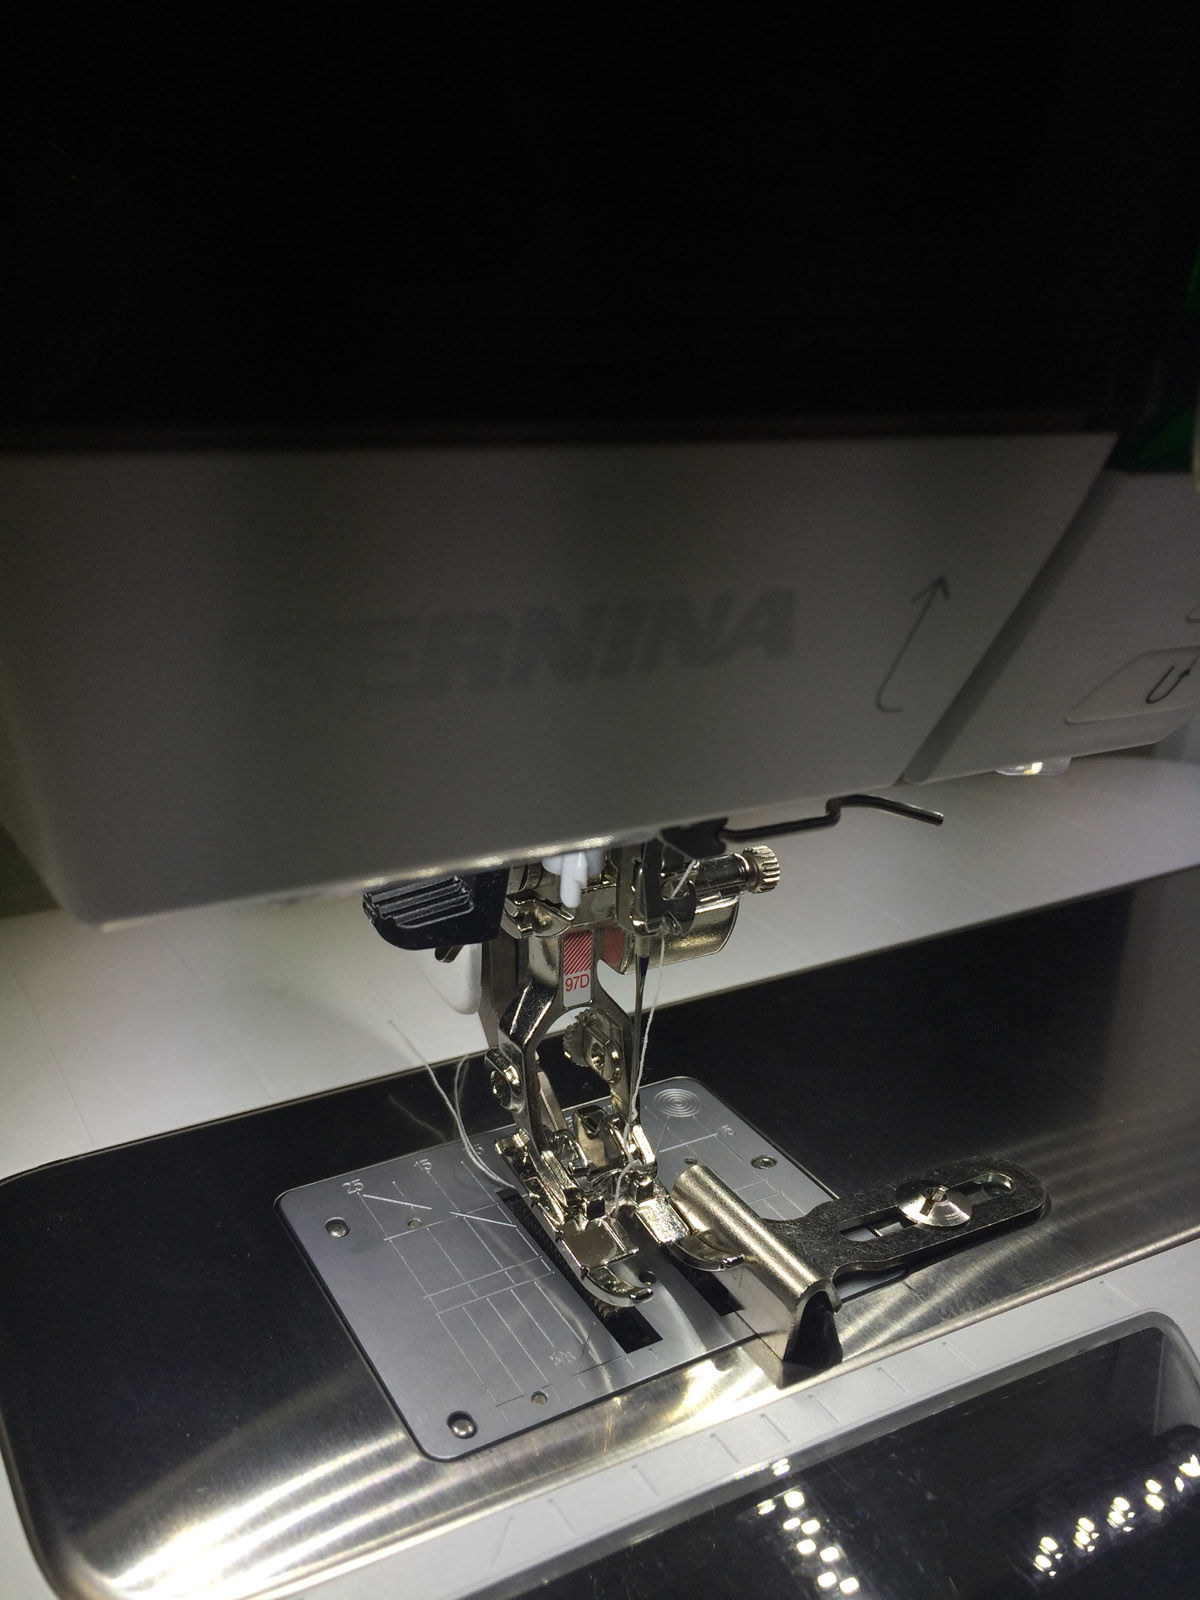
16. I love the Patchwork foot #97D with the BERNINA Dual Transport and the seam guide. The fabrics are fed evenly and I get a very precise seam allowance from start to finish. A single hole needle plate is also helpful.
17. Pin pillow front to the back, right sides facing and stitch around four sides leaving a 4″ opening along one of the long sides.
18. Trim corners, turn to right side and stuff well with polyester fill.
19. Hand sew opening closed.
Now you have an adorable gift to make any new mother smile!