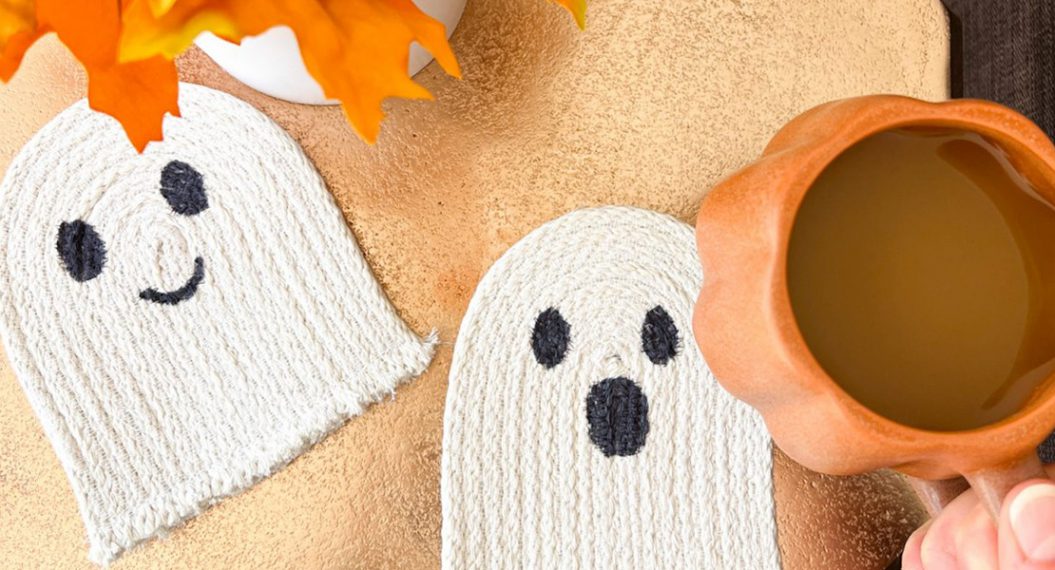
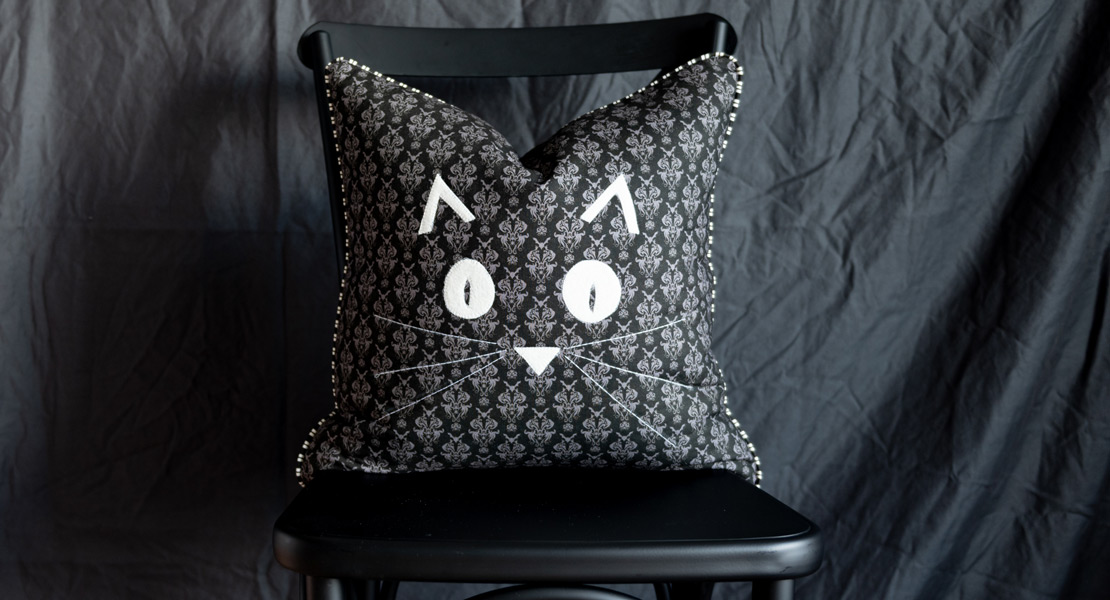
Patchwork Ghost Pillow Tutorial
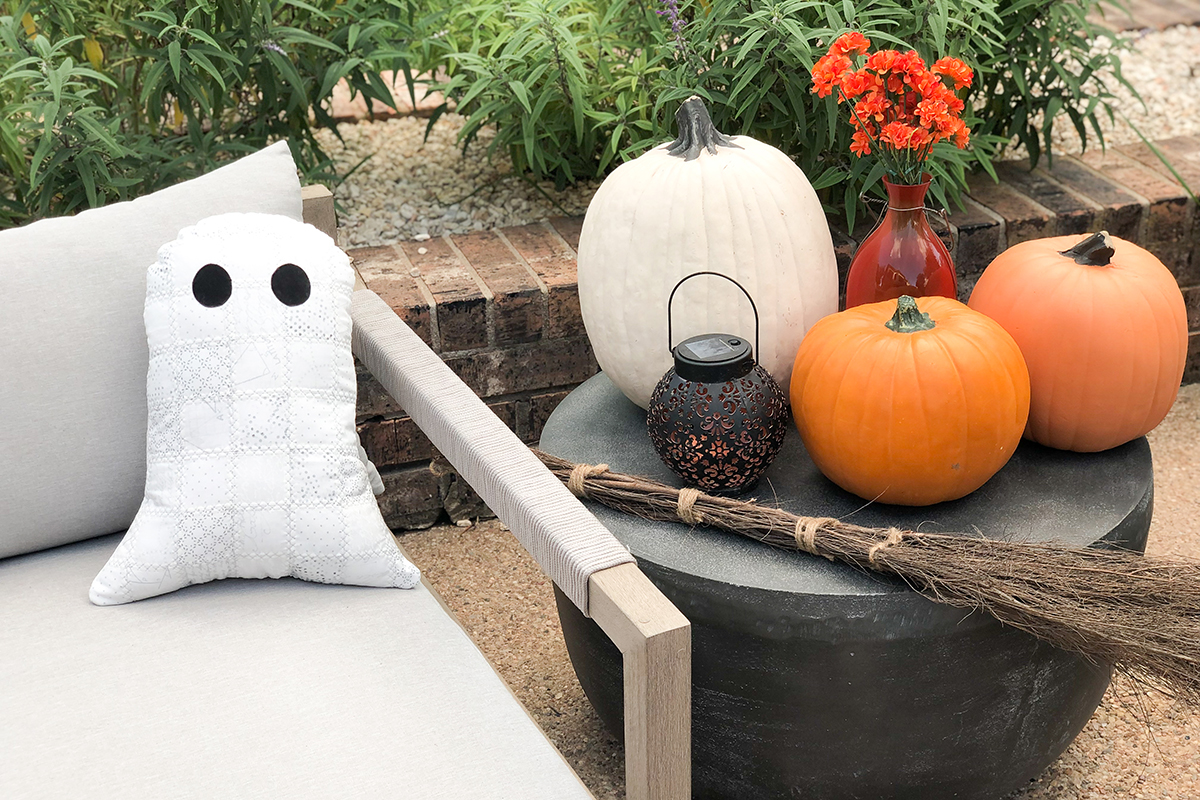
As summer comes to an end it is finally time for my favorite part of the year, spooky season! This patchwork ghost pillow is a great home décor accent to add some spooky flair to your house and creating it is a haunting good time. The pillow works up quickly and you can really get creative with your decorative stitches to make different looks for different ghost pillows. They make great gifts for the Halloween fan in your life, or just make a bunch to sprinkle throughout the house!
Materials to Sew a Patchwork Ghost Pillow
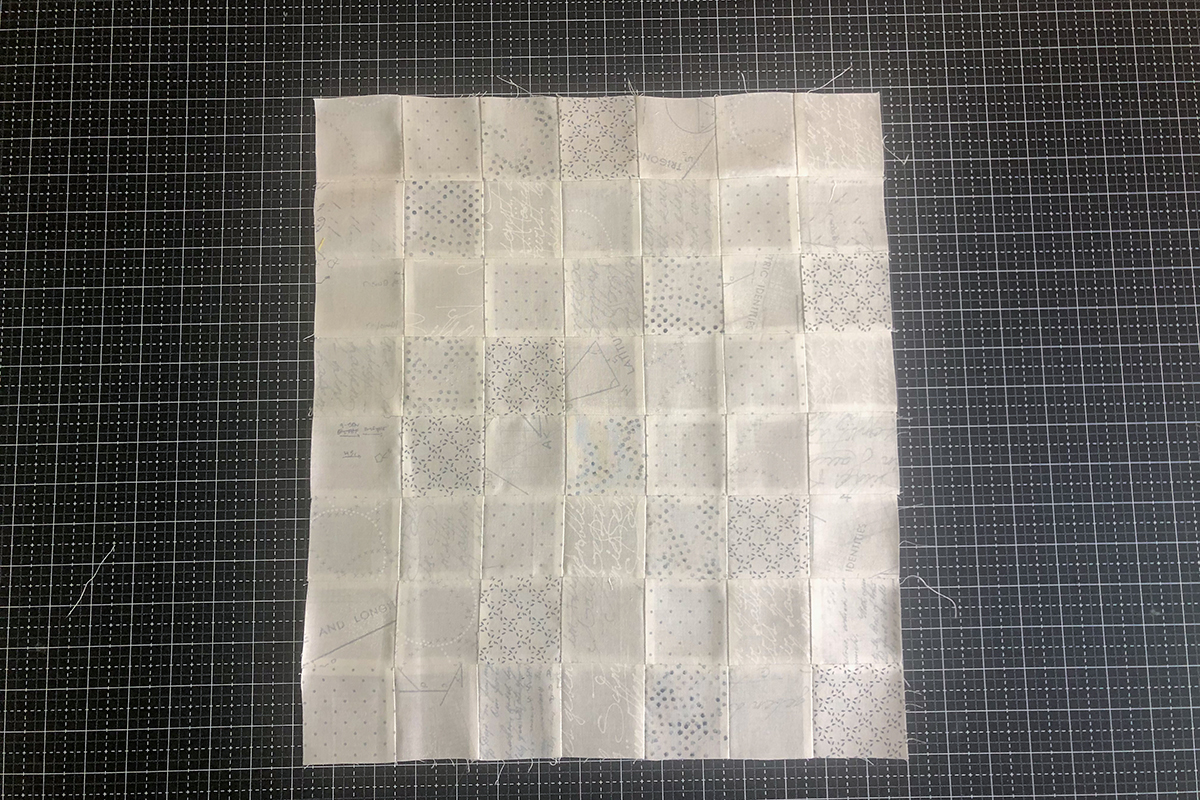
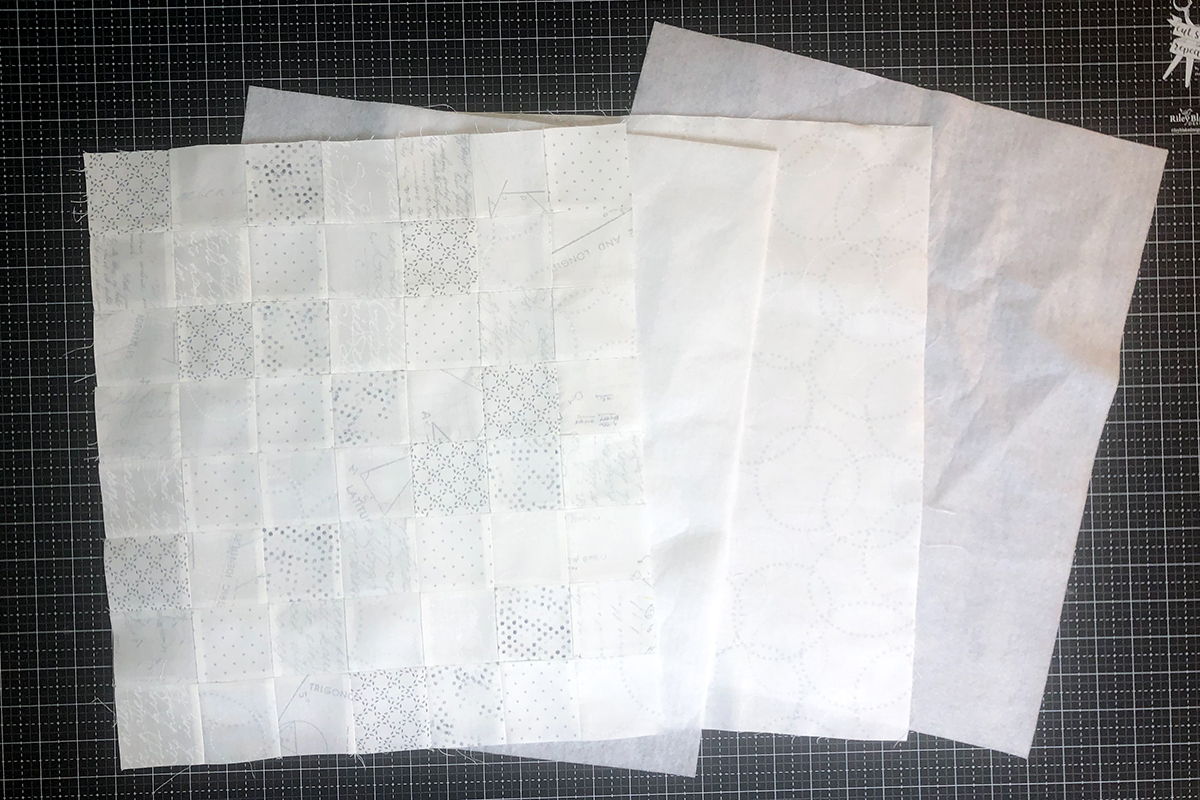
- 56 2.5-inch squares (6 jelly roll strips for variety cut into squares, 14 charms cut into squares, scraps, or a variety of fat eighths)
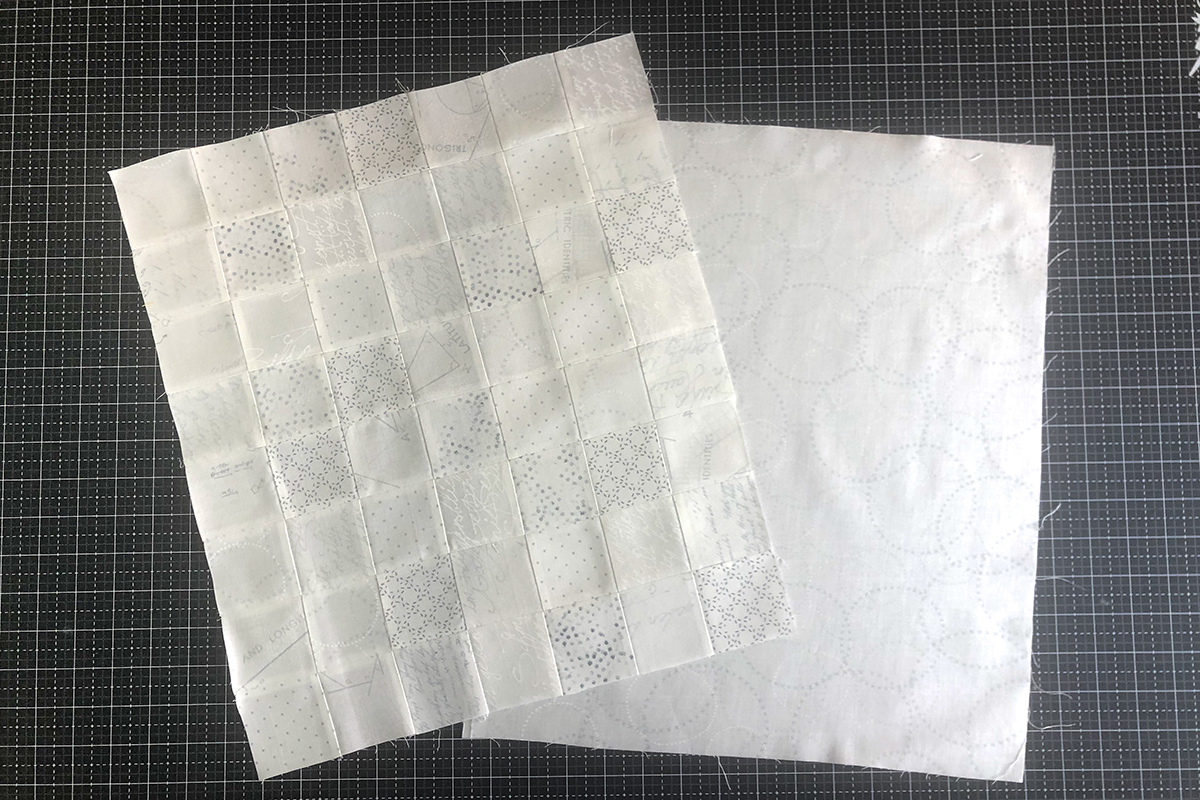
- Fat Quarter for pillow back
- 1/2 Yard Fusible Fleece
- Polyfil Stuffing
- Freezer Paper for eye applique or applique fusible of your choice
- Tape
- Fabric Safe Marking Tool
- Pencil
- Needle & Thread to Hand Sew Pillow Shut
- Pinking Shears (or notch your curves with fabric scissors if you don’t have pinking shears)
- Scotch Tape
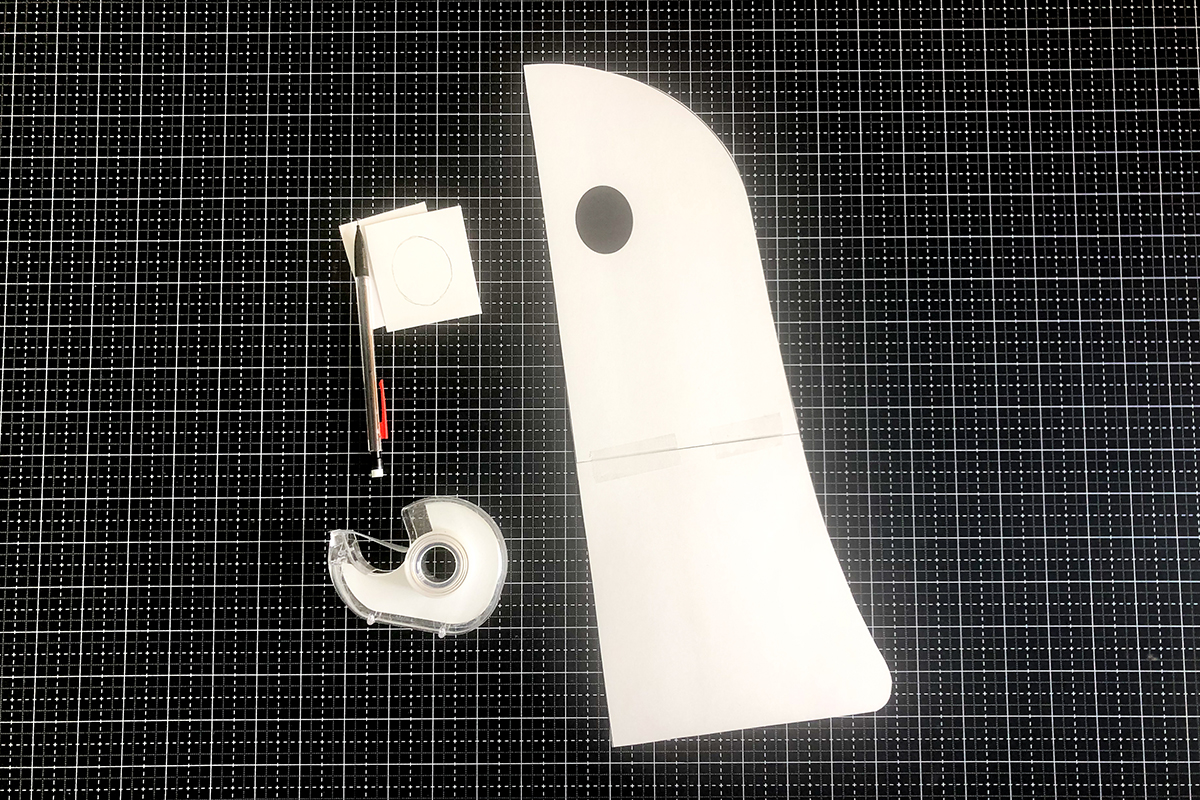
- Ghost Template Download Here

Instructions to Sew a Patchwork Ghost Pillow
Step One
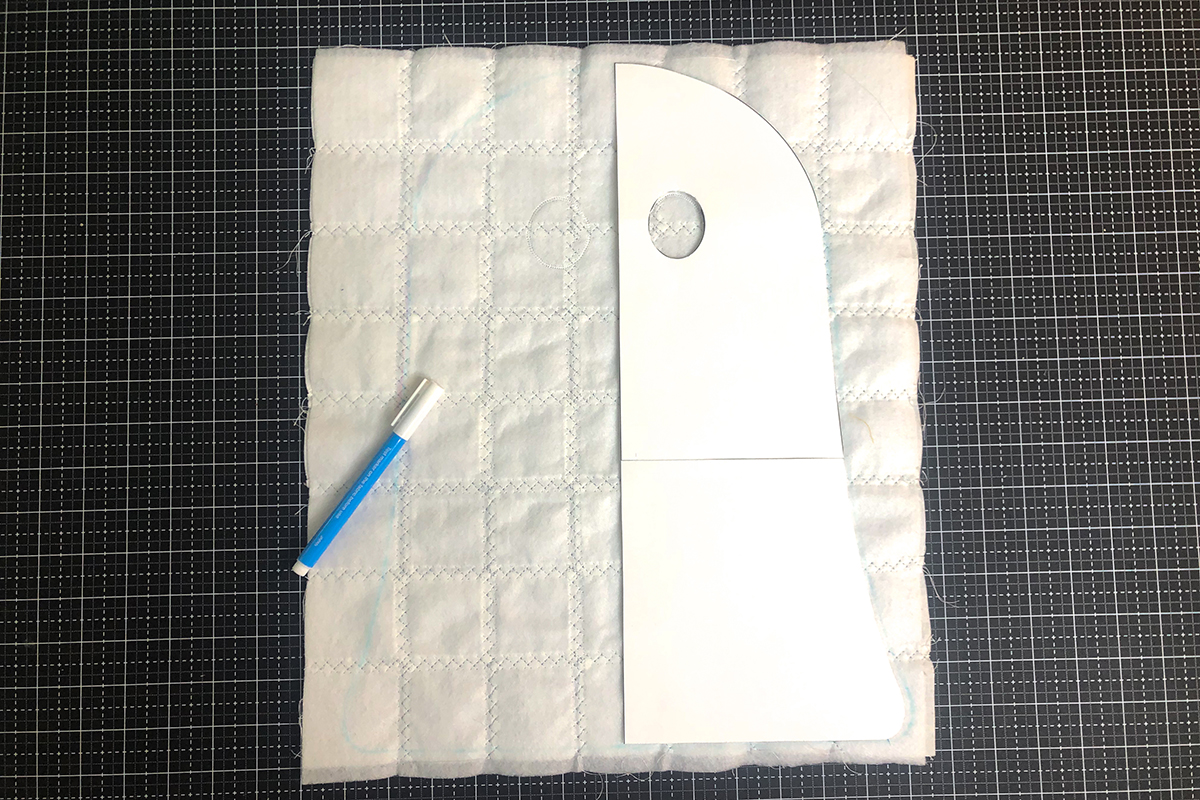
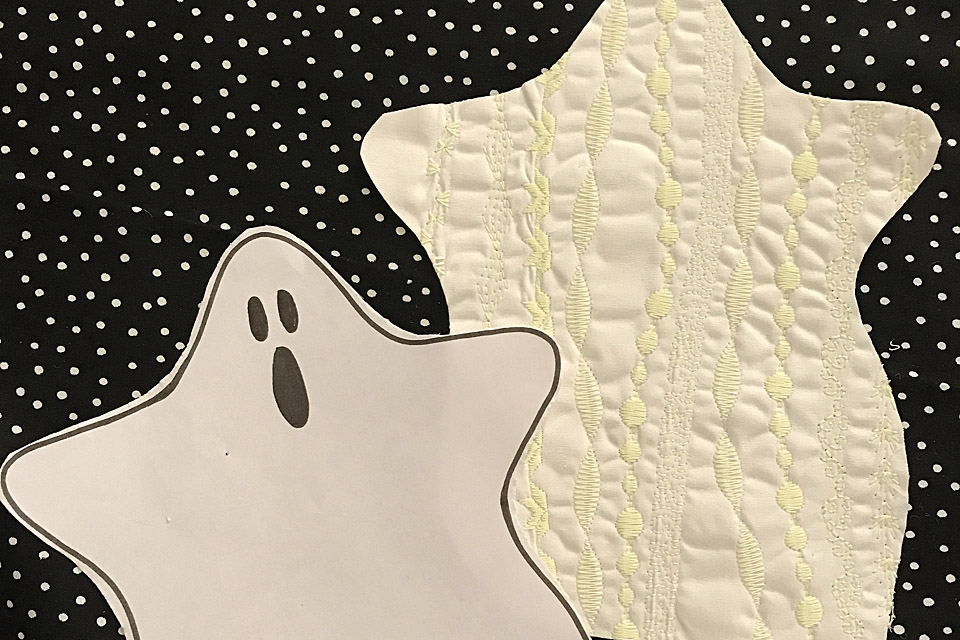
Cut out the ghost template and tape it together on the indicated line. Trace the eyeball onto freezer paper or your desired fusible applique method.
Step Two
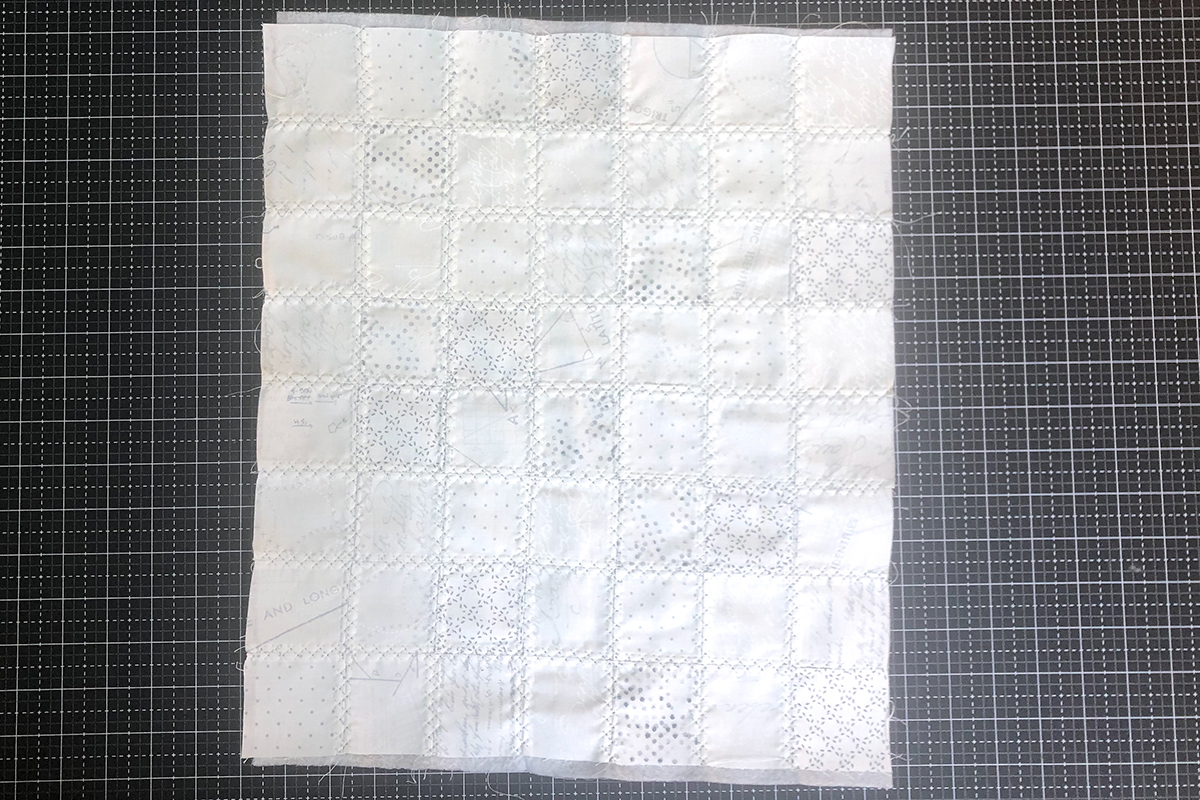
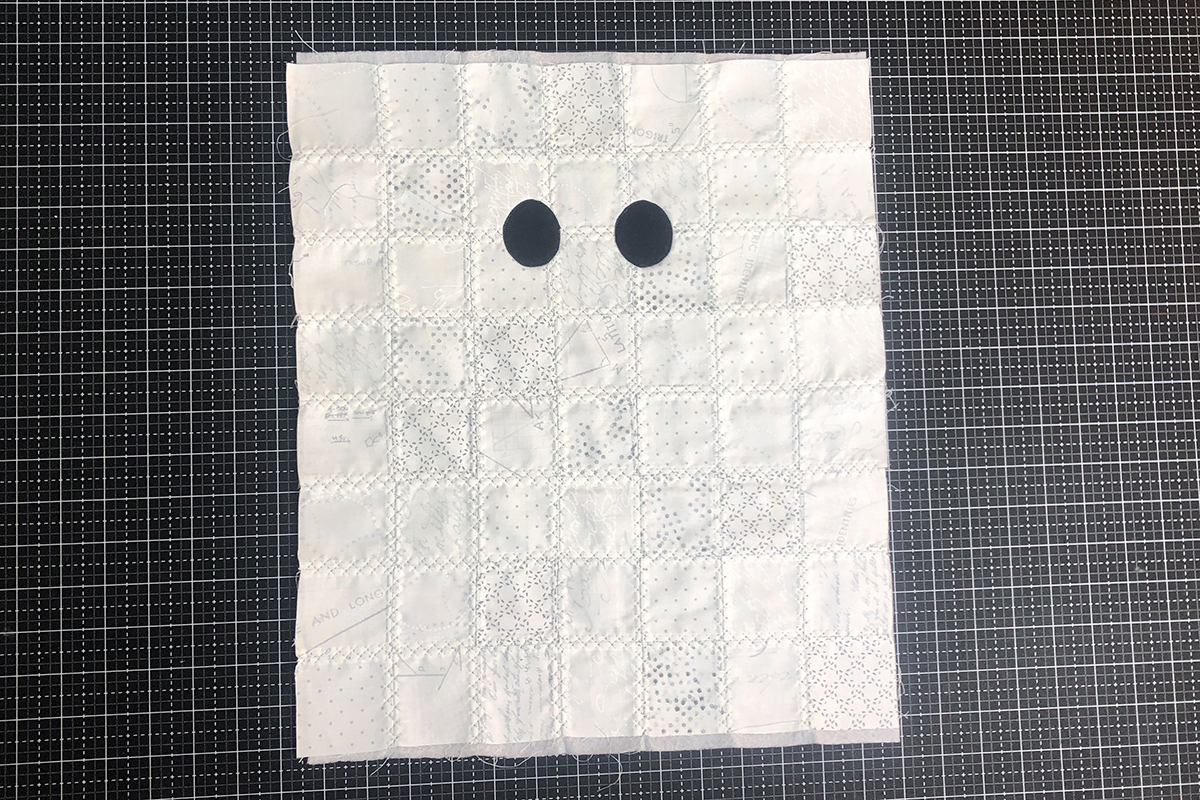
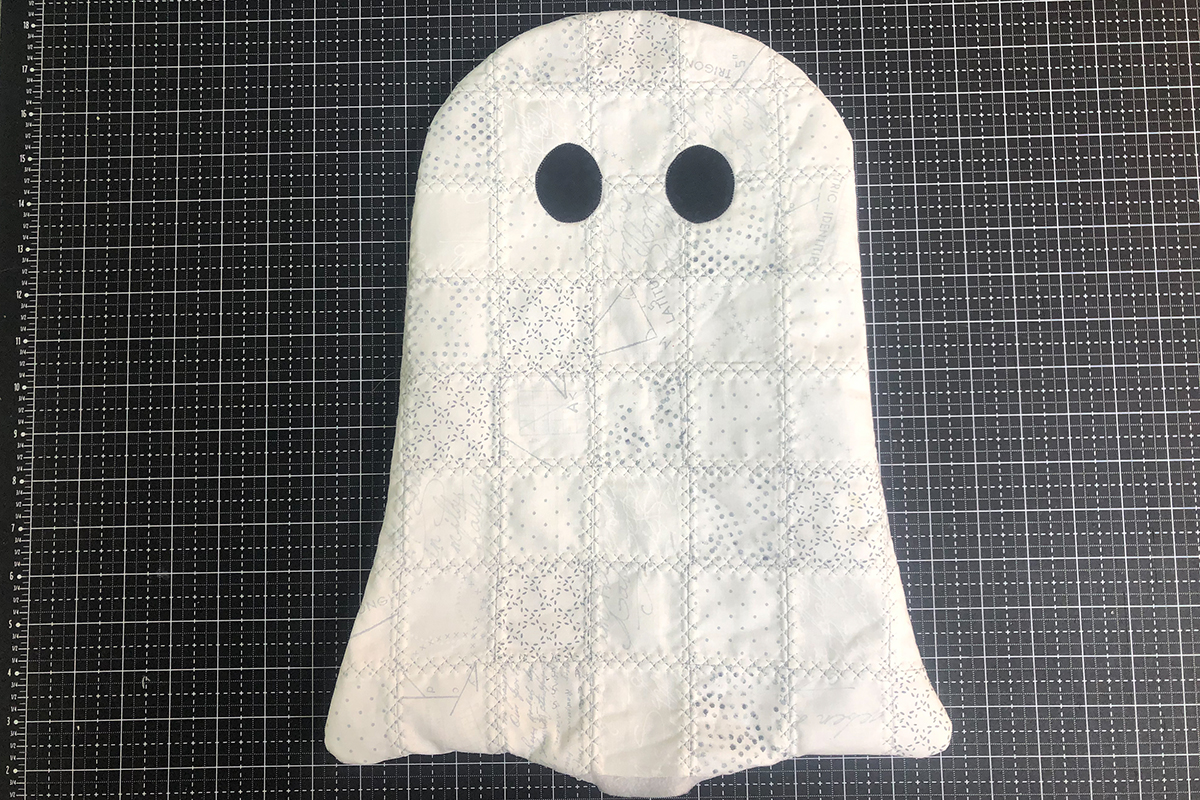
Cut out 56 2.5-inch squares and sew them together into rows of 7 squares. Make 8 rows. Sew your rows together to form the patchwork pillow front. You can choose to press your seams open or to one side to nest your seams.
Step Three
Use your patchwork ghost pillow front to cut out a rectangle in the same size from the backing fat quarter.
Step Four
Cut out fusible fleece to match the size of your ghost pillow front and backing. Iron onto the wrong side of the patchwork ghost pillow front and the wrong side of the backing.
Step Five
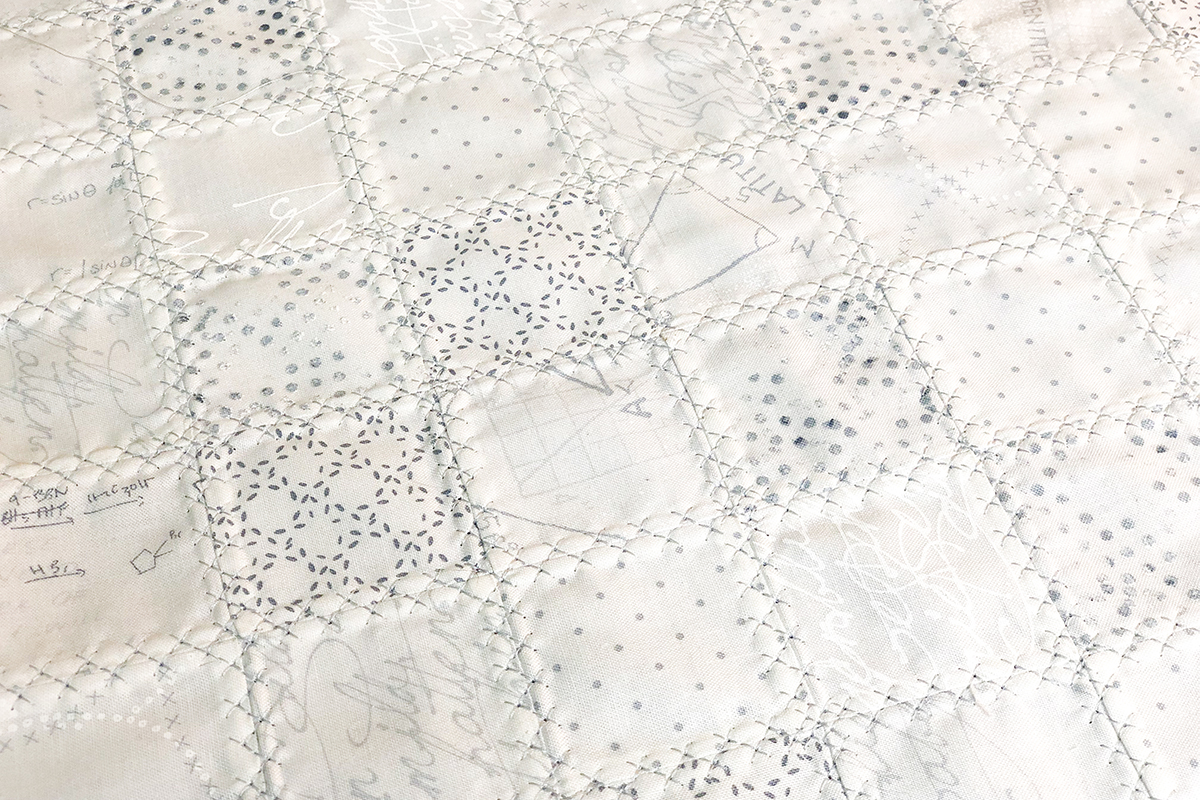
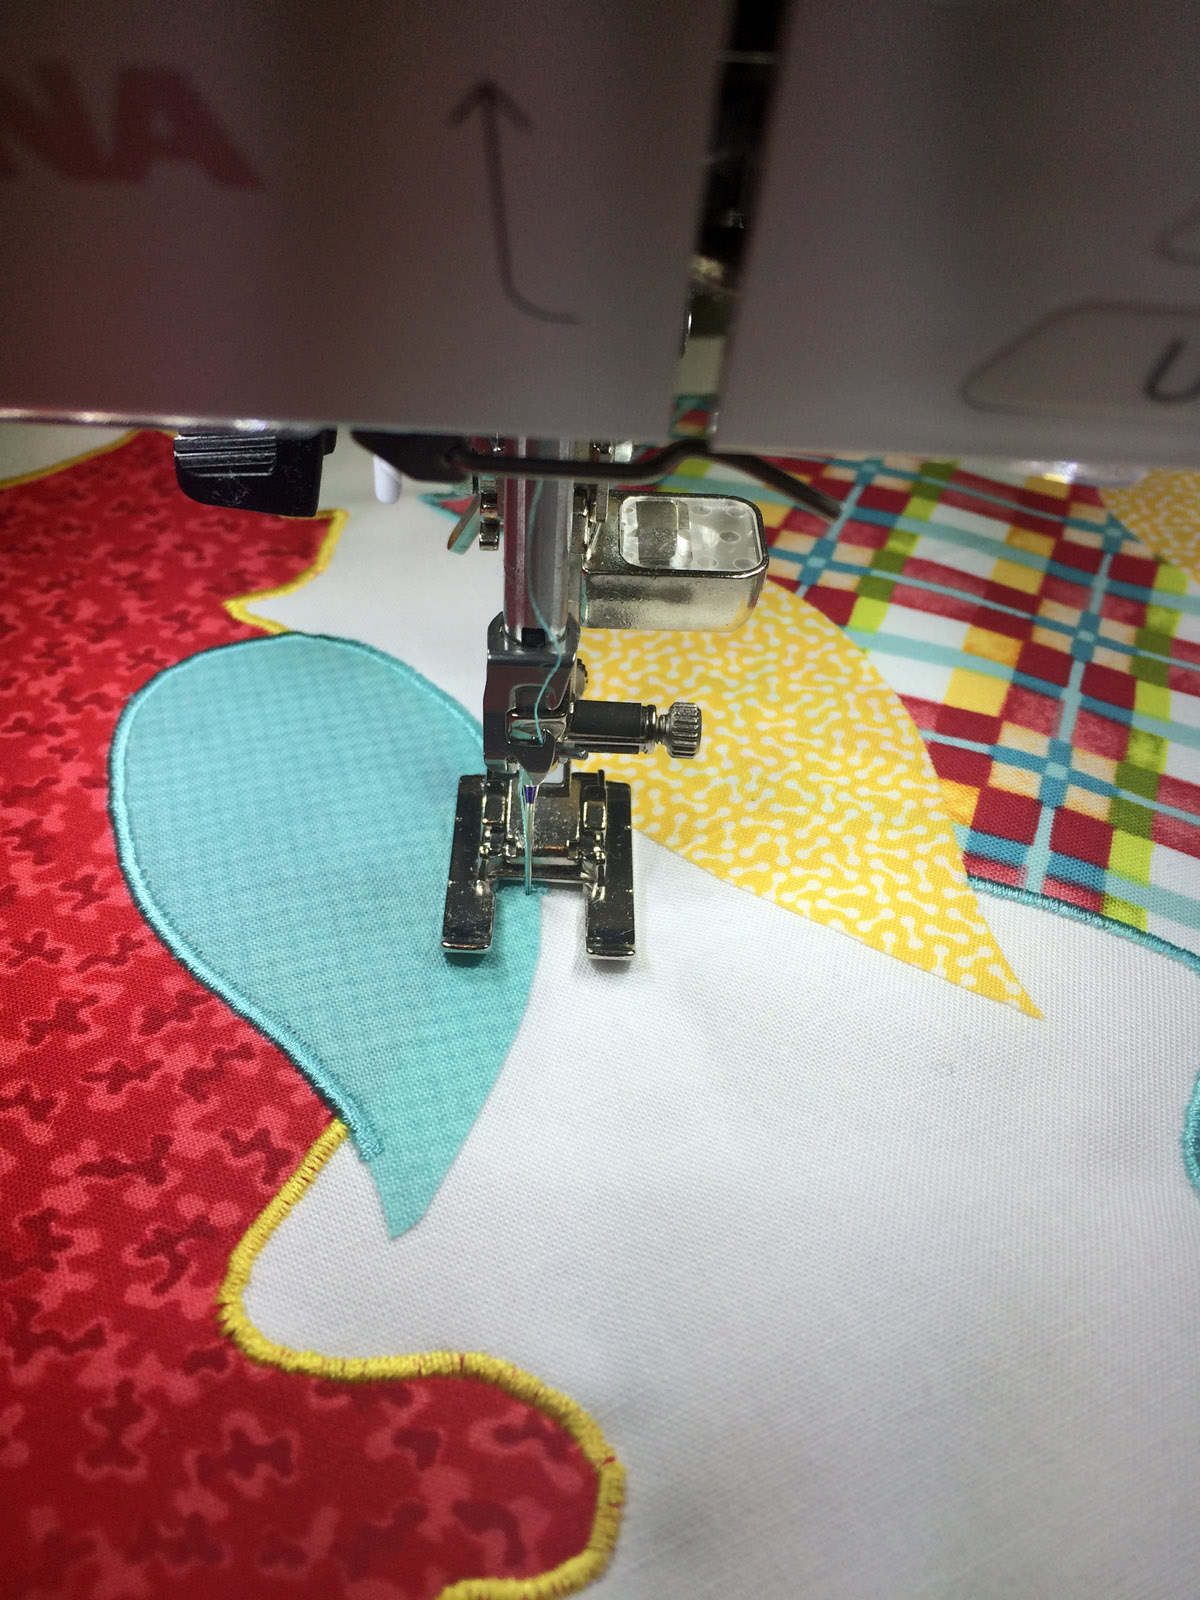
Use a decorative stitch to add some patchwork quilting flair to the patchwork ghost pillow front. I used stitch #327 on my BERNINA 590. Press your ghost pillow front after you have completed your decorative stitches.
Step Six
Use a fabric-safe marking tool and draw a circle where the eyes should go. I cut the eyeball out of the template to make it easy. Applique your ghost eyes where you drew your circles.
Step Seven
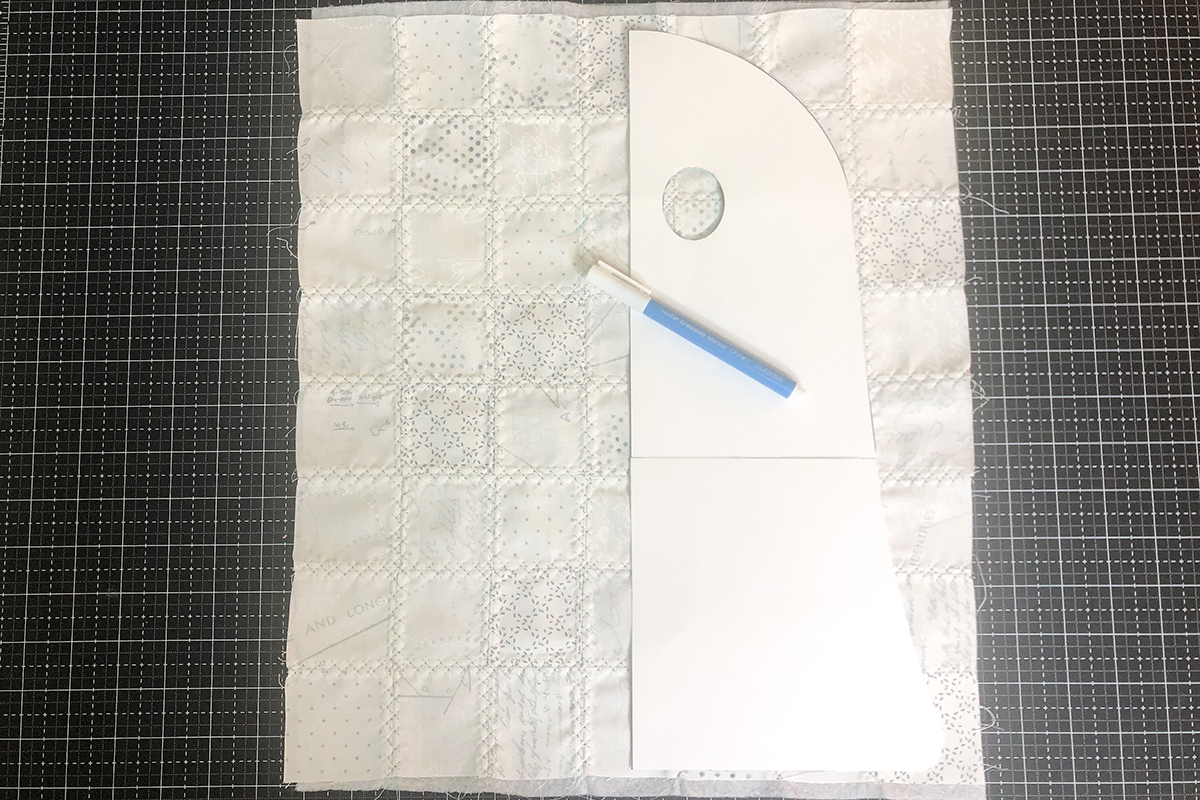
Use a fabric-safe marking tool and trace the ghost template onto the wrong side of the patchwork pillow front, lining up the template with the eyes you stitched down in the previous step. You will need to flip the template to draw the full ghost. The drawn line is the stitching line.
Step Eight
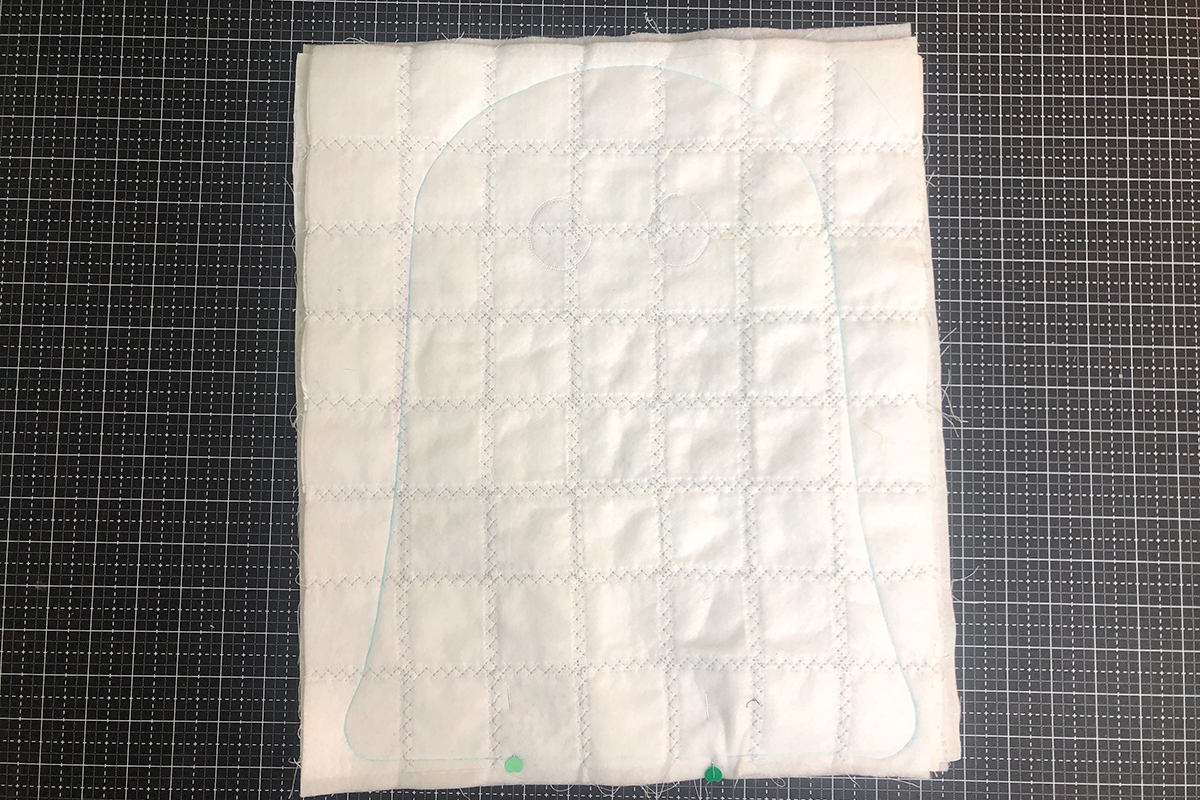
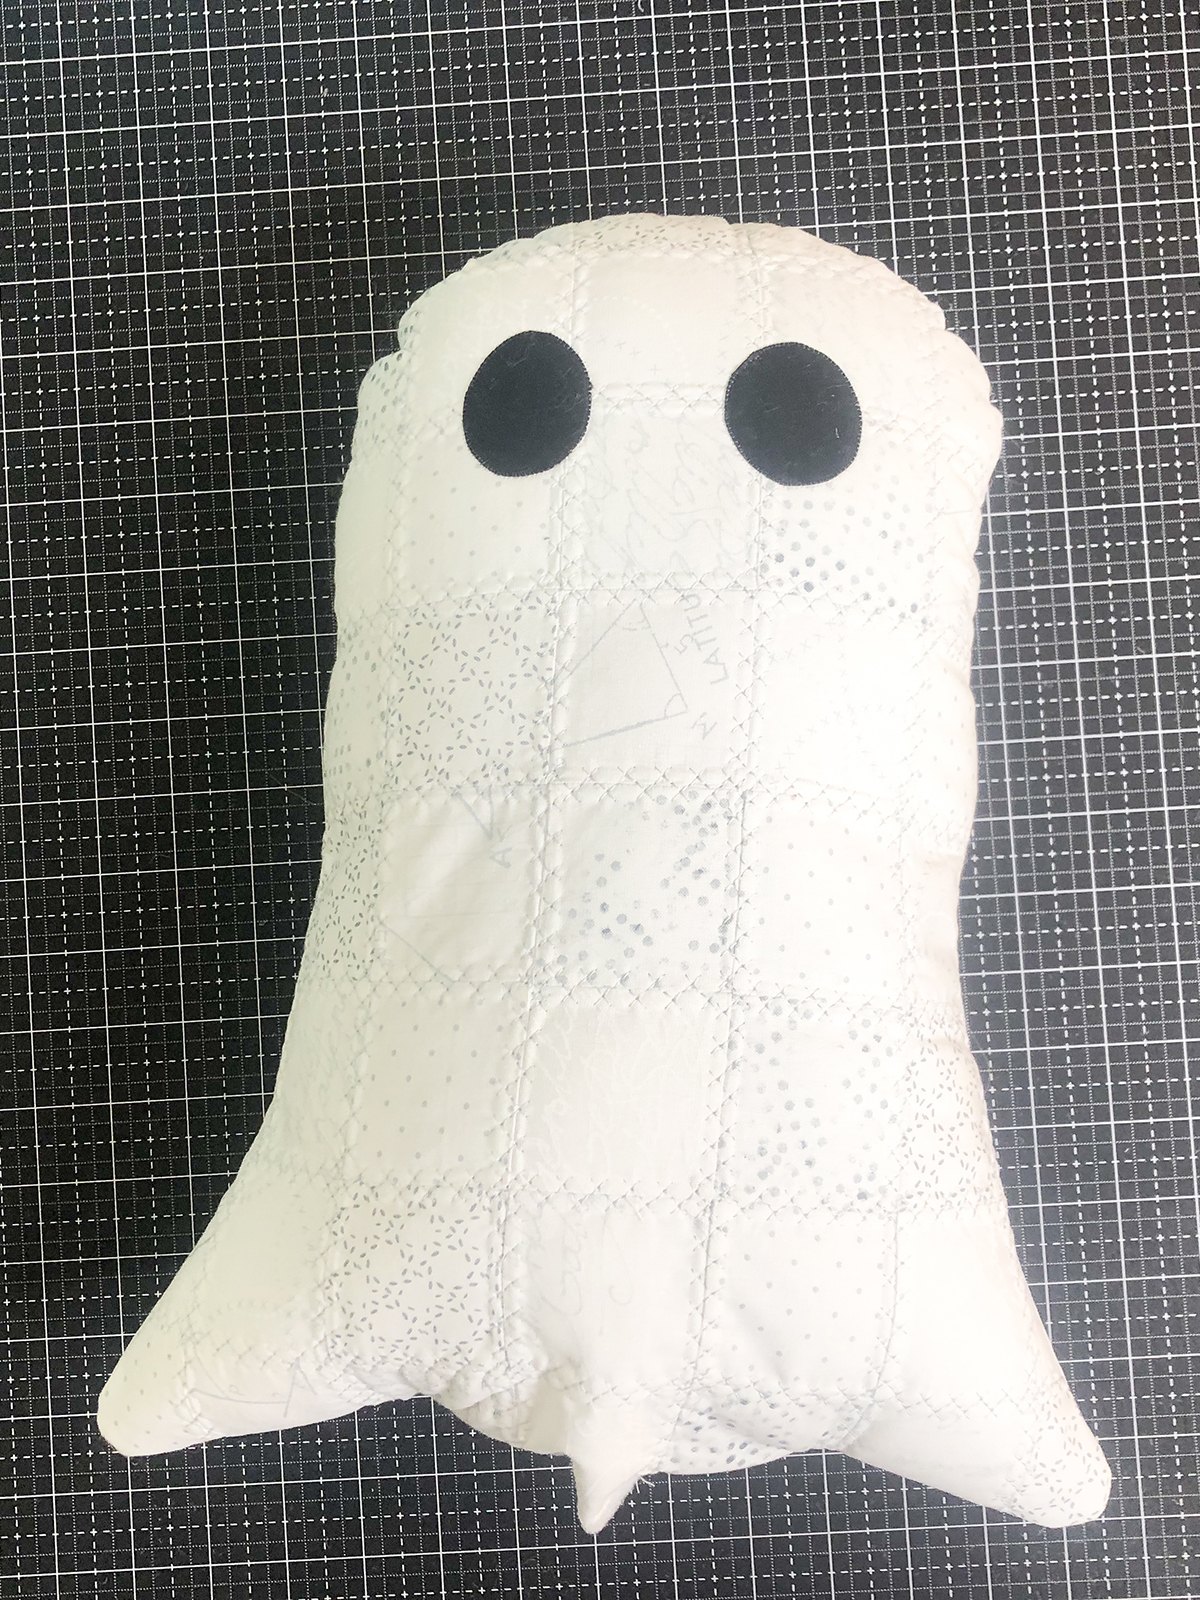
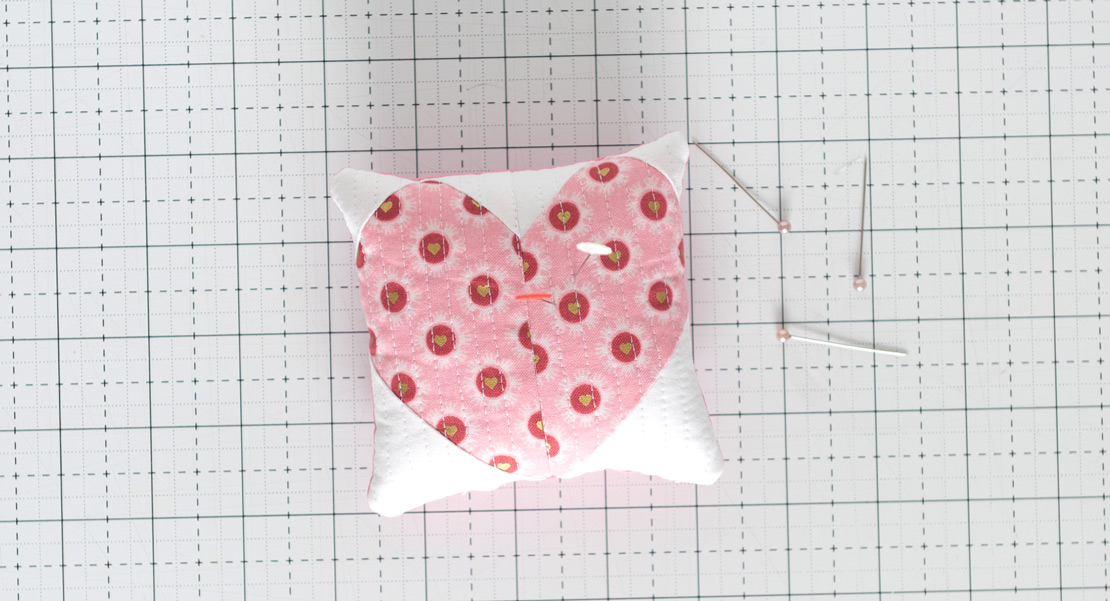
Place your patchwork ghost pillow’s front right sides together against your ghost pillow backing. Use two pins to mark an open space at the bottom of the ghost. You will leave this unsewn so you can turn the ghost right side out and stuff it with polyfill. You want approximately a space large enough to fit your hand and stuffing through. Stitch on the line you drew from one pin to the other pin, using a small stitch length such as 1.75 to make sure the ghost is secure.
Step Nine
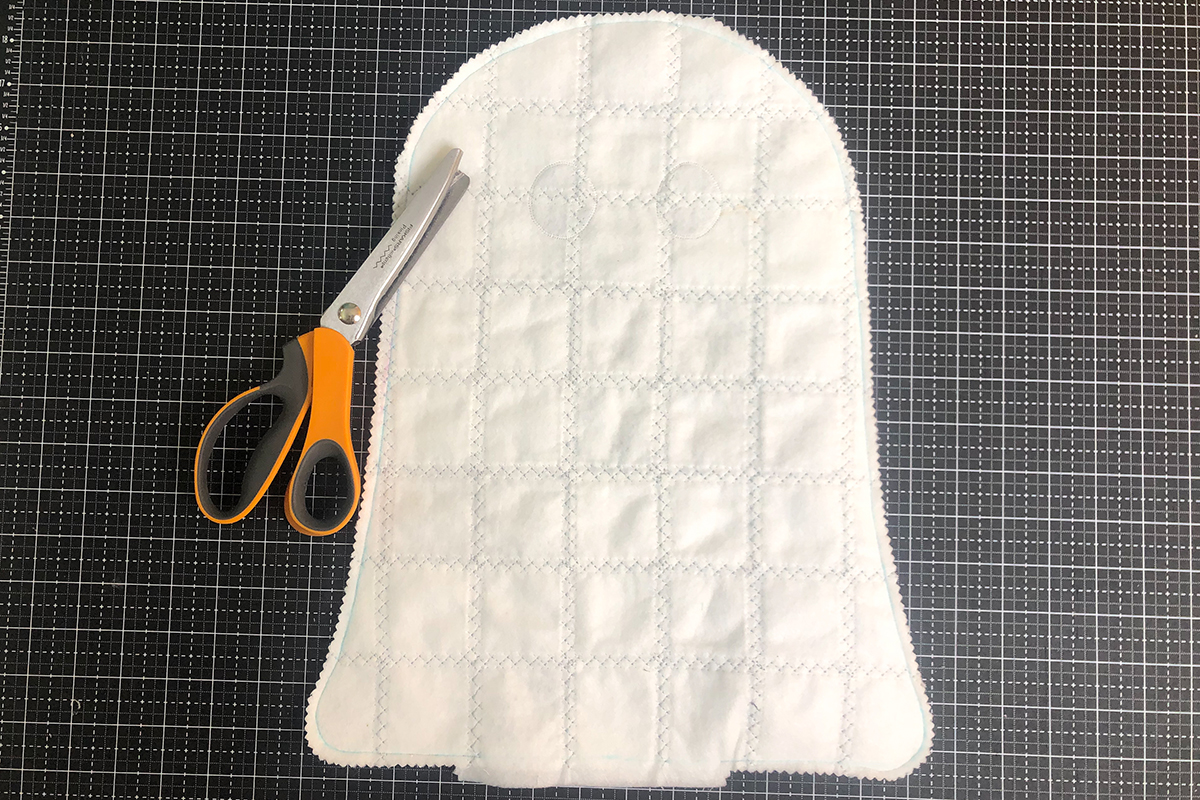
Use pinking shears and cut out your ghost, leaving a generous amount of excess at the open seam at the bottom. If you don’t have pinking shears you can just clip your curves after cutting out your ghost.
Step Ten
Turn your ghost pillow right side out and stuff generously with polyfill until it is nice and fluffy.
Step Eleven
Use a needle and thread and stitch the bottom open seam closed to finish your ghost pillow!
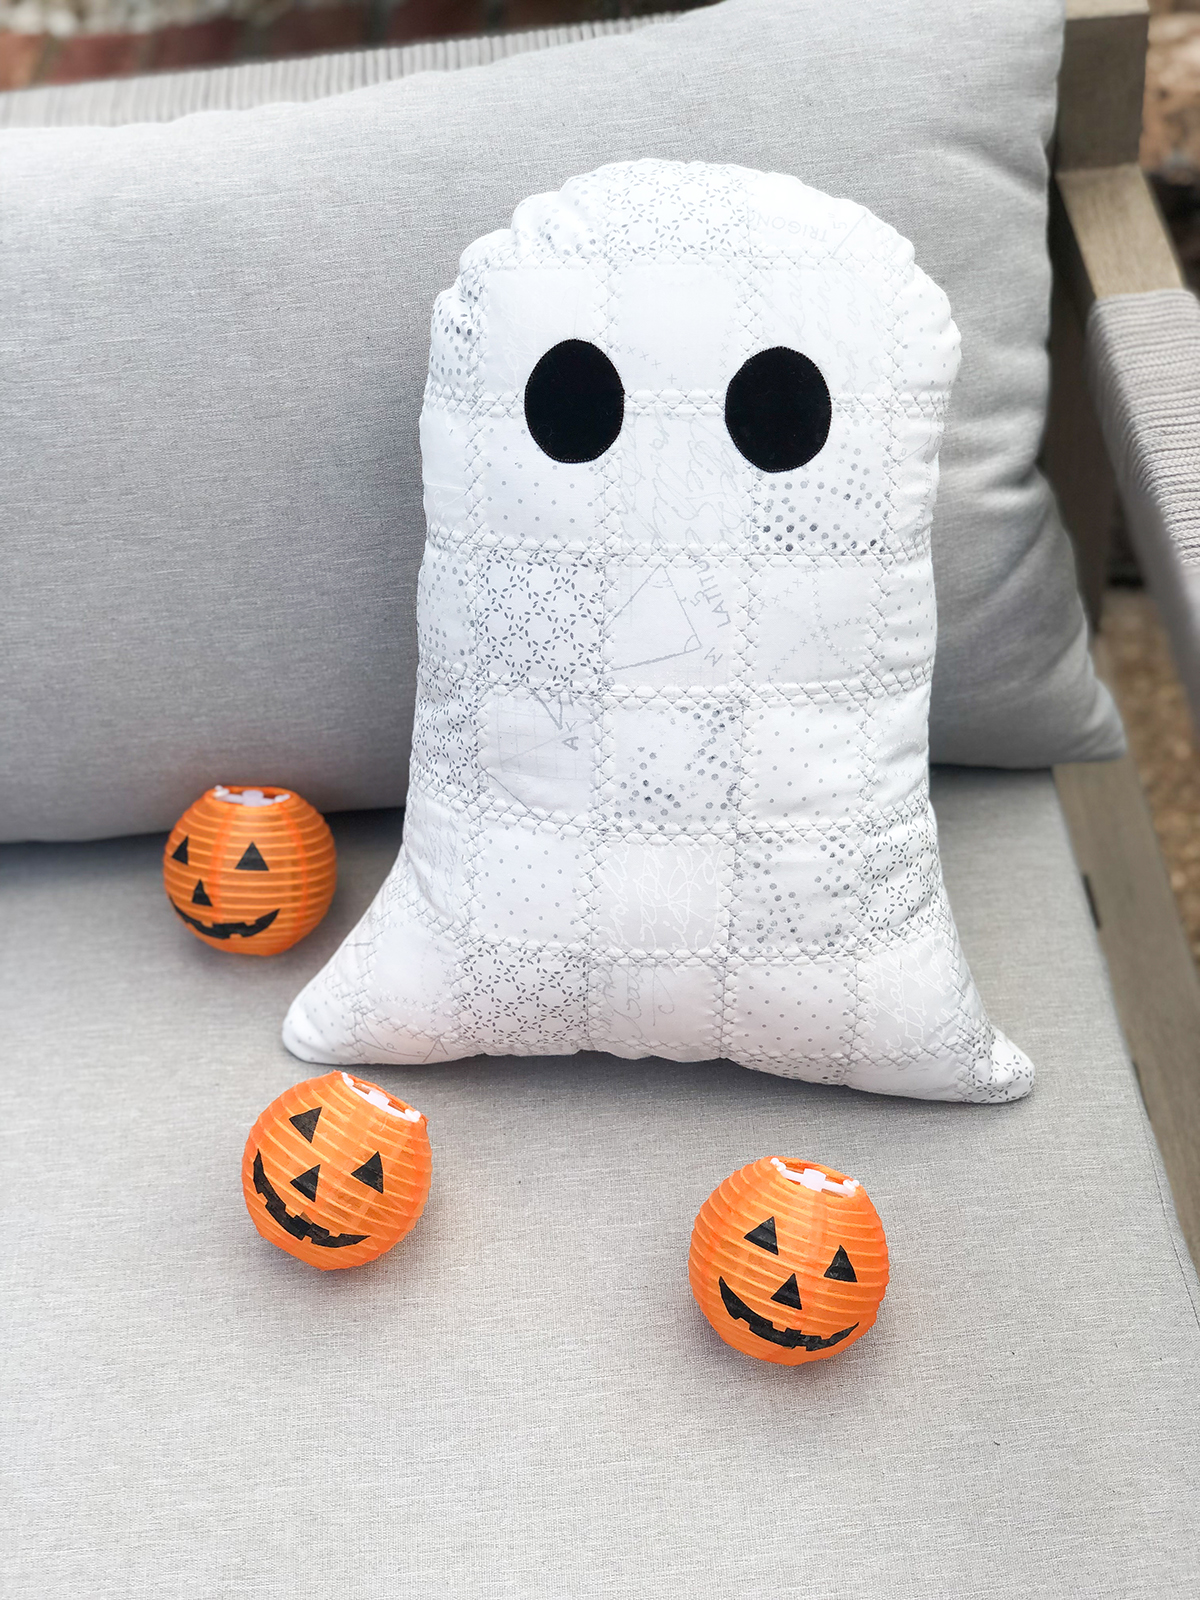

I hope you enjoy making a ghost pillow of your very own! Be sure to tag @corinne.sovey and @berninausa and use the hashtag #weallsew if you share your spooky makes on Instagram!


What you might also like


4 comments on “Patchwork Ghost Pillow Tutorial”
-
-
This pillow is so cute!
-
This ghost is so cute. I’ve been saving some white scraps, now I know what to make with them. Thanks!
-
This is so cute and I already have the book!
Leave a Reply
You must be logged in to post a comment.

Super cute! Glow in the dark thread would be fun here too!