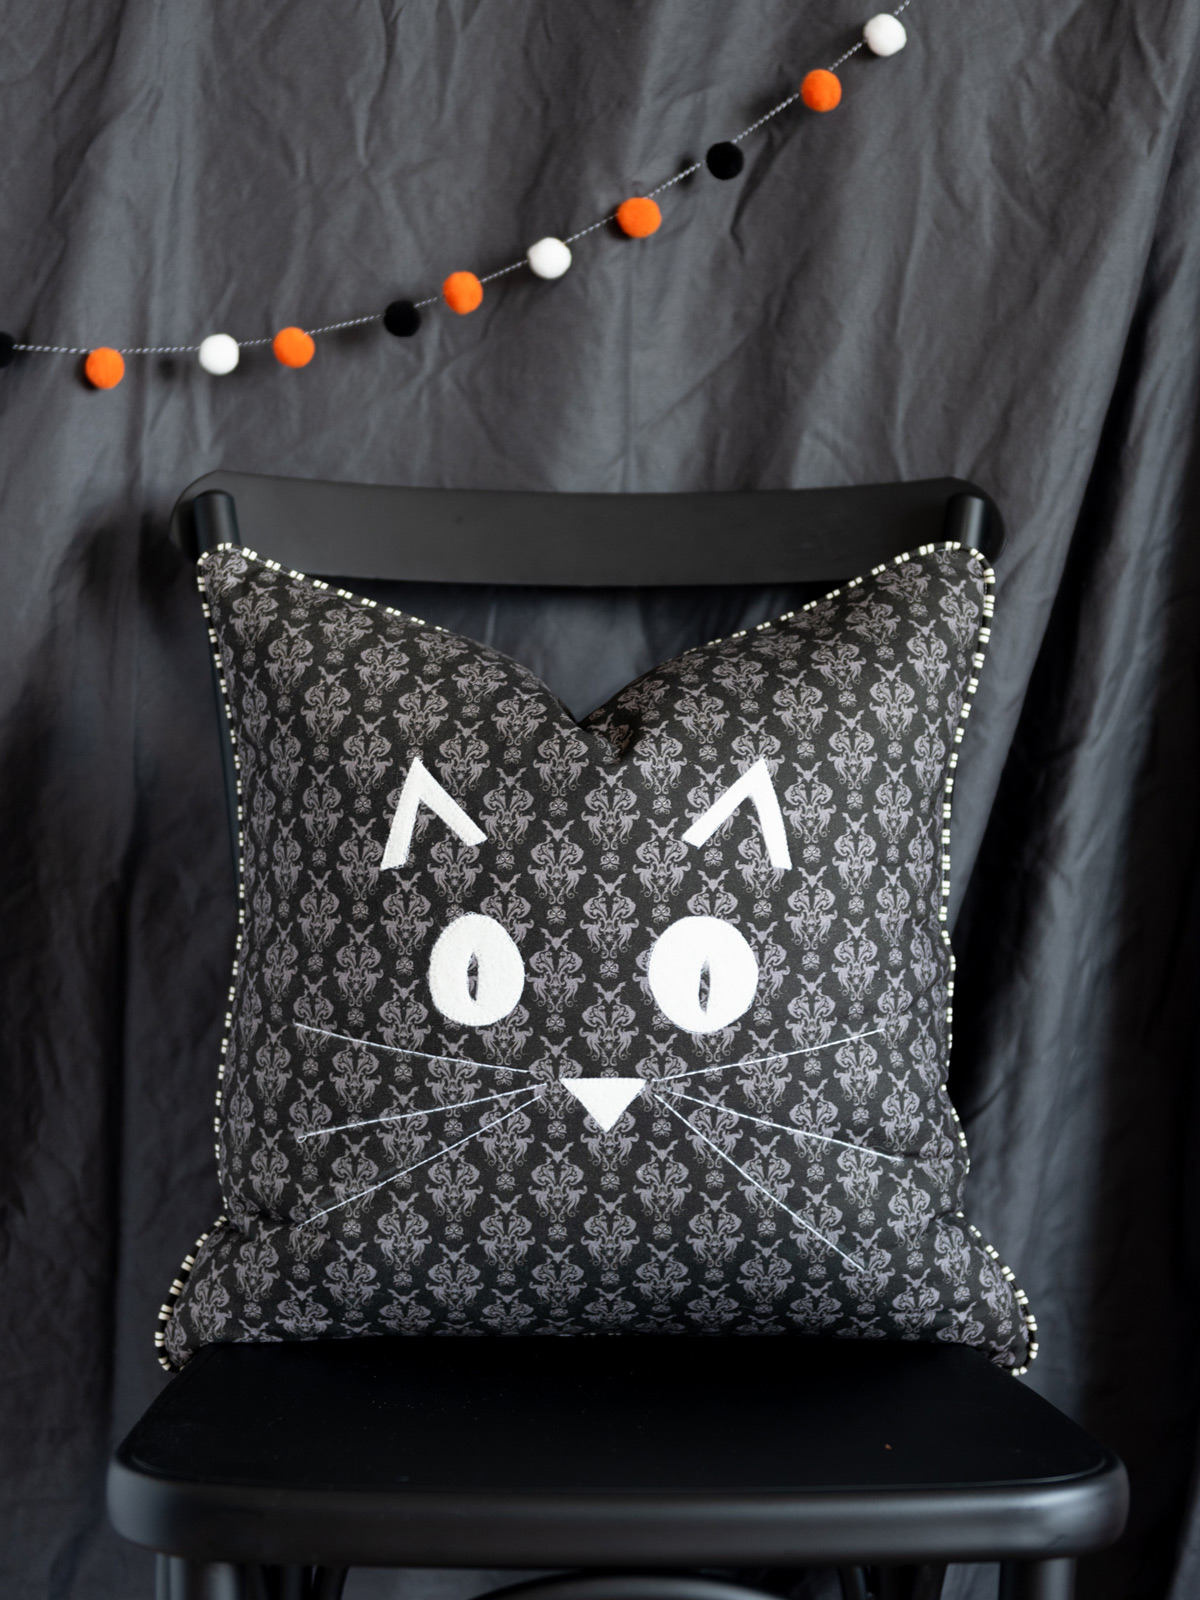
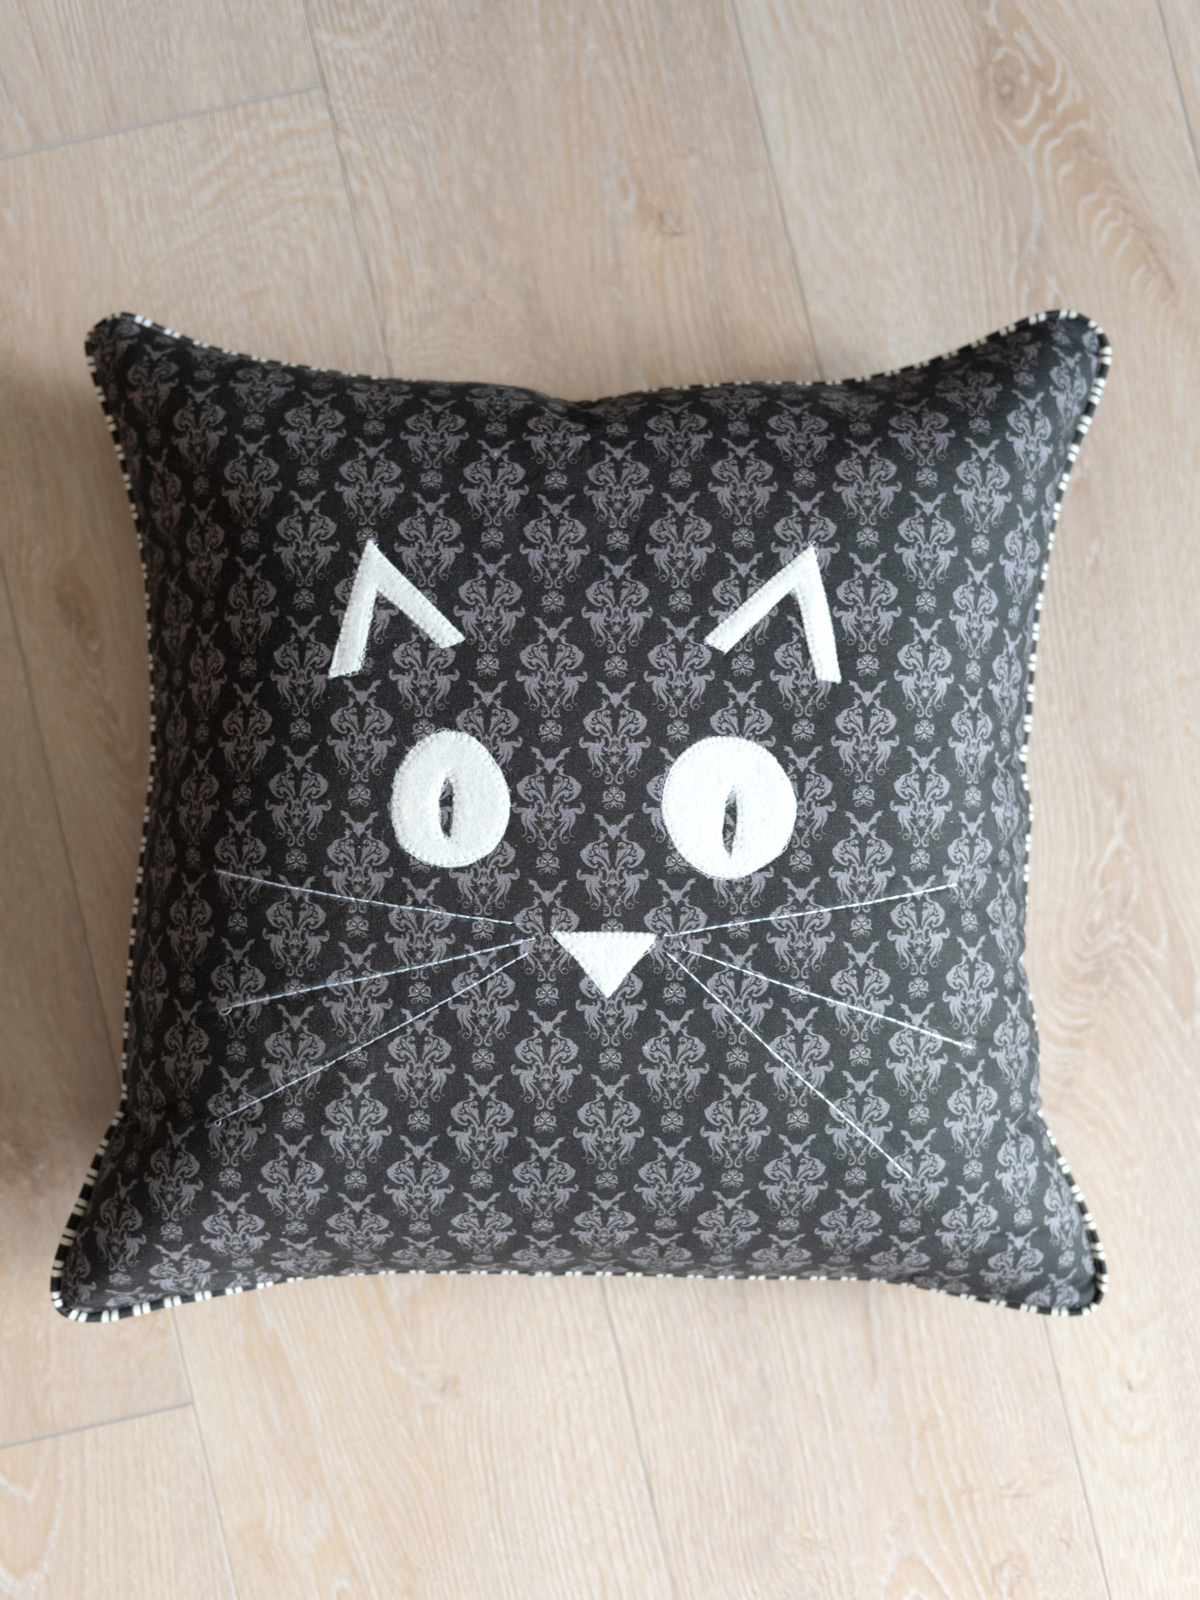
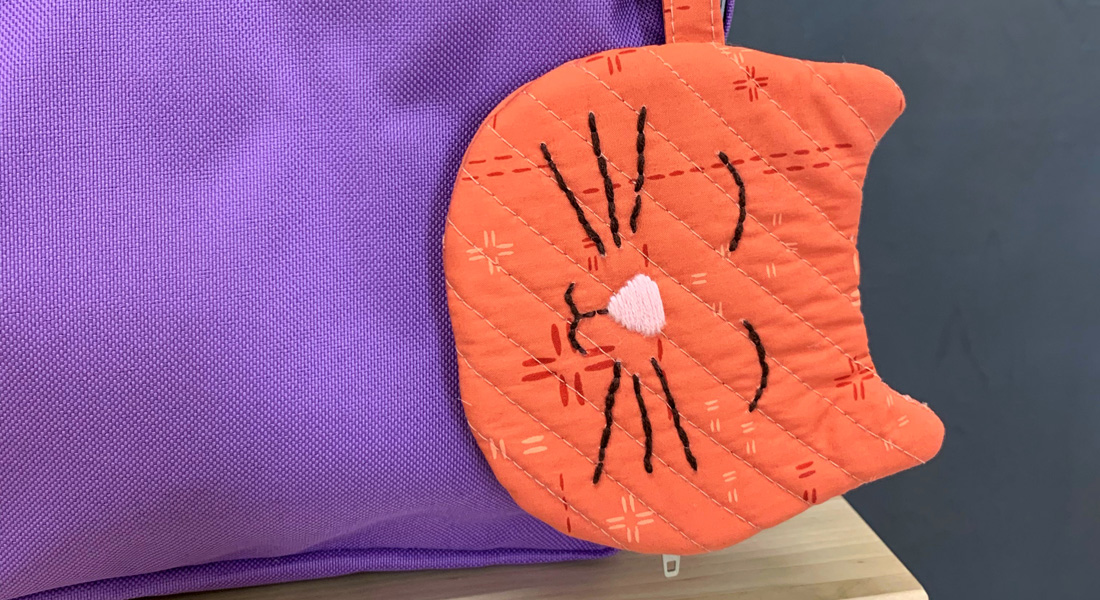
Cat Halloween Pillow Tutorial
Hi there We All Sew Readers! My name is Melissa Mortenson. I’m the founder of the Polka Dot Chair blog and a fabric designer for Riley Blake Designs.
Today I’m excited to be sharing with you a free tutorial for this cute Halloween Cat Pillow.
In this tutorial, I’ll show you how to add the wool appliqué to the front of the pillow along with how to create your own custom piping.
Supplies to create a cat pillow
- 1/2 yard fabric for pillow front and back
- 1/8 yard fabric for piping
- 1 package of purchased piping (any color, you are going to cover it with fabric). You can also just use cording, but I find that the packaged piping is easier to find.
- 1/2 yard fusible fleece
- Large Piece Paper Backed Fusible Web (I like HeatNBond Lite)
- 1 piece of Ivory Felt (I like wool felt)
- Chalk
- Ruler
- 18″ Pillow Form
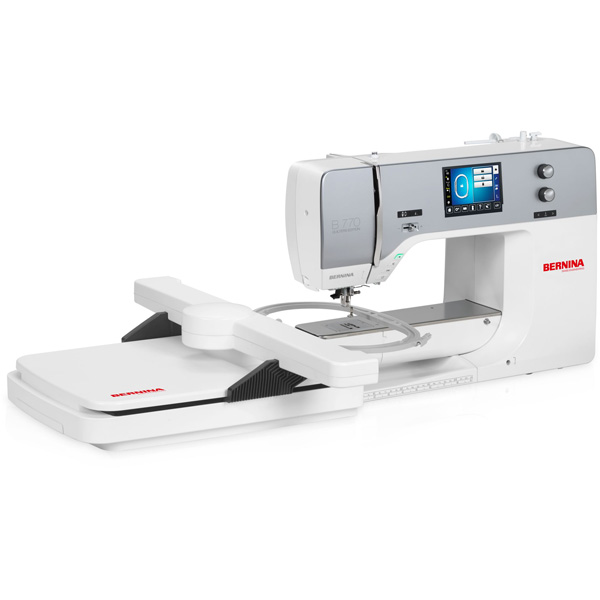
- Sewing Machine (I sew on a 770QEE)
Download the Cat Appliqué Pattern
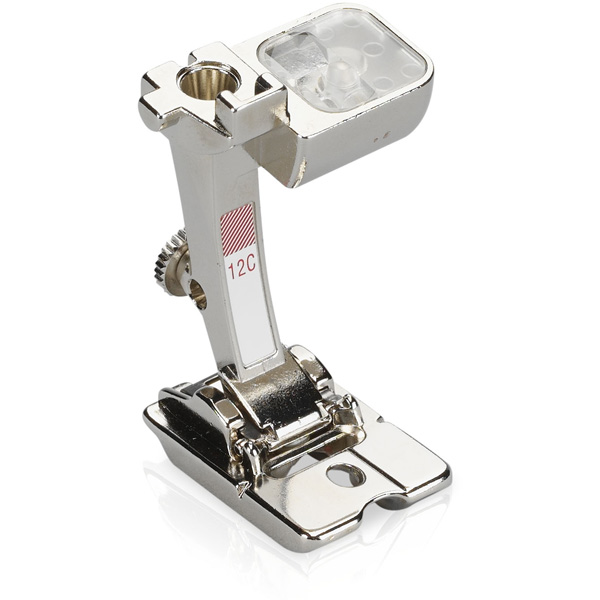
Presser Feet
- 12C Bulky Overlock Foot
- 20D Open Embroidery Foot
- Cutting Directions:
- For pillow front and back cut:
- 2 pieces each 18″ x 18″
- From Fusible Fleece Cut:
- 1 piece 18″ x 18″
- From Piping Fabric Cut:
- 2 pieces each 1 1/4″ x WOF (width of fabric)
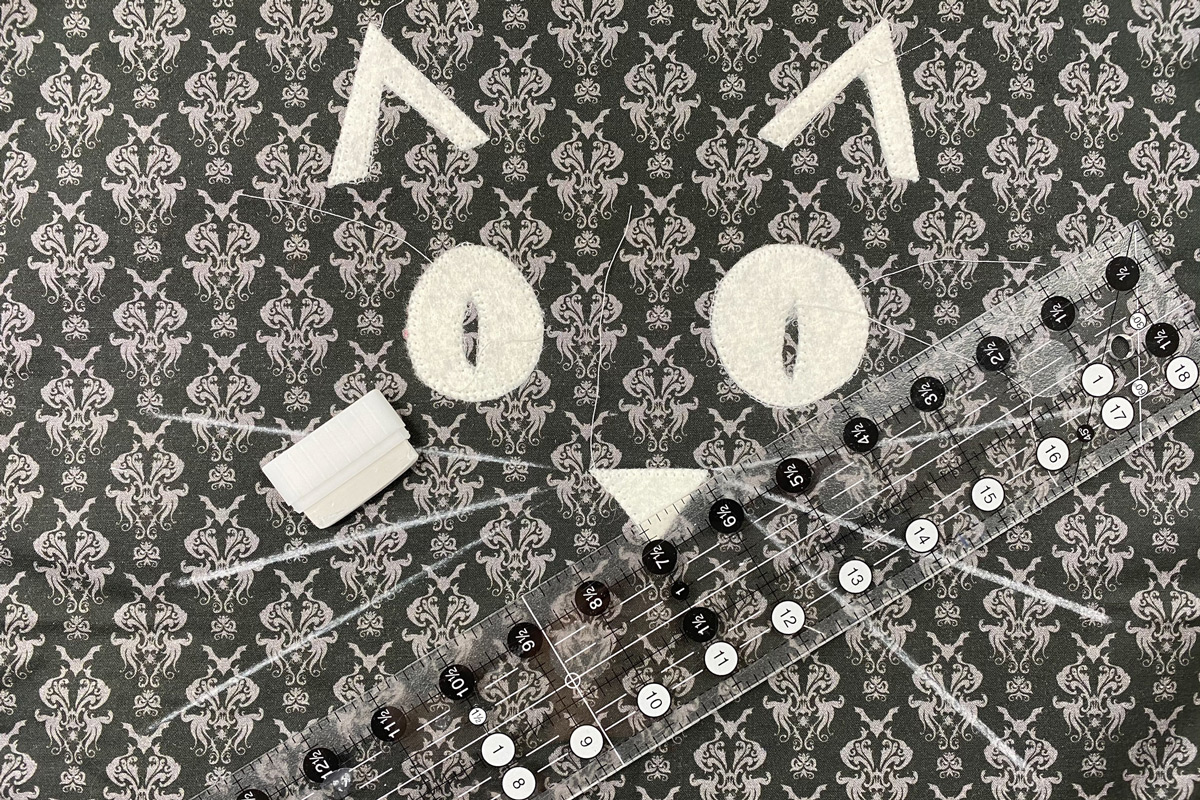
Step One: Create the Appliqué

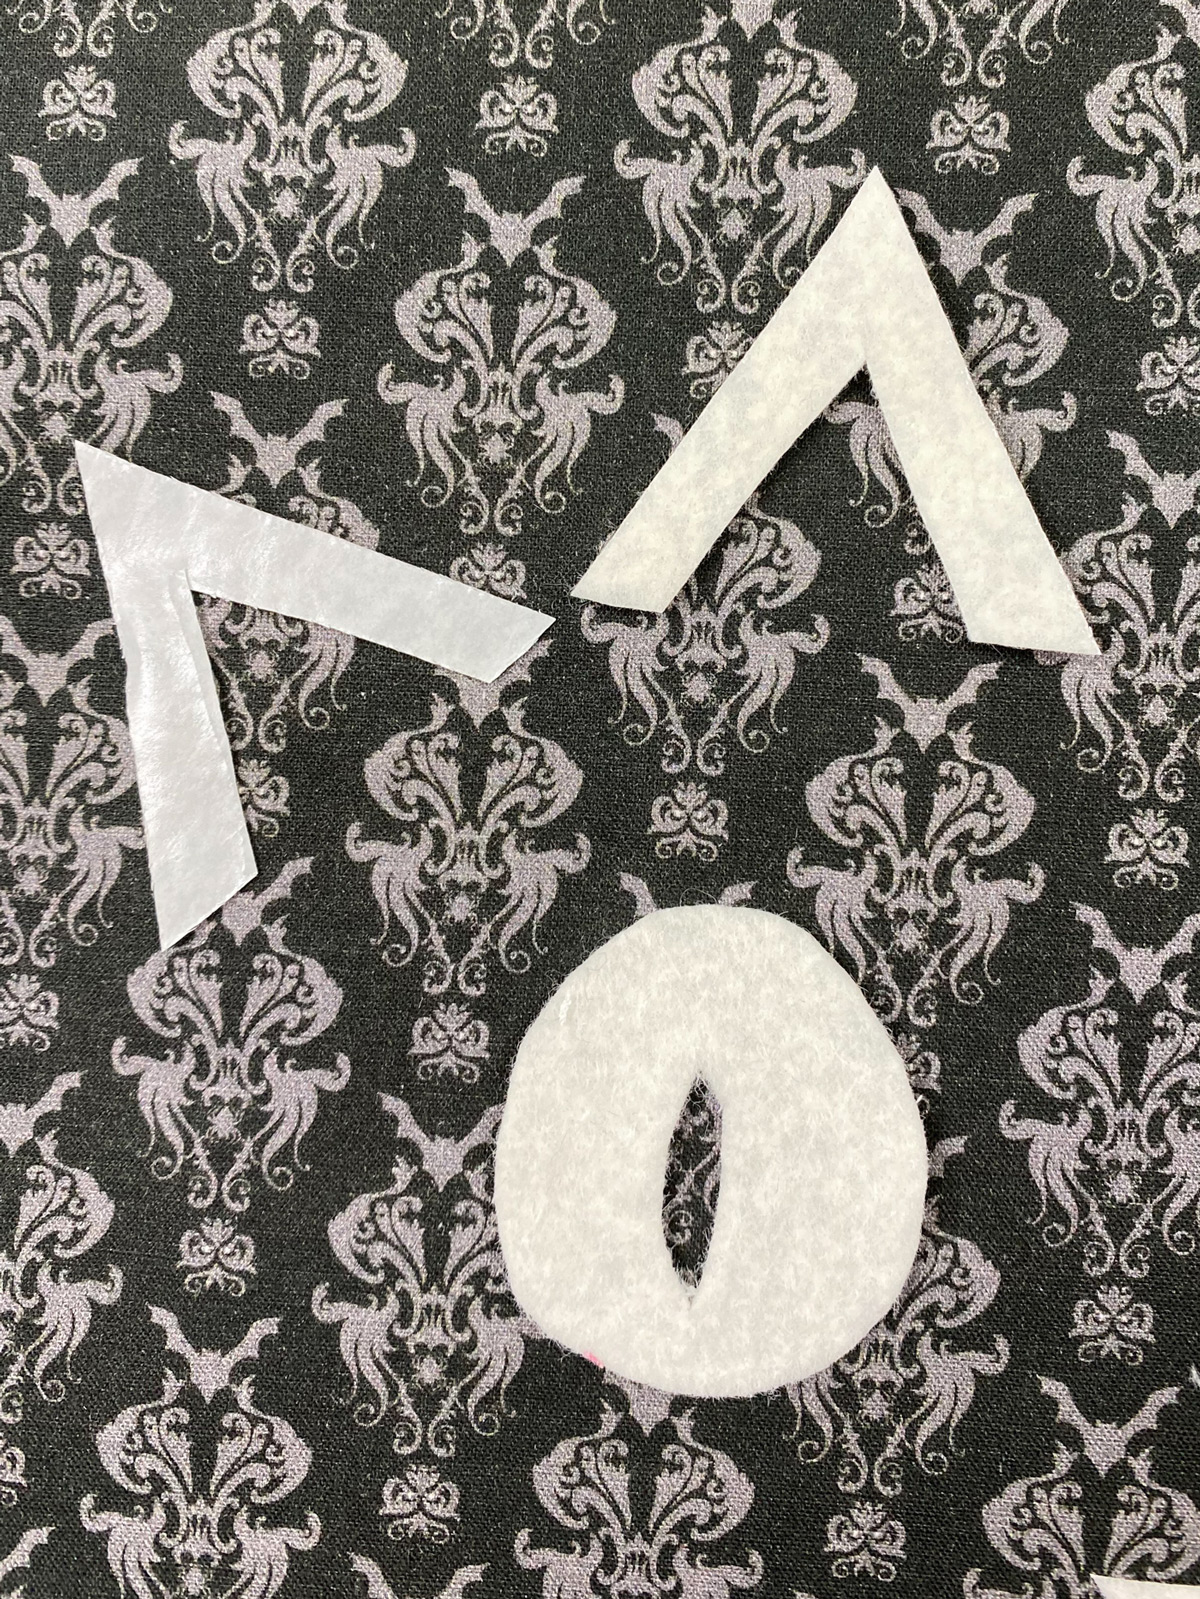
Print out the cat face applique pattern. Using a pencil, trace the shapes of the paper onto the paper side of the paper-backed fusible web. Cut out each piece loosely.
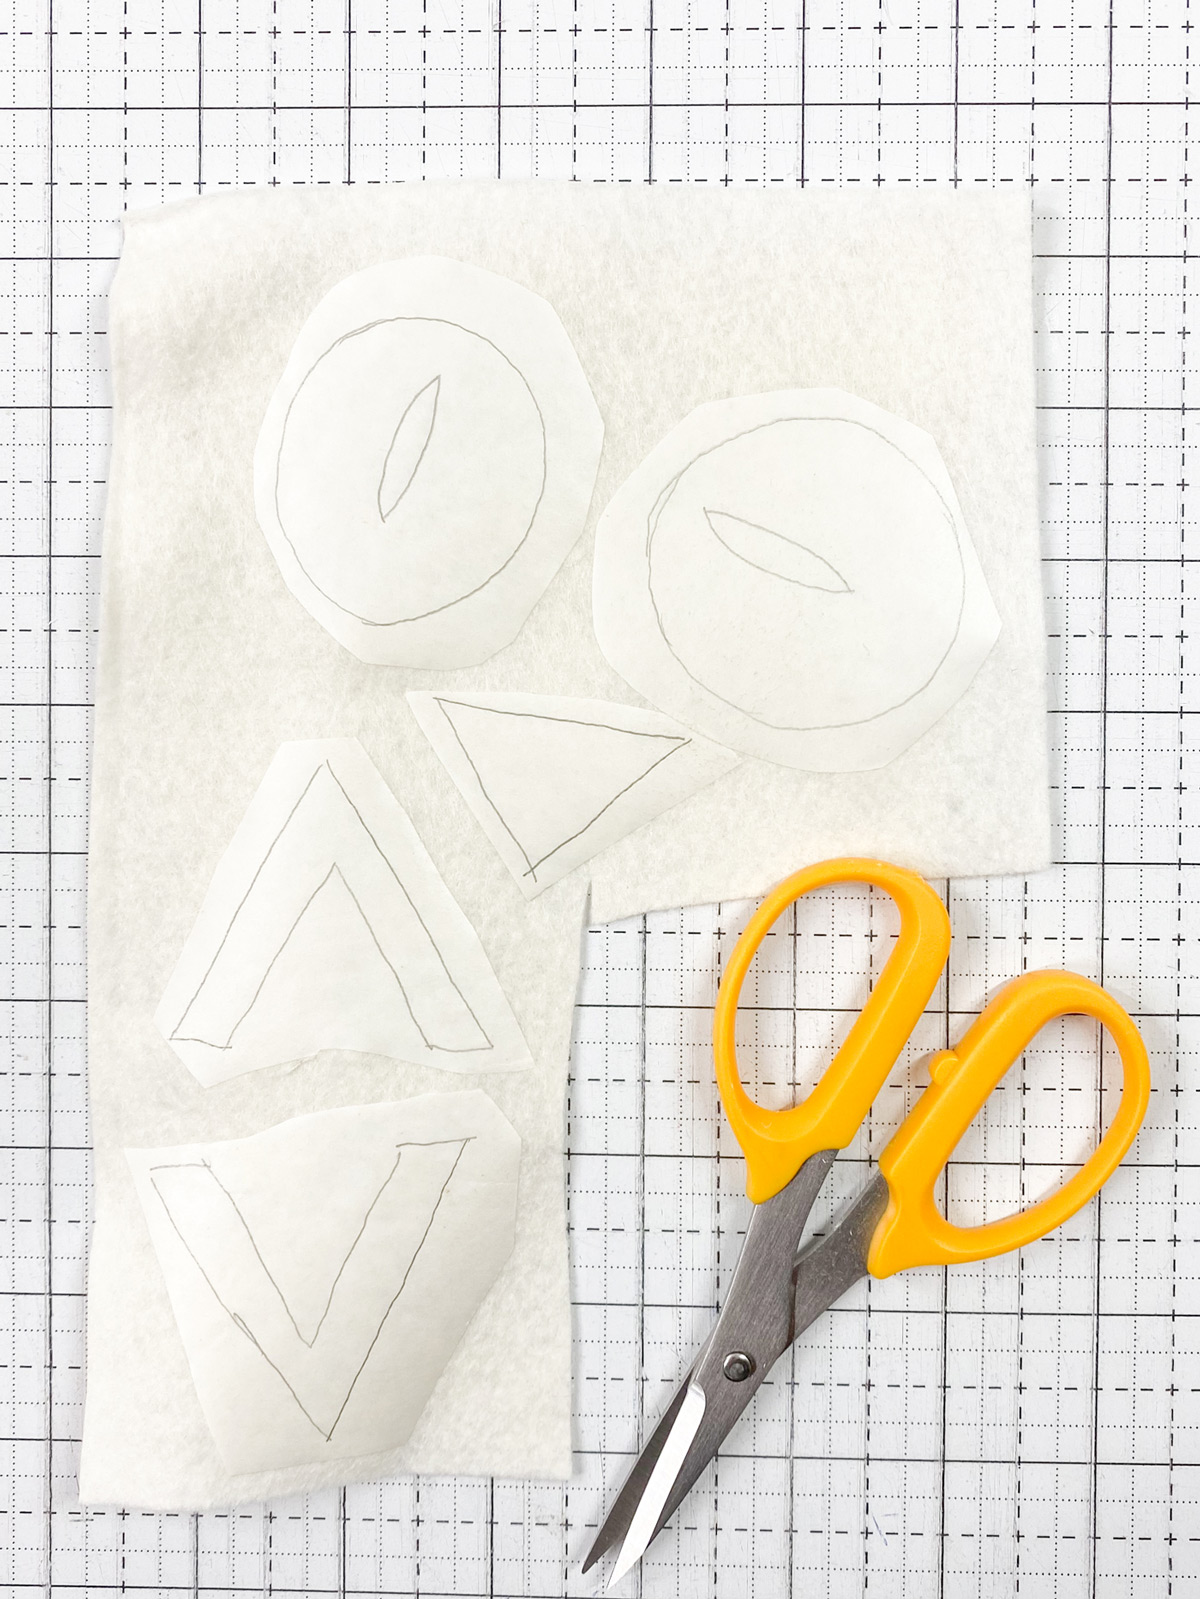
Iron the cut out pieces onto the wrong side of the felt. Cut out each piece, precisely this time.
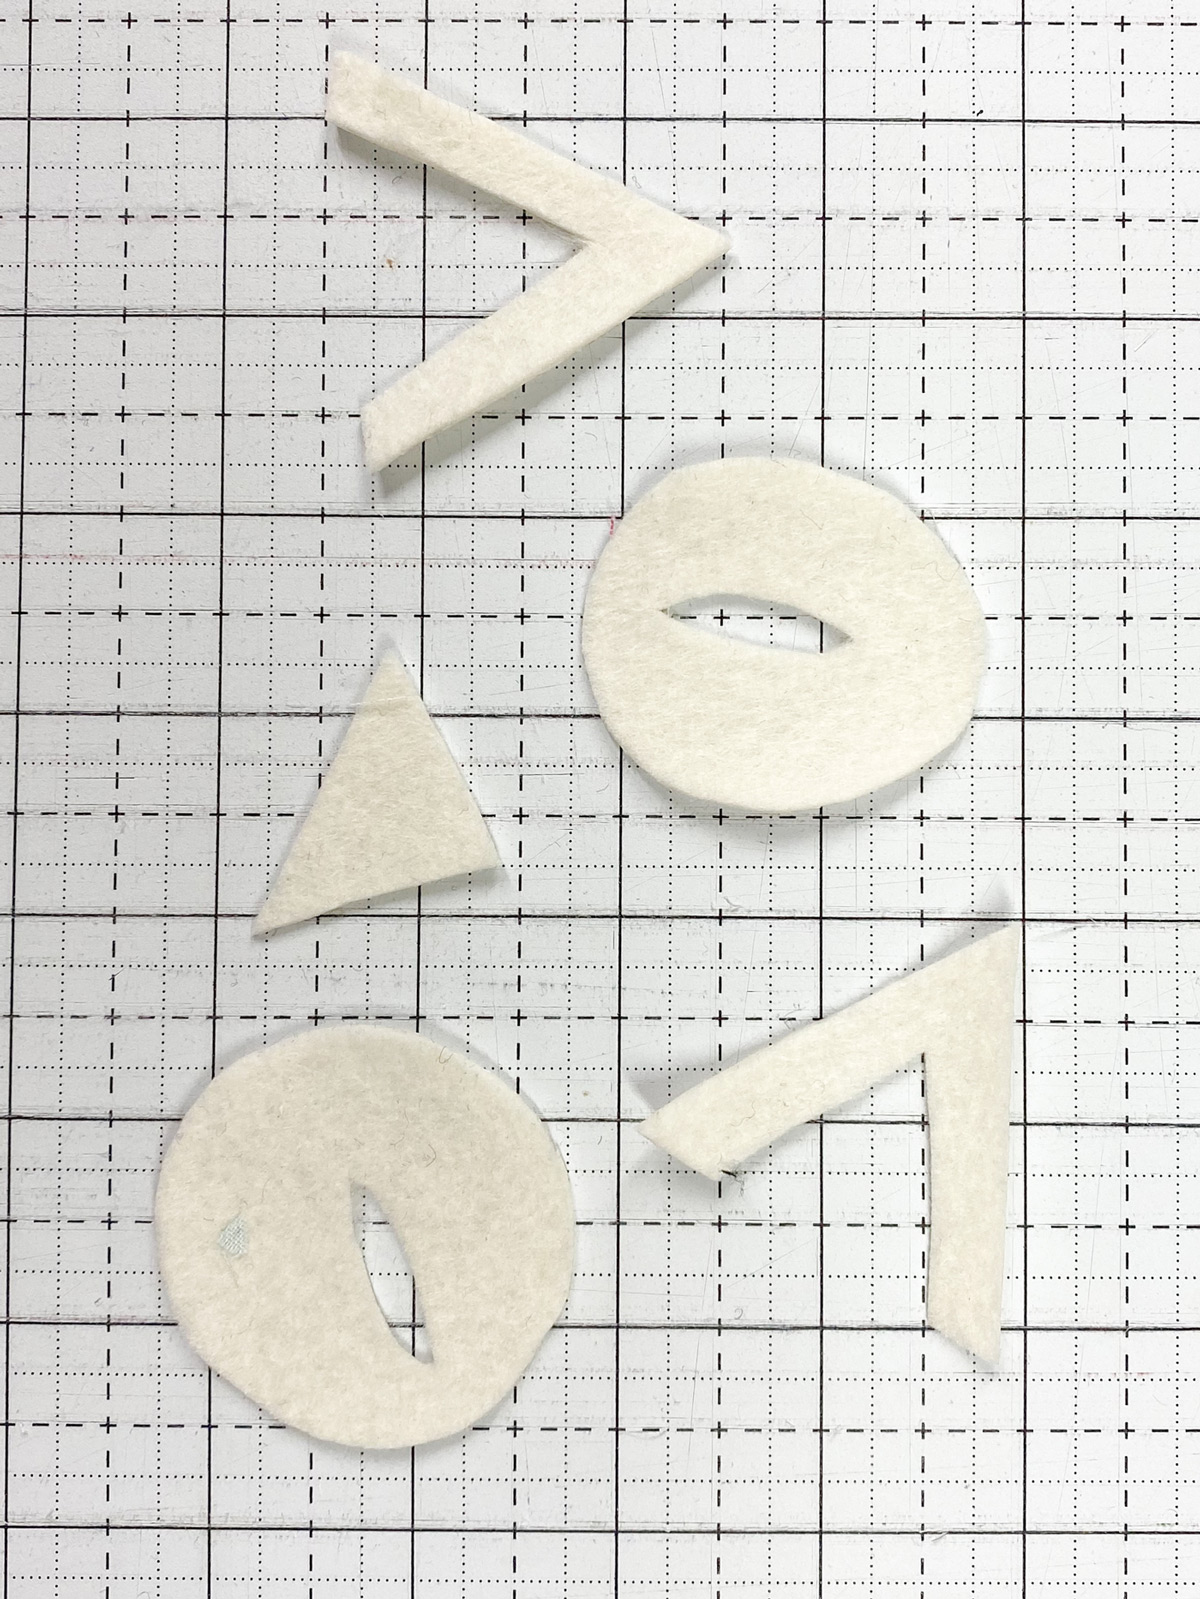
Set pieces aside.
Step Two: Cover the Piping
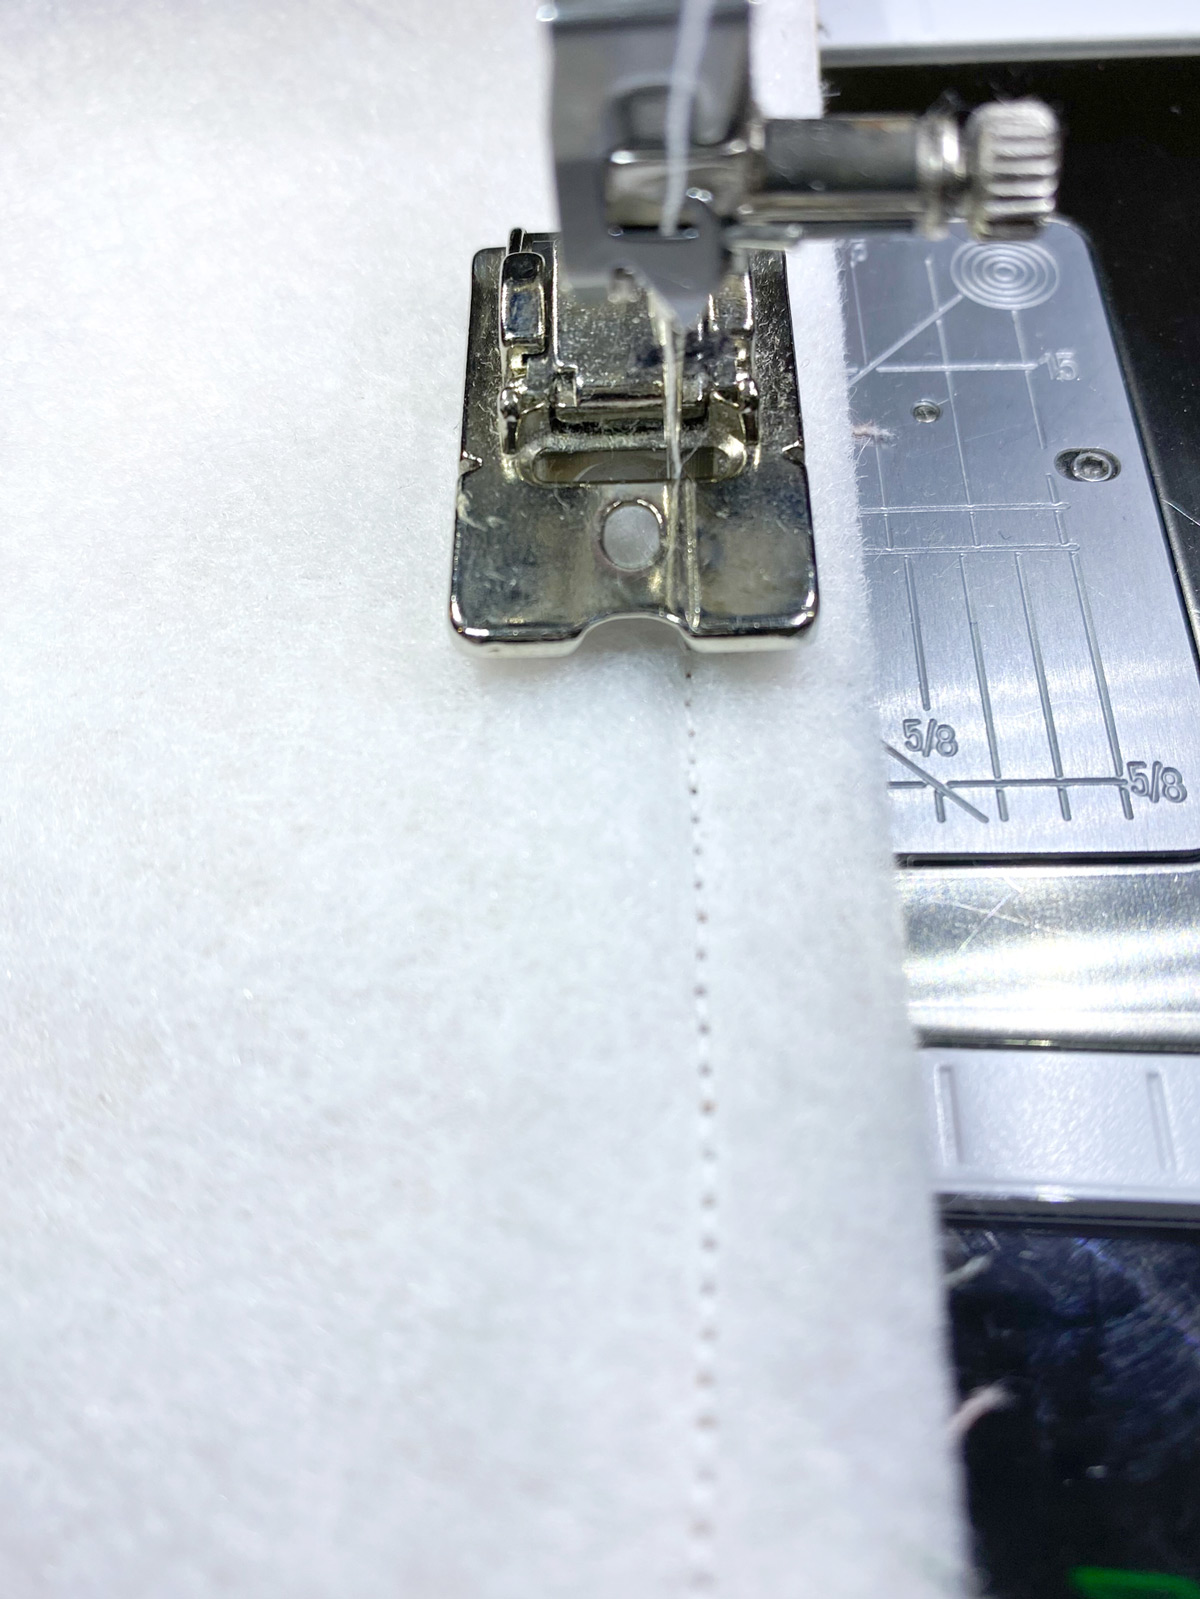
Sew the two 1 1/4″ x WOF pieces together along the short side.
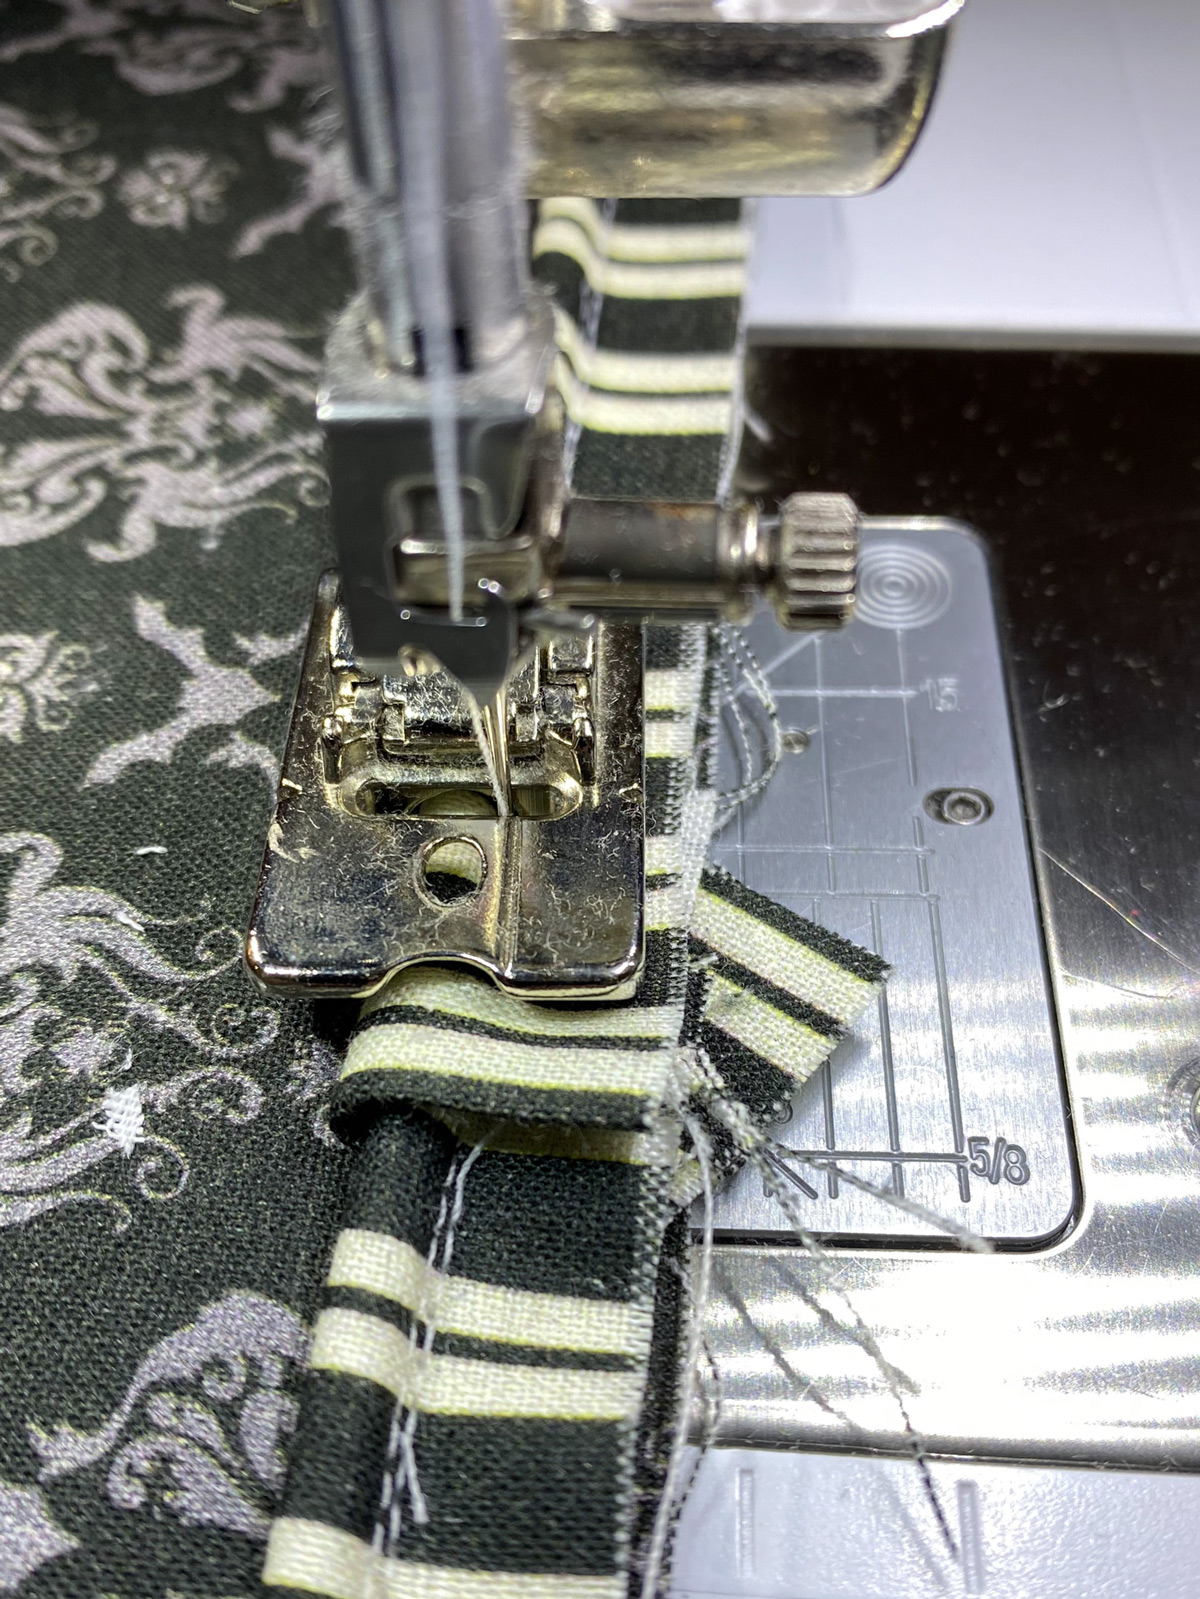
Install the 12C (or other cording foot) on your sewing machine. This foot has a groove in the bottom, as you sew the bulky part of the piping will pass through the groove.
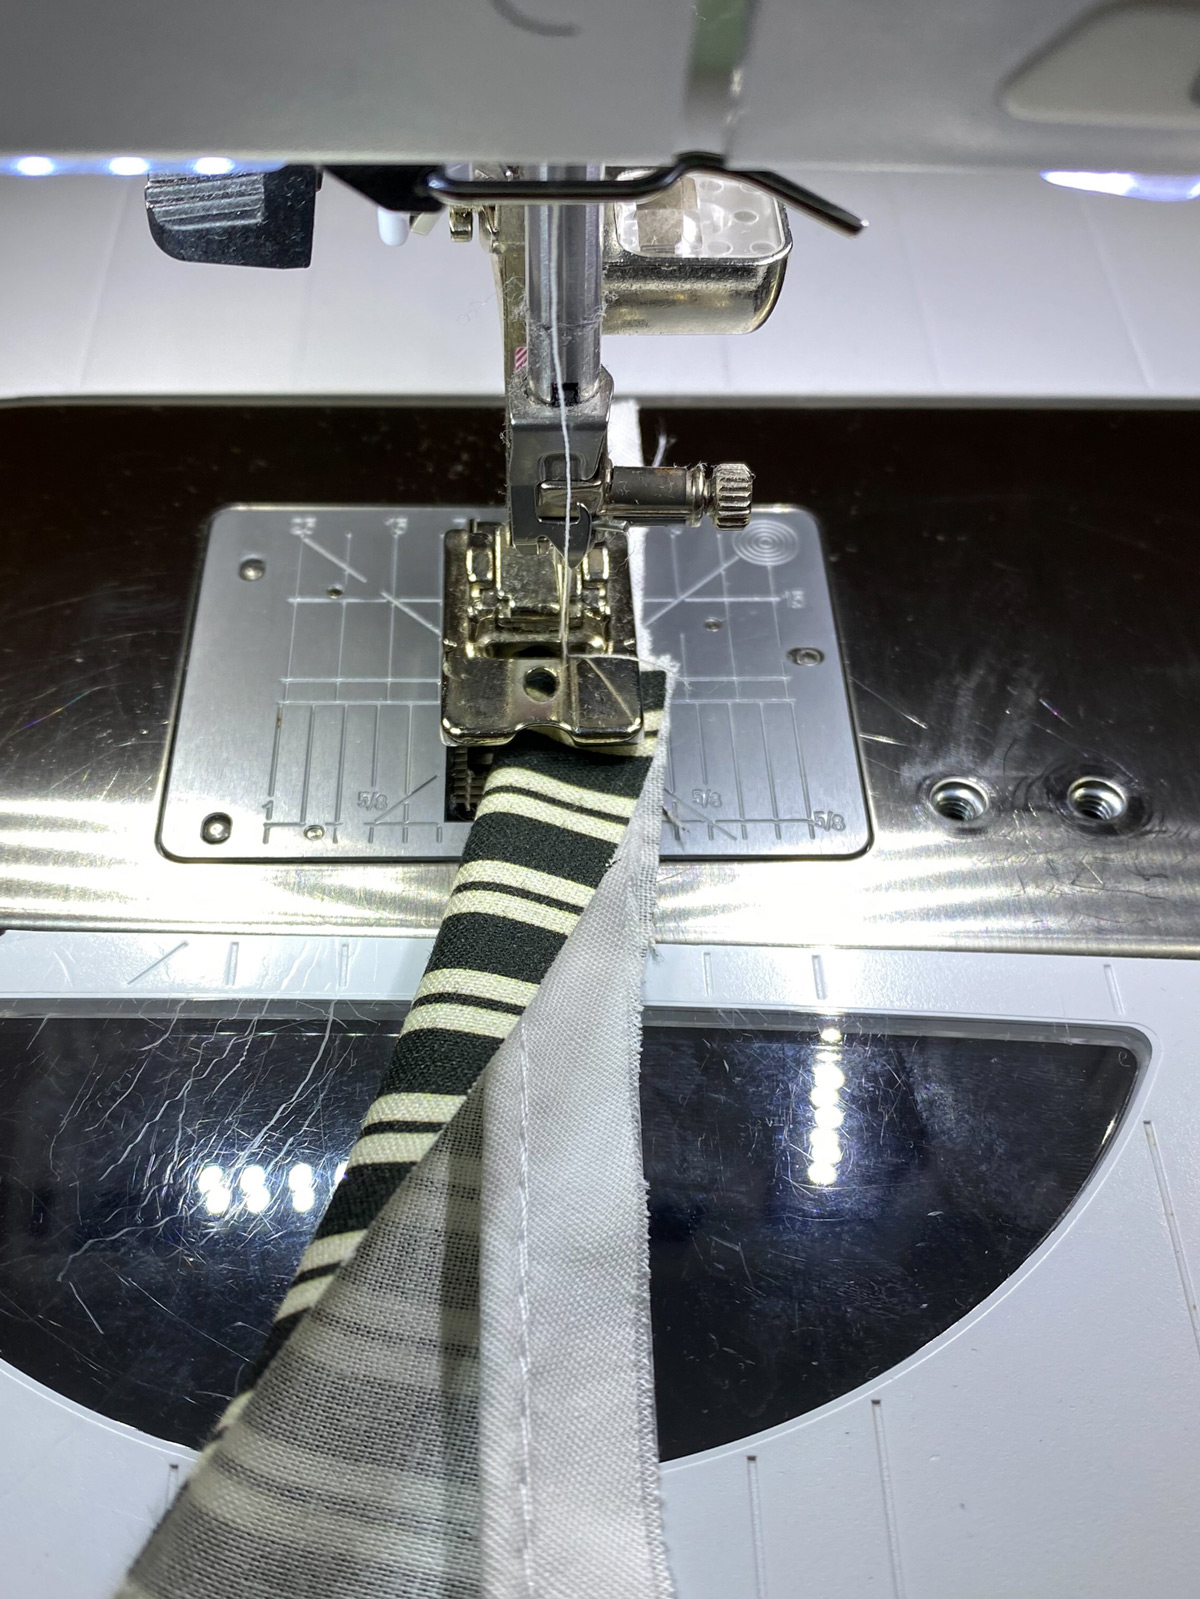
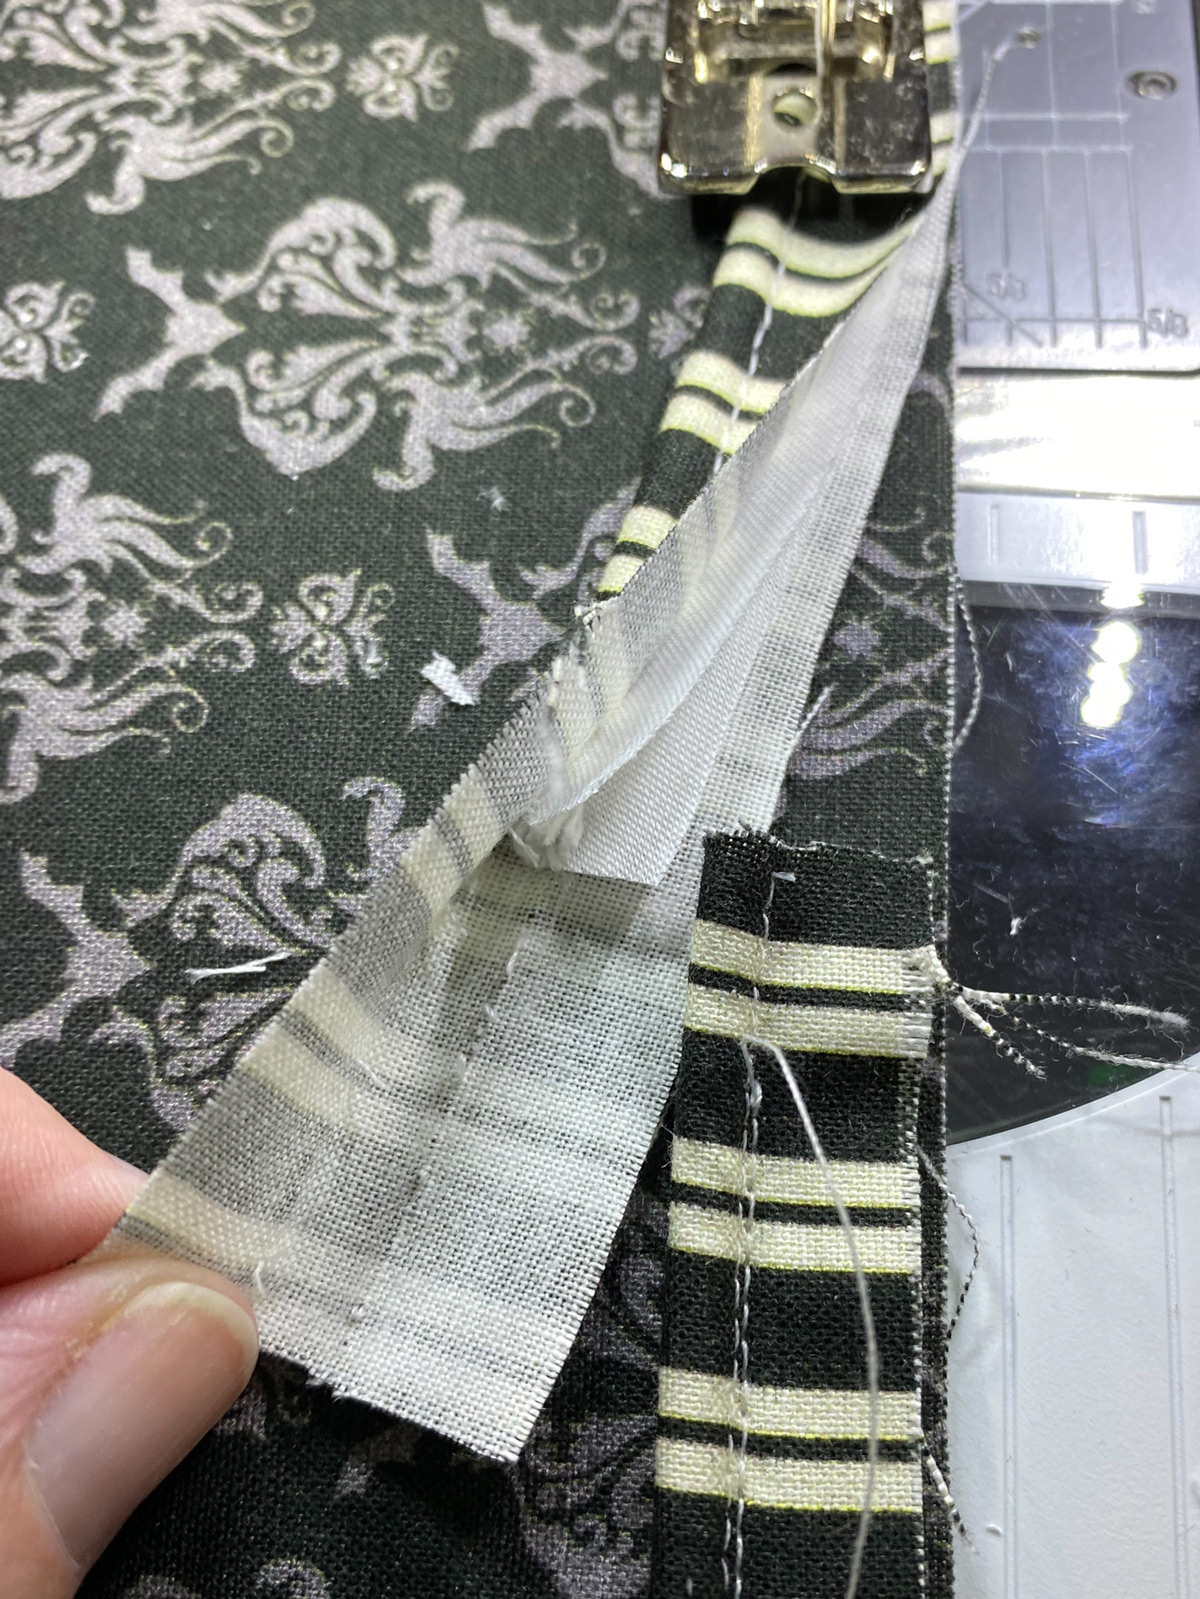
Wrap the cut fabric piece around the purchased piping. The fabric should cover the piping. On your machine set, the needle position 3 clicks to the right.
Place the piping/fabric under the foot so that the “cord” of the piping is in the groove of the foot. Begin sewing. As you sew make sure that the needle is hitting close to the edge of the cord portion of the foot.
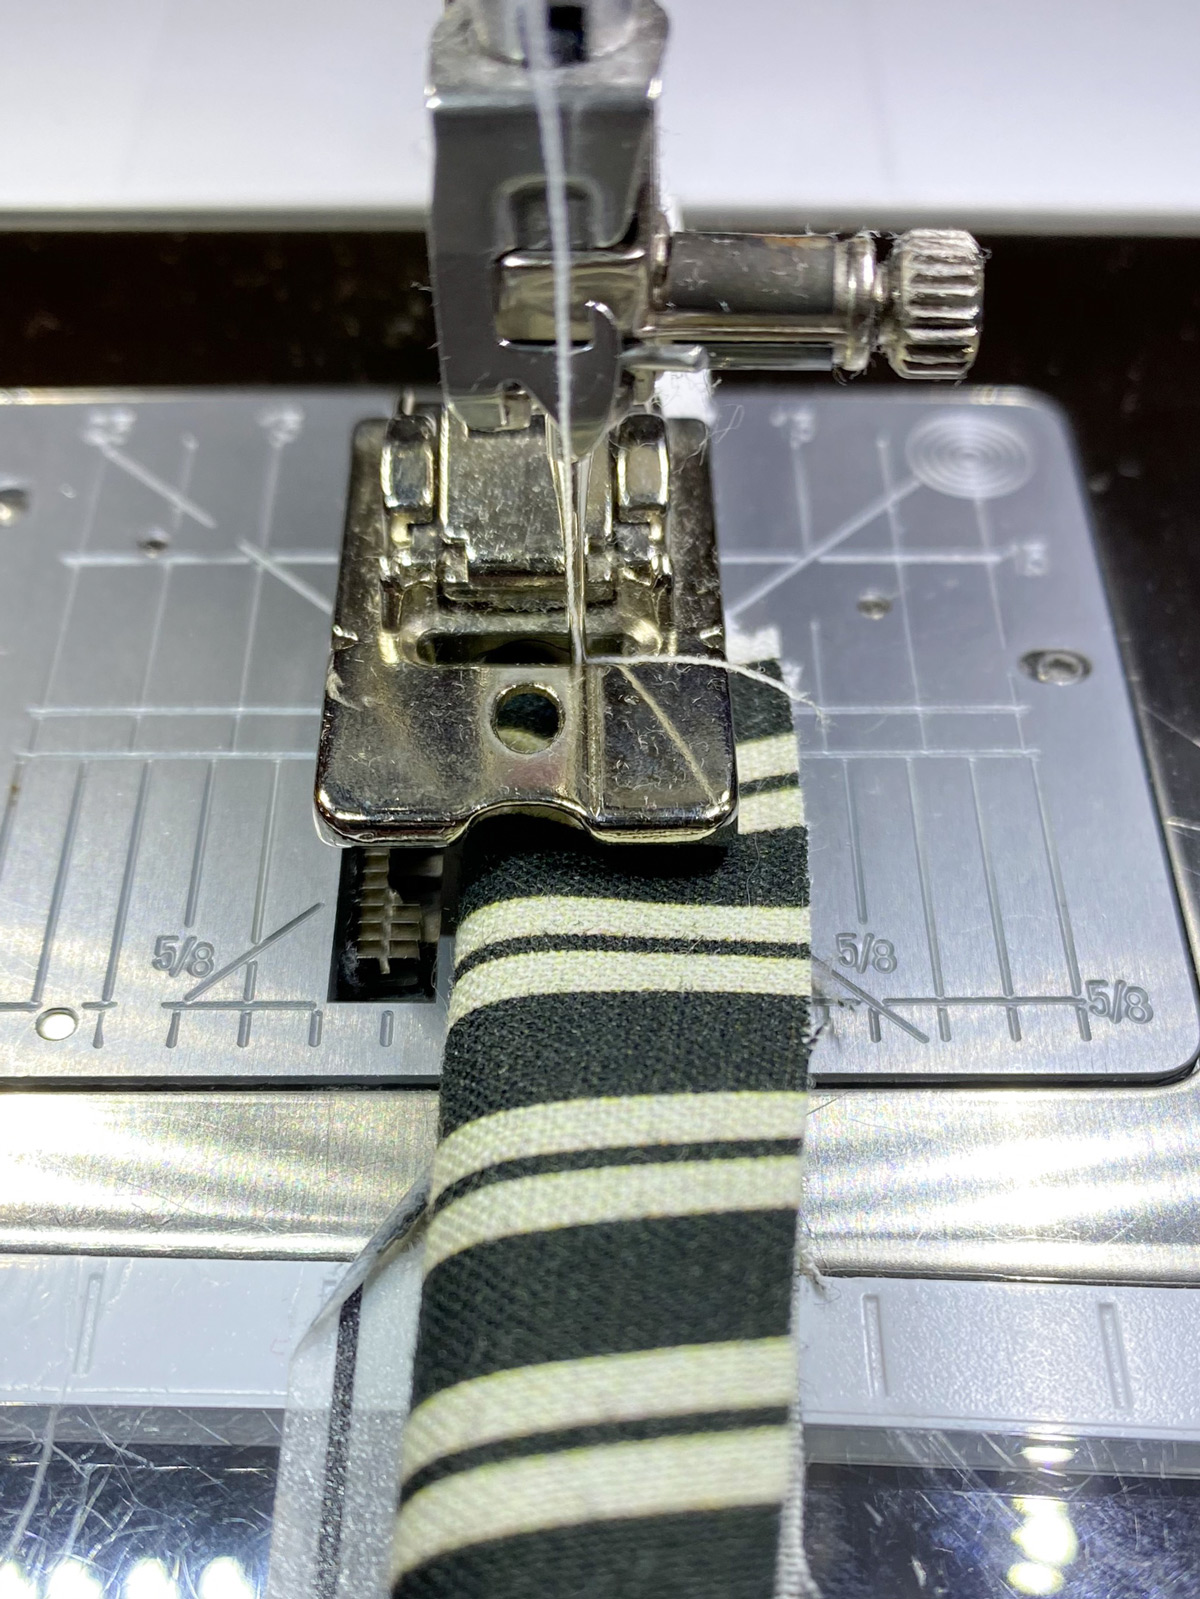
Keep sewing until you’ve sewn all of the piping. (Note: you will not have enough fabric to cover the entire package of piping, but what you cut will be plenty for our pillow).
Step Three: Pillow Front
Iron the fusible fleece onto the wrong side of the 18″ x 18″ pillow front piece.
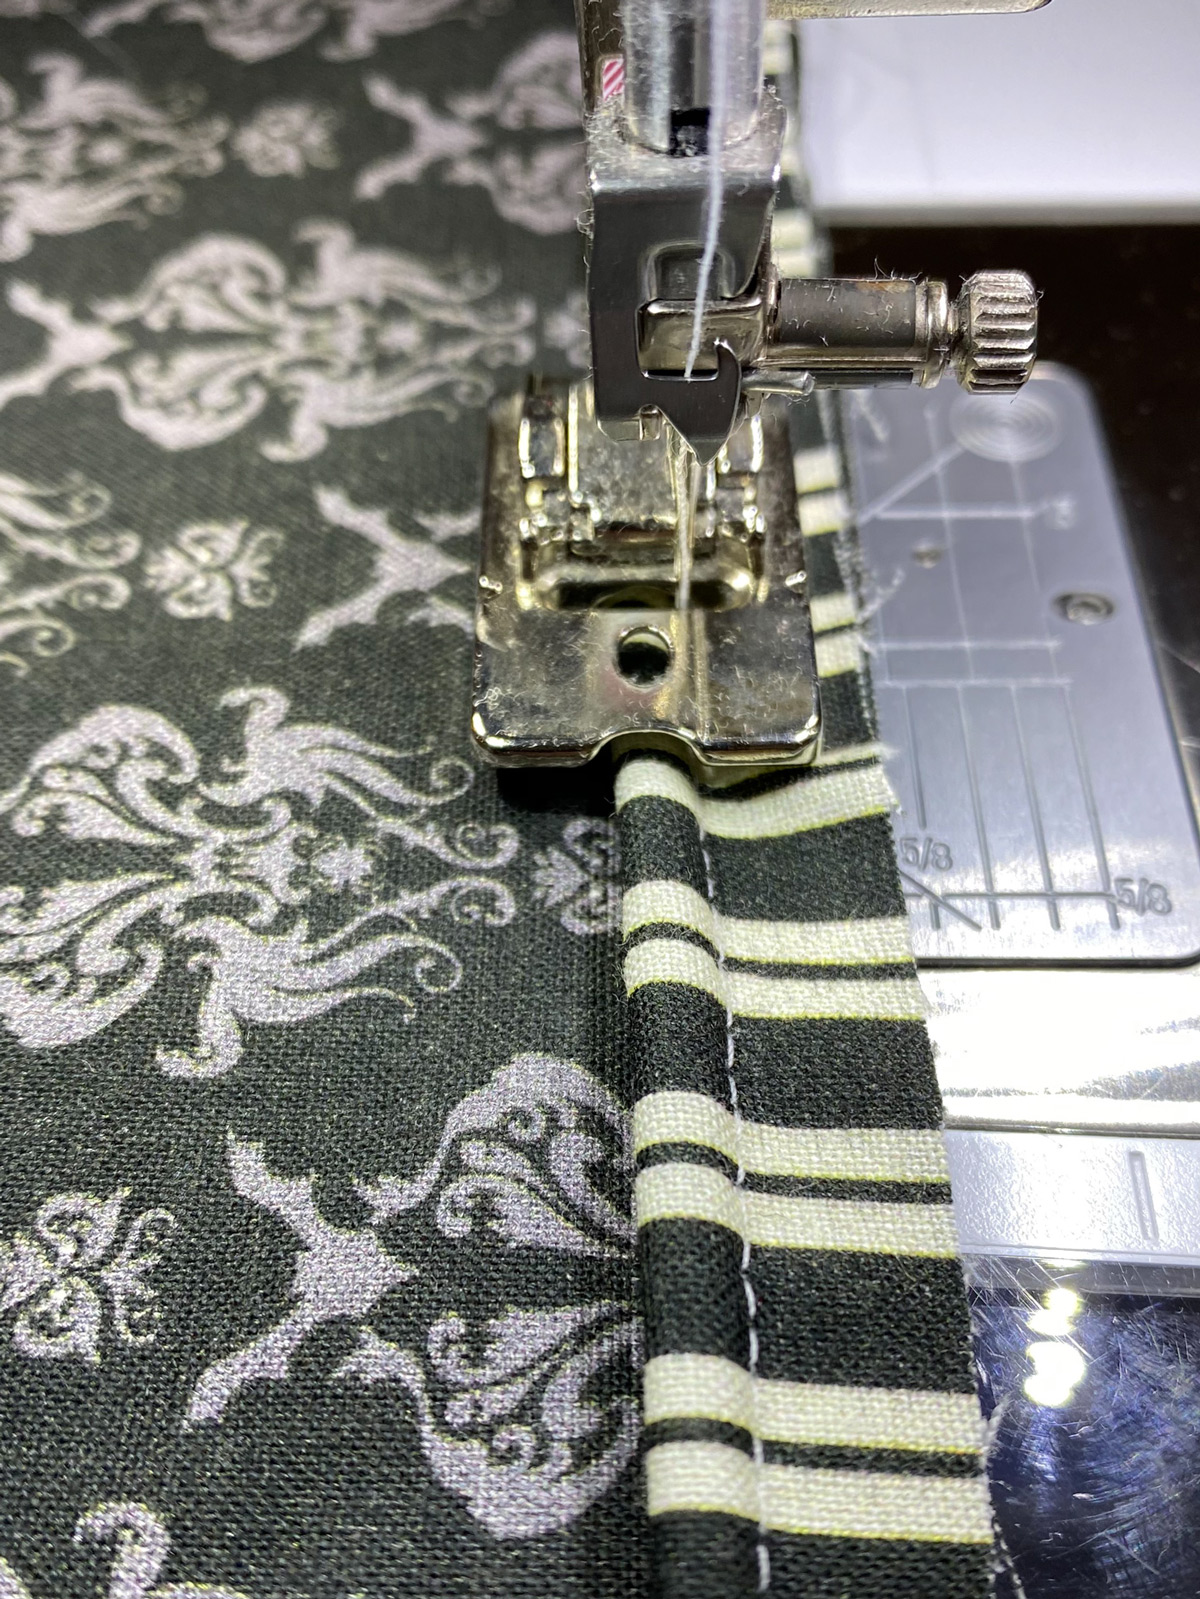
Pin the piping to the front of the pillow. The raw edge of the piping will be flush with the raw edge of the pillow front. As you pin, clip the seam allowance of the piping at the corners. This will allow the piping to curve around the corners easily.
Sew the piping to the pillow front.
To join the piping ends. You have two ends to your piping. The “start side” (which is the part you sew to the pillow first) and the “end side” (which is where you stop sewing).
When you get back to the point on the pillow front where you started stitching the piping, note where the two ends of the piping should meet and place a mark. Cut the “end side” of the piping 1″ longer than the mark you made.
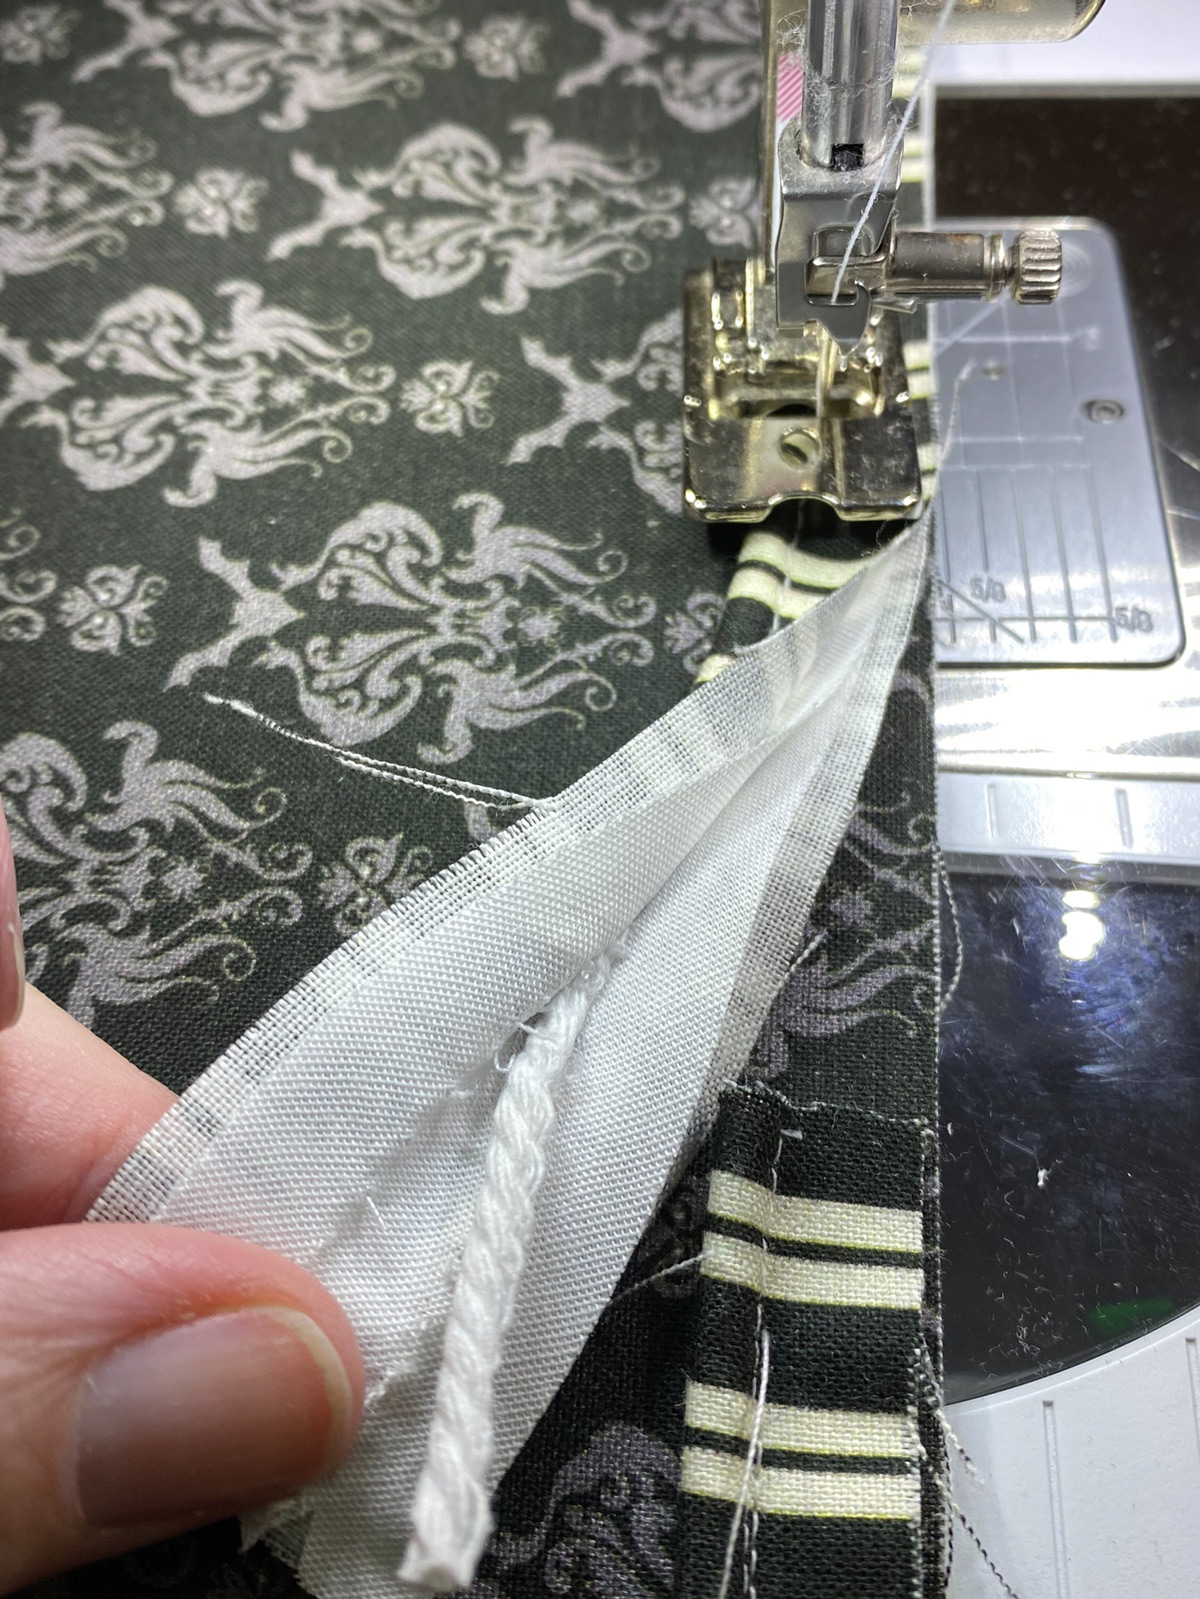
Unpick the piping from the cording at the end side “overlap point” that you marked on the piping. At this point, clip the cord from inside the “end side” of the piping. Do not cut the fabric.
Unpick the “start side” of the piping from the pillow front about 1″. Fold the fabric of the piping “end side” under and insert the “start side” of the piping. Stitch in place.
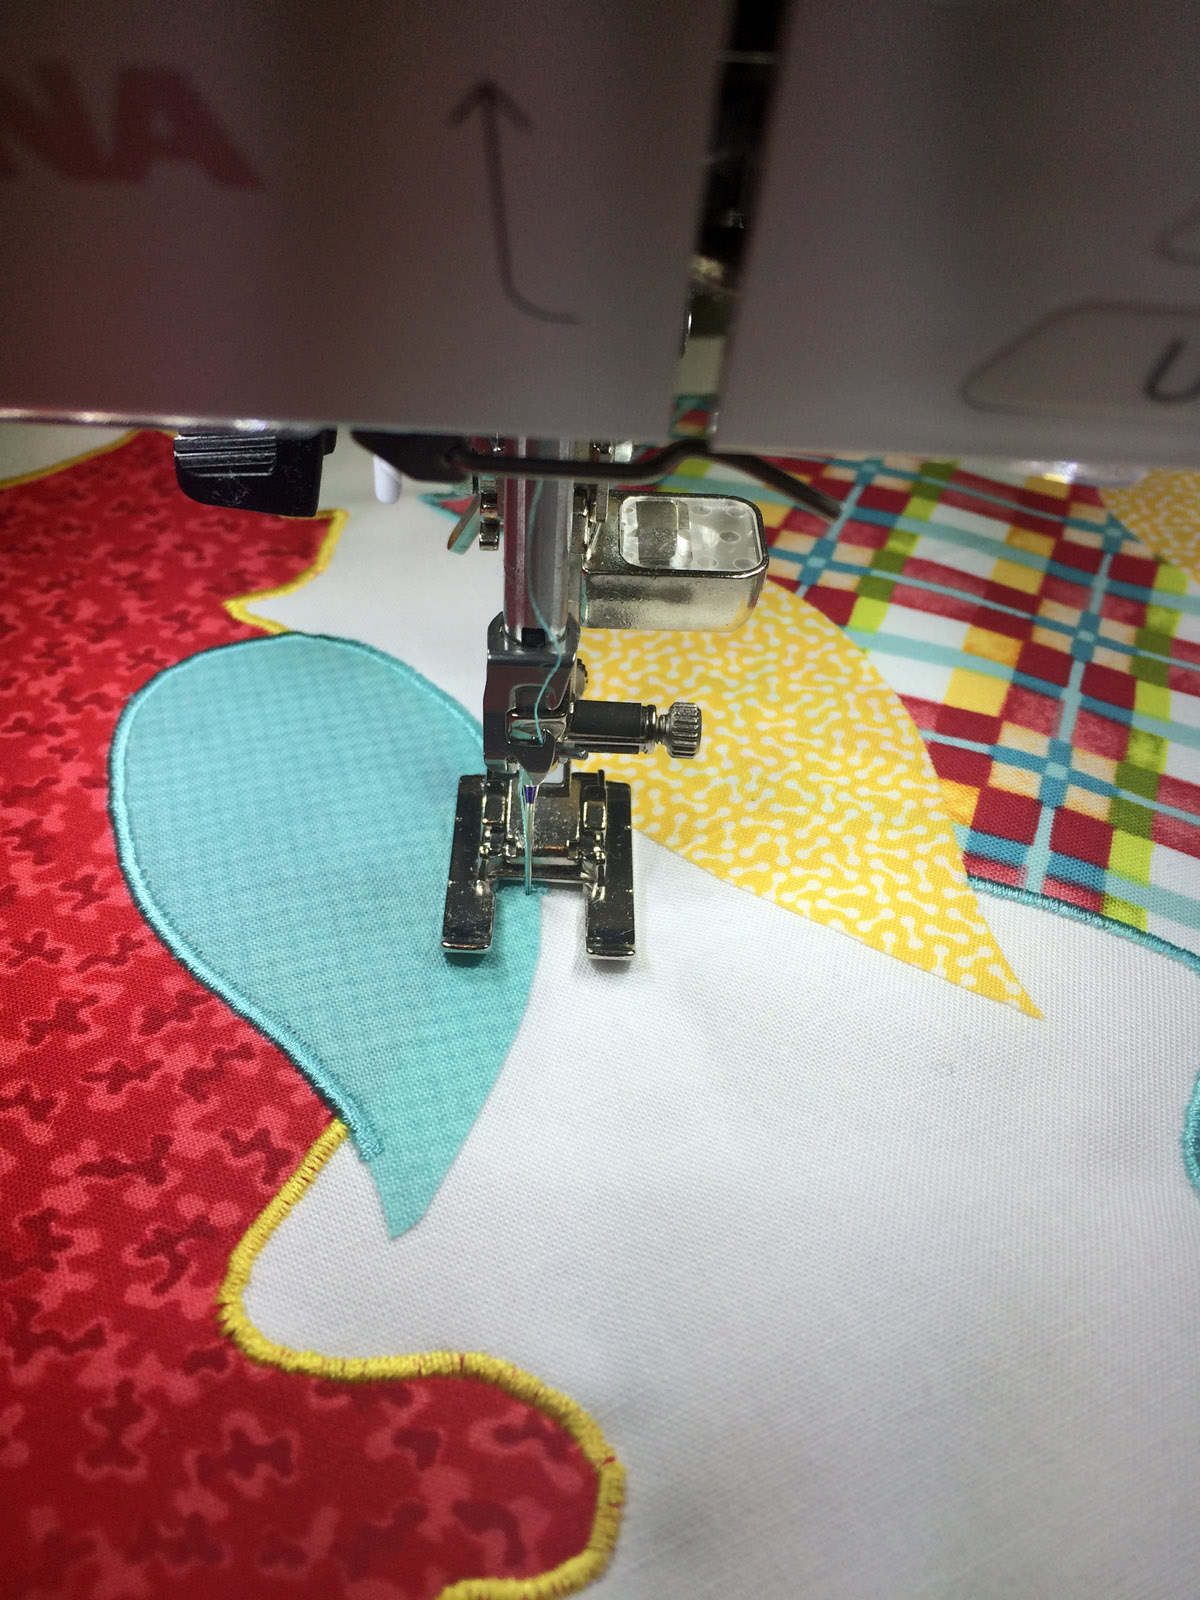
Step Four: Appliqué
Place the cat face applique pieces on the pillow front in the location that you like. Peel off the paper backing from the applique pieces and iron onto the pillow front.
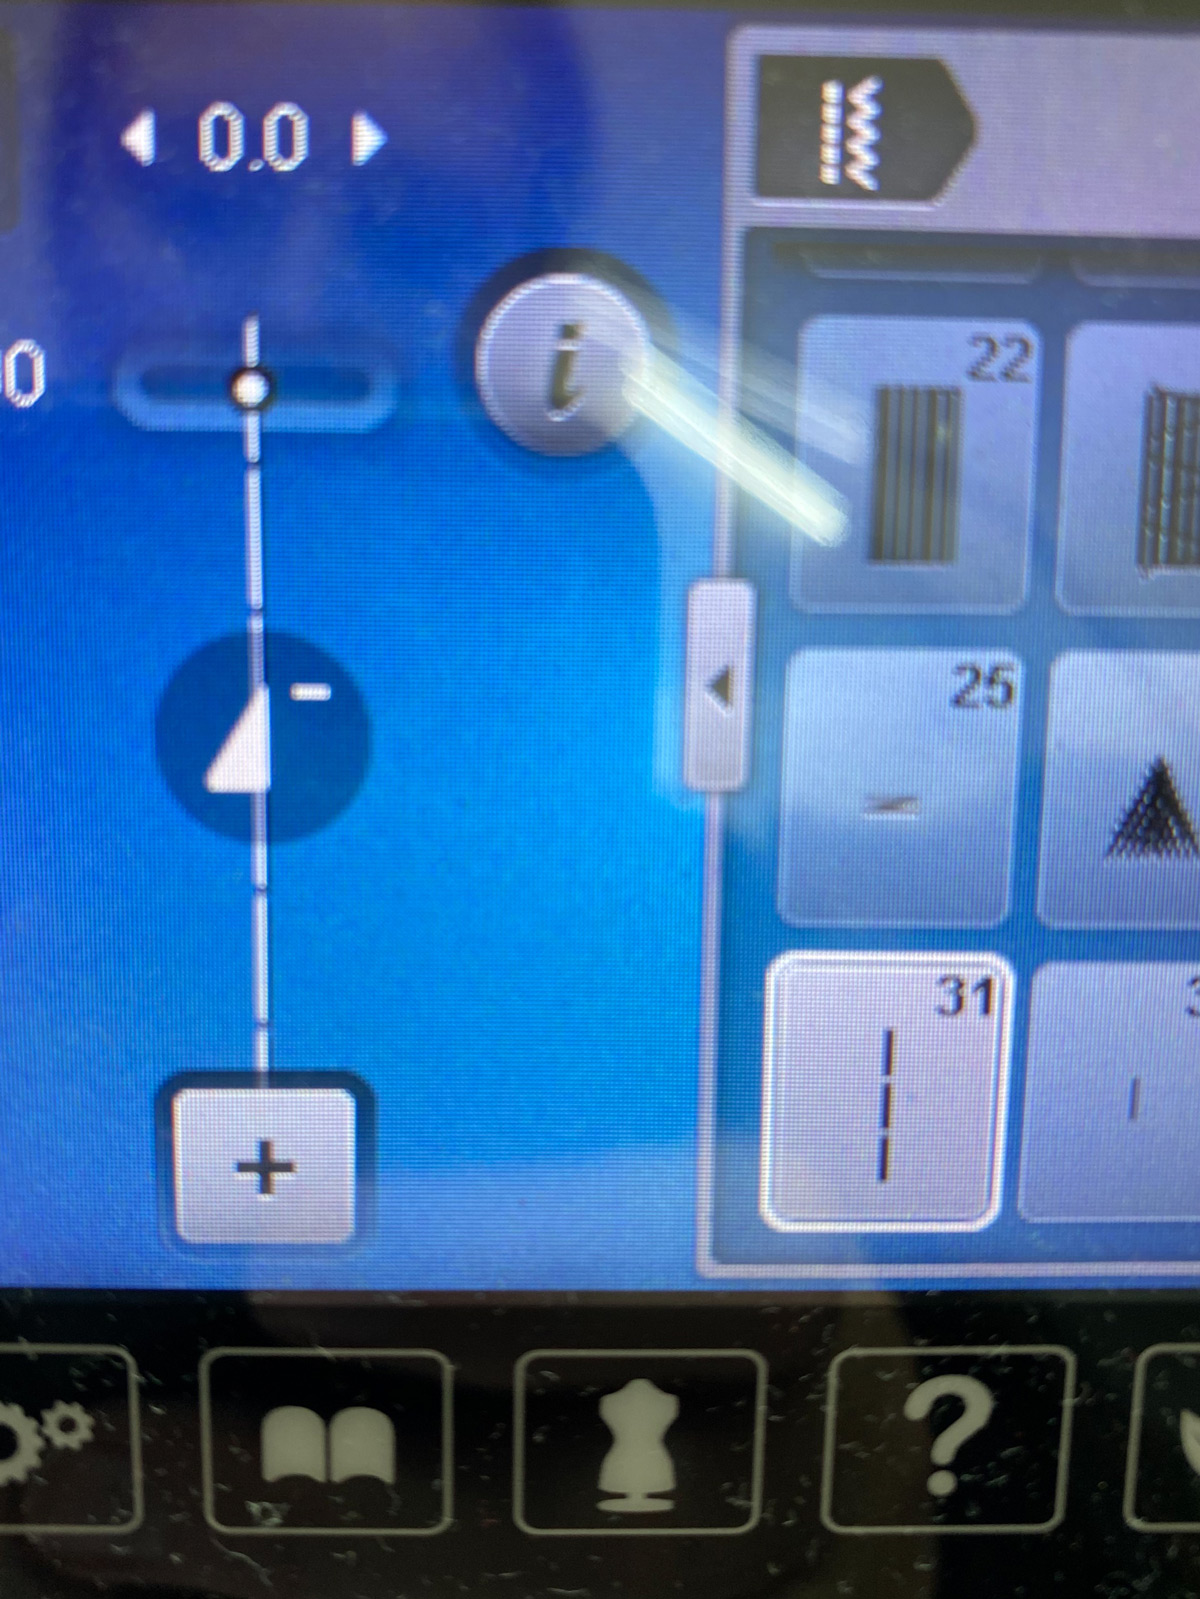
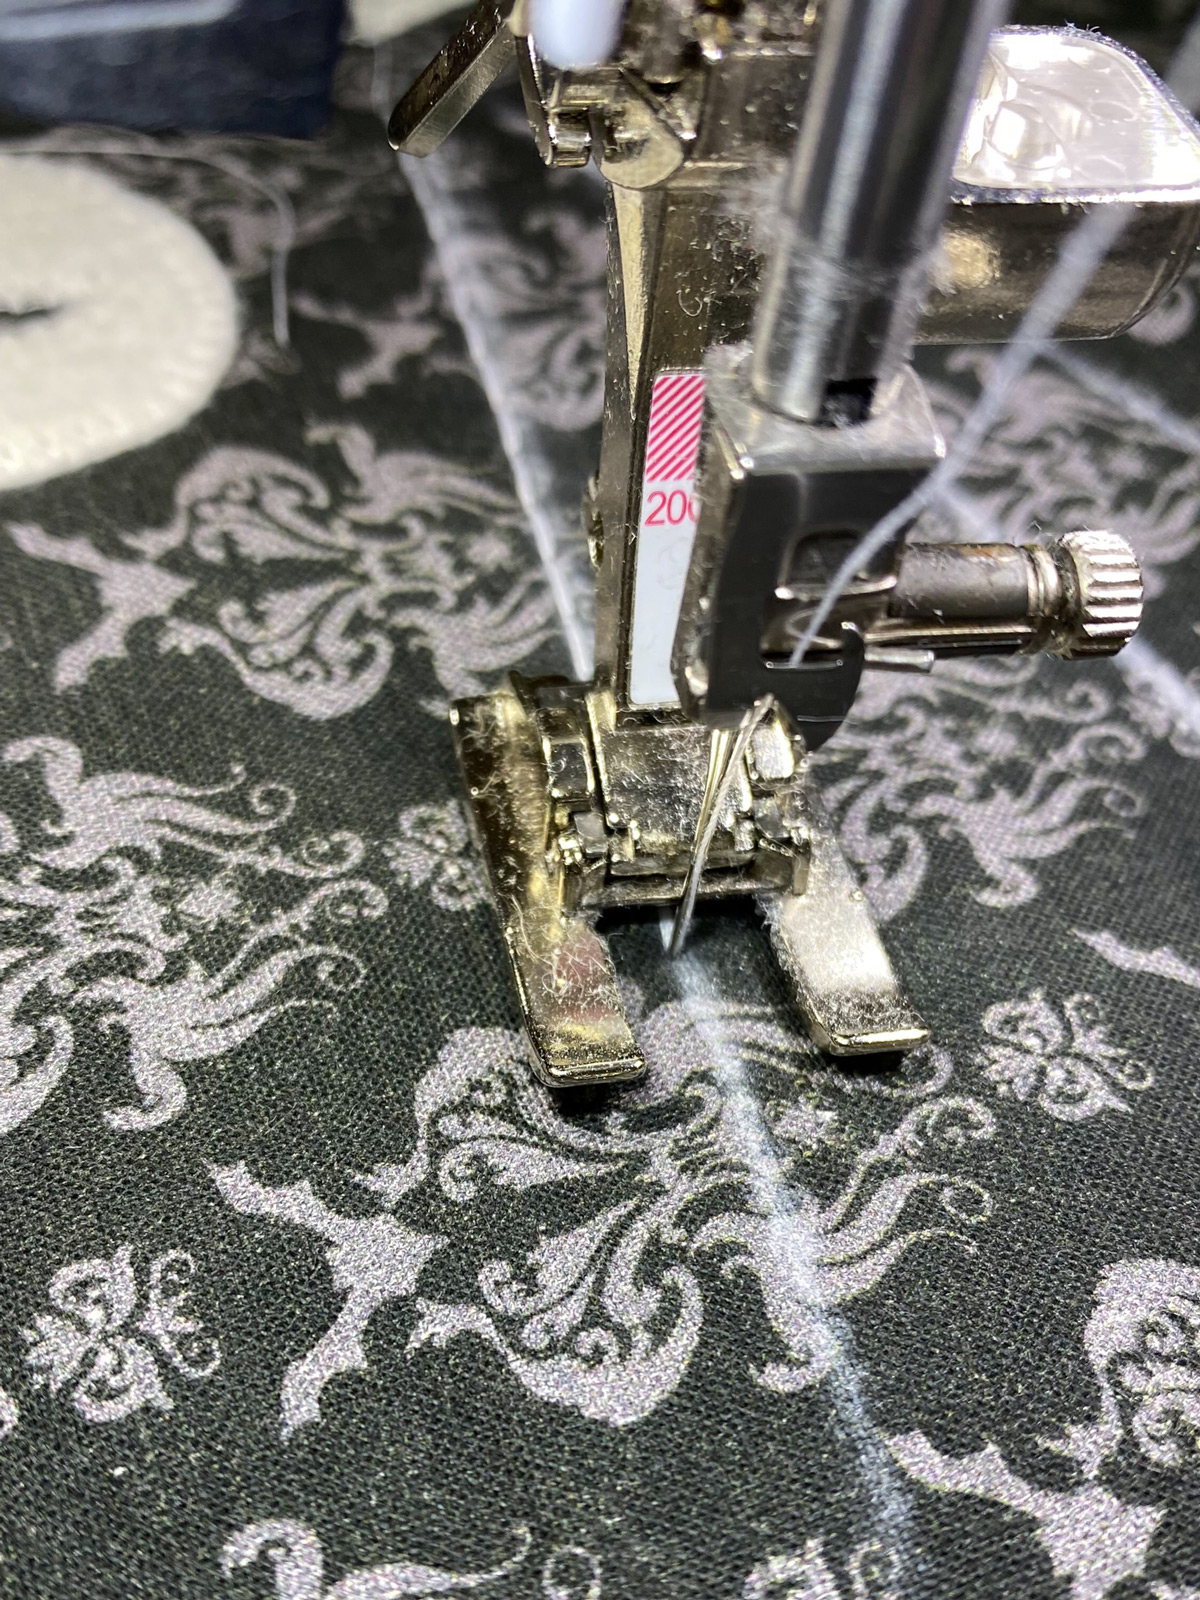
Install an open toe foot on your machine. Set your machine stitch to an applique stitch. I chose stitch 1329.
![]()
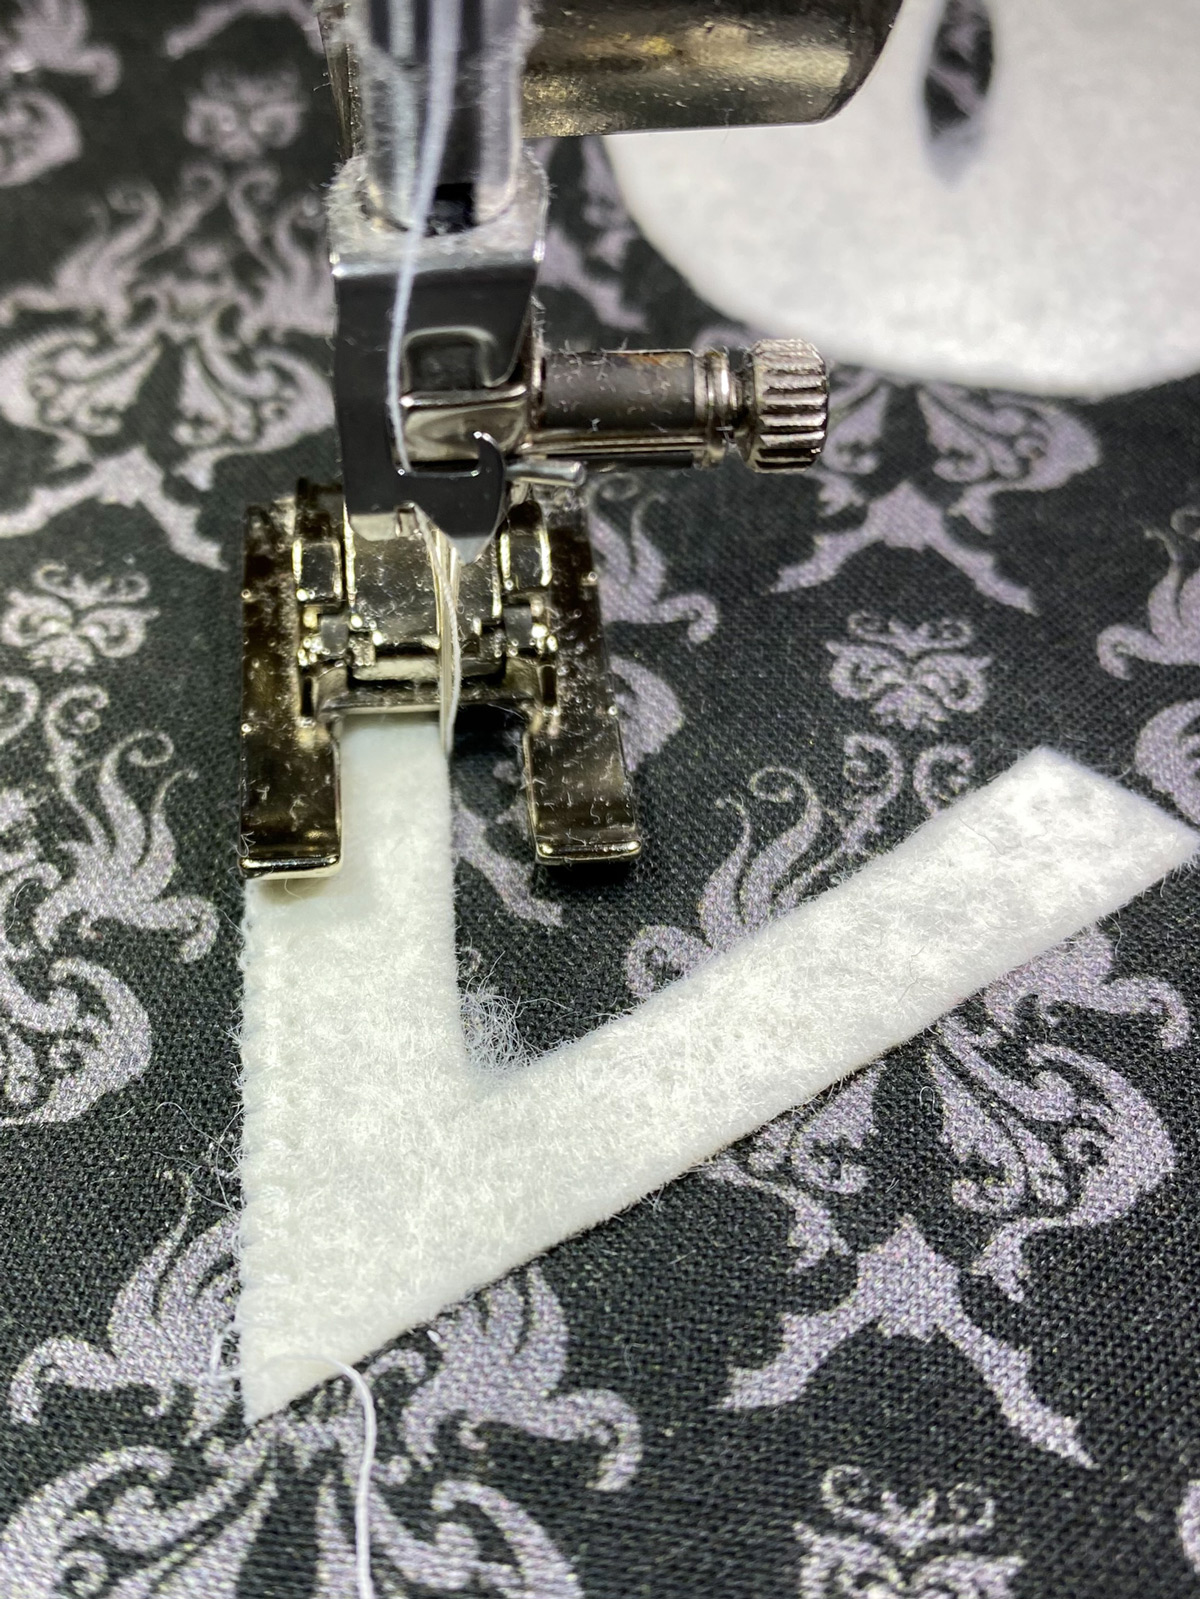
Stitch around the outside of the applique pieces.
Using a piece of chalk, mark 3 lines on each side of the cat nose creating whiskers.
Set your machine to a Blanket Stitch. On my machine that is stitch 31.
Using this stitch, stitch along the lines you drew for the cat whiskers.
Step Five: Finishing
Pin the pillow back piece to the completed pillow front piece, right sides facing. With the 12C foot on your machine, stitch the pillow front to the pillow back. Leave a 10″ opening on the bottom of the pillow. TIP: Stitch along the same seam that you used to attach the piping to ensure that your piping looks great on your finished pillow.
Insert the pillow form and stitch the opening closed.
Note: If you would rather have a zippered back to your pillow, you can follow the directions on my Dorm Room Memory Pillow tutorial. That pillow is also 18″ square and you can substitute the pillow back measurements if you prefer that method.

If you’d like to make the matching pumpkin pillow, you can find the tutorial on my blog.
Used Products

What you might also like


One comment on “Cat Halloween Pillow Tutorial”
Leave a Reply
You must be logged in to post a comment.

Absolutely adorable! Looks like great instructions. Can’t wait to try my hand at making it!!