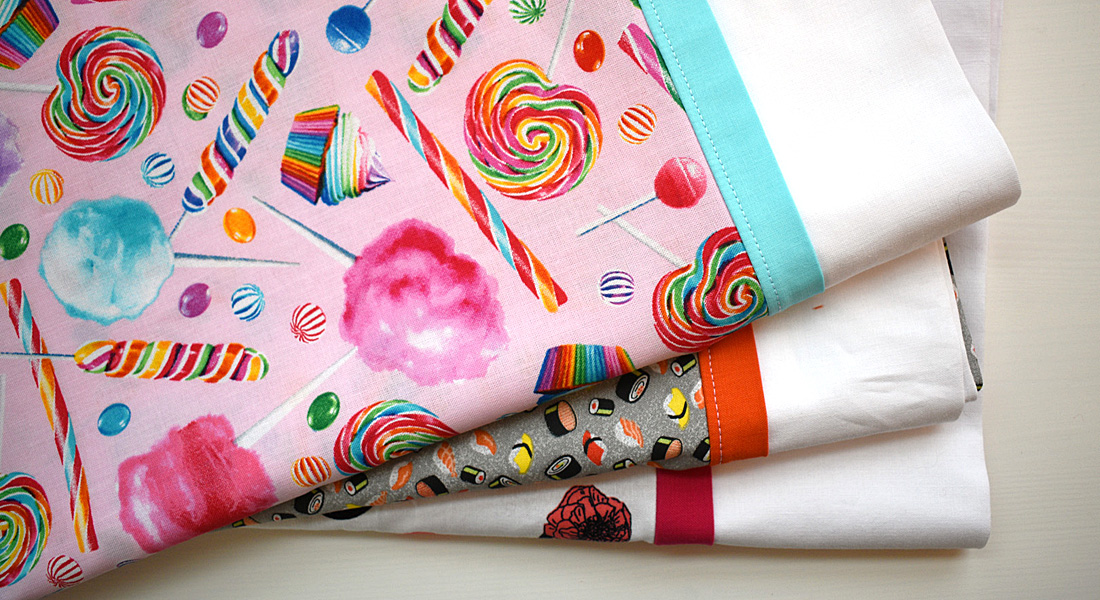
Spanish Hemstitch Pillowcase
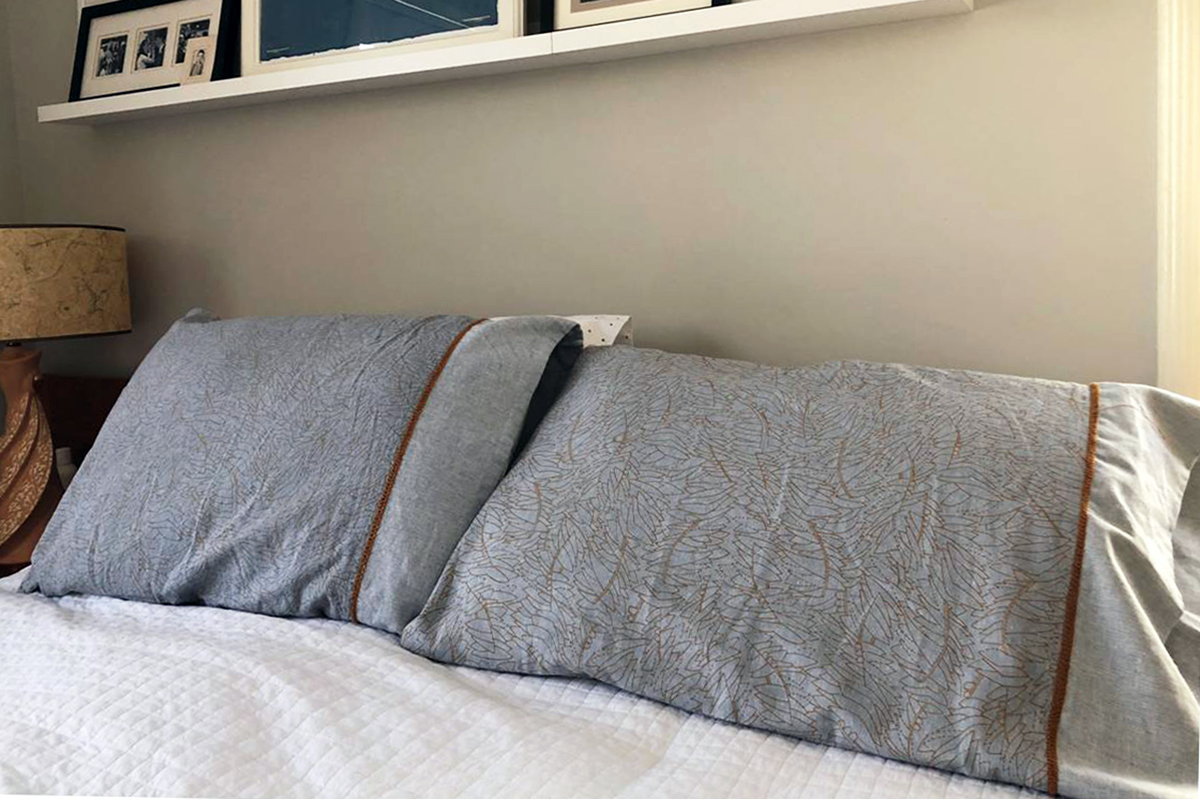
Who doesn’t love a fresh made bed with beautiful linens? Adding a few decorative touches with stitches to a set of homemade pillowcases is one of my favorite things to make for myself and they make wonderful gifts, too. Try out your favorite machine features and create your own beautiful linens for every season or bed set in your home. For this project, I will feature one of my favorite BERNINA attachments, the Spanish Hemstitch Attachment.
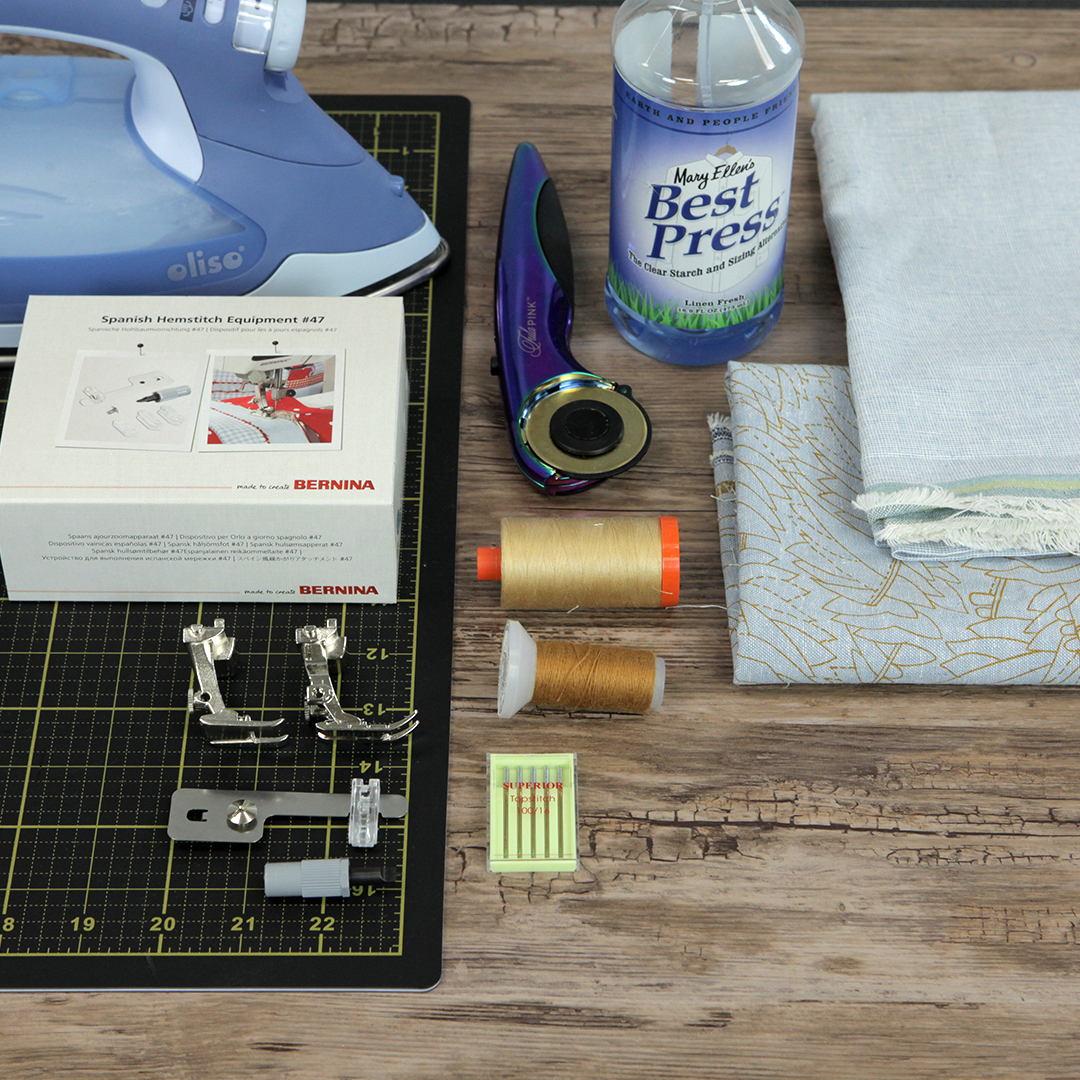
Materials for Sewing Luxe Linens
- BERNINA B 590
- Spanish Hemstitch Attachment #47
- Open Toe Embroidery Foot #20C
- Patchwork Foot #97D
- Fabric:
- Pillowcase Main Fabric: 26”x42”
- Pillowcase Cuff Fabric: 10”x42”
- Rotary cutter
- Cutting mat
- 6” x 24” ruler
- Iron
- Best Press
- Jeans thread (30wt polyester)
- Metrosene all-purpose thread
- 90/14 Topstitch needle
- Snips
- Pins or Wonder Clips
Steps to Sew Luxe Linens
Step 1. Cut fabric
- Cuff: 10”x WOF (width of fabric) or 42”
- Main: 26”x42”
For this project, I used Robert Kaufman linen fabric which is lovely, but will need ironed between washing. I generally buy one yard of each fabric and this will create two sets of pillowcases with opposite main and cuff fabrics. Why not make a set for yourself and a set to give away?
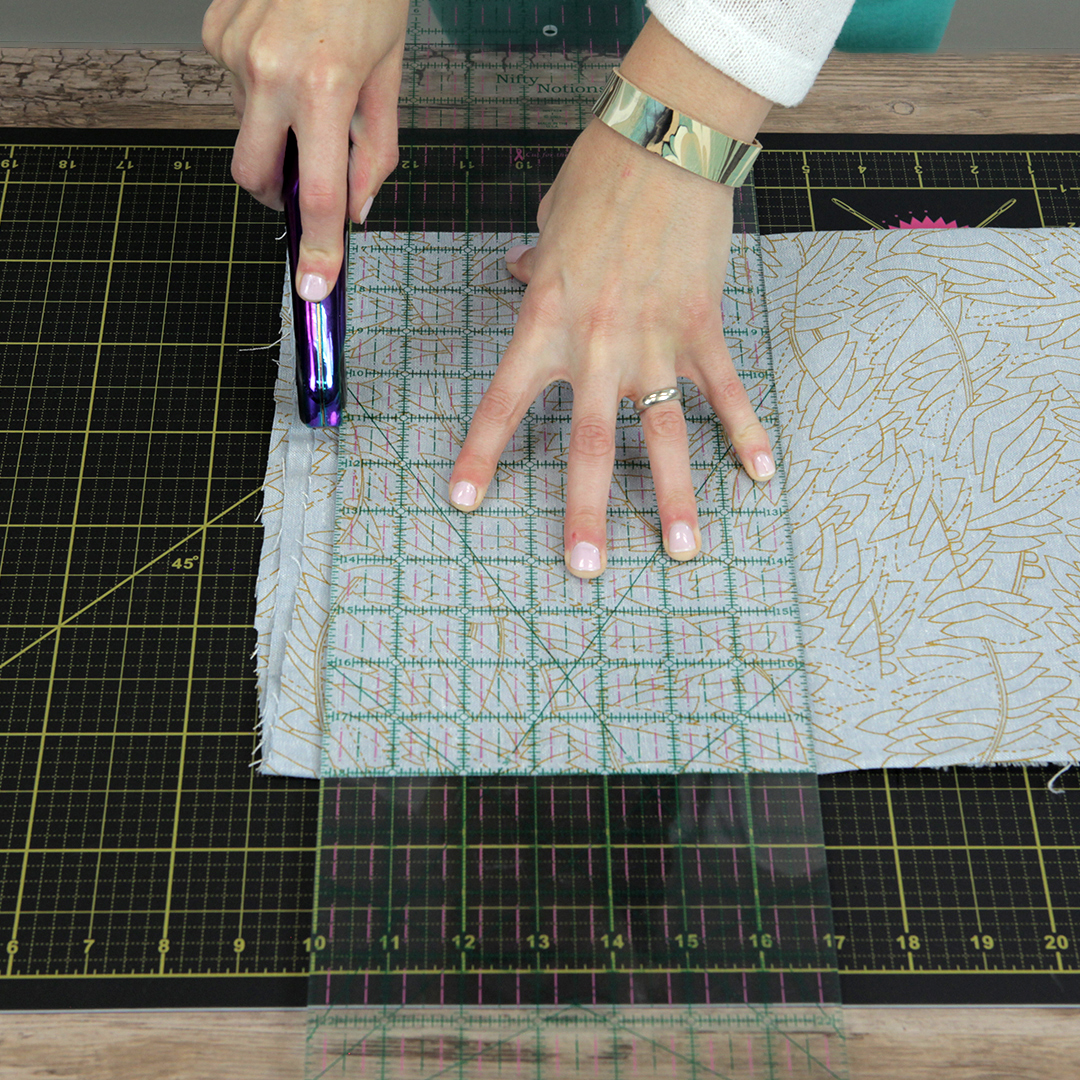
Tip: Cut the cuff as width of fabric instead of trimming to the exact size as it will allow you some starting and ending space to match the main body fabric. The challenge of this attachment is keeping both fabrics moving through the machine evenly.
Step 2. Sew and press edges
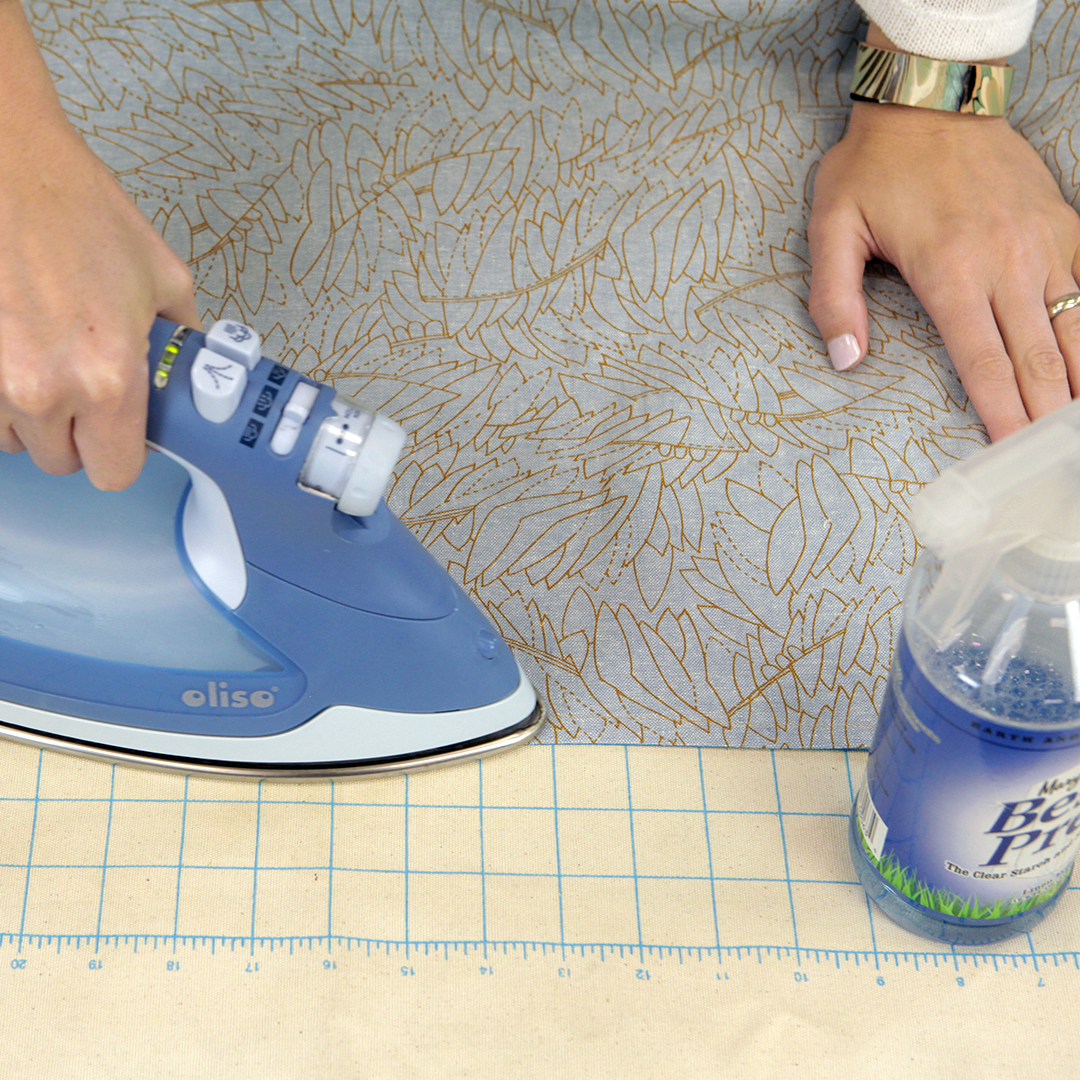
First things first, you will need a nice finished crisp edge for this specialty stitch, which leaves a space between the fabrics. Make the cuff by folding right sides together and sewing with a ¼” seam allowance. Turn the cuff right sides out and press the seam with some starch or starch-alternative pressing spray (like Best Press or Flatter). This will help the edge stay firm as it is sewn to the body fabric.
For the main body fabric, press a double fold hem at ½” (overall 1”) and edgestitch the hem. Use the starch on this edge also. Now you should have two long edges ready to be joined. Save time and do all pillowcases at once.
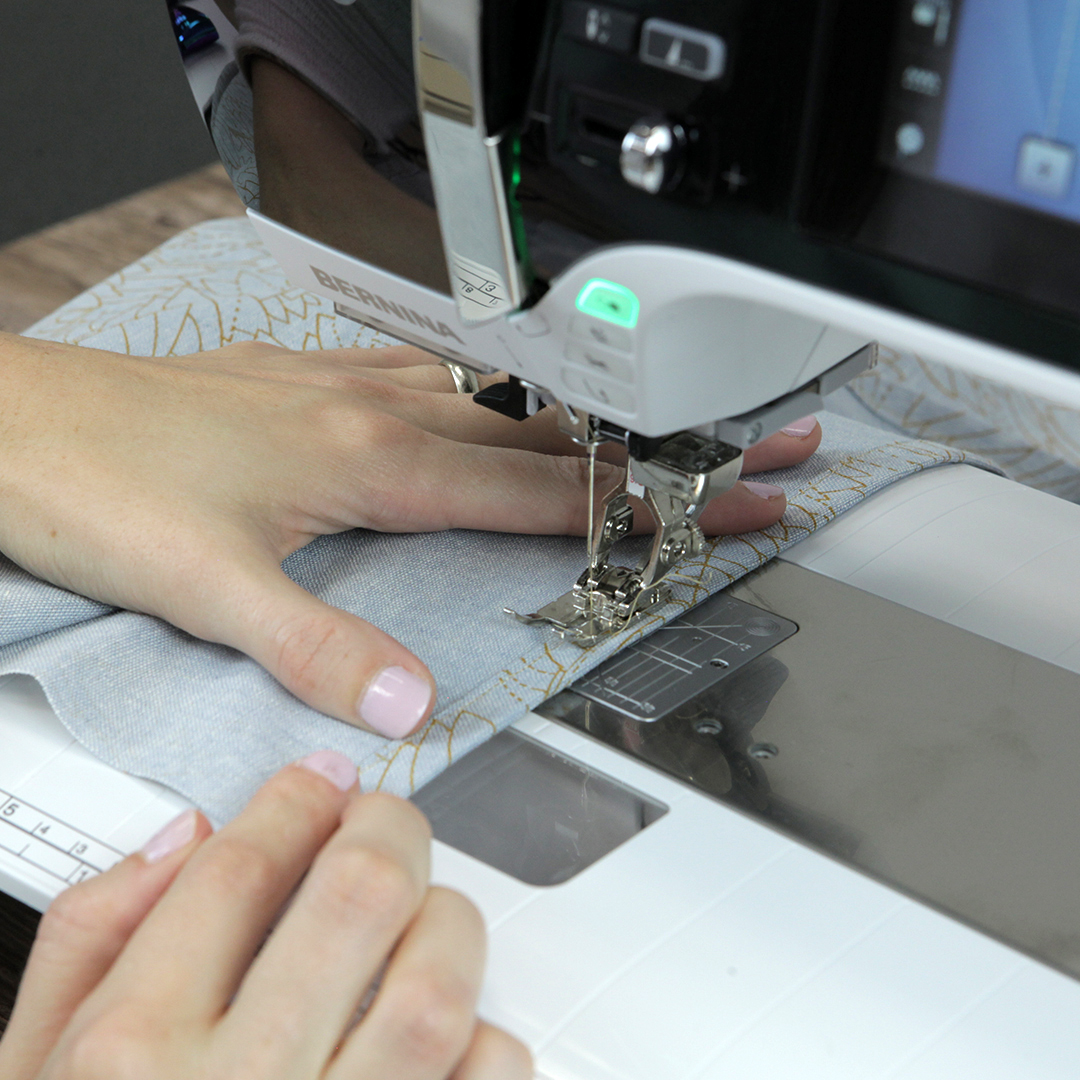
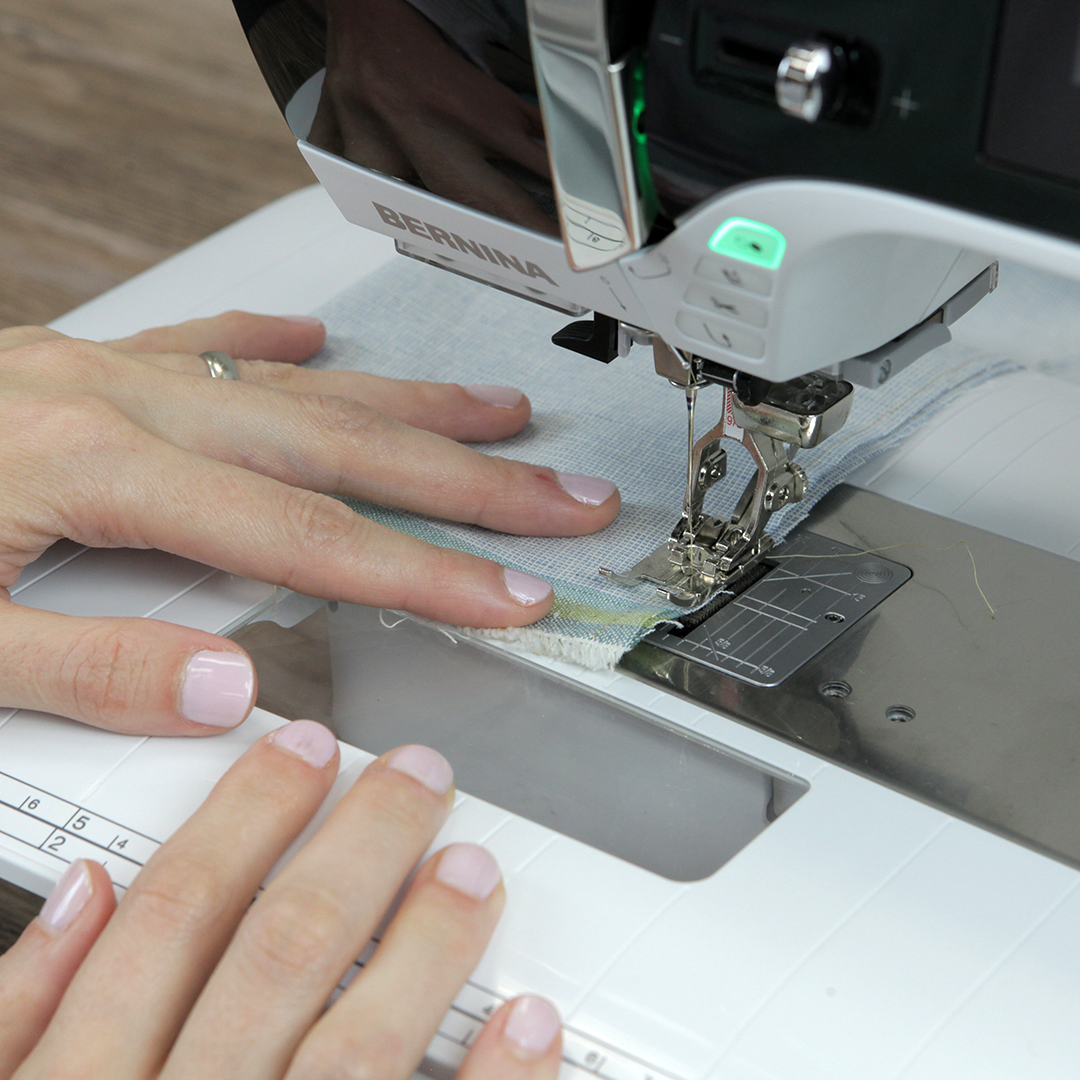
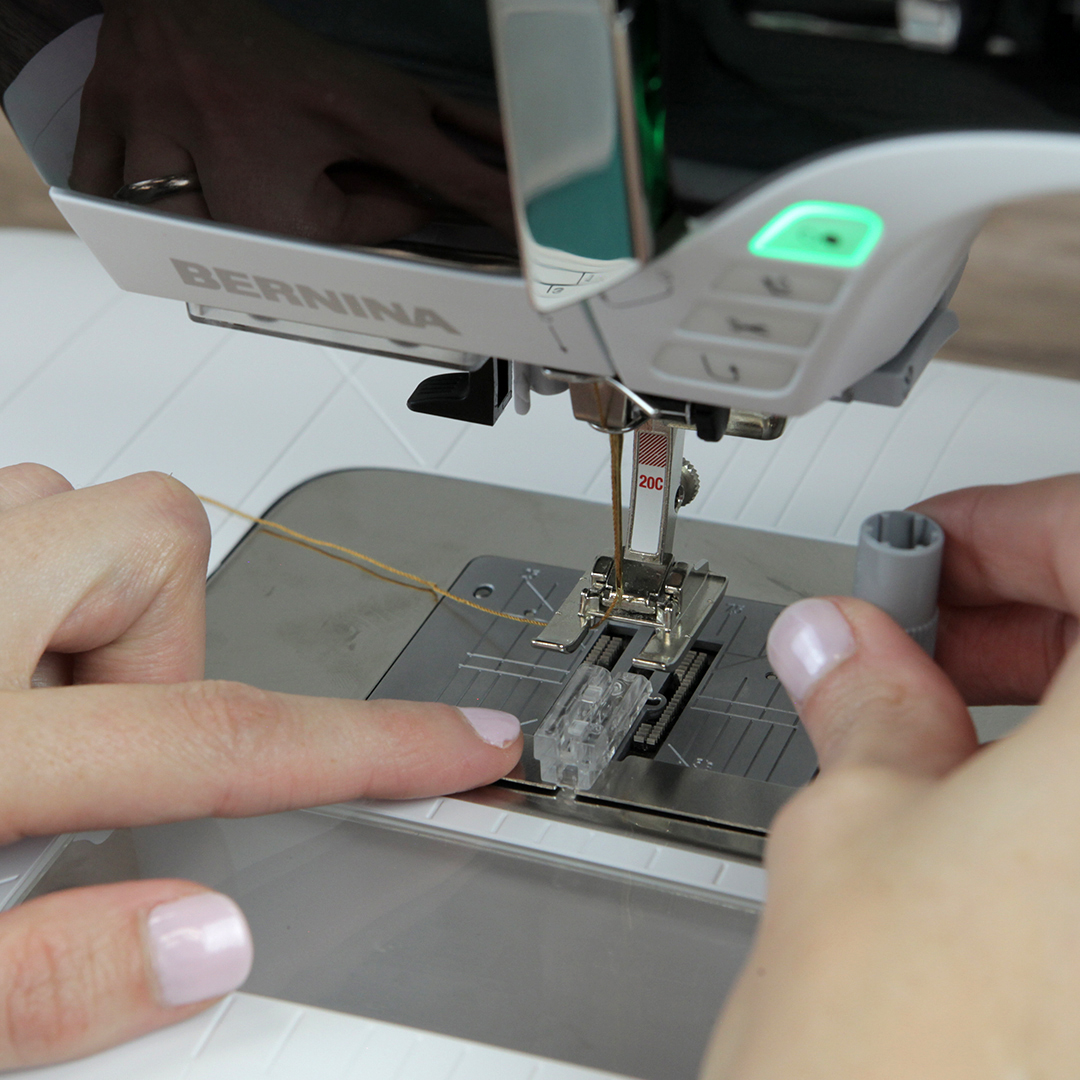
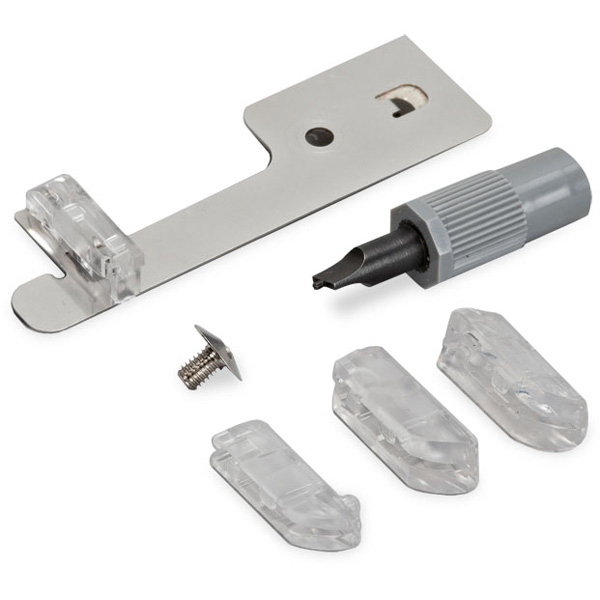
Step 3. Install the Spanish Hemstitch attachment
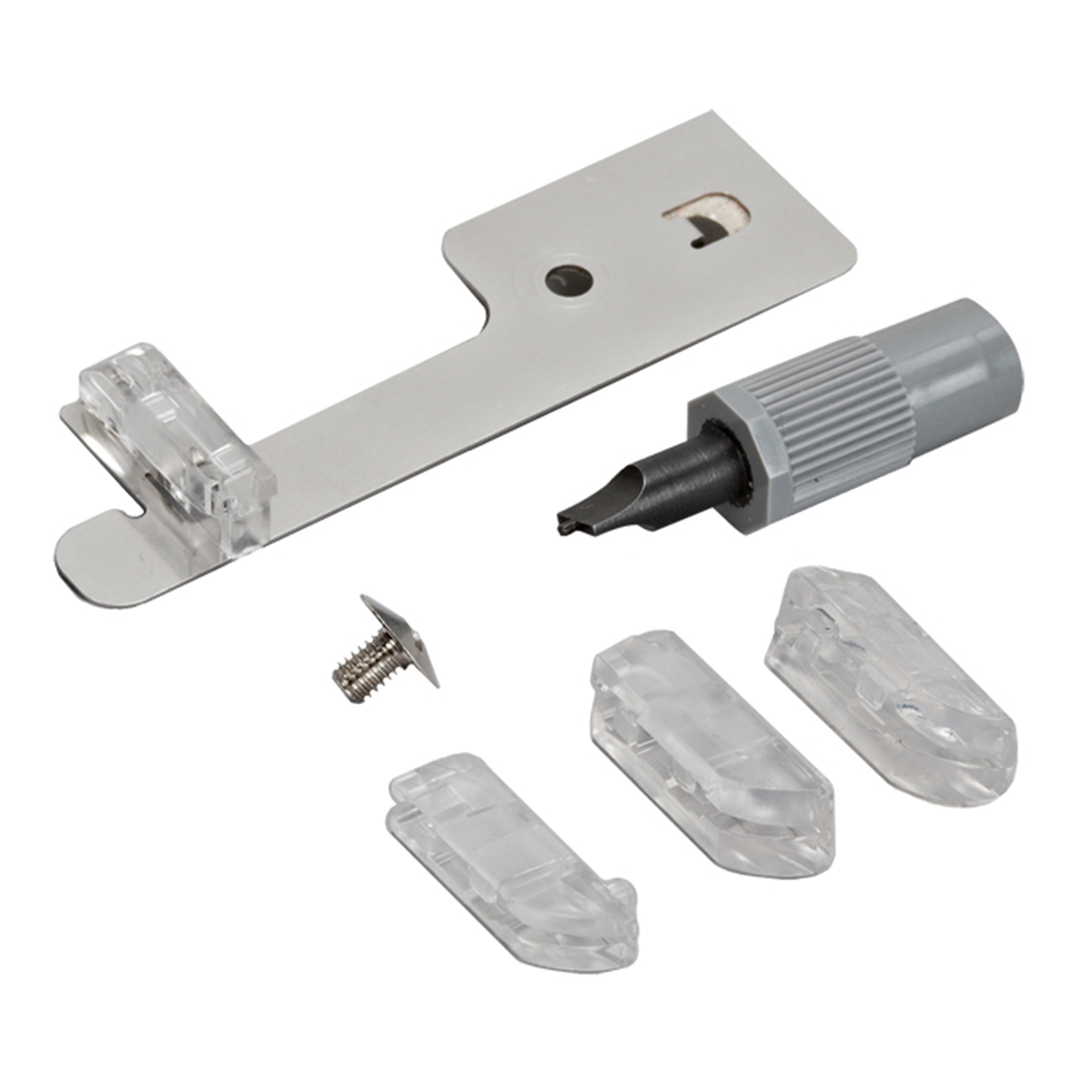
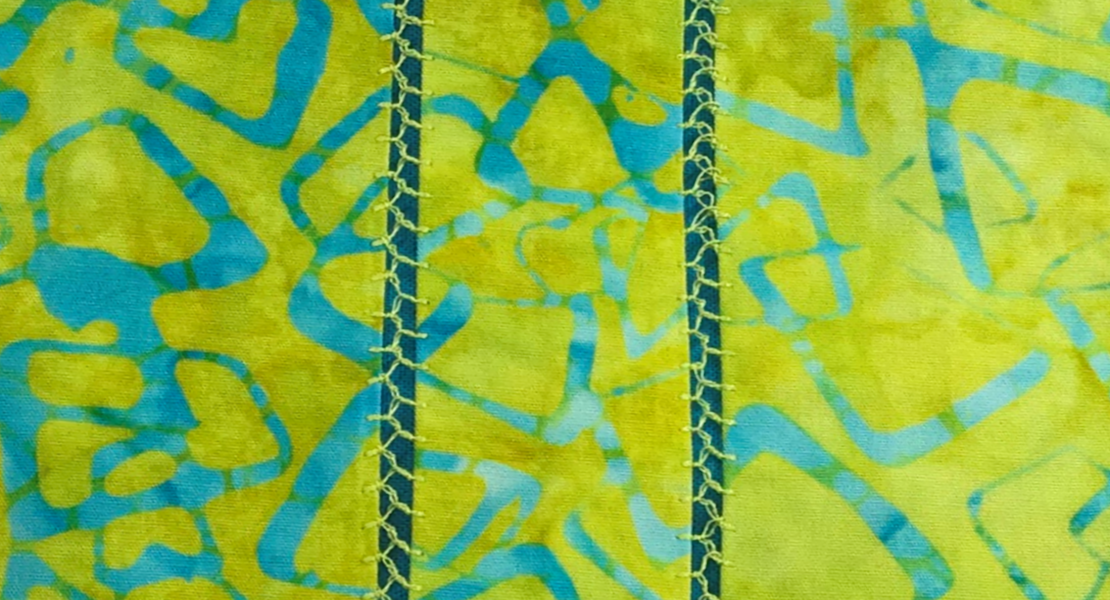
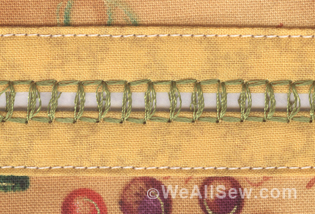
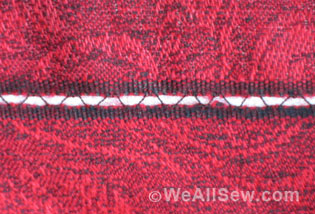
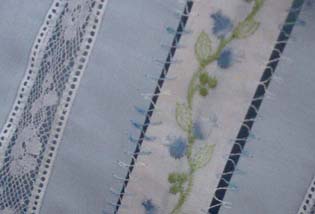
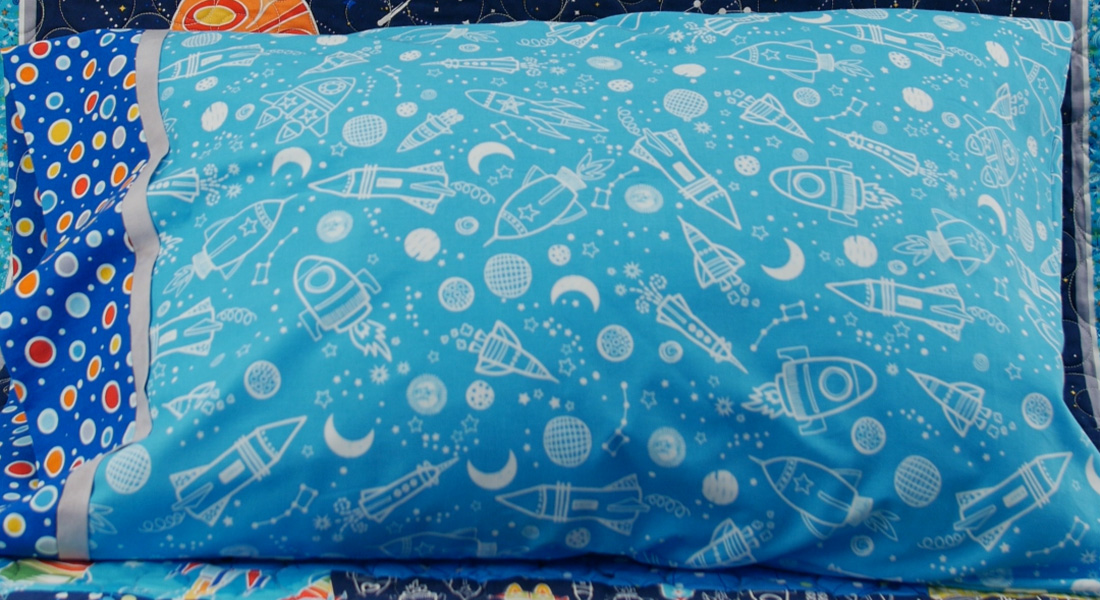
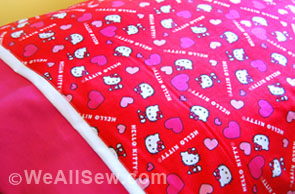
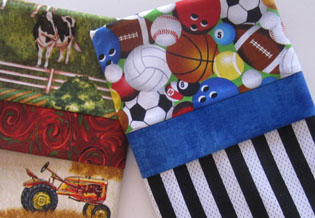
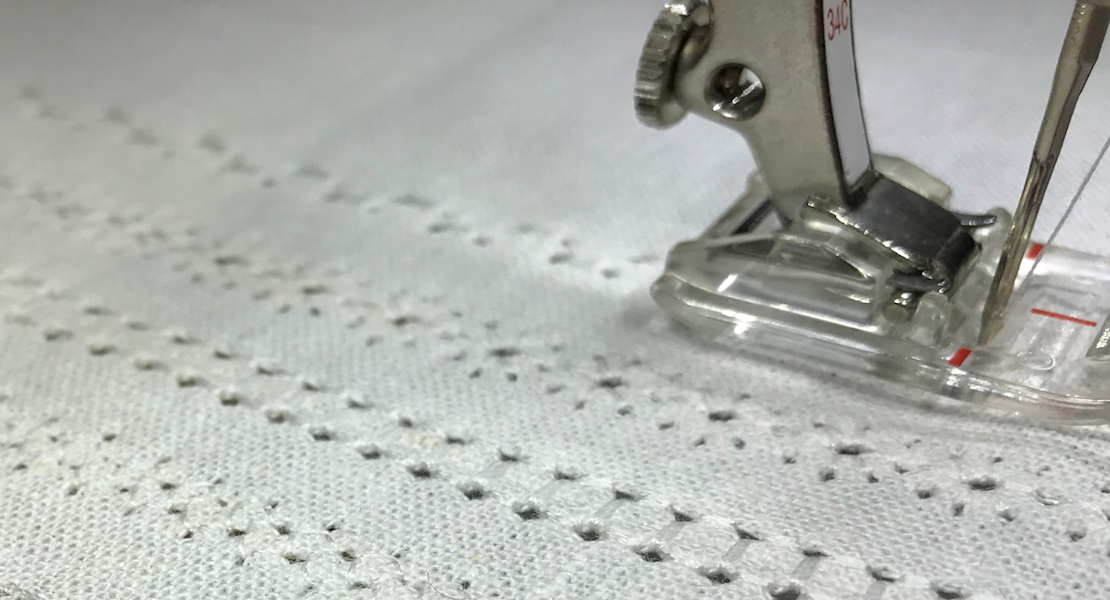
The Spanish Hemstitch attachment #47 acts as a spacer so the stitches are sewn from edge to edge with a consistent distance between them, creating an open lacy look. You can even add a decorative cord or thread through the center.
The attachment will work with both 9 mm and 5.5 mm machines and includes a fastening plate that screws into the free arm of your BERNINA machine. It is intended to be used with Open Embroidery Foot #20 or #20C. The attachment comes with four acrylic spacers; two for each machine stitch width. Each pair has one attachment for thinner, lighter fabric and one attachment for thicker fabrics. The larger 9 mm spacer should only be used on 9 mm machines, but the smaller 5.5 mm spacer can be used on all current models.
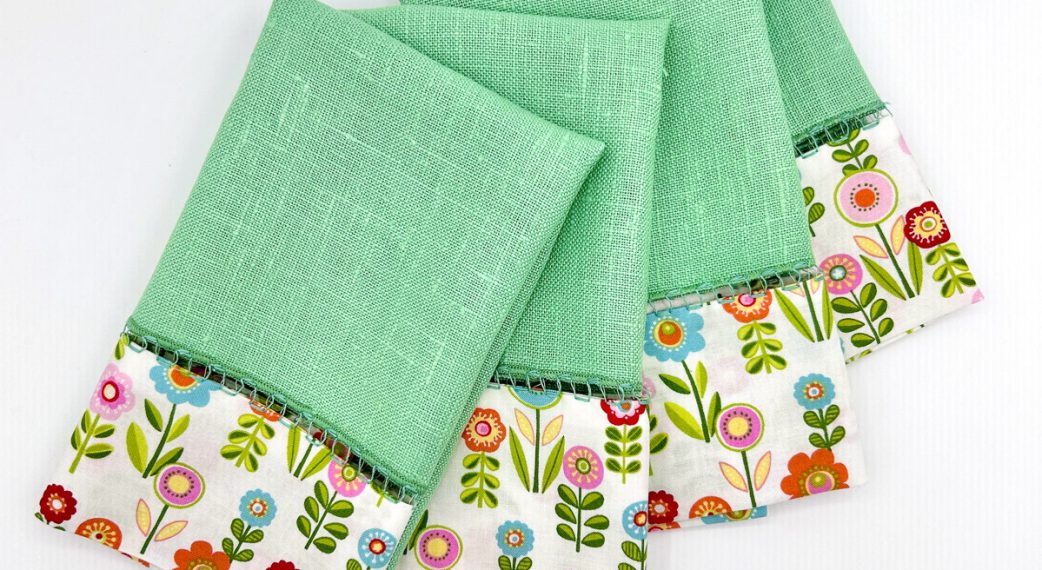
Step 4. Sew the cuff to the body with decorative stitch
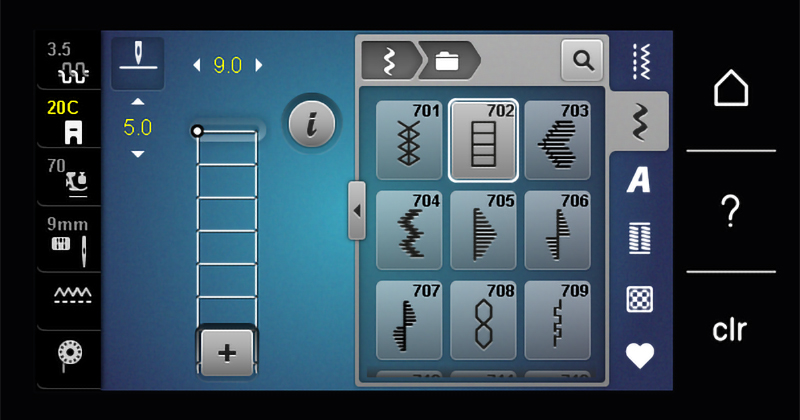
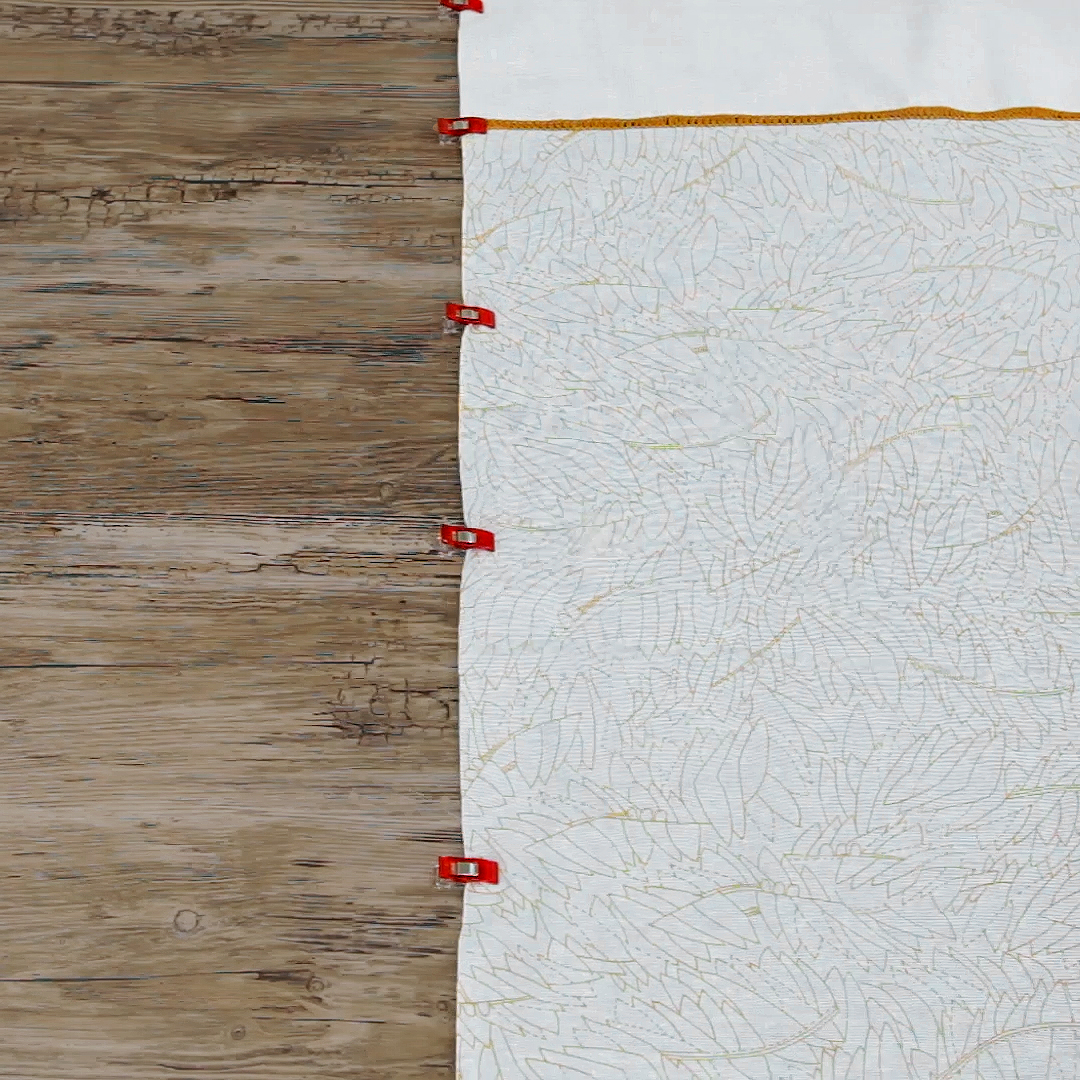
Selecting the stitch is important for the success of this attachment. You will want to choose a side-to-side decorative stitch that makes contact at both the left and right most edge and has limited action in the middle. I picked hemstitch #702 and set the width to 9mm and the length to 5mm.
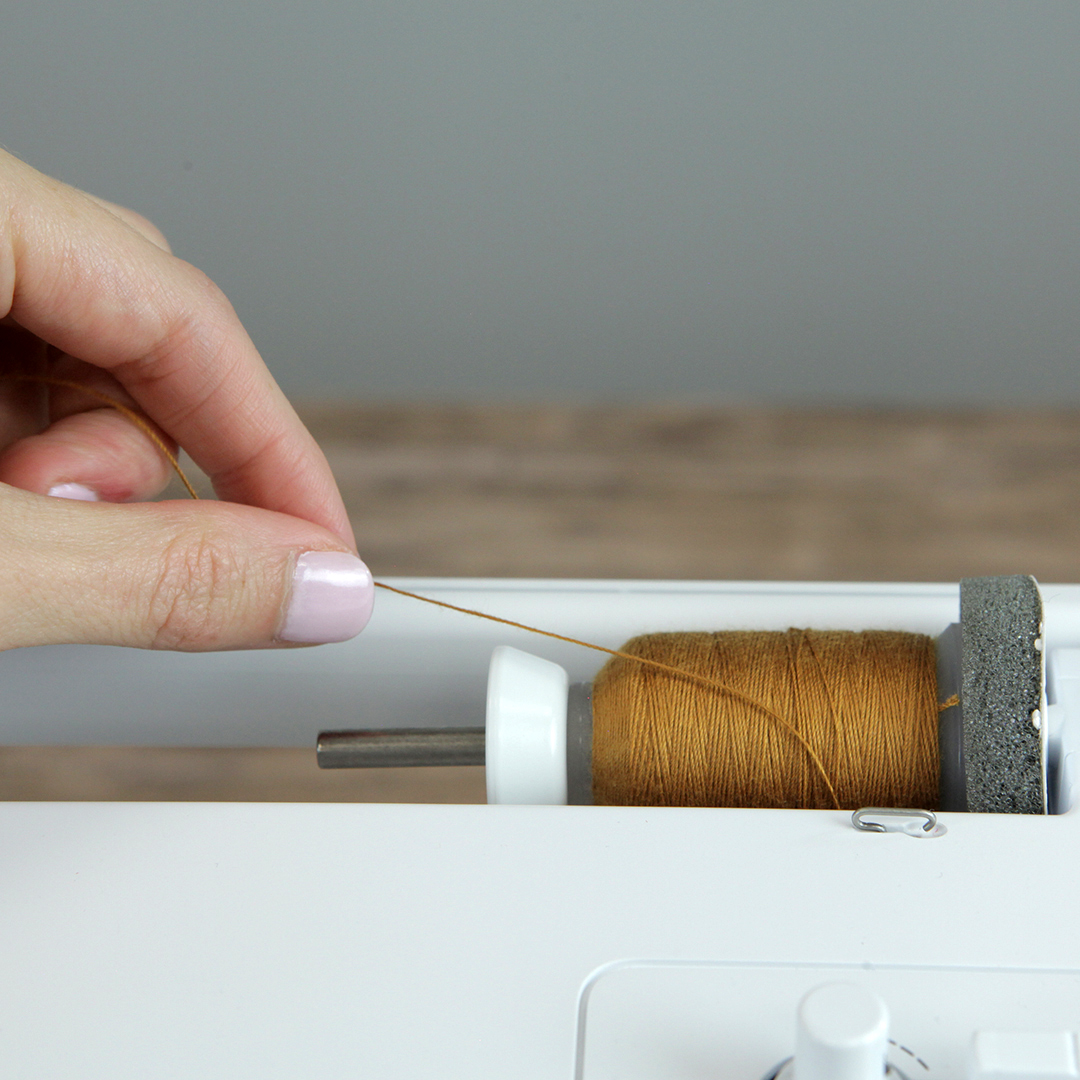
Choosing a decorative thread will make this stitch pop even more. I had some lovely jeans thread leftover from jeans making and thought it would look nice with my fabric. With this 30wt thread, I used a 90/14 topstitch needle. Also, I matched the thread color with standard Mettler Metrosene for the bobbin thread. Try decorative threads in various combinations to suit your project and thread availability. It is always a good idea to audition the stitch before beginning your project. Thread and stitch choice will produce different results.
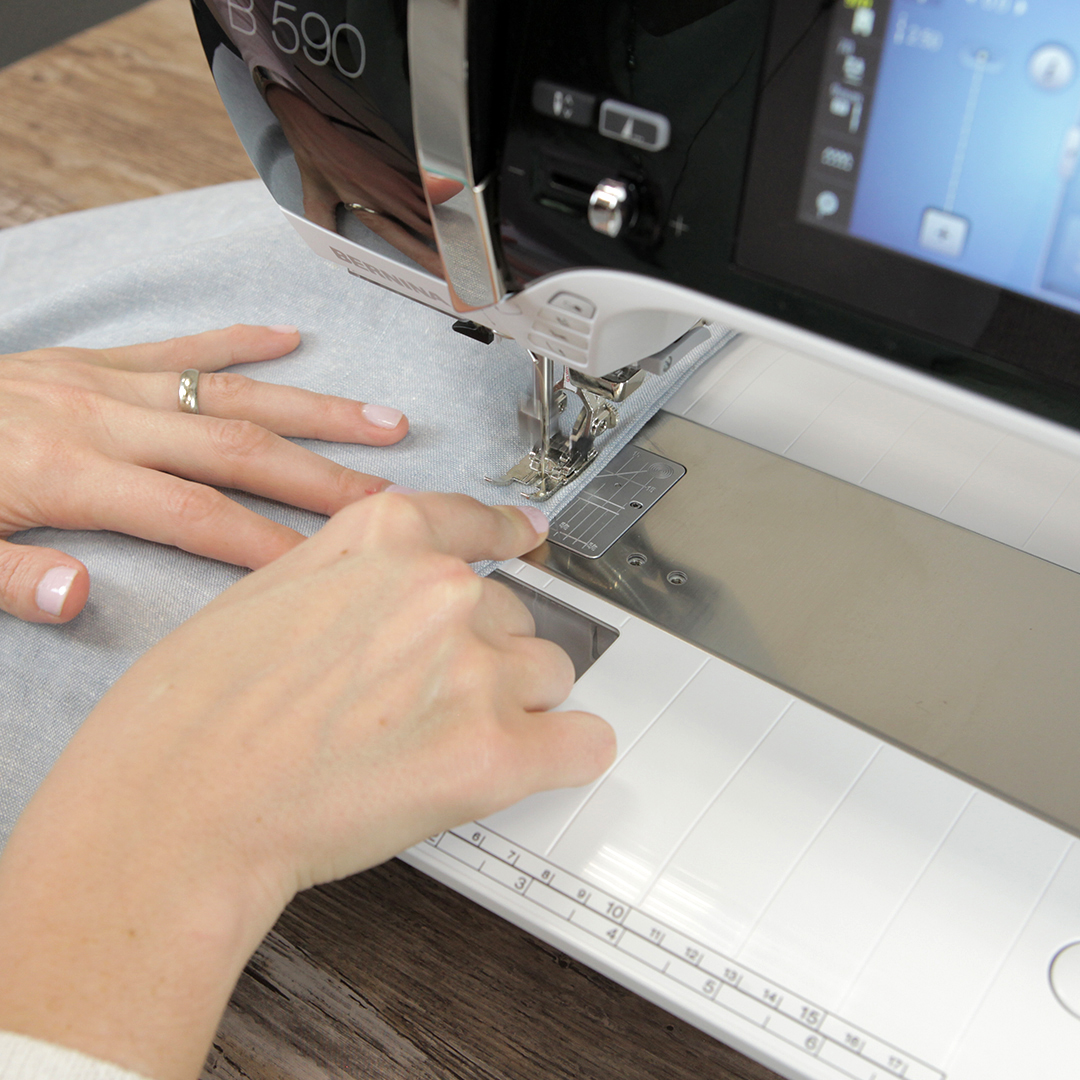
Tip: Because each fabric will move on one side of the feed dog independently, I like to draw some matching marks from side to side on both the cuff and body fabric. This enables me to check that my fabrics are moving through about the same rate.

Sew the decorative stitch the full 42” length of the hemmed fabric edges. Go slowly and carefully watch that the fabric aligns with the spacer on both sides. I find this is a great time to use the Free Hand System to position the fabric and I the start/stop feature with speed control. This allows you to have your hands on the fabric and focus on keeping the sides even.
Trust me the effort is worth it as the result is a very pretty and professional looking stitch.

Step 5. Finish the pillow with a French seam
Now you are ready to finish the pillowcase. Trim up any excess fabric from the cuff so that it matches the main body fabric length.
I love to make pillows on my overlocker but when I don’t, I use a French seam. This keeps all the raw edges encased so the pillowcases can be washed over and over without the worry of fraying fabric. To sew a French seam, you will sew the bottom and side edge twice. Start with a ¼” seam allowance and sew with wrong sides together (NOT a typo). Then turn the project, so that the right sides are facing. Give it a good press, then sew with a slightly larger 3/8” seam allowance.

Turn the pillow case out, press and enjoy. Even my sweet pup, Mo, loves the luxurious new bed linens.

Used Products


What you might also like


10 comments on “Spanish Hemstitch Pillowcase”
-
-
Thank you for your reply. In this project I did exactly as you state sewing first 1/4″ WST then 3/8″ RST. I did sew the side and bottom at one time, although you could do both bottom or side edges first. I think that might make the corner a bit bulky, but the French seam should still be a tidy finish this way too.
-
-
I love it and great information on sewing. I always wanted to do my own pillow cases and now I have. I couldn’t be more pleased
-
I’m happy to hear that you enjoyed the project. Thanks for checking out our blog.
-
-
Hi again Jamie, this is Hilloah from VA. I have this attachment so thank you for a technique to use it for the first time! Yay hemstitch. I hope you are thinking of me when you see the cardigan I made at the Capsule Club. Please, please we need MORE capsule clubs. I know I am not the only sewist who makes garmets. Thanks.
-
Hi Hilloah! Nice to hear from you. I’m always working to create content for the garment sewists out there. Thanks for the support.
-
-
I was taught to make my pillow cases by my grandmother and later my mother who also made them with French seams. But they taught me to make them envelope style, so easy to do and no inner pillows poking out. Love the decorative stitch, can’t find it on myBernette
-
Thanks for your comment. There are so many ways to make pillow cases and you know you can never have to many in my opinion. An envelope style is a great option. I chose to construct this one in this manner so that the decorative application with the featured attachment could be sewn easily.
-
-
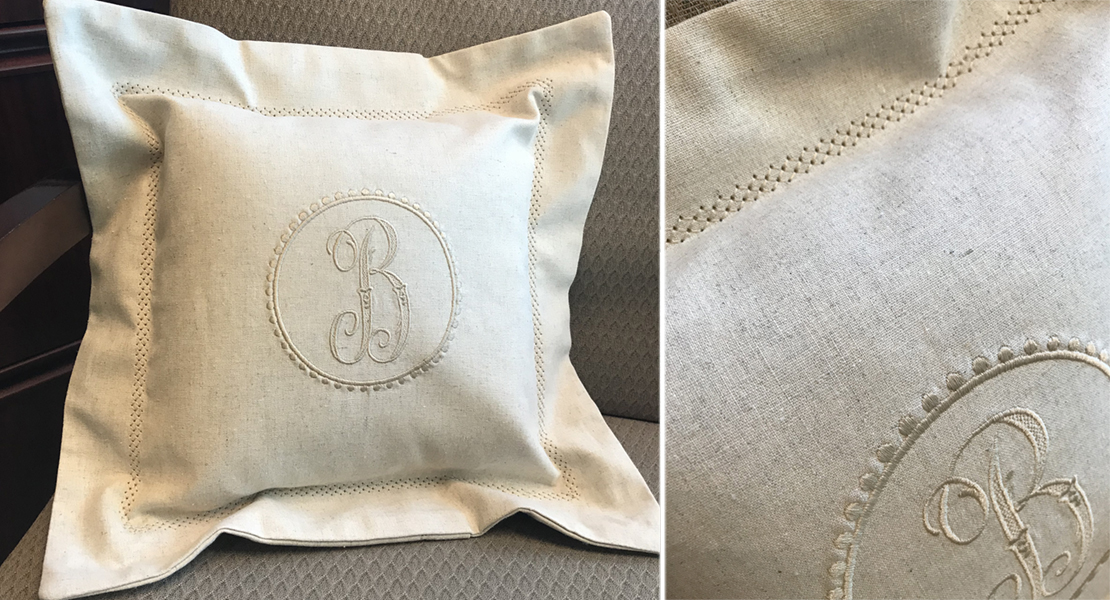
This was a great lesson. I made these pillowcases following your directions and learned how to use my hemstitch foot. I also added a monogram on the cuff and the pillowcases turned out stunning. I made one for my husband with his monogram and added my monogram to mine. Now we don”t get our pillows mixed up when we make the bed!
-
Thanks for your comment. I love that you added a personal touch by monogramming the cuff. What a great idea!
-
Leave a Reply
You must be logged in to post a comment.

I always wonder for the French seams, do you sew both bottom and side seams at 1/4 inch (w sides together) and then turn and do larger 3/8 seam (r sides together) or do you complete both sewings of the bottom seam before sewing the side seam?