Halloween Wall Hanging (Free Embroidery Designs)
Hi! I’m Christine Conner from Amélie Scott Designs and I wanted to share a project with you that featured both machine embroidery and the Spanish hemstitch attachment.
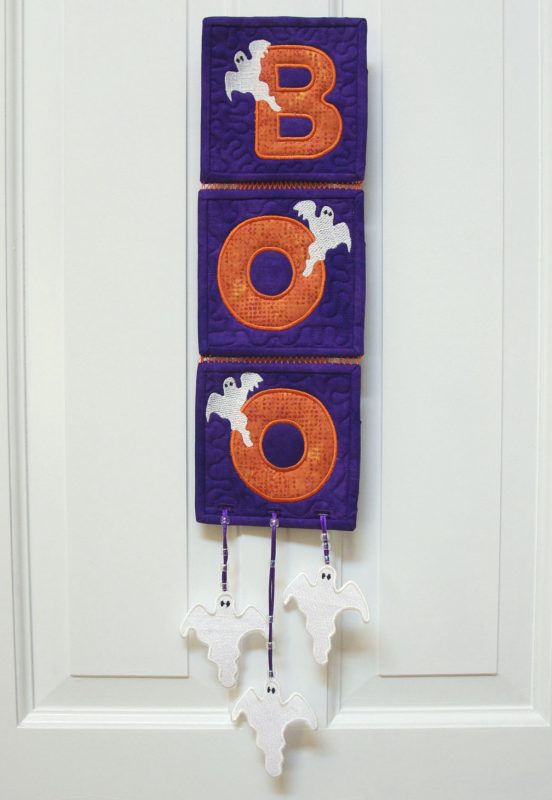
A few years ago, I created three art quilts for a private gallery. All three of these art pieces integrated a hand fagoting method that joined many individual bound rectangles and squares together. It was very difficult keeping everything straight. When I heard about the Spanish hemstitch attachment, I immediately recognized the benefits of such a tool, and I am very excited to share it with you in my Halloween Boo Wall Hanging project.
Materials:
- Embroidery thread (purple, orange, white, and black)
- 12 wt. topstitch or quilting thread, orange
- Size 80 embroidery needle and a size 90 topstitch needle
- 1/2 yard purple fabric cut into the following:
- 3 (6.5″ x 6.5″) purple fabric squares for backing
- 3 (5.5″ x 5.5″) purple fabric squares and batting, fabric is for the background
- 3 (2.5″ x 27″) strips for binding
- 4 (3″) squares of purple background fabric for holes inside the letters
- 1/8 yard of orange cut into the following:
- 3 (4.5″ x 5″) orange fabric rectangles for letters
- 1/6 yard of white fabric and organza (optional) cut into the following:
- 3 (5″) squares of white fabric for ghost
- 3 (5″) squares of organza fabric to lay over white squares when making ghost charms (optional)
- Practice fabric and batting scraps for Spanish Hem
- 2 (5″ x 8″) fabric scraps, and 2 (2.5″ x 8″) batting scraps
- 3 cuts of Nylon Mesh or Poly Mesh embroidery stabilizer for hooping
- 2 cuts of water soluble embroidery stabilizer for hooping
- Large Oval Hoop 145mm x 255mm
- 505 Temporary Spray Adhesive
- 1 yard of cord or ribbon for hanging ghost
- 1 plastic ring
- 3 beads for hiding knots (optional)
- Painter’s tape (optional)
- Fray check (helpful)
BERNINA Feet:
- Embroidery foot #26
- Patchwork foot #57/#57D with guide or Patchwork foot #97/#97D
- Spanish hemstitch attachment
- Open embroidery foot #20/#20C/#20D
Embroidery Designs:
How To Machine Embroider the BOO Wall Hanging Designs:

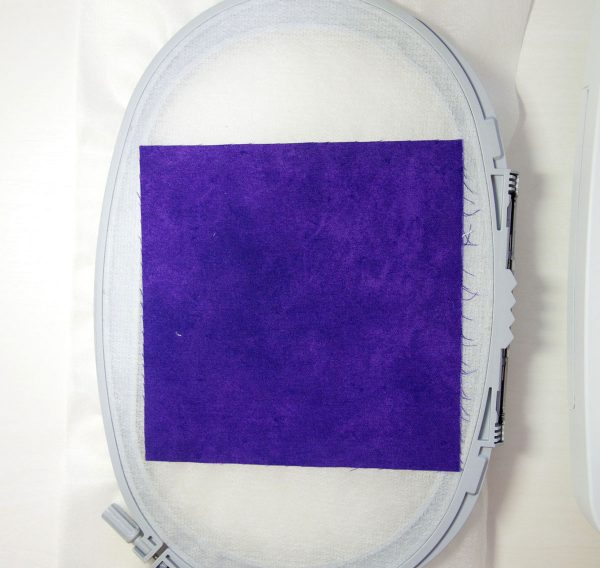
Load the embroidery design Boo-B into the machine, and thread machine with purple thread. Hoop with a poly or nylon mesh stabilizer only.
Start the machine. The machine will stitch a placement line for the batting and fabric.
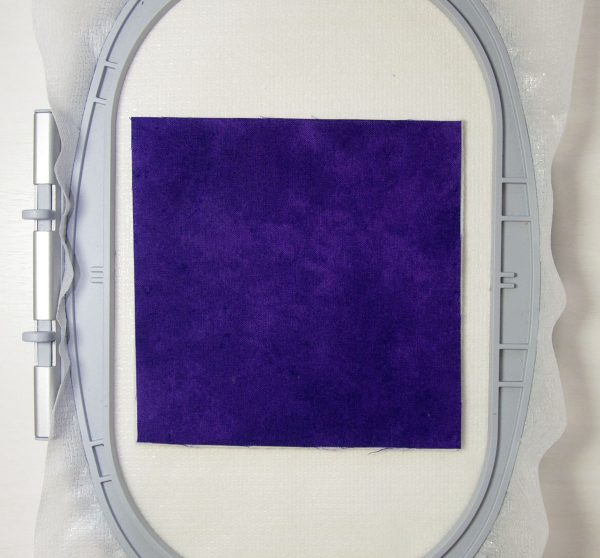
Place the batting inside the placement line, and then the fabric on top of the batting, with the right side facing up. Hold in place with painter’s tape.
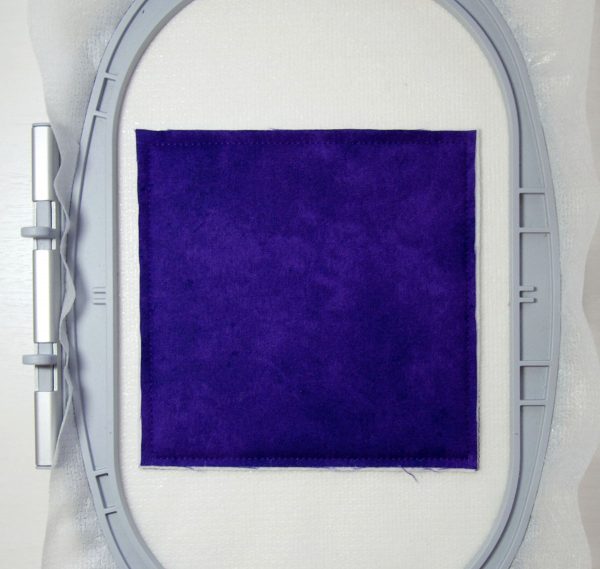
Start the embroidery machine. The machine will automatically tack the fabric and batting in place.
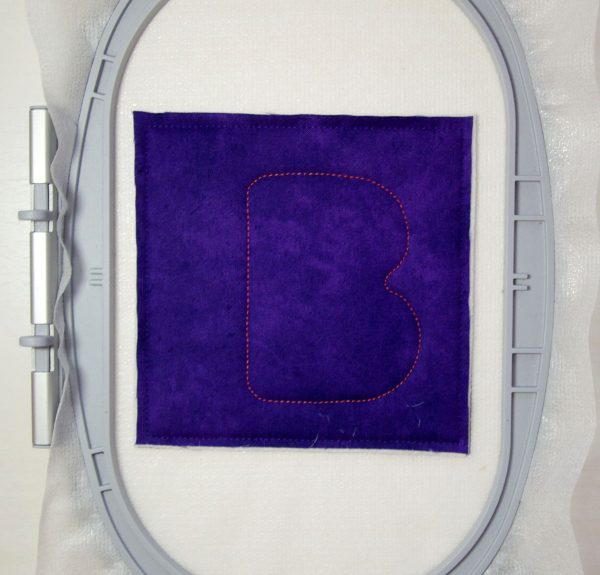
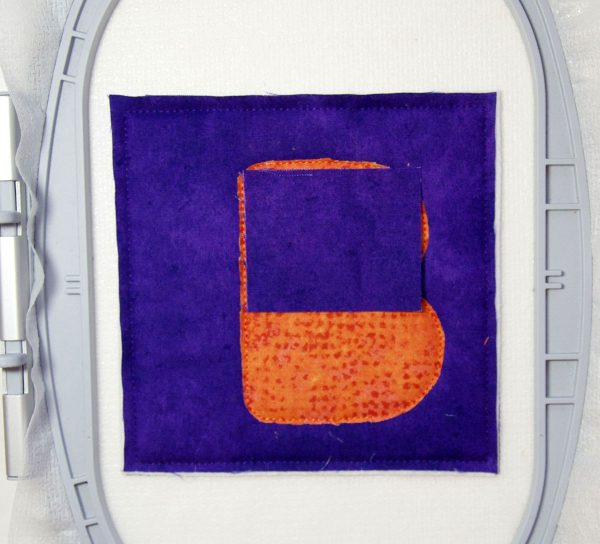
When the machine stops, change the thread to orange. Start the machine. The machine will stitch the letter B.
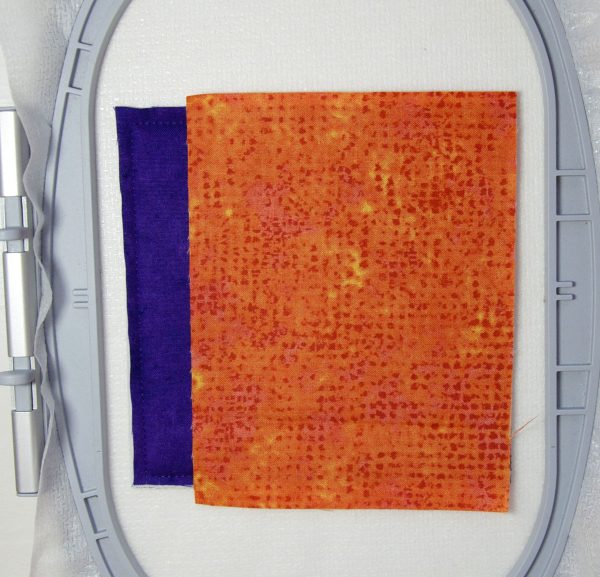
When the machine stops, place the orange piece of fabric over the placement line. Hold in place with painters tape or fingers.
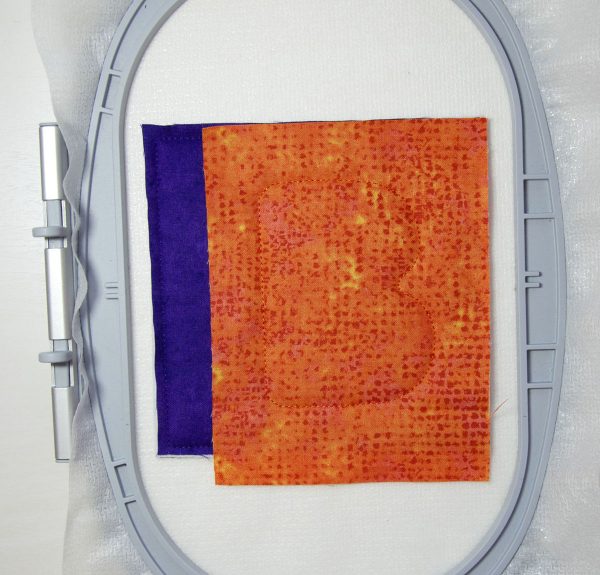
Start the machine. The machine will tack the fabric down.
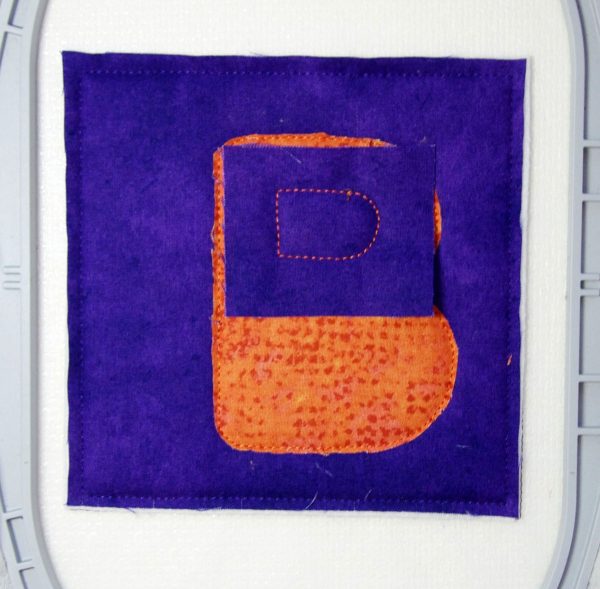
Note: I have made the stitches black in the photo so you can see better.
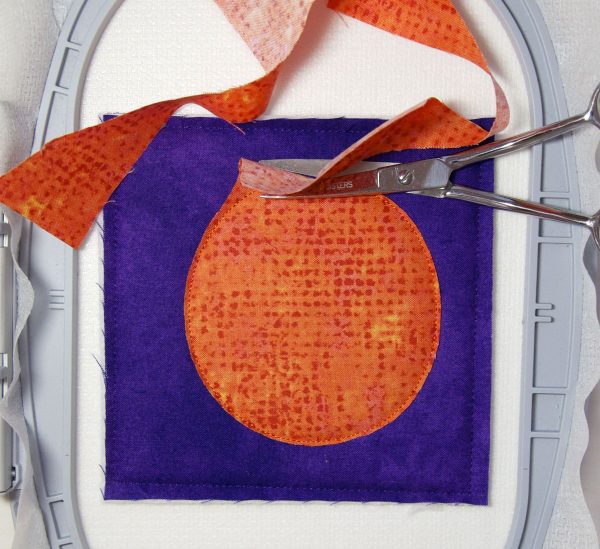
When the machine stops, remove the hoop from the machine, but do not remove the fabric from the hoop. Trim away the excess fabric. Trim as close as you can to the stitches without cutting them. Return the hoop back to the machine.
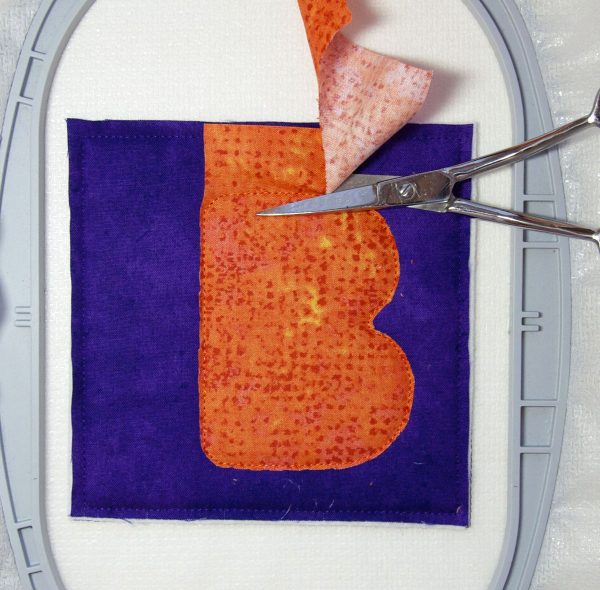
Start the machine. The machine will stitch the top hole in the letter B. Instead of cutting the fabric away to show the background, we are going to create another appliqué. This will be easier than trying to cut into such a tiny space.
When the machine stops, lay the 3″ square of purple background fabric over the placement line.
Start the machine. The machine will stitch a tack line
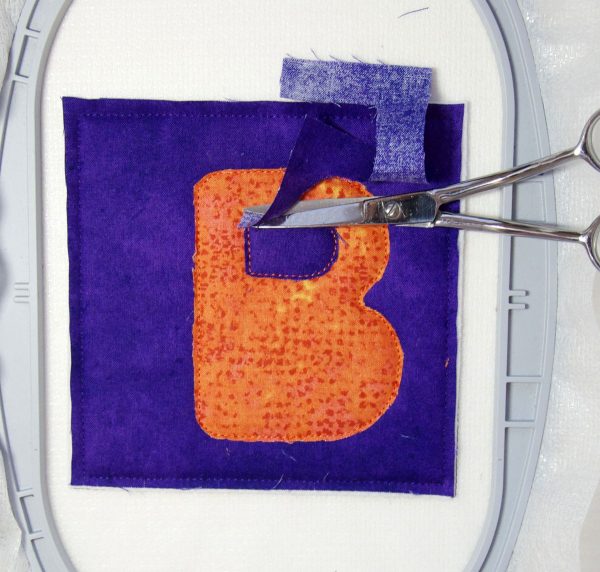
As before, remove hoop from the machine. Trim close to the stitch line to remove the excess fabric. Return the hoop to the machine.
Repeat the process again for the bottom hole.
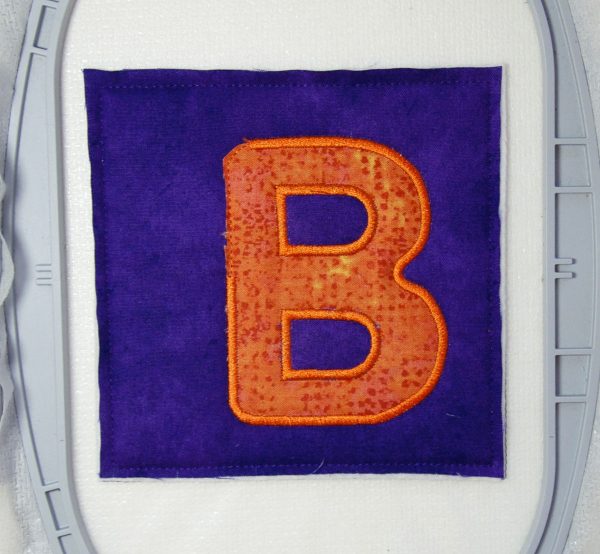
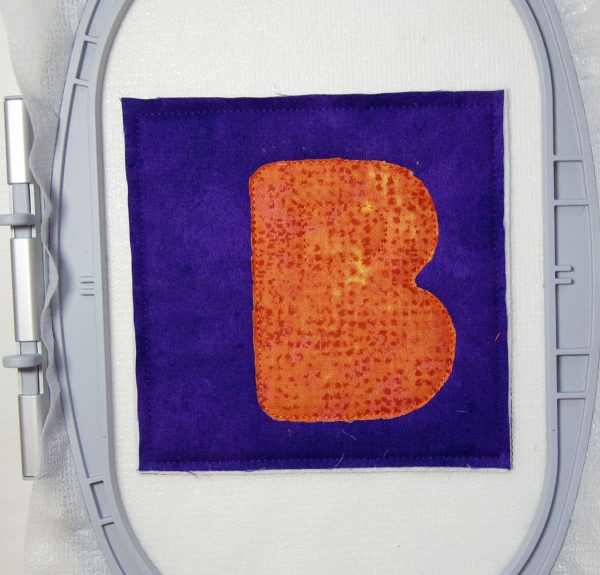
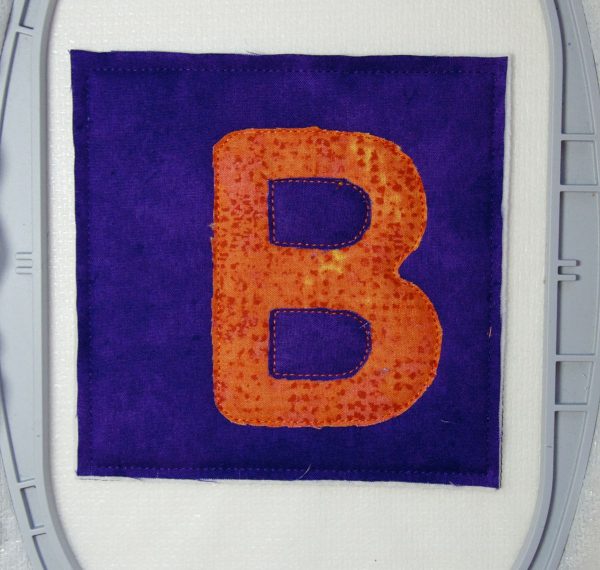
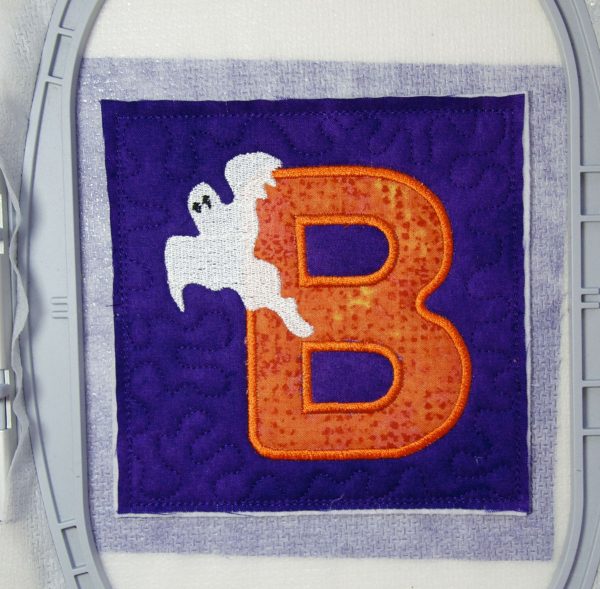
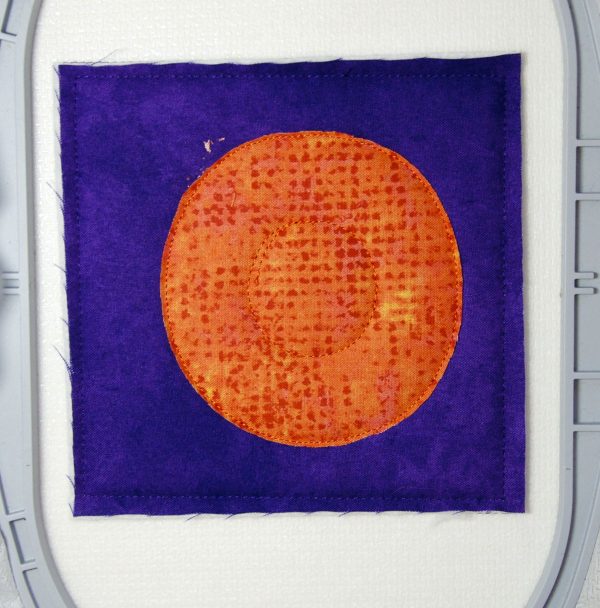
Change the thread to orange. Start the machine. The machine will stitch a satin stitch around most of the outer “B”, and completely around the two holes.
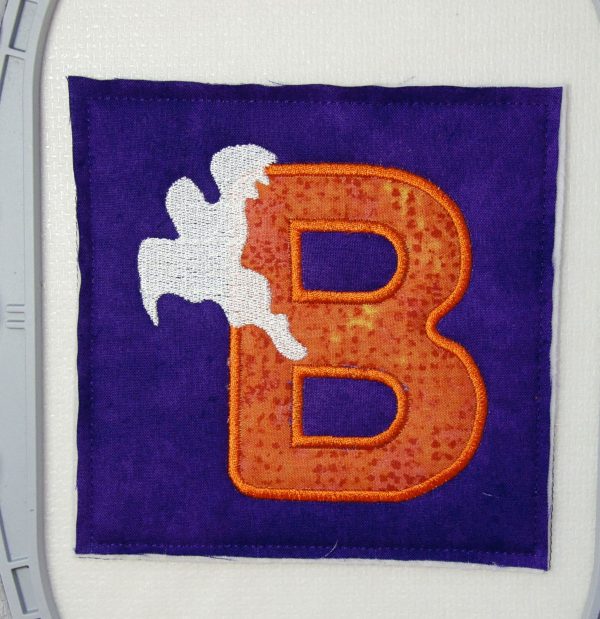
Change the thread to white. Start the machine. The machine will stitch the ghost.
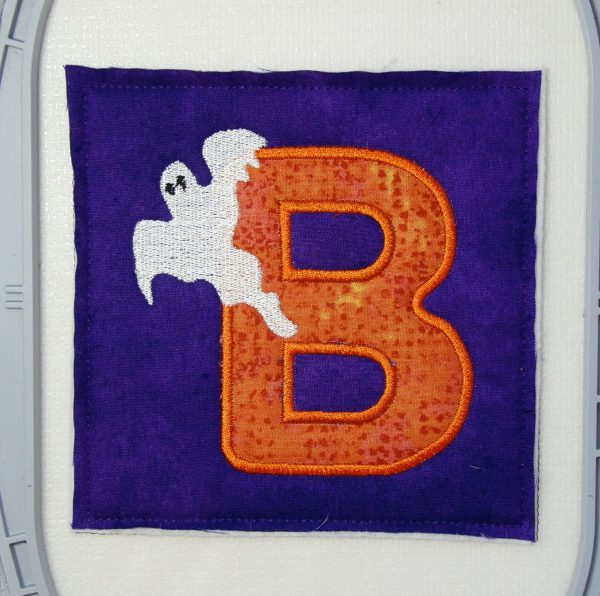
Change the thread to black. Start the machine. The machine will stitch the eye’s on the ghost.
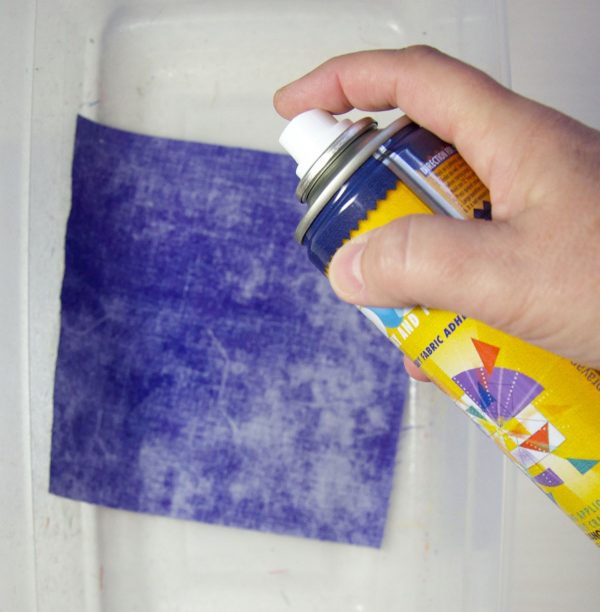
Now you will put the backing on the project. Remove the hoop from the machine, but leave the fabric in the hoop. Turn the hoop over so that the back side is facing up. Spray 505 Temporary Spray Adhesive to the wrong side of the 6.5″ square of backing fabric.
Note: I spray inside a plastic shoe box, to keep the sticky residue form getting on other items in my studio.
Place the sticky side of the backing fabric over the stitched area. Make sure it is smooth, and adheres well.
Return the hoop to the machine. Change the thread to purple. Start the machine. The Machine will tack stitch the back in place. Start the machine again. The machine will quilt the background
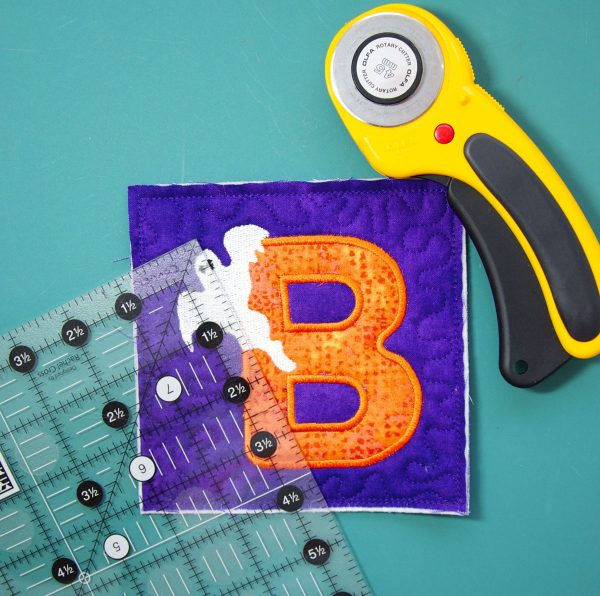
Remove the fabric from the hoop, and trim to a 5.5″ square.
Note: Design Boo-O1 and Design Boo-O2 are stitched out the same way. However, Boo-02 has buttonholes at the very bottom of the design.
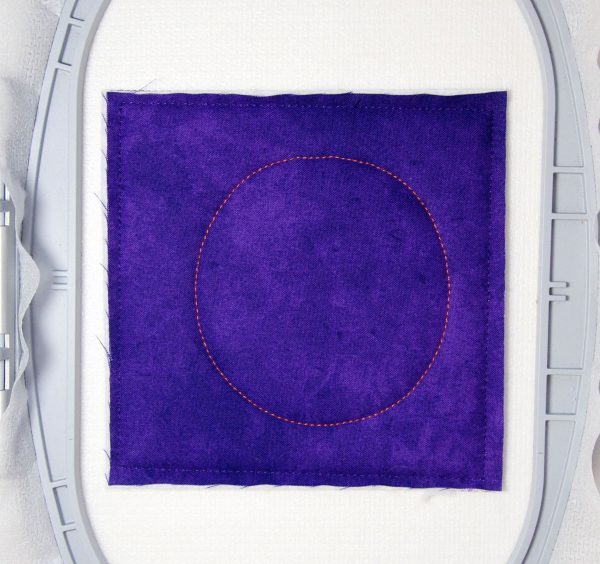
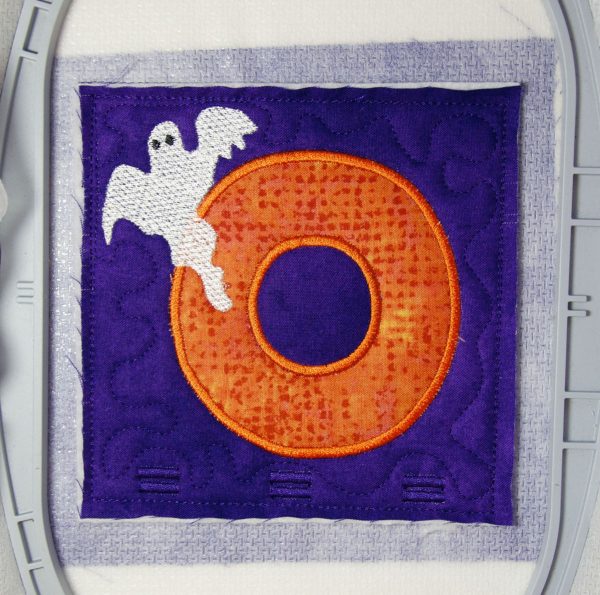
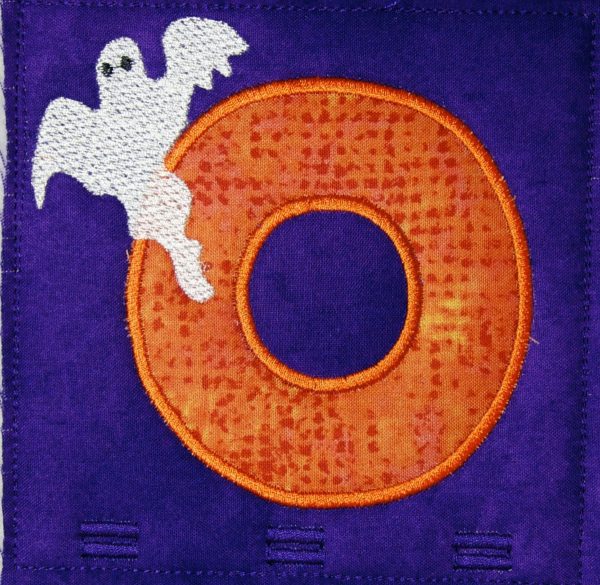
Load the Boo-O2 design into your machine. Repeat steps above for placement of background fabric and batting. Change the thread to orange. Start the machine. The machine will stitch the letter O.
Like before, lay the orange fabric over the placement line. Start the machine. The machine will tack stitch the fabric in place. Remove the hoop from the machine, but don’t remove the fabric. Trim away the excess fabric close to the stitching. Return the hoop to the machine.
Start the machine again. The machine will stitch a placement line. I made the stitch line in the photograph black so you can see it.
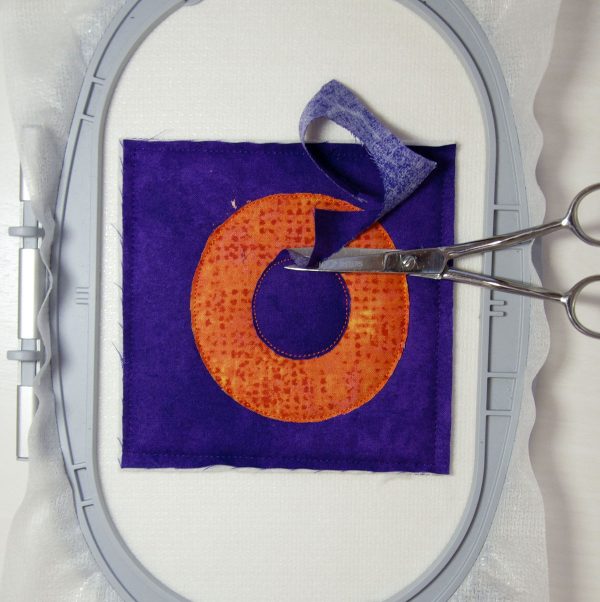
Lay the 3″ purple square over the stitch line. Start the machine. The machine will tack the fabric in place. Remove the hoop again, and trim away the excess fabric. Return the hoop to the machine.
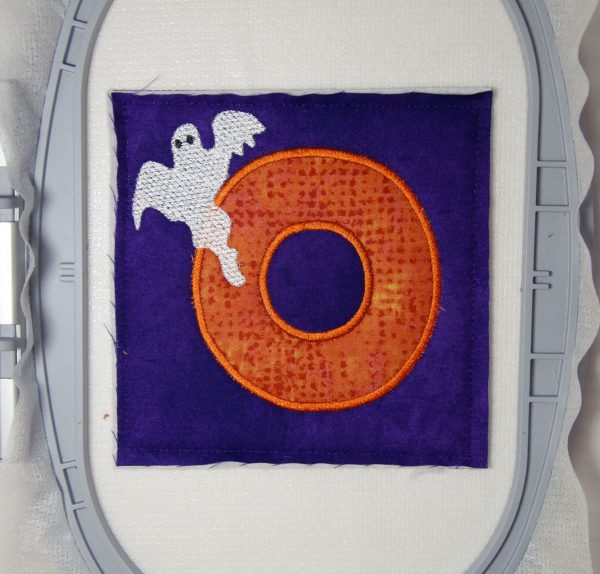
Start the machine. The machine will stitch the satin stitches around the center of the “O” and then along most of the outer “O”. When the machine stops, change thread to white. The machine will stitch the ghost. When the machine stops, change the thread to black. The machine will stitch the eyes.
Repeat steps above where you spray the backing and place it on the backside of the hoop. Return hoop to the machine.
Change thread to purple. Start the machine. The machine will first tack stitch the backing in place. Next the machine will make three (3) button holes at the bottom. (I made mine red so that you can see them in the photo.) Last, the machine will quilt the background. Trim block to a 5.5″ square. Cut button holes open.
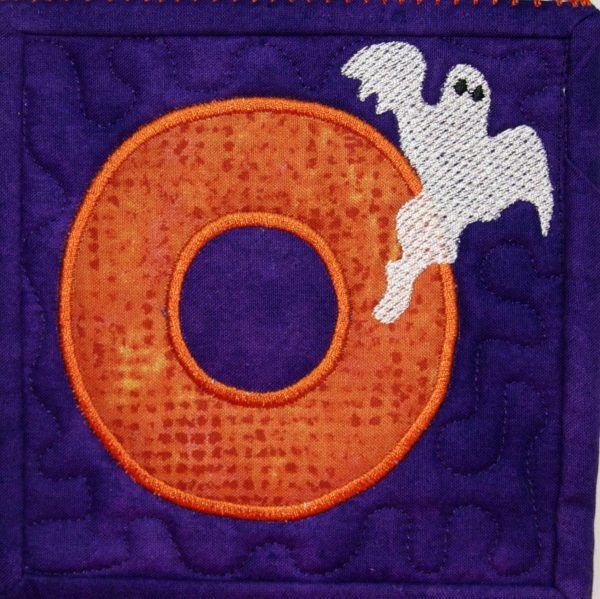
Load Design file Boo-01. Repeat steps above for stitching the background, and for stitching out the O.
Note: Remember that this “O” will not have the button holes.
Use your favorite method to bind all three squares. If you need help with binding, check out this tutorial.
Instructions for Assembling the BOO Wall Hanging:
Video that shows attaching and using the Spanish Hemstitch Attachment
If you don’t have experience using the Spanish hemstitch attachment, this video is a great place to start.
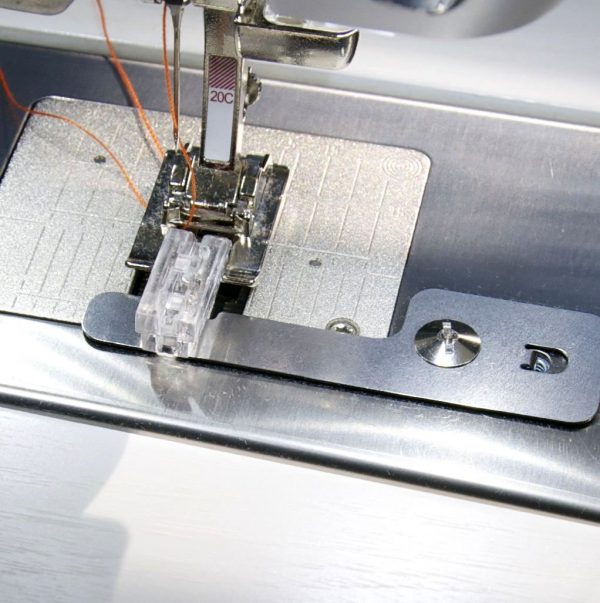
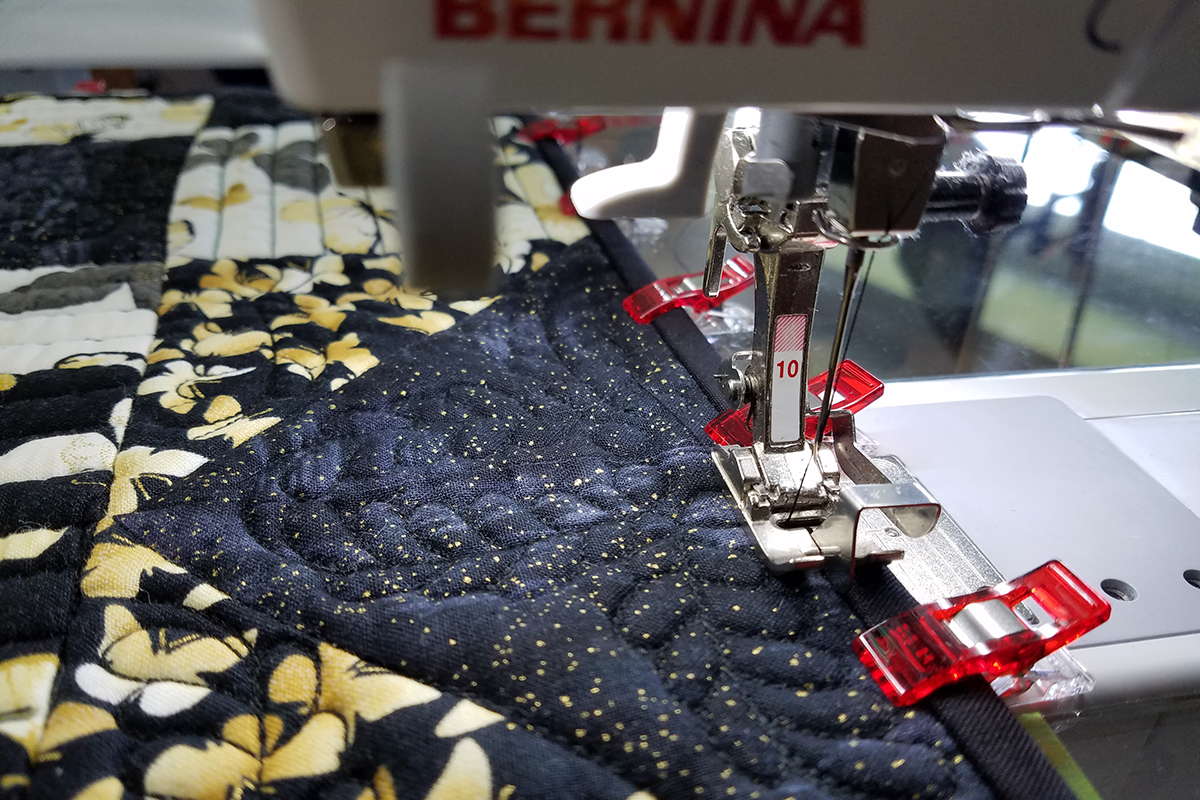
Set up your machine for sewing. Put heavy topstitch thread in both the bobbin and the top. (I tested 12 wt Sulky, and I would avoid using the thread cutters on your machine since the thread is heavy.) Attach the Spanish hemstitch attachment to your machine with the 9mm guide. Attach the #20 Open Toe Foot to your machine. Choose stitch #17, the Lycra stitch. Change the width to 9.0mm and the length to 1.0mm.
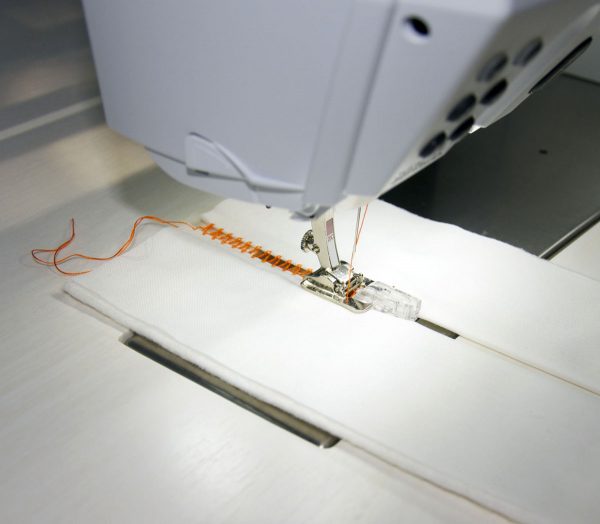
Practice the fagoting stitch first on two scraps. I took two 5″ x 8″ rectangles, and two 2.5″ x 8″ strip of batting. I folded the fabric strip in half lengthwise, and inserted the batting inside. This gave me two folded edges to join with the Spanish Hemstitch Attachment.
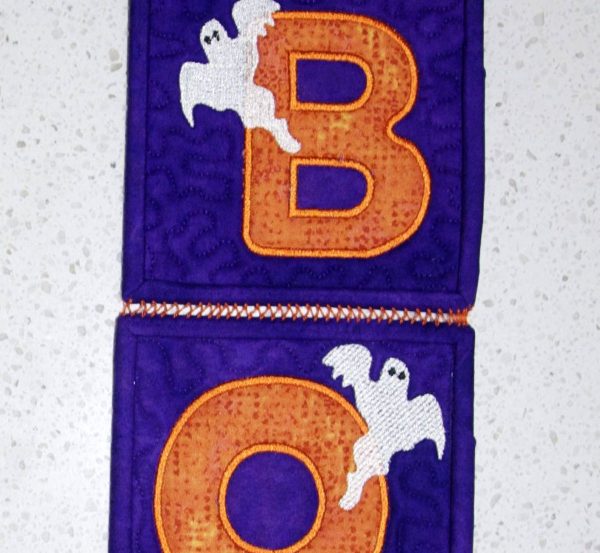
When you feel confident, use the Spanish Hemstitch Attachment to attach the three squares “B”, “O”,and “O” together. (The “O” with the buttonholes goes on the bottom.) Leave a long enough tail of both top thread and bobbin thread at the beginning so you can hand tie a hand knot when you are finished.
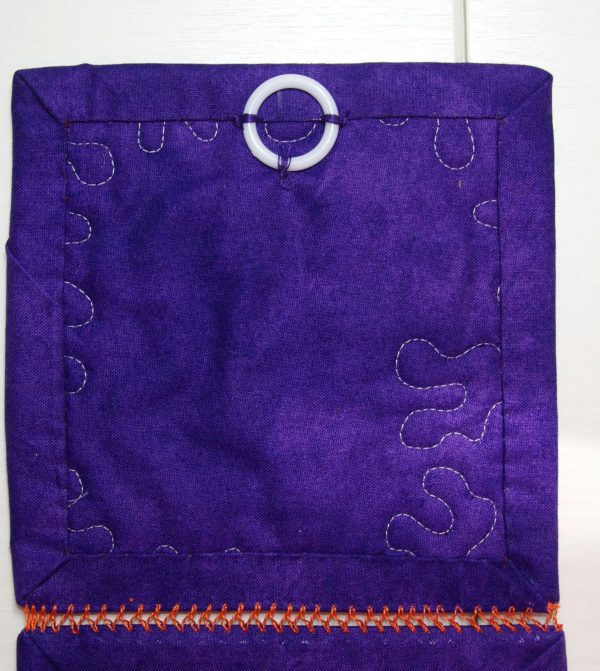
Attach a plastic O ring on the center top back of the letter B for hanging.
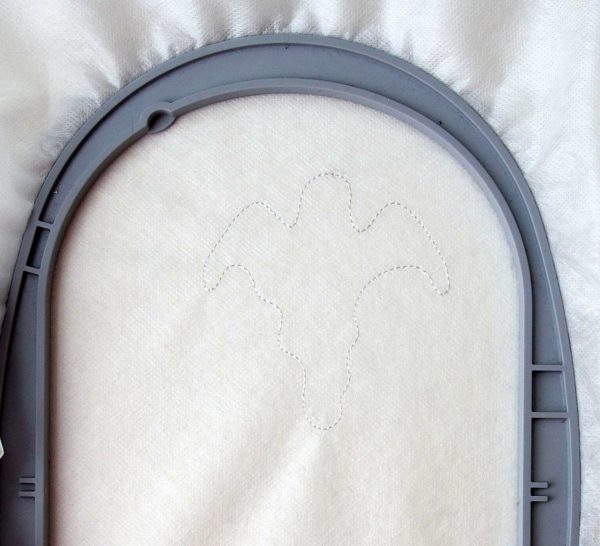
Note: We are going to stitch all three ghost charms in one hooping. I have also given you the design so it can be stitched out one ghost at a time. That file is called Ghost1.
Load Ghost3 design into your machine. Hoop 2 layers of water soluble stabilizer. Start the machine. The machine will stitch the placement line for the first ghost. Thread machine with white or light gray thread (Sometimes the white is hard to see.)
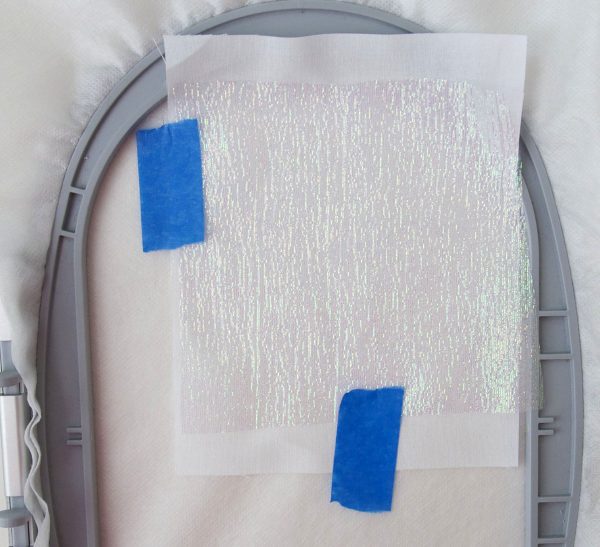
Lay a 5″ square of white fabric and a 5″ square of organza, if you choose, over the placement line. Tape to hold in place. Start machine. The machine will tack stitch the fabric in place.
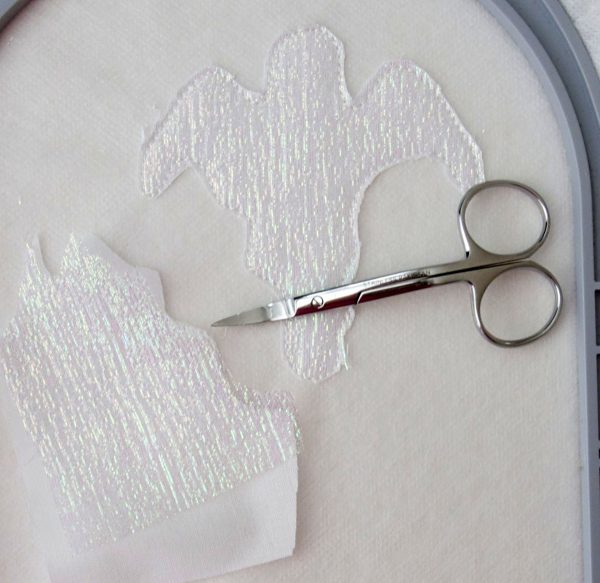
Remove the hoop from the machine, but do not remove the fabric. Trim away the excess fabric. Return to the hoop. Repeat this process for the other two ghosts.
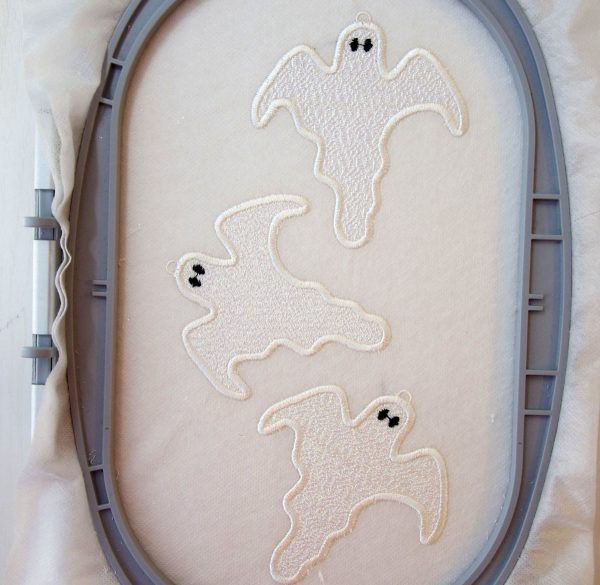
Change thread to white. Start machine. The machine will satin stitch around all three ghosts. When Machine stops, change the thread to black. Start the machine. The machine will stitch the ghosts’ eyes. Remove the ghost from the hoop. Cut away most of the stabilizer. Lay the three ghosts in a shallow bowl of water and let them soak for a few minutes to remove the rest of the stabilizer. Dry on a cloth.
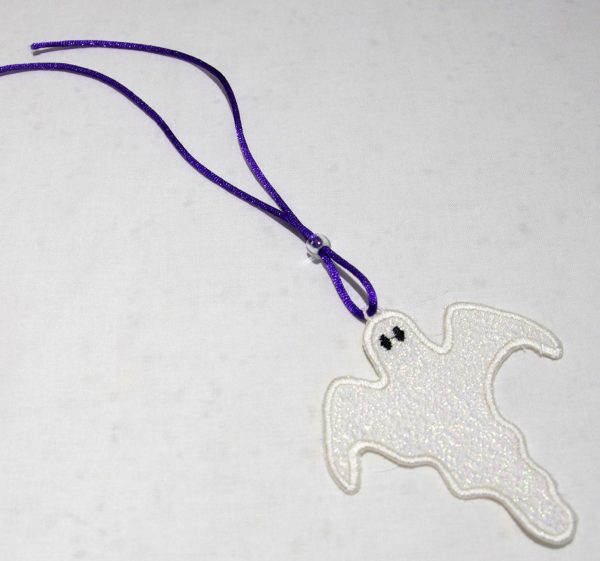
When the ghosts are dry, it is time to hang them on the wall hanging. Cut three 12″ pieces of 1/8″ cording. Place one end through the loop on top of the ghost. Bring the two ends together. Add a Pony bead or two if you like to hold the two cords together.
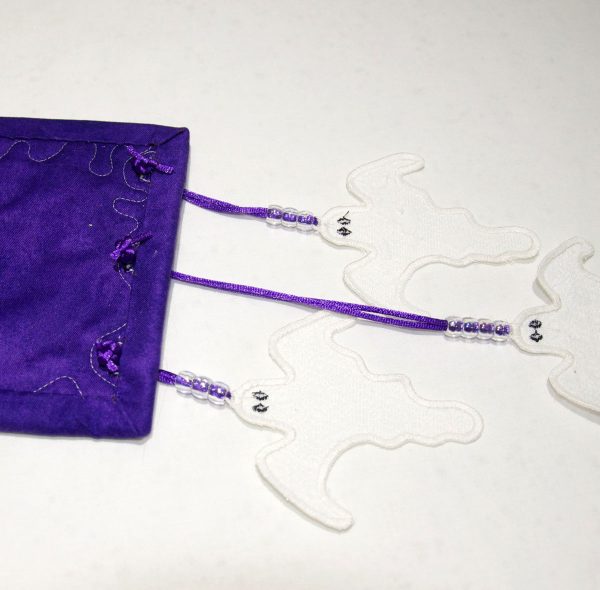
Thread both ends through the button hole. (If it is difficult to thread, wrap scotch tape around the end.) Adjust the length of each ghost to desired length. Flip over so that the back side is showing. Tie three knots, trim the cord, and apply Fray Check to the ends.
Watch my video on how to use the Spanish Hemstitch Attachment to assemble the Boo Wall Hanging:


12 comments on “Halloween Wall Hanging (Free Embroidery Designs)”
What a really great and easy idea for making a unique Halloween decoration; and especially easy to mail to grandchildren who live in other states. I plan on making 4; sending 2 to MD, and 1 each to SC and PA. It would be nice if a pdf was available to download. Thank you for the great idea. js
I’m so glad you like the project! I have made the ghost and hung them off furniture drawer knobs too.
Absolutely darling! I love making Hallowe’en decorations for the house. I think my daughters would love them for their houses too. Since I have the Bernina I’m guessing that I’ll be the one making all 3. It looks like a lot of fun to make so I think I’ll suffer through!!!!!
I am so glad you like the project!
I just wanted to add that the instructions look very straight forward.
I try! Thank you!
Love the wall hanging. I don’t have the Spanish hemstitch attachment so I used grosgrain ribbon to connect the blocks and made the hanger from a loop of grosgrain ribbon. I made this for my granddaughter and great grandson.
How creative of you!
This was a neat project. I just finished it. Can we post a picture on this blog?
Hi! We’d love to see what you created. You will be able to upload your own project to the blog very soon. Right now you can share it with all our fans on our BERNINA USA Facebook page. We are looking forward to seeing your wall hanging!
Hey !!! Cute Cute Cute; I Just finished this project tonight and enjoyed myself all evening. Thank you so much for this neat little project.