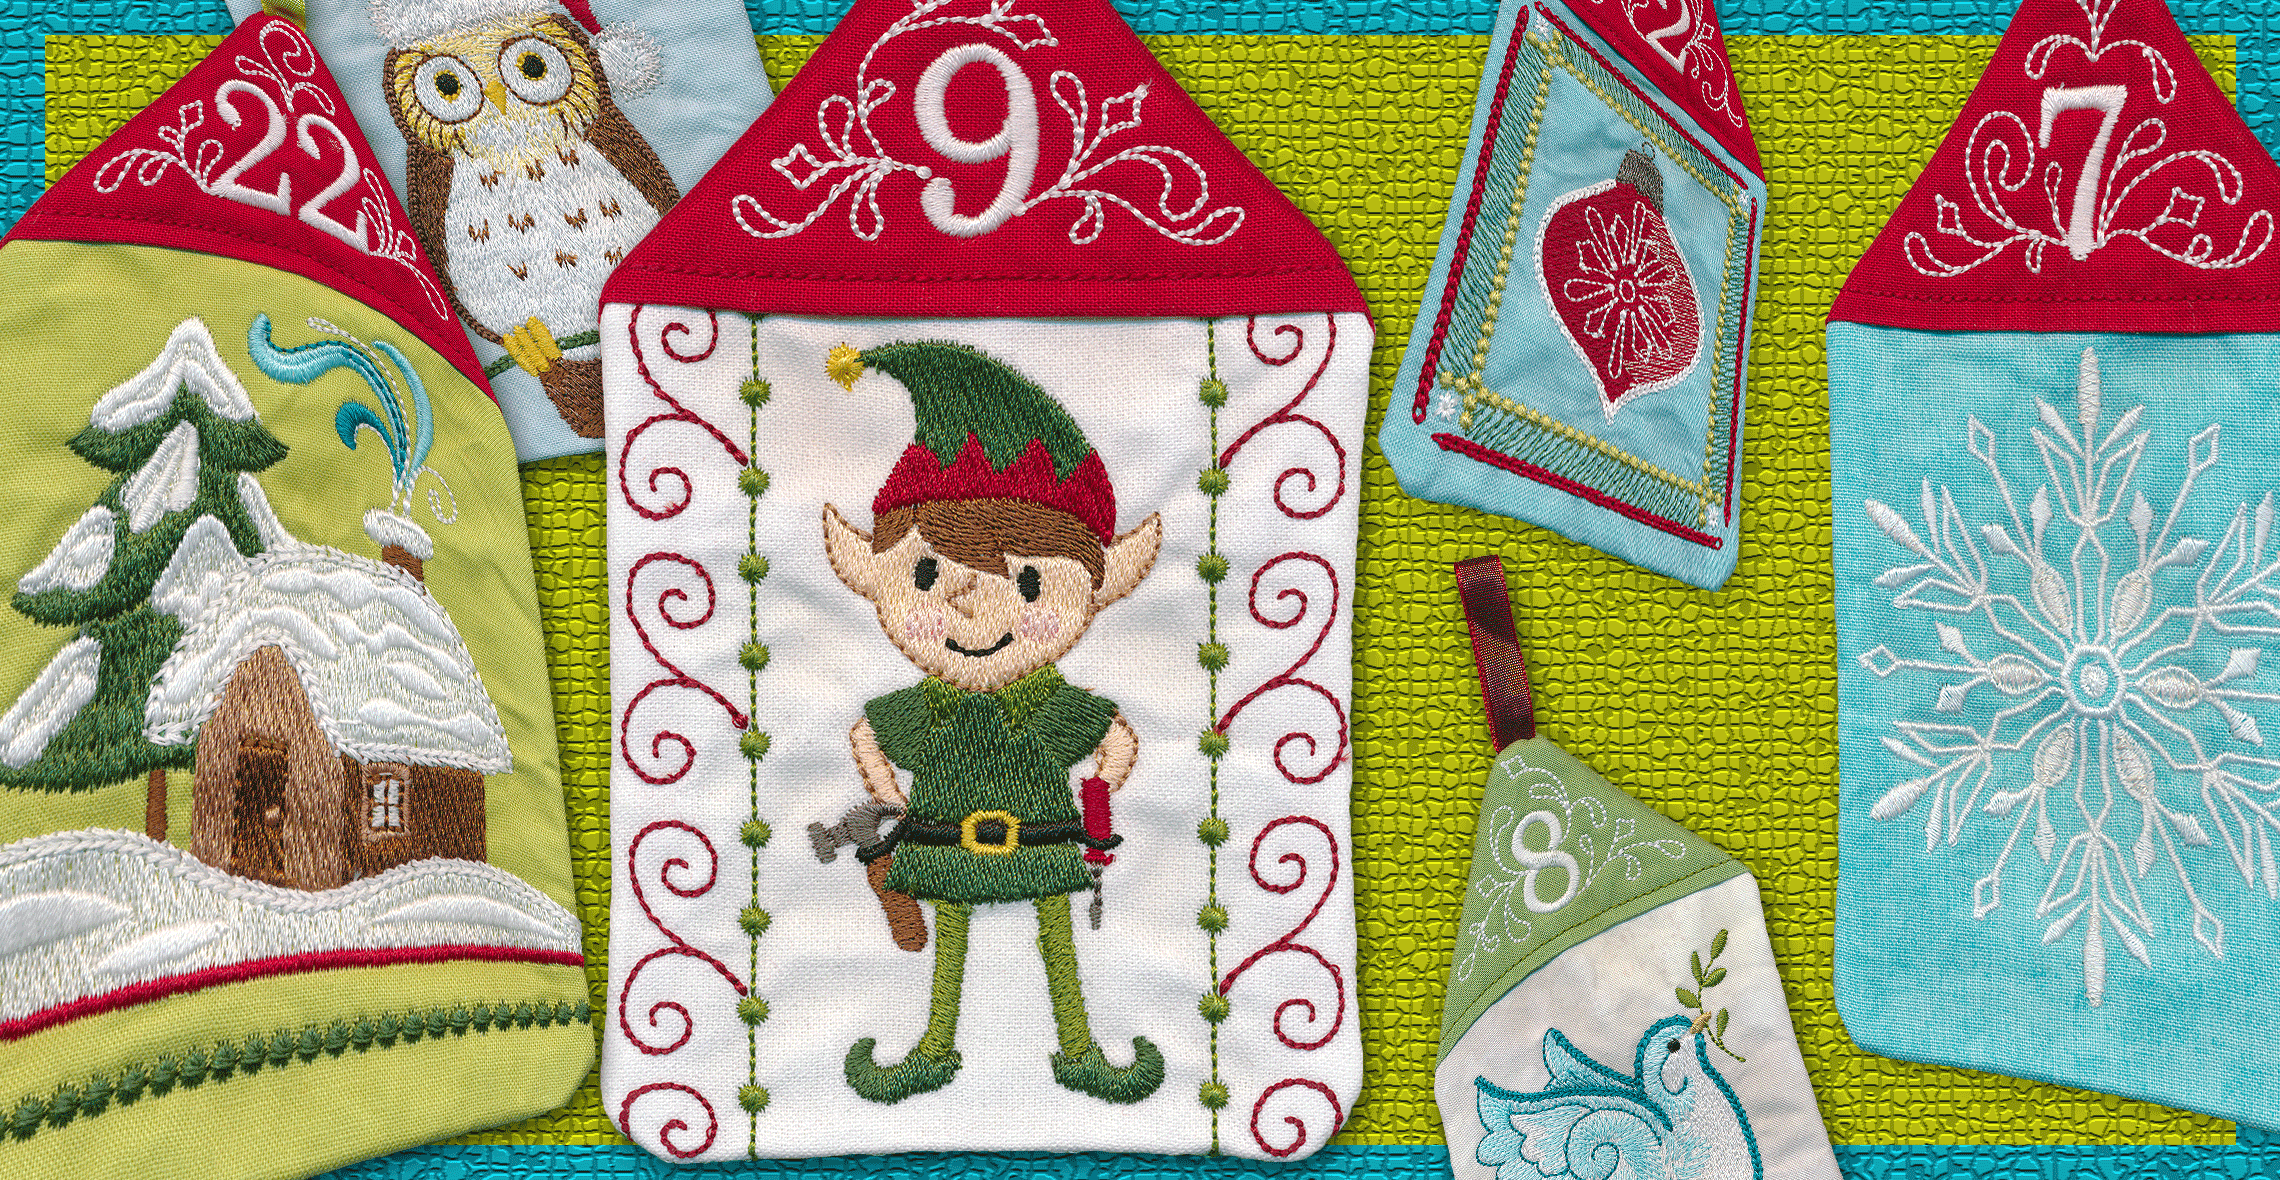
Christmas Countdown Wall Hanging, Part One
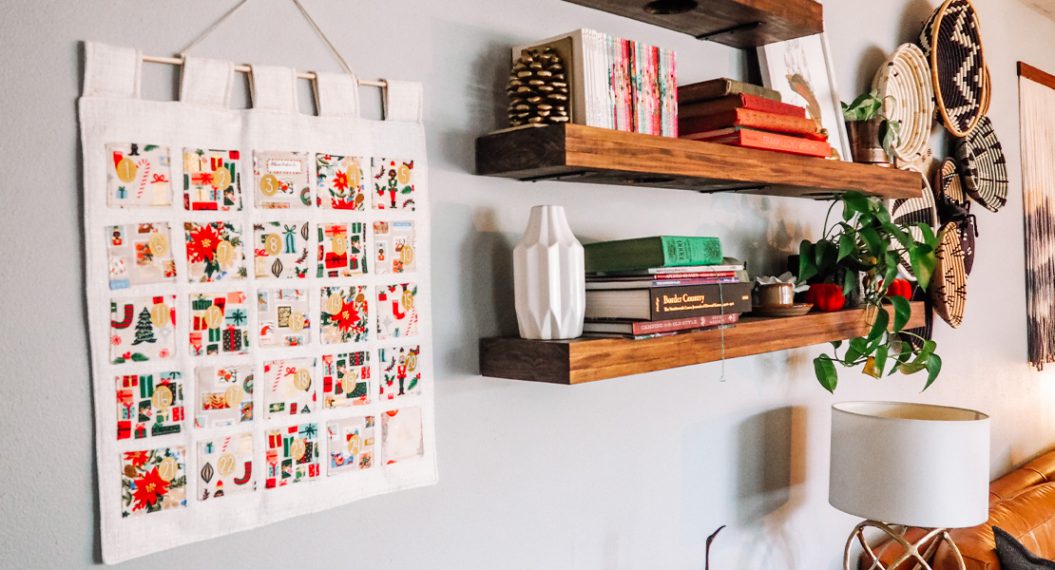
Hey hey sewing friends! It’s Candice from A+CO and I’m back to share how I made this Christmas Countdown Wall Hanging on my bernette 79.
As a kid, one of my favorite traditions was getting a little cardboard advent calendar with chocolates behind each door. Now as a grown-up, I wanted to continue the tradition with my kiddo, minus the candy (ya know, since I’d probably sneak all of the chocolate out after they go to bed anyway).
This Christmas Countdown Wall Hanging is such a fun make and there are oodles of ways to make it your own. The pockets allow enough room for a piece of candy or, you can switch it up and put your favorite verse/quote, a note of encouragement or thankfulness, or even just move a small doll or stuffed object from day to day.
This project will be split into three posts:
- Planning (that’s this post!)
- Embroidery
- Construction
Be sure to check back for part two where we will dive into embroidering the pockets!

Materials
- bernette 79
- Fabric (see requirements below)
- Sewing supplies (rotary cutter, ruler, cutting mat, pins, iron, clips, etc)
- Embroidery supplies (thread, stabilizer, hoop)
- Optional embellishments
- Dowel for hanging
- Fusible Fleece (or batting)
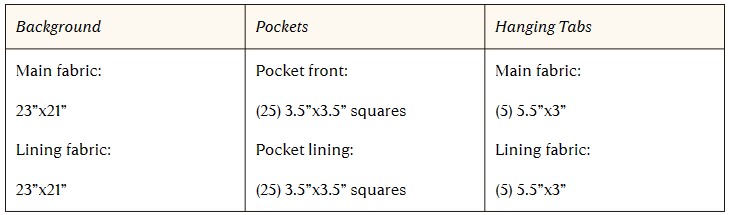
Fabric Requirements
The wall hanging has three main parts, each piece is lined for a fully finished look:
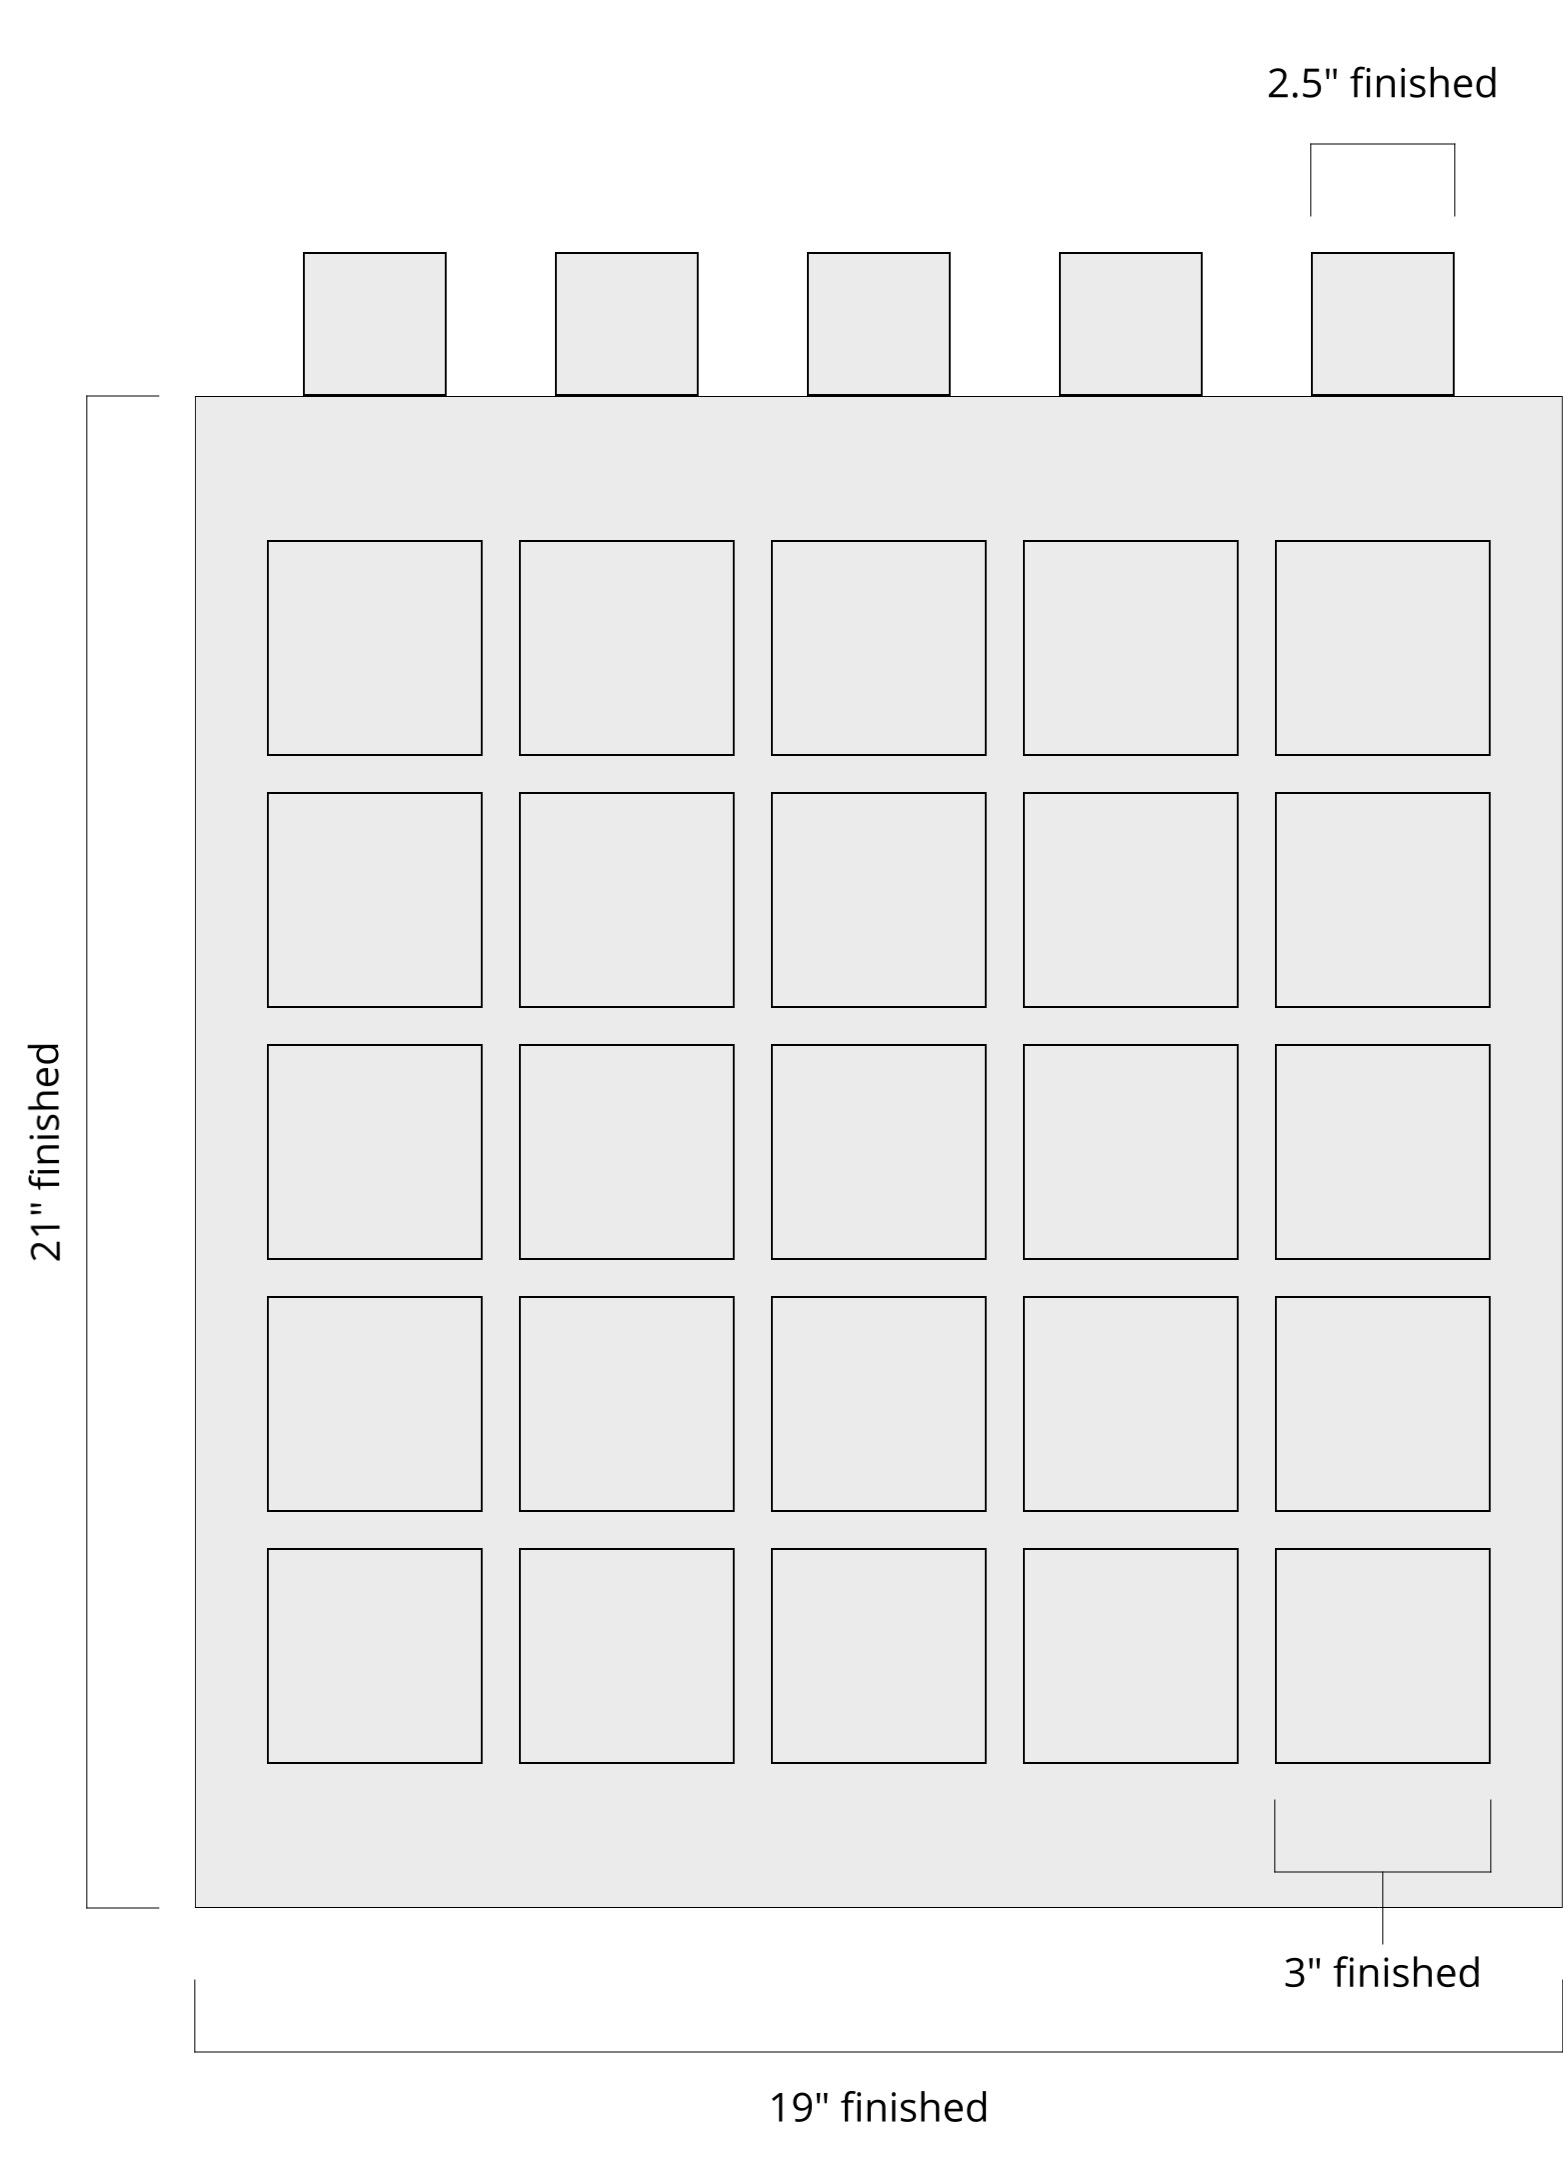
Background (21″ x 19″ Finished)
The background fabric is the largest cut of fabric in the project. When choosing your background fabric, look for a color or print that will work well with your pocket fabric design. I used tweed fabric to have a textured look but think any solid or linen would look fabulous.
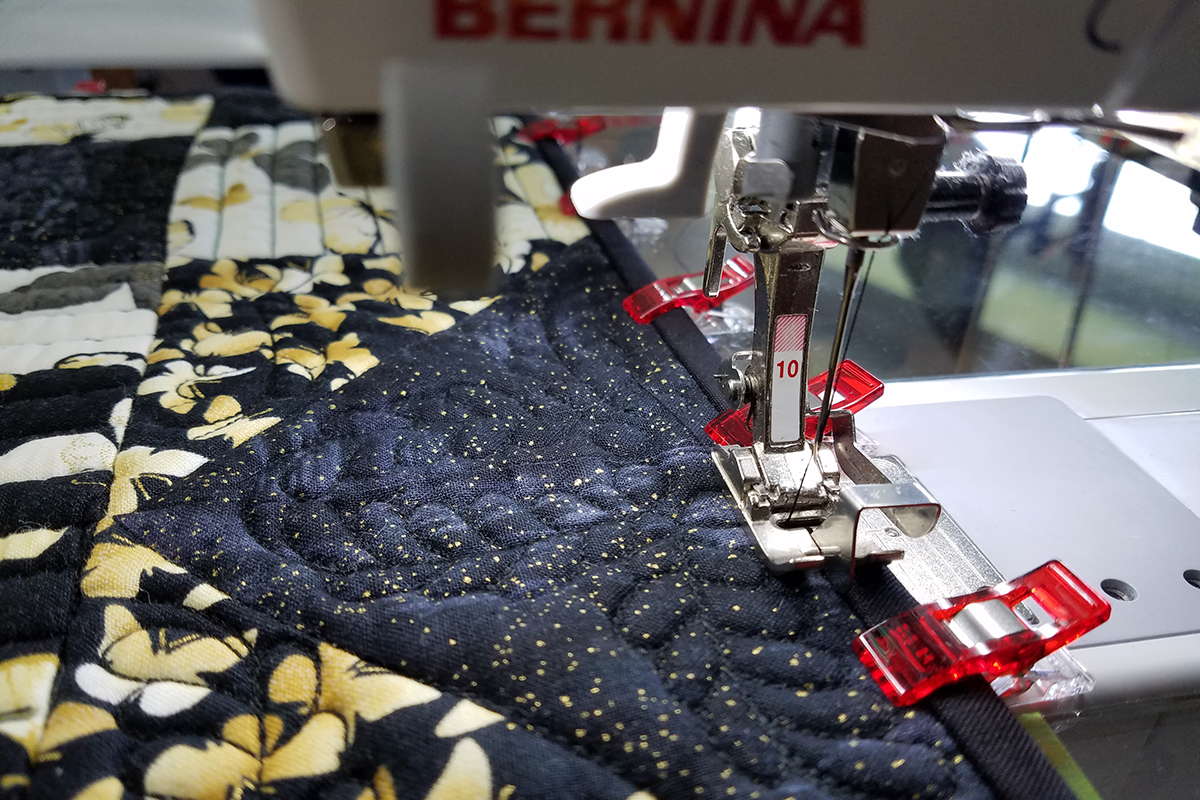
There is an opportunity to quilt the background or add additional embroidery or applique before attaching the pockets as another way to add a personal touch.
If you choose to add embroidery or other embellishments to the background, be sure to add additional length to the background main and lining fabric. For example: If you wish to add a 3″ tall design that says “December”, add 3″ to the cutting requirements listed in the table below.
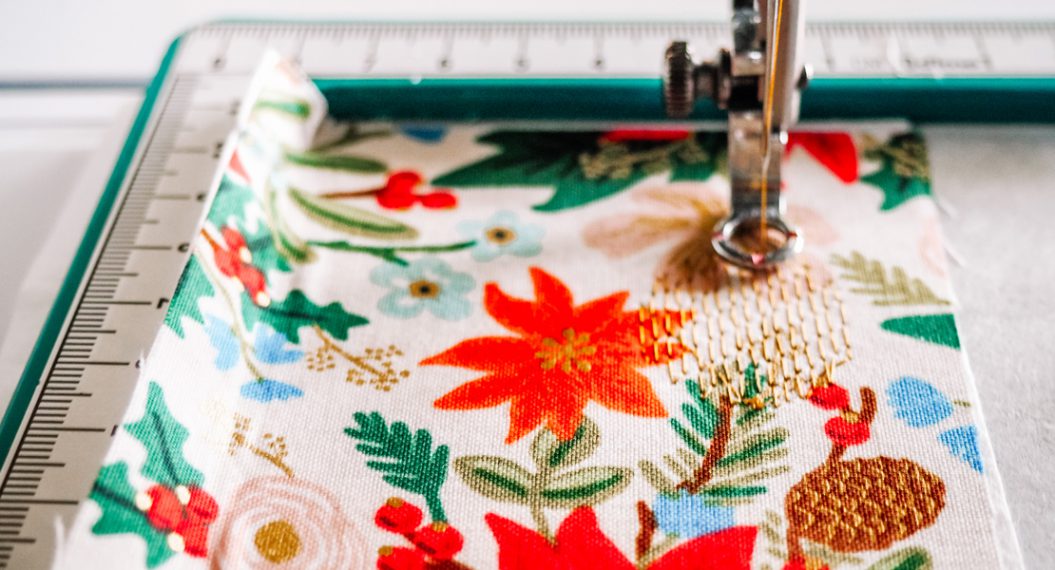
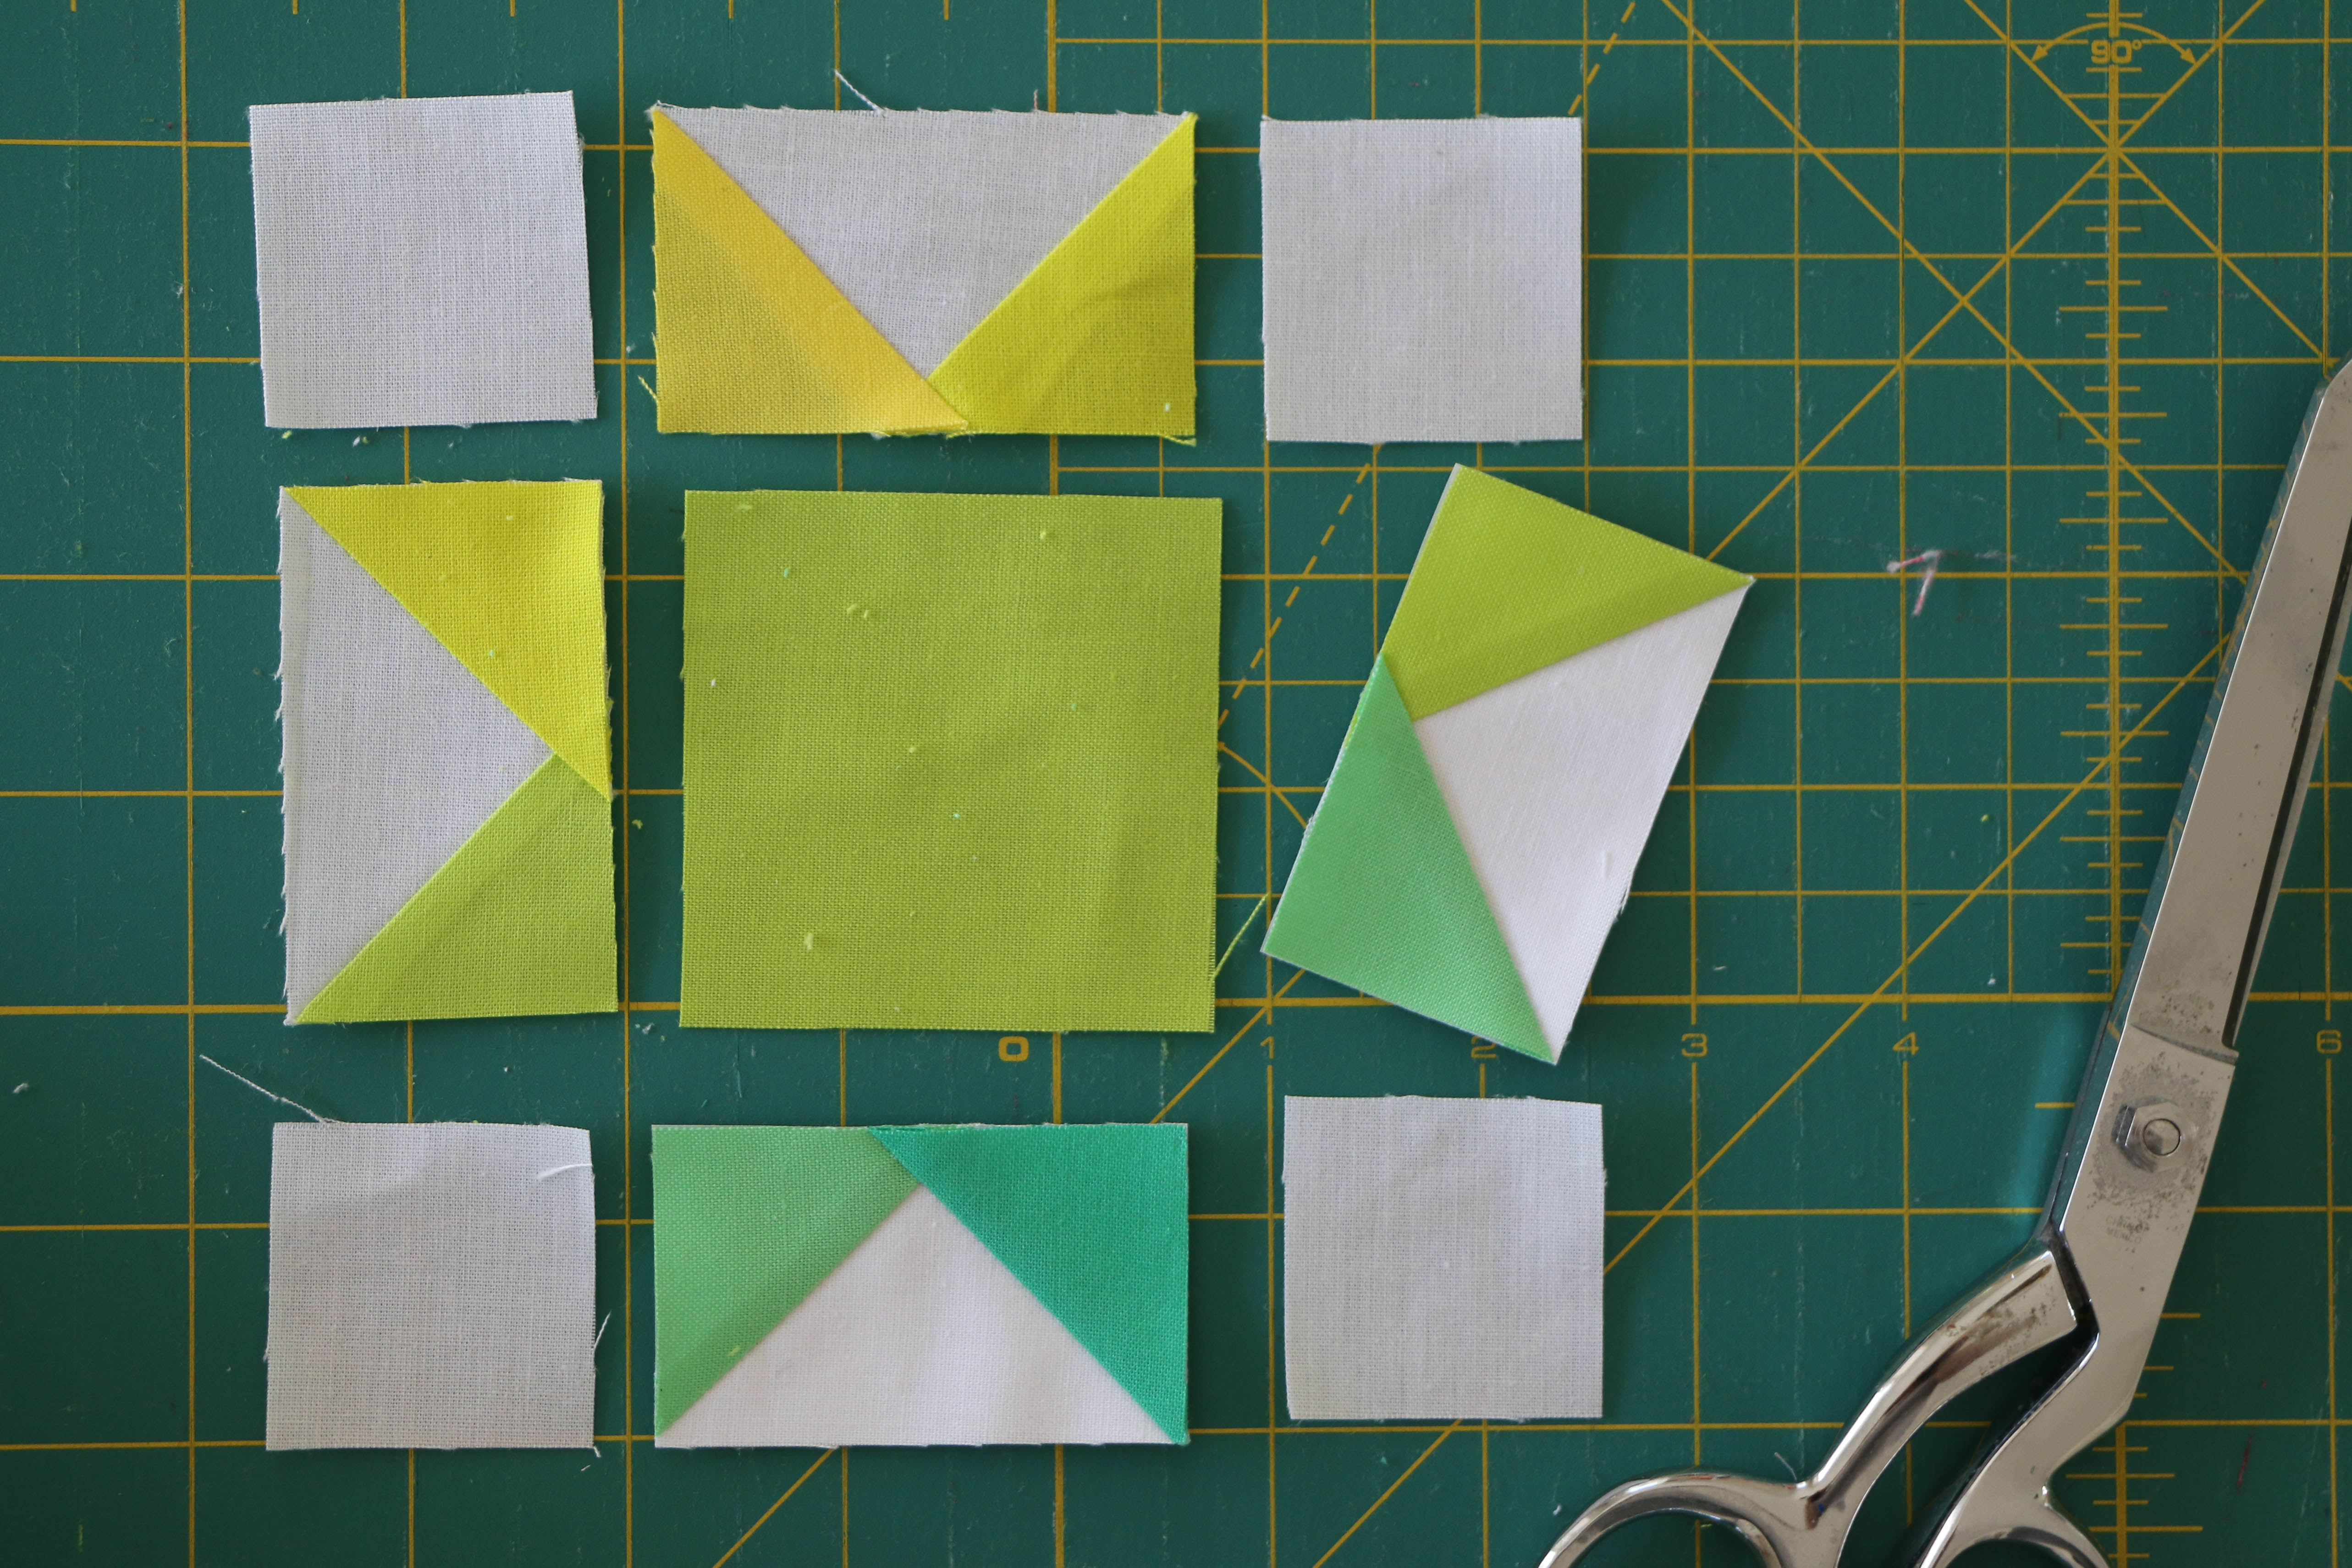
25 Pockets (3″ x 3″ Finished)
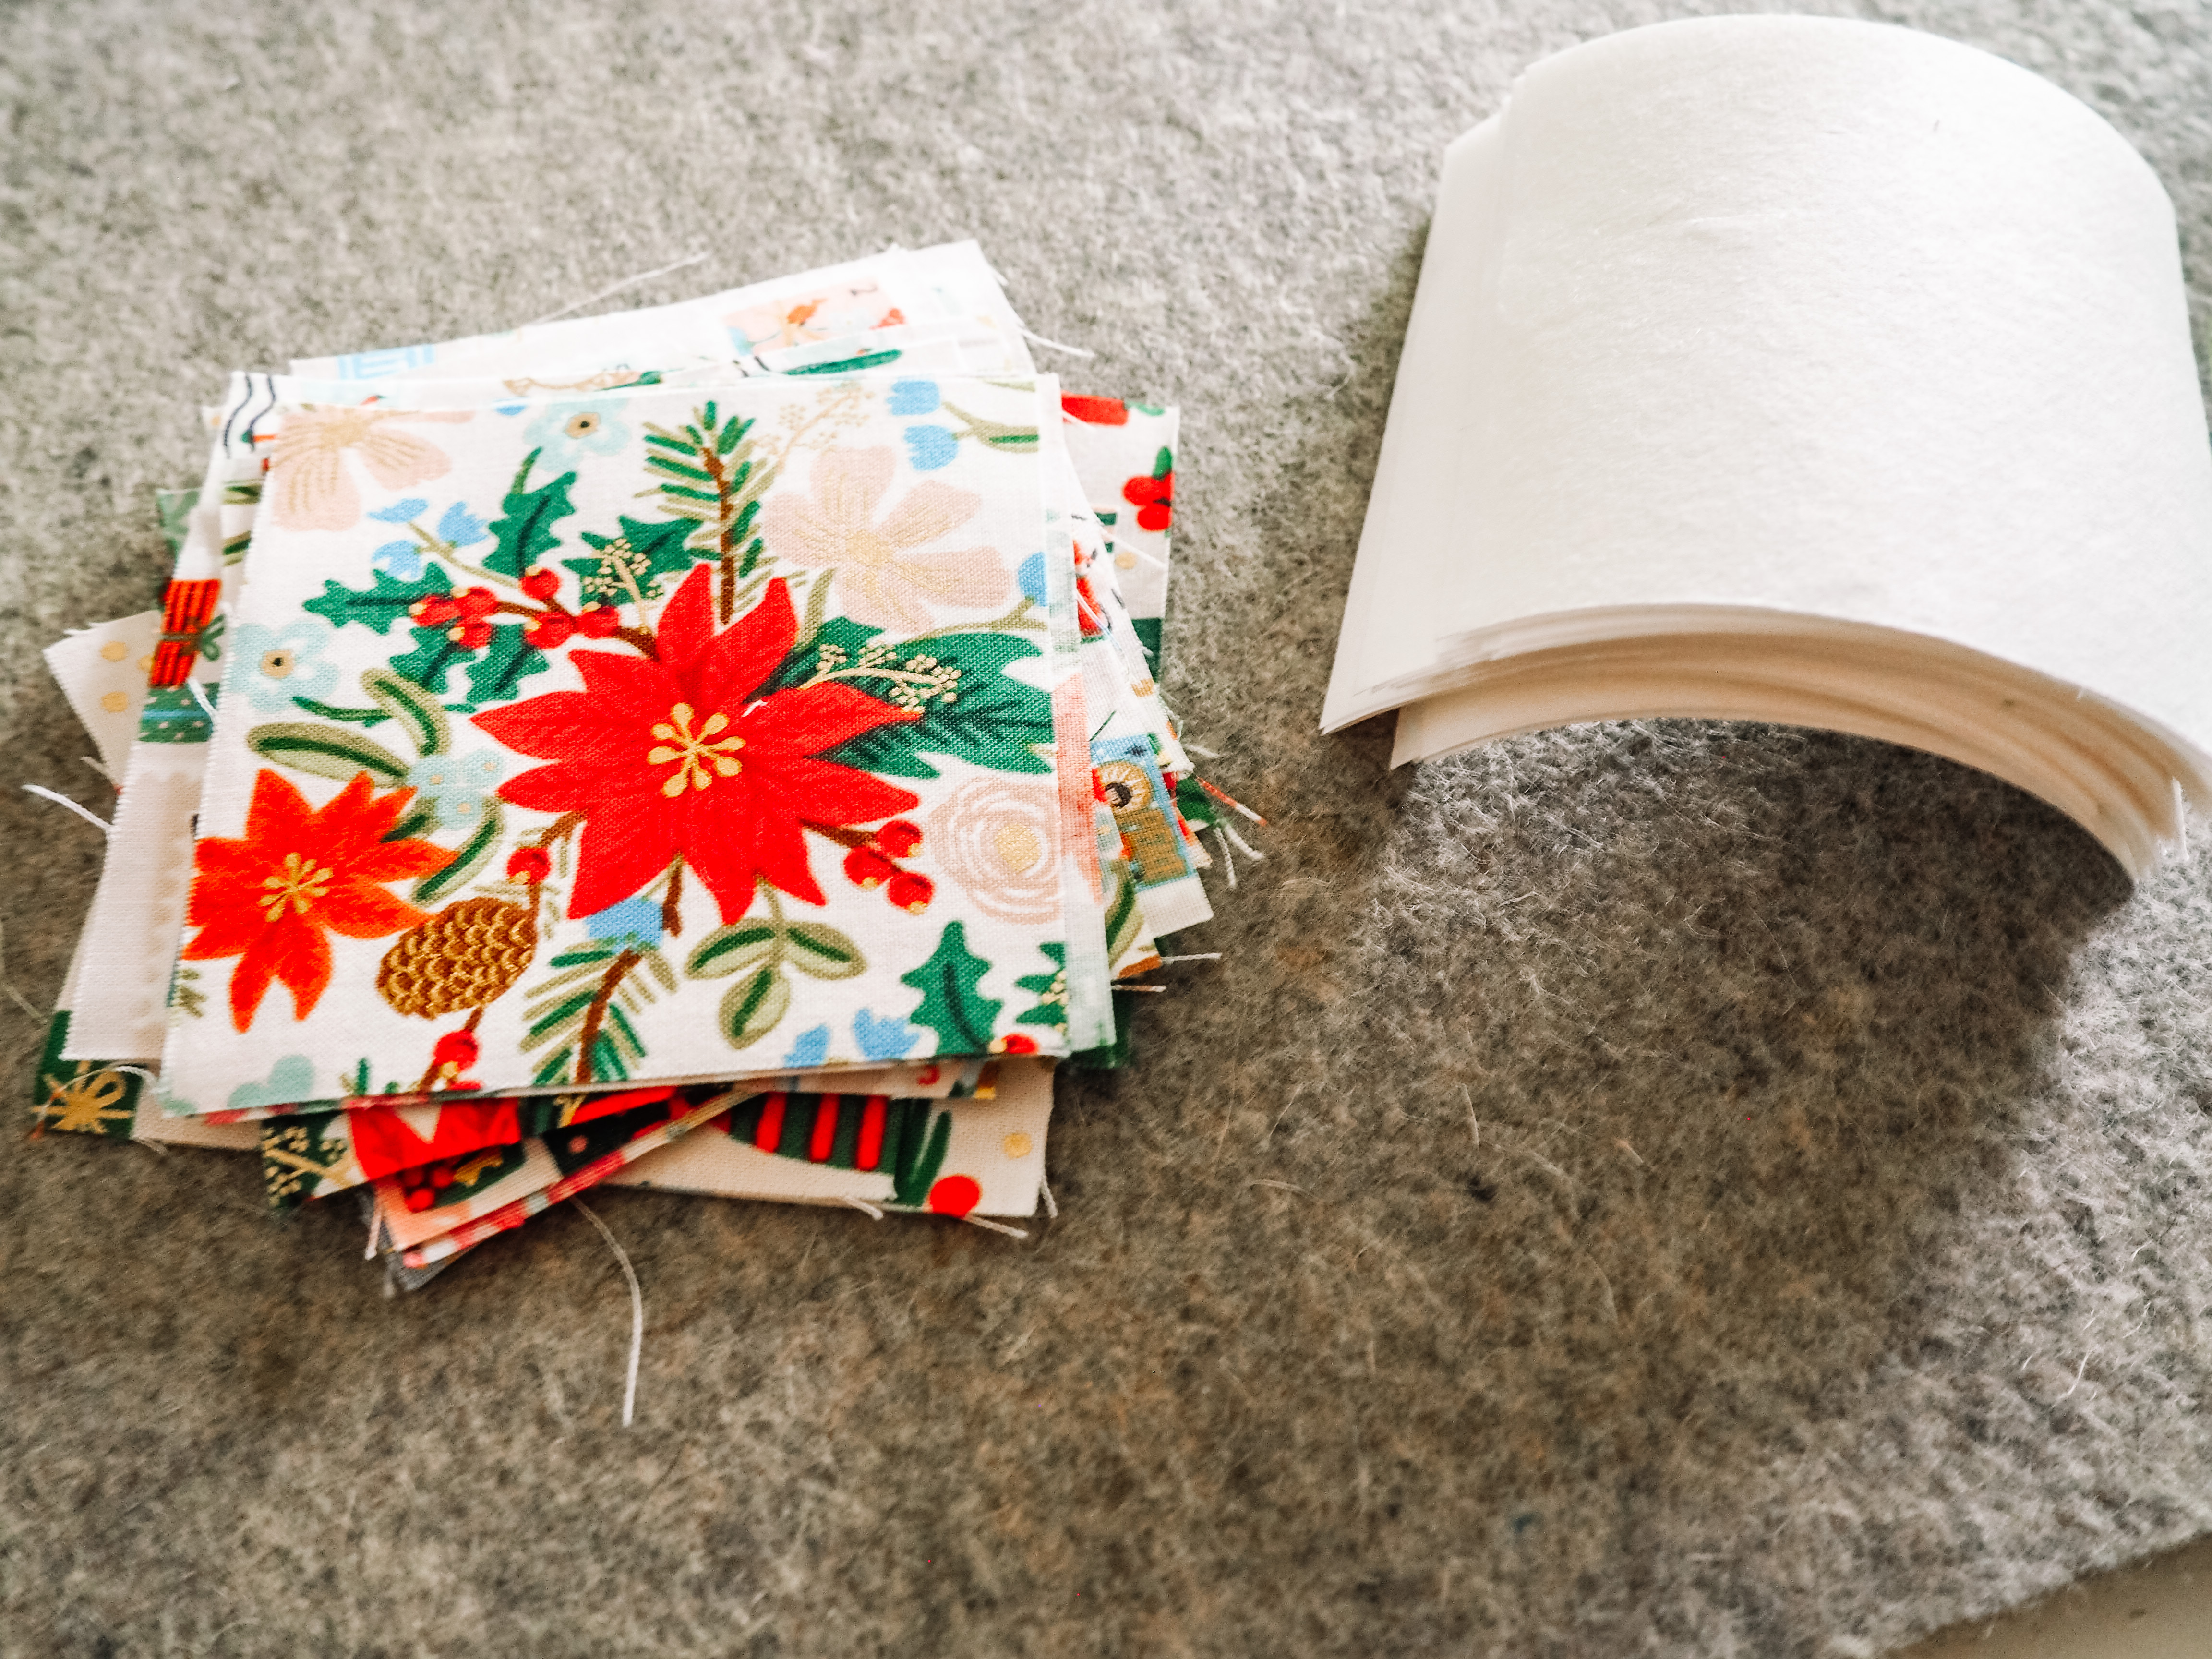
The pockets are a great opportunity to fussy cut that cute fabric you’ve been holding onto. Fussy cutting is when you have patterned fabric and cut it so that a specific part of the design is centered on the cut piece. We will also be embroidering numbers onto each pocket piece which you’ll want to take into consideration when fussy cutting.

5 Hanging Tabs (2.5″ x 2.5″ Finished)
The instructions will include hanging tabs for a dowel to go through. A couple other options I think would look great if you want to omit the tabs:
- Use a hanging sleeve on the back
- Sew corner pockets on the backside
- Skip hanging and use the finished piece as the front of a fun and interactive throw pillow
Cutting Instructions
See the table below for cutting instructions. For the background, the cutting instructions include a touch extra to allow you to square up after quilting, if desired.
Additionally, cut the following:
Fusible Fleece:
- One – 23″ x 21″ piece for the background
- Five- 5.5″ x 3″ pieces for the hanging tabs
Embroidery stabilizer:
Since the pocket pieces are small, I found that using two layers of OESD Ultra Clean and Tear Fusible stabilizer per pocket helped ensure there was no puckering.
- Cut 50 – 3.5″ x 3.5″ squares of stabilizer
Now that we have all of the materials prepped, be sure to check back for part two where we will work on embroidering the pocket pieces.