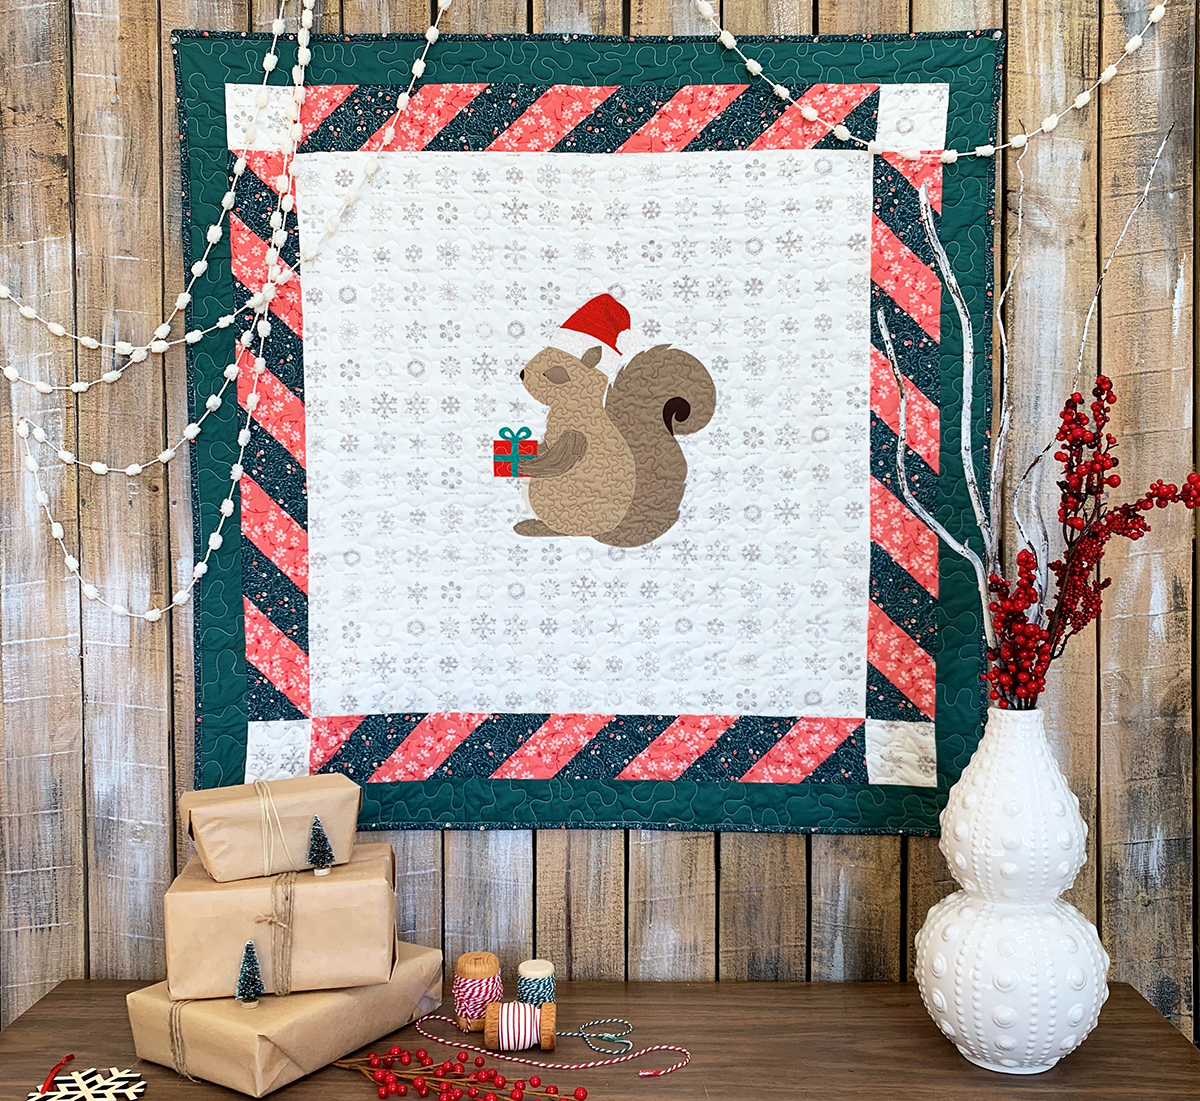
Coco the Squirrel Baby Quilt Tutorial
Hello Makers,
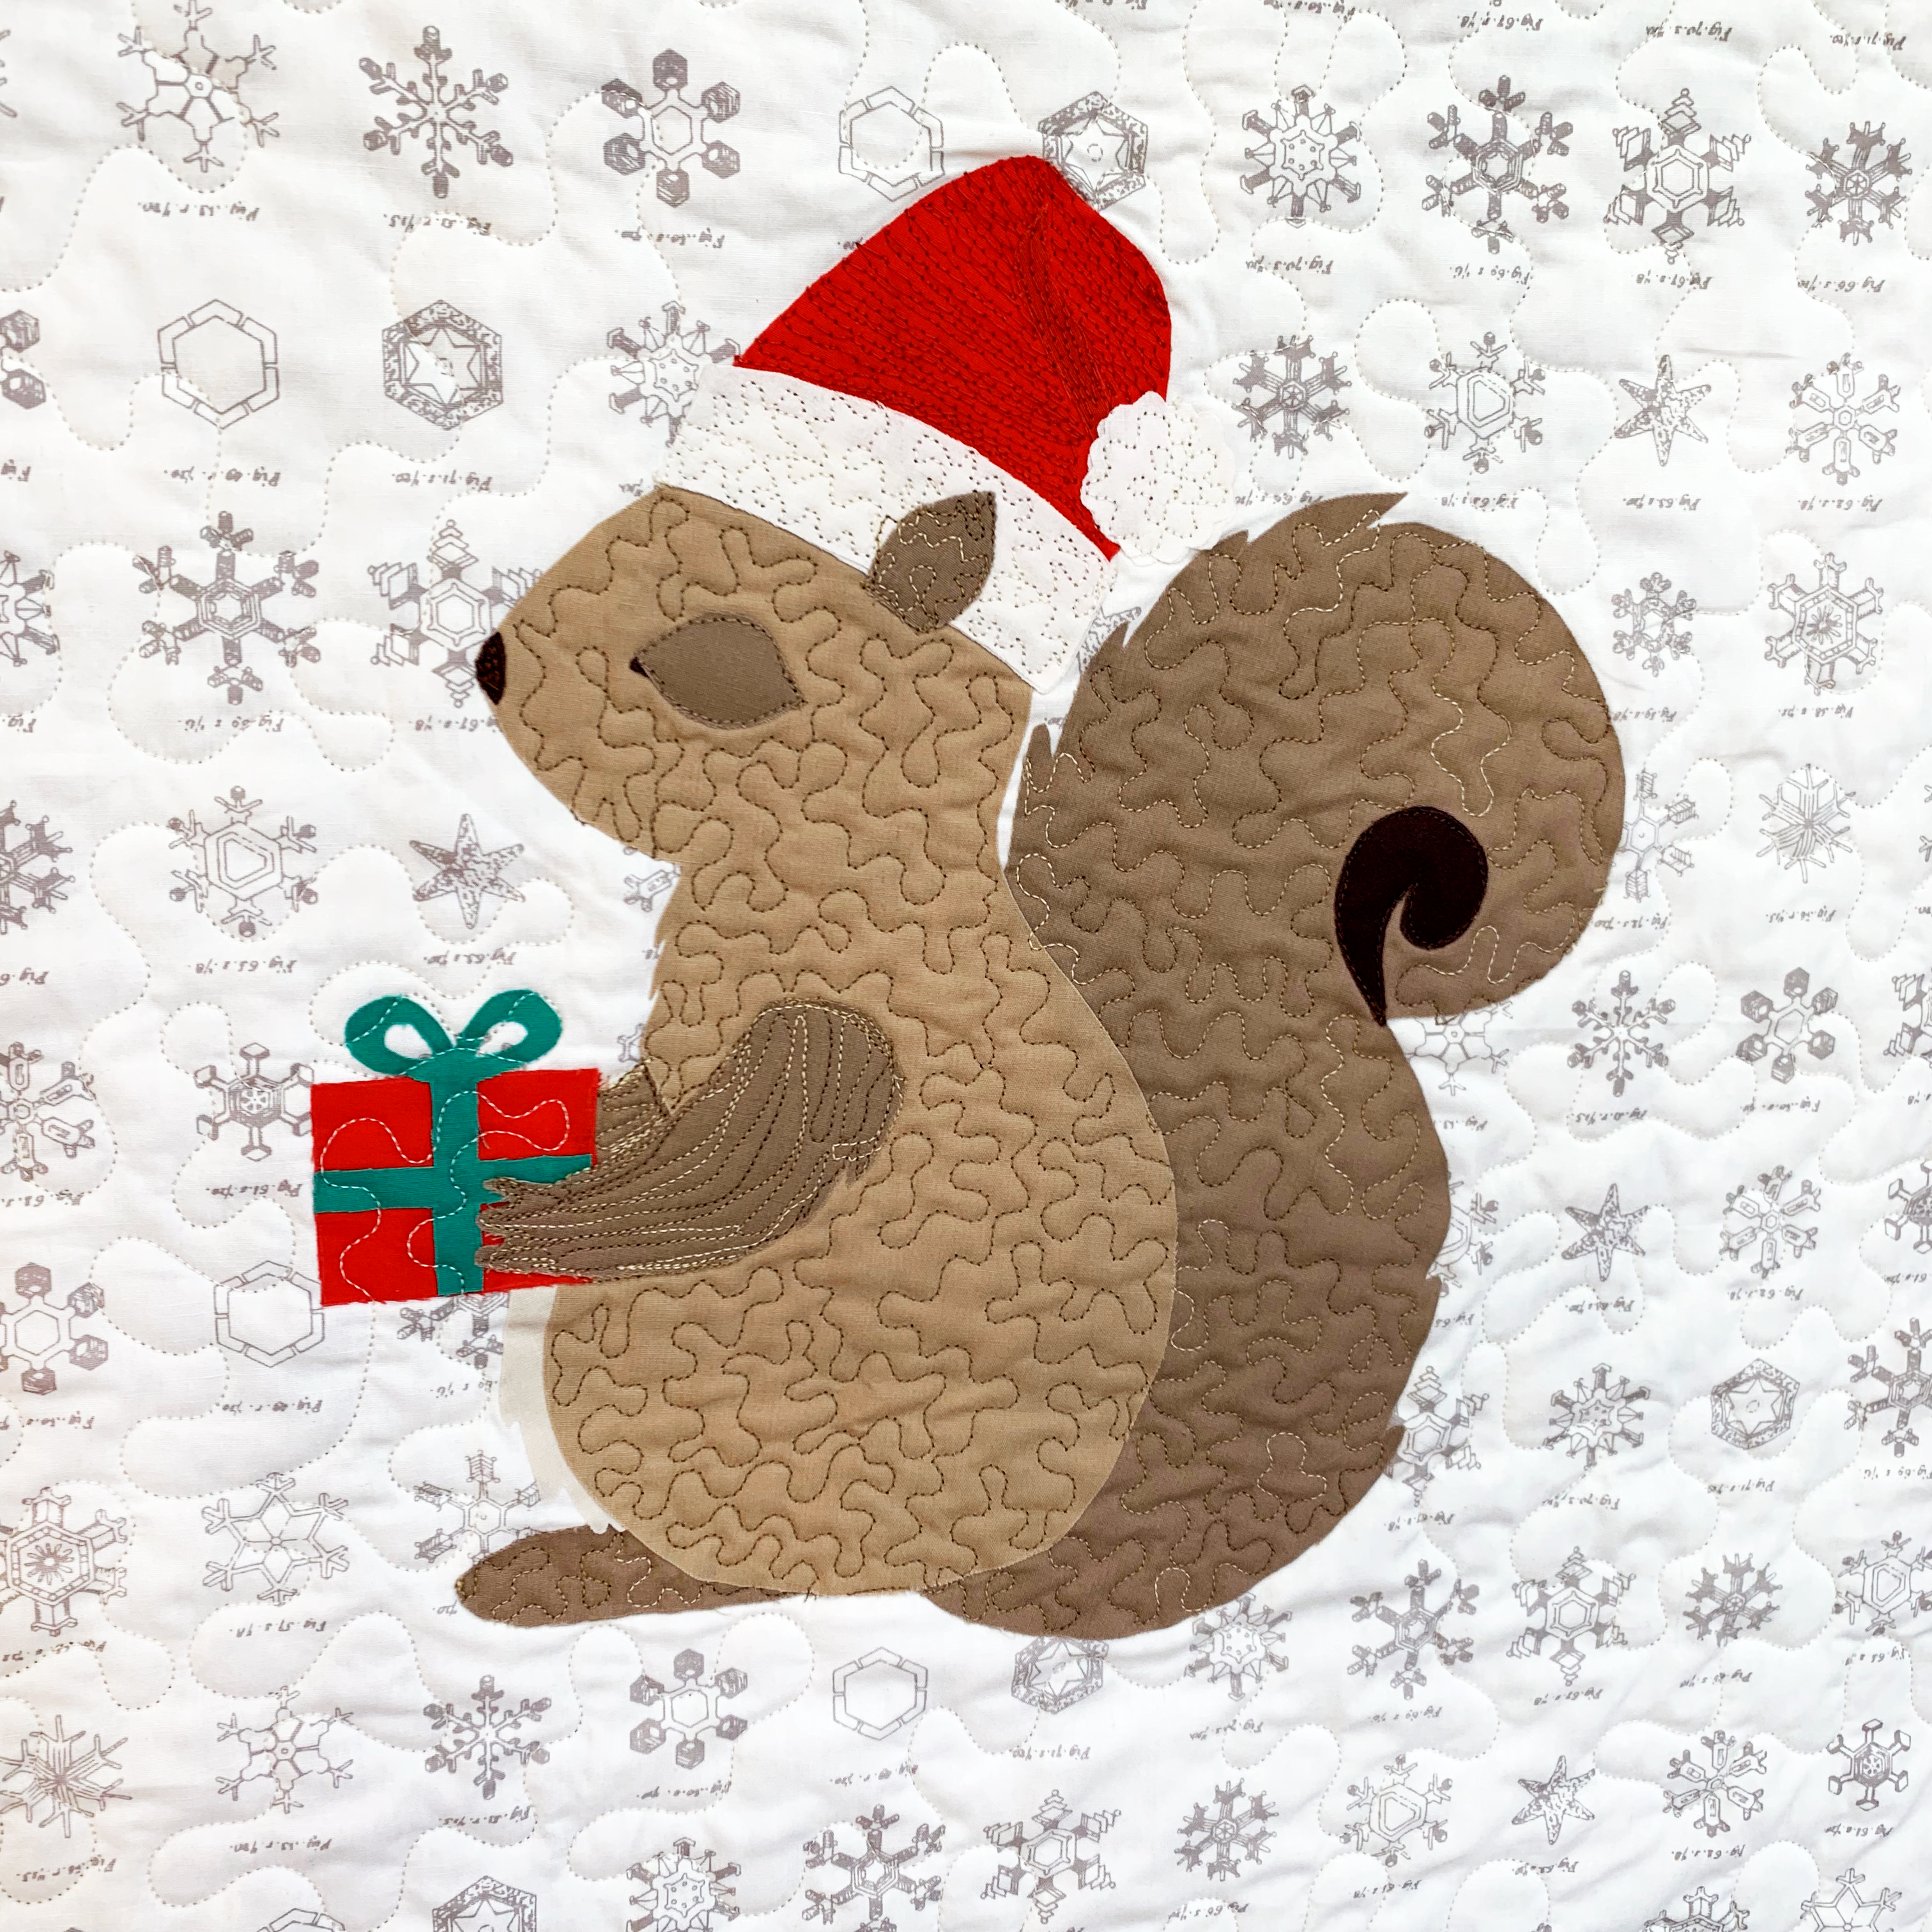
Happy December! For many this is the busiest social month of the year. There are so many events, parties, family gatherings to attend that we find ourselves a bit overwhelmed. As magical and joyous this month can be we have to sit back and remember to enjoy every second of it. Things we are super grateful for are quick projects we can whip up for gift giving or last minute touches to our home. Which is why we wanted to create this super cute project that could work great as a quilt for babies room or be used as a wall hanging to create the right amount of holiday cheer. In the step by step project below we sew festive red and green fabric prints from Little Town Fabrics by Amy Sinibali! By cutting our strip set on a 45 degree angle we get this great candy cane stripe effect! With the templates provided below have fun applying Steam-A-Seam to the great selection of pure element solids used to create “Coco” the squirrel.
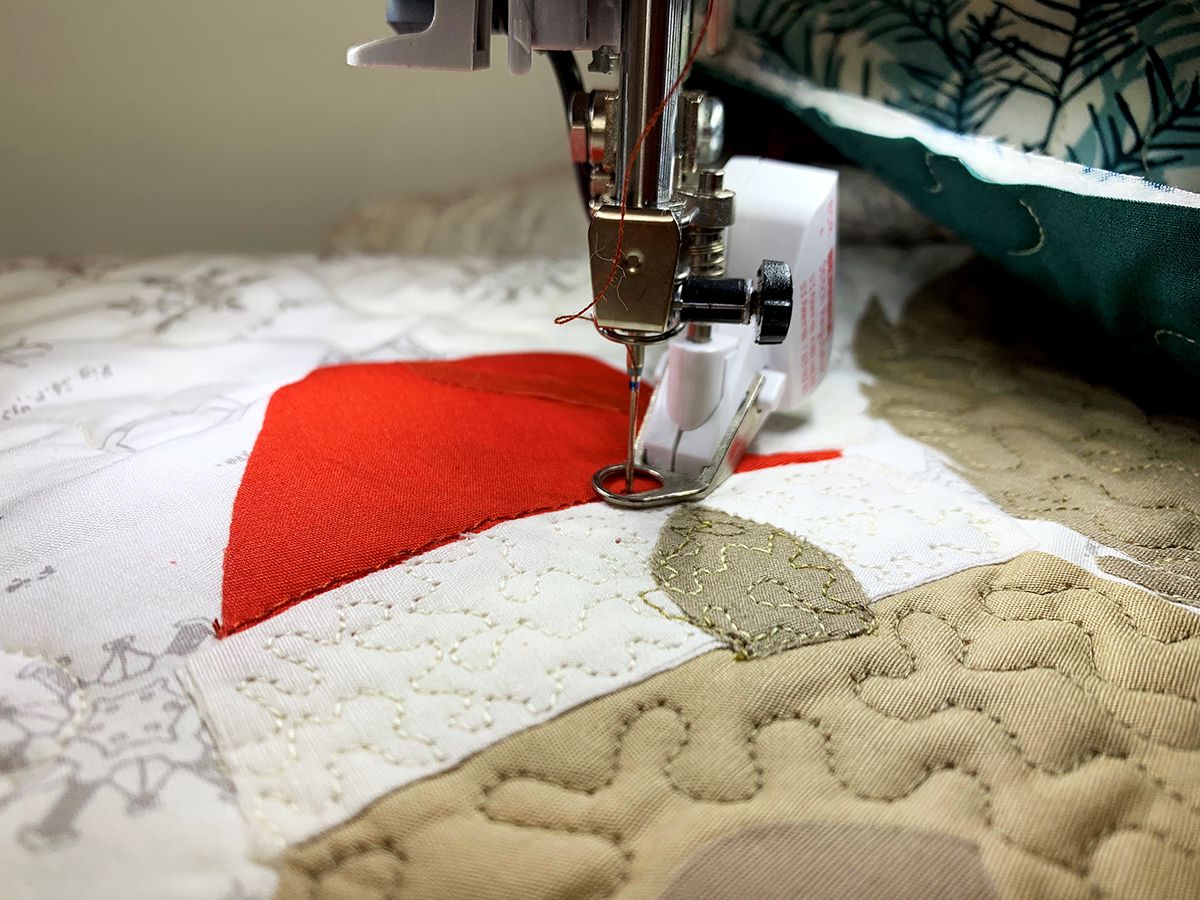
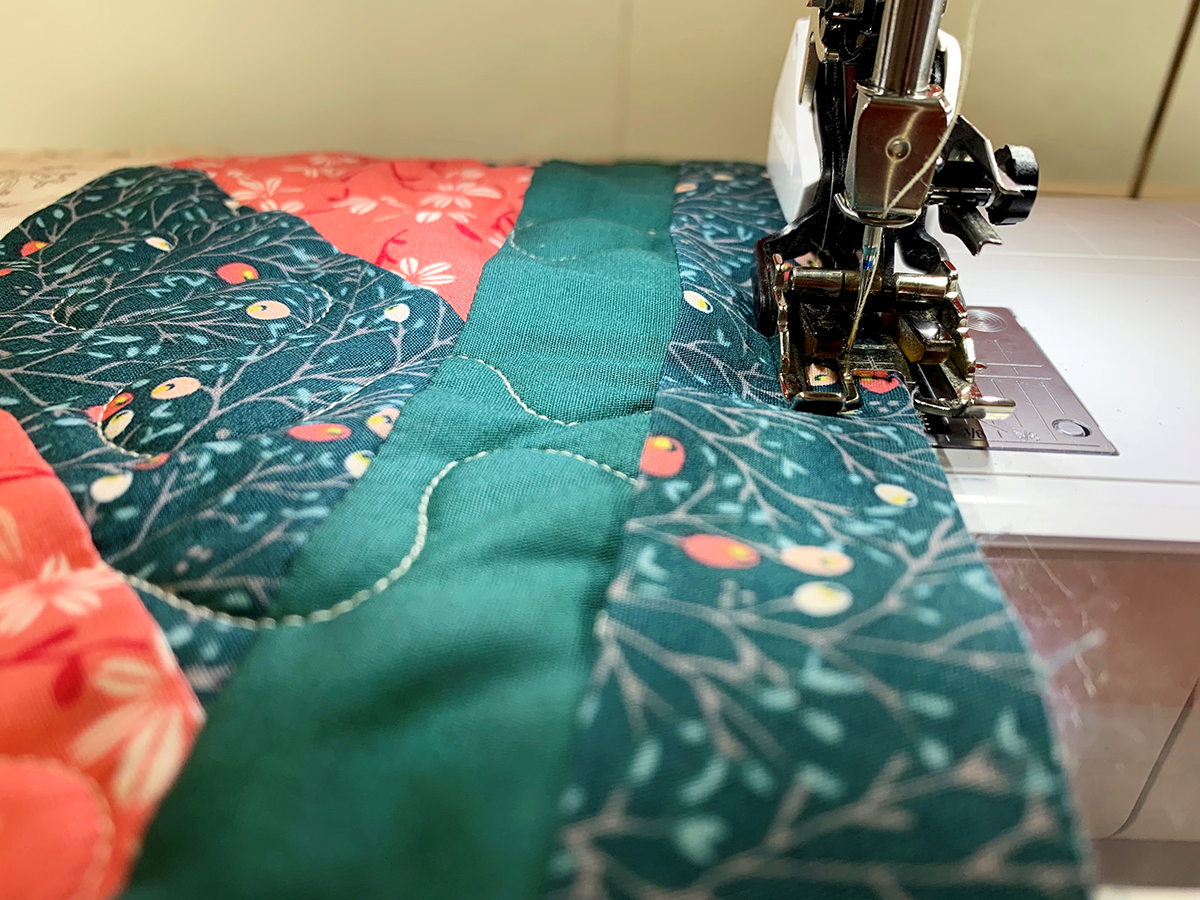
Free Motion Quilting with the BSR Presser foot really brought this project to life. Using coordinating threads to make “Coco” the squirrel pop from the background fabrics and adding yummy texture by using a creamy ivory thread for the background quilting. We couldn’t be happier with how fast this project came together and we hope you find the time to put this on your to sew list this year or for next.
Fabric Requirements:
Finished Quilt 37″ x 37″
Fabric A- LTO-9235- Snow Crystals Ash- 1 yd.
Fabric B- LTO-8234- Season Carols- 1/2 yd.
Fabric C- LTO-8231- Winterberry Spice- 3/4 yd.
Fabric D- PE- 463- Zambia Stone- 1/3 yd.
Fabric E- PE- 445- Mink – 11″ x 14″ rectangle
Fabric F-PE-440- Macchiato -11″x 8″ rectangle
Fabric G -PE-429- Coffee Bean – 2 1/2″ square
Fabric H-PE- 437- London Red – 5″ x 9″ rectangle
Fabric I-PE- 456- Aurora Red- 2 1/2″ square
Fabric J-PE- 417- Emerald- 2 1/2″ square
Fabric K-PE- 408- White Linen- 5″ x 6″ rectangle
Fabric L-PE- 432- Sandstone- 3″ x 4″ rectangle
Backing – LTO-8236- Be Merry- 1 1/4 yds.
Cutting Directions:
One (1) 26 1/2″ square from Fabric A
Four (4) 3 1/2″ squares from Fabric A
Five (5) 2 1/2″ x WOF strips from Fabric B and C
Four (4) 2 1/2″ x WOF strips from Fabric D
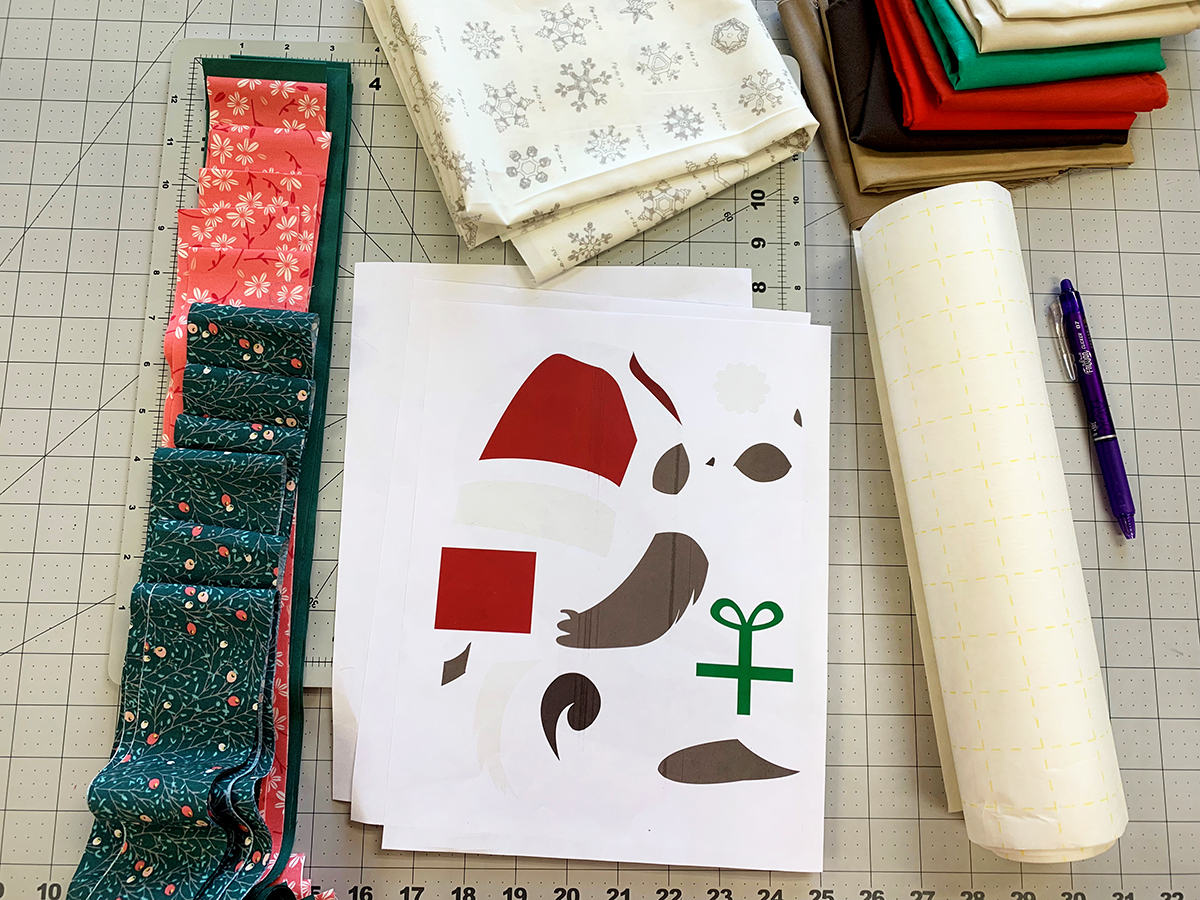
Fabric E-L cut and fuse Steam-A-Seam
to the back of each fabric
Binding Included- Four (4) 2 1/4″ x WOF strips from Fabric C
Additional Supplies:
- Download theCoco the Squirrel Templates
- Sewing Machine Used – BERNINA 570 Quilter Edition
- Steam -A-Seam
- Batting
- Coordinating quilting threads
- Walking Foot #50
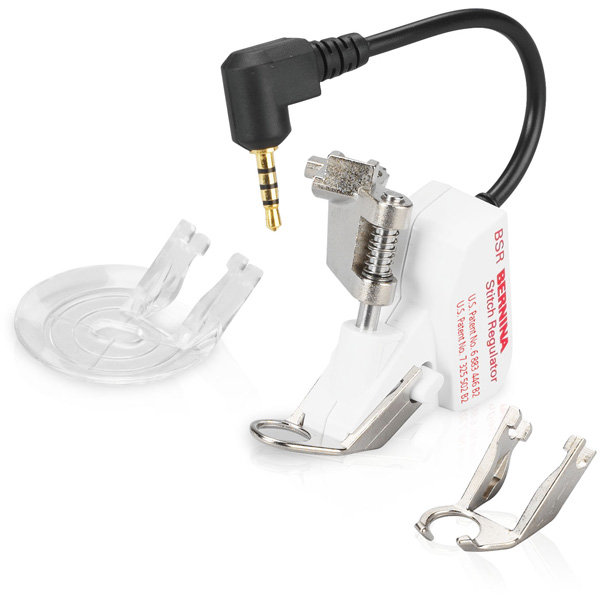
- BERNINA Stitch Regulator (BSR) Presser foot
- Fabric marking pen
- Scissors
- Iron
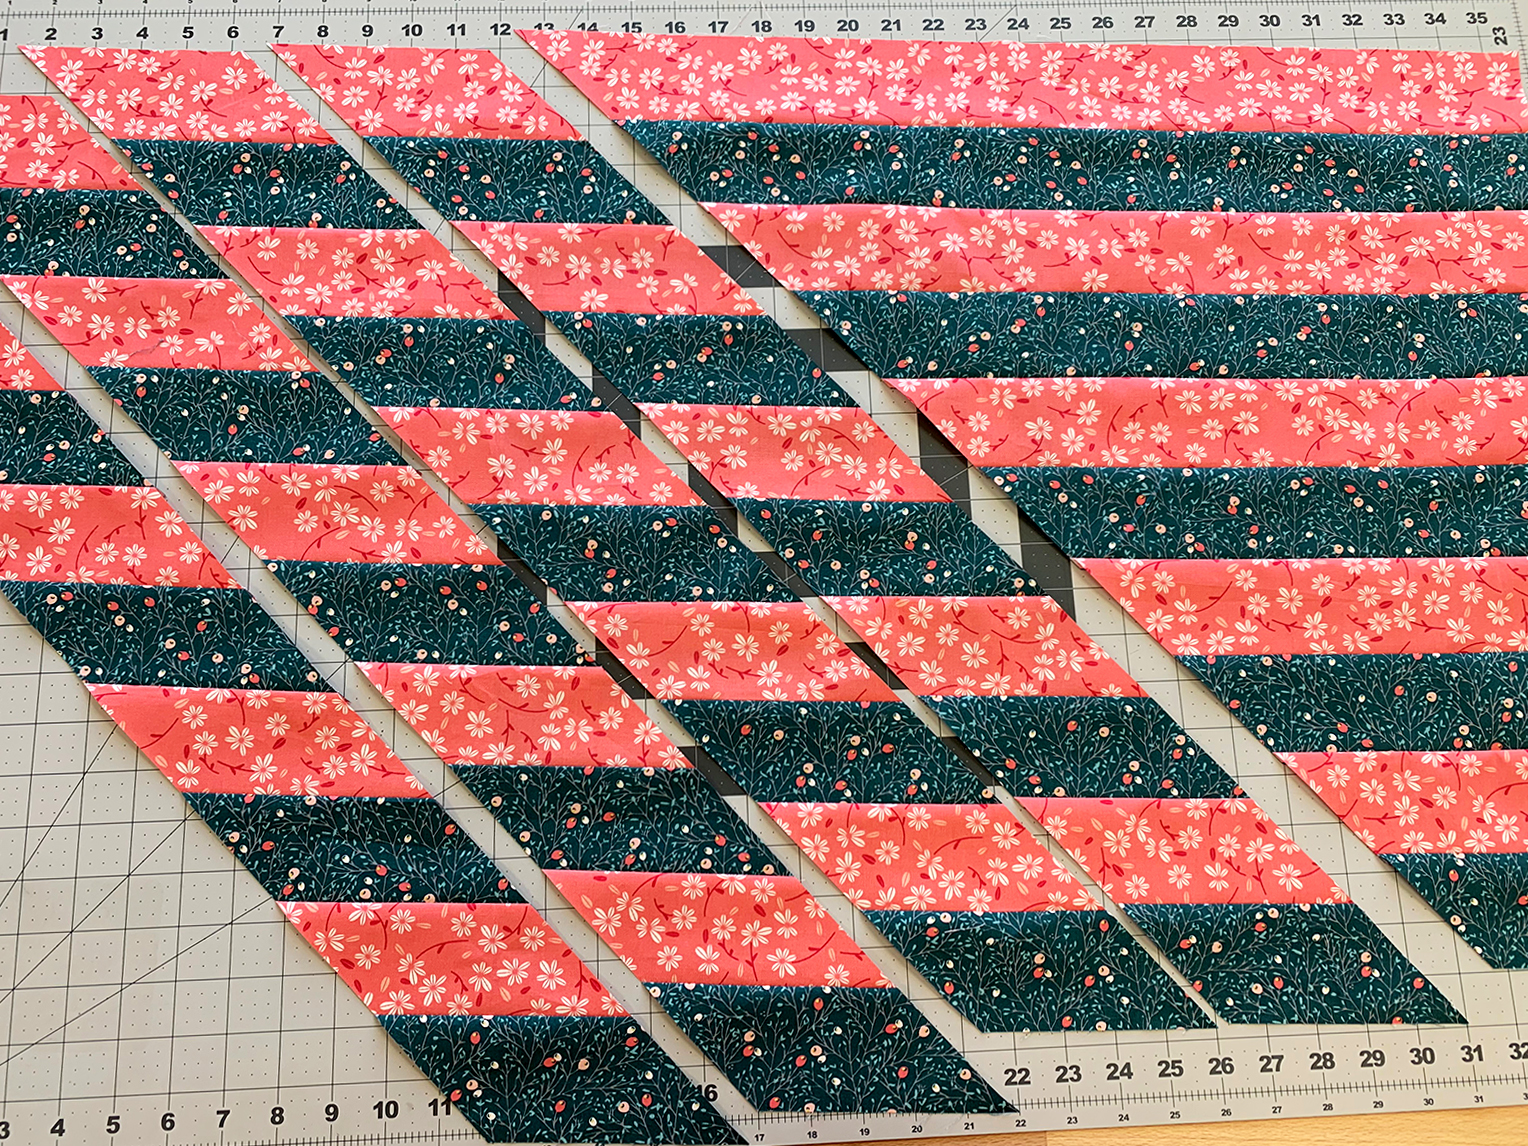
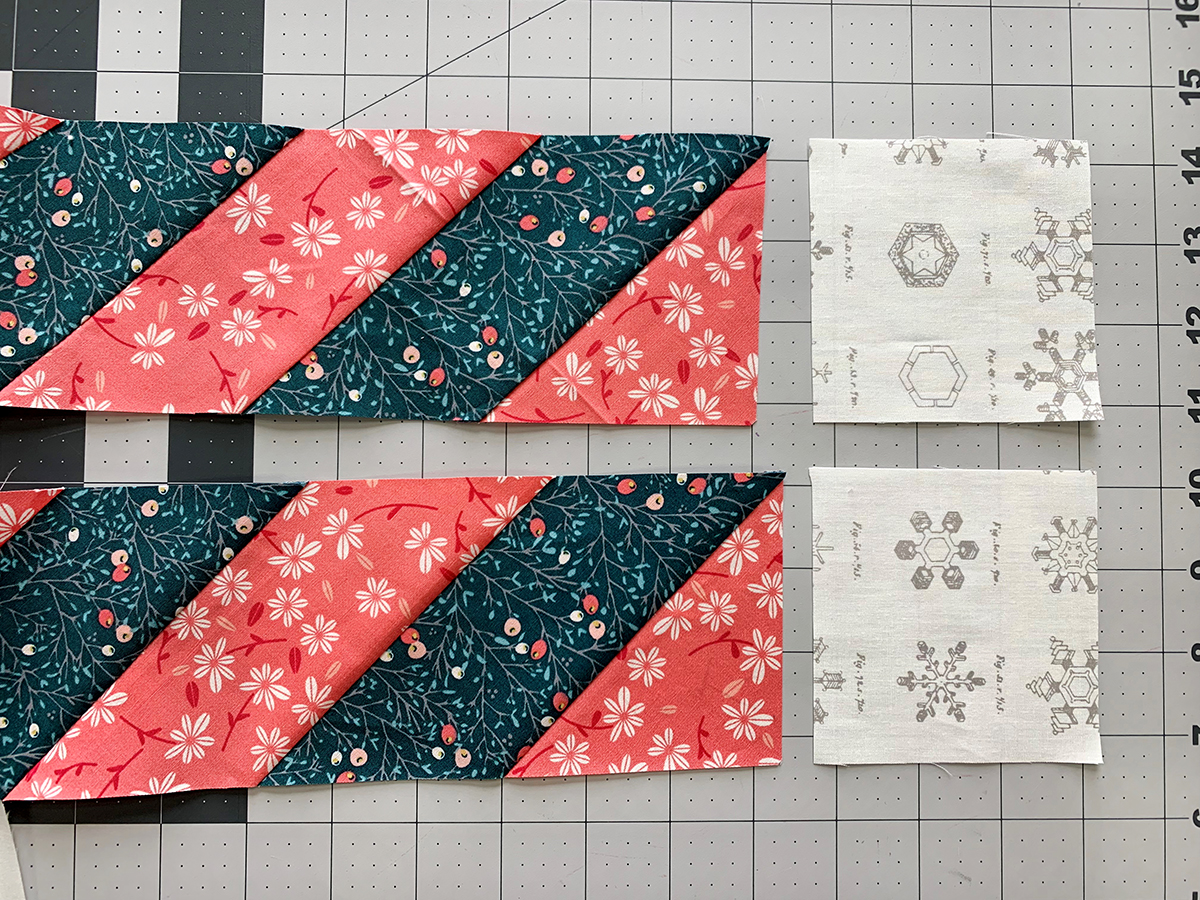
Step 1: Creating your strip units
Sew your 2 1/2″ strips from Fabric B and C together alternating colors and press your seams to one direction.
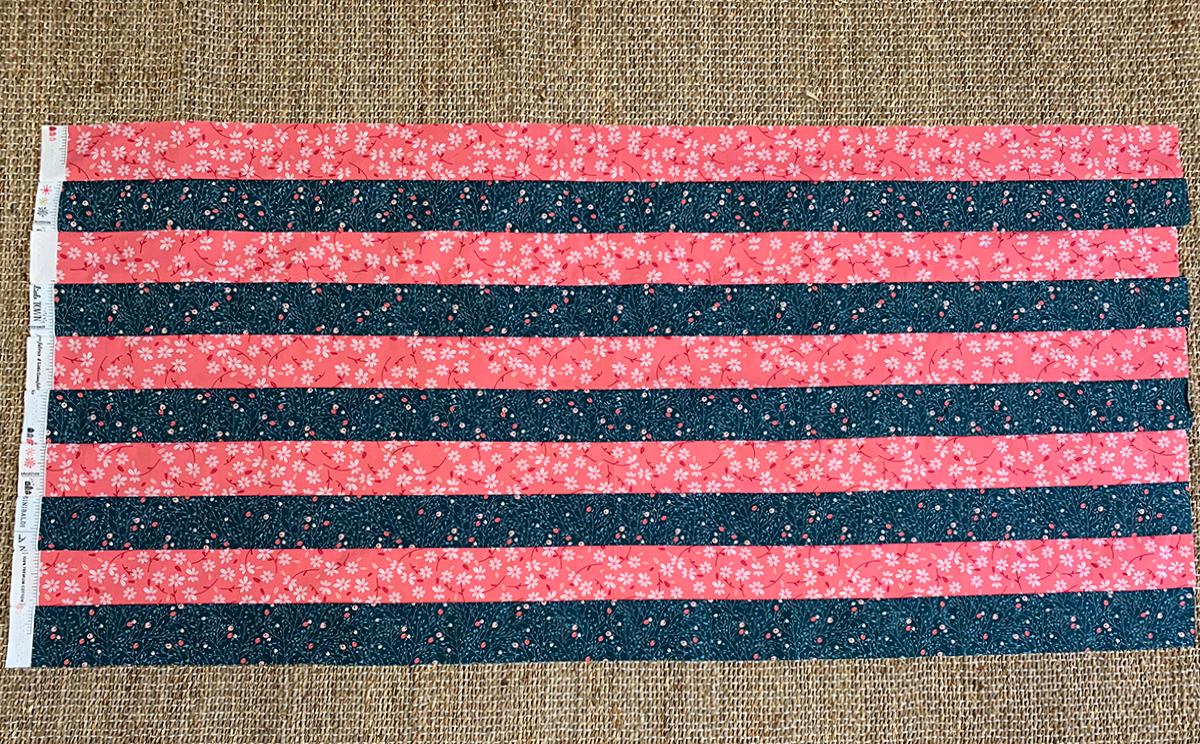
Trim off selvage to make a nice clean edge and place your rulers 45 degree angle lined up to the bottom of your strip unit. Trim your piece to create a 45 degree angle. Repeat this process measuring out 3 1/2″ to create 3 1/2″ strips.
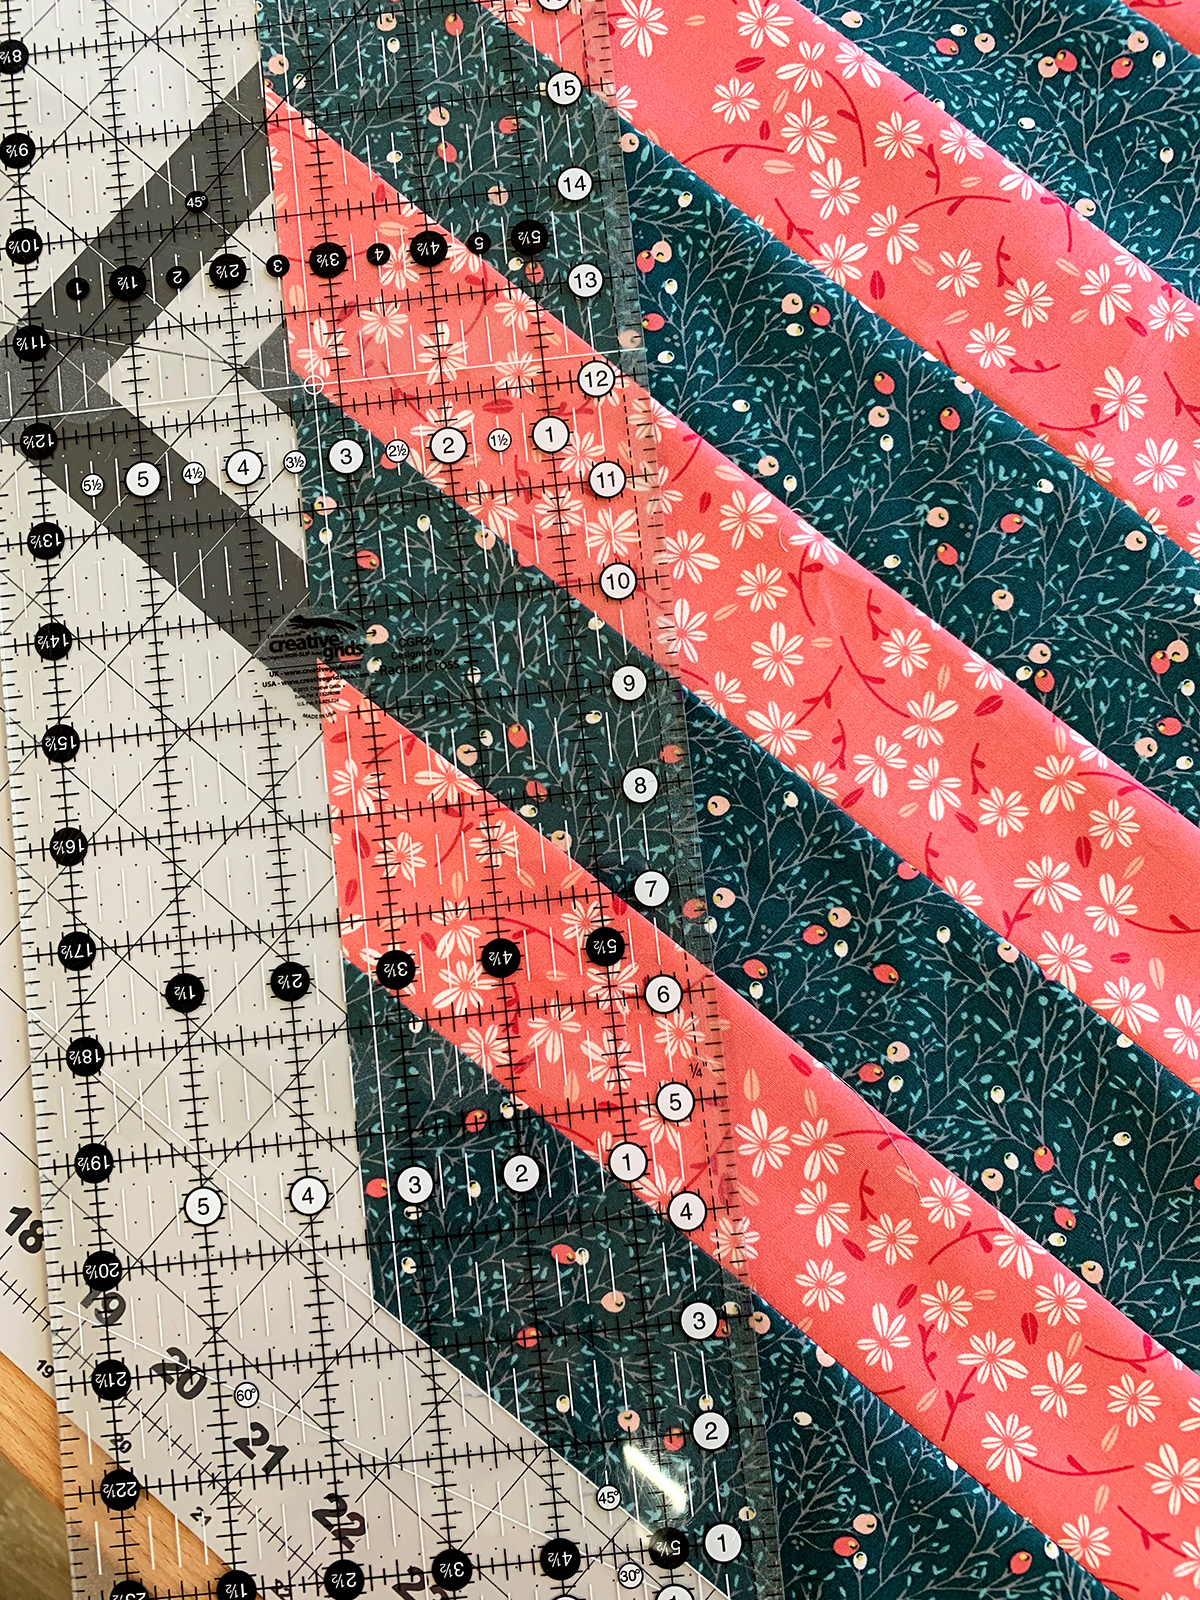
You will need four strips for this quilt. Use remaining fabric to possibly create a matching pillow or Christmas stocking.
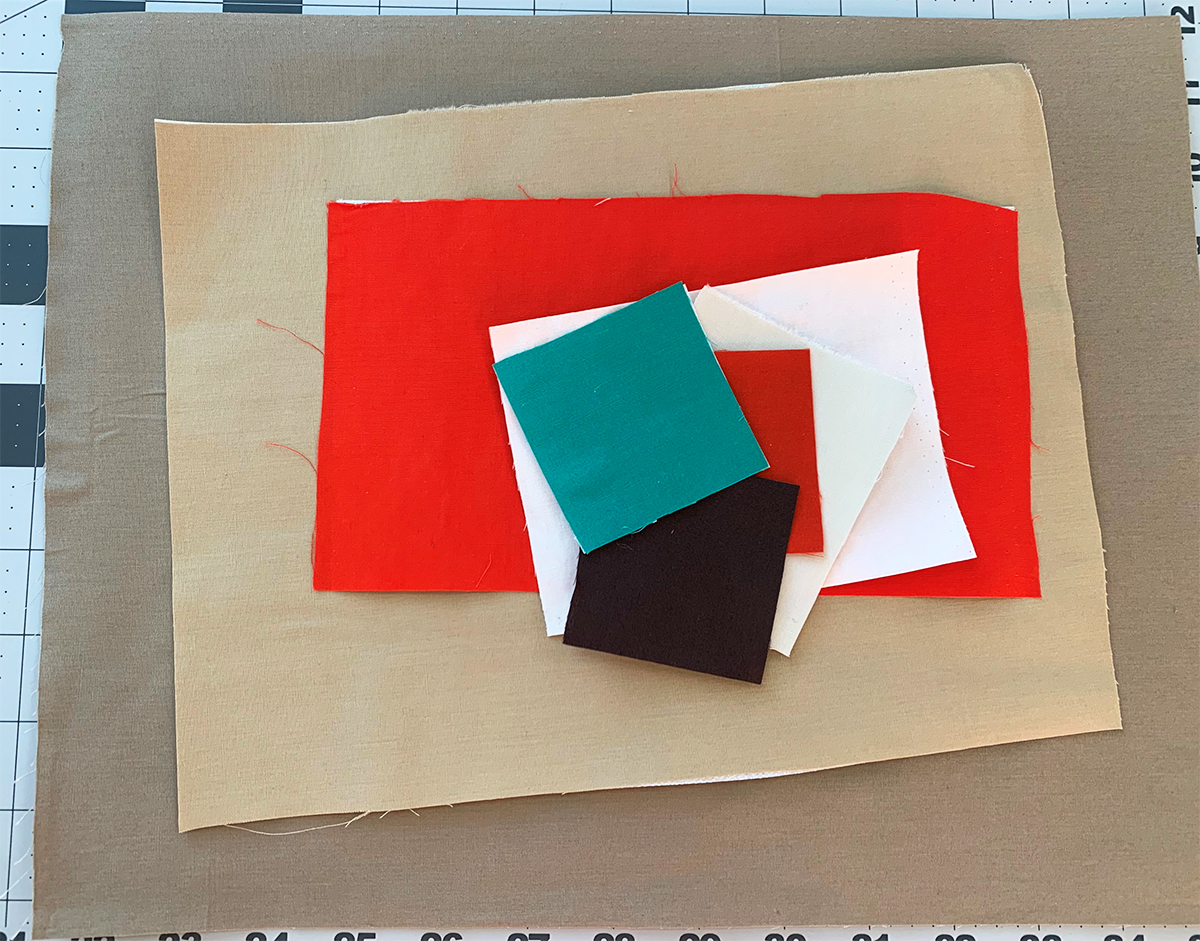
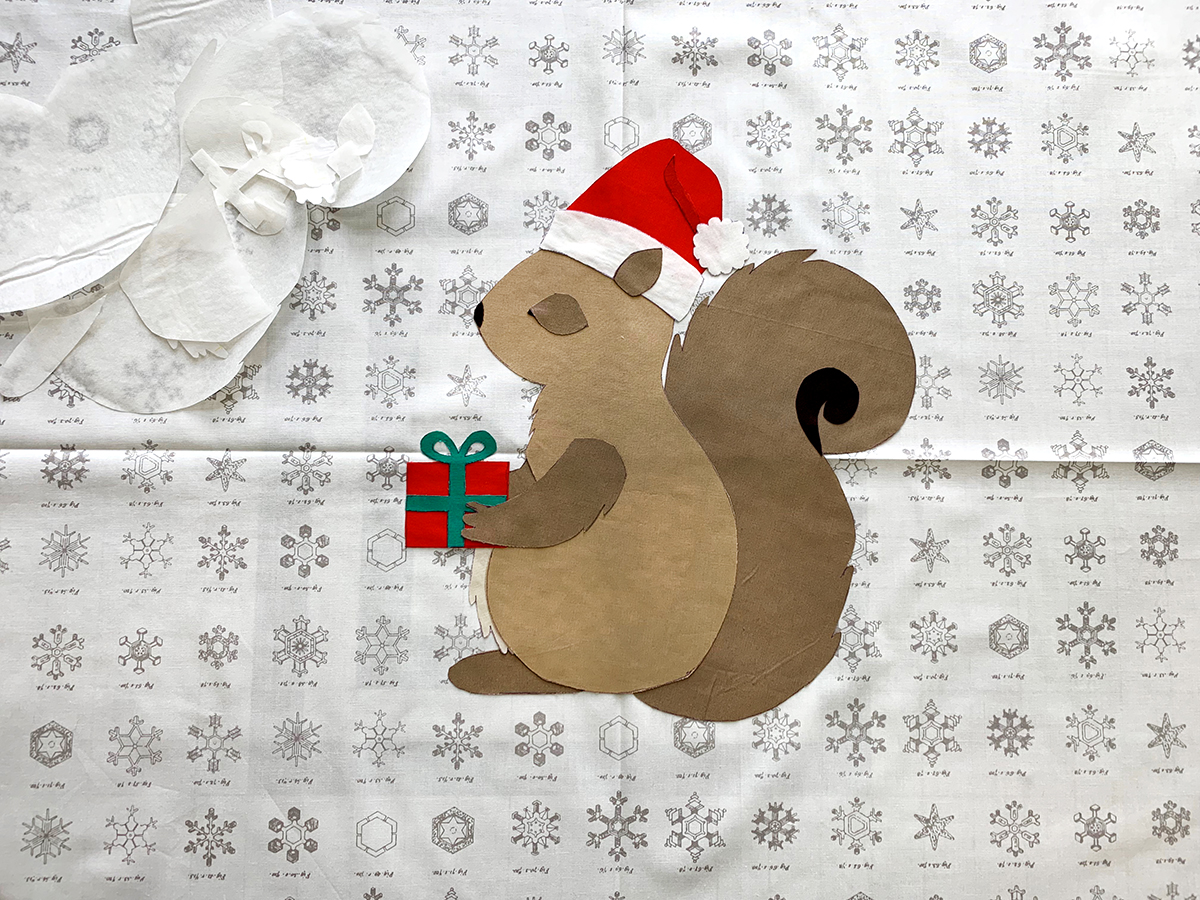
Step 2: Creating “Coco” the squirrel
Cut out your template pieces and match colors to coordinating fabrics. All of your Pure Element solid fabrics should have Seam-A-seam applied to the wrong side of the fabric. Trace your temples with a fabric marking pen and cut out your templates. Find the center of your 26 1/2″ square from Fabric A (background fabric) and piece your squirrel together following the illustration. Slowly layer your pieces on top of each other to create your final squirrel. Once your happy with the way it looks give it a good press with the iron to set in place.
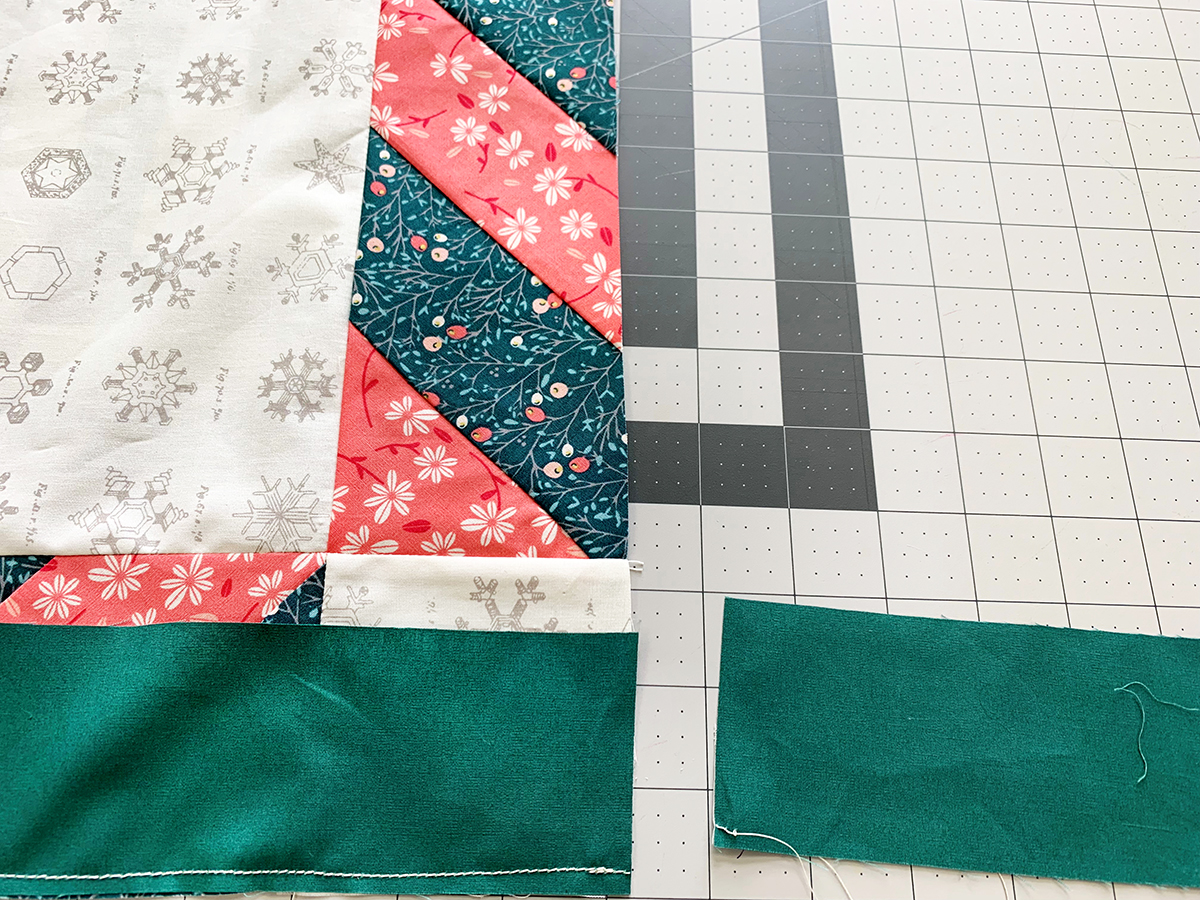
Step 3: Sewing the Boarders
Attach two of your diagonal red and green strips to the top and bottom of your center quilt. Trim off excess strip.
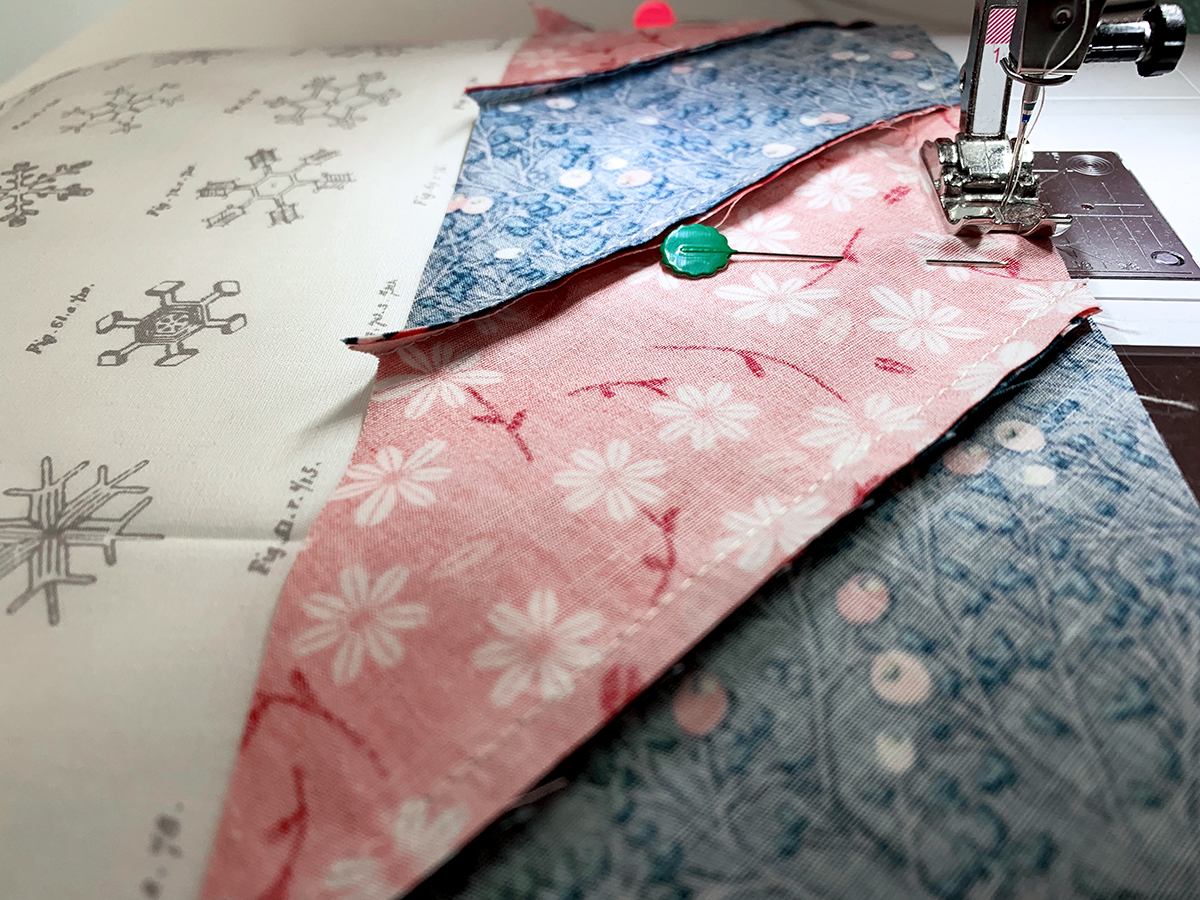

Next trim off excess ends on your other two red and green strips and sew a 3 1/2″ square from Fabric A to each end.
To all the sides of your quilt sew your 2 1/2″ x WOF strips trimming off excess fabrics as you go.
Step 4: Free Motion Quilting
Attach your BSR Presser foot to your machine and decided what quilting motif you would like to create. Watch this great step by step video to learn more about Free motion quilting with the BSR Foot.
Once you have successfully finished quilting your quilt it’s time to attach the binding. Using a walking foot makes this process so much more manage.
Your Baby quilt or wall hanging is complete and is ready to be gifted or placed somewhere special in your home.

Wishing you all a December filled with love and special memories!
Love,
The AGF Team


What you might also like


2 comments on “Coco the Squirrel Baby Quilt Tutorial”
-
-
Our WeAllSew blog content is posted in an open format. If you wish to print the post, you can easily print your tutorials from the WeAllSew blog. If you attempt to print directly from the screen a pdf will be generated for your convenience. Please give it a try.
-
Leave a Reply
You must be logged in to post a comment.

Love to see Amy’s reference on this site. I have been following her and the lovely things she creates. Coco is sooo cute! Is there a way to print this in a couple of pages for those of us that need a reference?