Summer Sparkle Quilt-Along: Part 2
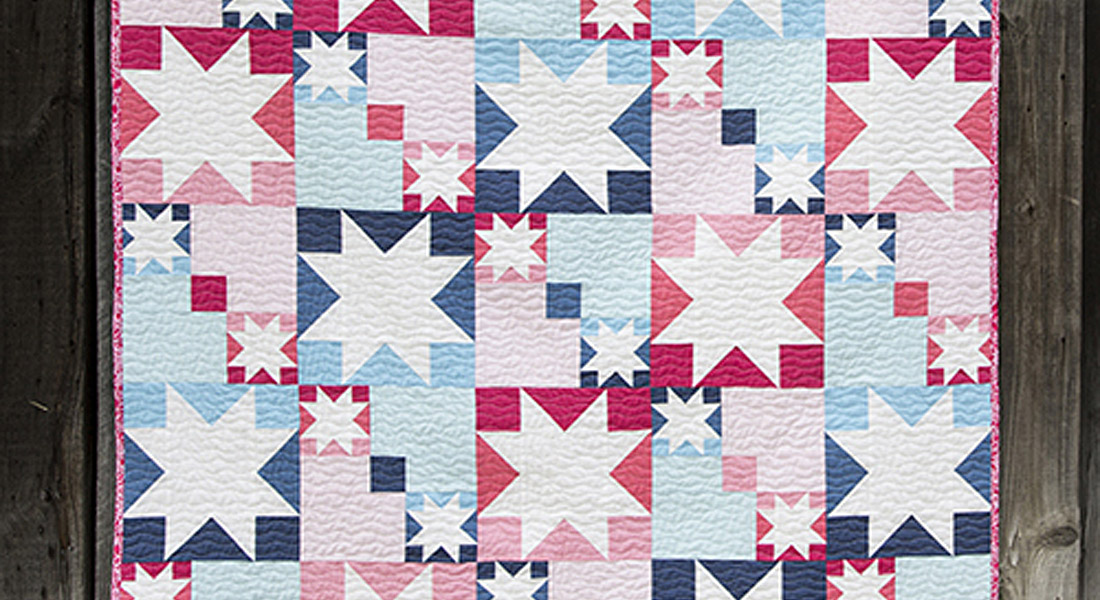
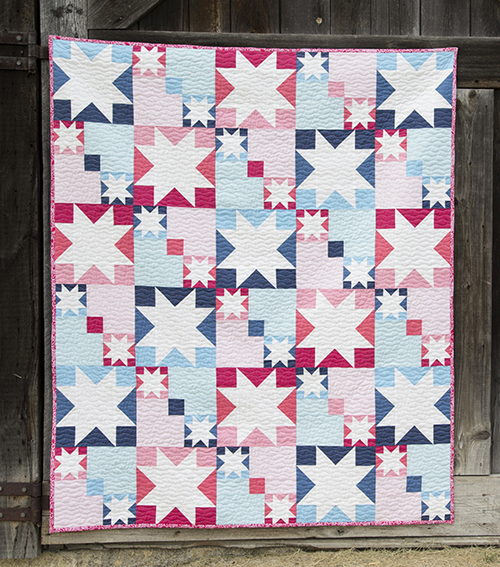
Welcome back everyone! This is Week 2 of the Summer Sparkle Quilt-Along. Hopefully you have your fabric gathered, cut and are ready to piece your quilt blocks. As I mentioned last week, we are going to make blocks based on Sawtooth Stars.
Click HERE to visit Summer Sparkler Quilt-Along Week 1.
Week 2: Piece the blocks.
This quilt has (30) blocks: (15) Block A and (15) Block B. Block A is a 10″ x 10″ finished Sawtooth Star. Block B contains two 4″ x 4″ finished Sawtooth Stars.
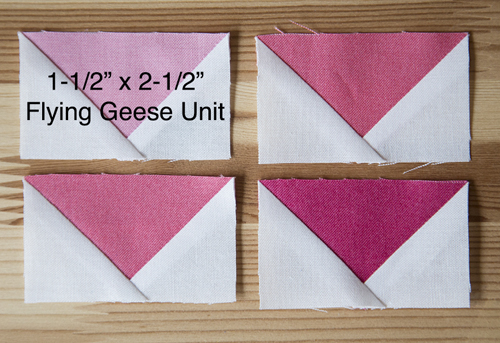
Both Block A and Block B contain Flying Geese Units. If you are not familiar with assembling Flying Geese, please refer to the below directions when the block instructions instruct you to piece a flying geese unit.
How to Piece the Flying Geese Units
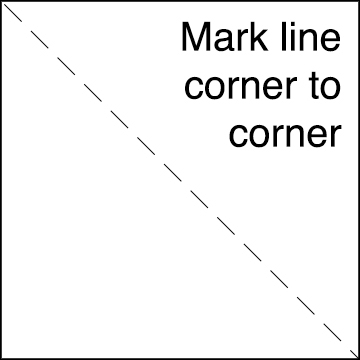
1. Gather (1) Color Flying Geese Rectangle and (2) White Flying Geese Squares. Using a marking tool (disappearing ink pen, pencil, hera marking tool, chalk, etc), mark your (2) White Squares from corner to corner on the wrong side of the fabric, along the diagonal.
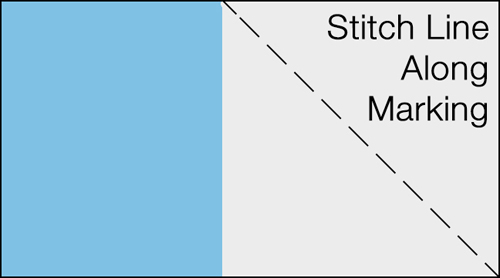
2. Place the Color Rectangle and (1) White Square right sides together as shown, lining up the fabric on the short end of the rectangle. Stitch along the marked diagonal line.
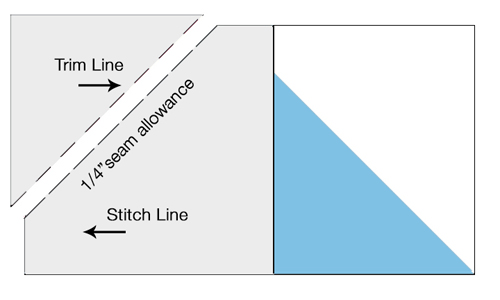
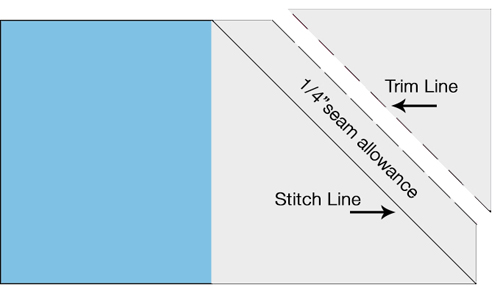
3. Using a quilting ruler, trim the stitched rectangle 1/4″ past your stitch line, as shown. Press your fabric open.
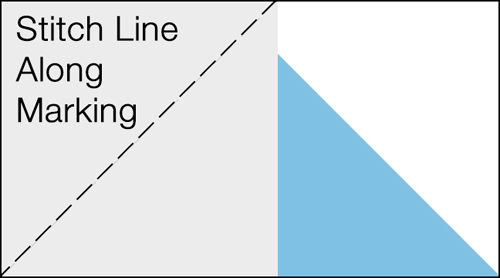
4. Place your next White Square, right sides together as shown, lining up the fabric on the other short end of the rectangle. Stitch along the marked diagonal line.
5. Once again using a quilting ruler, trim the stitched rectangle 1/4″ past your stitch line, as shown. Press your fabric open.
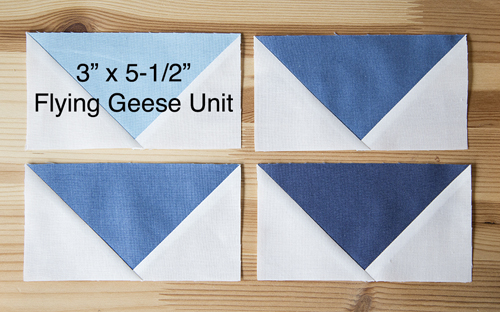
 You now have (1) Flying Geese unit.

How to Piece Block A
(10-1/2″ x 10-1/2″ unfinished)
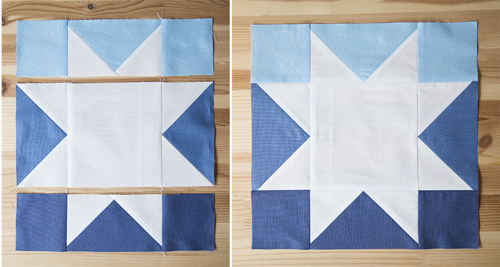
6. Select (1) 3″ x 5-1/2″ Light Blue rectangle, (2) 3″ x 5-1/2″ Medium Blue rectangles, (1) 3″ x 5-1/2″ Dark Blue rectangle and (8) 3″ x 3″ White squares.
7. Following the directions in How to Piece Flying Geese Units (above), piece (1) Light Blue Flying Geese unit, (2) Medium Blue Flying Geese units, and (1) Dark Blue Flying Geese unit, each measuring 3″ x 5-1/2″.
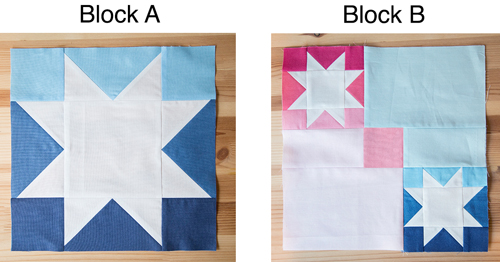
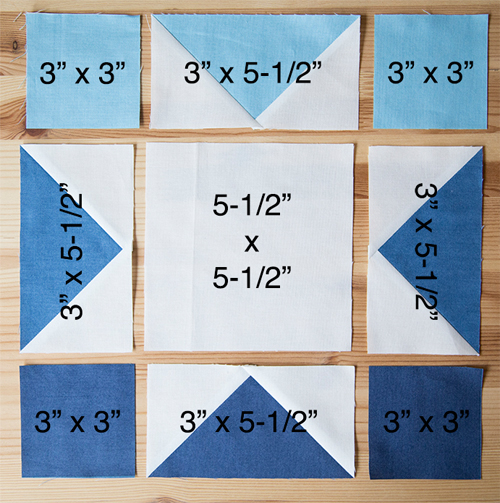
8. Select (2) 3″ x 3″ Light Blue squares, (1) 5-1/2″ x 5-1/2″ White square, and (2) 3″ x 3″ Dark Blue squares. Place those, along with your finished Flying Geese units, as shown. Piece the segments into rows. Piece the rows together to complete the block.
9. Repeat Steps 6 through 8 and create (7) additional Blue Block A and (7) Pink Block A, for a total of (15) Block As.
How to Piece for Block B
(10-1/2″ x 10-1/2″ unfinished)
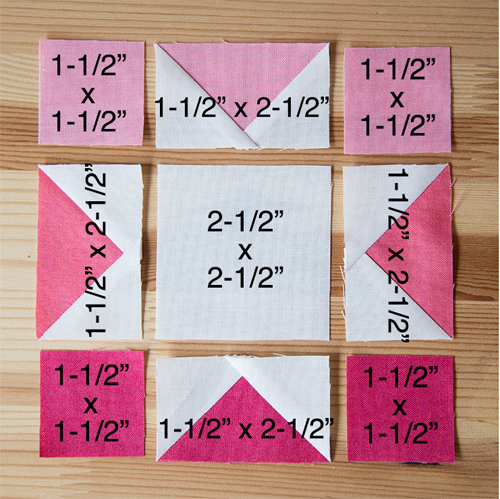
10. Select (1) 1-1/2″ x 2-1/2″ Light Pink rectangle, (2) 1-1/2″ x 2-1/2″ Medium Pink rectangles, (1) 1-1/2″ x 2-1/2″ Dark Pink rectangle and (8) 1-1/2″ x 1-1/2″ White squares.
11. Following the directions in How to Piece Flying Geese Units, piece (1) Light Pink Flying Geese unit, (2) Medium Pink Flying Geese units, and (1) Dark Pink Flying Geese unit, each measuring 1-1/2″ x 2-1/2″.
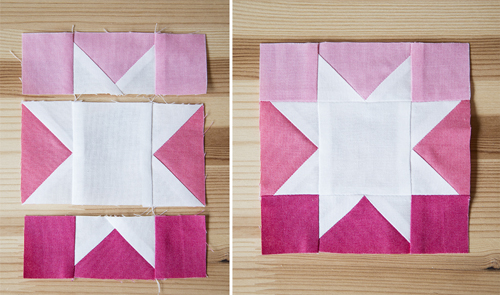
12. Select (2) 1-1/2″ x 1-1/2″ Light Pink squares, (1) 2-1/2″ x 2-1/2″” White square, and (2) 1-1/2″x 1-1/2″ Dark Pink squares. Place those, along with your finished Flying Geese units, as shown. Piece the segments into rows. Piece the rows together to complete the star.
TIP: For an added gradient effect, lay out your stars within the block with the lightest fabric touching the faded pink and blue rectangles.
13. Repeat and create (14) additional 4-1/2″ x 4-1/2″ Pink Stars and (15) 4-1/2″ x 4-1/2″ Blue Stars .
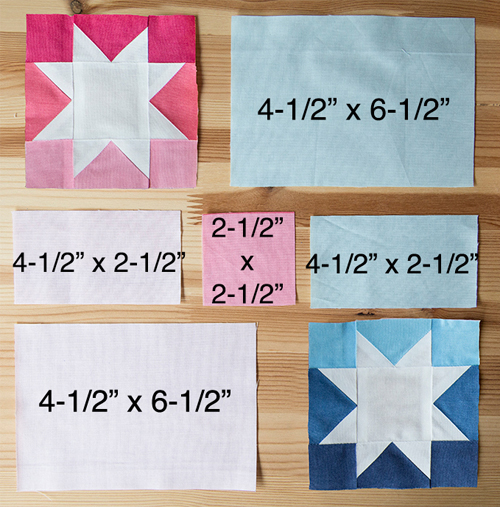
14. Select (1) Pink Star, (1) Blue Star, (1) 2-1/2″ x 2-1/2″ square from your Variety of Pinks/Blues, (1) 2-1/2″ x 4-1/2″ Faded Pink rectangle, (1) 4-1/2″ x 6-1/2″ Faded Pink rectangle, (1) 2-1/2″ x 4-1/2″ Faded Blue rectangle, and (1) 4-1/2″ x 6-1/2″ Faded Blue rectangle.
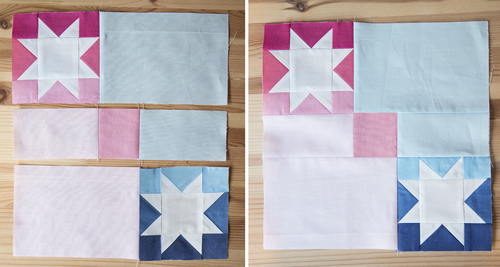
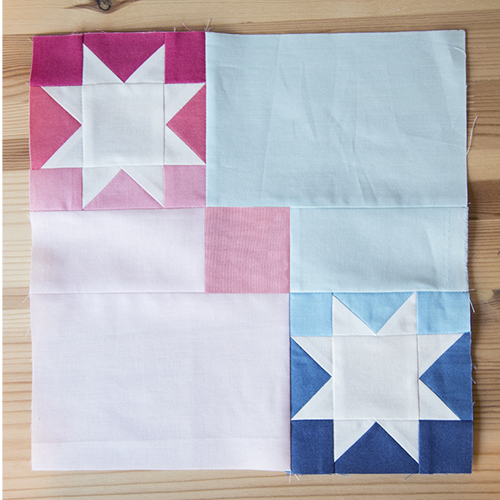
15. Lay out your fabric as shown. Piece the segments into rows. Piece the rows together to complete Block B.
16. Repeat Steps 14 and 15 to create (14) additional Block Bs, for a total of (15) Block Bs.
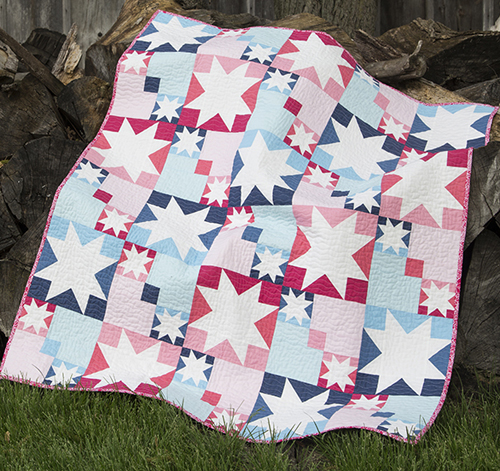
Next week I will be back with tutorials and tips for quilt top assembly and quilting! Happy piecing everyone!







5 comments on “Summer Sparkle Quilt-Along: Part 2”
I am short a little of faded pink, anyone have any to share? Can you tell me a little more about how to press the blocks? Of course I am way behind as I had a serious life event happen.
Hi, Linda – Which part of pressing do you need help with? Jo