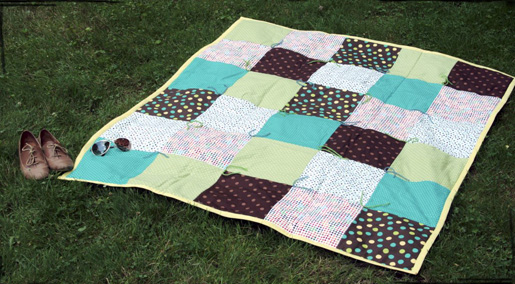
Blanket In a Bag
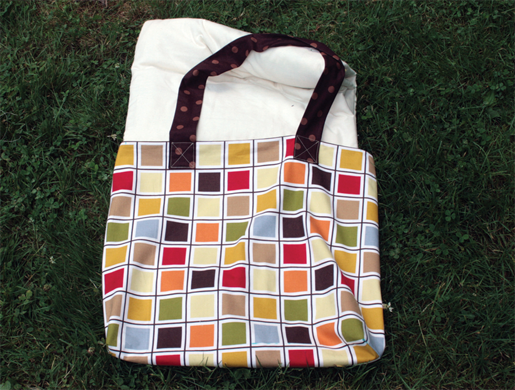
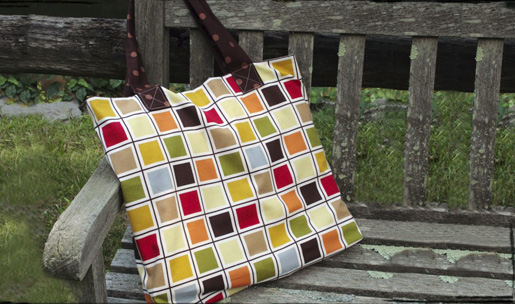
How many projects offer versatility, practicality and individuality? This blanket and bag combo does! Create a quilt-in-a-bag to keep you warm, hold your spot at the park, and help tote your goodies. Don’t want to spend the time creating a quilt? Use fleece or another cozy fabric for the blanket or simply stitch the bag onto an existing blanket or quilt. Fun is in the bag!
Supplies
- ²/3 yard each of 6 different coordinated cotton prints for the quilt top
- ²/3 yard of fabric for the bag
- 2-5/8 yards 60″-wide cotton fabric for the quilt back and bag lining
- 2 yards of 60″-wide low-loft cotton batting
- 6-1/4 yards of double-fold quilt binding
- Yarn
- Hand sewing needle
Step 1) Make the blanket/quilt.
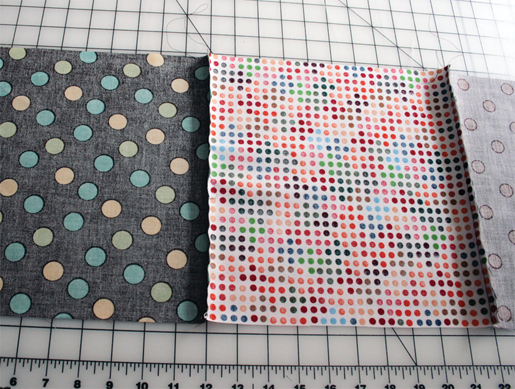
Cut thirty 10½” x 10½” squares from the coordinating cotton fabric prints. You can alternate prints and colors to create any look you like.
To join the pieces, pin two pieces right sides together and sew along one edge with a 1/4″-wide seam allowance. Repeat to join six pieces together. Repeat to make five rows of six squares each.
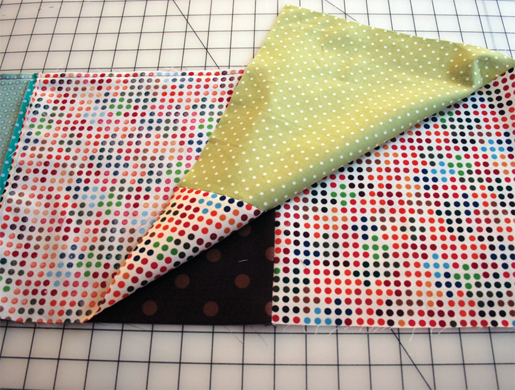
Lay two pieced rows right sides together with the seamlines aligned. Sew them together along one long edge. Repeat to join all five rows to assemble the quilt top.
Cut a rectangle 60″ wide and 70″ long for the quilt back. If your fabric is not long enough, piece two 35″-wide and 60″-long strips together.
Cut a piece of batting the same size as the quilt back.
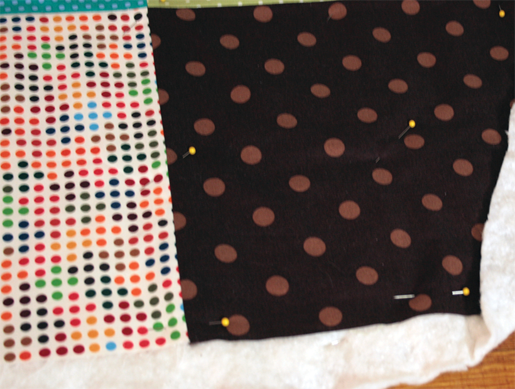
Lay the quilt back on your work surface or a clean floor, face down. Lay the batting on top, smoothing out any wrinkles and bumps. Lay the quilt top on top, face up. Smooth out the fabric again. Pin all of the layers together, using pins every 5″ or so.
Trim the batting and quilt back to match the quilt top.
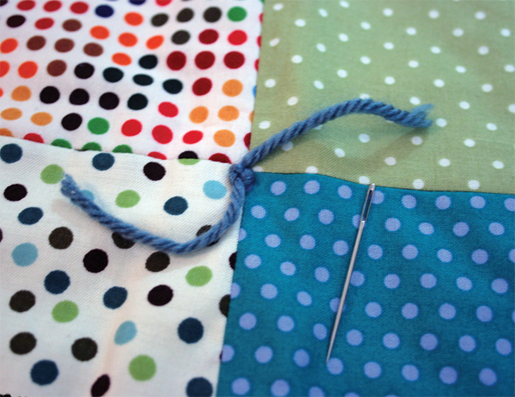
Secure the blanket layers together at each square intersection with a knotted piece of yarn. To do so, cut a 10″-long piece of yarn and thread it into a hand sewing needle. Push the needle through all layers of the quilts at one of the seam intersections, then bring it back up through all layers. Kno t the yarn and trim the ends to your taste.
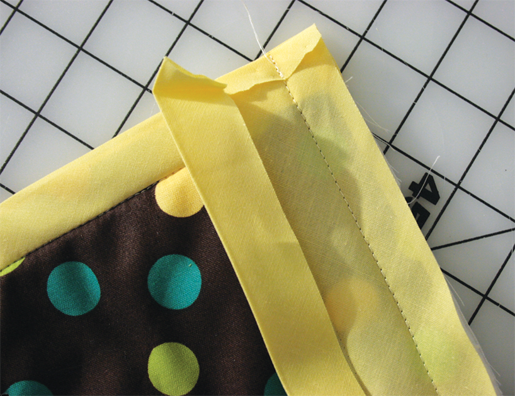
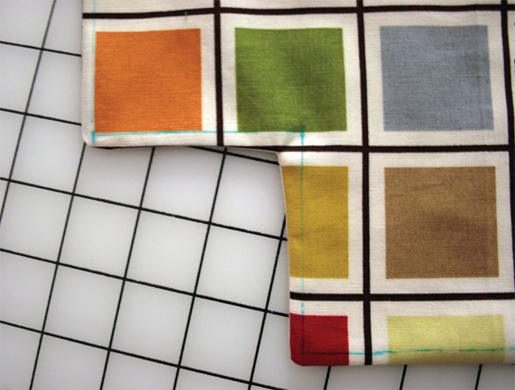
Cut two 55″-long and two 65″-long pieces of double-fold quilt binding.
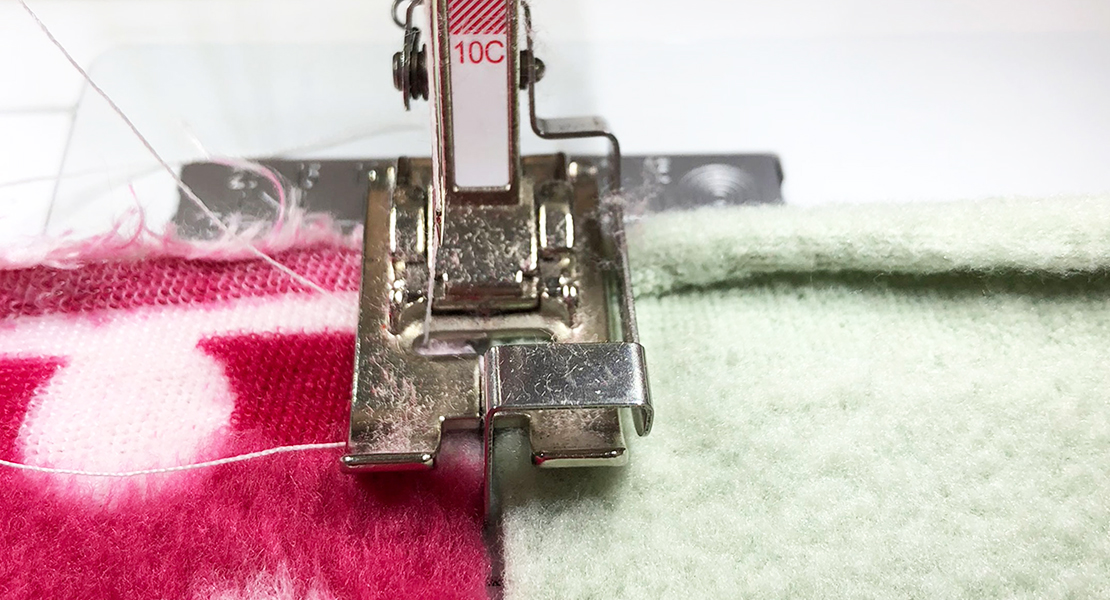
Open up one strip and pin it along one quilt edge with the raw edges aligned. Turn under the short raw edges. Sew the binding to the quilt along the first fold line as shown in the photo. Then wrap the binding around the quilt’s edge and pin it in place. Edgestitch the binding’s other side in place by stitching in the ditch along the previous seam.
Step 2) Make the bag.
Follow the diagram to create the bag/pocket pattern.
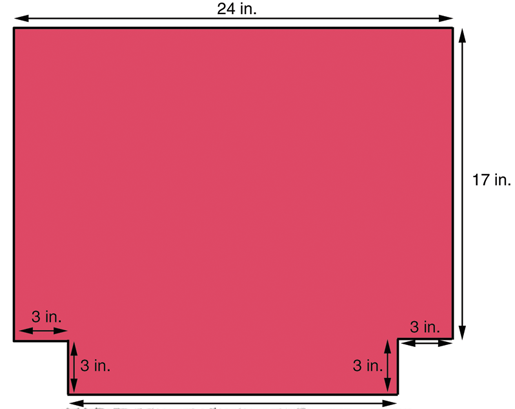
Cut one piece from a print and a second piece in the same fabric as the quilt back.
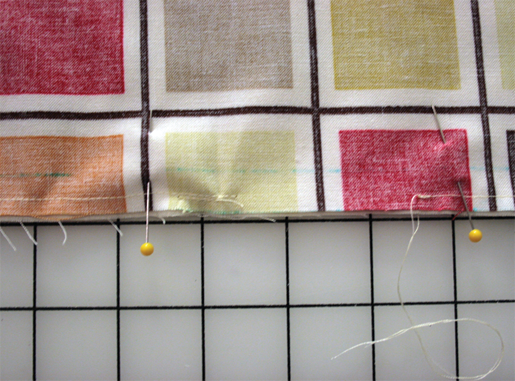
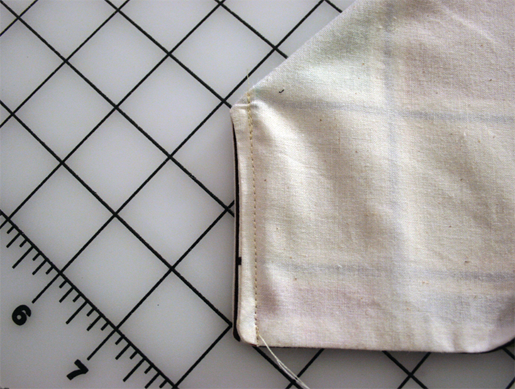
Pin the two bag pieces right sides together. Sew around all the edges with a ¼”-wide seam allowance, leaving an opening about 2″ wide at the bottom edge.
Clip the corners. Turn the bag right side out through the opening and press it.
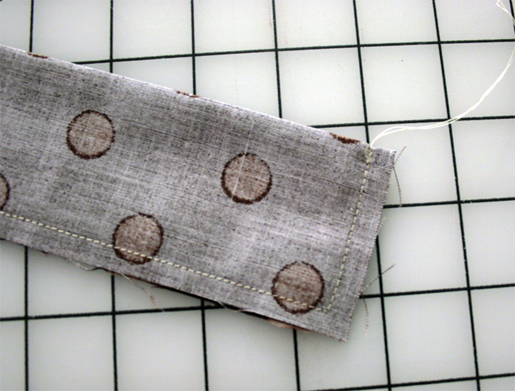
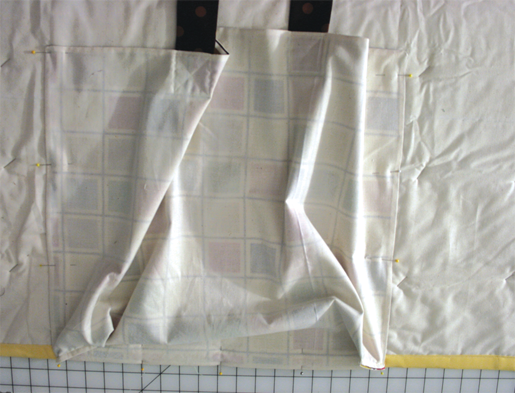
Before you attach the bag to the blanket, you need to sew its corners. To do this, fold the bag to bring the two 3″ sides of each corner together, aligning the edges.
Sew the corner edges together in a straight line using a ¼”-wide seam allowance.
Cut two 4-1/2″ x 31″ fabric strips. Fold one in half lengthwise with right sides together and long edges aligned. Sew around the edges, leaving one short end unsewn. Clip the corners and turn the strap right-side out. Press the strap, turning ¼” of fabric to the inside at the open end. Repeat for the second strap.
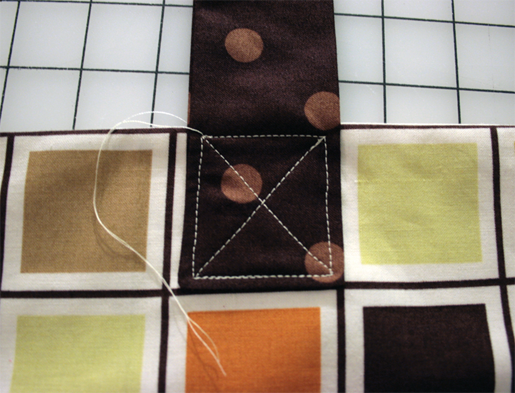
Pin one strap to the top of the bag with its ends spaced about 7″ inches apart and the strap ends extending 2″ past the bag’s top edge. Sew the strap ends in place as shown, sewing around the straps edges where they overlap the bag. Then sew diagonally across as shown.
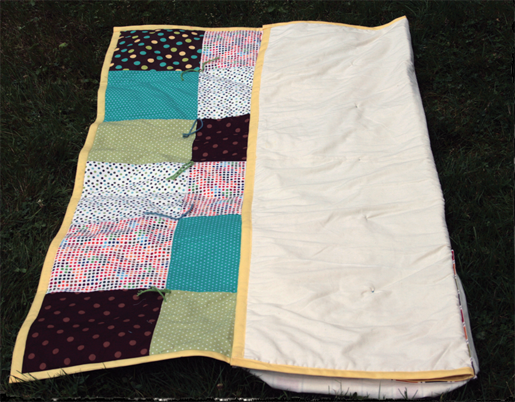
Step 3) Attach the bag/pocket to the blanket/quilt.
Center the bag along one blanket edge with the bag’s bottom edge aligned with the blanket’s edge. Pin the sides to the blanket, making sure they are even with the blanket’s edge and parallel to each other. Sew the bag to the blanket along its side and bottom edges using a 1/4″-wide seam allowance.
Fold back the bag’s top edge and position the second strap on the blanket opposite the strap on the bag. Sew the second strap’s ends to the blanket in the same way you sewed the strap to the bag, with your stitches forming a sewn square with criss-crossed stitch lines.
![]()
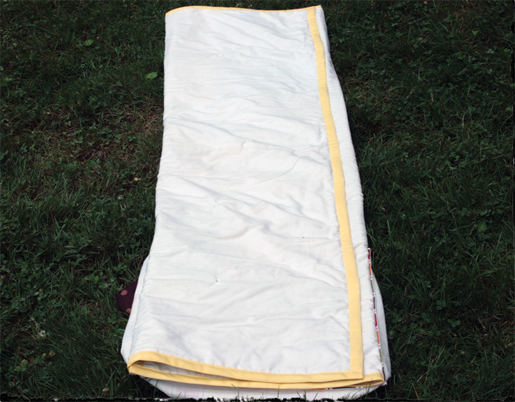
Step 4) Fold the blanket/quilt into the bag/pocket.
Lay the blanket out, face up, with the bag on the edge closest to you.
Fold the right-hand edge over, aligning the fold with the bag’s edge.
Then fold the left-hand edge in to match.
Next, turn the bag right-side out, encasing the blanket’s edge.
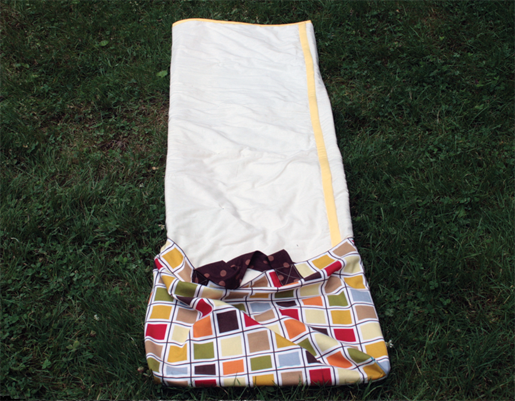
To finish, fold the blanket down into the bag.


What you might also like


5 comments on “Blanket In a Bag”
-
-
Help. I am stuck trying to do the corners I sewed all the way around the back including the 3-inch by 3-inch then I flipped the bag and now I don’t know how to make those Corners I don’t know how to bring them up I don’t understand I could leave it on the wrong sides and box the corners and then turn it inside out but the directions say turn it inside out and then do the corners and that those two pictures are vague if you could give me some more information about how to do those Corners do I so those 3 by 3 inch sides first then flip the back I don’t know how to I can’t get I don’t understand this Corners thank you for your help
-
Hello tstout, let’s see if we can help you finish this project. In the steps to finish the bag pocket for this quilt, you are first sewing the printed outside part of the bag pocket to the lining, leaving a 3″ opening in the bottom. After sewing around all edges except for the opening at the bottom of the bag pocket, you are turning this pocket right-side-out through the opening. It will look similar to the pattern piece in the illustration with the two bottom corners notched out. Bring these corners together by folding the side of the bag pocket over to meet the bottom of the bag pocket on a diagonal. When you see the corner pieces that are notched out meet together, pin them and stitch across this seam. Repeat for the other side. Then continue on with the tutorial.
-
-
Leave a Reply
You must be logged in to post a comment.

I’ve looked for this pattern for a long time Thank you for publishing this on the Blog