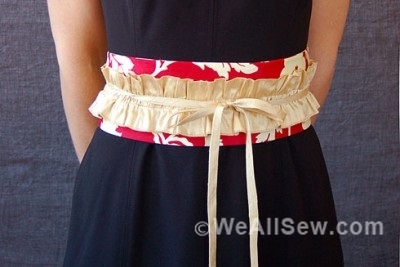
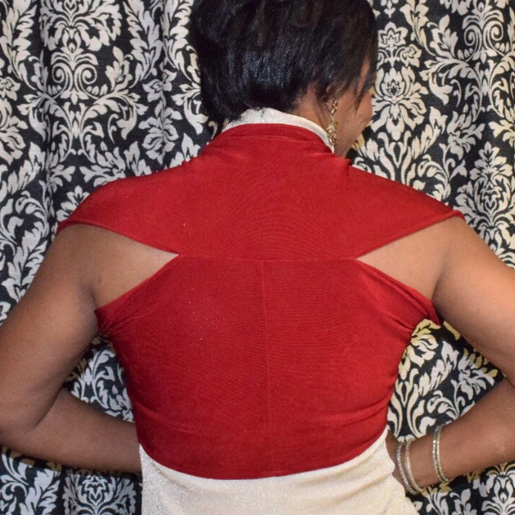
DIY Last-Minute Holiday Party Shrug
This is a nice take on the basic scarf or knit bolero, lovely over a strapless holiday frock.. Or dress up a tank top and jeans with this simple yet elegant shrug. Make one in less than an hour!

Perfect for gift-giving: 1-7/8 yards of any knit fabric can make up to five shrugs. (45″-wide knit fabric will make three, and 60″-wide fabric will make up to five.) Each cut piece is 60″-65″ long by 11″-13″.
Supplies
- 1-3/4 yard of any knit fabric with at least 100% stretch (This means that a 4″ crosswise fold will stretch to 8″.)
- Matching thread
- Stretch sewing machine needle
- 1 large hook-and-eye set
- Fusible webbing for hem, such as Steam-a-Seam 2 fusible web 1/2″ tape
- Chalk marker
- Walking foot (BERNINA Walking Foot #50)
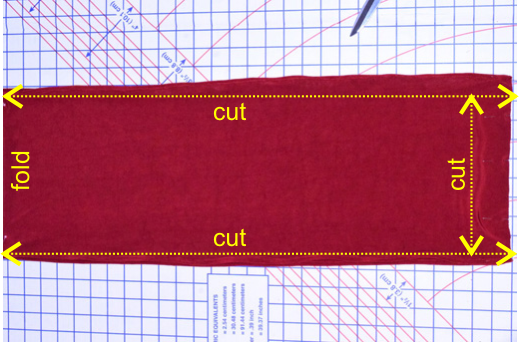
Step 1) Cut the fabric rectangle.
Fold fabric perpendicular to the selvages.
Cut one rectangle of fabric on fold as follows for the sizes needed:
Small/Medium (full bust up to 40″)
- 30″ long x 11″ wide
- The unfolded rectangle will measure 60″ x 11″
Medium/Large (full bust up to 45″)
- 33″ inches long x 12″ inches wide.
- The unfolded rectangle will measure 66″ x 12″
Large/X-Large (full bust above 45″)
- 36″ inches long x 13″ inches wide.
- The unfolded rectangle will measure 66″ x 13″
Step 2) Hem the long edges.
With the wrong side of the fabric facing up, affix 1/2″-wide strips of fusible web to the long edges of the rectangle.
Removing the paper backing a small amount at a time, fold the edge over 1/4″ onto itself. As you remove the webbing, continue folding and fusing just ahead of the point of the iron. The webbing will adhere to itself, creating a stable fold.

Fold the edge over 1/4″ one more time, encasing the raw edge. Pin.
Stitch the hem in place along the inside fold. For this “slinky” knit I used a non-stick foot (BERNINA Non-Stick Zigzag Foot #52D) to help the fabric move easily under the presser foot.
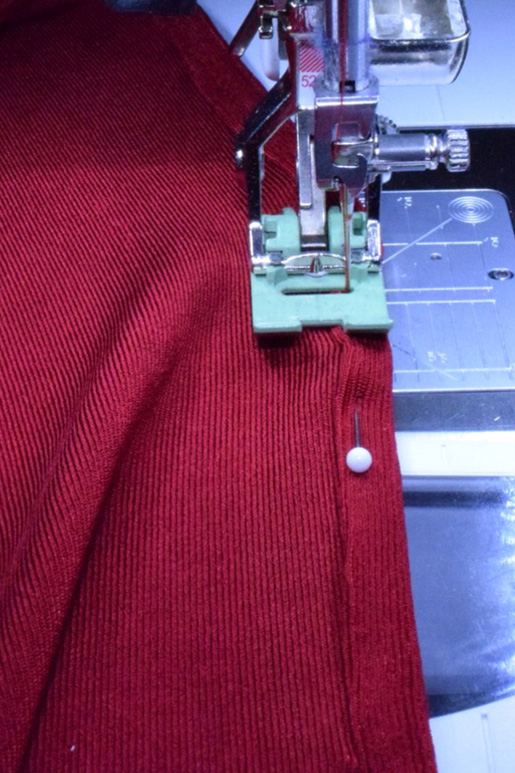
For evenly placed stitches, align the outer edge of the fold with the outer edge of the presser foot, then move the needle position so it lands a scant 1/8” from the inner fold.
Step 3) Sew the seams.
Pin the short ends right sides together. Stitch using a 1/2″-wide seam allowance, creating one continuous circle.
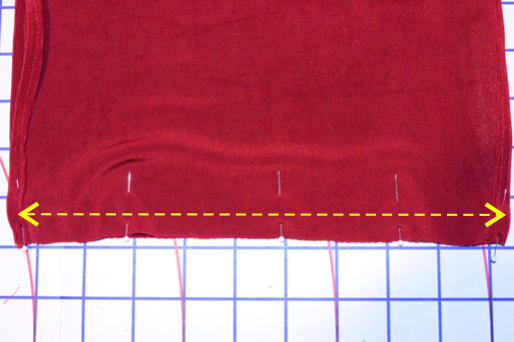
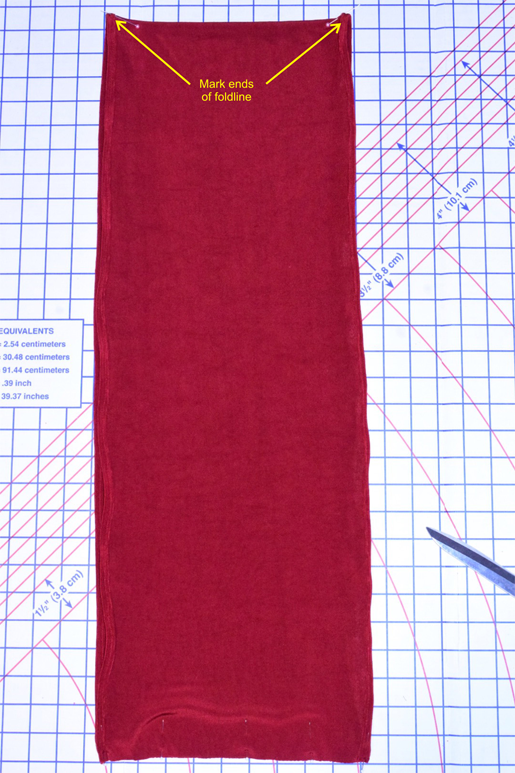
Using pins or a chalk marker, mark the edges of the folded end to indicate the center fold.
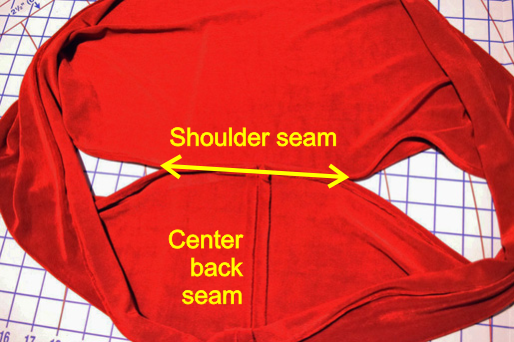
Match the center fold to the center back seam. Stitch together 4″ on each side of the center back seam, closing the circle.
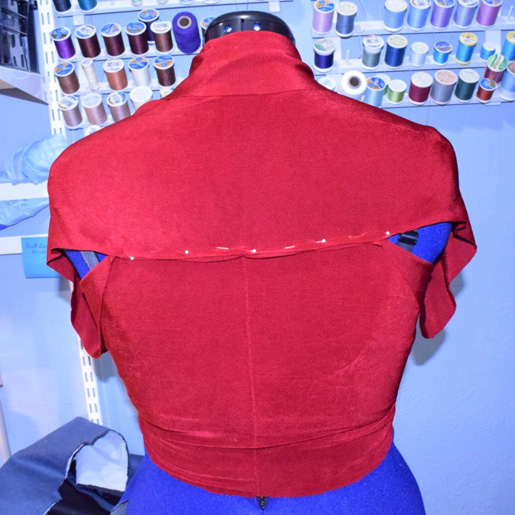
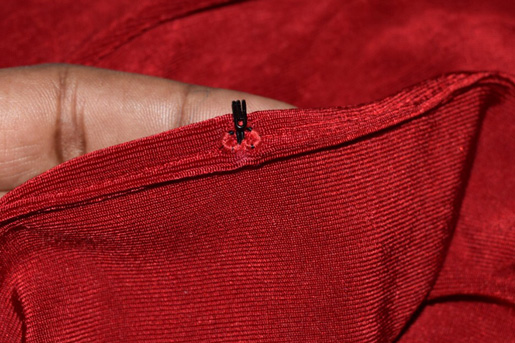
Step 4) Attach the closure.
Test fit your new shrug. Determine the placement of the hook and eye and mark with chalk.
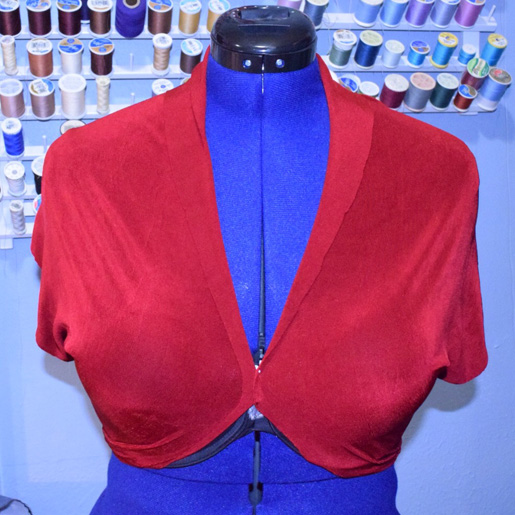
Remove the shrug and hand stitch the hook and eye in place. You’re done!