How to Make an Emergency iPad Case
Save your new iPad(TM) from damage and make a fashion statement while at it! Although iPads(TM) are the latest rage, protecting them can be challenging. Cases are hard to find, expensive, and often unattractive. No need to dial 911 – let the Emergency iPad(TM) Case come to your rescue! Once you assemble the materials, it’s only a few quick, simple steps to a fashionable and inexpensive case. Another big plus is that the case can be embellished according to individual tastes. Rescue has never been more attractive and personal!
Supplies
- Wool felt for the body of the case in gray, white or your choice of color; cut into three rectangles:
- 9″ x 25″, 3/4″ x 9″ and 3-1/2″ x 4″
- Wool felt for the decorative cross (optional): one 4″ x 4″ square
- Lightweight fusible web: one 6″ x 6″ square
- Marking pen
- Polyester thread to match the felt; you will need two colors if you use the cross design
- Pinking shears (optional)
- Sewing machine accessories
- BERNINA Edgestitch Foot #10 for decorative topstitching (If you do not own #10, you can use BERNINA Blindhem Foot #5.)
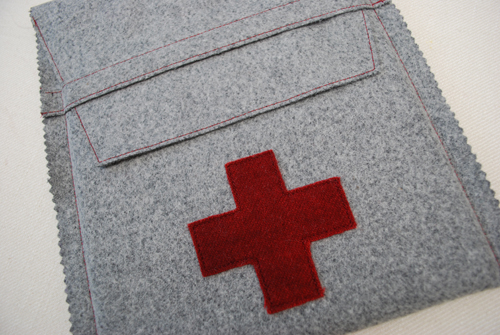
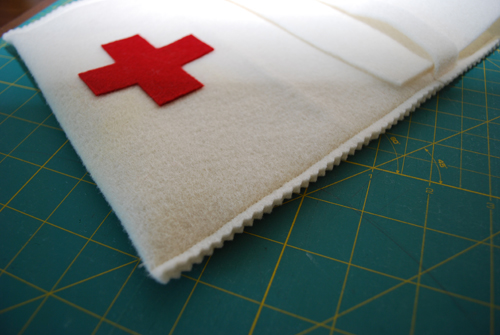
Step 1) Applique the red cross (optional).
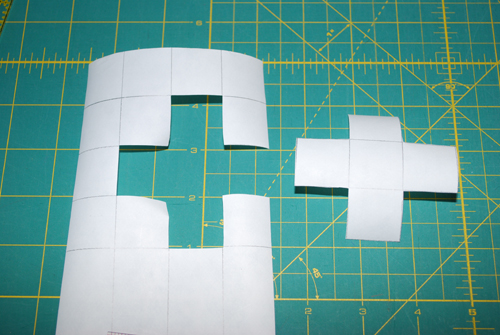
Draw a 1″ grid on the square of fusible web.
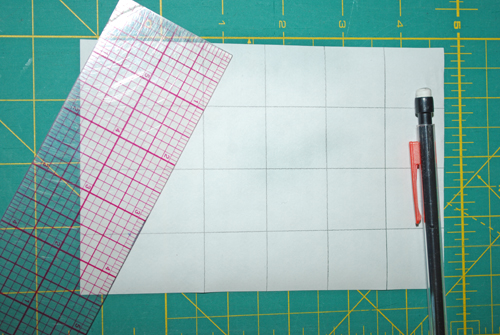
Fuse the web to the red felt following the manufacturer’s instructions.
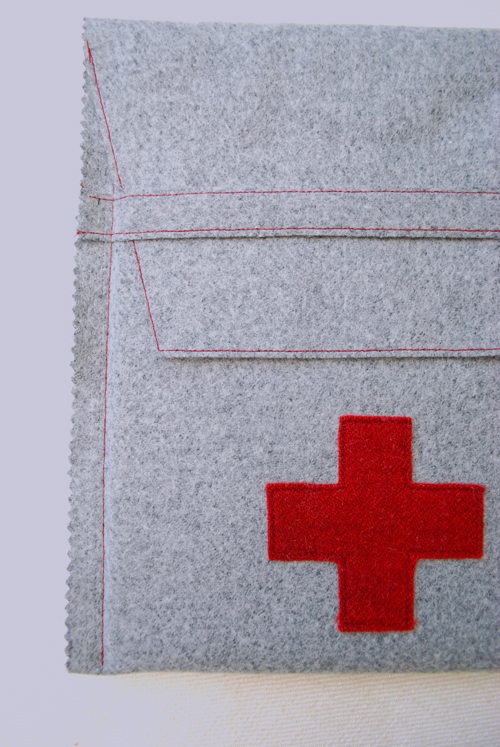
Following the drawn lines, mark the sides of a cross on the backing as shown in the photo.
Cut out the cross without removing the paper backing; this makes it easier to see the shape’s outline.
Fold the long felt rectangle (body strip) with the iPad inserted between the layers. The iPad should barely peek out from under the felt.
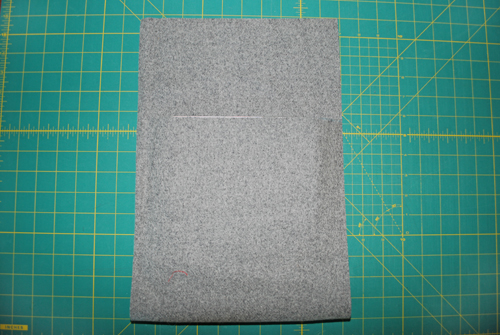
Remove the iPad carefully. Pin the sides of the folded felt to hold the layers in place.
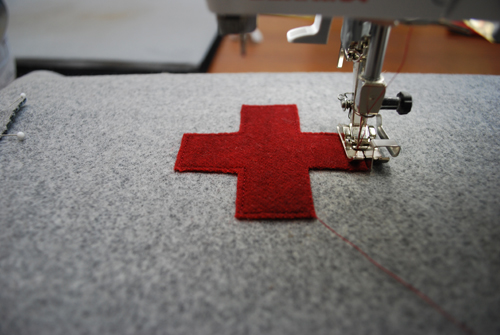
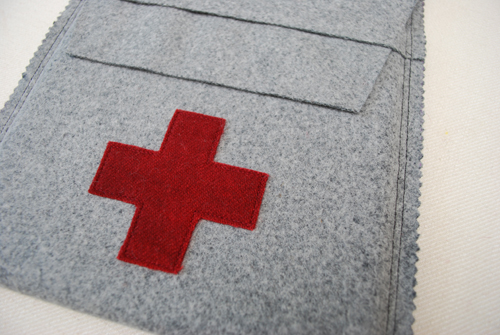
Folding the flap down, determine where you would like the cross to be positioned. Fuse the cross into place.

Because not all felt fuses well, you may want to topstitch close to the edges of the cross, all the way around the perimeter. I like to use BERNINA Edgestitch Foot #10 for this, as I can move the needle position to the side and simply align the fabric edge with the guide in the center of the foot.
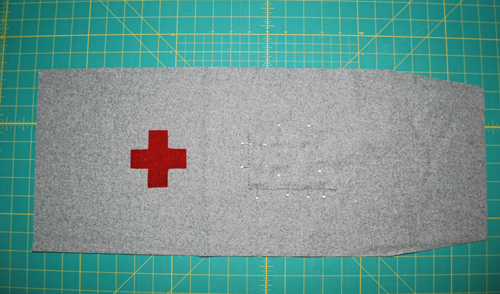
Step 2) Shape the flap.
Mark the top of the case 1″ from the edges. Mark the sides 1/2″ from the top of the pocket. Draw a line between the two marks, then cut along the drawn lines to shape the flap.

Step 3) Add the small pocket.
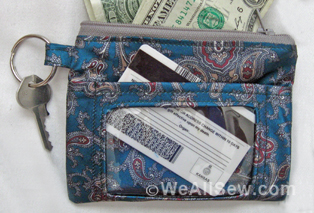
The small pocket in the back of the case lets you take a soft cloth with you to clean the fingerprints off the screen of your iPad.
Use the pinking shears to trim away the edges on three sides of the small 3-1/2″ x 4″ rectangle.
Center the small pocket on the back of the case, being mindful of the direction of the pocket and the positions of the fold and the flap.
Stitch the pocket to the body slowly to avoid stretching it, about ⅛” from the edge, pivoting at the corners.
Step 4) Attach the flap strap.
Optional: Reinforce the edge of the flap by stitching 1/8″ from the sides. Use a contrasting thread for added interest.
To personalize your case further you could sew a decorative stitch through the middle of the strap. (See photo at end of instructions.)
If desired, sew lines of stitching 1/8″ from the edges of the strap. Fold the flap down and place the long narrow strip 2″ from the top of the case, over the flap.
Pin in place.

Pin the folded side of the case body.
Sew along the edges of the case with a 5/8″-wide seam allowance, catching the strap in the stitching.
This large seam allowance allows you to use further decorating steps if you feel so inclined. You can run a second row of stitching inside the seam allowance, you can also use your pinking shears on the edges.
Your new case is now ready to house and protect your iPad. It is light and slim and will not weigh down your handbag. Take it along everywhere!