MYOG Roll-top Stuff Sack
As an avid hiker who seeks solace in the mountains, it’s important to be prepared for the unexpected with The Ten Essentials. No matter how long I plan to be out I always pack extra clothing and a small selection of personal safety equipment. To keep this gear consolidated in my pack a small roll-top storage sack is perfect to compress the clothing items and provide a bit of weather protection should a spring shower catch me off guard.
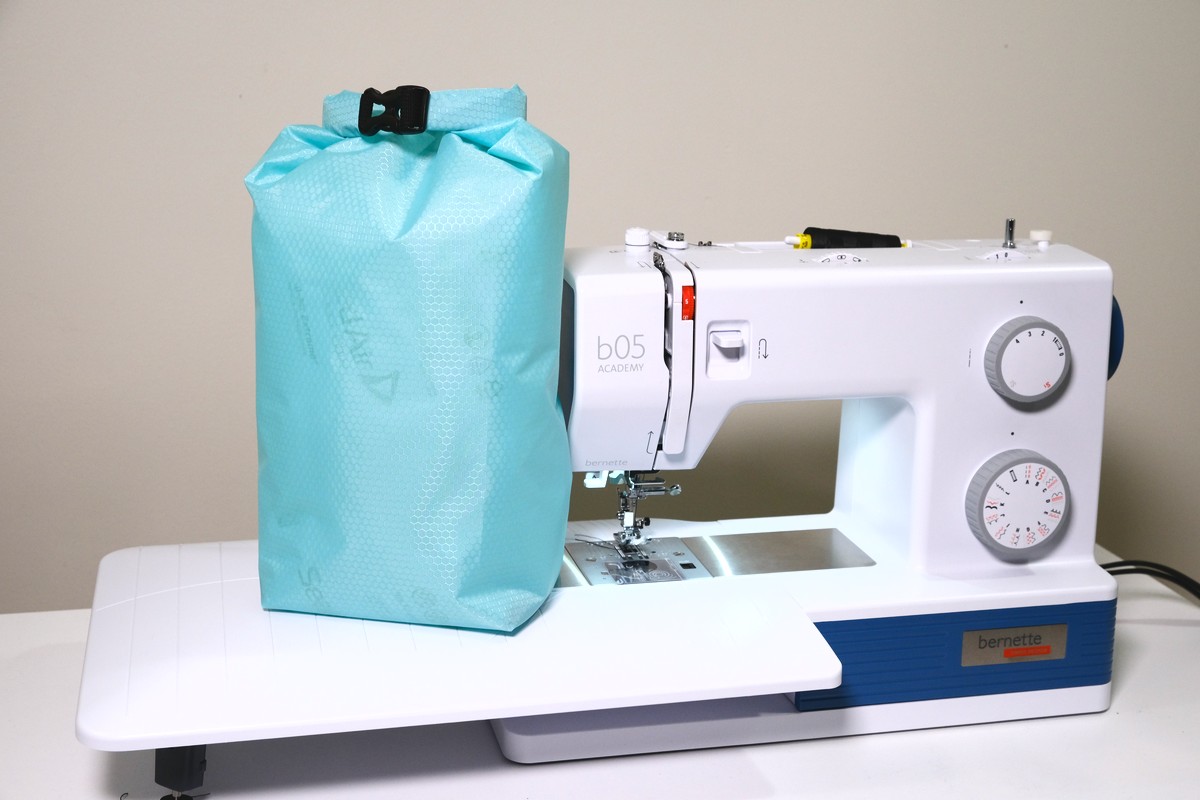
Presented in my previous post, Sewing for Outdoor Adventures with Make Your Own Gear (MYOG), with a little bit of sewing know-how and the right choice of technical fabrics, making a custom-sized Roll-Top Stuff Sack is a quick weekend project. The Roll-Top Stuff Sack is a square-bottomed compressible storage bag that includes a weather-resistant roll-top extension collar, a quick release buckle closure, and fray-proof seams for a long-lasting make.
As patterning a bag from scratch can be difficult, we’ll eliminate the complicated math by using the pattern generator on my website LearnMYOG.com. The pattern generator converts your desired finished bag dimensions and calculates the exact size single fabric panel as well as the length of webbing needed for the project.
Get started by first estimating the finished size of the Roll-Top Stuff Sack you’d like to create. You can input whatever measurements you feel are needed for your bag. For a medium size bag suited to stuff a jacket and a few personal safety items like a headlamp and small first aid kit, input the following measurements.
- Bottom Length of 6”
- Bottom Width of 4 1/2”
- Height of 10” with the roll-top closed

For the medium bag dimensions, the pattern generator returns a Body Panel pattern measuring 22 1/4” long and 21 1/8” tall. Jot down these pattern measurements in case you need to reload the webpage.
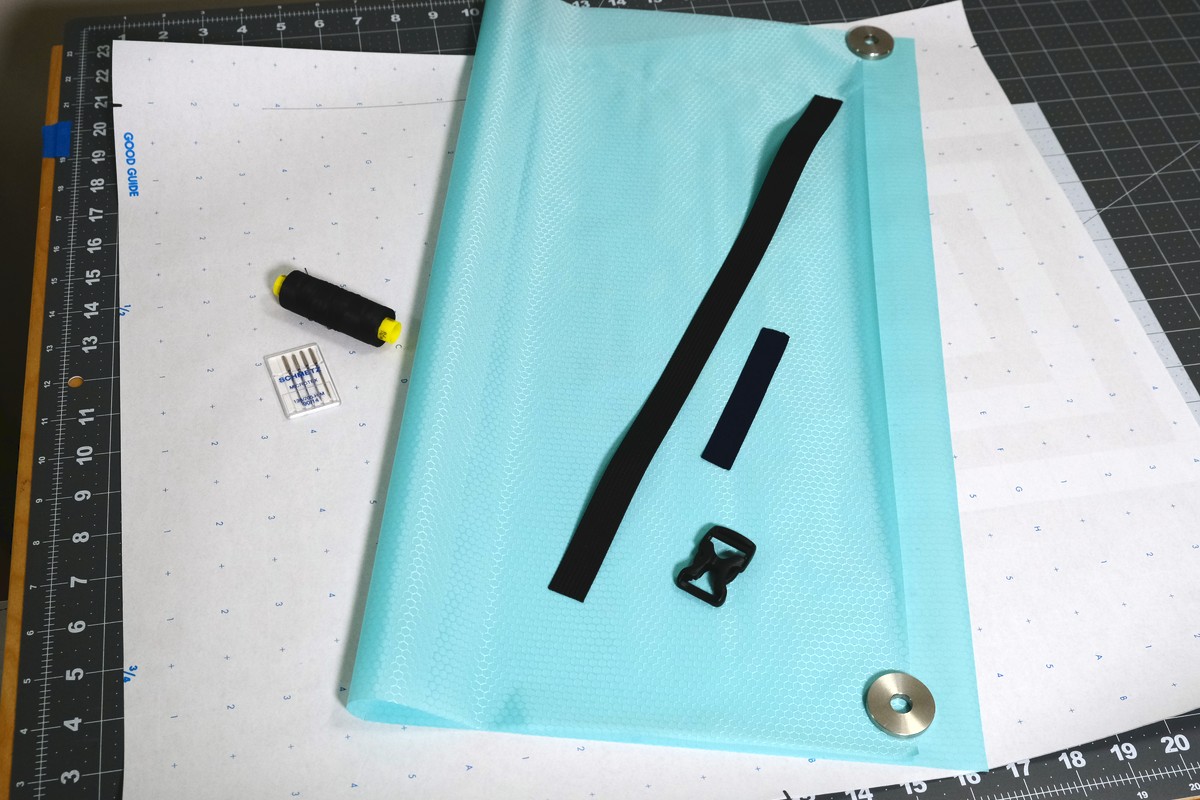
Materials Needed
- Technical pack fabric of choice. I’m using a PU-coated ripstop nylon called 2.2oz Hex 70 from Ripstop by the Roll. Fabric size is specified by the pattern generator.
- 3/4” wide nylon lightweight webbing, length is specified by the pattern generator
- One side release buckle for 3/4” webbing
- One 4” piece of webbing or ribbon, 1/2” to 1” wide is fine
- Polyester thread, tex 30 or 40
- Microtex needle, size 80/12 or 90/14
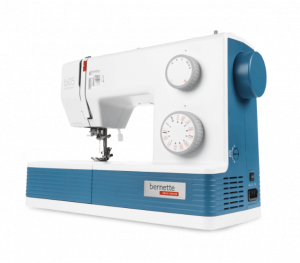
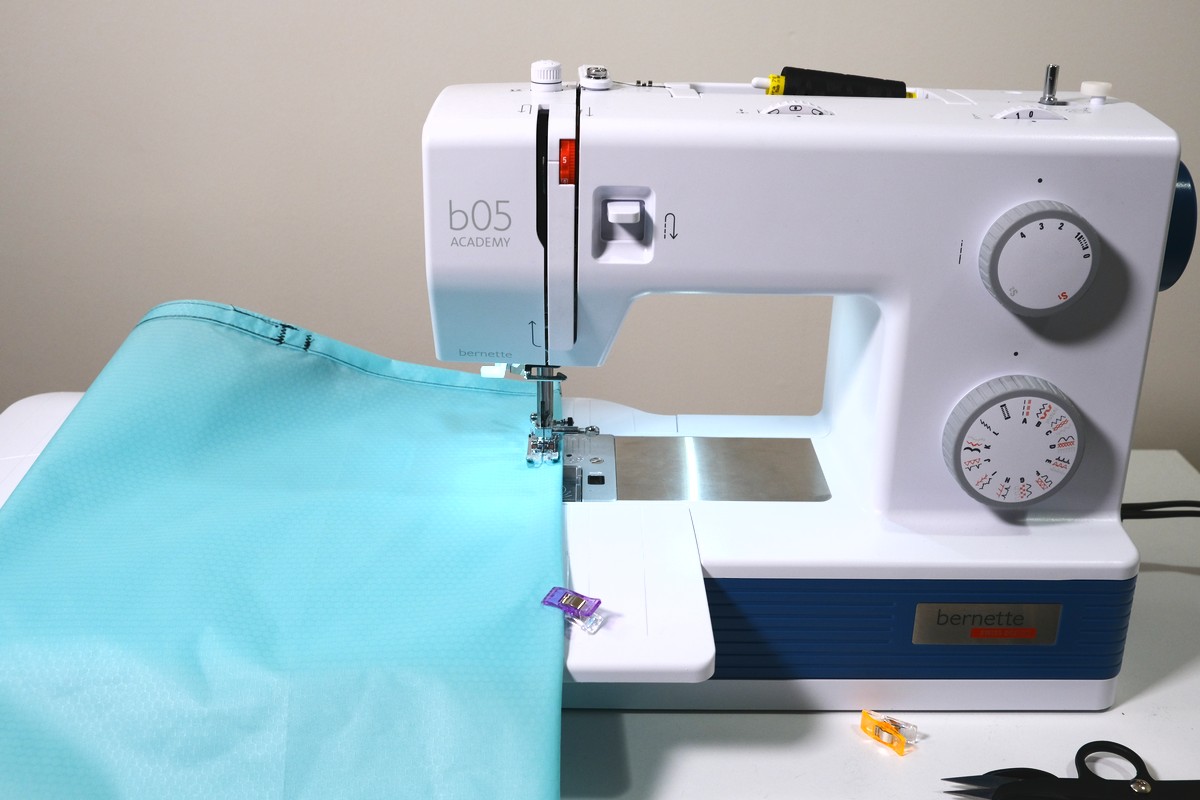
- Sewing machine (I’m sewing with a bernette 05 ACADEMY)
Optional Items
- Patterning paper
- Quilters square or tailor’s square ruler
- Marking tool
To make a reusable pattern, first draft the Body Panel pattern onto patterning paper. Alternatively, draw the rectangular pattern directly onto the wrong side of your fabric with a marking tool.
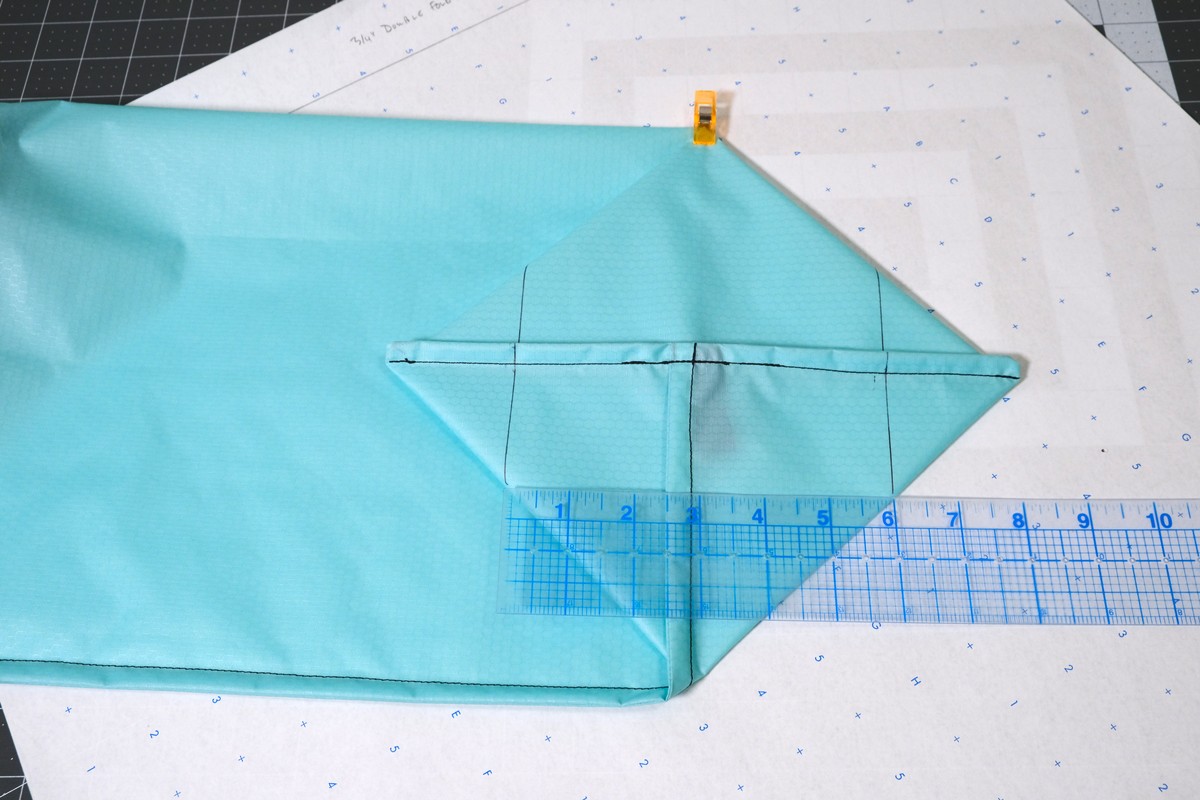
Referencing the measurements returned from the pattern generator, draw the “Body Panel Width” and “Body Panel Height” for your desired bag size. Mark the midpoint of the bottom edge for a notch. Scribe a hemline parallel to and 1 1/2” below the top edge. Cut the paper pattern on the line and label the pattern with the finished bag dimensions for future reference.
Tip: Low-cost alternatives for paper patterns include paper grocery bags cut open to lay flat, gift wrapping paper and general-purpose masking paper commonly found in the paint department at a hardware store. A quilting square or tailor’s square ruler ensures the pattern is square.

Continue following the instructions below while referencing the pattern generator instructions for additional key measurements.
Step 1: Roll-Top Collar
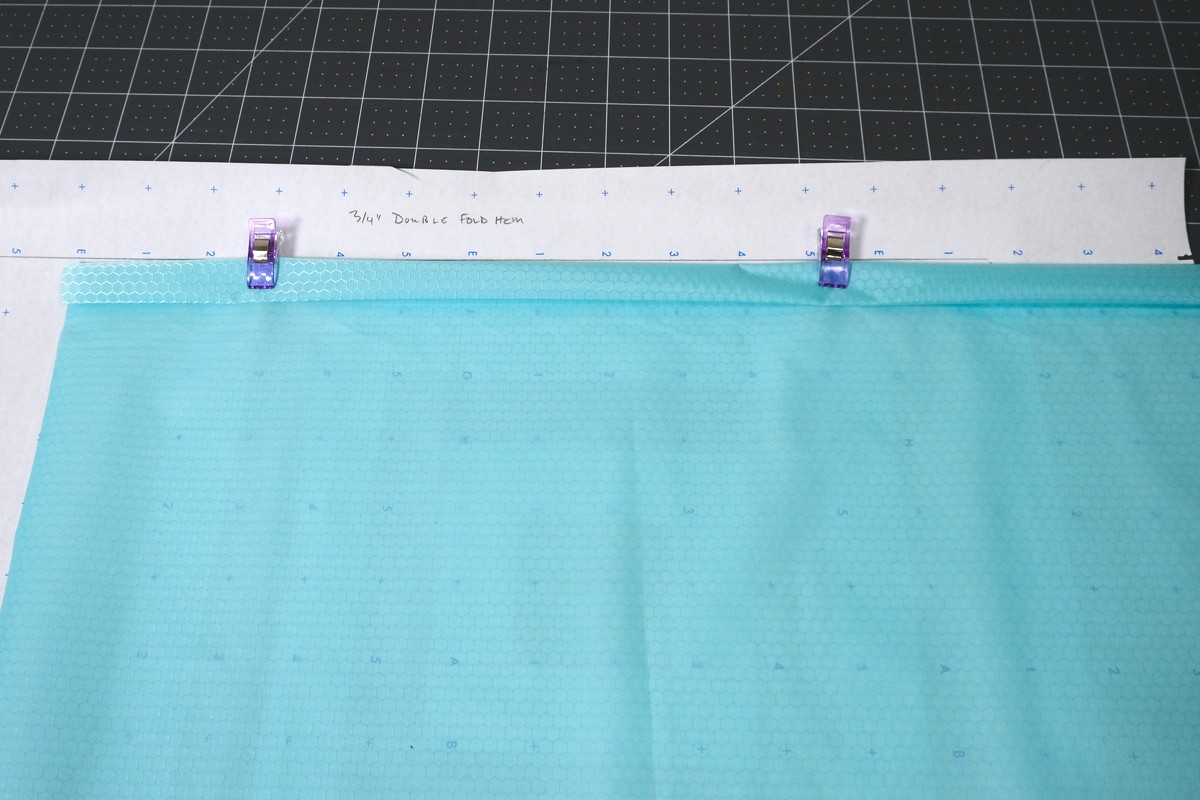
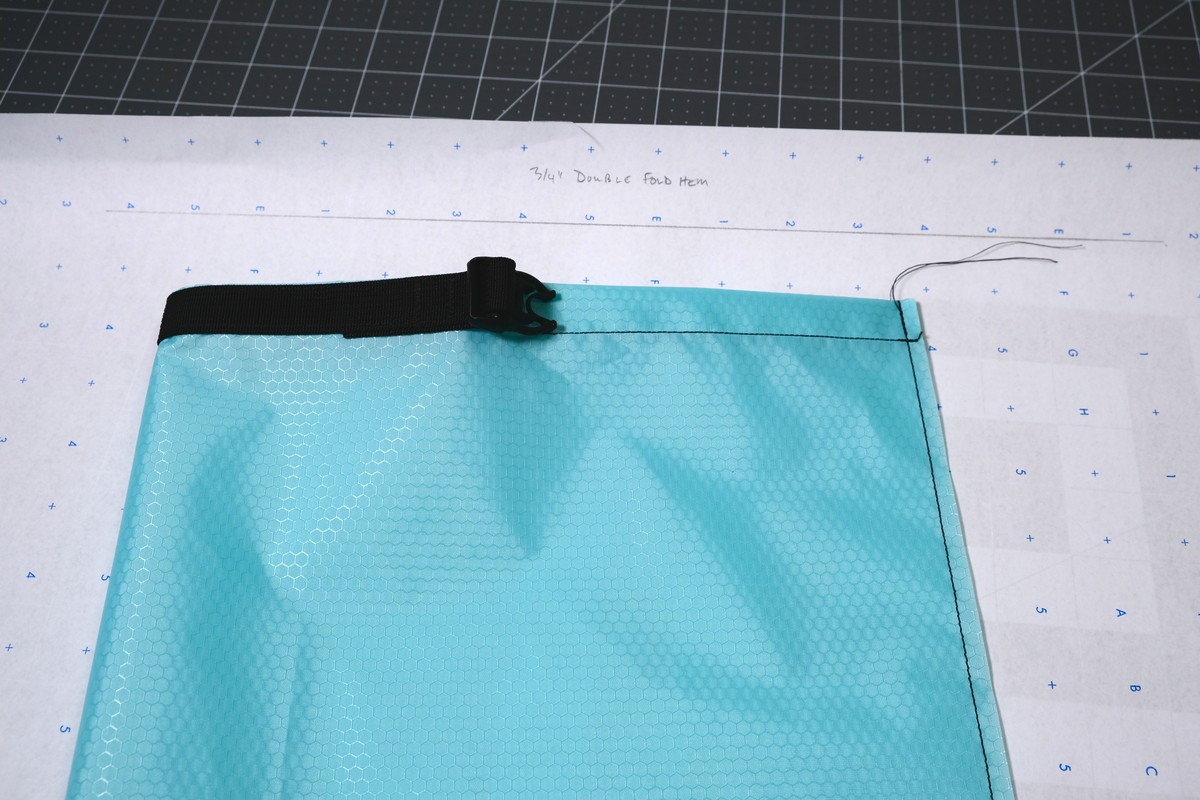
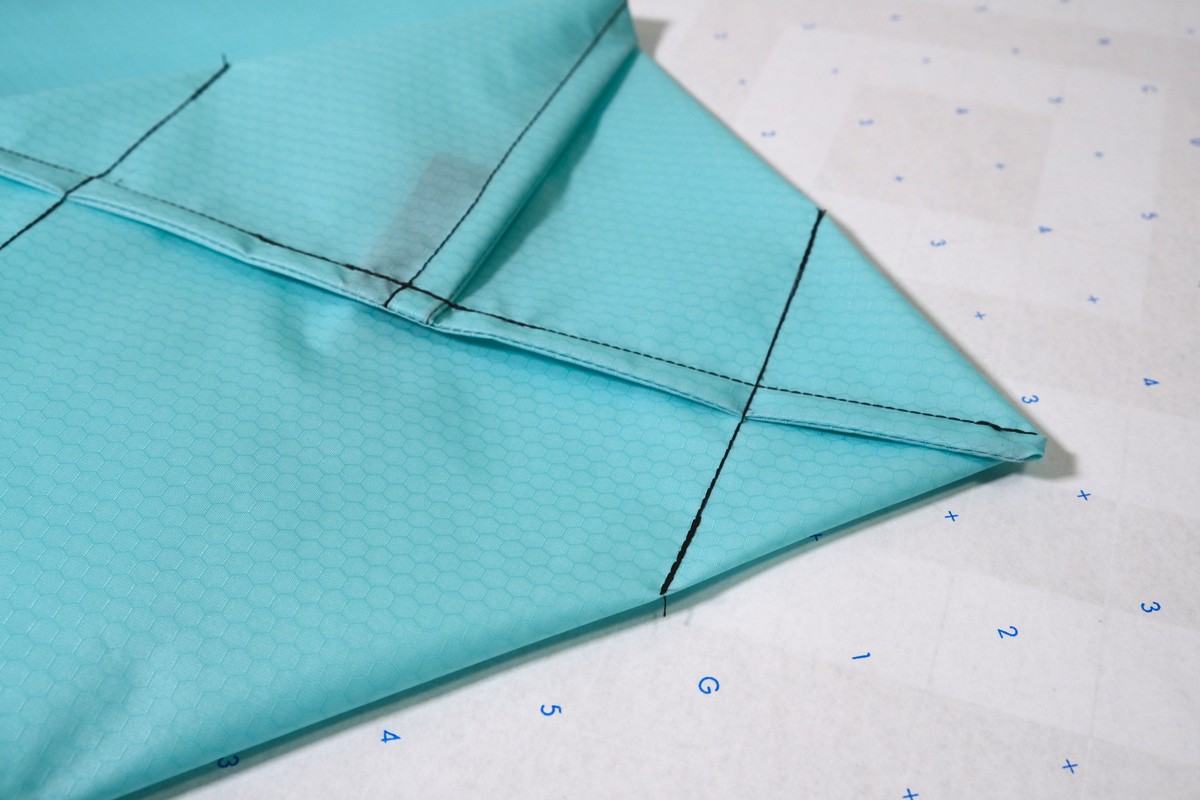
Fold the top edge down 3/4” towards the wrong side of the fabric. Fold again 3/4” concealing the raw edge. Finger press flat and clip the hem to hold it in place. Edge stitch the hem.
Remember, PU coated technical fabrics generally have the waterproofing coating applied to the wrong side. The prettier woven side is the right side and often has an invisible water-resistant finish. The duller rubbery feeling side is the PU coating on the wrong side. Silicon impregnated or “silnylon” are double coated so both sides are functionally the same.
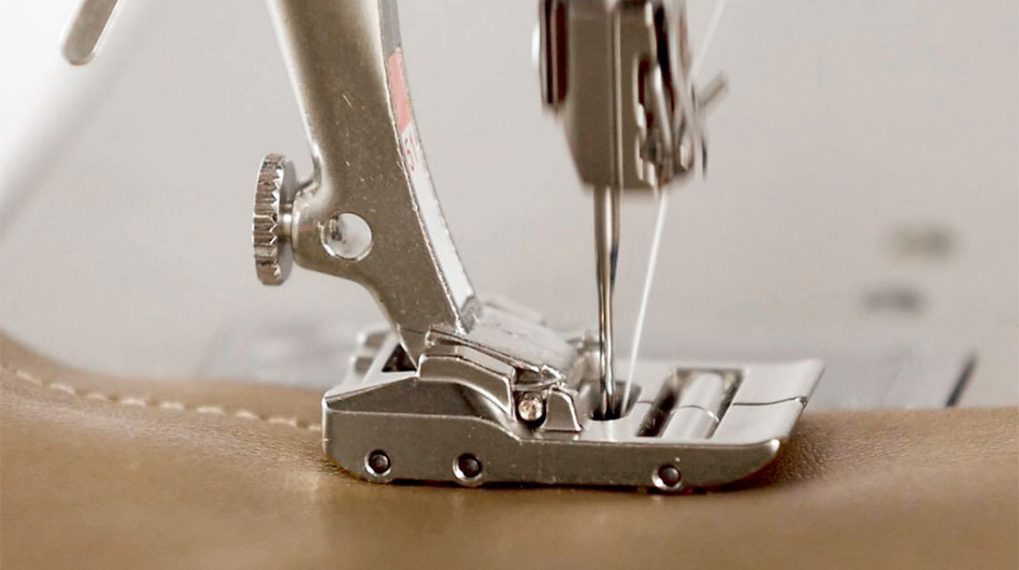
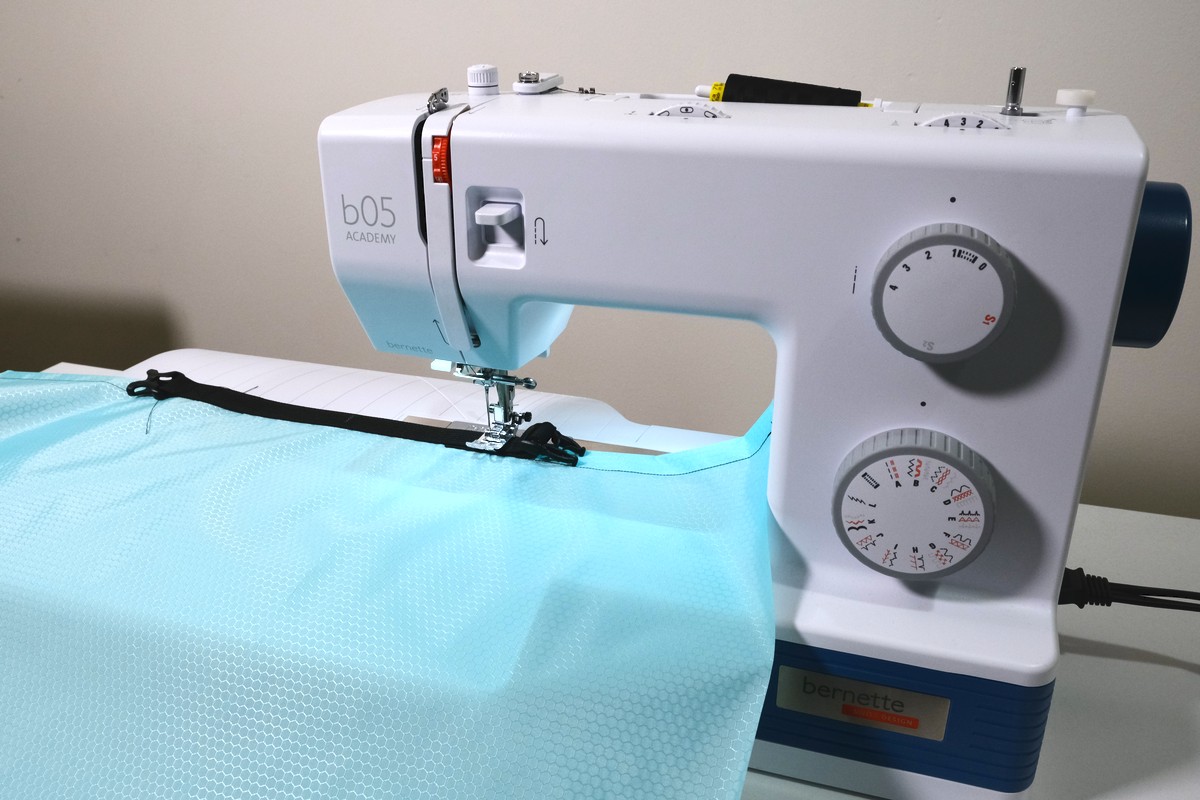
Tip: Sewing lightweight fabrics can be a bit tricky for the first time due to how slippery and thin they are. Using my b05 ACADEMY with Zigzag Foot with size 90/14 microtex needle and sewing with Tex 40 polyester thread, I found it helpful to make a few machine adjustments including:
- Set the Upper Thread Tension to 5 for even upper and bobbin tension
- Slightly increase the Presser Foot Pressure to about 2.25 out of 3 to help feed the slippery fabric evenly
- Installing the Slide-on Freearm Extension Table for additional support
On the right side of the fabric, position the webbing along the hem, centered in the middle of the fabric panel. Clip the webbing in place on top of the hem.
Tip: I first mark the midpoint of the webbing by folding it in half. This helps center align the webbing. If the webbing is fraying, gently fuse the cut ends with a lighter.
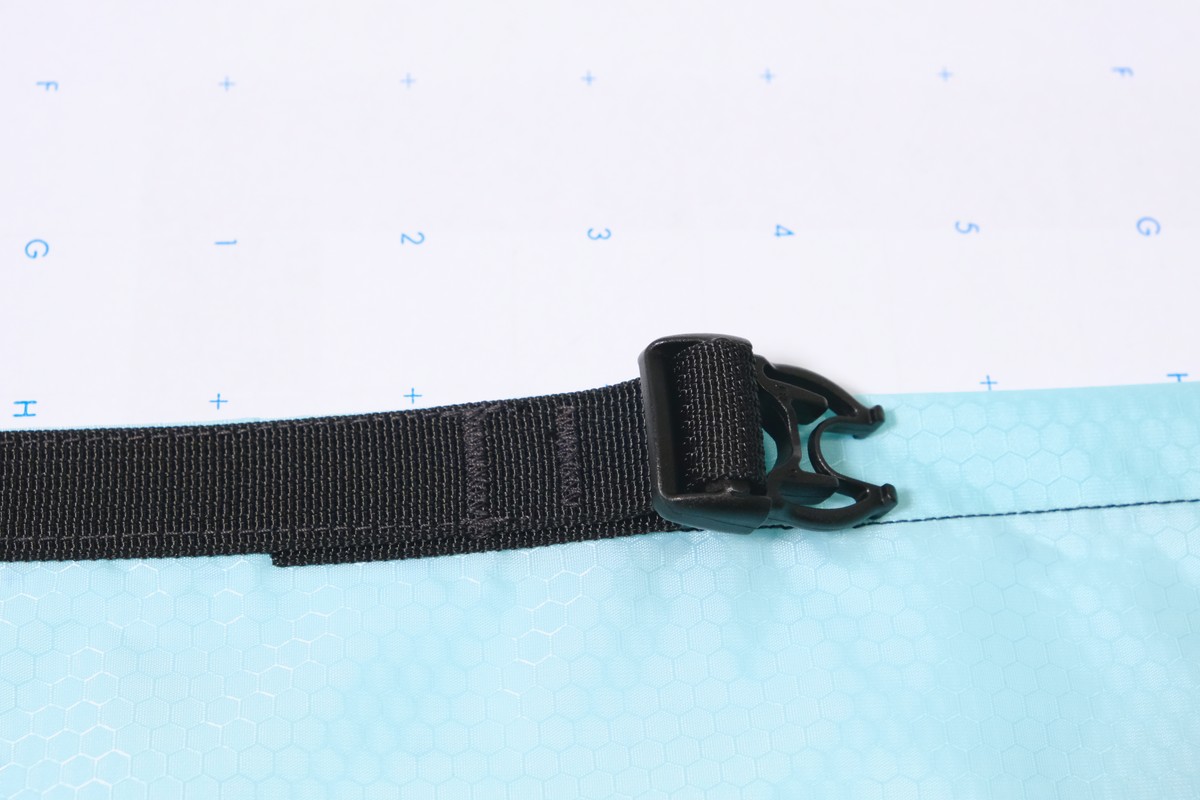
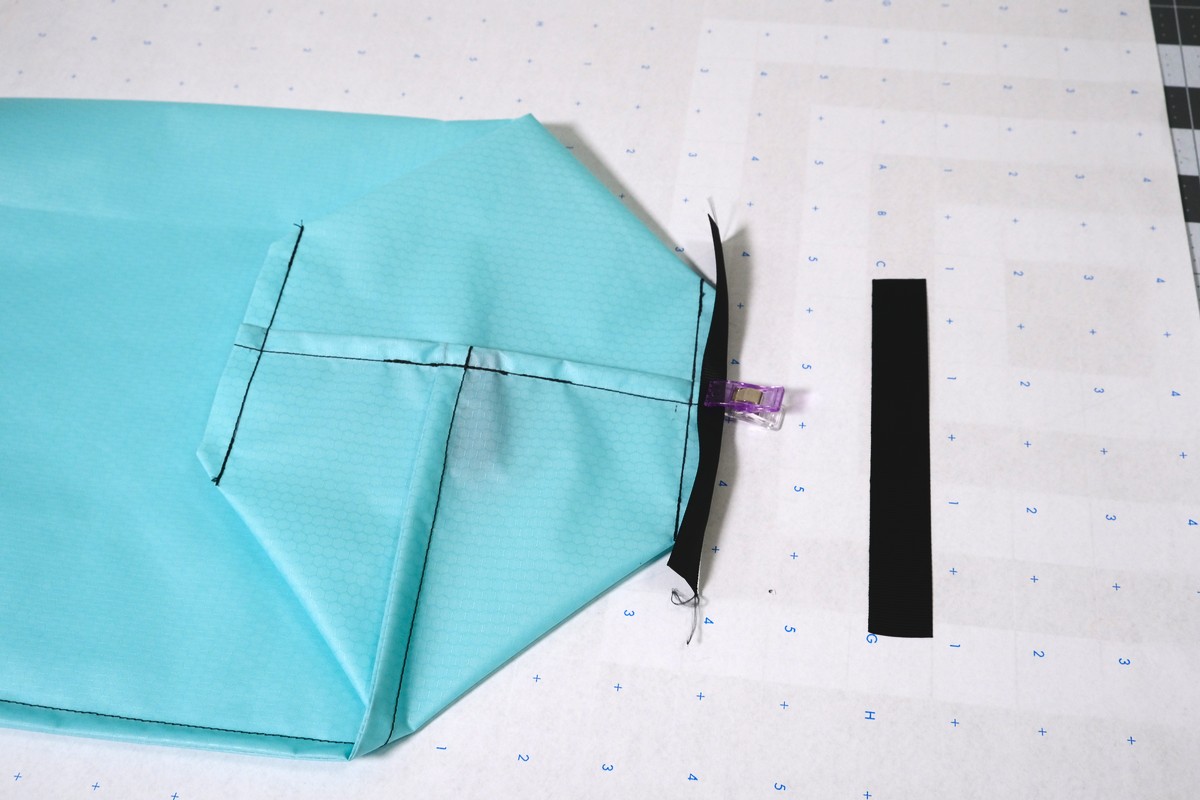
Install your buckle hardware on both ends of the webbing. Fold the tag end of the webbing under to be sandwiched and hidden. Clip in place. Verify your hardware is facing right sides out!
Ensure the webbing is of sufficient length. Measuring from folded end to folded end the webbing should be slightly longer than the webbing measurement provided in pattern generator instructions. Mine measures a tad bit longer than 6 + 4 1/2” = 10 1/2” end to end, as also stated in the pattern generator instructions.
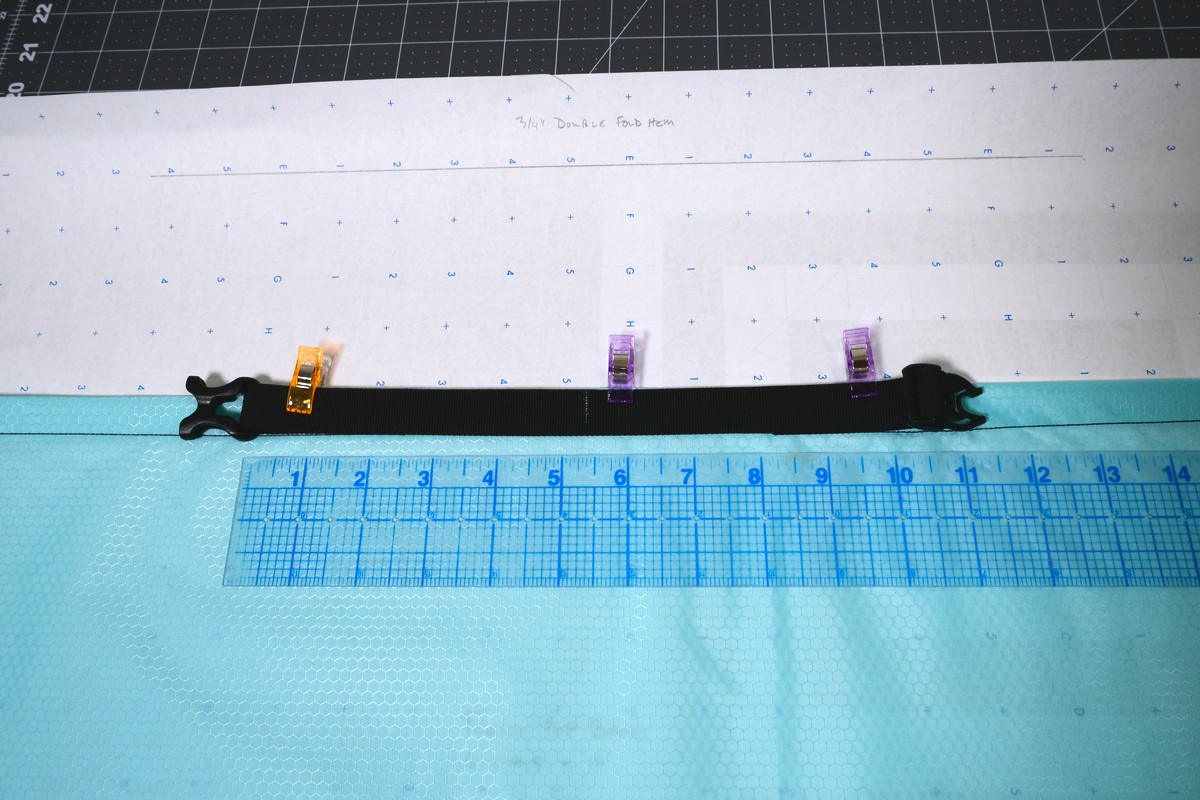
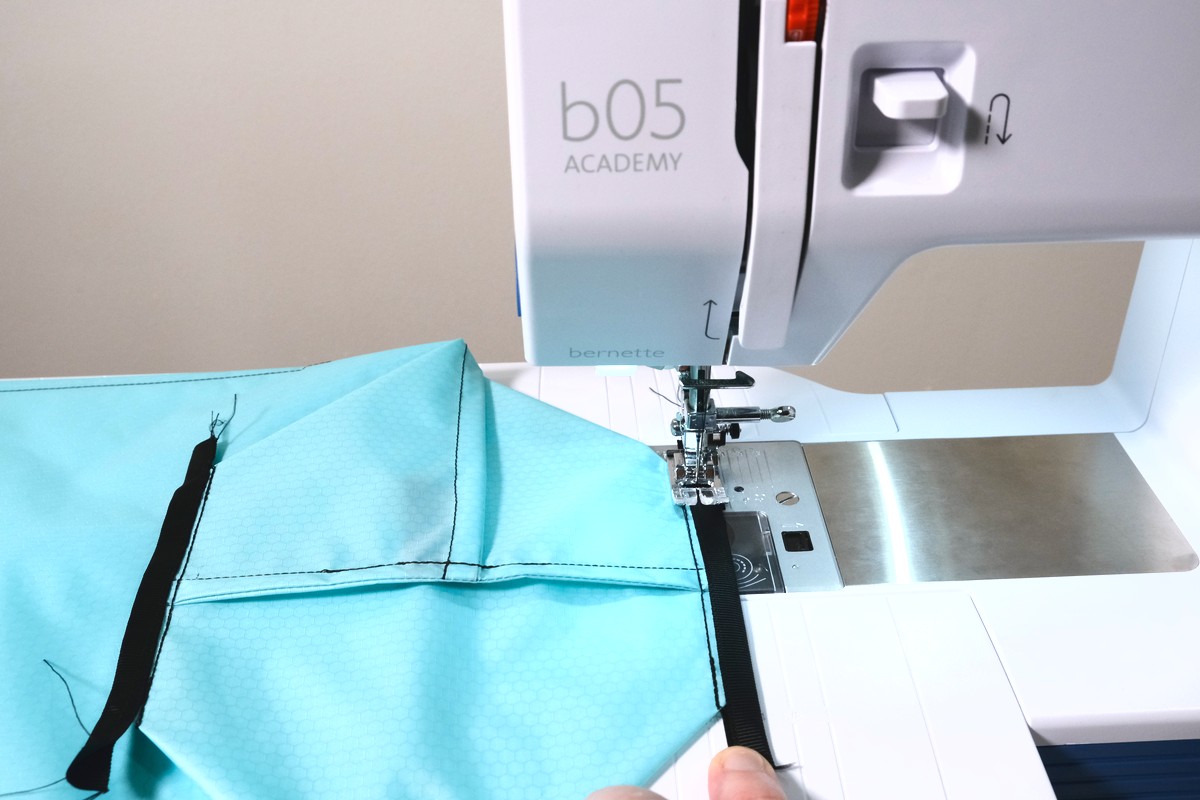
Edge stitch the webbing to the right side of the fabric along the top and bottom edges. Stitch close to the webbing hardware but don’t get so close that the plastic hardware interferes with the presser foot. Sewing through the two layers of webbing can be a bit jarring, so it’s advisable to first sink the needle through the webbing by hand by turning the Hand Wheel counterclockwise towards you.
Be confident in sewing through the webbing and allow the machine to feed the bag on its own. Pulling or forcing the webbing through the machine is likely to result in a broken needle. If the machine stalls in sewing through the webbing, simply let off the foot control and manual turn the Hand Wheel to advance the needle.
Tip: Using the Needle Position Dial with the Zigzag Foot or an Edge Guide Foot is a helpful aid in edge stitching the webbing for a nice straight topstitch. Remember to return the Needle Position Dial to the center before proceeding to the next step.
Step 2: Body Seams
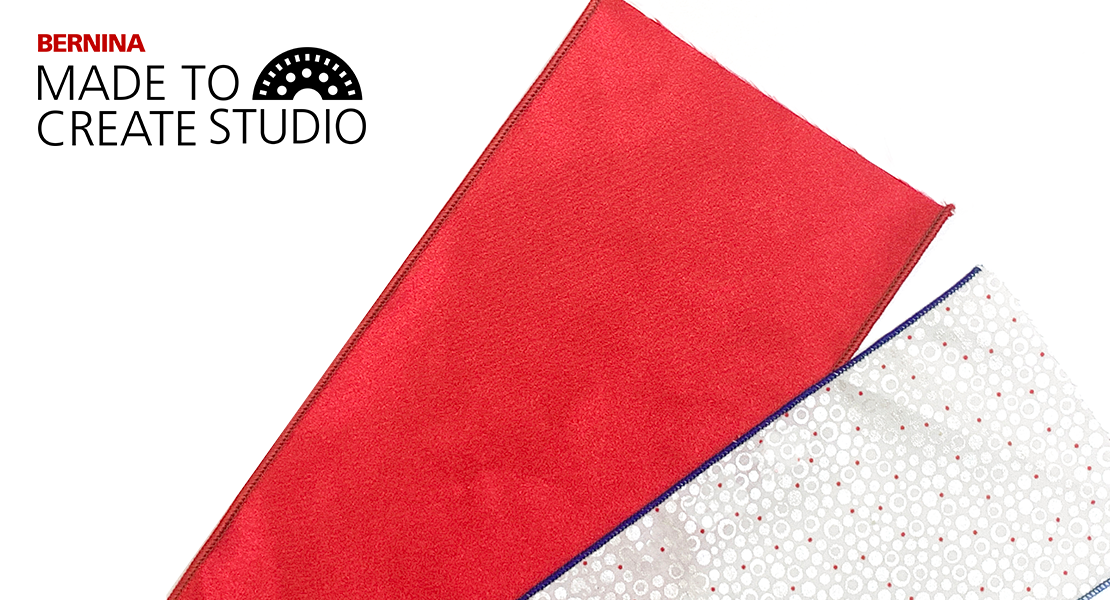
By using french seams, your bag will have concealed raw edges for a fray-proof professional finish.
First, fold the bag in half, right sides out (RSO), aligning the side seams together. Stitch the side seam at 1/4” (6mm) seam allowance.
Flip the bag right sides together (RST) so the wrong side is facing out. Finger press the side seam sewn in the previous step. Sew the side seam again, this time with a 3/8” (1cm) seam allowance, back stitching at the start and finish. The raw edges should be completely encased within the seam allowance.
Turn the bag right sides out (RSO) again and center align the side seam with the notch along the bottom edge of the fabric panel..
Sew the bottom edge of the bag with a 1/4” (6mm) seam allowance.
Turn the bag right sides together (RST). Finger press the bottom seam and square out the corners to lay flat.
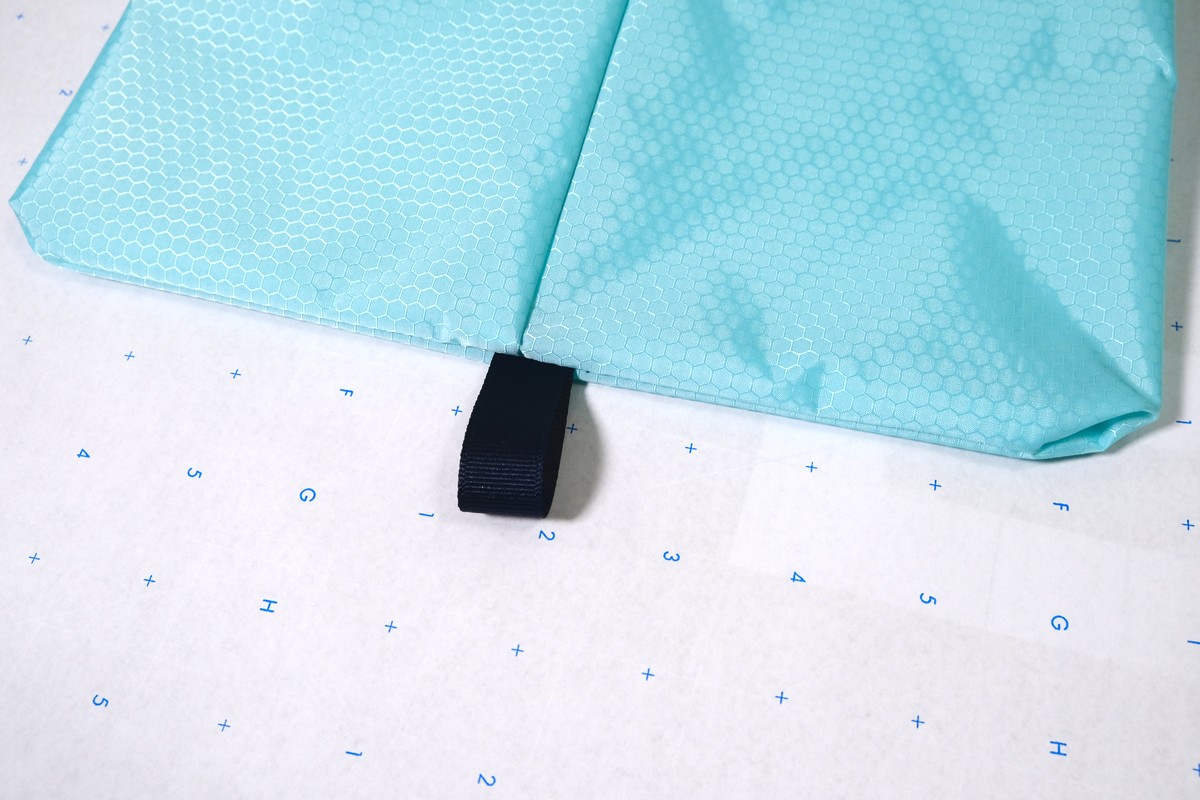
With the short 4” piece of ribbon, fold it in half to form a small 2” hang loop. Reaching inside the bag, position the ribbon to the bottom seam, center-aligned with the side seam. Clip in place.
Sew the bottom seam with a 3/8” (1cm) seam allowance, fully encasing the raw edges. Reinforce the ribbon by back stitching once or twice as you sew. With the bag flipped right side out, the hang loop should extend out of the bottom seam.
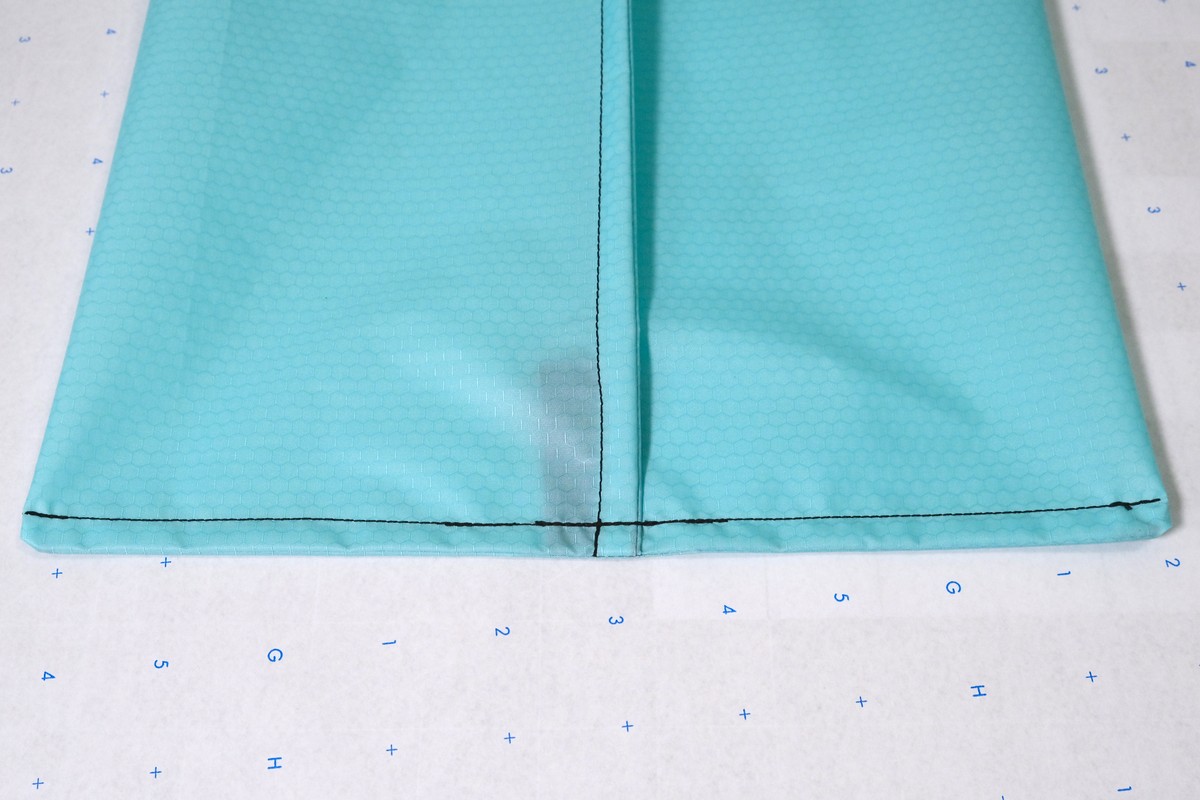
With the bag flipped right side out, the hang loop should extend out of the bottom seam.
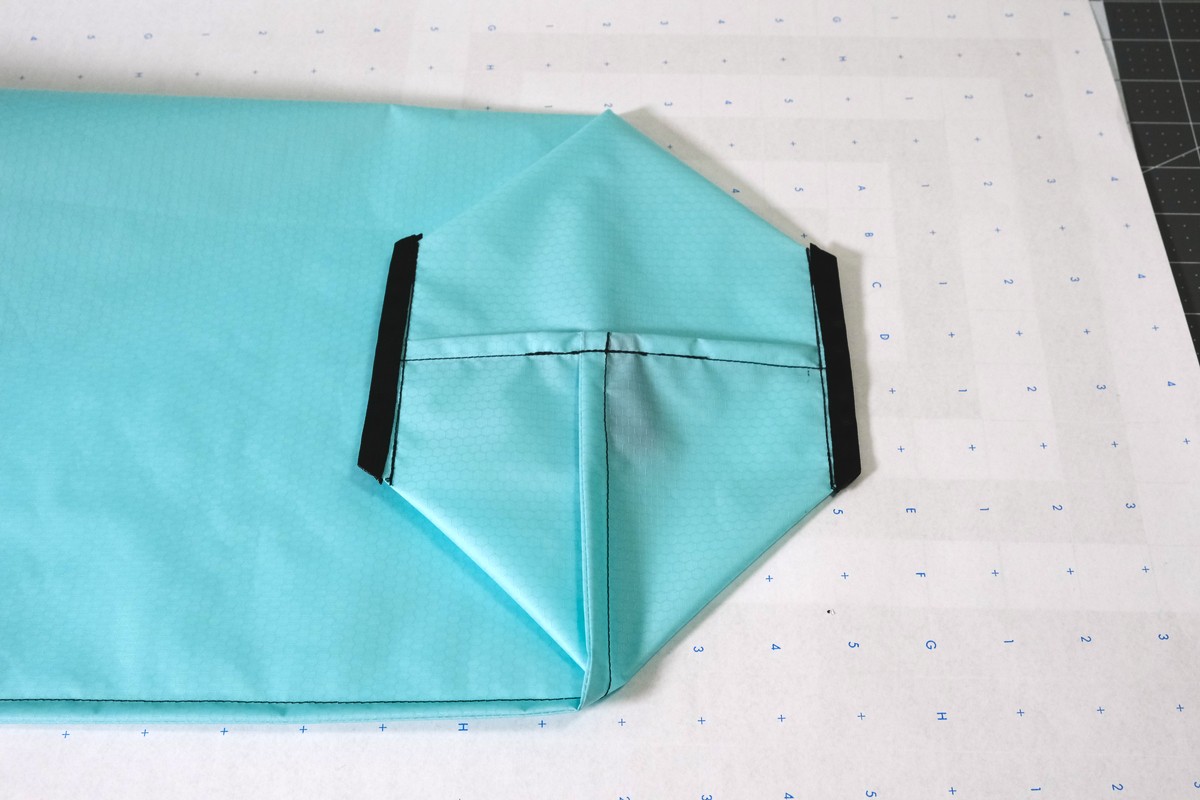
Step 3: Squaring the Bottom
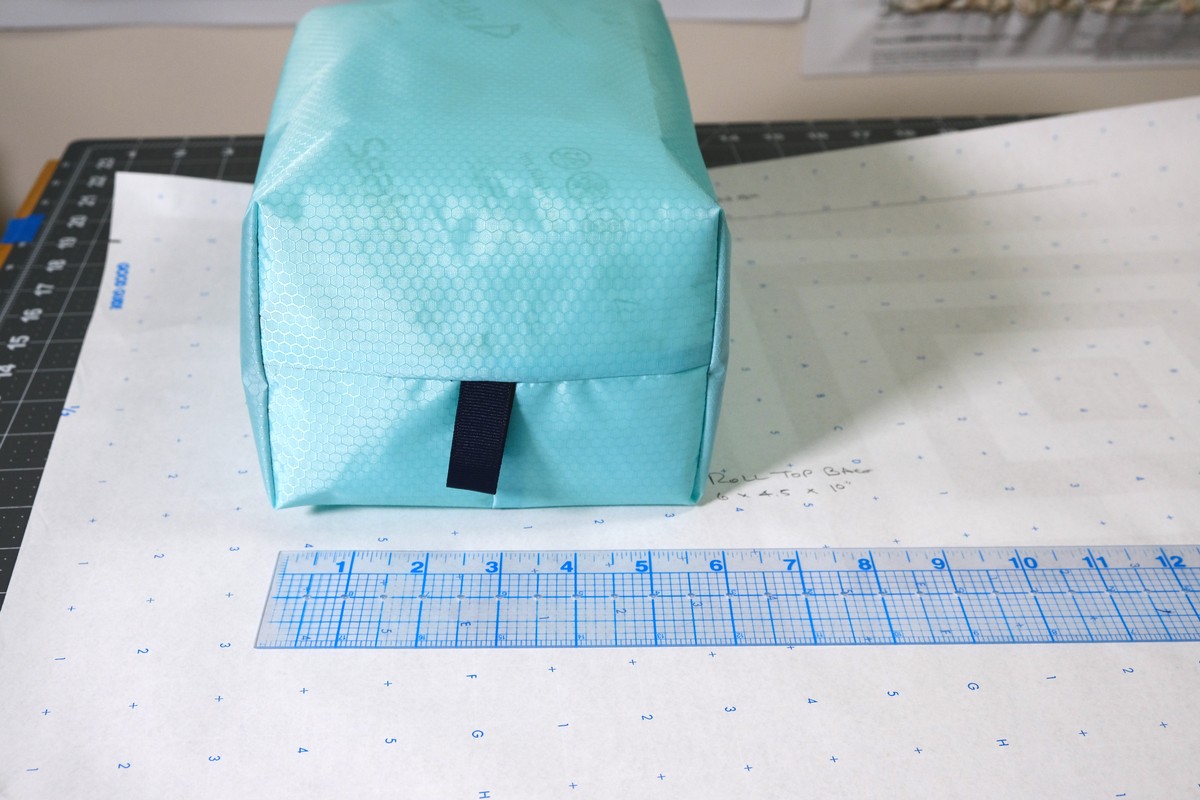
With the bag right sides together (RST), blow a little air into the bag and pull the bottom corners out. Press the corners flat such that the bottom seam is perpendicular to the side seam. It’s important the bottom creates a symmetric square shape.
To box the bottom, remember to reference the pattern generator for key measurements. My desired bottom shape input into the generator was 6” long and 4 1/2” wide. From each corner of the bottom seam, measure in half the bottom width (2 1/4” in my case). Make a small mark. The space between these marks should be the bottom length (6” in my case).
From each mark, square a line perpendicular to the bottom seam. If symmetric, this line measurement will equal the bottom width (4 1/2” in my case).
Sew a stitch line to close off each corner, sewing directly over the drawn line, back stitching at the start and finish very close to the edge of the bag.
An optional step is to trim the corners off the bag and bind the raw edges with ribbon. If trimming, alternative seam finish includes overcasting, serging, or hemming. Otherwise, simply leave the corners to be pressed flat inside the bag.
To bind the inside boxed edges, first trim the corner off leaving a 3/8” (1cm) allowance. With a short length of ribbon sized to cover the raw edge, fold and crease the ribbon. Pin or clip in place encasing the raw edges to help with alignment.
With the folded ribbon encasing the raw edges, sew in place with a 1/4” (6mm) seam allowance, back stitching at start and finish.
Trim the excess ribbon flush to the corner and carefully fuse the ribbon end with a lighter to prevent fraying. Be very careful as the nylon fabric will melt easily!
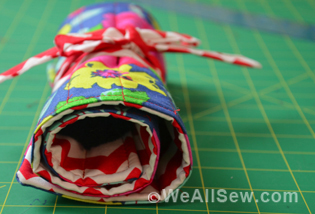
Flip your finished bag right side out and press the corners out. To close your bag, remove air by compressing the contents and then roll the collar down 3-4 times. The webbing along the openings provides a stout guide to fold around. Simply pull the buckle hardware together and snap closed. The loop on the bottom is a convenient finger loop to help remove contents or to hang dry the bag should it get wet.
Congratulations, with a bit of precise sewing you have a custom-sized Roll-Top Stuff Sack that is compressible, weather resistant, and ready for a lifetime of outdoor adventures!