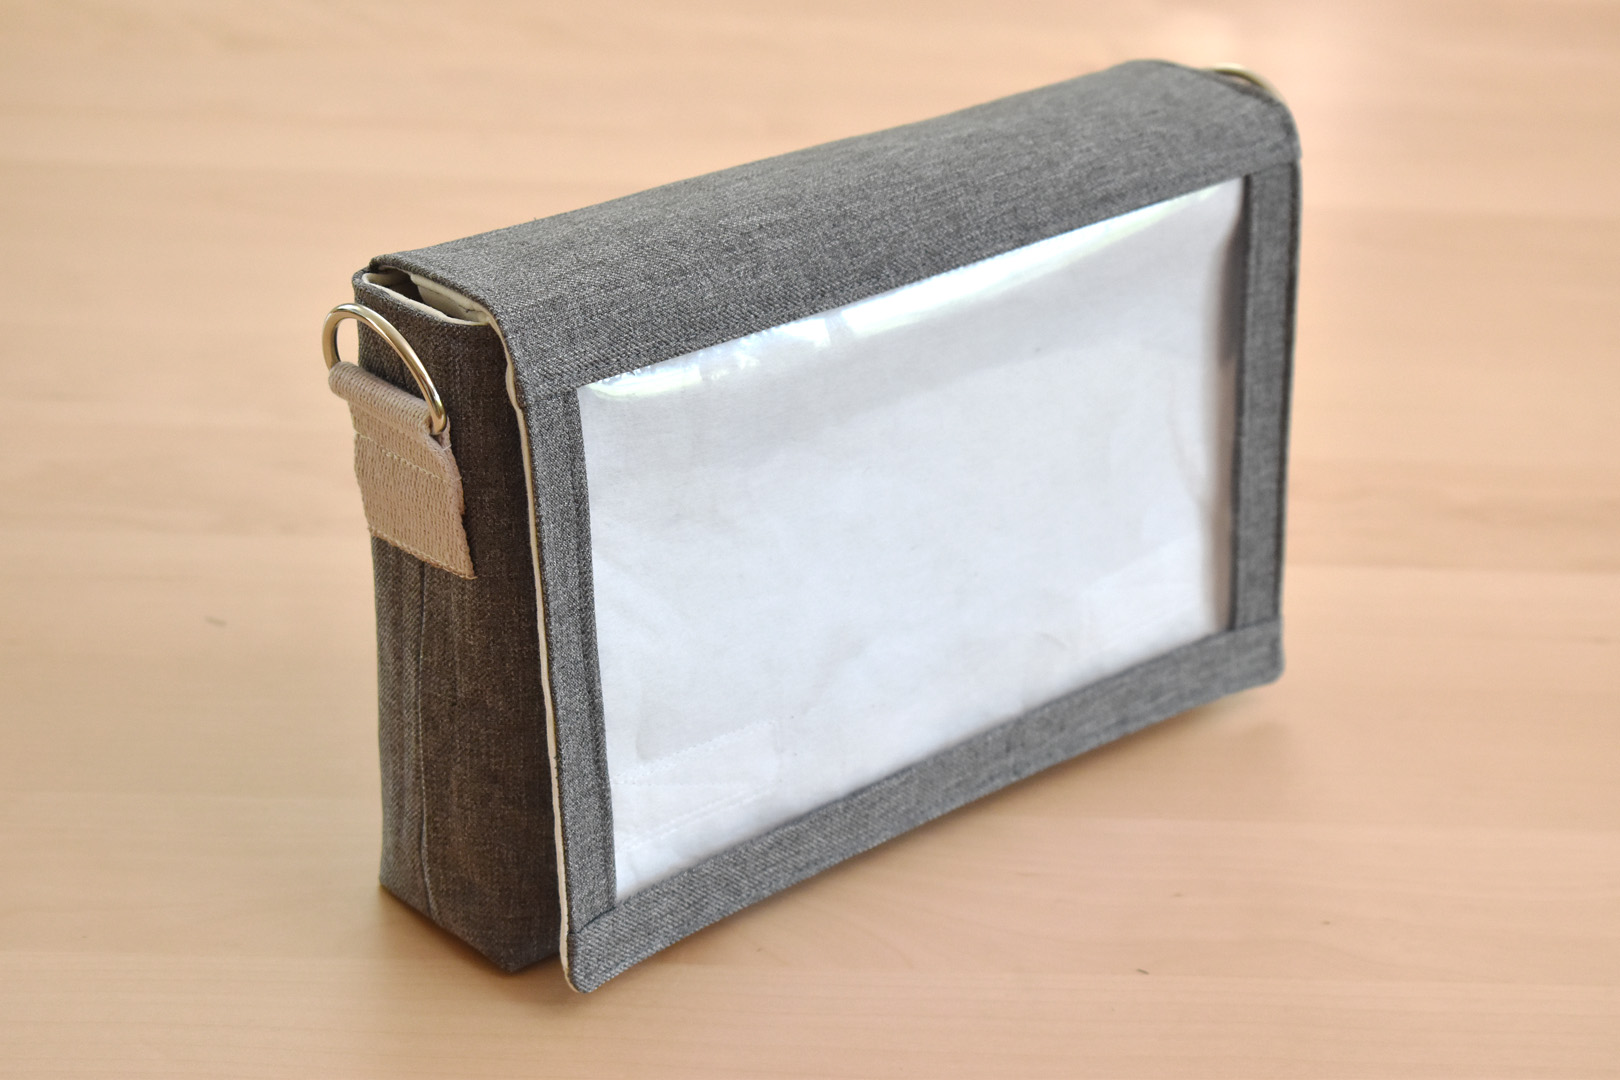
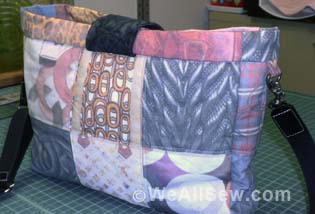
Pin Display Handbag Tutorial
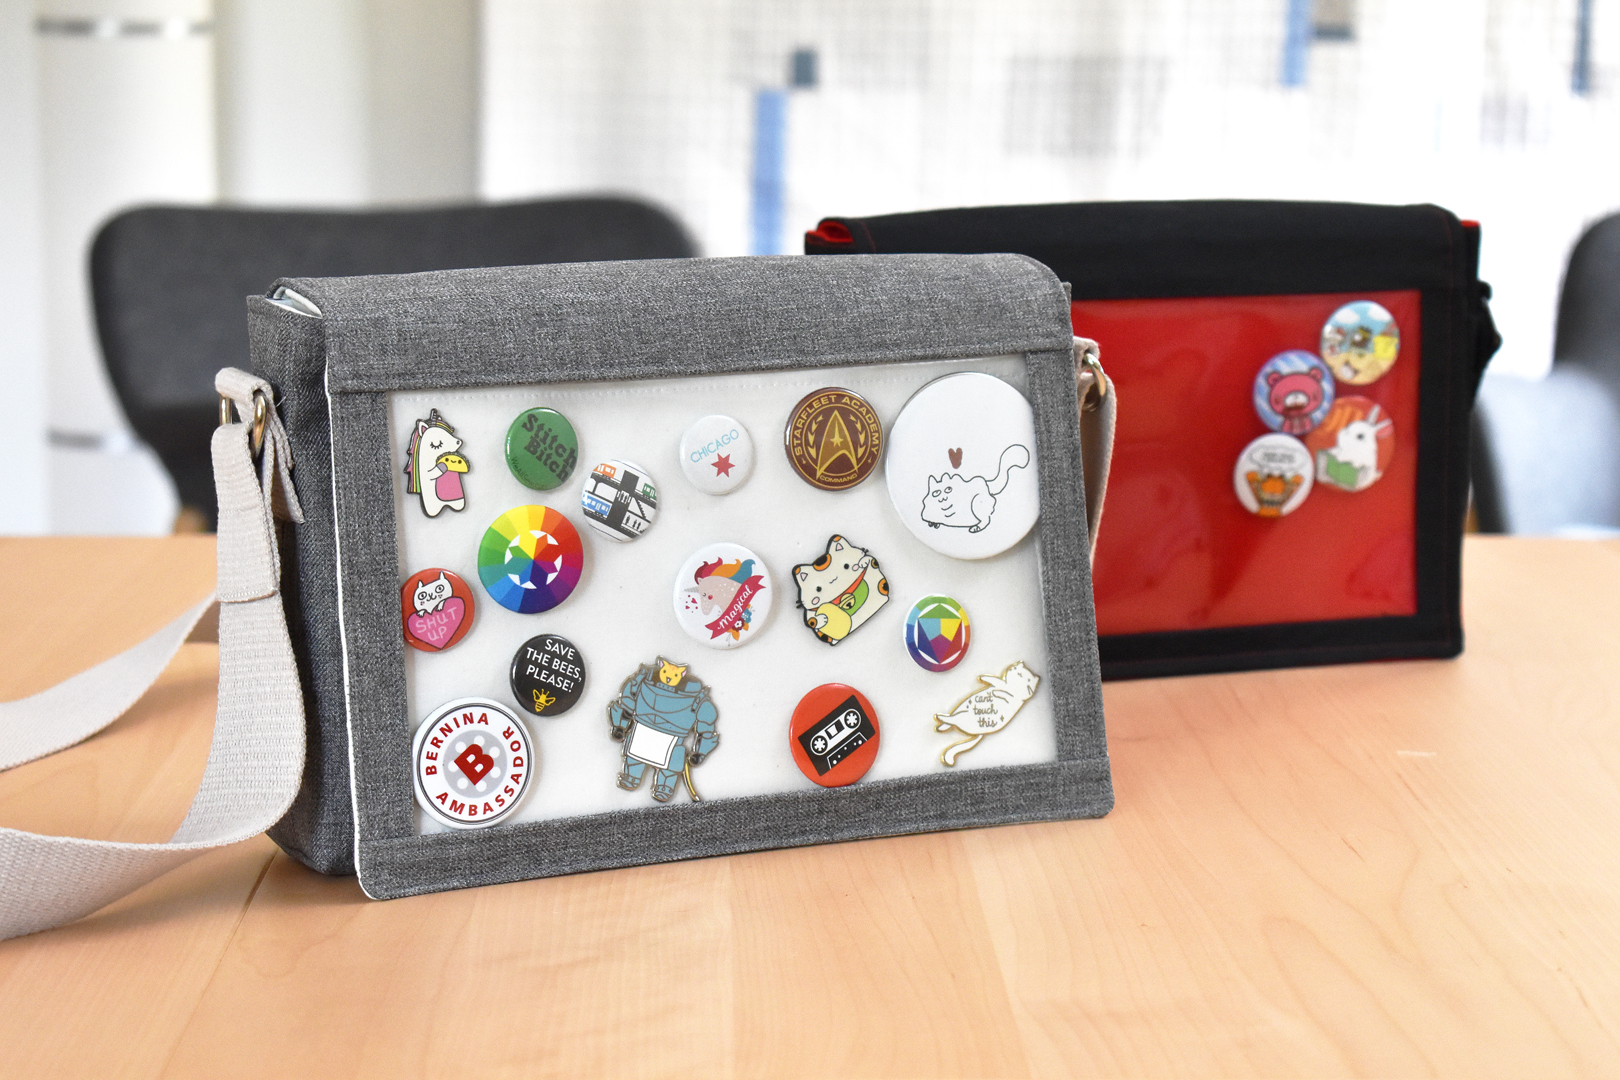
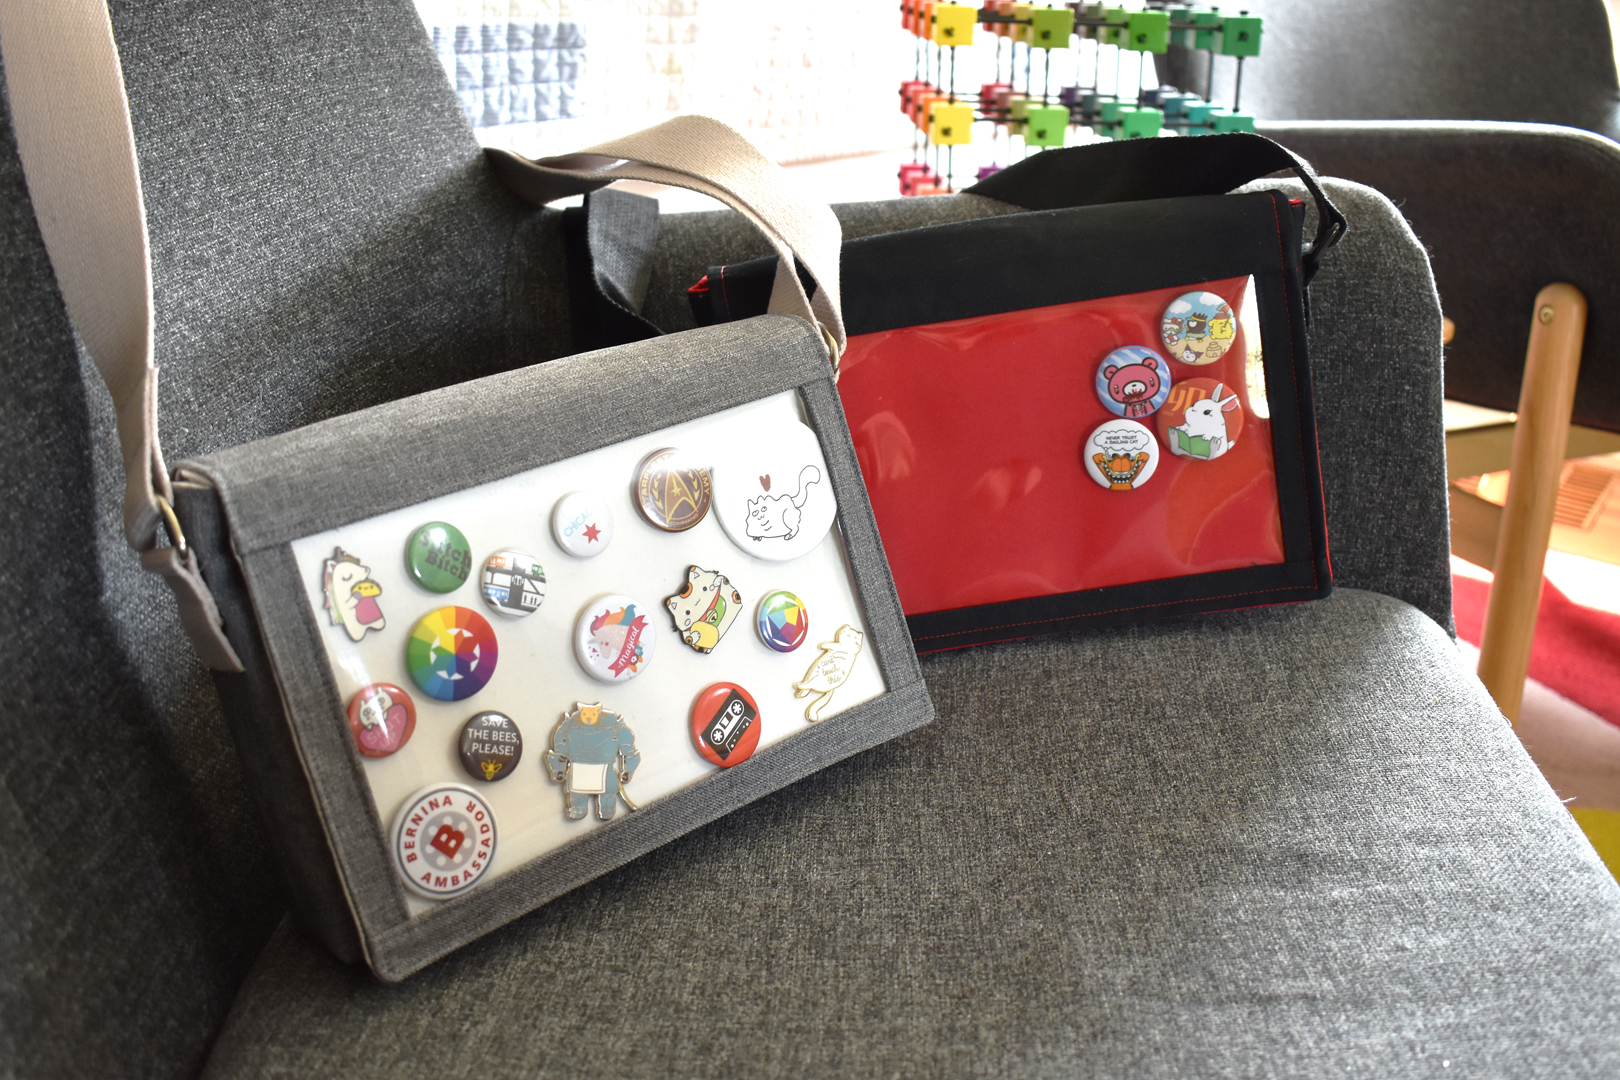
There’s nothing worse than pinning a favorite button or pin to your bag only to find it gone forever later on. You won’t ever worry about losing a button or pin again with the pin display handbag! This little bag features a pocket with a clear window in the flap that holds a fabric-covered base to protect and display all your treasured pins or buttons.
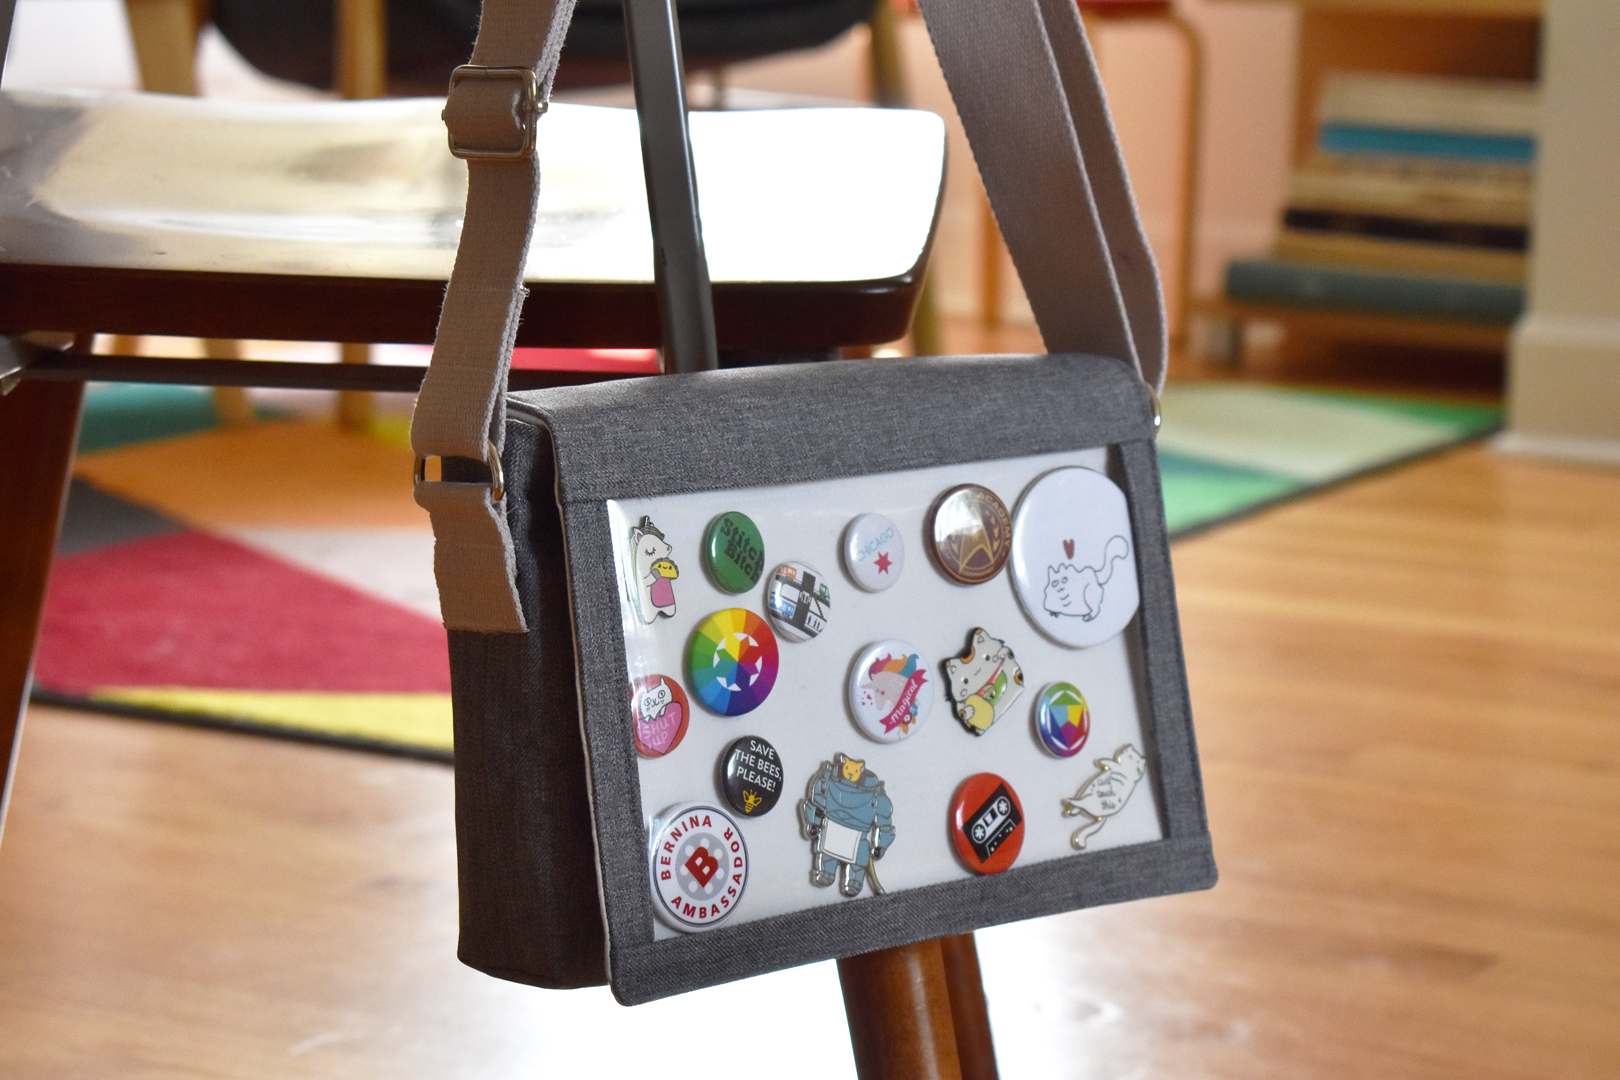
Learn how to make a pin display handbag featuring a vinyl window to protect and show off your favorite buttons and pins. The finished bag measures 6″ tall, 10″ wide, and 2″ deep. Follow along as we tackle the handbag in 4 main steps; creating the main bag body, sewing the pocket flap, assembling the bag, and adding the finishing touches.
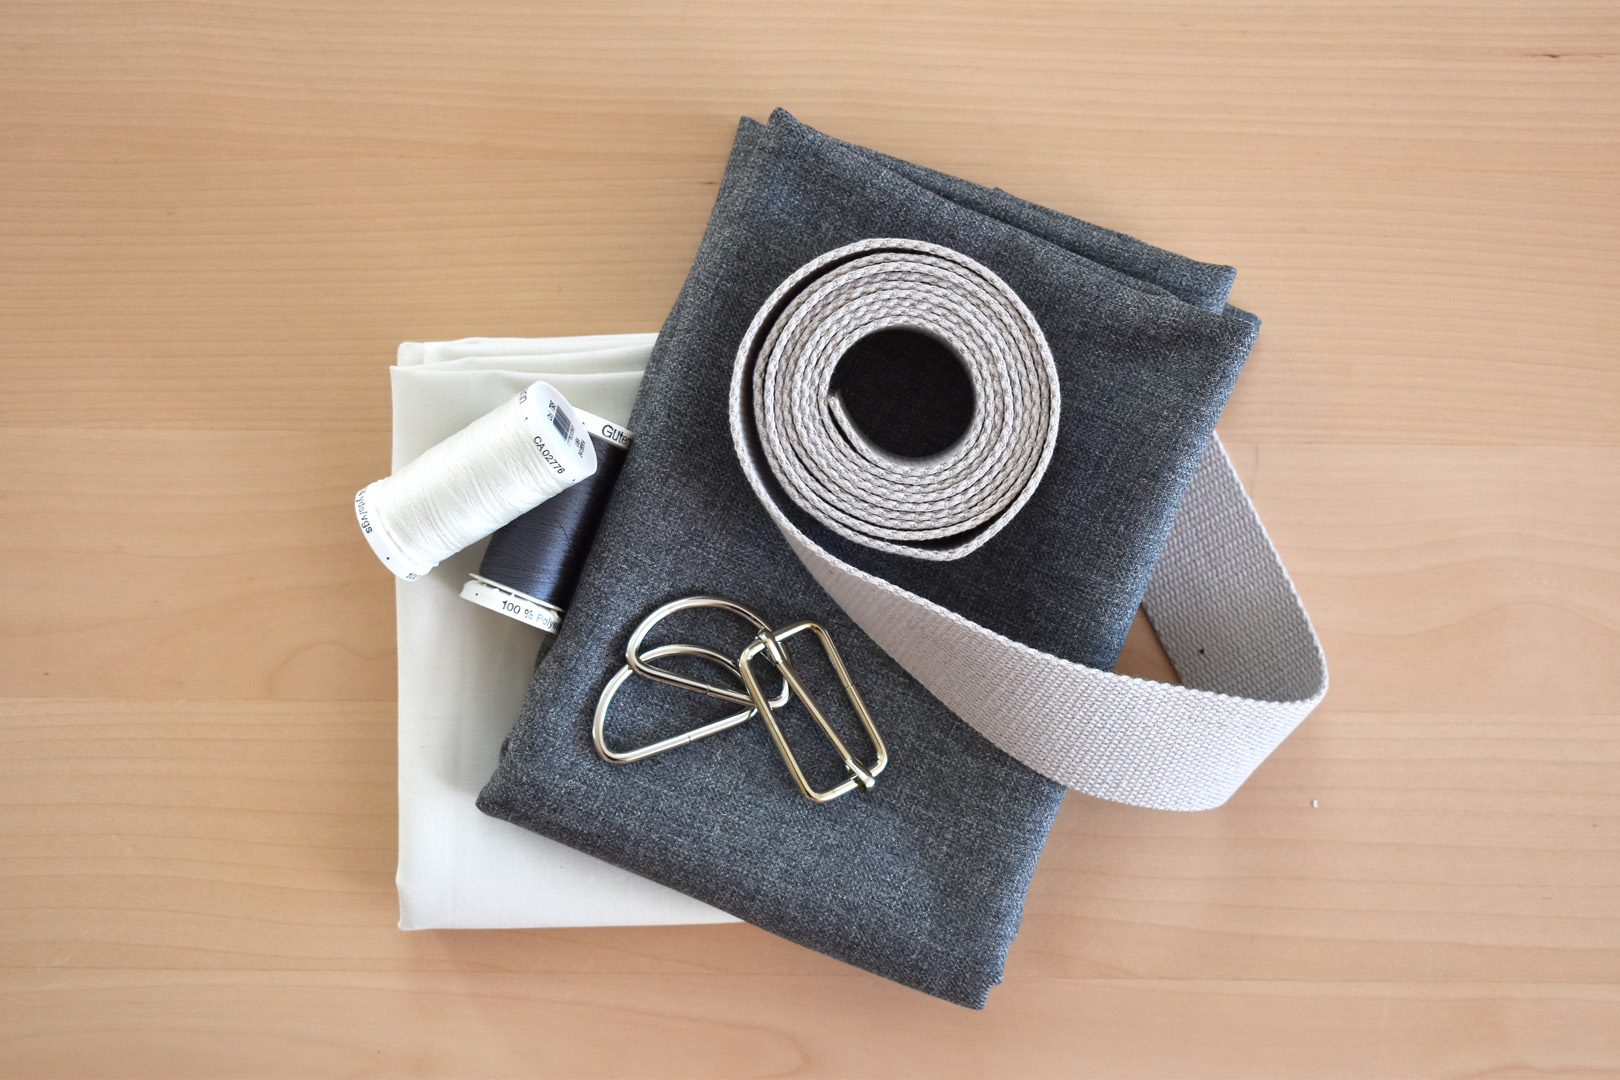
Materials to Make a Pin Display Handbag
- Sewing machine (I use a BERNINA 570 QE)
- Reverse Pattern Foot #1/#1Dndba
- Zipper Foot #4/#4D
- Patchwork Foot #97/#97D
- Sharp or microtex sewing machine needle size 90/14
- 18″ x 24″ cutting mat (or larger)
- 6″ x 24″ quilting ruler
- 45mm rotary cutter
- Steam iron and pressing surface (a sleeve board helps but is not necessary)
- 8″ fabric shears and small thread snips
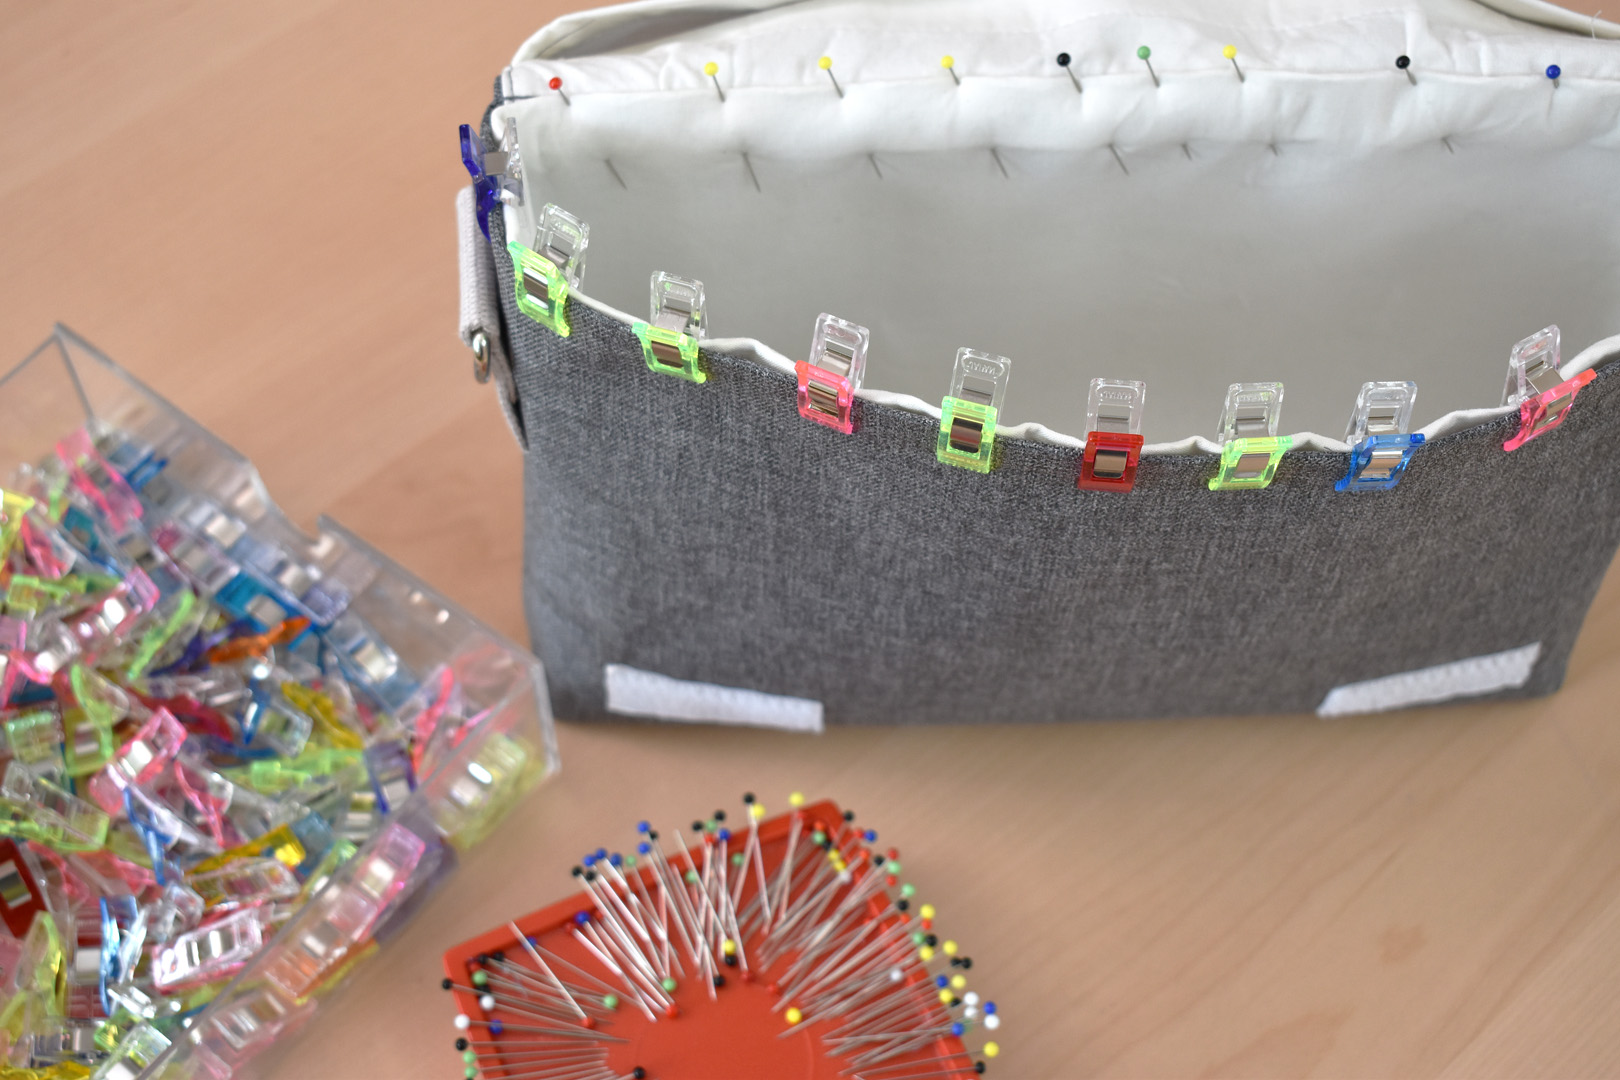
- Sewing pins and fabric clips
- 1/3-yard 16-gauge clear vinyl
- 1/2-yard outer bag fabric (twill, denim, or similar)
- 1/2-yard bag lining fabric (medium weight cotton such as quilter’s cotton)
- 2 yards Pellon 808 Craft Fuse fusible crafting interfacing
- 1/3-yard Pellon 71F Peltex one sided fusible ultra firm stabilizer
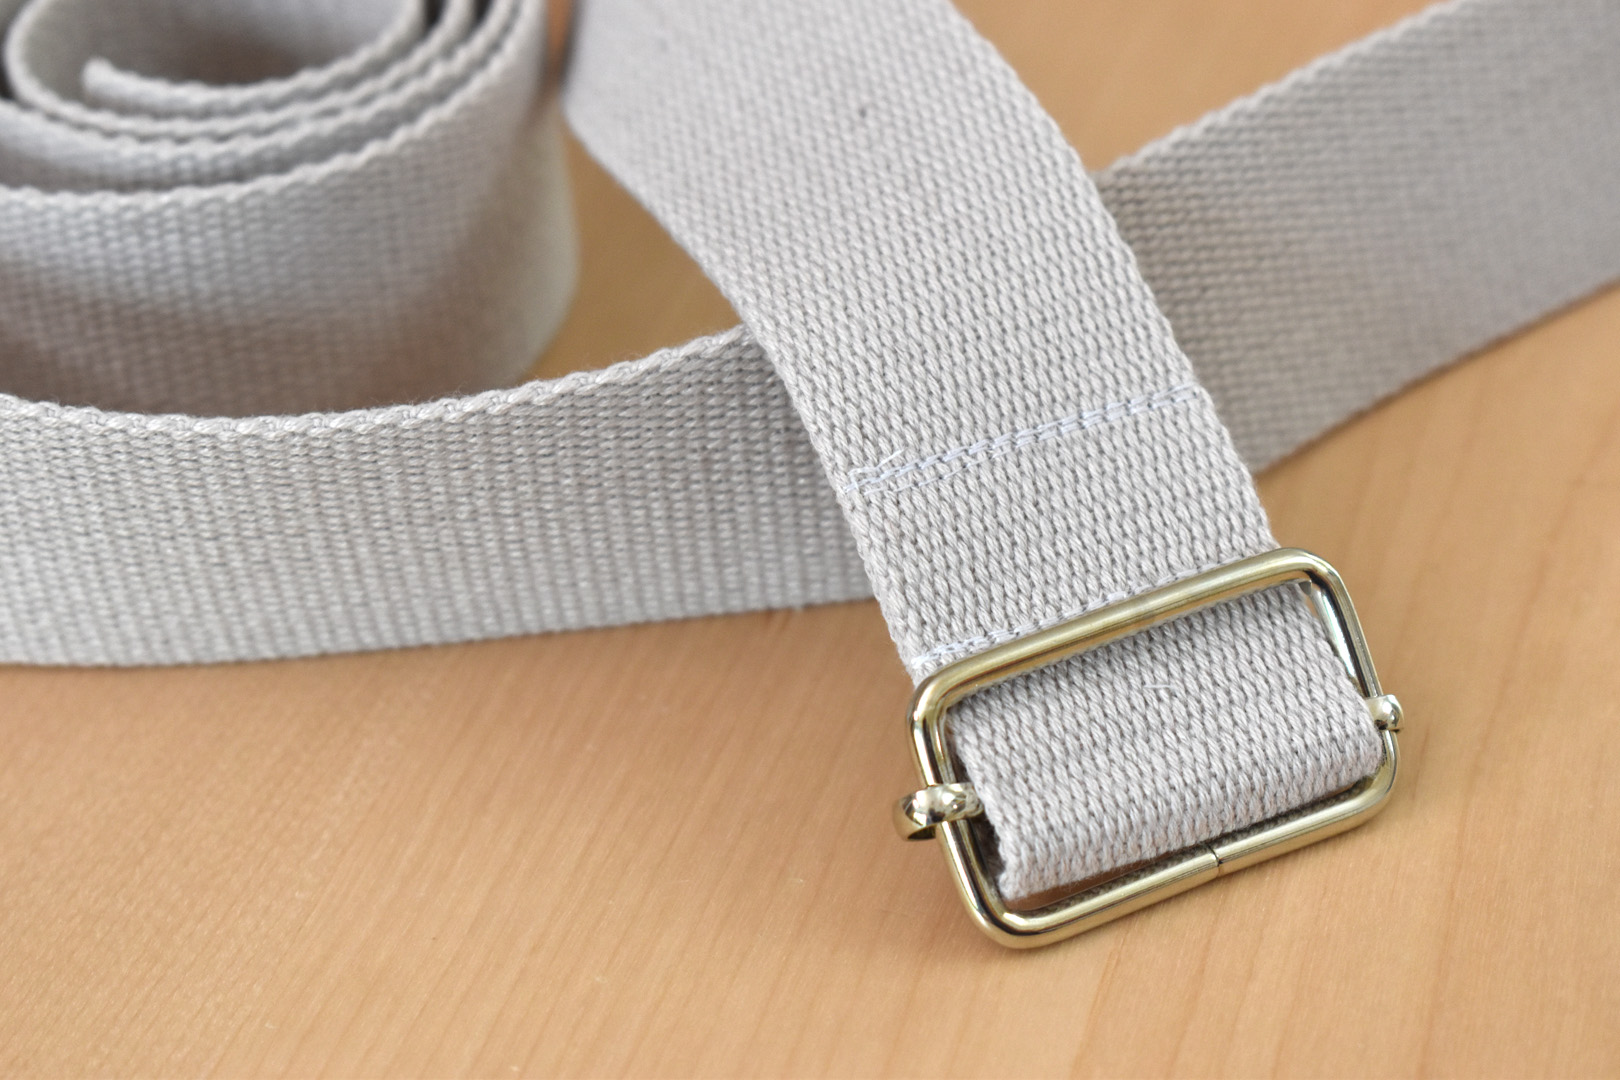
- 2 yards 1-1/2″ wide strapping
- 2, 1-1/2″ D style or rectangle rings
- 1, 1-1/2″ adjustable slide buckle
- 12″ of 1/2″ wide hook and loop tape
- Threads that match main bag fabric and lining
Making the main bag section of the pin display handbag
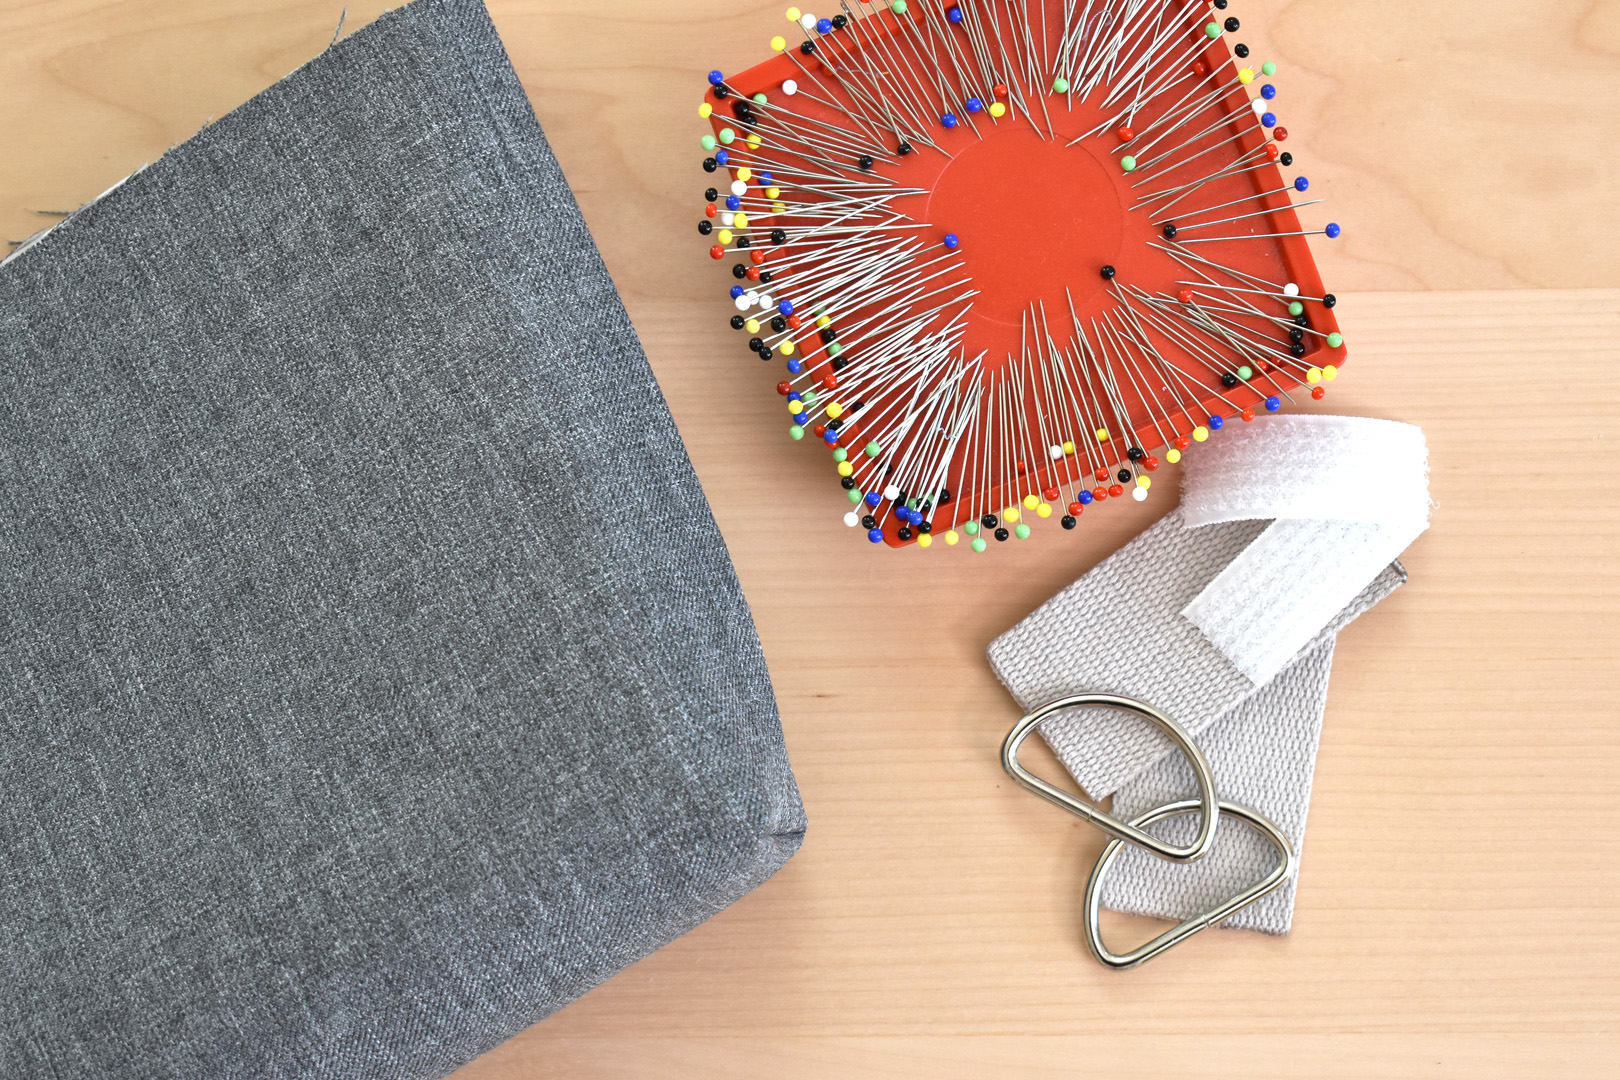
To sew the main bag you will need the main bag fabric, lining fabric, Craft Bond, hook and loop tape, D or rectangle rings and strapping.
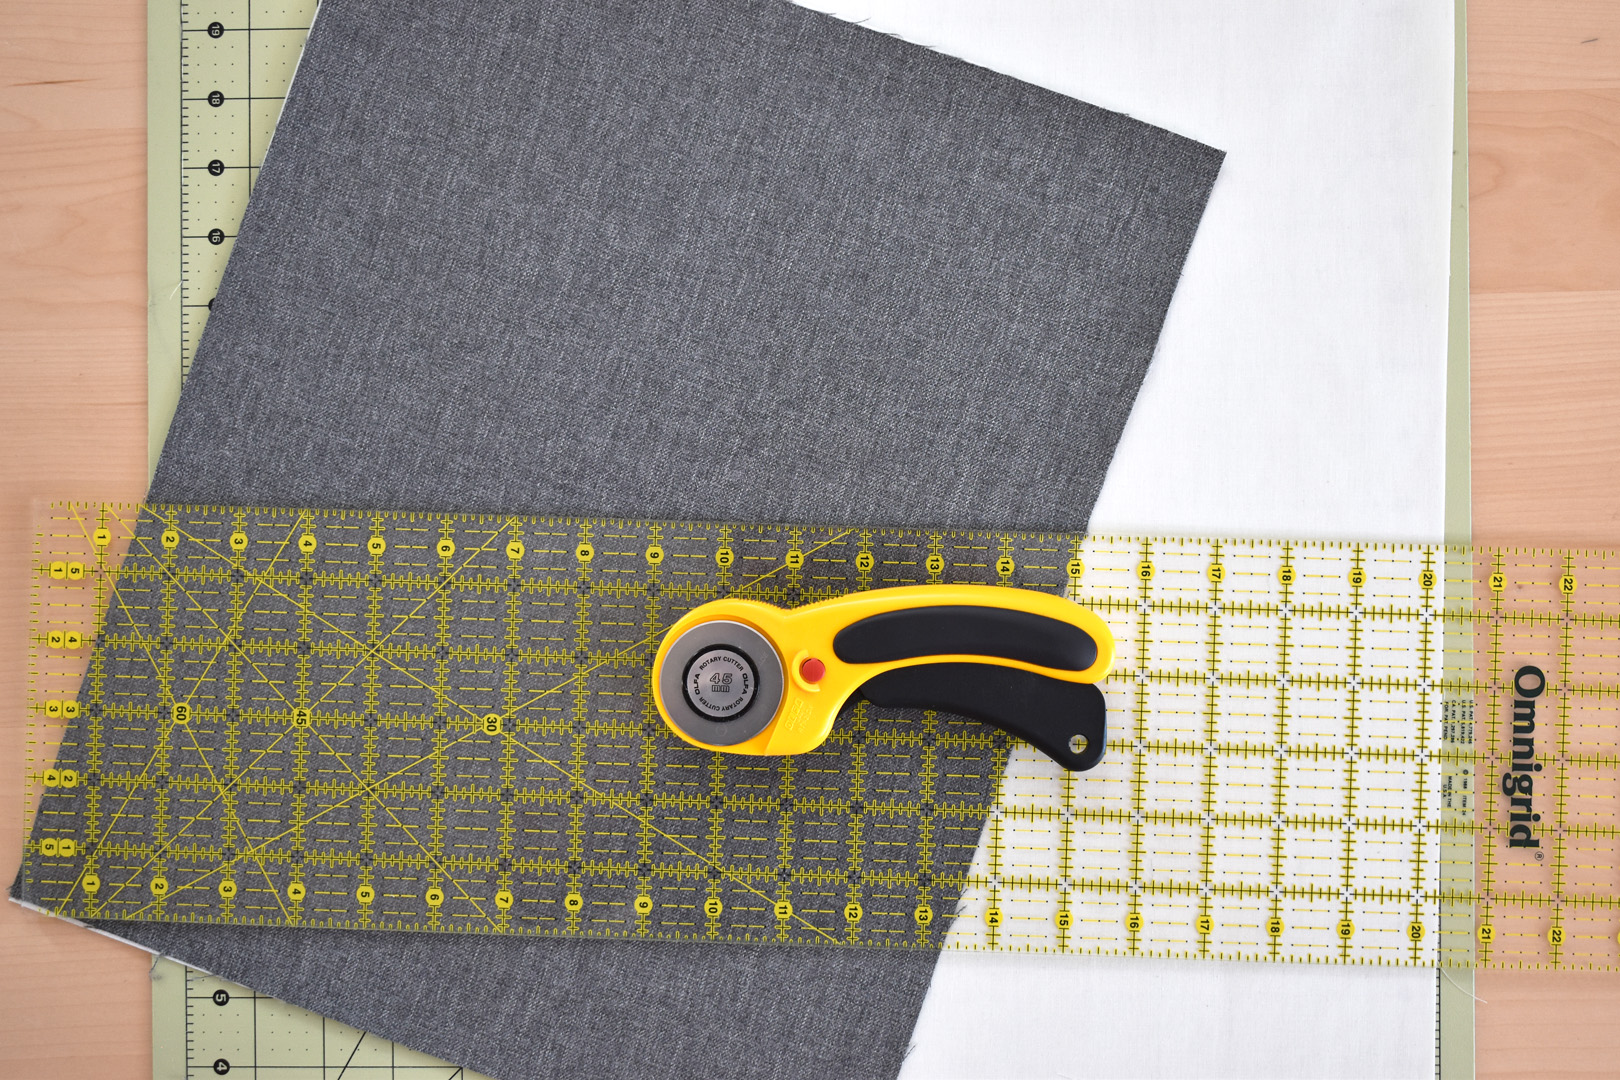
Cut one 13″ x 16″ rectangle from the main bag fabric, one 13″ x 16″ rectangle from the lining fabric, and two 13″ x 16″ rectangles from the Craft Fuse. Follow the Craft Fuse directions and fuse one rectangle each to the back side of both the main bag and lining fabric rectangles. Use a fabric marking pencil, disappearing fabric pen, or a regular pencil with a very light hand for the next steps.
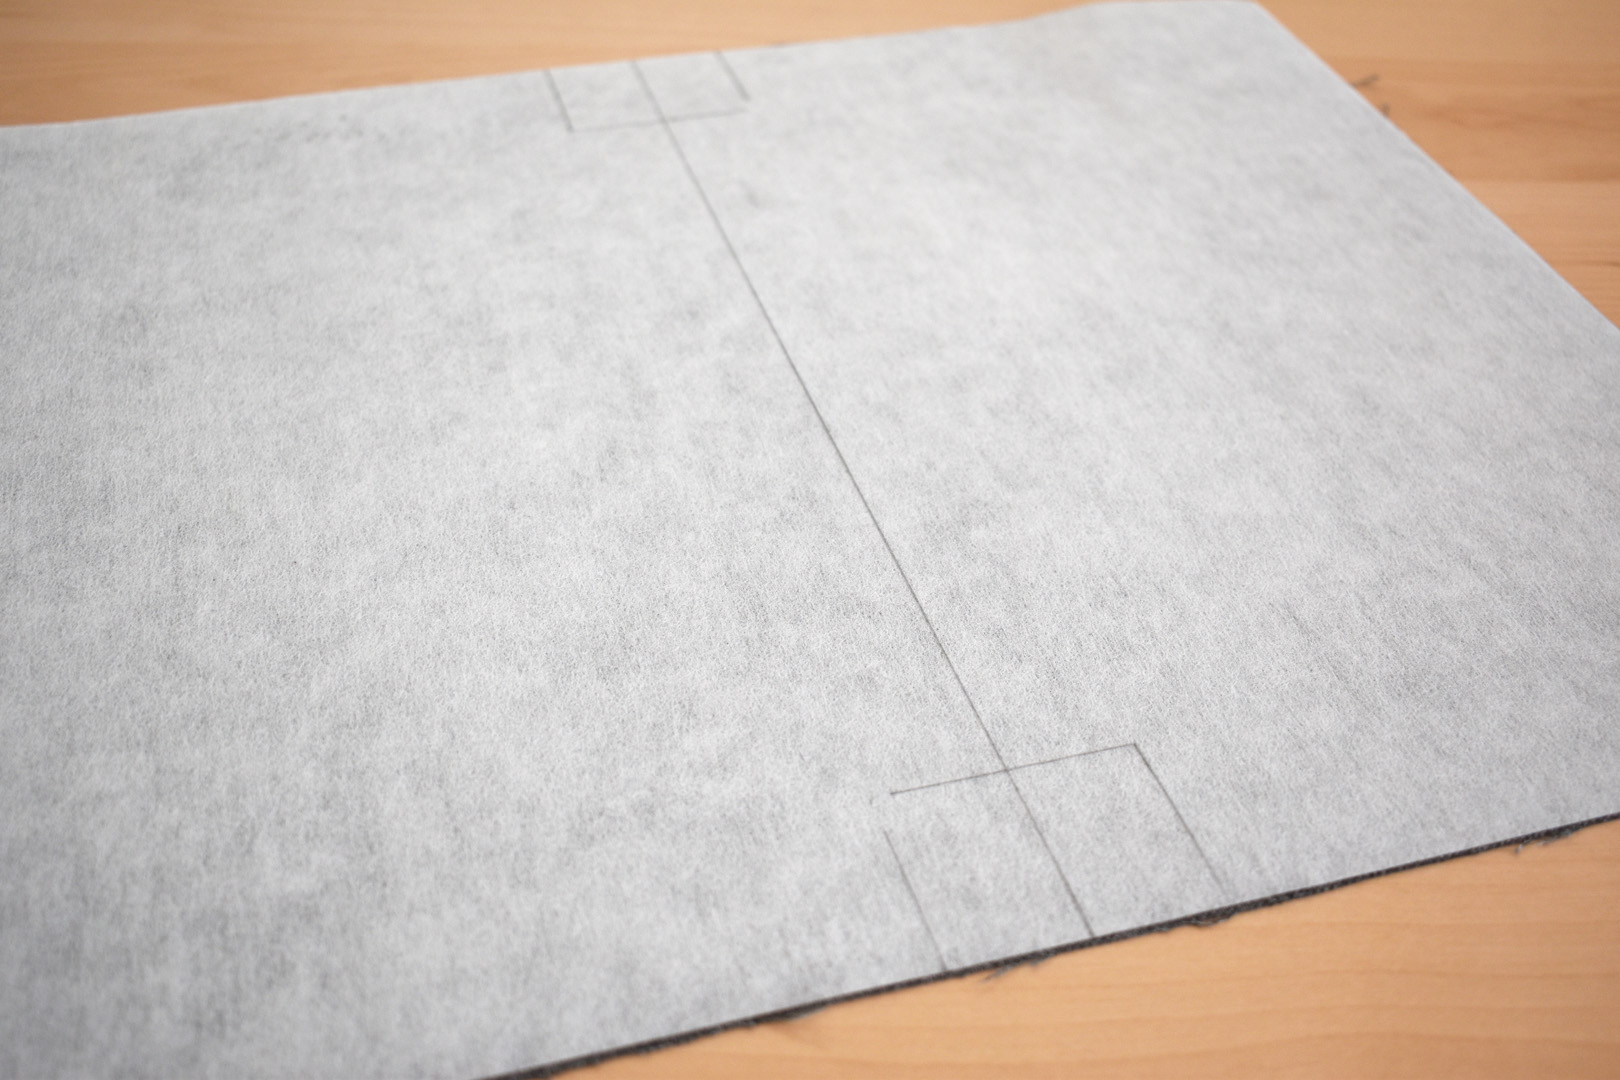
Mark a center line on both the main bag and lining rectangles using the 6″ x 24″ quilting ruler. On the back side, measure the middle of one long side (8″ over from the corner of the long 16″ edge), do the same on the other long edge, and join the marks to create the center line. Then mark 1 1/2″ up from each edge and 1″ over from the center mark on both ends as in the photo below.
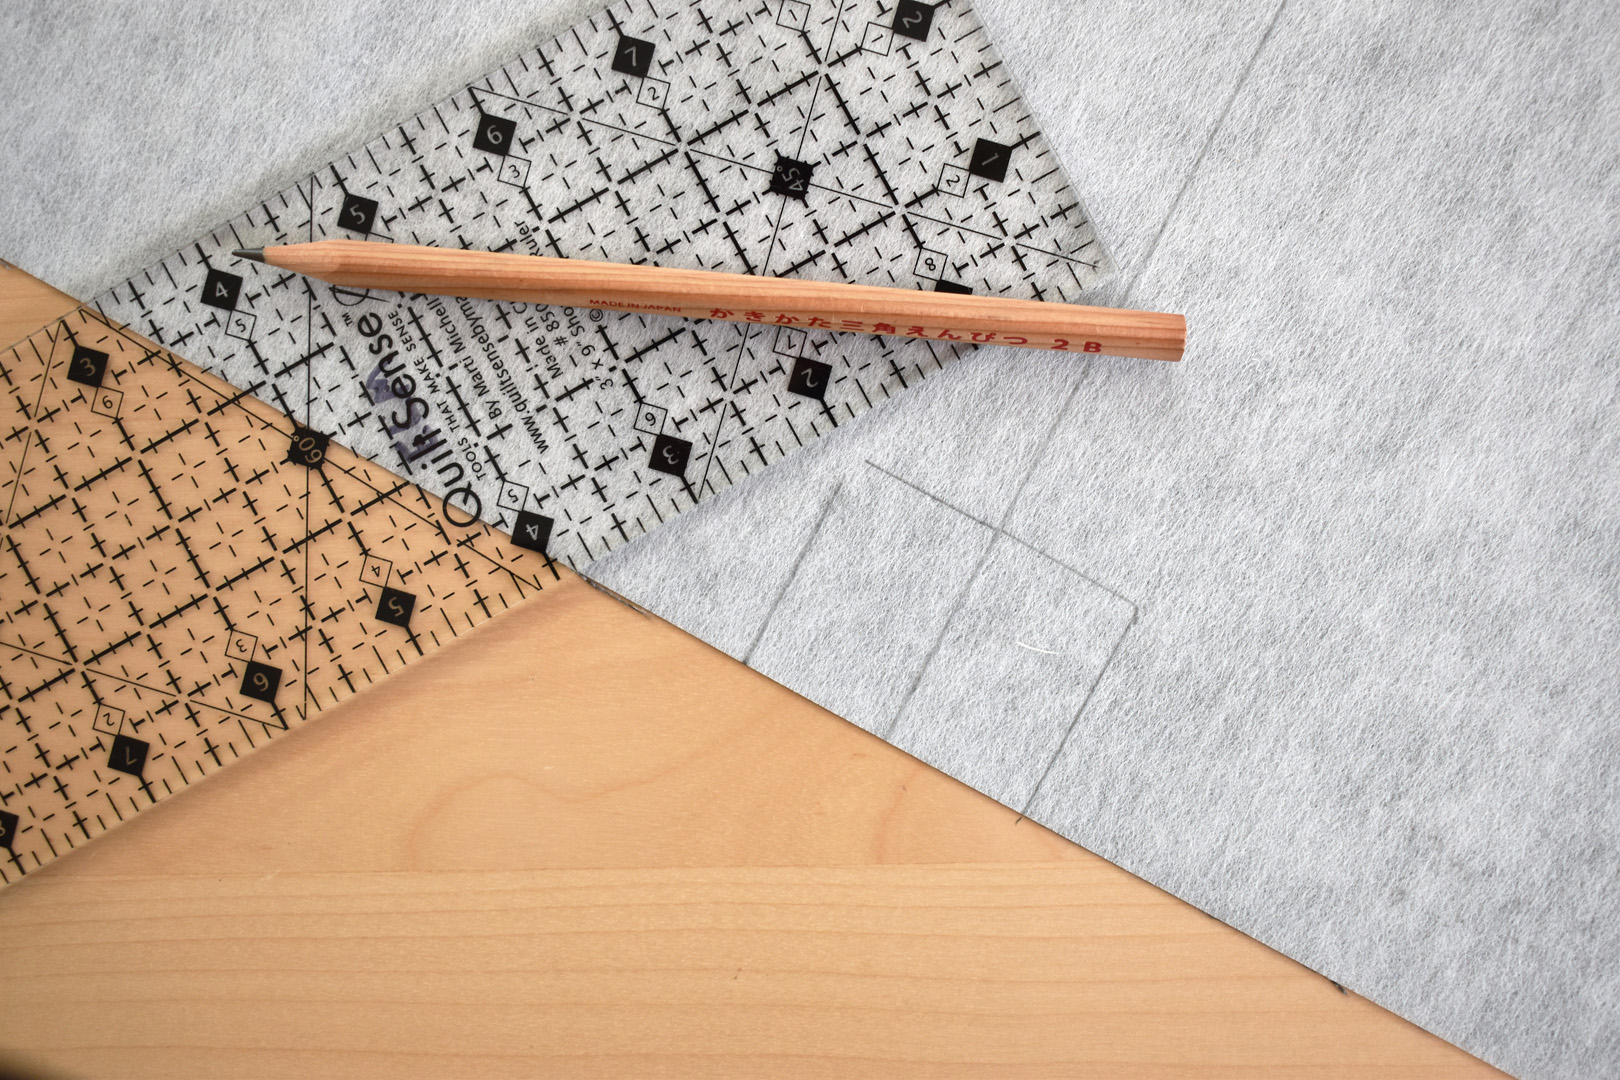
I line-up the ruler 1 1/2″ up from the raw edge, and 1″ over from the center line, then trace the outside edge of the ruler. I repeat on each side of both the main bag and lining pieces.

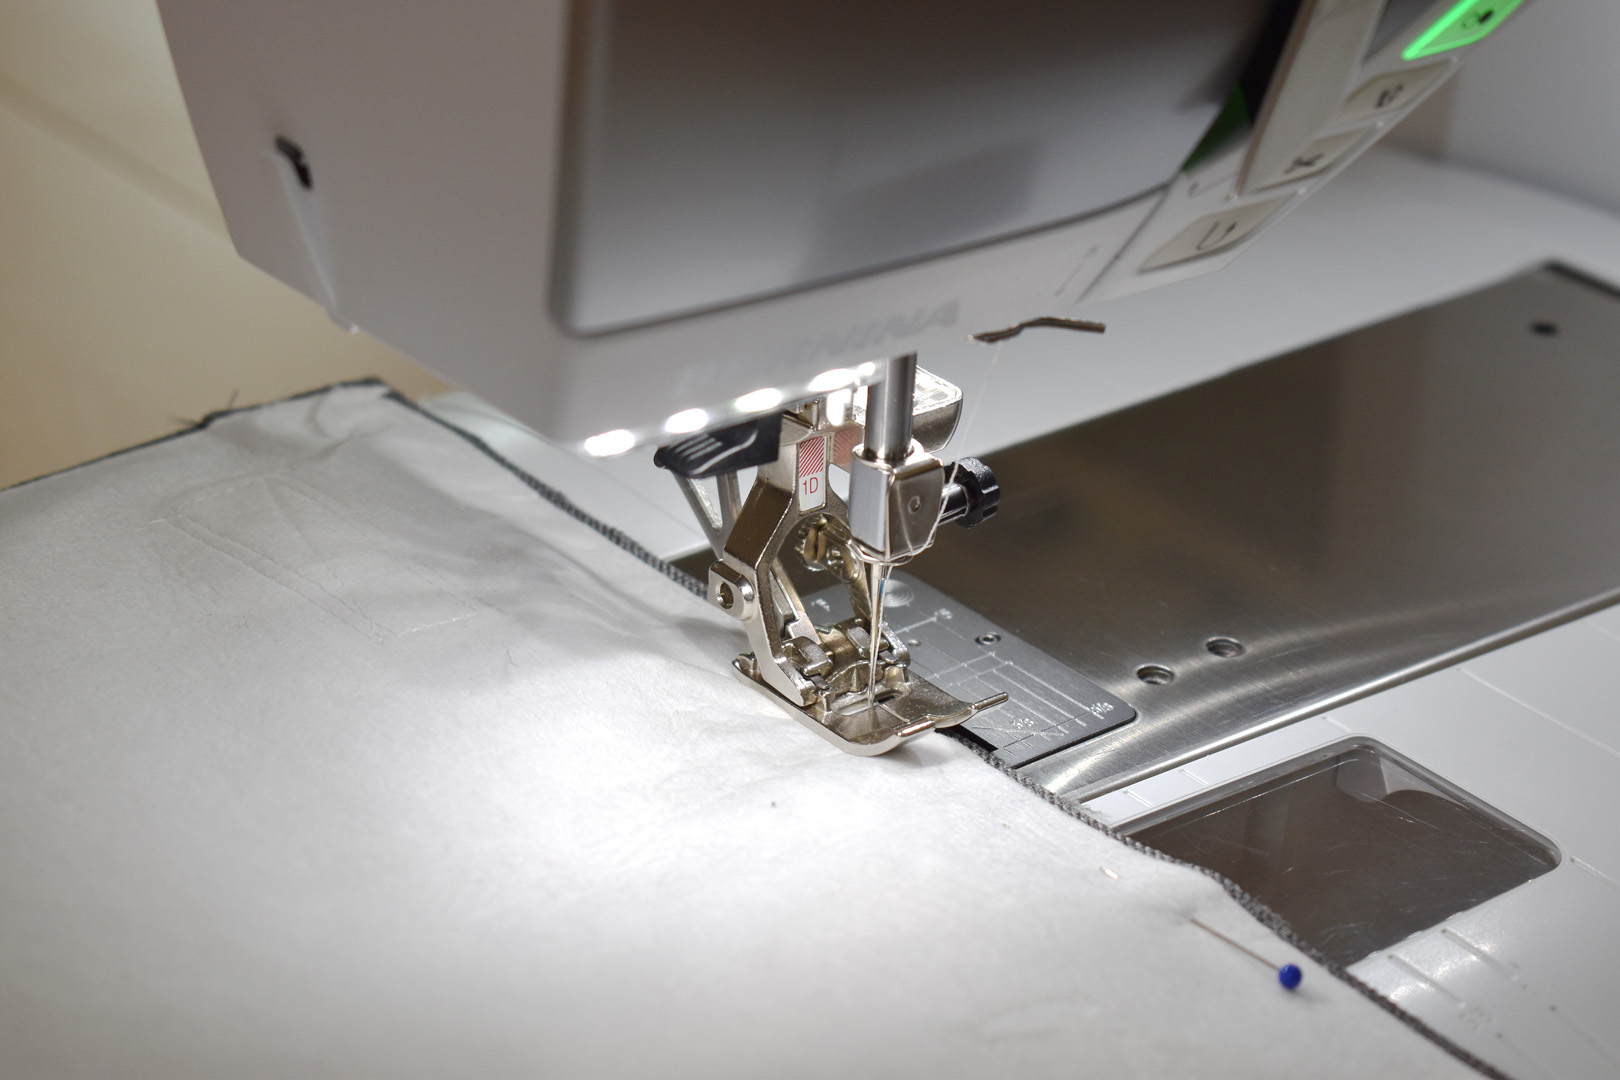
If your main and lining fabrics are different colors like mine, wind bobbins from each matching thread color. Set up your sewing machine with Reverse Pattern Foot #1/#1D and thread to match the main bag fabric.
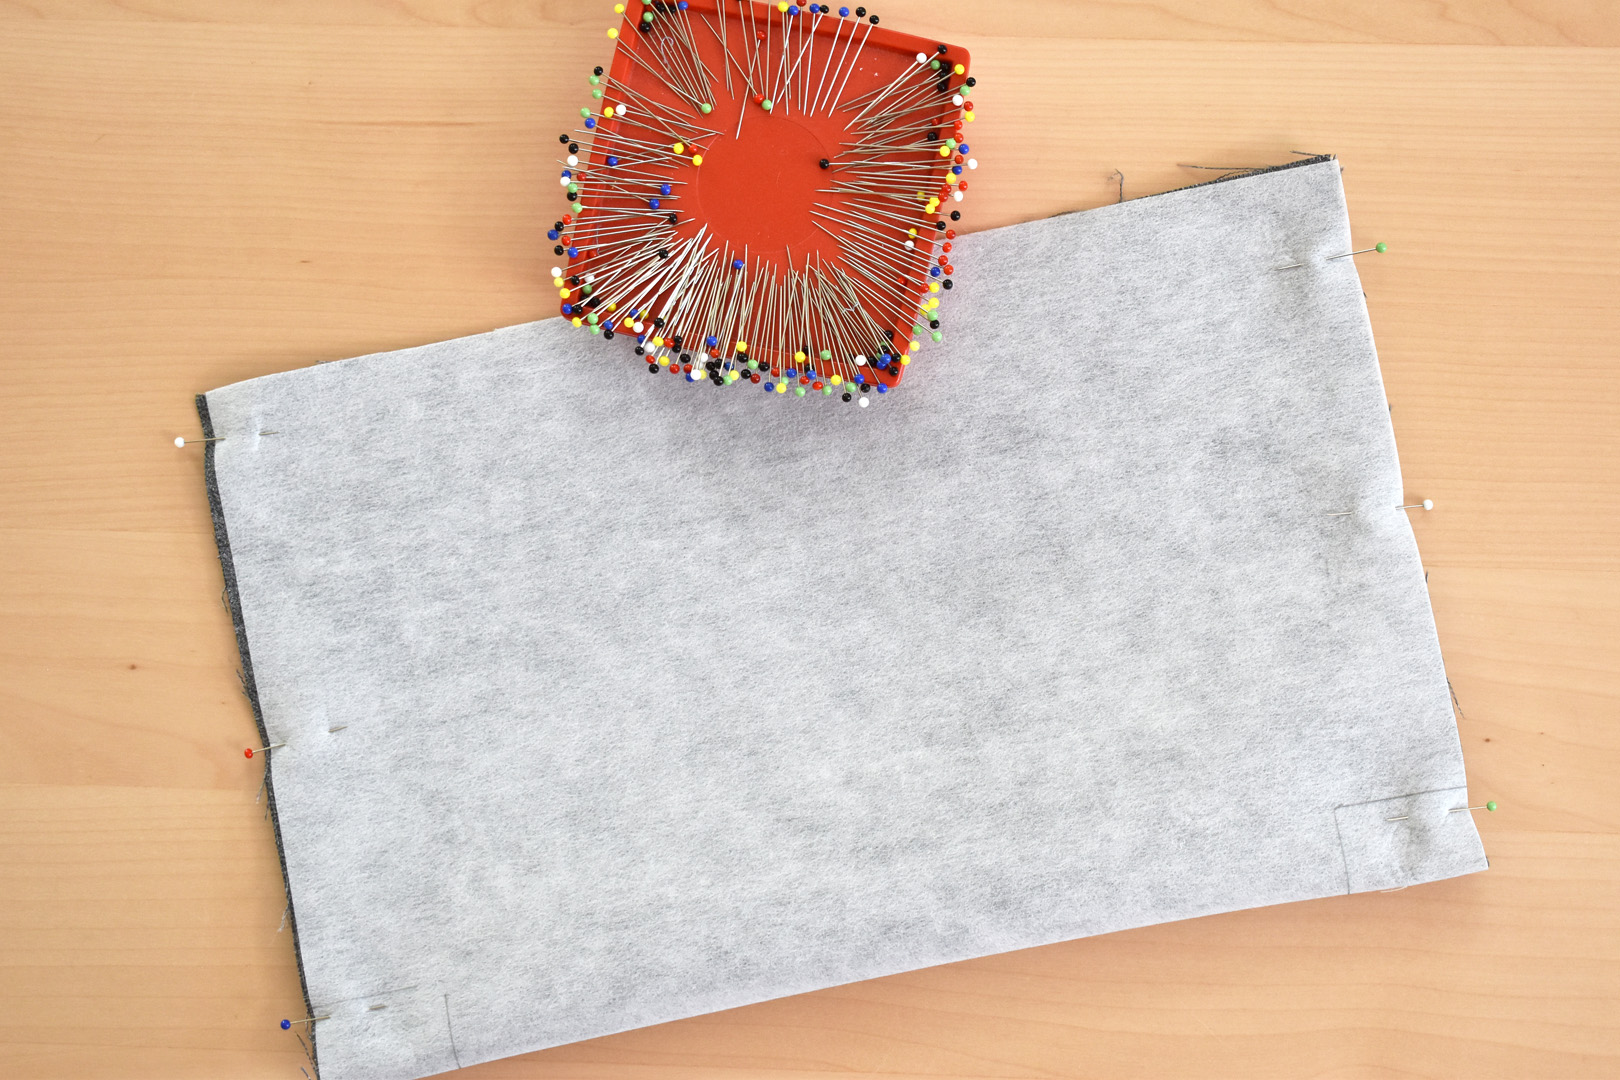
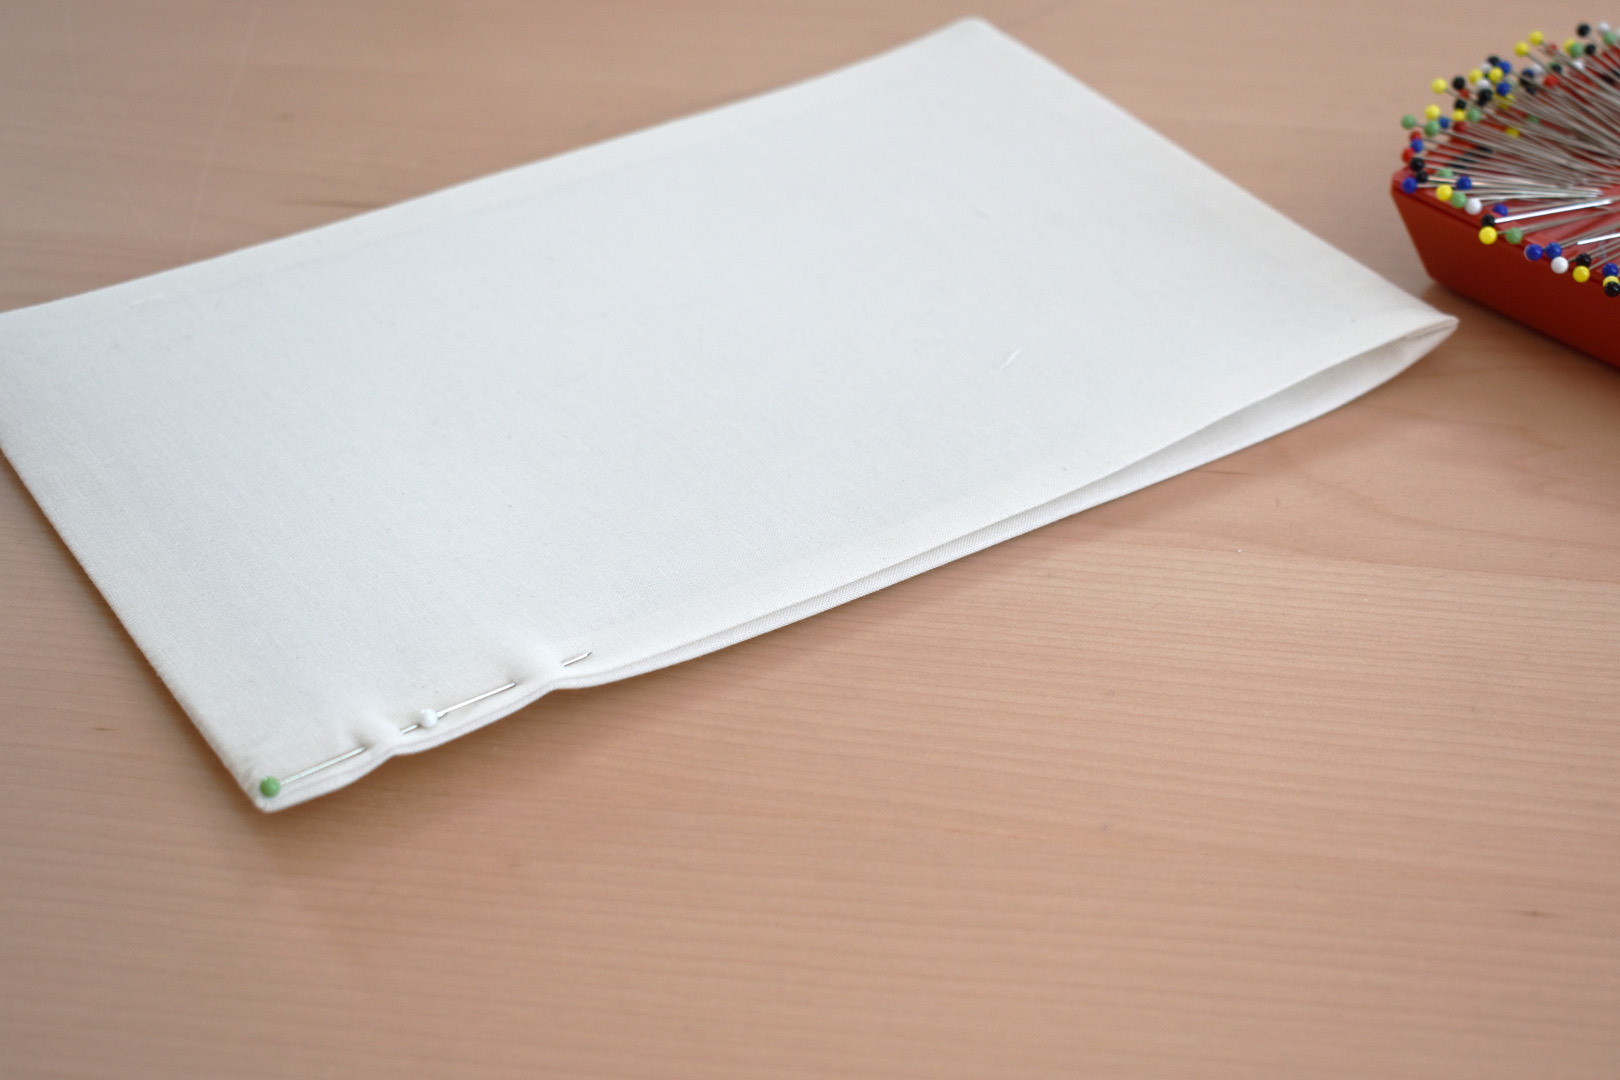
Fold the main bag fabric in half, right sides together, along the center marked line and pin along both sides.
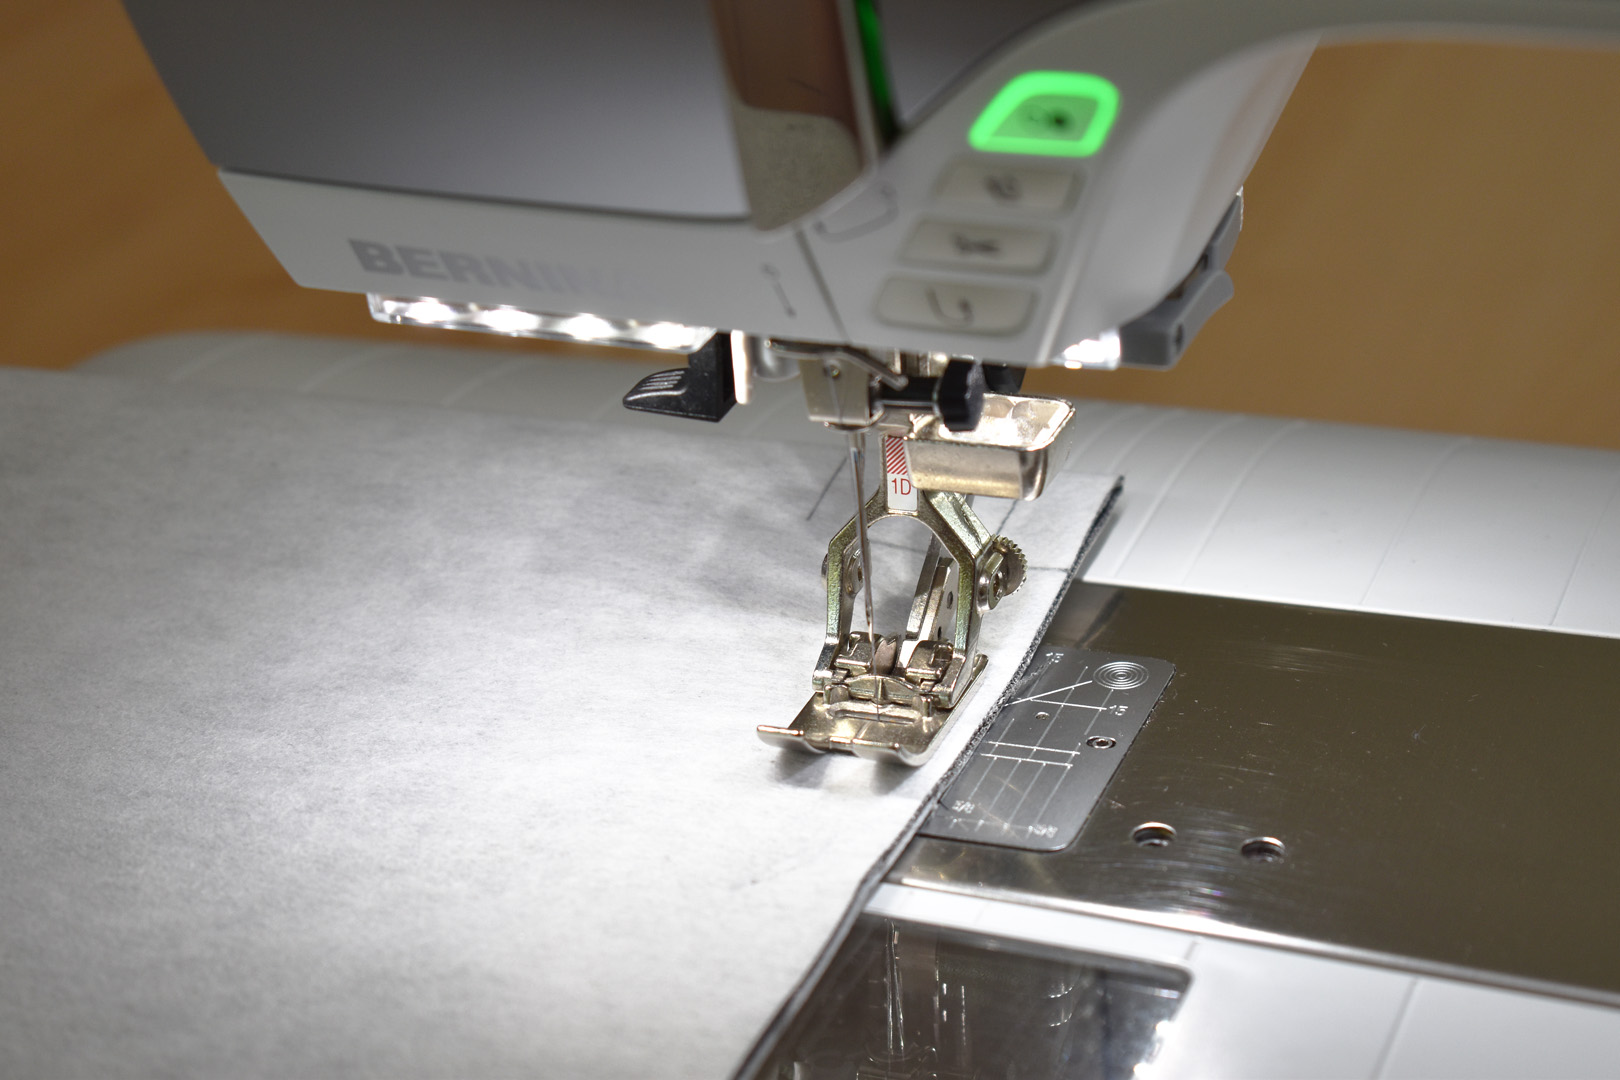
Stitch down both sides using a standard 2.5mm straight stitch with a 1/2″ seam. Backstitch at the top end of the main bag opening.
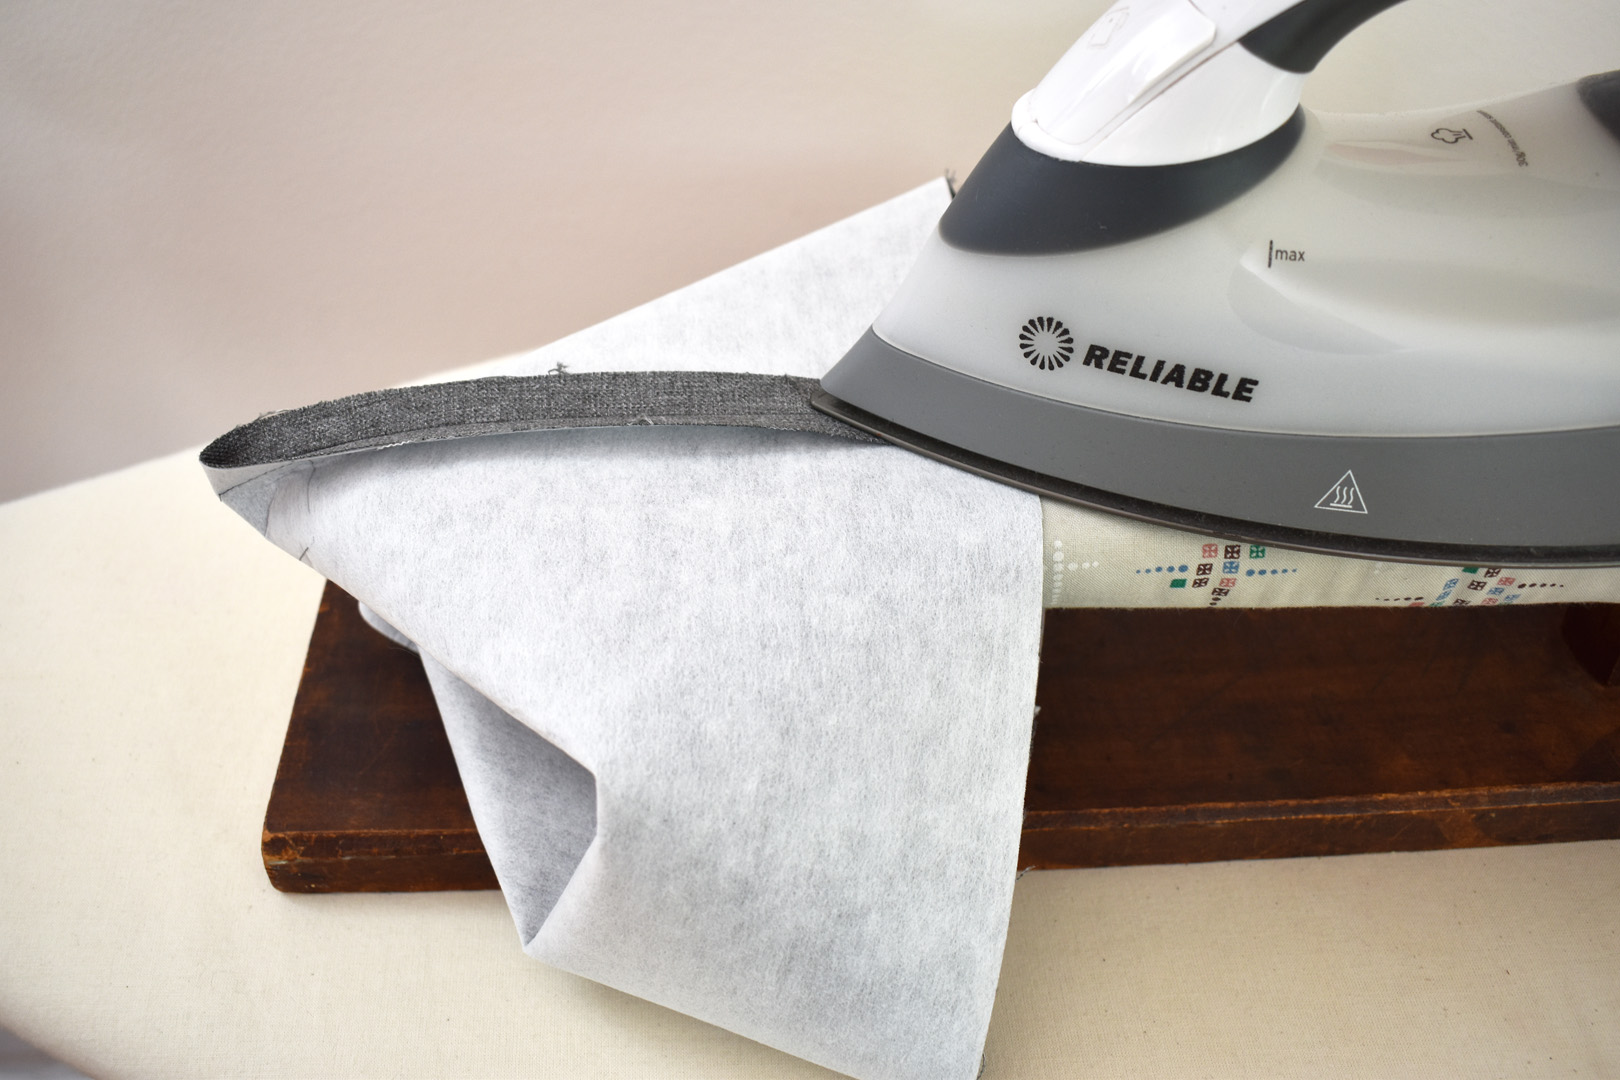
Press seam allowance open. Here is where a sleeve board comes in handy! If you don’t have a sleeve board, use the end of your ironing board and press as much as you can open.
Remove the sewing table from your sewing machine to access the free arm for the next steps. Stitch down the seam allowances about 3/8″ on each side of the seam, starting at the top raw edge and sewing at least 3″ down. Repeat for the other side.
Pinch the bottom corners together so the side seams are even with the bottom, center line drawn on the Craft Fuse. Now you can see the lines you made across the corner, pin over from these lines.
Stitch across the marked lines on the corner of the bag, backstitching at the edge start and end points.
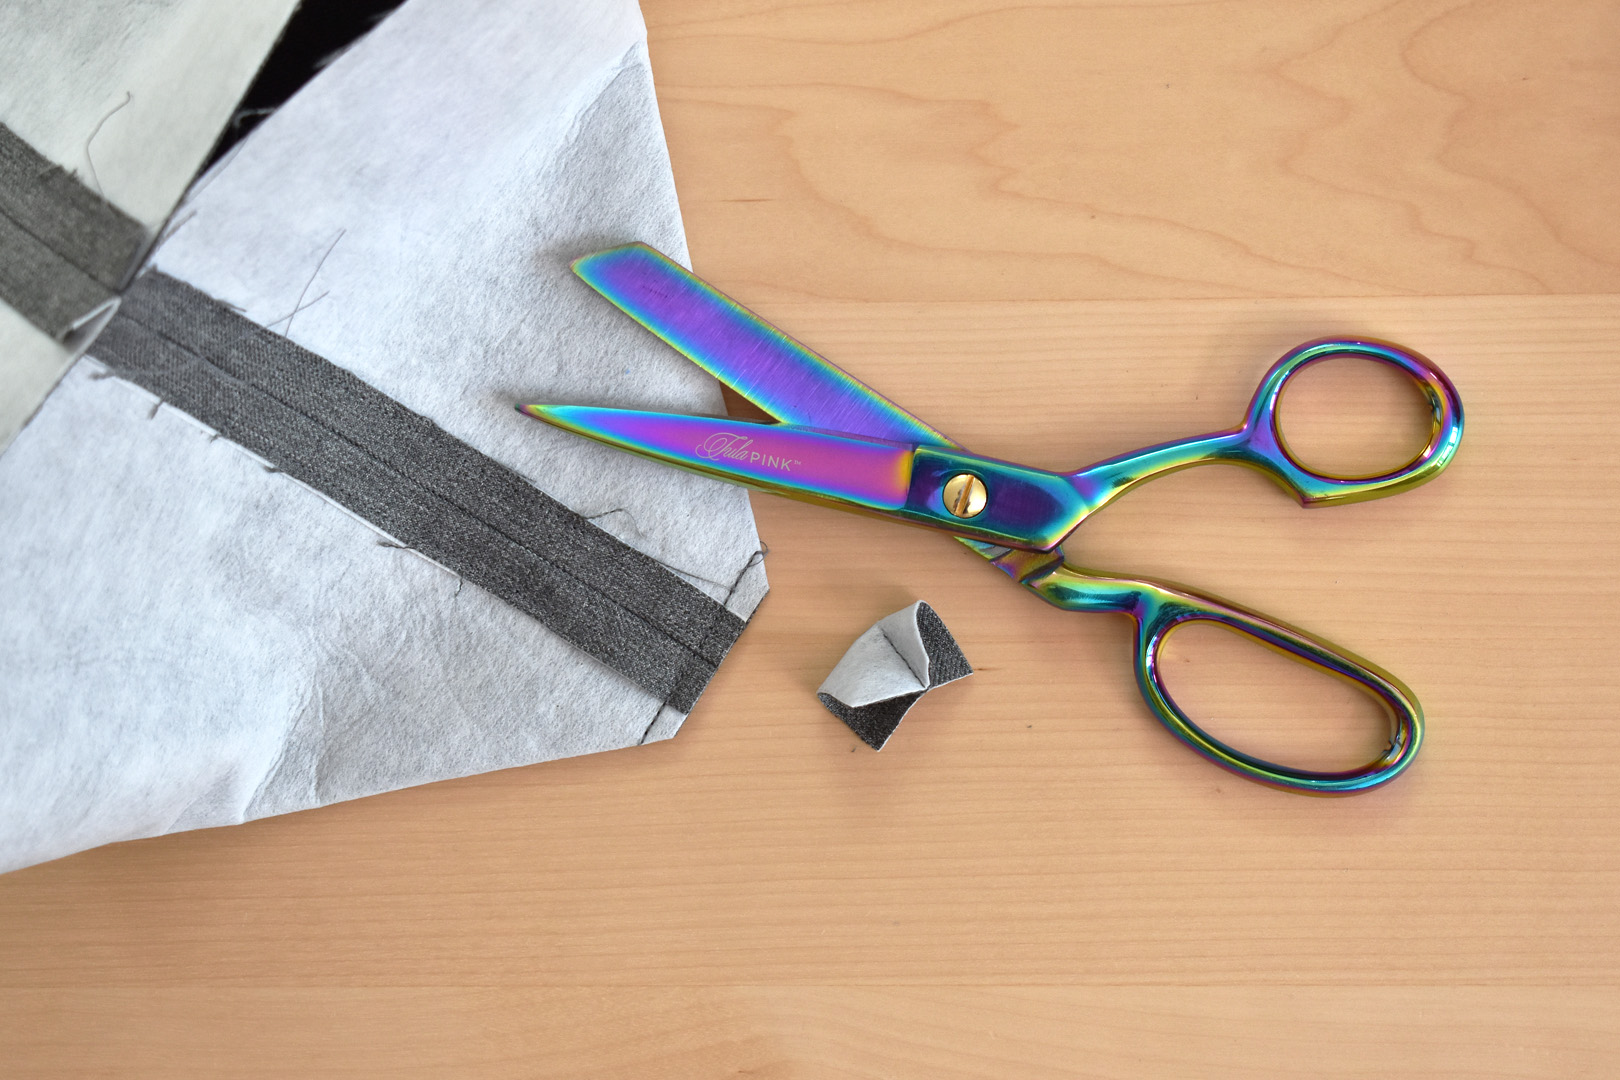
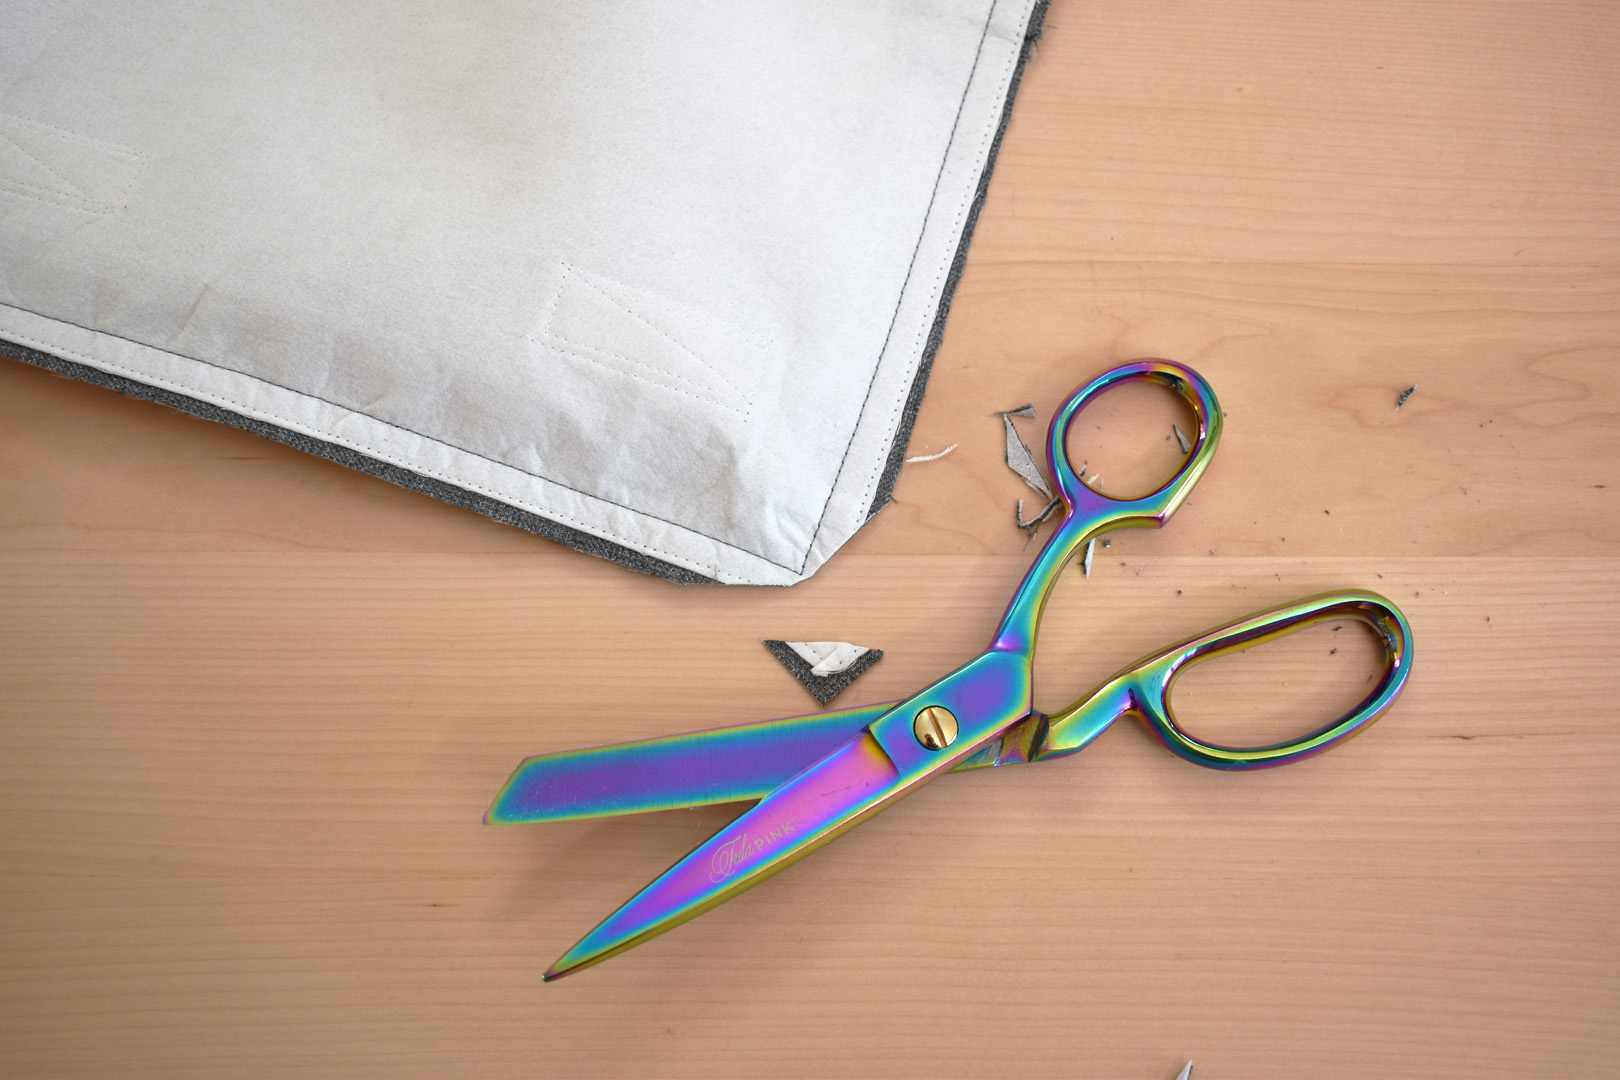
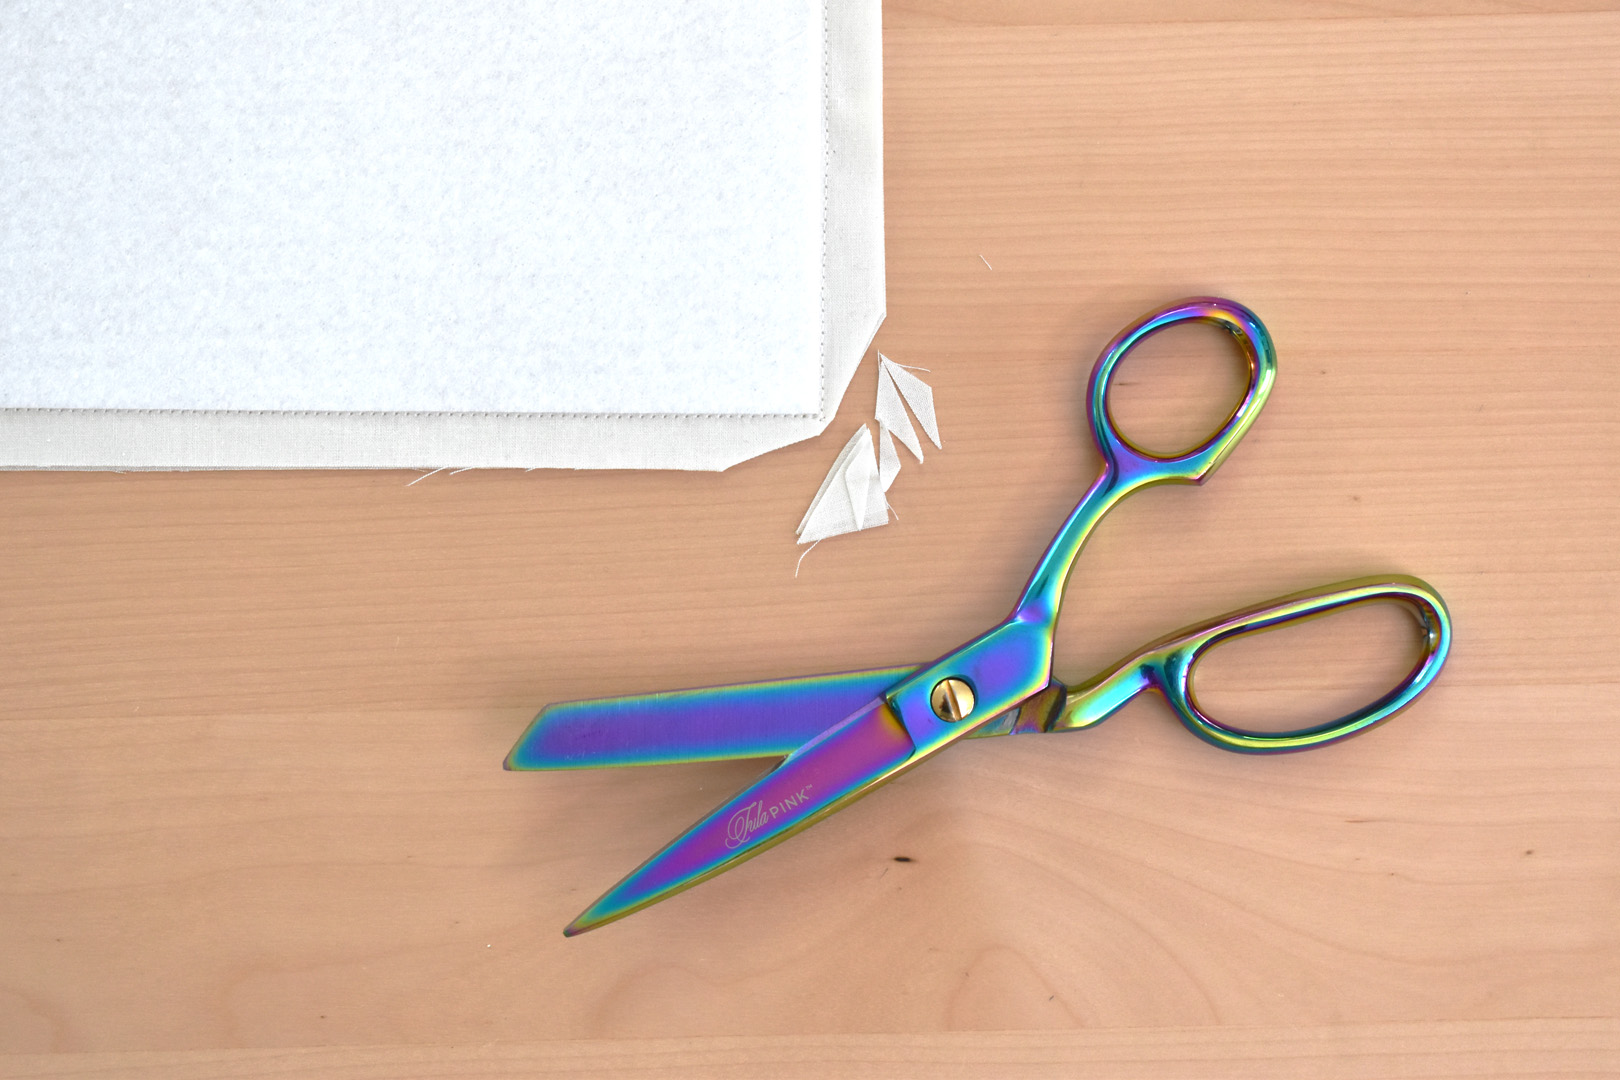
Cut corners about 1/4″ from the stitching.
REPEAT all of the above steps to complete the bag lining in the same manner.
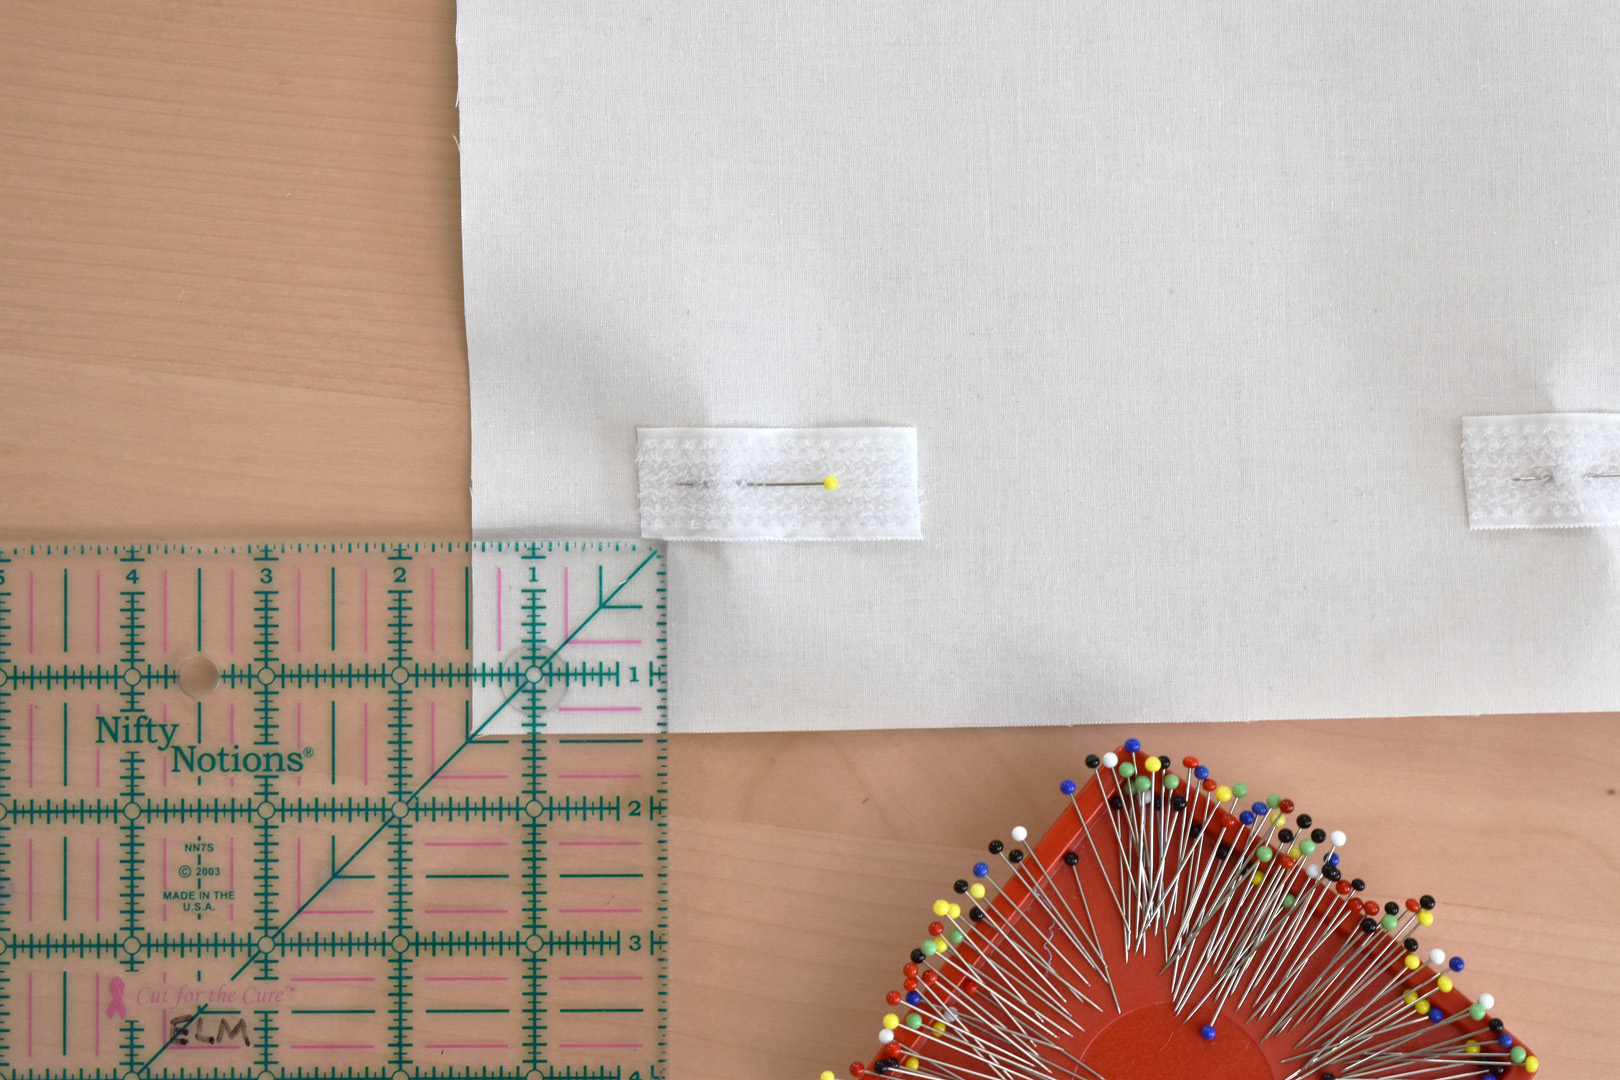
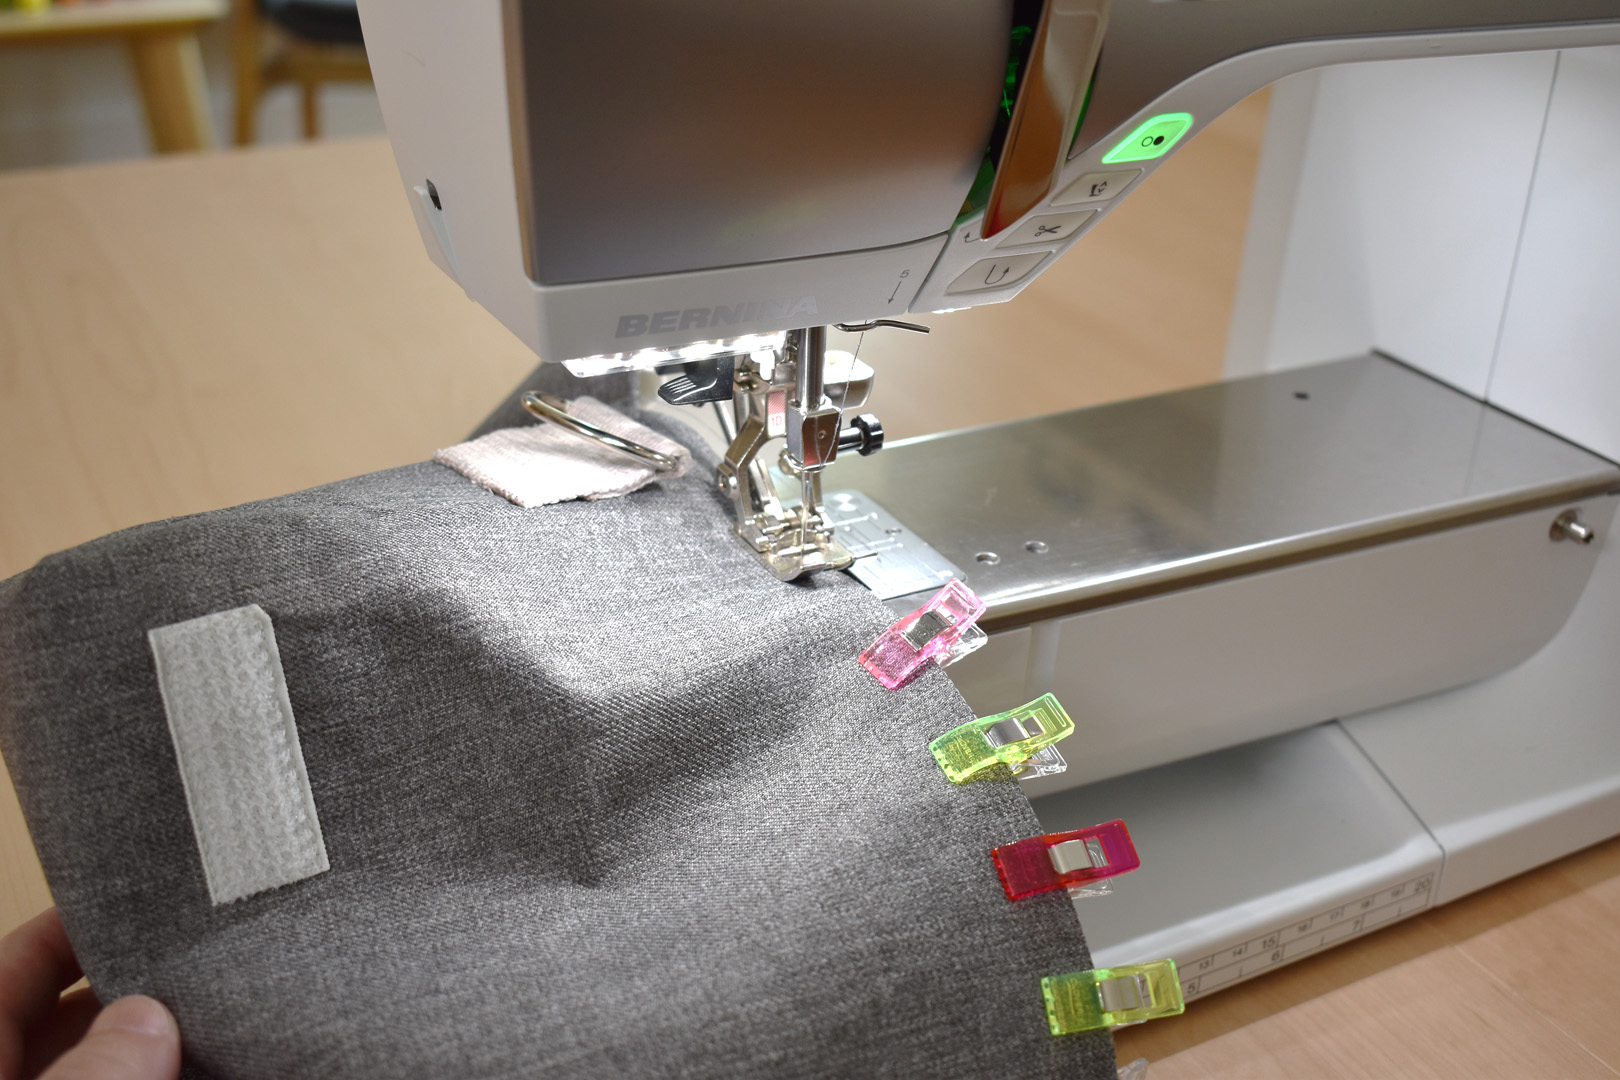
Next, add the hook and loop tape and strap rings to the main bag. You will need the main bag, the two D or rectangle style rings, two pieces of the strapping cut to 3″ long, and two pieces of the hook and loop tape cut to 2″ long.
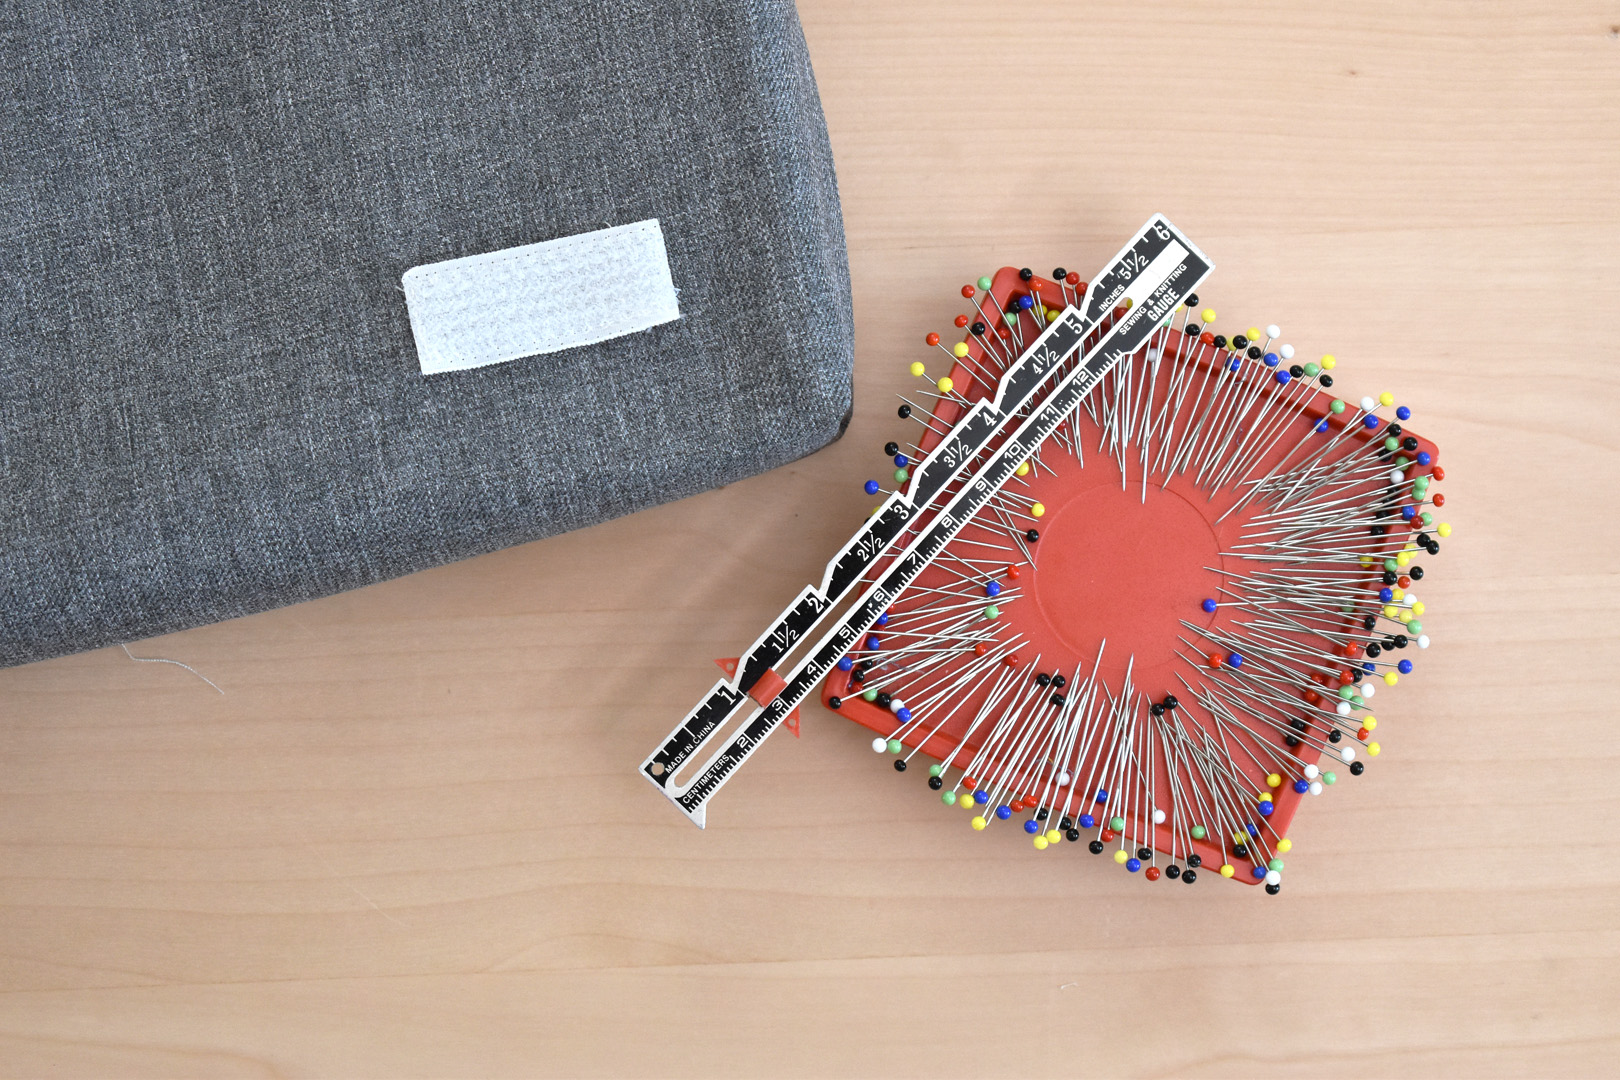
Pin the strips of hook and loop tape to the front side of the bag (whichever side you think should be the front) about 1″ up and 1″ over from each bottom bag corner.
Use the free arm of your sewing machine to maneuver the hook and loop tape under the presser foot to stitch in place. I opened the bag and pulled the extra bag fabric out of the way for this step.

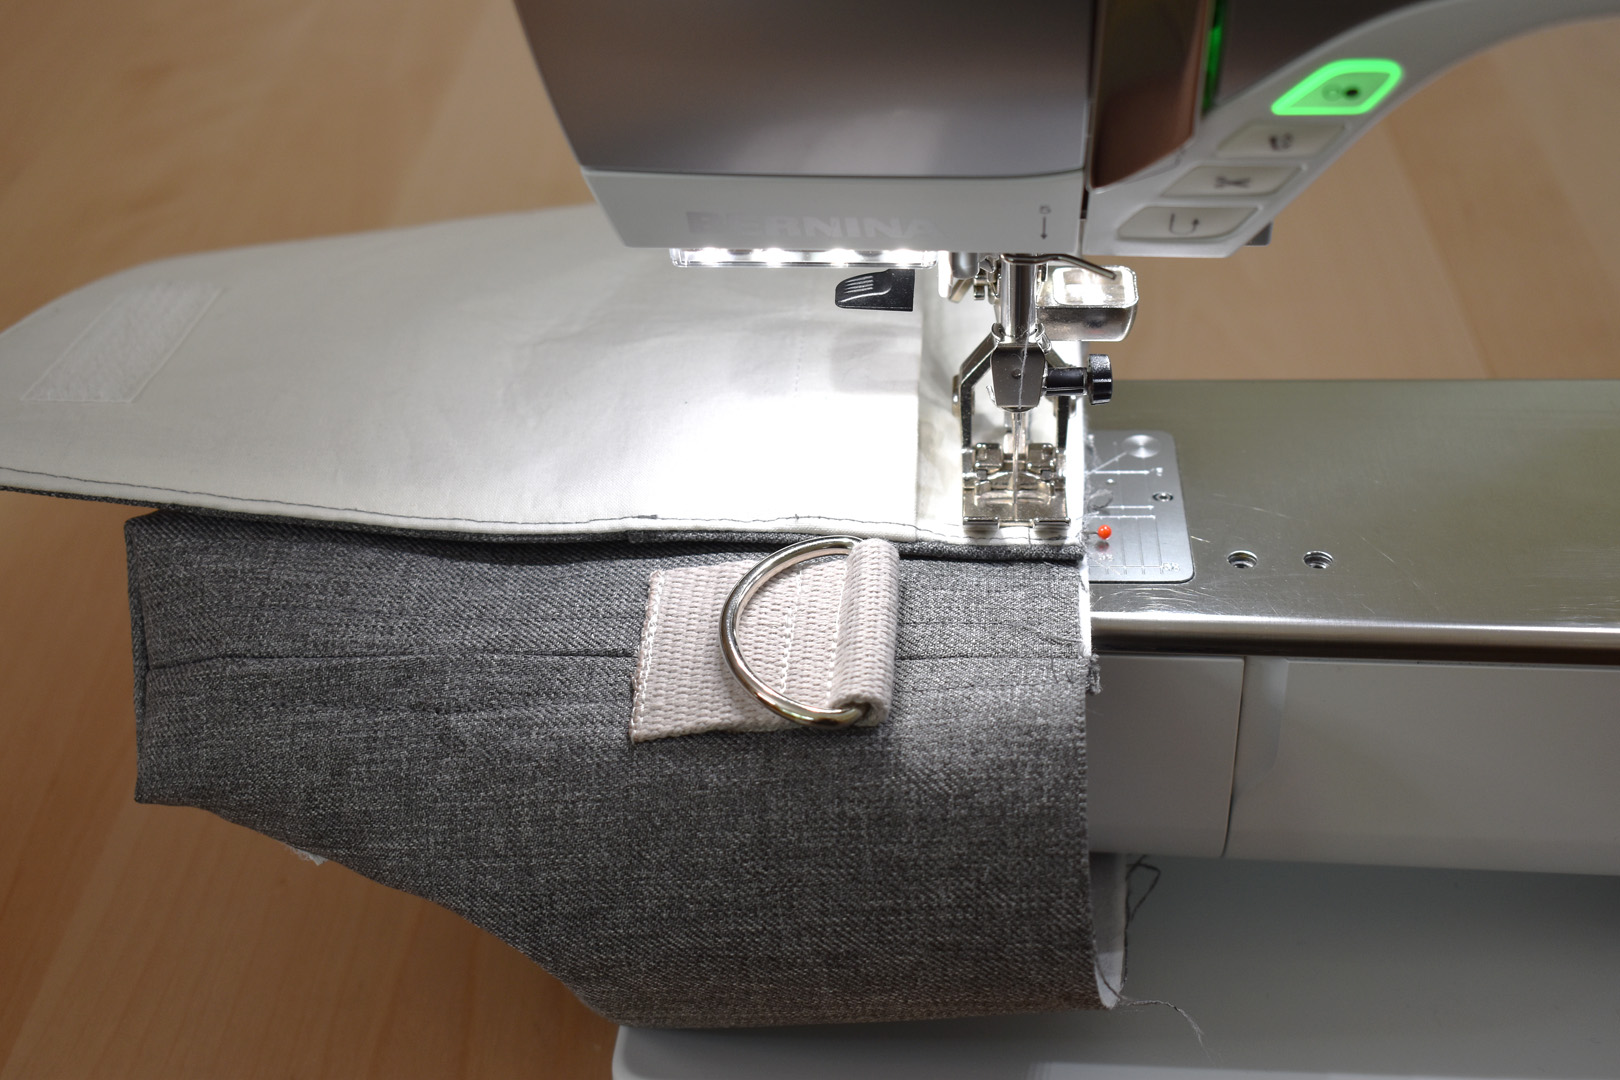
Replace the sewing table on your sewing machine and install Zipper Foot #4/#4D to attach the rings to the strap tabs. Slide a ring through the strap tab and fold 1″ over the ring; pin in place. Repeat these steps with other ring and strap tab.
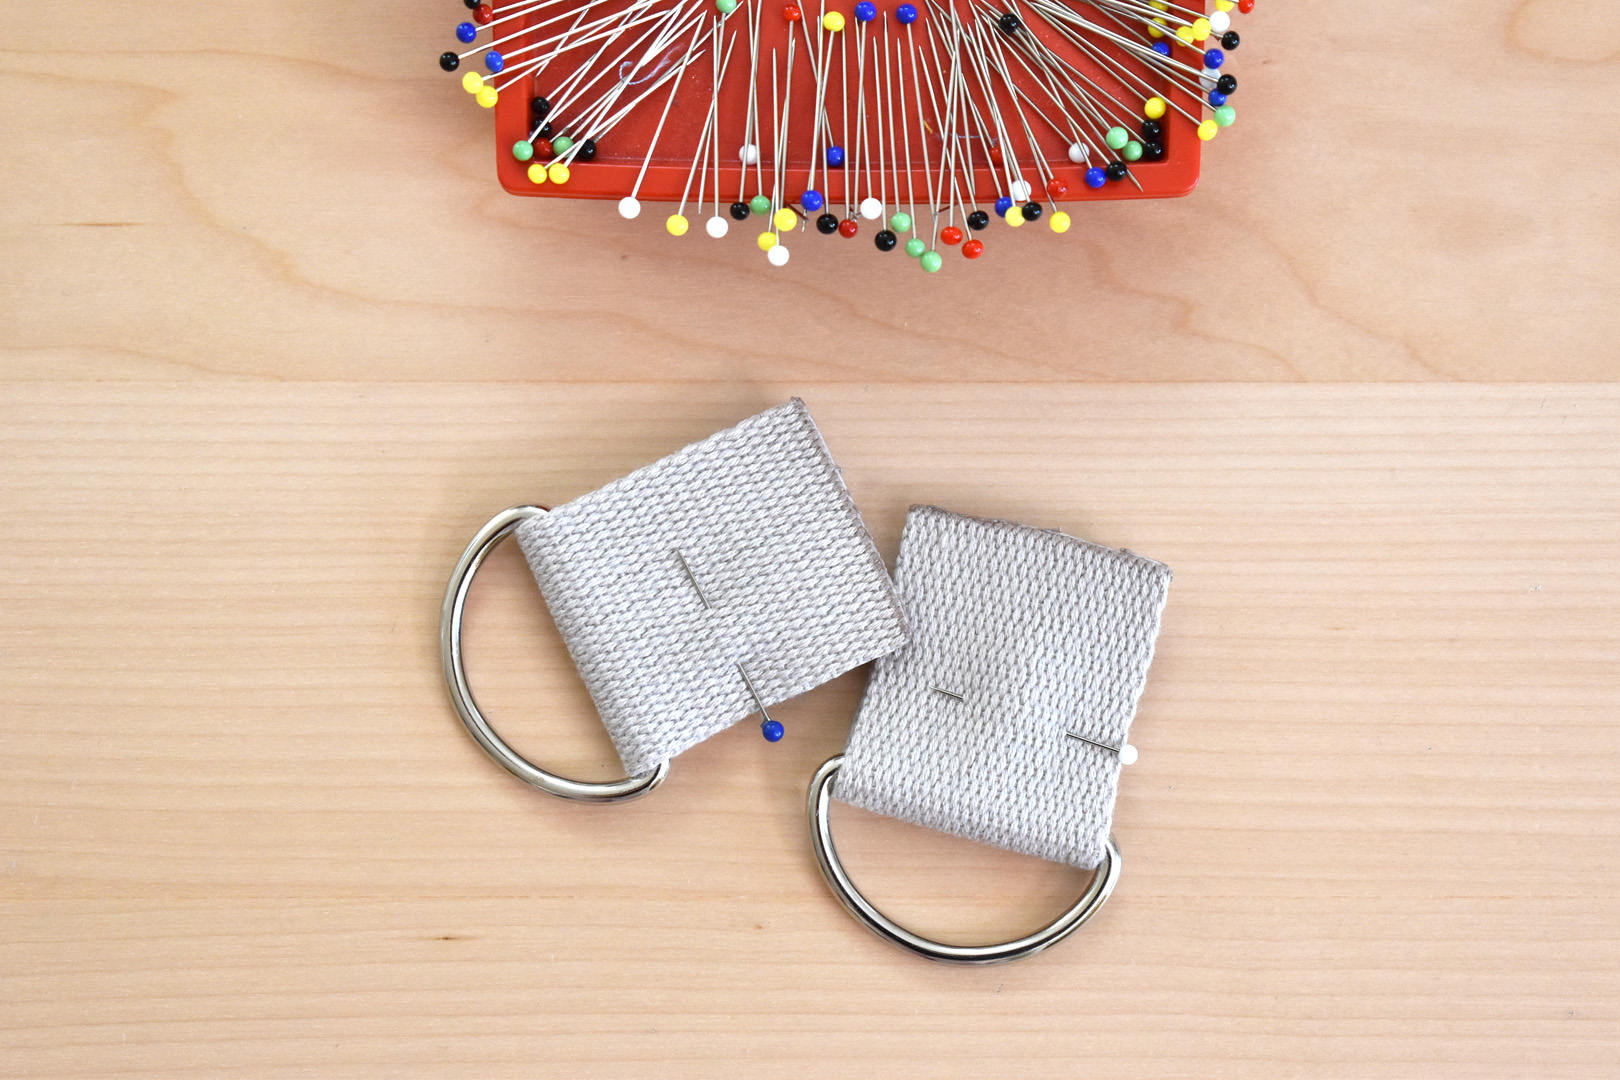
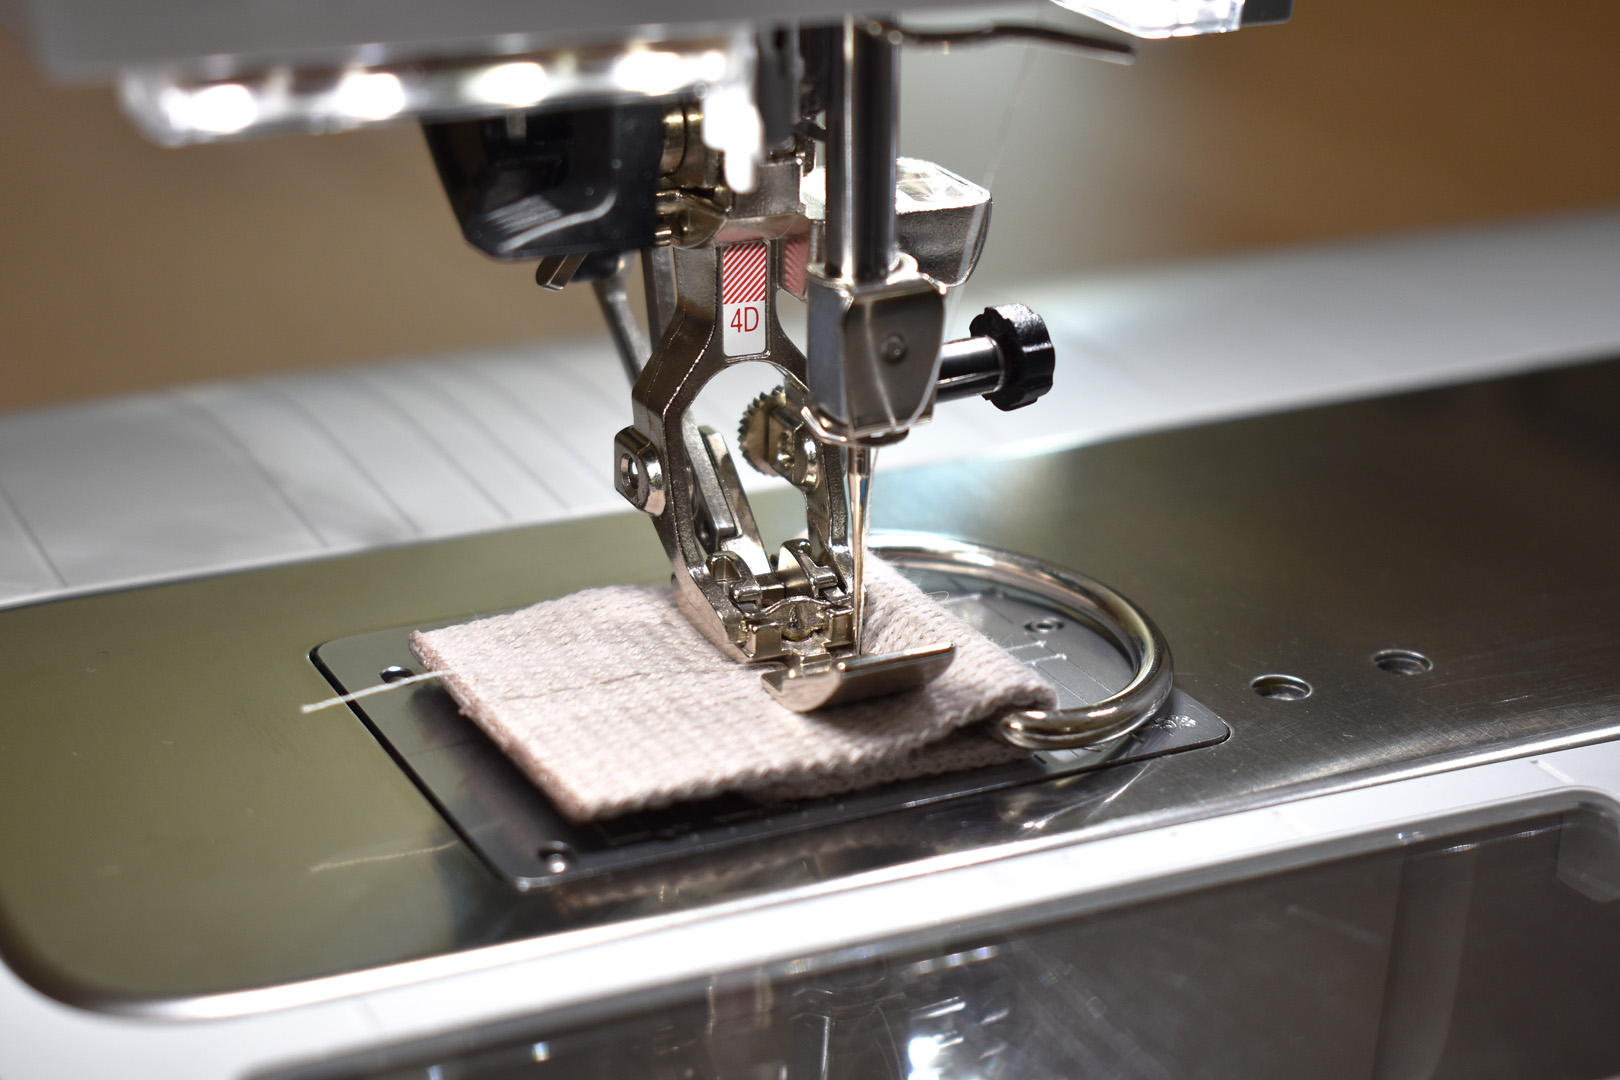
First, move the needle hard right and place the zipper foot as close as you can to the metal ring. Stitch across the width of the strap tab, then backstitch all the way to the start point. Repeat with other D ring and strap tab.
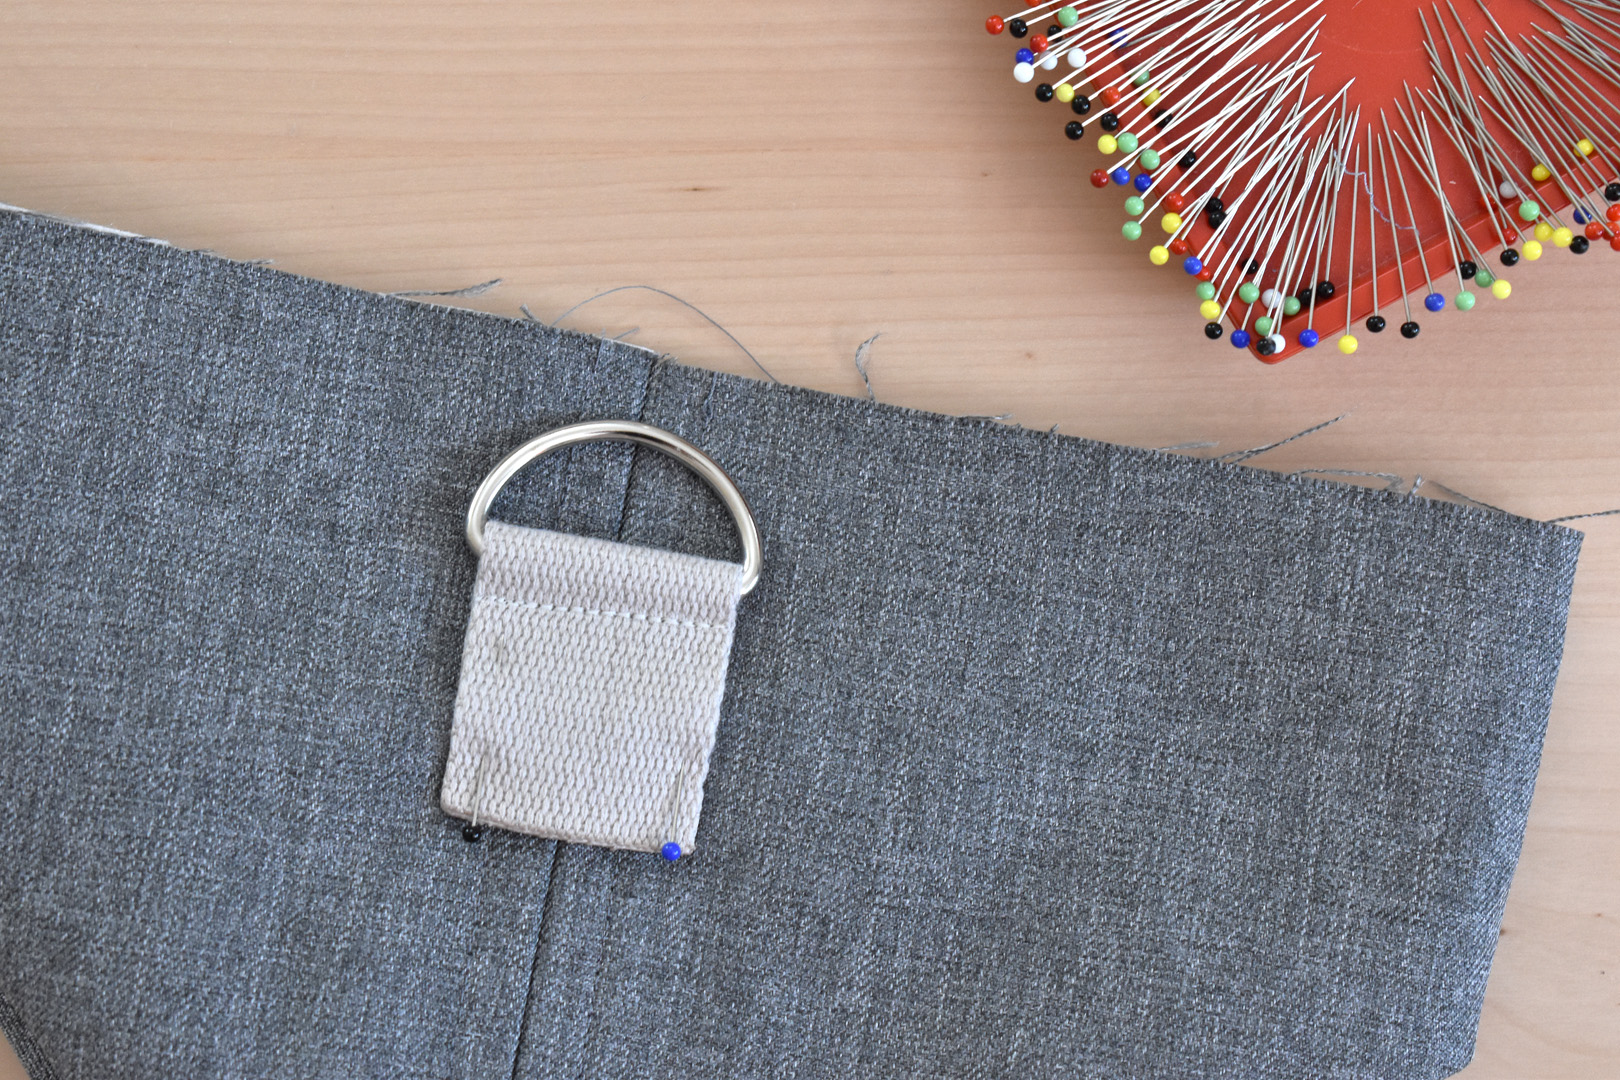
Pin each strap tab over the side seam with the very top of the D or rectangular ring 1/2″ down from the raw edge. Center the strap tab over the side seam.
Replace the Reverse Pattern Foot #1/#1D for the next step.
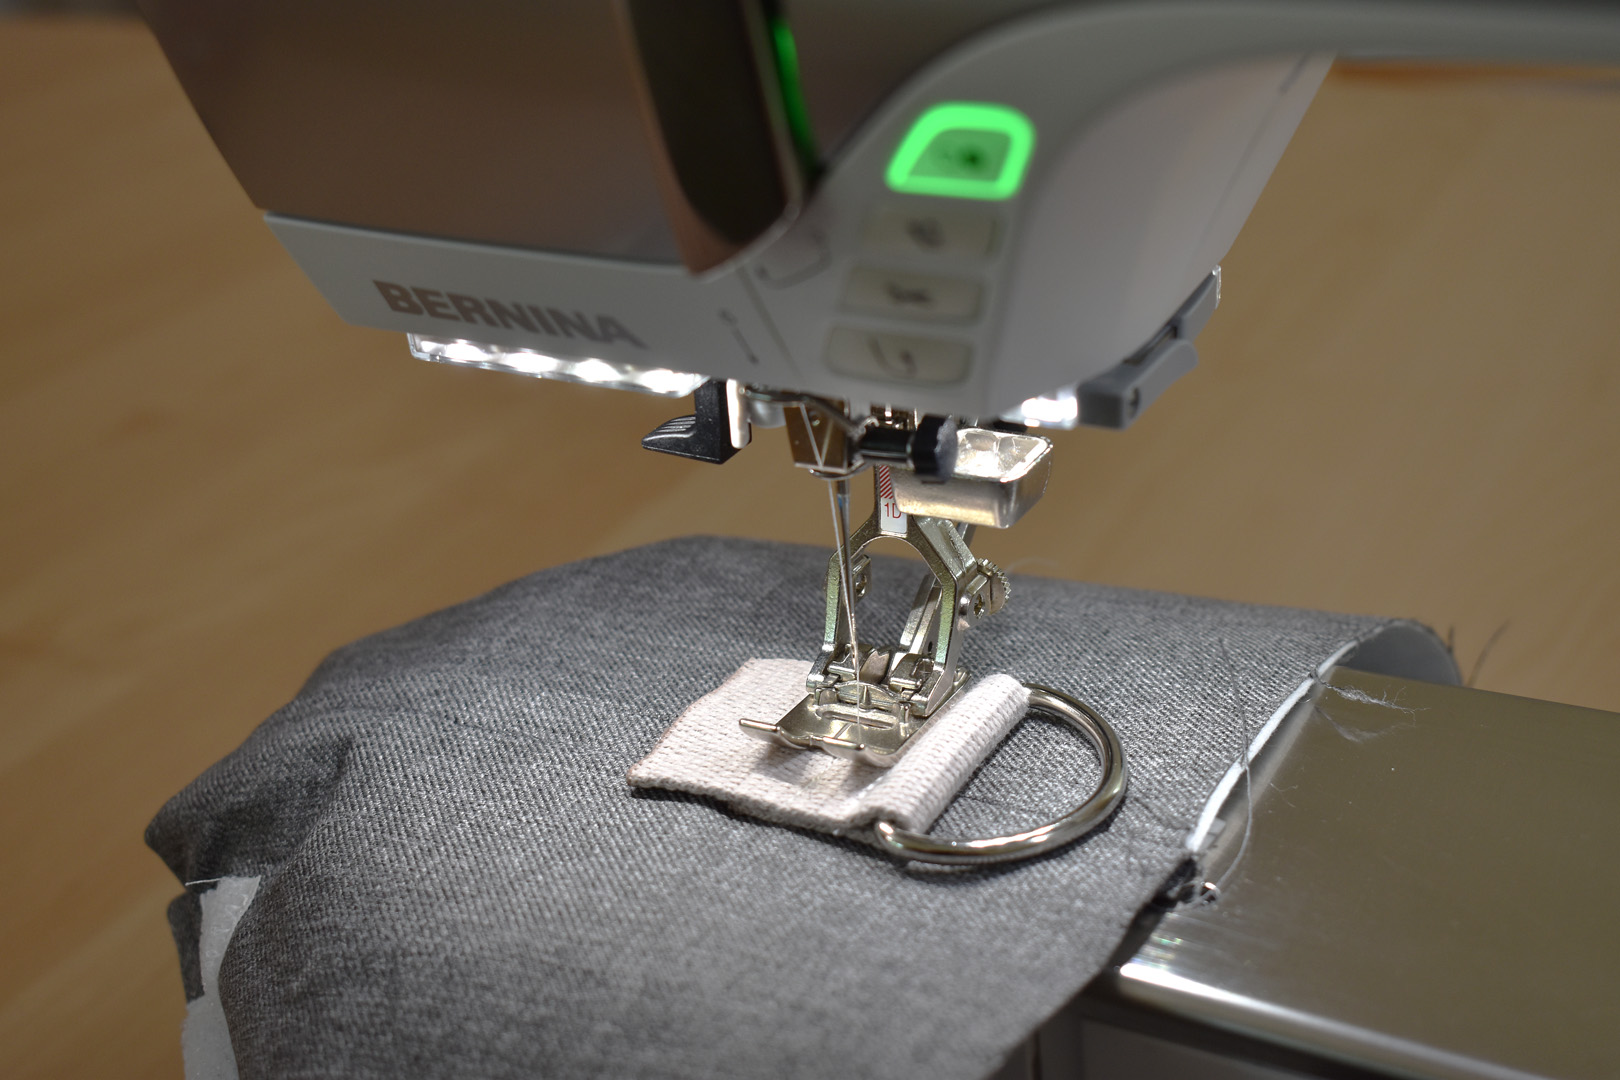
Place the edge of the sewing machine foot against the bottom edge of the ring and stitch across, backstitching a few times to create a strong seam.
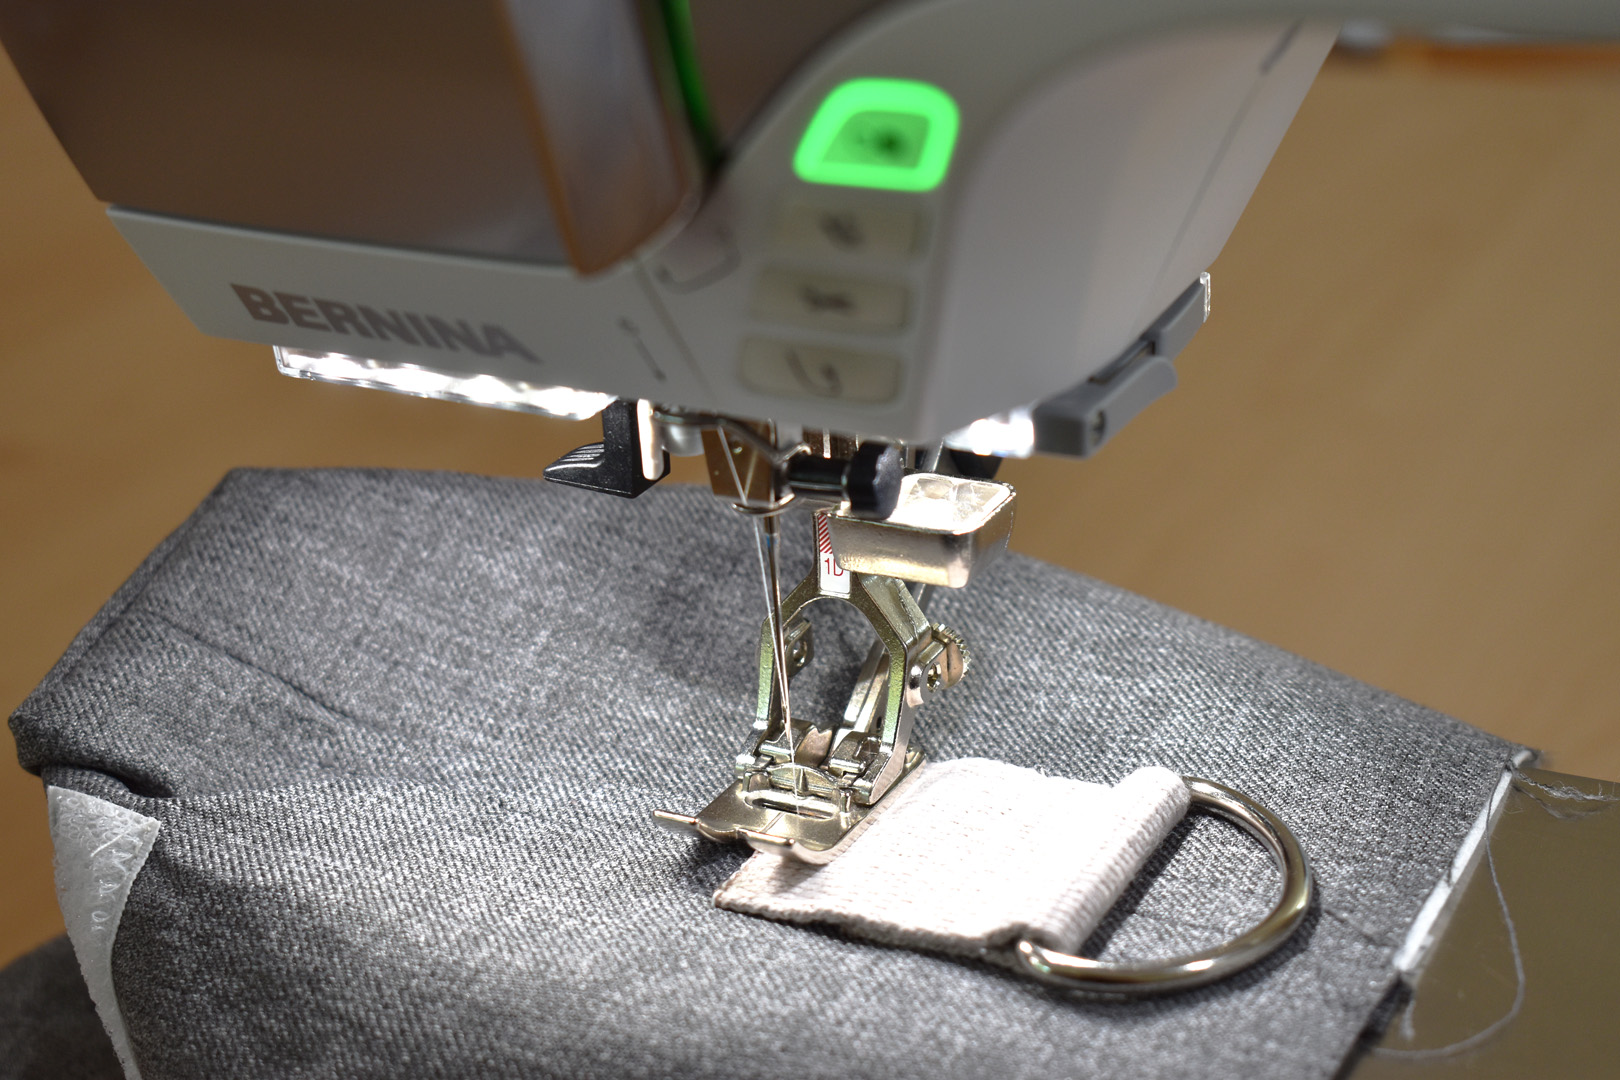
Then stitch the bottom edge to the main bag in the same manner. Repeat to attach the other strap tab to the other side of the bag.

Now put the main bag and lining aside while you finish the bag flap.
Making the pocket window section of the pin display handbag
Cut the following for the front flap and pin window:
- One piece of 16-gauge vinyl 5 1/2″ x 9″
- One piece of Craft Fuse 11″ x 11″
- One piece of main bag fabric 11″ x 11″
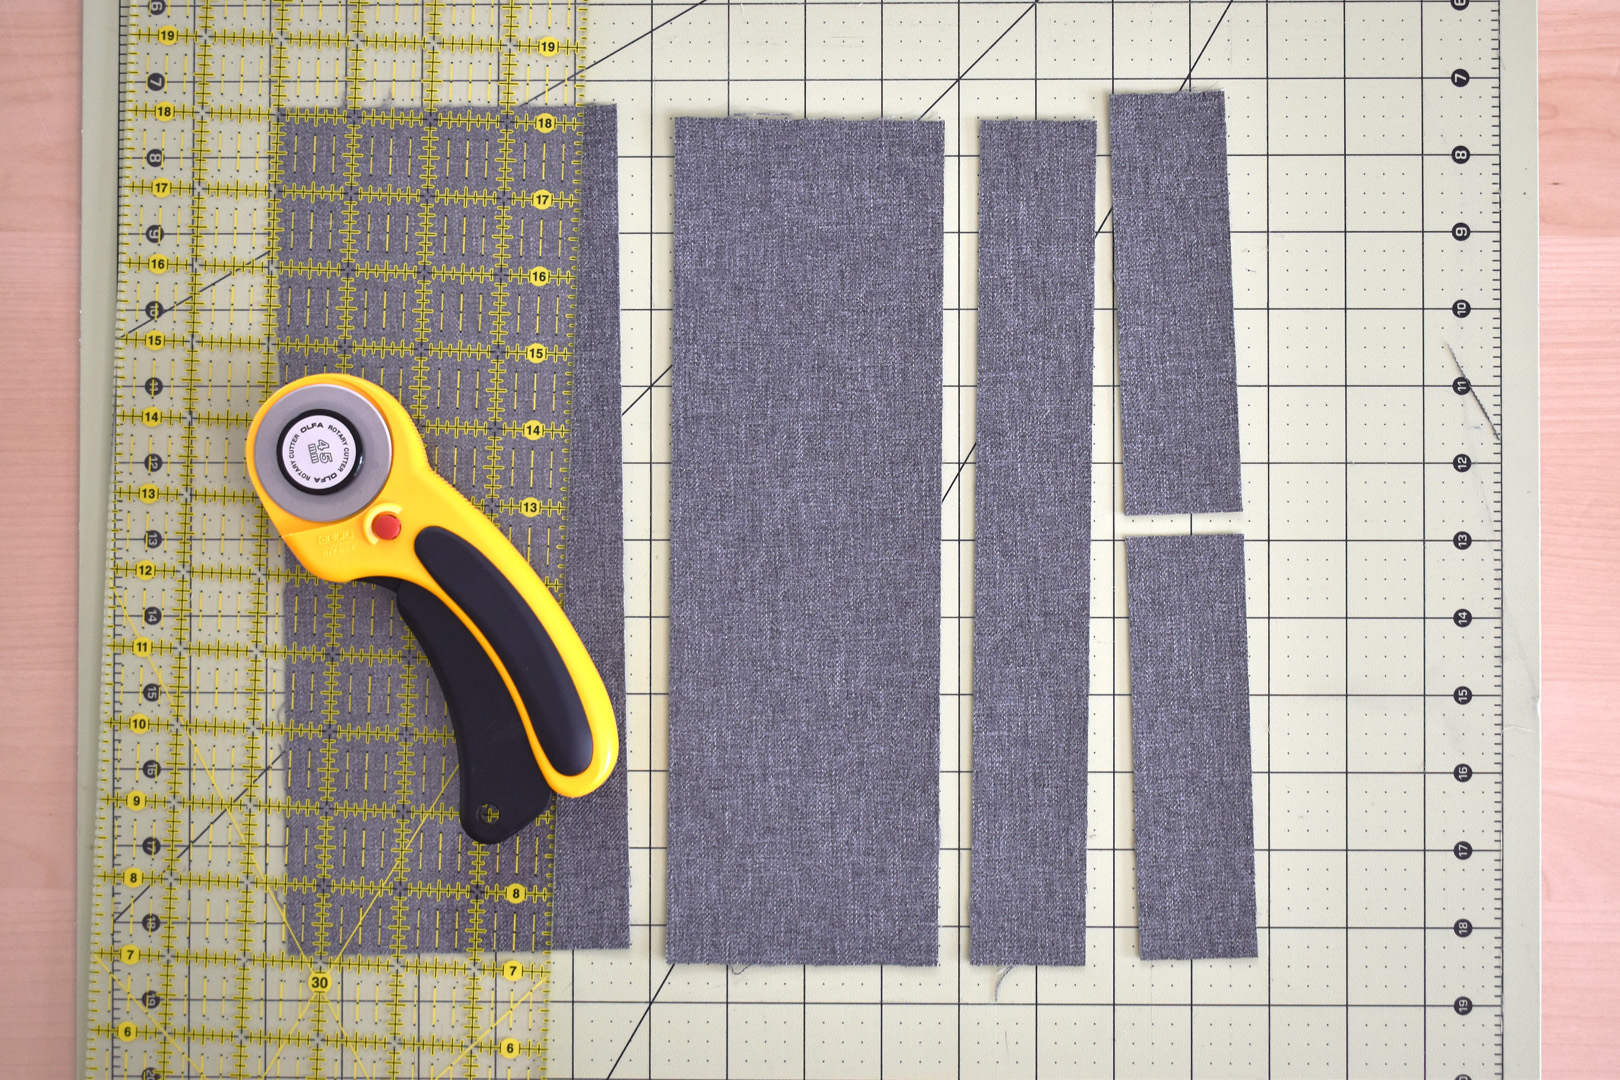
Fuse the 11″ x 11″ Craft Fuse to the wrong side of the 11″ x 11″ main bag fabric. Cut this piece into two 1 1/2″ wide strips and one 3 1/2″ strip. Cut one of the 1 1/2″ x 11″ strips into two 5 1/2″ strips. Set the remainder aside.
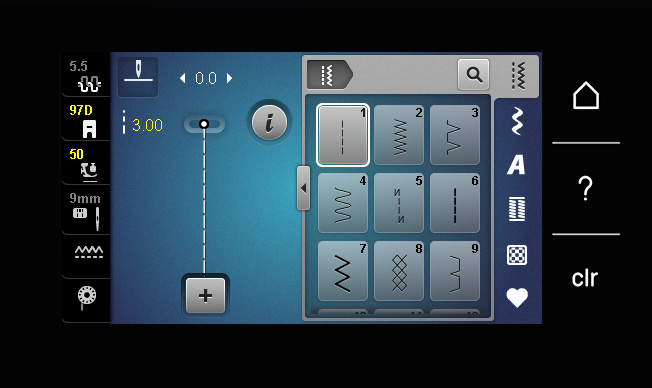
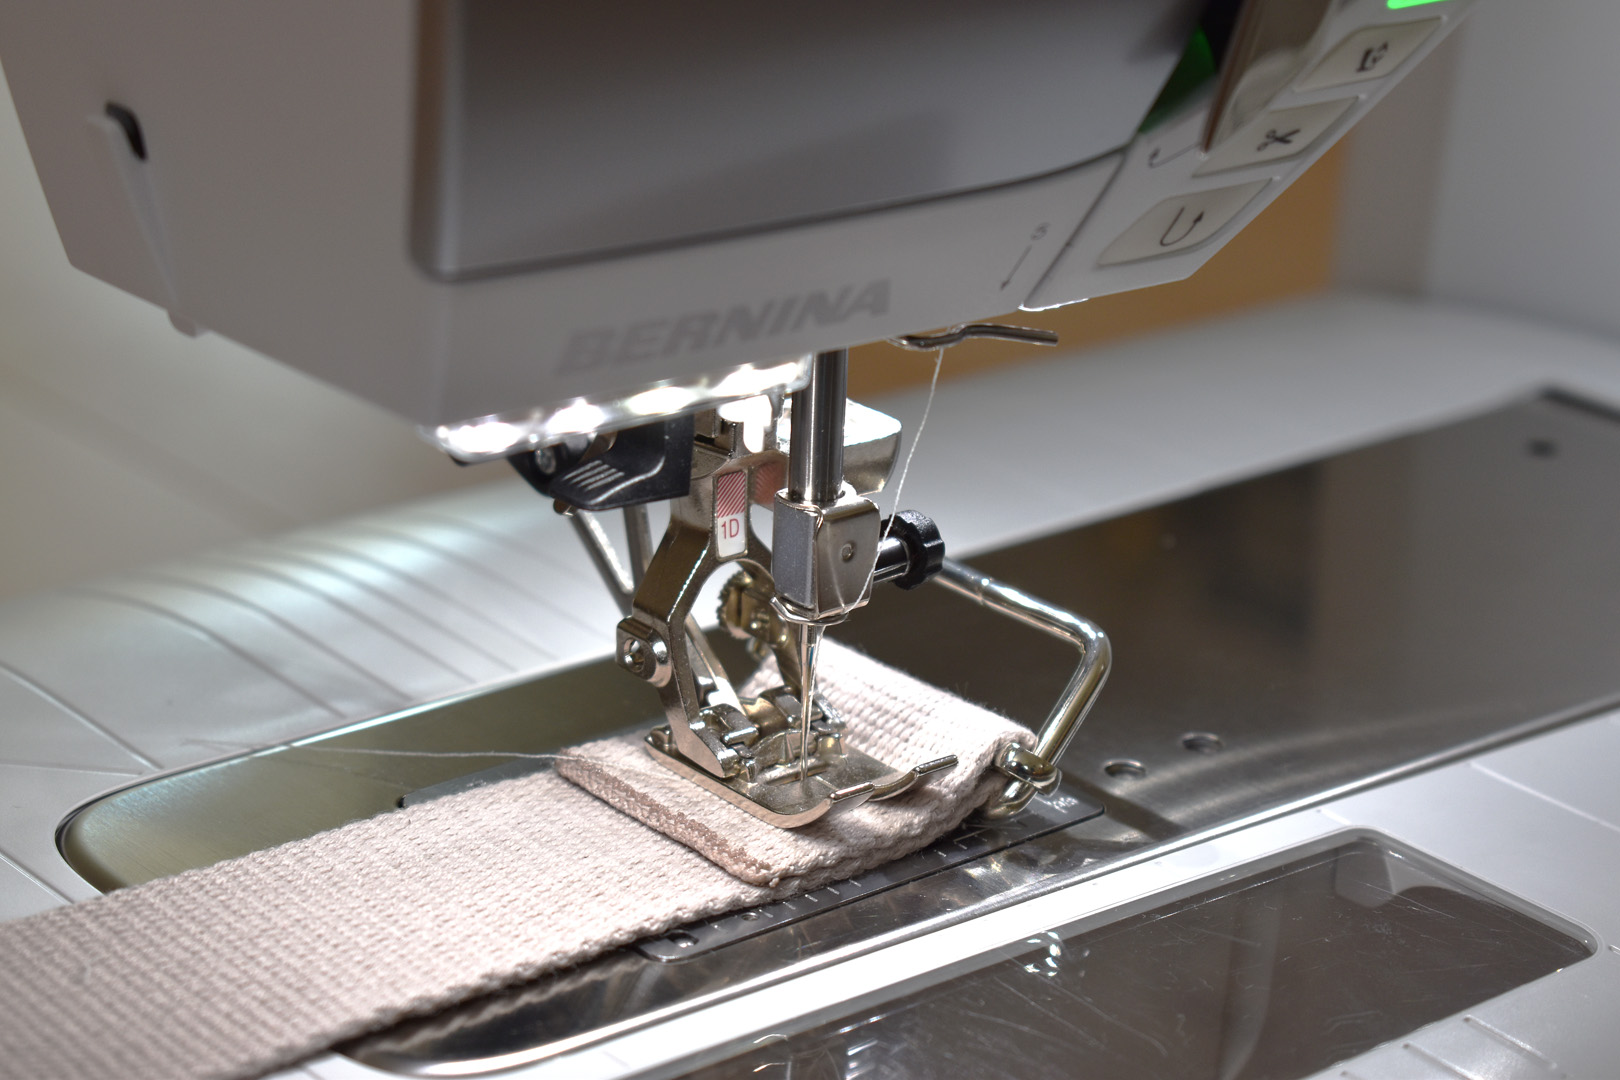
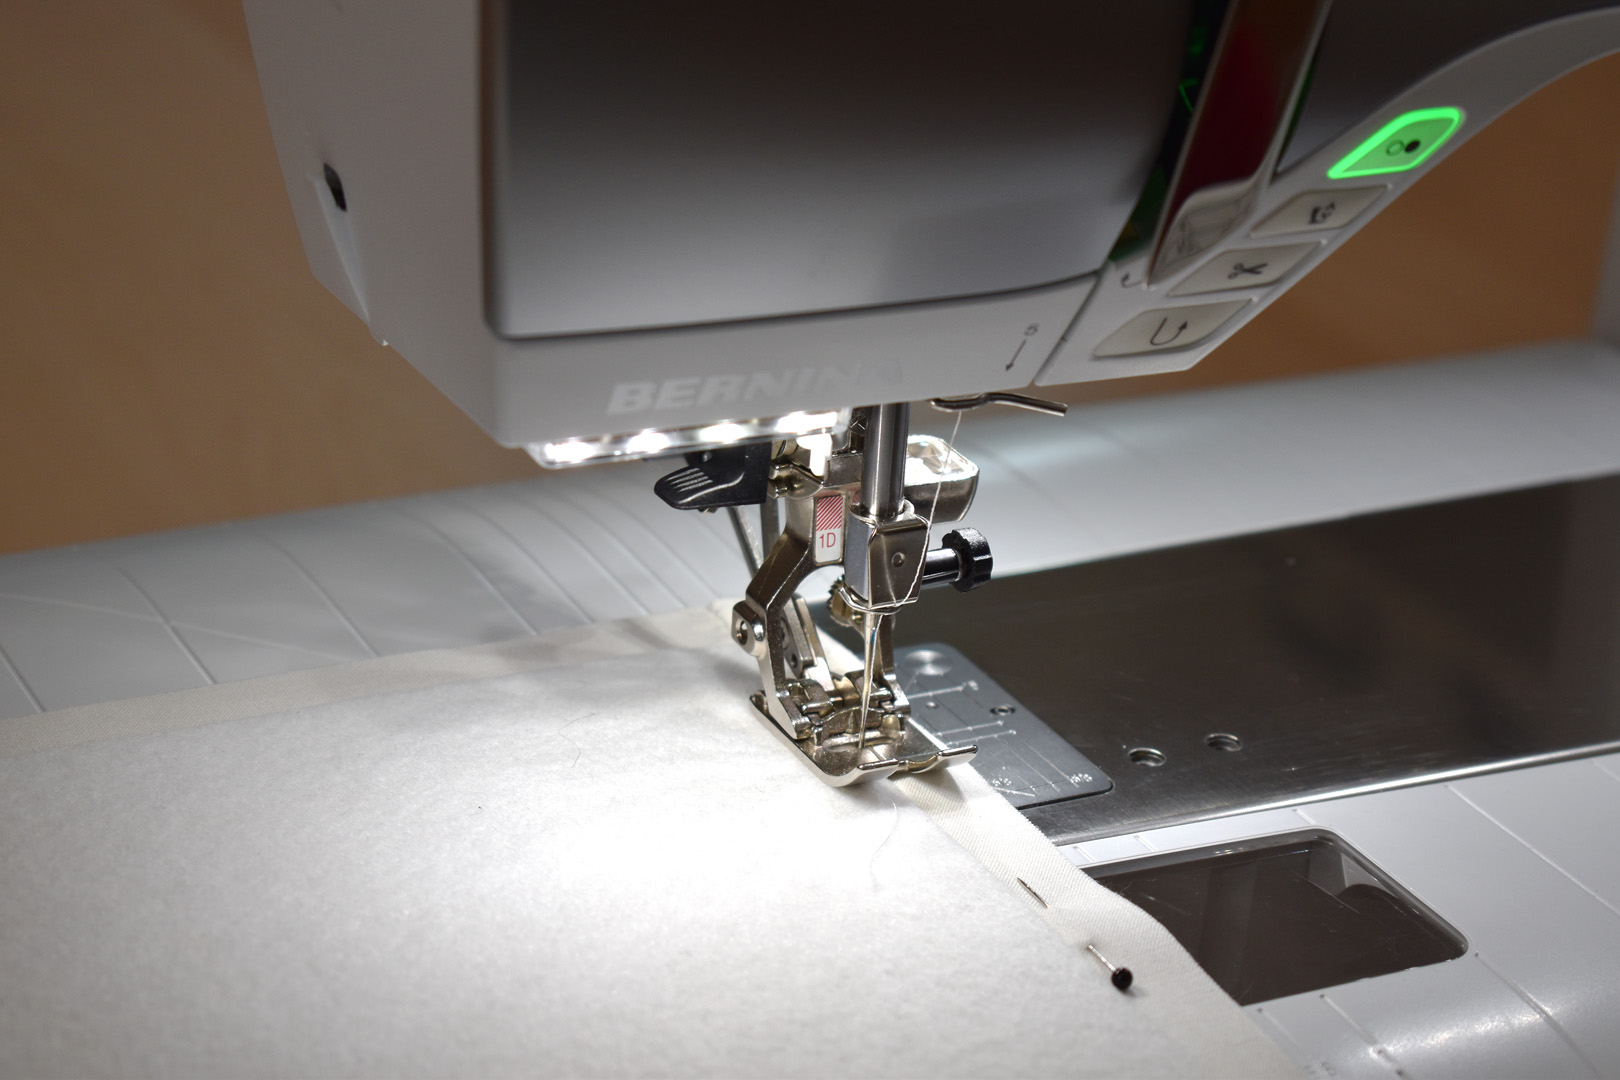
Install Patchwork Foot #97/#97D for the next steps. Set your sewing machine for a longer straight stitch 3.0mm and lower the presser foot pressure to 50. You can see my machine settings below.
Sew with the interfaced main bag fabric up and the vinyl down; gently guide the vinyl through the machine to keep it from sticking to the machine bed or table.
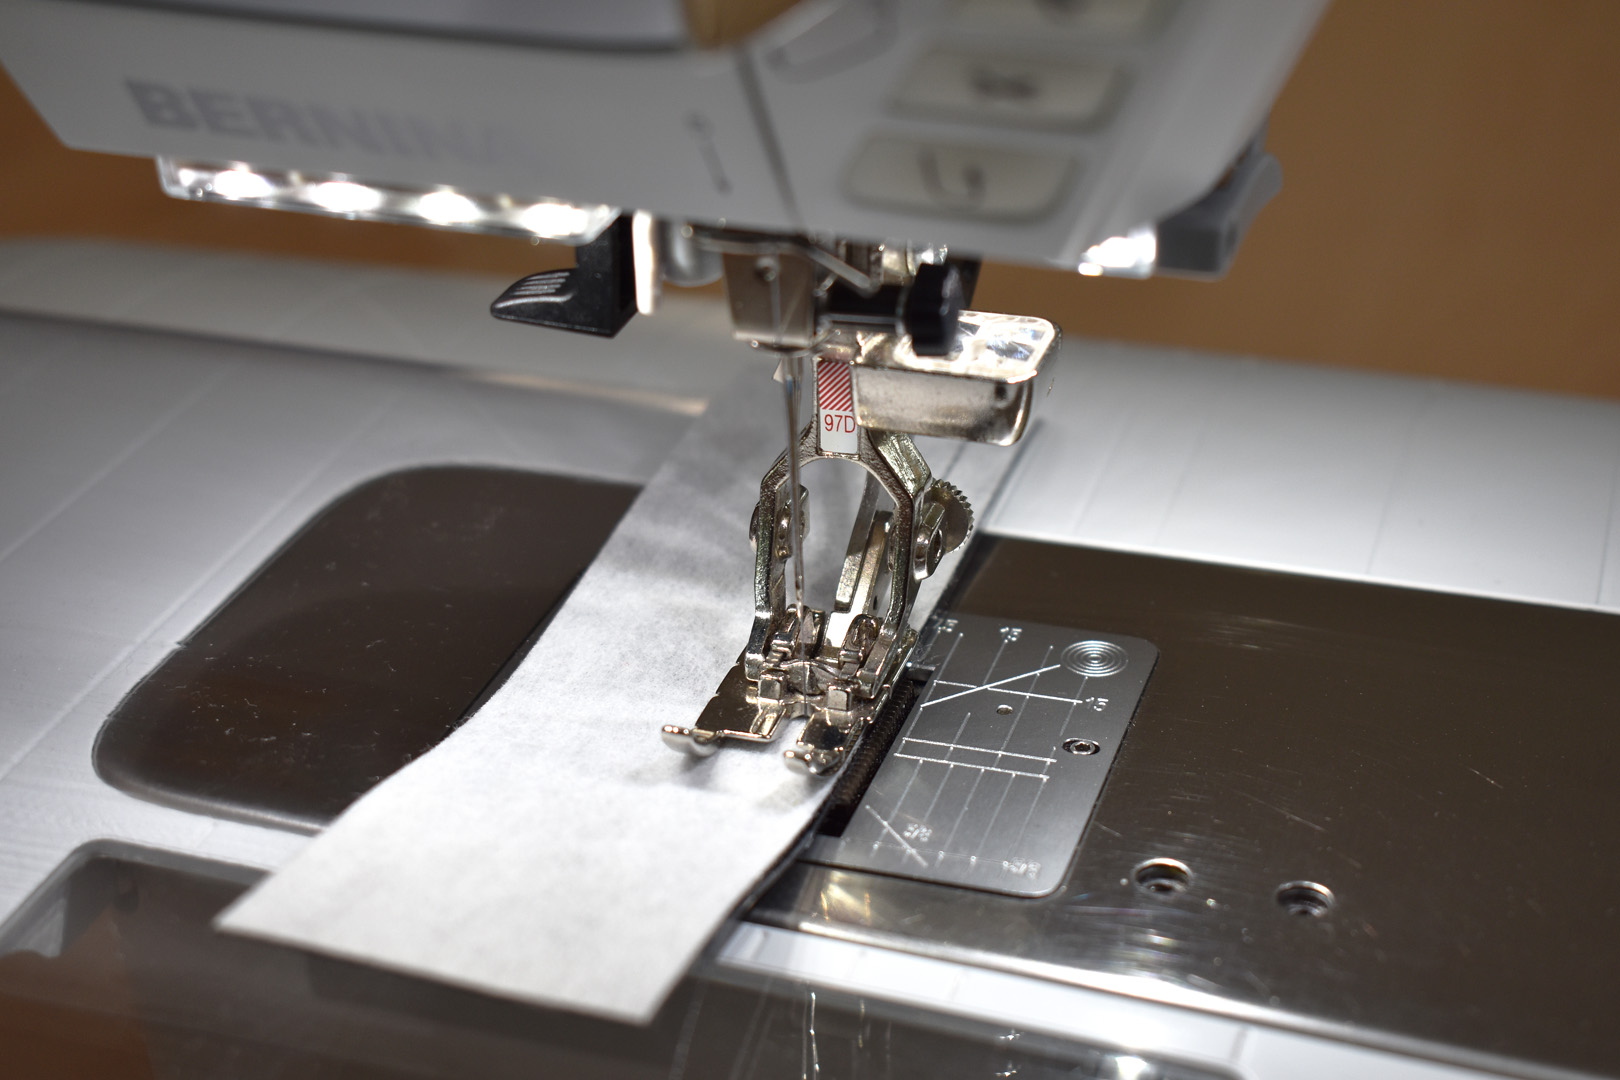
If you need to hold the fabric to the vinyl use clips and avoid pins; pins will leave holes in your vinyl that won’t go away. First, sew the short strips to each short end of the vinyl rectangle with a 1/4″ seam (line-up the edge with the right-side edge of the patchwork foot).
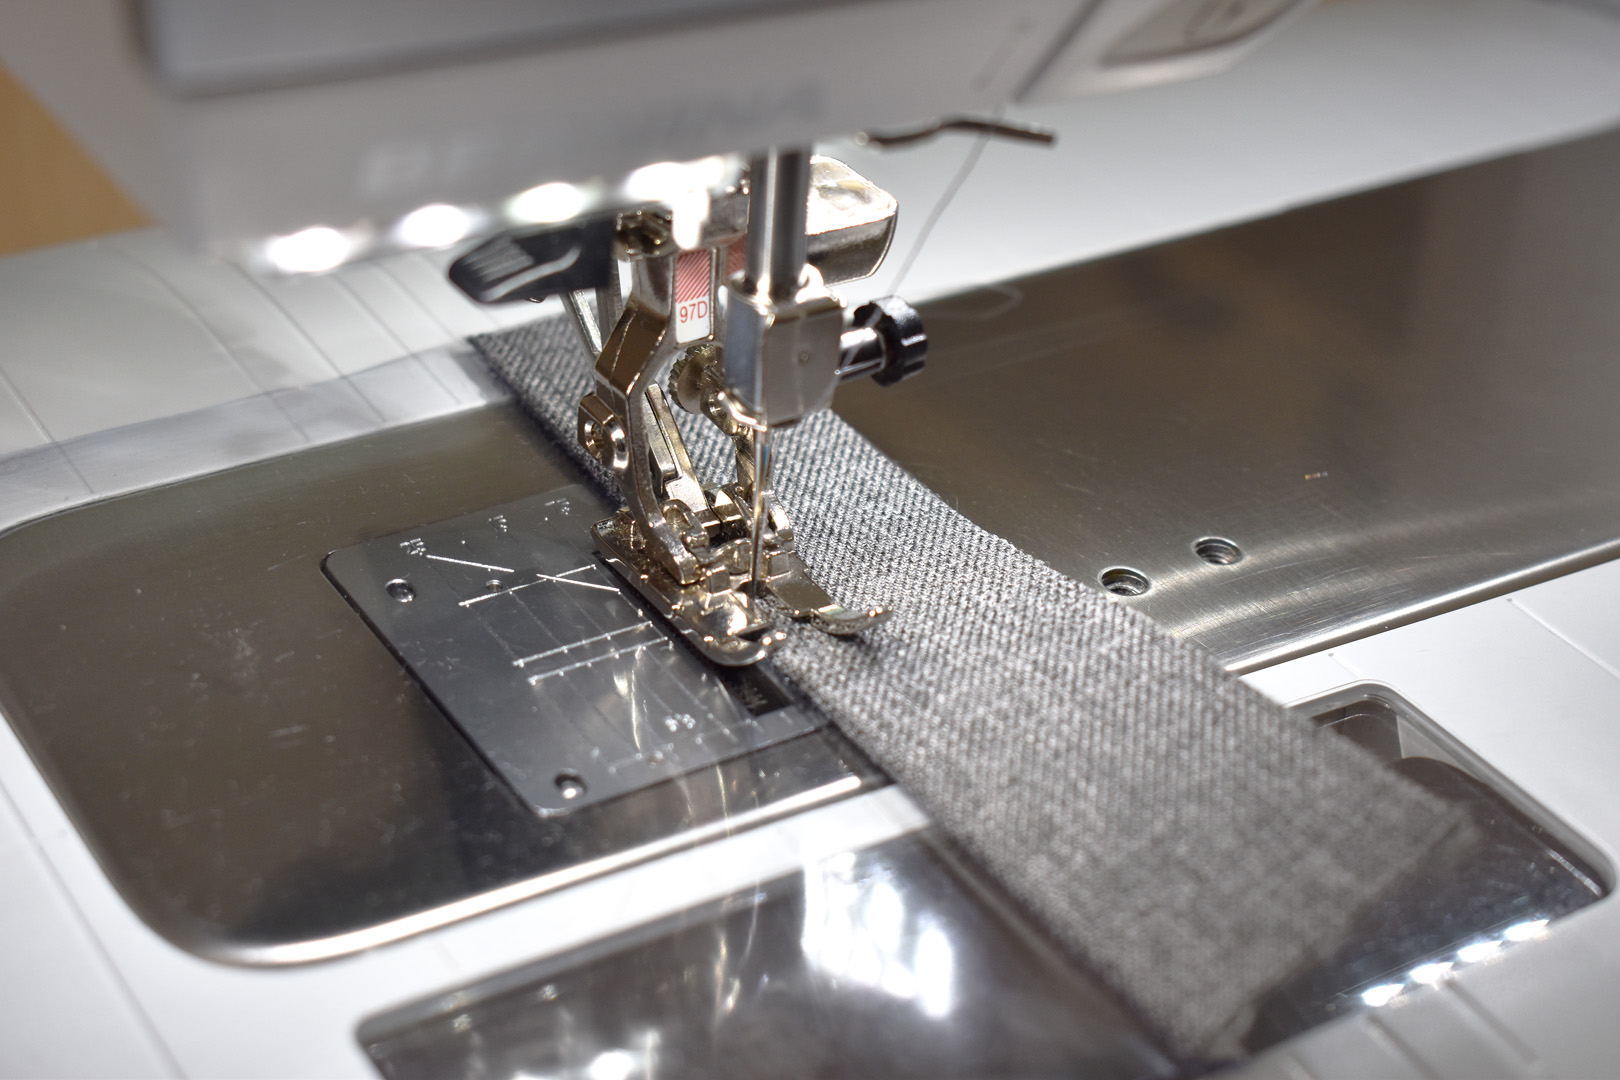
Finger press the strips open, and top-stitch about 1/8″ away from the seam on the main bag fabric. Repeat with the other short side.
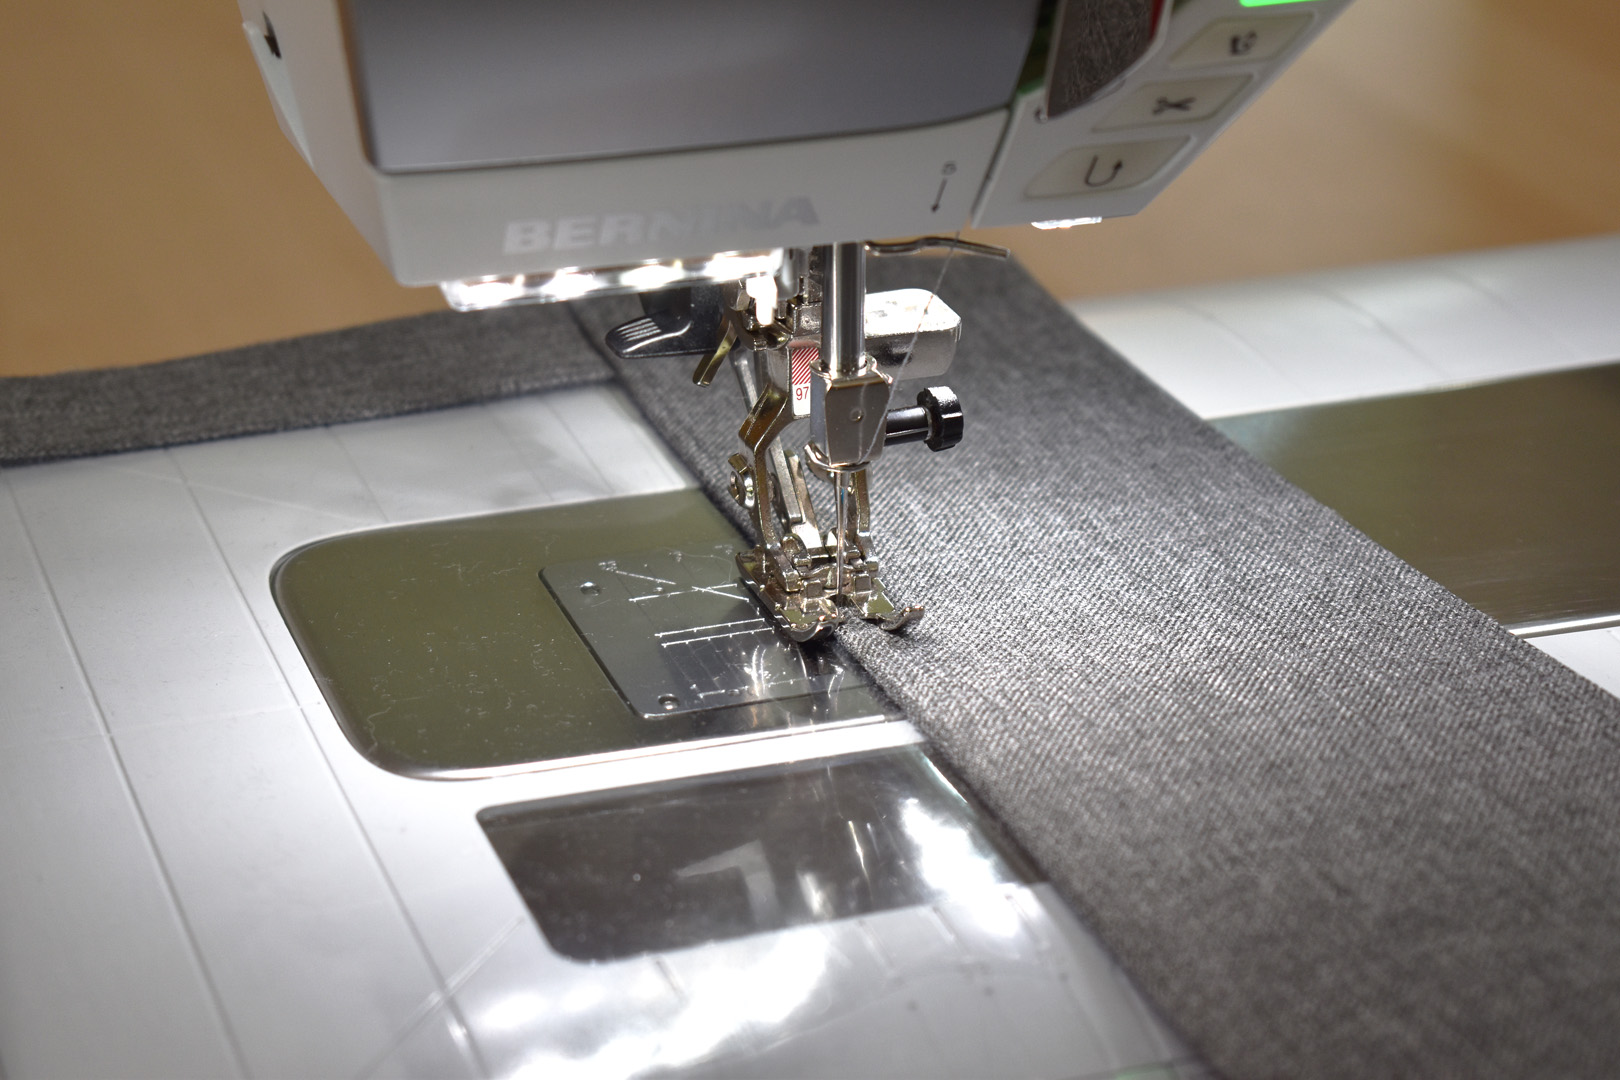
Next, sew the long edge of the 3.5″ piece to one long side of the vinyl as above. Then repeat with the 1 1/2″ strip on the other side.
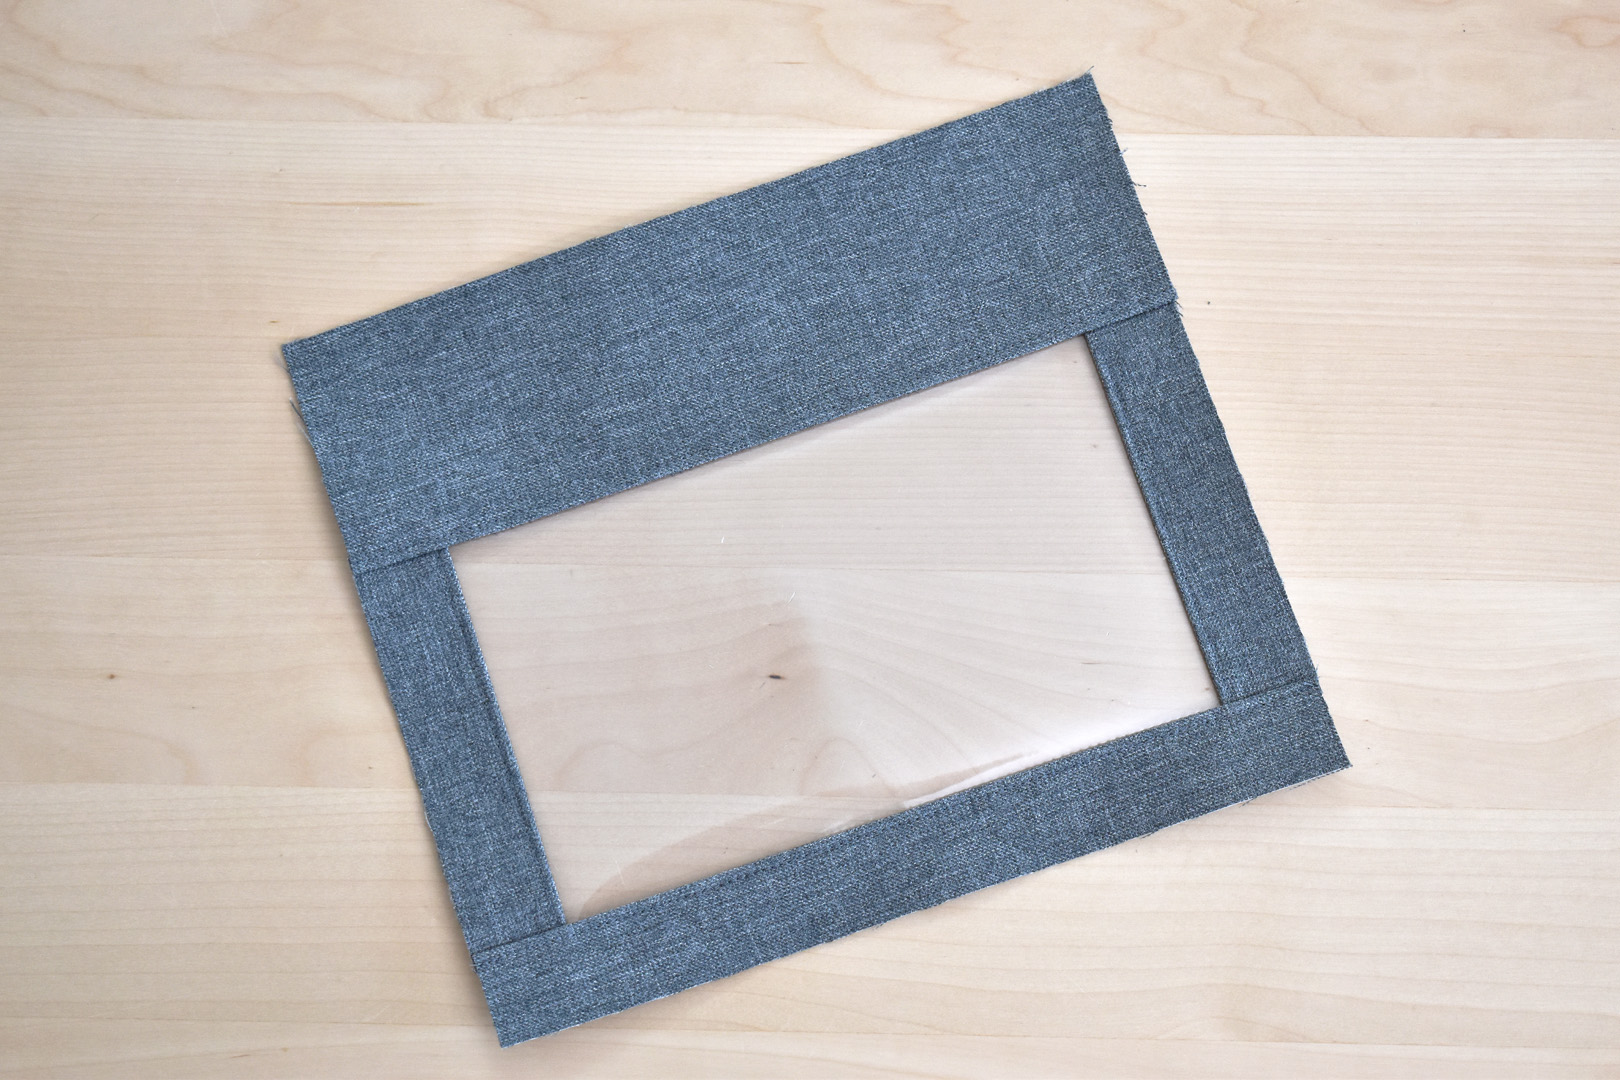
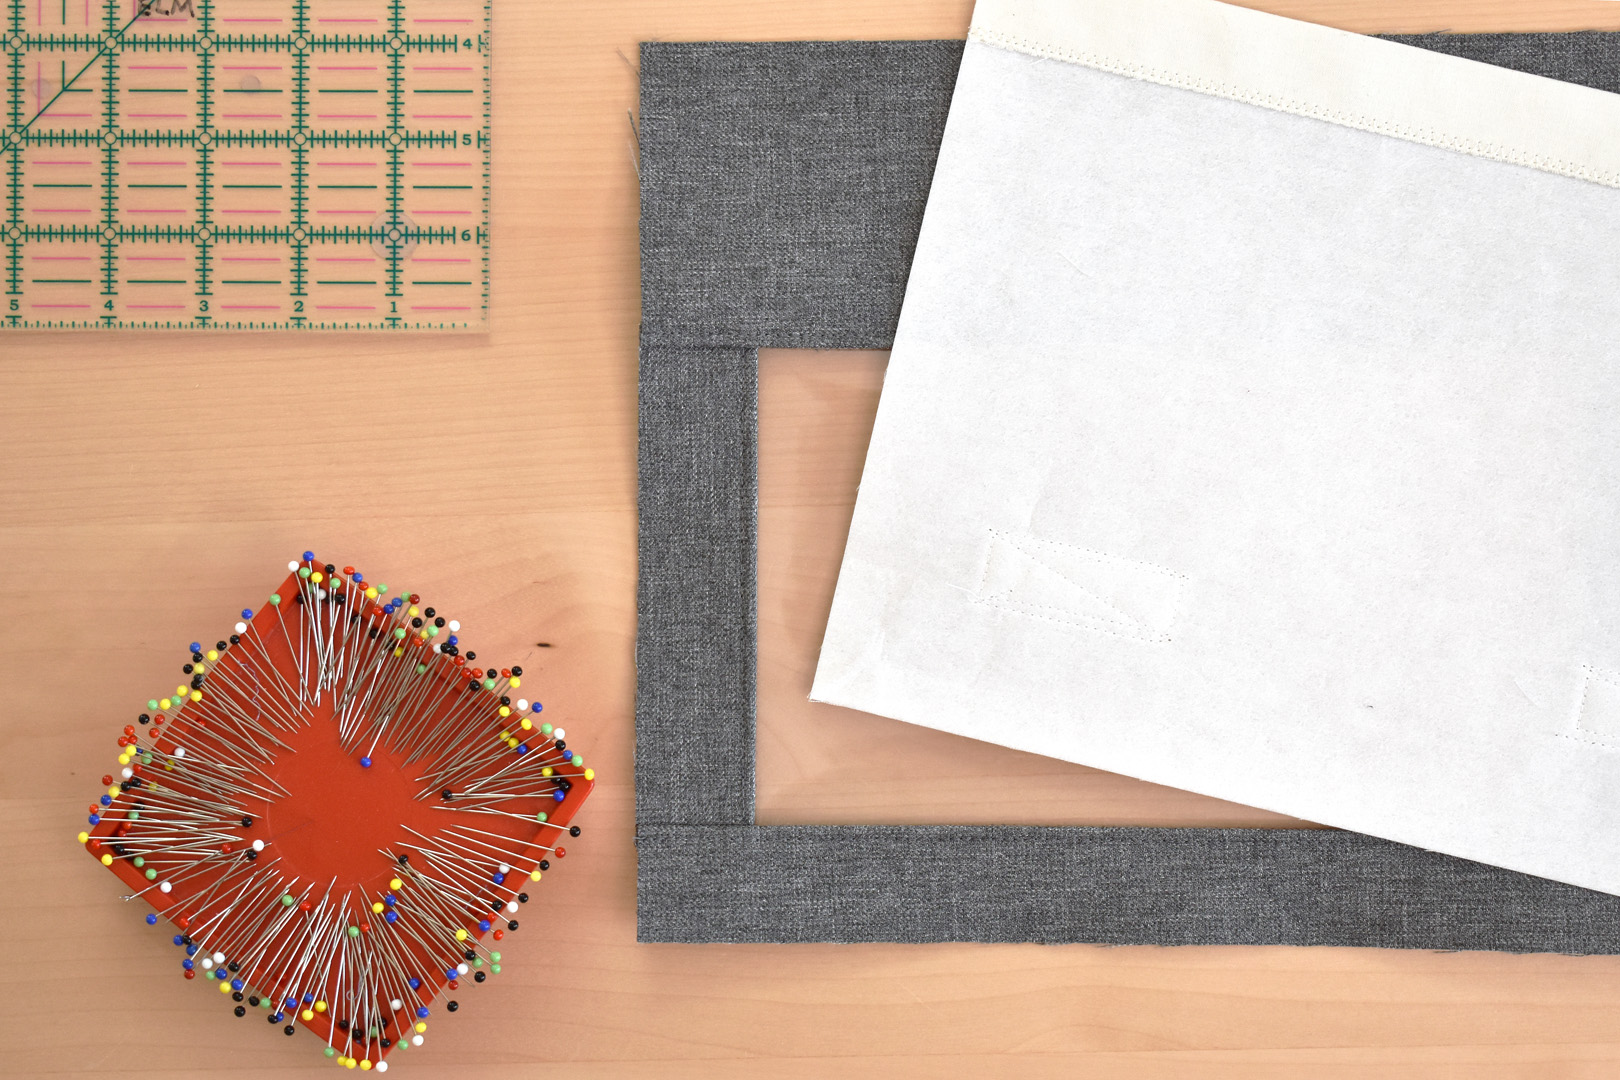
Set the front flap aside (the wider edge is the top of the flap, and the skinny edge is the bottom of the flap) until a later step.
Be sure to switch to thread that matches your lining to complete the back side of the flap, and reset your sewing machine settings to 2.5mm straight stitch and default presser foot pressure. Cut one piece of Craft Fuse 13″ x 13″ and one piece of bag lining fabric 13″ x 13″. Attach the Craft Fuse to the wrong side of the lining.
Cut two pieces for the flap lining, one piece 3 1/2″ x 11″ and one 9″ x 11″.
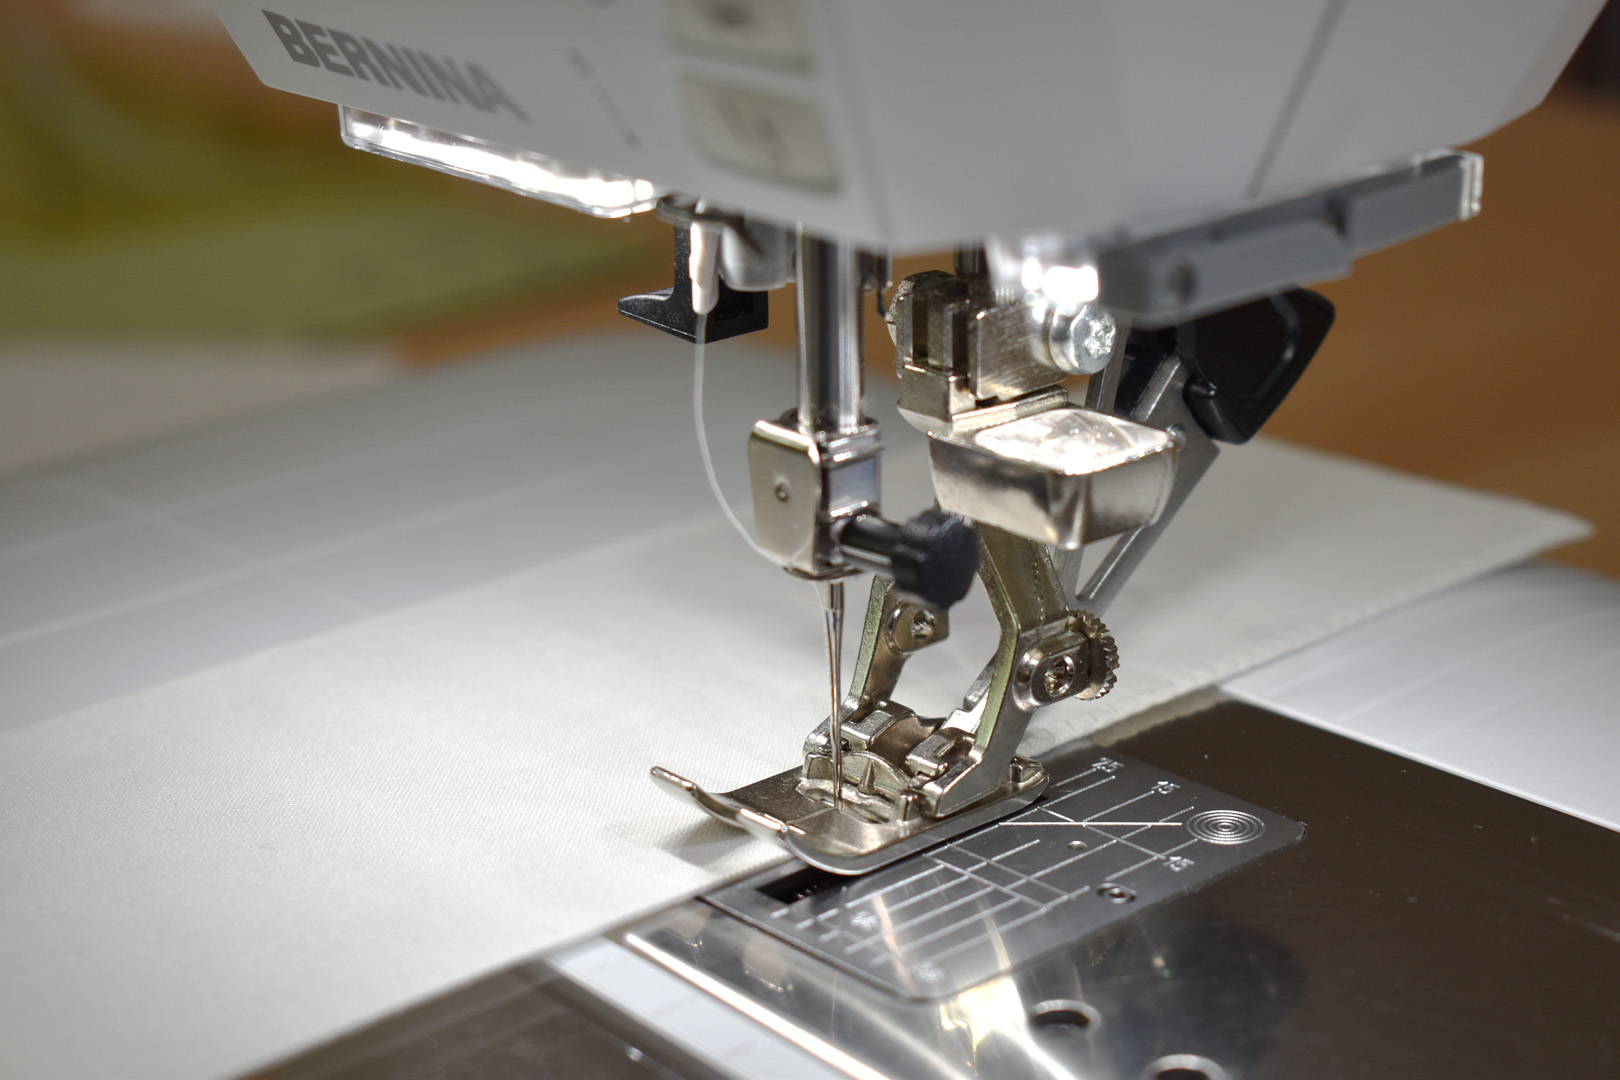
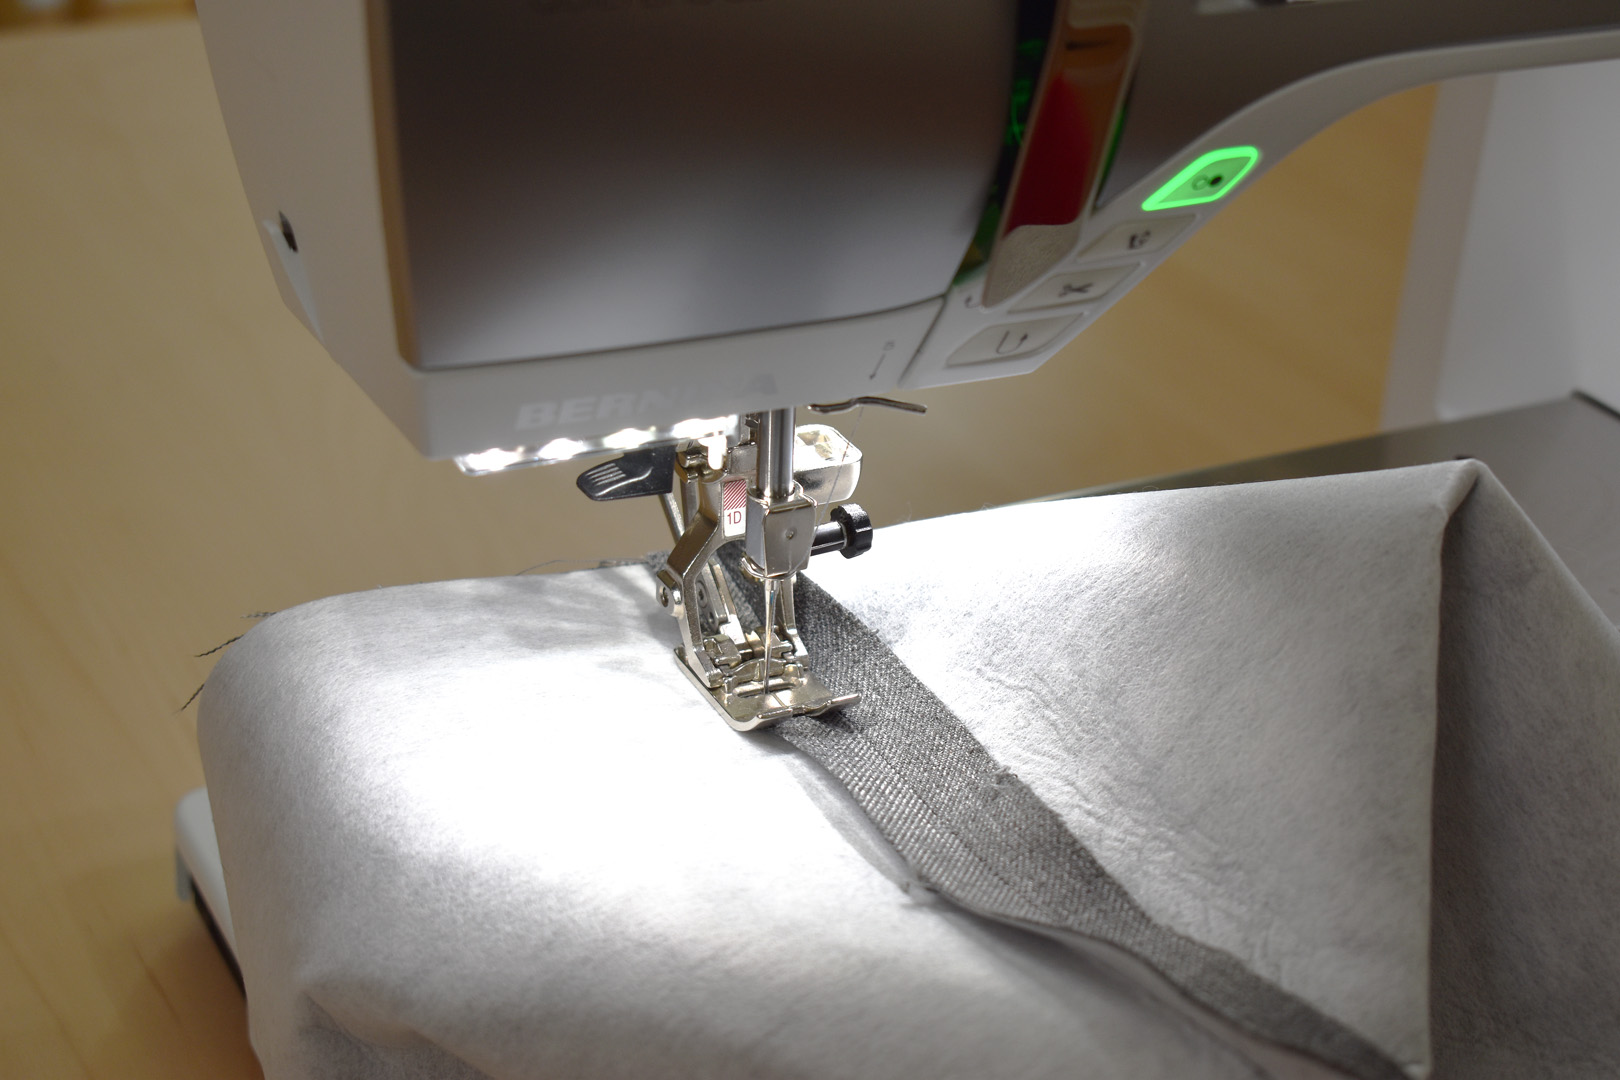
Install Reverse Pattern Foot #1/#1D on the machine and use a standard zigzag stitch to finish one long edge of the 3 1/2″ x 11″ piece and one long edge of the 9″ x 11″ piece.
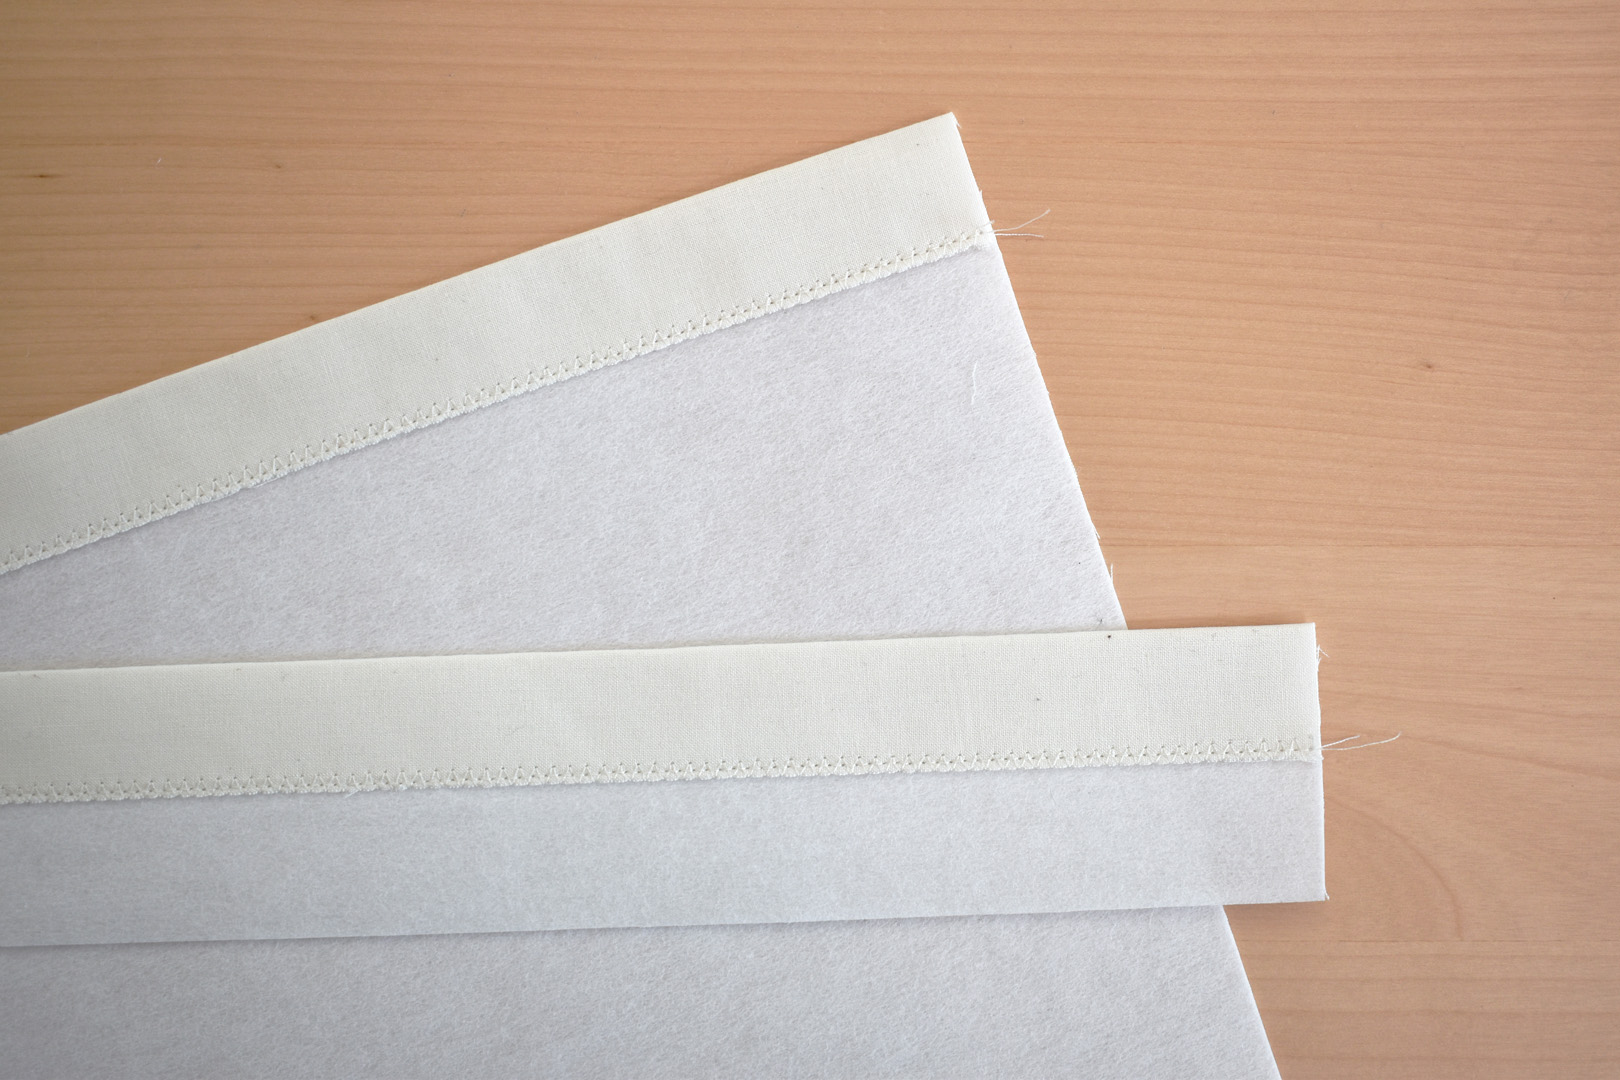
Press the zigzag stitched edges over 1″ to the wrong side and press well. Stitch along the folded over edge with a straight stitch, close to the zigzag edge, to hold in place.
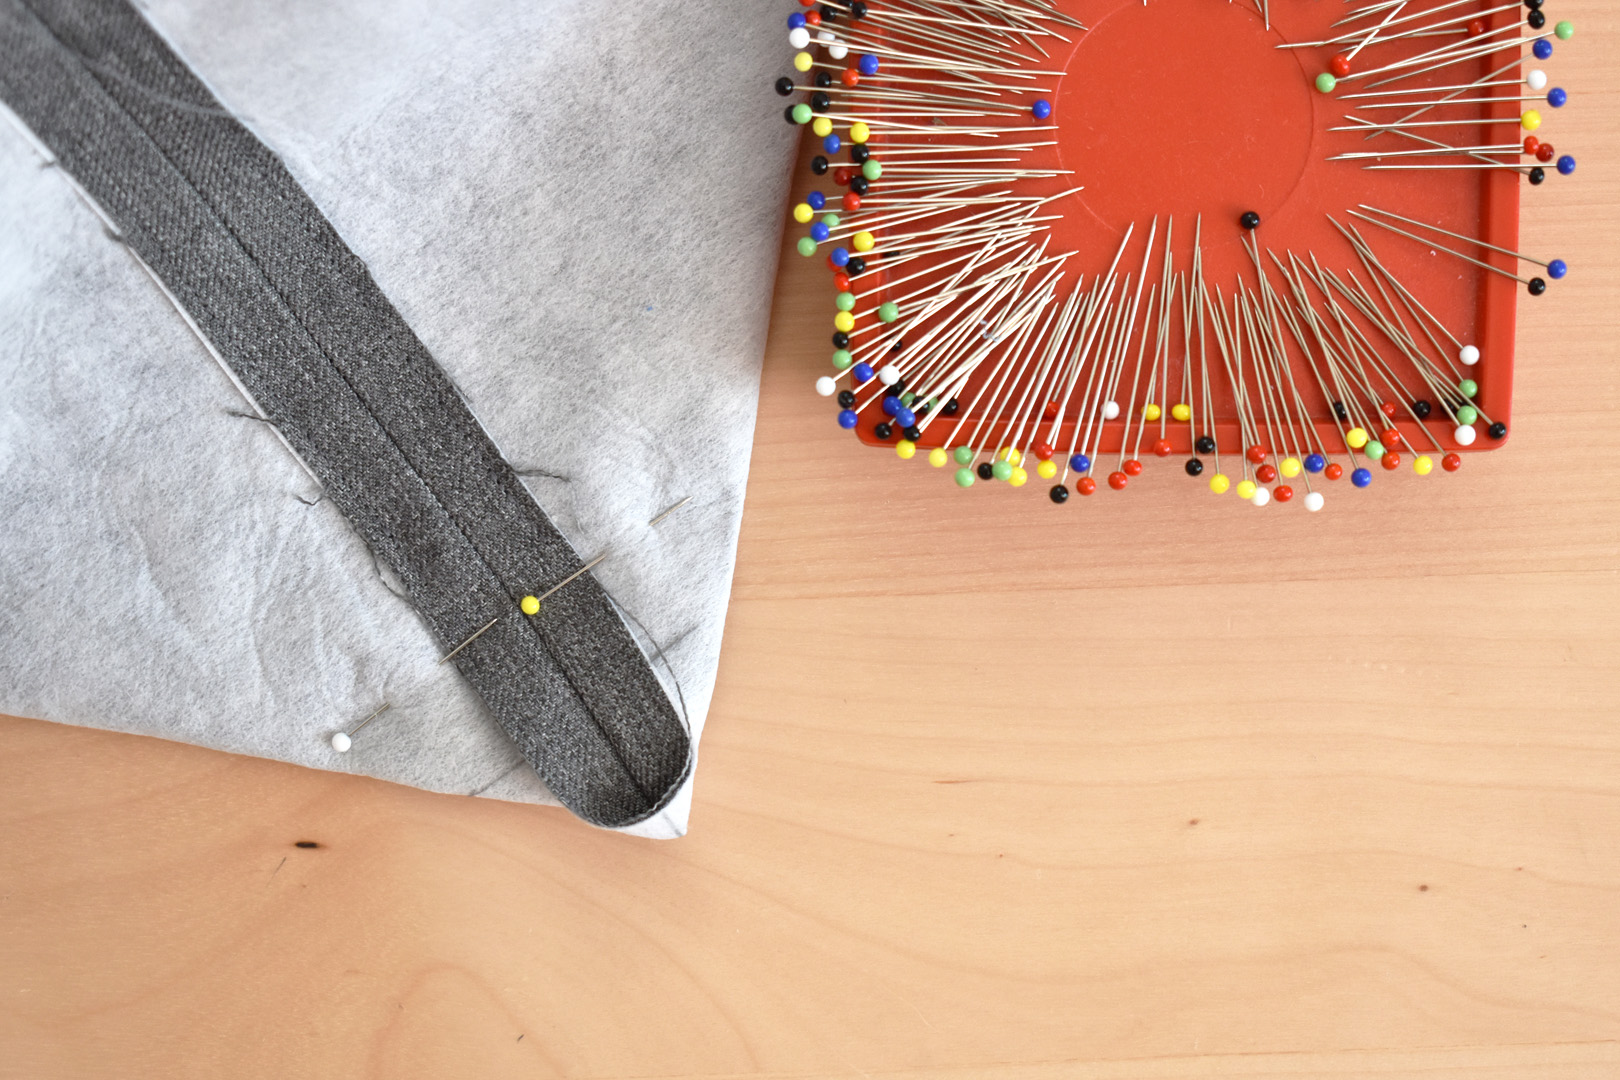
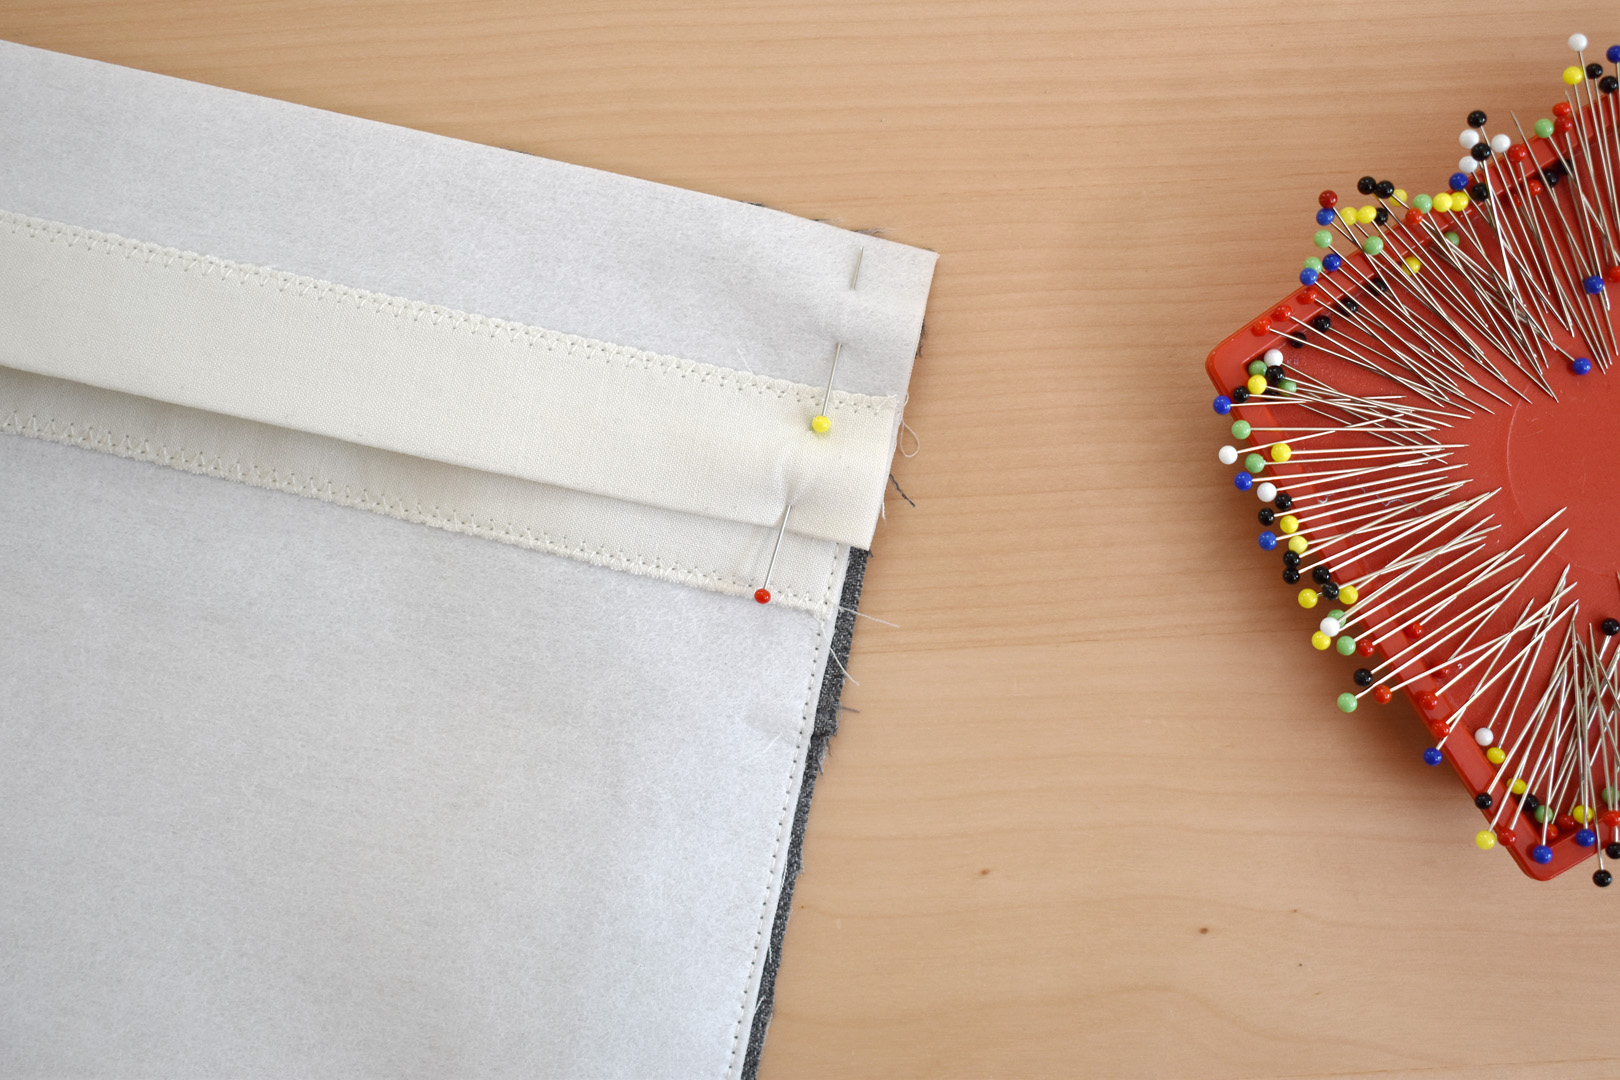
Sew the hook and loop tape to the bottom edge of the flap lining. Use a ruler to measure 1 1/2″ up and 1 1/2″ over from the bottom corner (opposite the finished edge made in the last step) and pin in place. Secure with a straight stitch.
Place the finished window side of the flap down, right side up, with the fat side of the main bag fabric facing up. Place the larger piece of lining fabric on top, right side down, with the hook and loop tape at the bottom.
✂Read the next few steps carefully! Normally you would NOT want to make a lining bubble, but sewing the lining with an extra bubble of fabric in it allows for the thickness of the pins to sit nicely inside the flap without warping or pushing out on the vinyl window. So, let’s make room for those pins.
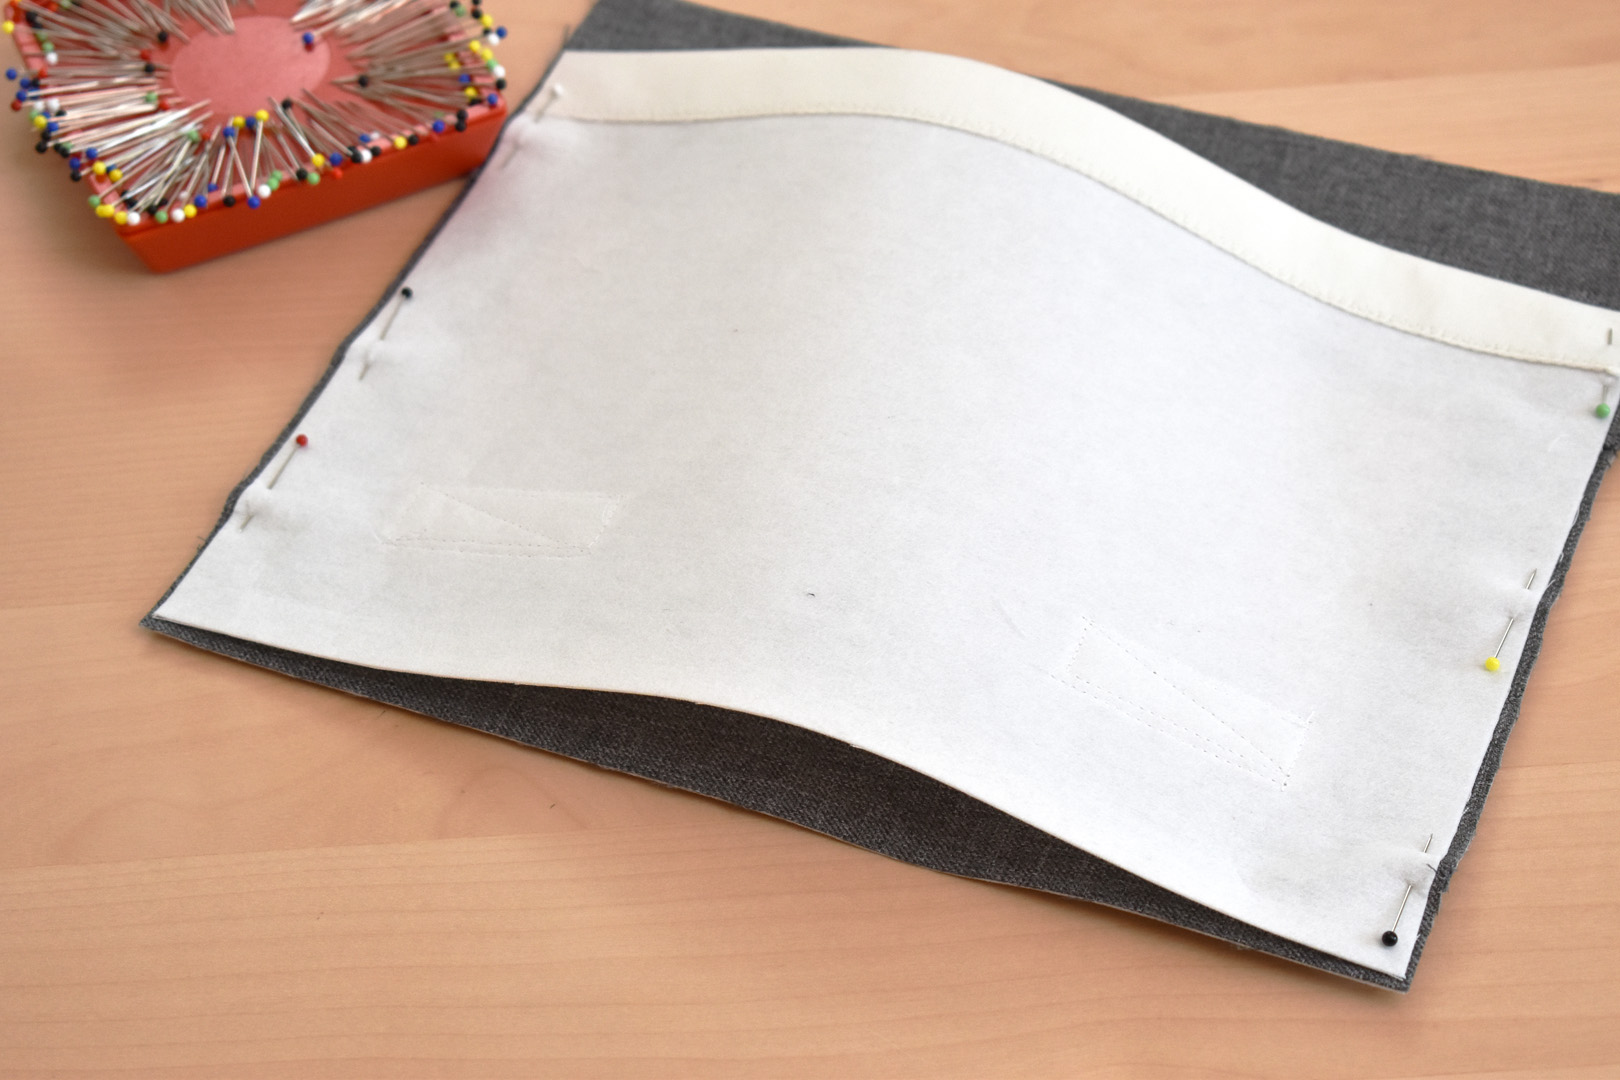
Begin by lining up the bottom left corner of the lining 1/8″ away from the edge and bottom of the main bag fabric. Pin the left sides together. Then repeat on the right side. You will see the bubble of extra lining fabric forming in the middle.

Next, pin down the bottom edge of the lining fabric in the center, easing the extra fabric evenly to both sides of the pin, making sure the bottom edge is 1/8″ away from the main bag fabric edge.
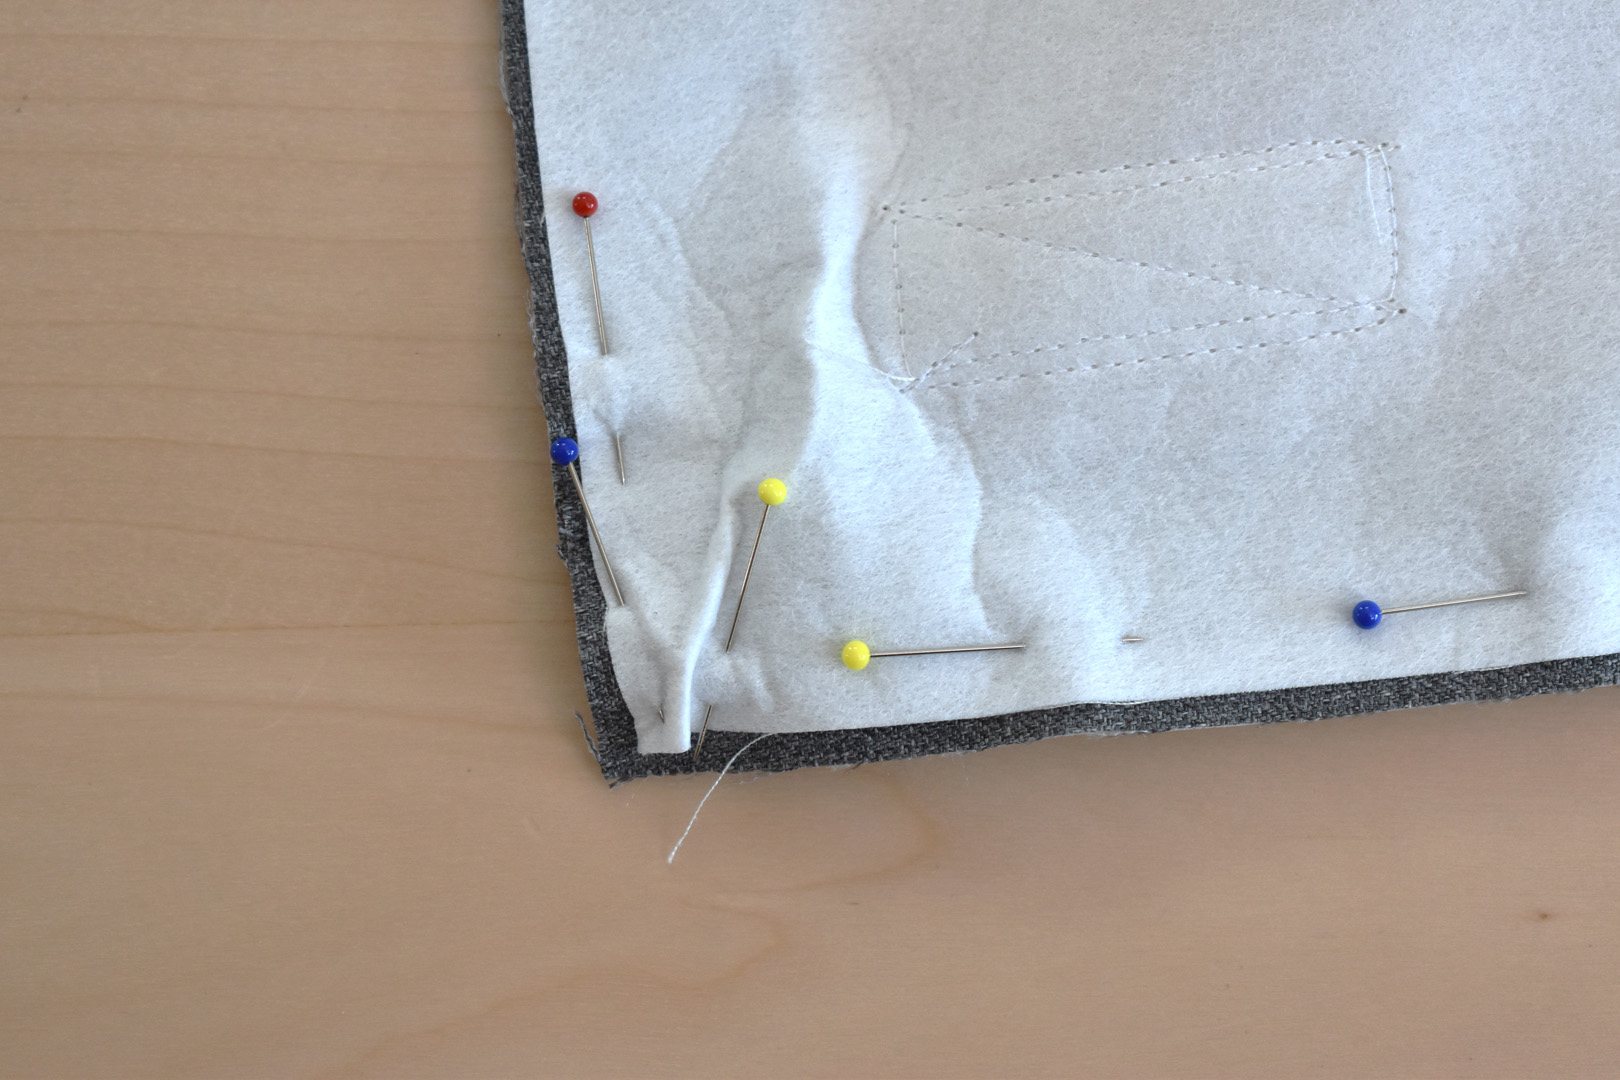
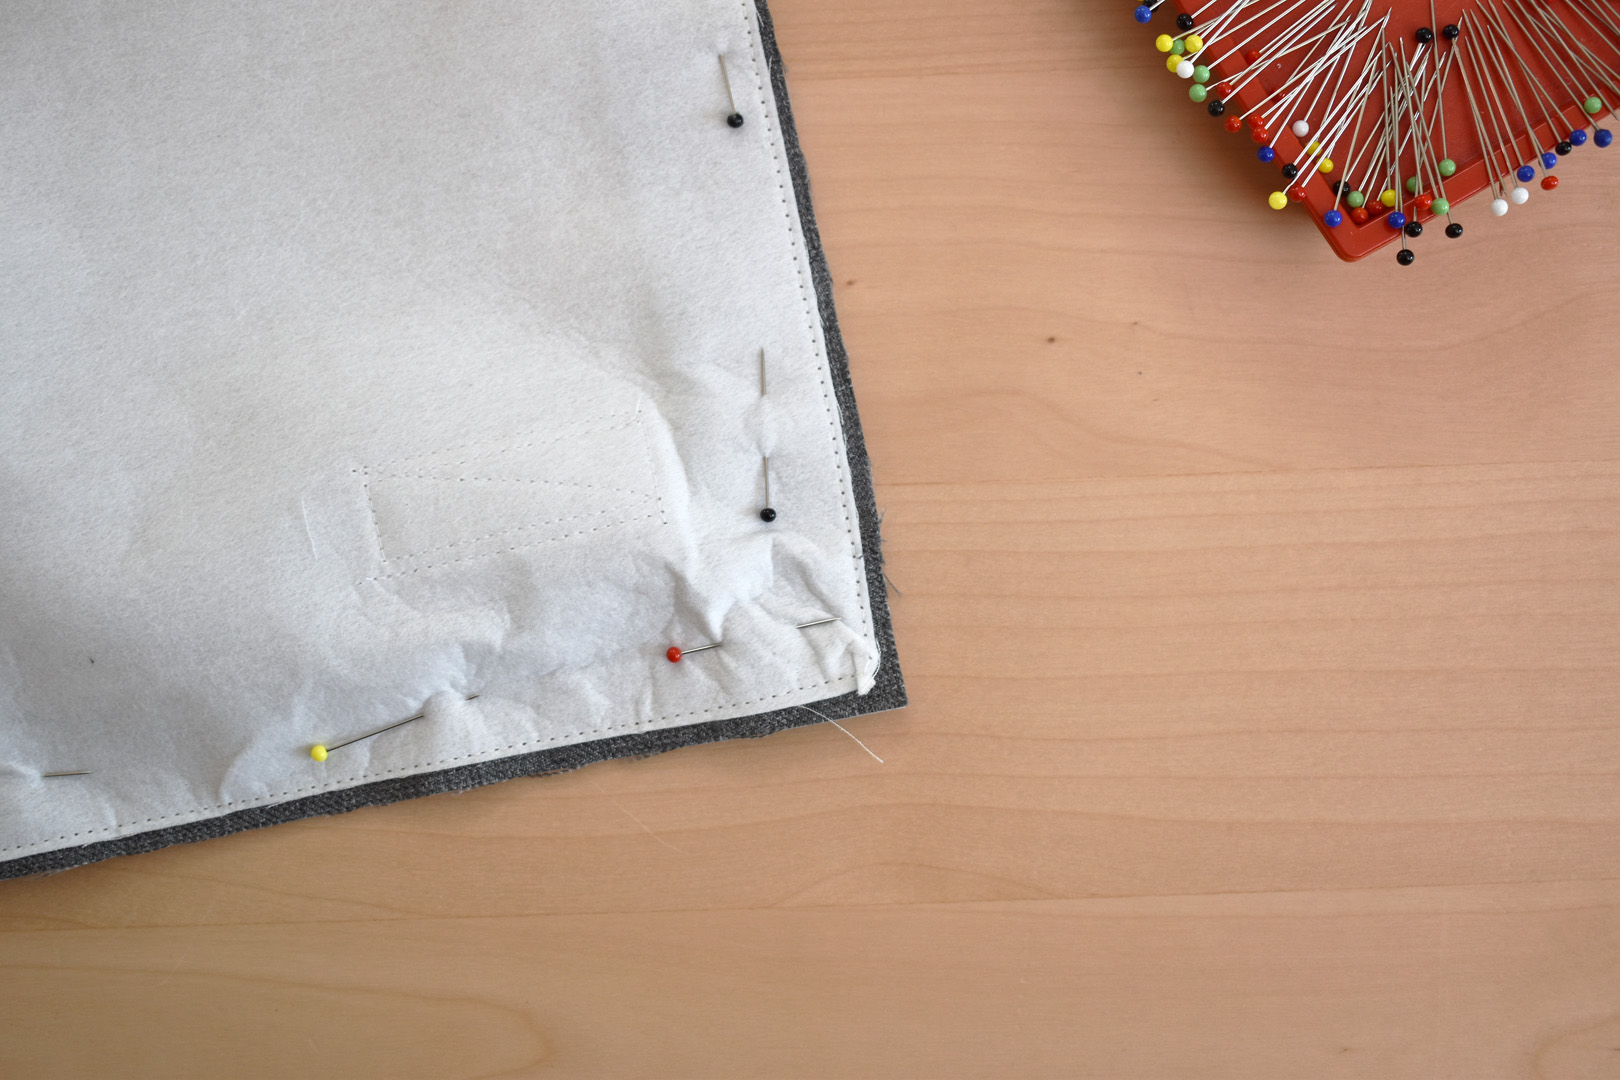
Keep pinning along the bottom edge, pushing the extra towards each corner. When reaching the corners, pinch the fabric together to create a small pleat and pin in place.
Baste stitch around the edges and bottom of the lining, across the pleat in the corner. Stitch close to the edge of the lining.
Next, add the smaller lining piece to the top of the bag matching the raw edges on the top and sides. The finished edge will rest on top of the other lining piece. Make sure there is no bubble when pinning this piece down by pulling it over so the edges on the sides meet when pinning.
Continue pinning along the sides and bottom edge, moving that extra bubble of fabric to the center and out of the way of the sides for the final seam.
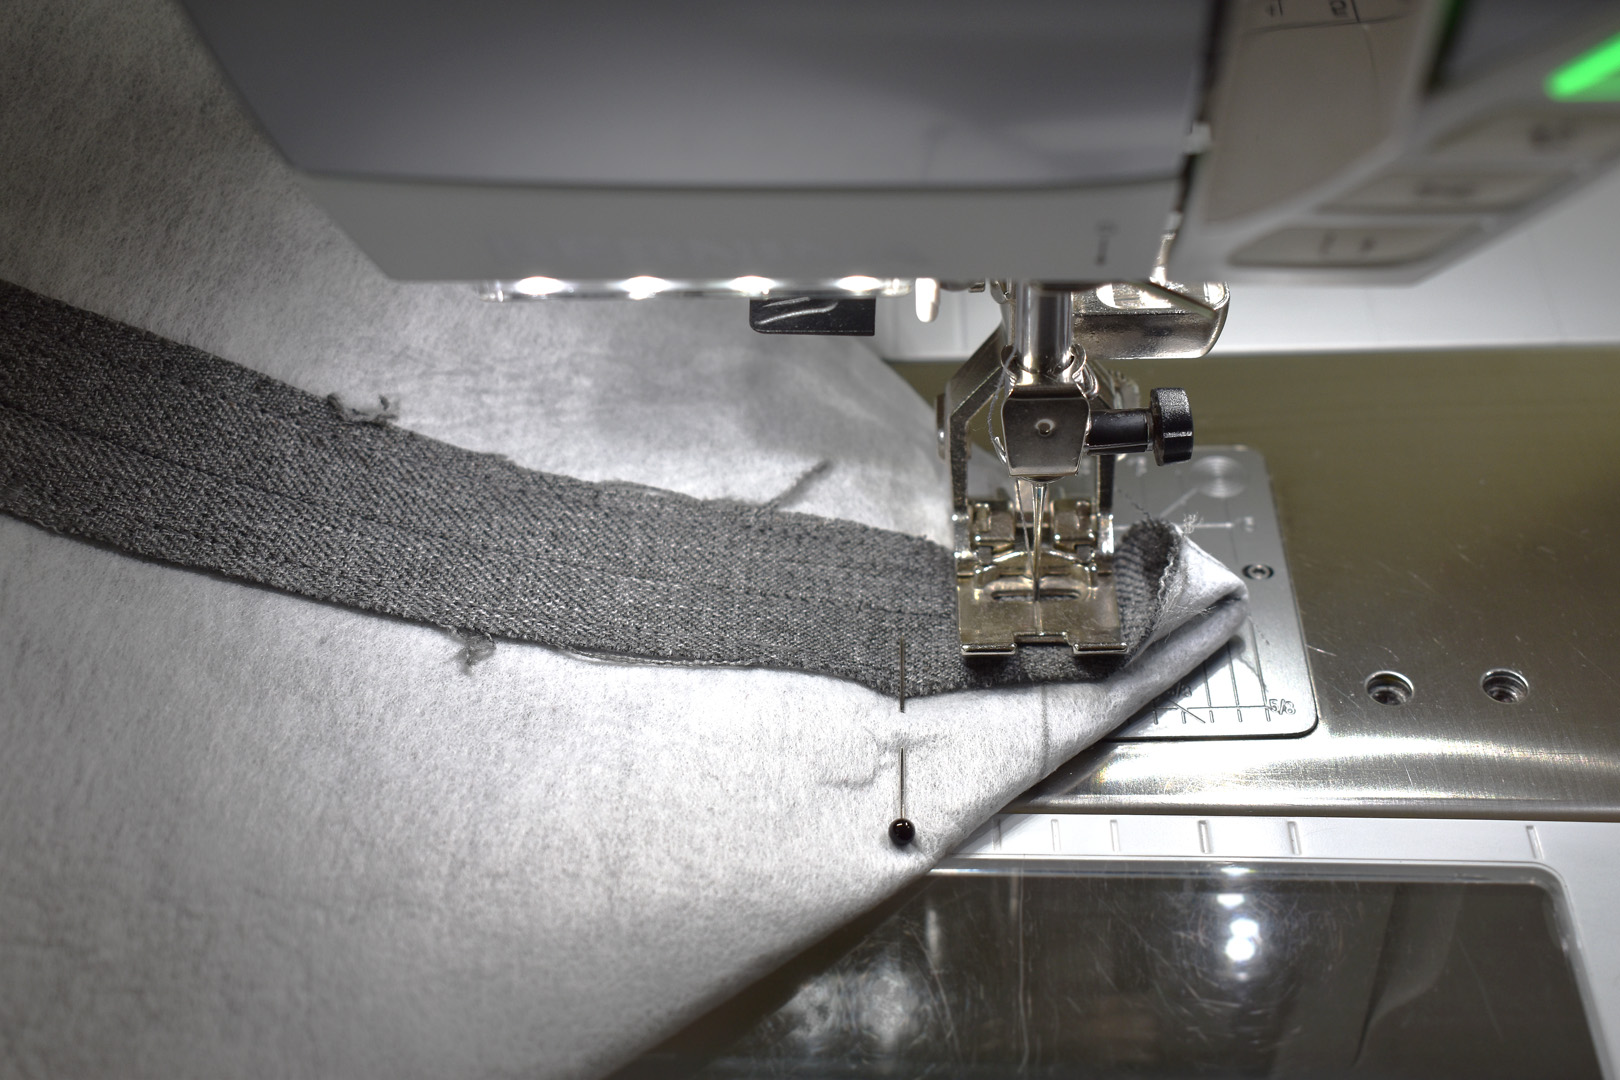
Sew along the sides and bottom of the flap with a 1/2″ seam, backstitching a few times at the top of the flap and over the part where the flaps overlap on each side.
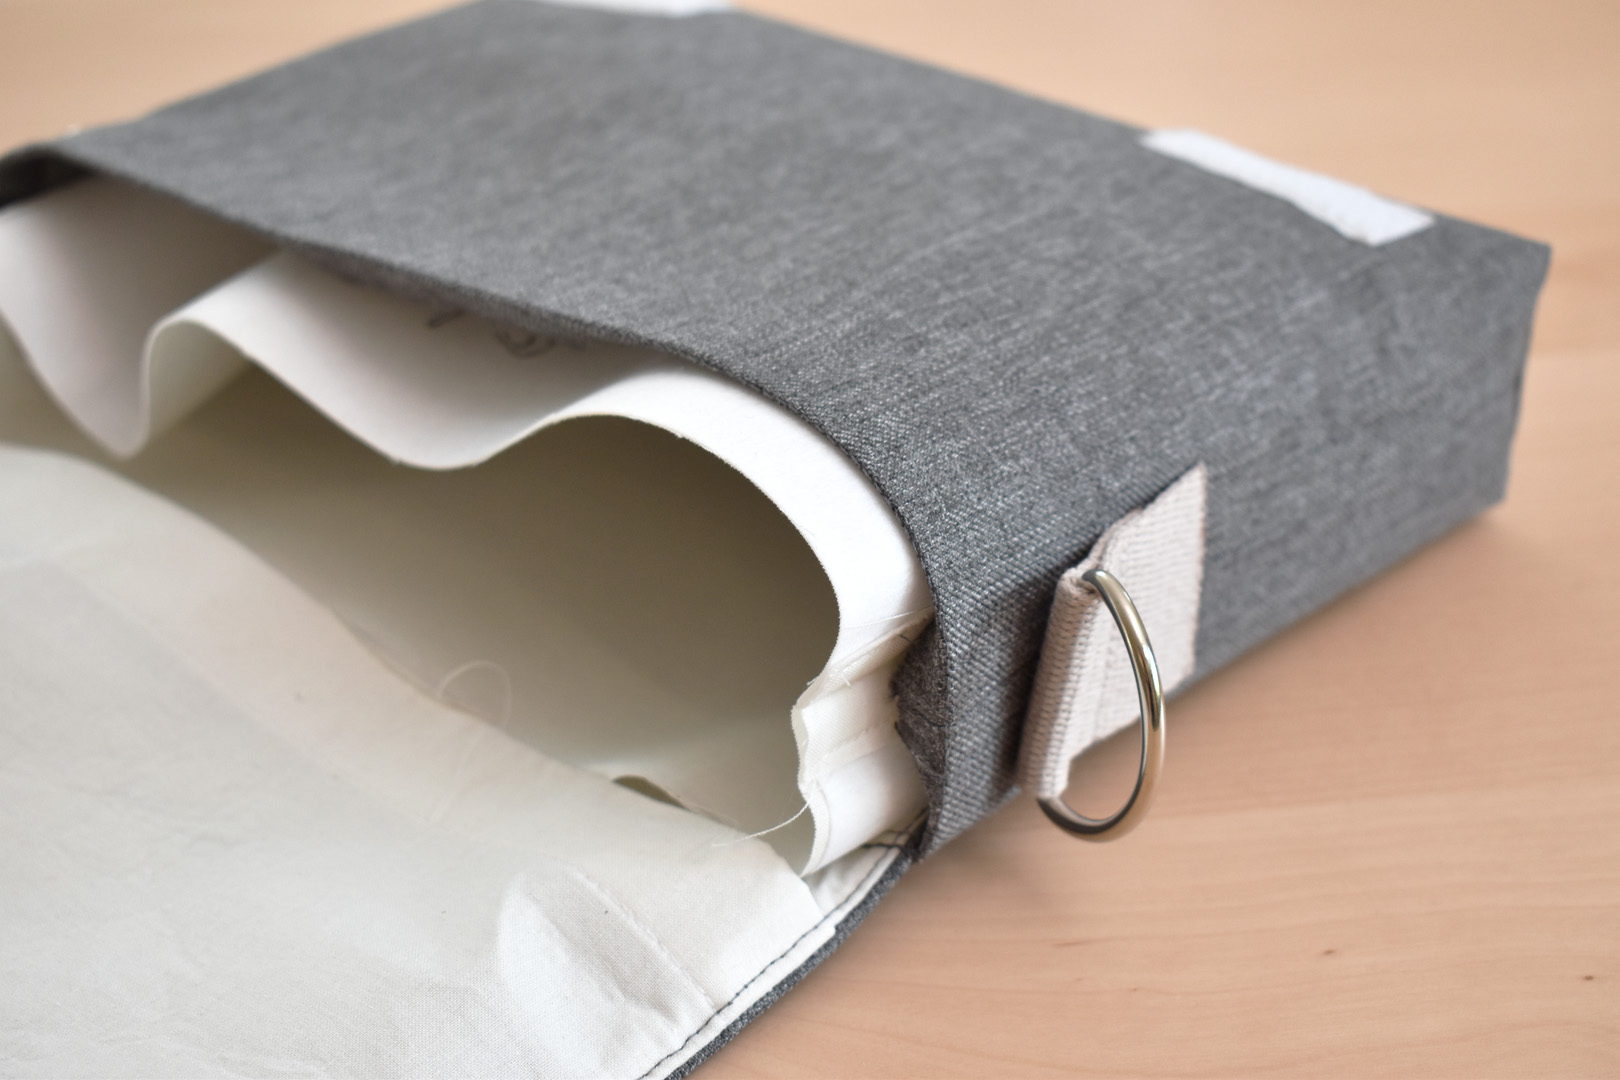
Clip the two bottom corners of the flap, and gently turn the whole flap inside out, being careful to flip from the top opening.
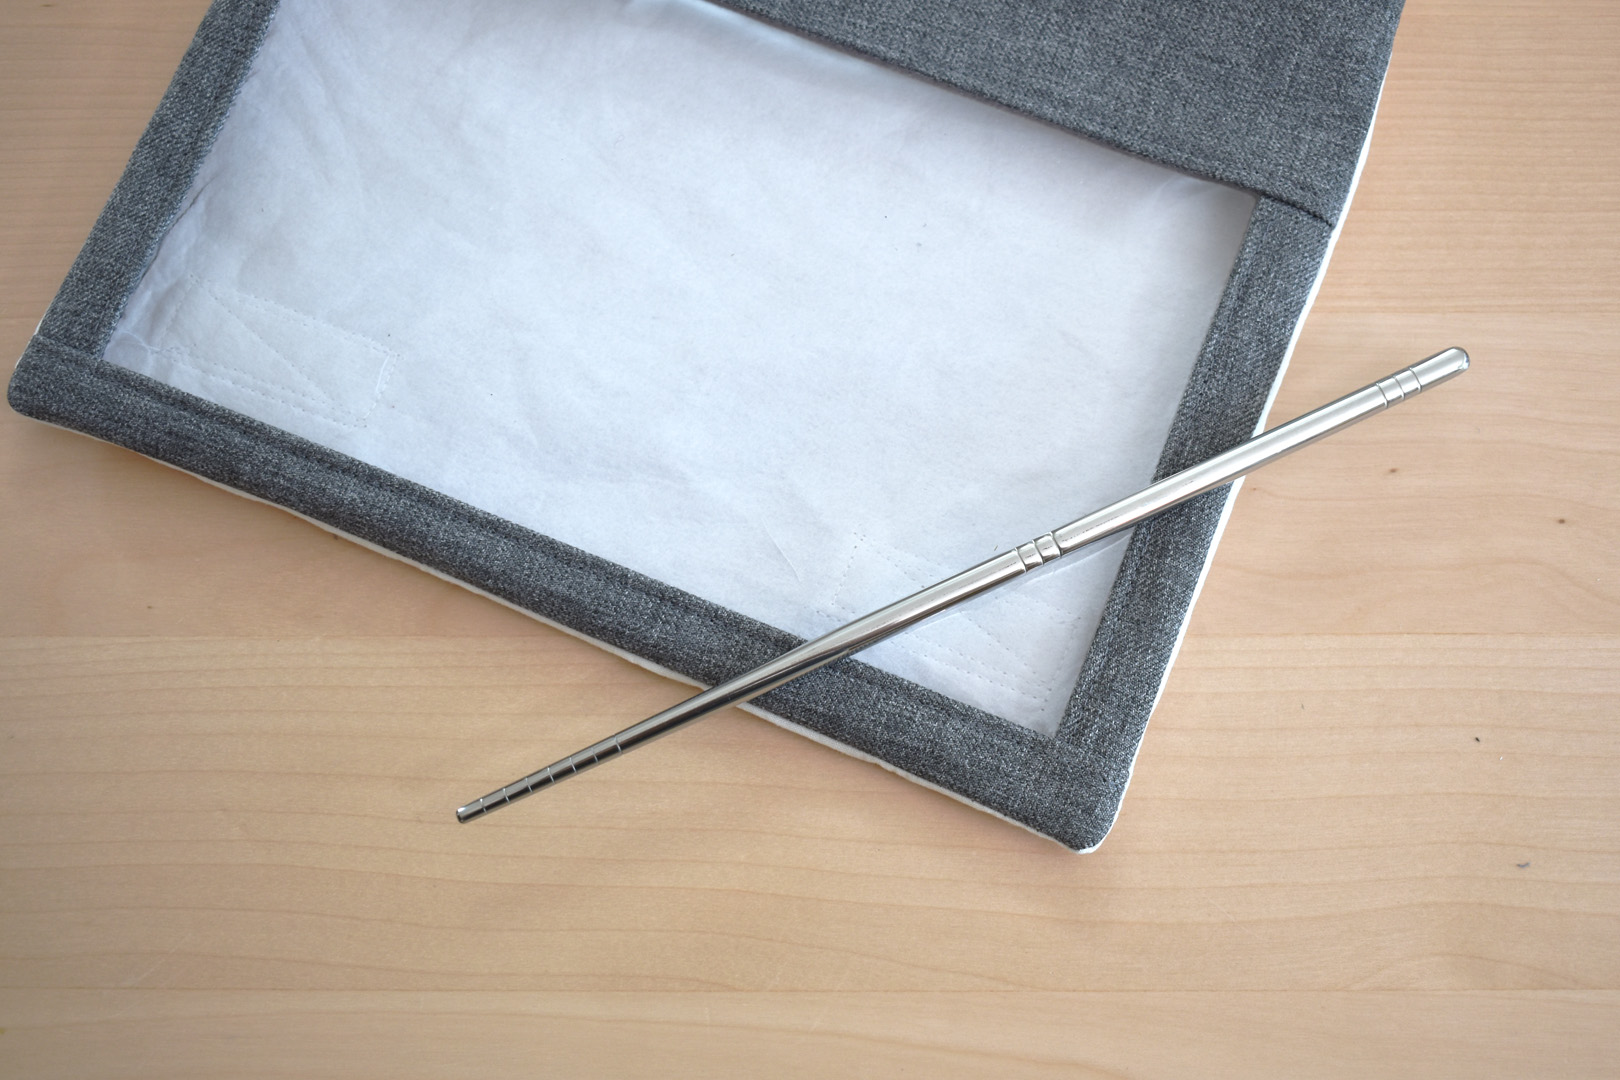
Gently push out corners with a chopstick or eraser end of a pencil. Avoid ironing anywhere near the vinyl because it will definitely melt!
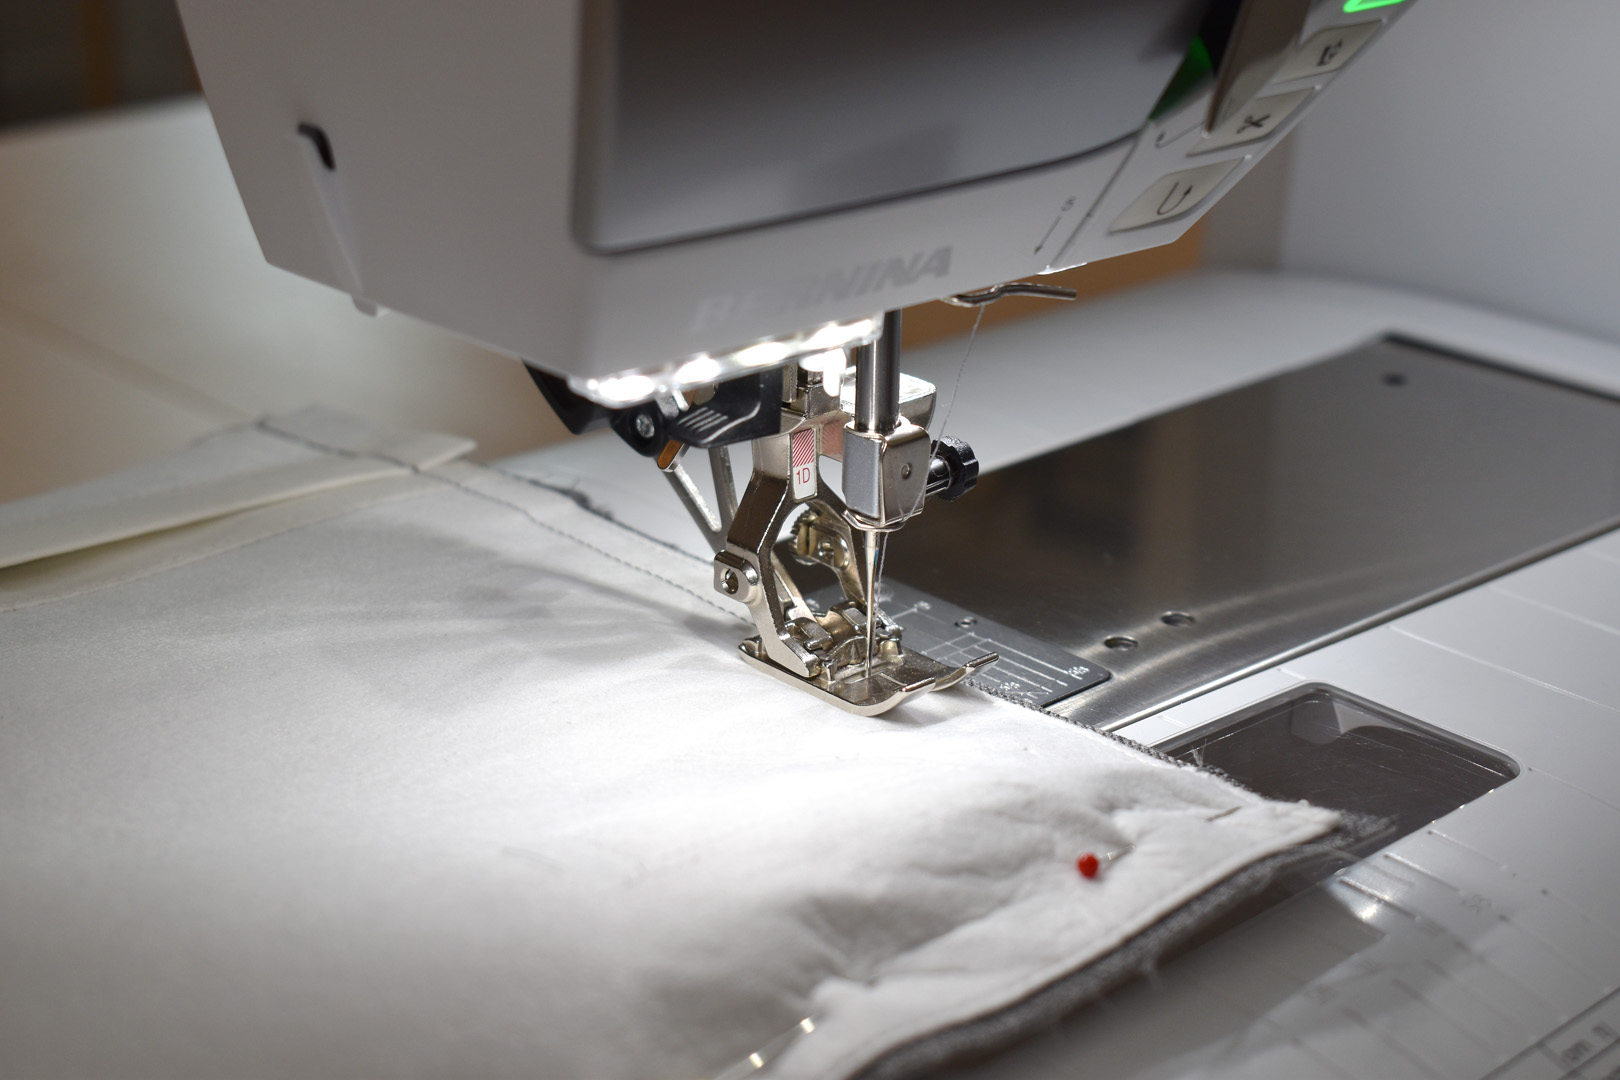
Finger press the seams open, and clip in place. Use pins to secure the top main fabric and lining together. Topstitch around the finished edges and bottom, and sew about 1/4″ away from the raw edge to baste the top closed.
You are now ready to sew the bag together.
Assembling the main bag and pocket window of the pin display handbag
Grab the finished main bag and the bag flap for this step. Pin the finished flap to the top, back edge of the main bag (the side with NO hook and loop tape). Make sure the flap is centered between the two side seams, adjust if needed.
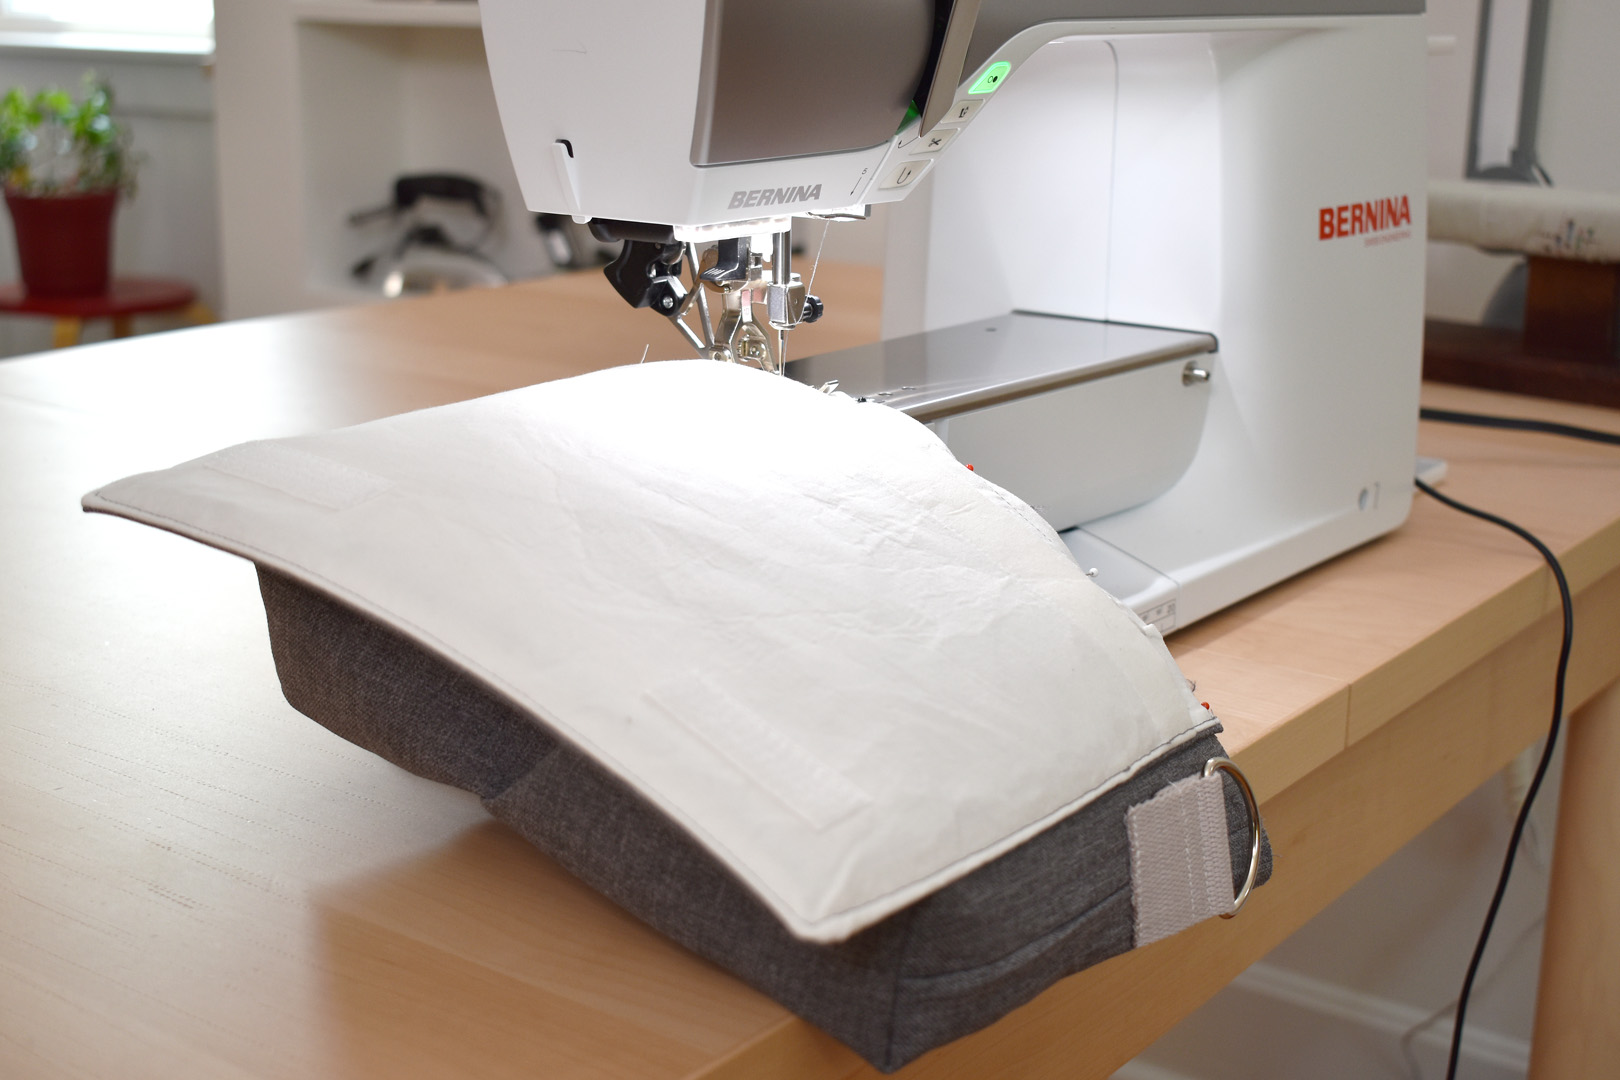
Slip the bag opening over the sewing machine free arm and stitch the flap to the main bag with a 1/2″ seam allowance. Keep stitching all the way around the bag opening at 1/2″ from the raw edge. Move the bag around the free arm of the sewing machine as you sew.
Flip the ring down when stitching over the side seams.
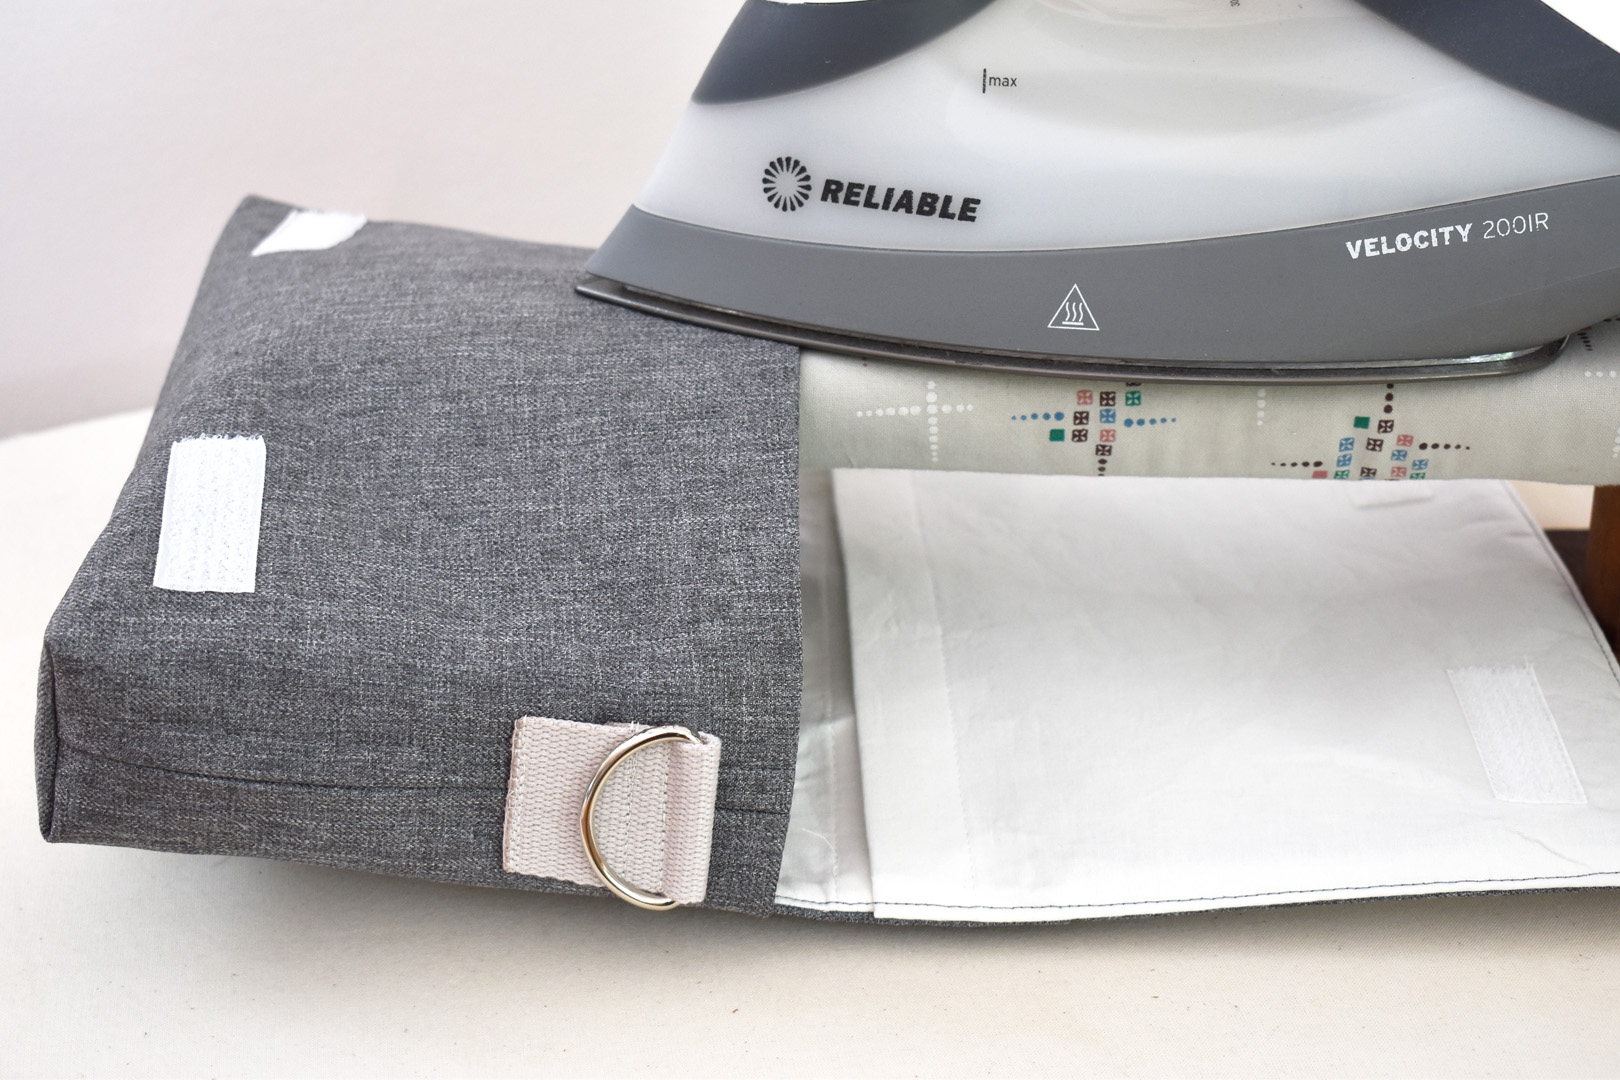
Press the bag opening over at the stitch line being careful to stay away from the vinyl in the flap.
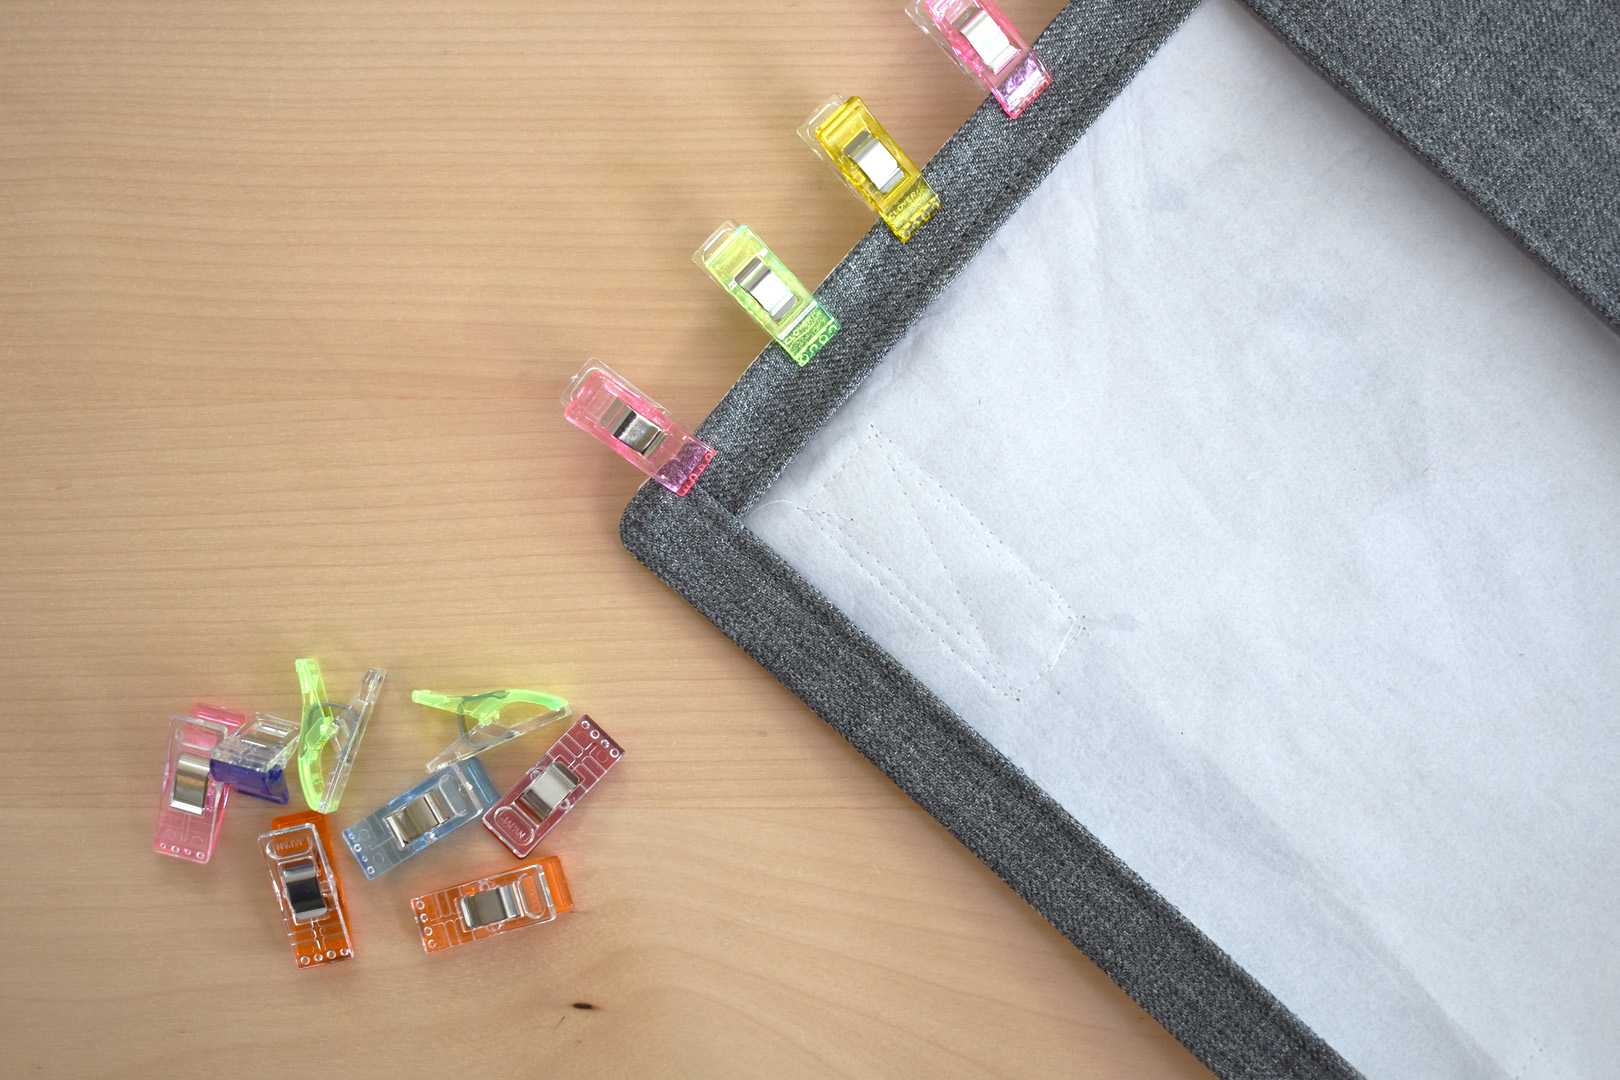
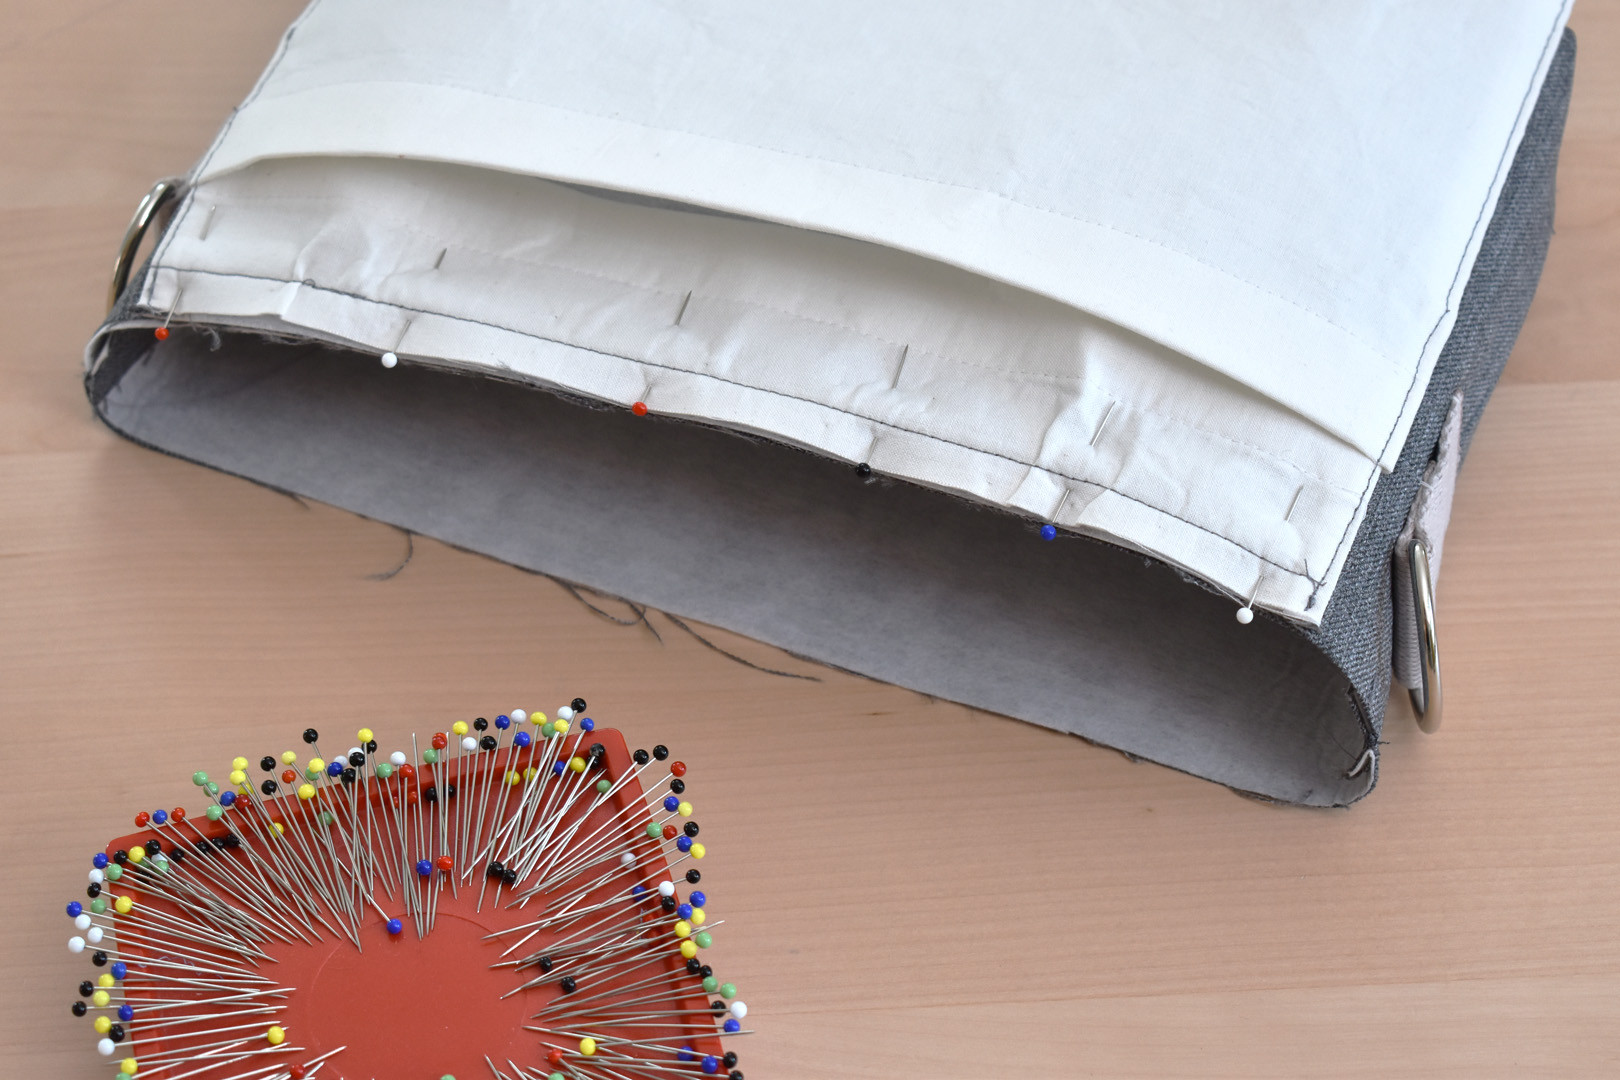
Insert the lining, wrong side out, into the main bag. You should be looking at the right side of the lining when looking down into the bag. Press the bottom corners of the lining down so they are firmly nestled in the main bag corners. Begin to turn the top, raw edge of the lining over to the wrong side so it is even with the pressed over top of the main bag. Starting by matching the side seams and clip the lining and main bag together, easing any extra lining fabric in evenly between clips as you go.
Use straight pins to secure the folded over lining to the bag flap from the inside (clips won’t fit over the flap).
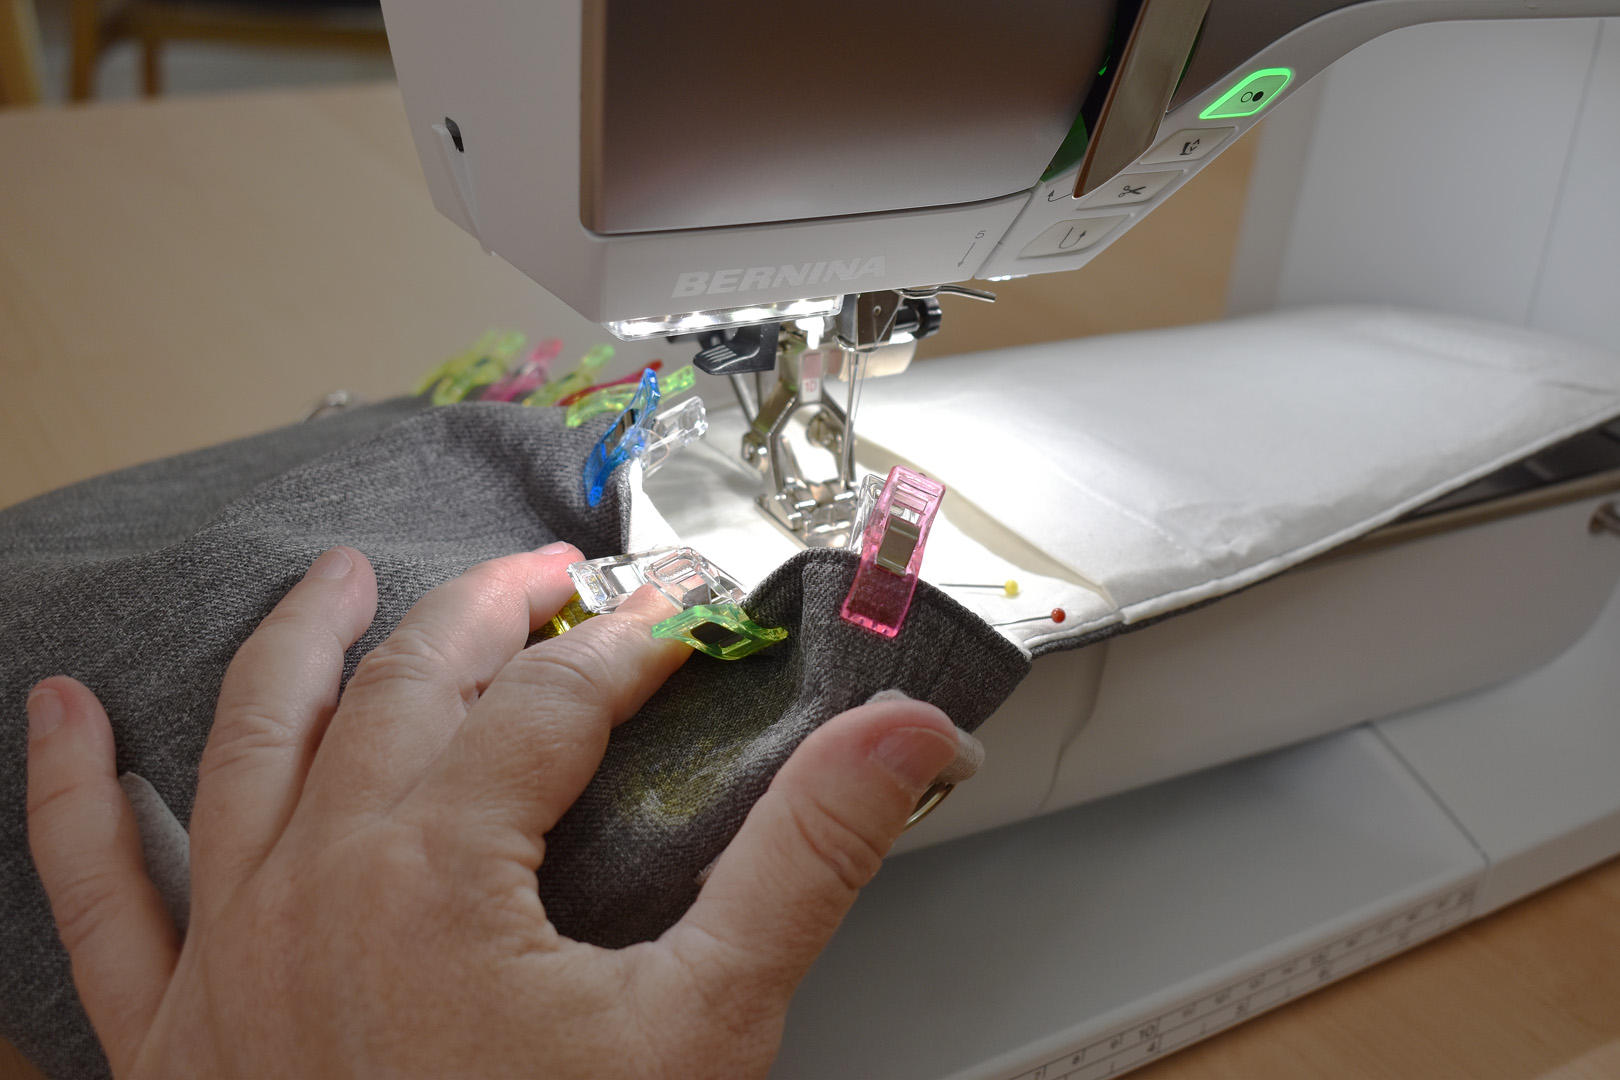
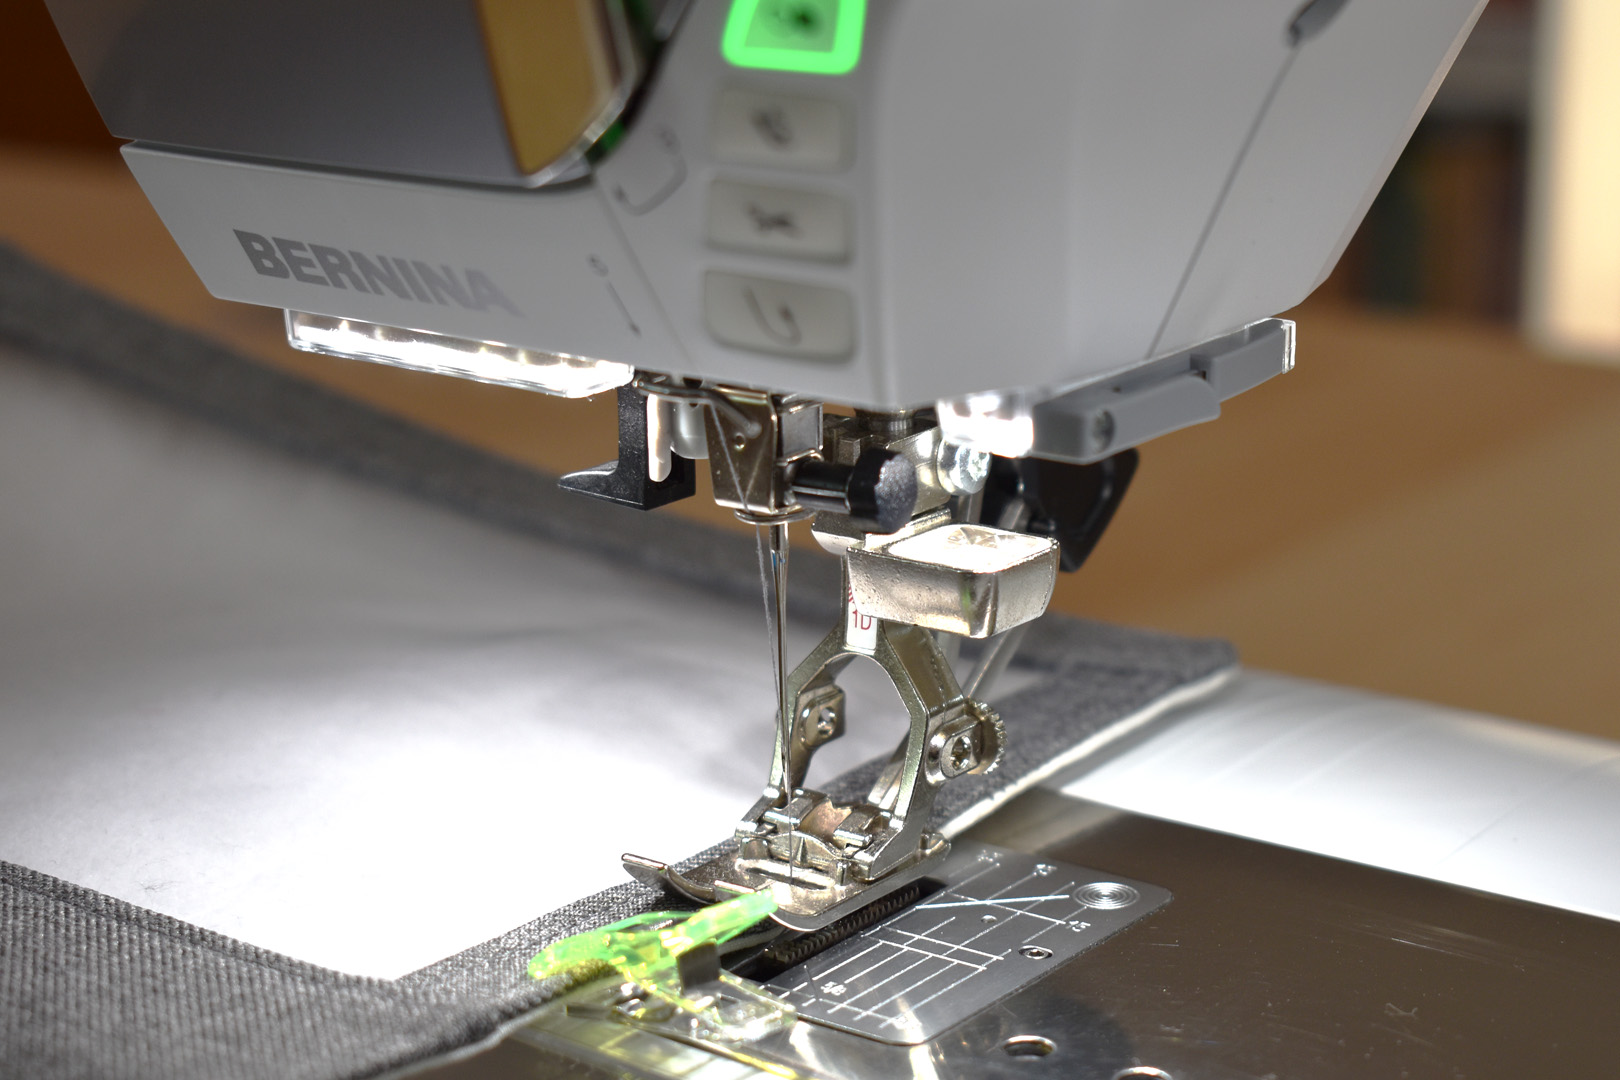
First sew the lining to the main bag on the inside over the flap. Stitch on top of the folded over lining, close to the folded edge, removing pins as you go. After stitching the lining to the flap, remove the bag from the sewing machine, flip the bag flap open, and slip the bag opening over the free arm of the sewing machine.
Sew from the right side of the bag about 1/8″ from the top edge through both the main bag and lining layers, starting from the flap and sewing around to the other side of the flap. Stop every few inches to move the bag around the free arm of the machine and straighten out the fabric in front of the presser foot. Sew slow and steady in this step, keeping the stitching as straight along the top edge as possible. After stitching, make sure both layers are stitched together across the entire opening of the bag.
Now it’s time to add those finishing touches; creating the base for the pins and adding the strap.
Adding finishing touches to the pin display handbag
Using the remainder of the strap, attach the adjustable strap buckle to one end of the strap.
Wrap one end of the strap around the middle of the adjustable buckle, overlapping about 1″, and stitch across both layers with the presser foot close to the buckle. Stitch again across the very end of the overlapping piece of strap to hold it in place.
With the adjustable buckle secured, thread the strap through one end of the bag.

Thread the end of the strap down through one ring, pulling the buckle close to the ring. You should be looking at the stitched end of the strap on the buckle and not the finished side.
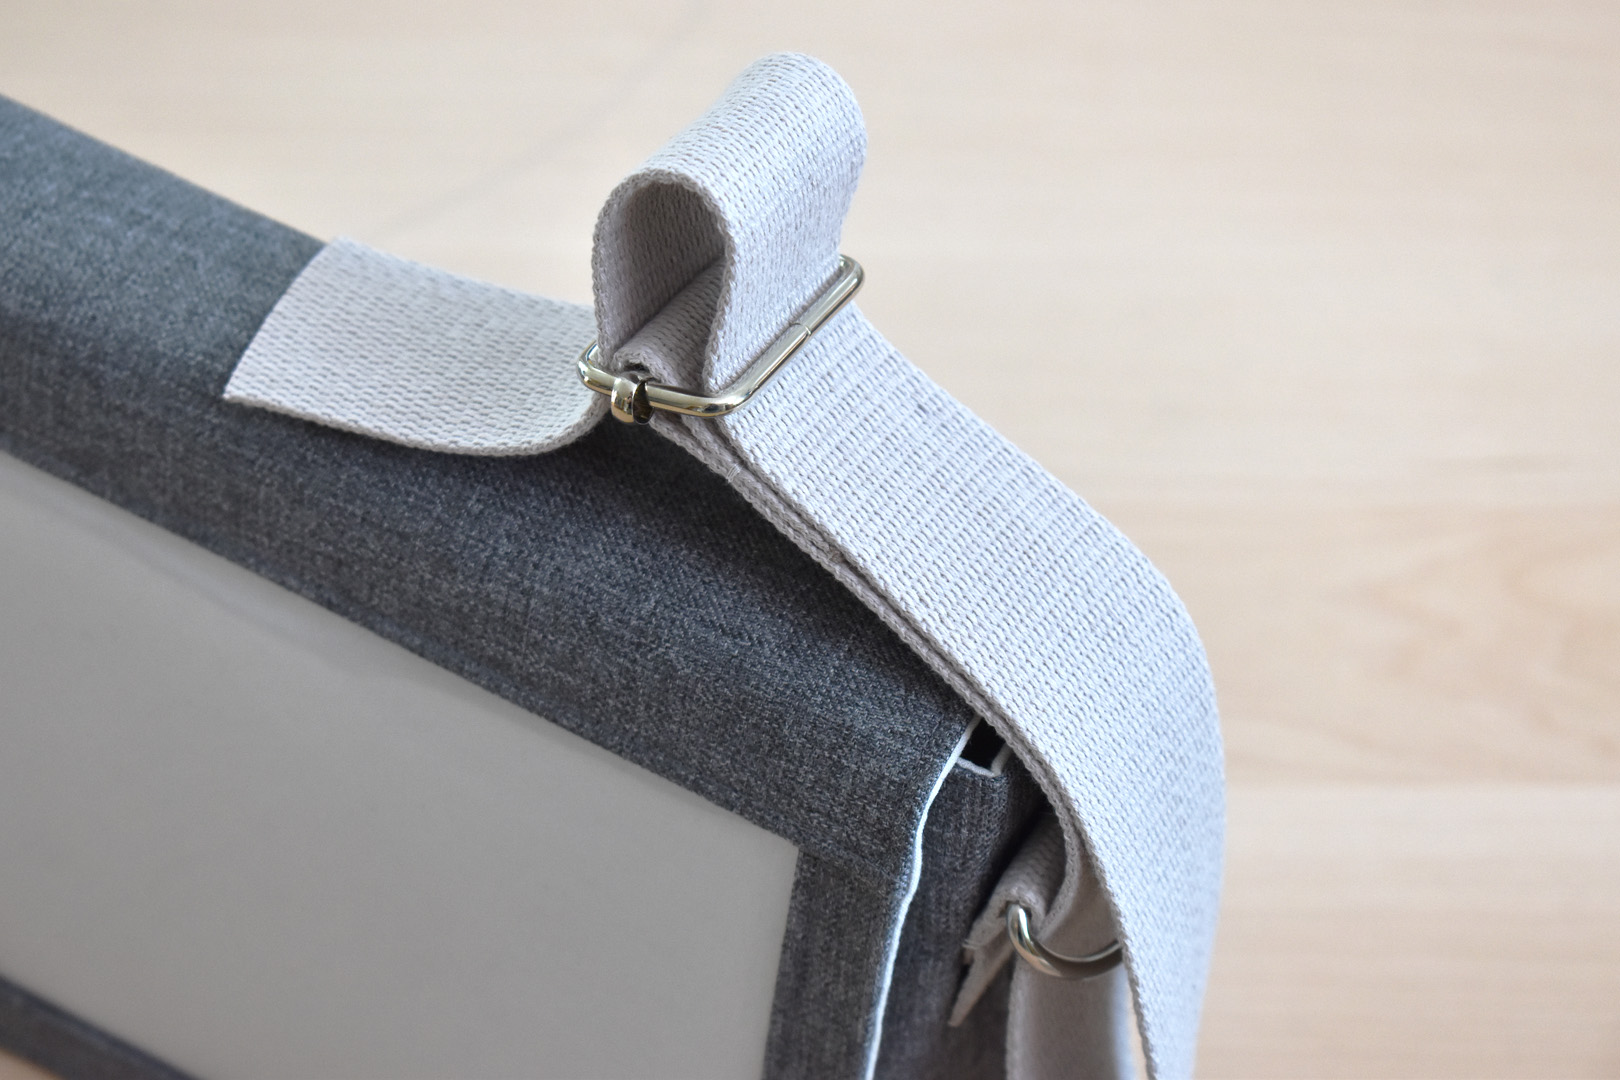
Thread the end of the strap over the ring, under the part of the buckle closest to the ring, over the middle of the buckle, then under the other end of the buckle just like in the photo above. Pull the strap through the adjustable buckle.
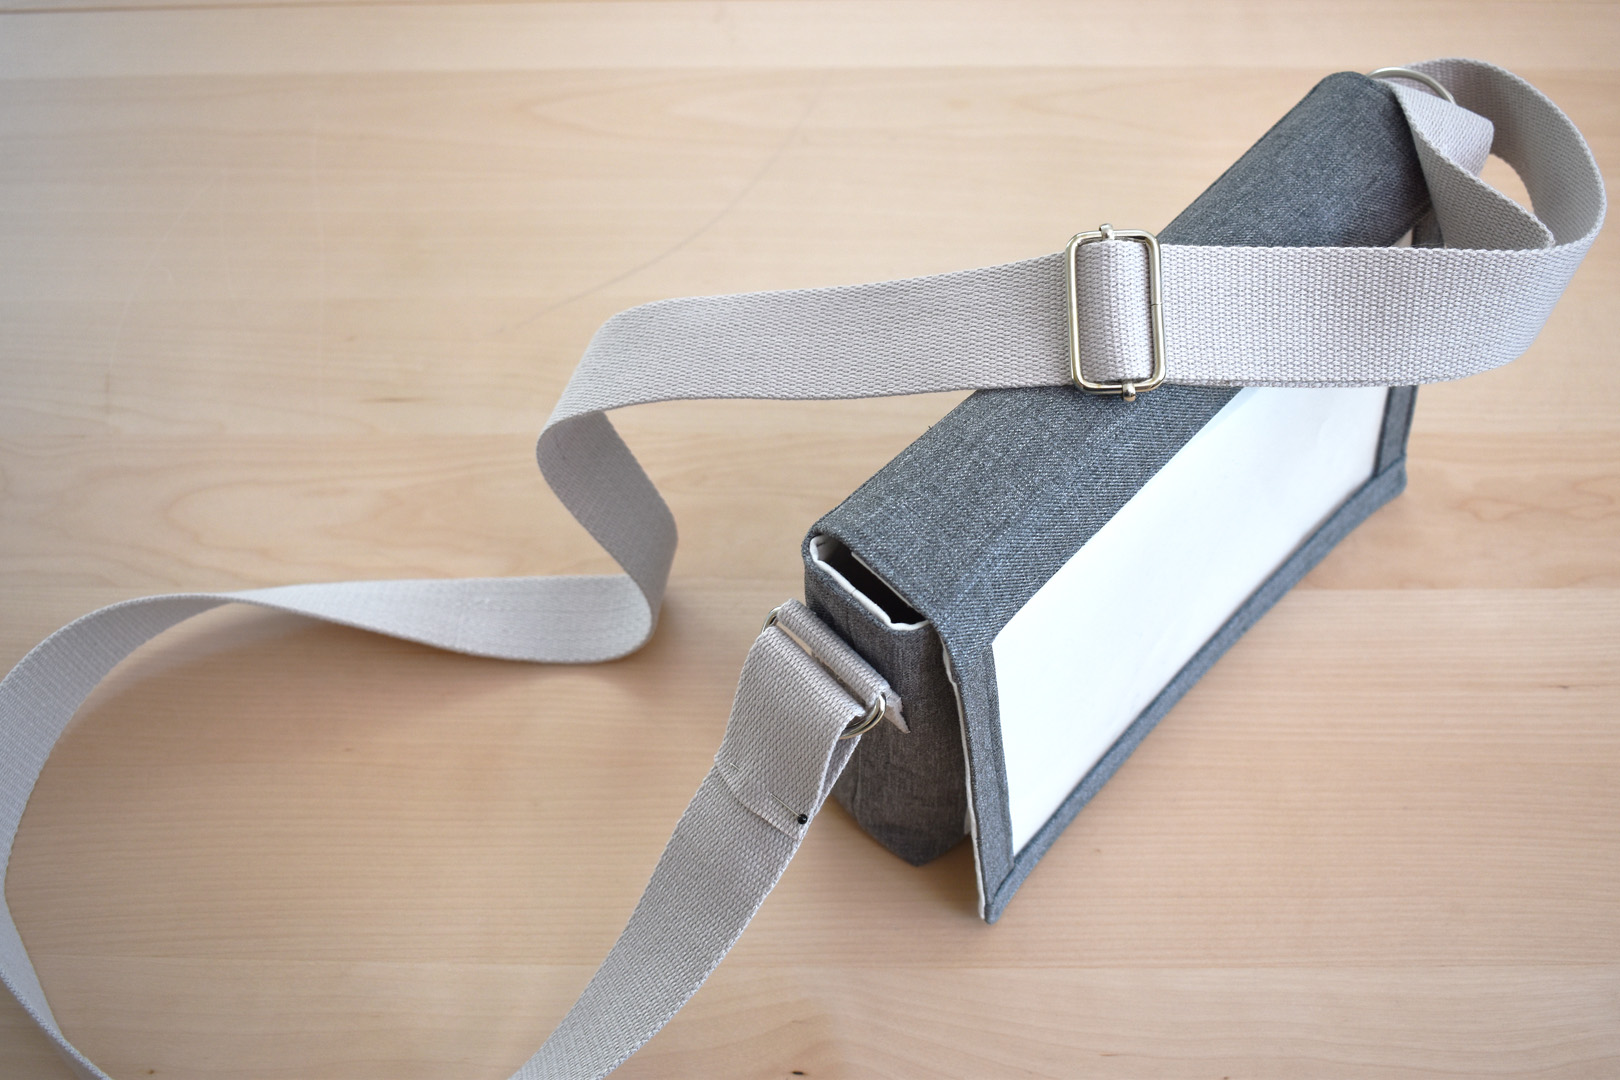
Wrap the other end of the strap around the other ring, overlapping about 1″ and secure in the same way that you stitched the strapping to the buckle above.
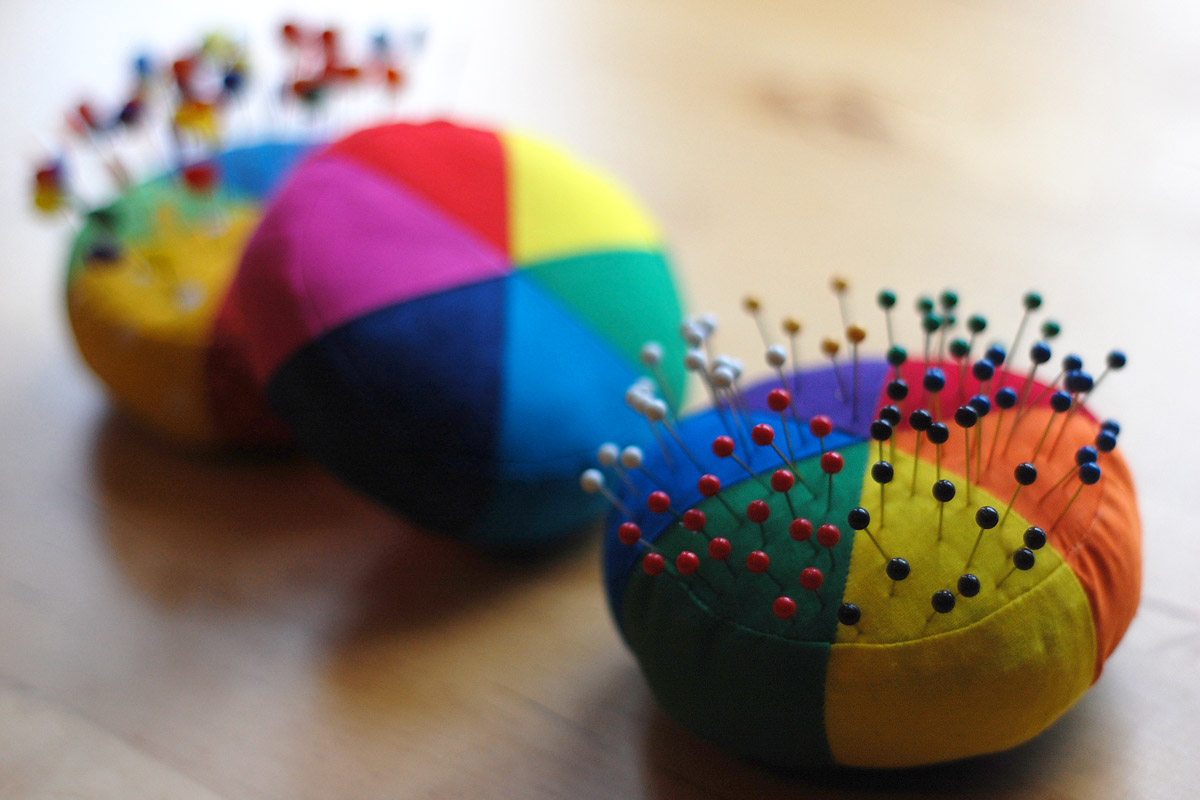
Now for the very last step! Let’s make the base for the pins to attach and display inside the window. Cut one piece of Pellon Peltex 6″ x 9″, and cut two pieces of lining fabric 7″ x 10″. Center the Peltex to the wrong side of one of the 7″ x 10″ pieces of lining fabric and fuse into place.
Place the two lining pieces right sides together with the Peltex facing up. Pin around the two sides and the bottom, leaving one long edge open. Stitch around the sides and bottom close to the Peltex edge (approximately 1/2″ from raw edges). Backstitch at the top, open edges of the pin base.
Clip the corners and turn the pin base inside out. Press the seams to the inside. At the opening, fold the extra fabric over the Peltex layer and press, then fold the other edge even with the first and press well.
Pin the opening closed. Topstitch all the way around the pin base to finish and close the opening.
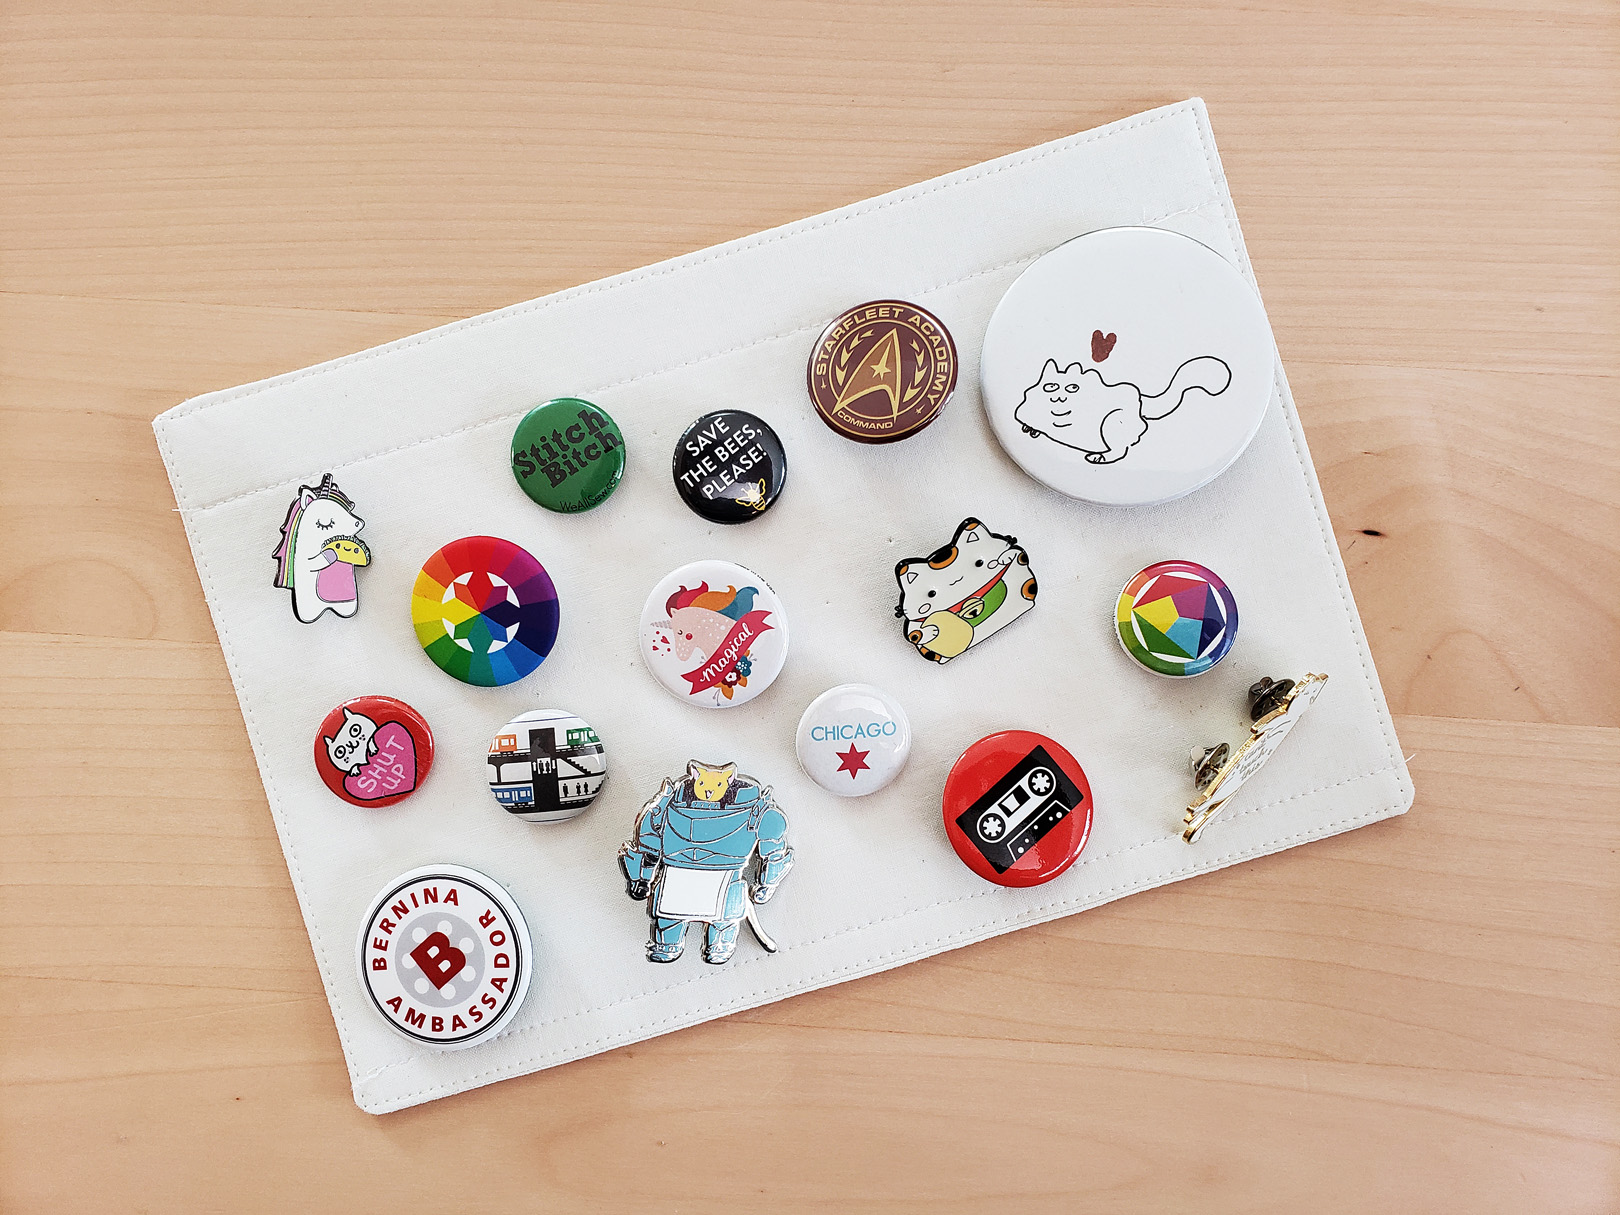
As a final step, topstitch 1″ away from the top edge of the pin base and 1/4″ away from the bottom edge of the pin base. These guidelines will help you place the pins so that the display perfectly within the window. I spent some time arranging the buttons on the base until I liked the way they looked, then attached all the pins to the base.
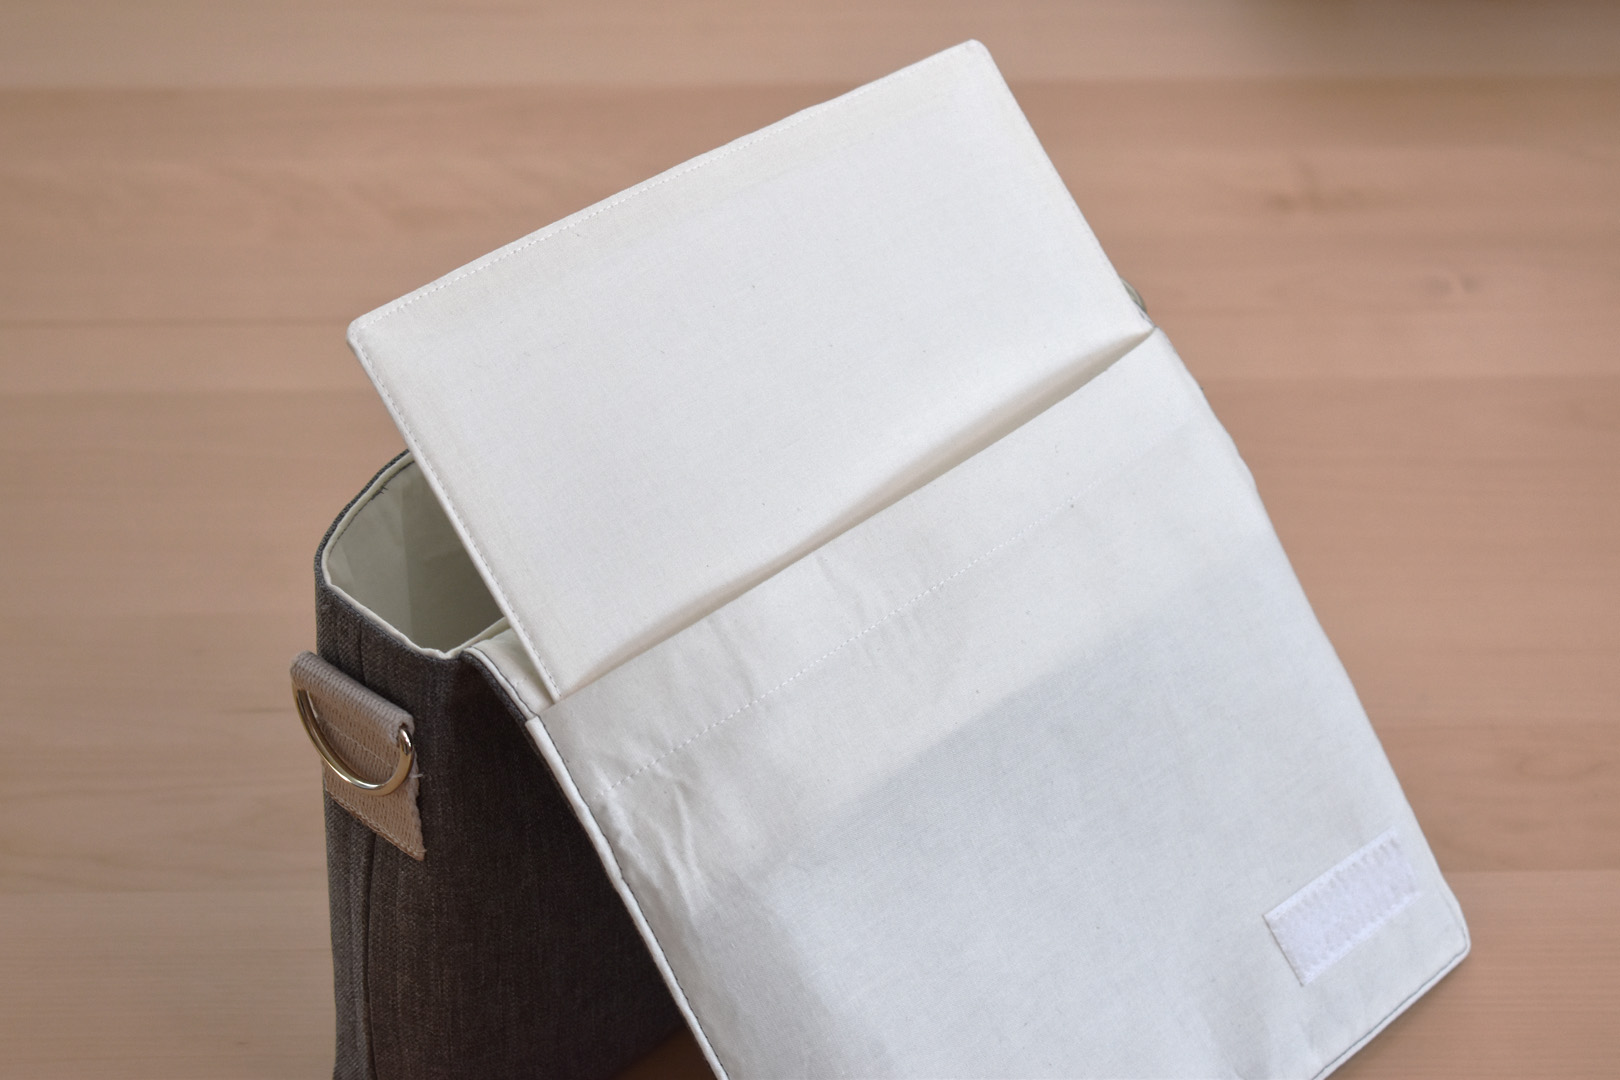
To slip the pin base inside the flap, open the flap all the way and carefully slip in the base between the flaps.

Now you’re ready to show off your pins without the fear of losing them!
My teenager requested a pin display bag in black with red lining, they’re slowly adding favorite pins and have been carrying the bag since I finished it – with rave reviews. I hope you enjoy the pin display bag project as much as we do!


What you might also like


4 comments on “Pin Display Handbag Tutorial”
-
-
You’re like the third person who’s asked about my thread stand! It’s from Superior Threads and has convertible options for cross-wound or stacked spools, large spools, or cones. Had it for several years and can honestly recommend it as one of the more useful sewing tools I’ve ever used. The only thing that would improve the stand would be a heavier base to keep it in place when quilting – I’ve knocked it over once or twice ?.
-
And oh yeah, the cheeky cat sticker is made by an awesome independent artist Leeza Hernandez, find her on Etsy @LeezaWorks. Her black cat is “Nigel”
-
-
I was just at Anime Magic and discovered that these bags are called Ita Bags. They are very popular at cons.
Can’t wait to make one. Thanks for the tutorial 🙂
Leave a Reply
You must be logged in to post a comment.

What a great idea to add a pin base to display your pins! Where did you get the white thread stand with the cat?