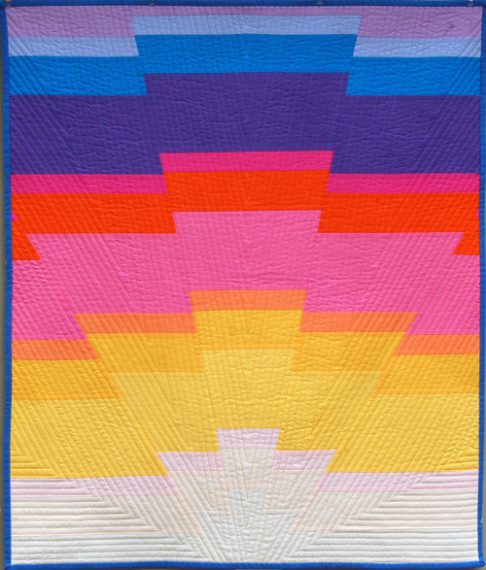
Radiant Splendor Supersized Quilt-along: Week 3
Welcome back to Week 3 of the Radiant Splendor Supersized Quilt-along. During Week 1, we discussed your Fabric Selection, Fabric Requirements, and Cutting Instructions. During Week 2, we assembled our block units. This week we are going to assemble our quilt top and finish our quilt.

Finished Size: 60″ x 60″
The Radiant Splendor Supersized Quilt-along will follow the below schedule:
Week 1 : Fabric Selection, Requirements, Cutting
Week 2: Piecing Block Units
Week 3: Quilt Top Assembly, Quilting, Finishing Up
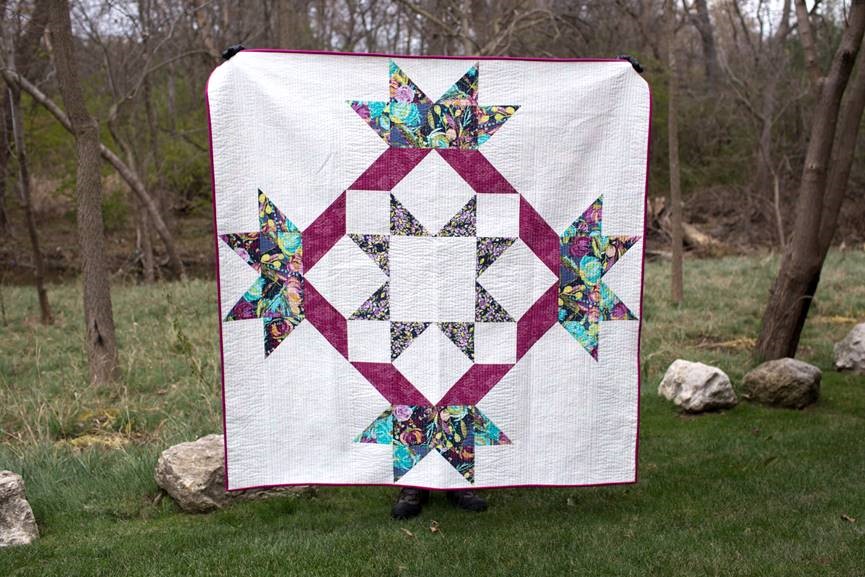
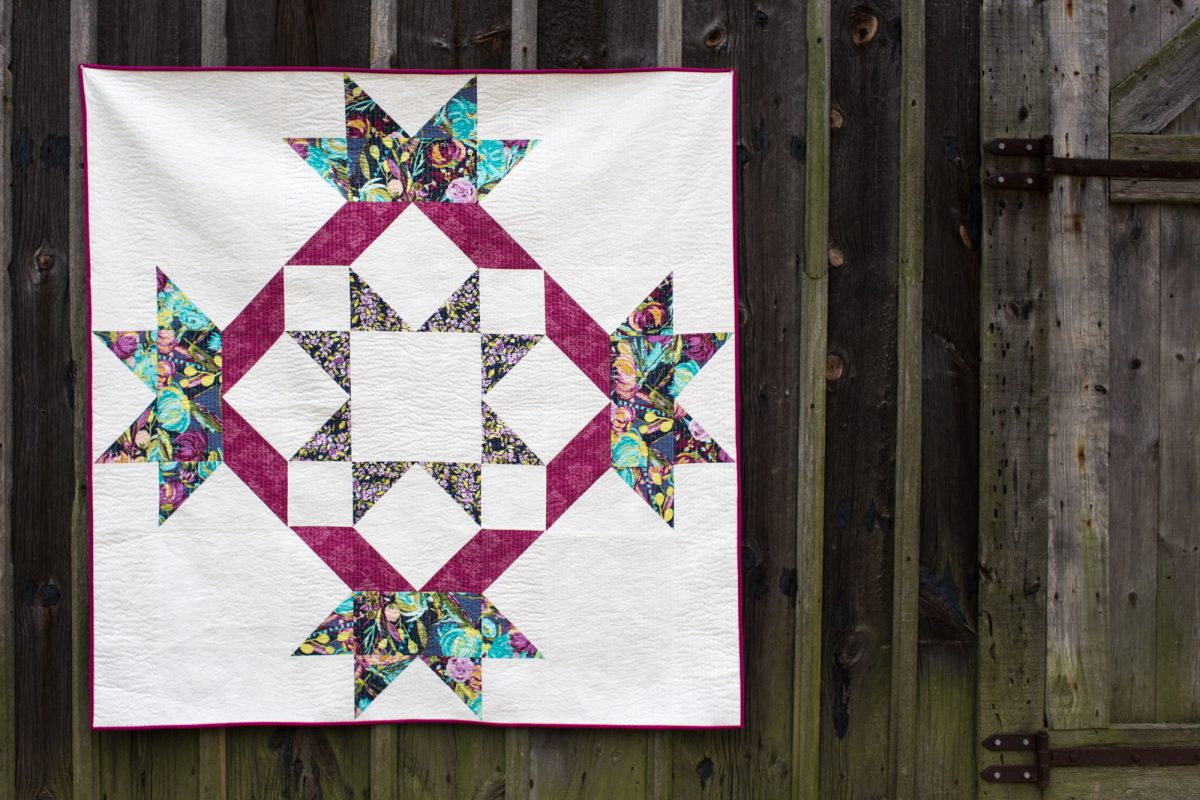
Assembling the Radiant Splendor Supersized Quilt
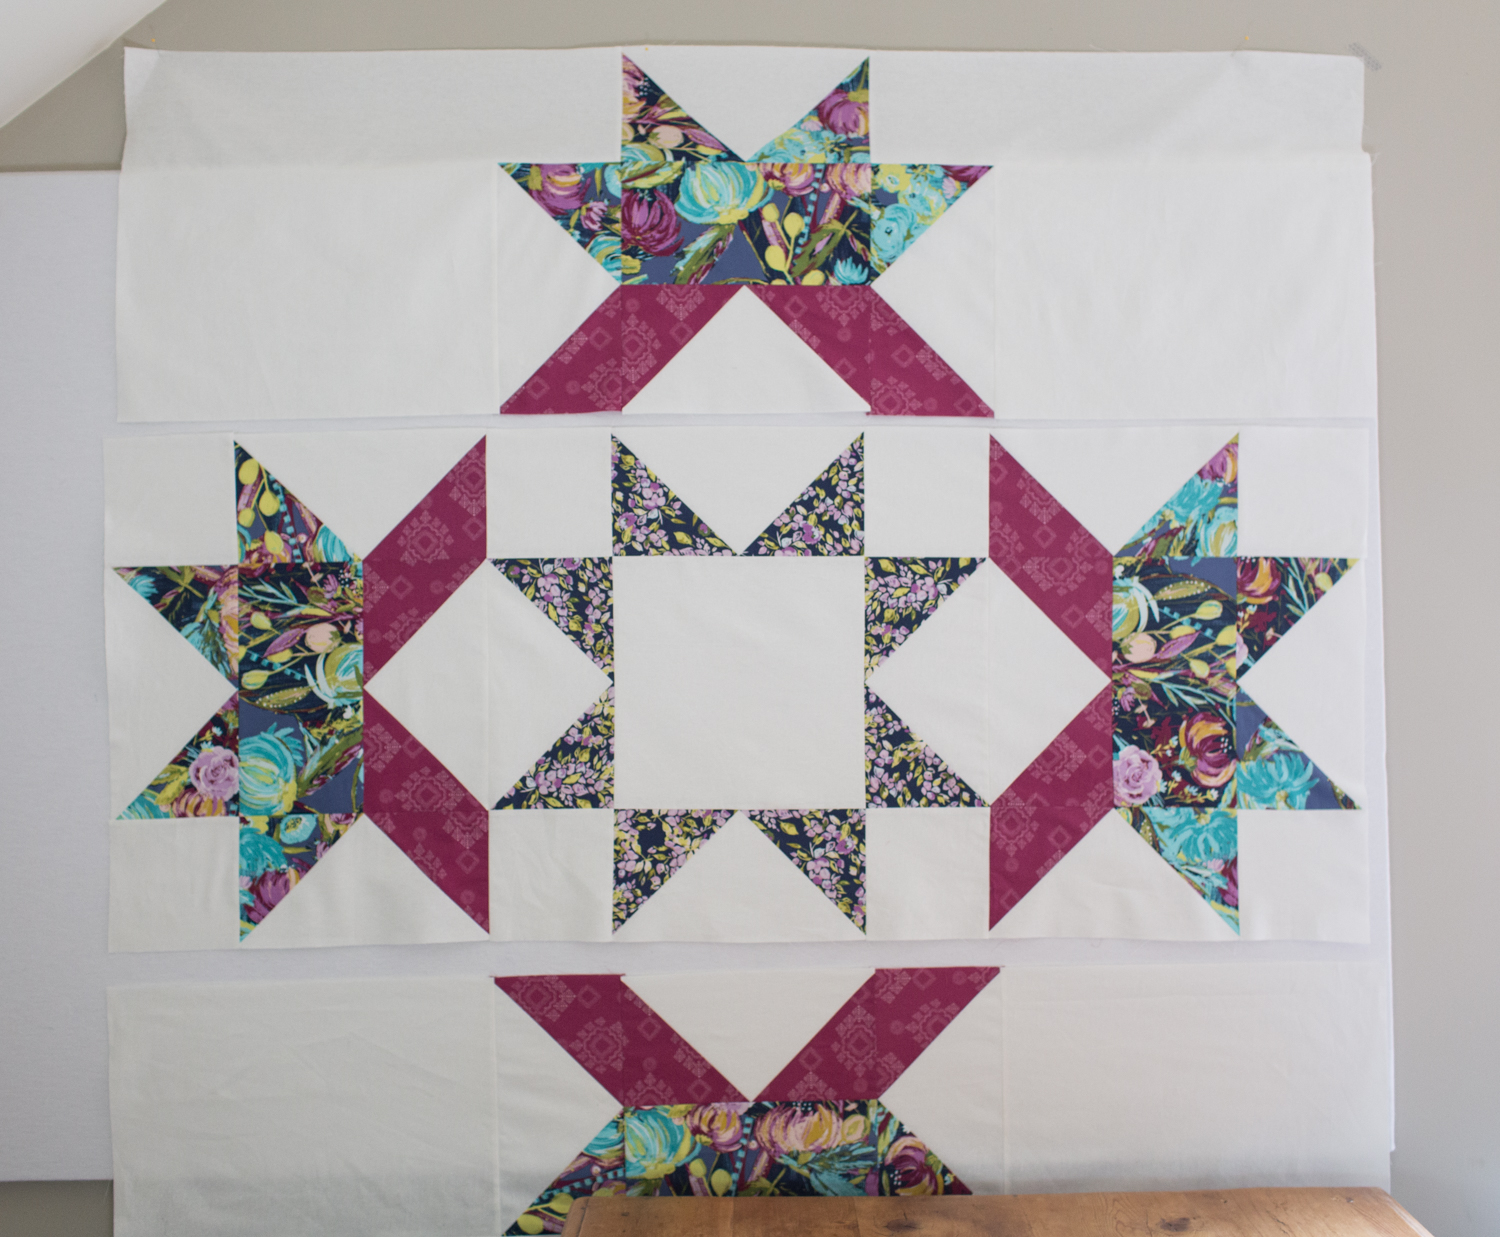
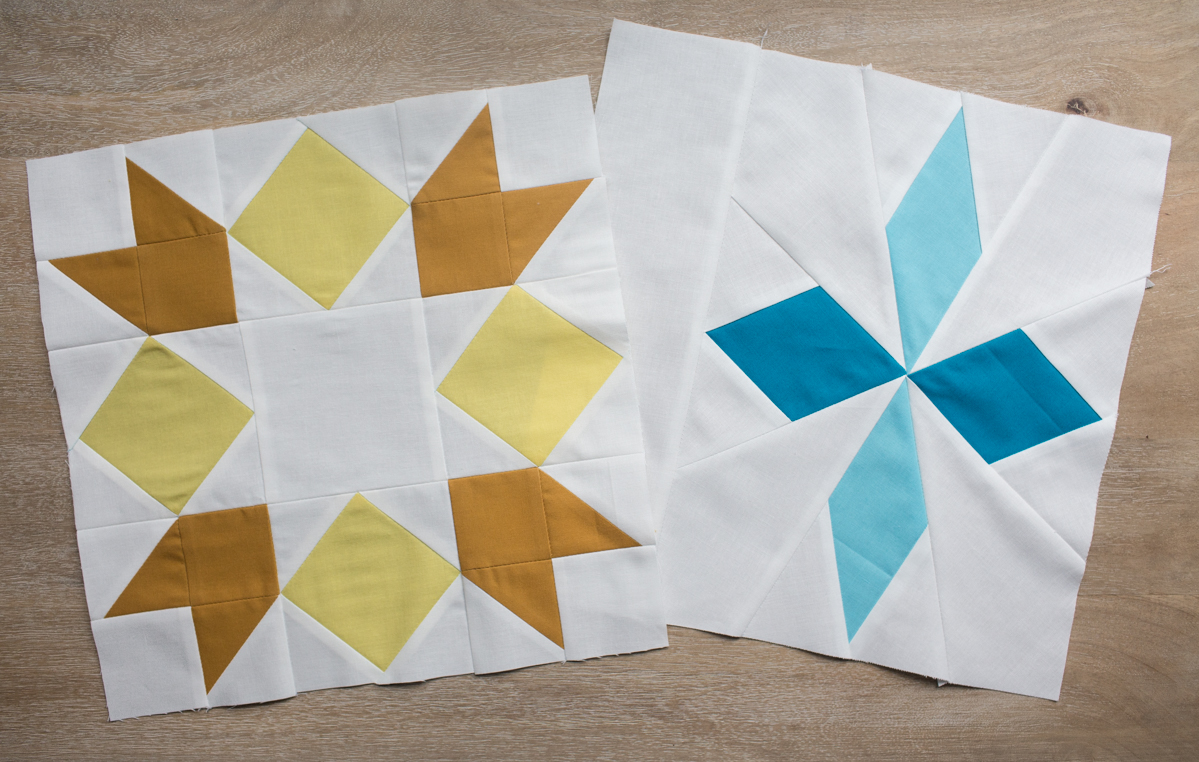
Assemble Center Star unit
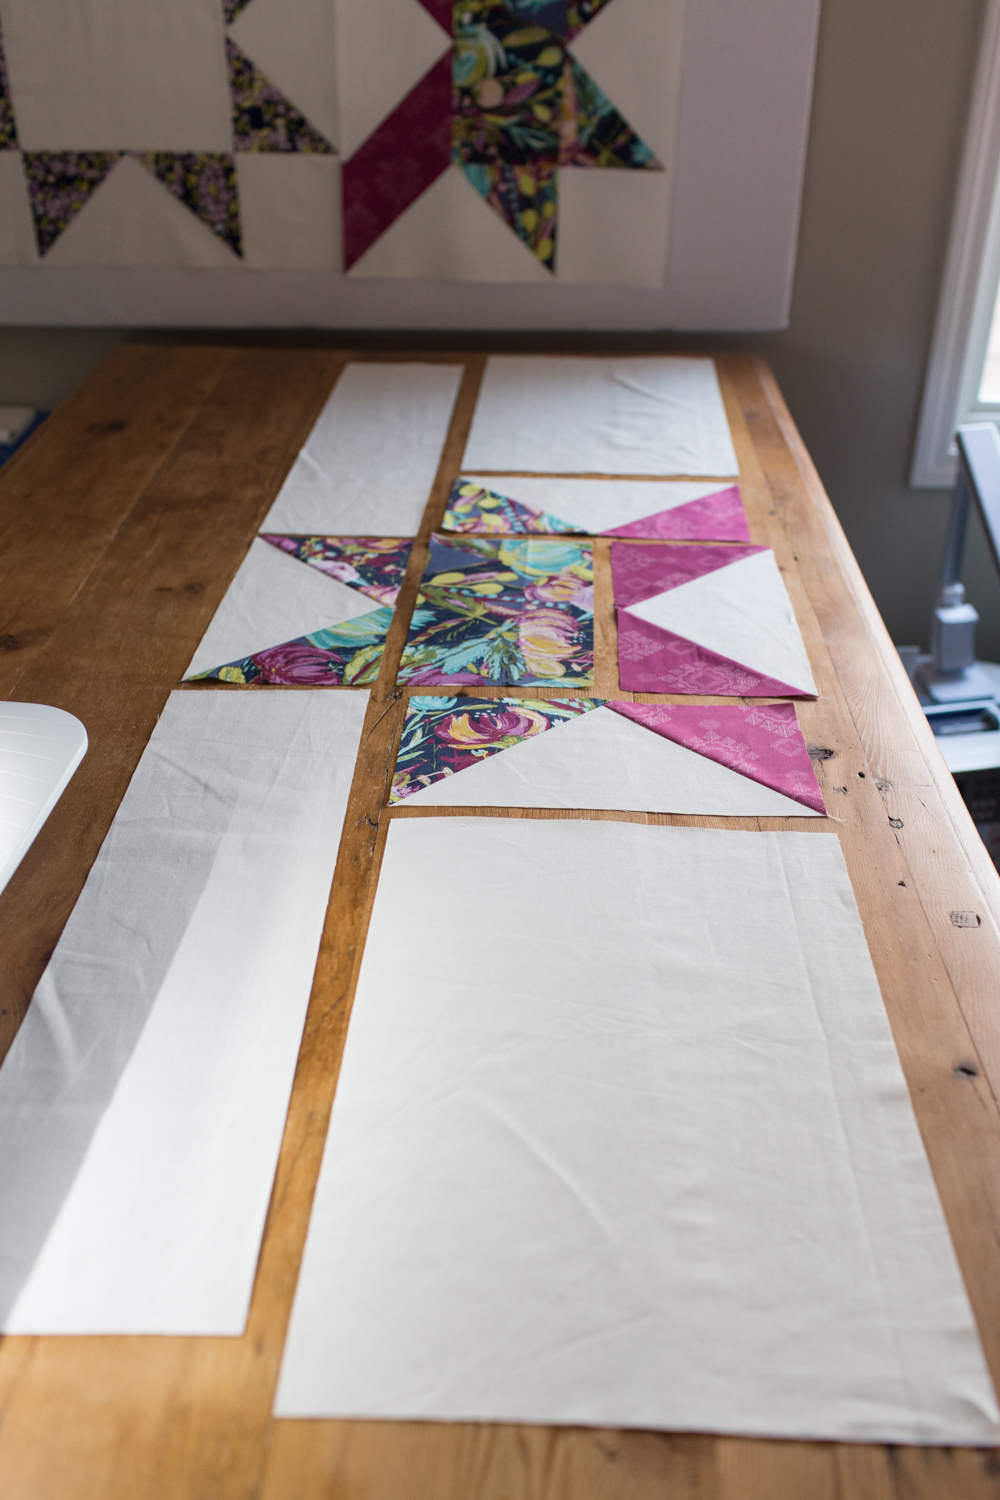
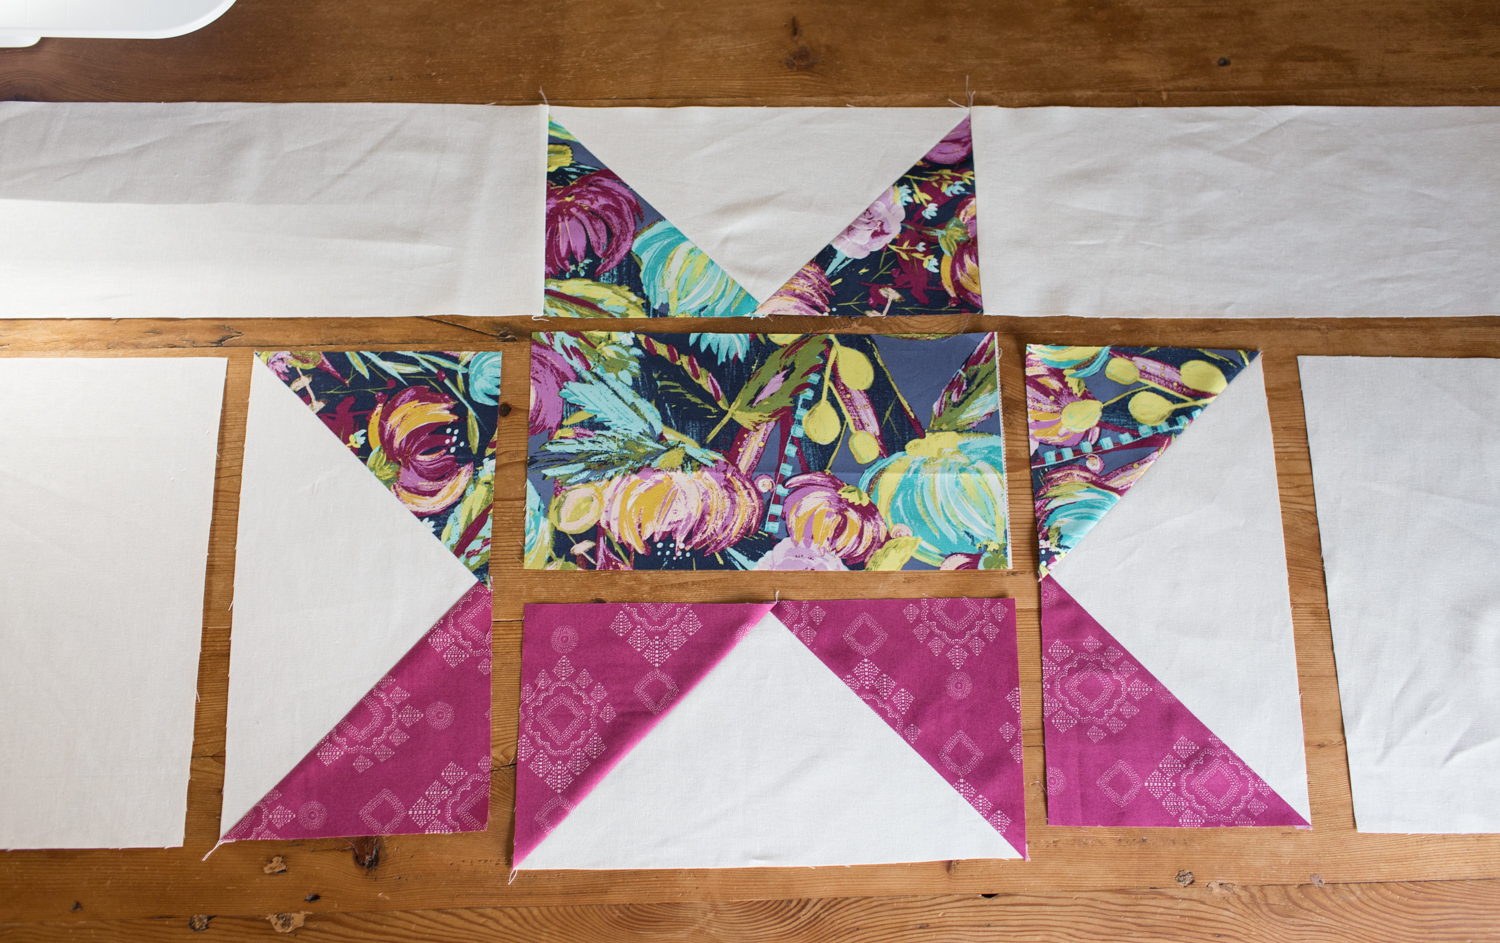
Step 1: Select your (4) Bougainvillea Lilac/Linen Flying Geese units, (1) 12-1/2″ x 12-1/2″ Linen Square, and (4) 6-1/2″ x 6-1/2″ Linen Squares. Lay them out as shown.
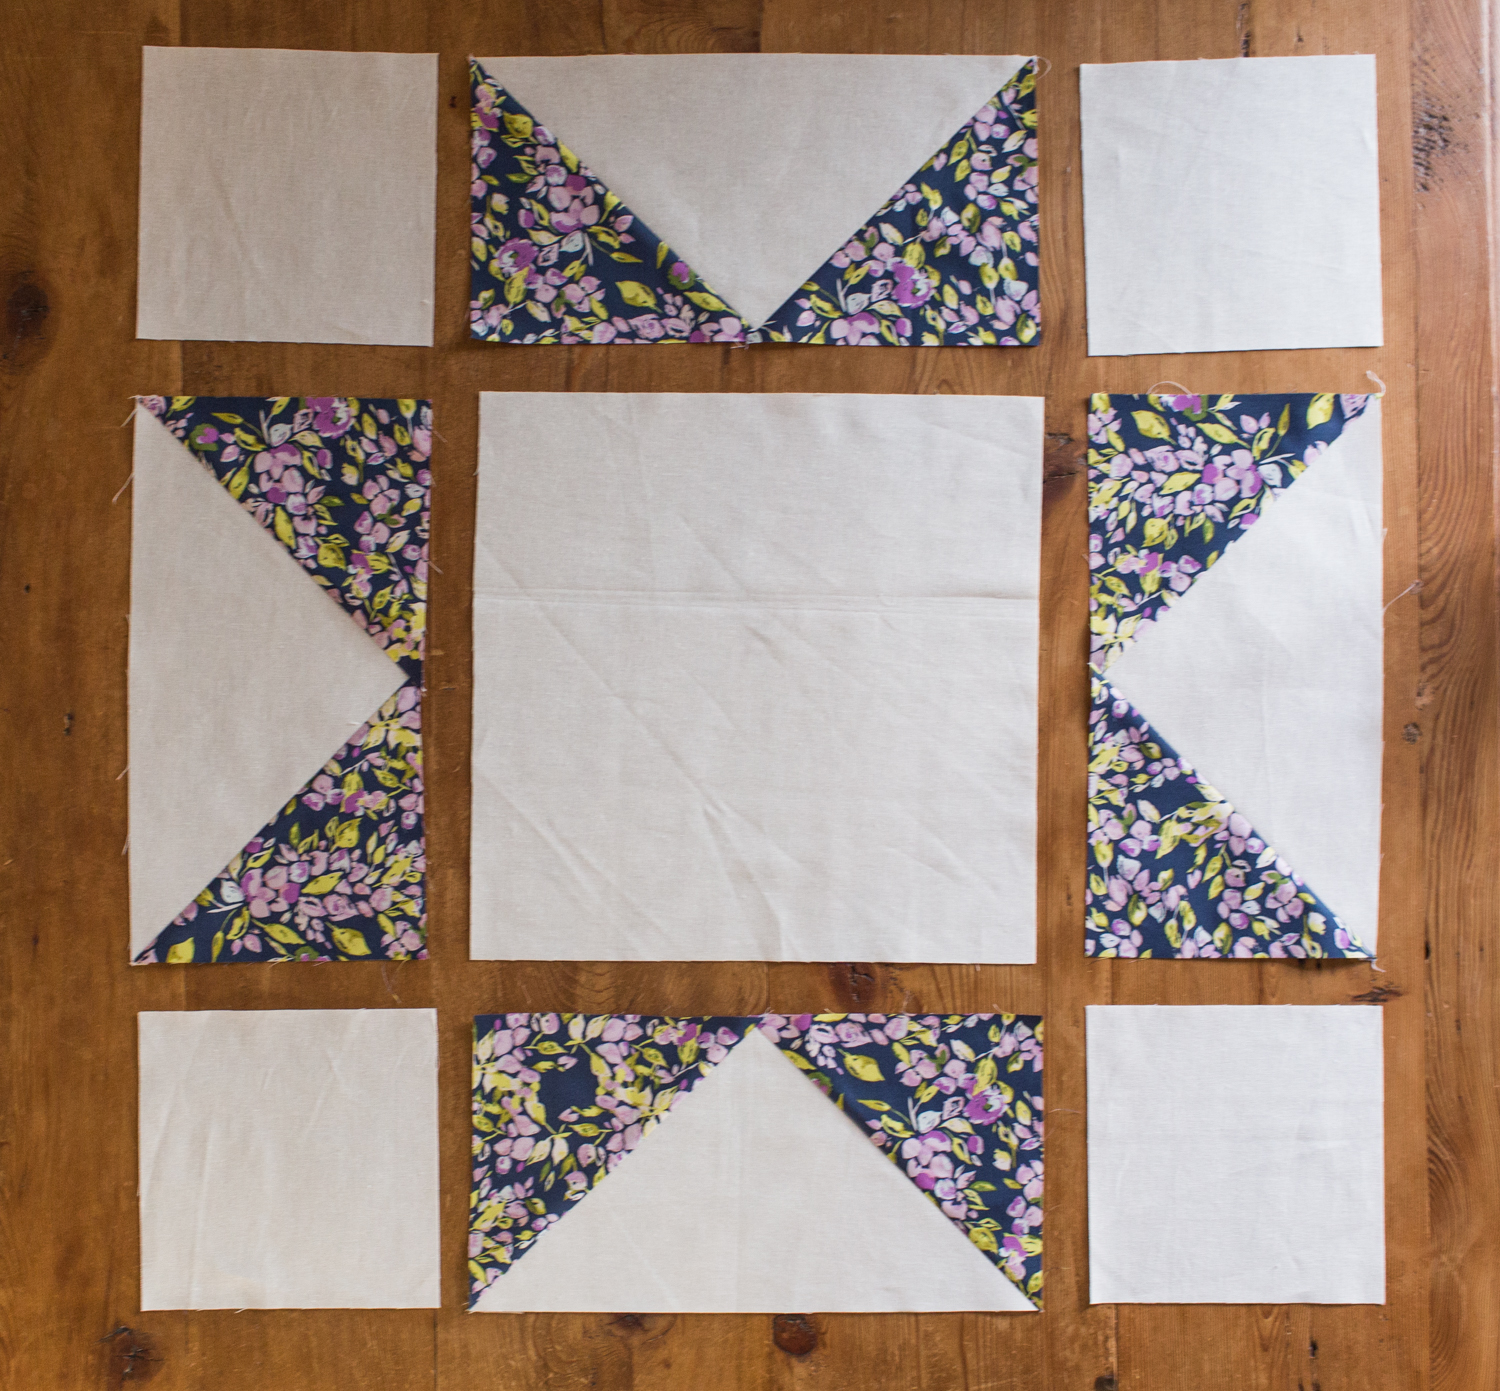
Step 2: Stitch together the segments into three rows as shown.
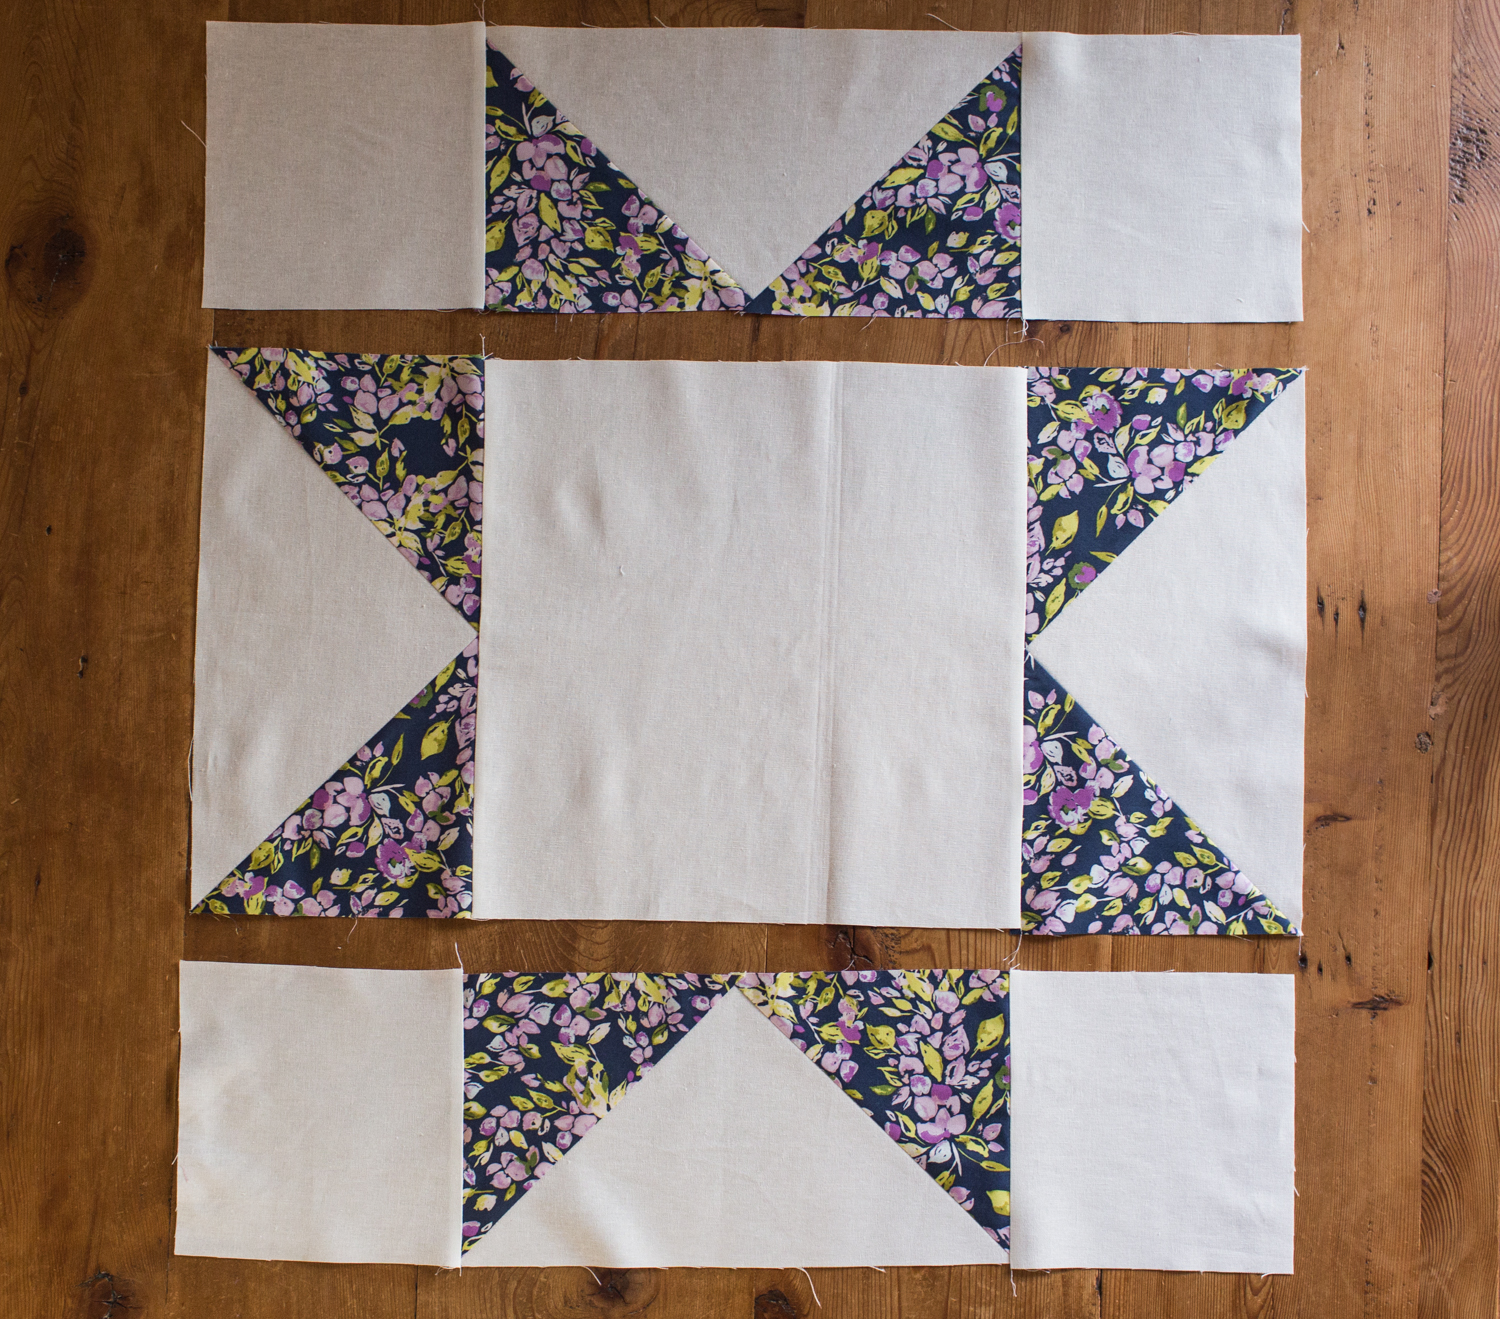
Step 3: Stitch your rows together to form a finished 24-1/2″ x 24-1/2″ block, as shown.

Assemble Left and Right Border Stars
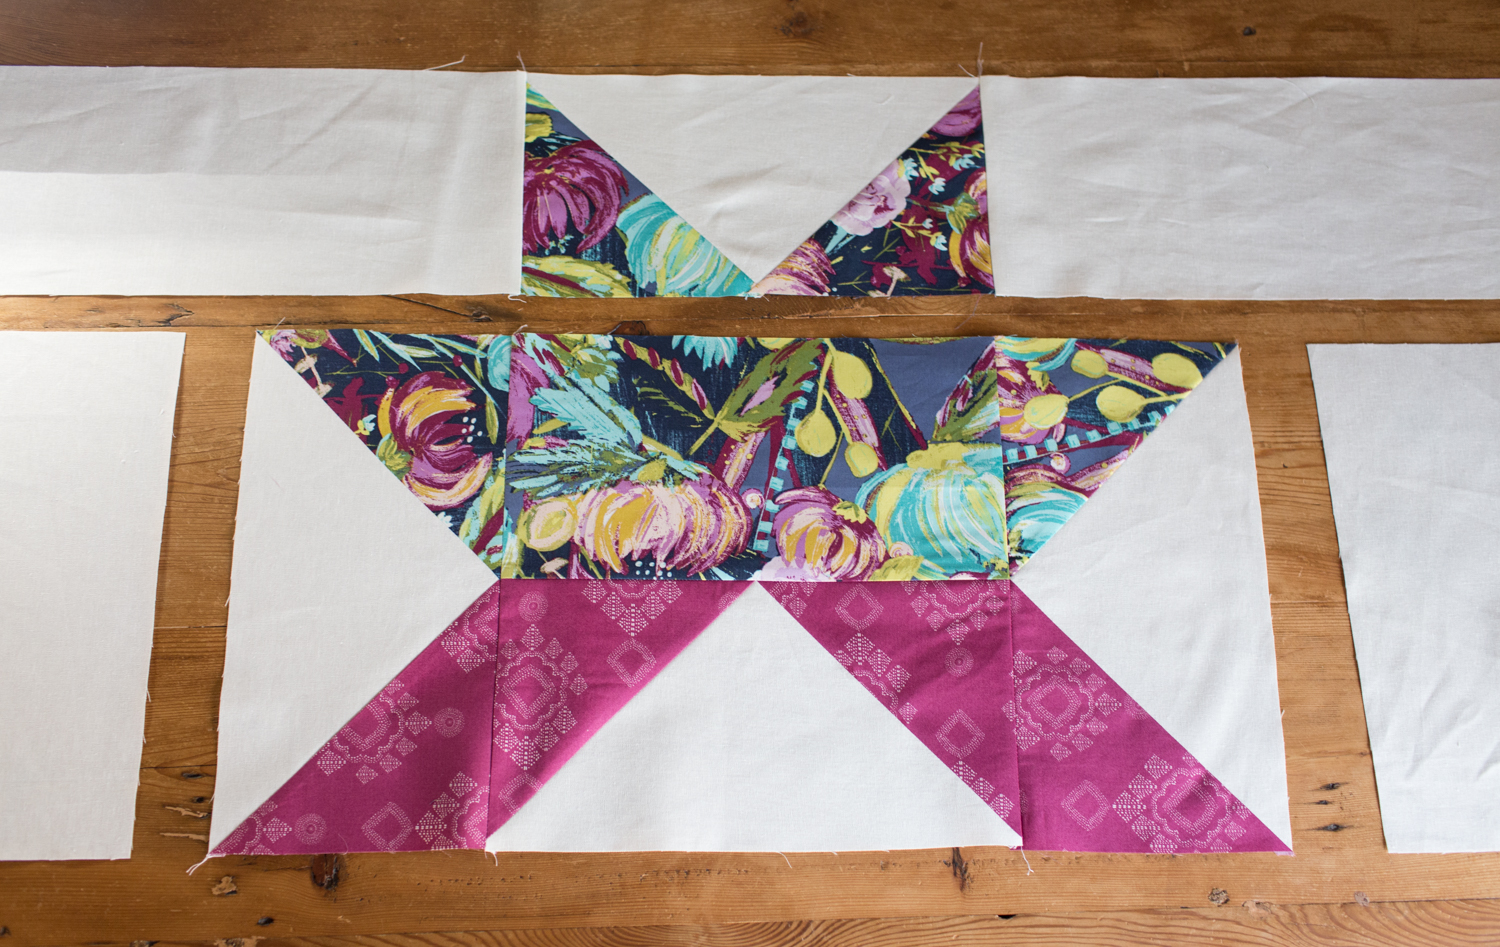
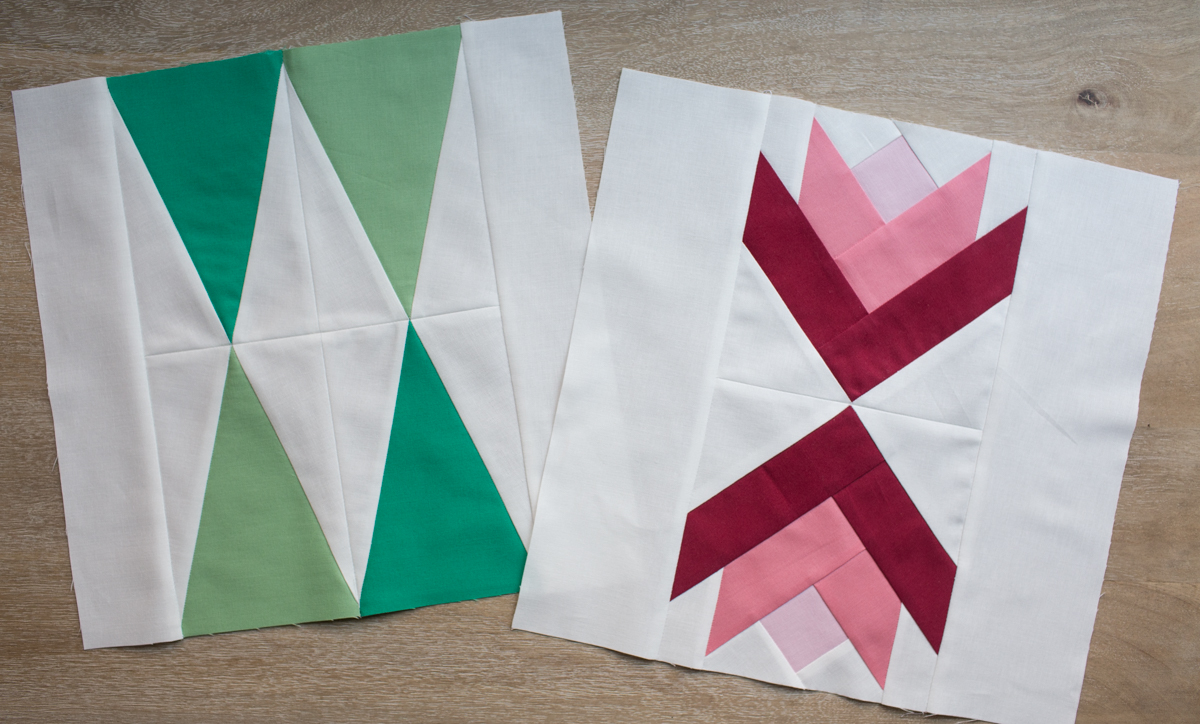
Step 1: Select (1) Painted Desert Night/Linen Flying Geese unit, (1) Stitched Diamant Verve/Linen Flying Geese unit, (1) Painted Desert Night/Stitched Diamant Verve/Linen Flying Geese unit, (1) Stitched Diamant Verve/Painted Desert Night/Linen Flying Geese unit, (1) 6-1/2″ x 12-1/2″ Painted Desert Night rectangle, and (2) 6-1/2″ x 6-1/2″ Linen squares. Lay them out as shown.
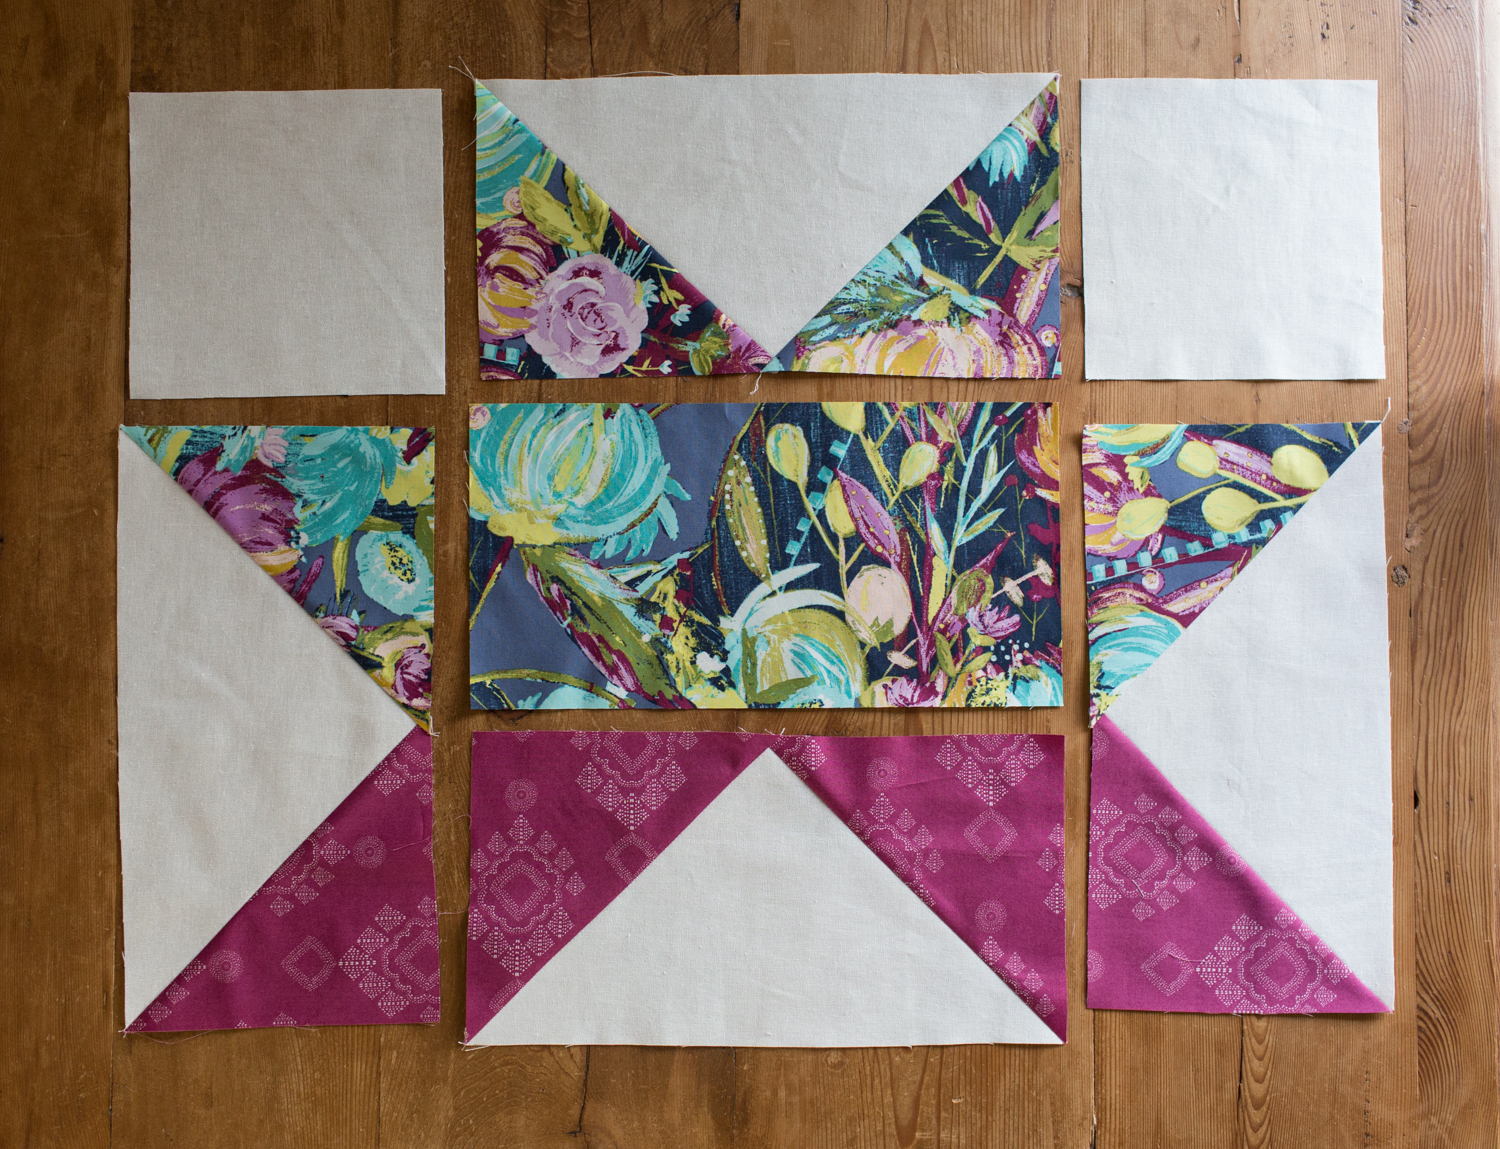
Step 2: Stitch the top row of (2) 6-1/2″ x 6-1/2″ Linen squares and (1) Painted Desert Night/Linen Flying Geese unit together, as shown.
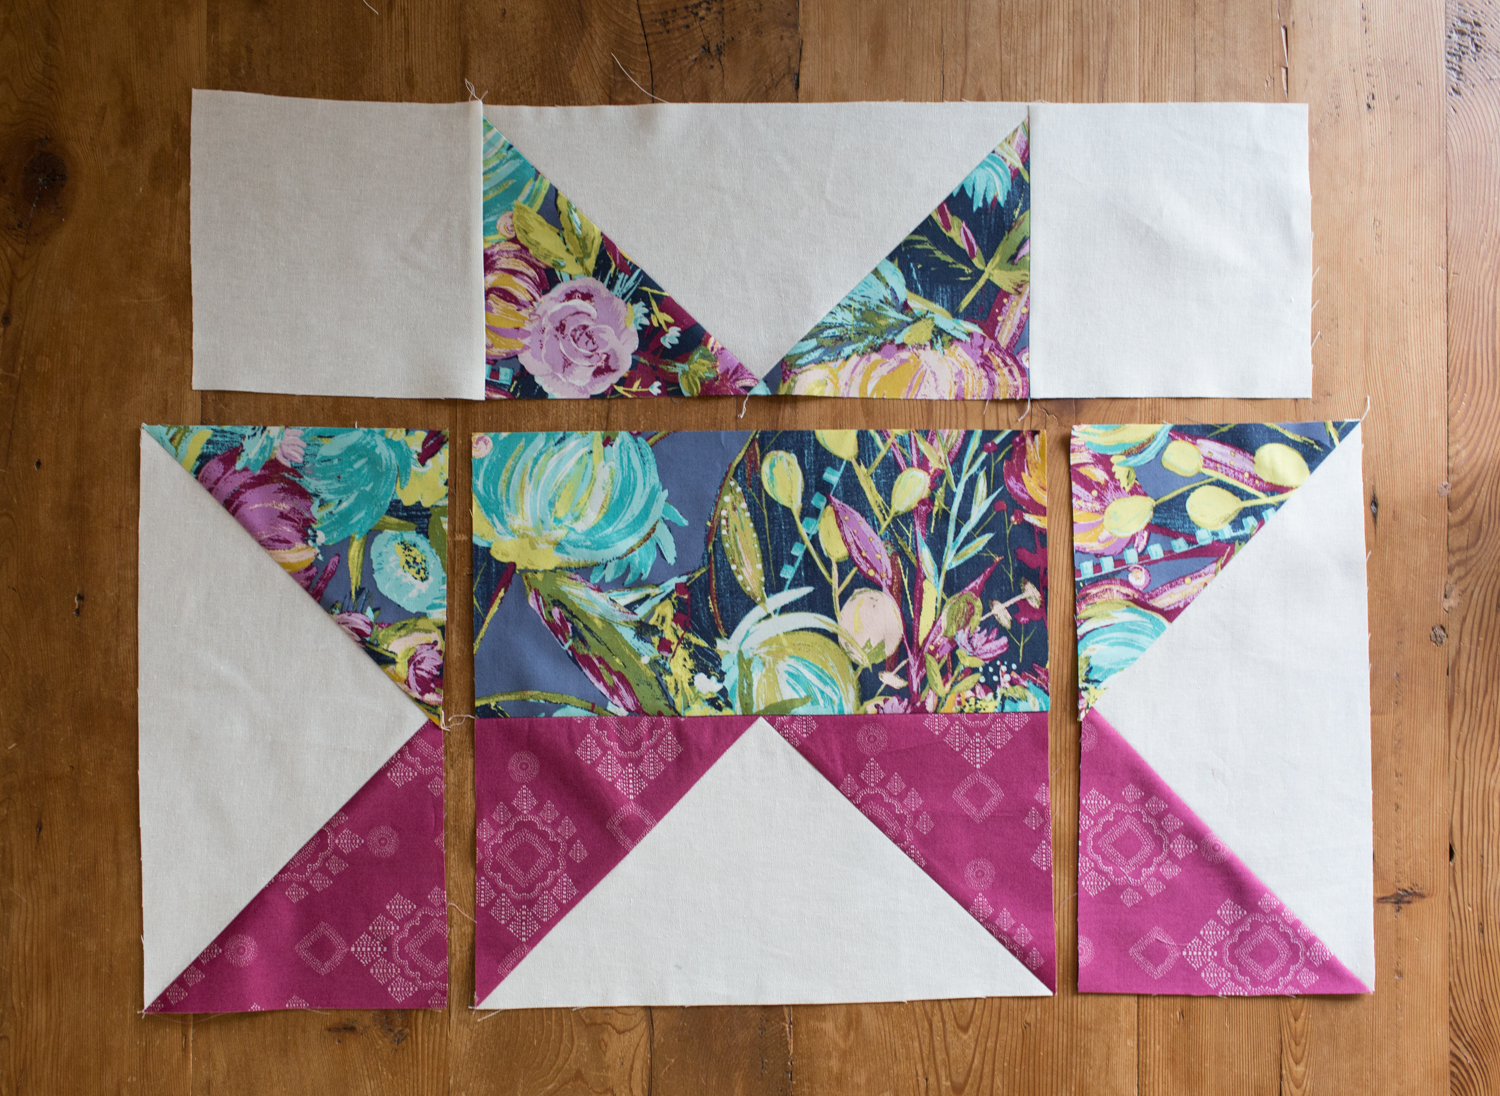
Step 3: Stitch the 6-1/2″ x 12-1/2″ Painted Desert Night rectangle to (1) Stitched Diamant Verve/Linen Flying Geese unit, as shown above.
Step 4: Stitch the remaining (2) flying geese units to the center pieced unit, as shown.
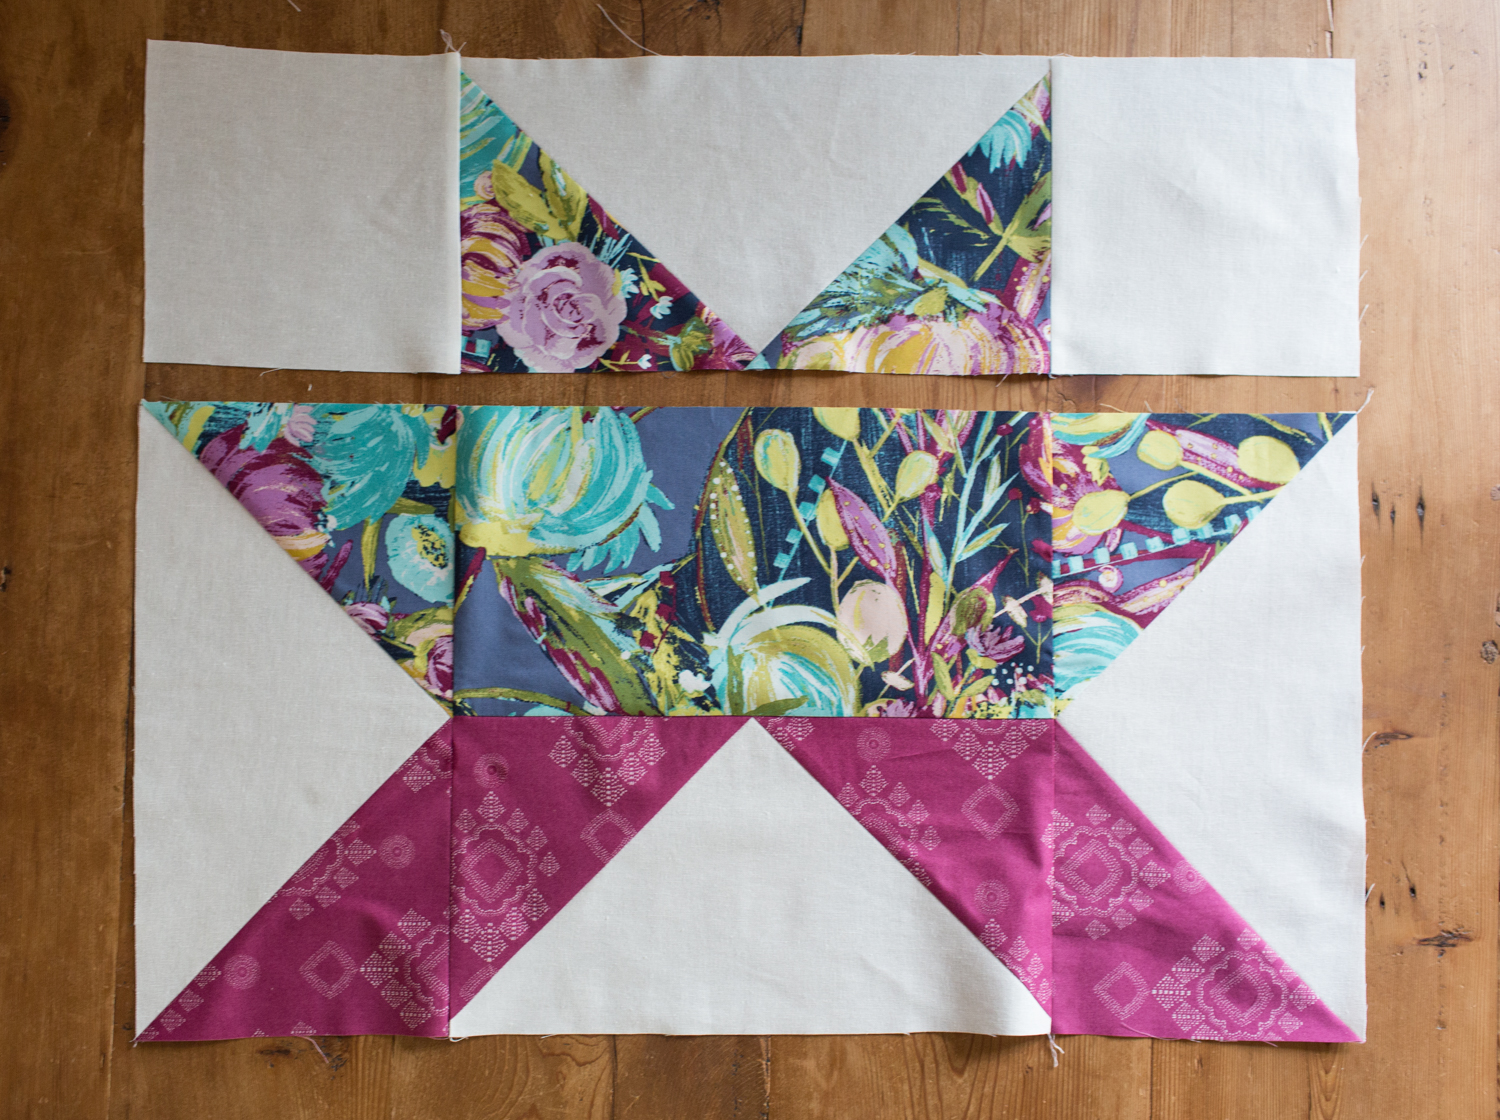
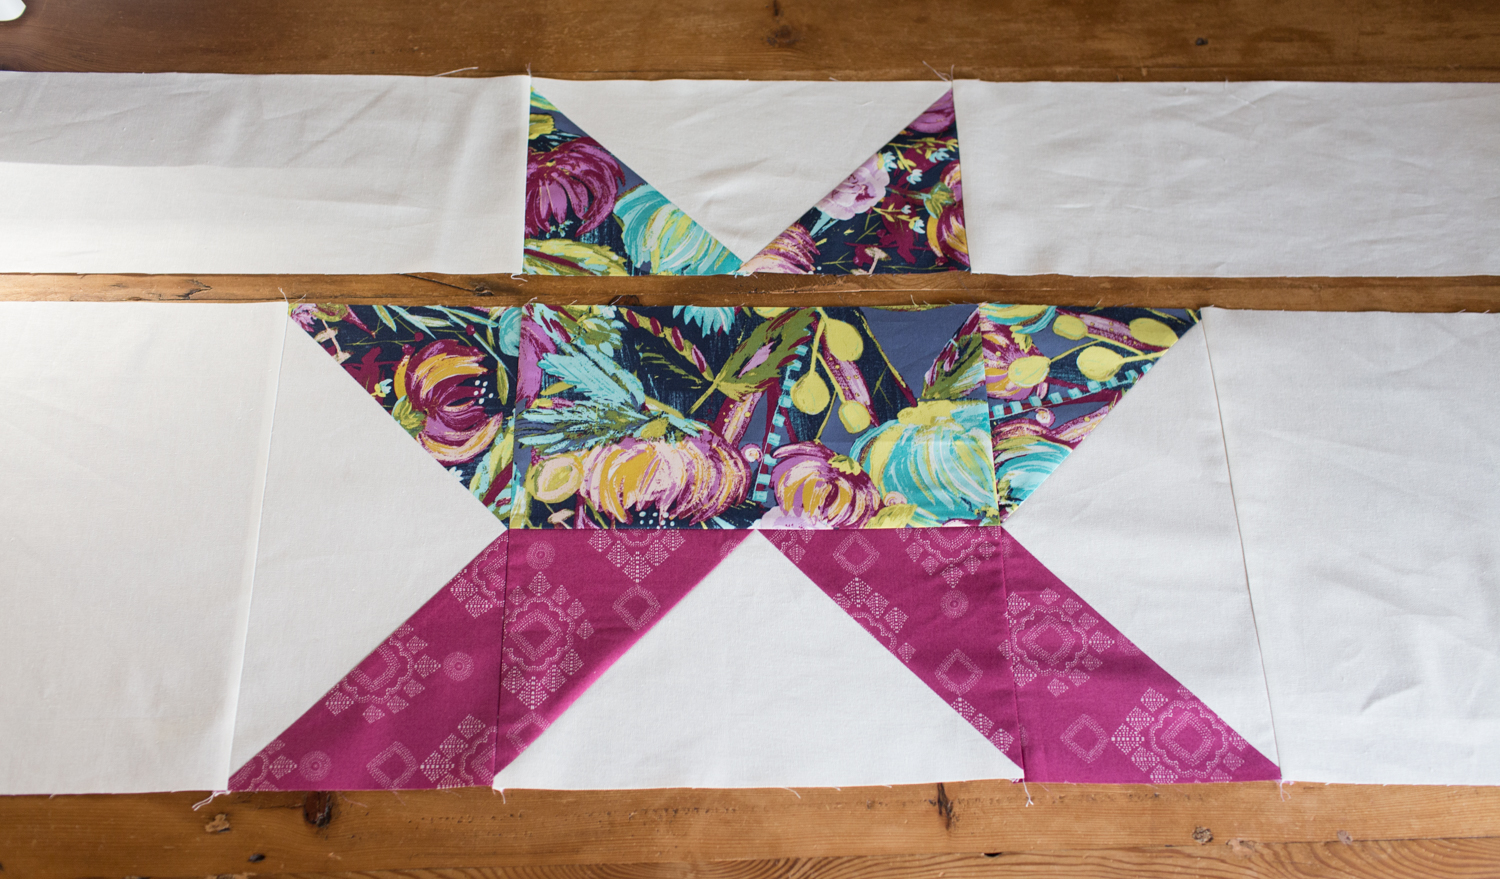
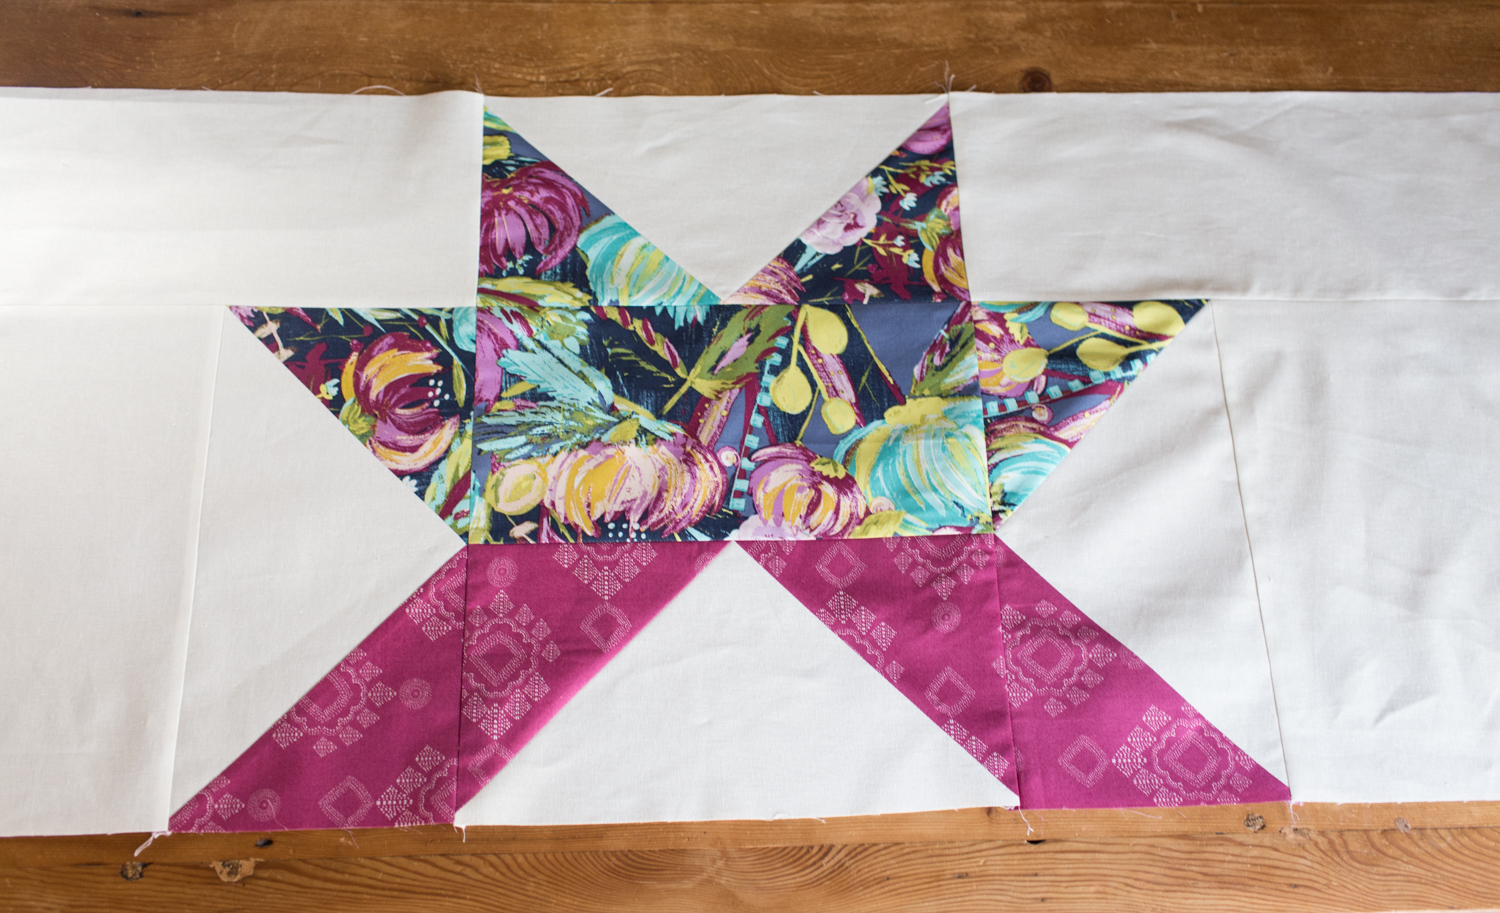
Step 5: Piece the assembled top row to assembled bottom section, as shown, resulting in a 18-1/2″ x 24-1/2″ Border Star.
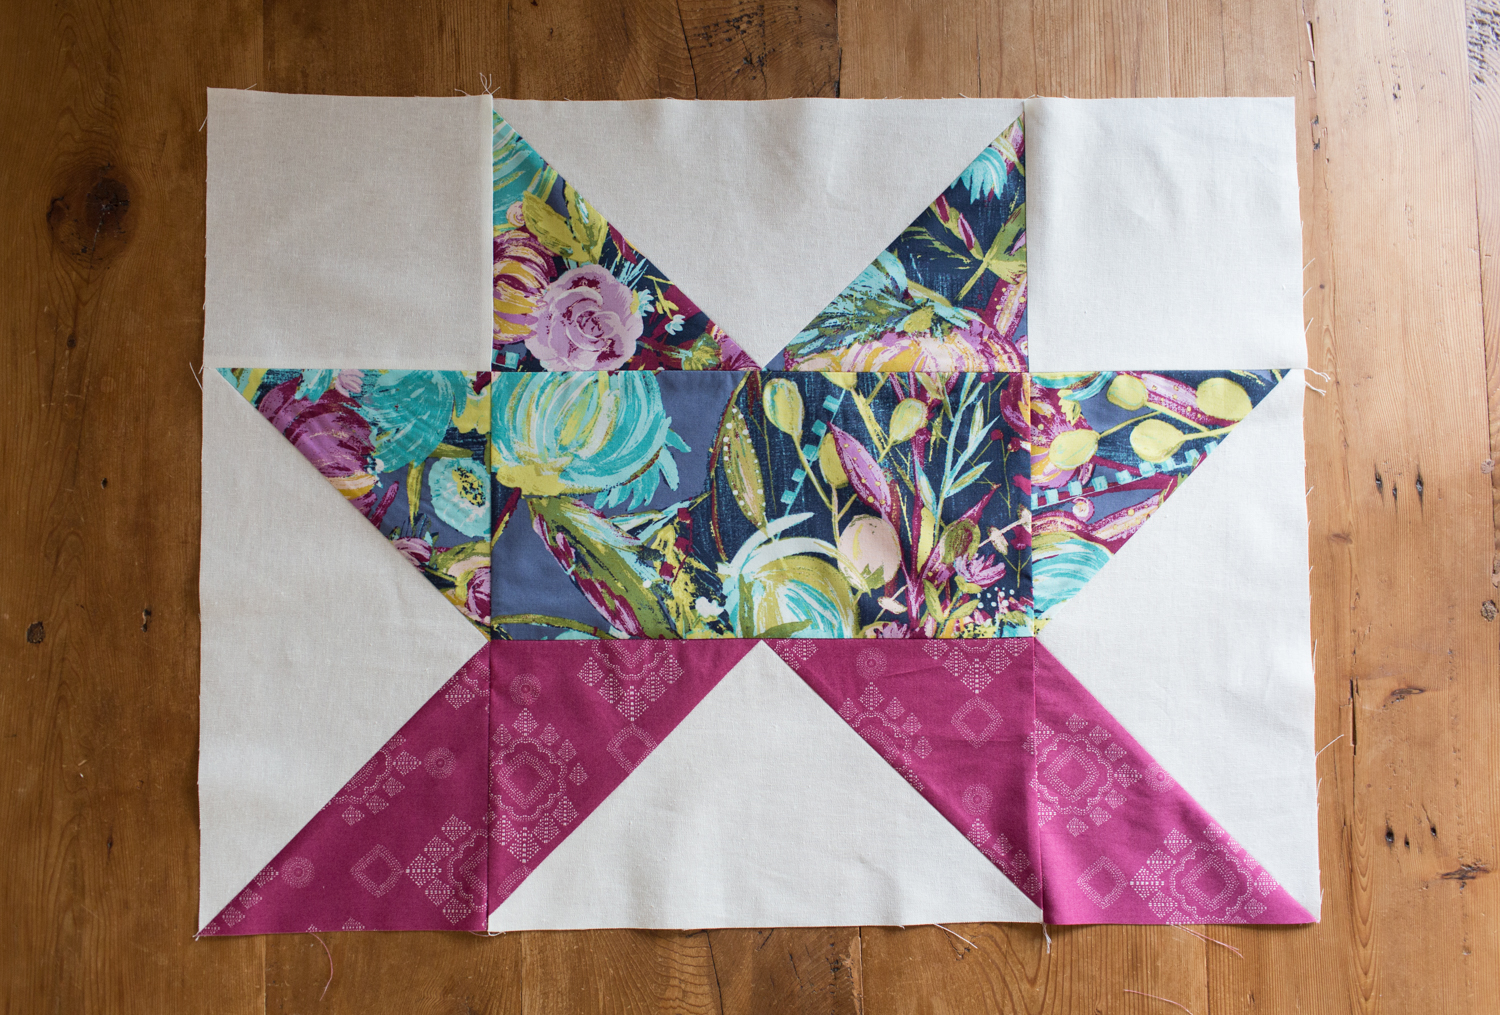
Step 6: Repeat Steps 1-5 to make (1) additional Left and Right Border Star.
Assemble Top and Bottom Border Stars
Step 1: Select (1) Painted Desert Night/Linen Flying Geese unit, (1) Stitched Diamant Verve/Linen Flying Geese unit, (1) Painted Desert Night/Stitched Diamant Verve/Linen Flying Geese unit, (1) Stitched Diamant Verve/Painted Desert Night/Linen Flying Geese unit, (1) 6-1/2″ x 12-1/2″ Painted Desert Night rectangle, and (2) 6-1/2″ x 24-1/2″ Linen rectangles, and (2) 12-1/2″ x 18-1/2″ Linen rectangles. Lay them out as shown.

Step 2: Stitch the top row of (2) 6-1/2″ x 24-1/2″ Linen rectangles and (1) Painted Desert Night/Linen Flying Geese unit together, as shown.
Step 3. Stitch the 6-1/2″ x 12-1/2″ Painted Desert Night rectangle to (1) Stitched Diamant Verve/Linen Flying Geese unit, as shown.

Step 4: Stitch the remaining (2) flying geese units to the center pieced unit, as shown.
Step 5: Stitch the (2) 12-1/2″ x 18-1/2″ Linen rectangles to the unit, as shown.
Step 6. Sew the (2) large rectangular units together, as shown, resulting in a 18-1/2″ x 60-1/2″ Border Star.
Step 7: Repeat Steps 1-6 to make (1) additional Top and Bottom Border Star.
Block Assembly
Step 1: Lay out Center Star unit, (2) Top and Bottom Border Stars and (2) Left and Right Border Stars as shown.
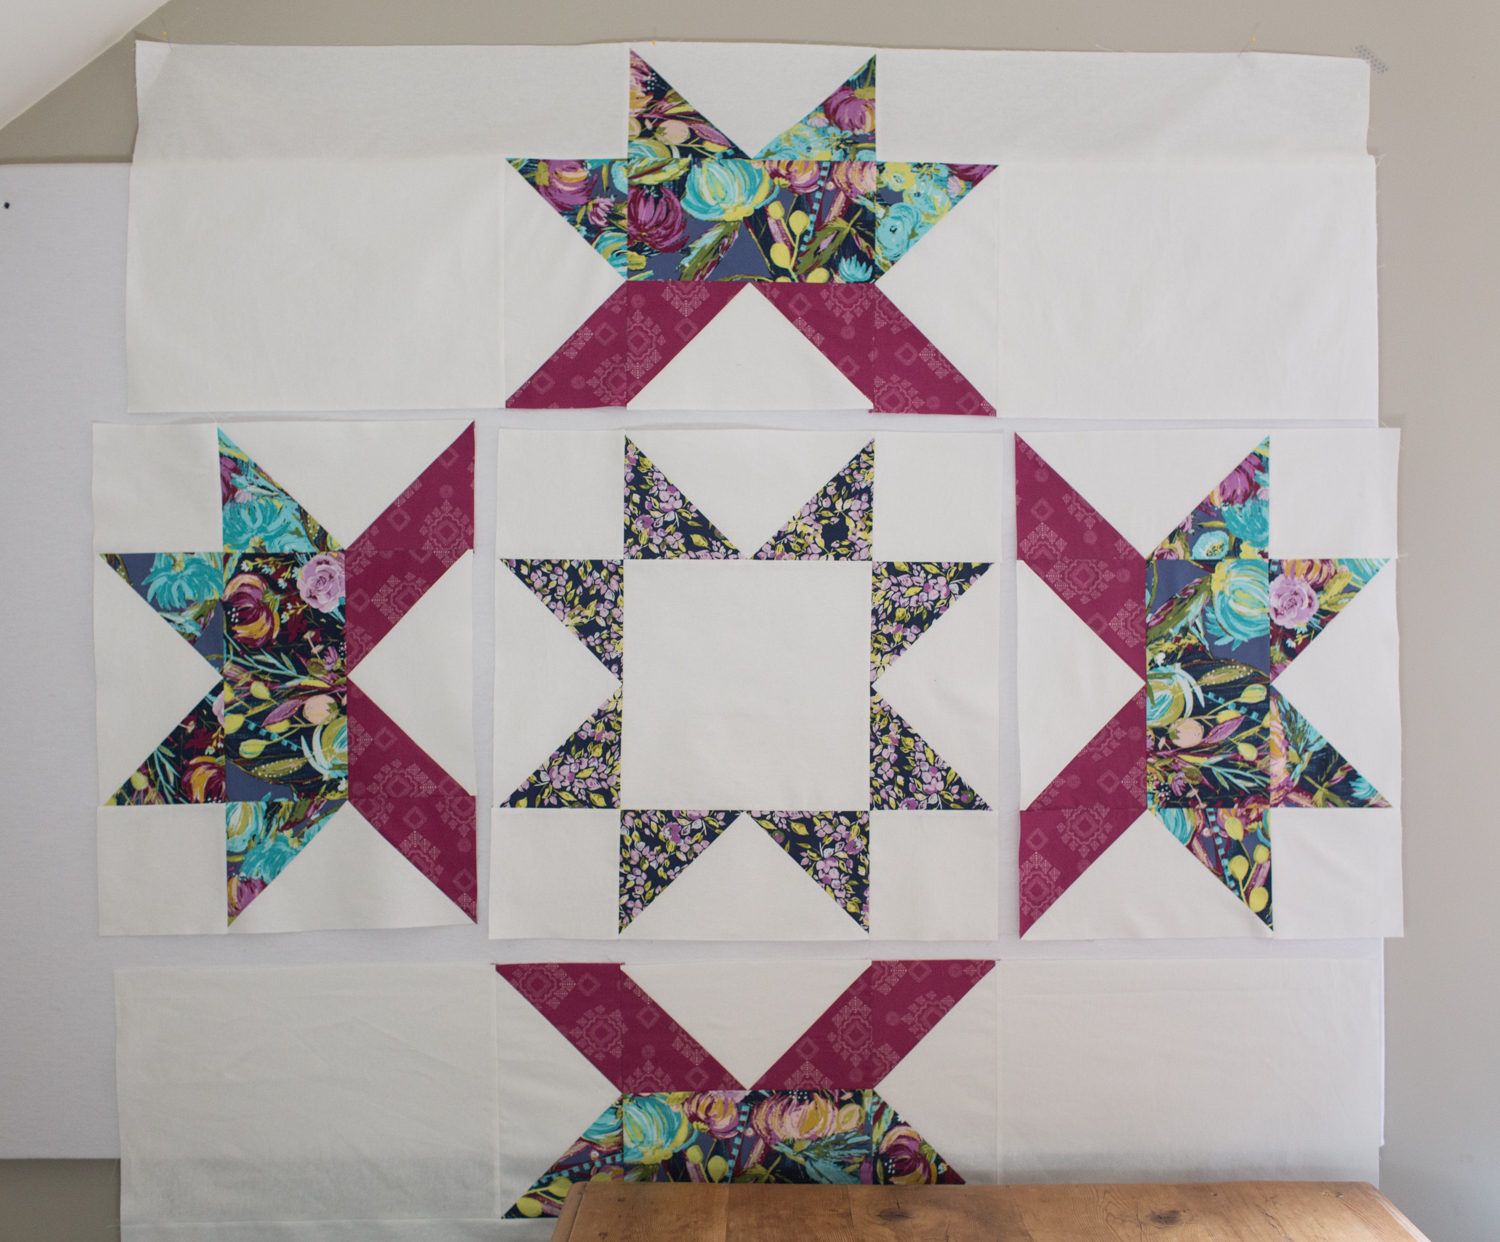
Step 2: Stitch your Left and Right Border Stars to your Center Star unit. Press your seams.
Step 3: Stitch your rows together.
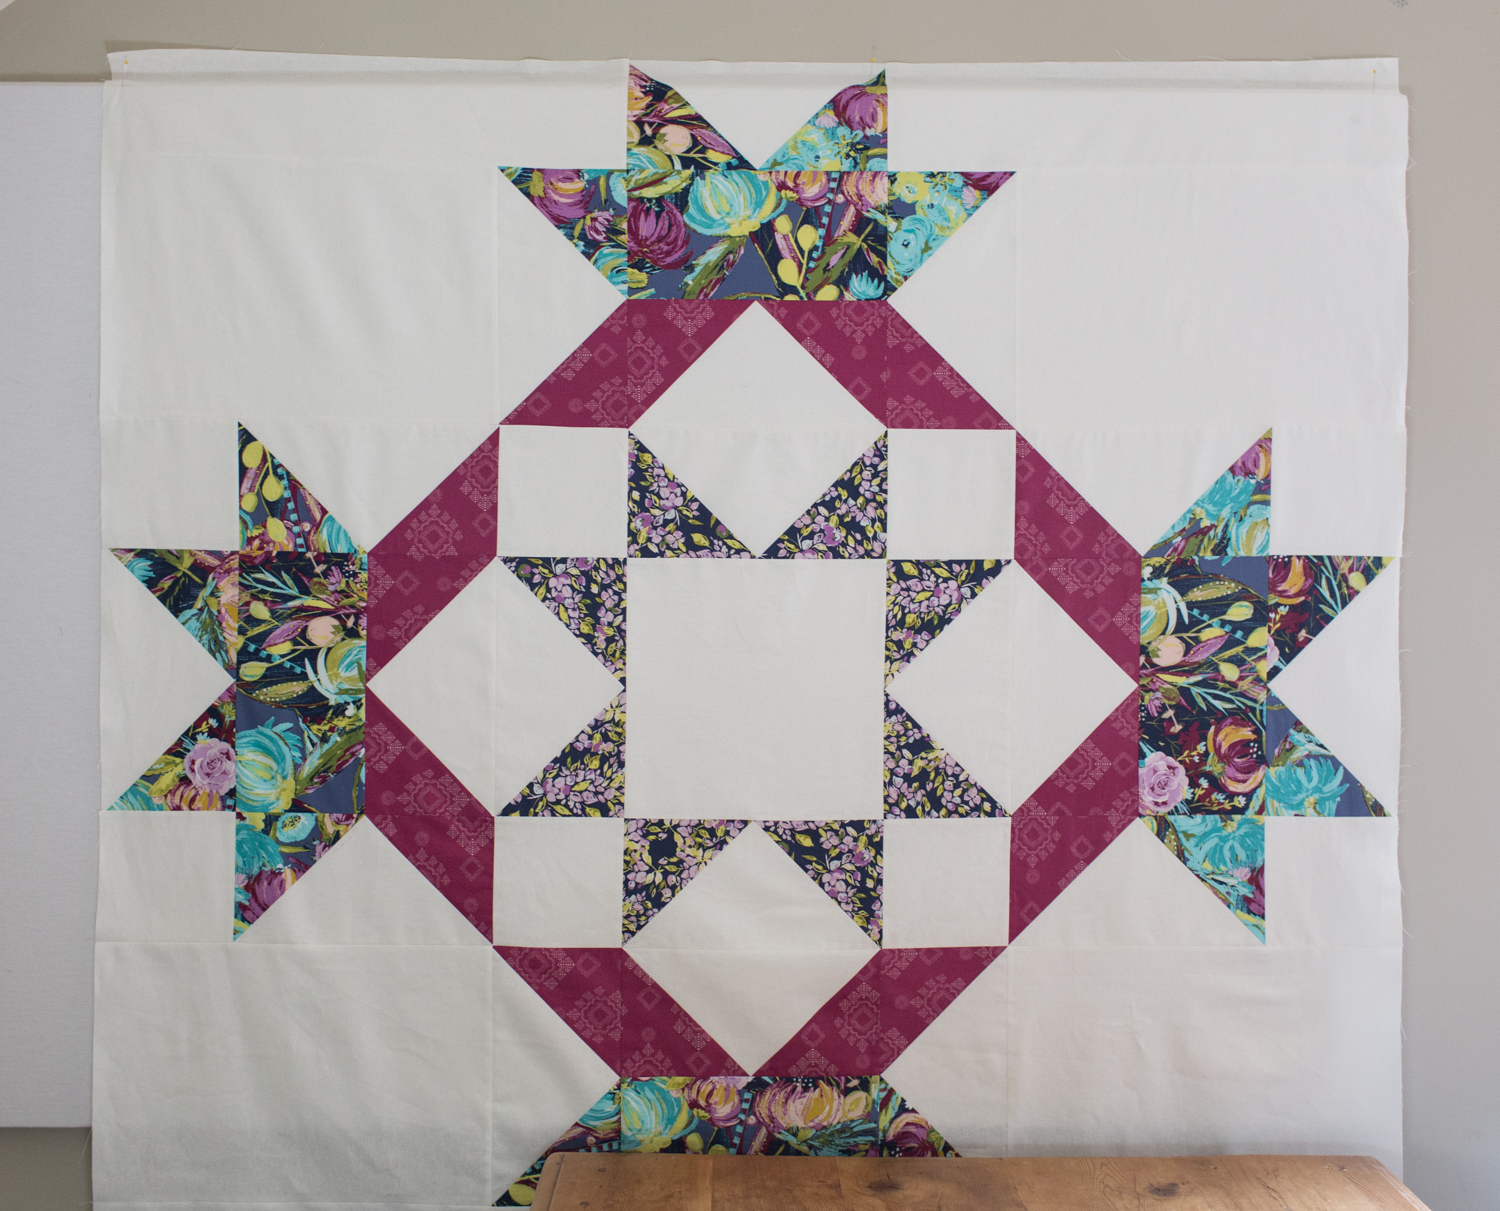
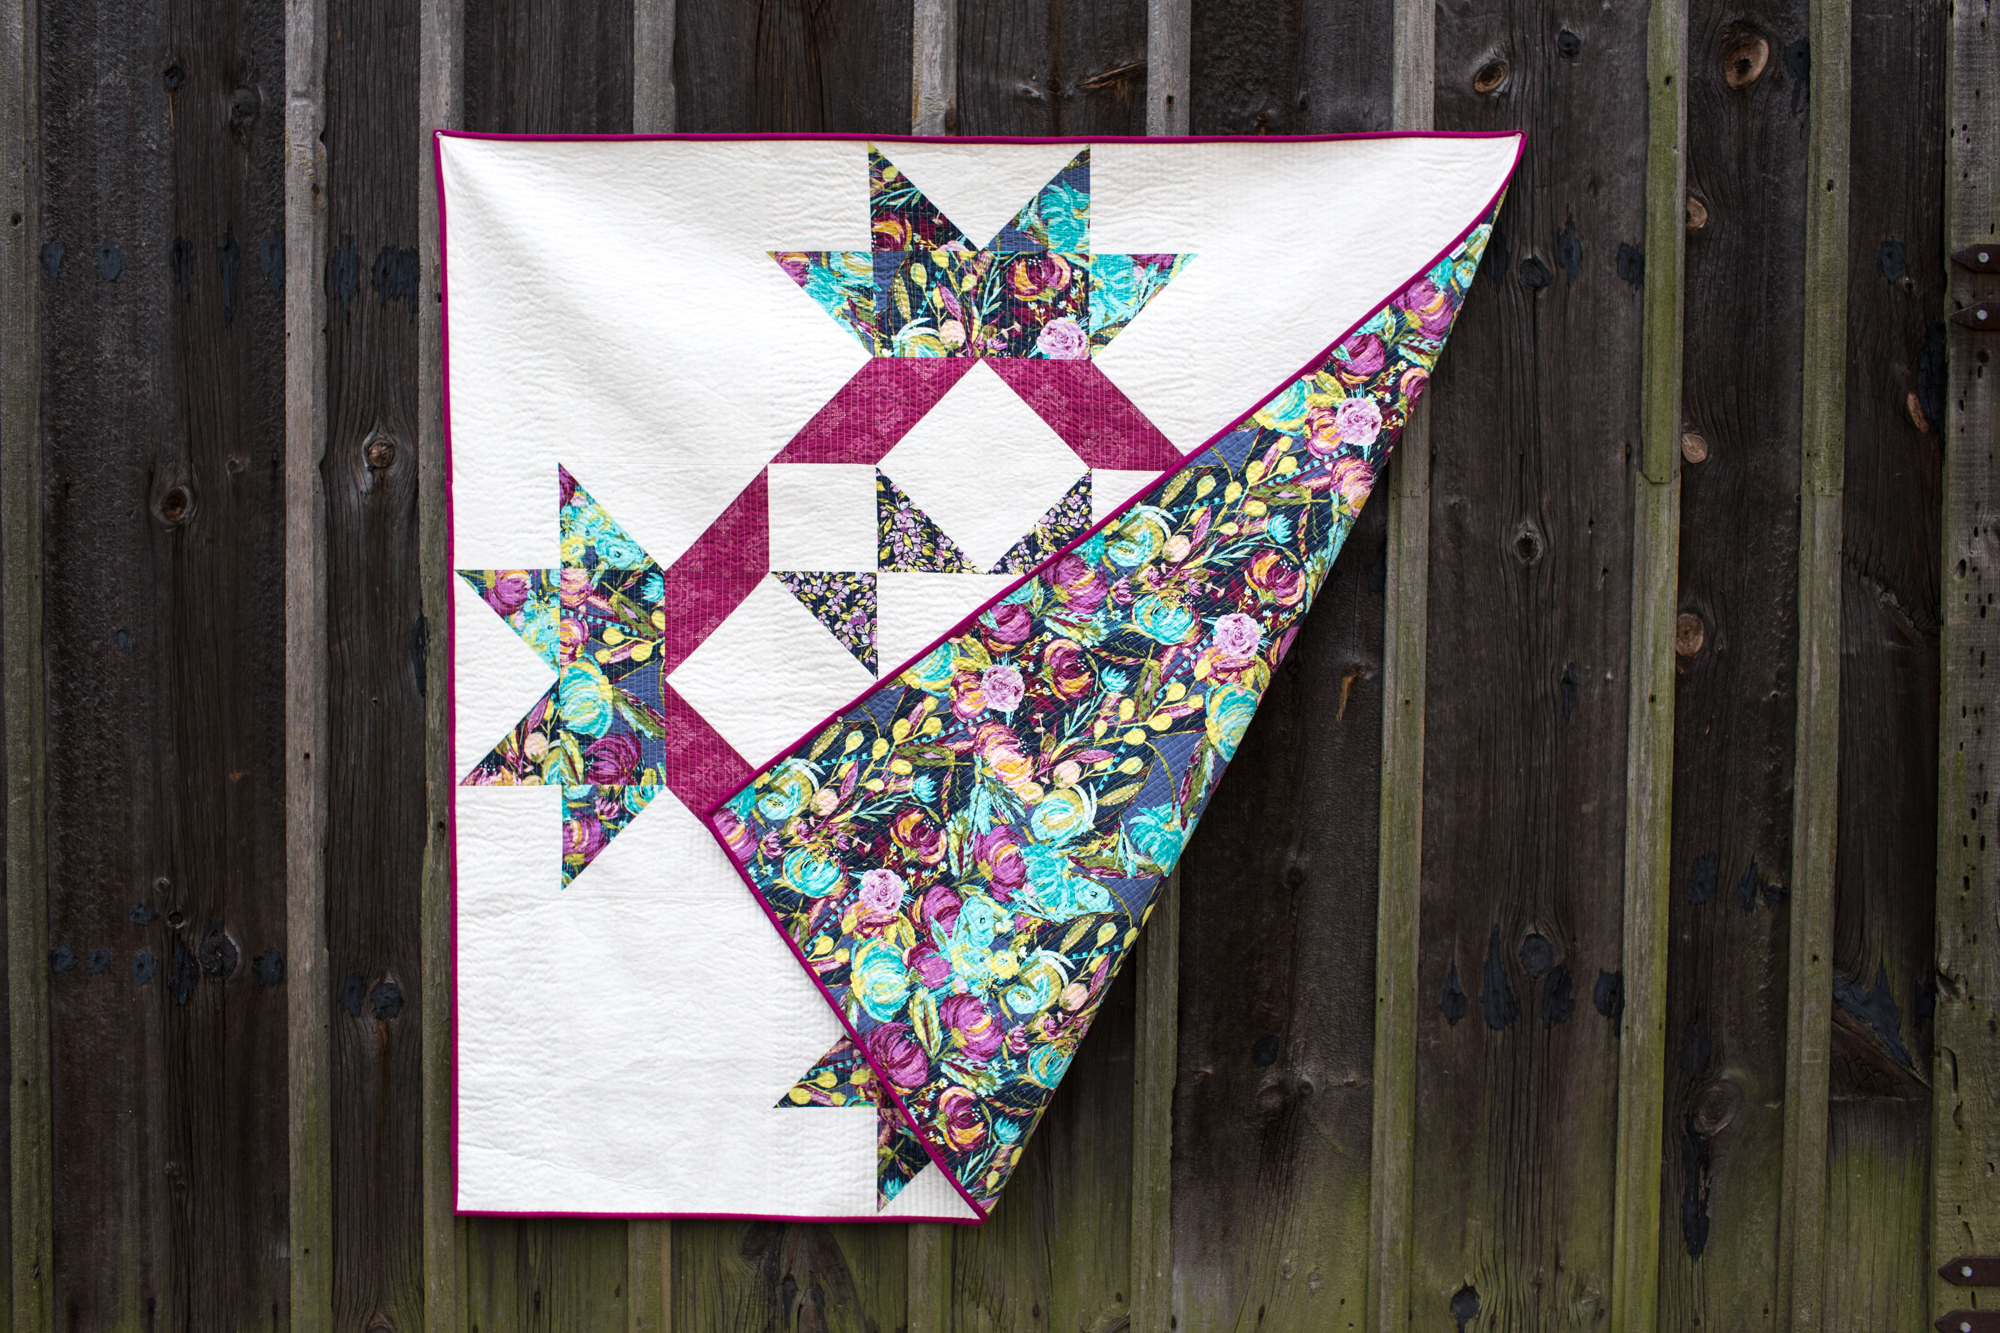
Congratulations! Your quilt top is now finished!
How to Quilt the Radiant Splendor Supersized Quilt
Create Your Quilt Backing
Step 1: Create your backing. Cut the (3-1/2) yards of backing fabric in half, resulting in (2) pieces, 42″ x 63″. Sew together along the long side of the fabric, resulting in a backing that measures 63″ x 84″. Trim to 63″ x 63″.
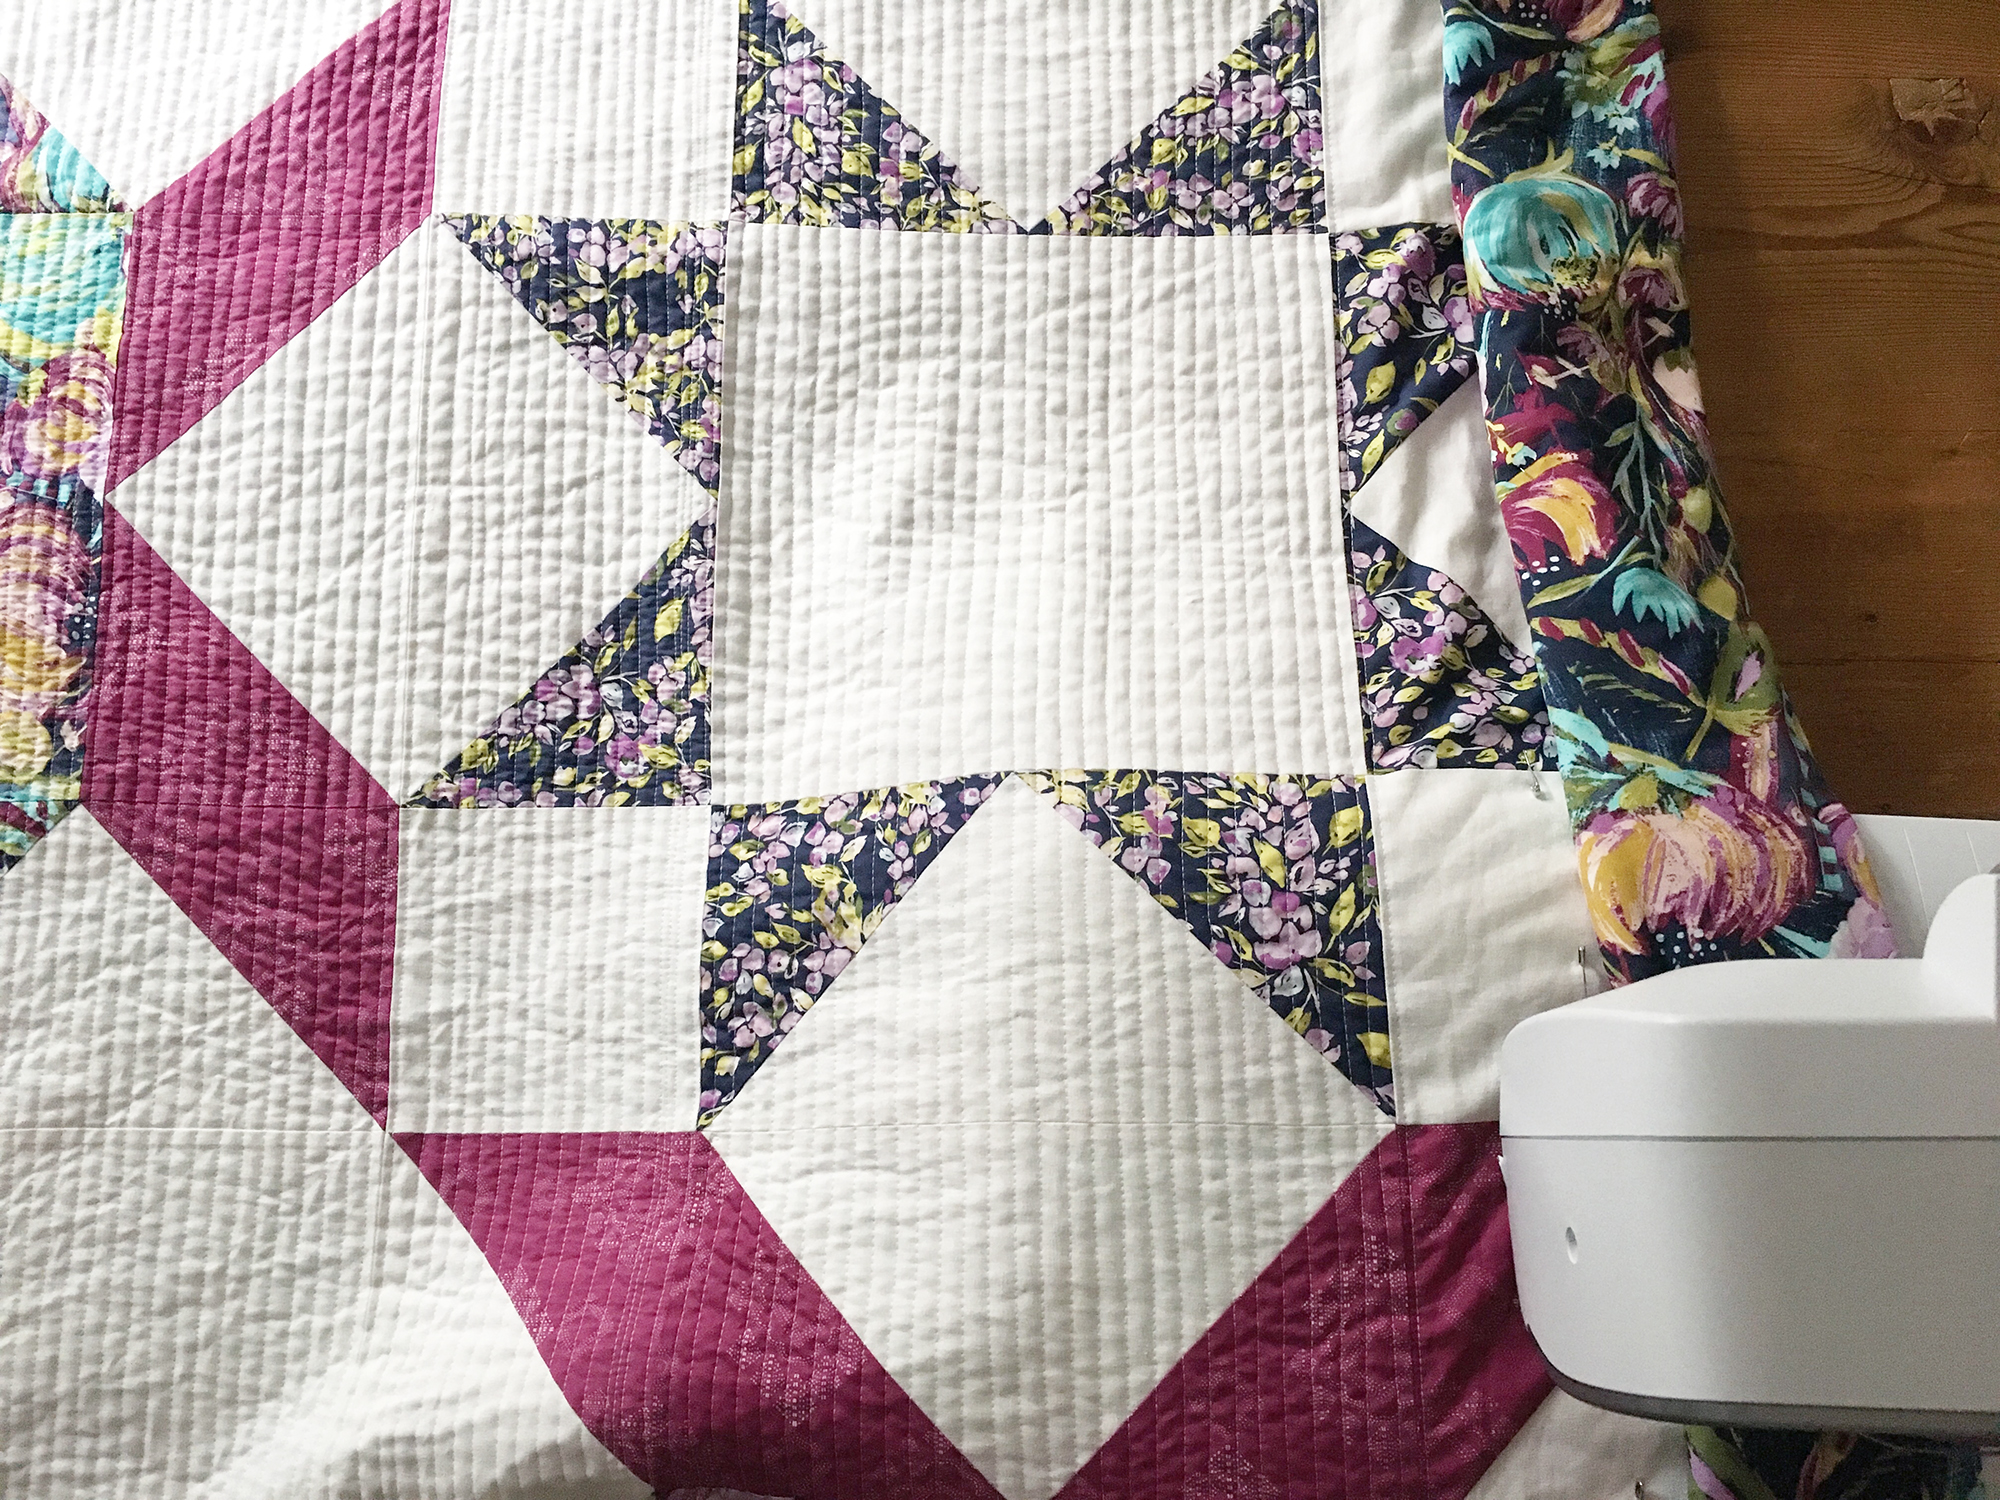
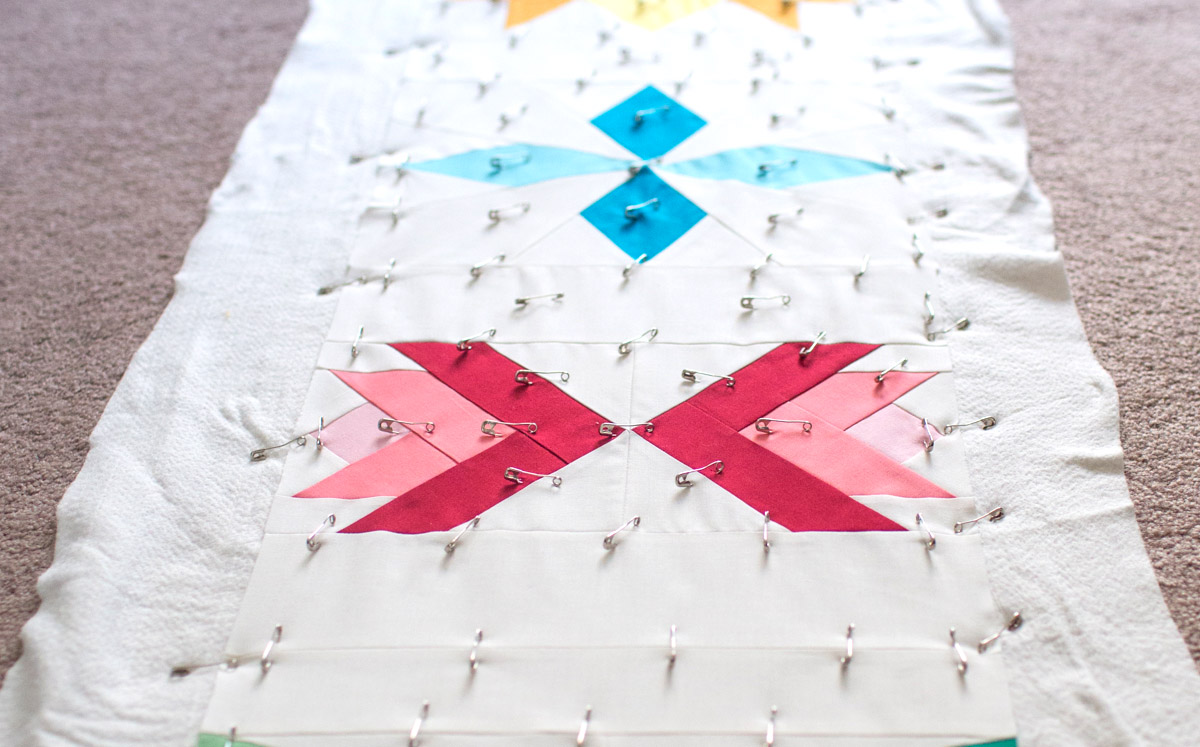
Step 2: Baste the quilt using your preferred method. If you have never basted a quilt before, be sure to check out my tutorial!
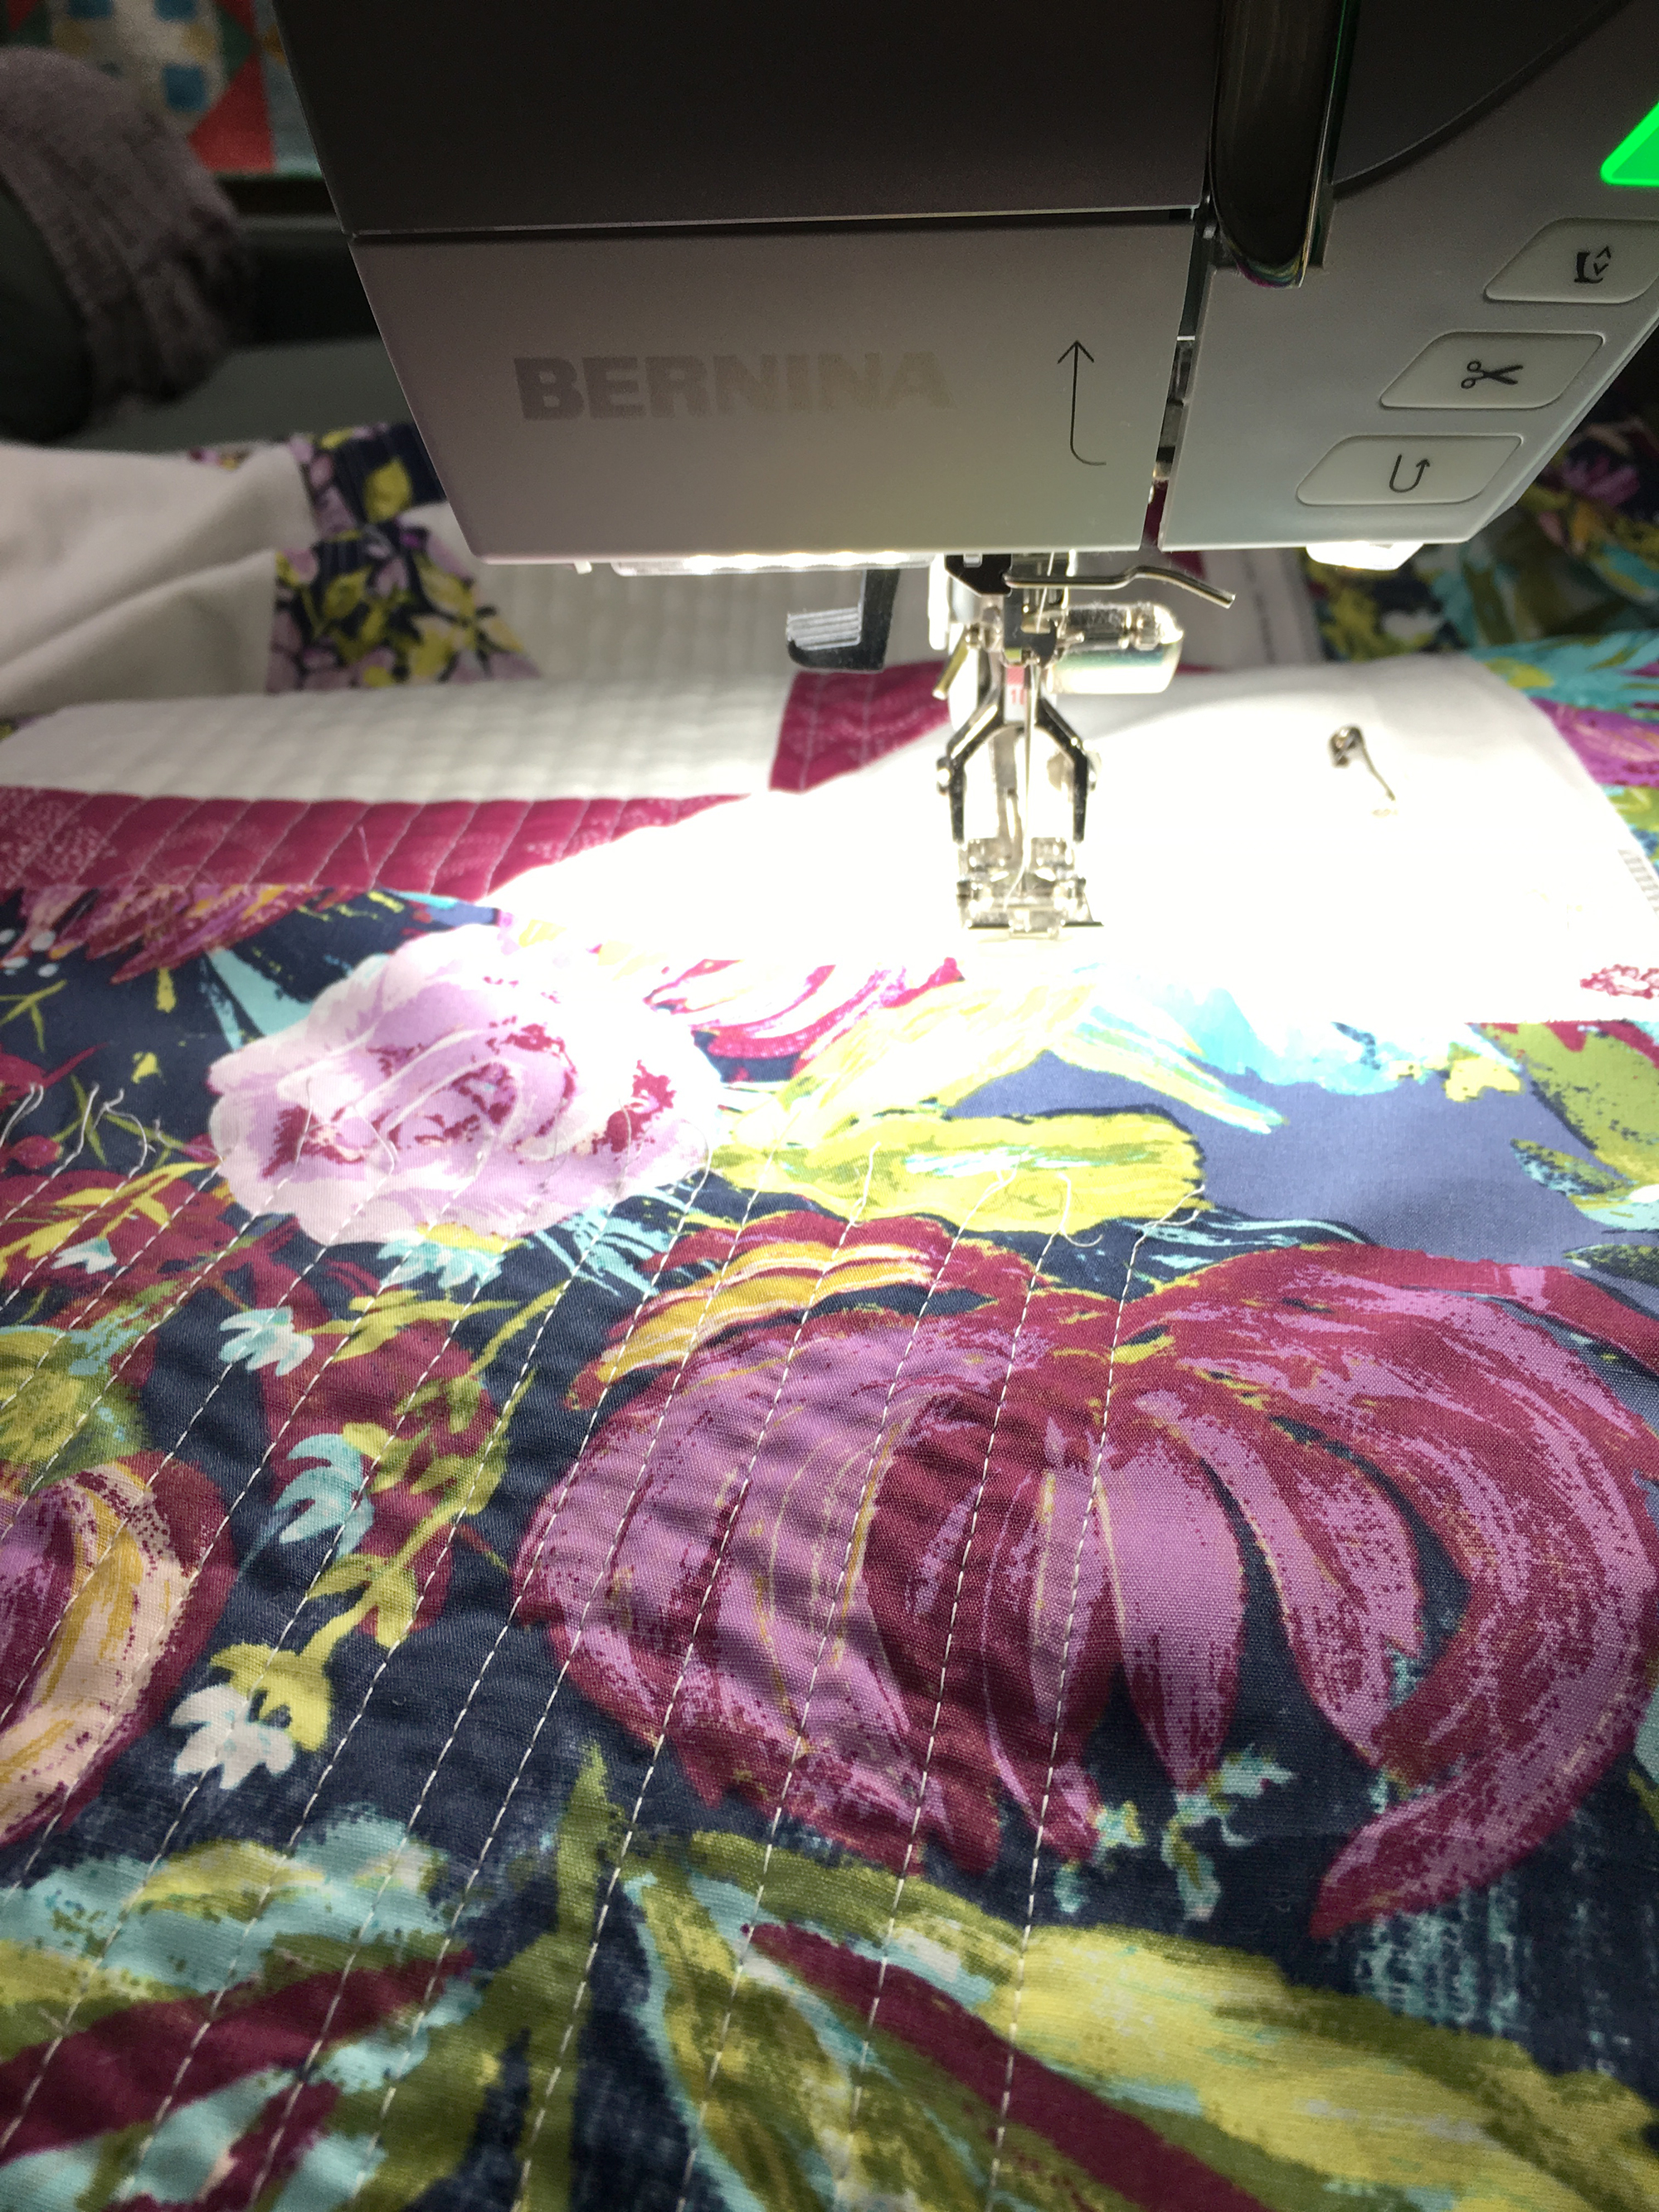
Step 3: Quilt your quilt. I quilted my quilt using straight lines about 1/2″ apart, and Reverse pattern foot #1D with my Dual Feed engaged on my BERNINA 770QE sewing machine. I increased my stitch length to 3.50 and decreased my pressure foot setting to 14, to allow the quilt layers to easily move as I was quilting.
TIP: Fill several bobbins before starting your quilting.
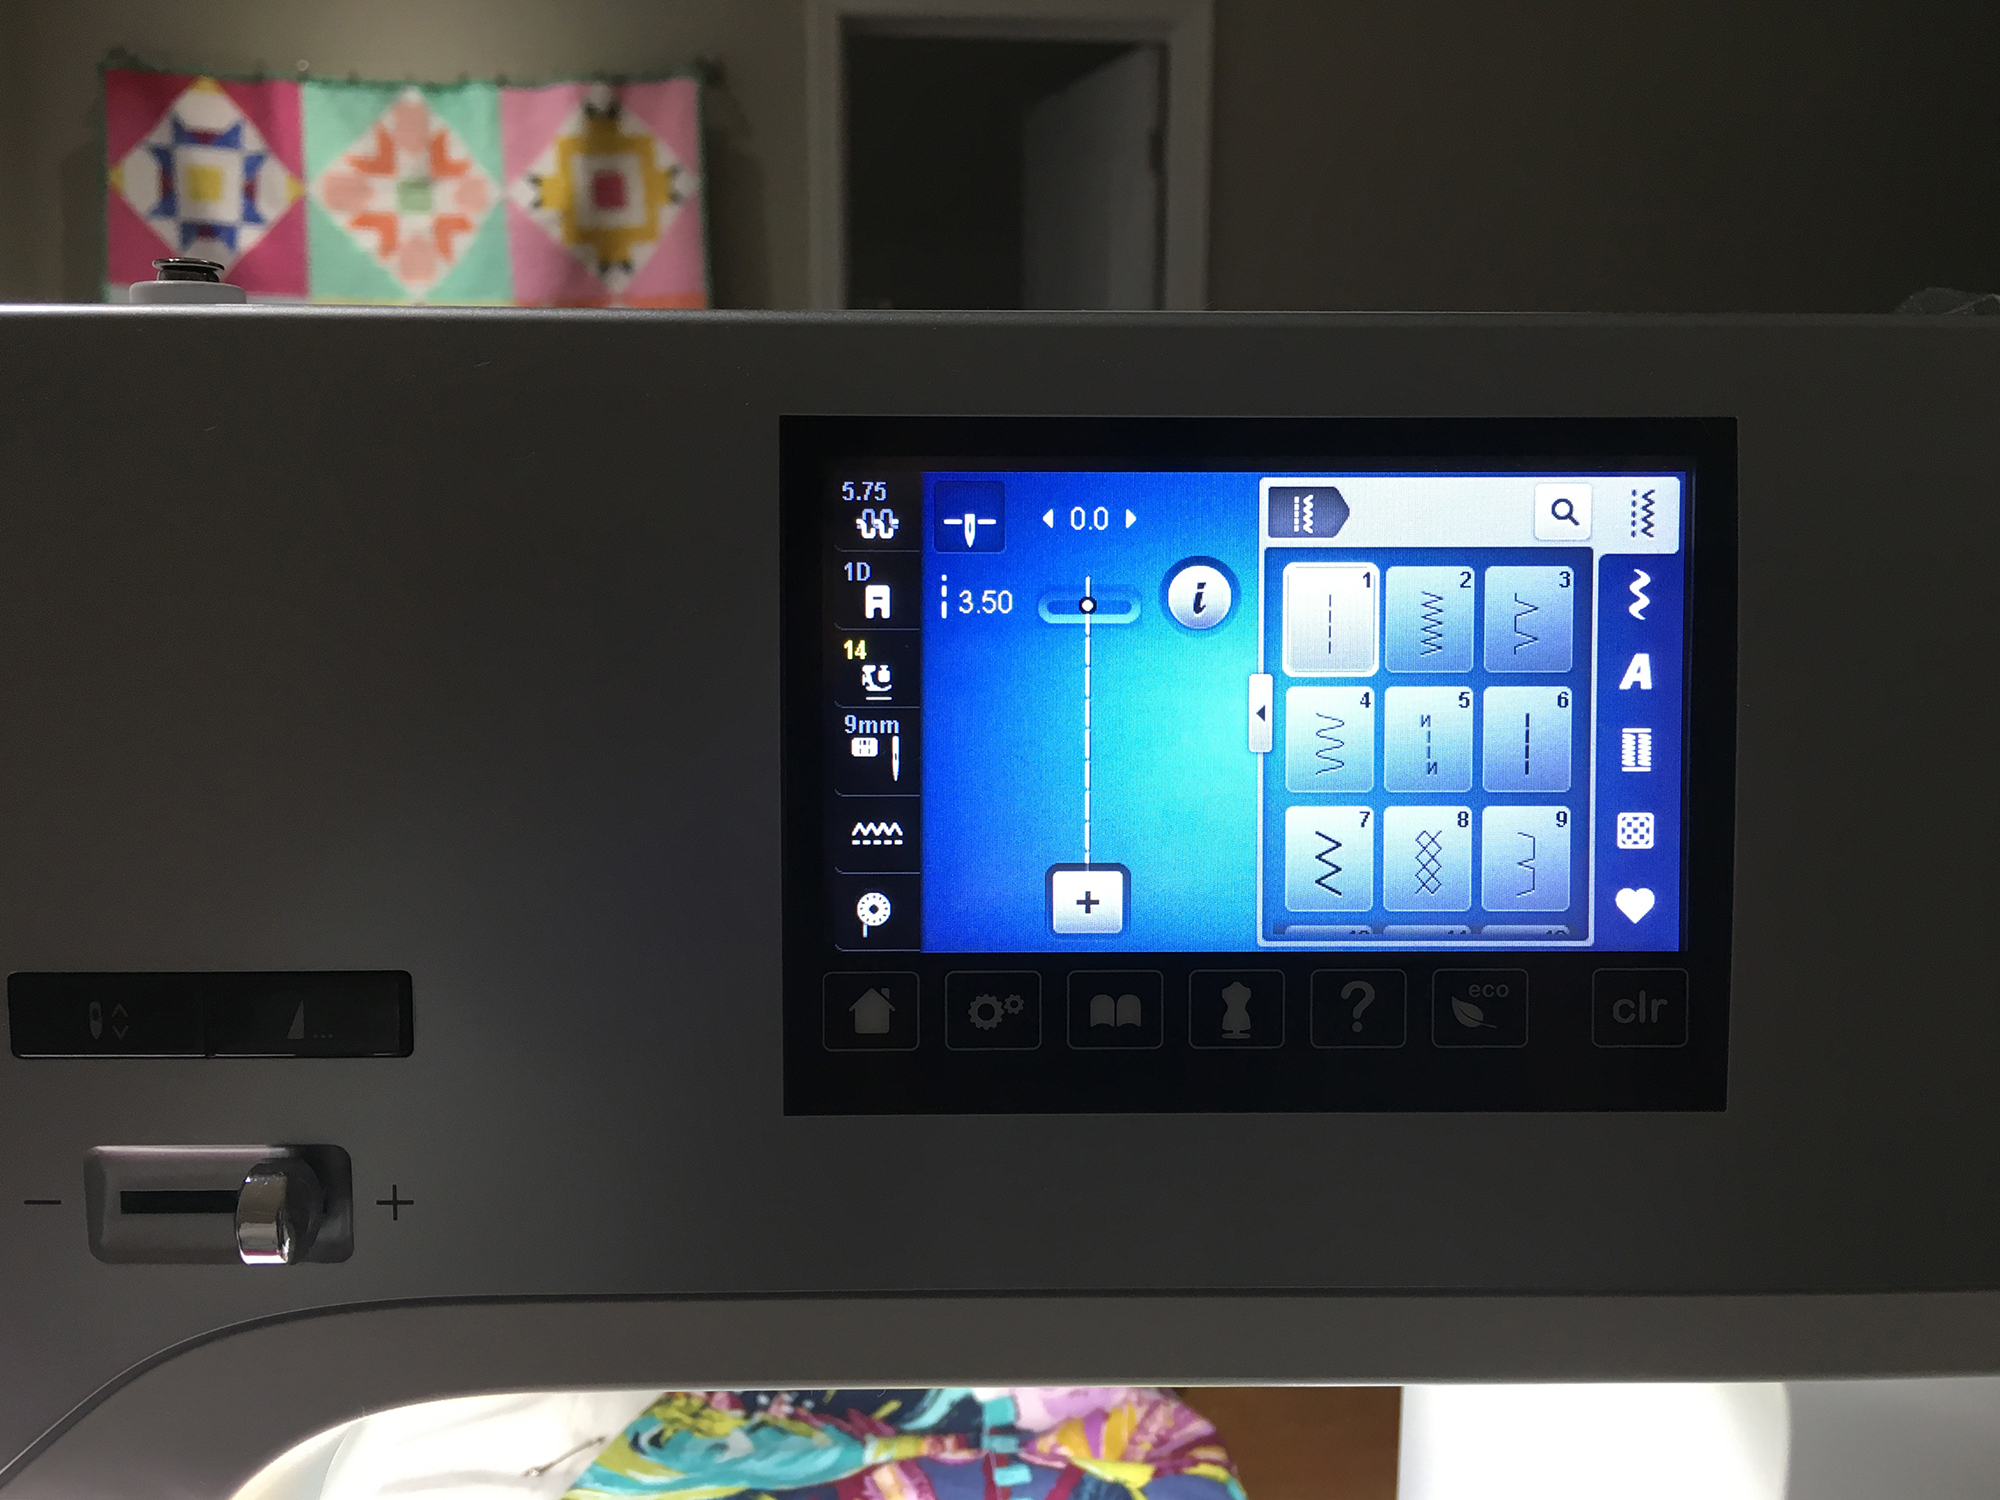
I love the perfect tension that my BERNINA 770 QE provides!
Step 4: Cut (6) strips of fabric for your binding, 2-1/4″ x 42″ (width of fabric). Create your binding and bind the quilt. If you have never made binding before, check out my tutorial! For this quilt, I sewed on my binding using a 1/4″ seam allowance, so I would not lose my star points.
Enjoy your Radiant Splendor Supersized Quilt!
Used Products


What you might also like


One comment on “Radiant Splendor Supersized Quilt-along: Week 3”
Leave a Reply
You must be logged in to post a comment.

Finished this quilt as a veterans, red/white/blue, for our Air Force veteran Son. How can I upload a picture for you?