Crazy for Hexagons: A CutWork Shortcut Grandmother’s Flower Garden
By popular demand, Mary Beck’s instructions for her Grandmother’s Flower Garden block – stitched entirely on her embroidery machine. If you’re in Tucson this winter, check out her class at The Sewing Room. Jo
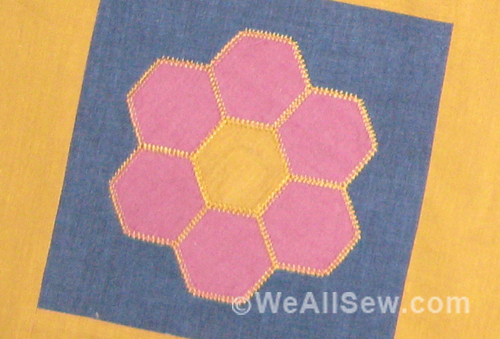
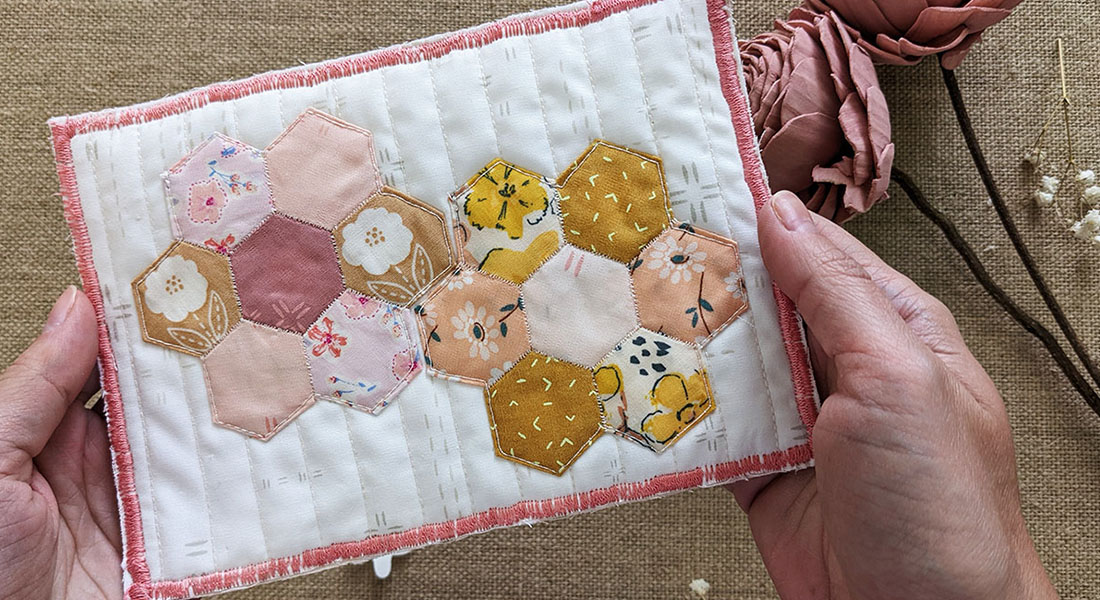
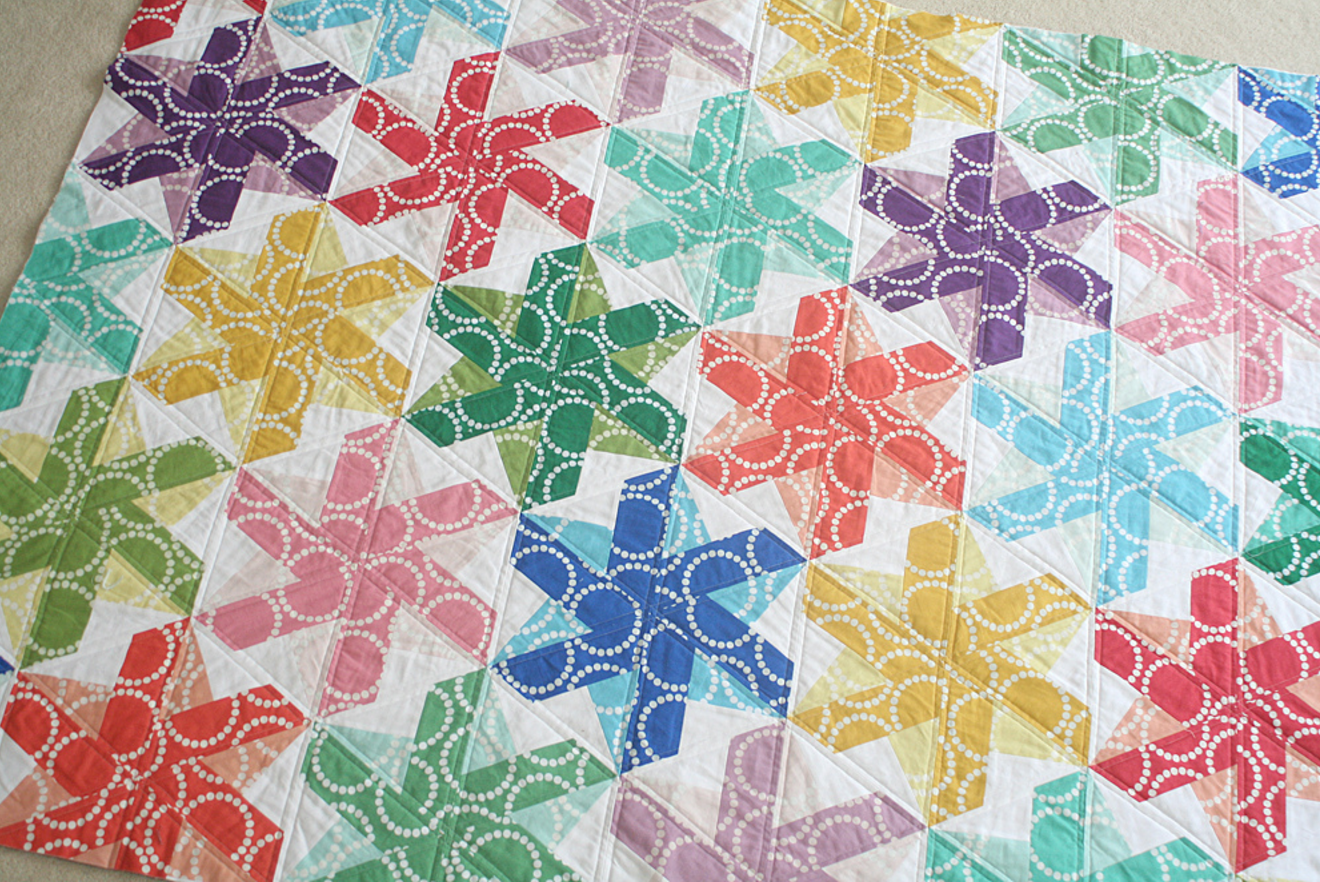
Here’s how I created the machine-applique design for my machine-cut and -appliqued Grandmother’s Flower Garden quilt in BERNINA DesignWorks Software. The applique pieces are cut using the BERNINA CutWork Tool, then embroidered in place by machine. Looks like a pieced block, but stitched in a fraction of the time!

CRAZY FOR HEXAGONS
Open a New Design
• If you have just opened the CutWork software, click on Next in the wizard. Otherwise, select File > New.
• In the Fabric dialog box, click Next.
• In Artwork Source select New Graphic.
• From the Hoop drop down selection, choose BERNINA Large Oval 255 X 145, #44C. Click Finish.
Create a Hexagon
• Select Create Polygon. If the polygon shape is not showing click on the black triangle in the lower right corner and choose the polygon from the fly out menu.
![]()
• In Tool Options, enter “6” for number of sides and 90 for start angle. This orients the hexagon with a point at the top.

• Hold CTRL + SHFT with one hand and left click and drag on the design screen to create a hexagon shape.
• Press the space bar to select the hexagon.
• Deselect Proportional in Tool Options.
• Change width to 38.87 mm and height to 44.87 mm.
• Rotate 90 degrees.
• Enter “0” for X axis and “45” for Y axis.

• Click on None in the Fill Tab of Object Properties.

• Save as “Hexagon Shape”.
Create a Hexagon Array
• Select Create Circular Array.
![]()
• In Tool Options make the following changes:
o Start Angle: 90°
o End Angle: 90°
o Step Angle: 60
o Step Count: 6
o Check Clone Objects and Clockwise.

• Six hexagons should be on your screen.
• Click on the node at the center of the original hexagon (at the top of your screen).
• Hold the Shift key and drag the top hexagon down until all of the hexagons are slightly overlapping. Release the mouse first, then the shift key.
• Click on Apply Circular Array. The size should be about 110 mm wide and 114 mm high (give or take a mm or so).

Weld the Array
• While everything is selected click on Weld Shape in upper tool bar.
![]()

• Save as “Hexagon Array”.
Create the CutWork File
• While everything is selected choose Cutwork in Object Properties.

• Next select Auto Border in the side toolbar.
![]()
• In the dialog box make the following selections:
o To the Outside
o Distance: 1mm
o Type: Running.
o OK

• Right Click and select Break Apart.
• Select center hexagon and delete by pressing the delete key on keyboard. This deletes the running stitch on the inner hexagon.
• Move Layer 2 in Sequence Manager to position 1 by clicking and dragging.

• Save as Hexagon_Cut. Export to machine and cut.
Create the Appliqué File
• Delete Layer 1 in Sequence Manager.
• Save as Hexagon_App.
• Select design.
• Select Fill Tab in Object Properties and choose Appliqué.

• Place a check in Cleaning and select Laser Cut from the drop down menu.
• Select Outline Tab and click on Running. Choose Stitch #132. Save.
• Select Create Bezier Shapes in side tool bar.
![]()
• Left click first on a corner of the inner hexagon and then on a valley of the outer hexagon. Right click to set. Repeat to make 6 lines dividing the larger hexagon into 6 equal smaller hexagons. It is important to go from inside to outside so that the directions of the decorative stitching are all the same.
• Press the spacebar to deactivate the drawing tool and select the lines.
• While the lines are selected choose Stitch #132.
• Select all. Change Stitch Length to 4.0. Save.

• Export to BERNINA CutWork-compatible machine.
• Complete cutwork and applique following the on-screen prompts.


What you might also like


4 comments on “Crazy for Hexagons: A CutWork Shortcut Grandmother’s Flower Garden”
-
-
A HUGE thank you to Mary for this terrific idea. I used this for my lesson on Monday night and you can check out my post on http://www.sweetalinedesigns.blogspot.com. A quilt is too ambitious for me – I made 4 little mug rugs!
-
Thanks for this tutorial. I wonder, when you were creating the quilt did you do the applique then cut the square to size?
-
Hi, Kathleen – Yes, first the applique was stitched on the fabric, then removed from the embroidery hoop and trimmed to size. Jo
-
Leave a Reply
You must be logged in to post a comment.

Just what I needed – a little push to use my Cutwork again! This will make a darling baby quilt for our Covered Bridge Quilters NICU project, where we provide a brand new quilt for each baby who is in the neonatal intensive care unit (even if for just a day). Thanks for the inspiration, Mary.