Sweet Dreams Quilted Pillow Sham
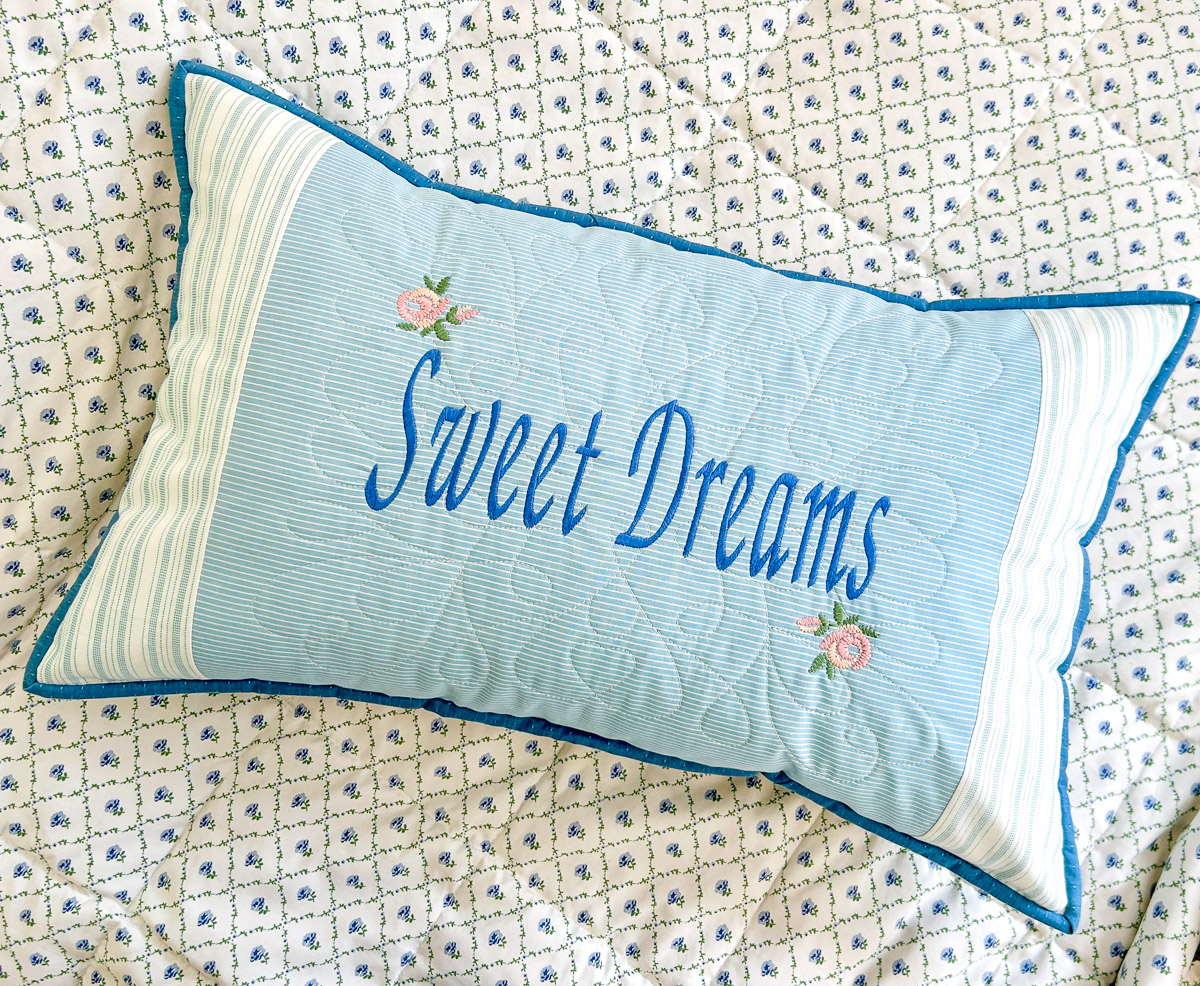
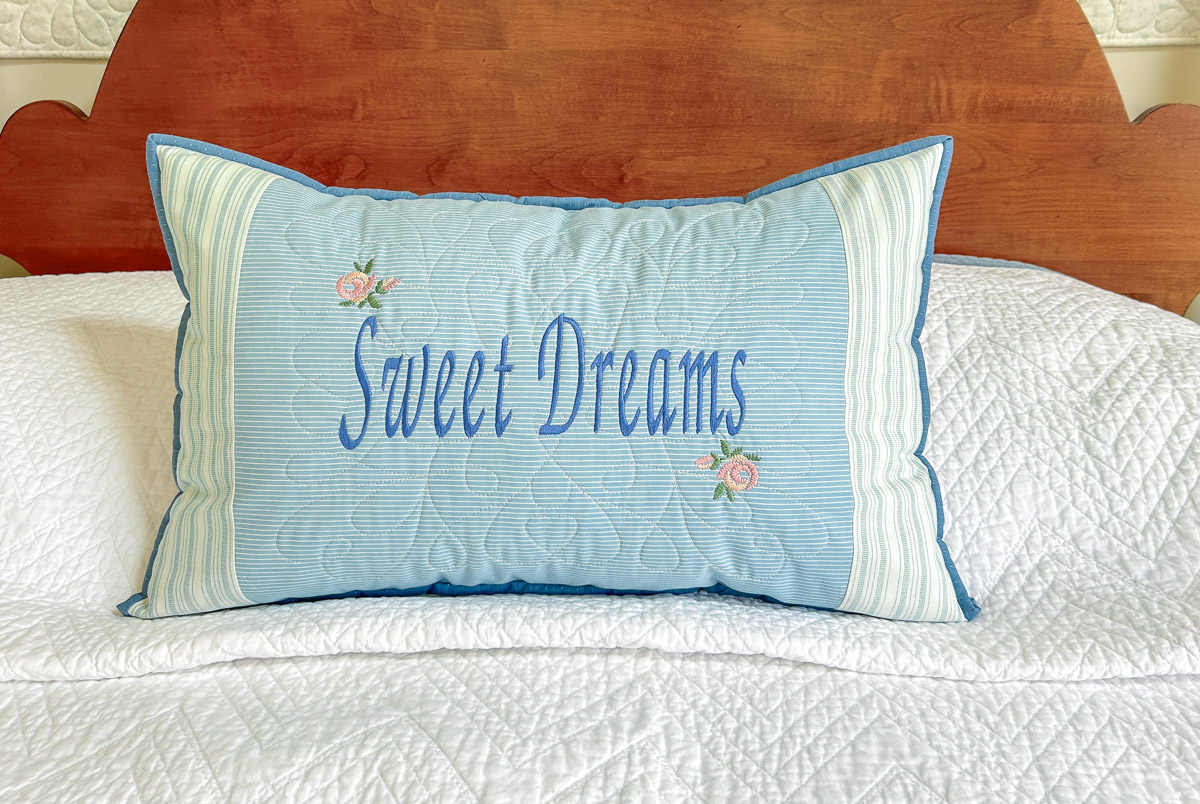
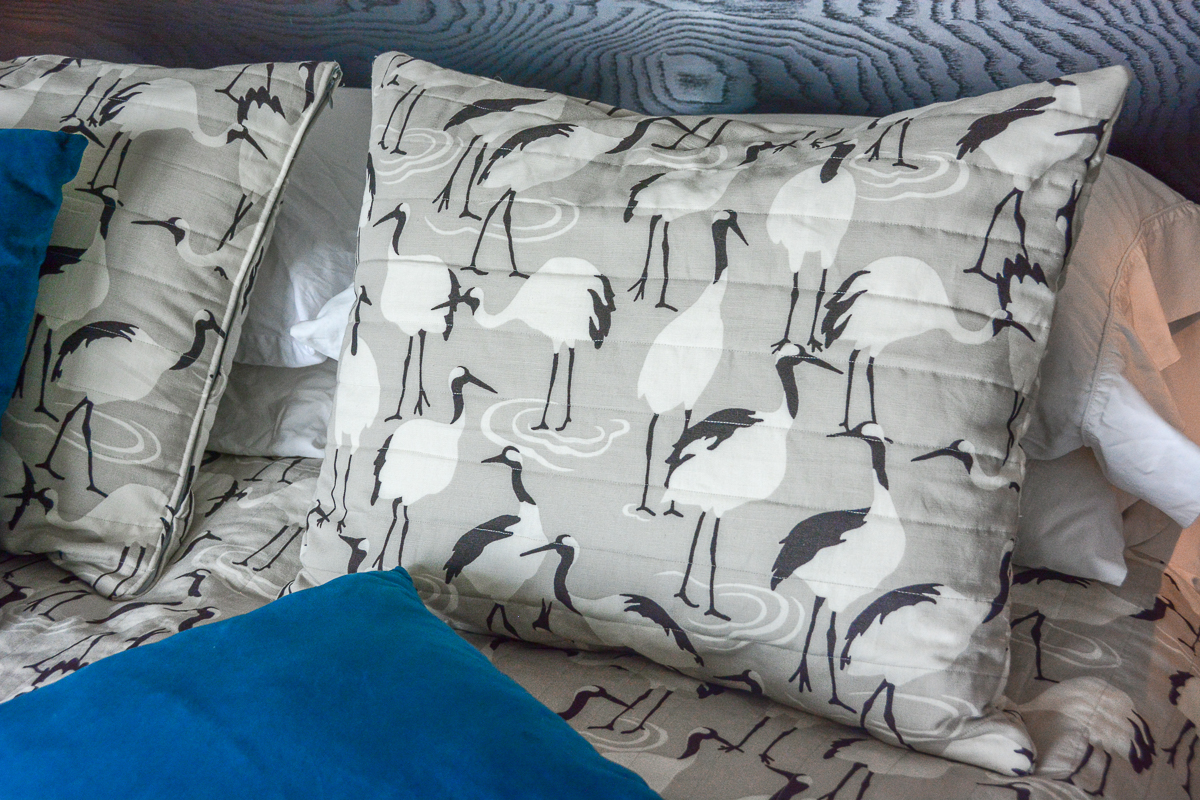
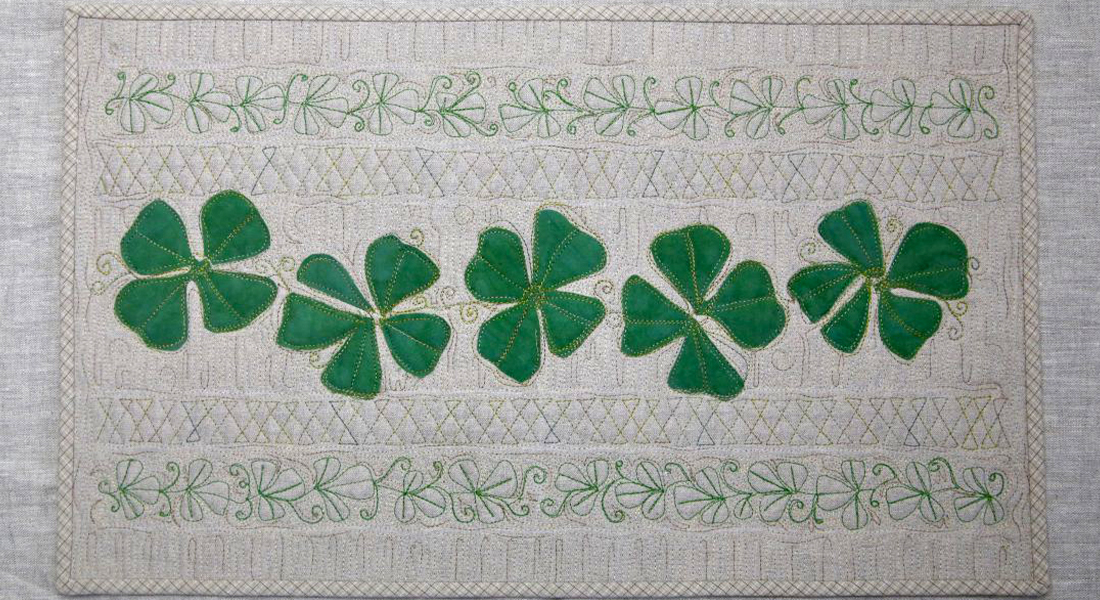
Until recently, my quilting consisted of straight-line quilting with Walking Foot #50. Now, with the BERNINA 990, I’m having so much fun with the built-in quilting designs and the new Giant Hoop. I’m quilting on lap-size quilts, table toppers, and pillows with designs that I could never accomplish before, such as feathers. Also, I have the option of transferring quilting designs to my machine in different formats, which gives me endless designs to choose from. Check out my latest project — a pillow sham I quilted, embroidered, and stitched together — and join in on the fun!
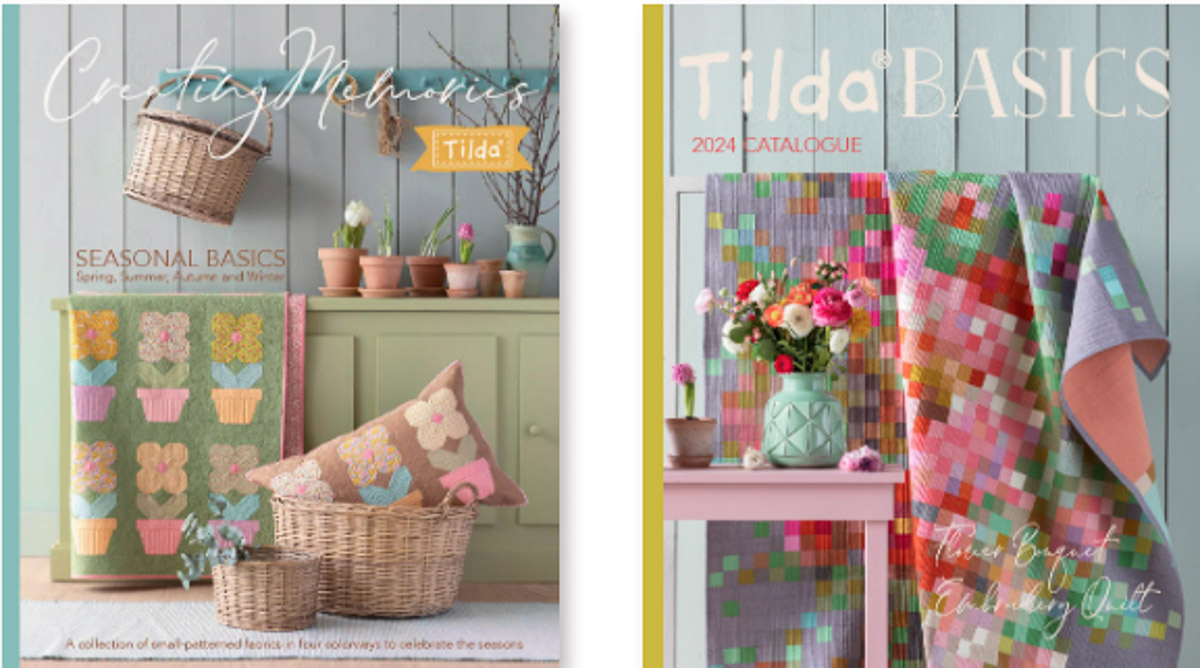
I’m using Tilda fabric, a Norwegian fabric company that I adore. The main fabric and binding are from their Creating Memories Collection and the border fabric is from Tilda Basics — Cookie Stripe. Let’s get creative!
Materials for Sewing a Quilted Pillow Sham
- BERNINA 990
- Patchwork Foot #57D or #97D
- Embroidery Foot #26L
- Zipper Foot #4D
- Edgestitch Foot #10D
- Walking Foot #50
- Fabric:
- Main Fabric: (1) 16” x 22”
- Border: (1) 5” x 22”
- Lining: (1) 26” x 22”
- Backing: (2) 13” x 15”
- Zipper Flap: (2) 4” x 15”
- Binding: (2) 2/14” x WOF
- 26” x 22” piece of Brewer Cotton Batting
- 15” (or longer) zipper
- Mettler Silk-Finish Cotton 40 or 50 weight thread, any color preferences
- Rotary cutter and ruler
- Wonder Clips or pins
- Temporary marker
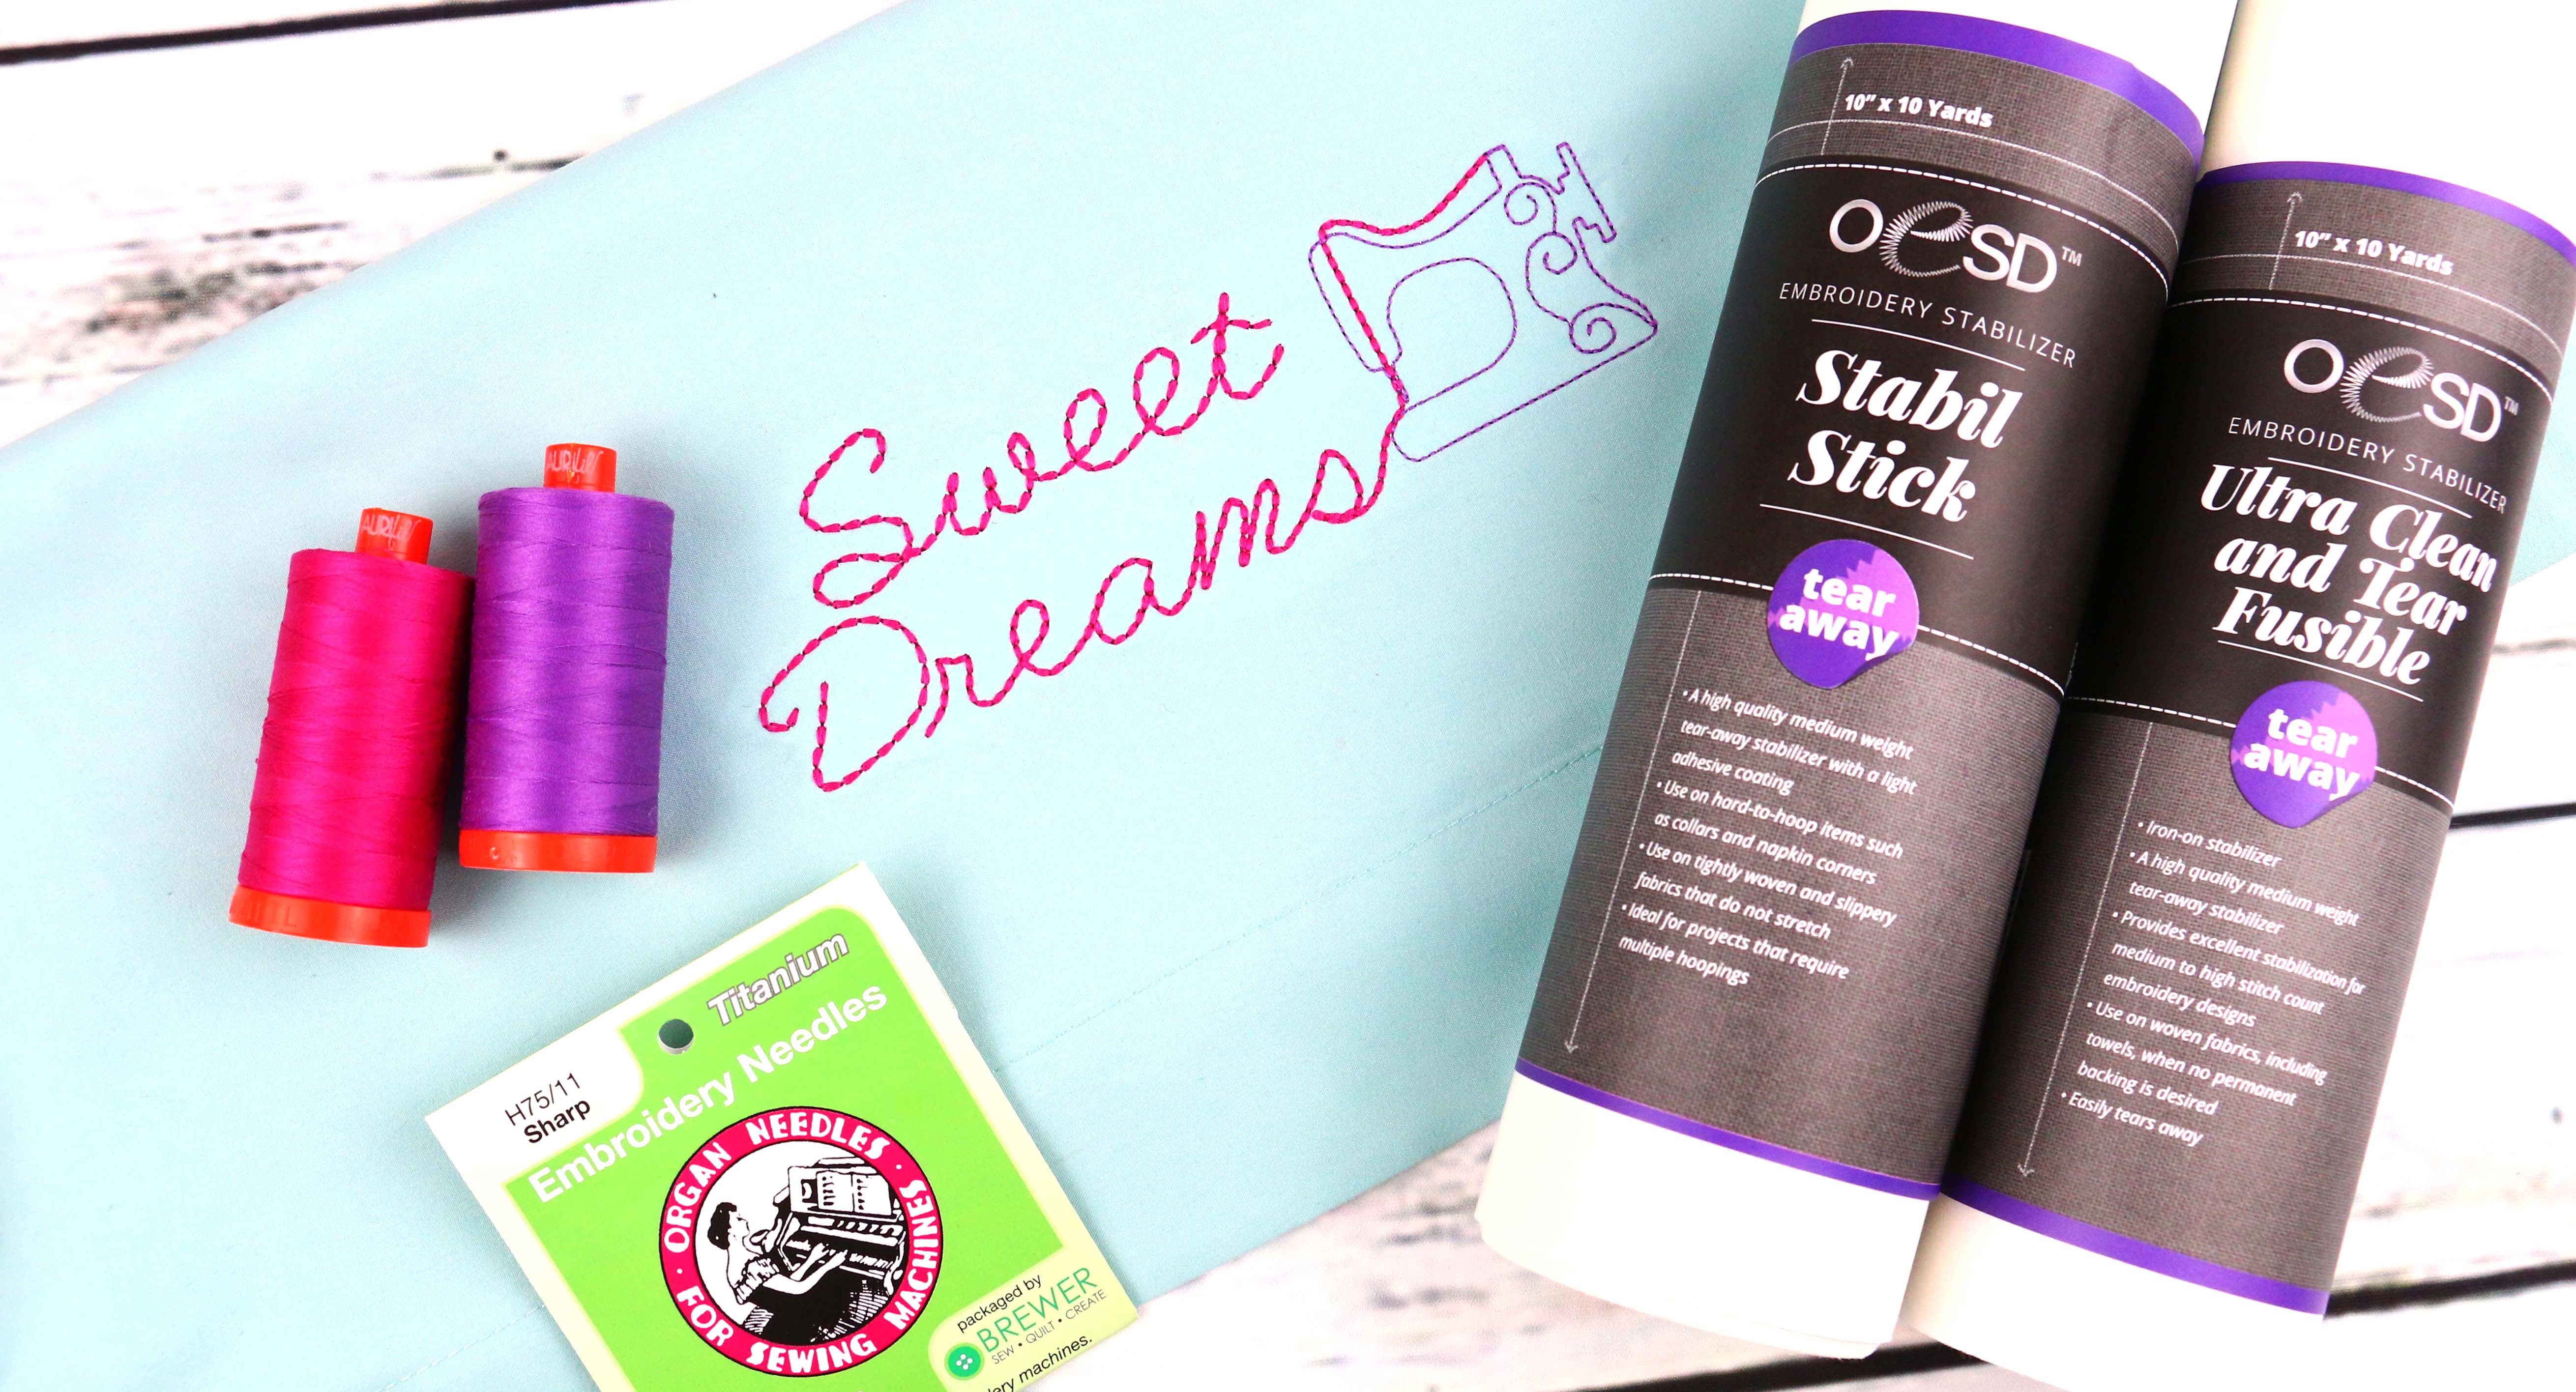
- Optional: OESD PolyMesh CutAway Stabilizer
- Optional: 505 Temporary Spray Adhesive
Sep 1: Construct the Pillow Front
Place the main fabric on a flat surface, right-side up. Pin the borders along the 22” sides, right sides together, matching raw edges. Attach Patchwork Foot #57D/97D to the machine. Sew together with a 1/4” seam allowance. Press. Mark the center of the pieced fabric.
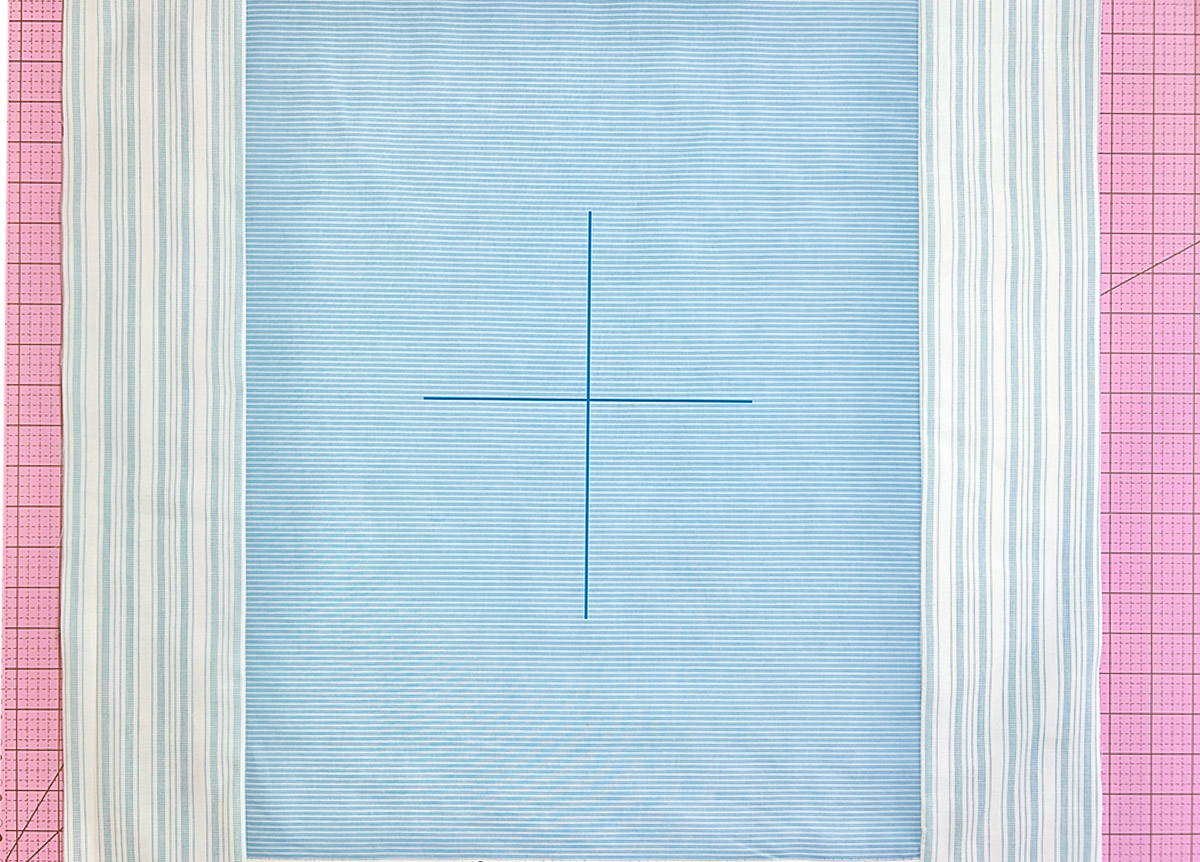
If using PolyMesh, place it on top of the batting, centered lengthwise. Next, place the pieced fabric on top, right-side up. Spray baste to secure.
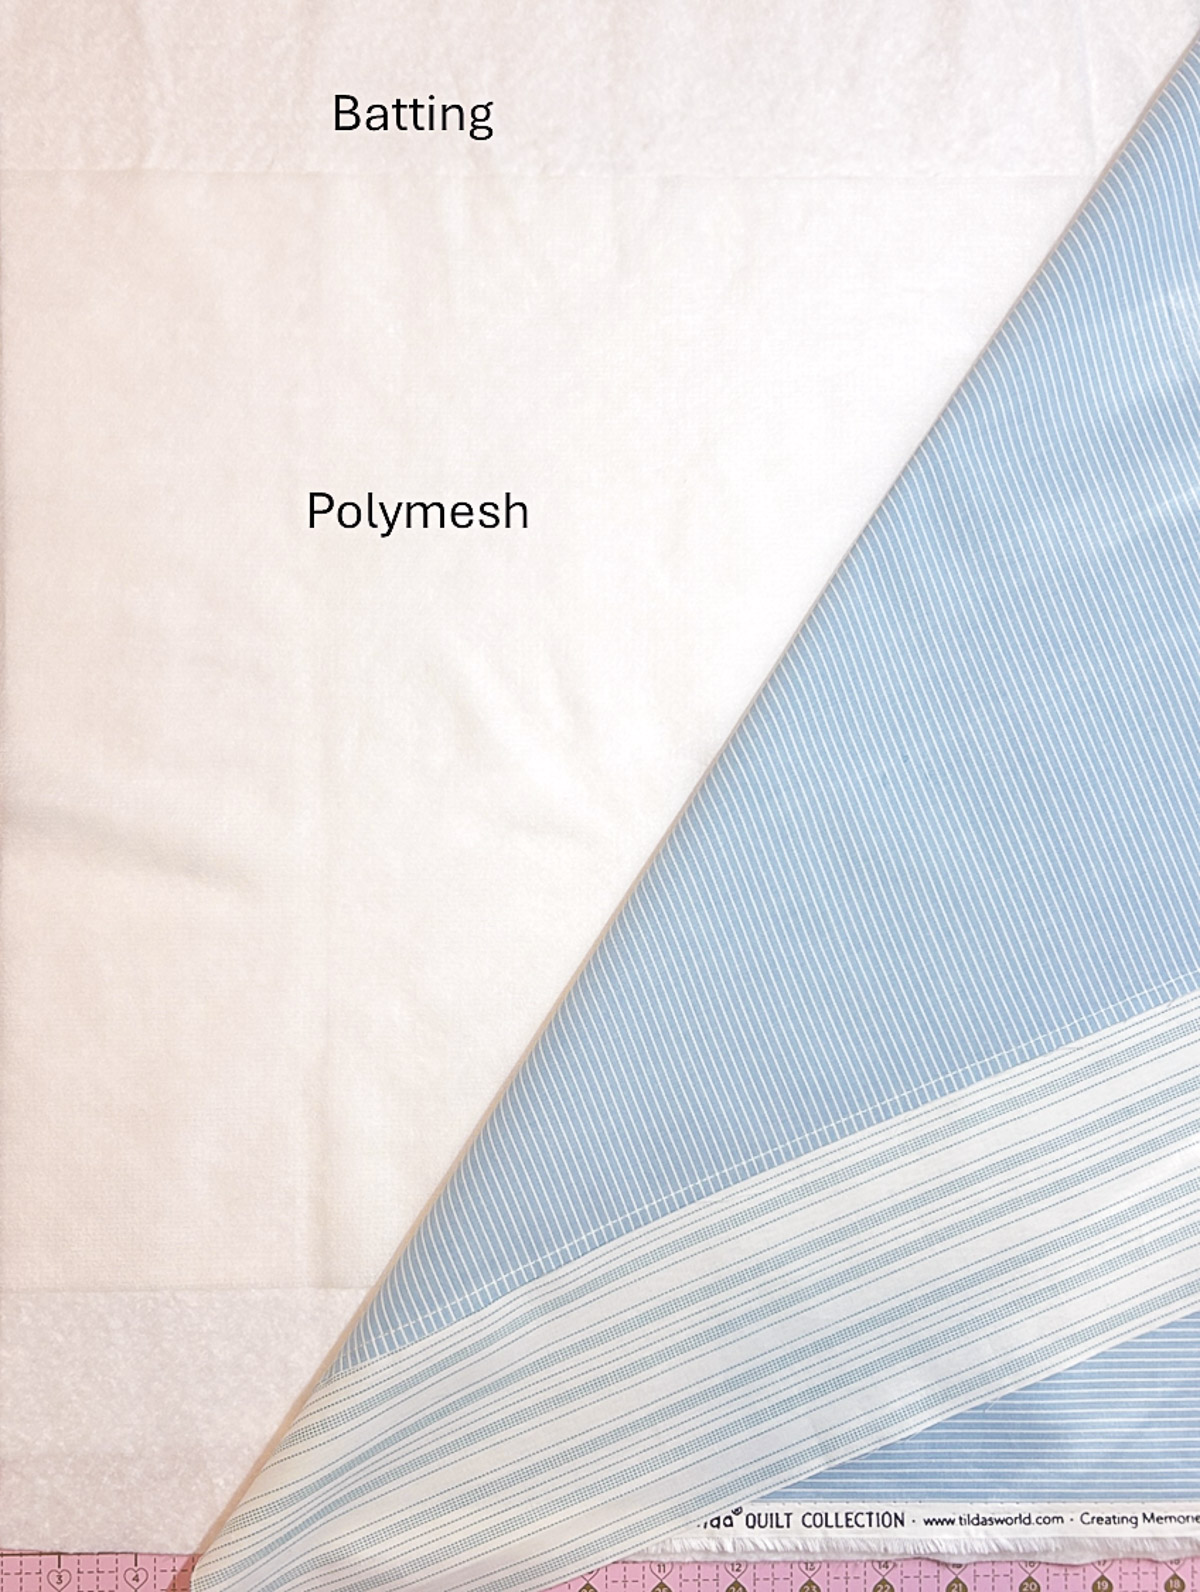
Flip the pillow front and batting so the batting is on top. Position the lining on top of the batting. You should have the following layers starting from the bottom — lining, batting, optional stabilizer, and pieced fabric.
Step 2: Hoop with the Giant Hoop
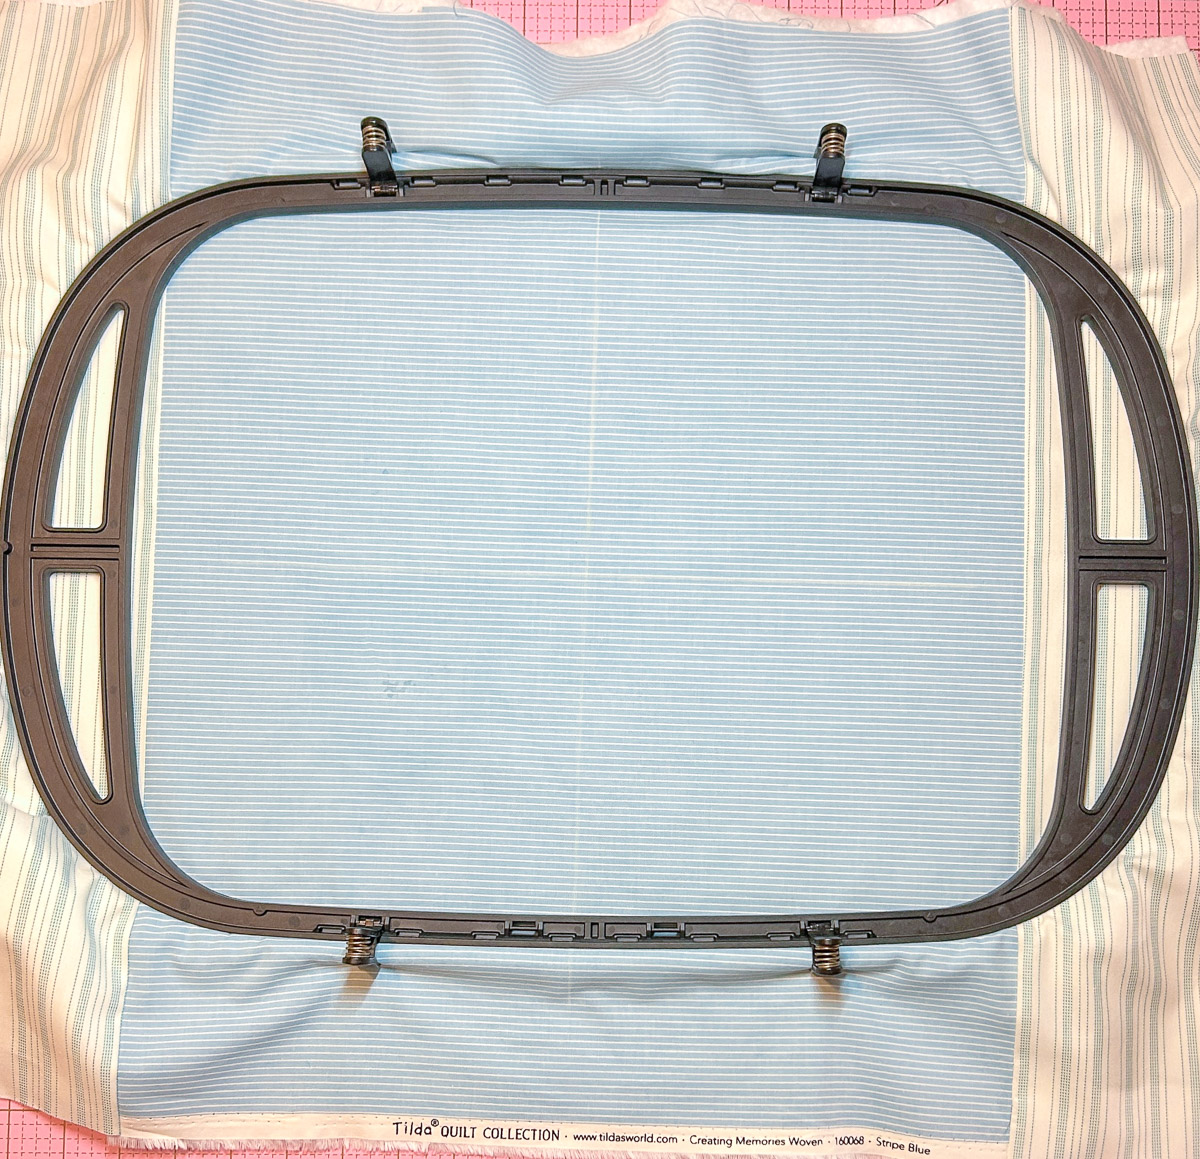
Carefully add the quilt sandwich to the Giant Hoop. Don’t you love the size of this hoop? Use the Twist-lock to tighten the hoop. Secure the black clamps for extra stability. Don’t worry about hooping the stripes exactly straight since you’ll use the precise positioning tools on the machine.
Step 3: Create the Embroidery Design
In Embroidery mode, begin by tapping the Add Design icon. Select the Embroidery Designs Folder. Then, select the Quilting Folder and design #BD285q.
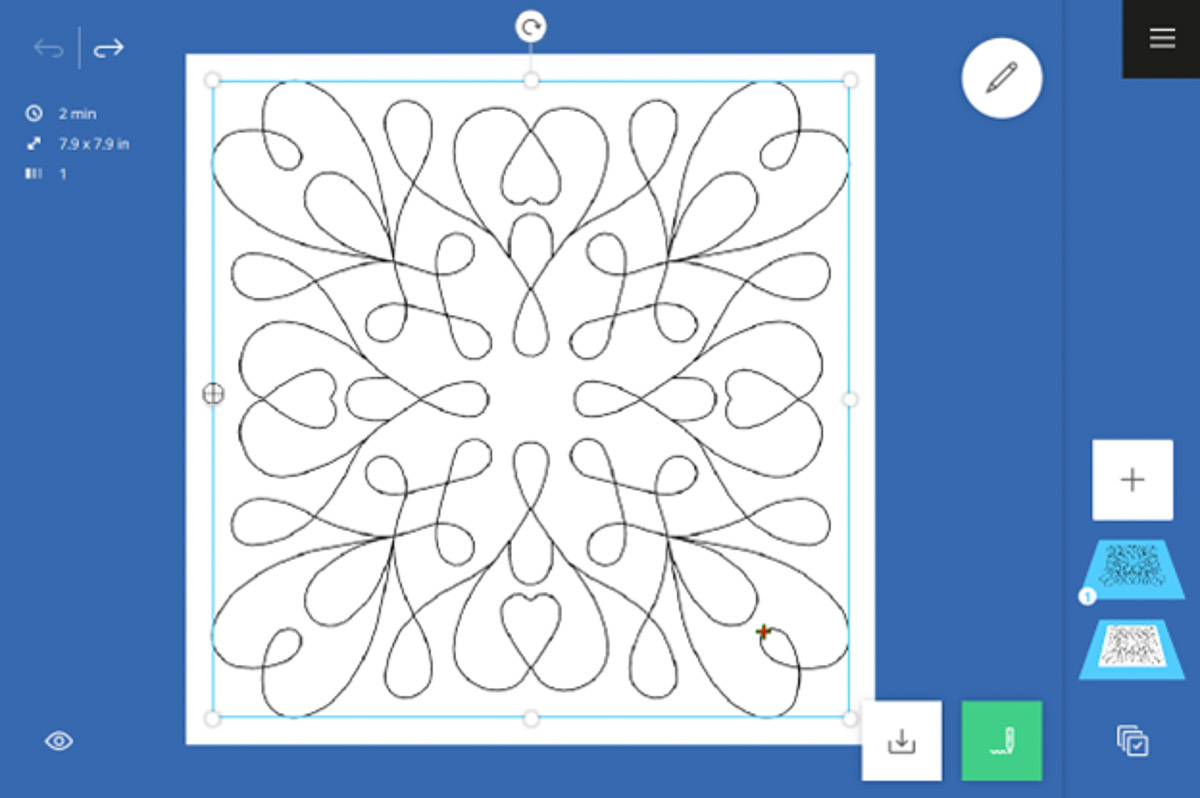
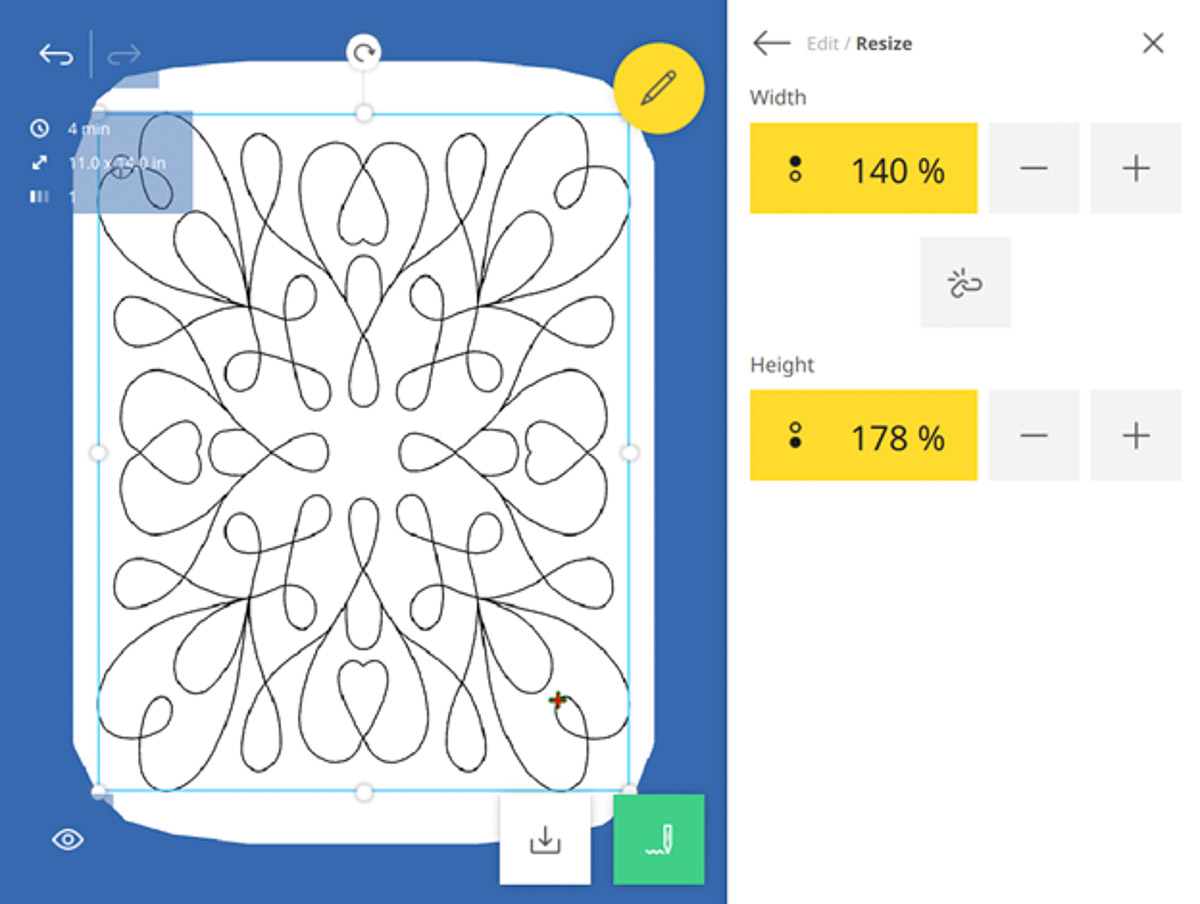
Tap the Hoop in the Status Bar and select the Giant Hoop. Tap the Edit Menu and select Resize. Deselect the Proportional Lock icon. Set the design width to 140% and the height to 178% (11” x 14” / 279 mm x 356 mm) using touch gestures, Multi-function Knobs, or the +/- icons in Resize.
Tap the Add Design icon again. Select the Lettering icon in the Quick Access Bar (right column).
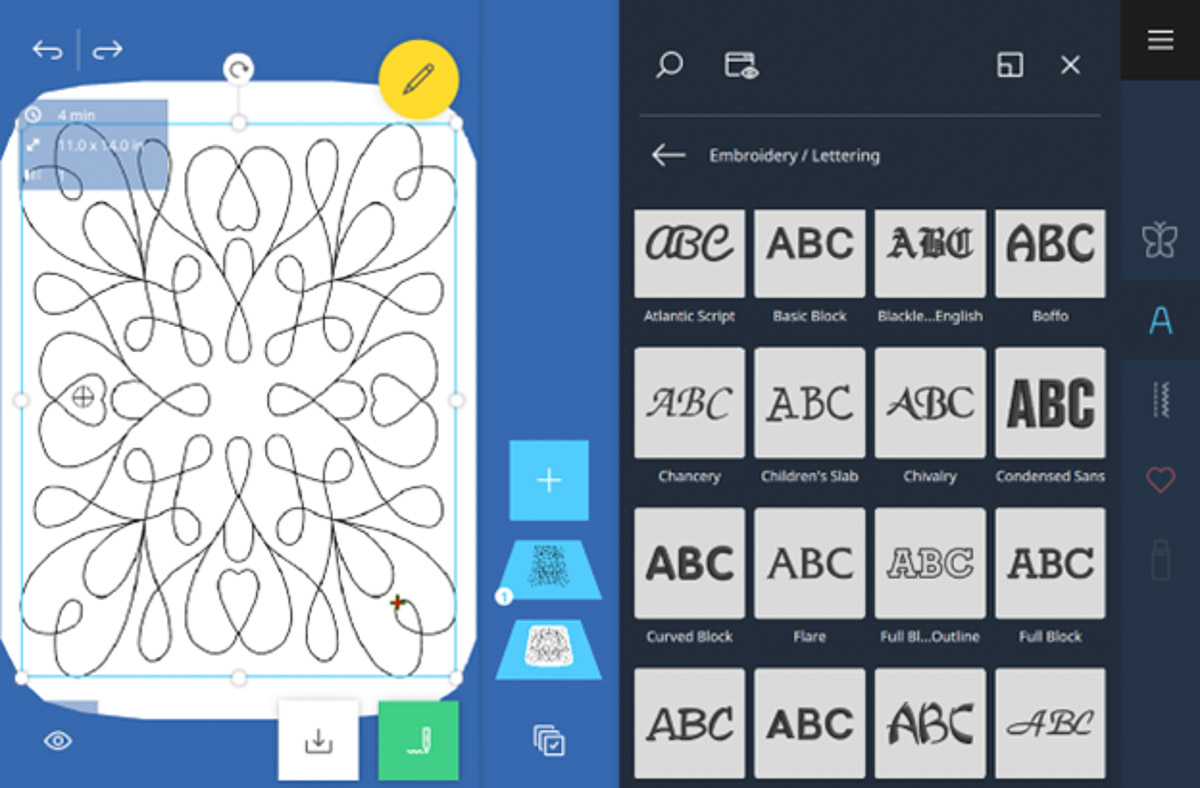
Tap the Chancery font and type Sweet Dreams. Confirm with the green checkmark.
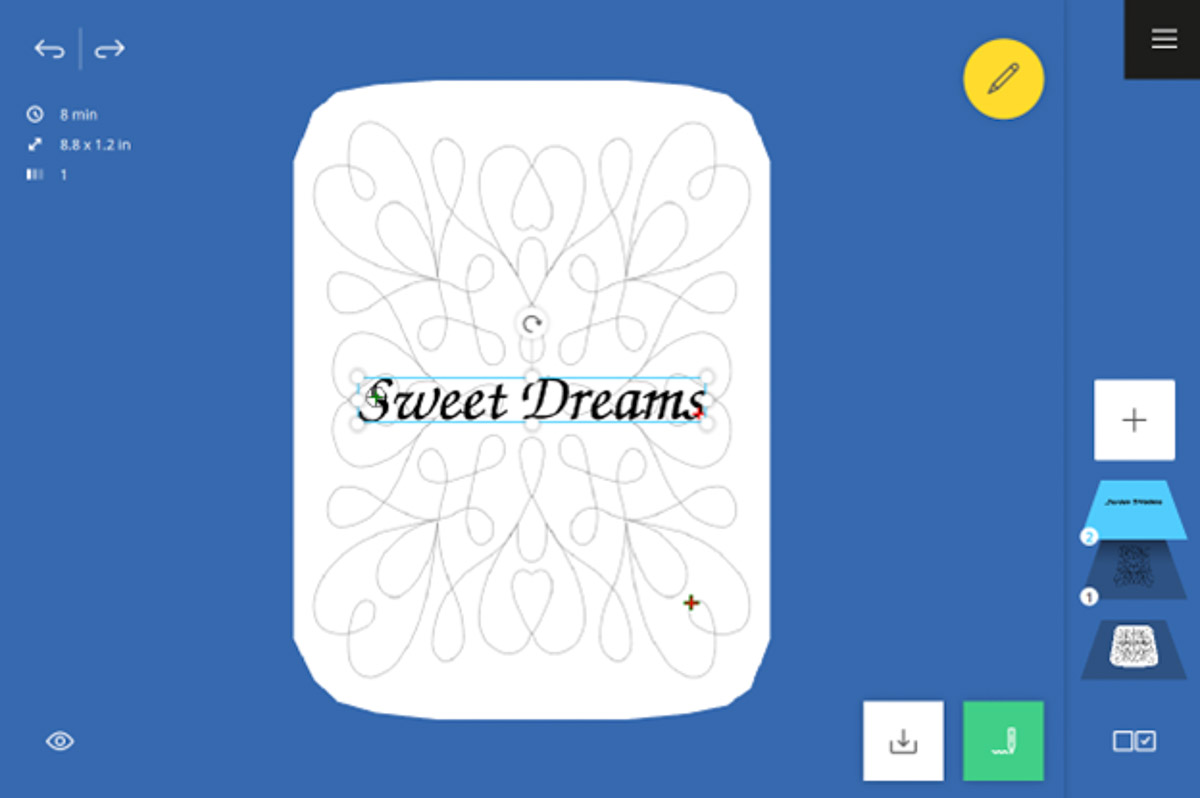
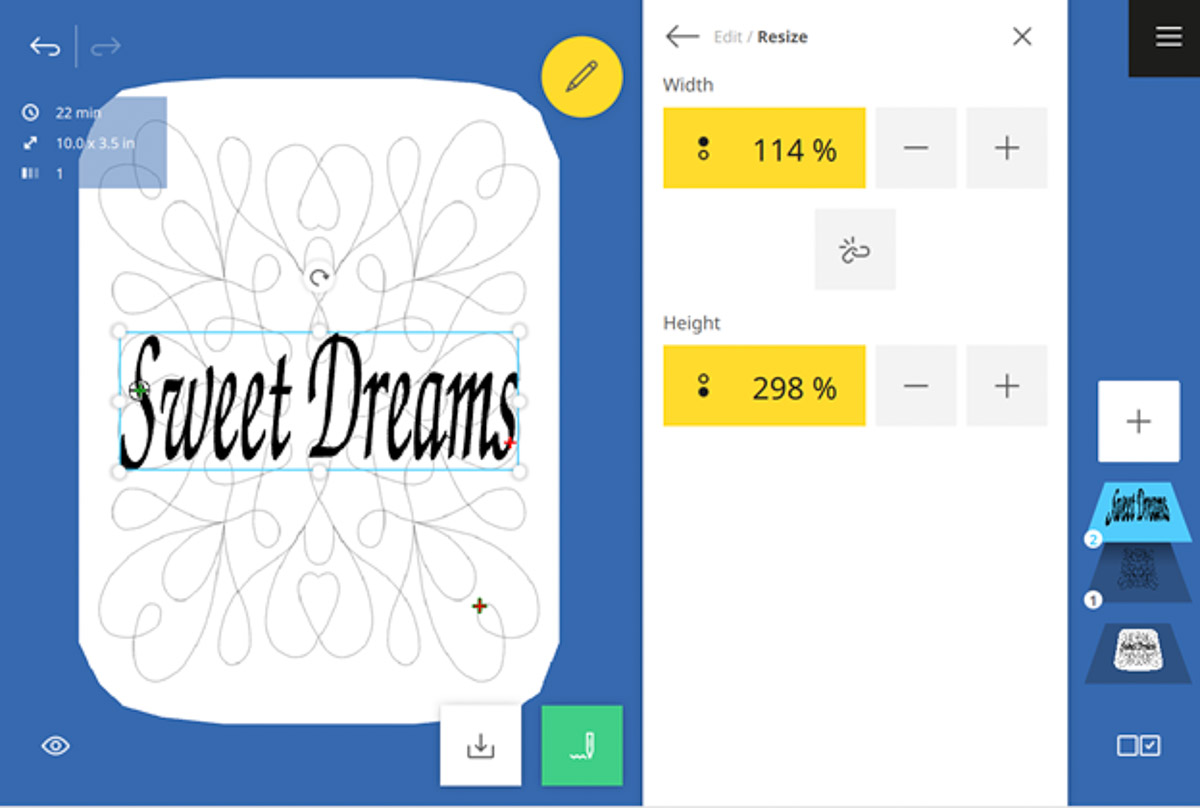
Tap the Edit Menu and select Resize. The Proportional Lock should still be de-selected. Set the design width to 114% and the height to 298% (10” x 3 1/2” / 25 mm x 89 mm).
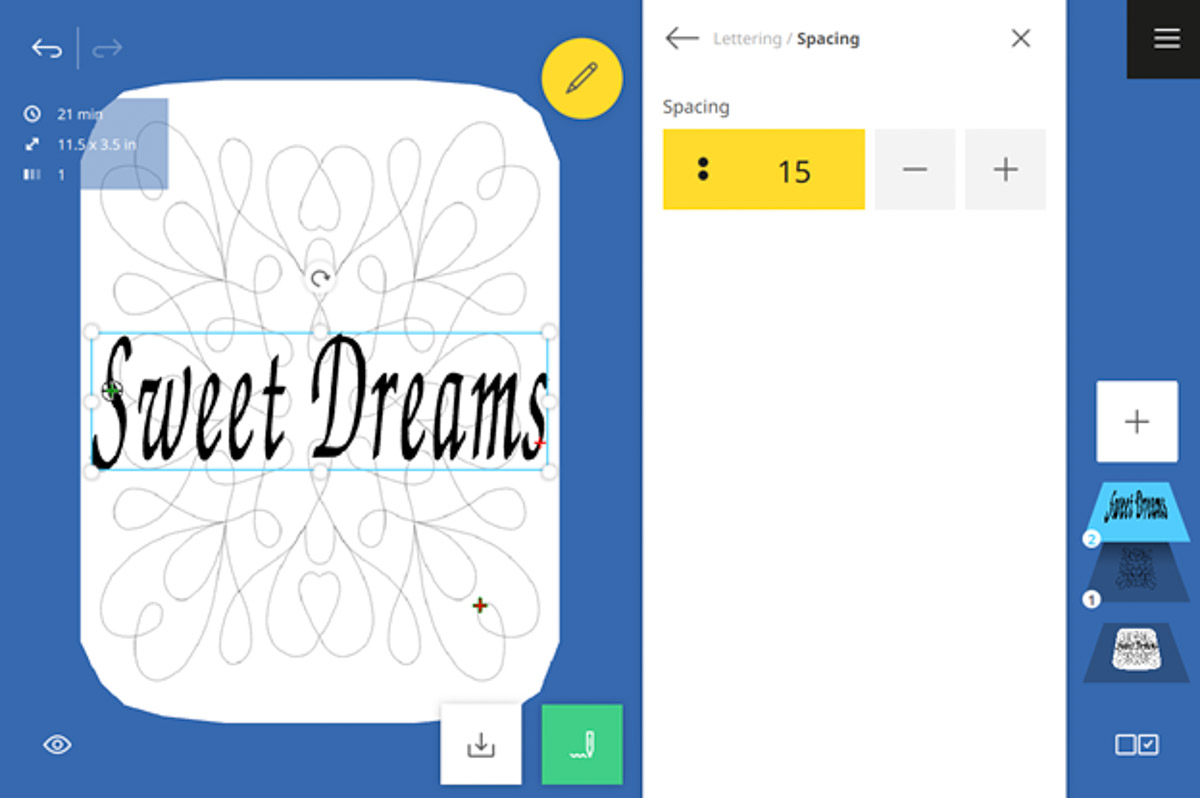
Go back to the Edit Menu. Tap Spacing in the Lettering submenu. Increase the spacing to 15.
Go back to the Edit Menu. Tap Rotate in the Edit submenu. Rotate the design 90º.
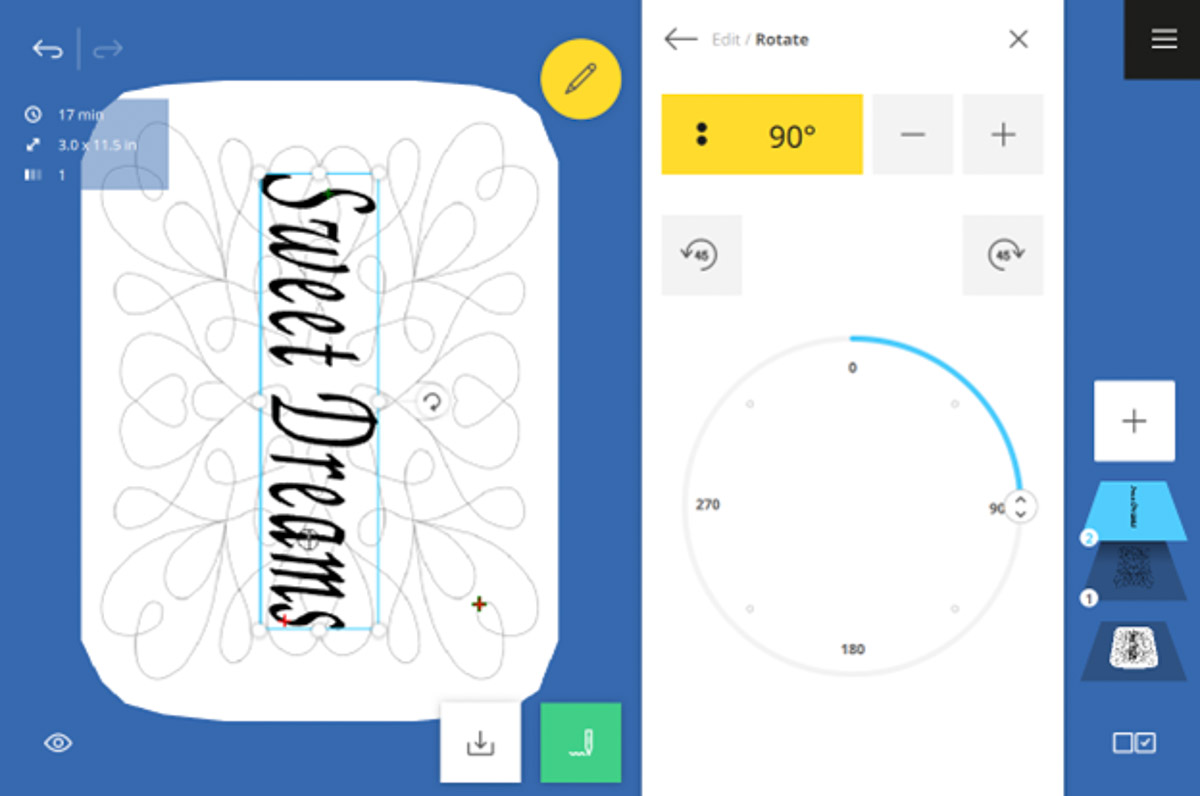
Go back to the Edit Menu. Tap the Selection icon in the lower right corner and tap Select All.
![]()
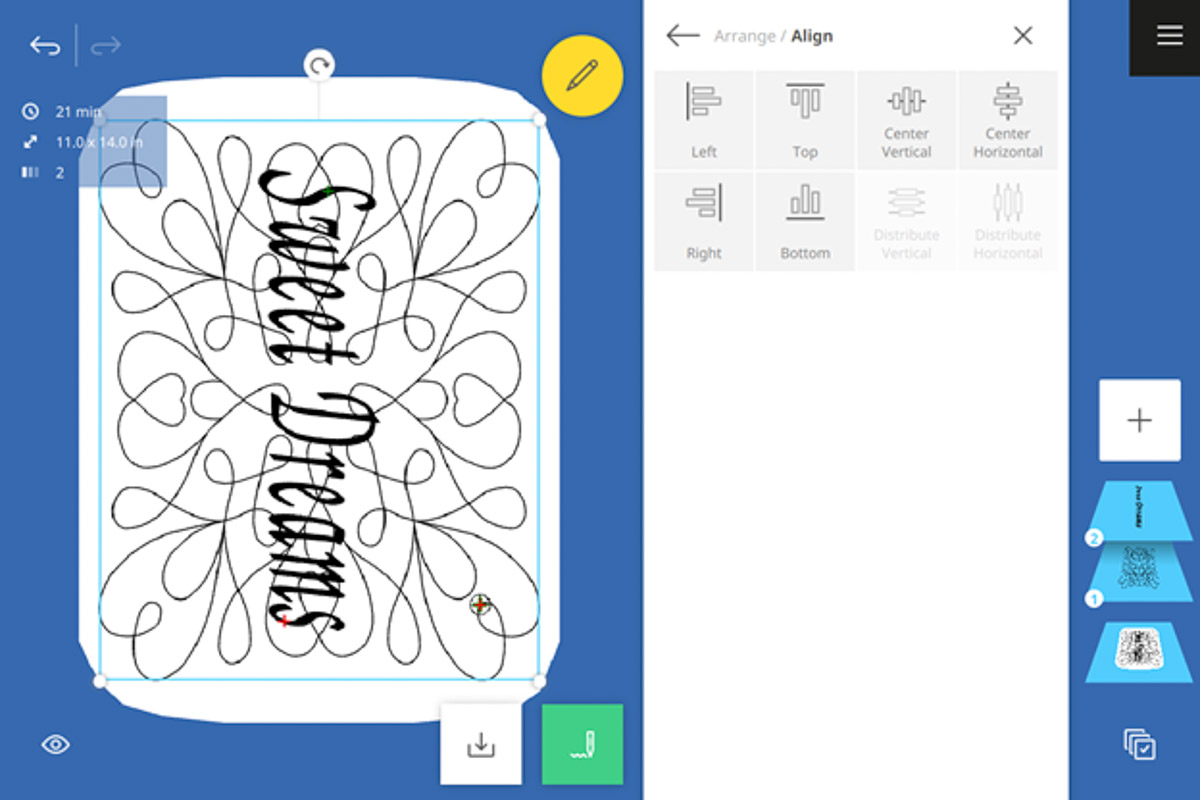
Select Align in the Arrange Submenu. Tap Center Vertical and Center Horizontal. Most likely, the designs have stayed center, but it’s good to double-check.
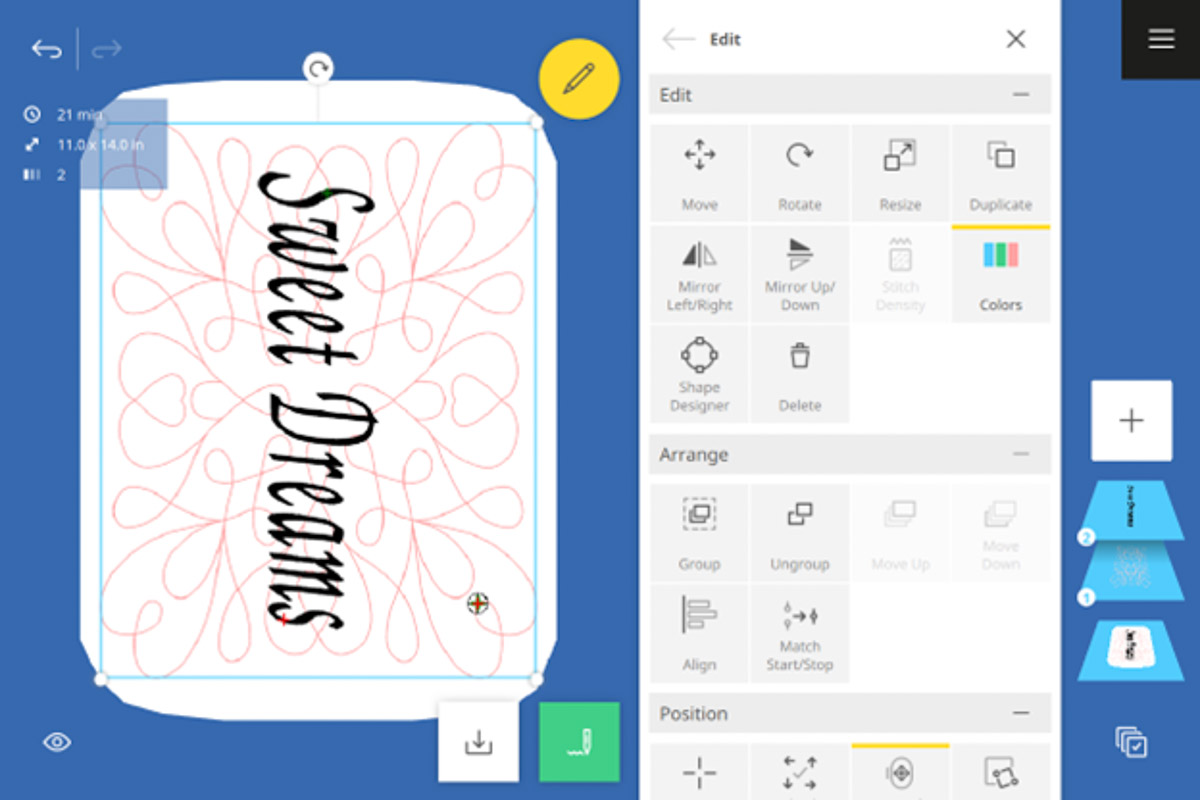
If it’s hard to see the two layers with everything showing in black, change the color of Layer 1. Go back into the Edit Menu and select Colors in the Edit submenu. Select a lighter color for the quilting design.
One of my fave folders is the Mini Folder. Most of the designs in this folder are under 2”. Check them out and see if you’d like to add a mini design or two.
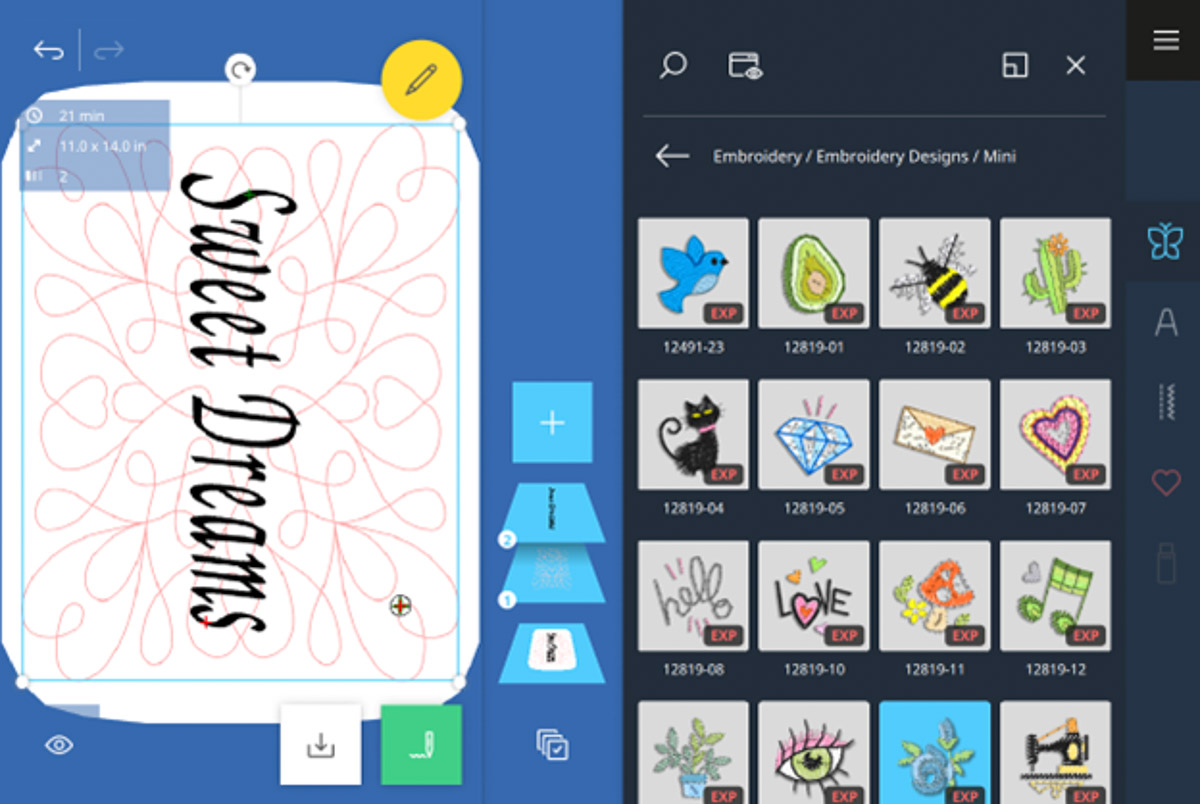
Here I added design #12819-17, increased the size 20%, and duplicated it. Then, I played around with placement and rotation until I was happy 😊. Play around with the minis and see what you like!
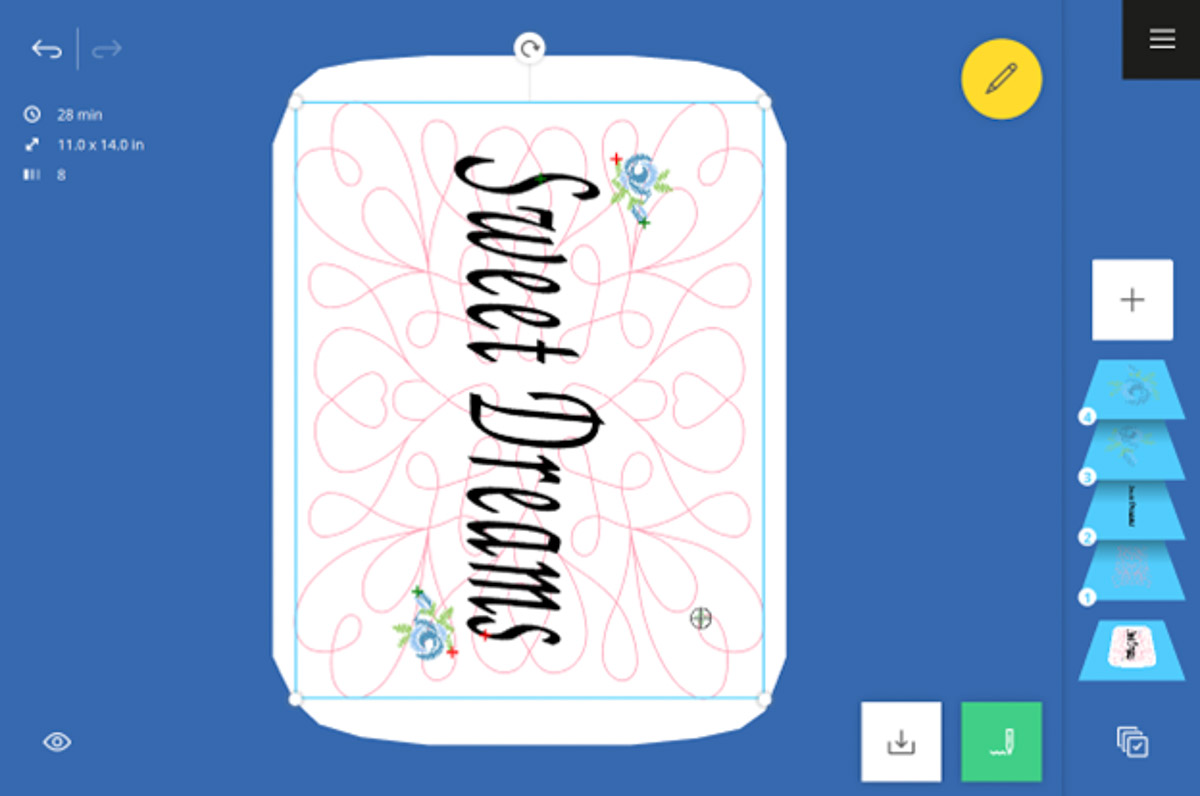
Step 4: Stitch Out
Let’s get ready to stitch out! Attach Embroidery Foot #26L and the Straight Stitch Plate. Add Mettler thread to the needle and bobbin. Go into the Edit Menu. Tap the Pinpoint Placement submenu and select Grid. Make sure the Pinpoint Laser is on. Touch the center node and position the laser on the center crosshair lines you marked earlier. Tap the green pin to set.
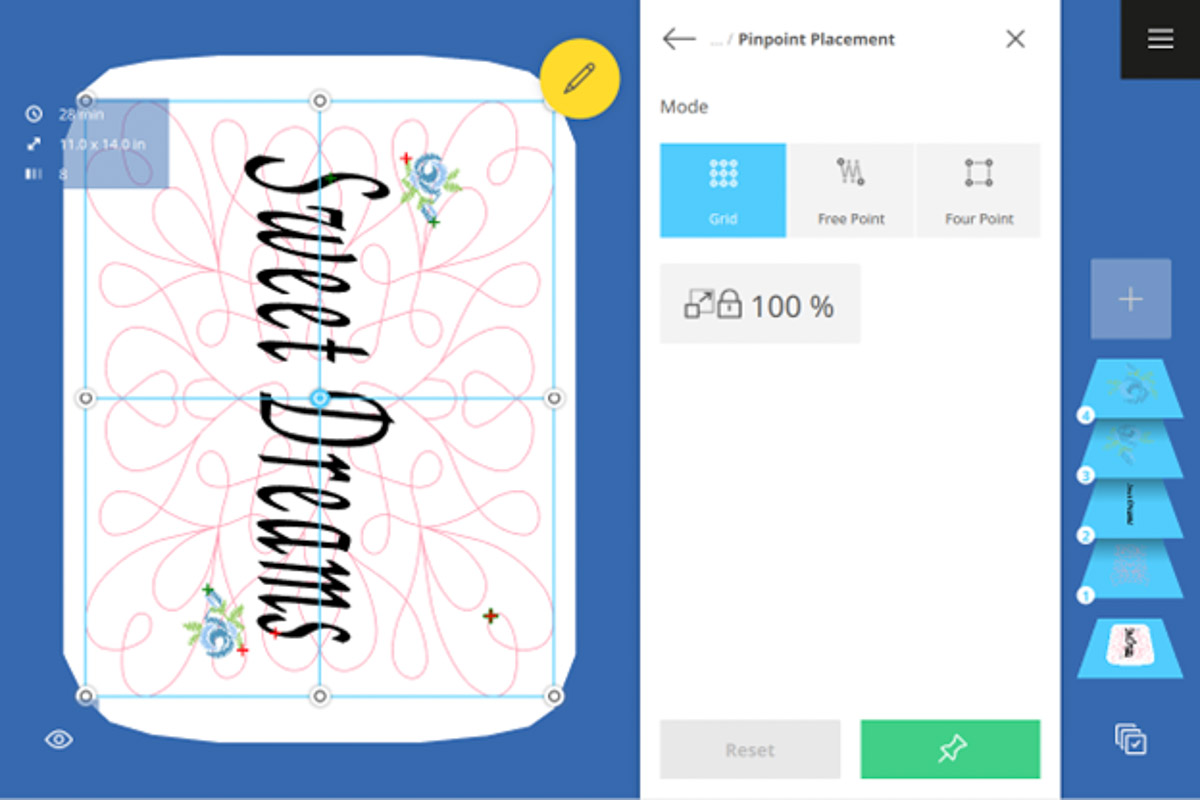
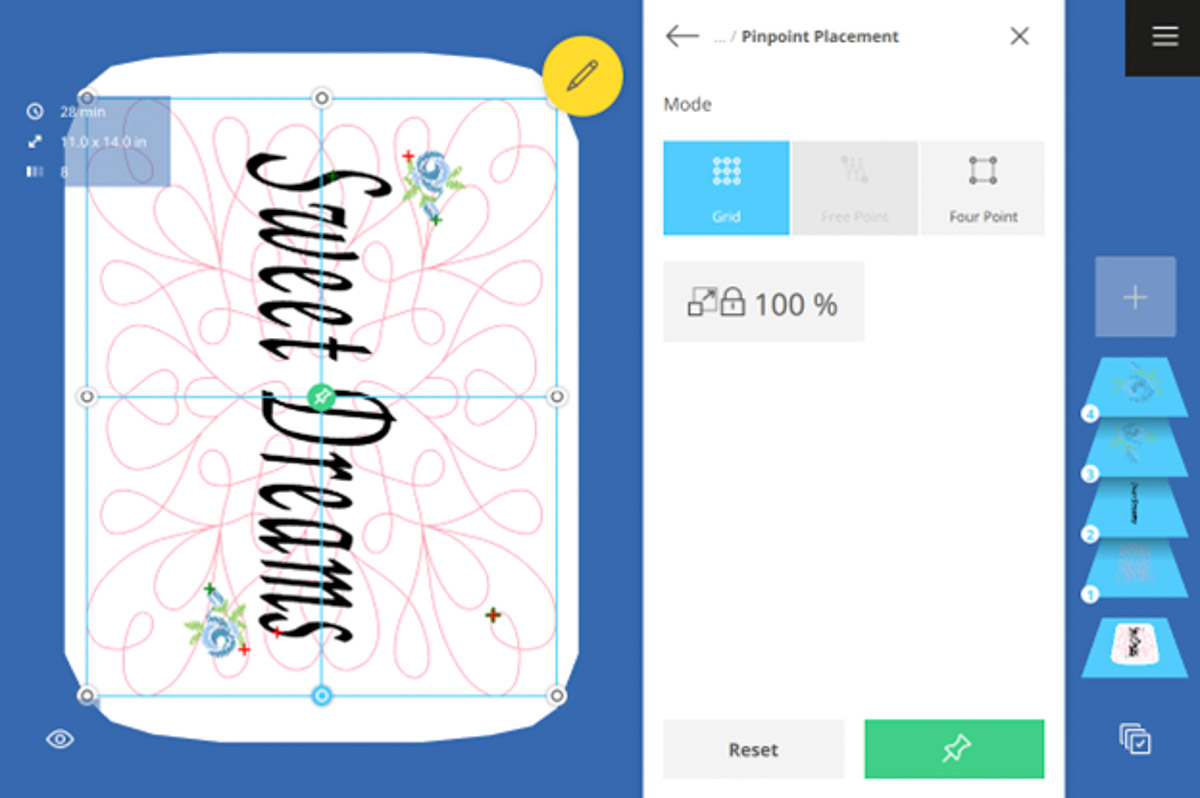
Touch the bottom center node. Position the laser on the marked line. Tap the green pin to set. Now the design will stitch out straight. If you wanted to add this design to a quilt block, use Four-Point Placement for precise and quick placement. The Four-Point function allows you to place a design in any four-sided shape!
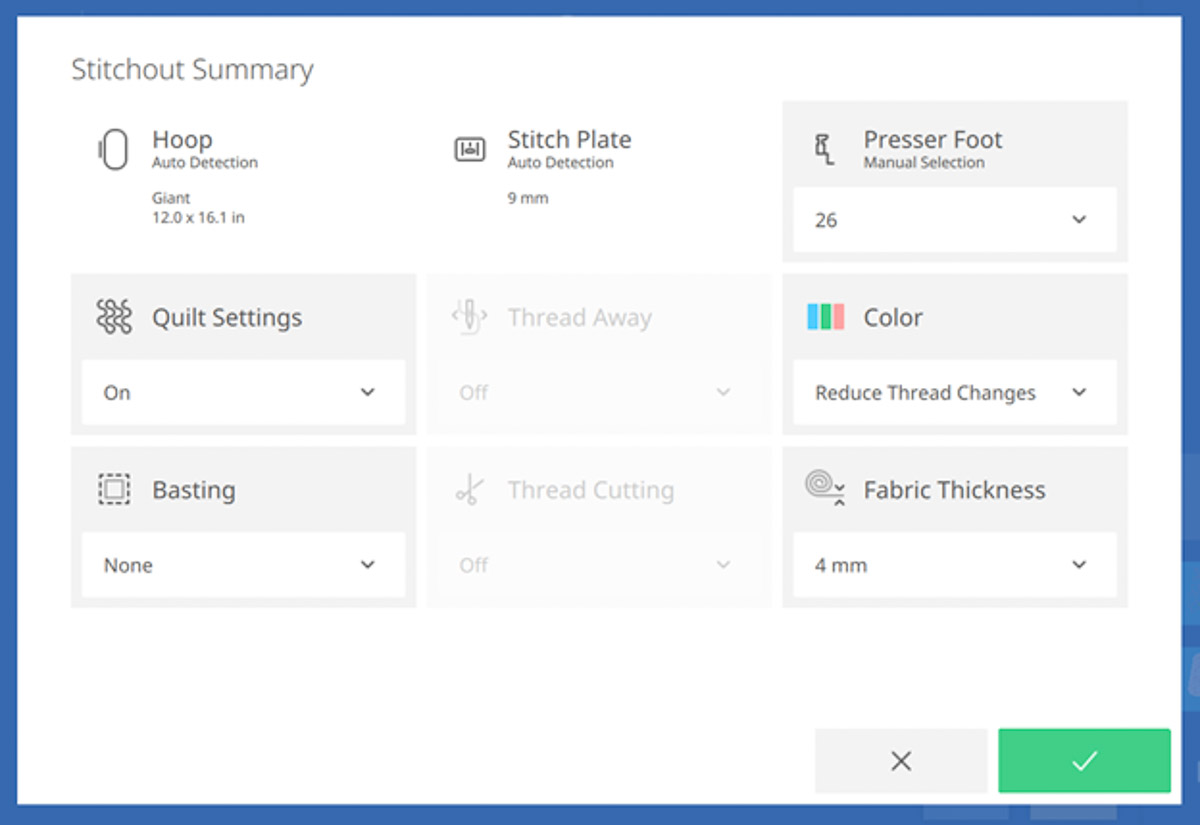
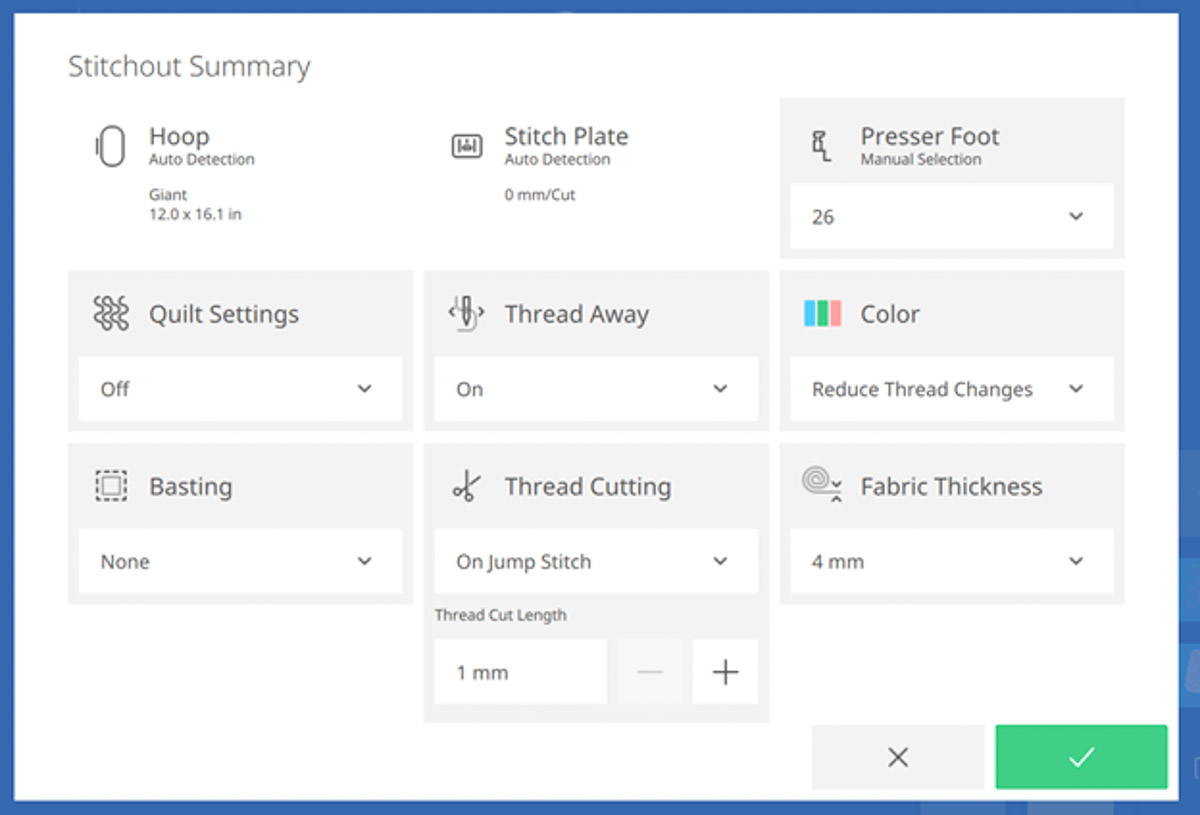
Select “X” to exit out of the Edit Menu and tap the green needle icon. The B 990 has a new screen called the Stitchout Summary. Here, several features are available before the actual stitching, including Quilt Settings. Since the first layer is a quilting design, turn on the Quilt Settings. Now the machine knows to stitch a few securing stitches at the start and end of the design. Next, tap the Color dropdown menu and select Reduce Thread Changes. Confirm with the green checkmark.
Notice the new Stitchout screen with thread colors, stitch count, total time, and color time. In the lower left corner, there are icons to go back to the Edit and Summary screens. In the lower right corner, you have Rabbit Mode and Stitch Selection.
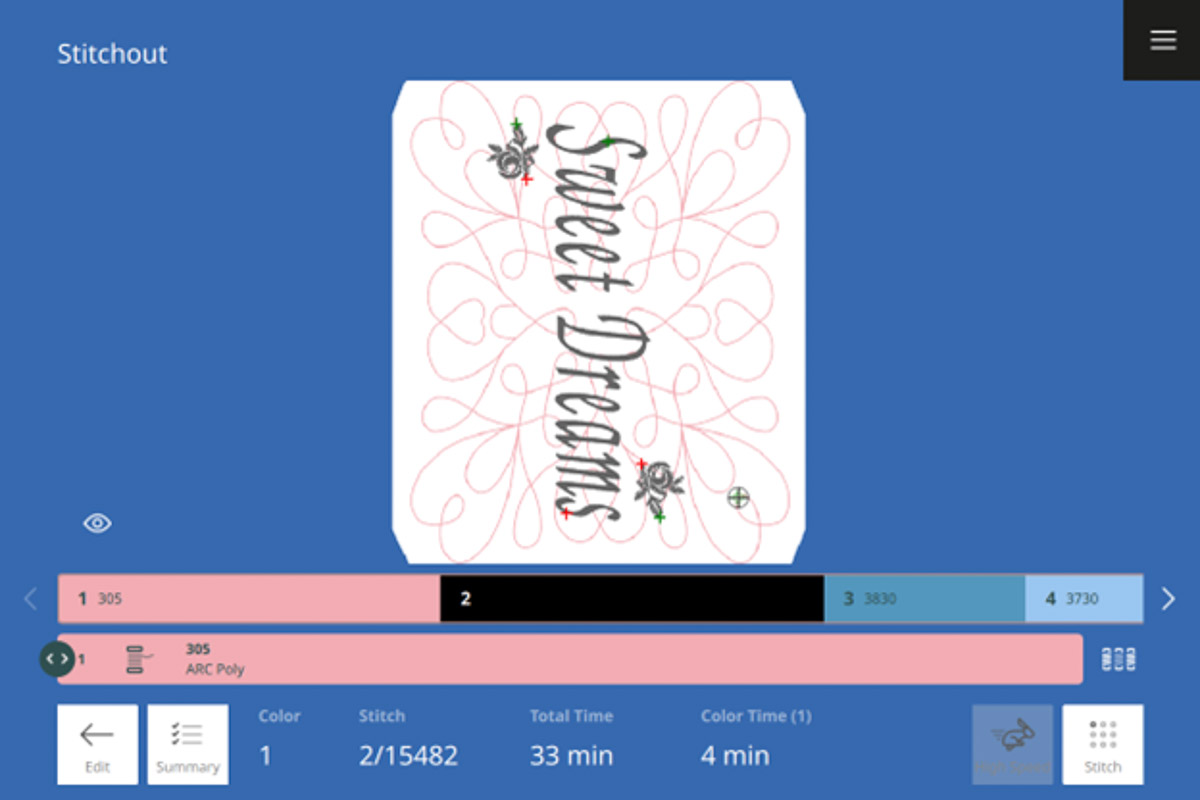
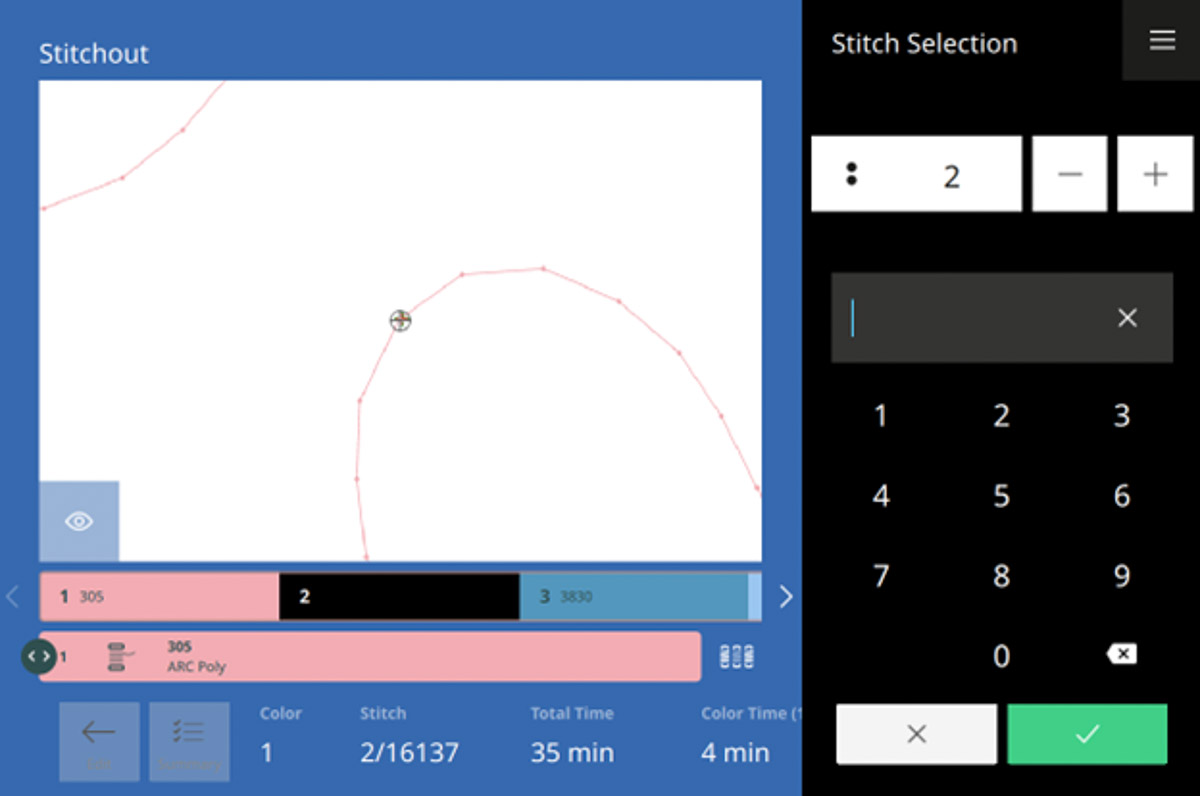
With the new Stitch Selection, you can easily navigate to the exact spot needed. Use the upper Multi-function Knob to get close and then use the +/- icons to get the exact placement. Remember to activate your laser. No more using the handwheel!
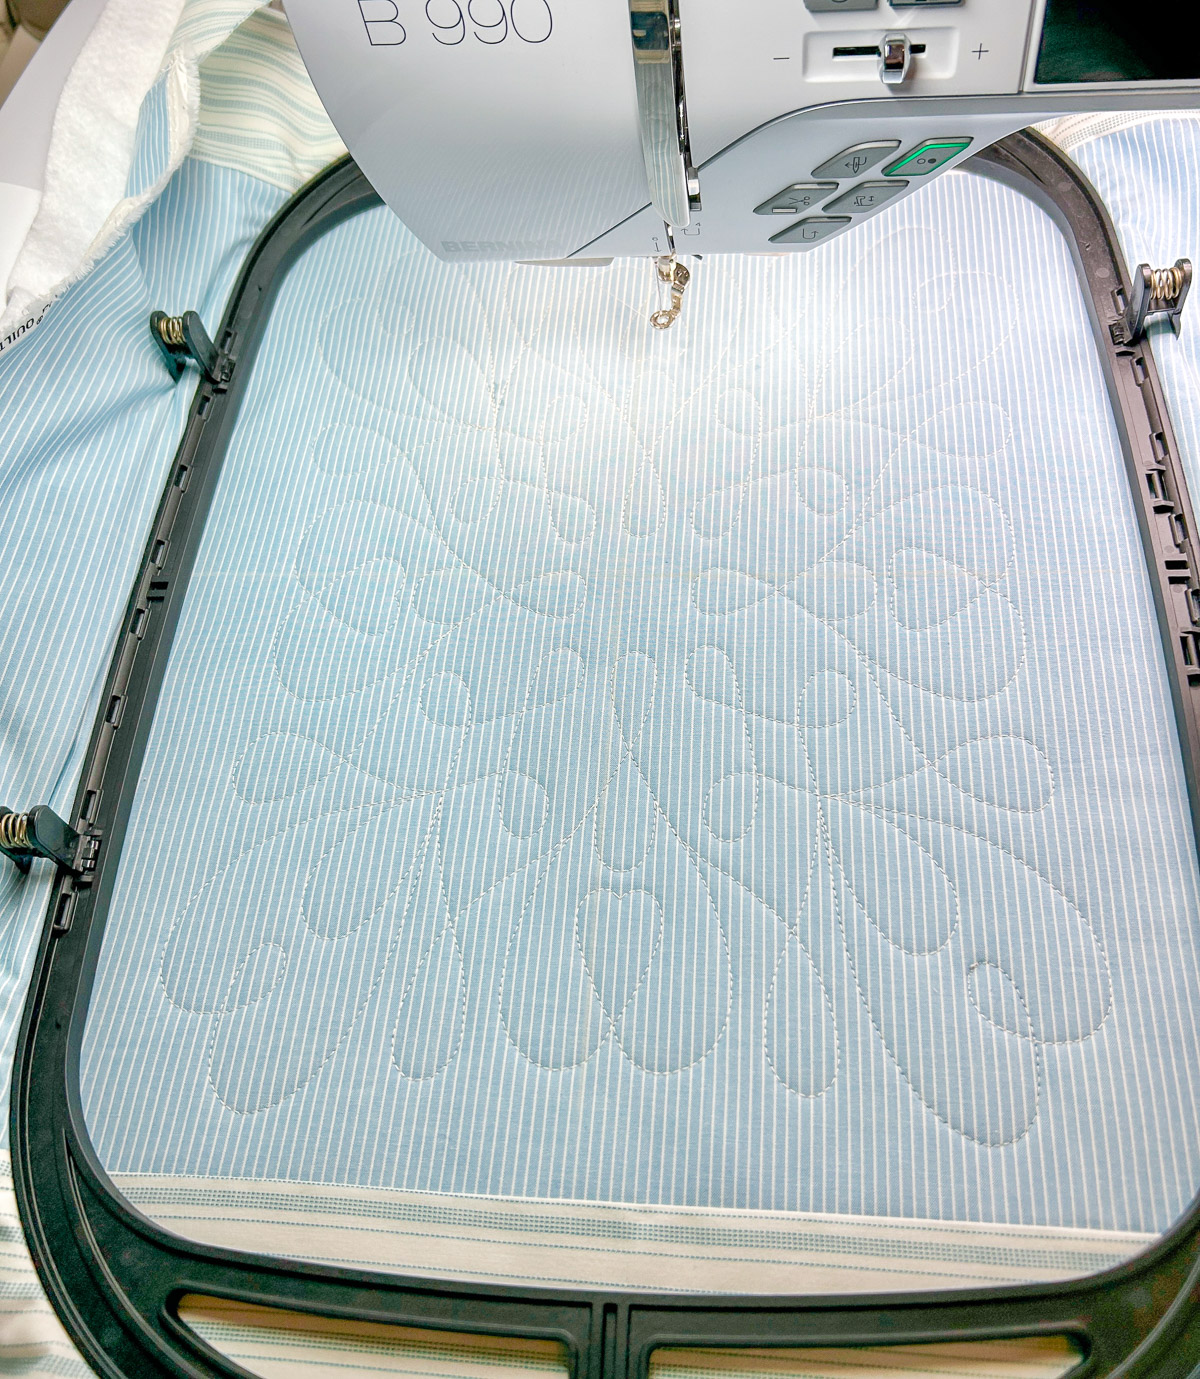
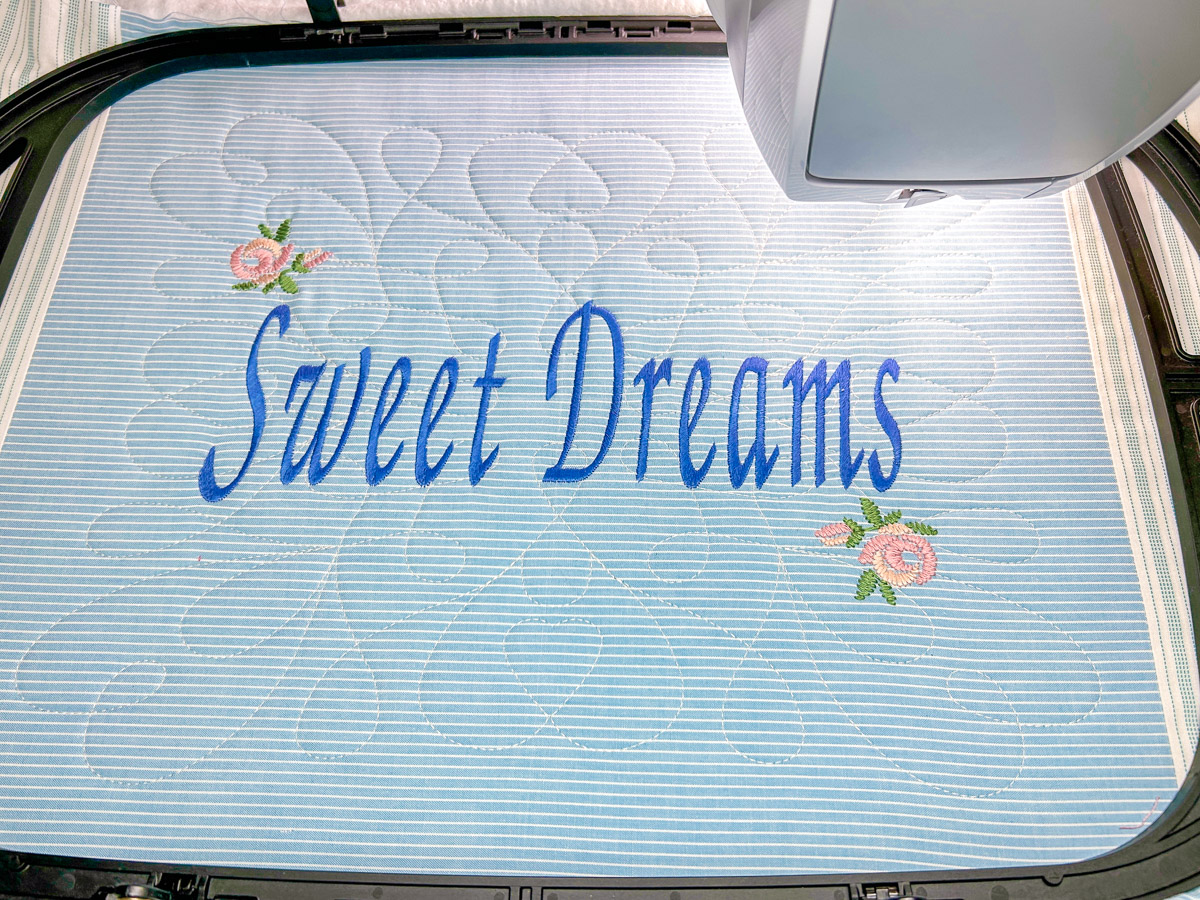
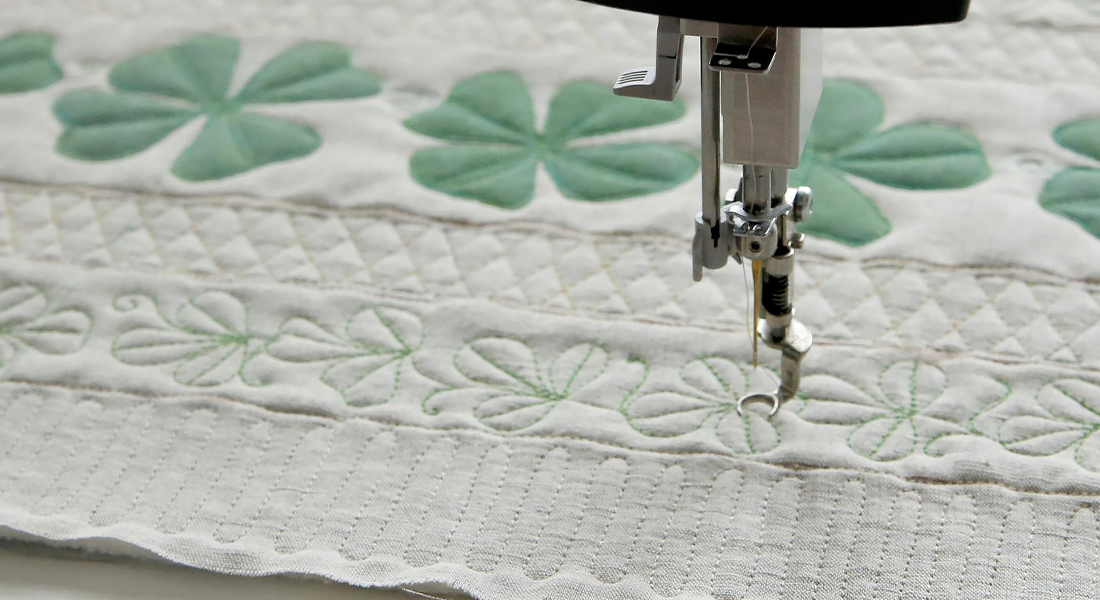
Stitch out the quilting layer. Notice how smooth and quiet the B 990 stitches with the new module. It’s mesmerizing!
Go back to the Stitchout Summary screen. The following designs are all embroidery, so turn off the Quilt Settings. Then, under Thread Cutting, change Thread Cut Length to 1 mm. Tap the green checkmark.
Stitch out the rest of your design, changing thread colors as needed. Pro Tip: If you are using a bold, directional print, you can go back to the Edit Menu to use Pinpoint Placement again for the second “Sweet Dreams” layer. Since the first layer quilted the fabric, there might be a slight shift in the placement. It’s always good to double check if using a fabric print that is directional. And it’s good that we have the option!
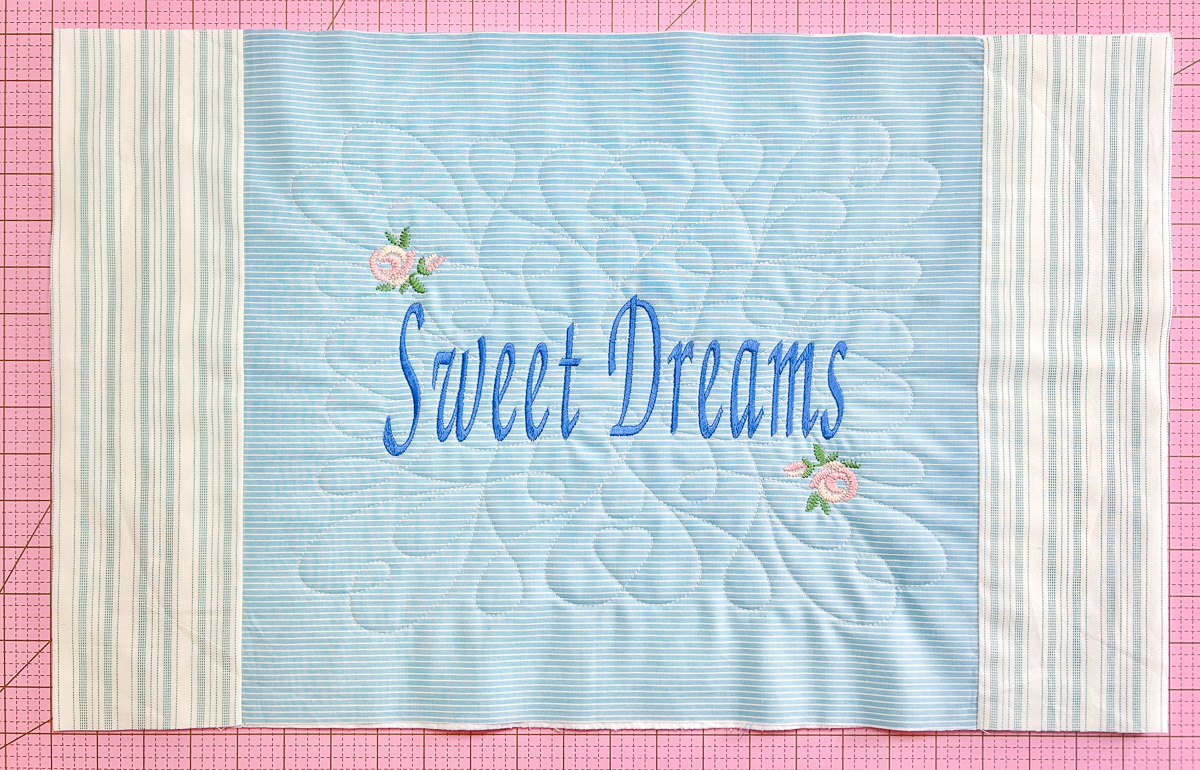
Trim the pillow front to 24” x 15” making sure to keep the design centered and proportional.
Step 5: Sew the Pillow Back and Zipper
This is one of my fave ways to add a zipper! Press the zipper flap lengthwise, wrong sides together, so it’s 2” x 15”. Take a pillow back piece and place right-side up. Match the raw edges of the zipper flap to the 15” side of the back. Secure with pins or Wonder Clips. Attach Patchwork Foot #57D/97D to your machine and select Straight Stitch #1. Sew with an 1/8” seam allowance.
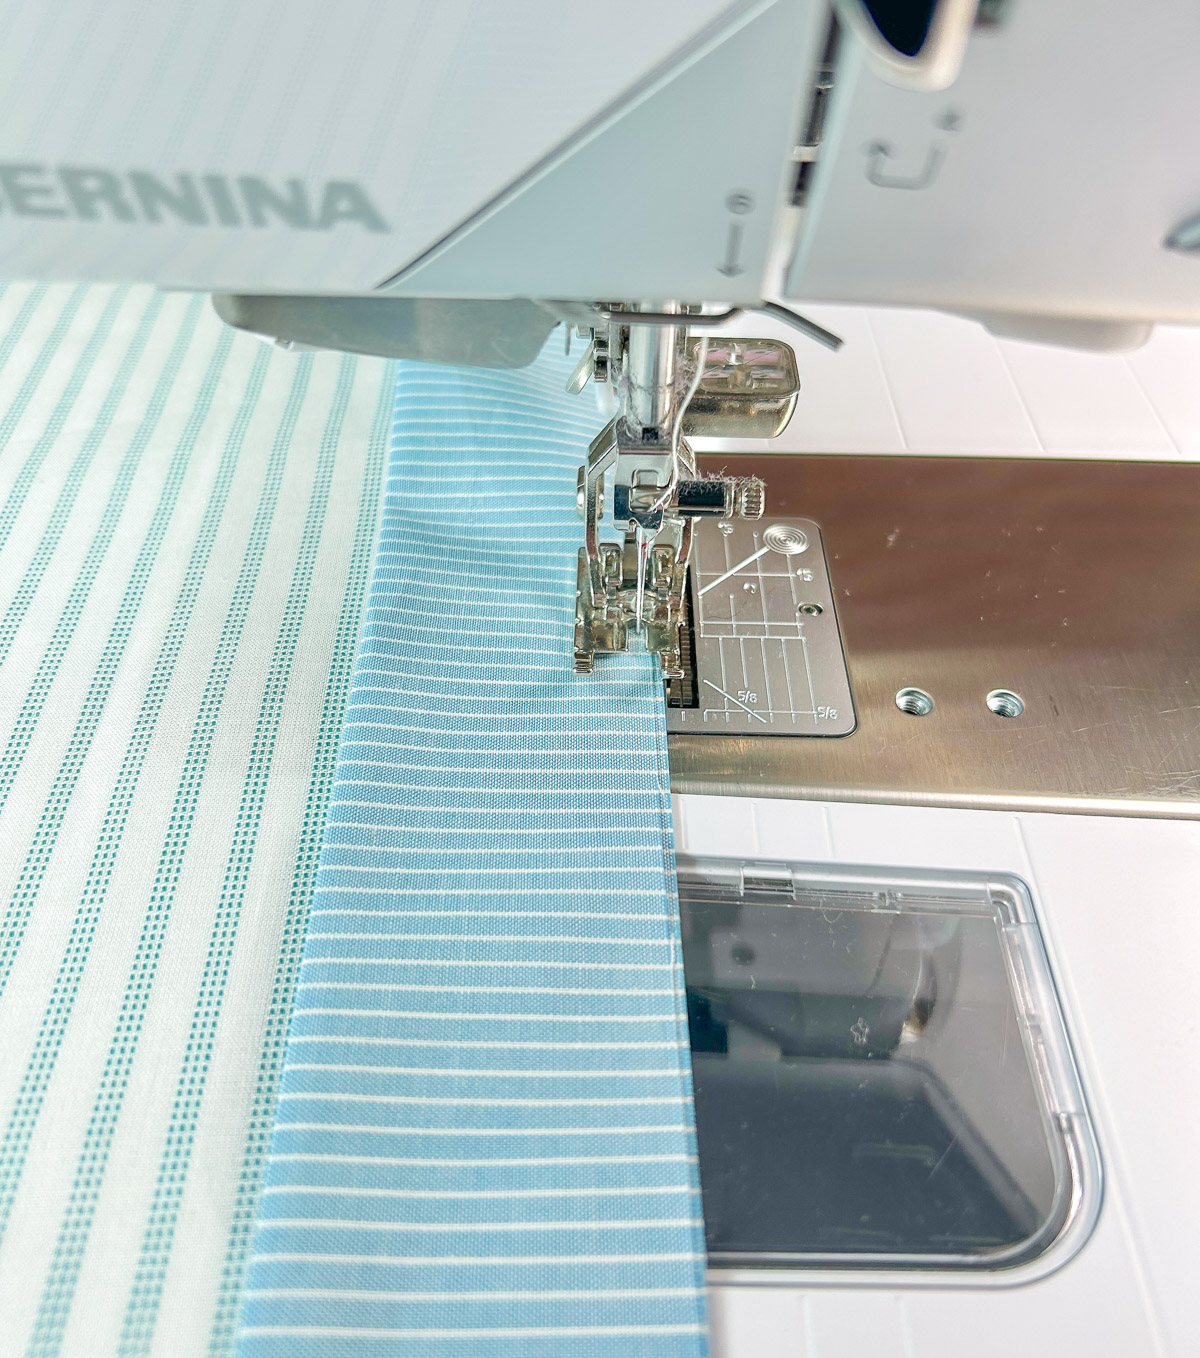
Next, attach Zipper Foot #4D to your machine and the 9 mm Stitch Plate. Place the zipper, wrong-side up, onto the zipper flap along the raw edges. Secure with pins or Wonder Clips. Move the Needle Position to -5. Sew a 1/4” seam allowance. Tip: I am using an 18” zipper so I can easily move the zipper tab out of the way when attaching the zipper tape.
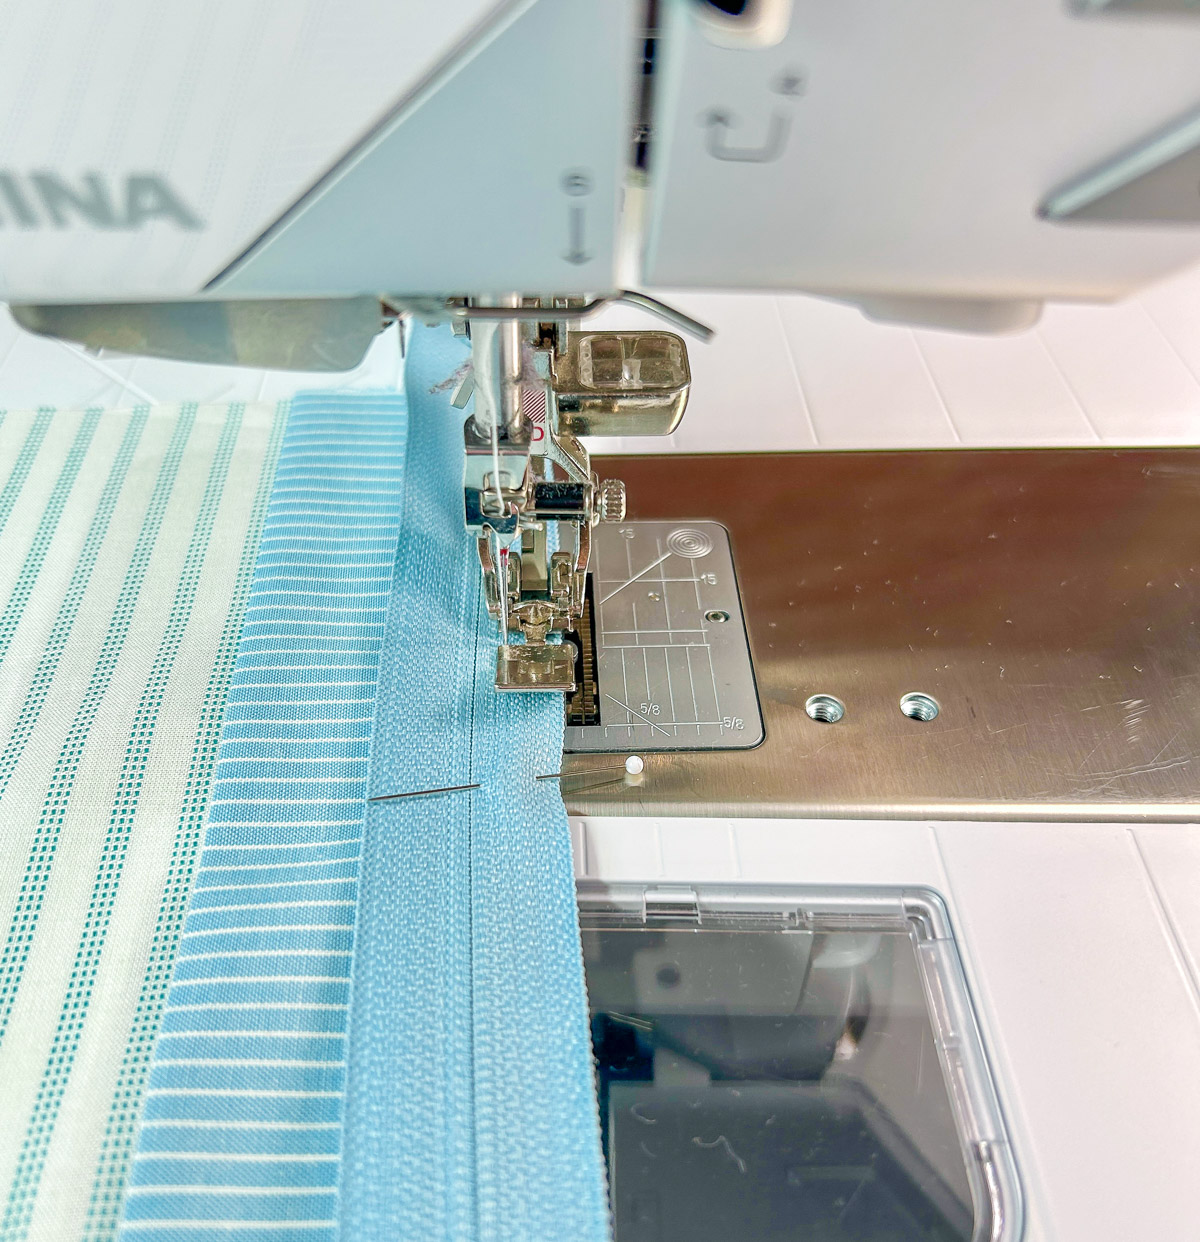
Press the seam with the back fabric on one side and the zipper flap on the other. Attach the Edgestitch Foot #10D. Place the Center Guide Blade in the seam. Move the Needle Position to -3. Edgestitch to secure in place and create a neat topstitch.
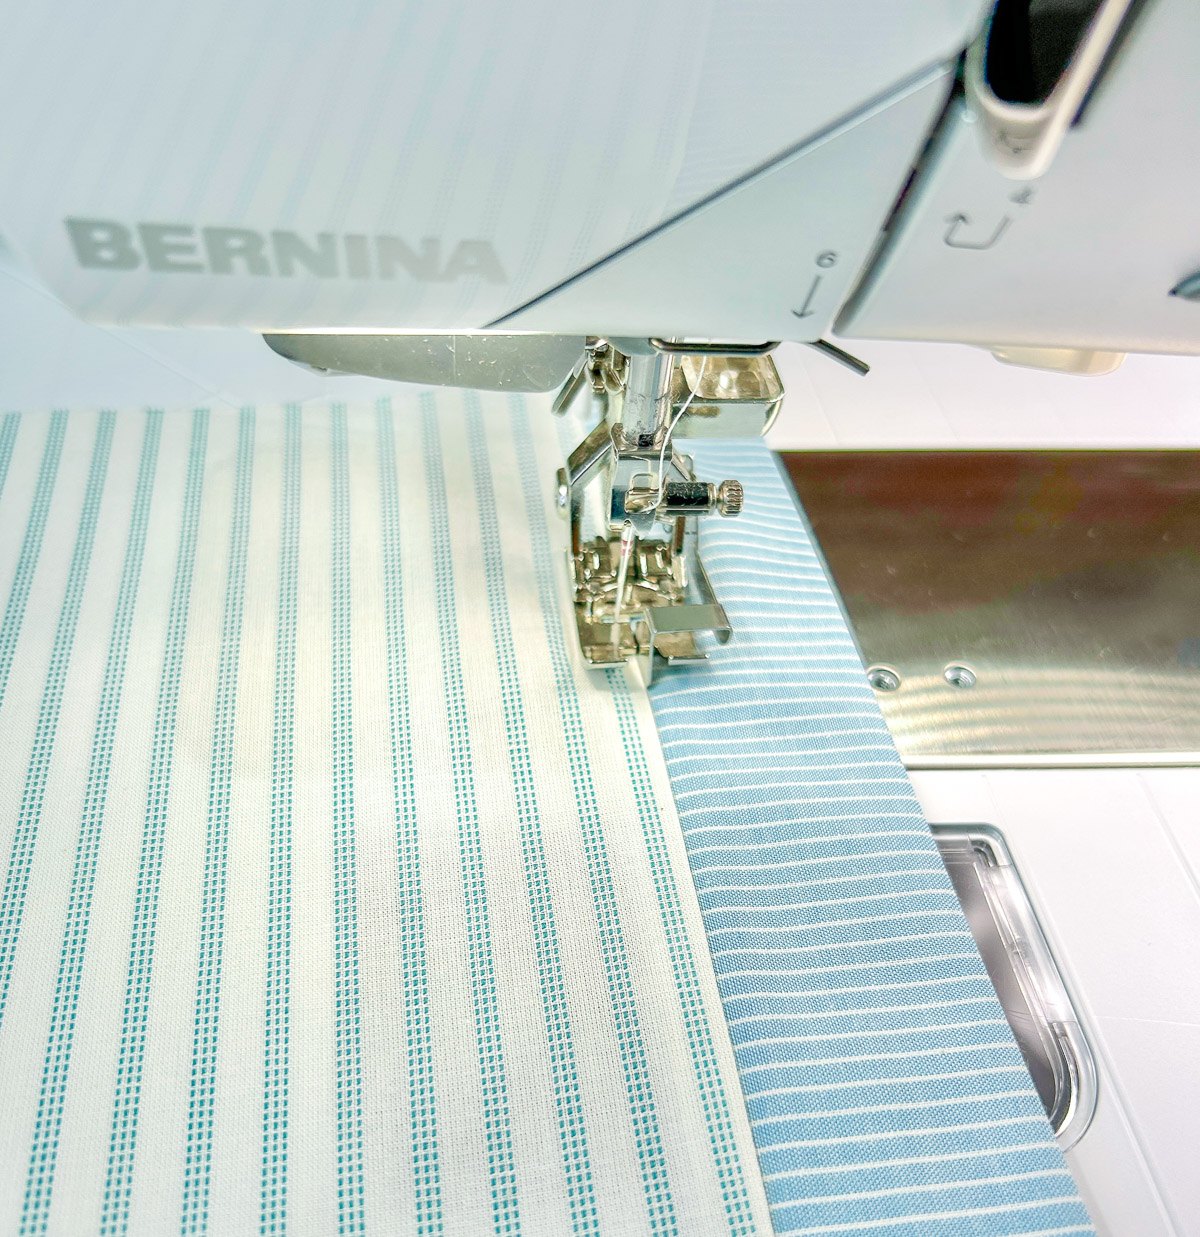
Pin the zipper flap away from the zipper for the next step. Attach the Zipper Foot on the machine and move the Needle Position to -5. Place the other pillow back fabric along the edge of the zipper, right sides together. Secure with pins or Wonder Clips. Sew a 1/4” seam allowance.
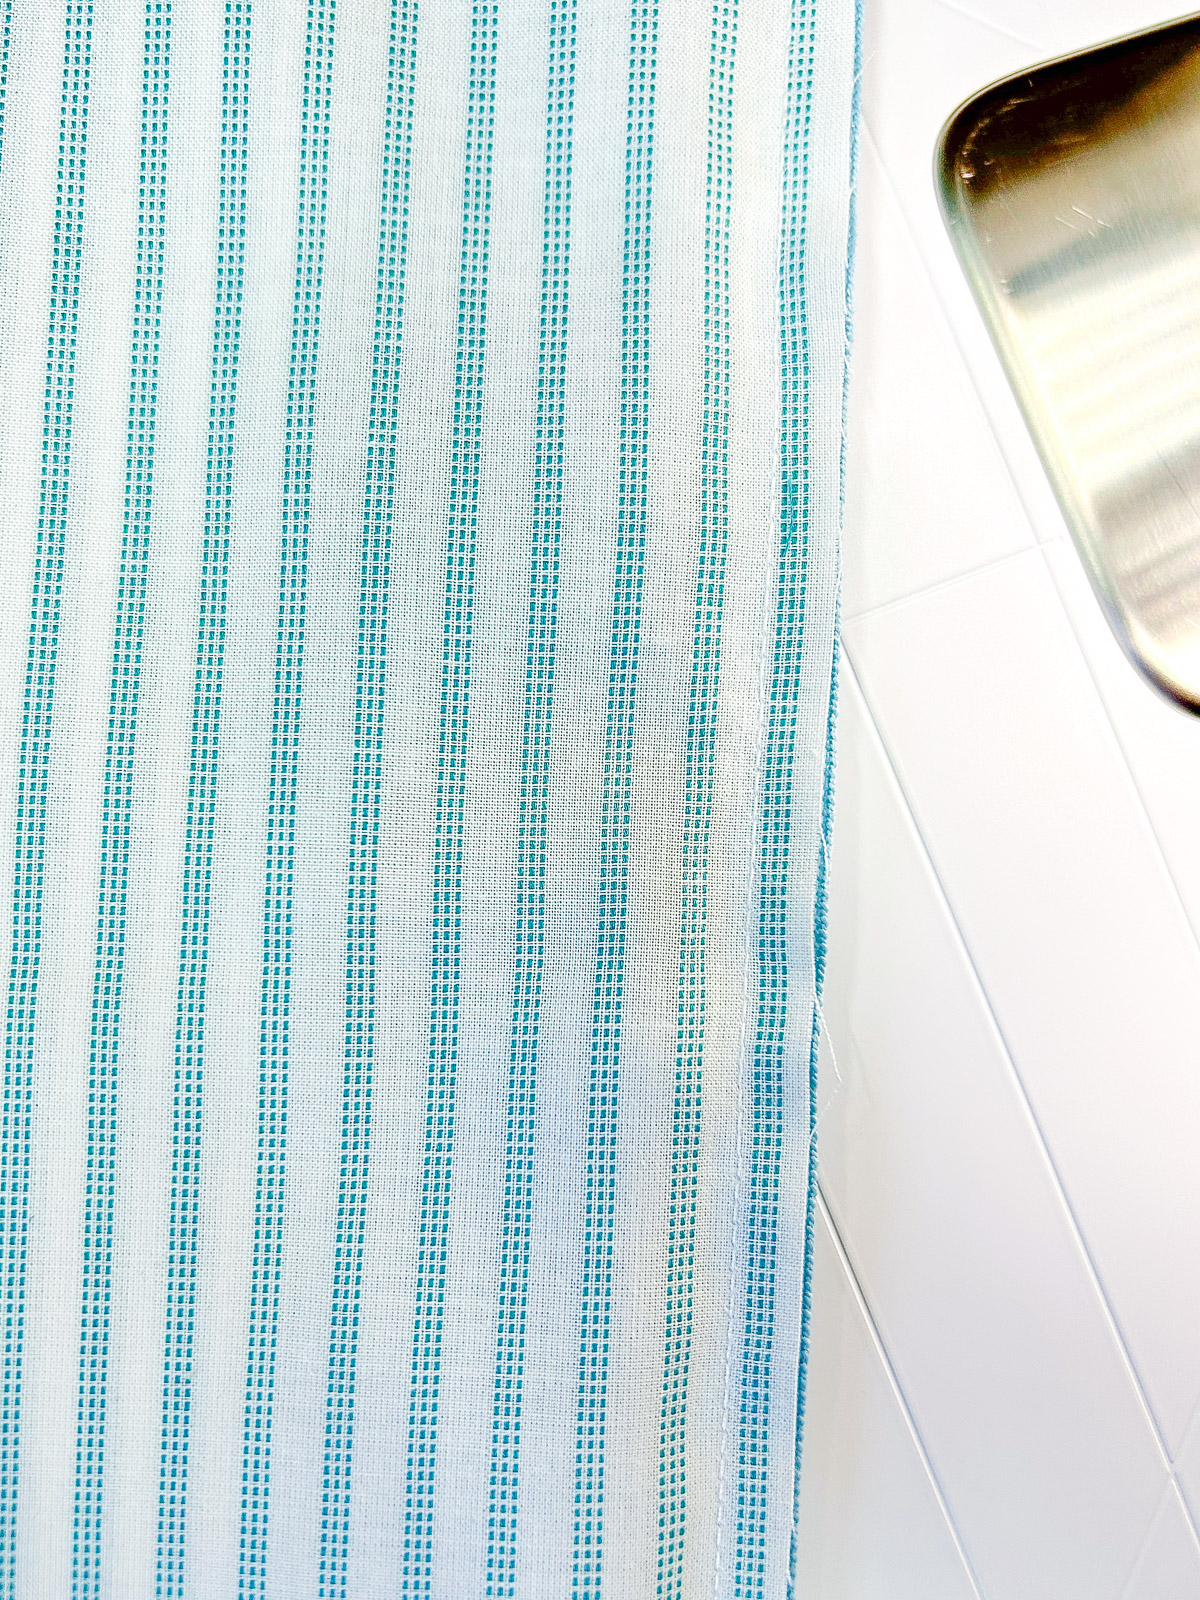
Press the seam allowance with fabric right-side up and away from the zipper teeth. Attach the Edgestitch Foot #10D and place the Center Guide Blade in the seam. Move the Needle Position to -3. Edgestitch to secure in place.
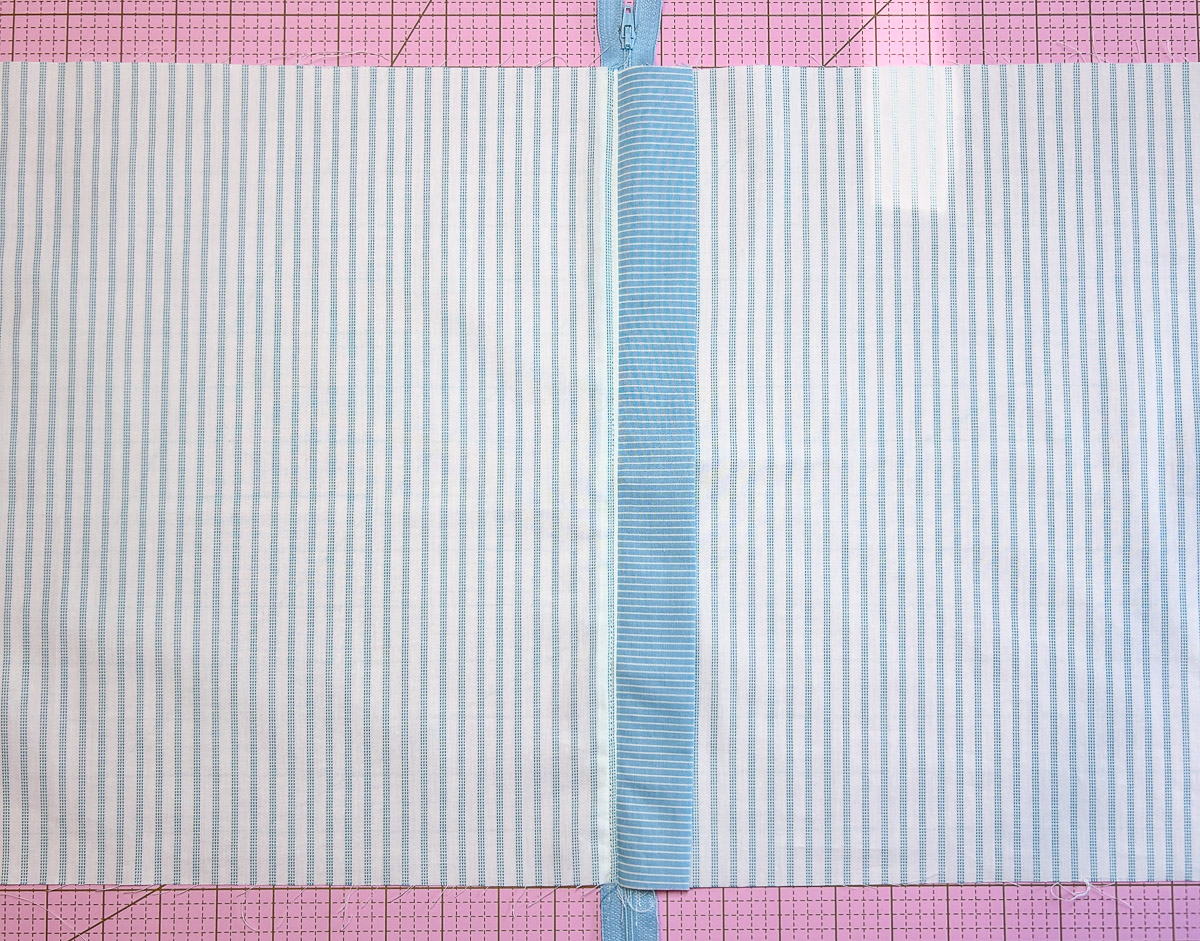
Trim the pieced back so it measures 24” x 15”. Don’t you love how easy it is to sew on a zipper and how the flap covers it?
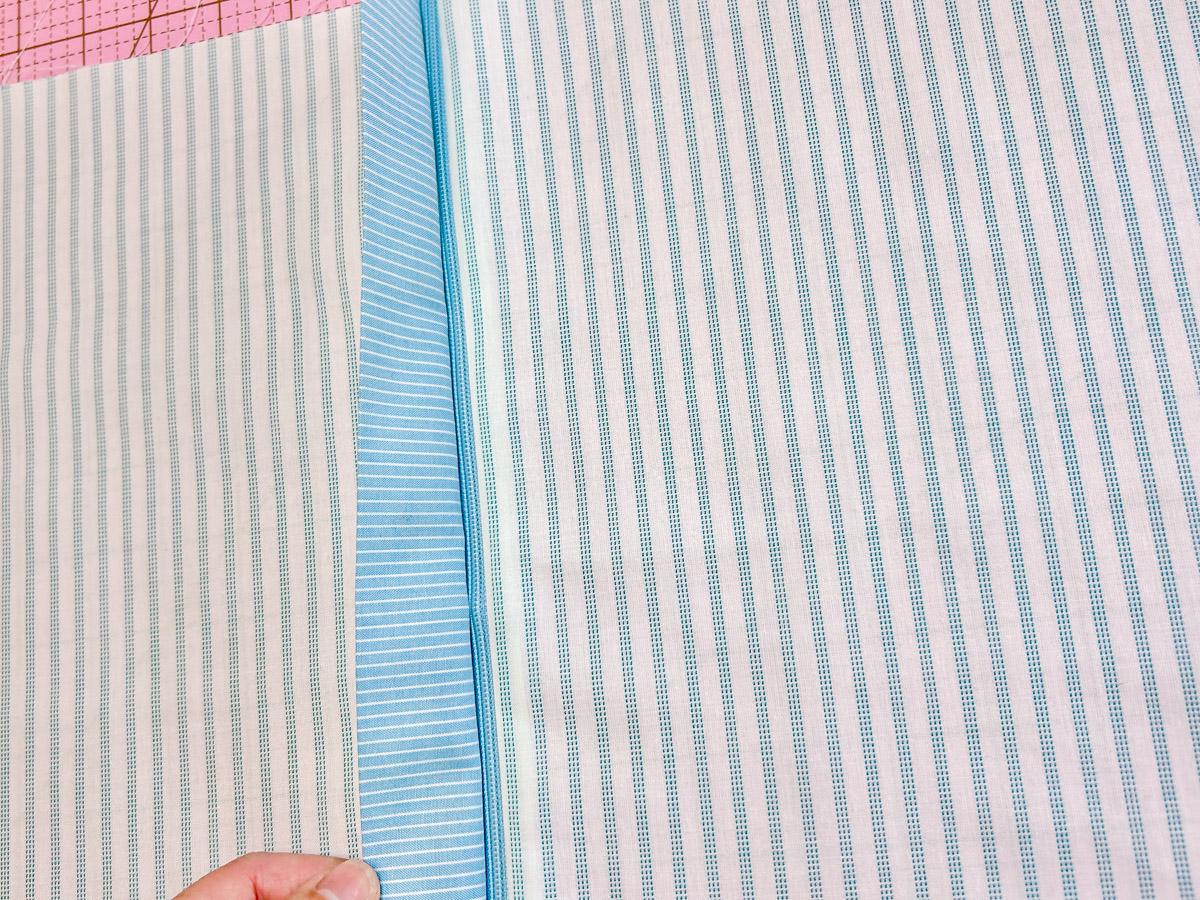
Step 6: Sew Front to Back and Binding
Place the pillow front and back, wrong sides together so the pretty sides are facing out. Secure with pins or Wonder Clips. Attach Walking Foot #50 and increase the Stitch Length to 6 mm. Baste the around the outside edges with an 1/8” seam allowance. When you are close to the zipper, move the tab toward the middle to avoid sewing into it.
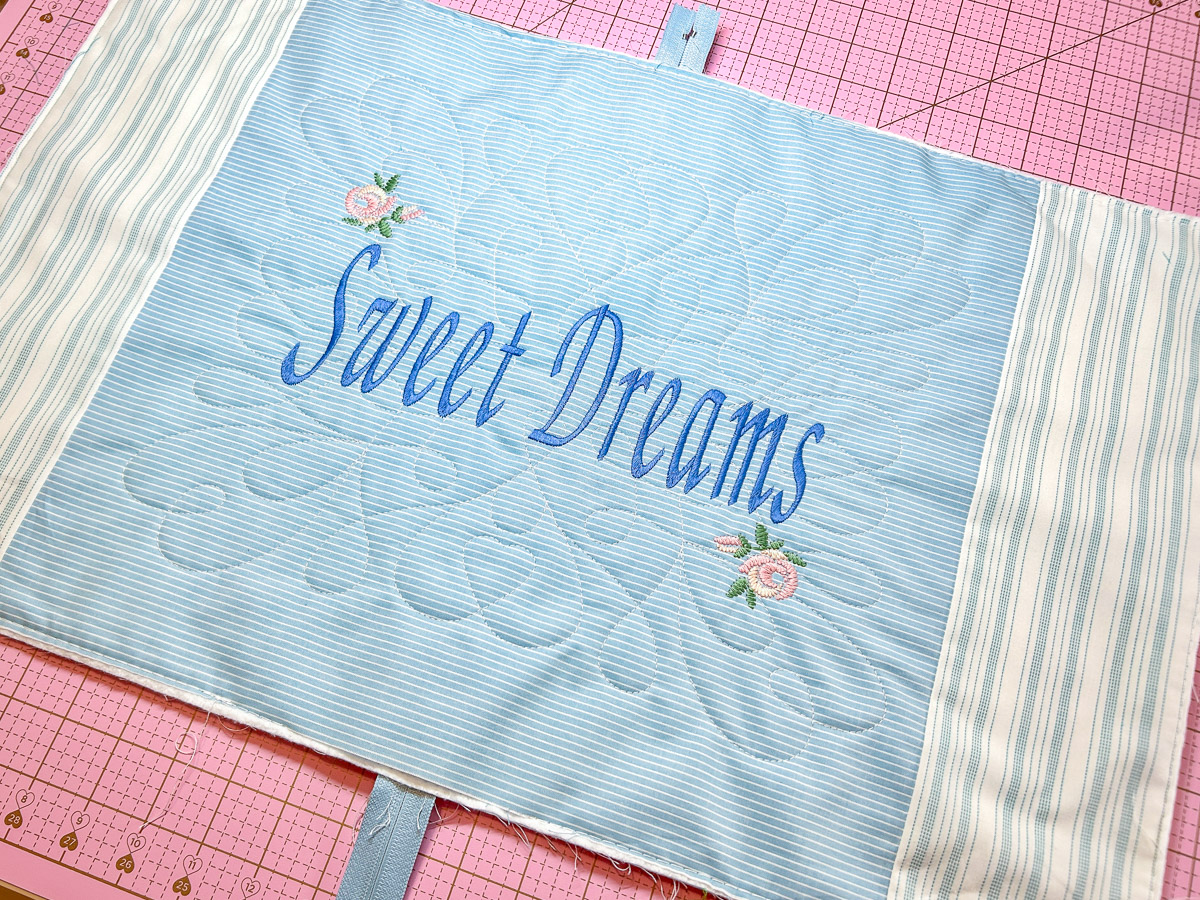
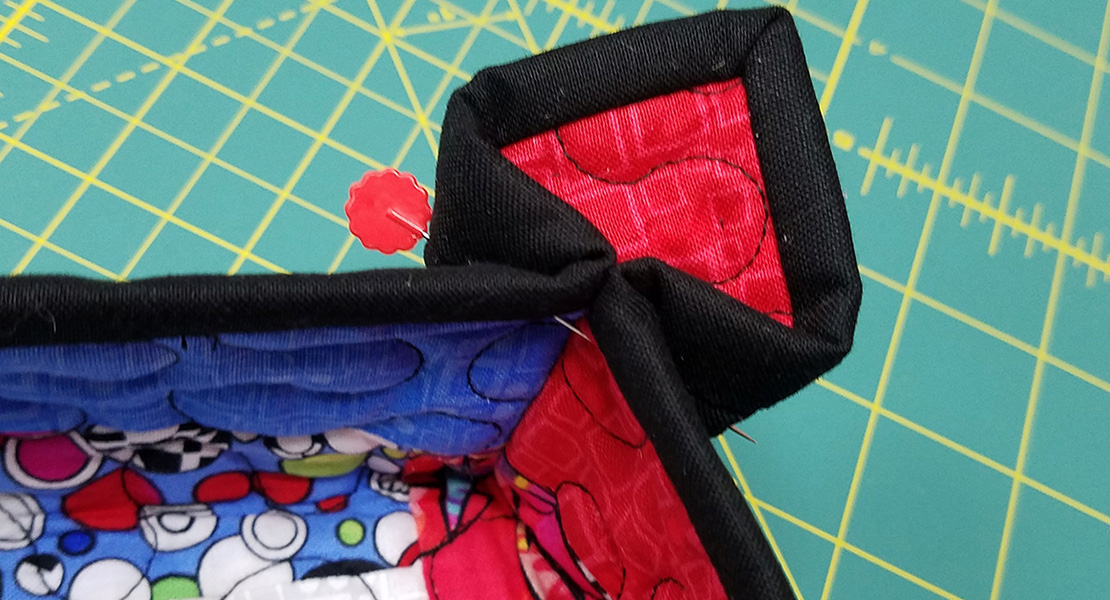
Trim the excess zipper. You are ready to add your binding! Use your favorite method or refer to one of these WeAllSew posts:
- Stay Gold Quilt Along Binding
- How to Create Faux Piped Binding
- How to Create Binding with the Lap Seam Foot #71
- Decorative Stitch Binding
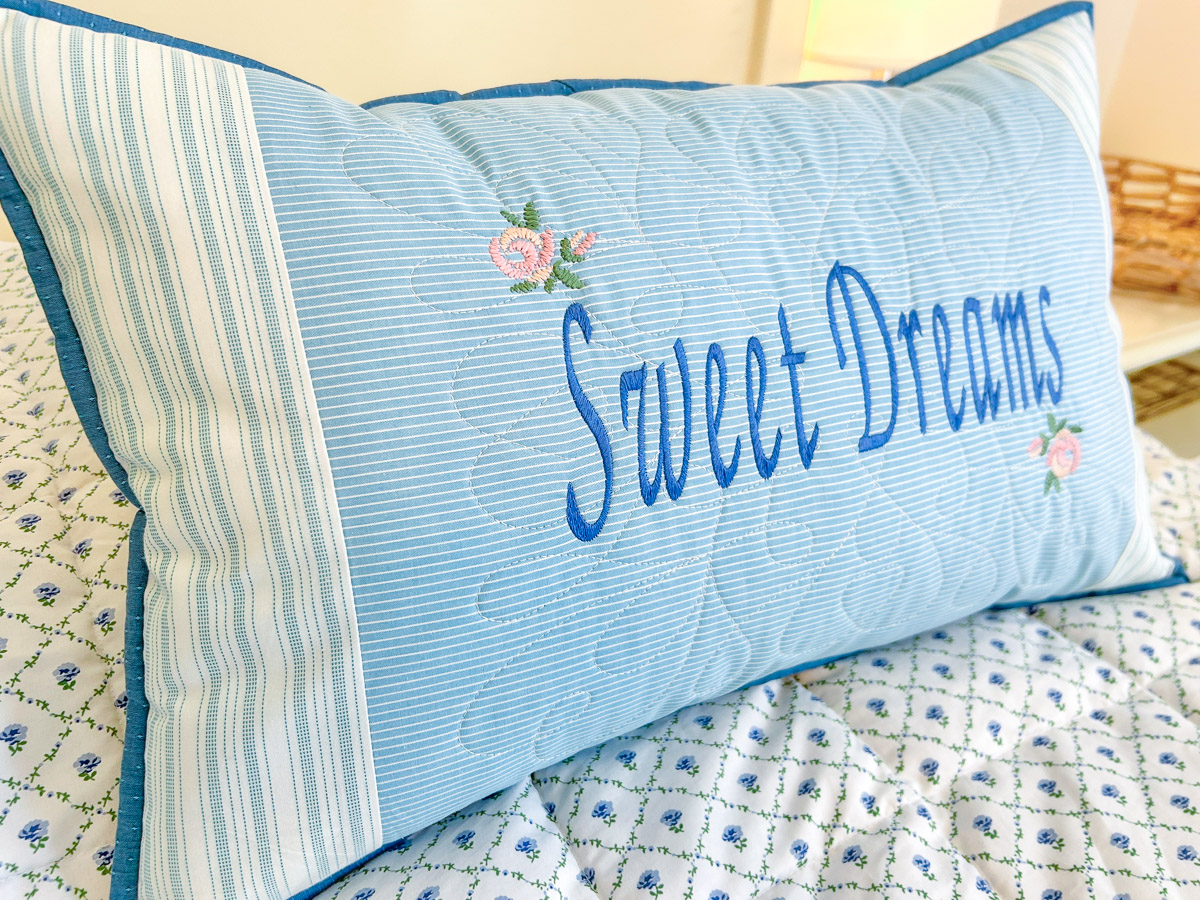
Here’s another color option using a darker thread for the quilting design on a solid blue fabric.

What you might also like
One comment on “Sweet Dreams Quilted Pillow Sham”
Leave a Reply
You must be logged in to post a comment.




Love it what size is the pillow sham? Can that also be done on the 790 pro