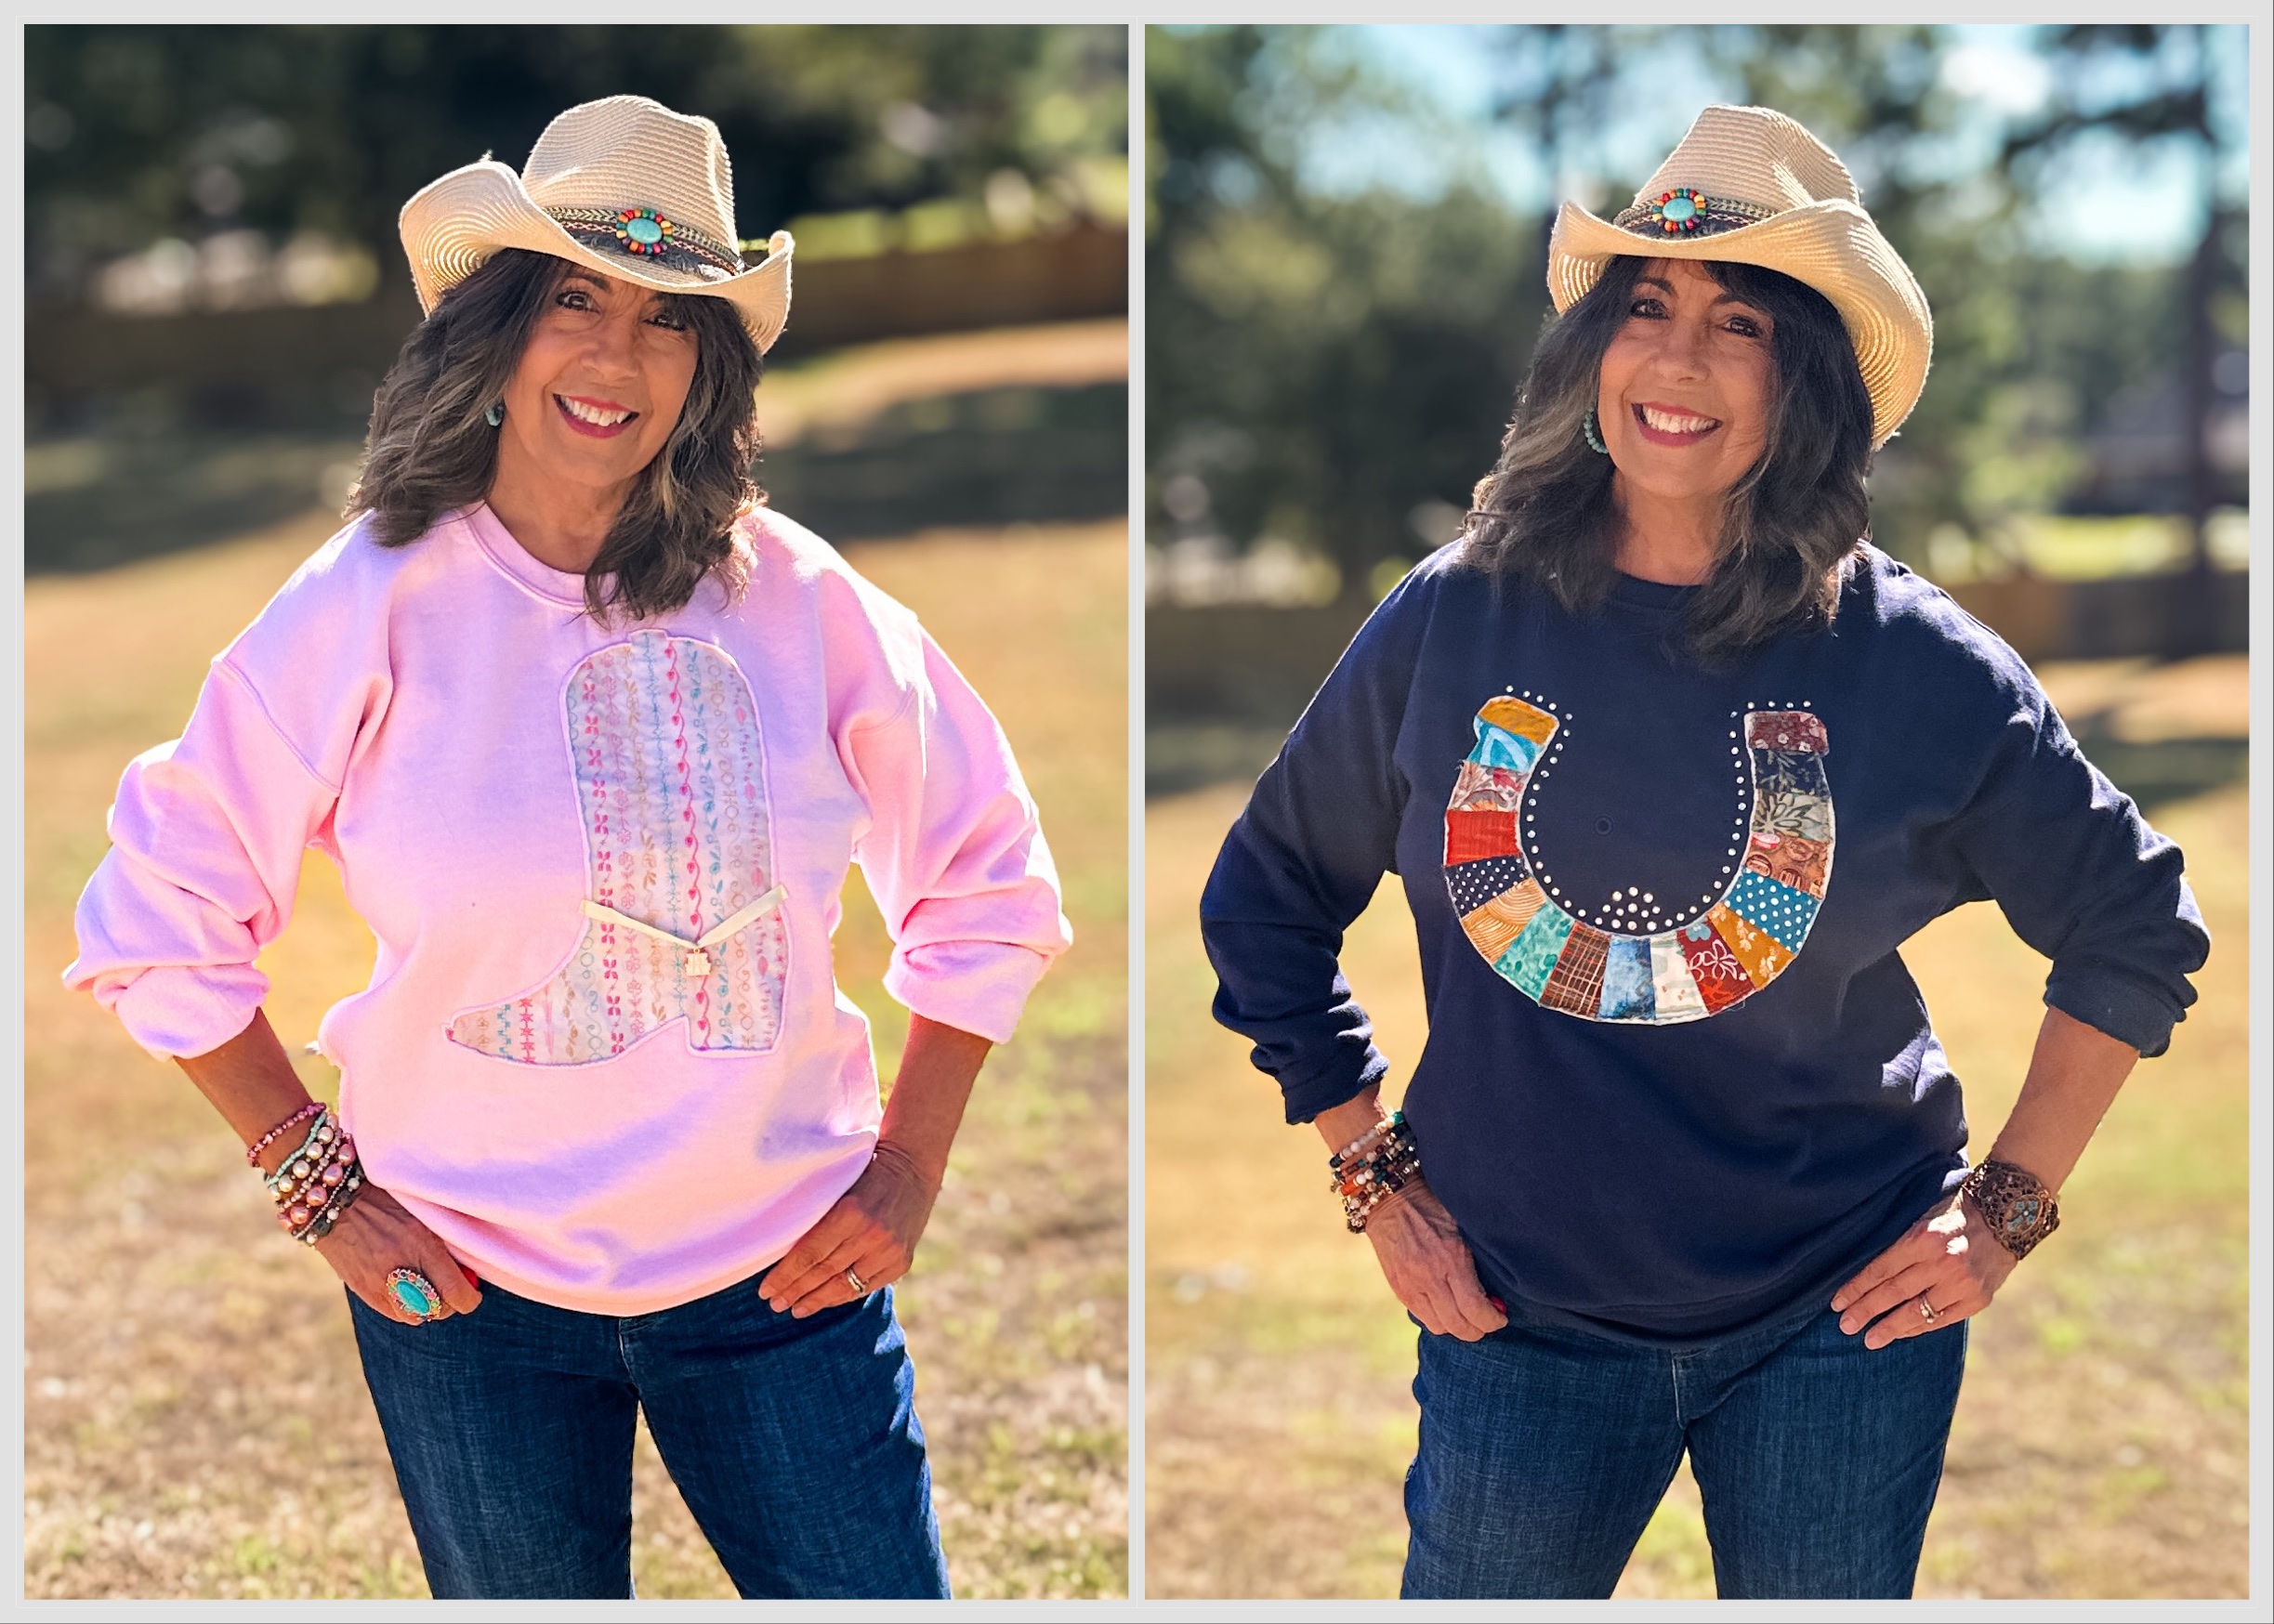
Easy Sweatshirt Upcycles: Western Boots and Horseshoe Appliqué

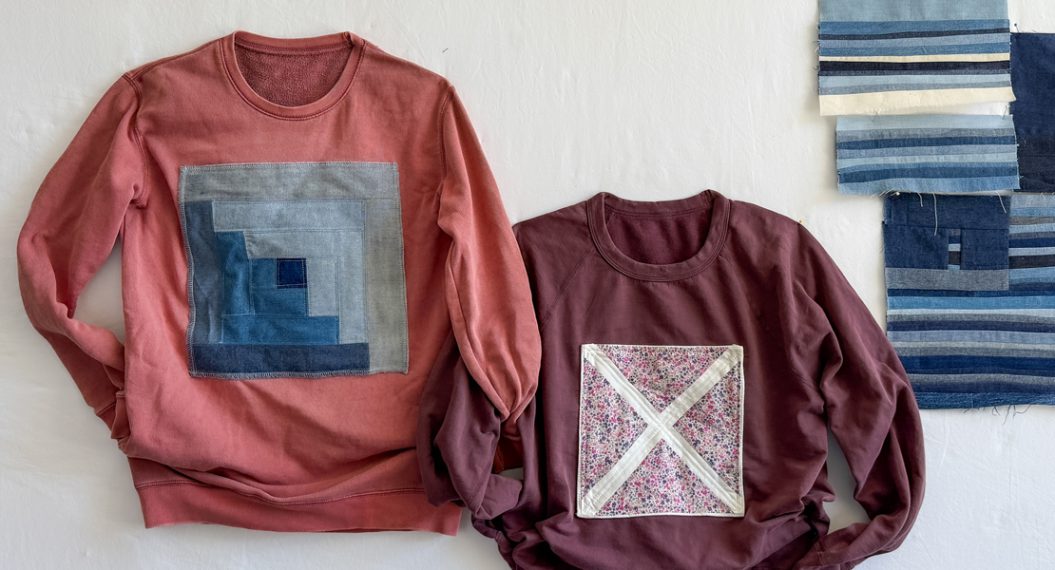
Saddle up your sewing machine as we’re giving a couple of plain sweatshirts some Western flair. Create a patchwork appliqué horseshoe with fabric scraps and add rhinestones for a bit of bling, or add a cowboy boot using reverse appliqué and decorative stitches. These two projects start with a ready-to-wear sweatshirt, so there’s no fitting required. Both projects are easy, creative, and perfect for yourself or gift-giving.
Hello everyone! It’s Sharon from Sharon Sews, a sewing enthusiast and instructor. You can connect with me on YouTube and Instagram, where I share sewing tips, projects, reviews, and fashion sewing ideas.
Let’s saddle up and sew!
The Patchwork Horseshoe Sweatshirt Upcycle
Supplies needed
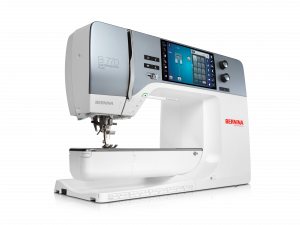
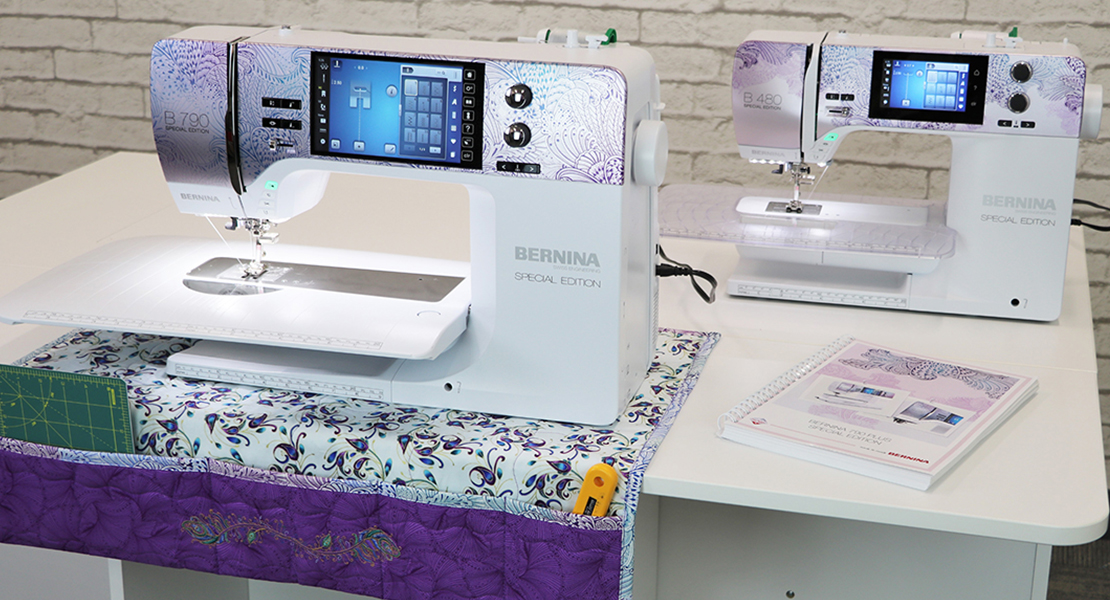
- Sewing machine – I used my BERNINA 770 QE PLUS
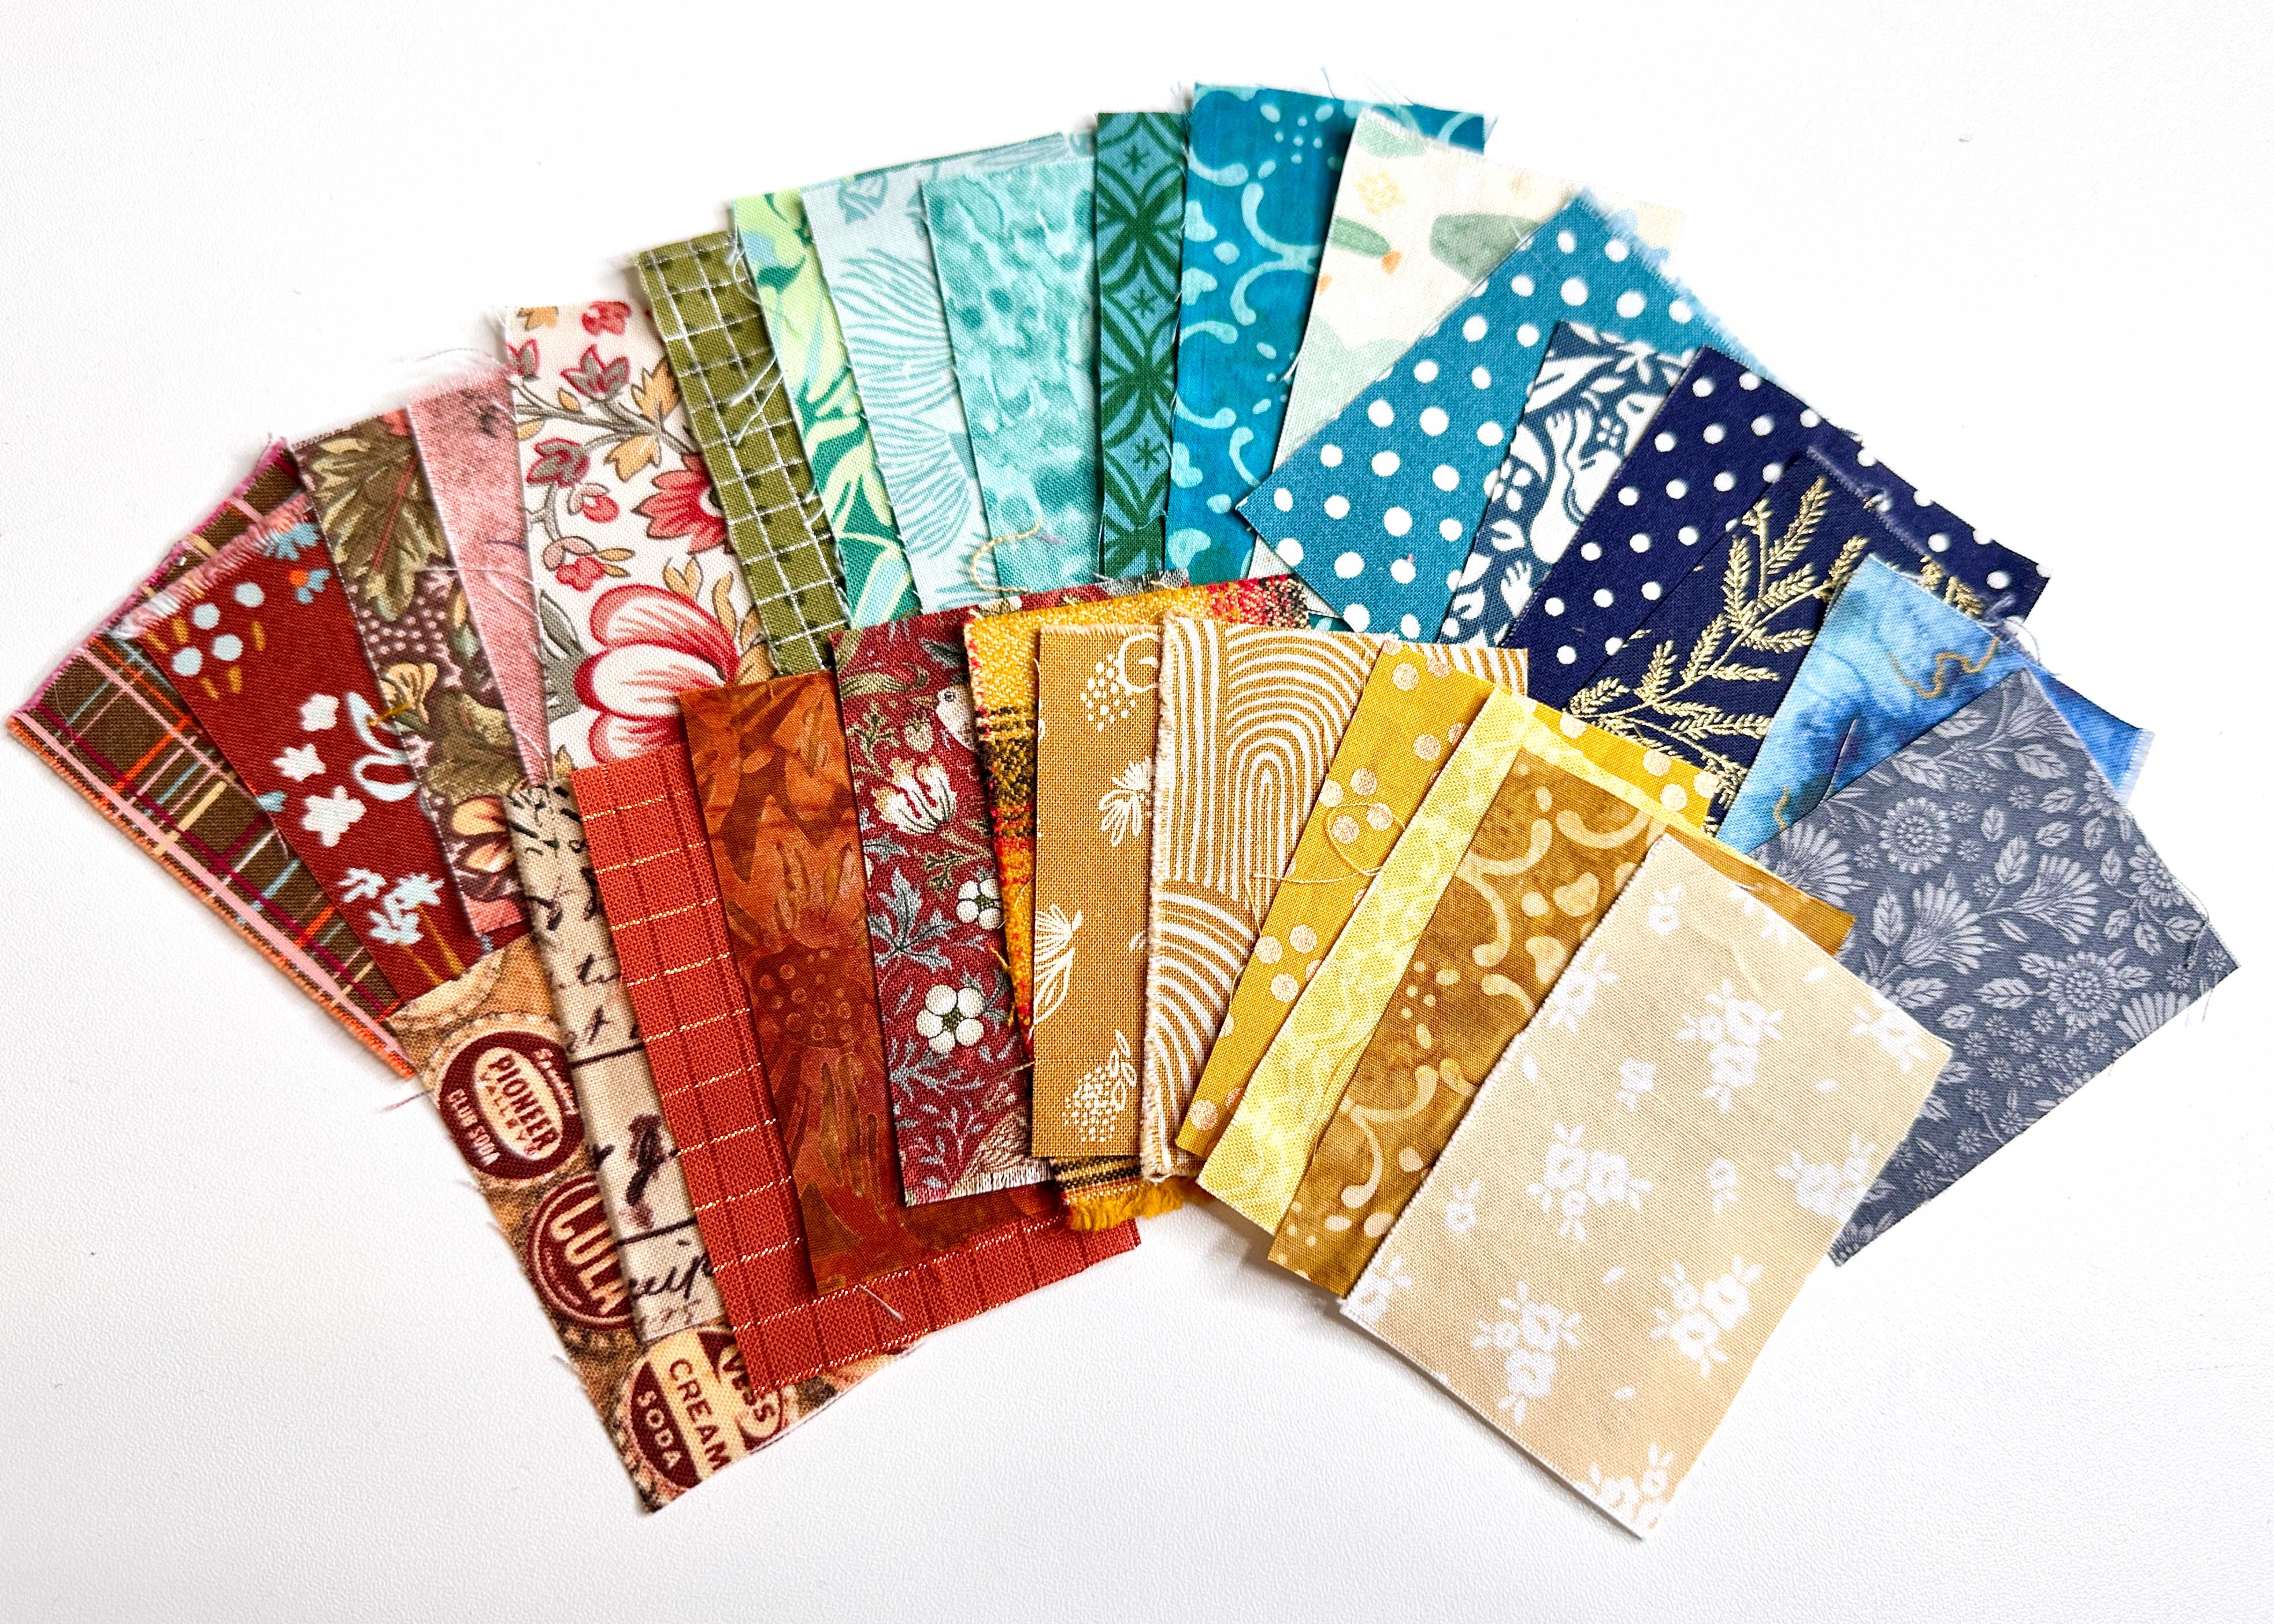
- Assorted cotton fabric scraps
- Cotton batting (12″ x 12″ piece)
- Fabric glue stick
- Fabric chalk or marker
- Thread
- Horseshoe template (download or draw your own)
- General sewing supplies
- Optional rhinestones (hot fix or sew-on)
Prepare the Sweatshirt
Prewash the sweatshirt, mark the center with chalk or a removable fabric marker, then set it aside.
Prepare the Horseshoe Template
Download and print the two-page PDF horseshoe template.

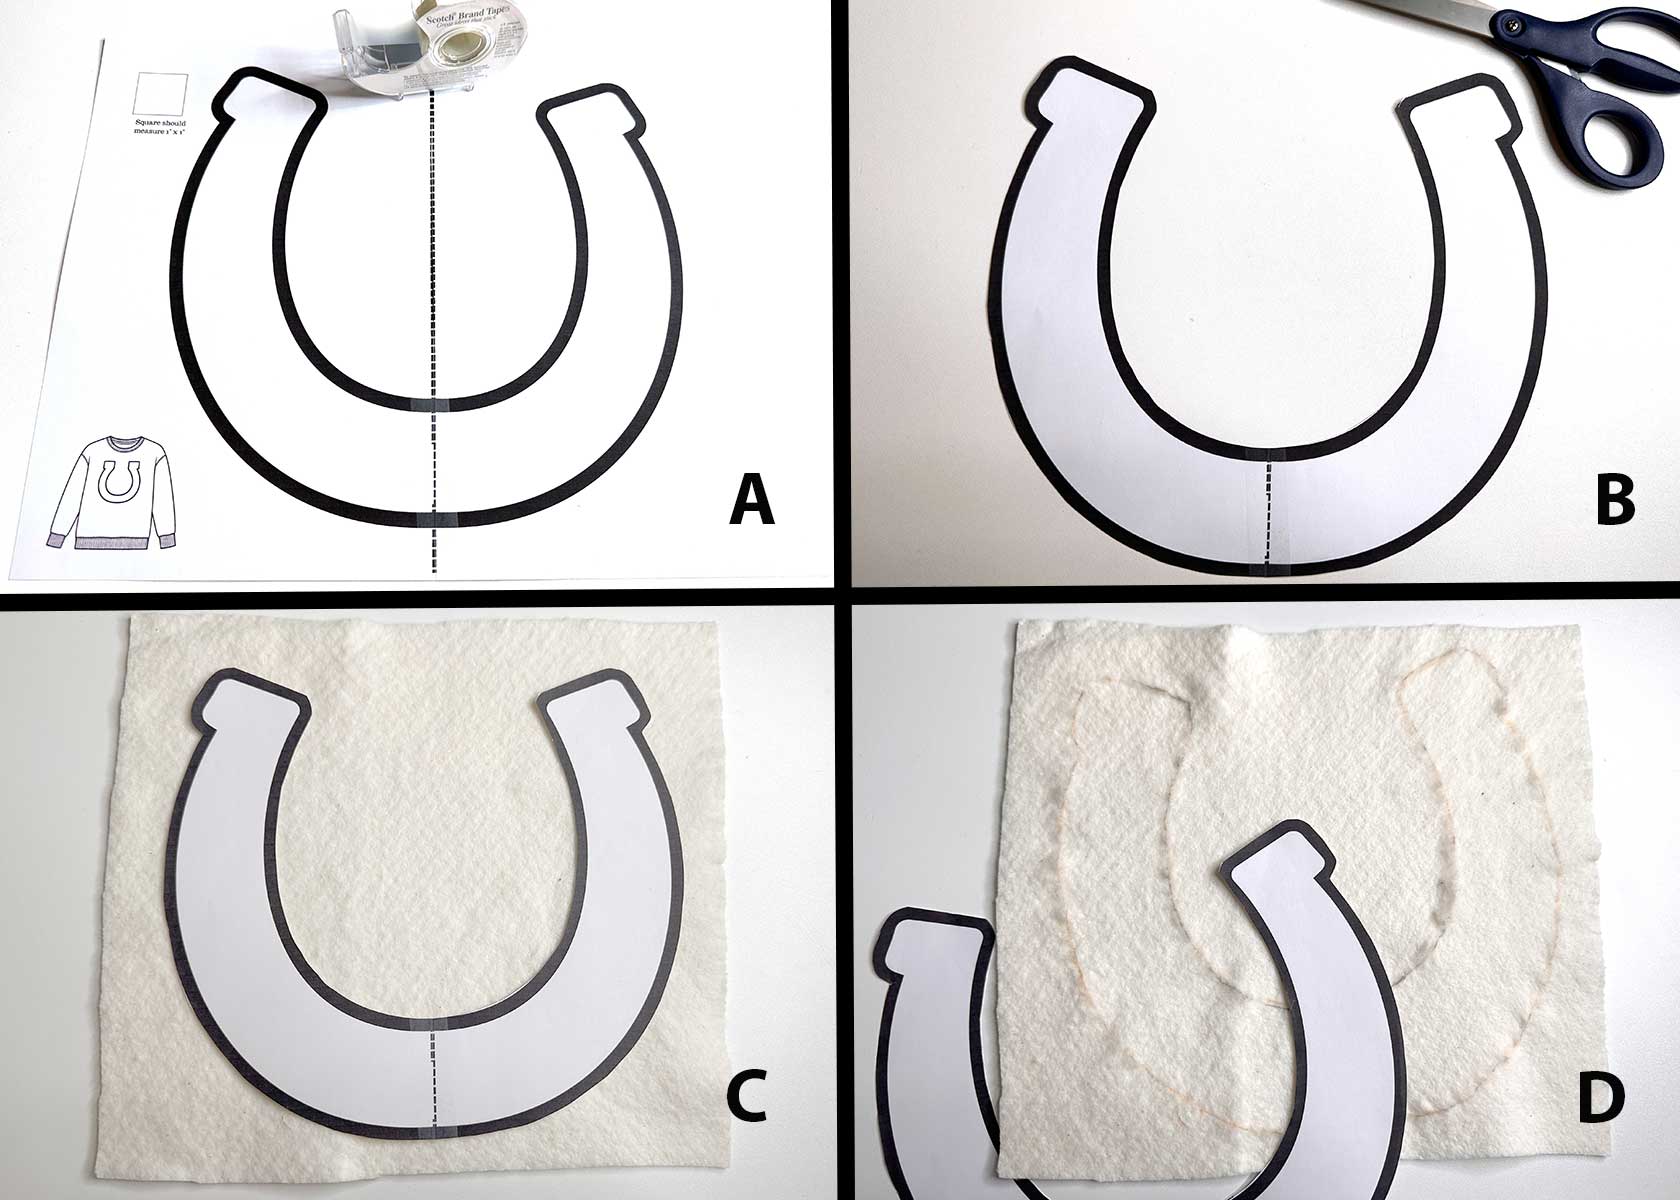
Match the dotted lines, tape the horseshoe template together (A), and cut it out (B). Place it on a piece of 12″ x 12″ cotton batting (C) and trace around the template (D).
Sew the Patchwork Horseshoe
Grab some fabric scraps and cut 17 pieces, each measuring about 2″ x 3″. Note that you may need more or less depending on the size of the fabric pieces you use.
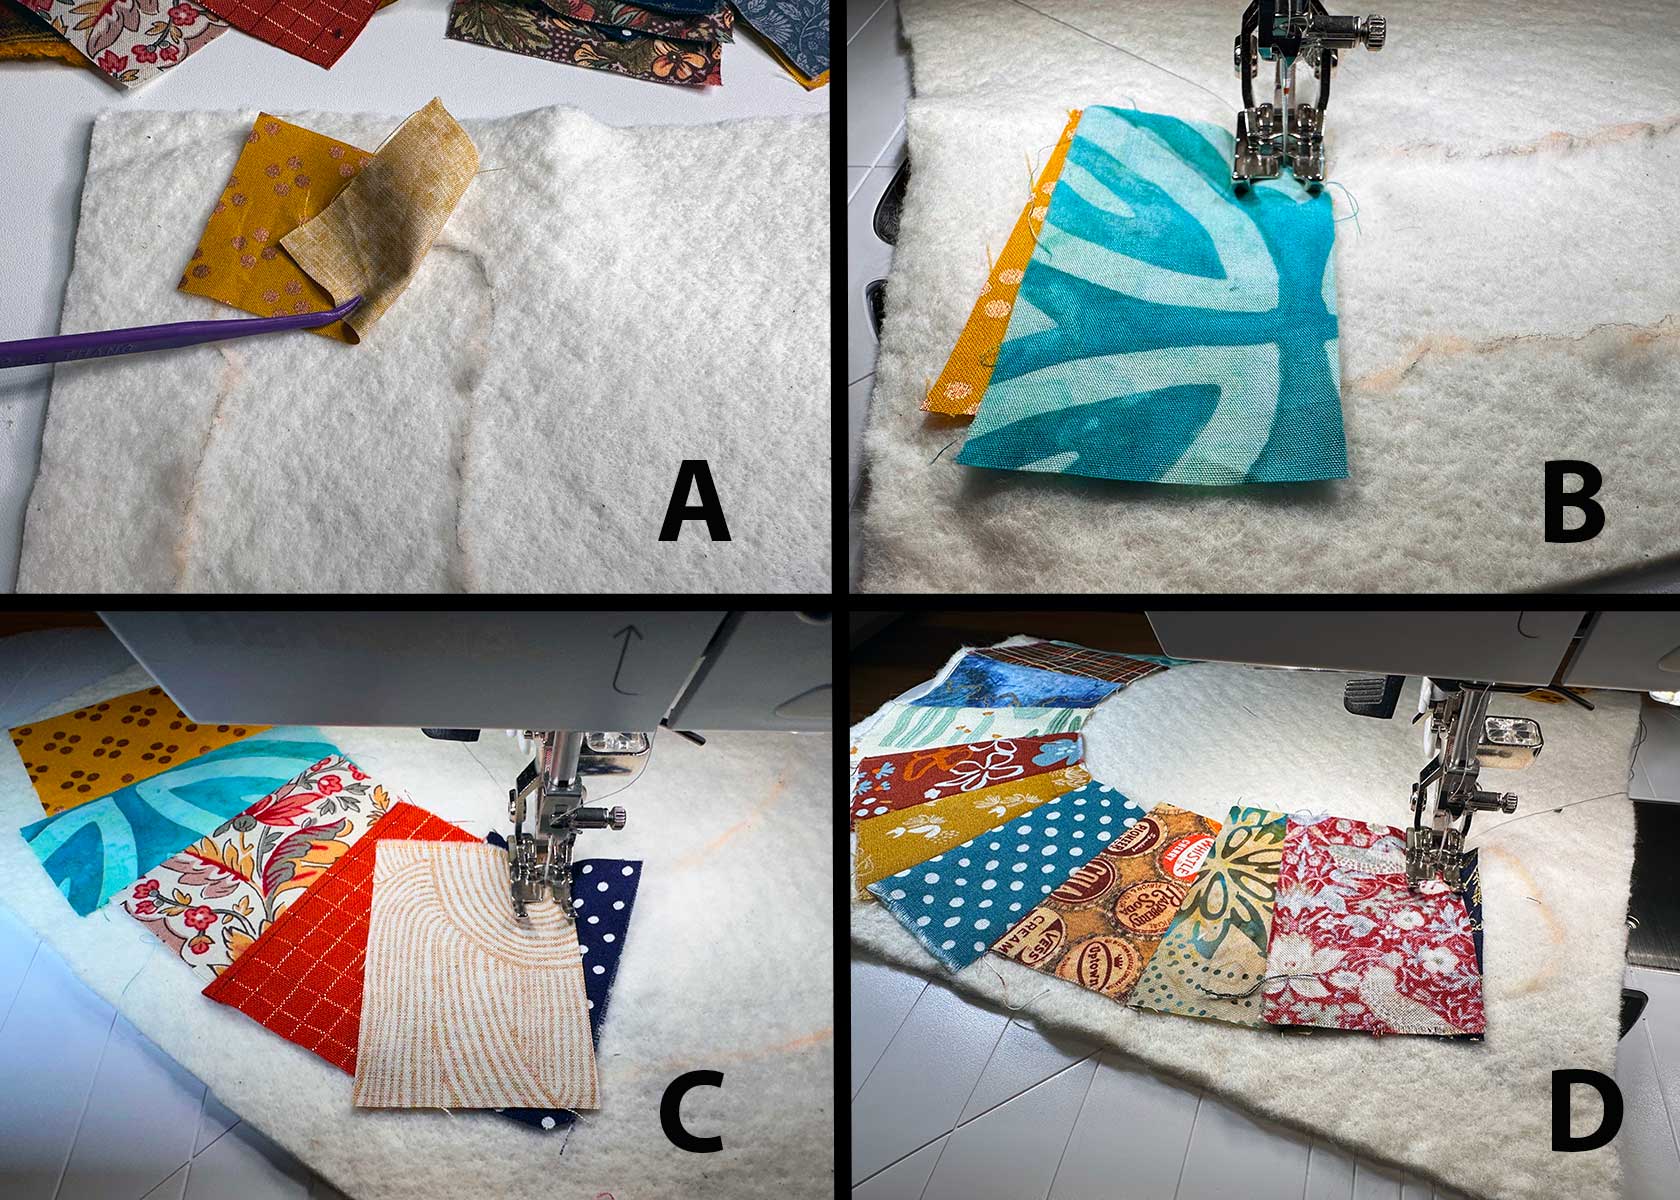
On the batting, position a piece of fabric right side up at the left top edge of the horseshoe, making sure it covers the horseshoe outline (A). Take another piece of fabric and place it on the first one, right sides facing, and stitch together using a 1/4″ seam allowance (B). Press the second fabric piece down over the horseshoe outline.
Take another piece of fabric, place it right side facing on the fabric you just added, stitch using a 1/4″ seam allowance, and press. Because the horseshoe curves, you’ll want to angle fabrics slightly as you add them, making sure they cover the horseshoe outline (C). Continue adding fabric pieces in this manner until the entire horseshoe is covered (D).
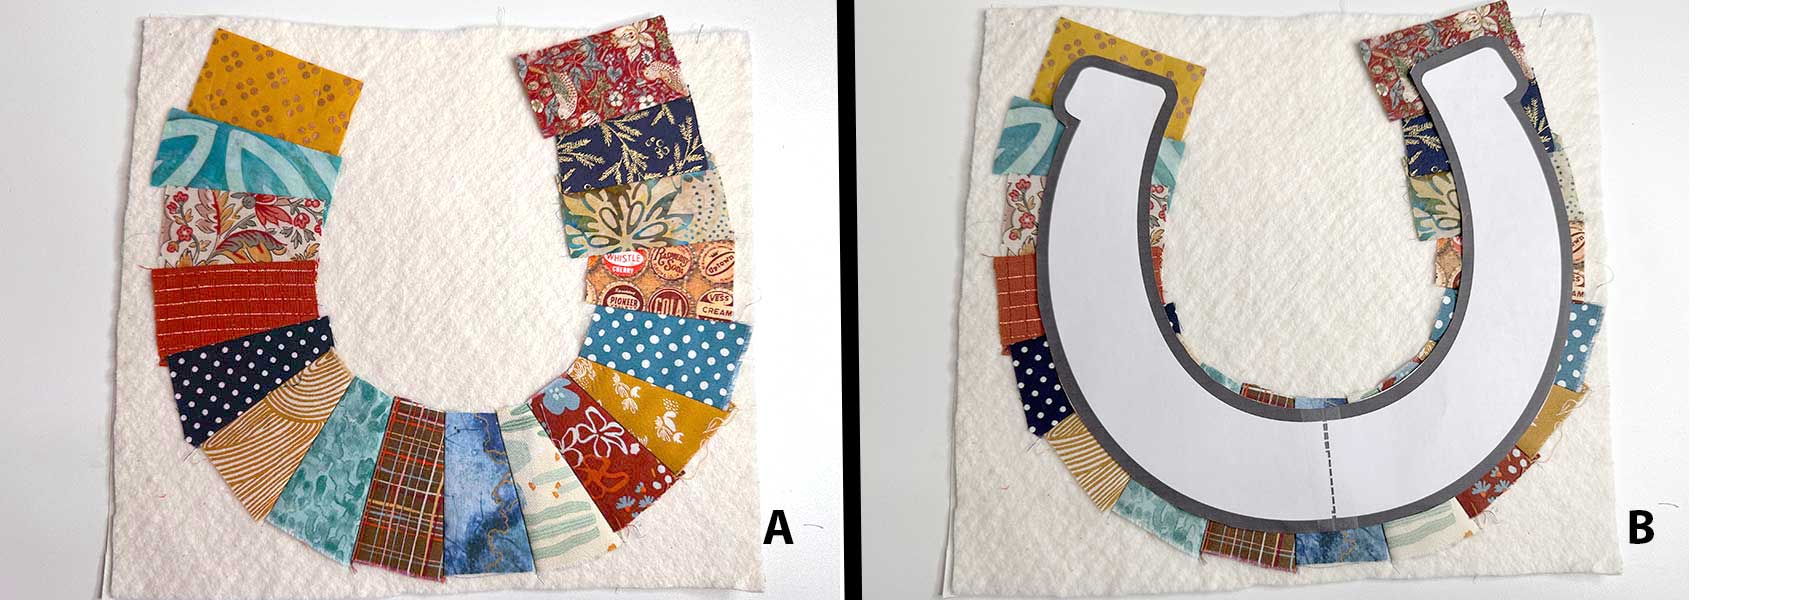
Place the batting on a flat work surface with the patchwork facing up (A). Place the horseshoe template on top of the patchwork and trace around the template using chalk or a removable fabric marker (B). Cut out the horseshoe along the traced lines.
Sew the Patchwork Horseshoe to the Sweatshirt
With the sweatshirt on a flat work surface, align the center of the patchwork horseshoe with the center of the sweatshirt. I placed the top edges of the horseshoe about 3-1/2″ down from the neck edge. Once you’re happy with the look, secure the horseshoe in place with pins, fabric glue, or fusible web, such as Heat n Bond. I tried all three methods and preferred using a fabric glue stick.
Clean and oil your sewing machine, then thread your machine with metallic thread (regular thread in the bobbin) and insert a metallic needle.
Remove the extension table, exposing the free arm. Slide the sweatshirt onto the free arm, with the patchwork horseshoe facing up. This appliqué design is intended to have raw edges, so a straight stitch is used. Beginning at the bottom curve, stitch the horseshoe to the sweatshirt along all edges, using the knee lift to raise the pressure foot as you stitch around the curves.
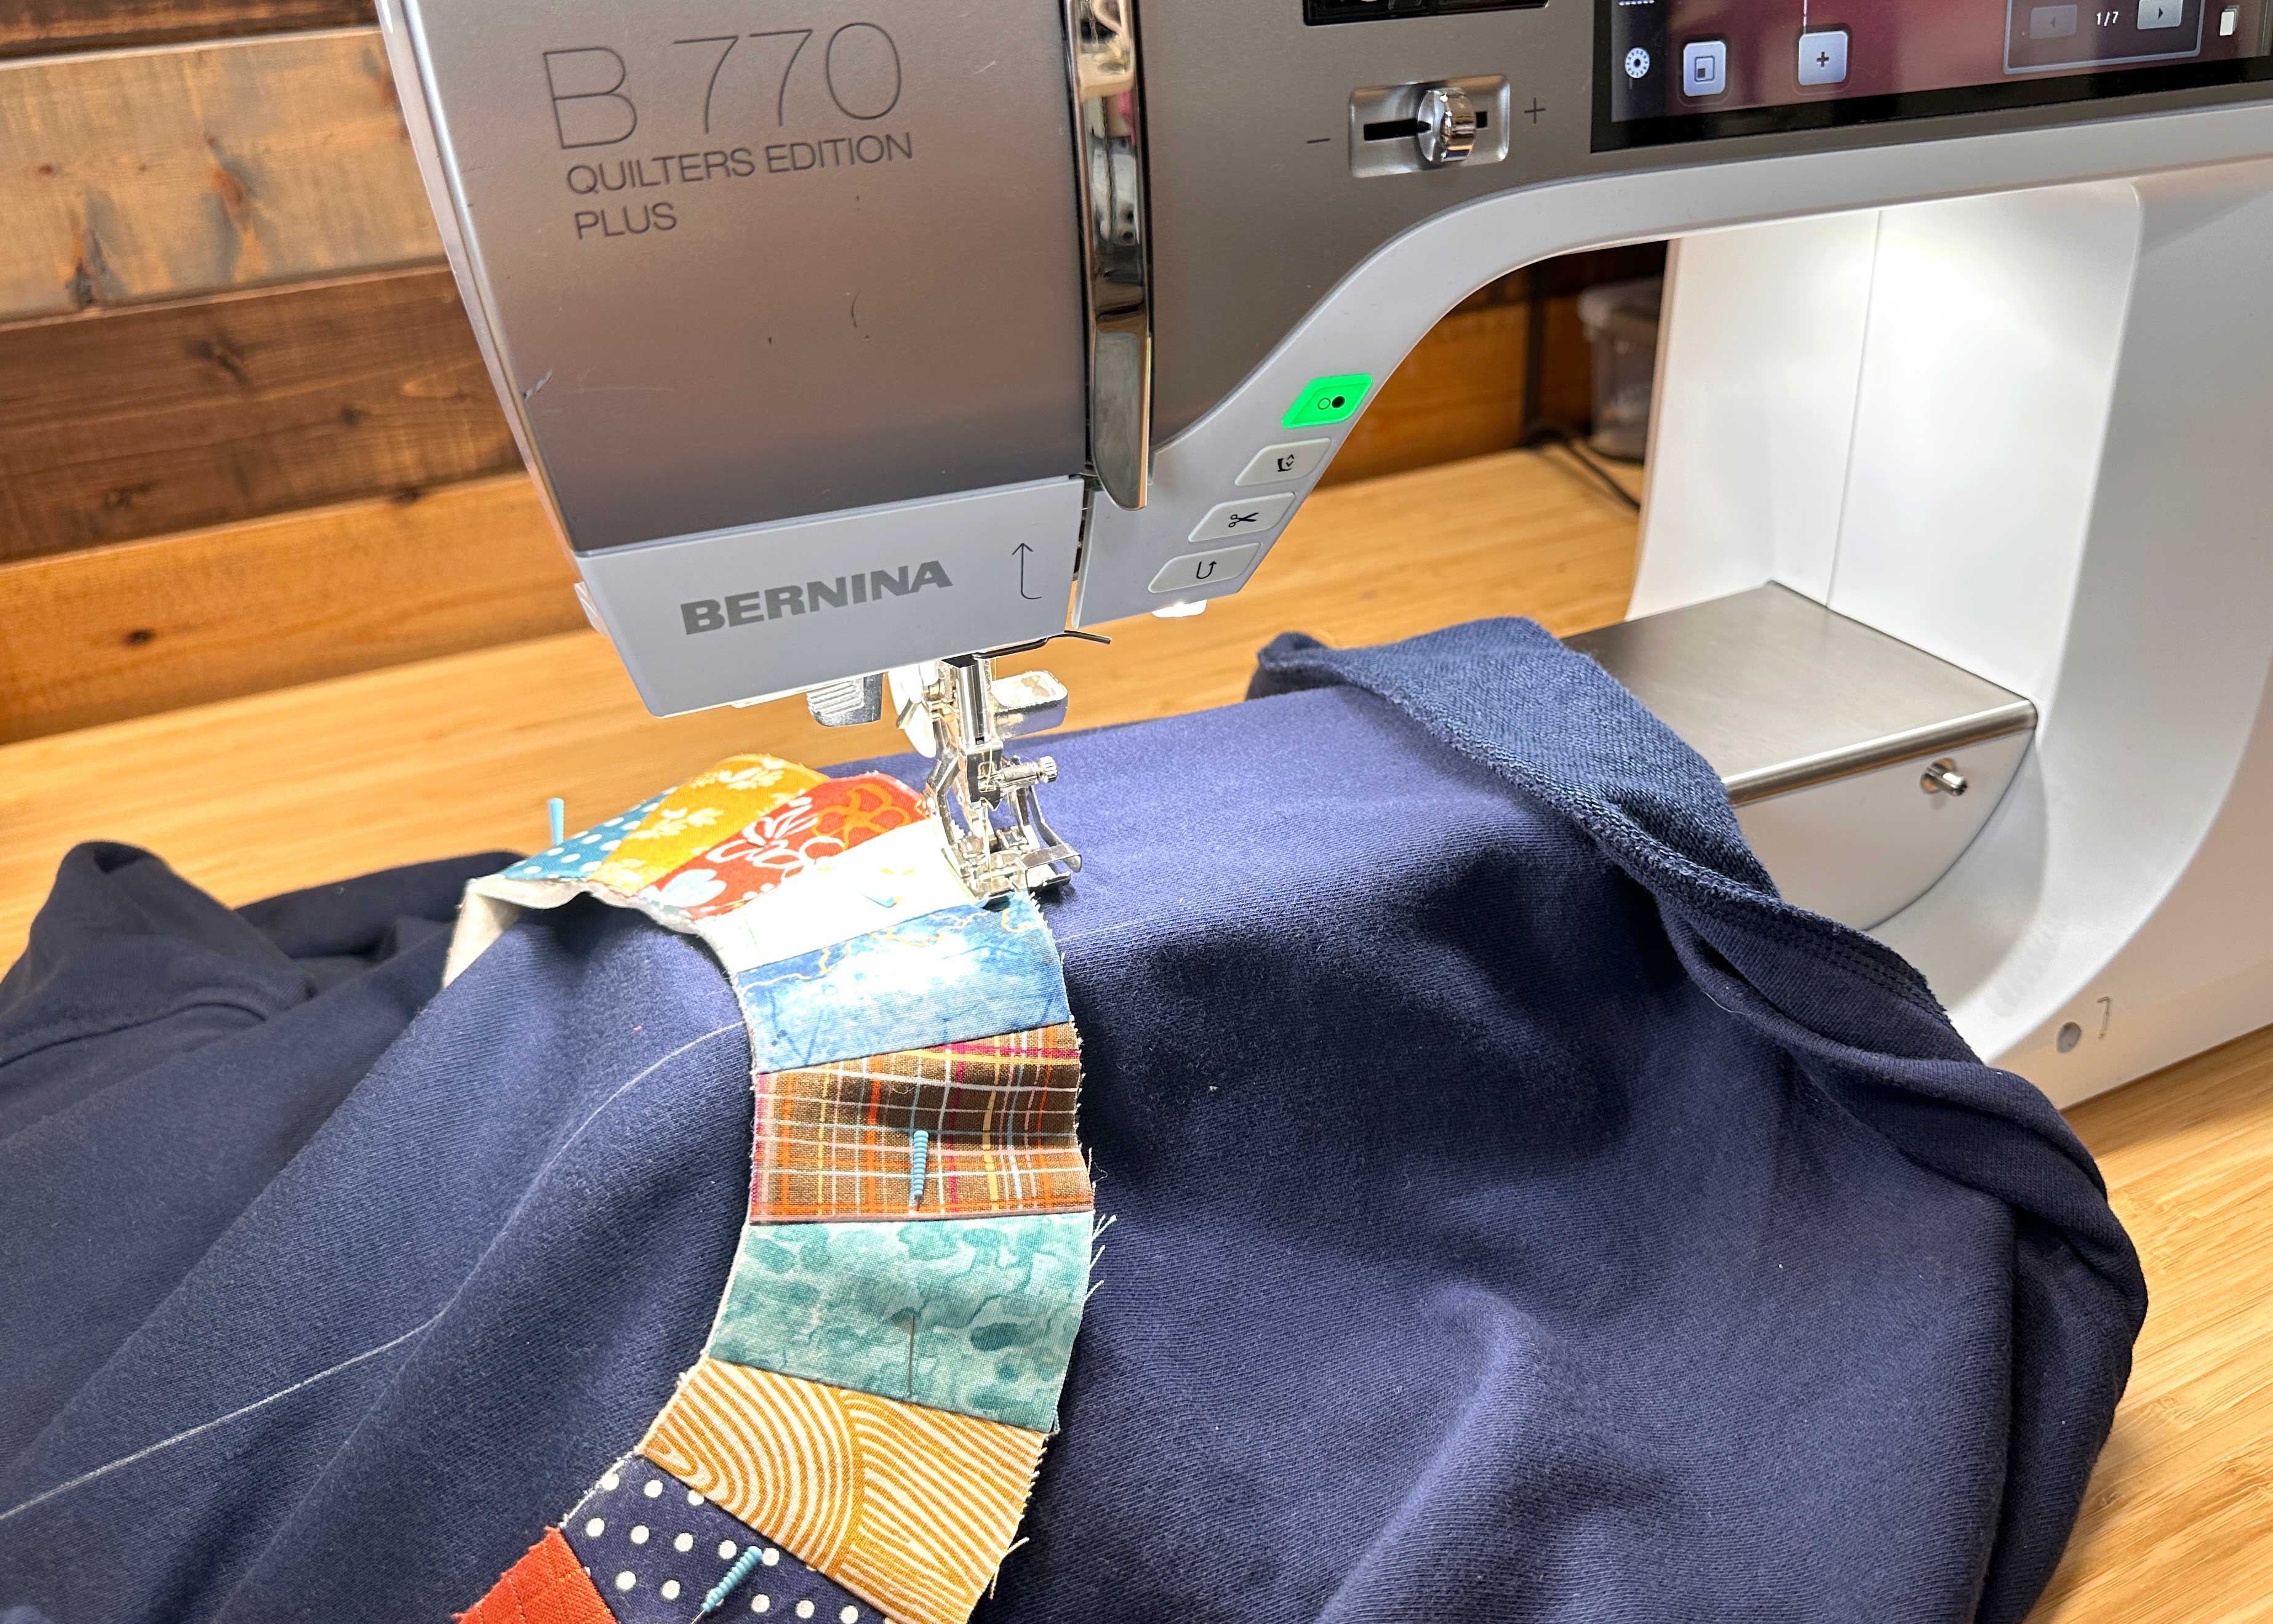
Continue stitching around the edge of the horseshoe, adjusting the sweatshirt as necessary to ensure it does not get caught in the stitches, backstitching at the end. Sew a second row of stitches about 1/4″ from the first row of stitches.
Add Optional Rhinestones
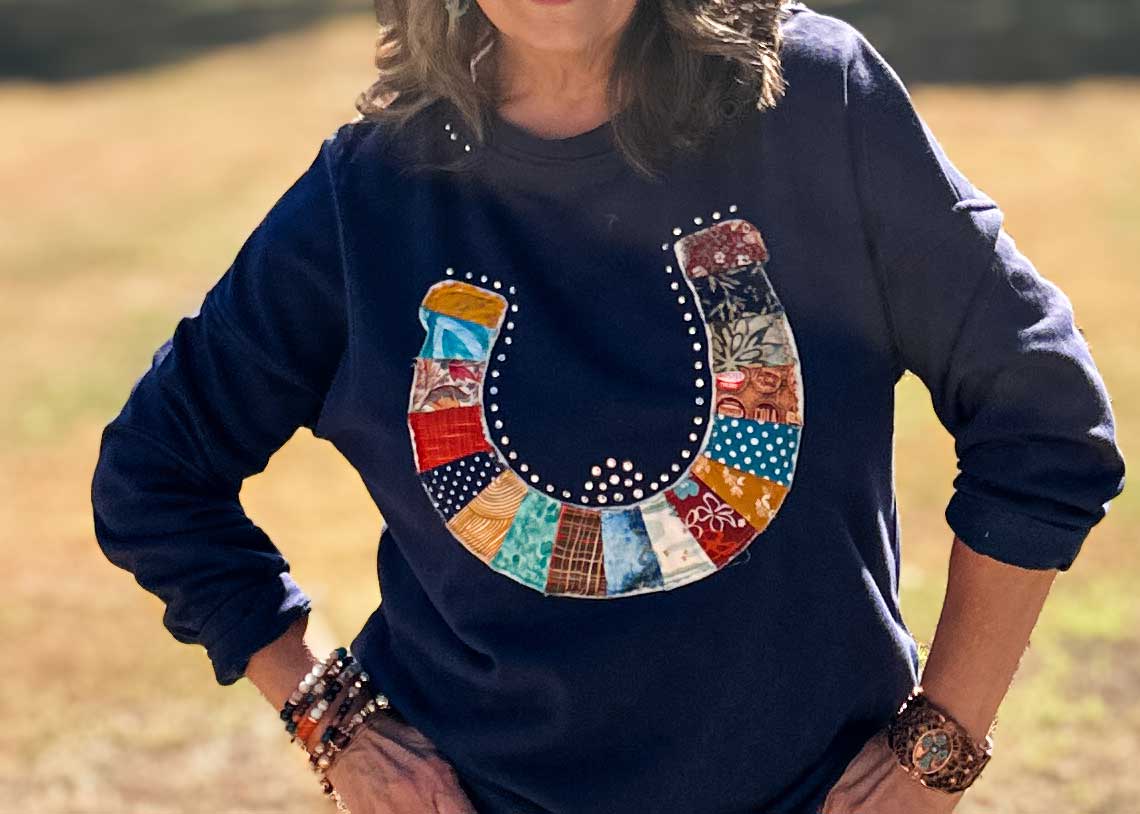
Use a hot fix rhinestone applicator to add rhinestones along the inner edge of the horseshoe for a little extra sparkle. You can go big and blingy or keep it subtle. There’s no right or wrong, as it’s completely up to you as the designer, so have fun! For one final touch of sparkle, add three little rhinestones to the right side of the neckband.
The Western Boot Sweatshirt Upcycle
Supplies Needed:
- Sewing machine. I used my BERNINA 770 QE PLUS
- Fabric for boot – 13″ x 16″
- Stabilizer – OESD Clean and Tear
- 505 Temporary Adhesive Spray
- Assorted threads for the decorative stitches
- I used Isacord Thread from OESD
- Dark Pink 2532, Light Pink 2550, Turquoise 4220 and Gold 0731
- Ribbon – 7″ long
- Small decorative charm
- Removable fabric marker or chalk
- Thread
- Small scissors
- Pinking shears
- Western Boot template (download or draw your own)
- General sewing supplies
Prepare the Sweatshirt
Prewash the sweatshirt, then mark the center of the sweatshirt using pins, chalk, or a removable fabric marker and set aside.
Prepare the Western Boot Template
Download and print the two-page PDF boot template.
Match the dotted lines (A), tape the boot template together (B), and cut it out.
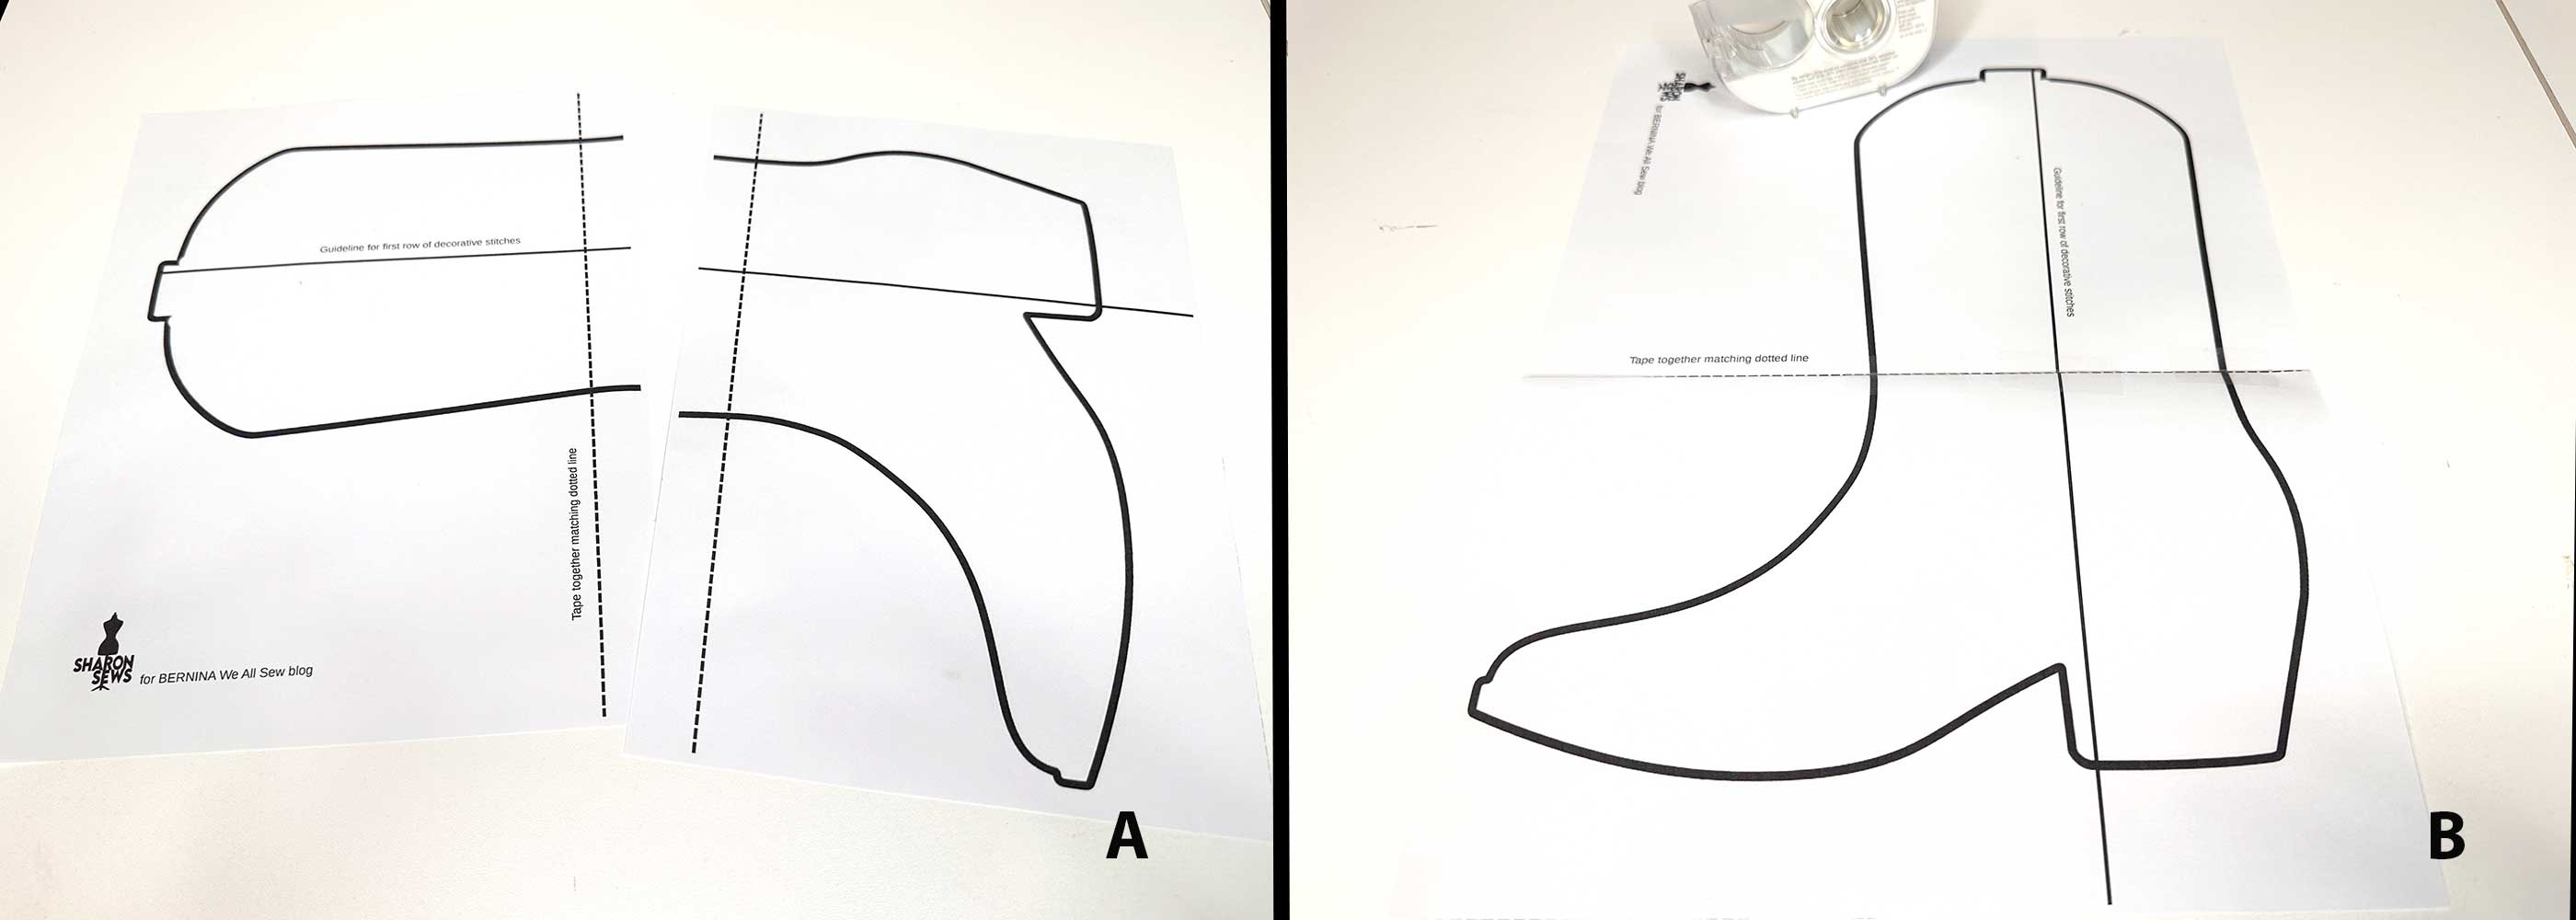
Cut a piece of fabric 13″ wide by 16″ long. Add stabilizer to the back of the fabric. I used 505 Temporary Adhesive Spray and OESD Ultra Clean and Tear.
Place the boot template on the stabilized fabric and trace around the boot using a removable fabric marker (A). Next, draw a vertical line from the top of the boot to the bottom, following the line on the template (B). This is the guideline for the first row of decorative stitches.
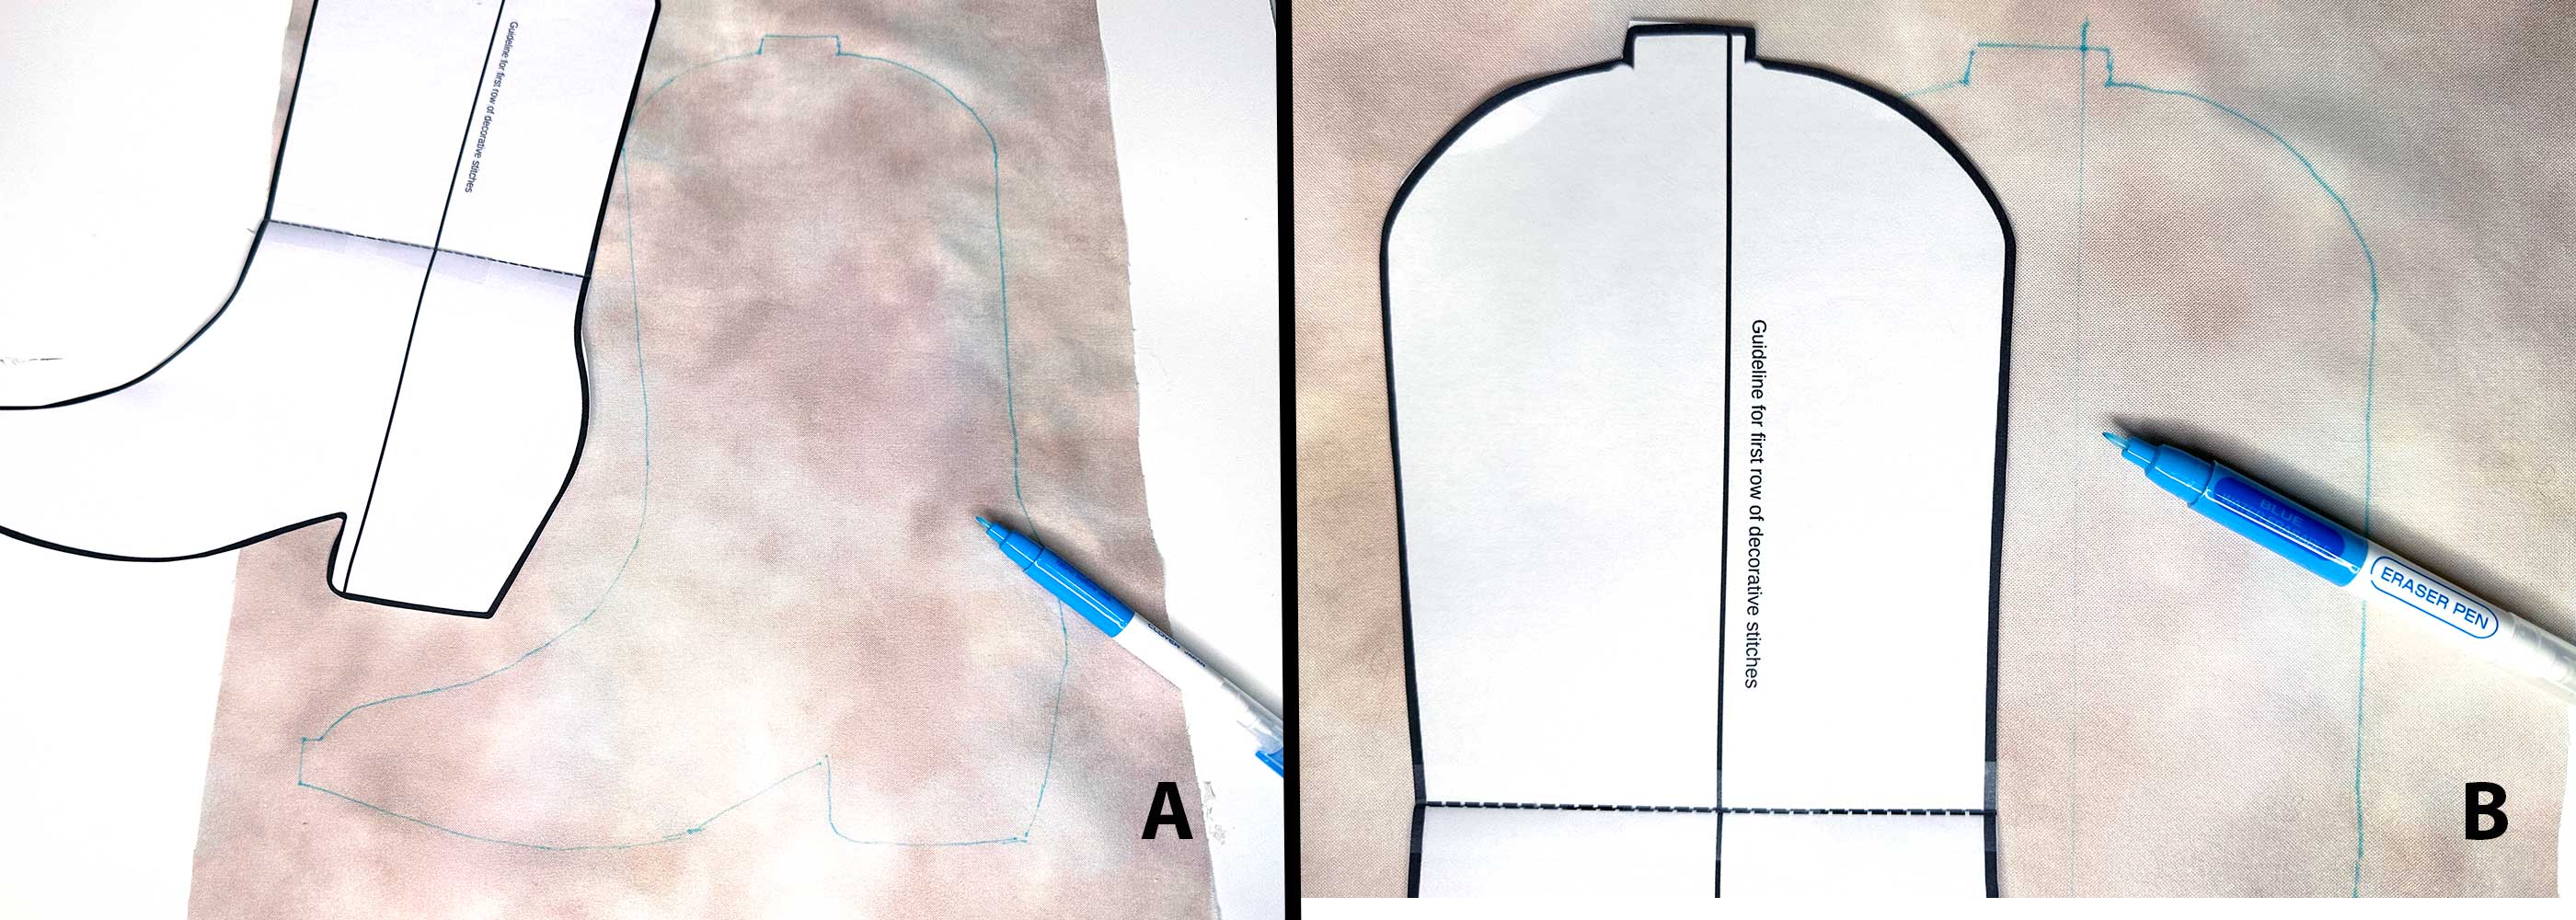
Sew the Decorative Stitches on the Western Boot
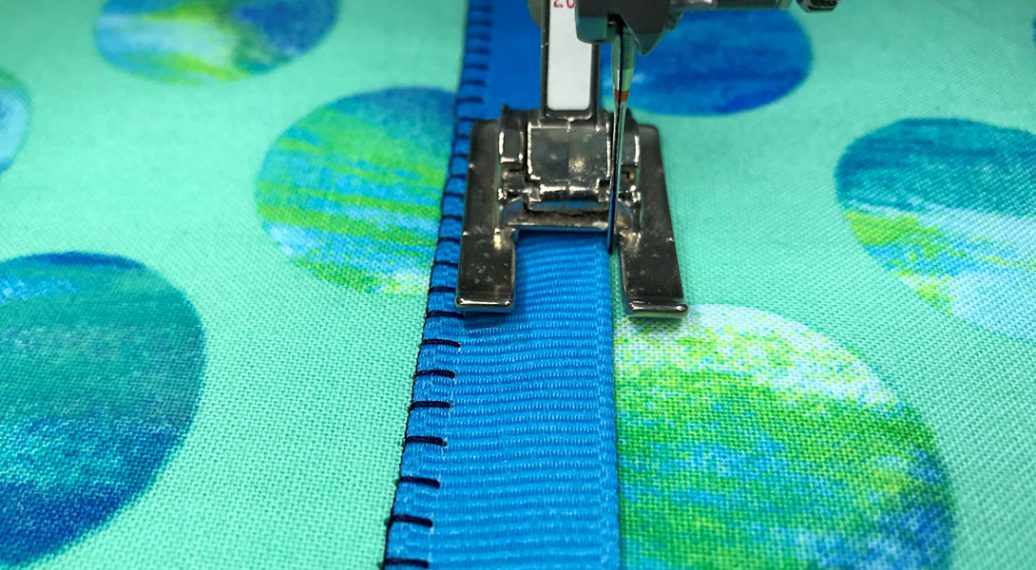
Clean and oil your machine. Wind a bobbin with 60 wt polyester bobbin thread. Change the thread tension to 2.5, slow the stitch speed, set the needle to stop in the down position, and attach the Open Embroidery Foot #20C.
Choose a variety of decorative stitches, and practice stitching them out on a stabilized piece of fabric. This will help you determine if the thread tension is set for your fabric, and if you like the stitches.
Choose thread colors for your decorative stitches. I used four colors of Isacord Threads from OESD: Dark Pink 2532, Light Pink 2550, Turquoise 4220, and Gold 0731.
Here are the BERNINA 770 QE PLUS decorative stitches used for this boot (from left). Refer to your manual or the BERNINA BIG Book of Stitches for instructions on combining stitches.
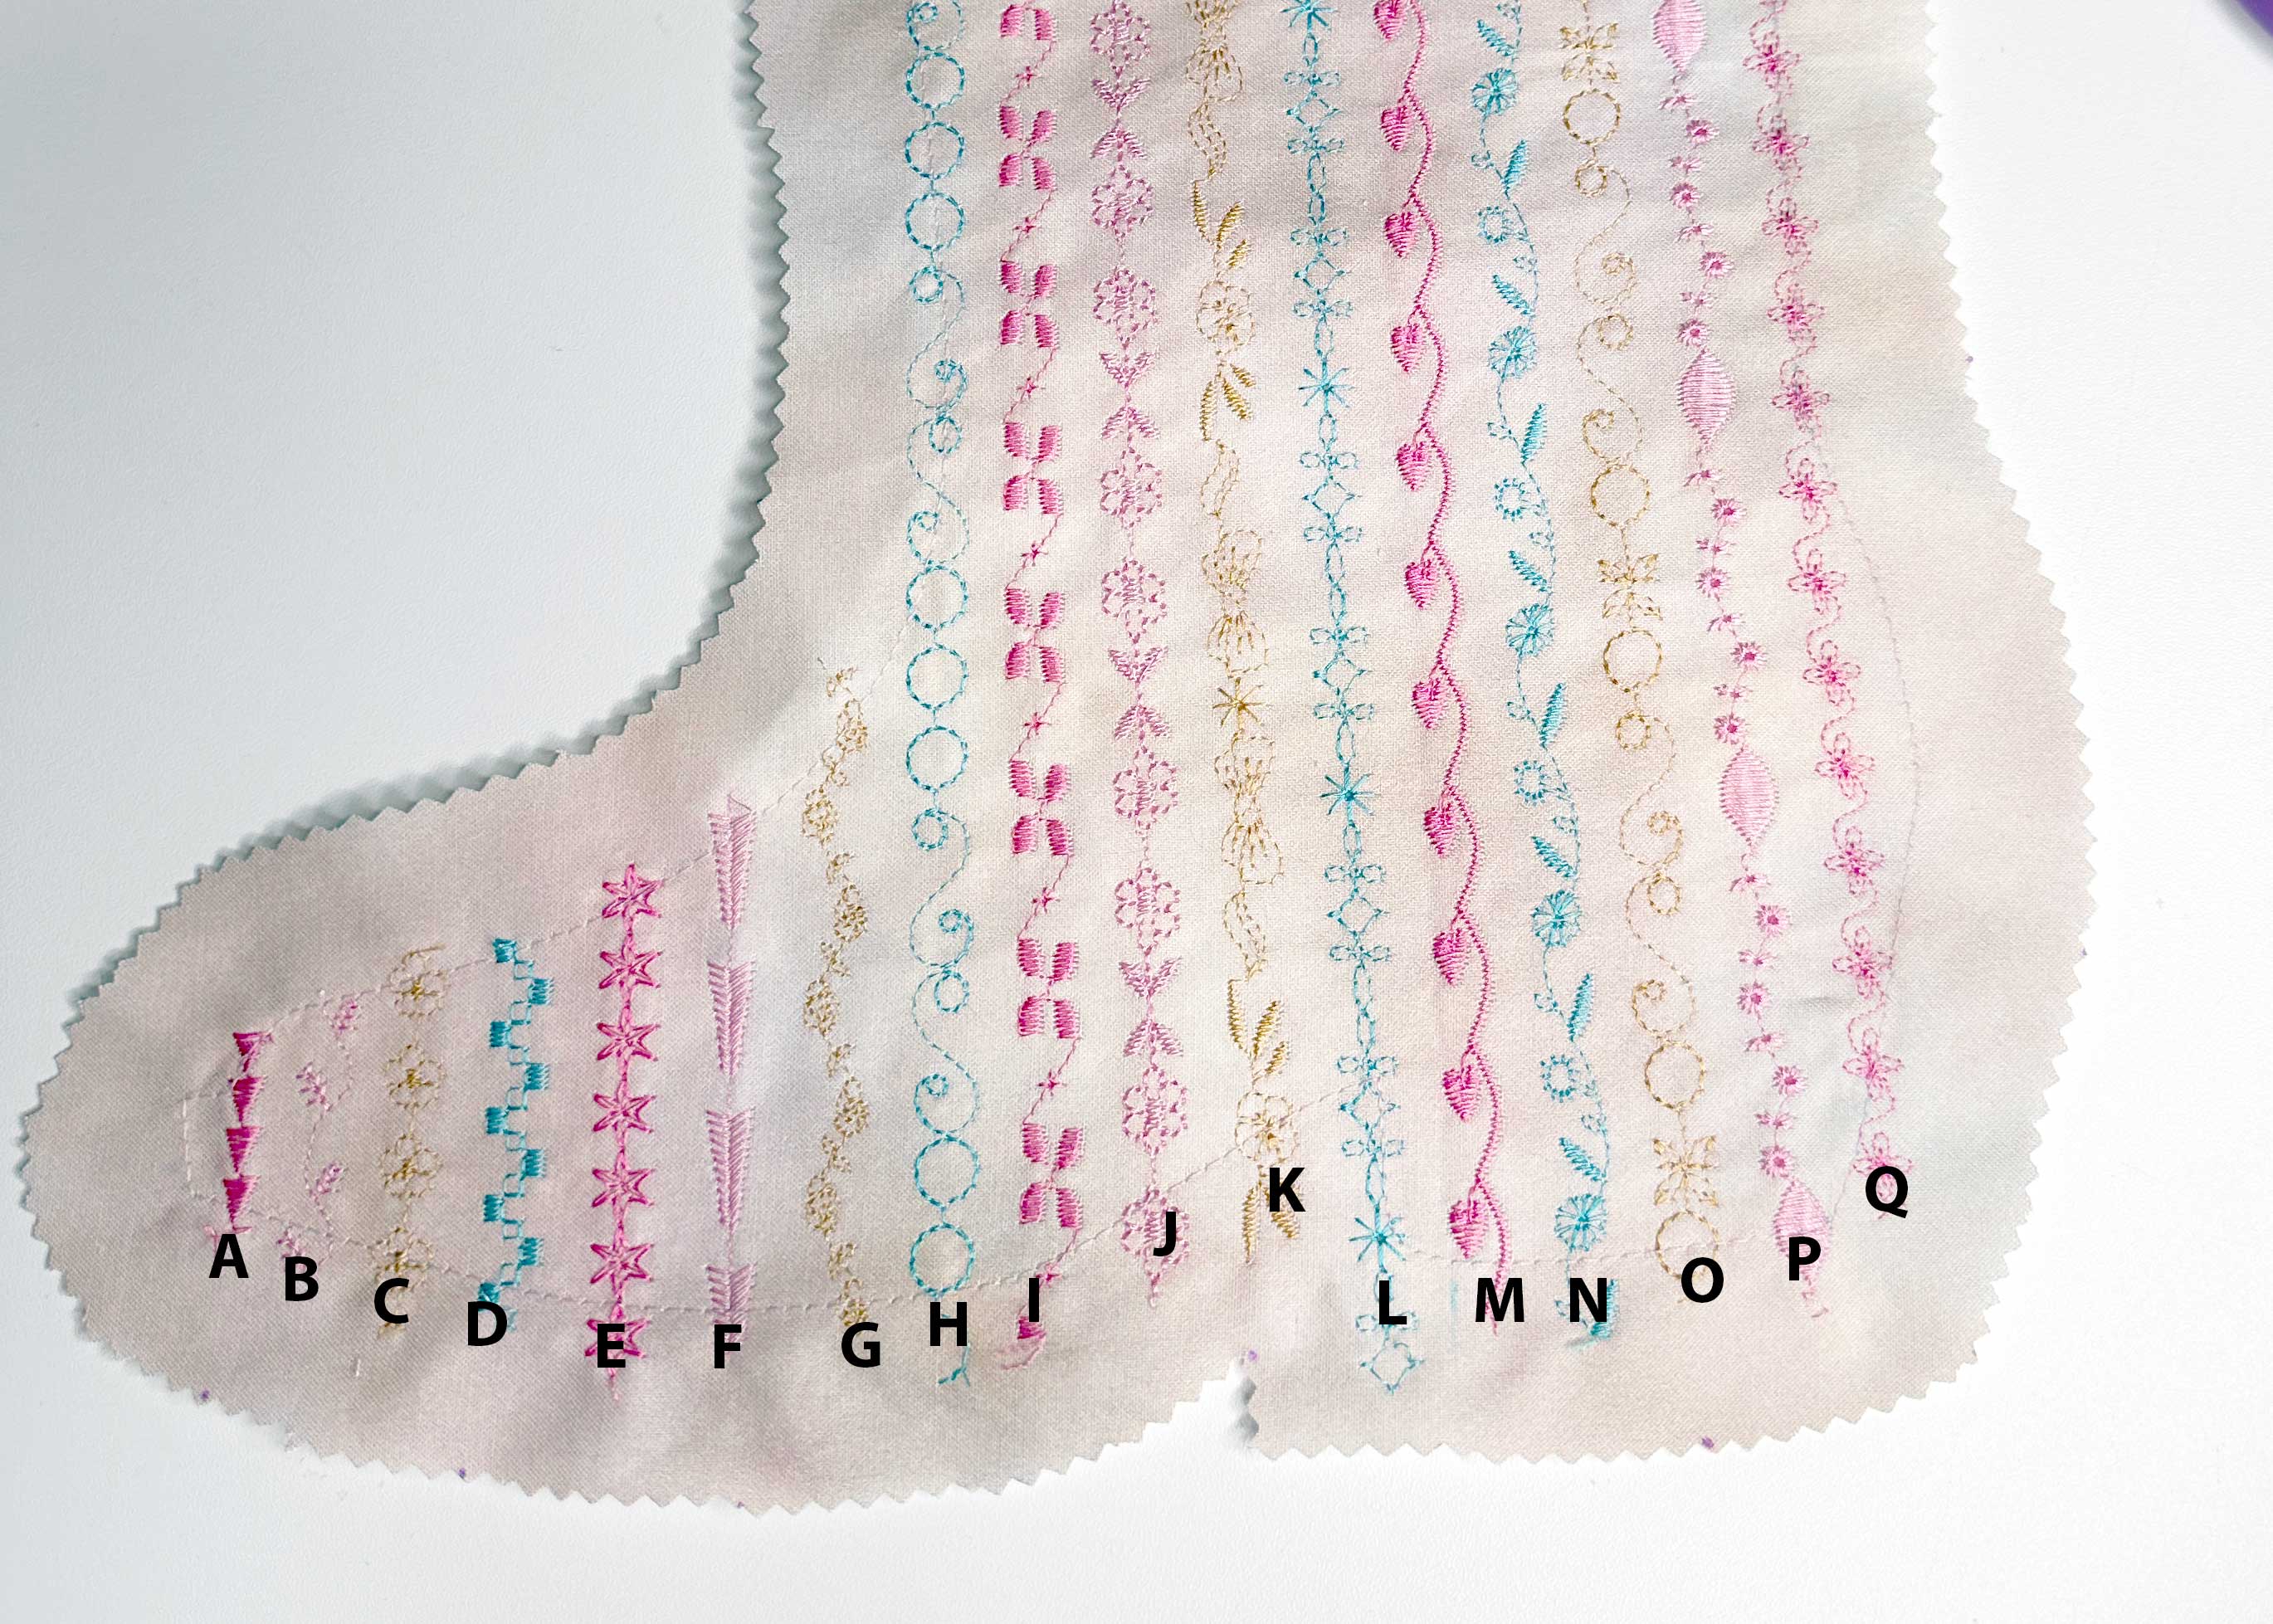
- (A) Dark pink, stitch 401
- (B) Light pink, stitch 173
- (C) Gold, stitch 102
- (D) Turquoise, stitch 424
- (E) Dark pink, 605
- (F) Light pink, stitch 468
- (G) Gold, stitch 147
- (H) Turquoise, Combi Mode combination stitches 656, 652 three times, and 656 reversed
- (I) Dark pink, 412
- (J) Light pink, Combi Mode combination stitches 106, and 106 mirror image down
- (K) Gold, Combi Mode combination stitches 714, 142, and 711
- (L) Turquoise, Combi Mode combination stitches 711, 750 two times
- (M) Dark pink, stitch 472
- (N) Turquoise, stitch 143
- (O) Gold, Combi Mode combination stitches 656, 652, 655, 652, and 656
- (P) Light pink, Combi Mode combination stitches 114 two times, and 407
- (Q) Dark pink, stitch 152
Begin Sewing the Decorative Stitches
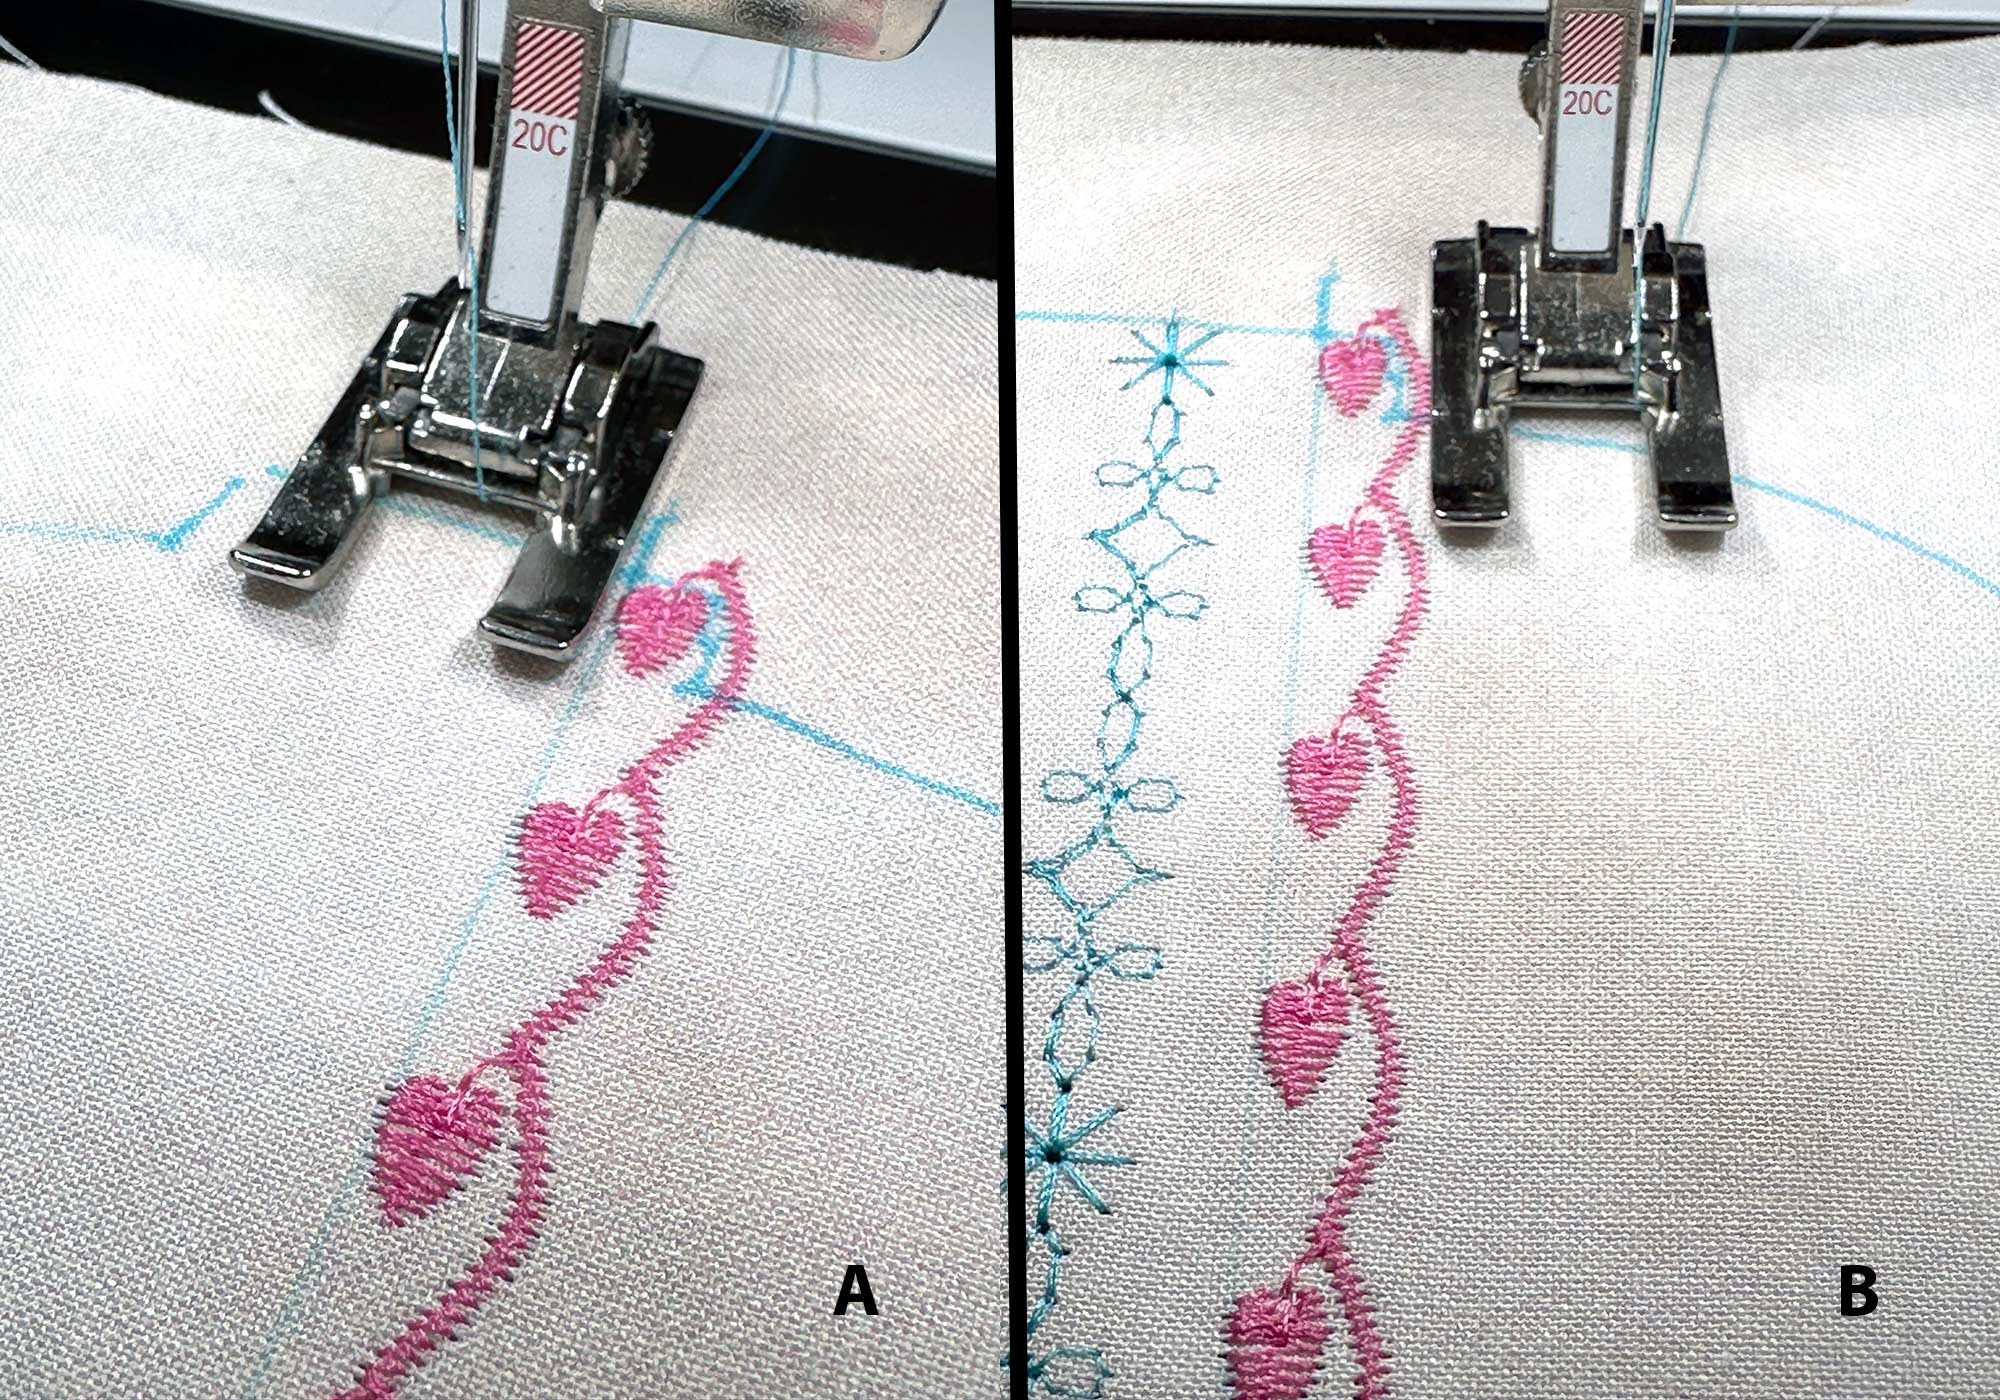
At the top of the boot, line up the inner edge of the presser foot with the horizontal guideline. Begin sewing the first row of decorative stitches, making sure the stitches start just beyond the outline of the boot. Sew all the way down along the guideline, ending with the stitches just beyond the outline of the boot.
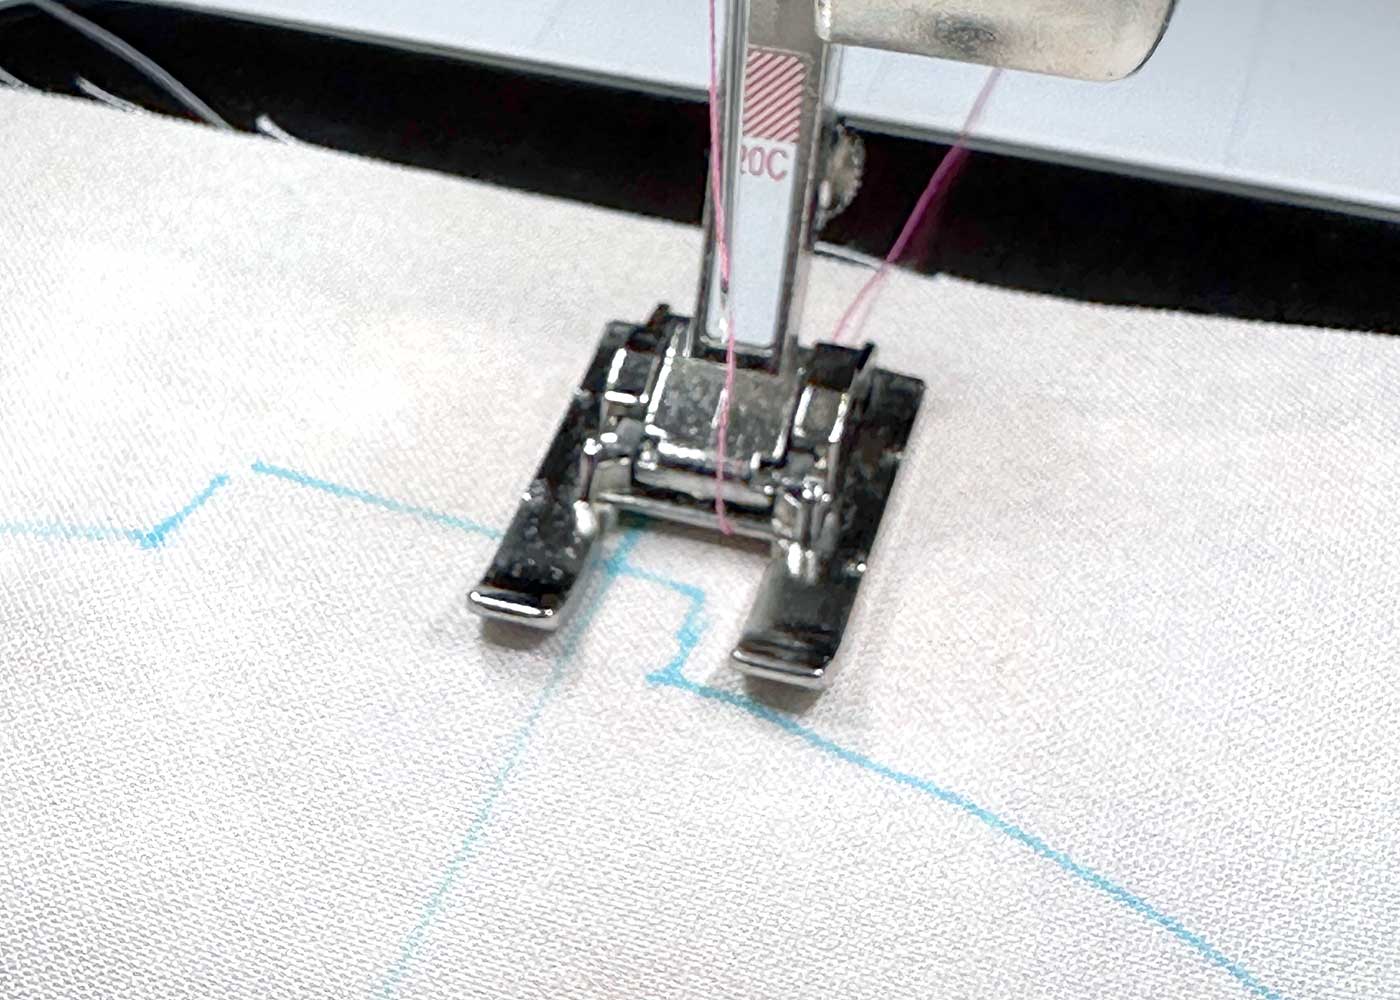
Change thread color and align the right edge of the presser foot along the edge of the first row of decorative stitches and sew the next row of stitches (A). Next, align the left edge of the pressure foot along the other edge of the first row of stitches and sew the next row of stitches (B).
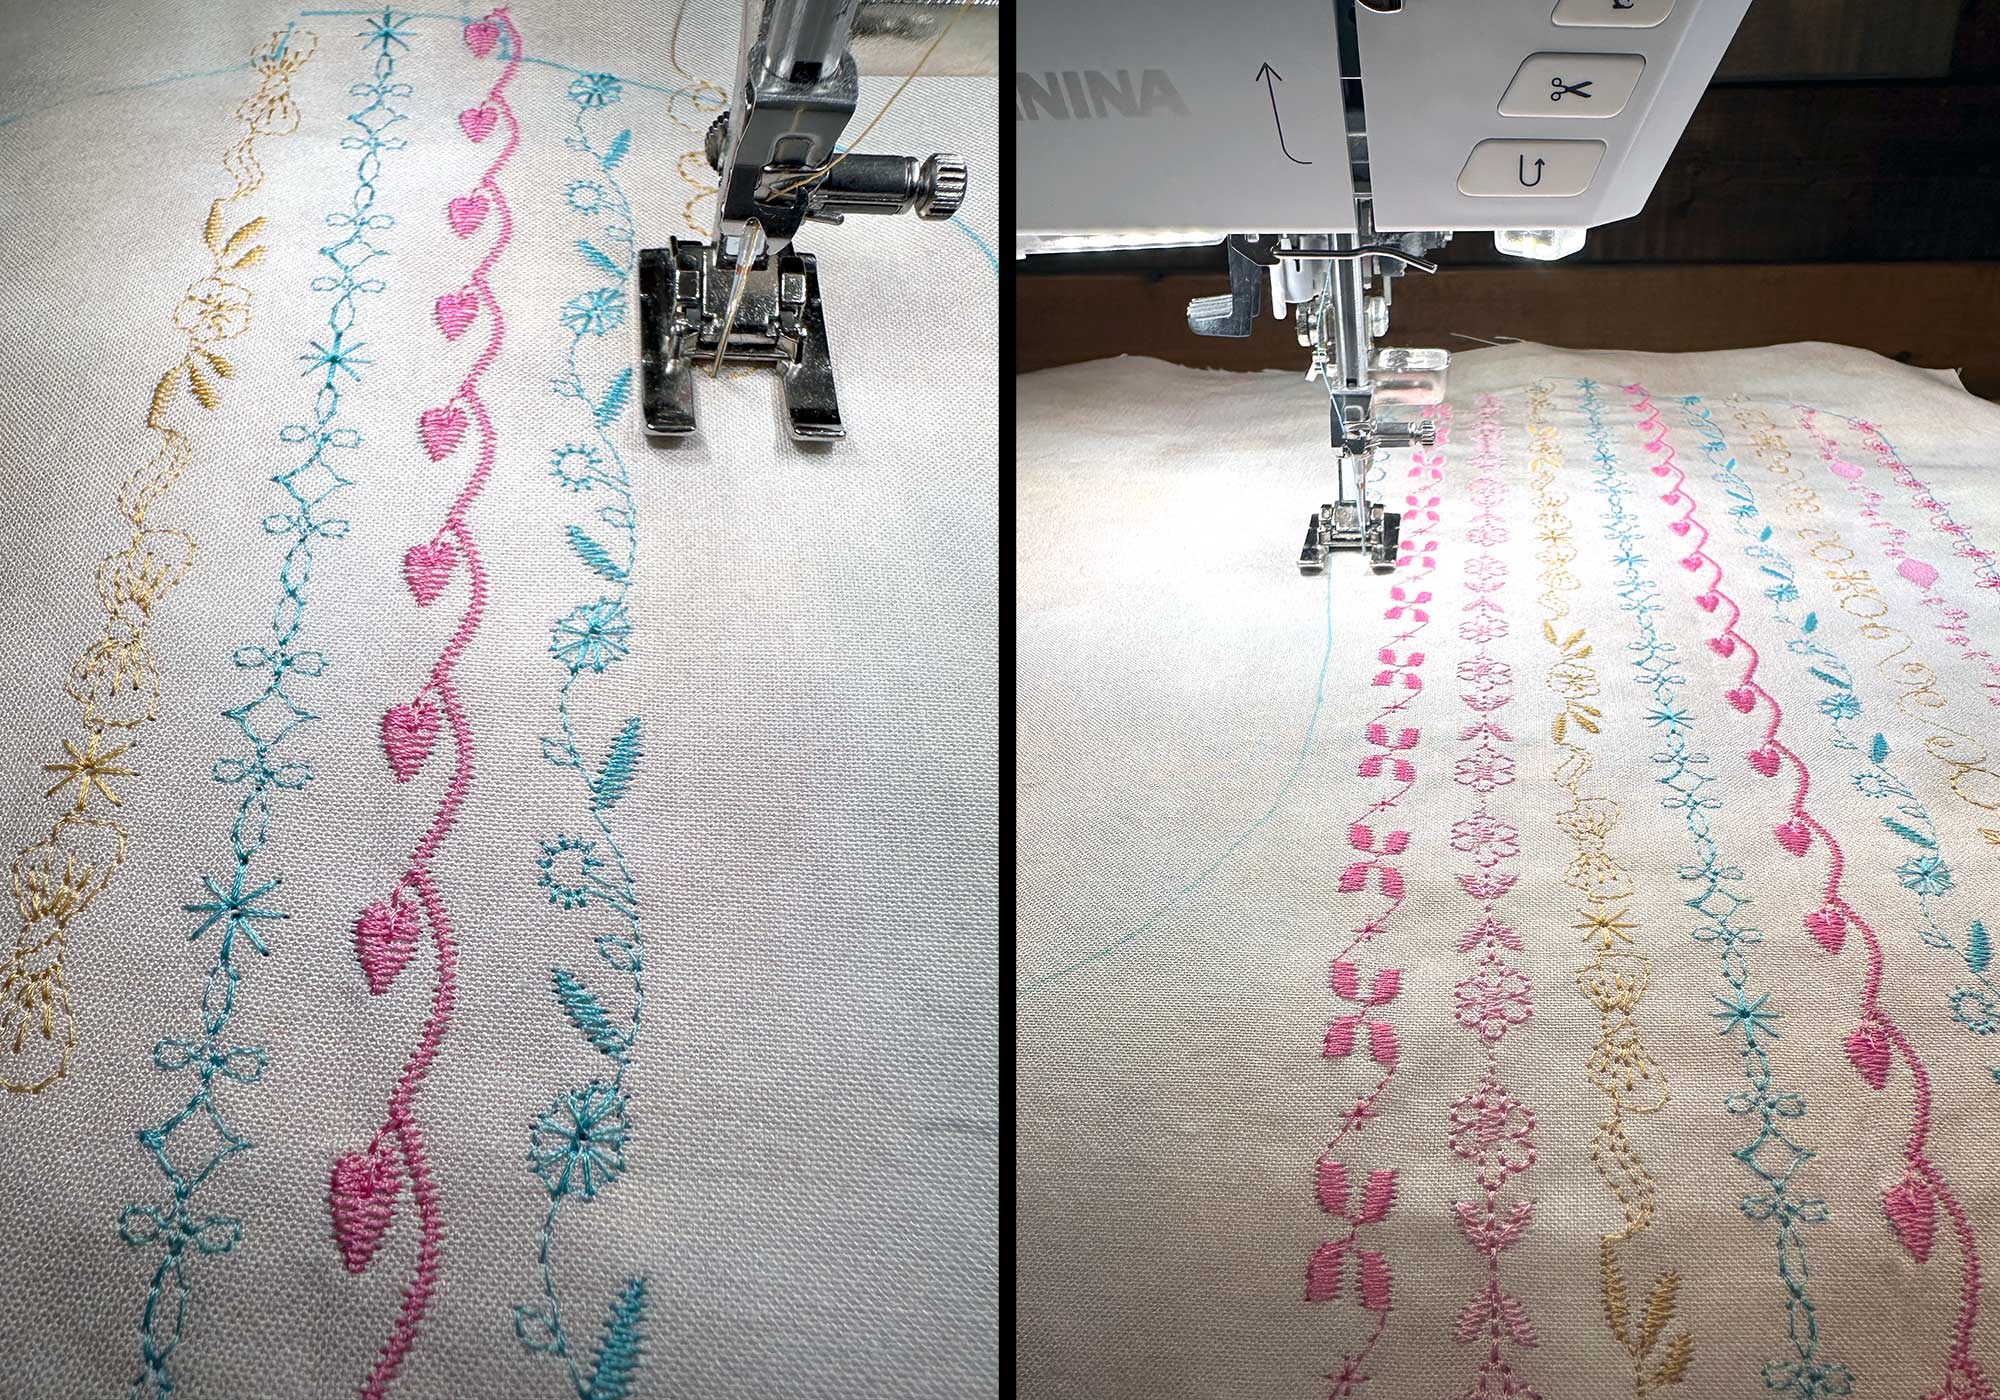
Continue sewing rows of decorative stitches, changing thread colors and aligning the edge of the pressure foot to the previous row of stitches, until the entire boot outline is covered.
Be sure to remove the guideline that was marked for the first row of stitches. Remove the stabilizer from the back following the manufacturer’s instructions.
Sew the Western Boot to the Sweatshirt
Change the bobbin thread to the color you want to show on the right side of the sweatshirt and attach the Reverse-pattern Foot with Clear Sole #34D. If needed, retrace the outline of the boot (A), then stitch along the traced outline of the boot (B). This will act as a guideline when it is stitched to the sweatshirt.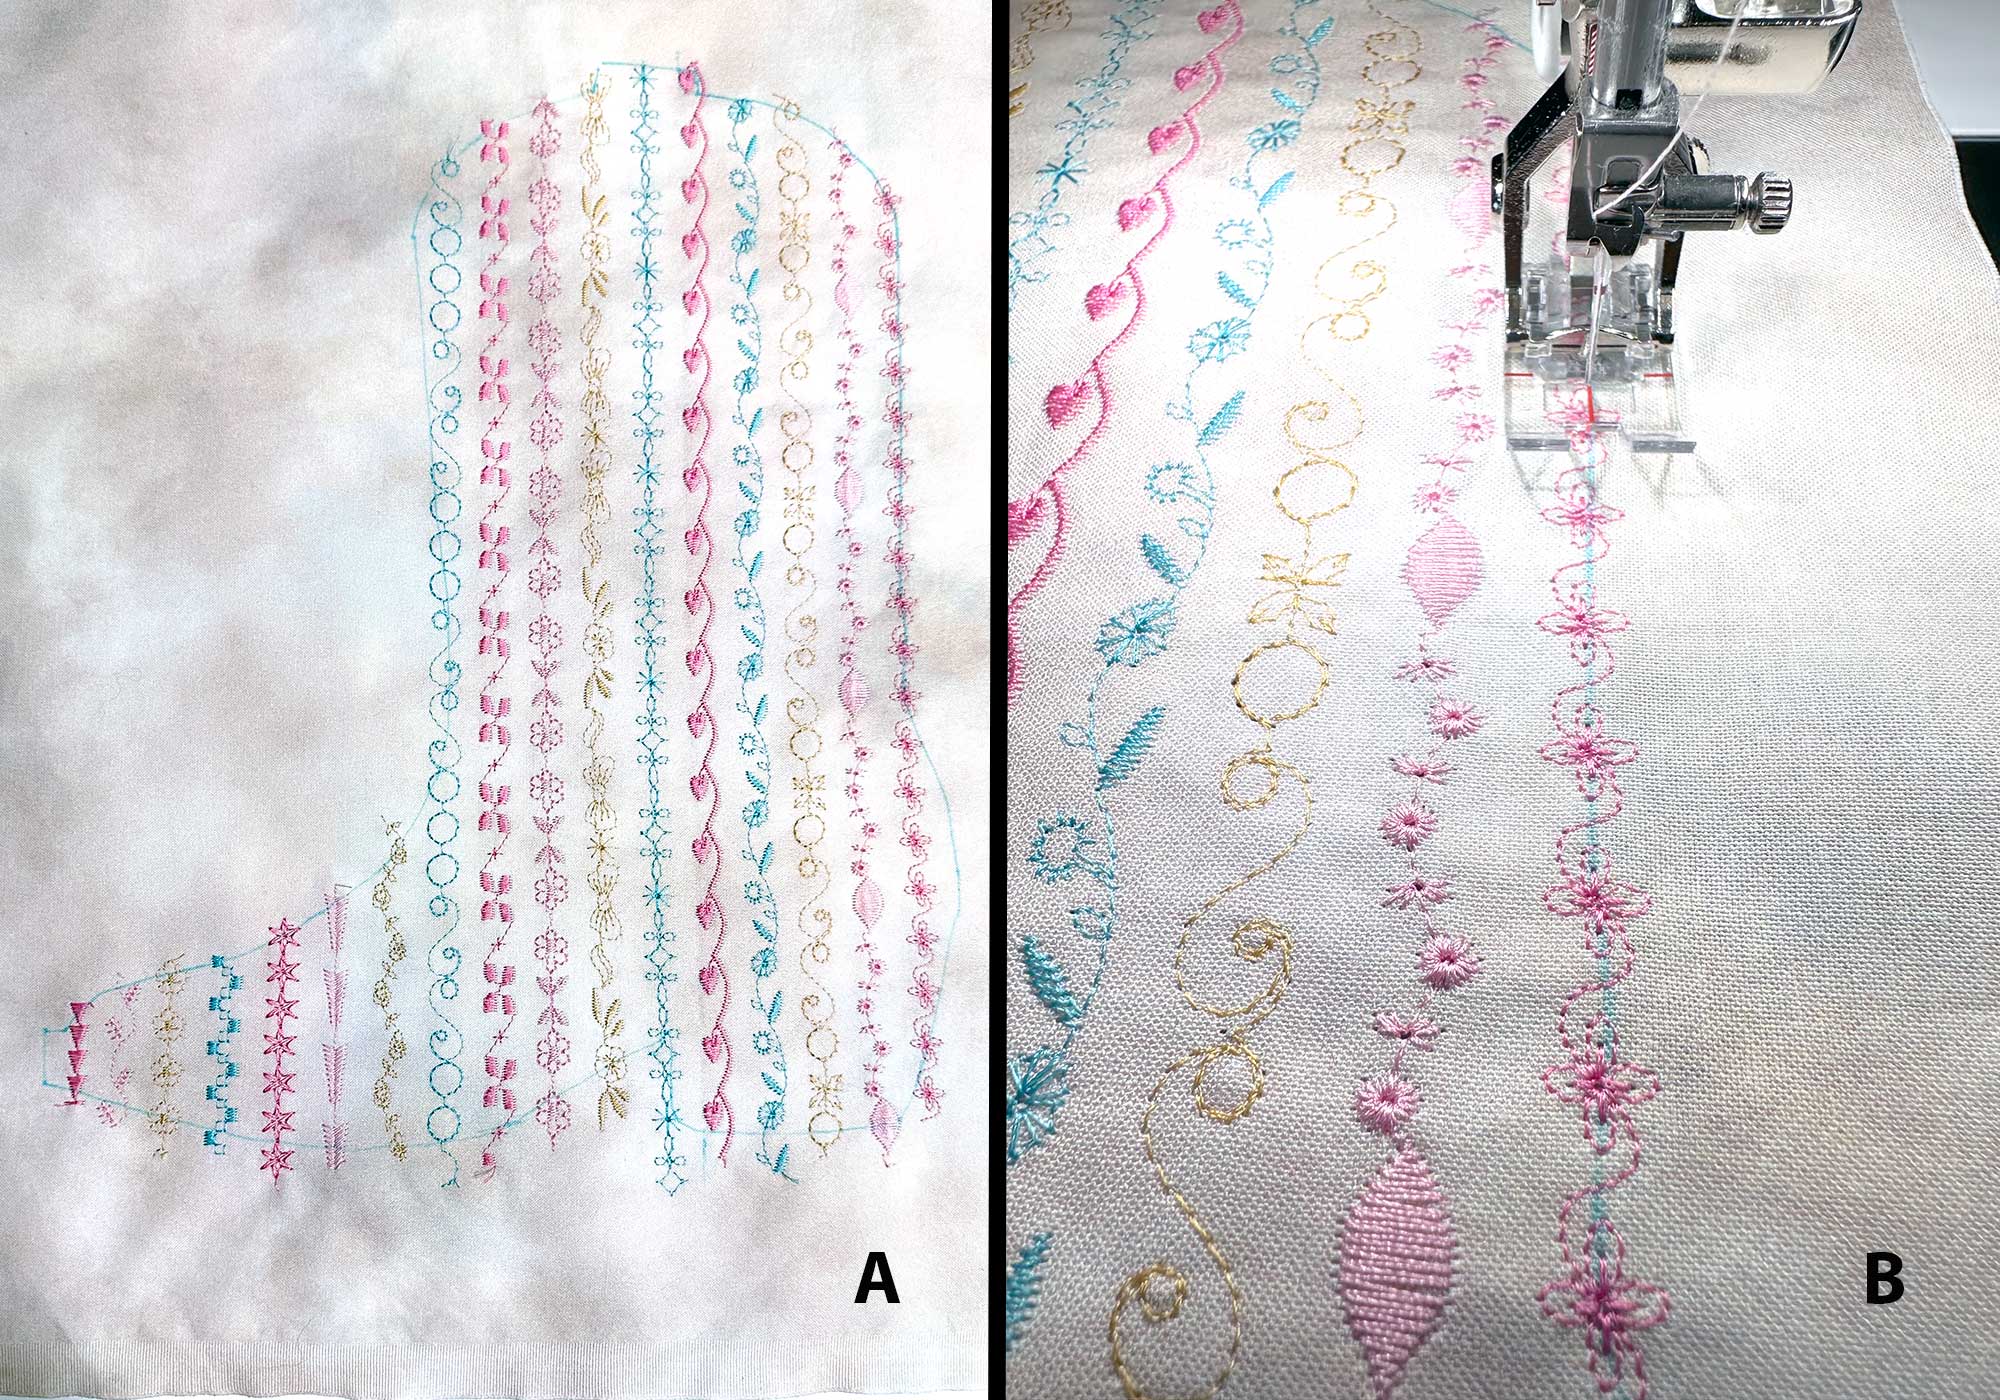
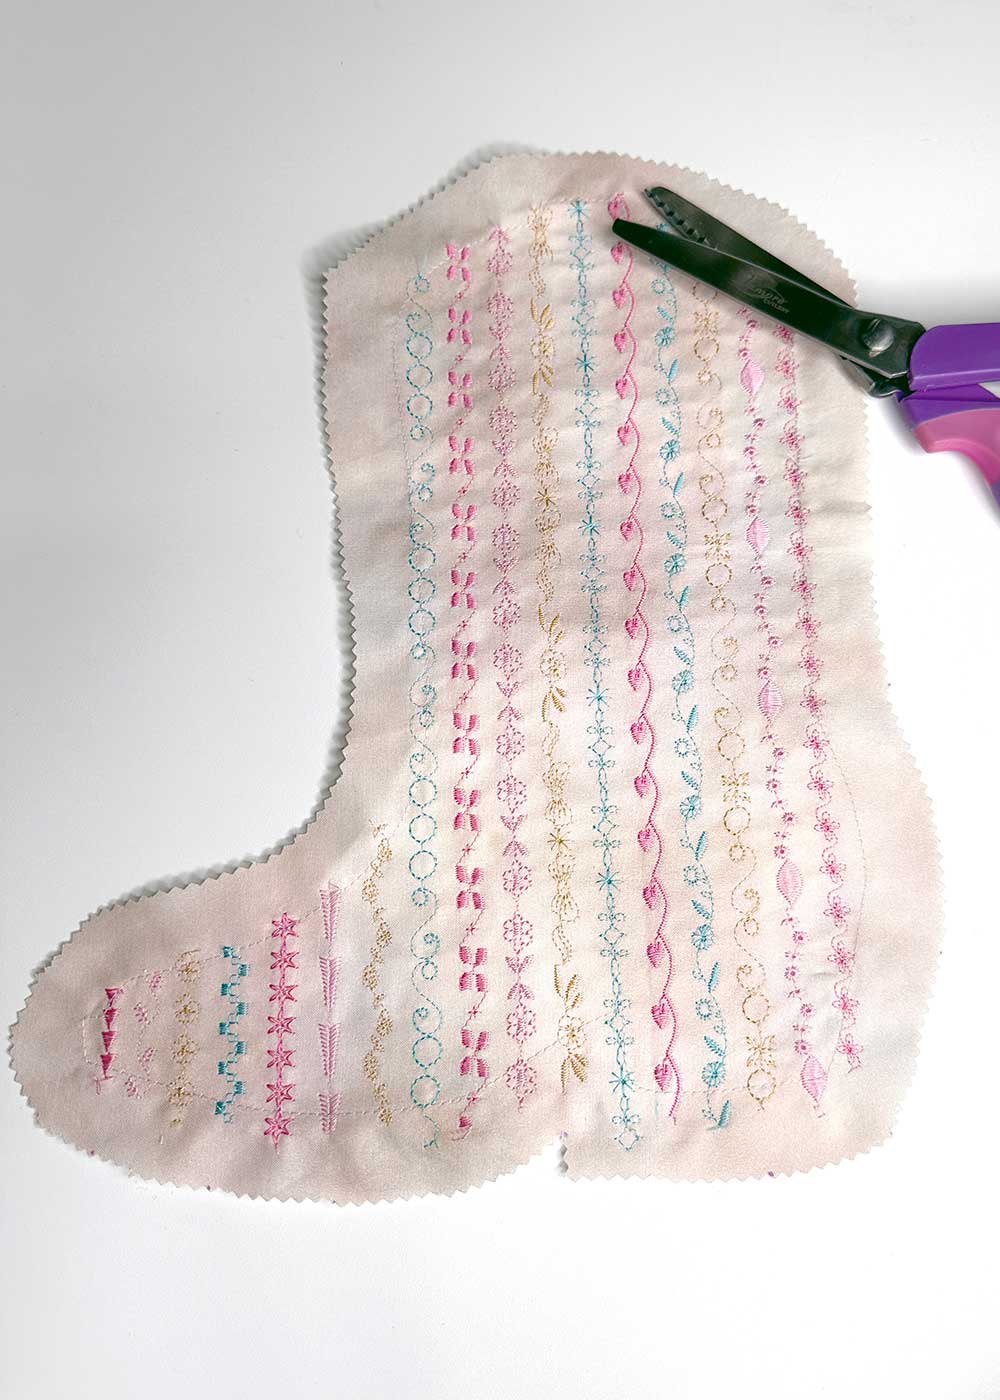
Use pinking shears to cut out the boot about 1″ away from the stitched outline. Since the raw edges of the boot will be on the inside of the sweatshirt, this will help prevent fraying.
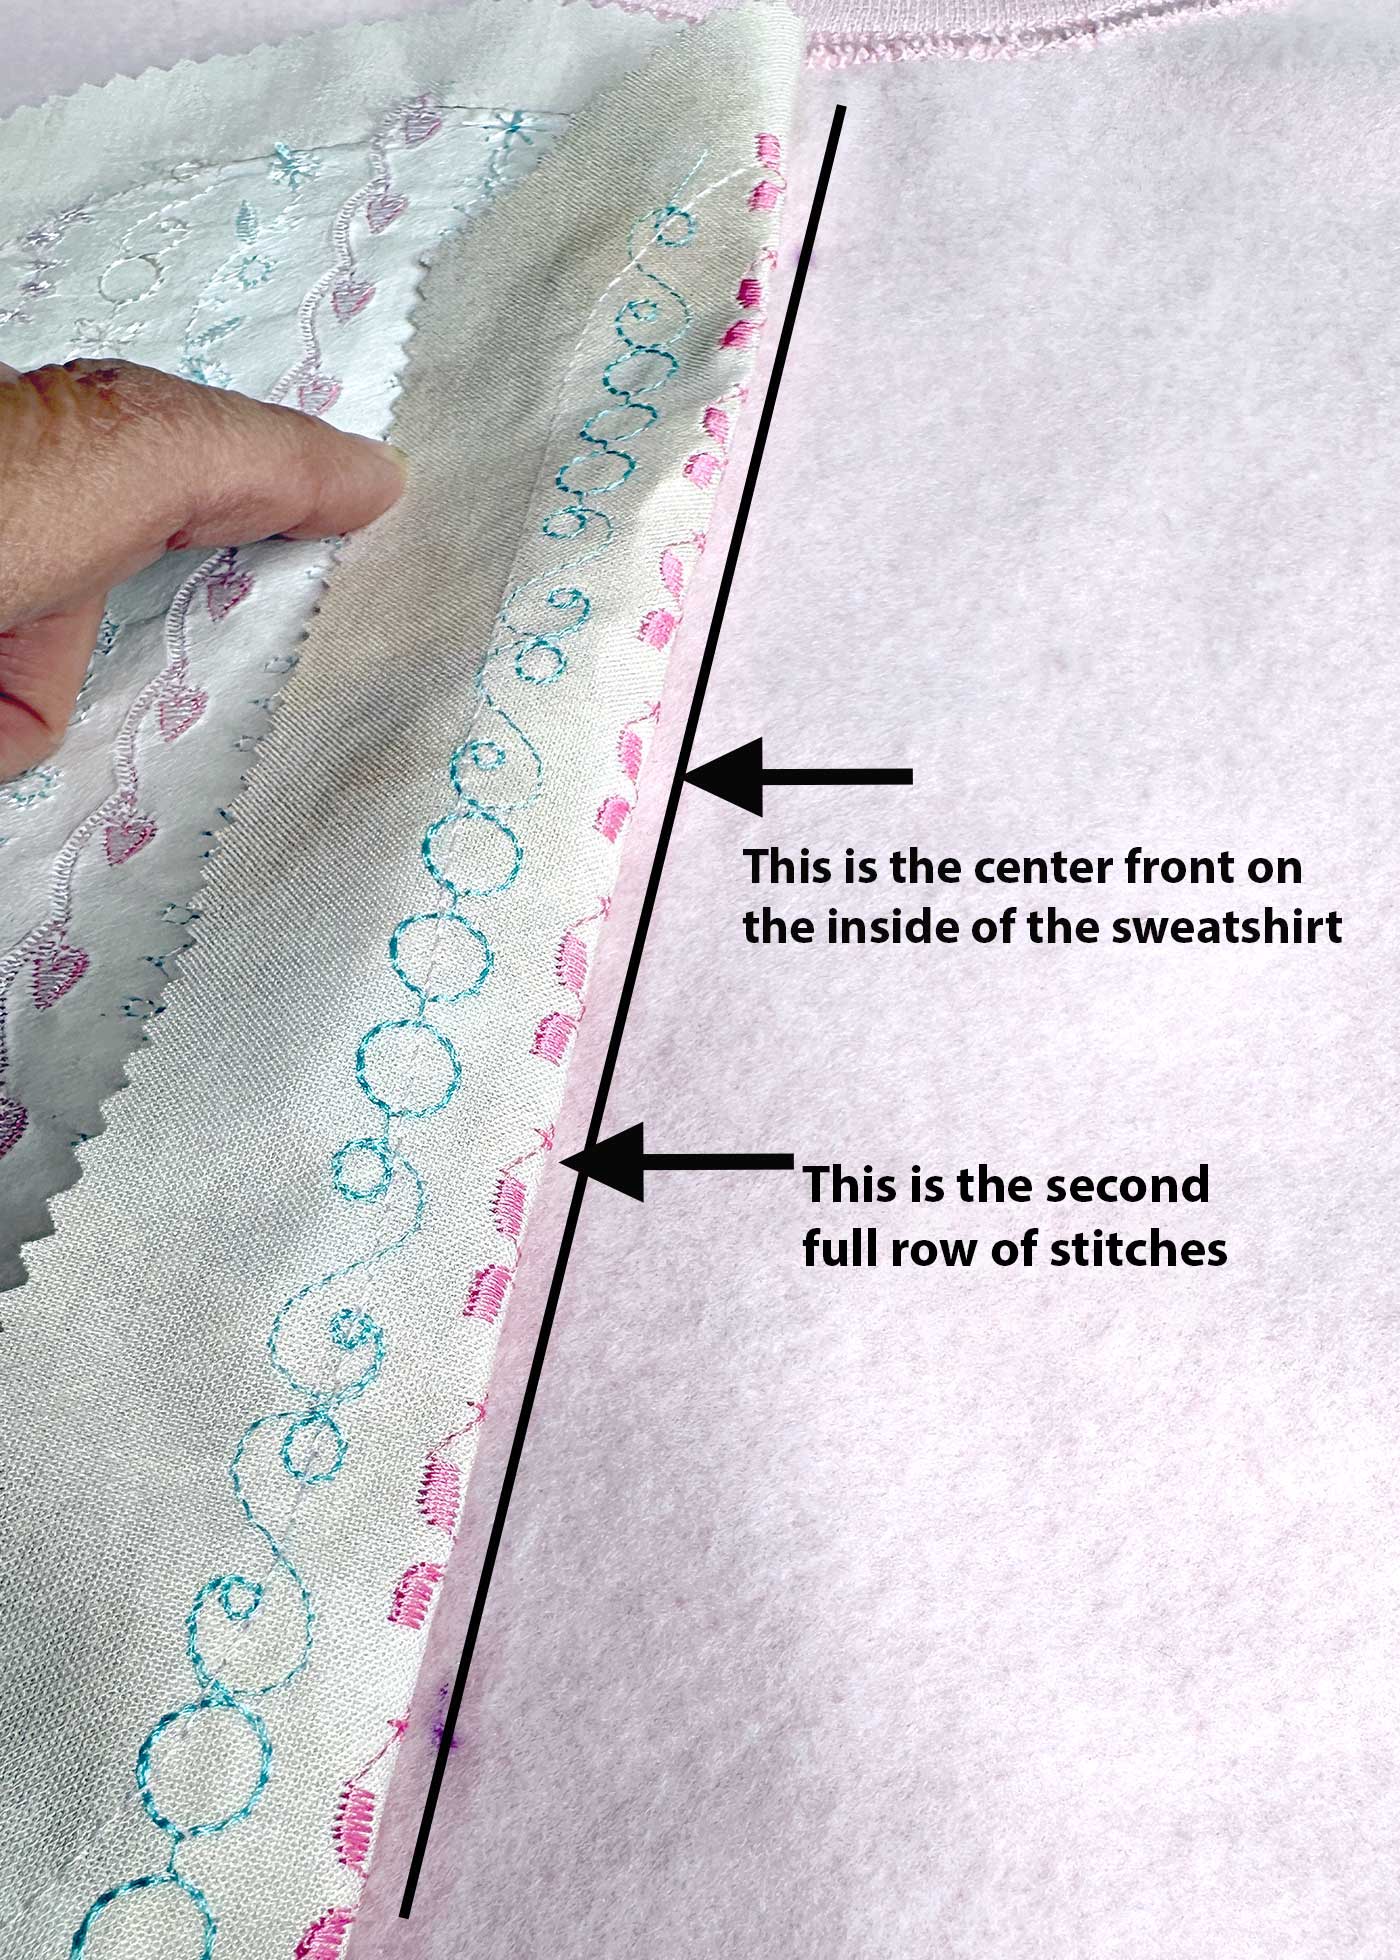
Turn the sweatshirt inside out, and place it on a flat work surface. Position the boot with the right side facing the wrong side of the sweatshirt, aligning the second full row of decorative stitches along the center front of the sweatshirt.
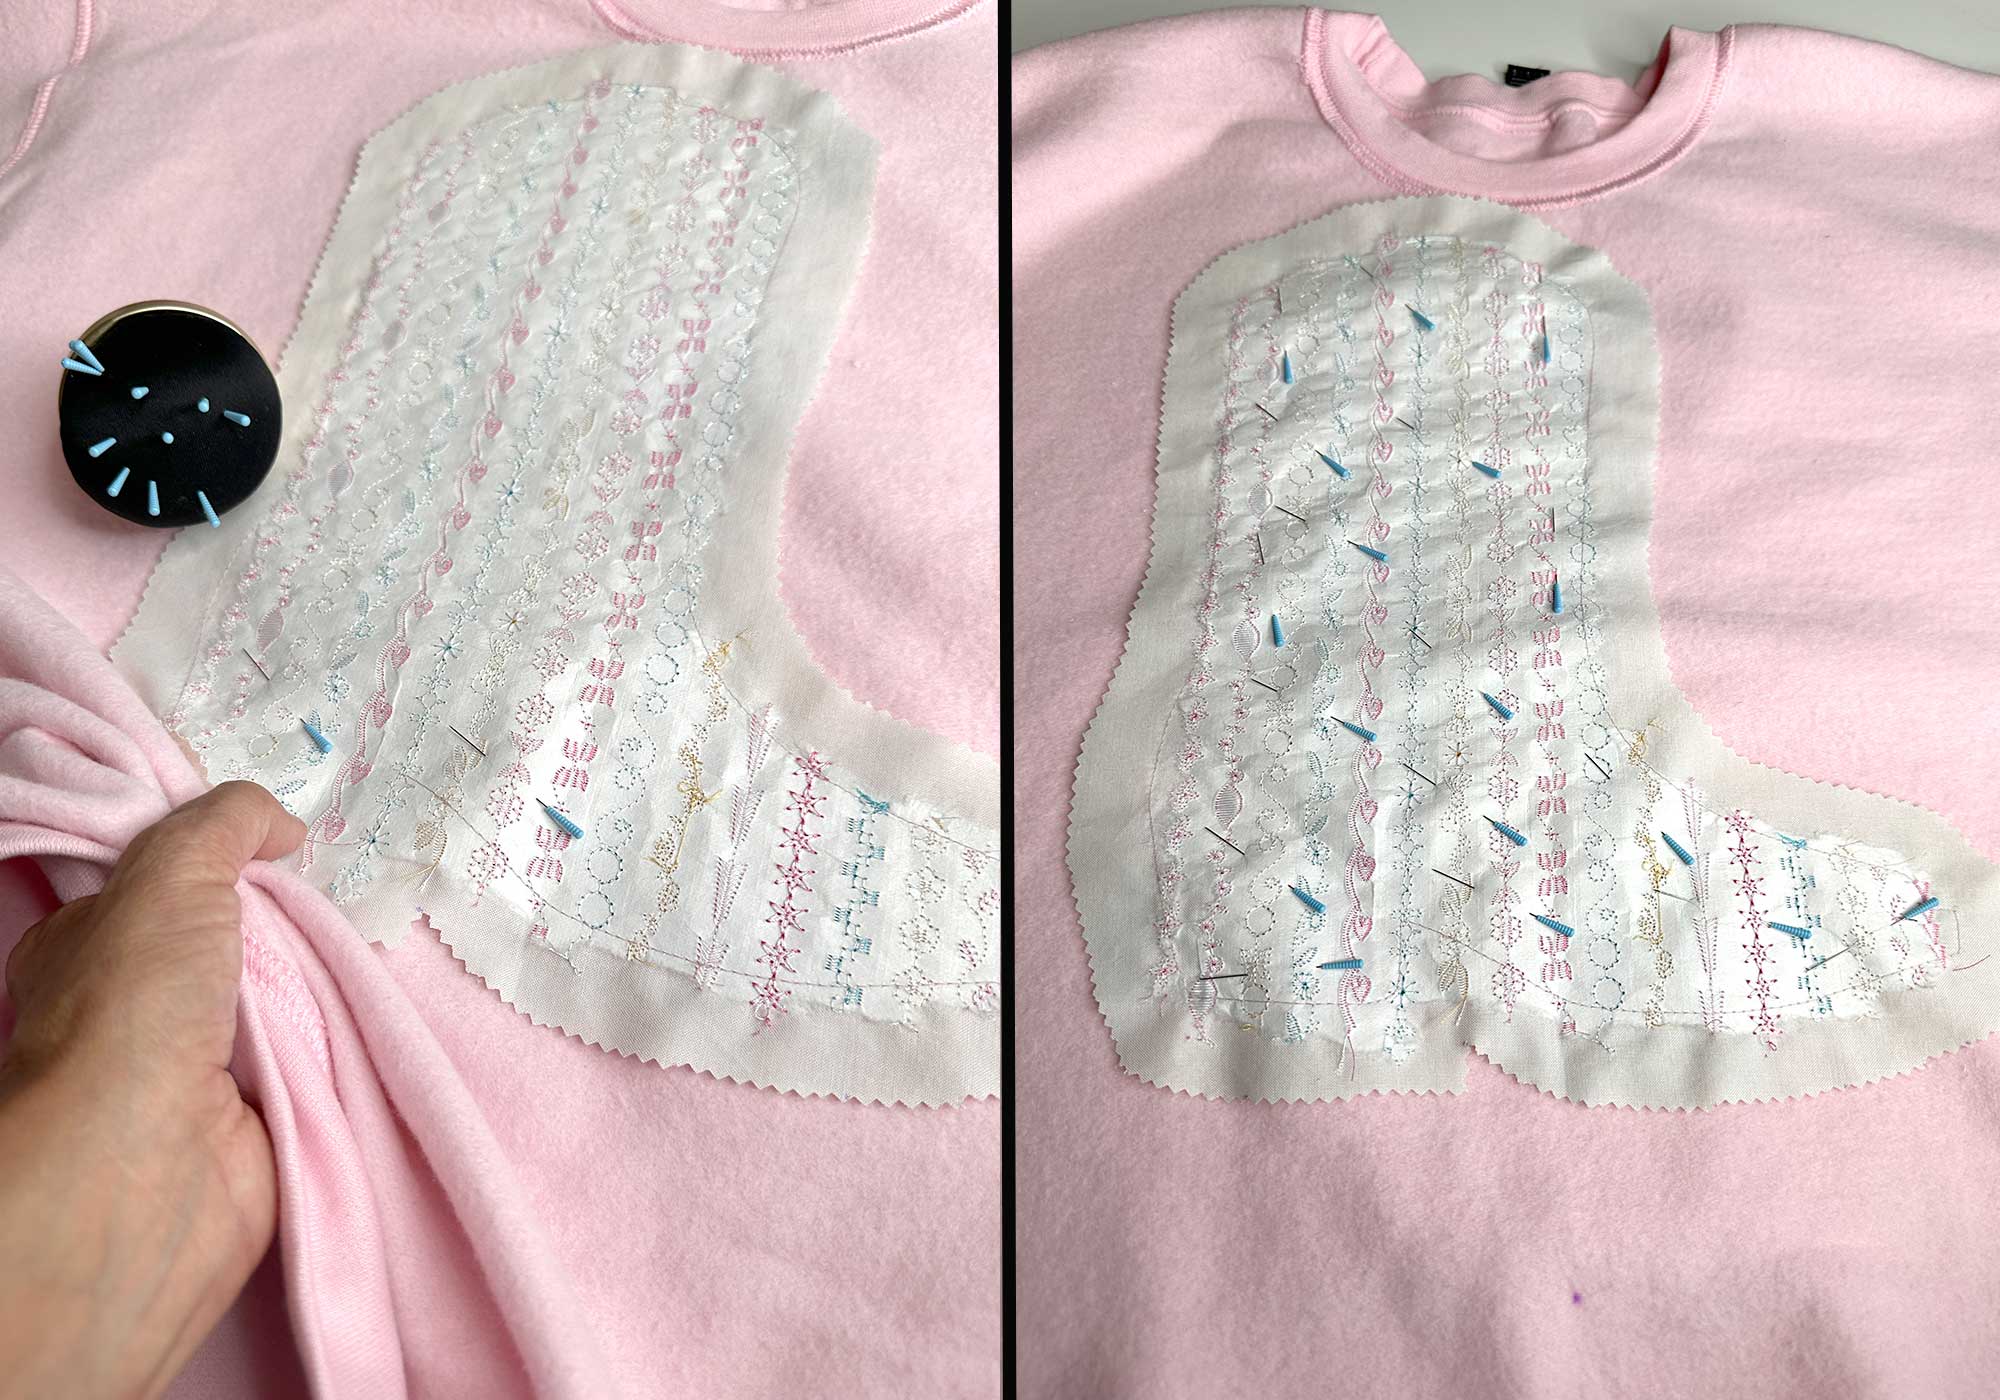
Pin the boot in place using as many pins as you want, being careful not to catch the back of the sweatshirt with the pins.
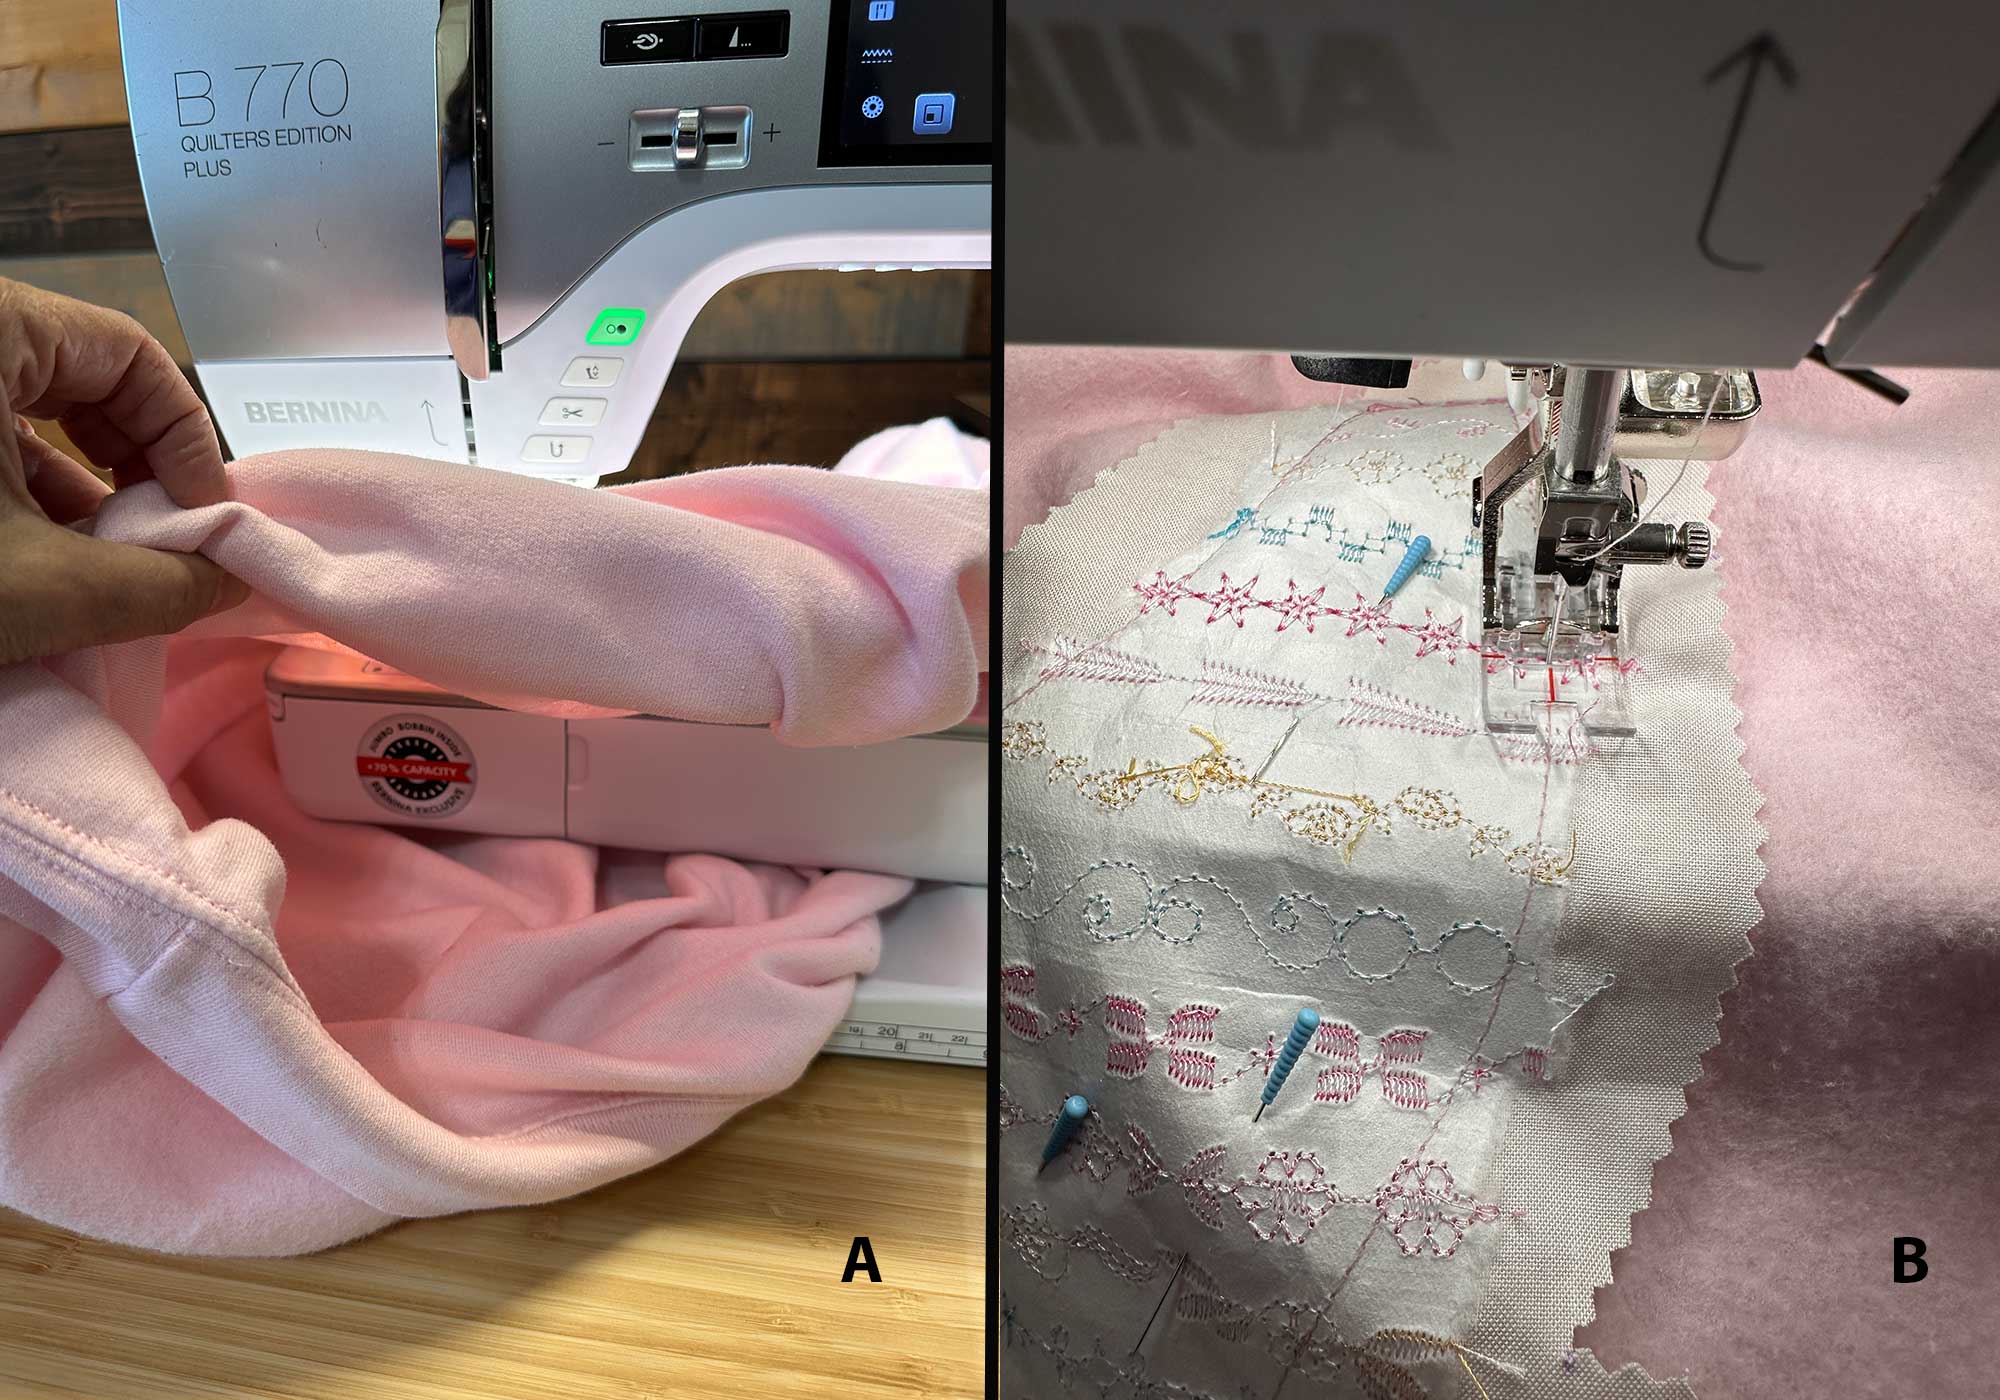
Remove the sewing tray from the sewing machine, exposing the free arm. Slide the sweatshirt onto the free arm (A), and stitch the boot to the sweatshirt using the previous stitches as a guideline, being careful to only stitch the front of the sweatshirt (B).
Cut the Sweatshirt to Reveal the Boot Appliqué
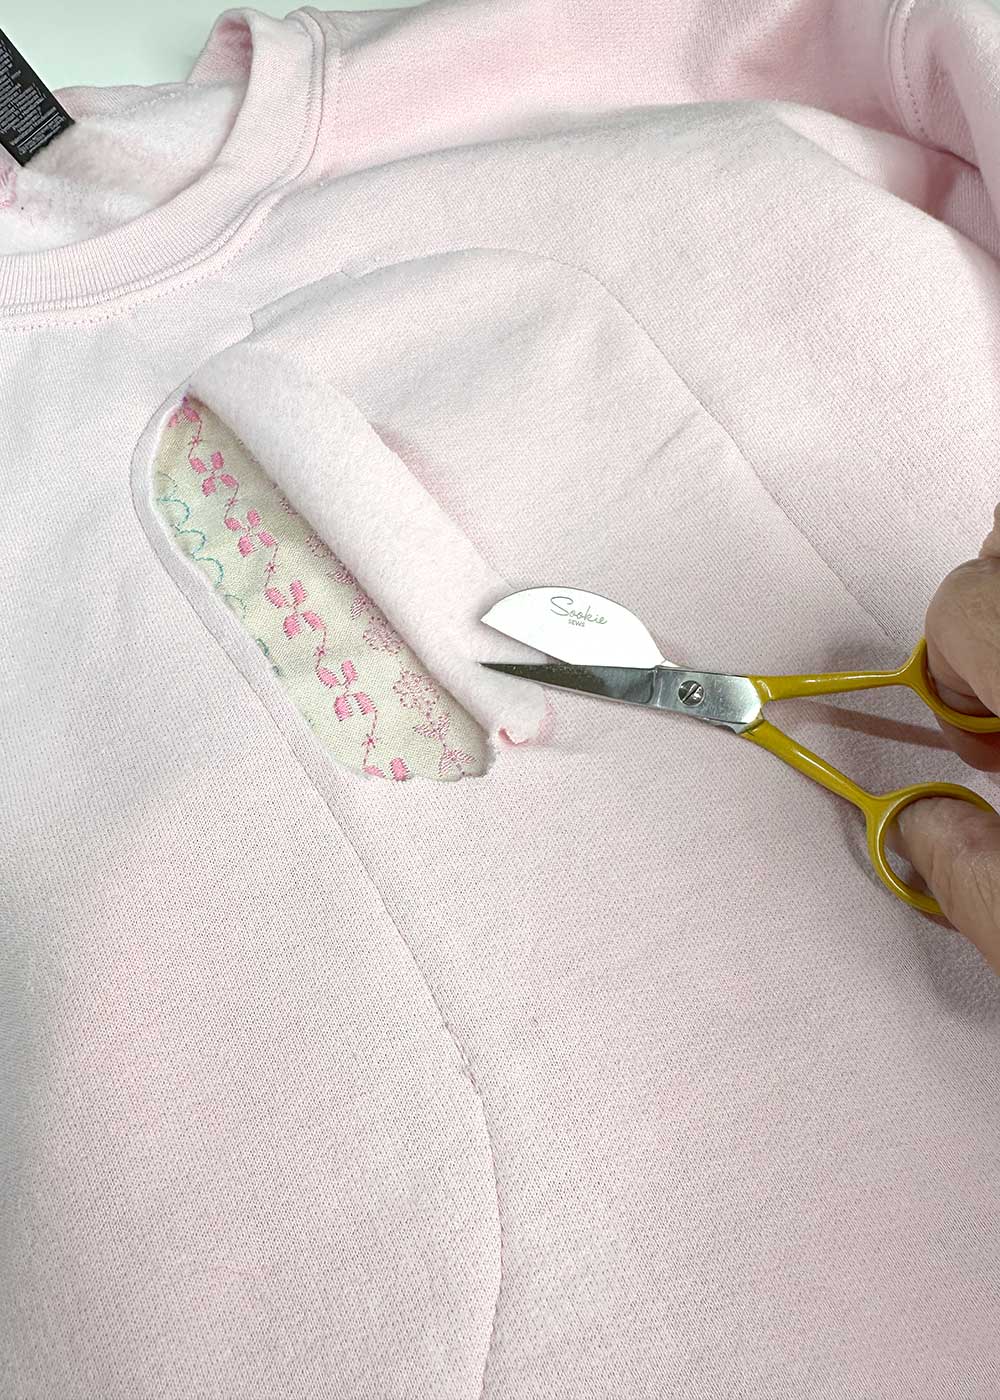
Turn the sweatshirt right side out and pinch a small section of the sweatshirt to separate it from the boot appliqué underneath. Using a sharp pair of scissors, make a small cut in the sweatshirt and begin to carefully cut away the sweatshirt, taking care not to cut the appliqué. Cut close to the stitch line but not through it. I like to use my duckbill appliqué scissors, as the one side is flat against the fabric, helping to prevent accidentally cutting the appliqué. Remove the sweatshirt portion that was cut away to reveal the boot appliqué.
Add an Optional Boot Strap
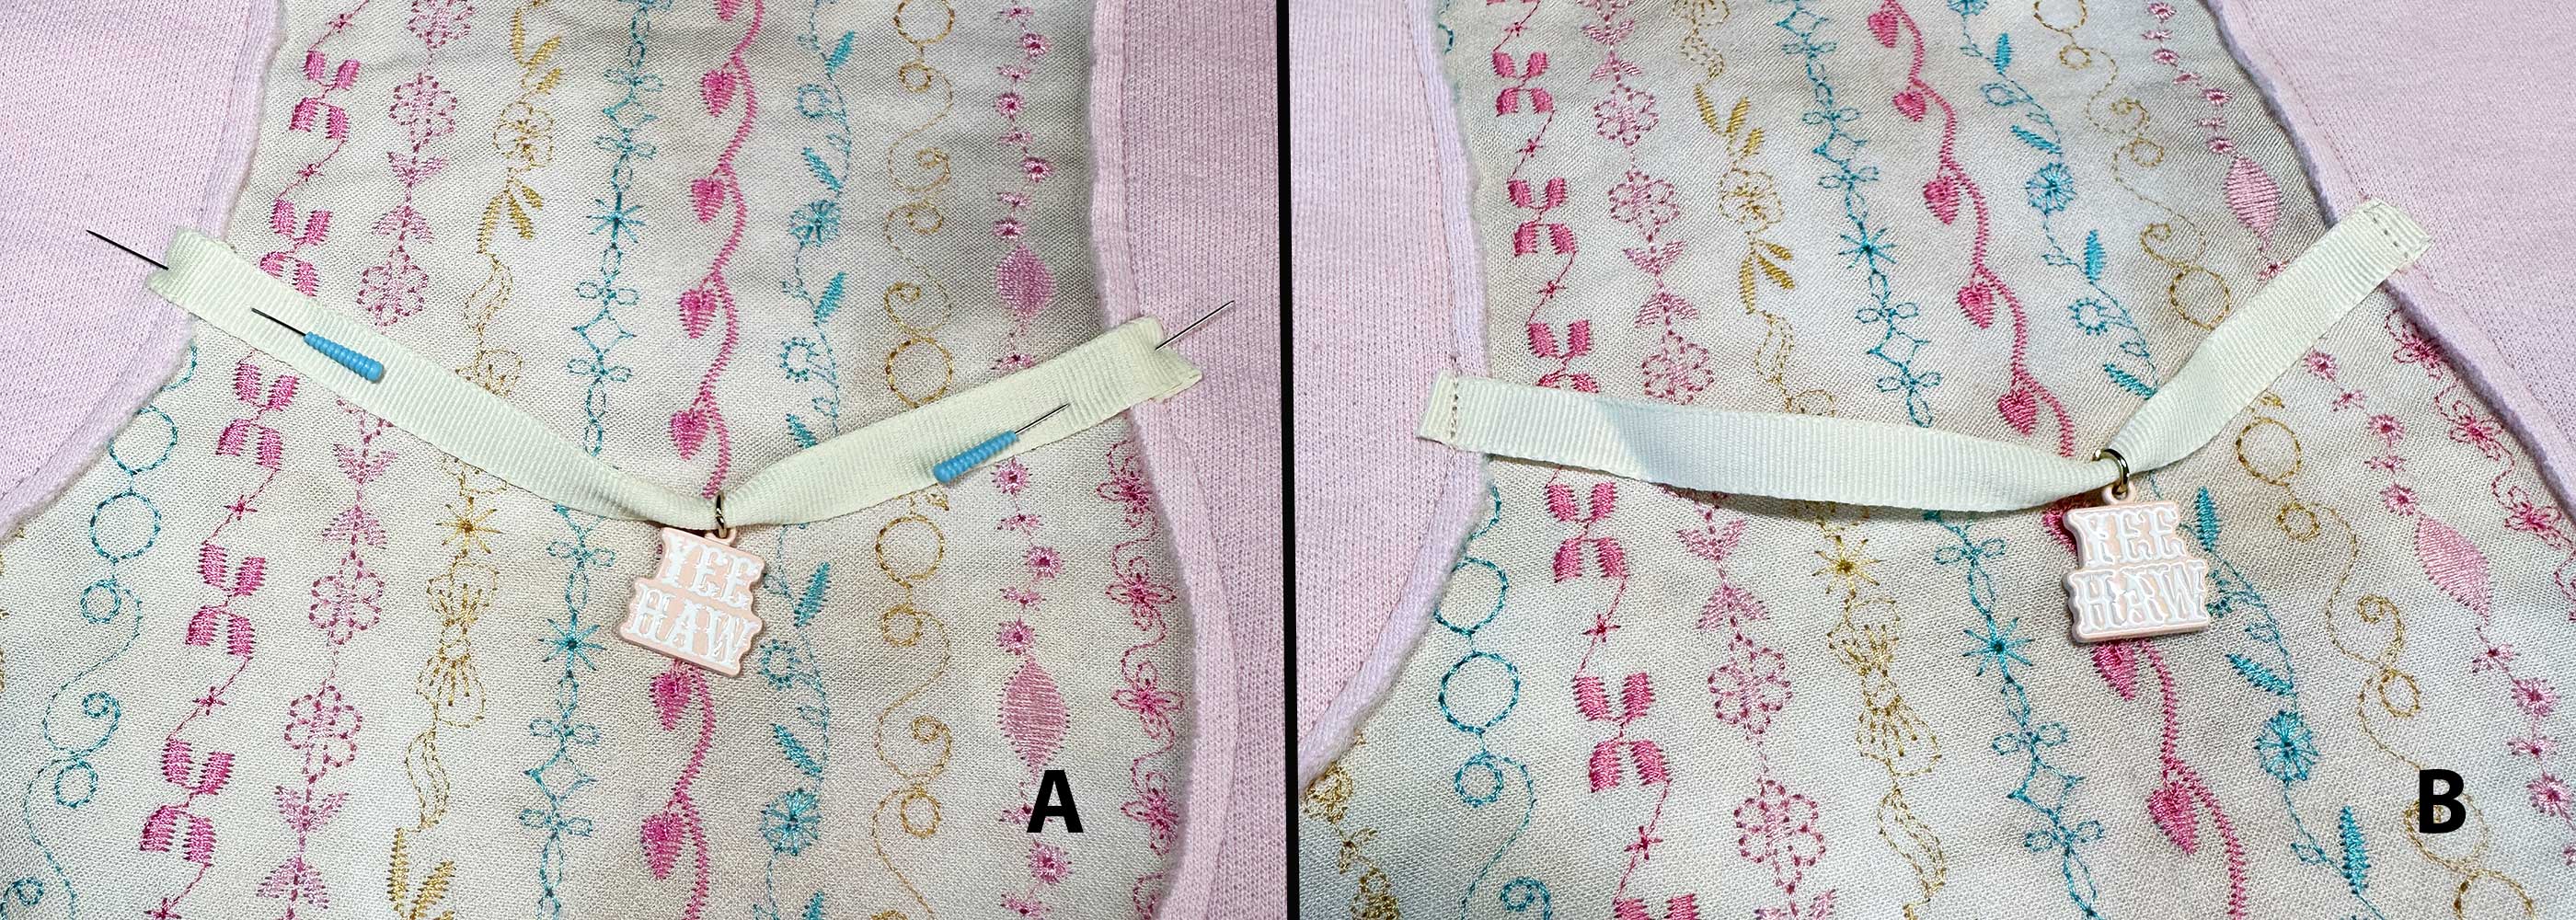
To create a decorative boot strap, cut a piece of ribbon 7″ long and thread a small charm onto the ribbon. Next, fold under each end of the ribbon, pin it to the side of the boot appliqué (A), and stitch in place (B).
See how a few decorative stitches and reverse appliqué can really add personality to a plain sweatshirt?
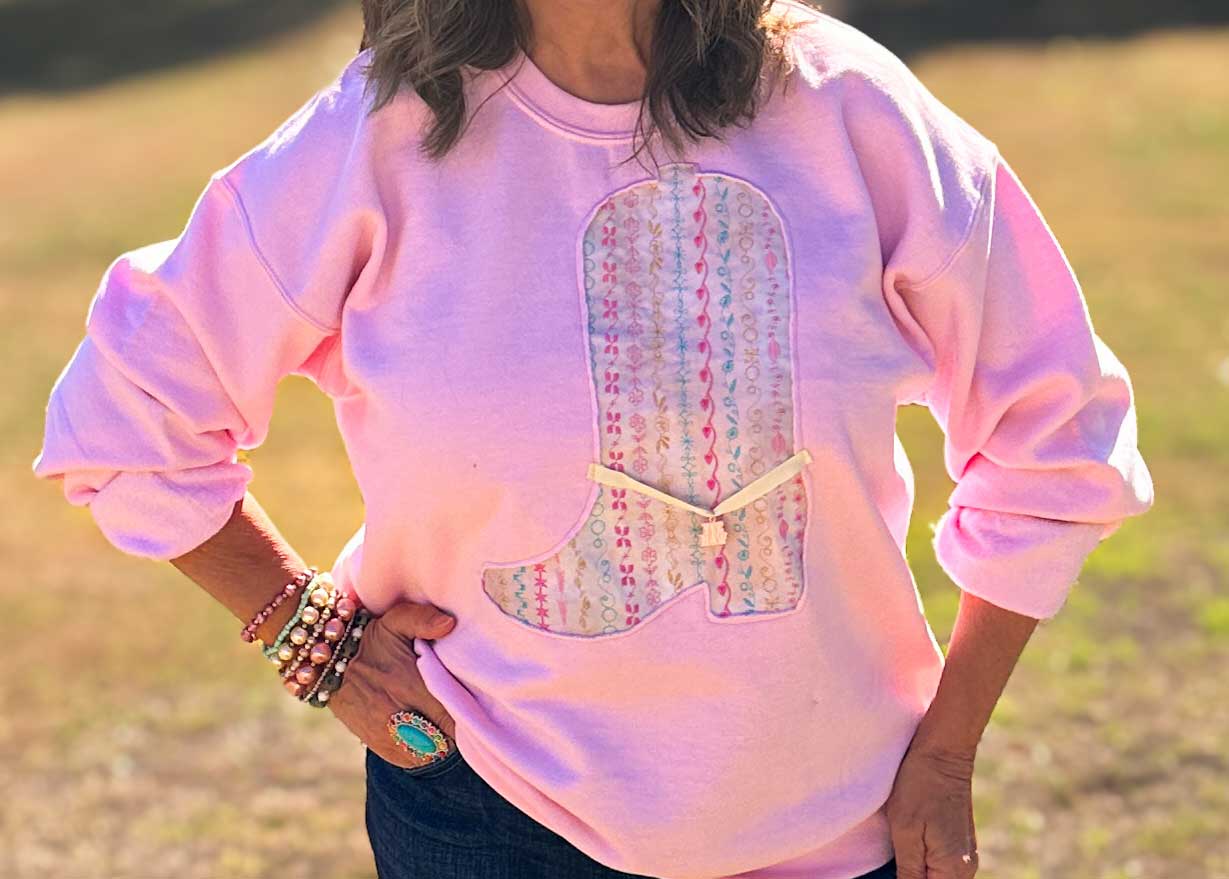
The Two Western Themed Sweatshirts
There’s something mighty fun about taking a plain sweatshirt and making it one of a kind. A colorful cowboy boot, a patchwork horseshoe, a few rhinestones, and a bit of metallic thread can turn a simple sweatshirt into something worth showing off.
And the best part? There are no rules about how much Western flair is enough. Add a little sparkle, stitch it your way, and let your inner cowgirl or cowboy have some fun!
Now go create your own sweatshirt and be sure to tag me and BERNINA on Instagram so we can see your version!