Holiday Coasters
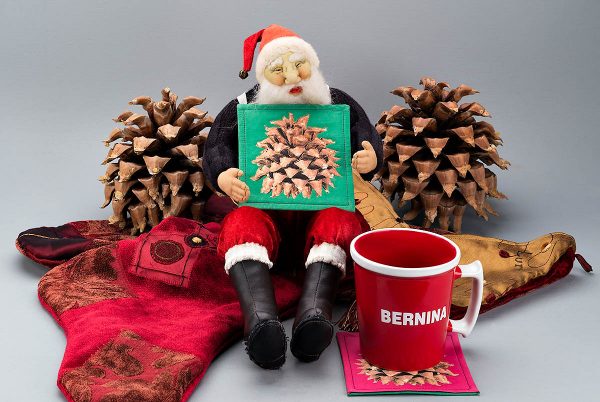
Need something to set your BERNINA coffee cup on? This easy holiday coasters project will show how to make reversible fabric coasters using a photographic image printed on fabric.
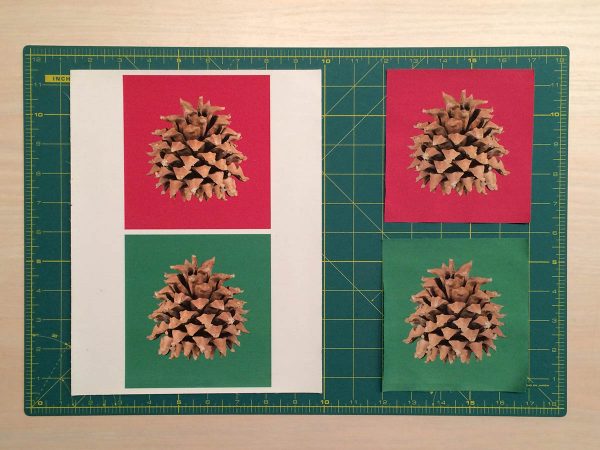
I started by photographing a pine cone and dropping the background out of the picture in Adobe Photoshop. I placed the cutout image of the pine cone first on a white background. This would allow me to create a variety of different colored backgrounds behind the pine cone.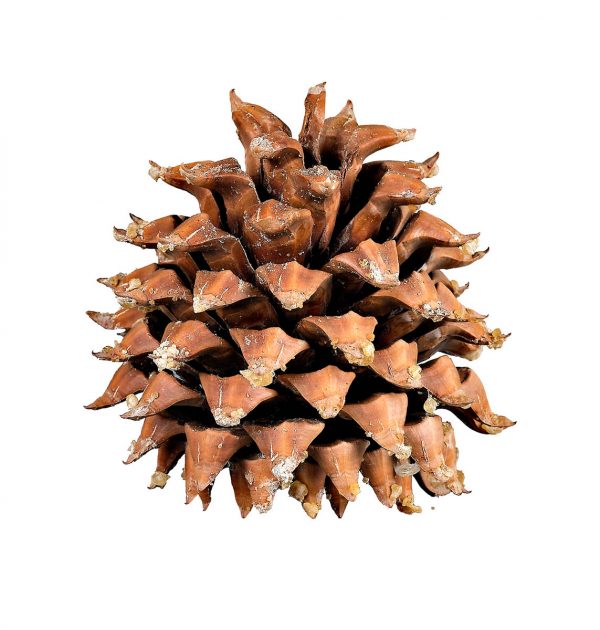 The image of the pine cone is approximately 3.5 inches square. You can download the original size photograph here: Pine Cone High Res Original Size. The canvas behind the pine cone is 5 inches wide by 5.25 inches high. I colored the background behind the top pine cone red. Then I flipped the image horizontally in Photoshop and changed the background to green.
This created a second piece of fabric that was the mirror image of the first. The two images easily fit on an 8.5-inch by 11-inch commercial inkjet fabric sheet. The file with the two images was printed with pigmented archival inks in my inkjet printer. Once the fabric sheet (you can use THREADS fabric sheets) was dry, I cut the two images out and peeled the backing off the fabric.
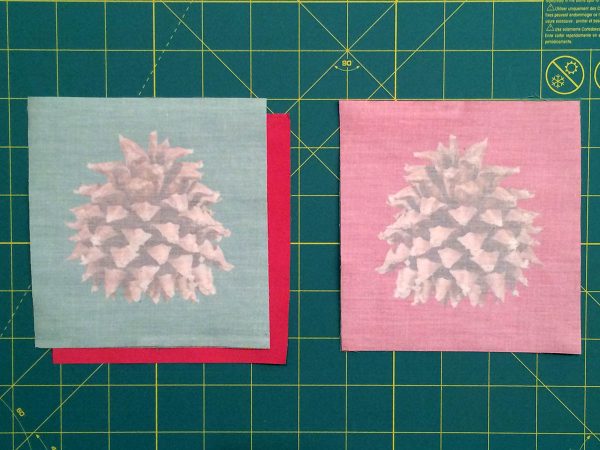
I turned both fabric images over and faced them together. It takes a bit of work to line up both pieces of fabric. But it is worth the effort. On a small project like this I did NOT pin them together.
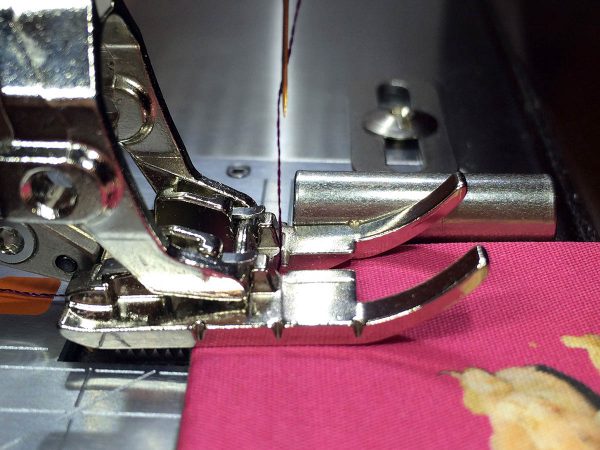
The markings on the BERNINA Patchwork foot 97D are marked at quarter-inch increments. This allows you to easily stitch a quarter-inch seam.
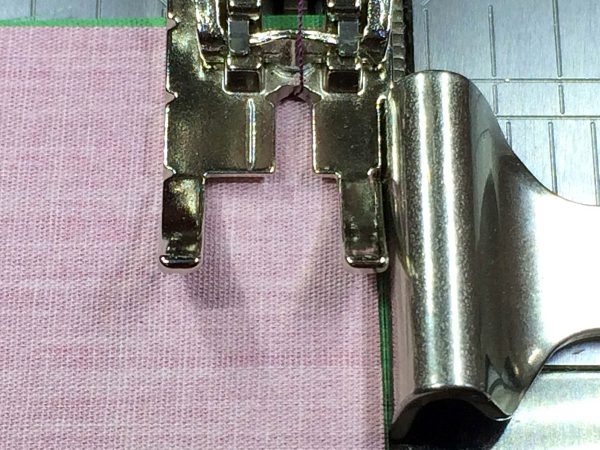
The BERNINA Patchwork foot # 97D comes with a guide that screws into the arm or base of the BERNINA sewing machine. In this instance, I am using a BERNNA 7 Series machine. The precise dimensions of the screw-on guide allow you to position it next to the presser foot. This will place your needle and stitch line a quarter-inch inside the edge of your fabric square. Note that the BERNINA Dual Feed is engaged so that the top and bottom layers of fabric are fed simultaneously. The even feeding of the fabric keeps the mirrored images matching face to face.
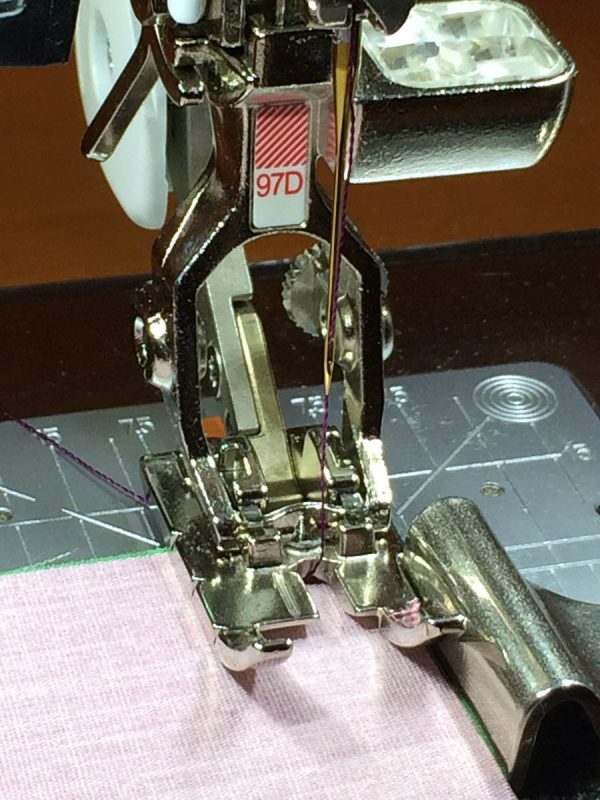
The markings on the BERNINA Patchwork foot 97D, as well as the cutout in the front of it, are a quarter of inch. By carefully watching the progress of your needle as it stitches the line, you can stop stitching a quarter of an inch from the edge of your fabric.
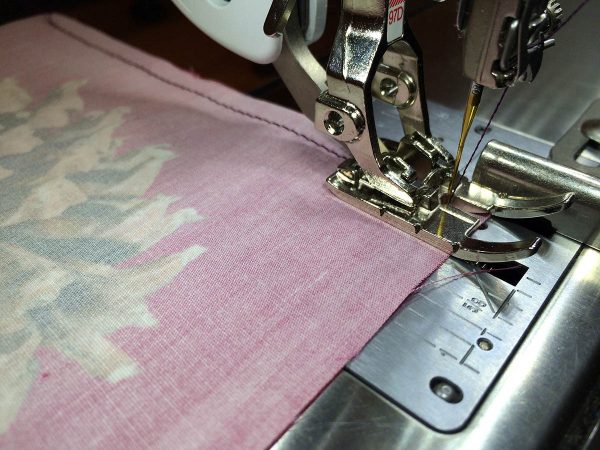
Using the needle down function on the sewing machine, it is easy to raise the presser foot and turn your fabric 90 degrees as you stitch along the top edge of your fabric square.
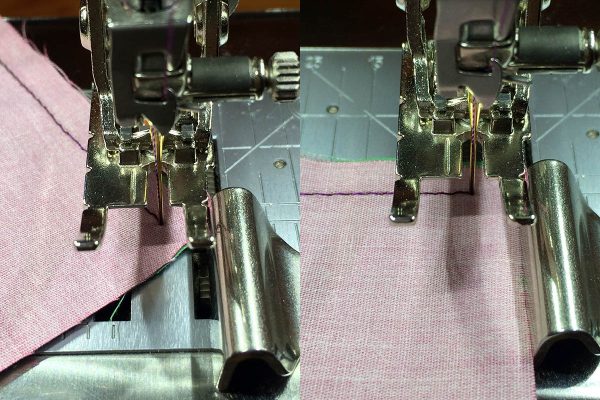
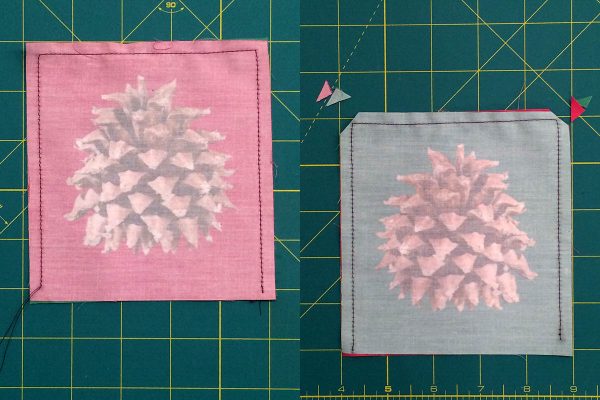
Once you have stitched a quarter of an inch around both sides and the top of your fabric sandwich (left) then trim the two top corners off (right). This reduces excess fabric in your corners when you turn the fabric sandwich inside out. Be sure to leave the bottom edge open so you can turn the coaster sandwich inside out.
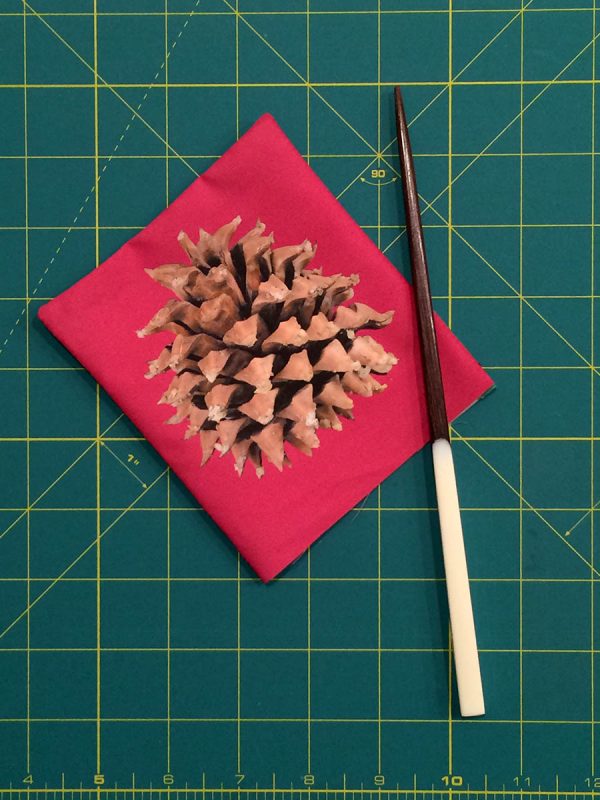
Once you have turned the fabric so the right sides are out, use a blunt instrument like a chop stick to carefully push out the corners.
Cut a small piece of heavyweight fusible interfacing. The dimensions that I found to be the best for this size project were 4-1/4 inches wide by 4-3/8 inches high.
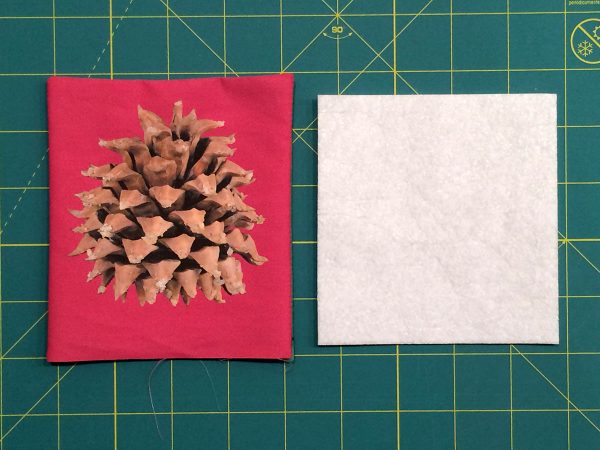
Slide the piece of fusible interfacing into your coaster pocket. It works the best if you keep the inside stitched fabric all on one side of the insert.
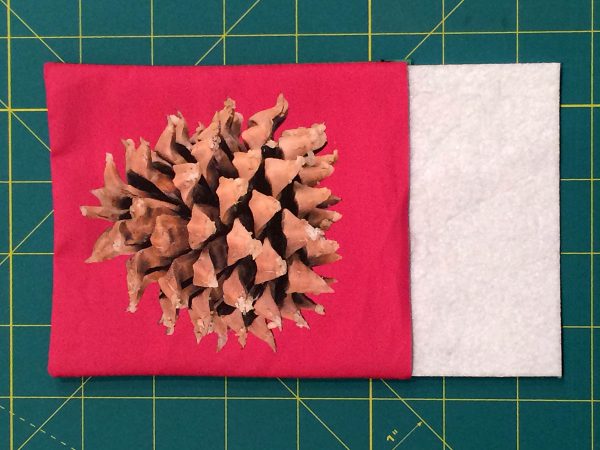
Fold one side of the bottom fabric over the insert and use the edge of your iron to fuse the edge of the folded fabric to the bottom edge of the insert.
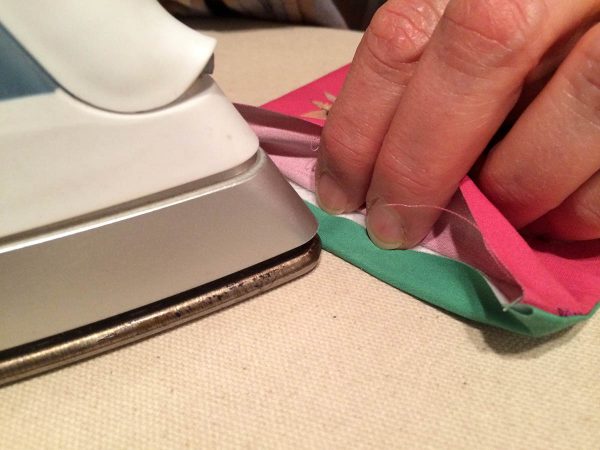
Carefully fold the top edge of your fabric over the insert and inside the pocket. Then fuse it with the heat from your iron. Do not let the iron sit too long on the edge or it can burn the fabric.
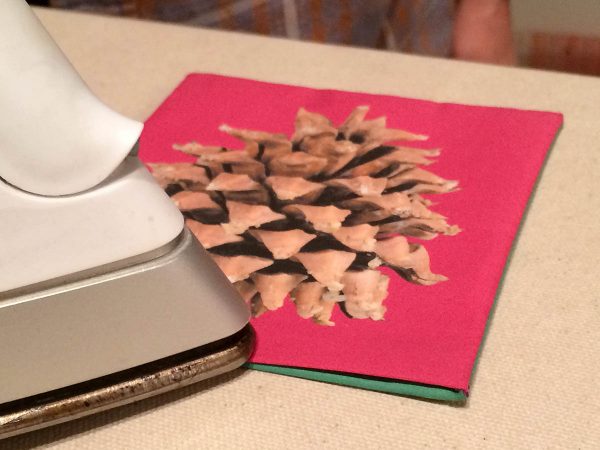
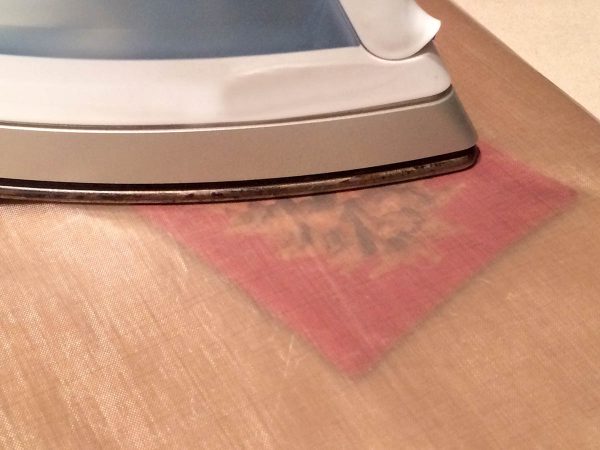
Use a press sheet like this Teflon press sheet to fuse both sides of your fabric to the fusible interfacing.
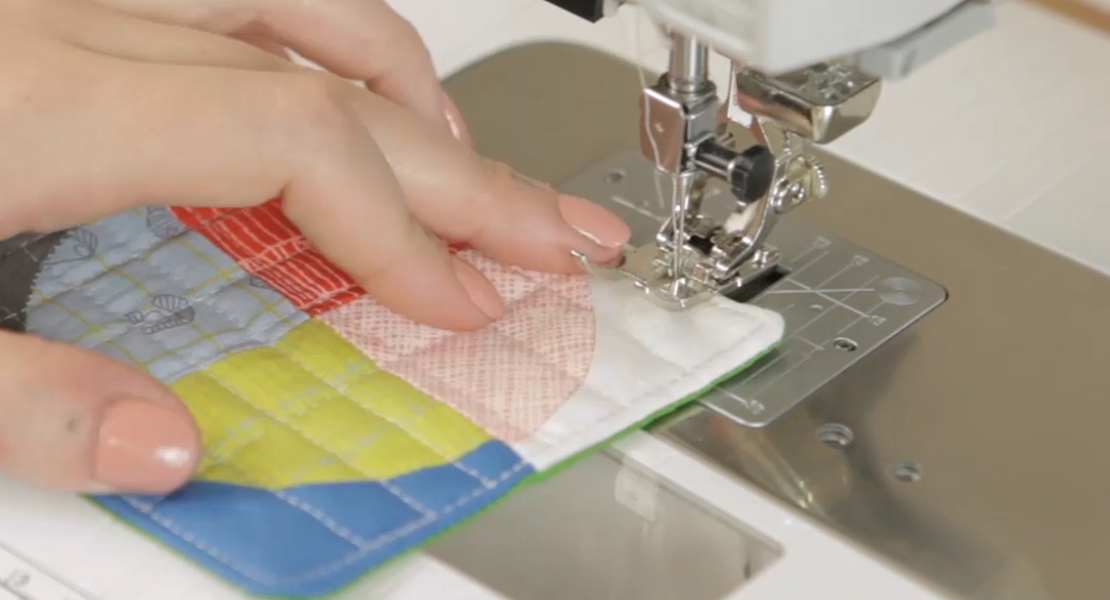
Again, use the quarter-inch markings on the BERNINA Patchwork foot 97D to stitch a line around the inside of the fabric sandwich.
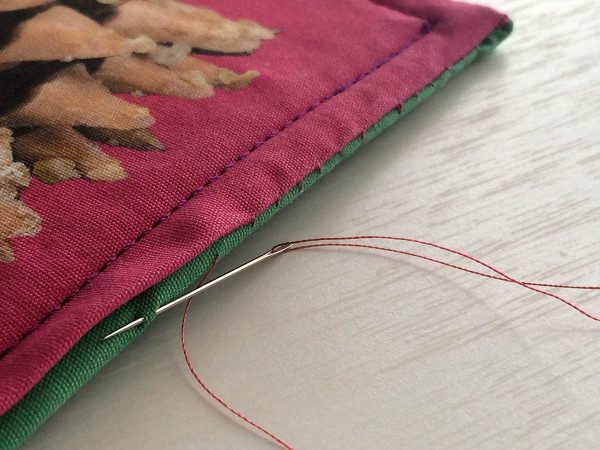
To close the bottom edges of your sandwich, use a needle and thread and stitch it closed with a whip stitch.
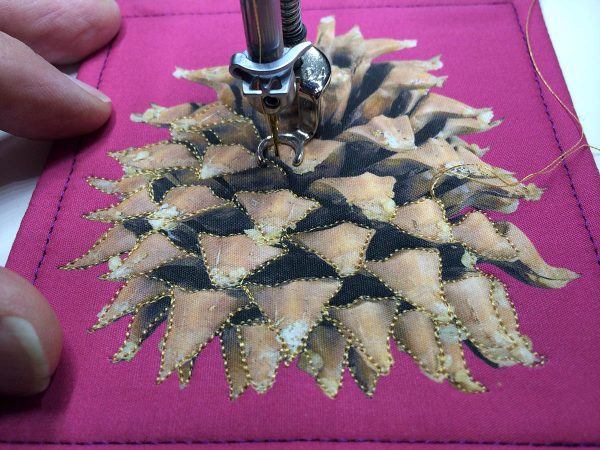
Using the BERNINA Stitch Regulator (BSR) or a number 24 free-motion presser foot, stitch around the needles of the pine cone on the top side of the fabric sandwich with a bright contrasting thread.
If you lined up your mirror image fabrics correctly, the stitching pattern on the back side should match the stitching on the top side.
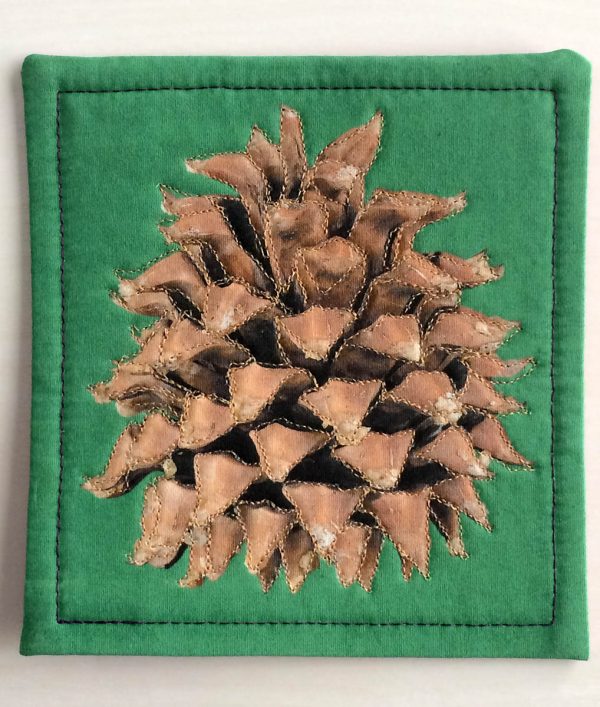
Final note: Once you have finished your pine cone holiday coaster, because water glasses and cups “perspire” it is recommended that you treat the fabric with either a water resistant lacquer or a water repellant fabric protector.
Our December 8 Gift For You
Today’s gift is a BERNINA-red “thread” can for your sewing room to one awesome WeAllSew fan. All you have to do is post a comment below answering the following question:
What would be your favorite coaster design?
A winner will be chosen at random on December 9, 2015 and announced later this week!
Good luck!
Congratulations to our WeAllSew reader “watercolorjen”, the winner of the December 8 gift. Enjoy!
What you might also like
87 comments on “Holiday Coasters ”
-
-
again wild horses
-
make coasters for each holiday.
-
Very nice love it thank you.
-
-
Thank you for the inspirational tutorial.
-
This is awesome. I love this. My embroidery machine is in for it’s yearly up-date. I cannot wait to bring her home and try this.
Thank you!!! -
Nice! Thank you for the tutorial, this will make a nice hostess gift.
-
Clever gift idea that could be used just by changing the motif. Thank you….
-
BERNINA Patchwork foot 97D are marked at quarter-inch increments…that is nice bonus when doing lots of piece work. I tend to zone out at times and this would keep me steady.
-
What a great idea. Nice photography too. Thanks for sharing.
-
Cute idea
-
I love to see how the different Bernina feet are used for different projects.
-
I have some small pictorial squares that I bought years ago without knowing what (or how) I was going to use them. I love the interfacing insert idea- this is perfect for the squares-I am on my way to my stash to find the units!!!!!
-
I have everything I need except a picture of that beautiful pine cone.
I never saw one like that before. -
Very cool. Tutorial was very nicely done.
-
What a cute idea, would love to make coasters with great danes on them.
-
I made gingerbread men mug rugs (coasters) for everyone this year.
-
What a great idea, not sure I would mirror image, but definitely add some free motion to a cute coaster
-
My favorite coaster design would change with the season. Right now I think a snowman with a sweet face would be great because it could be used all winter long. Spring, summer, and fall would each have to have their special design as well that could cover more than one month and not be holiday specific.
-
I love angels – so, angel coasters would be the sweetest thing. 🙂
-
This is a cool design. I would do penguins, gingerbread people, snowflakes, and try this pinecone.
-
My fav design (I think the pinecone is fabulous!) would be an “olde World Santa” a vintage santa design or a St. Nicholas. Thank you for the great ideas!
-
I think I’d love some snowflake coasters. That would be a cute design.
-
I would like to try a snowflake image – great idea!
-
I would make cute elves
-
I think a simple coffee cup would make a nice coaster. We drink a lot of coffee!
-
I like to use snowflakes a Christmas & other designs to match the seasons. Thank you for pine cone picture and the tutorial.
-
This is a great idea for a coaster. I might try doing a snowflake coaster.
-
I would like a set of butterflies coasters.
-
coaster with a good Leonberger profile on it!
-
I think snowflakes, snowmen, or gingerbread men would be great for Christmas coasters! Loved your tutorial and the pine cone is awesome!
-
I would absolutely do some kind of abstract spiral design.
-
I would like a picture of my dog on a coaster.
-
That is a great design. I think I would do different seasons or holidays. Great instructions
-
A Christmas Tree is always fun to use for a design in any project, especially a coaster. Thanks for the tutorial.
-
Actually, I think the snowman from yesterday’s post would be really cute on some coasters.
-
A TARDIS would be awesome!
-
I would have to go with a coffee, tea, or drink theme.
-
Love this tutorial. Great Idea. Love my hand made /homemade coasters.
-
a teapot 🙂
-
This is a great tutorial using photos. I would use the photo snap features of software 7 in eliminating the background, etc. and then applique, etc. I would like to try using a bald eagle picture or something similar.
-
I really like this idea. However if I had an embroidery machine I would use the adorable little owls…if I was using the technique that we learned today I would use a photo of my adorable PUG Luigi 🙂 to make coasters
-
I love coasters. This is a great idea so thank you!
-
This project is a great idea. I would make my coasters from a picture of a barn.
-
I would do a snowflake on a round coaster.
-
I think a Christmas tree or shiny ornament would make a cute coaster.
-
My favorite coaster design would be an angel.
-
A little elf would make a cute coaster.
-
I would choose a basket of spring flowers to be my favorite design on a coaster. This pinecone is really beautiful!
-
A cute coaster would be a little embroidered or appliqued Bernina sewing machine….
-
My favorite coaster would be in the shape of a mitten!
-
I inherited a box of vintage Christmas cards. It would be fun to use these on coasters.
-
Same answer as yesterday…holly leaves and berries! lisajcowell(at)cs(dot)com
-
Love your coaster. I would do a variety of snowflake images…to make up a set with all different images.
-
I love how the design is reversed on this so the stitching lines up on both sides making it truly reversible. My favorite design would be a snowflake I think, with lovely silvery metallic accent stitching. Thanks for the giveaway I’d love to win some thread.
-
I think I’d like a snowflake on my coasters.
-
I’d put a Christmas tree on a square coaster. A set would make a wonderful hostess gift.
-
I made some recently out of outdoor fabric. They can just be rinsed off. I did different sea shells and seahorses for my daughter’s beachy décor.
-
Love the project. I would do some for every season like pumpkins, snowflakes, spring flowers and sea shells.
-
Oh I would use birds and wreaths on mine. My Christmas dishes are the Lenox Winter Greetings… The coasters would then match!!
-
I would like to make American flag coasters. Red,white, and blue.
-
I would like snowflakes because they would be appropriate all winter, not just at holiday time. Great project!
-
Christmas trees and snowflake coasters (not together) would make cute hostess gifts. Heck, I’d want some for myself!
-
I love snowmen and snowflakes!
-
I use coasters along with placemats at my kitchen table surrounded by window that look out on the bird feeders in the backyard. I’ve been planning coasters with bird designs. Watching the birds is so amusing! Thanks for the chance!
-
I was thinking patchwork stars, but hadn’t seen photo work before, Nice
-
It would have to be a sprig of holly with berries for a Christmas mug rug or coaster.
-
I could use this for ornaments rather than a coaster. This year I am making Snow people. never thought of a two sided ornament. Thanks for the inspiration.
-
What a unique idea. I like the pattern featured here and can see many variations of this coaster.
-
I’m doubtful that I could line up the front and back images, but I like the tutorial method and may give it a try. I just mentioned to my husband that I needed to make replacement coasters; this would be a good opportunity to try something new.
-
Nice idea for family pictures to use on quilt squares
-
I think a picture of my five year old son wearing a Santa hat would be cute.
-
A leaf of some sort and for Christmas a poinsettia.
-
I ,like the lady who said Tardis 🙂 My favourite would be something intricately geometirc
-
Perhaps a brown house would be a nice image. Thank you for the tutorial.
-
This is a great idea. I love the pine cone, and can think of all kinds of images that would make great seasonal coasters – flowers, birds, nautical things.
-
Great tutorial. Great information. I really appreciate it. I am going to do the pine cone.
-
DOn’t know what my favorite would be but this pine cone looks great!! Thanks for the wonderful tutorial : )
-
I like wreaths for my Christmas coasters!
-
I think snowflakes or Christmas trees would make fabulous coasters!
-
Since these would be fairly easy to do, I would be inclined to do different designs for different folks on my Christmas list!
For Terri, I would do photos of her dogs, especially the ones who have passed over the Rainbow Bridge. For Sally I would do penguins as she collects them and I doubt has any penguin coasters. For Betty I would do Hummingbirds & flowers, as she loves to garden and delights in hummingbirds.For JoAnn I would do kitties as she loves kittens. And for Michelle, Barbara & Jen I would do Christmas ornaments. And I would do one coaster with a photo of Rudolph for putting under Santa’s cup of Eggnog! -
Nice project. Never thought about using a photo.
-
I am not really a coaster fan but if needs be probably sunshine.
-
Pingback: Linky Thursday | StacySews
-
I lvoe learning new ways to use my Bernia – thank you
-
I just finished making this for a Christmas gift. Very practical for my Dad who MUST drink coffee every morning. I wanted a bit more stability so instead of using interfacing, I inserted a sturdy piece of cardboard.
-
great picture, cute idea. I think a Christmas tree would be fun to try
Leave a Reply
You must be logged in to post a comment.




that is really cool Kerby!